- Is it worth restoring an old bath?
- When is it time to refurbish a bath?
- Features of painting the bath
- Bathtub enameling
- Do-it-yourself bath restoration: new enamel application technology
- Acrylic painting
- Re-enamelling
- Training
- Padding
- Enamel application
- How to paint a bath What paint and how is the bath painted
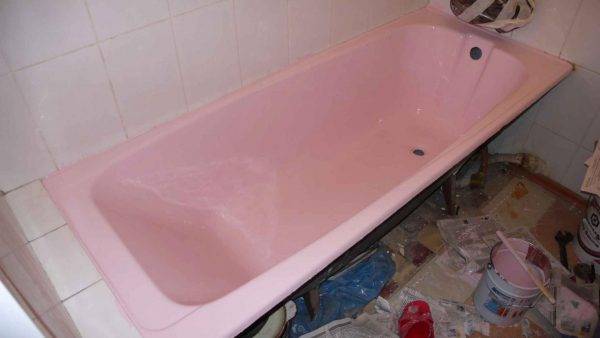
- What color to paint the bath?
- How to paint a bath with your own hands?
- Preparing the bath for painting
- Conclusions and useful video on the topic
Is it worth restoring an old bath?
We usually send our used product to the landfill without regret. However, a cast-iron bath, which has lost its attractive appearance, may well be used further. But replacing it may seem irrational.
The heavy weight of the equipment makes it very difficult to dismantle and remove it from the apartment, especially if it is located above the first floor. In addition, if tiles were laid around the bath or a ceramic screen was made, all this will have to be disassembled.
The owner understands that a simple removal of the device will not do, repairs will be required. Big or small - it all depends on the extent of the upcoming destruction. In addition, there will be costs for the purchase of new equipment, its transportation and installation.
Thus, to avoid serious financial losses will not work.It must be understood that all this is very troublesome and will require loss of time.
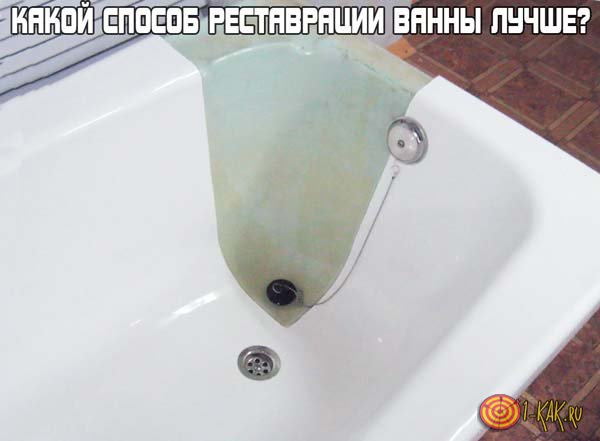
Perhaps you should save your nerves and money by taking on the restoration of an old bath. There are three fundamentally different methods for restoring plumbing fixtures: installing an acrylic liner, cold enamelling, and pouring or “filling tub”. Each of them has advantages and disadvantages. Let's take a closer look at all restoration methods.
Modern technologies make it possible to restore an old cast-iron bathtub without time-consuming dismantling
When is it time to refurbish a bath?
A cast-iron bath is a standard of quality, strength, and reliability in the plumbing world. No wonder it is advised to install products from this alloy in apartments. In many houses built back in the Soviet Union, just such bathtubs were installed. And such baths are used to this day. Also, a cast-iron product is comfortable to use: it does not create noise, unlike, for example, a thin-walled iron bath. Yes, and it is pleasant to wash in it - the bath retains the heat of the water poured into it much longer than others.
Cast iron bath retains heat longer
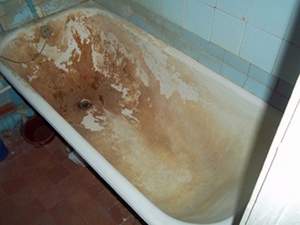
Unfortunately, even seemingly eternal things wear out over time. And a cast-iron bath is no exception. At the same time, it is not she herself that deteriorates, but the coating - enamel, with which the structure was covered at the factory. And now this special paint, applied using a special technology, begins to lose its appearance, and its performance is deteriorating.
Cast iron tub is strong and durable
Here are some signs that it's time to upgrade your bathtub.
- Roughness of the inner surface. It is much more pleasant to step on smooth enamel than on a pumice stone resembling the touch.
- Bath cleaning is getting harder.The reason is the very rough surface on which an ordinary sponge no longer slides easily and pleasantly. Cleaning a bathtub takes a lot of effort.
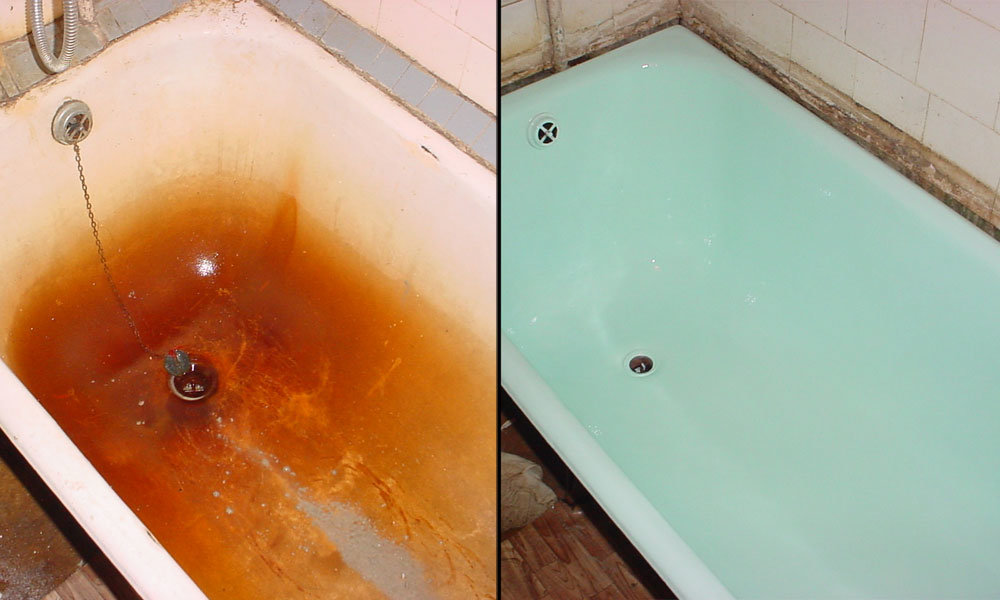
- Dirt and rust quickly and strongly eat into the enamel due to the loss of smoothness. In some cases, contamination cannot be removed at all.
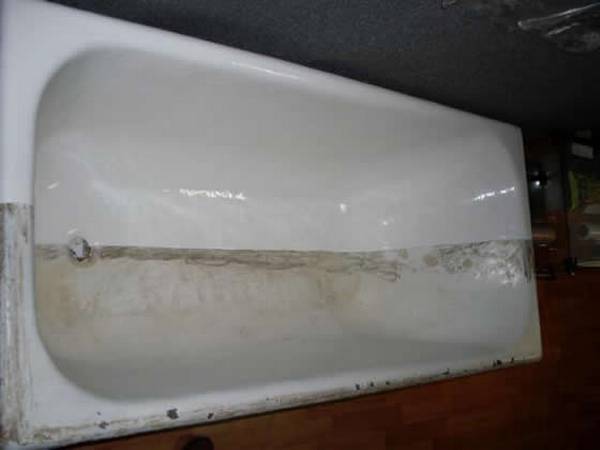
- The appearance of chips and cracks on the surface of the enamel.
It's time for a bathroom refurbishment
Chip in cast iron bath
It is these signs that inform the owner of the bath that it is time for her to “rest”. But do not rush to dismantle it and throw it away - the bath can be reanimated! And for this, there are three fairly simple and, moreover, relatively inexpensive ways - this is the use of an acrylic liner, the “filling bath” technique and enamel renewal.


Features of painting the bath
Various materials are used in the production of bathrooms. But the leading positions remain with cast iron and metal products. They are coated on top with a special composition that allows you to create a smooth surface of the selected color. Over time, the layer wears off, cracks, and defects form.
Replacing such monolithic equipment is associated with many problems, so often the owners decide refurbish cast iron bath.
Acquiring a cast-iron model again is quite expensive and problematic, because it is very heavy. Easier to restore.
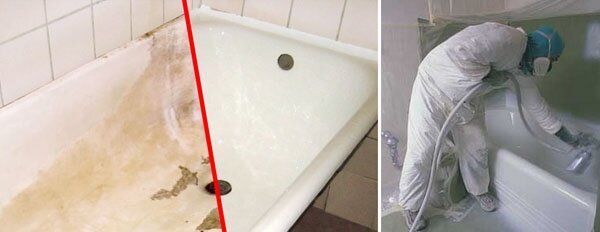
This process allows you to repair the damaged enamel coating and return the bath to its former attractive appearance.
It is only important to choose the right paint composition so that it lies evenly and lasts for a long time. Also be sure to wear face and hand protection.
Paint compositions can be toxic and adversely affect health.
Restoration of cast-iron baths by applying a new enamel coating allows you to do the work yourself.
Bathtub enameling
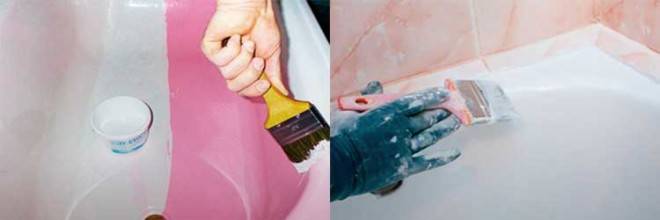
The most inexpensive way is to cover the bathtub with new enamel. It is suitable for cast iron and steel bathtubs. This is painting the bath with a brush with a special waterproof compound.
Enamel helps to remove roughness, yellowness, rust, small scratches, cracks and chips, but will not cope with larger damage and deformation. Enamel is important to choose specifically for baths, because other types of enamel release toxic substances when in contact with hot water.
The specialist copes with this work in an average of two hours, but then the bath will dry for at least another 24 hours (the exact period depends on the quality of the enamel and the ventilation in the bathroom) - during this period it cannot be used, but it is better to leave the house altogether: while the bath dries, a pungent smell spreads throughout the apartment.
The renewed coating will last for about 5 years, if you do not rub it with abrasive products and do not subject it to shocks to which the enamel is sensitive.
Pros:
- low price;
- a thin layer that does not particularly “eat up” the volume of the bath;
- no need to dismantle the siphon during restoration;
- if the tile comes on the sides of the bath, it also does not need to be dismantled.
Minuses:
- low strength;
- there may be stains from the brush with non-professional performance;
- dries for a long time;
- pungent odor during operation and drying;
- does not remove large damage;
- relatively low coating life.
Do-it-yourself bath restoration: new enamel application technology
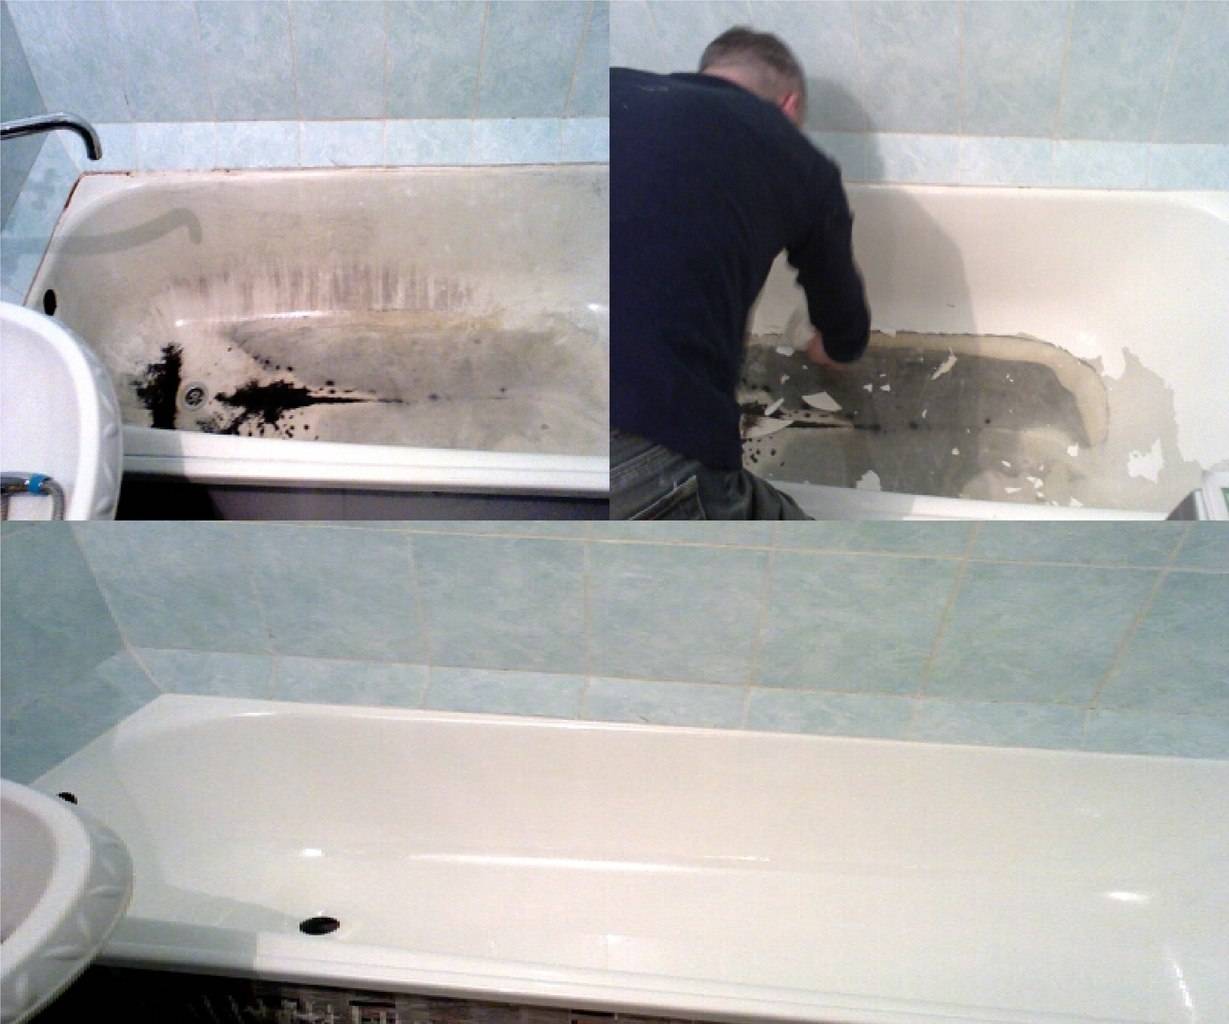
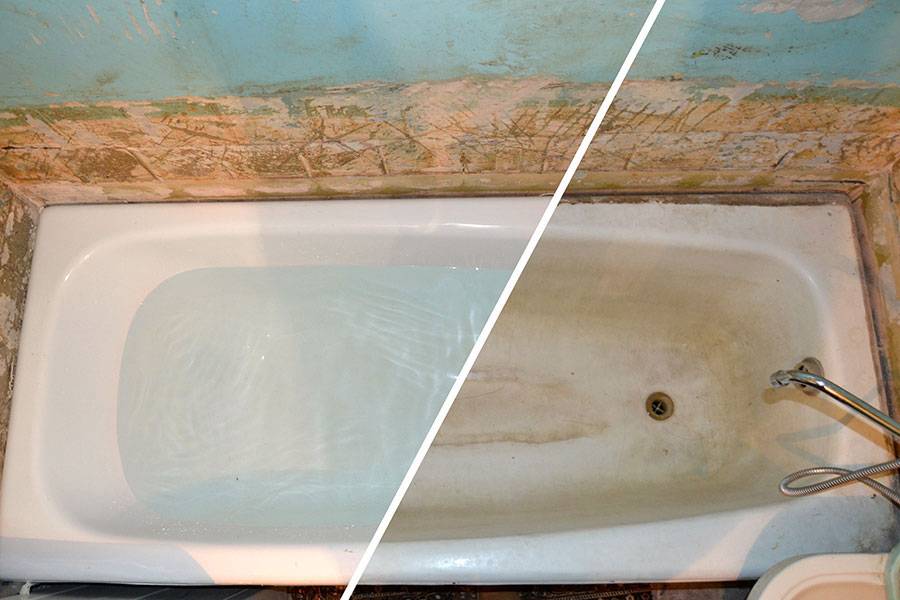
This method of restoring a cast-iron bath is not suitable for every situation - it can only be used in cases where the old enamel has lost its former beauty and is covered with rust spots, turned pale, turned yellow and became rough. But if there are chips, deep scratches on the surface of the bath, or the enamel generally peels off in pieces, then this method will not work.


So, having figured out the possibilities of this method of solving the issue of how to restore a bath with your own hands, you can safely get down to business. As always, for a better understanding of the essence of the issue, we will consider the entire technology of restoration work in stages, but first we will deal with the enamel itself.
Restoration of a bathtub with enamel photo
Undoubtedly, it is better to give preference to imported products, the composition of which is thoroughly thought out and selected. Working with Reaflex enamels from TIKKURILA is much more pleasant and easier, besides, this bath paint dries pretty quickly. If someone finds such enamel too expensive, then you can opt for domestic products Epoksin or Epovin. Using these bath paints, you need to be prepared for a long drying process - usually up to 4 days.
With the enamel seems to be sorted out, now you can get to work.
-
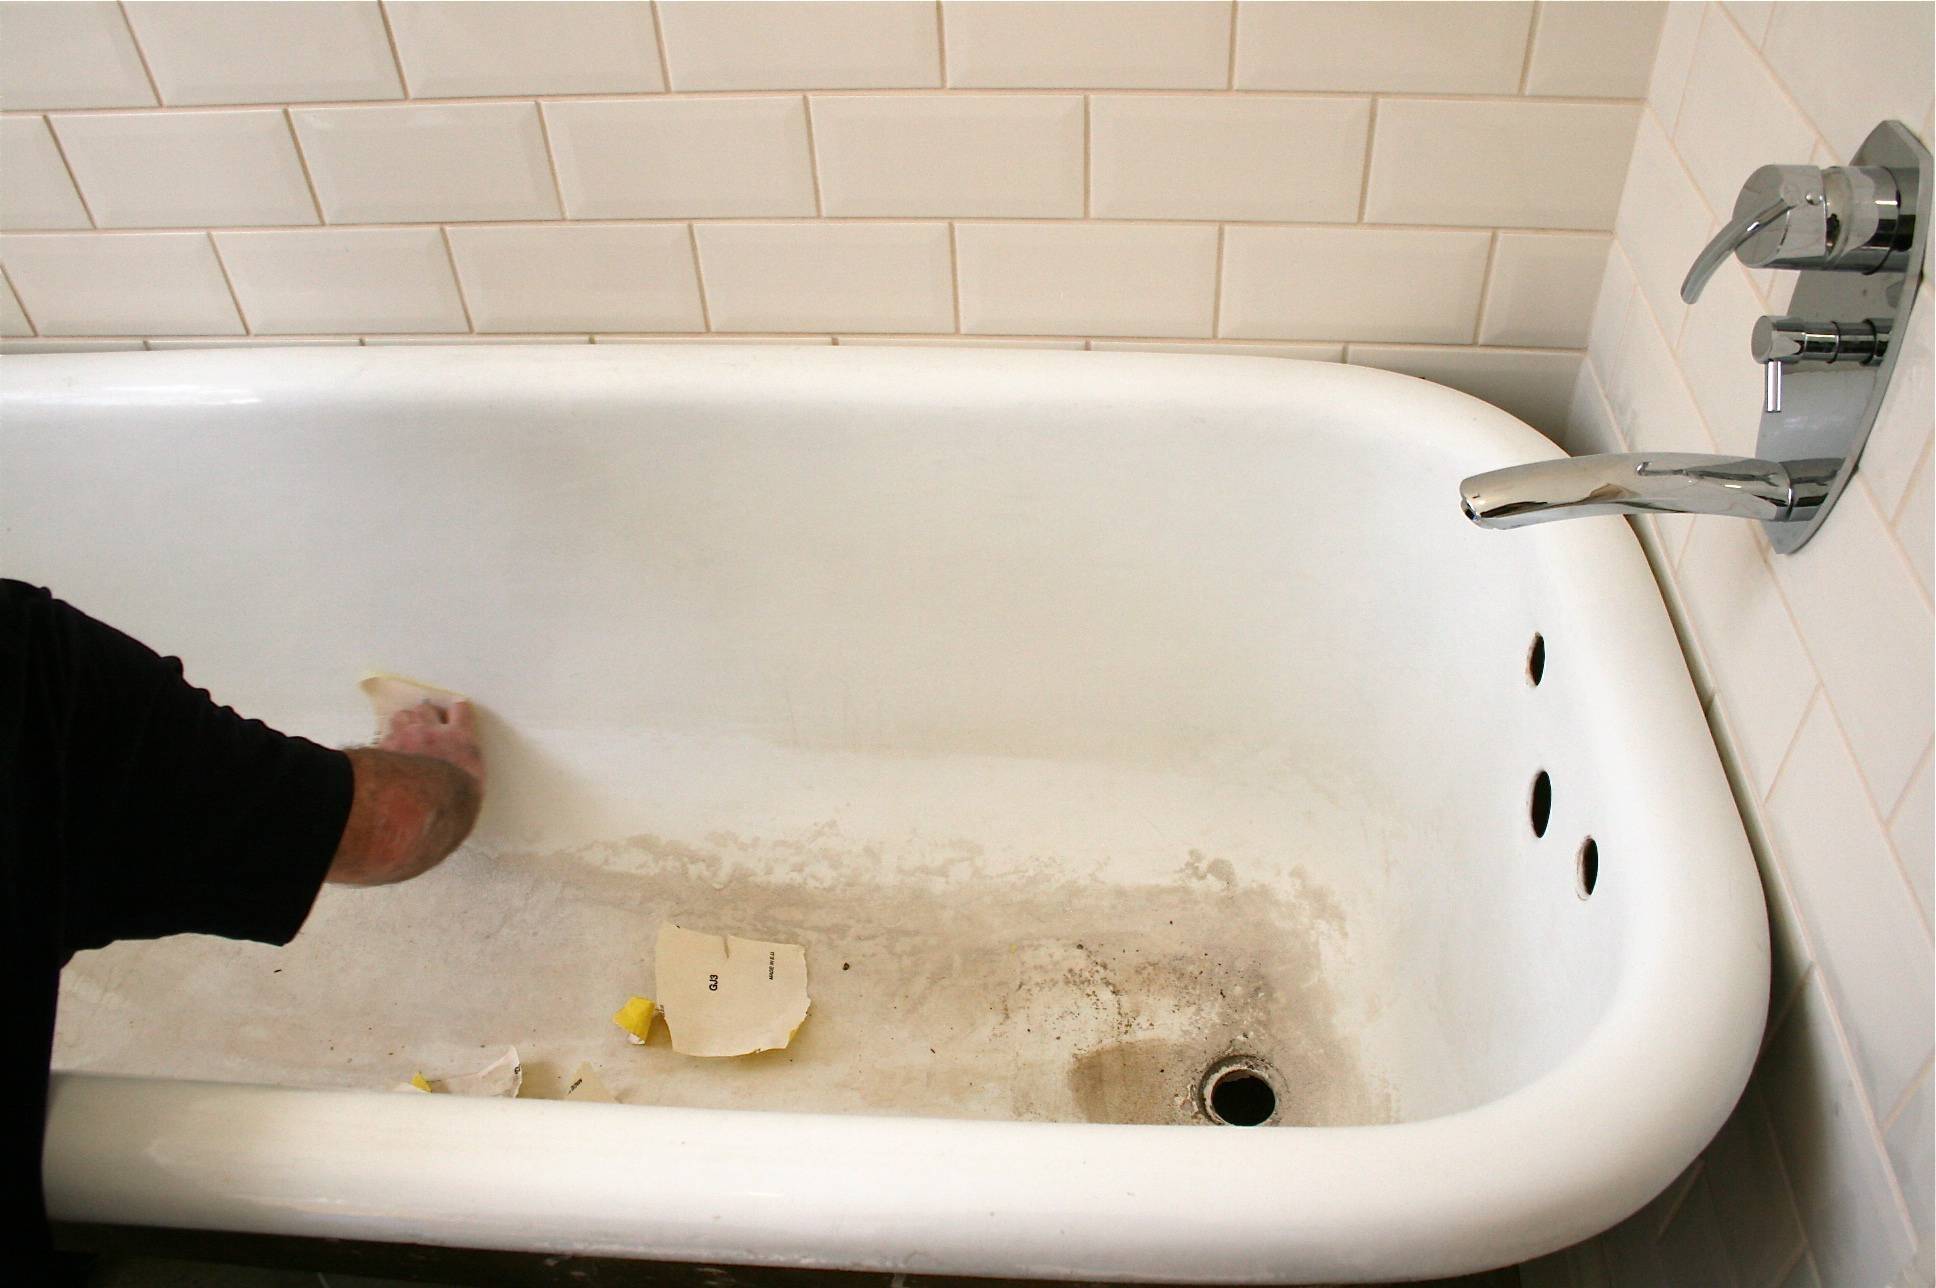
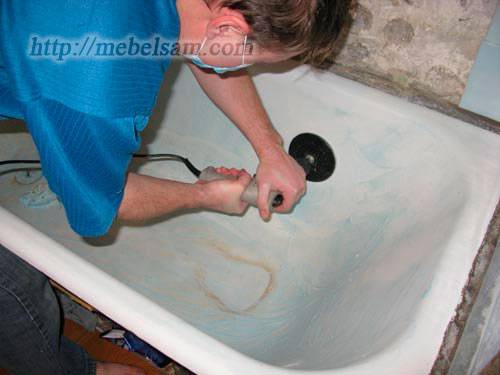
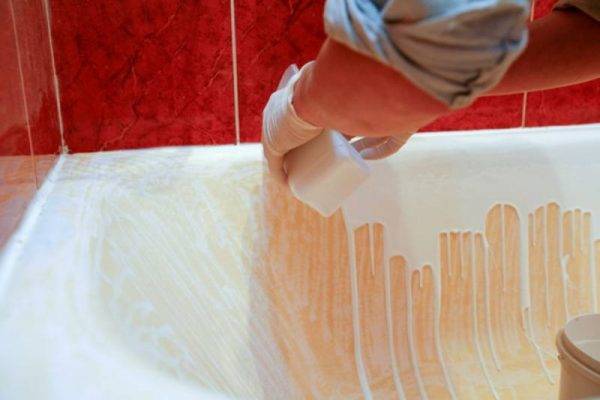
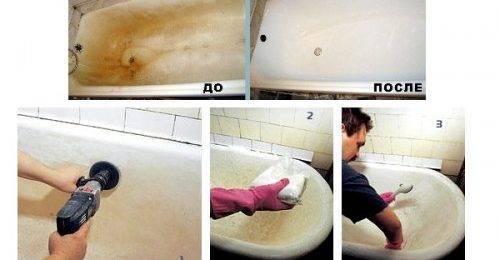
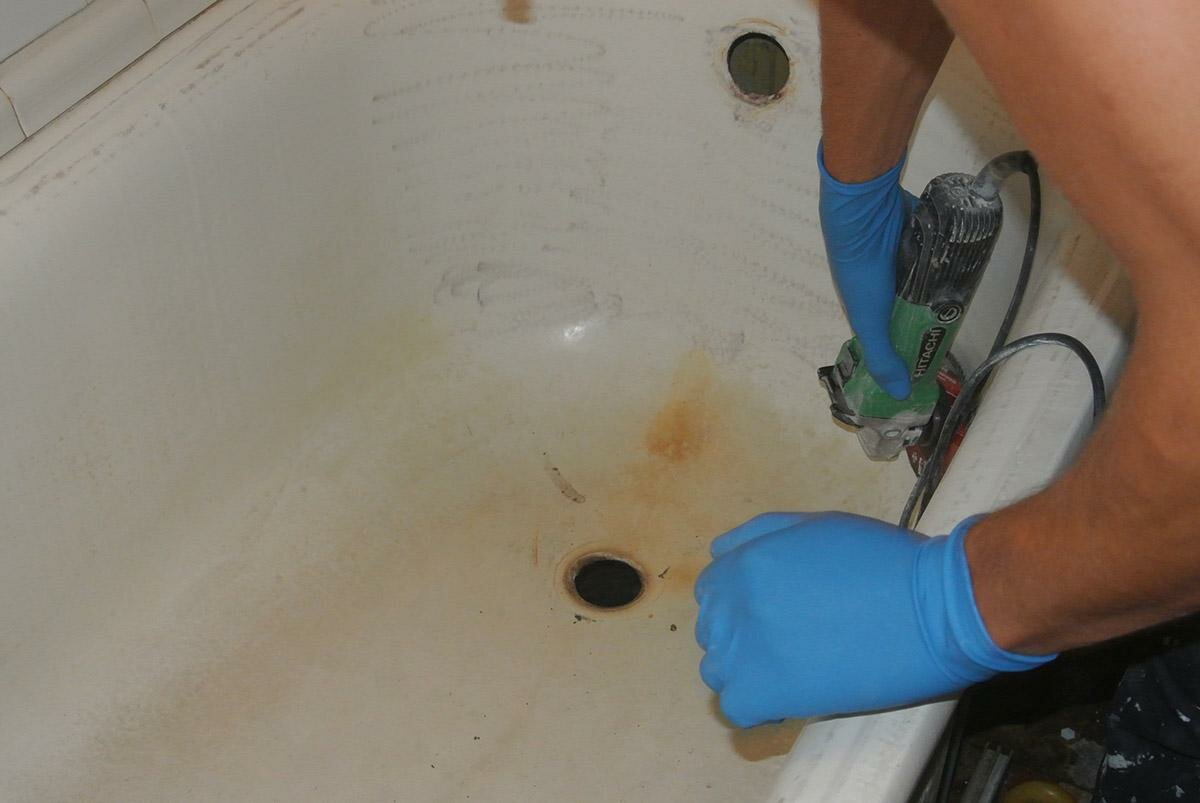
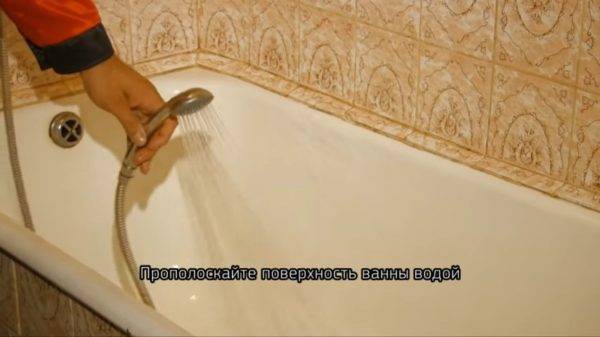
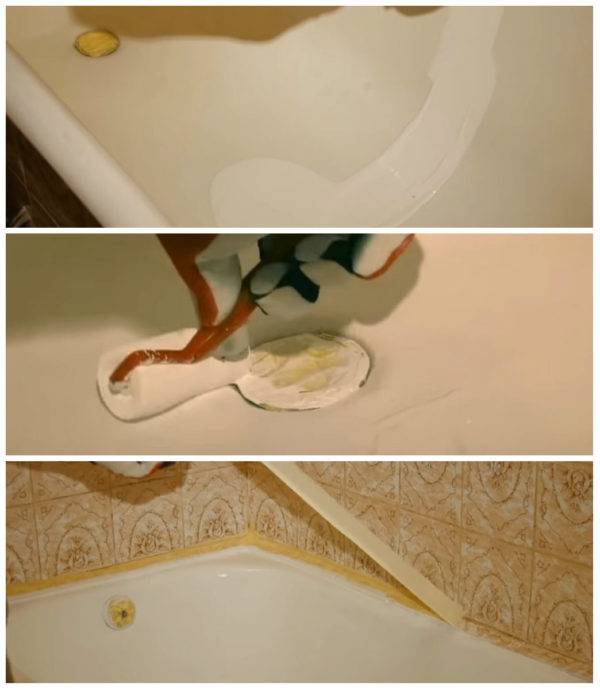
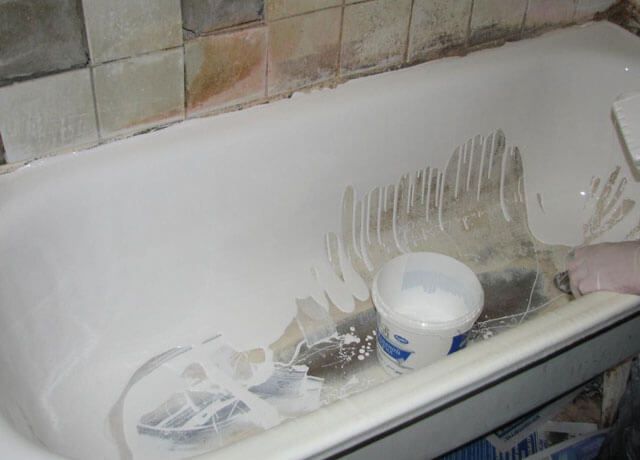
Preparing the bath for enamelling. To begin with, the inner surface of the bath must be thoroughly rinsed using aggressive household chemicals, such as Pemolux. The essence of such cleansing is to rid the surface of the bath of fatty layers that have eaten into the old enamel over a long period of operation of the bath. Then we arm ourselves with a grinder or a drill equipped with grinding nozzles.I want to warn you right away, if you are new to this business, then it is better to refuse the grinder. One wrong move - and a cavity that will not be hidden by enamel is guaranteed to you. You need to grind the bath until it becomes relatively smooth. At the end of grinding, the bath is thoroughly washed with water using aggressive detergents. At the same time, it is necessary to ensure that the water flowing down the walls of the bath does not descend in droplets, since this is a sure sign that the fat from the old enamel has not been completely removed. Then leave the bath to dry for at least 24 hours. We remove the siphon from the dry bath and vacuum it to remove the smallest particles of dust - this work must be done immediately before applying the enamel.
-
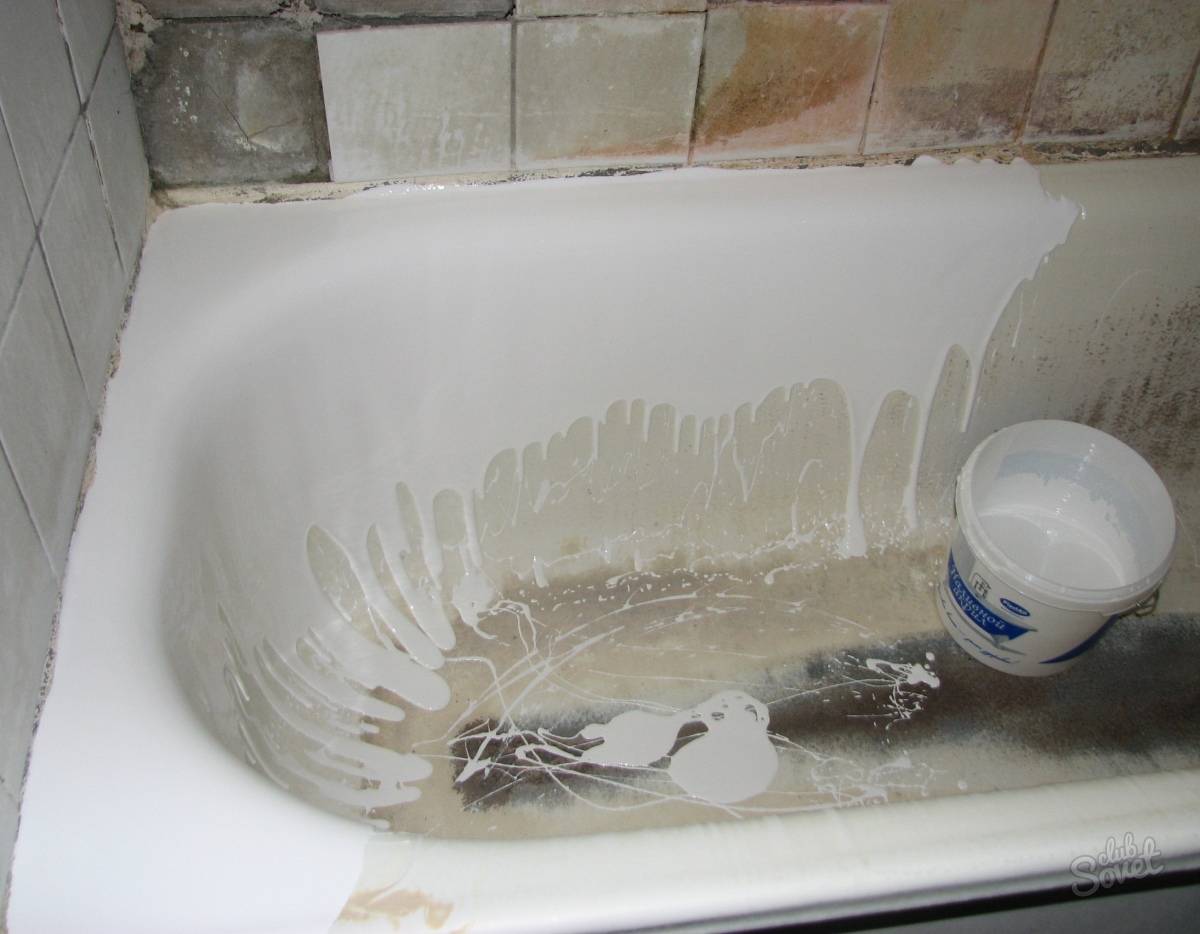
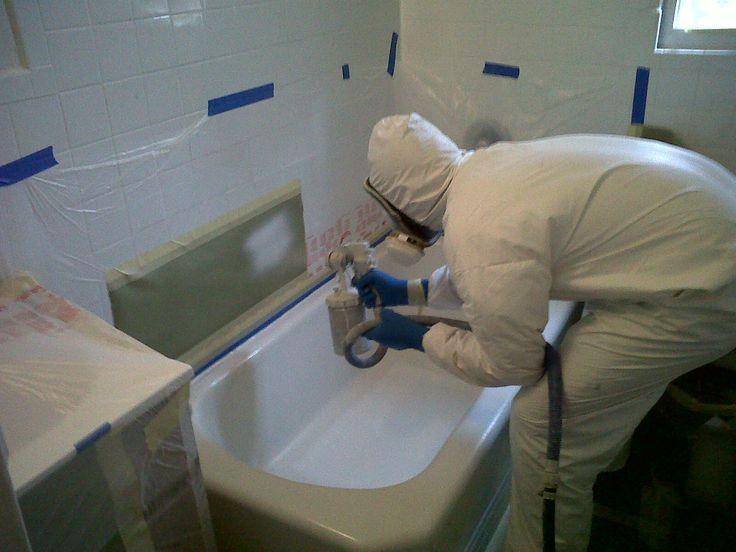
Applying enamel is the most important stage of work. Restoration of bathtubs with enamel, depending on the composition used, may have some differences in technology - as a rule, all the necessary nuances can be read on the packaging. When starting to apply enamel, the first thing to do is to divide the acquired paint into two equal parts - the first will be used as a starting coating, and the second as a finishing layer. The first (base) layer is applied with a wide brush in a very thin layer. The task is to fill all the pores of the old coating with new enamel. You need to start applying enamel from the edges of the bath and gradually go down. In this case, the paint must be smeared very high quality, and most importantly evenly. It’s not worth waiting until the base layer dries - it can fall into dust, and then all the work will go down the drain. The top coat is applied immediately after the bath is covered with the start coat.The enamel is applied with the same brush, and the direction of strokes should be from the middle of the bath to the top. After the final layer of enamel is applied, leave the bath alone for 15 minutes. After this time, we return to the bath and eliminate streaks (they are almost always formed even by experienced craftsmen). The streaks are removed with a brush in the same direction (from the middle to the edges). This work must be done until the enamel has lost its fluidity. All! Leave the bath to dry completely. And just before installing the siphon, it will be necessary to cut off the hanging drops of enamel in the hole.
If everything was done correctly, then after drying you will get an almost new bath that will delight your eyes for a long time.
Acrylic painting
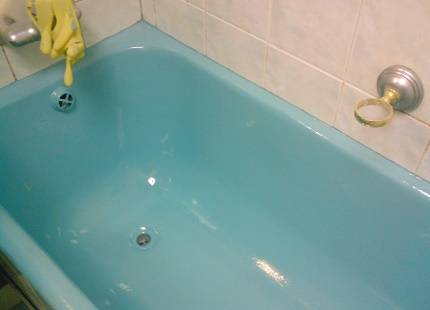
Using acrylic, you can create a smooth enamel coating up to 4 mm thick on the walls and 6 mm on the bottom. Especially smooth and absolutely glossy, it will turn out when applying paint to the surface by pouring. Such a coating will not be slippery. In addition, it will receive protection from mechanical and chemical effects.
Among the construction advantages of acrylic can be identified:
- strength, which has a hardened coating;
- long service life of the material;
- easy care - acrylic can be washed using detergents, they should not damage the surface;
- the possibility of polishing, which may become relevant over time, when small scratches appear on the surface of the bath.
At the same time, the most difficult part of the work, according to the masters, is the preparation of paint.
It is important to accurately observe the ratio of the acrylic base to the other component - the liquid hardener.Their consistency is very different, so mixing the two parts can be very time consuming.
 To obtain the desired shade, tinting paste is added to the polymer, only compounds that are compatible with each other are used.
Meanwhile, it is necessary to interfere carefully and very qualitatively. So that hardened areas do not appear on the painted surface. By the way, using a mixer when mixing the composition is not suitable. After all, he will not allow mixing that part of the composition that is on the walls of the container with paint.
You can work with both a brush and a roller. It is best to set them in a spiral direction - from the edges of the bath to its drain. Movement should be light, without pressure. The main thing is to prevent the appearance of bubbles. They must be noticed in time and immediately removed with a clean brush.
In addition, when painting, the appearance of streaks and sagging is inevitable. Their formation should be controlled 3–5 minutes after a specific section of the bath has been painted.
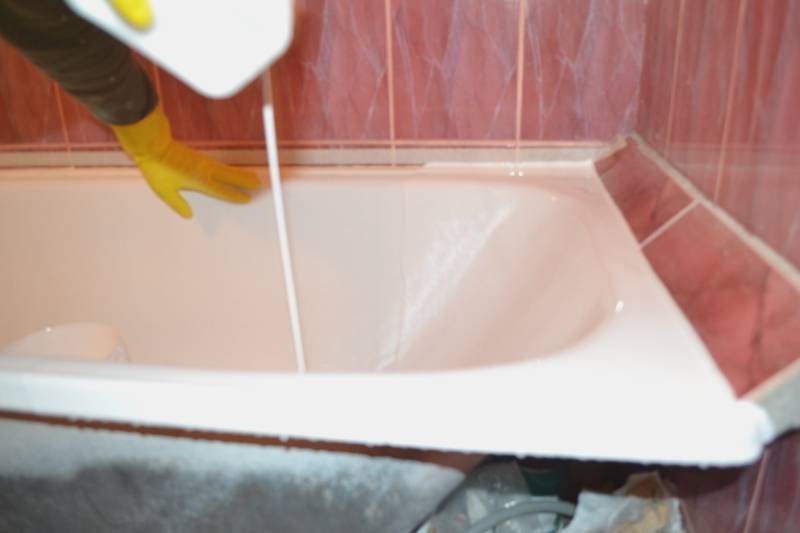
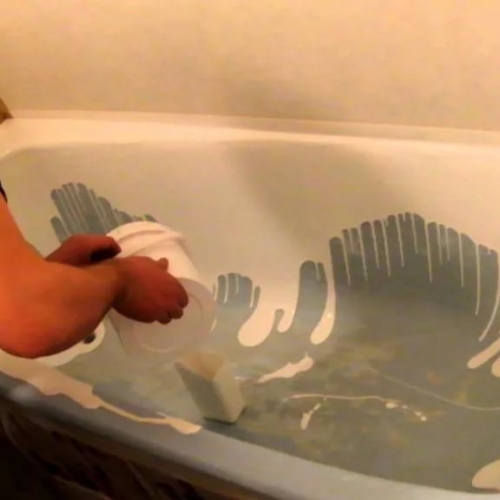
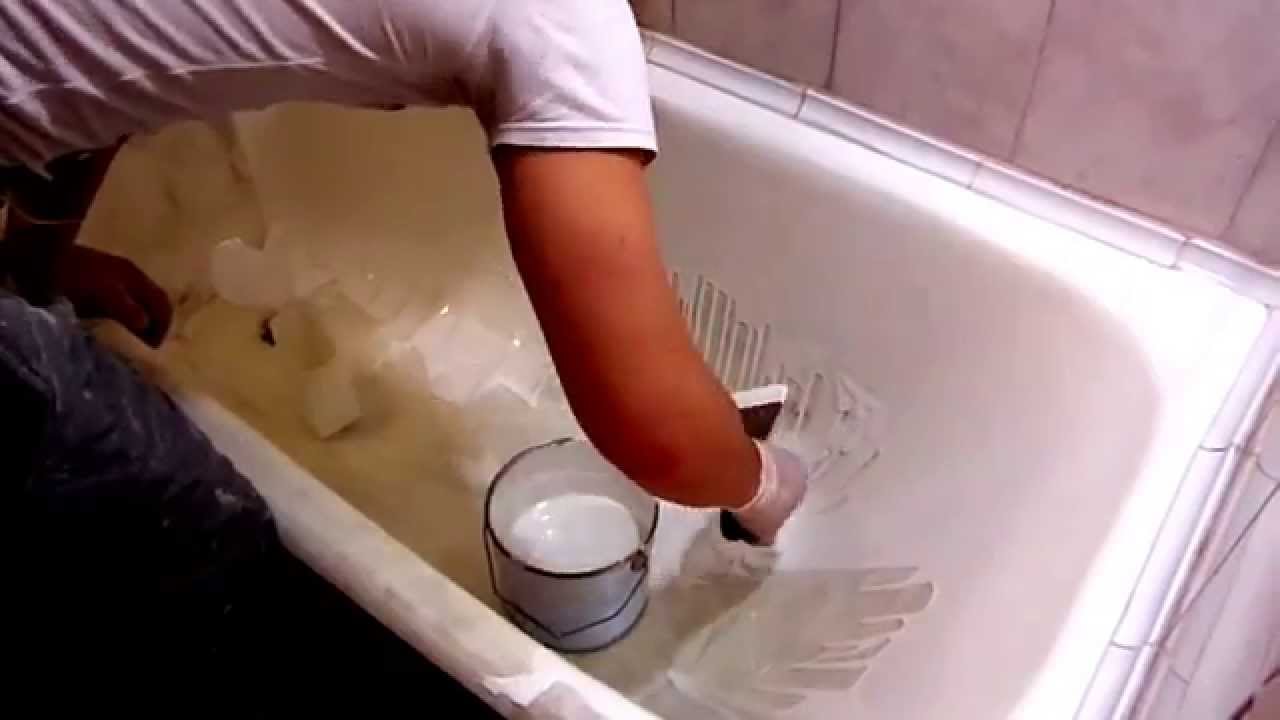
Another option for painting with acrylic is this: paint is applied to the surface of the bath using a special plastic cup and an ordinary spatula. From a glass, the paint is evenly poured onto the walls of the bath, while the process is only slightly adjusted with a spatula, which is also useful for processing hard-to-reach areas, for example, the corners of the bath.
 You can remove streaks and sagging with a smearing stroke with the brush up
Acrylic painting will take an average of about 3 hours. You can start using the bathroom carefully in a day, provided that it is dry, when the thermometers in the apartment showed no lower than + 25 ° C. If the house is a little cooler, the first use will have to be postponed for another day.


Re-enamelling
Restoration of cast-iron baths by applying a new enamel coating allows you to do the work yourself, since this does not require special skills and experience. In addition to the possibility of self-restoration, the use of enamel compositions has the following advantages:
- The cheapest option for updating coverage.
- Suitable for steel and cast iron products.
- Dismantling of drain and overflow is not required.
The disadvantages of this method include the toxicity of the compounds: it is recommended to work in a respirator. Re-enamelling has a short service life - about 5 years, while the coating is sensitive to impacts and prone to yellowing. In addition, the paint is not able to fill large shells or chips of old enamel.
The set for restoration by applying a new enamel includes two products: a primer and enamel with a hardener. All components are supplied in separate containers, the capacity of which is calculated for the repair of one bathtub.

In fact, the enameling of an old bathtub is a simple staining with a special composition. The procedure and technology for performing enamel restoration is as follows.
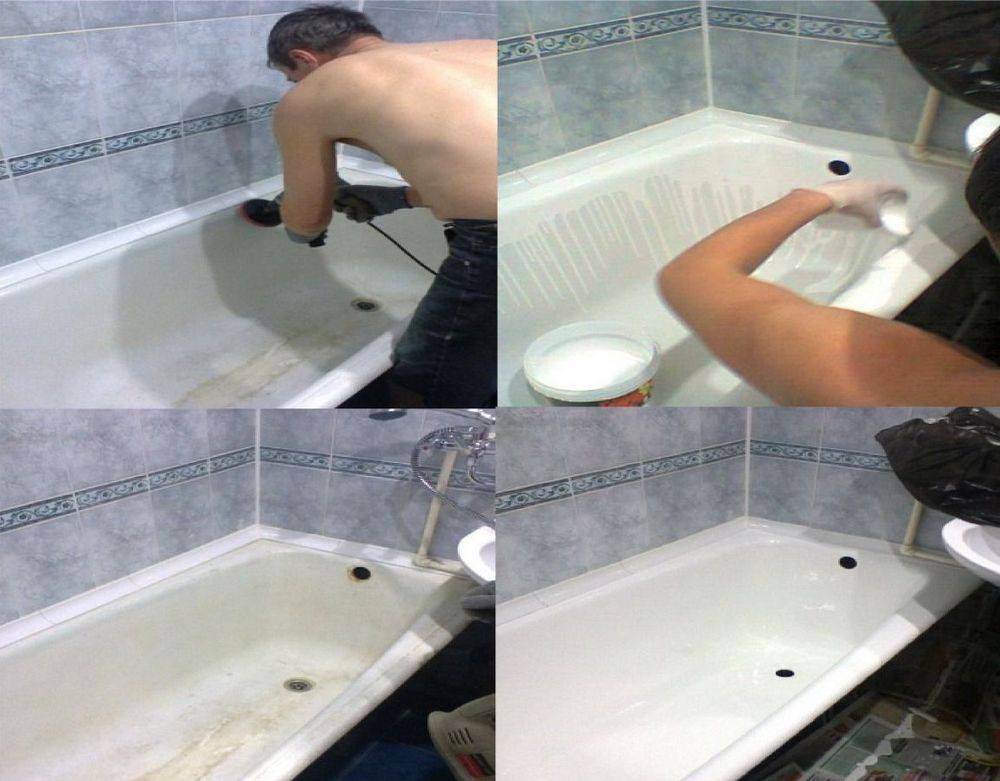
Training
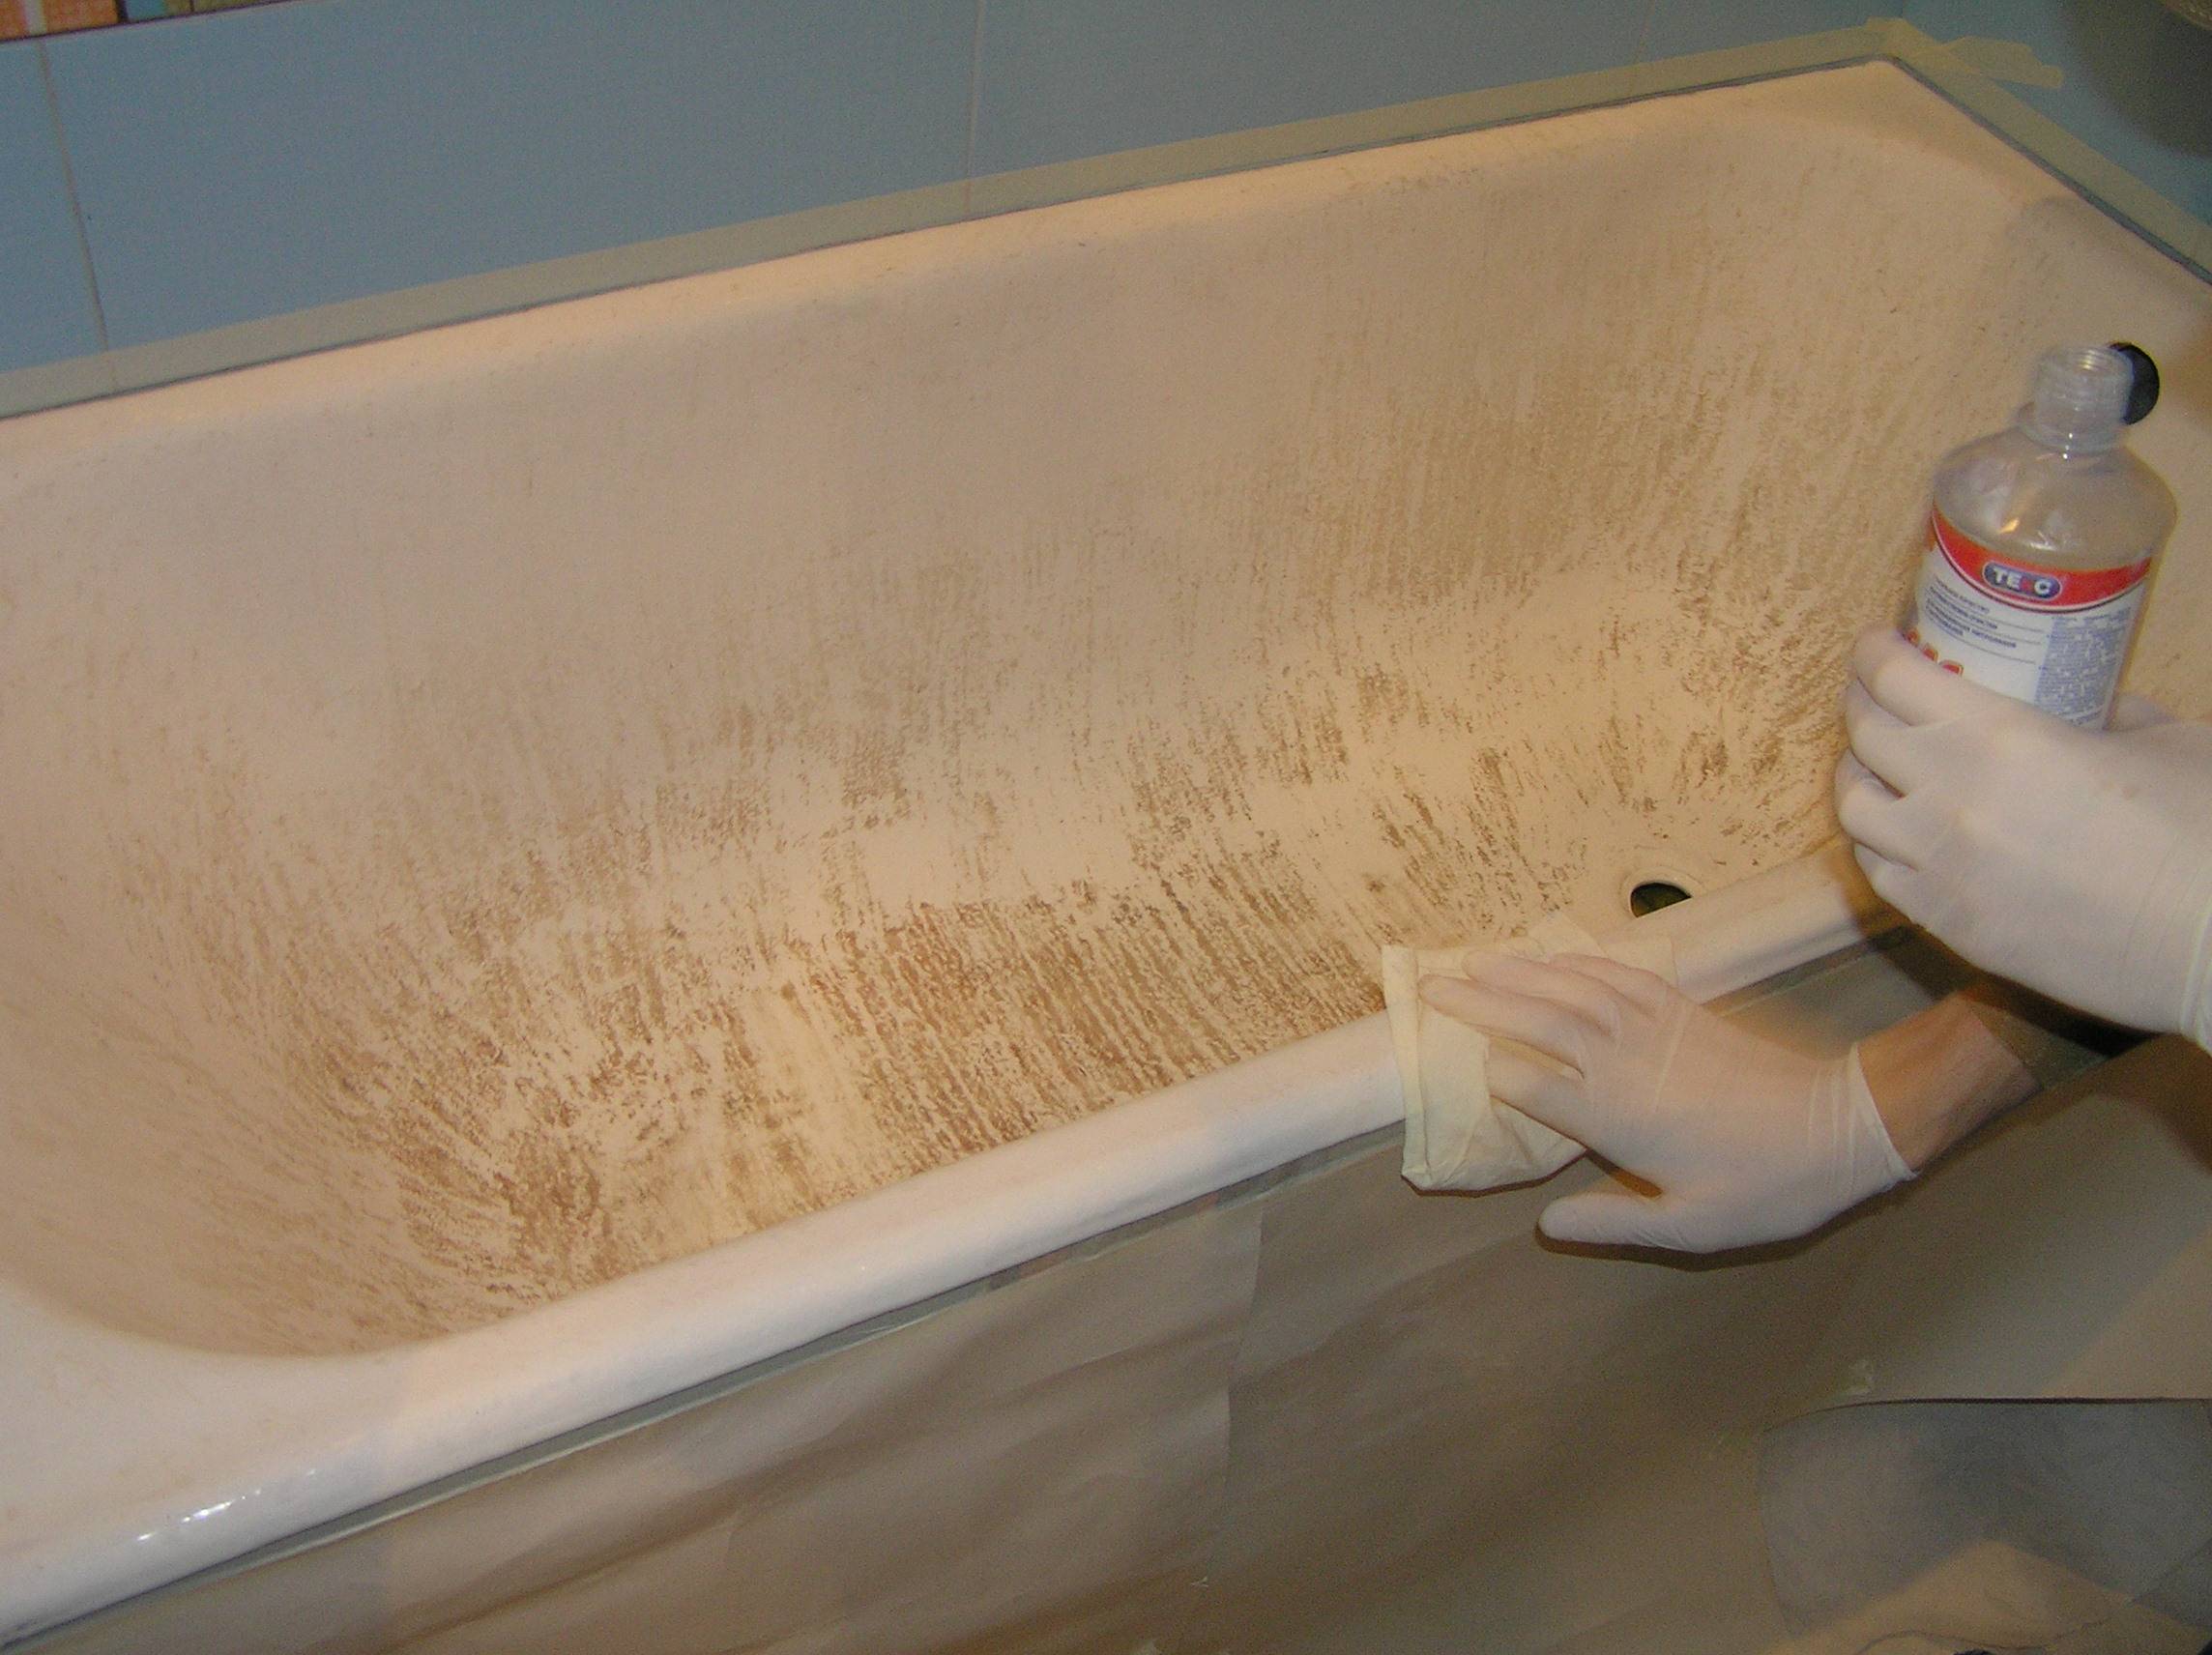
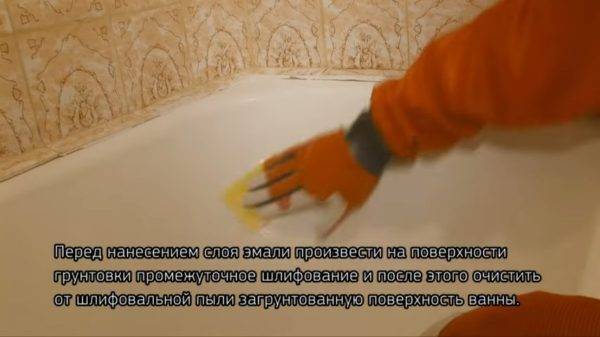
In order for the paint to have sufficient adhesion with the old coating, the inner surface of the bath is cleaned with fine sandpaper. This roughens the surface and removes dirt and grease at the same time. The dust formed during the grinding process is removed from the bowl with a vacuum cleaner. At the same time, it is recommended to leave the body of the vacuum cleaner with the motor behind the door so that the outflow of air does not raise dust.
Padding
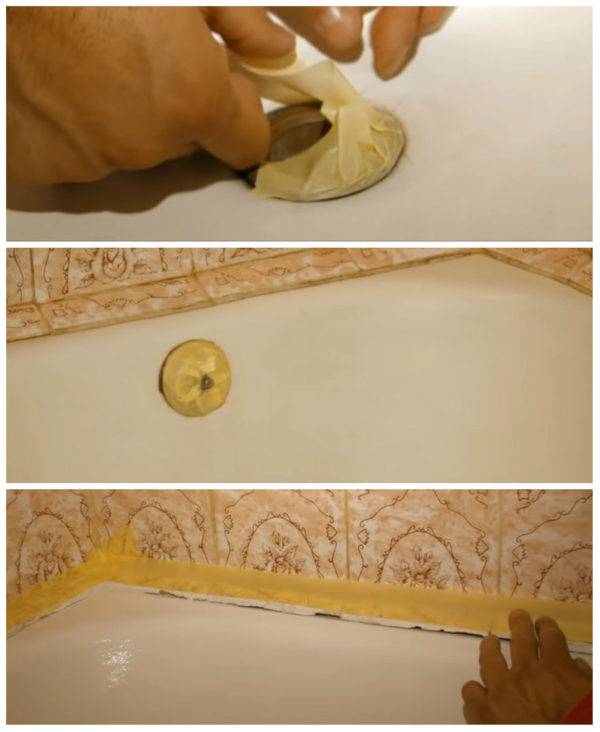
The next step is to apply a primer. Before this masking tape, the drain and overflow holes are carefully pasted over, and the lining along the edge of the bath is also protected.
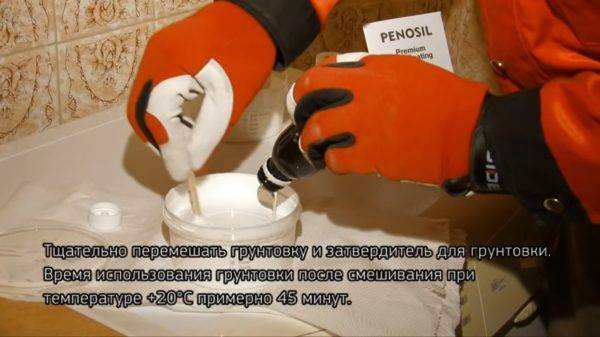
Then a hardener is added to the mixed primer and the composition is thoroughly mixed.
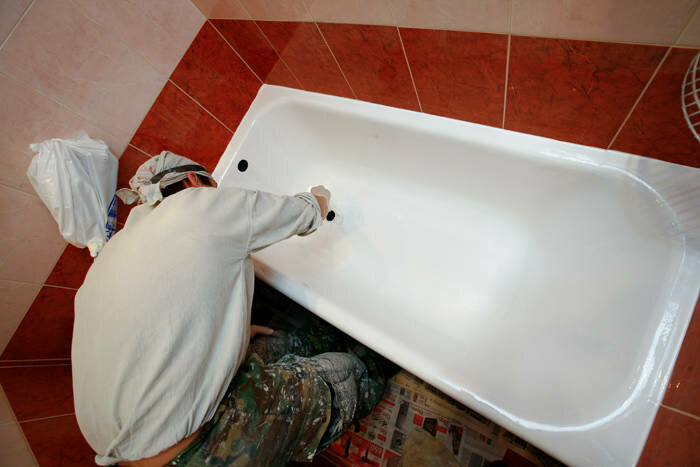
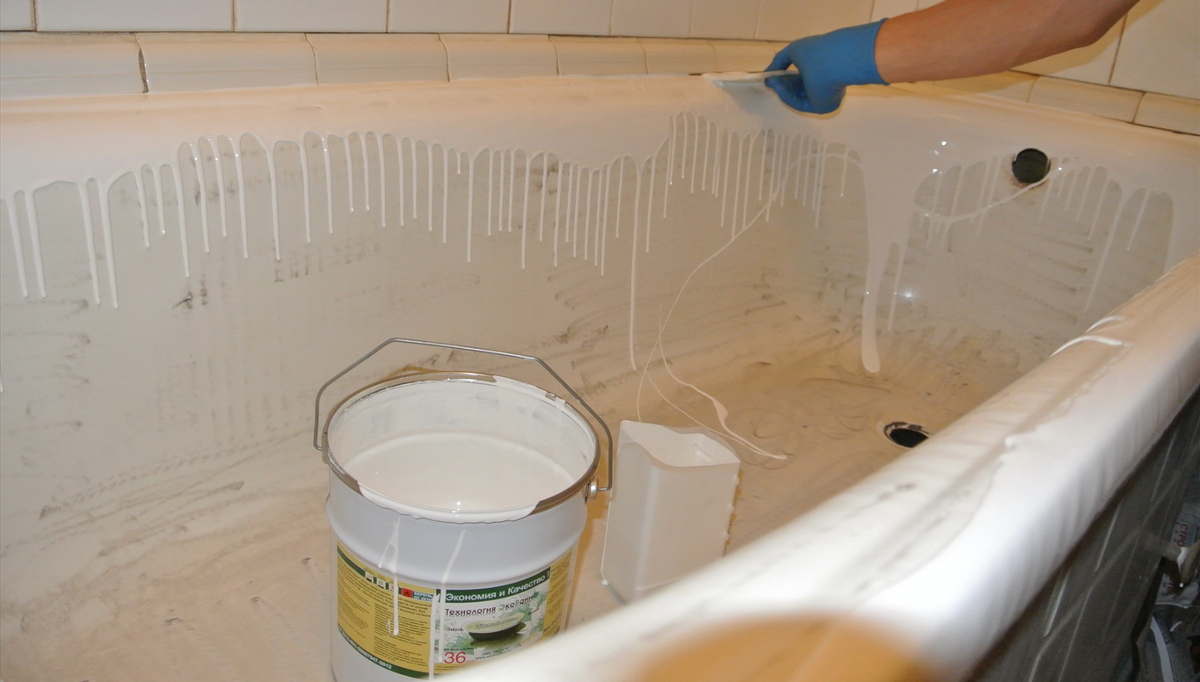
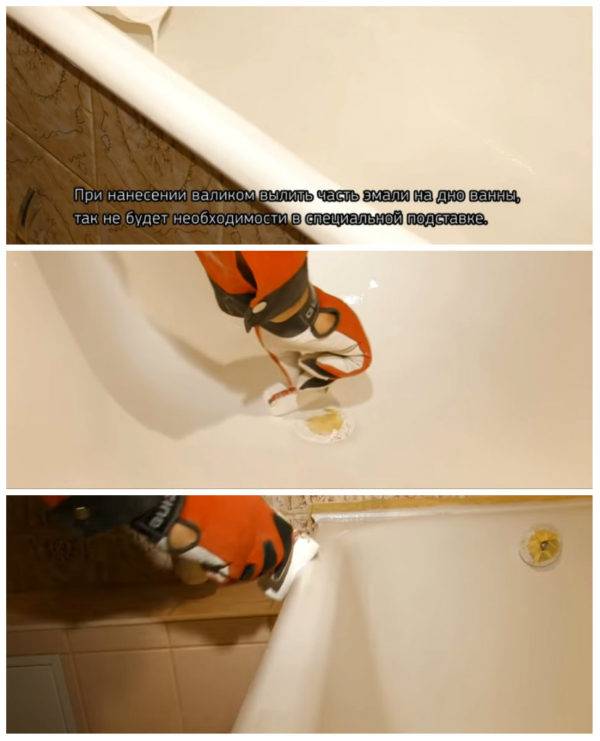
Part of the primer is poured onto the bottom of the bath, after which it is rolled evenly over the entire bowl with a roller. When developing the poured composition, more is poured. The primer is applied in a thin layer so that there are no streaks and gaps. If necessary, while the primer is mobile, you can go through the second pass. Upon completion of priming, the protective masking tape is immediately removed so that it does not stick.
Enamel application
To paint the bath with enamel, they start after 12-24 hours (depending on the air temperature and the manufacturer's recommendations).
Before applying the enamel coating, the following activities are carried out:
- The primed surface is polished with fine sandpaper.
- Grinding dust is removed.
- The bath is washed with water and wiped dry with a rag.
- Drain holes and edges of the cladding are sealed with adhesive tape.
The enamel is then mixed with a hardener. The pot life of the composition is also 45 minutes. Painting is carried out according to a similar scheme: the enamel is poured onto the bottom of the bath, after which it is rolled out with a roller over the entire surface in a thin layer, without gaps and sagging. After staining, the protective tape is immediately removed.


You can use the updated bathroom no earlier than indicated by the manufacturer (from 3 to 7 days). If you use the bath before the specified period, this will negatively affect the quality and strength of the enamel layer. After the enamel has dried, the bathtub is wiped with a soft, soapy cloth, and then washed with water.
How to paint a bath What paint and how is the bath painted
How to paint a bath with your own hands
Sometimes, in order to update the bath, it is not necessary to change it to a new product. An old cast-iron bathtub can be safely painted and given a “second life”. How to paint a bath with your own hands, how to paint a bath and the choice of paint for this will be discussed in the article.
Painting a bathtub at home is a simple procedure. Nevertheless, a good result can only be obtained with certain knowledge of how to paint the bathtub correctly, as well as what kind of paint and tool is best to use for this.
What color to paint the bath?
Everything must start, of course, with the choice of paint. First of all, it must have moisture resistance, and secondly, it must adhere perfectly to any surface, otherwise it will begin to peel off over time. Professionals recommend compositions consisting of three components, which are kneaded immediately before painting.
Before starting work, the container must be prepared. To do this, it needs to be cleaned and degreased. It is not recommended to use products containing chlorine. On a well-cleaned and degreased bathtub, drops and trickles of water are completely absent when the surface is wetted, and the glossy enamel layer is also removed.
Then the bath dries well. To do this, you can use, for example, a hair dryer. And then pour hot water into the tank, which must be drained after about 15 minutes, then wipe the tank dry and apply a primer.
How to paint a bath with your own hands?
Then the process of painting the bath at home begins. In order to protect the bath from dust, it is necessary to tightly close all windows - doors and do not open them for some time after the bath is painted.It depends on how long the paint will dry.
For the painting itself, it is advisable to use a brush with a natural bristle of a flat shape. It is better to dilute the paint in such a way that about half of the prepared volume of the coloring matter goes to the first layer.
It is necessary to start painting the bath from the edges, gradually descending to its bottom. After the first layer dries, you need to apply the second. Bath paint, during painting, must be diluted in several parts, and not all at once, otherwise it may dry out before it is used.
You can use the bathroom no earlier than a week and a half after painting it.
Preparing the bath for painting
After the question of what paint to paint the bath has been sorted out and the final conclusion has been made, it is necessary to begin work on preparing the surface of the cast iron for applying the coloring composition:
- First of all, the drain and pipes are removed from the cast-iron bath;
- All fat and lime deposits are removed from the inner surface with the help of special detergents, which include alkali (oxalic acid or baking soda). The cast iron bath is polished from the outside;
- Peeling paint, enamel is removed with a grinding wheel or an electric drill with abrasive nozzles to smooth the surface;
- Cracks and log cabins are polished separately with sandpaper;
- The primer is distributed throughout the bath, a thick layer is applied to the chips and to the edges of the bath sides;
- We prepare the mixture - we breed. You need to know that the diluted composition should not stand for more than half an hour - this is the time for painting the bath, as it begins to harden.
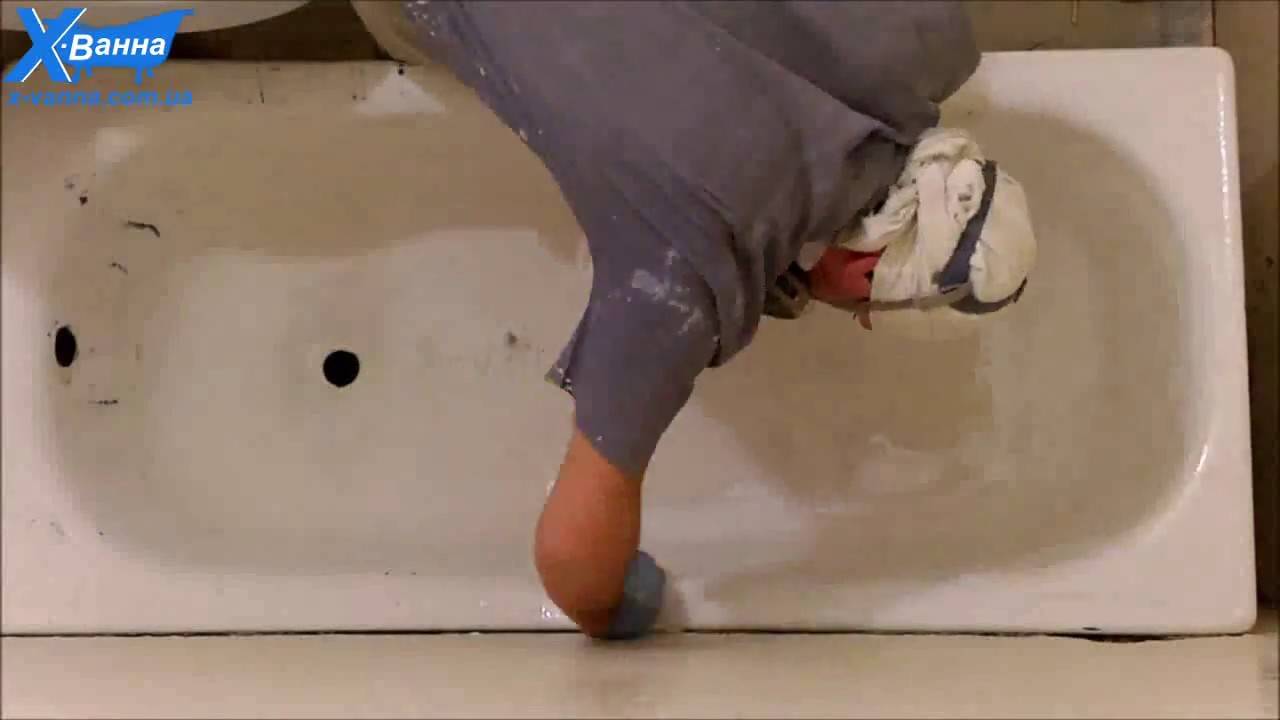
- Next, a coloring composition is applied to the dried surface and evenly distributed over the surface of the cast-iron bath with your hands;
- The second layer of cast iron or metal bathroom paint (quick-drying option) is applied only after the first layer has dried;
- After application, allow to dry for at least a day with doors and windows closed.
The grinding nozzle is selected in accordance with the material being processed - for metal, you can also use sandpaper or a steel brush.
You can check the cleaned surface for paint and enamel residues, for the quality of degreasing, you can use a jet of water. If smudges and drops remain, the surface is poorly processed, and if it is smooth, then the work is done properly.
How and how unusual to paint a cast-iron bathtub outside? You can use bright paint, and after it dries, apply a drawing.
The pattern can be found on the Internet and printed on a printer. Usually the outer side of the bath is covered with plastic frames or ceramic tiles. You can use a cast-iron bath after painting no earlier than seven days after applying the pigment.


Conclusions and useful video on the topic
Restoring a cast-iron bath with special enamels:
Bathtub coating with liquid acrylic:
Restoration of a bathtub with an acrylic liner:
Restoration is the best way to update the appearance of a bathtub, as it allows you to quickly, easily and inexpensively give new life to an old cast-iron bathtub. Each method has its pros and cons, so it's up to you which one to use.
Do you have experience with a cast iron bathtub? Please share information with our readers, suggest your own way to solve the problem. You can leave in the form below.


