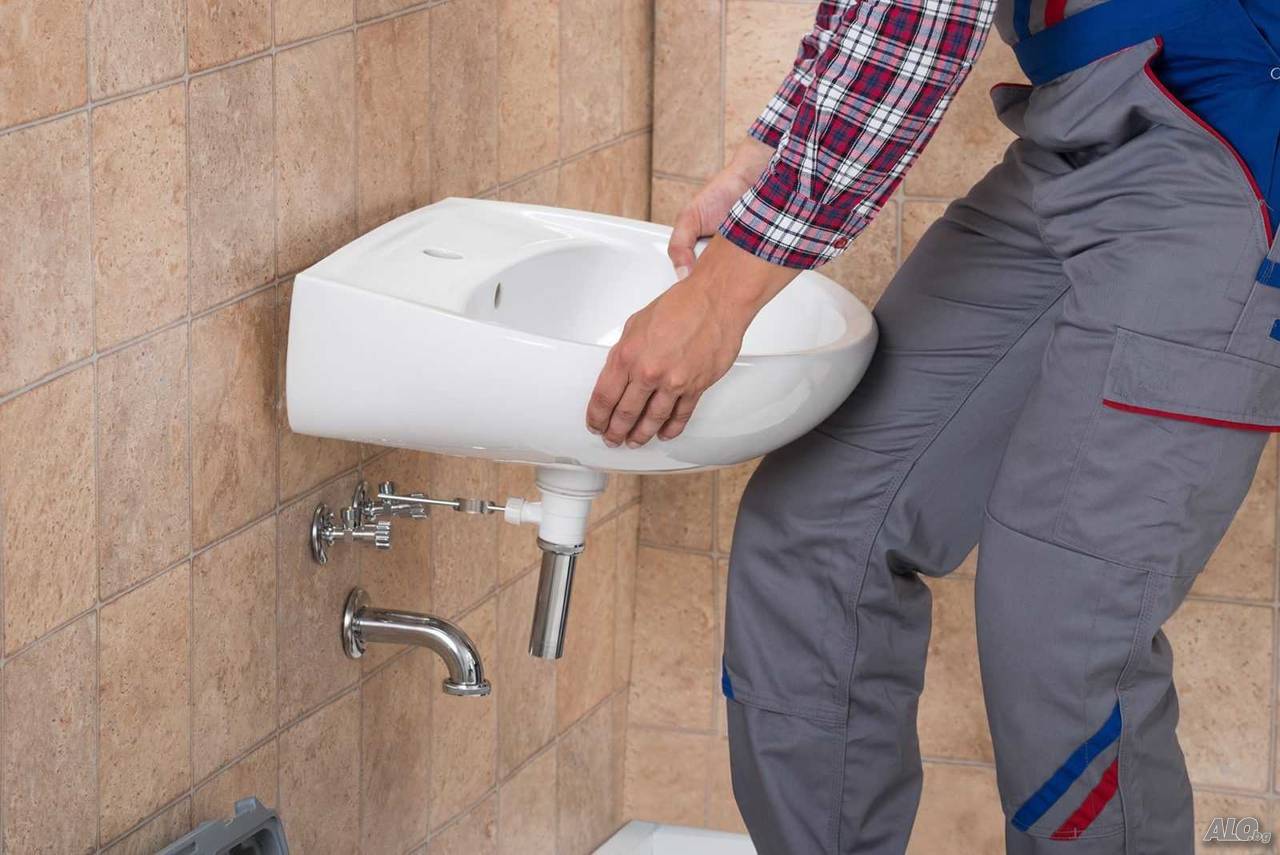
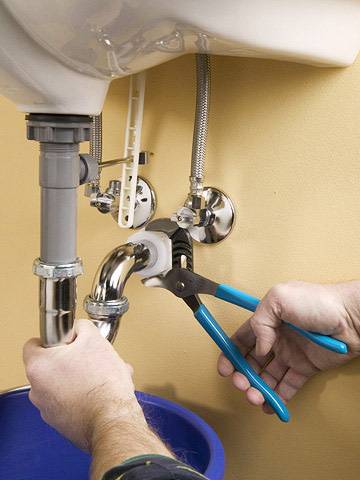
- Photo of the sink installation process
- Preparation for work
- Types of fasteners for sinks
- Installation Tips
- Installation requirements
- Detailed instructions for installing a tulip sink
- We outline the place of attachment of the sink
- Installing bracket mounts
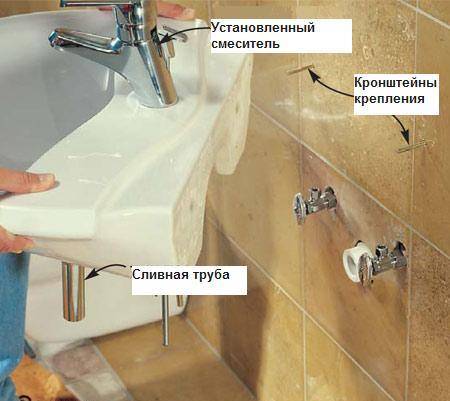
- We install and connect the mixer
- We connect the siphon to the sewer
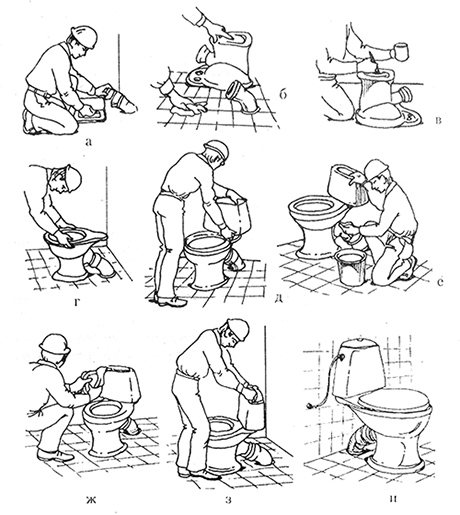
- Stages of installation work
- Installation instructions for the sink on the wall
- Choosing a pedestal when hanging models are needed
- Undeniable advantages of suspended models
- A variety of models - what are the hinged cabinets
- Creative ideas and practical advice
- Connection to water and sewer systems
- Types of shells according to the method of attachment
Photo of the sink installation process


We also recommend viewing:
- Acrylic bathtubs triton
- Bidet mixer
- Bath faucet
- Shower faucet
- Bathroom extractor
- Sink siphon
- Hand dryer
- Hair dryer holder
- Leak protection
- Stone sink
- Bath sink
- Acrylic corner bath
- Sensor mixer
- Kitchen faucet
- Instantaneous water heater
- Countertop sink
- Rimless toilet
- Basin mixer
- Spouts for faucets
- Toilet seat
- Faucets set
- Bidet
- flush key
- Water heater installation
- small sink
- corner sink
- Floor standing toilet
- Toilet installation
- Cast iron bathtubs
- metal bathroom
- Acrylic bath
- double sink
- Countertop sink
- Toilet fittings
- Water boiler
- Toilet bowl
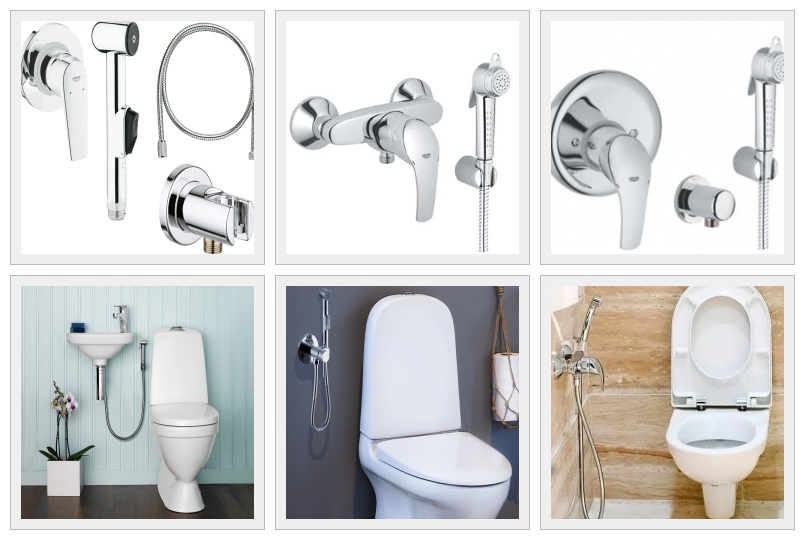
- Faucet with long spout
- Faucet for hygienic shower
- Storage water heater
- Urinal
- white shell
- Wall hung toilet
- Built-in sink
- Hanging sink
- Hydromassage bath
Please repost
Preparation for work
When all the necessary measurements are made, you can proceed to the removal of the old "washstand". First of all, the water supplied to the old sink is blocked (you can turn off the water either upstream through the supply pipes, or by turning it off throughout the house / apartment). After that, it is necessary to disconnect the mixer together with the supply pipes from the supply pipes.
You should not try to unscrew the nuts on the hoses with pliers, or even more so by hand: in order to avoid leaks, the attachment points are sealed and tightened quite tightly, so you need a wrench or a gas wrench. After the liner is disconnected, the siphon must also be disconnected. As soon as the sink, along with the faucet, is freed from all communications, it can be carefully removed.
Depending on how the bowl and pedestal (if provided by the design) are fixed, different methods of dismantling are used. The easiest way is if it is fixed with bolts - in this case, they can simply be unscrewed. If the bowl is attached to the wall on a special metal frame (this often happens in "Soviet" apartments), then it will have to be cut down with a grinder or a hacksaw.
Types of fasteners for sinks
Hanging washbasin on brackets has long been considered a familiar accessory in bathrooms. For a long time of operation of these devices, different types of brackets have been created, differing in design, standard sizes and high permissible load (see also the article “Round sink: materials, installation methods”).
In accordance with the operational highlights, these devices are of the following types:
Standard modifications with which it is possible to attach a solid part of the sanitary equipment currently being created to the walls.
Most of the mounts on the market fall into the standard bracket category. By choosing such products, you have the opportunity to believe that they will fit virtually any sink.
In most cases, such products are sold in a set with one or another model of the sink. Based on this, in a simple sale, these components are seen infrequently and their price is high.
Designer accessories are in many ways similar to special brackets, in addition to the fact that they are designed for a specific model, they have one or another decorative shape.
According to the type of production material used and the configuration, the following are distinguished:
Cast iron brackets with a T-shape configuration and monolithic structure are distinguished by a reinforced base and a solid mounting platform.
- Metal fasteners made by welding. Such accessories are made in the form of the letters "G" and "T". From time to time, simplified versions of welded fasteners made of profiled pipes are seen.
- Iron fasteners of frame type (sector, arc and rectangular).Certain models have sliding units designed to mount sinks with different sizes.
Installation Tips
The installation instructions for sinks on the walls with the help of special fastening components do not seem to be something very complicated. From the tools you will need a puncher with a drill of the appropriate diameter, a water level, a tape measure, a pencil, dowels and a hammer with plastic seals.
Installation instructions are as follows:
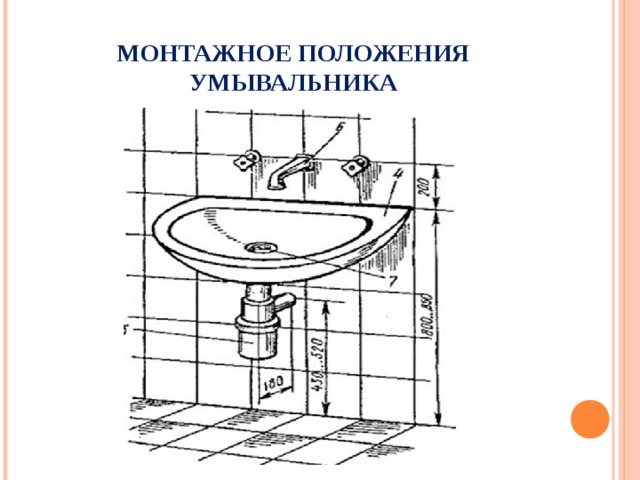
- We measure 80 cm from the floor. As a result, the sink will be located at a distance of approximately 85 cm. If the device is used by people with small stature, these parameters may be revised in favor of a reduction.
- We measure the distance between the mounting holes in the back of the sink and mark the screws on the wall. We control the horizontalness of the applied marks with a level, after which it is possible to start drilling.
- We drill holes using a drill of the same diameter as the sealant that will be used with the dowel. While drilling, we try to keep the puncher with our own hands in a strictly horizontal position, without moving it from side to side.
If you pull the puncher on the sides, the hole will be broken, and the seal will simply not hold in it. We drill the surface to a depth of 1.25 of the length of the seal.
- After the hole is ready, blow the dust out of it and insert the seal. For greater strength of the connection in the hole, pre-moisten with a small amount of water.The seal is hammered in with a small hammer until it is flush with the wall surface.
- Then we fix the bracket chosen for the installation of plumbing.
- After the brackets are mounted, it remains to put the washbasin on them and check the level of quality of the work done.
Installation requirements
- Installation of plumbing fixtures must be carried out at the end of the installation of the pipeline and at the end of the preparatory and finishing work.
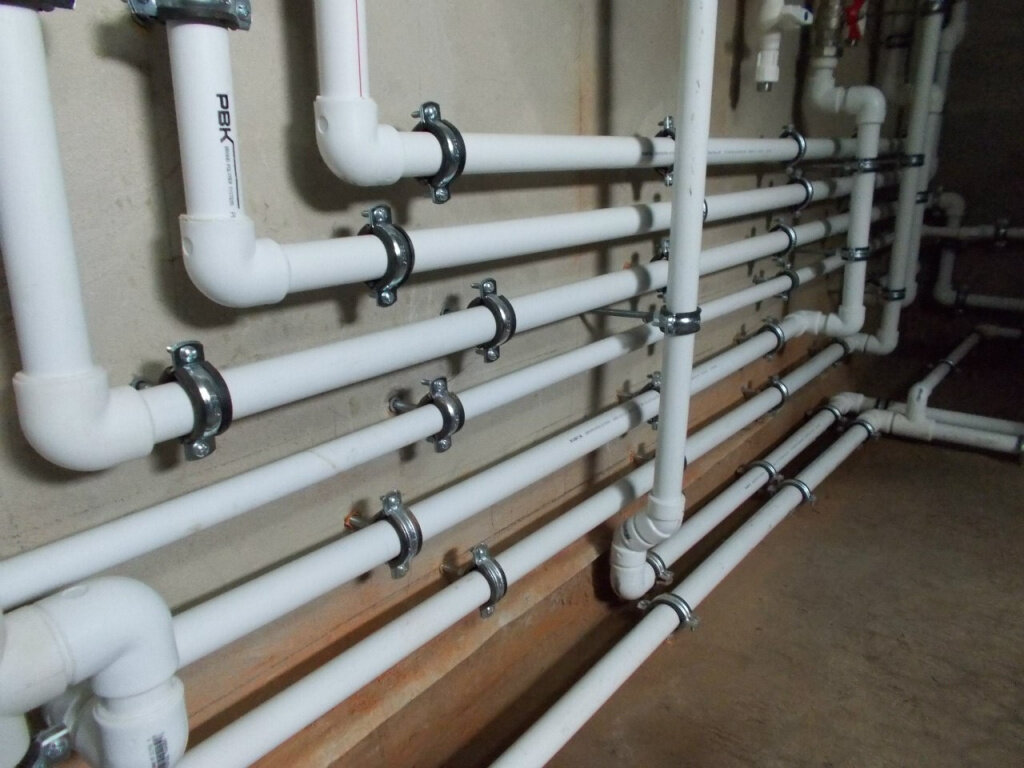
- Before fixing the sink, the plumbing pipes must be equipped with water sockets, tees, elbows, or couplings with an internal diameter of 1/2 inch.
- The supply of pipes with warm and cold water to the sink should be carried out taking into account a distance of 15 cm between the pipes.
- Regardless of which pipe connection is used - hidden or open, water outlets must be placed in such a way that they are virtually invisible behind the installed washbasin.
- Plumbing fixed on brackets should not be mobile and should not creak. If there is a swing and a creak, the installation should be done again.
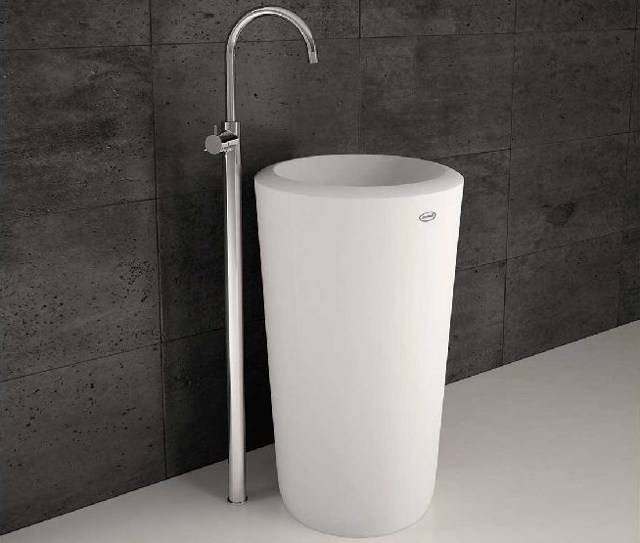
Detailed instructions for installing a tulip sink
Connecting the sink to the water supply and sewerage systems is carried out in standard ways.
We outline the place of attachment of the sink
Despite the fact that the bowl rests on a pedestal, it must be additionally attached to the wall. Before marking, a trial installation of the product is carried out. The stand must not wobble. After leveling the pedestal on the wall and floor, mark the locations of all parts. The correct drawing of lines helps the use of the building level.


 Marking the place of attachment of the sink.
Installing bracket mounts
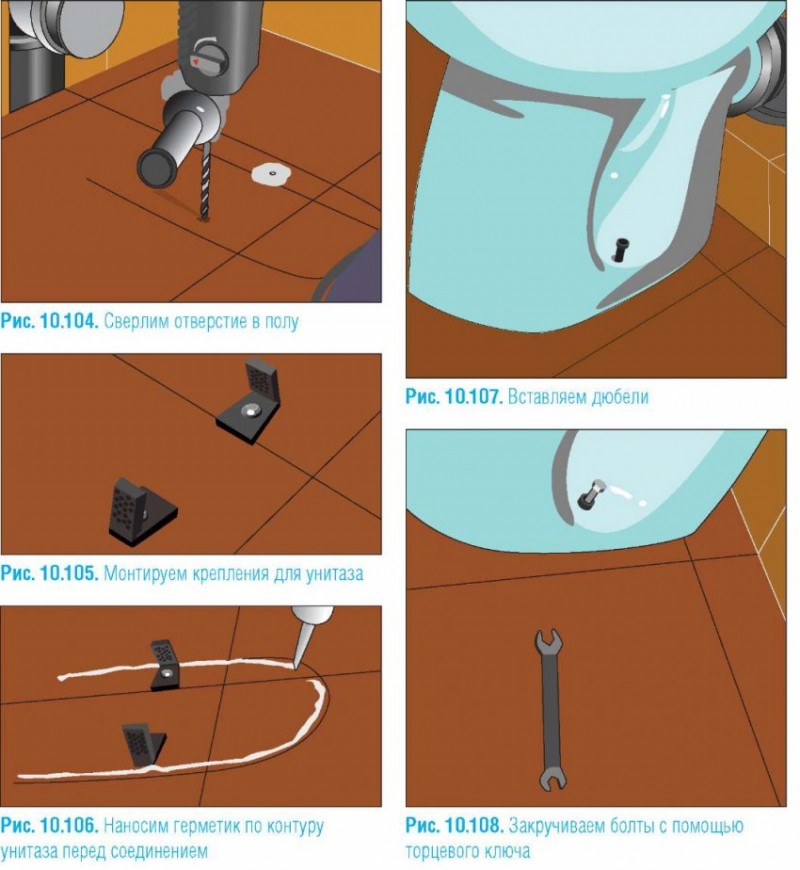
At this stage, holes are formed. After drilling, the holes are filled with glue, then dowels are inserted there. To fix the brackets, use anchor bolts longer than 7.5 cm, because. under the influence of the load, ordinary self-tapping screws pop out from a wall with dowels.
We install and connect the mixer
The installation of the washstand on the holders is carried out in two ways:
- The bowl is placed on fasteners, after which the wall is tiled. The gap between the sink and the tile is filled with sealant. It is recommended to choose the product that contains antifungal additives.
- The composition is applied to the surface of the holders. Next, you can put the bowl and fill the joint with plumbing sealant. This prevents the sink from moving.
We connect the siphon to the sewer
To assemble the drain system with your own hands, you need to perform the following steps:
- Connect overflow. The hole is combined with a flexible hose, which is brought to the base of the siphon, fixed with a nut.
- A grate, rubber seals, and a screw are placed on the grooves of the washbasin. Tighten the bolt, providing a tight connection.
- The drain pipe is bent, inserted into the sewer pipe. Raise the sink, move the pedestal, placing elements of the drainage system in it.
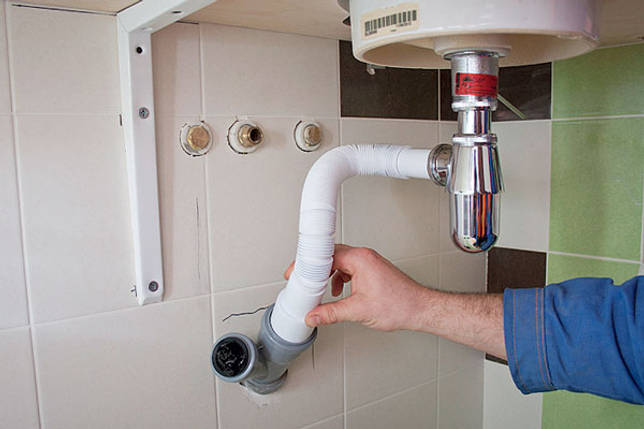 Connecting the siphon to the sewer.
Stages of installation work
Shut off water, both cold and hot. Then you need to decide what place in the interior of the room is reserved for the bowl, taking into account the supply of cold and hot water under the mixer. After that, the sink prepared for installation is tried on in place, and its position is finally chosen.
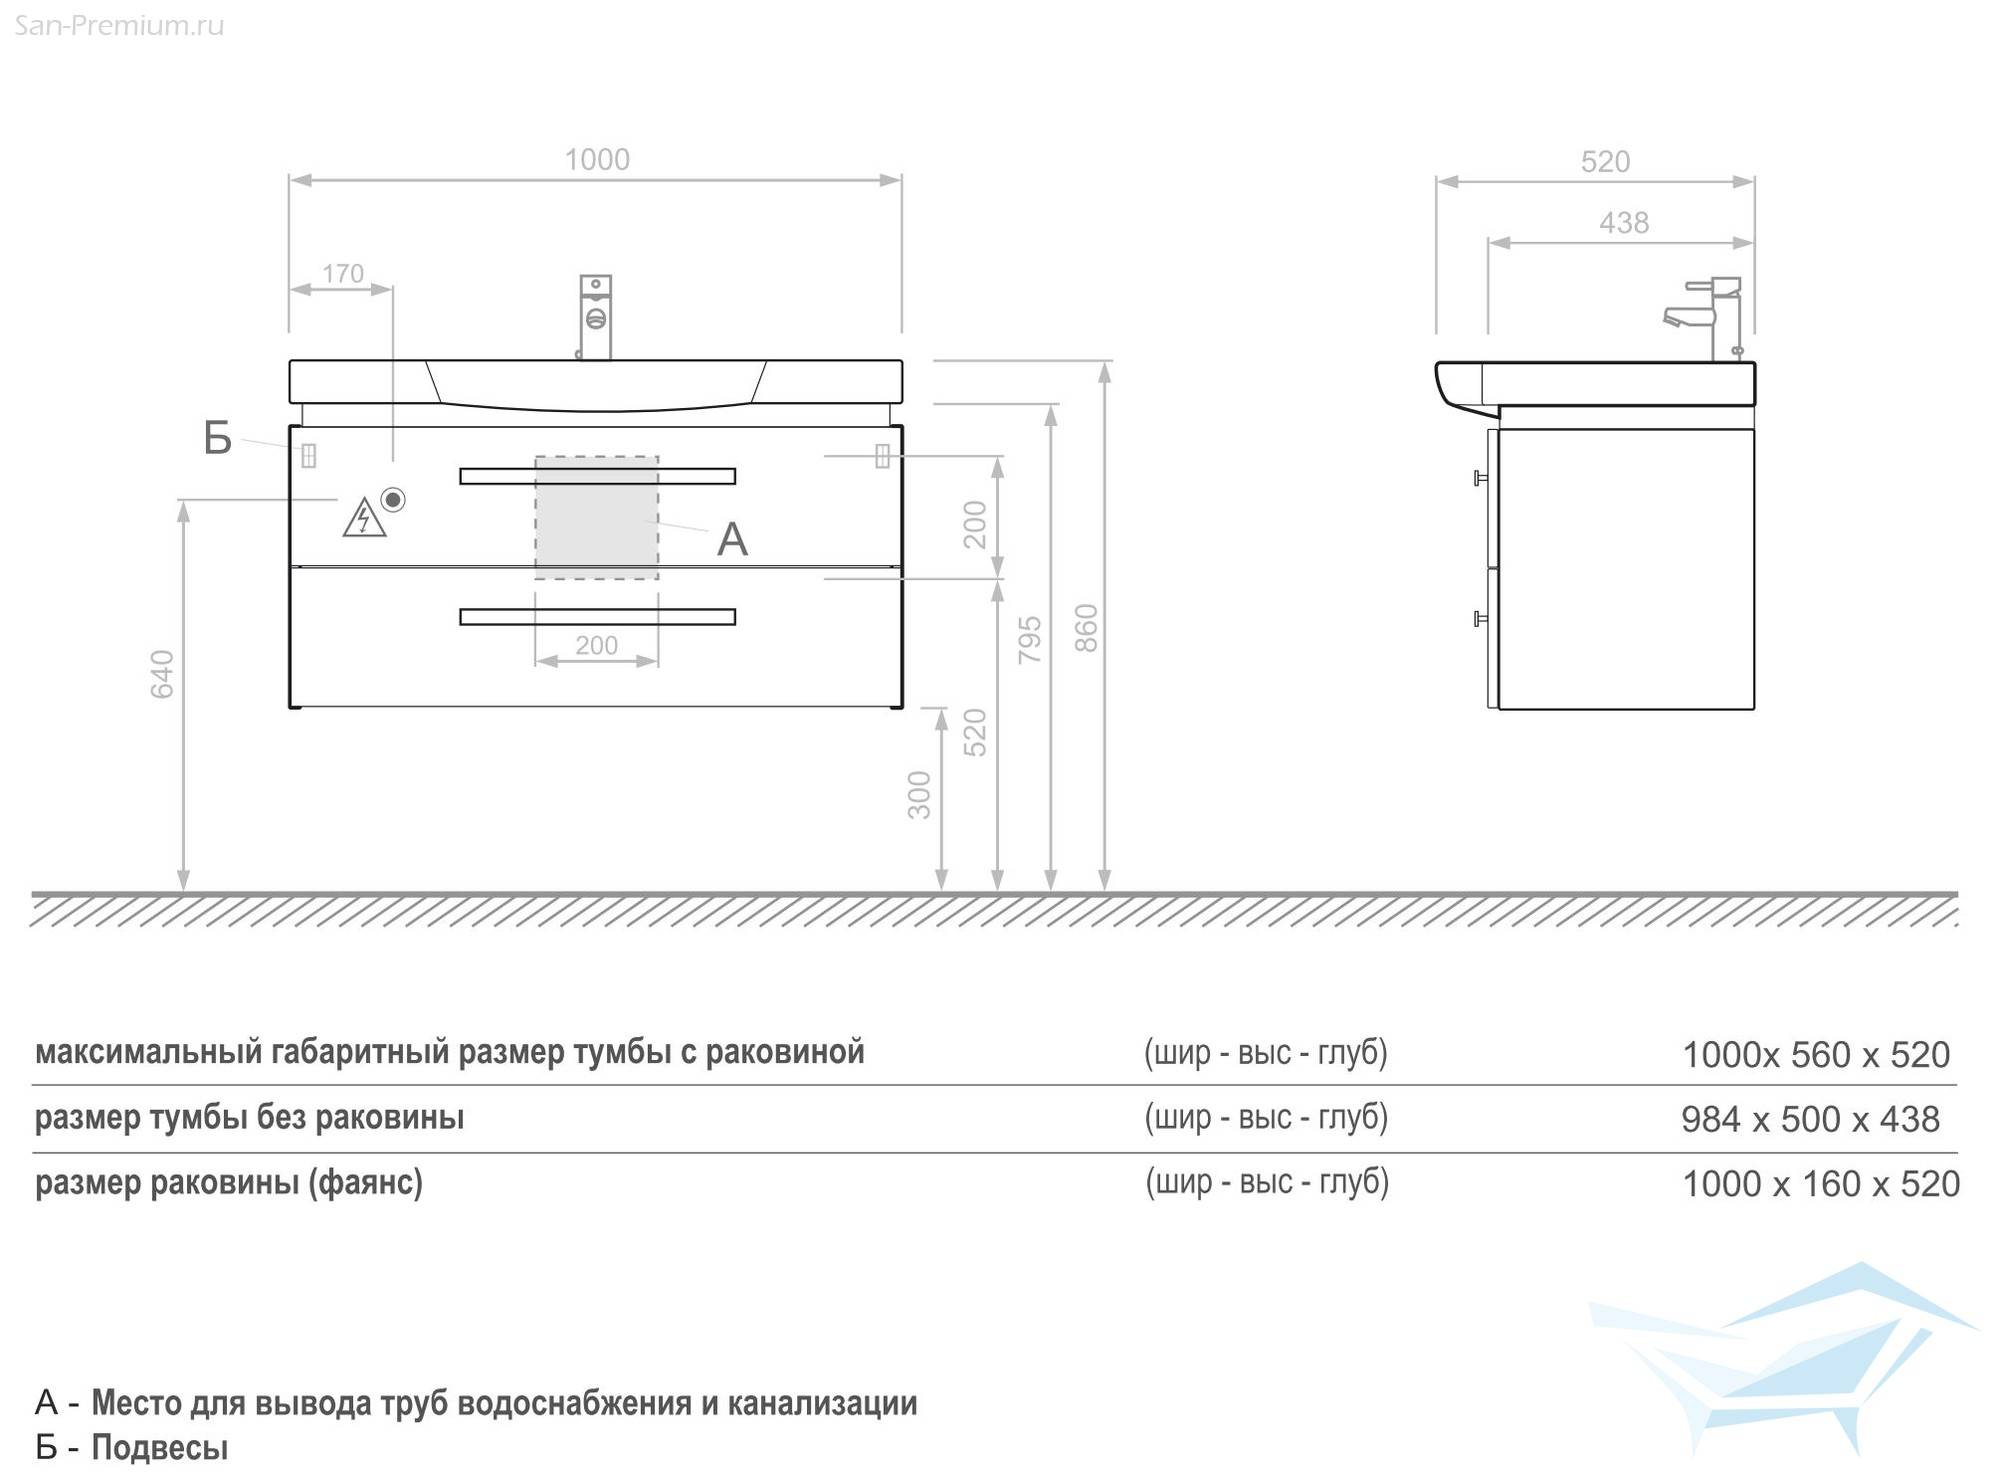
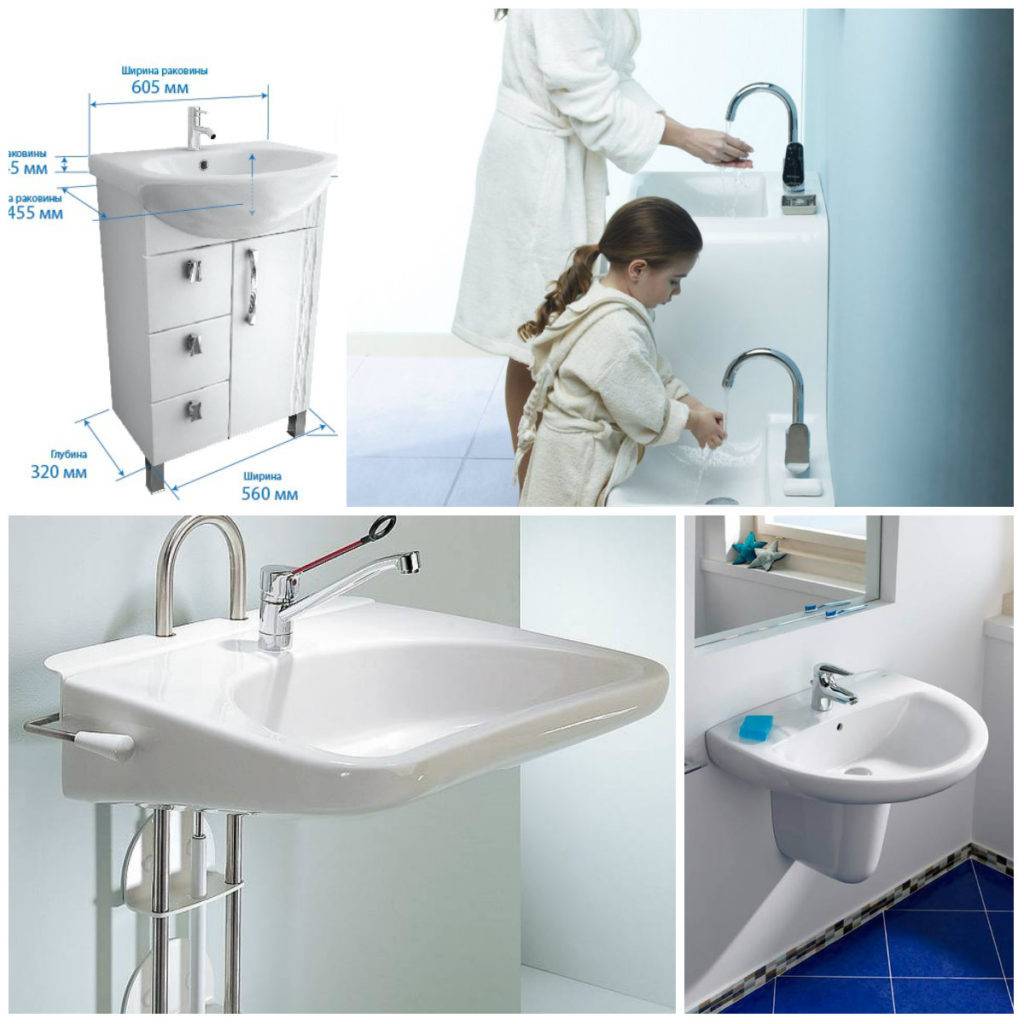
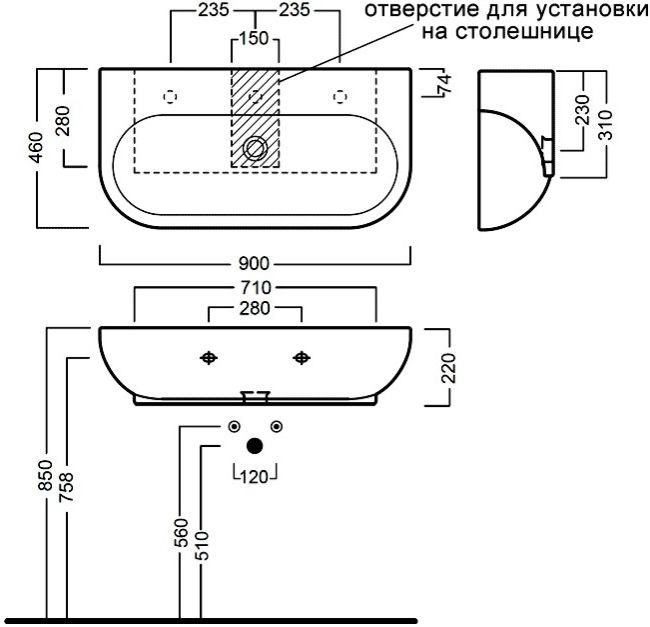
Correctly determine the size of the bowl and the height of its installation.It is necessary to choose such a model so that it does not occupy extra square meters of the room, but, at the same time, has sufficient dimensions to cover the spray sector of the water jet. It can be standard in width 50-65 cm models. The most “ergonomic” installation height is 0.8 m from the floor. And the distance in front of the wash basin is preferably left within 0.8-0.9 m.
Photo guide for mounting the washbasin on the wall - in principle, everything is clear without further ado
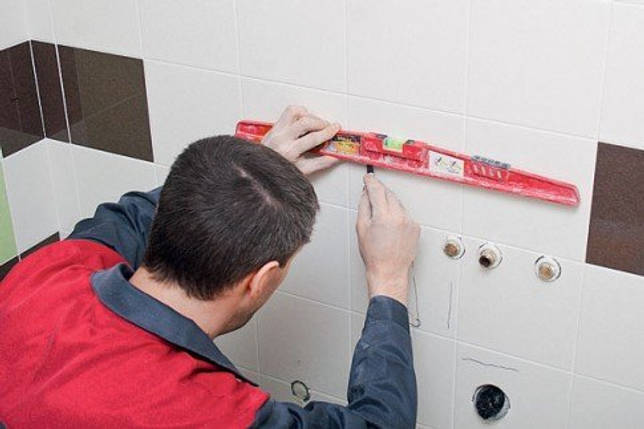
At the chosen height, armed with a ruler, a pencil and a level, the central horizontal line is indicated along which the installation work will be carried out. This will be the upper limit of the installation of the plumbing fixture.
It is very important to know the thickness of the sides of the bowl. They must withstand the emphasis of the brackets. The measured thickness is laid down from the previously made horizontal on both sides of the sink and is fixed with a mark
The measured thickness is laid down from the previously made horizontal on both sides of the shell and fixed with a mark.
The resulting marks are connected by a horizontal line indicating the height of the brackets.
Next, we work with the bowl: turn it over and fix the brackets on the sides. It is better to do this work together: one - manipulates the sink, exposing it horizontally; the other - makes the necessary marks.
Having attached the bowl to the horizontal, mark with a marker through the recesses on the reverse side of the place for installing the fasteners. In this case, you need to make sure that all the lines, places for the brackets match.According to these designations, holes with a diameter slightly smaller than the diameter of the fixing screws or dowel screws are drilled with a drill.
Plastic or nylon bushings (plugs can be used) are driven into the drilled places, screws are screwed into them. Support-brackets are attached to them, on which, in turn, the sink bowl is installed. The places of its further fastening to the wall are marked with a marker, drilled, and the bowl is put in its place.
The final step is to connect the siphon, the outlet end of which is inserted into the sewer socket; faucet installation and plumbing connection.
Slightly “baited” the fasteners, finally expose the sink horizontally in level, after which the final reliable fixation of all fasteners is carried out.
Installation instructions for the sink on the wall
After determining the dimensions and installation location of the device, they begin to measure and mark the future design. This makes it possible to properly mount the device to the wall plane of the room.


For this purpose, you must perform the following steps.
- Mark the center line. At the selected height, with the help of a level, the upper boundary of the plumbing fixture is marked and installation is carried out along its line.
- Measure the thickness of the side walls of the sink. This indicator is necessary to determine the pressure resistance of the brackets. The strength and durability of the entire structure depends on this. The measured value is laid down from the central horizontal and fixed with a mark on both sides of the bowl.
- Connect all the marked marks with a fastening line. This action allows you to determine the required height for the installation of support brackets.
Remember, it is more efficient to mark up two people.At the same time, one person should hold the sink at the central horizontal, and the second should mark from below the places where the mechanism will be attached.
After the structural layout, they begin to install the plumbing equipment in the room.

Mounting the sink on the wall
This process consists of the following steps.
Tilting ceramic bowl. In this case, special brackets should be fixed on the side walls of the sink.
Designation of places for installation of fasteners. For this purpose, the device is applied to the horizontal and, through the recesses on the reverse side, the necessary marks are made.
It is important to control the coincidence of all lines and places for brackets.
Installation of fasteners. Holes are drilled at the marked points on the wall and dowel-screws are driven in.
Then, the fastening pin is carefully screwed into the prepared places.
Installation of support brackets. After fixing this mechanism, a sink bowl is installed on it.
Installation of a ceramic device. The connection points of the device with the wall must first be marked and then processed with a drill. After preparing the necessary holes, the sink is finally mounted in a permanent place.
Connecting the device to the water supply and sewerage system. For this purpose, the siphon outlet pipe is connected to the socket of the drainage network, then the mixer device is mounted and the water supply is connected.
Checking the reliability of fasteners. The final step in installing the bowl to the wall is its final adjustment to the horizontal level and additional fixation of all fasteners.
After carrying out the installation work, the sink is tested for tightness.For this purpose, with the valve turned on, the water pressure is changed and the joints are carefully examined. If leaks occur, tighten the fixing nut with a wrench.
Remember, it is advisable to install plumbing equipment to the wall only if the wall surface is a solid and reliable structure.
If this requirement is not met, it is important to create a supporting frame
So, before carrying out installation work, one should take into account the layout of plumbing equipment, the existing interior of the room, as well as the needs and desires of the whole family. However, when implementing an extraordinary design in the restroom, do not lose sight of the main purpose of the design - functionality. For this reason, they initially acquire a bowl of the correct size, and then proceed to connect the equipment.
Qualitatively executed installation of the device will become a guarantee of reliable, comfortable and long-term operation of sanitary elements.
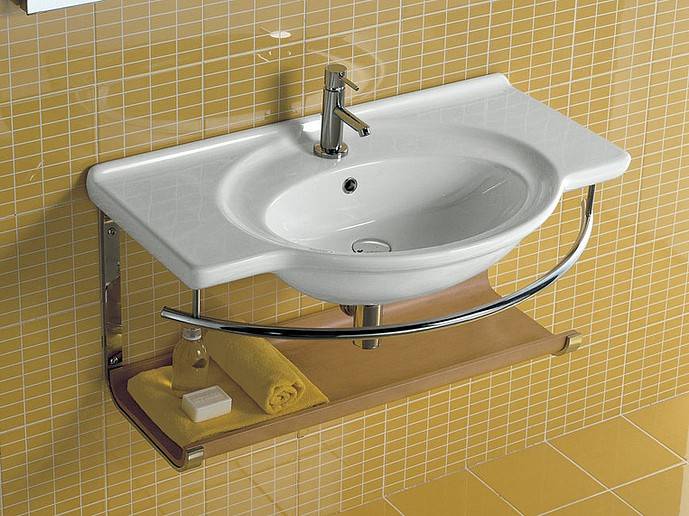
Choosing a pedestal when hanging models are needed
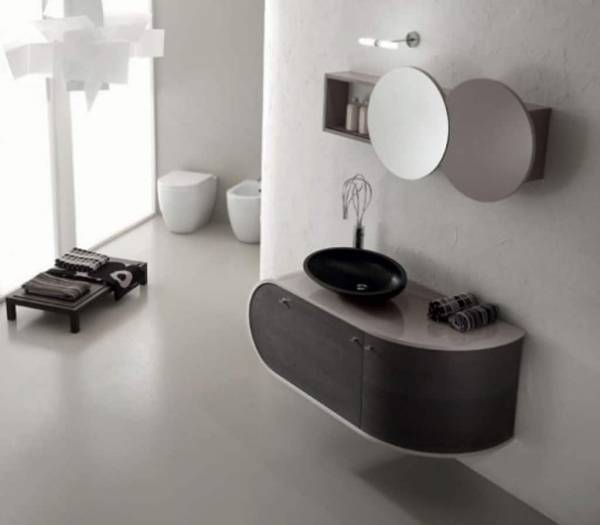
Wall furniture is considered the best for small spaces. Leaving the floor free, it visually enlarges the room and simplifies cleaning. But this is not all the advantages of fashionable plumbing and furniture.
Undeniable advantages of suspended models
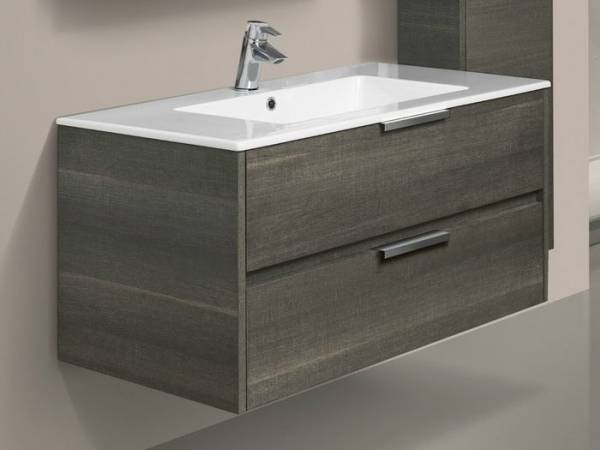
Wall hung cabinet with sink has the following advantages:
The bathroom floor is equipped with a heating system. This means that the furniture for this room should either stand on legs or be hung on the wall. If you think about how the metal coating of the legs is affected by constant humidity, the choice becomes obvious.A wall-hung cabinet under the sink is the best solution in this case.
Owners of high or, conversely, very miniature stature, it is better to adjust the height of the sink attachment to suit themselves. And wall models are ideal for this purpose.
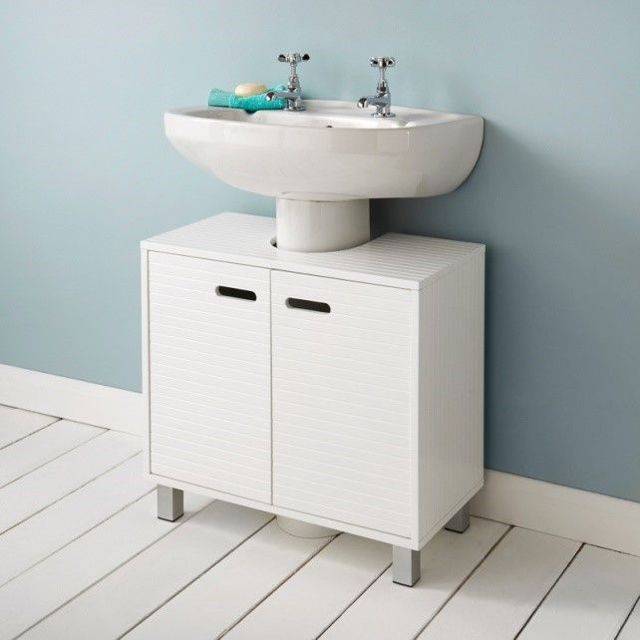
For rooms with a small area, owners often choose a layout in which the washing machine is located under the washbasin. Such a composition looks more aesthetically pleasing if a hanging cabinet is installed under the sink in the bathroom.
In order to place a communication system behind a nightstand standing on legs, it is often necessary to cut holes in its back wall. Installing a hanging sink is devoid of such inconveniences.
The flying design visually makes the room more spacious, adds lightness and weightlessness.


This is especially important if a massive, most often double, sink is chosen. The wall cabinet eliminates the heaviness of the washbasin.
Installation of a wall-hung sink, despite all its advantages, has a number of limitations:
- First of all, when installing a bedside table, the reliability of the fasteners is important. Therefore, if the bathroom has flimsy walls made, for example, of drywall, you should not choose a wall model. But do not rush to despair! If your repair is still at the planning stage, just provide mortgages in the wall for further installation.
- If it is not possible to hide the sewer pipe into the wall, it is not necessary to mount a hanging sink for aesthetic reasons. After all, the appearance of such a design under the cabinet is not very pleasing to the eye.

A variety of models - what are the hinged cabinets
Hanging models of bedside tables for bathrooms can be divided into several categories:
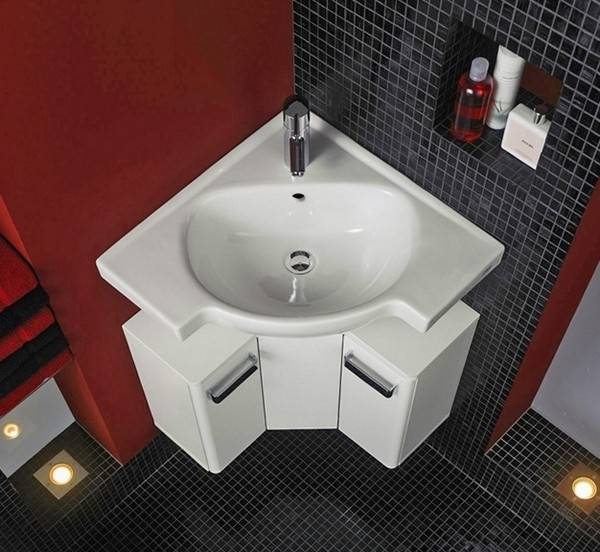
- by location: corner and classic;
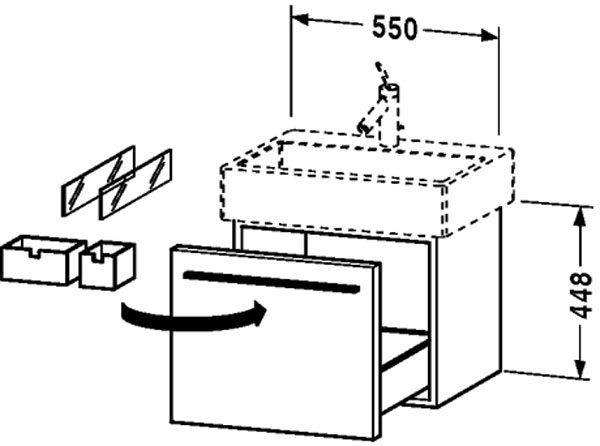
- by type of sink: with a mortise and overhead bowl;
- according to the type of material: wooden, made of MDF, chipboard, etc.;
- with and without table top.
For miniature bathrooms, it is better to choose corner models. In operation, bedside tables equipped with a worktop are much more convenient.
Creative ideas and practical advice
Mounted models open up the widest possibilities for creativity. Some interesting ideas for competent organization of space:
- A practical option is to choose a hanging cabinet with a built-in towel rack or an open shelf for storing them. This will help keep the room tidy and make it more spacious.
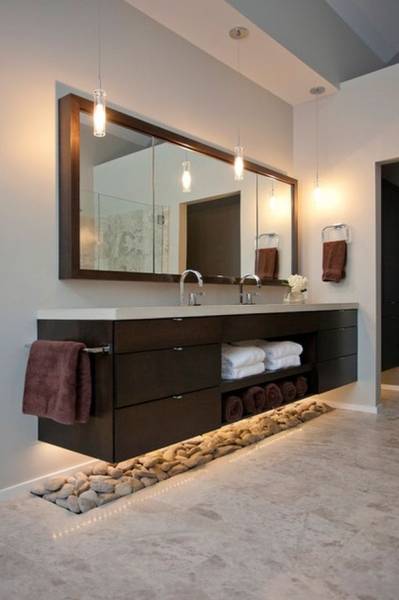
- An additional highlight of the bathroom can be the installation of lower lighting. A pebble path with built-in lights mounted under the sink will also look very nice. This will give the room charm and mystery.
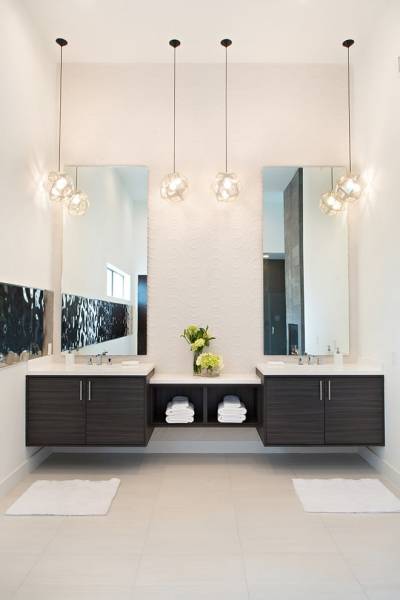
- When choosing a double sink in the bathroom, it is better to choose a long mirror that matches the size of the cabinet. So the composition will look complete.
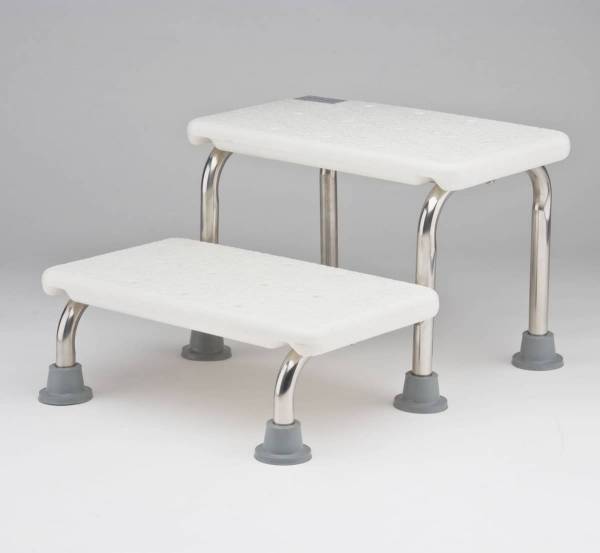
- Hanging cabinet with a sink makes it possible to conveniently place a highchair! Is it difficult for a child to reach the faucet due to their small stature? Provide for him a stable stool, hiding under the design with a washbasin.
Connection to water and sewer systems
When connecting the faucet to the water supply, make sure that the hoses are not twisted. Flexible hoses are connected to the water supply as follows: to the right - cold, to the left - hot. Connection is made with nuts and tightened with an adjustable wrench.
Connection to the sewerage is carried out in stages:
- fixing the siphon to the washbasin;
- screwing a corrugated or rigid pipe to the siphon;
- inserting a pipe into a sewer drain.If necessary, use an adapter if the 2 pipes to be connected have different diameters.
After connection, the system is checked for leaks. When installing, do not overtighten the connections, because this can damage the seals. It is necessary to check the system for reliability: pull all the fixed parts. They should not creak or twitch.
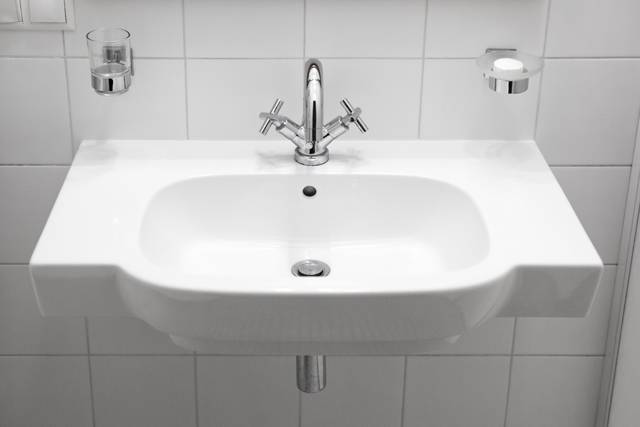
Types of shells according to the method of attachment
According to the method of attaching the sink, there are the following types:
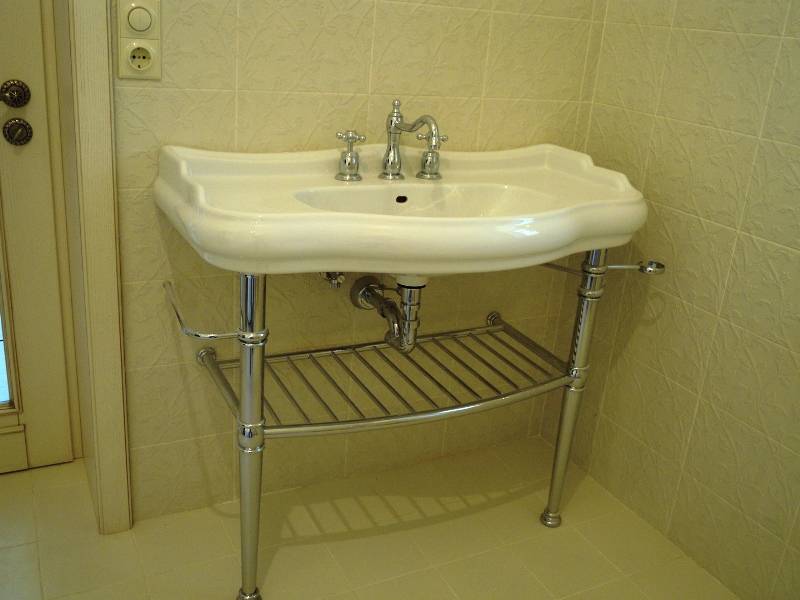
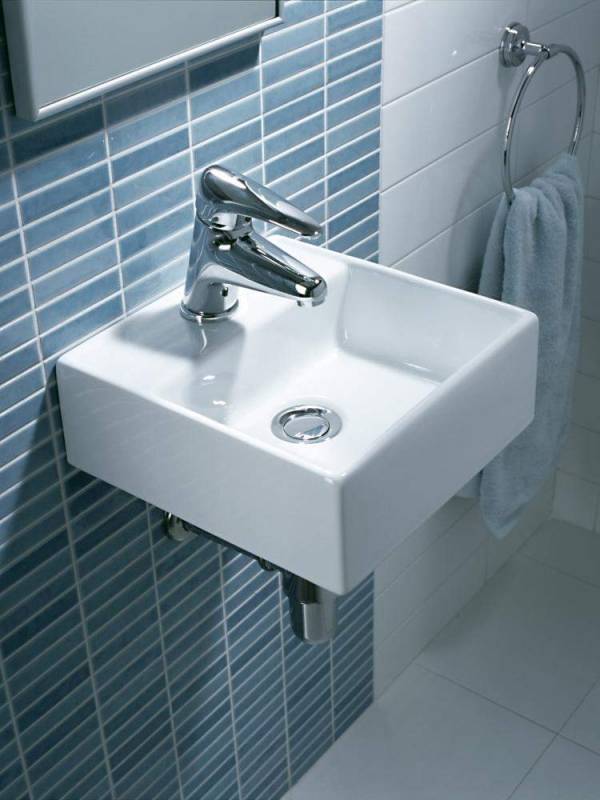
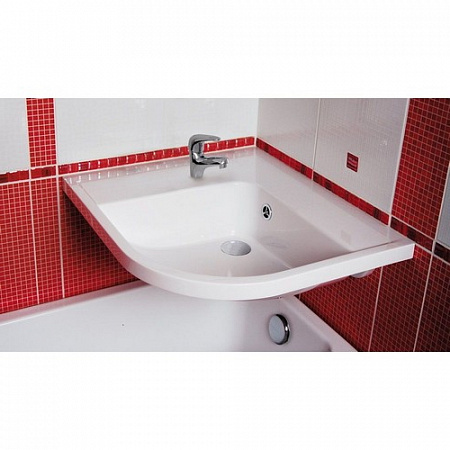
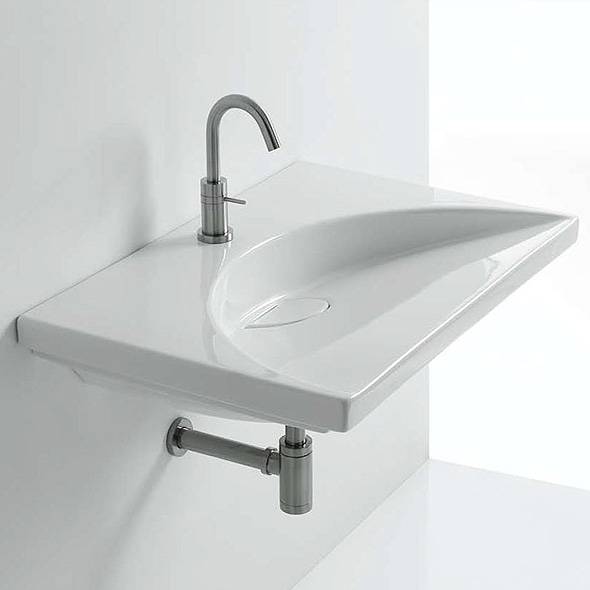
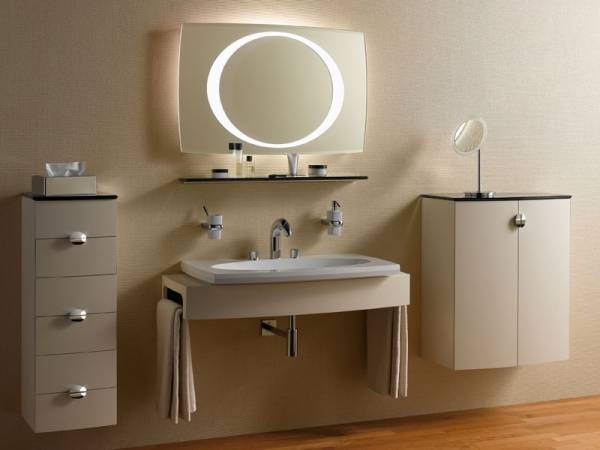
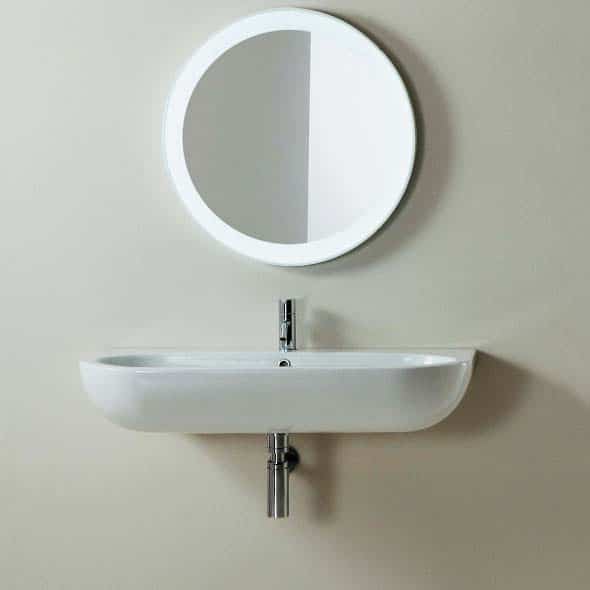
- Suspended (console). They are attached to the wall with brackets or other fasteners. The main drawback is that the plumbing fittings and the siphon remain visible. The advantage is space saving. There are also hanging flat sinks under which you can install a washing machine.
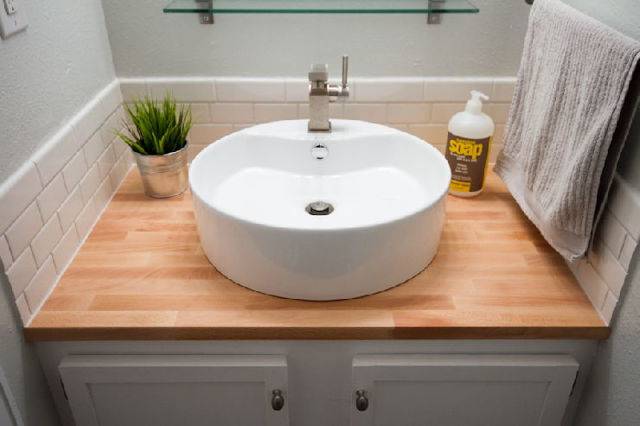
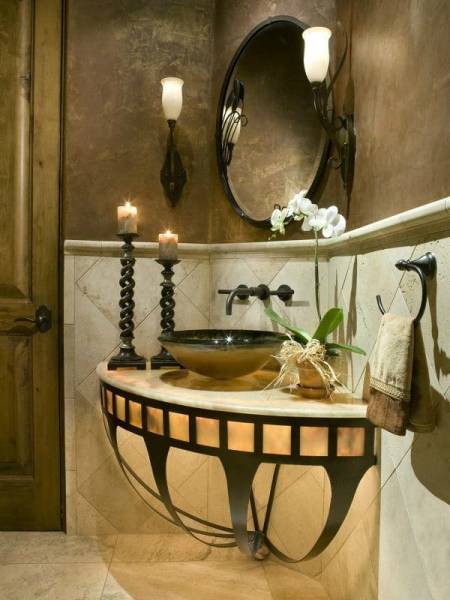
- Shells on a pedestal (tulip). They differ from hanging ones in that they are equipped with a special stand, which serves as an additional support, and also hides the siphon and other communications.
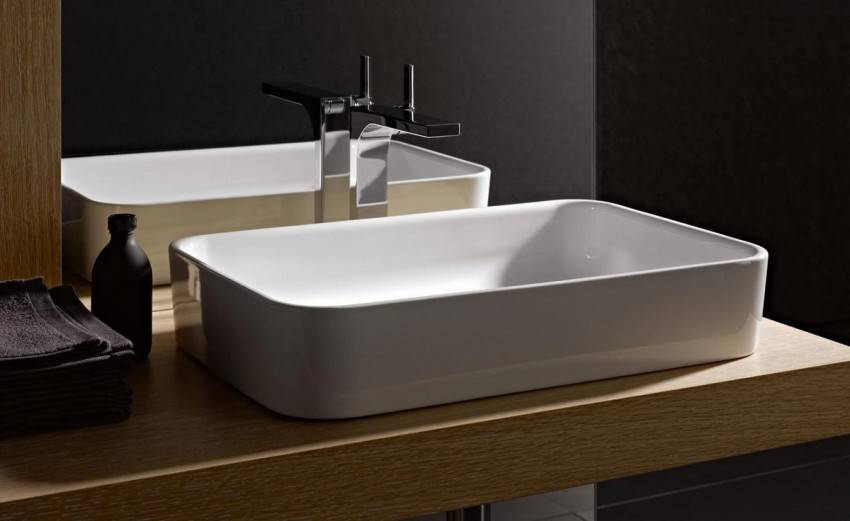
- Overhead. Placed on a flat tabletop. These sinks often do not have tap holes.
- Embedded. They are built into furniture (bedside table, cabinet or a separate tabletop).
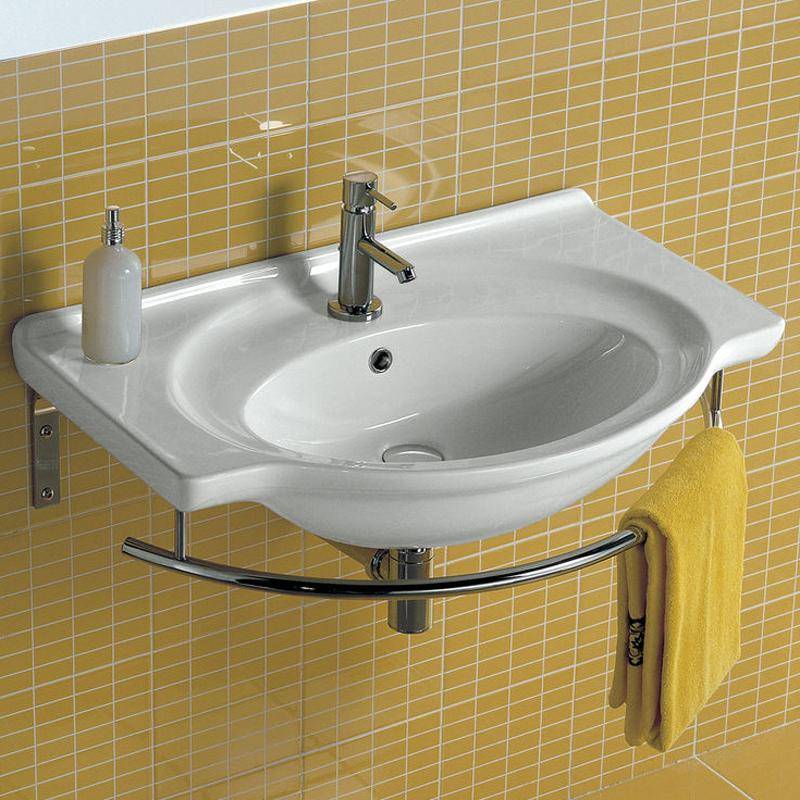
Hanging washbasin on brackets