- The use of LEDs: advantages and disadvantages
- Lighting in the rooms
- This must be taken into account
- Installation instructions
- Hook fastening
- Mounting with a bar
- Video instruction for installation with a mounting plate
- Mounting with a cross bar
- Several design tricks
- Advantages and disadvantages
- Kinds
- apartment
- Office
- Trade
- Industrial
- emergency
- Cantilever/street
- architectural
- Searchlight
- landscape
- Illuminations
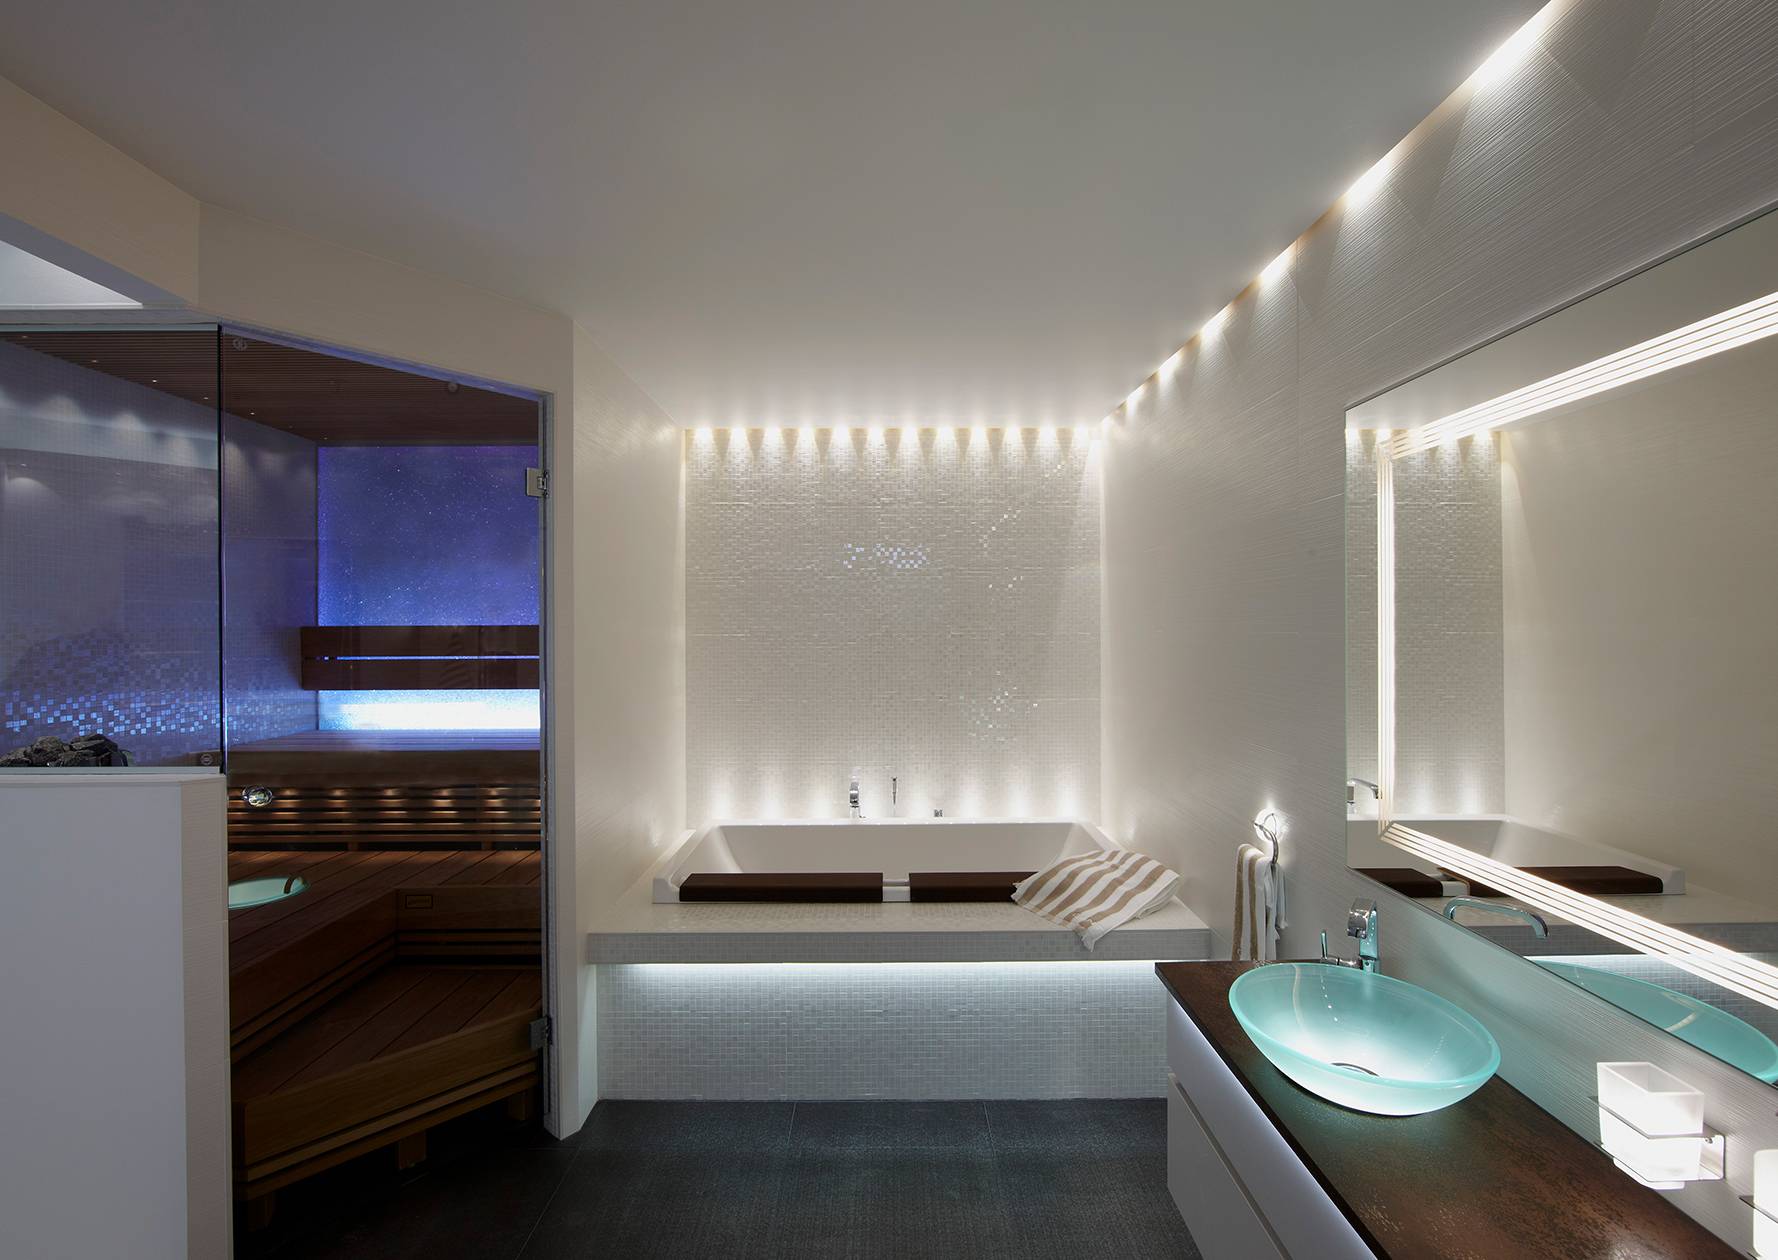
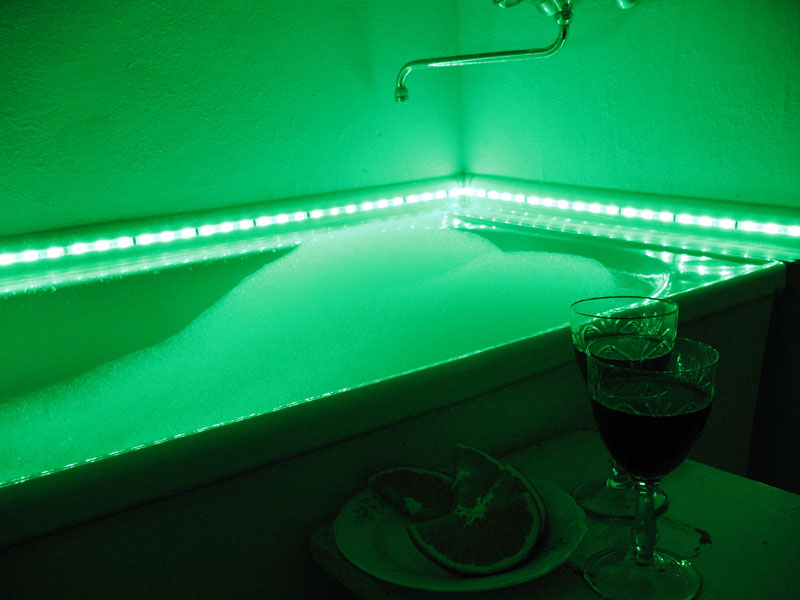
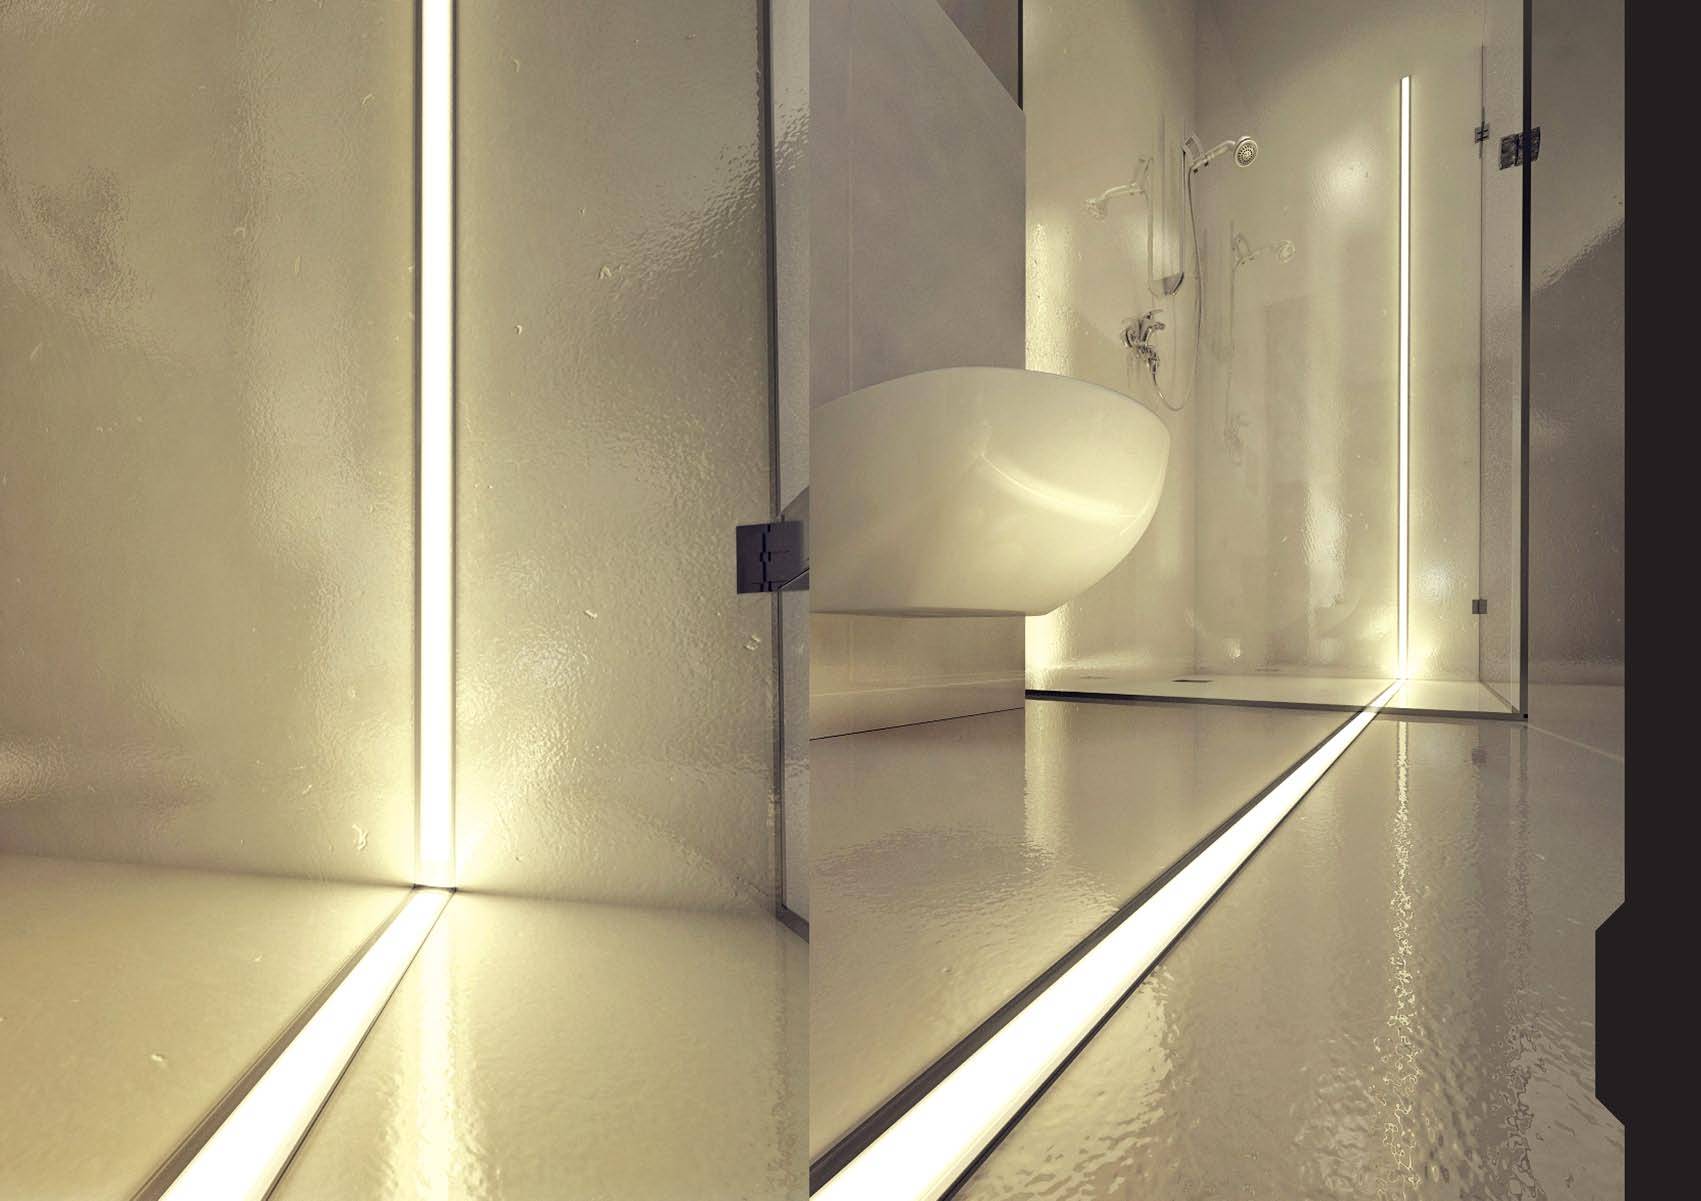
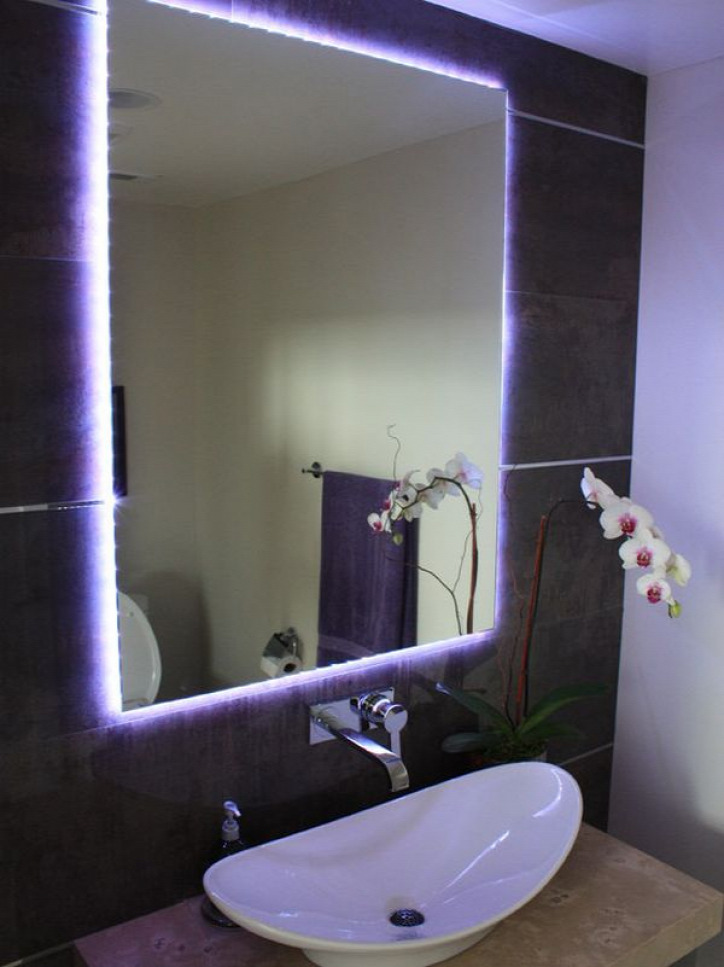
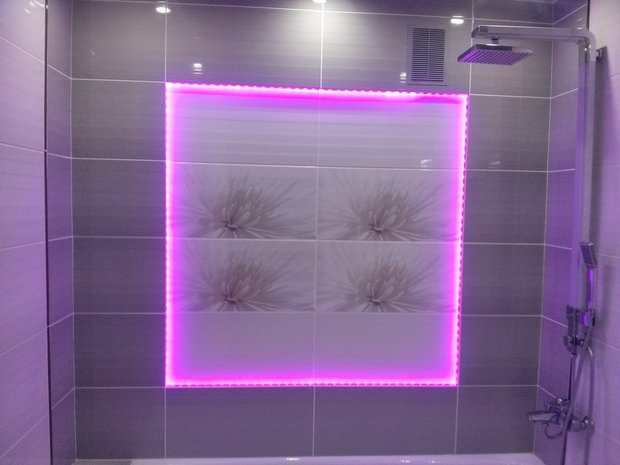
- Upper bathroom lighting
- Do-it-yourself installation features in the apartment
- Schemes of spot diode lighting of premises
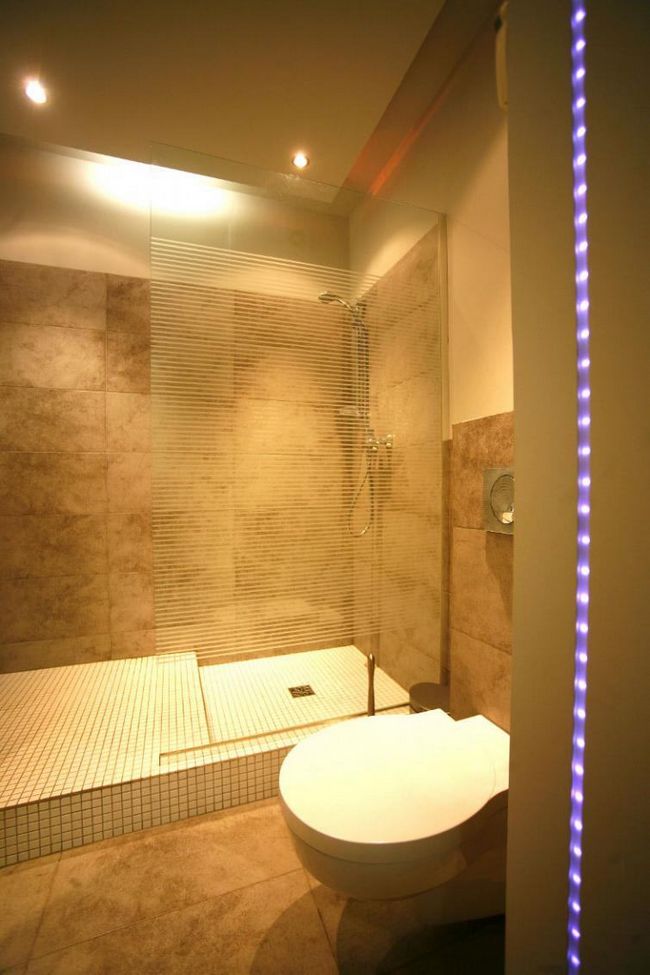
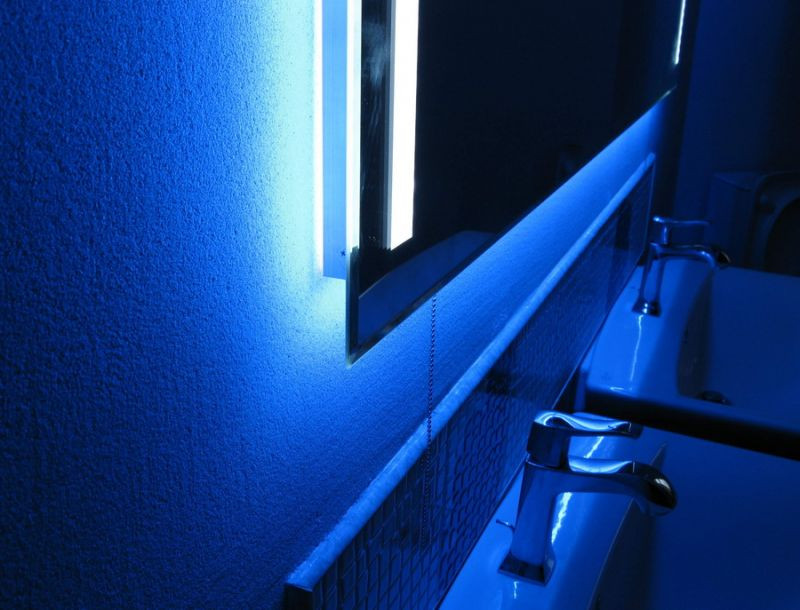
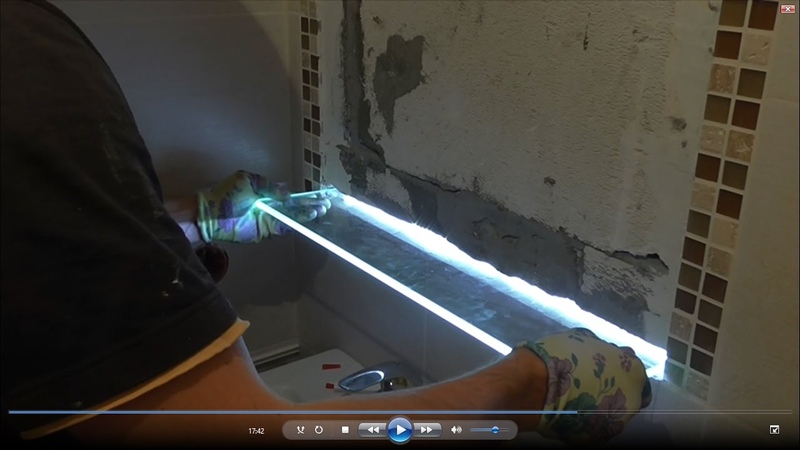
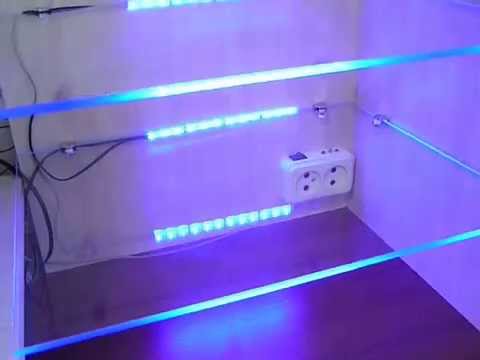
- LED Strip Light
- Chandelier installation
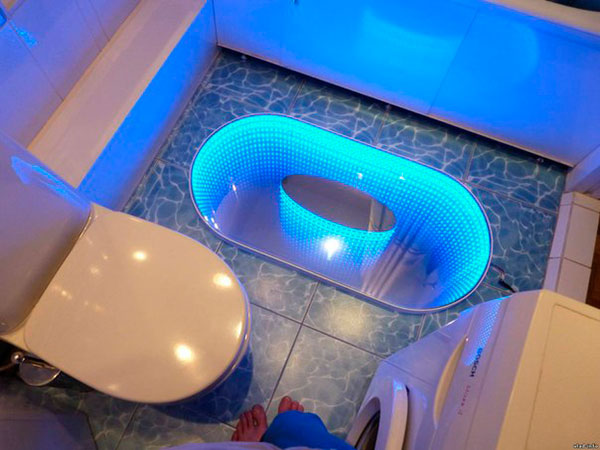
- Ice panel
- Installation of a wireless volumetric luminaire
- Purpose of backlight installation
- Pros and cons
- Location and style
- Spot lighting
- bathroom lighting scheme
- Built-in backlight
The use of LEDs: advantages and disadvantages
In the apartment, the LED strip was originally used on the ceiling. Designers created a drawing of the starry sky from it. After LEDs began to be used to decorate walls. Best of all, diode mosaics and ornaments looked in the bedroom and nursery.
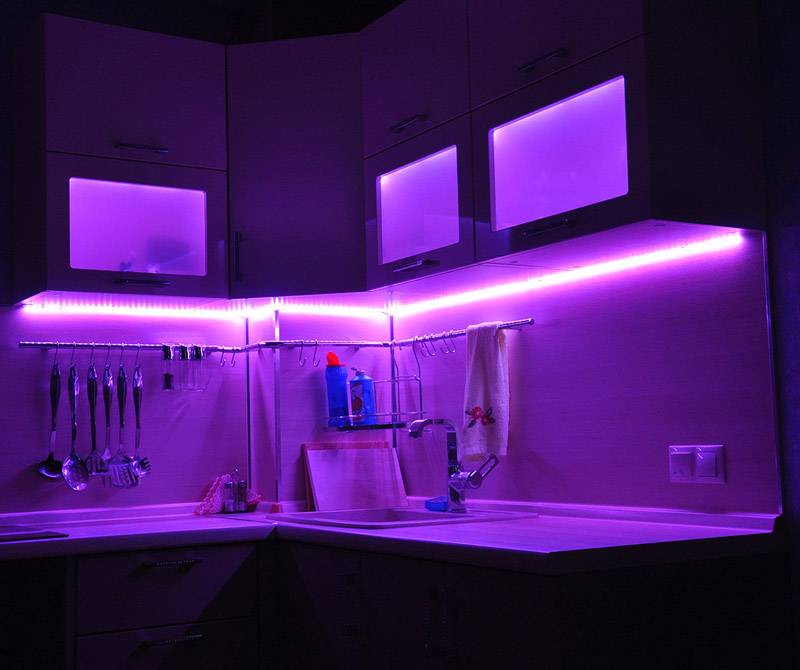
Today, a ribbon of monochromatic lights can illuminate a painting or a bathroom shelf. It can be seen as an independent decor.Many use LEDs to highlight niches and bar counters in the kitchen. They illuminate skirting boards, walls, ceilings and photo frames.

Like everything in the world, such lamps have their drawbacks and advantages. The disadvantages of the diode tape lie in its high cost, although, today, budget options are increasingly appearing on sale.
Another disadvantage of using LEDs is the inability to make their light less bright. The pluses include the following:
- A large number of colors and sizes;
- Various modifications to solve different interior tasks;
- Energy saving;
- Long service life;
- Wear resistance, no problems with voltage drops.

The interior, which uses lighting, looks modern and stylish. Loft, modern, eco, pop art and other design trends are only changing from the use of soft lighting tape.
The ceiling with a diode pattern is a classic of the genre. But girdling the ribbon with plasma TVs has become relatively recent. The home option for using diodes is limited only by the imagination of the owner of a house or apartment. The idea of including them in the interior can extend to lighting furniture, cabinets in the kitchen and even the refrigerator.
Lighting in the rooms
The LED strip in the rooms can look different. The stone in the interior of the living room is decorated with diodes quite neatly, since there is usually a fireplace nearby, which is an additional source of light. Diodes can highlight the window, the emphasis is on curtains, front doors and drawings on the floor. Emphasizing is a good way of zoning a home.
Loft-style brick walls go great with any type of lighting.Connecting diodes to them does not take much time, and there you can use the backlight fearlessly.
In the bathroom, a tape with diodes is combined with “ice” type lamps. With this technique, a small room receives enough light. In the living room, everything depends on the overall concept of the interior.

Houses decorated in a classic style imply the use of LEDs only on the columns. Modern designs allow you to choose the right diode lamps for almost any part of the interior. No fashion project is complete without them.
This must be taken into account
For each specific room, the number and power of lamps will vary.
When determining the number and power of fixtures, you should also use a small correction for the color of the walls of the room. Light walls scatter light better, which means you can put lamps of lower power (we multiply the result by 0.8). If the design of the bathroom involves dark colors, the estimated number of fixtures must be multiplied by 1.5. The result increases by the same amount if the ceilings are higher than 3 m. Also, the ceiling covering imposes certain restrictions on the use of lamps. The most sensitive to heat are plastic panels and PVC film sheets, less susceptible are slatted and fabric coatings, followed by plasterboard structures and concrete ceilings themselves. For the first two coatings, LED, fluorescent and low-power halogen bulbs are allowed. For the latter, you can use any light bulbs, but of course, without placing them closer than 10 cm to the surface.


Installation instructions
Regardless of which lighting device you have purchased, its installation begins with the installation of a profile to fix the ceiling covering.Then two fishing lines are stretched between the profiles, at the intersection of which a chandelier will be located. After that, the fastener is installed in the concrete base. As noted earlier, the product can be hung using a hook, a mounting plate, or a cruciform plate. Here are step-by-step instructions for installing a chandelier with each of the mounting options.
Hook fastening
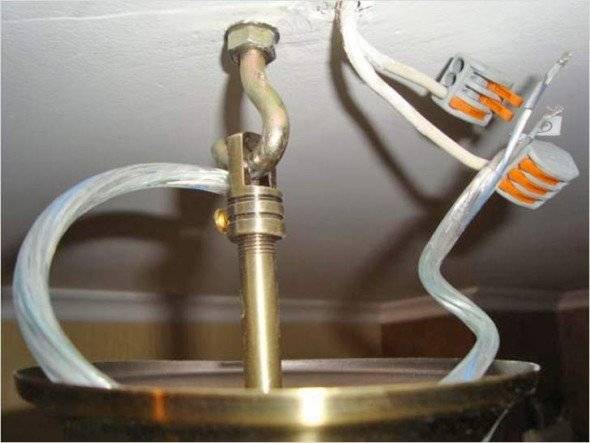
The hook is the simplest and most reliable fixture for a lamp.
- We install a mounting hook on the ceiling. To fix it, we use powerful dowels or anchor bolts. In this case, the lower edge of the hook should be above the level of the future false ceiling, that is, above the stretched fishing line.
- At the second stage, we perform the installation of a stretch ceiling.
- Glue a heat-resistant plastic ring at the location of the hook. To do this, we use mounting glue. The ring must be selected in such a way that later it can be completely closed with a decorative cap.
- We cut a hole inside the ring and take out the electrical wires to connect the device.
- We hang the chandelier on a hook and connect the power wires.
- In conclusion, we raise the structurally provided decorative cap, which allows you to hide the places of the electrical connection.
Mounting with a bar
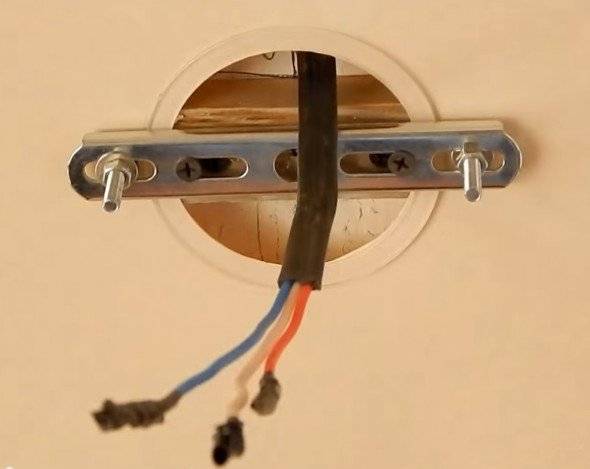
Installation of the sealing ring avoids stretching of the stretch ceiling coating
- We fix the wooden block to the main ceiling. We use dowels as fasteners, and make holes for them with a perforator. In the bar, you need to pre-drill a hole through which electrical wires will be passed to connect the lamp.
- As in the previous case, the stretch ceiling is then installed, the thermal ring is installed and a hole is cut in the latter, followed by the supply wires.
- The next step is to install the mounting plate. Within the ring, we fasten it to a wooden bar with self-tapping screws.
- We attach the base of the chandelier to the bar so that the pins of the bar coincide with the mounting holes of the device. We fix the lamp with decorative nuts.
Video instruction for installation with a mounting plate
Mounting with a cross bar
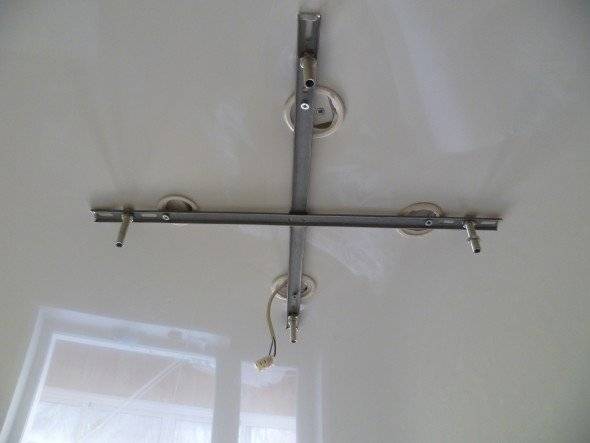
The cruciform mounting plate is used to mount chandeliers with a wide round or rectangular base
- In accordance with the dimensions of the cross, we cut out a platform from a plywood sheet, in the center of which we make a hole for the output of electrical wires.
- We fasten metal strips in each corner of the platform. The latter are needed to attach the structure to the main ceiling. Fixing the structure to the ceiling is carried out using dowels.
- After installing the tension coating, we install the ring, bring the wires into the hole made in advance and fasten the cruciform plate to the wooden platform using self-tapping screws.
- Fixing the chandelier to the bar is carried out by analogy with the method described above. In this case, the base of the chandelier should be located strictly parallel to the plane of the suspended ceiling.
If the chandelier does not include a decorative cap, then you can ennoble the place of attachment of the lighting fixture using a polyurethane socket.This product is light in weight, beautiful in appearance, repeating the original gypsum ceiling rosette, and also goes well with the stretch ceiling coating. You can decorate the place of attachment of the lamp in another way. For example, if you have a small piece of ceiling fabric left, cut a ring of the appropriate diameter from it and carefully glue it to the right place.
Installing a chandelier on a stretch ceiling is not an impossible task. Installation of the product by any of the above methods is within the power of the owner, who has an idea about repair and construction. But do not forget that the installation of the lamp involves working with electricity. Therefore, observe safety measures and perform all actions carefully.
Several design tricks
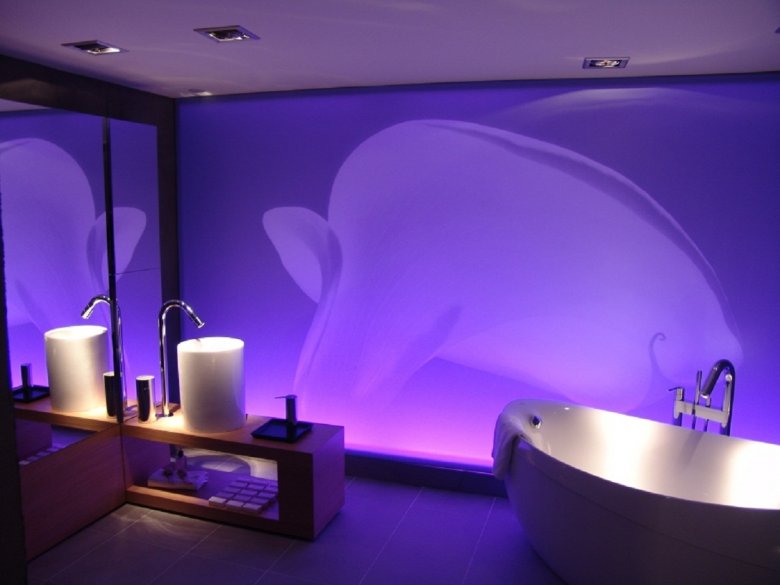
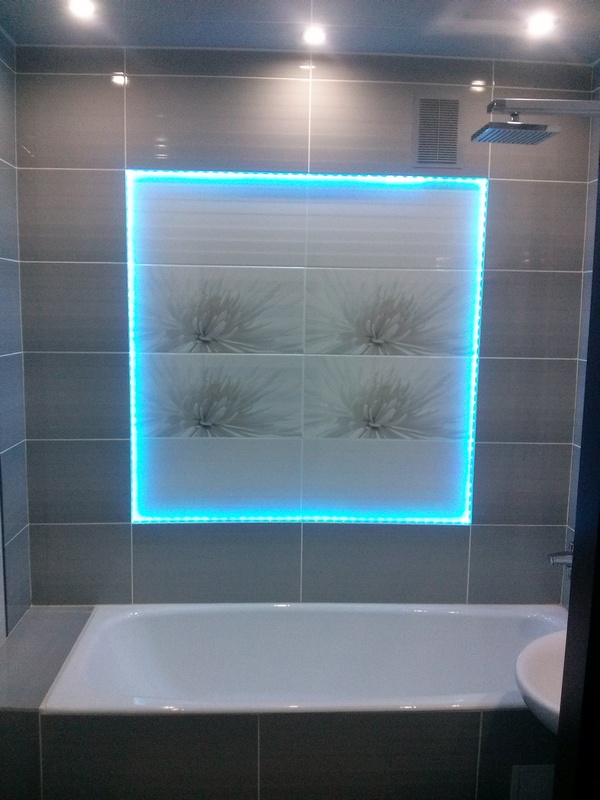
There are several design tricks that will decorate the bathroom of even the most modest dimensions. Additional light and space in the room will provide a fake decorative window. To do this, behind the frosted glass depicting a window, you need to place a light source. With the help of moisture-resistant paints "outside the window" you can recreate any landscape that is pleasing to the eye.
 A fake window always looks very impressive. It can depict intricate frosty patterns or a pleasant summer landscape.
 Of course, it makes no sense to use everything at once in your bathroom: you need to combine different types of lighting, guided by a sense of proportion and your own taste.
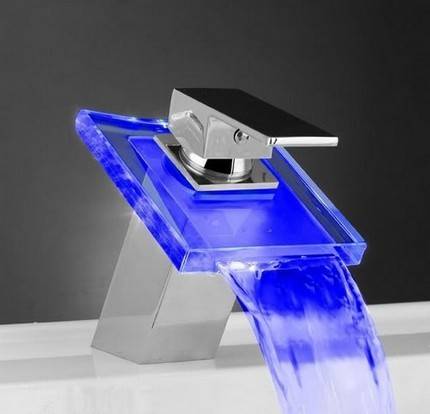
Original and safe lighting for some elements of the bathroom can be done without connecting to the mains. For this purpose, special devices are used - a light crane and a light shower: with their help, water jets are illuminated.Moreover, as the temperature of the water changes, so will its color. This creates an amazing romantic atmosphere that will not leave anyone indifferent.
Advantages and disadvantages
Benefits of LED furniture lighting:
- additional lighting improves working conditions;
- elements have low power consumption;
- low level of heat generation does not adversely affect the surfaces of furniture sets;
- tapes can be removed or moved to another location;
- the backlight resource reaches 50 thousand hours.

Flaws:
- high price of lamps and control equipment;
- it is necessary to use step-down transformers;
- to install overhead fixtures, you will have to drill holes;
- power supply requires cabling.
Kinds
LEDs are actively used in any area where illumination is needed. They are installed both indoors and outdoors.
apartment
The apartment uses different LED products - lamps, strips, panels. With their help, you can visually divide the room and add emphasis to the desired element.


Office
For the office, LED lamps and panels are used. They give uniform illumination without flicker.
Due to the absence of flicker, diodes are often used in workplaces. The LED lamp does not strain the eyesight and nervous system of a person.
Trade
High-quality retail lighting will help emphasize the product being sold. For this purpose, powerful LED lamps are used. They are used for both general lighting and accent lighting.
Industrial
Industrial lighting is subject to stringent requirements. It should be bright, comfortable, flicker-free, uniform.The light bulb itself must be durable and safe, with a high degree of protection against dust and moisture. Diodes are great for creating backlight in industrial premises.
emergency
In the event of an emergency, there is an emergency light source in the room. It works during a power outage, and also has an anti-panic effect. Dangerous zones and safety signs are also illuminated (sign “Exit”). The most progressive emergency light are diode lamps.
Cantilever/street
Outdoor luminaires must have a high level of resistance to temperature changes, moisture, and mechanical shock. Street lights that are installed along the highway should be pulsation-free for driver comfort.
architectural
the main objective architectural lighting - to emphasize the facade of the building, ensemble, structure of any type. Lighting allows not only to illuminate the object in the dark, but also to decorate the city. It is carried out using decorative LED lamps or spotlights.
Searchlight
LED spotlights are actively used to illuminate the main entrances, small areas, protected facilities, stadiums. Such devices have a small solid angle and a long range of the light beam.
landscape
Landscape LED lamps are used to illuminate sculptures, trees, lawns. They must be resistant to aggressive environmental conditions and provide optimal light.
Illuminations
One of the types of architectural lighting is illumination. This is lighting with the help of diode garlands, luminous figures, running lights.It is used to decorate the mall and highlight objects on holidays.
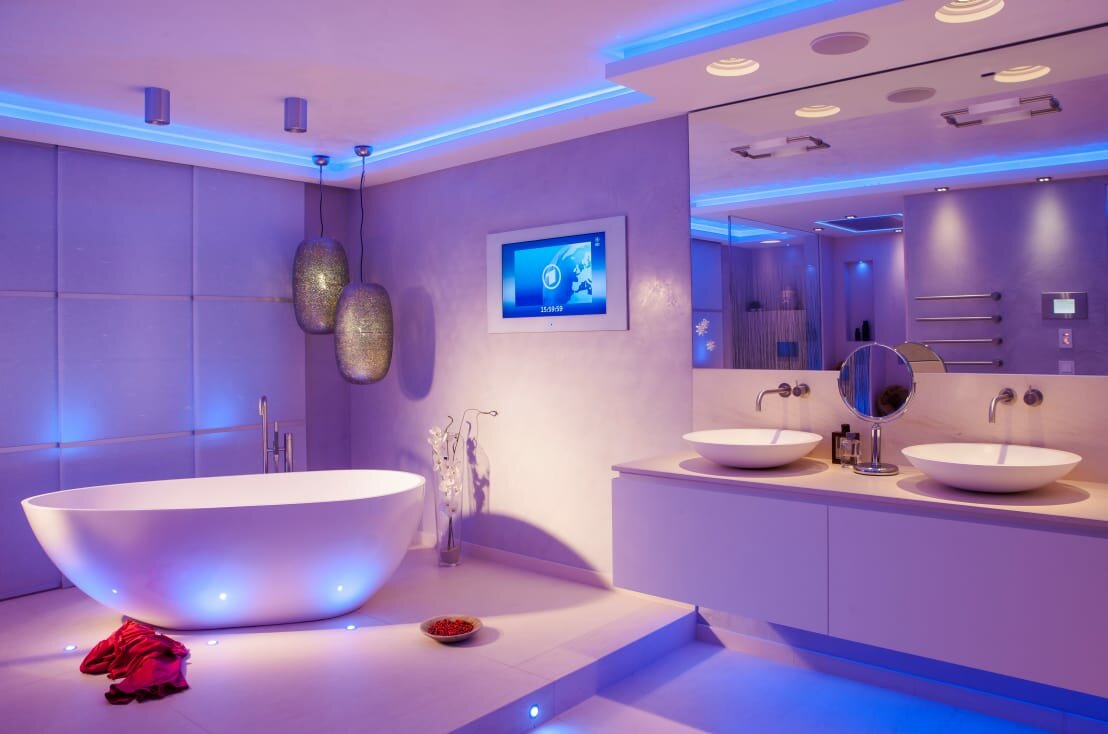
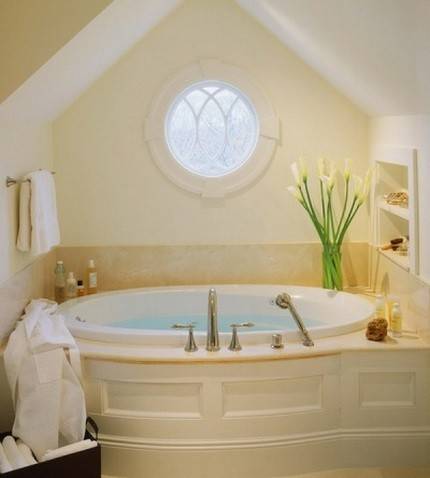
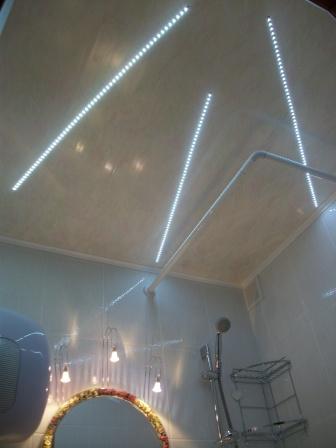
Upper bathroom lighting
 Original ceiling lighting
Most often, only one lamp is enough for high-quality lighting when it comes to repairs in a small bathroom. In cases where the bathroom is distinguished by its large dimensions, two or more ceiling lights can be installed.
It is worth remembering that a large number of fixtures is appropriate, however, the more fixtures, the smaller their size and power should be. Small lamps with halogens, built into a plasterboard or stretch ceiling, are suitable.
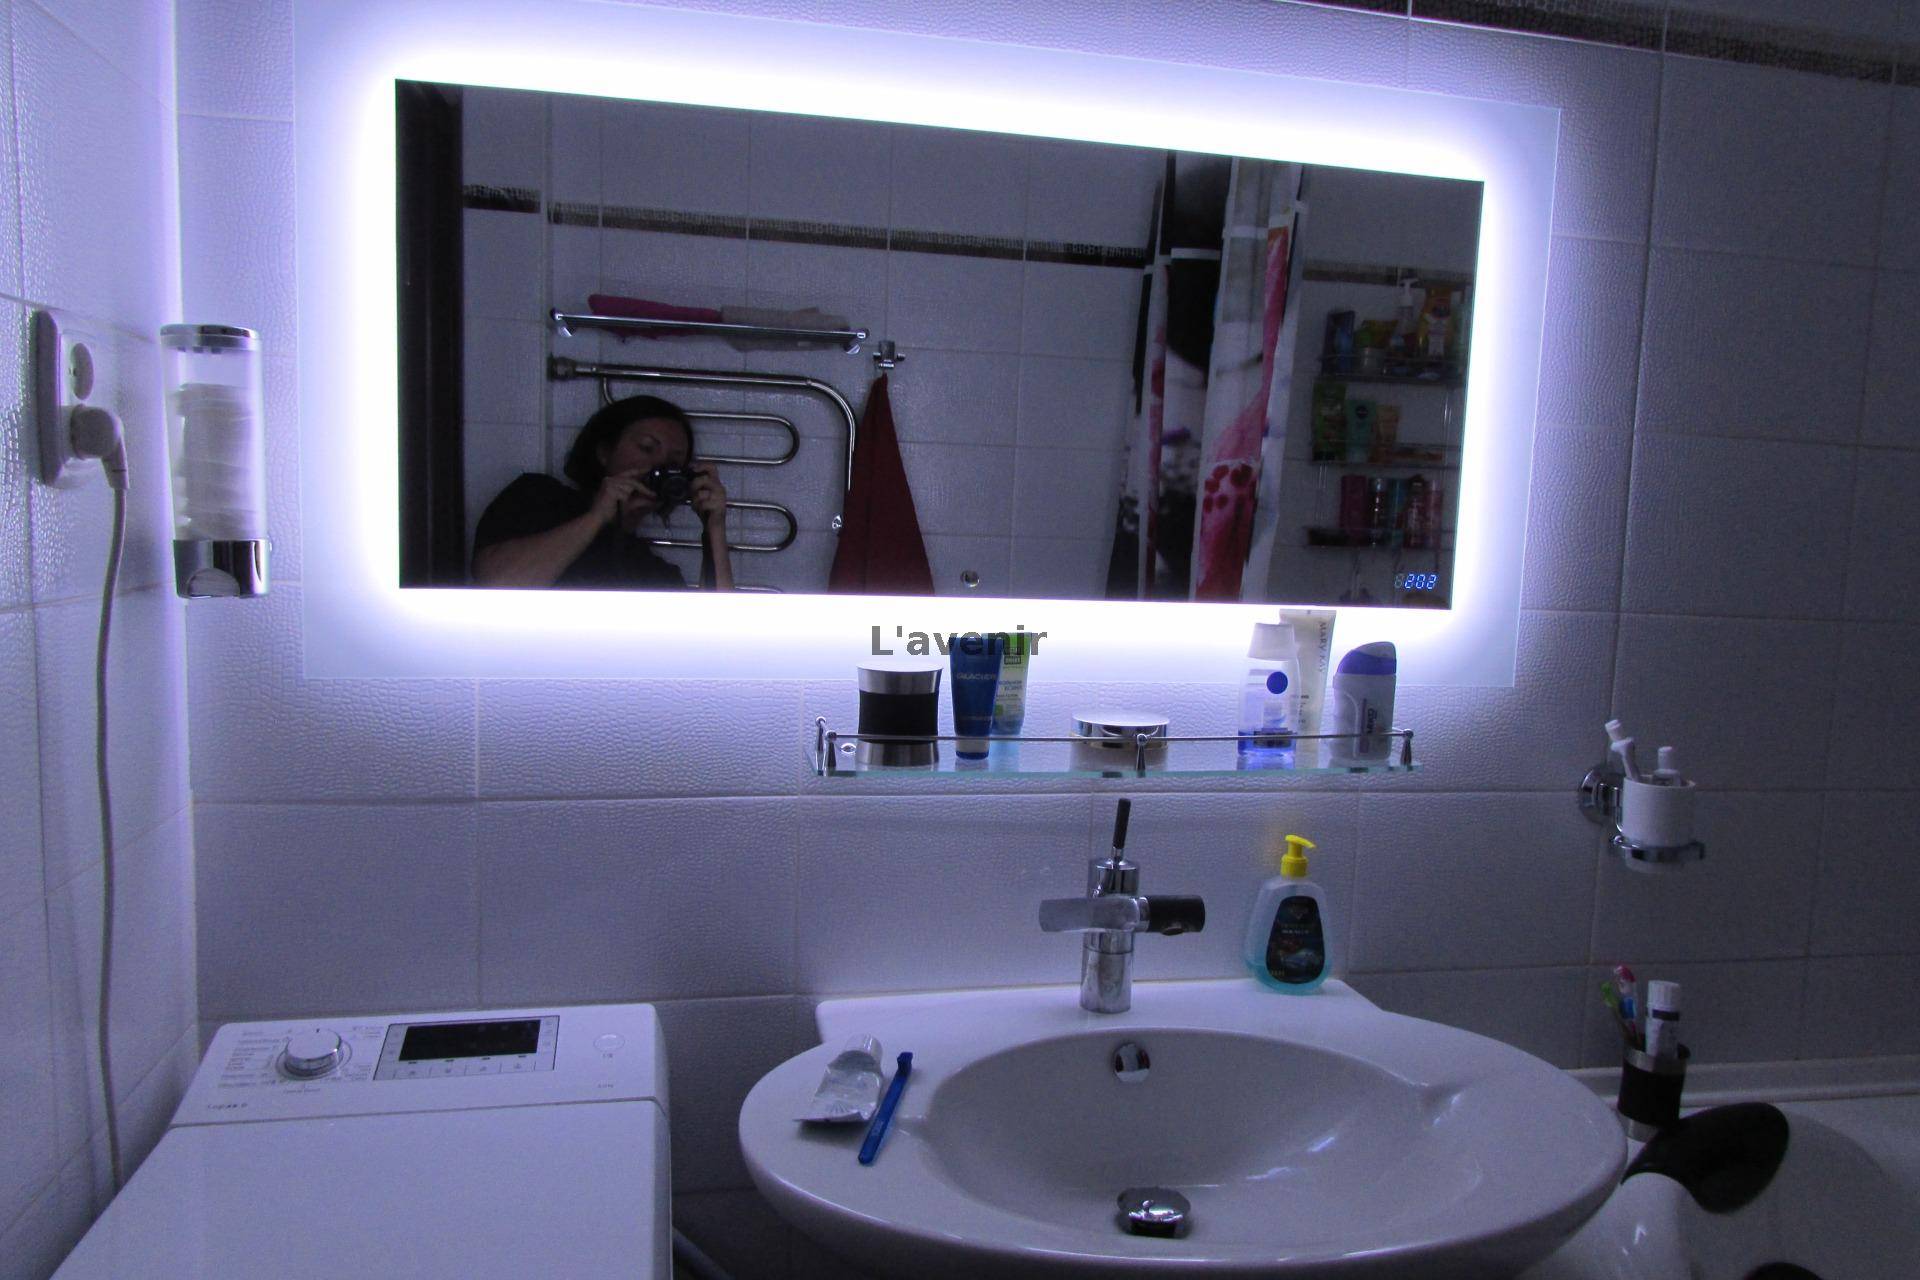
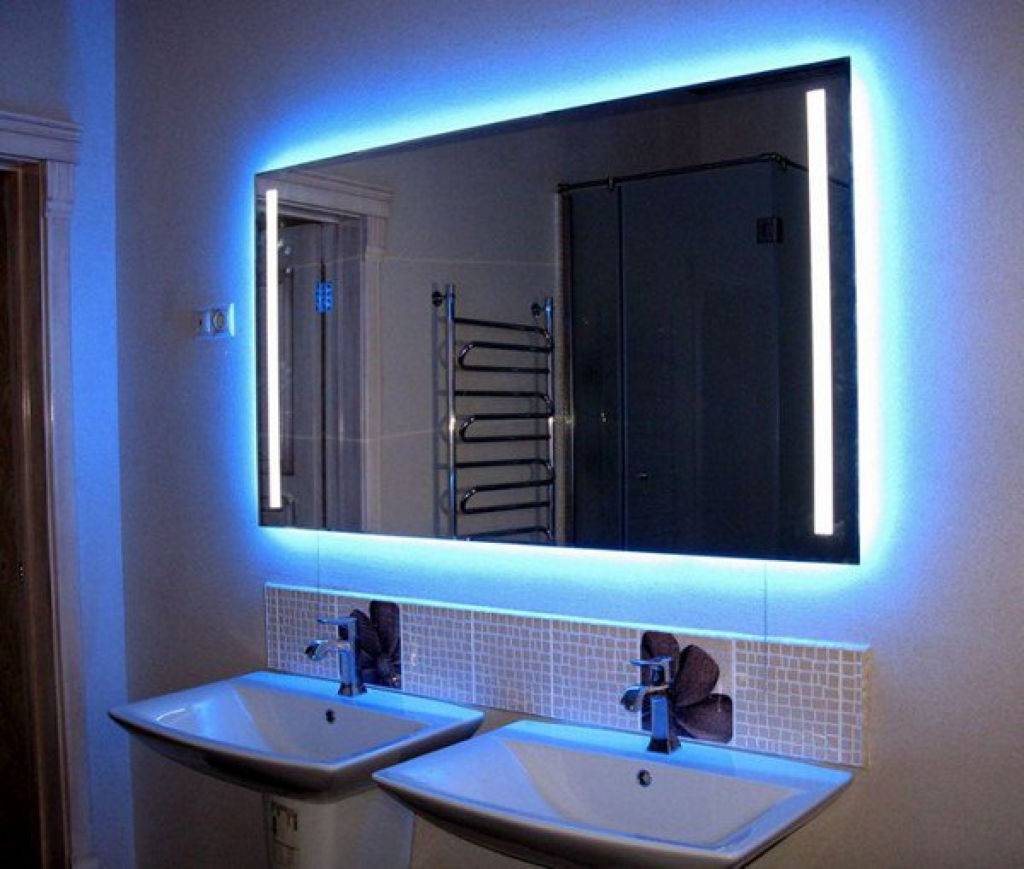
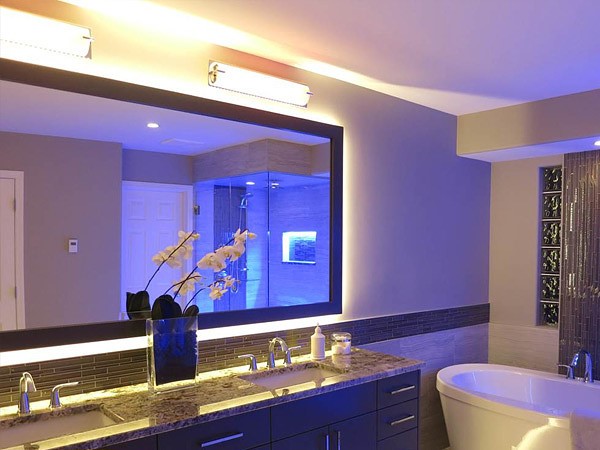
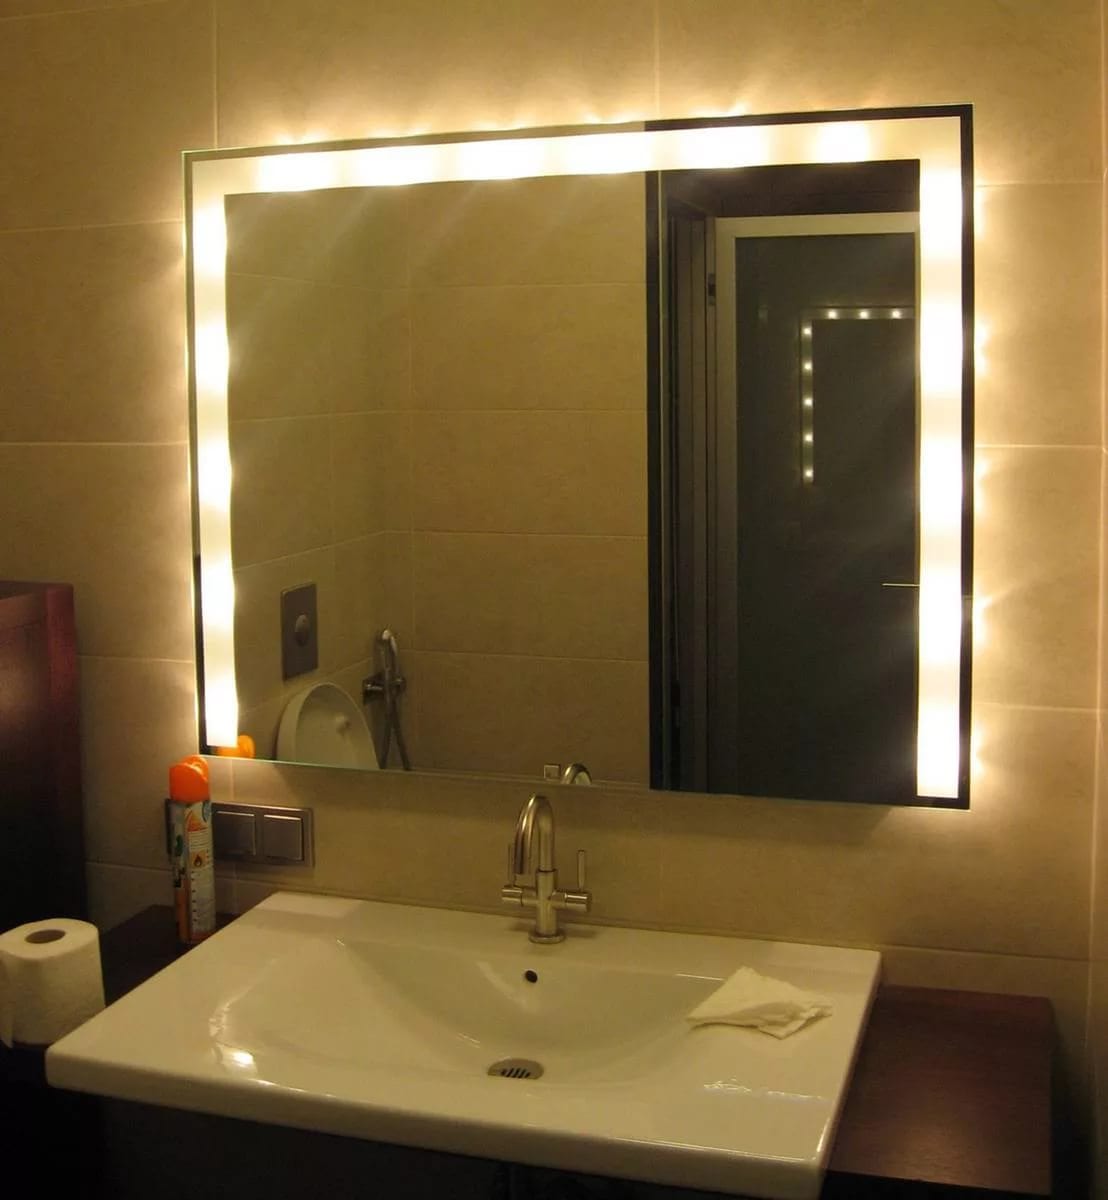
Lighting above the mirror is another part of the upper lighting zone. A lot of lamps attached to the ceiling or walls cannot always illuminate the mirror area well, so you need to think about your own individual lighting for it. We will not talk about which lamp to choose - this is already a matter of taste. It is only worth noting that the lamp for one ceiling is enough if it is installed in the center. Sometimes there is also a composition in which at the upper corners of the mirror there is a lamp, located symmetrically in relation to each other.
Floor lamps are another solution to light up the top of the bathroom. True, their height must be adjusted, otherwise too bright light will irritate the eyes. It is best if the light level is somewhere near the face of a person of average height, or rather, at the level of the chin.
Do-it-yourself installation features in the apartment
During installation, you need to take into account the features of the backlight. Observe the safety precautions and installation instructions for the lamps.
Schemes of spot diode lighting of premises
Spot lighting must be mounted in such a way that there is heat dissipation
This is especially important for stretch ceilings. There are different schemes for arranging lamps - round, oval, with and without a central chandelier
LED Strip Light
The tape is installed in an aluminum profile, which will act as a heat sink. ICE tapes are sold in reels of 5 meters. If you need a smaller piece, it is cut strictly along the marked lines. An optional power supply is available.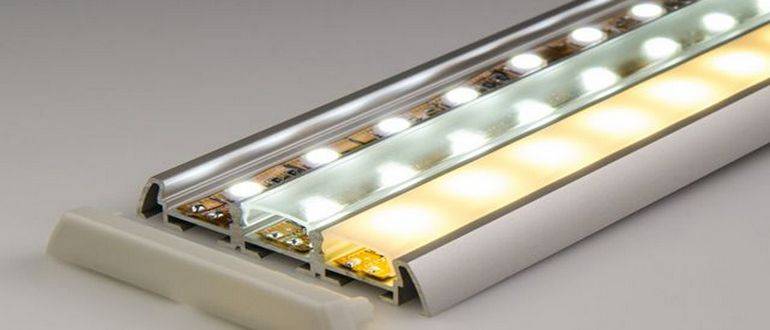


Chandelier installation
Chandeliers come with and without controls. Before putting the chandelier, it must be assembled. Before installation, all wires are also connected in accordance with the instructions for the device. Then it can be hung on the ceiling and checked.
Work is carried out with the power off!
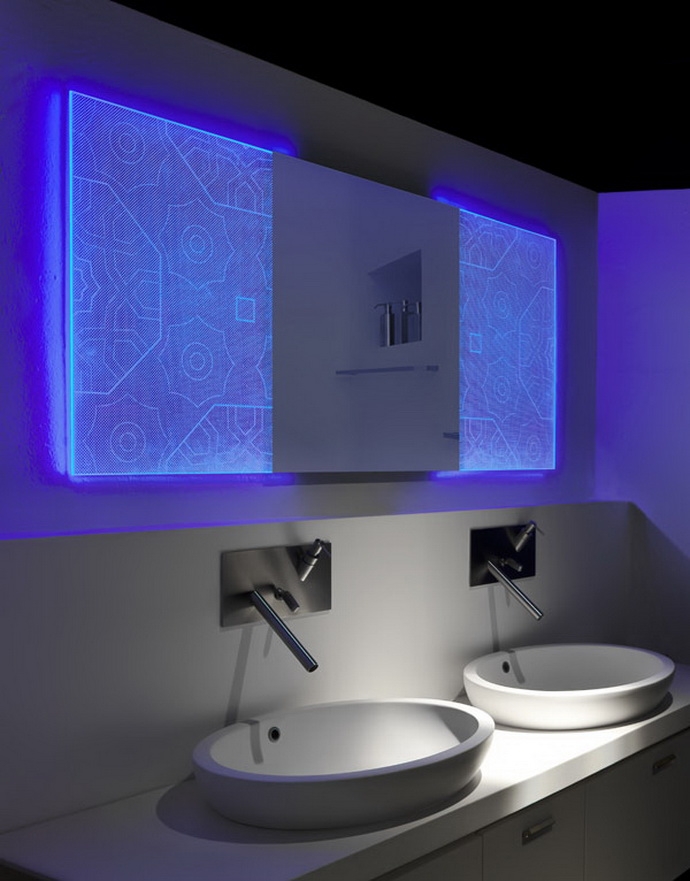
Ice panel
Ceiling panels are fixed on both concrete and wooden surfaces. Installed with cables that allow you to adjust the height of the fixtures
It is important to correctly mark the ceiling in order to then mount the panel
Installation of a wireless volumetric luminaire
Wireless lamps are convenient because they do not require cables to work. They can be installed anywhere in the apartment - as nightlights, kitchen lighting. Ceiling wireless lights due to their low weight can be mounted on stretch ceilings and drywall products. Wall mounted in a convenient place for users.
LED lighting is an effective way to create high-quality light in any room and on the street. LEDs have many advantages over conventional sources. They are environmentally friendly, economical, durable, safe.A variety of shapes of diode sources allows you to create unique design solutions.
Purpose of backlight installation
Illumination on the wall in your own apartment, private house or other structure can
installed for various purposes:
- Decorative lighting to highlight any interior design features.
- Visual elimination of deficiencies in the design of the premises.
- Decoration of walls, partitions, niches, pieces of furniture in honor of an event, holiday, event.
- Practical improvement in the visibility of work areas, such as kitchen, bathroom, WC, dining area in the living room, study corner in the nursery.
- Changing the style of the room (instead of rearranging).

Pros and cons
LED lamps are gaining more and more popularity, overshadowing other sources of artificial light. And the use in the bathroom is almost indispensable due to the positive characteristics of the product.
The most important advantage of LED lighting is its efficiency. With high light output, there is a small consumption of electricity (120 Lm / W, while an incandescent lamp is capable of delivering 10-24 Lm / W). And since there are almost always no windows in the bathroom with access to natural light, the quality of artificial lighting plays a leading role.
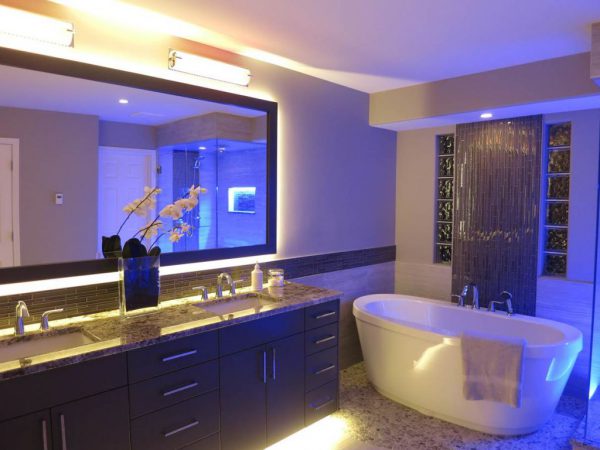 LED lighting in the bathroom
In wet conditions, the safety of electrical equipment is important. Since the LED lamp operates under a voltage of 12 or 24 V, even with possible contact with damaged wiring or the lamp itself, no harm will be done to the body.
Such products are distinguished by a long service life, which, compared with incandescent lamps, is 50 times longer.Approximate calculations show that the installed backlight will last about 8 years with continuous use.
This virtually eliminates the possibility of breakage and the need for replacement. Which is not always possible if the lighting points are in hard-to-reach places or are mounted in such a way that the integrity of any structure has to be destroyed in order to be replaced.
The lighting of the chandelier with LED lamp is regulated, making it brighter or muted. This property is in demand for the average consumer, because sometimes you want to create a romantic atmosphere in the twilight or just give your eyes a break after a long day at work at a computer monitor.
The popularity of LED lighting devices is explained by the breadth of design solutions, color spectra and a variety of operating modes. And today, full-fledged ceiling and wall lamps, which are equipped with such lamps, have begun to be actively produced.
The disadvantages, first of all, include the high cost of the product. Although due to the long service life we are talking about long-term savings.


Some users note that in the process of being under diode lighting for a long time, eye strain is felt. Lamps cause fatigue and increase stress. But this drawback loses its relevance, even if LEDs are used in the bathroom as the main lighting. Being in this room is limited to a small time frame.
Products with LEDs do not tolerate temperatures above 100 ° C, so their use in baths and saunas is impractical.
Location and style
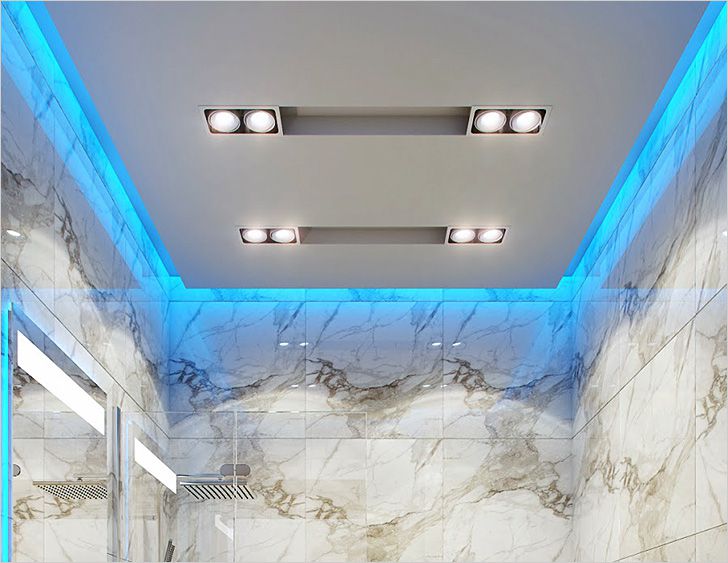
When planning bathroom lighting, lighting fixtures should be placed so that it is convenient to use all the plumbing, but the lighting should not dazzle and create glare. Ideally, it should involve three levels: upper, working and lower.
In a room with a small area, one ceiling lamp on the ceiling above the door or in the very center will be enough. In more spacious bathrooms, it is better to put several of them. The best solution is spotlights.
The main working area in the bathroom is a mirror. The light in this area should be as diffused as possible. If the glass is not very large, then you can put two lamps on the sides. If the mirror is massive, then it is better to put small lamps around the entire perimeter.
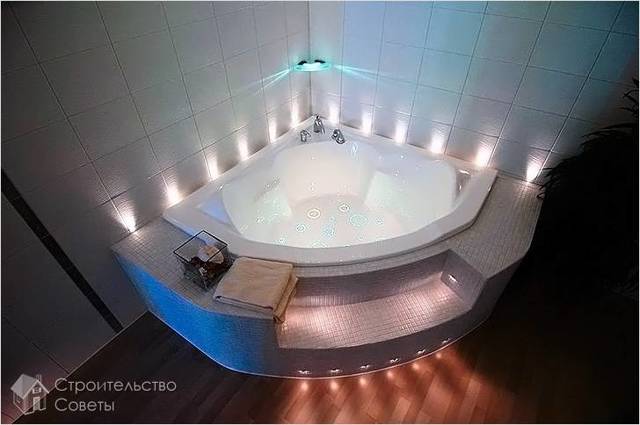
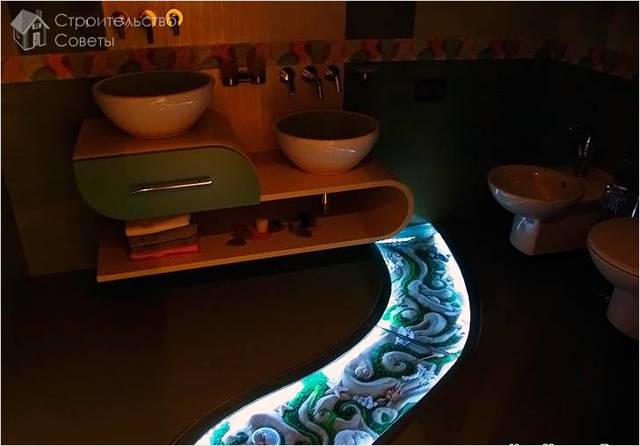
The lower lighting is more of a decorative function. For example, the bathroom floor can be illuminated with LED lights of different colors. This will create a very interesting effect.
In the bathroom, you need to use closed shades made of white or completely transparent materials with a matte surface. The type and dimensions of lighting fixtures must be chosen, taking into account the area and height of the room. In a small room it is impractical to put a massive chandelier, and a hanging ceiling does not fit on a too low ceiling. A great option - spotlights and spots.
If an ultra-modern design direction (minimalism, hi-tech) was used for interior design, then it is better to give preference to elements with clear outlines made of plastic or metal alloys. For a classic style, you can pick up concise appliances without any frills. Stained glass devices are especially popular.They are able to create an interesting play of light on the surface of the walls.
Spot lighting
Lighting in the style of a starry sky is more difficult to make than a ceiling with lighting around the perimeter. Tape is not enough here. Separate miniature LED luminaires must be used. They cannot all be connected to the same power source. It may not withstand a high load, which is fraught with security risks.


Before lighting the ceiling in the form of a starry sky, it is recommended to build a tension structure. It is easiest to embed individual LEDs in a stretch ceiling. And all the wiring remains behind the canvas.

In this case, the lighting fixtures are attached to the main ceiling surface, and are neatly built into the canvas. Some types of canvases allow you not to build in lamps, because they let light through without holes.
In the case of drywall construction, installation is somewhat more complicated. It is necessary to make a separate niche in the ceiling, into which lighting fixtures are built. The niche is closed with a special translucent polymeric material.

Choose a canvas with a slightly corrugated surface, this will allow you to get the effect of the maximum imitation of a real starry sky.

bathroom lighting scheme
Given the type of room, the quality of lighting will depend on the correct location of the light sources, on the power of the selected lamps.
The correct organization of lighting for the bathroom is represented by the layout of the fixtures:
- spotlights or ceiling lamps provide overhead lighting (on the ceiling);
- spots and ceiling lamps on the wall are used for auxiliary and working lighting, for zoning the room;
- spot and LED strips (duralight) are used for lower lighting, for room decor (illumination of steps, bath pedestal).
Based on the ISO 8995 bathroom lighting standard, 200 lx (lux) is achieved
This standard takes into account both the features of the room and the needs of a person, his psychological and physical condition is taken into account. Knowing the power of the LED lamp, the number of lamps is calculated, but taking into account the area of the room
Built-in backlight
Recessed lighting fixtures suggest
placement in wall panels, be it drywall, concrete, wood, bricks or
any other building material. Naturally, it's easiest to make it look like this
lighting for walls from an easily processed base. In any case, you should
follow a number of recommended rules:


- Before
the beginning of the installation work, you need to markup. - Calculate
the power of the installed lamps so that they do not turn out to be excessively bright,
because it is not the main lighting. - Lighting
characteristics of lighting fixtures must match the style of the interior
design. - For
uniform illumination of the room, the bulbs in the wall should be located
evenly spaced approximately the same distance apart. - At
installation in drywall and other hanging panels, you need to make sure that behind the place
The markings are not located on the frame or wires. - Install
luminaires must be strictly according to the rules of electrical work in compliance with
safety technology.

As light sources for built-in lighting
ice elements or fluorescent light bulbs are best suited to the wall.
For example, the most popular models suitable for such an installation are
are LED-A03B, LED-J04, LED-L02B and LED-HH02.


