- Tips
- materials
- metal
- Acrylic
- Ceramic
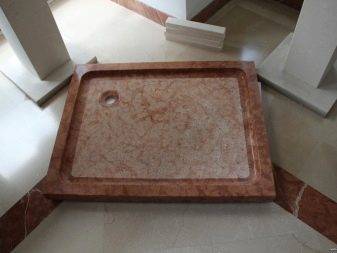
- Made of artificial stone
- A natural stone
- Sequence of work
- Brick pallet
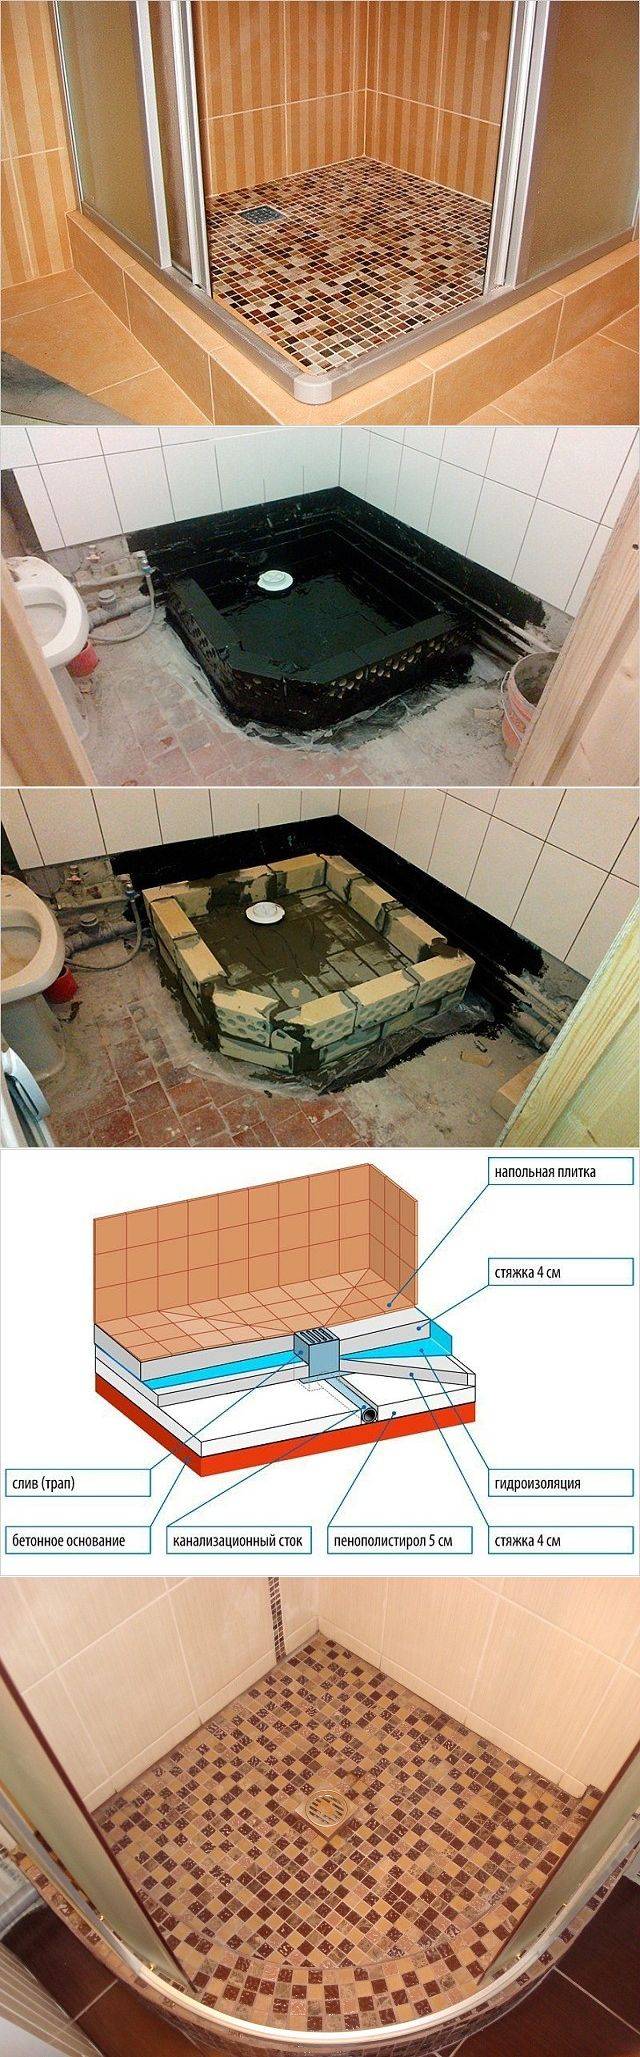
- We build a shower tray from ceramic tiles
- Waterproofing and installation of a ladder
- Pallet lining
- Peculiarities
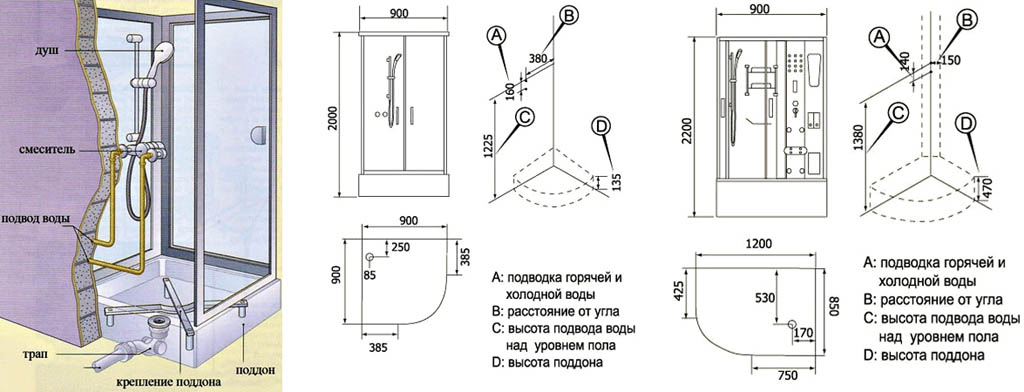
- General assembly diagram of a rectangular shower tray
- Monolithic shower tray
- Types of finished models of shower trays
- Benefits of a low pallet
- Decorative design of the pallet
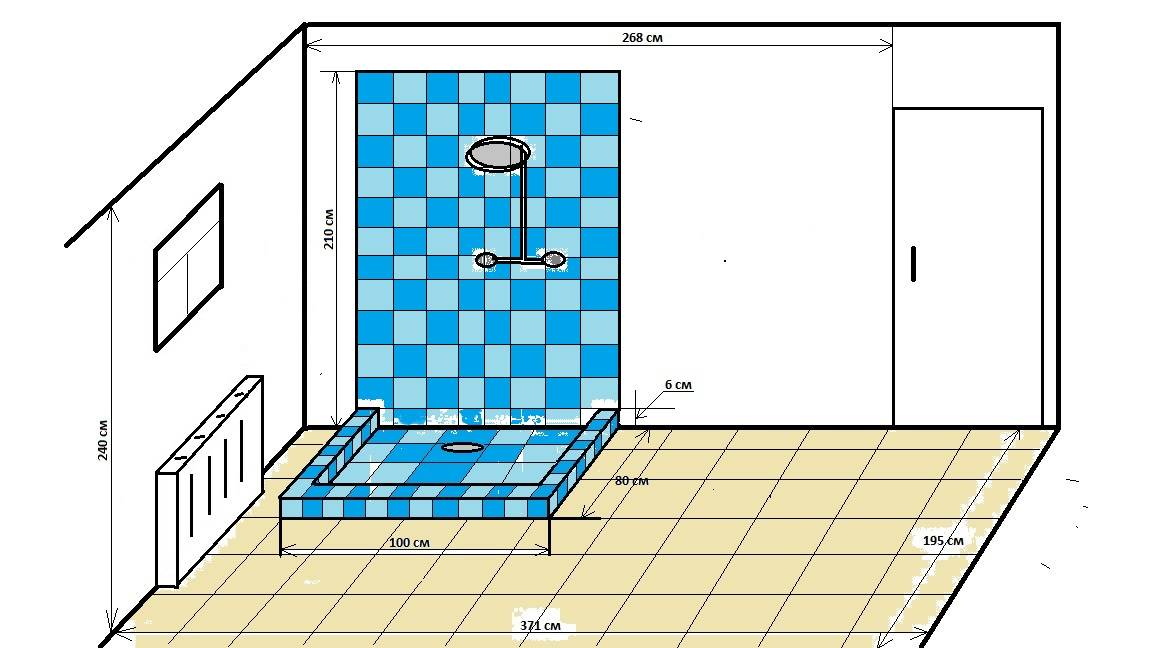
- Where will we build? We choose a place and determine the parameters
Tips
- when performing work on the manufacture of a booth, keep in mind that the entrance to the sewer pipe must be below the level of the pallet: from the drain hole to the entrance to the drain of the tee, 2 centimeters of slope per meter;
- it is desirable to decorate the pallet with whole lamellas or mosaic blocks;
- as a cladding, use pebbles of different colors, shells: lay them on the base and fill with a transparent sealant;
- a home-made booth can be equipped with a hydromassage, decorated with shelves for placing hygiene products or a tiled chair.
Having decided to make a cabin yourself, start by developing a plan and sketching a sketch, consider the size of the room, the location of utilities and the features of connecting pipes with hot and cold water.Installation of a shower area without the use of a tray is a practical and original option for a bath.
materials
Pallets are made from different materials. Let's get acquainted with their features.
metal
Pallets made of carbon steel of different grades are commonly called steel. Corrosion susceptibility directly depends on the steel grade. If there are enamel chips on such a pallet, rusty spots are observed at the site of defects and around them. With prolonged use of a damaged product, corrosion can lead to a through hole through which water will seep into the foundation and gradually destroy it.

Steel pallets are made by stamping, so the material is in a stressed state, which causes deformation and destruction of the integrity of the enamel coating. Cast iron is more preferable when choosing a metal pallet, it is an alloy of iron and carbon. A feature of the manufacture of cast iron products is the fact that they are produced only by casting, followed by heat treatment. Such a product is heavier, stronger and more durable.
Acrylic
These are one of the most affordable types of shower trays. The beautiful appearance of the glossy surface, lightness, a wide variety of shapes and colors - all this attracts when choosing a shower tray or cabin. The disadvantage of this material can be considered its possible yellowing and dullness if improperly maintained or used by the manufacturer of low quality acrylic.
Ceramic
With no less aesthetic appearance than acrylic counterparts, ceramic products last much longer. They are easier to take care of. The downside is the high price and weight.But it pays off with a long service life.
Made of artificial stone
These products are made by injection molding of polymeric materials. Visually, these products resemble natural marble or granite. Easy care, lack of habitat for fungi and bacteria, beautiful appearance, resistance to temperature changes, lack of deformation - this is what leads buyers to them. The only drawback of such products can be called their rather high price.
A natural stone
This option is suitable only for those who do not feel sorry for anything for themselves. They are the most expensive and luxurious. For their manufacture, polished marble or granite is usually used. The downside is the careful selection of cleaning products that should not contain alkali. When exposed to alkali on a natural stone, it can change color. In addition, such products must be polished at least once every six months. In order not to accidentally slip, it is worth putting a transparent silicone mat on the bottom of such products.
Sequence of work
In the case of strict adherence to all instructions and recommendations, do-it-yourself shower cabins are made from tiles quickly and easily.
Steps:
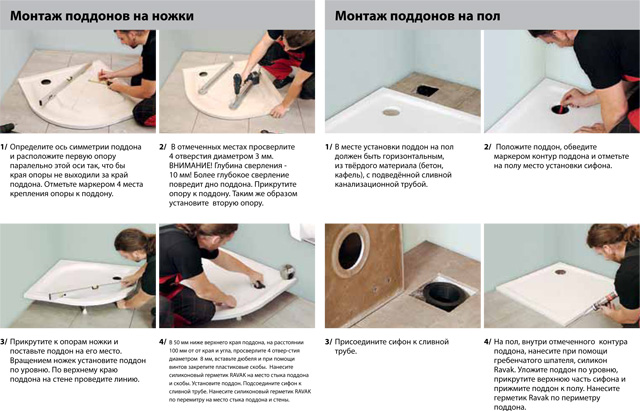
- Make site markings. The siphon connected to the sewer pipe is laid exactly in the center with a slight slope towards the water outlet.
- For a siphon with a pipe, grooves are cut out.
- Styrofoam overlaps on the floor with a fence on the walls (3-5 cm). The edges of the sheets are fixed with a sealant.
- The diluted cement mixture is poured from above. Its thickness should not exceed 3-4 cm. Then reinforcement is made.
- A rolled roofing material is laid out with a tight fit to the wall (there should be no gaps anywhere). The overlap on the wall should be at least 15-20 cm.Then a hole for the siphon is cut out in the sheet, inserted into it with a fixing ring.
- The grate is covered with adhesive tape to prevent construction debris from entering the sewer. The prefabricated and installed formwork is poured with a cement mixture and rammed. After this action, no air sacs should remain in the formation.
- All remaining holes are filled with a waterproofing compound. Corners and joints are glued with waterproof tape.
- Start laying tiles. First they cover the floor with it, then the walls.
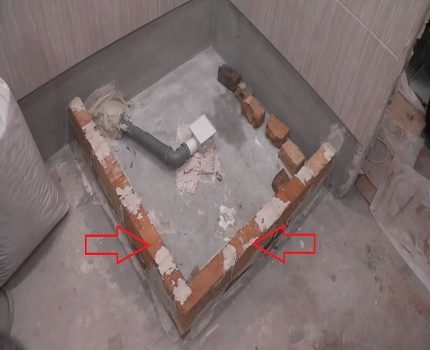
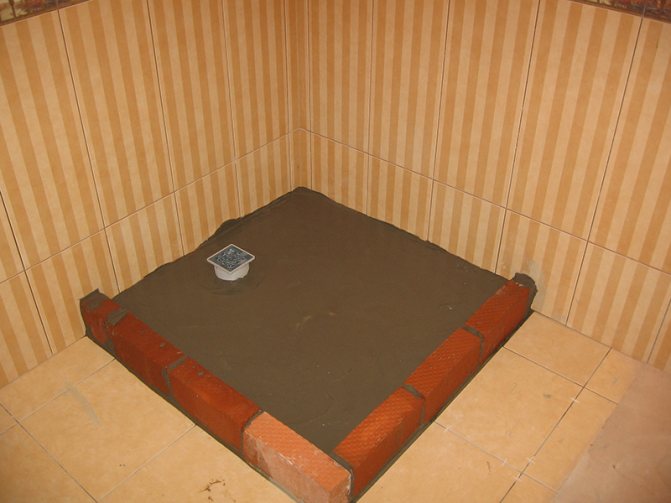
Brick pallet
With an uneven and old floor surface, it makes sense to make a screed from cement mortar or ready-made powder. After drying, cover it and the adjacent walls with bituminous or waterproofing mastic in several layers to the level of the design height of the pallet. Then:
- Mount the drain neck and sewer pipe with a slope of at least 3 degrees. For convenience, bars of various sizes are used.
- Proceed to the formation of the floor of the shower tray from tiles. To do this, bricks are laid flat on the floor using cement mortar in one layer. At the same time, all cracks and voids are filled with cement. After drying, proceed to the waterproofing device.
- They make a side, laying bricks on edge in 1-2 rows with offset seams.
- When the solution dries, proceed to the screed. With its help, the slope of the floor to the drain is also made, followed by plastering.
The pallet can also be made of concrete. To do this, follow the following sequence:
- Also, as in the previous version, a sewer pipe and a drain neck are mounted.
- Install the formwork for the bottom of the pallet and pour the concrete mixture. After a day, the formwork can be removed from the floor and set up for the sides. Also fill with solution.
- After complete drying, coat with waterproofing mastic for pools.
- They make a screed, as in the previous case, forming a slope with a spatula and trowel.
- At the finish, the entire surface is primed and leveled from the outside and from the inside.
The missing walls are made of moisture-resistant cardboard or plywood on a metal frame and leveling the seams with putty.
When everything is ready, proceed to the finishing work. You can use mosaic or ceramic tiles for the shower.


Lining the pallet starts from the drain hole. Moisture-resistant glue is applied with a notched trowel. The tile is laid with seams of the minimum size, using crosses. The seams are rubbed after drying and the joints are treated with a transparent sealant. In the finished shower, you need to make a shelf for soap, shampoo and other things, as well as hang a curtain.
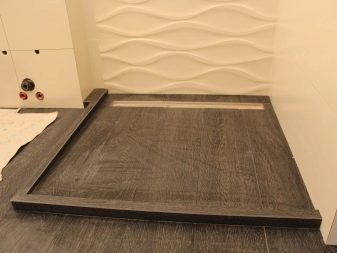
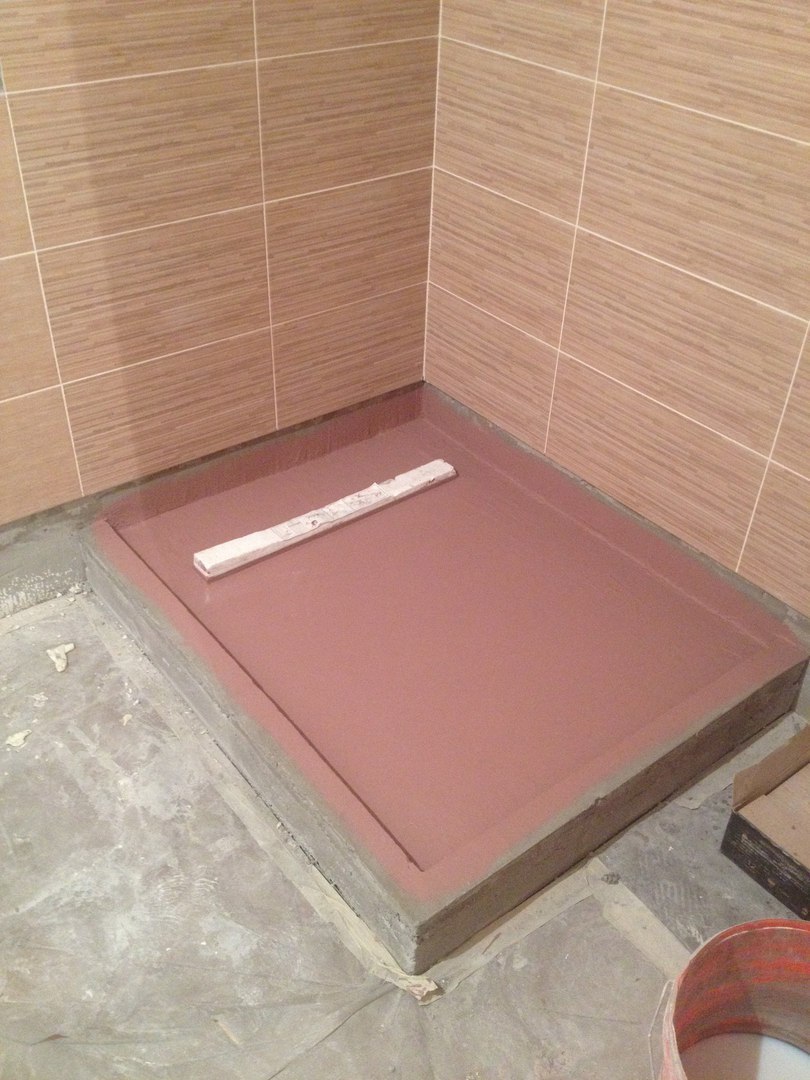
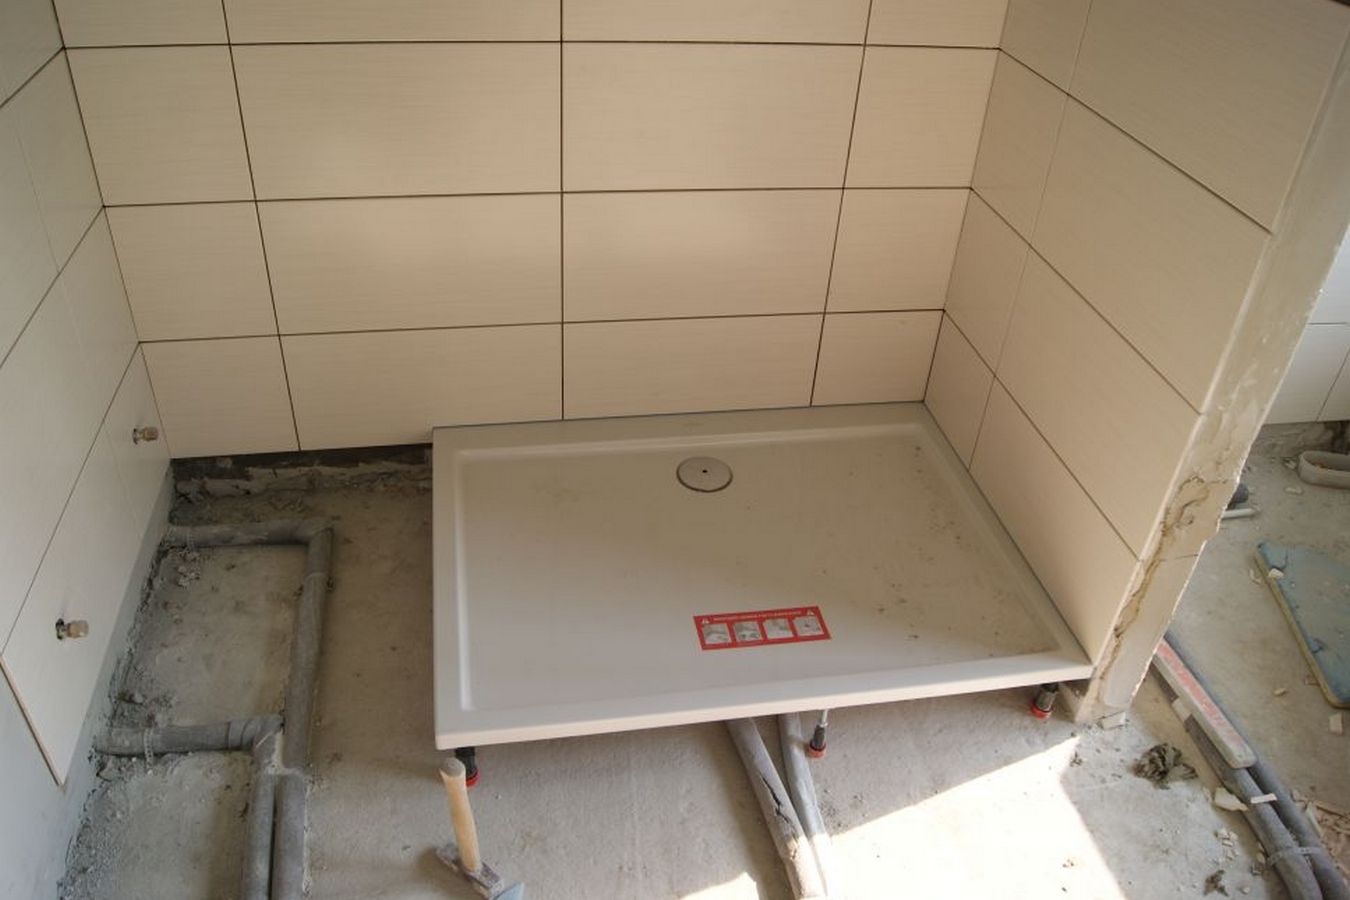
We build a shower tray from ceramic tiles
In most cases, the floor level of the shower tray rises above the floor level of the entire room to allow installation of drainage equipment. For example, in apartments, sewer pipes are usually laid at floor level. The same method is used in most private houses. Therefore, to ensure the desired slope, the drain hole in the pan must be located above the floor level.
For the construction of a tile pallet, the following sequence of operations should be observed:
First of all, a ladder (drain neck) and a sewer pipe connecting it to the central sewer are installed. For convenience, the pipes are laid on wooden blocks of different heights and fixed. The slope of the pipe should be 4-7 degrees, but not less than 3 degrees.Experts advise using plastic ladders and sewer pipes, as they are easily and reliably mounted and are not subject to corrosion. But the grate of the drain hole should be purchased metal, one that can freely hold the weight of a person.
The ladder is installed before the foundation is poured
After that, the floor formwork is installed and a rough pour is made with cement mortar. The solution is made in proportion at the rate of 1 part of cement to 3 parts of sand. The density of the solution must be sufficient to fill the entire space inside the formwork. The thickness of the layer during rough pouring should be carried out in such a way that the neck of the ladder protrudes slightly above the level of the base, taking into account that the finishing pouring and tiling will be carried out further. As a result, the ladder should be flush with the floor. Some masters recommend covering a small space around the drain neck with a solution of building alabaster. This is done in order to provide easy access to plumbing units if necessary. Alabaster, unlike cement mortar, is easy to remove if necessary. After this operation, the base in the formwork should be left for a day.
When pouring the base, it is necessary to exclude the formation of voids
The next step will be the installation of the formwork of the side of the pallet and pouring it with cement mortar. A number of experts advise, after the screed has dried, to perform another processing of the future pallet with bitumen or moisture-proof mastic.
Final finishing is made after complete drying of the fill.
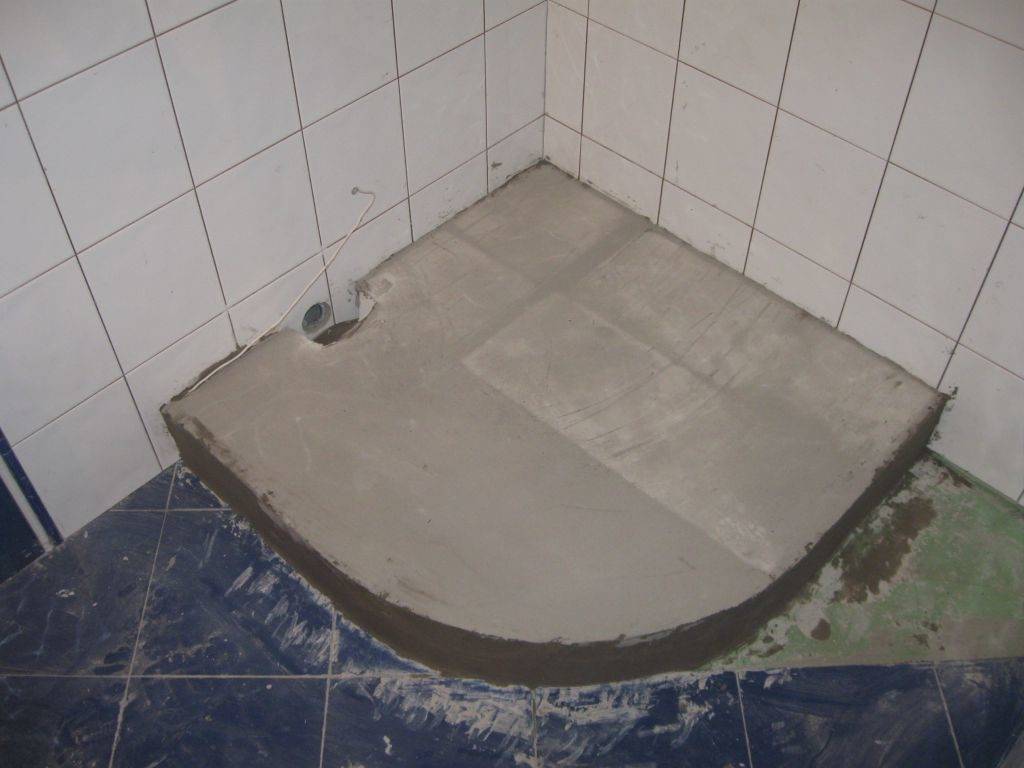
After that, the pallet is coupled with the organization of the floor slope towards the drain.To do this, with the help of a level, beacons are installed on the sides, and the desired slope is formed with a solution using a trowel and spatulas. It should not be significant so that it is comfortable to stand on the floor. Finishing is also carried out with a solution of the sides of the pallet from the inside and outside.
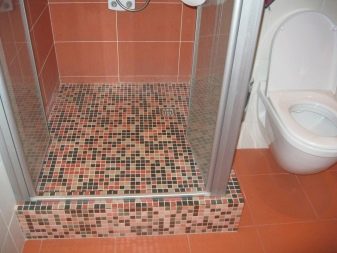
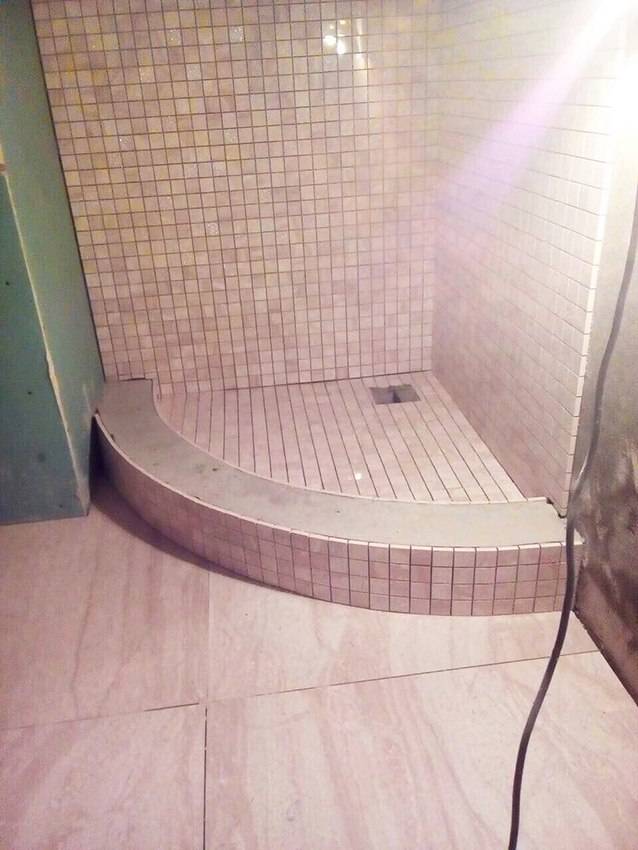
The inner surface of the pallet is finished with a slope towards the drain
The next step is actually tiling the pallet. The cladding should start from the drain neck in order to trim the tiles near the walls of the pallet. The tile adhesive is applied with a notched trowel. The dimensions of the gap between the tiles can be maintained using mounting crosses. The minimum width of the seams must be maintained. After the tile adhesive has dried, the joints are grouted. At this stage, the work on the construction of the pallet can be considered completed.
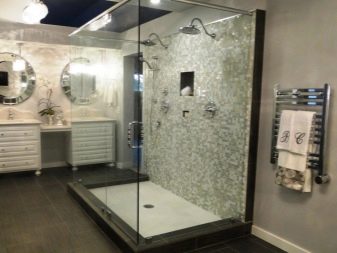
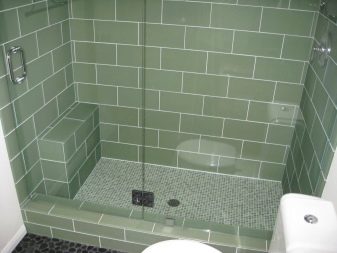
Tiled shower tray matches the overall interior design
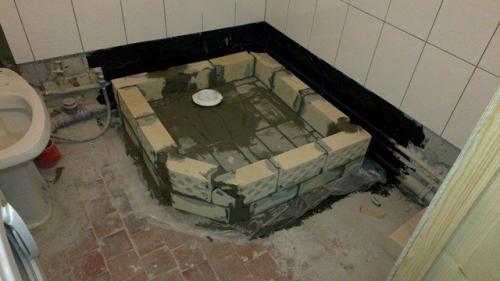
Waterproofing and installation of a ladder
The first step in the direct arrangement of the shower tray is waterproofing the site. First, several layers of roofing material are laid on the floor - it must close all the cracks in the areas where the floor and walls meet. Next, the site is treated with waterproofing mastic - it must be applied in an even layer, like a primer. And in the end, at the joints of the surfaces of the walls and the floor, you need to stick a waterproofing tape.
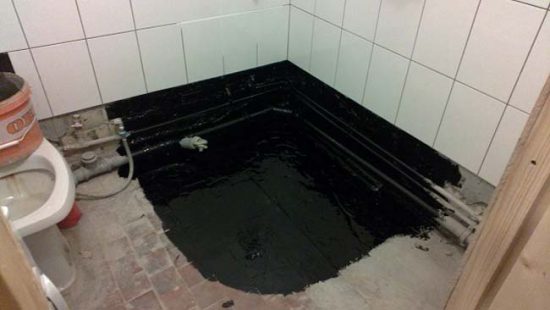 Waterproofing
The next stage is the installation of a sewer ladder, which is responsible for drainage. Structurally, the drain consists of discharge pipes, a water intake funnel, various gaskets, seals, a grate and a siphon that prevents the penetration of unpleasant odors into the bathroom
It is very important to securely fix each element in order to ensure the effective functioning of the water drainage system from the sump.
First, install the pipes on the already waterproofed floor, fasten them tightly and attach them to the bathroom sewer socket. Fill the site with cement screed and level it. When pouring cement, do not forget to ensure a slope towards the drain - at least 10 mm. For proper pouring, use beacons or guide rails.


 Sewerage supply
Next, install the funnel, siphon, all gaskets, seals and grate. Then fill in the second layer of the screed - its level should be higher than the level of the siphon by the thickness of one tile and a layer of glue for it.
Advice. Before pouring the second screed, seal the drain with mounting tape to protect the drain from getting concrete.
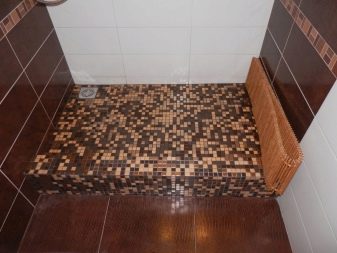
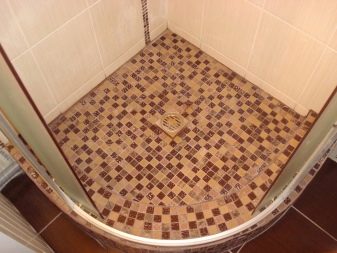
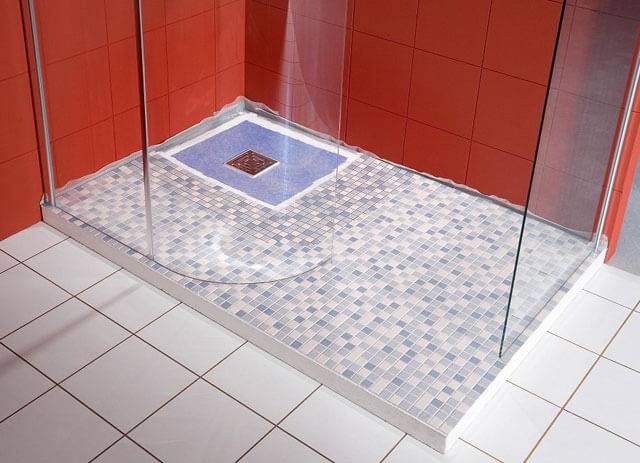
Pallet lining
An unconditional plus of self-construction of a shower tray is the ability to design the resulting structure exclusively to your liking. You can use tiles or mosaics of any shape and shade and in any combination. The main thing is that the selected finishing material is as moisture resistant as possible and has anti-slip properties.
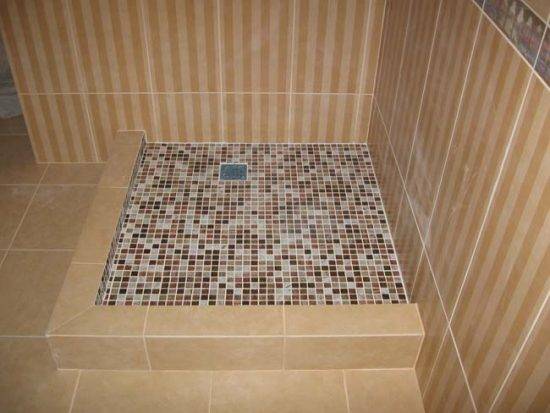 Facing the shower tray with mosaics and tiles
Facing is carried out according to the following scheme:
Prepare the glue mixture
Please note that some compositions deteriorate quickly, so it is better to knead them in batches.
Start laying the finish from the far corner of the pallet: with a notched trowel, apply the adhesive mixture to the tile, attach it to the work surface and lightly press down. Install the rest of the trim in the same way.
To achieve the most even seams, insert special crosses between the tiles.
Check each tile with a level.After alignment, finally fix the lining by tapping it with a rubber mallet. Then remove any adhesive residue with a damp cloth.
After finishing the tiling, remove the crosses and process the seams - fill them with waterproof grout. Remove the remaining mixture with a dry cloth, and then carefully walk over the surface with a rubber spatula.
Treat all joints of the pallet and walls with sealant.
Close the corners of the boot with special silicone corners.
When the grout is dry, clean the tile.
In order for the pallet structure to dry out faster, try to keep the humidity level in the bathroom to a minimum: turn on forced ventilation or heating radiators, or simply open the doors of the room wide open.
Installing a tile shower tray is not a quick procedure, but it is absolutely feasible even for a non-professional. Be sure that if you do everything according to the instructions and with strict observance of the norms, you are guaranteed to receive not only a functional sanitary ware, but also an attractive piece of bathroom interior.
Peculiarities
The small space of the bathroom often forces us to look for optimal solutions so that all family members are comfortable there, and at the same time everything they need is available. If the bathroom is combined, then this problem becomes even more urgent. Sometimes a good way out is to install a shower cabin. But finished products, which are available in a wide range in construction and plumbing stores, are not suitable for everyone because of the high price. You should consider how best to enclose the space in order to protect nearby things from water ingress, and the pallet can be made of tiles.And this is a simple process if you have all the necessary materials and tools.
There are two options for installing the pallet.
- You can buy a ready-made kit in the store, which includes a polystyrene pallet. It is already sealed and has a frame. You can install it, build a border, decorate with ceramic tiles. Arrange the upper space in the simplest way: screw handrails to the wall for convenience, place a pipe at the top and hang a waterproof curtain.
- Everything is done by hand - from start to finish.
Pallet shapes can be very diverse: square, triangular, round, oval. Sizes vary from seventy centimeters and above. It all depends on the size of the bathroom and the place that can be taken under the shower without prejudice to the rest of the space. It would be logical to consider for the future the option of installing a certain type of cabin without a pallet. Then the dimensions are adjusted to the size of the cabin base, which is subsequently planned to be installed.
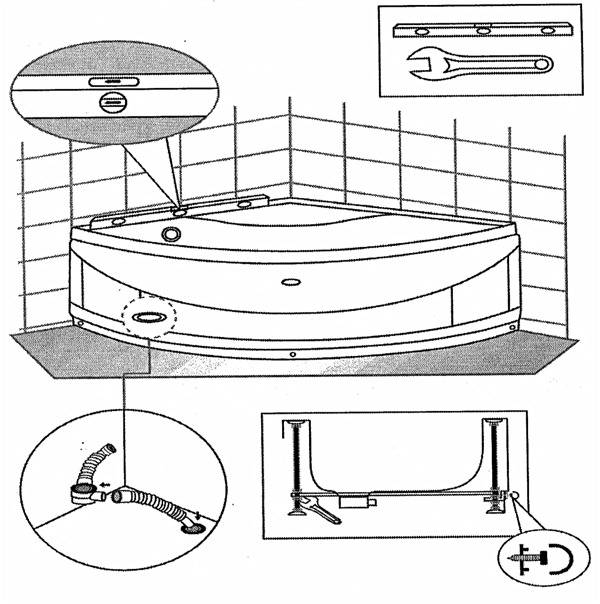
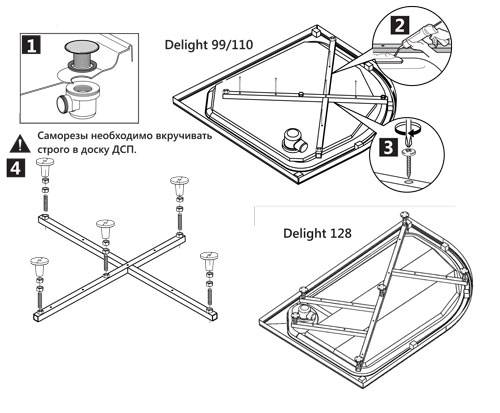
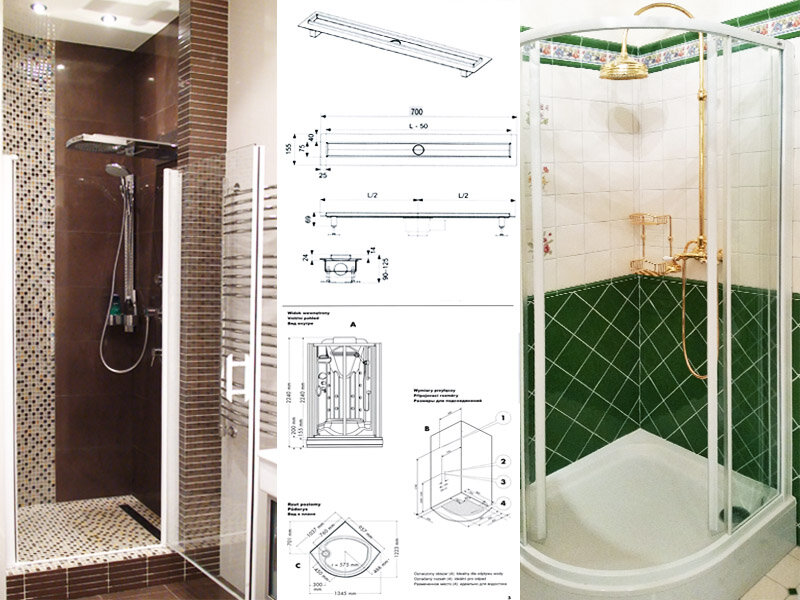
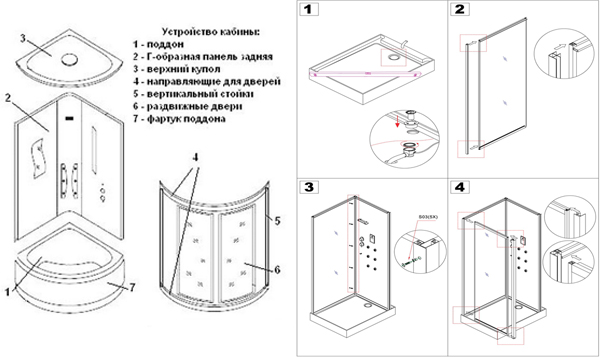
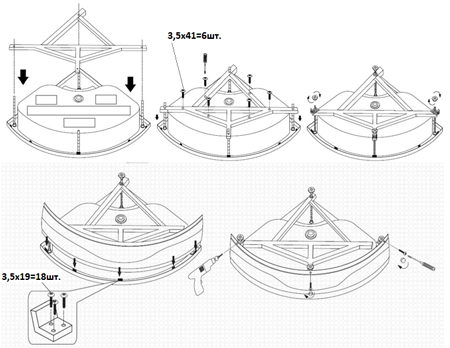
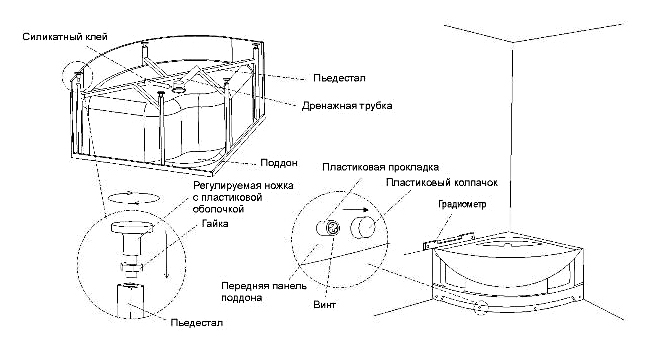
General assembly diagram of a rectangular shower tray
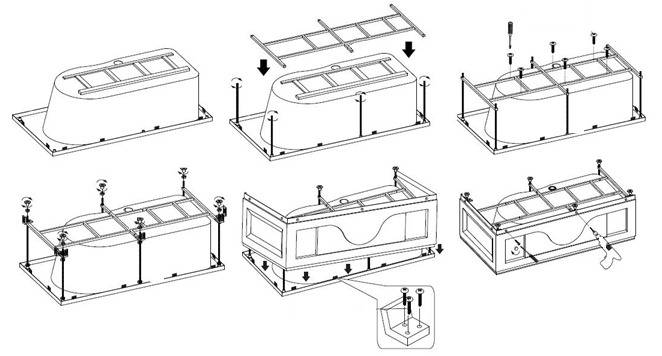
Video instruction for pallet assembly for do-it-yourself shower cabin
A standard shower tray consists of the following parts
- Pallet
- frame
- legs
- Front (front) panel
- Siphon
All these things most often lie in one box with a pallet. Or in a box with all the spare parts, you can find legs, a siphon.


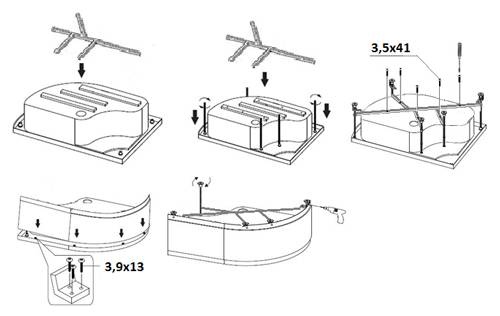
Sometimes the pins from the legs are placed in the frame itself, inside, if you cannot find them, shake the frame, maybe they are inside.
You will also need self-tapping screws, they should be included.
Most importantly, look at the length of the screws so you don't screw in longer screws.This is fraught with the fact that they will go out and you will pierce the acrylic coating of the pallet itself.
Pay attention to the length of the screws!
Also remember that everything that you screw into the pallet with screws must fall into the mortgages specially made for this. These are such protruding parts at the bottom of the pallet. If you do not get into the mortgages, then you will simply ruin the pallet, all your self-tapping screws will come out !!!
Monolithic shower tray
When creating a monolithic podium, two design options can be used: with and without thermal insulation. The first type is convenient for cold floors (for example, the first floor of a private house), the second - in standard apartment buildings.
For a pallet with thermal insulation, the diagram of the device is shown below.
It is important to remember at the same time: waterproofing is arranged both on top of the draft layer of the screed, and over the entire floor area in the bathroom.
Necessary materials:
- expanded polystyrene for the device of a heat-insulating layer;
- cement-sand (with any fillers) mixture for rough and finish screed;
- waterproofing coating or roll type;
- shower drain and sewer pipes;
- facing material, tile adhesive and grout mixture.
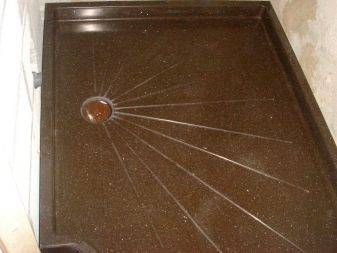
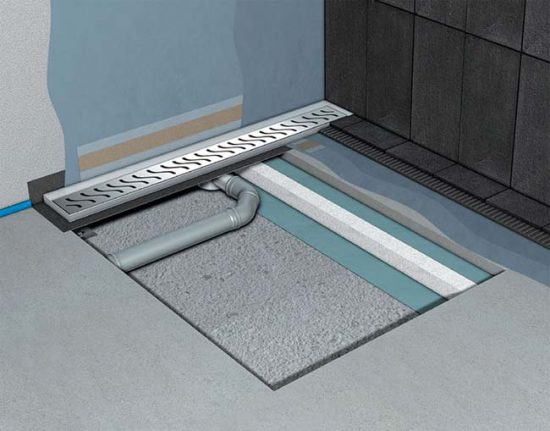
When arranging a do-it-yourself tile shower tray, you can choose two ways to organize the desired floor slope: removable wooden limiters or a fixed metal frame. The second option is more convenient and reliable, since it increases the strength of the screed and does not require subsequent sealing of the areas from which the guides are removed.
The illustration shows a fully assembled metal profile for a tile tray with a rim. A rolled membrane was used as a waterproofing material.
The drain here is shifted to the wall, so the slope of the bottom is uneven. In general, the rule is used: for one meter of length, a depth of at least 1 cm is required.
The cement-sand mixture is laid so that only the upper part of the shower drain remains visible (outside the screed).
Otherwise, the rules for arranging a do-it-yourself tile pallet do not differ from the finishing of a brick podium: after the base has solidified, ceramic tiles are laid out, followed by grouting.
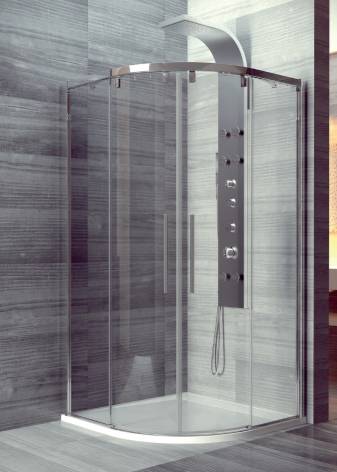
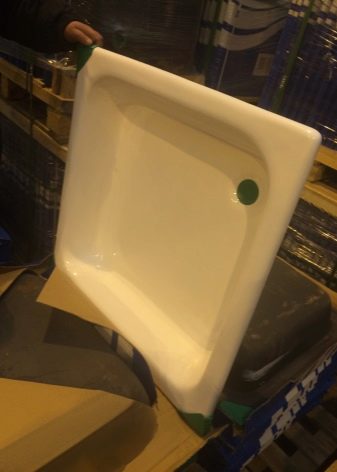
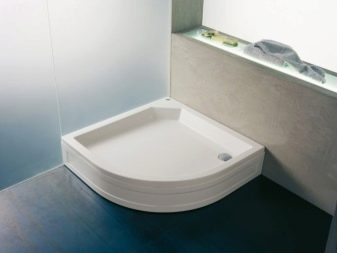
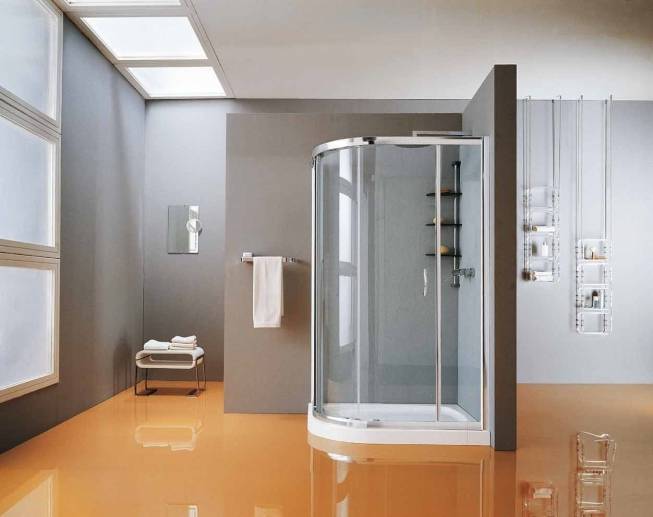
Types of finished models of shower trays
Finished pallets are classified according to different criteria: shape, parameters, type of material from which the structure is made.
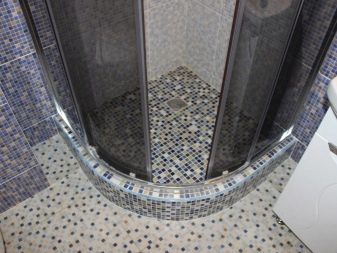
When choosing plumbing for the shower, special attention should be paid to the shape of the bowl. It can be square, semicircular, oval, polygonal
Here, each manufacturer expands the range in random order, giving preference to square models with a rounded front. It is these pallets that are considered convenient in operation and economical in terms of space.


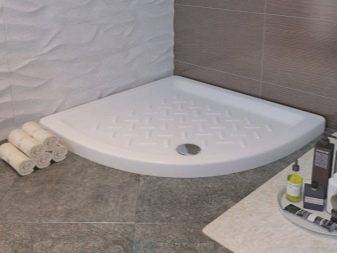
It will be a little more difficult to determine the desired plumbing parameter. This is due to the fact that the pallet is installed on the siphon (the knot connecting the shower drain hole and the sewer pipe). Its height varies from 10 to 20 cm. Only having all the components on hand can you correctly calculate the height of the bottom of the plumbing structure. Some models are equipped with adjustable feet that allow you to adjust the height level from the floor to the bottom.
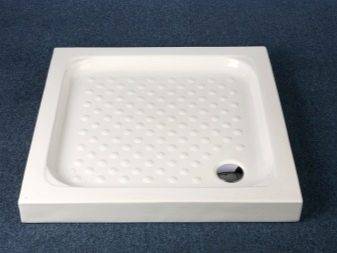
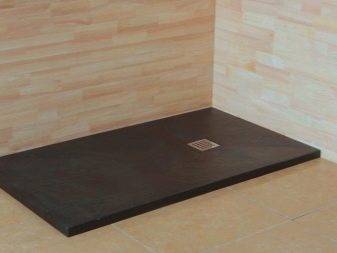
To take a shower comfortably, it is important to take into account the height of the side of the pallet. All presented models are divided into the following varieties: • deep - the height of the sides starts from 15 cm;
• deep - the height of the sides starts from 15 cm;
• medium - 6-12 cm;
• small - up to 4.5 cm.
The length of the sides of running models is:
• 90090050 cm;
• 90090070 cm;
• 10001000140 cm.
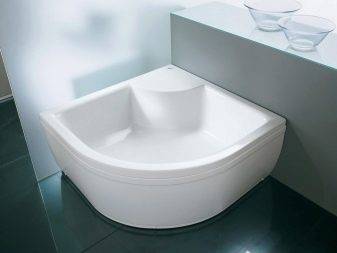
Double pallets with deep sides will not leave anyone indifferent. Such designs are designed for two people. The parameters of the rectangular shape of the bowl with beautiful curved lines make it possible to use it not only as a shower, but also as a bath. By type of materials of construction are:
• cast iron - the most durable and reliable products, but are characterized by high weight and prolonged heating of the surface;
• ceramic - the main advantage is high performance, but the structures are quite fragile and are not equipped with legs;
• products made of artificial stone - they attract with a beautiful surface structure and acceptable performance, but the high price and heavy weight are alarming;
• Acrylic - lightweight constructions with a beautiful surface, pleasant to the touch, but repels the material's susceptibility to deformation and various damages;
• wooden - eco-friendly material looks quite original in the shower, but due to the low resistance of the material to moisture, the service life is very short (about 3-4 years);
• plastic - a budget type of plumbing with a short operating period, suitable for arranging a summer shower in the country or in the yard of a private household.
For the manufacture of the pallet, natural stone and kvaril (improved acrylic) are also used. Products are distinguished by excellent aesthetic qualities, resistance to aggressive environments and durability.
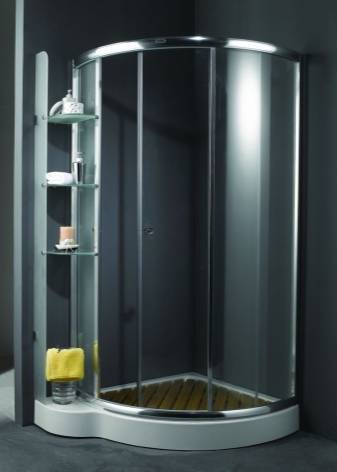
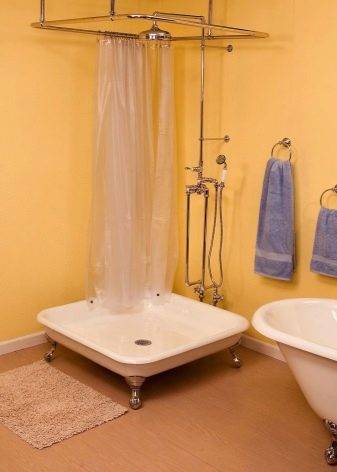
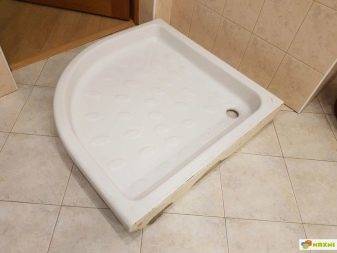
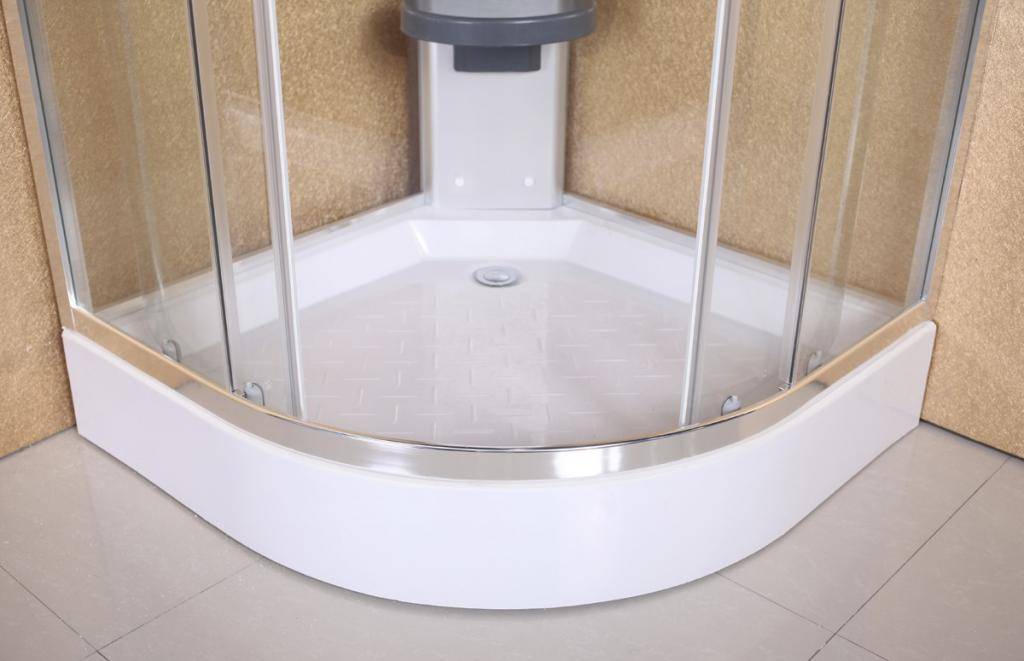
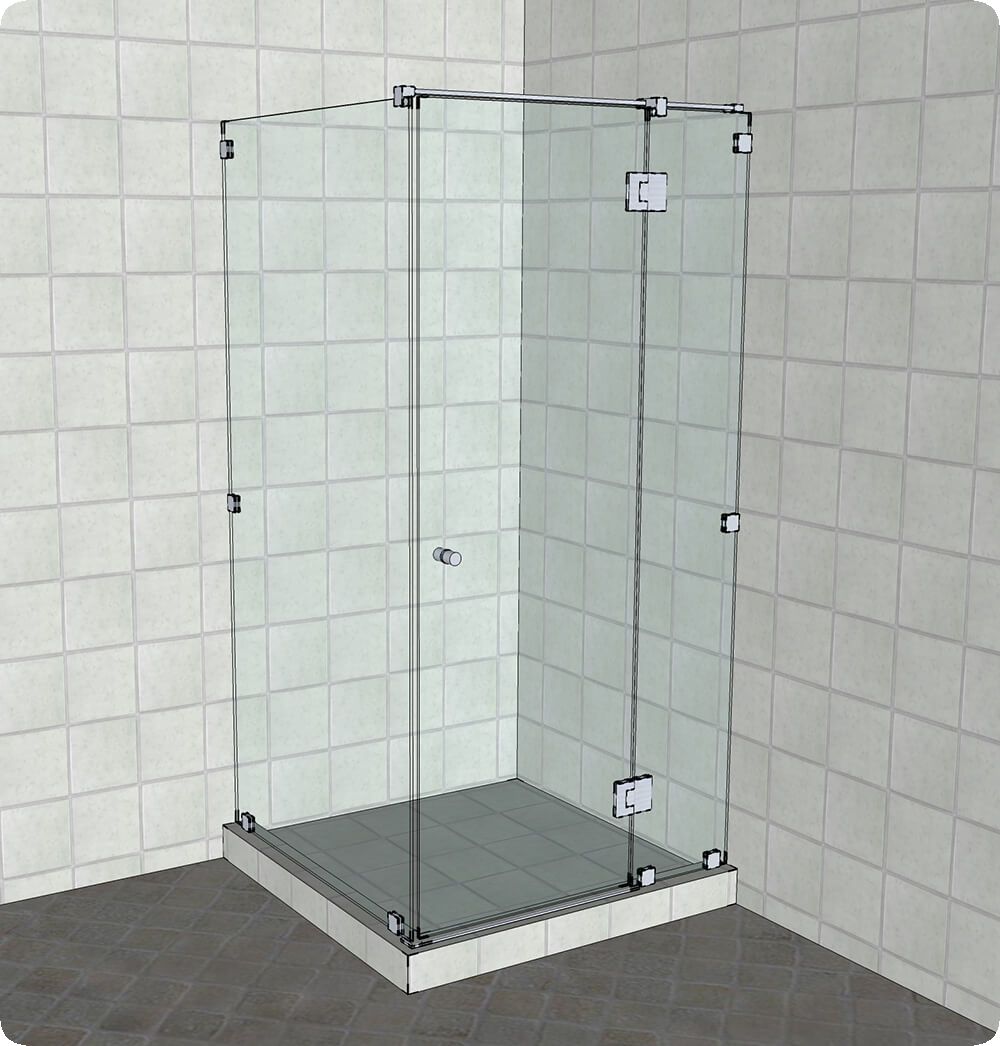
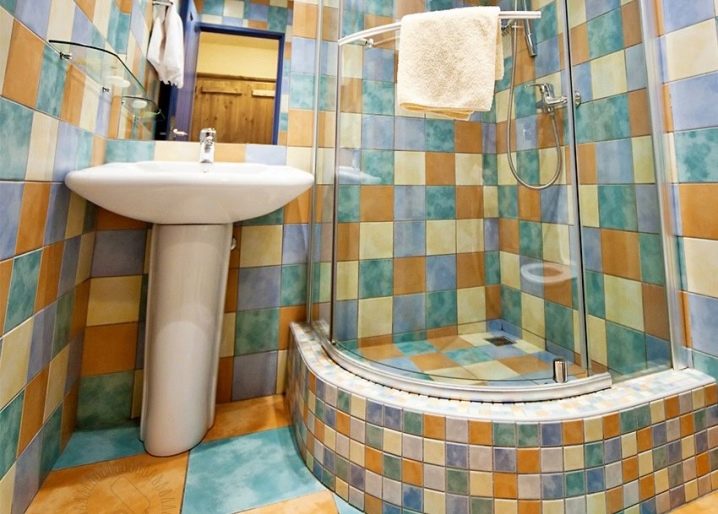
Benefits of a low pallet
Using a shower cabin with a low tray has a lot of positive aspects:
- all designs are disassembled according to models, so they fit perfectly into any interior and make it more alive;
- a shower with a low tray is perfect for a small room, its installation will not take much time;
- designs of this type are very diverse, they perfectly complement the interior and fit perfectly into it;
- due to the low tray and the presence of a tight door, water will not splash on the floor, in addition, washing the cabin is quite easy;
- while taking water procedures in such a bathroom, it is very convenient to monitor a child or help an elderly person.
However, despite this, installing a cab with a low pallet has its drawbacks.
Decorative design of the pallet
To finish the shower tray with your own hands in an apartment or a private house, use:
- ceramic tiles;
- tile moisture resistant glue;
- grout and water-repellent joint compound;
- notched and rubber spatula;
- roulette;
- building level;
- drill plus nozzle "mixer";
- pliers;
- tile cutter.
The work is carried out in stages:
- Using a drill with a nozzle, prepare the mixture.
- Tiles are placed in the direction from the sides and corner.
- With a notched trowel, spread the finished mixture on the wall.
- The tile is applied and then pressed down.
- The remaining tiles are laid similarly to the first. To ensure even masonry, you can purchase special crosses.
- To adjust the level of tile placement, a rubber hammer is used - they are lightly tapped in different places on the tiled surface.
- After 24 hours, proceed to finish the shower floor.
- When the glue has dried, the crosses are removed and the seams are overwritten.
- Water-repellent grout is diluted in accordance with the instructions and applied using a rubber spatula.
- After the grout dries, wipe the tiles with a damp cloth.
- At the end of the manufacture of the shower tray, the tiled surface is rubbed with a dry, clean cloth.
To obtain a piece of ceramic of the required size, a self-tapping screw is used, it is carried out along the intended line and the excess part of the tile is cut off with pliers.
Where will we build? We choose a place and determine the parameters
Having decided on the independent construction of a shower tray, first of all, you should determine the location of the future shower and the main parameters. Several factors can influence the decision:
First you need to determine the room in which the shower will be located. The shower cabin can be located in the bathroom, in the bathhouse of a private house; in some cases, it is placed in industrial premises - a workshop, a garage. In all cases, when determining the place of construction of the pallet, one should take into account the presence and type of foundation, the characteristics of the floors, if the shower is located in an apartment or on the upper floors of a private house. So, pallets in apartments and private houses on the upper floors should be made using a light screed and low sides in order to minimize weight. At the same time, taking into account the hygroscopicity of concrete floors, reliable waterproofing should be used.
The place of the shower tray inside the room depends primarily on the location of communications, that is, the possibility of supplying water to the shower and draining drain water into the sewer. The simplest and most budgetary solution is at the location of an existing mixer. In the same place, most likely, there will be a sewer pipe.
The shape and dimensions of the pallet largely depend on the imagination of the master. However, you should take into account the parameters of the premises, and ease of use, and security requirements. So, you should not erect a pallet that interferes with free passage in the room, which has sharp corners and protruding parts, especially from the entrance side. The most commonly used shapes are in the form of a square, rectangle or sector of a circle. It is worth considering the parameters of the facing material. So, when using facing tiles, it is advisable to make the dimensions of the pallet a multiple of the dimensions of one tile - this will significantly reduce the labor costs for cutting it. The height of the sides can also be different. Of course, if desired, you can turn the tray into a sit-down bath and even a mini-pool. However, this will be a completely different structure, which has different strength and mass parameters, and can lead to the collapse of load-bearing structures. In reality, the craftsmen consider the optimum height of the side to be 10–15 cm from the surface of the pallet floor


The experience of the master and the possibilities of the material from which the pallet is made are important. For example, when choosing a form, it is necessary to take into account the very possibility of building a foundation of such a configuration from bricks, or building a formwork for pouring a cement mixture.
Structures of complex shape, in addition, create additional difficulties in facing.


