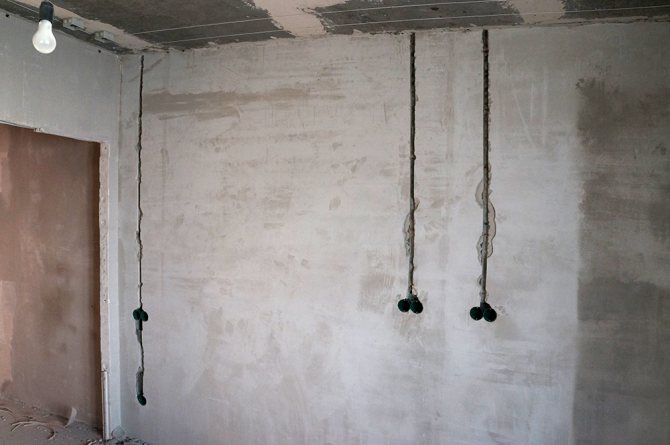
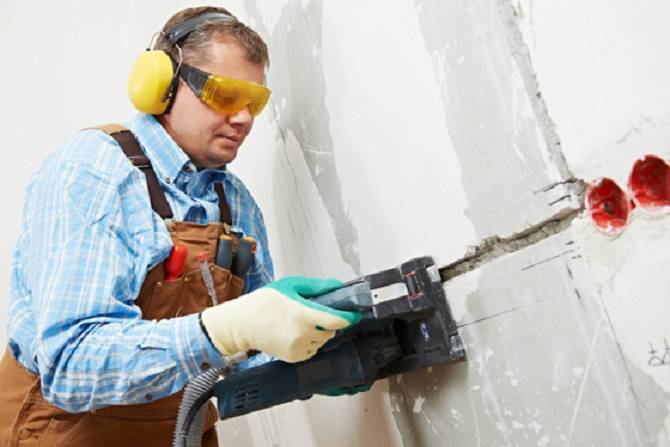
- Useful tips from professionals
- Distances, depth, strobe width
- Consequences of gating in a panel house
- Wiring in monolithic houses: features of electrical wiring
- Problem Statement
- Wiring in monolithic houses according to regulatory laws
- What is a monolithic house
- What can not be ditched in a monolithic house
- How to make hidden wiring in a monolithic house
- Design of load-bearing wall panels
- What is an internal finishing layer and why is it needed
- What is its thickness
- What should he be
- How to distinguish between finishing and protective layers
- What structural elements of the building can not be categorically ditched
- Shtroblenie in a brick house
- SNiP for wall chasing - Rezalmaz
- SNiP for wall chasing for electrical wiring
- SNiP for chasing load-bearing walls
- Additional Information
- Wall chipping technology
- Hammer and chisel
- Drill and chisel
- Perforator
- wall chaser
- Tool for chasing walls for wiring
- Chasing load-bearing walls snip – Electro
- How to ditch walls: basic rules
- Preparatory work
- What can you do with walls?
- Chasing walls during redevelopment
- Bearing walls of a panel house
- How to identify a load bearing wall
- Is it possible to ditch load-bearing walls and ceiling
- What can be difficult
- Danger of hidden pipe laying
- Danger of hidden wiring
- Diamond discs
- Features and rules of gating
- Strobe in the wall
Useful tips from professionals
- Before starting work, be sure to make sure that there are no hidden wiring in the wall. For this, special equipment is used. The new plan should be depicted on the drawing and left in case you need to drill a wall or carry out any actions on it.
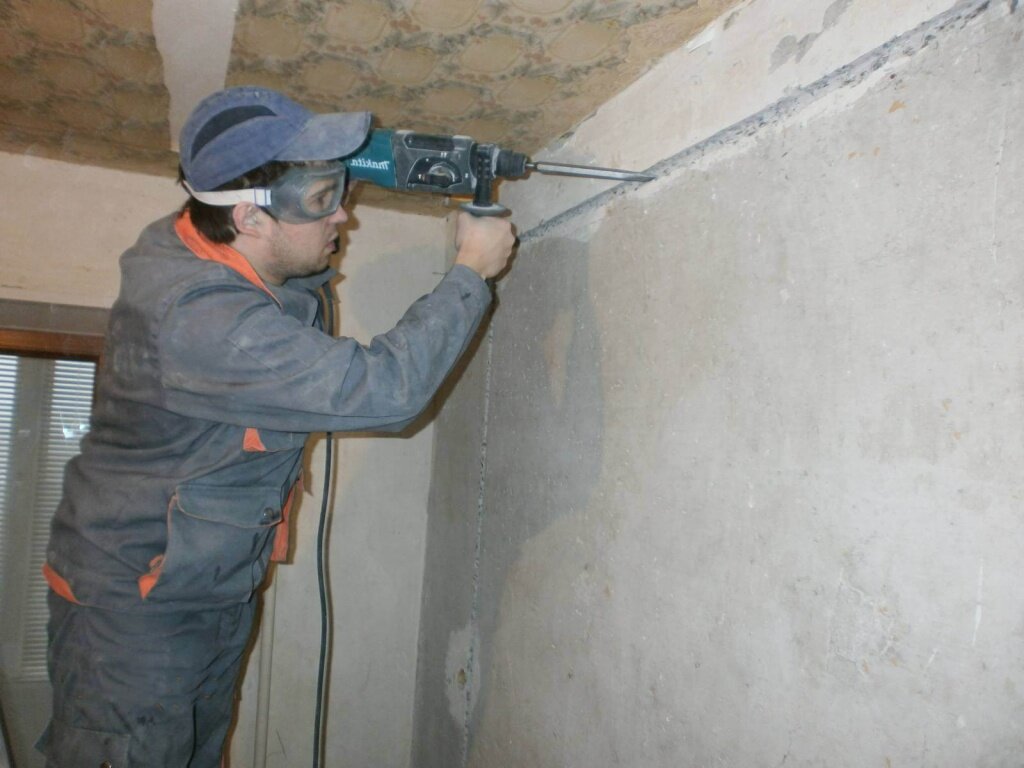
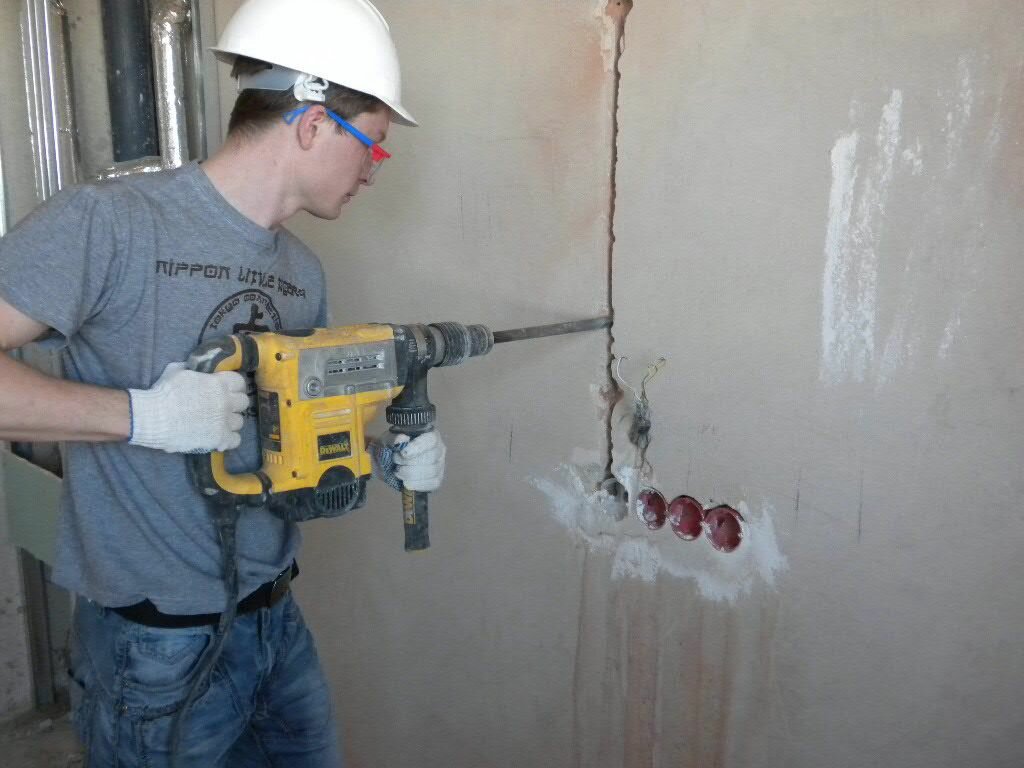
- The choice of the method of carrying out the work will depend on financial capabilities and the availability of tools. The cheapest but time-consuming approach would be to use a chisel and hammer. The future strobe must be divided into segments, walking along the marked lines with a chisel. The tool is installed along the edge. Then it should be installed across to knock out the desired depth.
- Work will go faster if you use a drill with a percussion function or a hammer drill. With the latter, you can use nozzles in the form of a spatula or a drill. Here the principle will be somewhat different. It consists in making many holes to a depth of 20 mm. Then the gaps between the holes are removed with a perforator blade. It should be placed along the line. Otherwise, you may encounter excess material knocking out, which then requires more mixture for embedding.
- If you are not afraid of dust, but do not want to spend money on a wall chaser, including renting it, you can use an angle grinder. It allows you to achieve smooth edges of the strobe. This method is most suitable for that stage of repair, when rough work is carried out, and dust for the premises is not so terrible. If the manipulations are carried out at a stage when there is already a fine repair in other rooms, you should be prepared for the fact that it will be difficult to cope with the resulting dust even with a vacuum cleaner.
It is very important to exclude the intersection of strobes.Before marking future grooves, you should check the walls for the presence of a metal frame using a detector.
A great way to avoid working with load-bearing walls is to run wiring in a loft-style room. The external location of the wires looks quite modern, eliminates the dusty work of chiselling near the walls, and also allows you to immediately understand where the communications are located and in what places you can drill the walls. If you do not know who to contact for a gating permit, you should find out where the design organization is located. It is she who determines the possibility of carrying out such work.
If you are a real lucky person, and you have a wall chaser available, you still need to be able to work with it. Since the equipment has a rather impressive mass, it is most convenient to make vertical grooves, moving from top to bottom. This will allow you to apply less force, because the equipment will move down under its own weight.
Distances, depth, strobe width
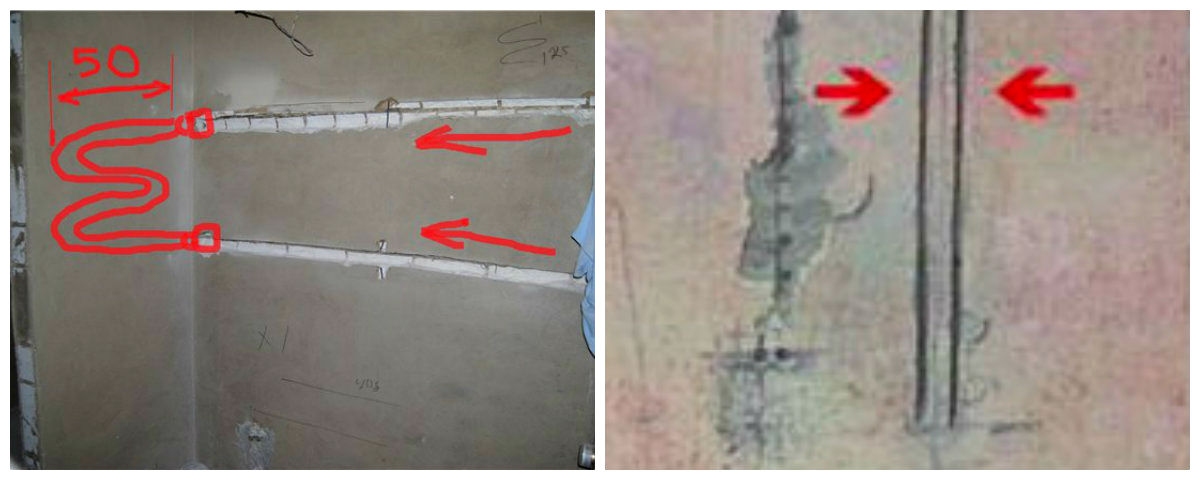
What nuances should be paid attention to when chasing walls for cable? First, these are the minimum distances and indents. Please adhere to the following guidelines and rules:
max strobe depth — 25mm
when installing one cable without corrugation, a width of up to 5 mm is sufficient
when using corrugations - 20-25mm
Also pay attention to the location of the groove relative to the socket. It shouldn't go straight down the middle.
Always orient it closer to the edges.And left or right also plays a role.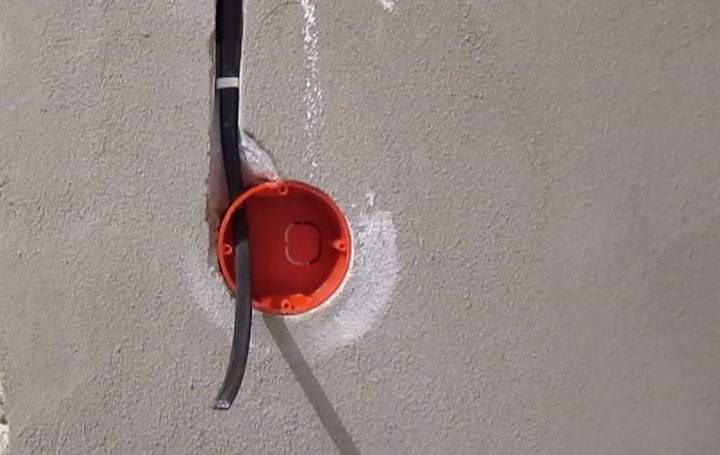
If the future socket or switch is close to the doorway, then it would be more correct to hold the gate exactly to the far edge from the door. Otherwise, when installing the doors, installers with a long dowel will damage the cable when drilling.
Even when gating, they often use a laser level. First, it facilitates and speeds up the work. And secondly, the cable will be laid perfectly evenly.
In the future, when drilling a screw into the wall under the picture, you will know exactly how many millimeters away from the outlet you have a cable under the plaster.
There will be no need to use all sorts of tricky devices and fancy wall scanners to detect wires under the plaster. 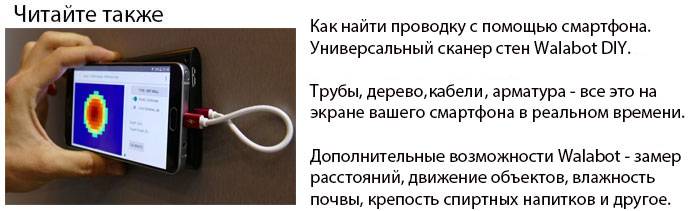
The correct cutting direction is from top to bottom. You will be less tired, and gravity, on the contrary, will be an assistant during work.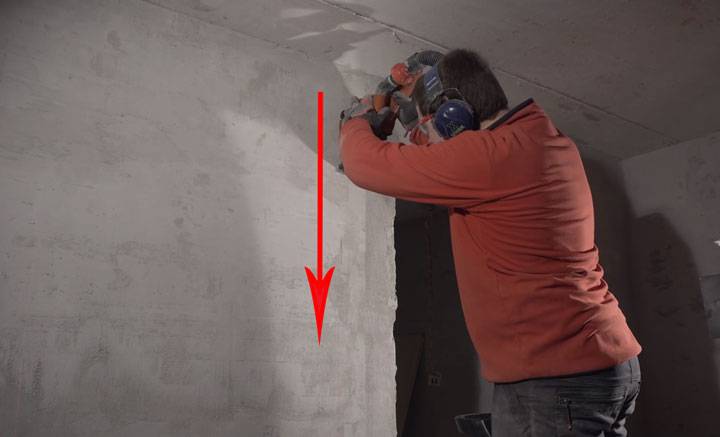
It is enough to attach the wall chaser to the wall, and then high-quality discs and the force of gravity of the earth will do most of the work for you.
Consequences of gating in a panel house
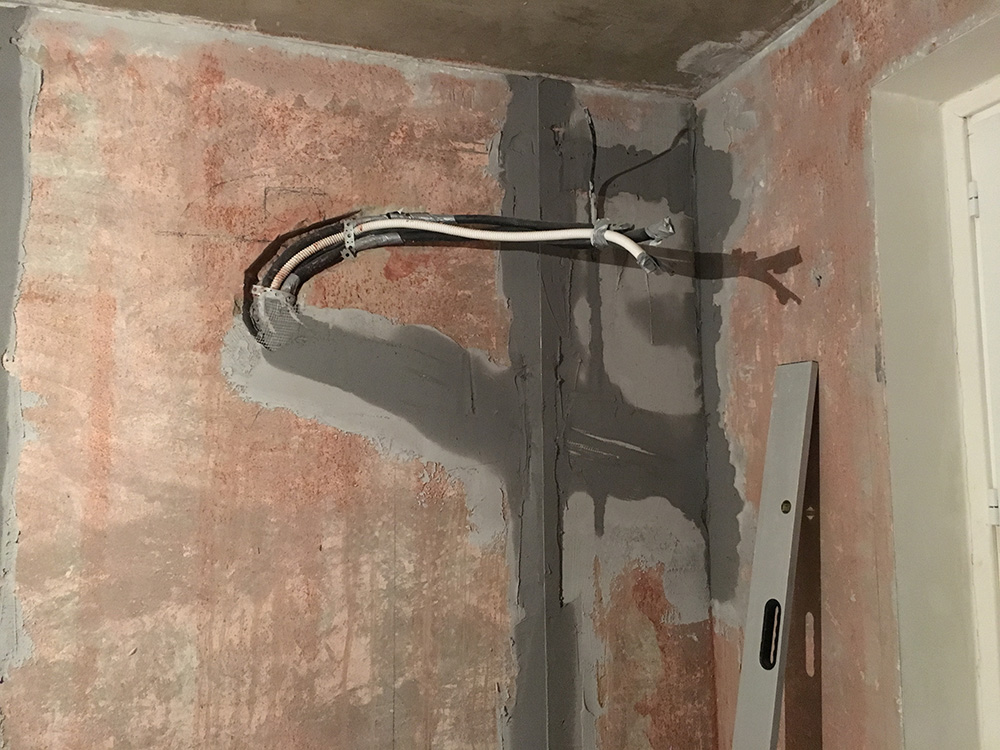
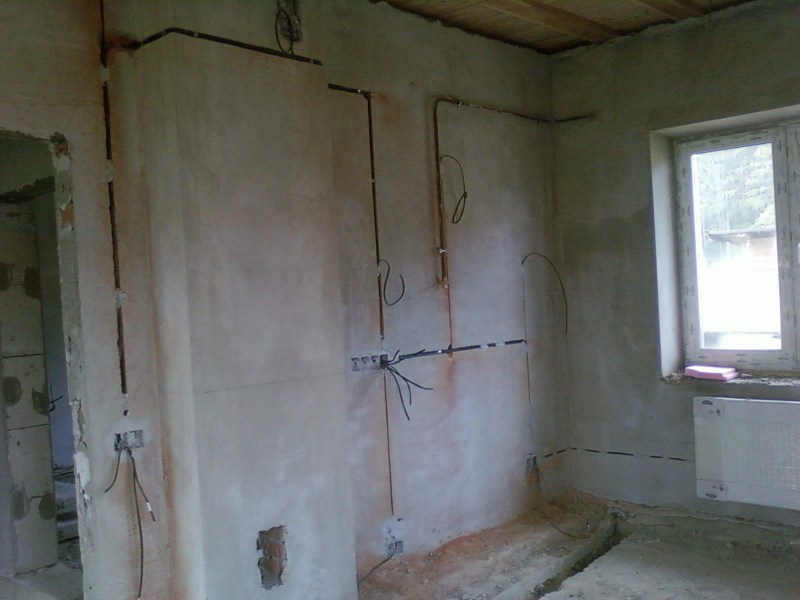
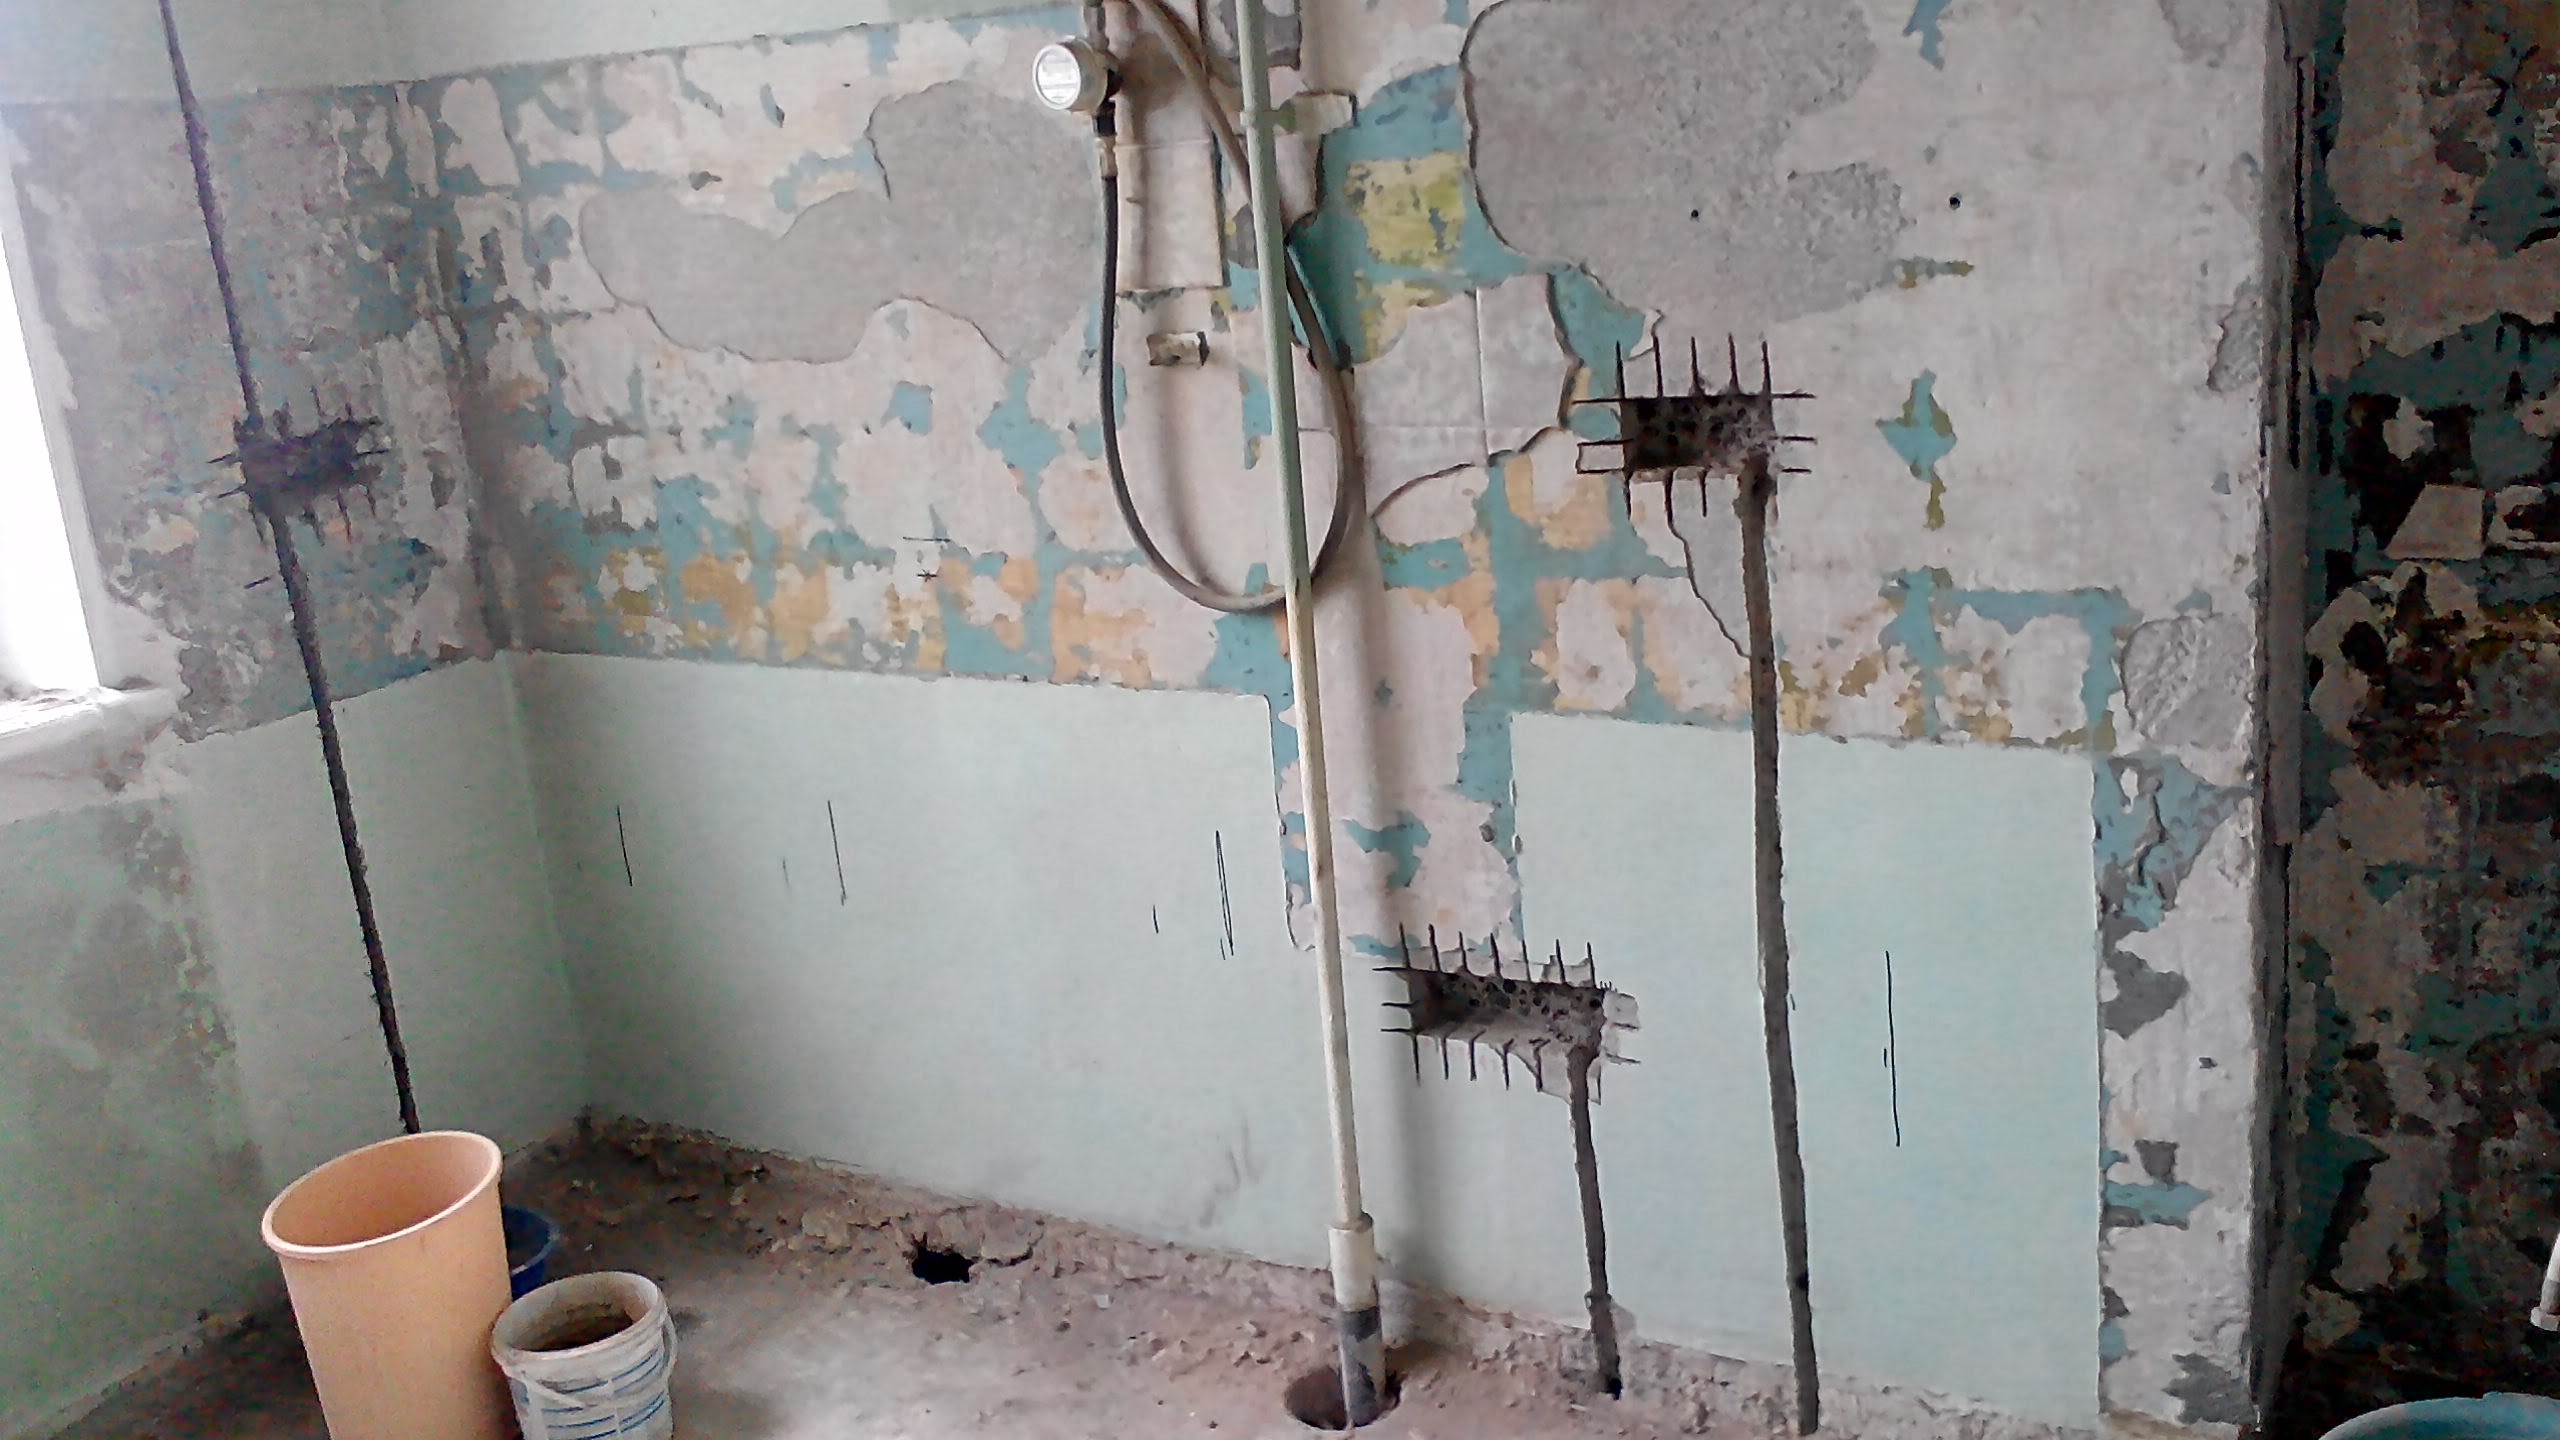
Hi all! Usually I found answers to all my questions through the search, thanks to the forum and its inhabitants! But now I decided to ask for advice. The bottom line is this:
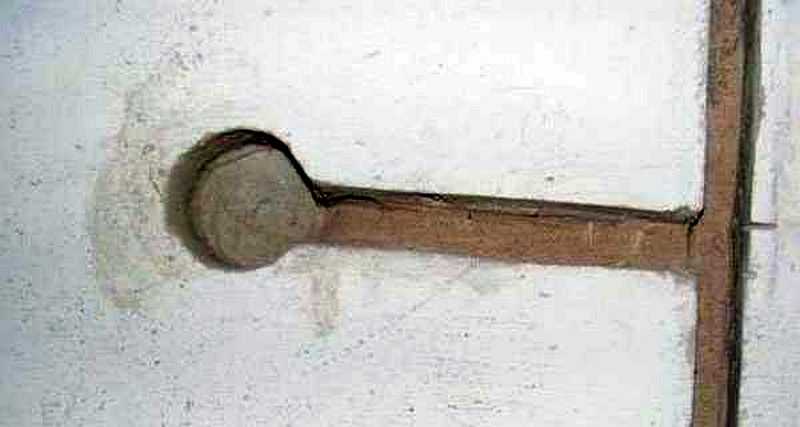
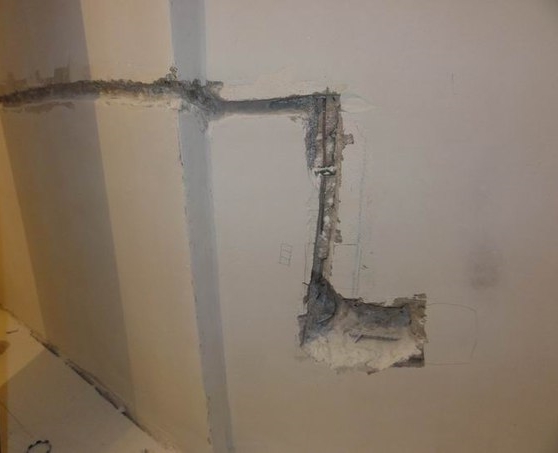
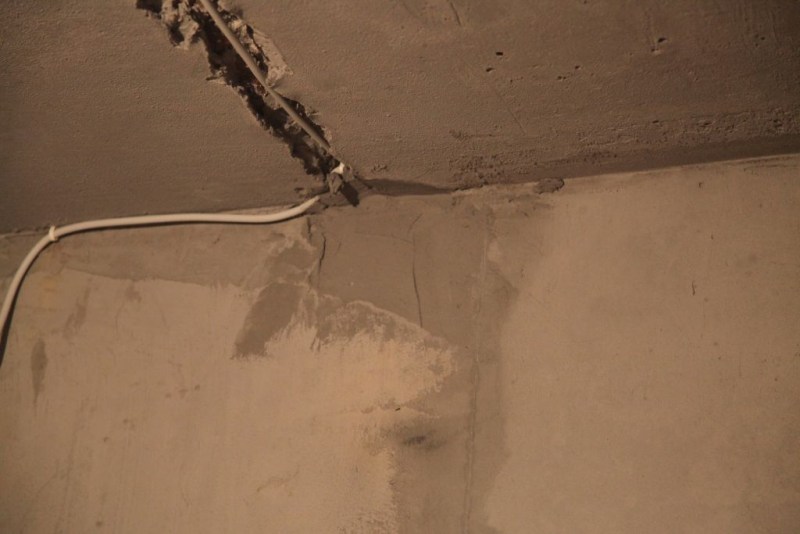
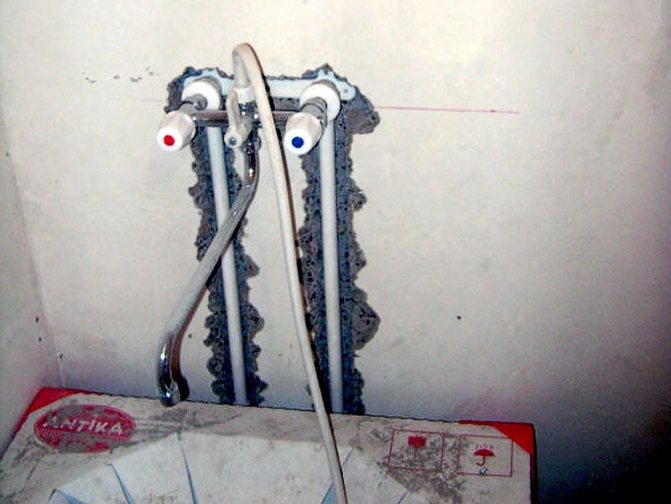
A couple of years ago I started a bathroom renovation. The house is an ordinary socket, P-30 series. Through one well-known portal, a kind of social network for customers and teams, performers were found. The performers ultimately turned out to be extremely unscrupulous, but we will only talk about one point. For laying pipes, they drilled a load-bearing wall, and horizontally. For a thickness of 20 to 30 mm (under 20 mm polypropylene). I began to worry about this right now because I began to master work technology and what is possible and what is not.Now I'm wondering what to do with it. I am attaching a photo. Does anyone know how thick this wall is? Is it worth contacting MNIITEP with this question? (the institute that designed the house). In short, I want to hear people's opinions. Unfortunately, there are no photos with grooved, but not plastered walls.
Up to 3 cm in depth and up to 3 m in length are allowed technologically, but in practice this is not observed. If so far there are no problems, do not worry - everything is fine. The thickness of the plaster layer also compensates for interference with the slab.
Thank you! I really hope nothing bad happens.
The event has already happened.
and a couple of years ago - the booth can be ditched in any direction - it holds nothing but its own weight
Pay attention to the photo, the cabin is dismantled
and a couple of years ago - the booth can be ditched in any direction - it holds nothing but its own weight
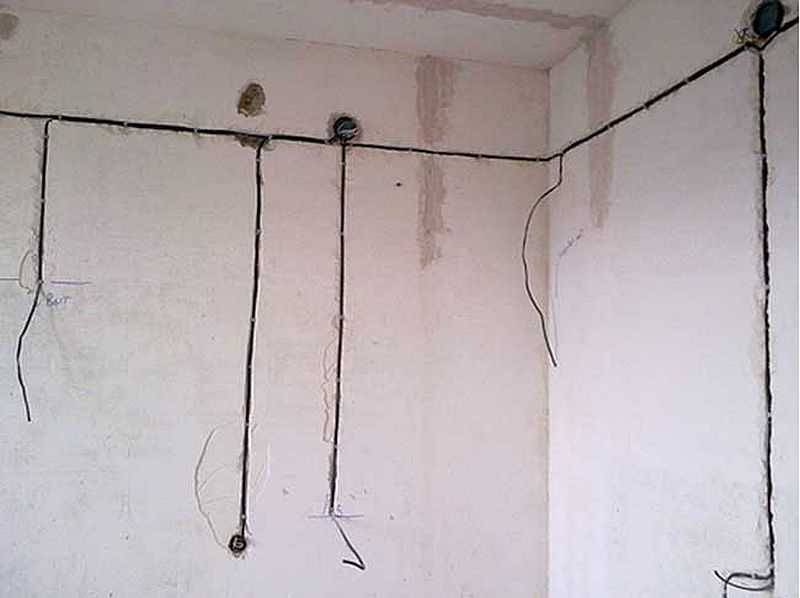
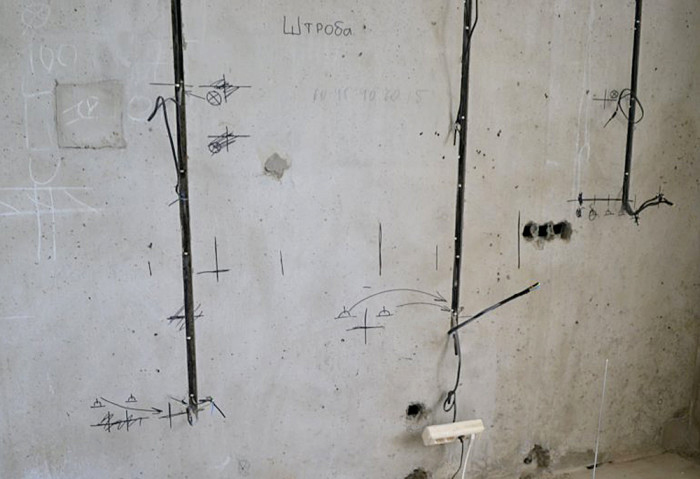
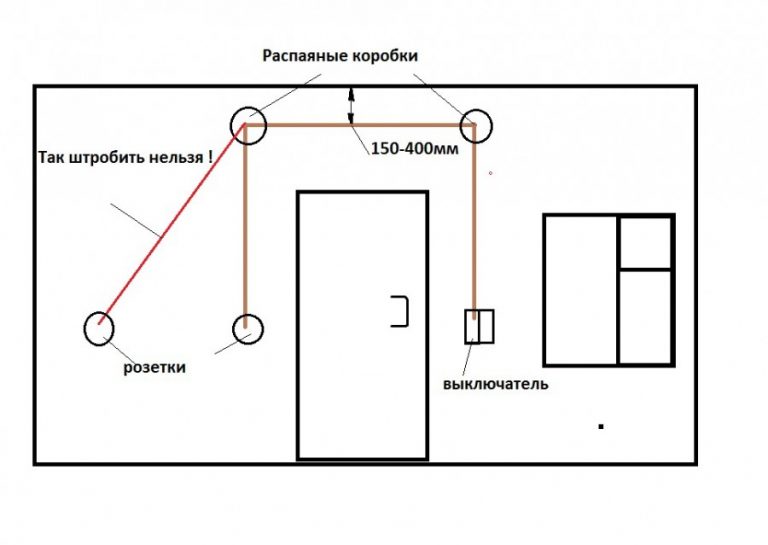
Yeah. Photos and plan - from different objects.


And what regulatory document allows this, for me for general development.
apparently, tom did not pay attention to the horizontal gating. previously there was Decree of the Government of Moscow dated February 8, 2005 N 73-PP "On the procedure for the reconstruction of premises in residential buildings on the territory of the city of Moscow":
Annex 2 LIST OF RESTRICTIONS ON MEASURES (WORK) FOR THE RECONSTRUCTION OF PREMISES IN RESIDENTIAL HOUSES
- In residential buildings of standard series is not allowed: 4.1. Device openings, cutting niches, punching holes in pylon walls, diaphragm walls and columns (racks, pillars), as well as in the locations of connections between prefabricated elements. 4.2. The device shtrab in horizontal seams and under internal wall panels, as well as in wall panels and floor slabs for the placement of electrical wiring, piping.4.3. Installation of additional openings in the wall panels of rooms adjacent in height without agreement with the design organization - the author of the project of a residential building or its successor, and in their absence - without additional expertise.
now (from 01.01.2012) PP-580.
it's all for Moscow. in the regions there are other numbers of Decrees.
The plan is a mirror in relation to mine, but it reflects the essence. Most of the resources posted just such an option.
Yeah. Photos and plan - from different objects.
I already got acquainted with this document, it’s a pity I didn’t know about it two years ago, but I trusted the “experience” of the brigade
- In residential buildings of standard series is not allowed: 4.1. Device openings, cutting niches, punching holes in pylon walls, diaphragm walls and columns (racks, pillars), as well as in the locations of connections between prefabricated elements. 4.2. The device shtrab in horizontal seams and under internal wall panels, as well as in wall panels and floor slabs for the placement of electrical wiring, piping. 4.3. Installation of additional openings in the wall panels of rooms adjacent in height without agreement with the design organization - the author of the project of a residential building or its successor, and in their absence - without additional expertise.
now (from 01.01.2012) PP-580.
it's all for Moscow. in the regions there are other numbers of Decrees.
Wiring in monolithic houses: features of electrical wiring
Hello. The topic of today's article is quite relevant, although in practice, it is of little concern to apartment owners in new and old houses. The question that we will discuss in this article is whether it is possible to do and how to do hidden wiring in monolithic houses.
Problem Statement
Judging by the publications you read and the practice of working in new buildings, it seems that wall chasing in monolithic houses is not a problem at all. In practice, hidden wiring associated with wall chasing in apartments in apartment buildings is done according to the following rule:
It is possible to ditch any wall, in any direction, without disturbing the reinforcing mesh. It is important, the subsequent sealing of the strobe, with a cement-sand mortar.
But is it really so? Let's start with the regulations.
Wiring in monolithic houses according to regulatory laws
To begin with, let's see what they "say" about hidden wiring in regulatory documents.
Many people remember SNiP 3.05.06-87. But these rules apply to electrical work at enterprises, and does not apply to residential buildings. There is SP 31-110-2003, which deals specifically with residential buildings. There is one point in it on hidden installation of electrical wiring: 14.5.
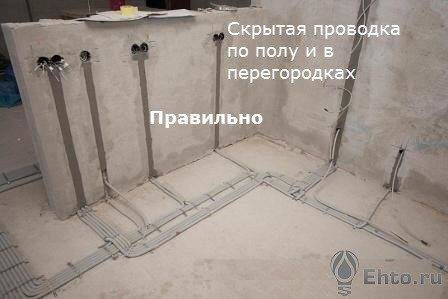
The essence of this paragraph is as follows: hidden, non-tightening electrical wiring is allowed as follows:
- In the strobes (furrows) of the walls,
- In the partitions
- in the overlap,
- Under the plaster layer
- In the floor screed layer,
- In the voids of building structures.
We look at the basis of the basics: GOST R. 50571.1 - GOST R. 50571.18. These are 18 electrical laws. We see: Installation of electrical wiring should not reduce the performance of building structures ... (GOST R. 50571.15-97).
Important! It is worth noting that for Moscow, there is a Decree of the Government of Moscow 25-10-11. "On the procedure for the reconstruction of premises in residential buildings in the city of Moscow"
Clause 11.11, it says: Prohibited:
- Make strobes in horizontal (!) seams and under interior wall panels;
- Make grooves in wall panels and floor slabs for electrical wiring, piping.
The question arises, maybe I'm looking in the wrong place and the wiring in monolithic houses is understandable by device of this type at home.
What is a monolithic house
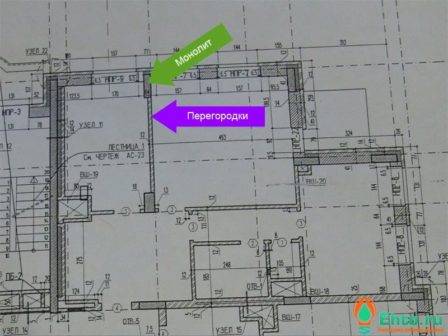
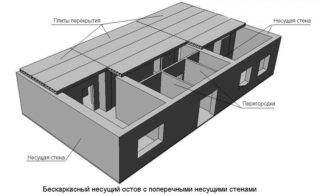
Let's remember what a monolithic house is. In fact, a monolithic house is a concrete box, where the supporting structures are external walls and / or concrete columns and elevator shafts. The internal partitions of monolithic houses are made of foam blocks or other similar material.
What can not be ditched in a monolithic house
Based not on a direct ban on wall chasing in a monolithic house, but on regulations that prohibit any structural changes that could affect their performance, it is reasonable to limit the installation of hidden wiring associated with chasing. You can not make strobes:
- In all load-bearing elements of a monolithic house, including external walls, floor and ceiling;
- In columns and beams of a monolithic house.
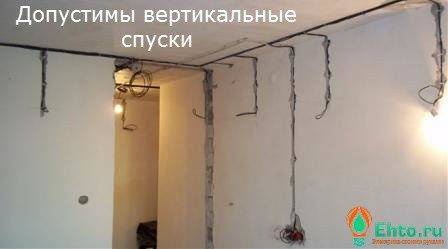
Important! Unlike a panel house, in a monolithic house one cannot even make furrows for descents (ascents) of cables to switches (sockets) located on load-bearing walls (columns). Note: The ban on wall chasing in monolithic houses applies to load-bearing monolithic structures of this type of houses
The ban on gating internal partitions made of cinder blocks and other similar materials does not apply
Note: The ban on wall chasing in monolithic houses applies to load-bearing monolithic structures of this type of houses. The ban on gating internal partitions made of cinder blocks and other similar materials does not apply.


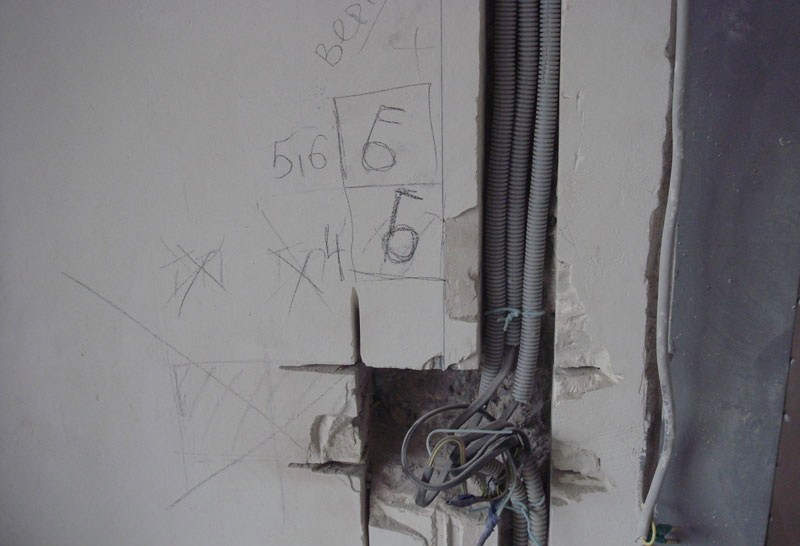
How to make hidden wiring in a monolithic house
We will formulate the rules for concealed wiring in monolithic apartment buildings, which will make it possible to avoid violations of standards and construction rules as much as possible.
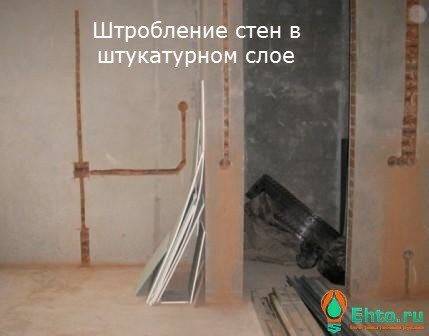
Note: if it is not possible to avoid the manufacture of chisels in the load-bearing walls of a monolithic house, this is done without affecting the vertical reinforcement in the concrete monolith. The depth of the groove should be minimal, about 30 mm. For the manufacture of shtraba, the method of vertical cutting of concrete with minimal chiseling at an angle is used.
To avoid problems with supervisory authorities, you need to:
Design of load-bearing wall panels
In the context of this article, there is no need for a detailed consideration of all structural elements. We are only interested in two of its elements: the inner finishing and protective layers.
What is an internal finishing layer and why is it needed
As obvious as the answer may seem, let's turn to standards.
GOST 11024-2012
Based on this definition, it is logical to assume that the partial removal of this layer will not lead to deformation of the wall panel, but this circumstance itself does not mean anything. For its practical use, you need to know the thickness and its composition is very desirable.
GOST 11024-2012 Even looking to this picture one can imagine what would happen if at least one of the rods were cut.
What is its thickness
Let's turn again to the same GOST (11024-2012).
It is clear that the nominal thickness cannot always be maintained, so the current standard provides for a deviation from the nominal.
Please note that the keyword of paragraph 6.2.3.8 is “no more than”, i.e.
the thickness of this coating can be so insignificant that it is simply impossible to use this circumstance in practice.
What should he be
GOST 11024-2012
In the paragraph explaining what should be the thickness of the inner finishing layer (6.2.3.8), the keyword was “no more”, in this case, “no less” and this is no coincidence, but given the operating conditions, the dimensions and location of the trajectory of the electrical wiring with subsequent sealing of the partial of destroyed concrete with a similar solution, it can be assumed that not one of the functions that the protective layer should provide will be lost.
How to distinguish between finishing and protective layers
Yes, not really. Surface prepared for painting without puttying (categories A2–A4), increased thickness of protective concrete, its composition, can only be indirect signs the fact that concrete products really have a finishing layer.
What structural elements of the building can not be categorically ditched
Floor slabs and crossbars. However, this is not necessary.
Floor slabs have alternating longitudinal voids. Therefore, to stretch the electrical wire in the plate, it is enough to make two small holes. One, closer to the end, the other at the location of the consumer and pull through them, with the help of steel wire, electrical wires.
If you need to lay wires on the floor, then in any case, either a screed or a void will be under the flooring.
As for the crossbars, there is another consideration. Protruding geometric shapes are unlikely to decorate the interior of the apartment. Therefore, they still have to be hidden in one way or another. Under the coating, you can and should hide the electrical wires along the way.
Shtroblenie in a brick house
There are some job restrictions.Due to a noticeable decrease in the bearing capacity of surfaces in flush mounting, it becomes more difficult to determine the location of the wires.


Therefore, it is important to follow special rules:
Arrange strobes only vertically or horizontal.
The length of the groove is three meters maximum.
In terms of gating, a minimum of turns is required.
The maximum dimensions of the strobe are 2.5 * 2.5 cm.
They retreat from doors and window openings by 10 centimeters, down from the ceiling - by 20.
Stages of work:
- Making a plan on paper. It marks all the locations of sockets, switches, installation of lamps, air conditioning.
- Marking on the wall.
- Cleaning of the working area, preparation for the process.
- Shtroblenie.
- The final step is cleaning.
wall chasing for the home master is a very doable task. Carry out work with power tools and manually.
SNiP for wall chasing - Rezalmaz
Chasing is a type of construction work that is performed when it is necessary to install electrical wiring and other communications. It involves making special recesses (strobes) in the walls. with the help of a special equipment. Gating is a complex labor-intensive process that requires the involvement of highly qualified specialists. Poor performance of these works can lead to deformation of the supporting structures, damage to communications and the creation of an emergency, up to the collapse of the house.
SNiP for wall chasing for electrical wiring
Chasing walls according to SNiP requires some preparatory work.Before proceeding with the laying of recesses, it is necessary to familiarize yourself with the layout of existing communications and check their location using special equipment. This is necessary in order to prevent damage to pipes, cables and wires, as well as to exclude the possibility of injury to workers.
SNiP for chasing load-bearing walls
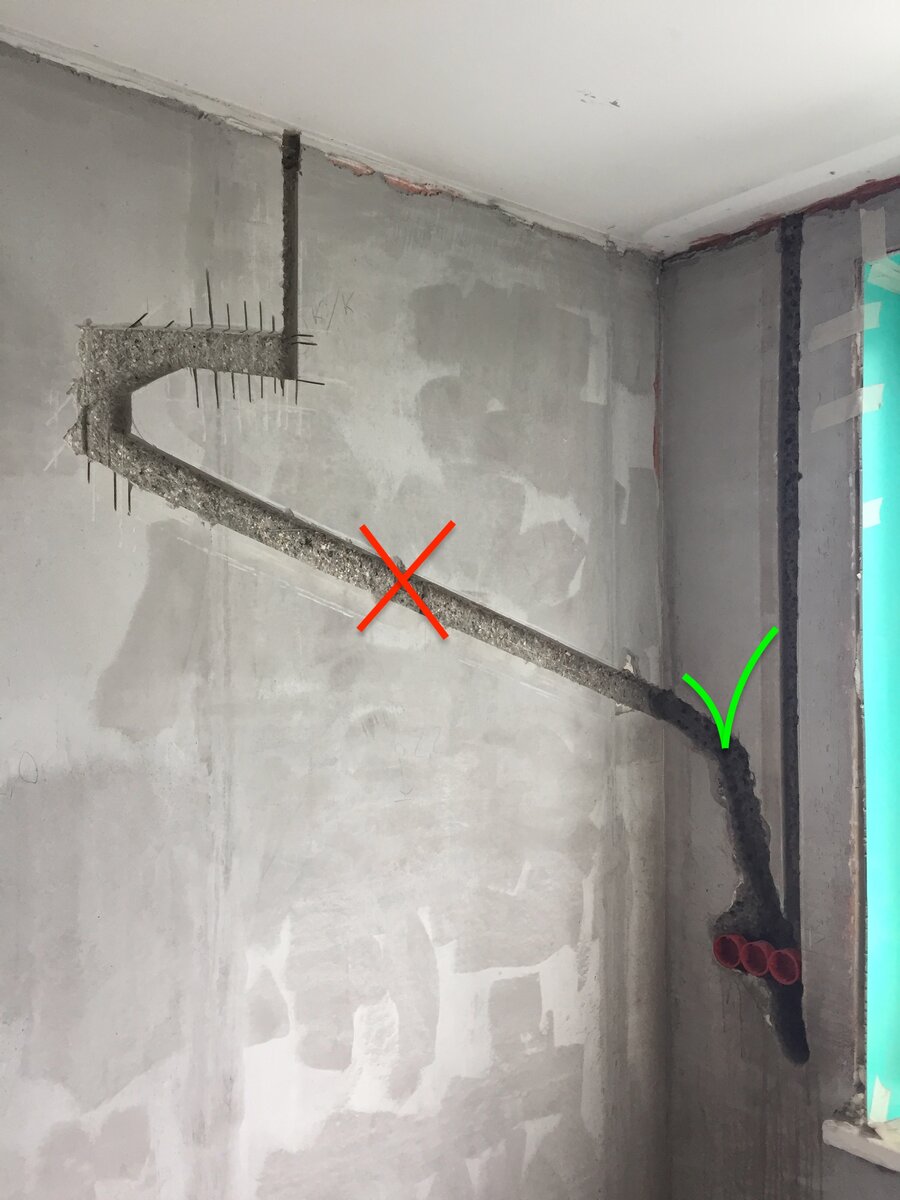
Chasing load-bearing walls according to SNiP requires compliance with the following rules:
- recesses (strobes) must be laid either vertically or horizontally, diagonal chasing is strictly prohibited;
- horizontal recesses can be made no closer than 150 mm from the ceiling;
- vertical recesses - no closer than 100 mm from windows, doors and corners;
- if the gate is planned to be placed parallel to the gas pipeline, the distance between them should be at least 400 mm;
- the dimensions of the gate should not exceed the following restrictions: length - 3000 mm; width and depth - 250 mm;
- on walls with a thickness of more than 800 mm, recesses must be laid along the shortest path;
- on walls less than 800 mm thick - parallel to the construction lines.
These are far from all the SNiP standards for wall chasing, there are other rules that must be observed when performing this work.
The RezAlmaz company will perform wall chasing for electrical wiring according to SNiP and provide you with complete safety. Our specialists have extensive experience and high qualifications. We use modern reliable equipment, so you can be sure of the high quality of the services provided.
Additional Information
| Name of works | Brick (cost of 1 linear meter) in rubles | Concrete (cost of 1 linear meter) in rubles |
|---|---|---|
| Strobe 2x2 cm.wall chaserwith vacuum cleaner on the wall | 200 | 300 |
| Shtroba 2x2 cm. Shtroborezom with vacuum cleaner on the ceiling | 400 | |
| Socket socket | 200 | 300 |
| Shtrobe under the air conditioner | 1000 | 1500 |
Wall chipping technology
There are several ways to pierce a wall:
Hammer and chisel
 The channel can be slotted by tapping the bit with a hammer
The channel in the plaster layer can be punched with a hammer and chisel.
Plaster is essentially a soft material.
By lightly tapping the hammer on the bit, a channel of the desired width is pierced. A chisel can be used as a chisel.
Drill and chisel
A drill for concrete is inserted into the drill chuck. Holes are made at small intervals along the entire length of the strobe. Then the channel is pierced, removing the concrete between the holes with a chisel.
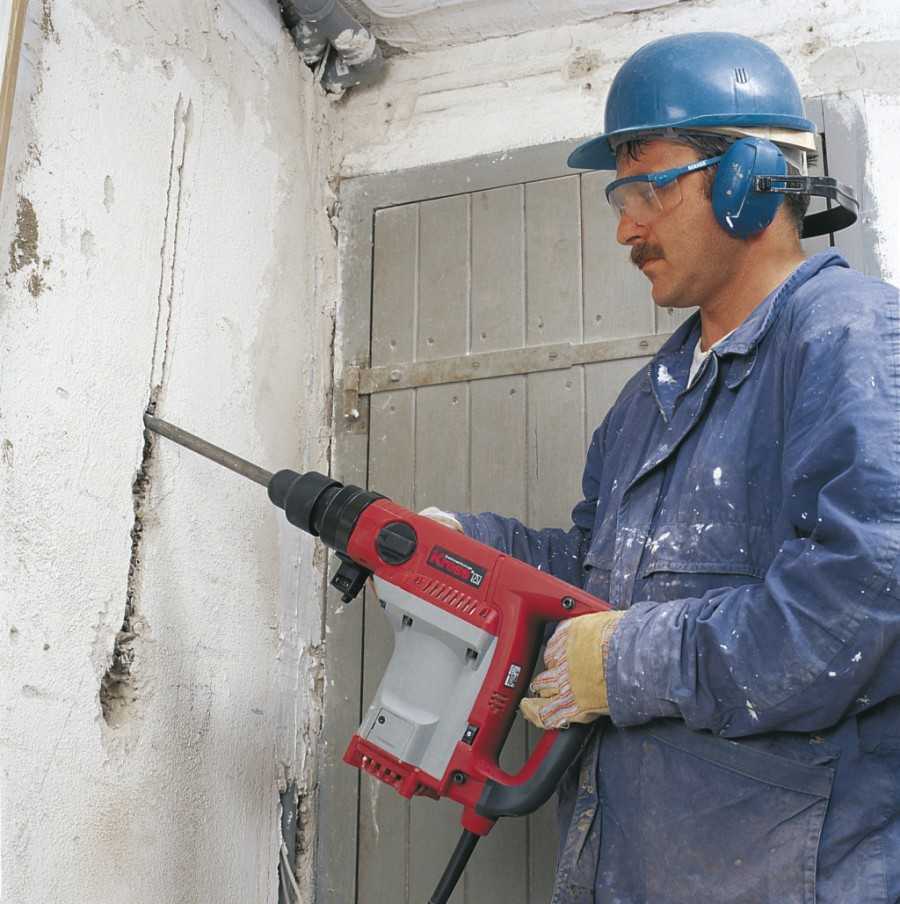
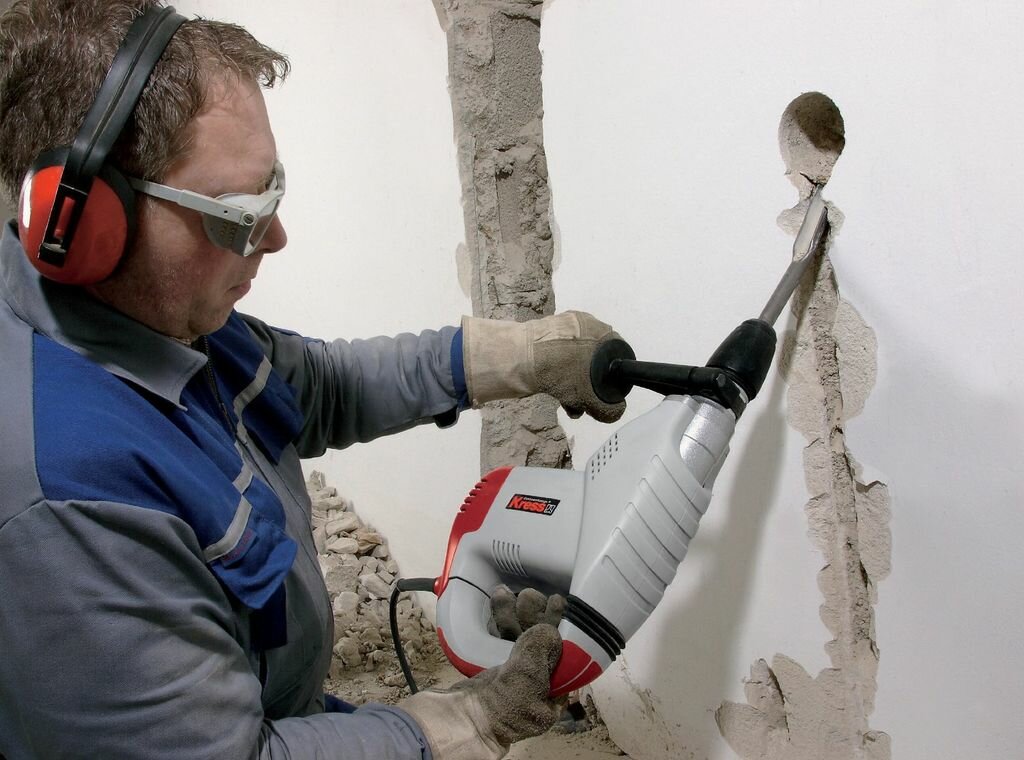
Perforator
A tip in the form of a spatula or peak is inserted into the tool. Working in the mode of a jackhammer, the perforator knocks out a strobe of the desired depth and width in concrete.
wall chaser
 Wall chaser device
The power tool is equipped with one or two cutting discs. Double-disk wall chaser allows you to cut channels of various widths. The distance between the cutting discs is adjusted manually.
Tool for chasing walls for wiring
Now a little about how to make a strobe for wiring in a non-load-bearing wall and how to make a strobe in concrete. It is best to cut through the strobes with a special tool - a strobe cutter. It has two diamond cutters, the distance between which is adjustable. the depth of the strobe for wiring can also be adjusted. As a result of the operation of this tool, two grooves are obtained, the material between which is then removed using a scarpel or a perforator. As a result, a good strobe with smooth walls is obtained.The tool itself is also equipped with a casing to avoid dust and chips during its operation. The strobe can also be made simply with a diamond cutter. It is highly not recommended to make strobes with a jackhammer or perforator, as they easily lead to chips, and the surface itself is uneven. Also, using a puncher, it is difficult to track the depth of the strobe.

Wall chaser.
Chasing load-bearing walls snip – Electro
How to ditch walls and why, in principle, do it? For example, in Soviet-built houses, switches and sockets are located approximately at eye level, and the modern approach to the layout of the premises involves the placement of these elements at the level of the lowered hand. Another reason to carry out wall chasing is to replace old electrical wiring with a new one or increase the number of outlets so that more household appliances and other equipment can be connected.
Wall chasing is one of the first steps in renovating a room. It is carried out before wallpapering begins, and even before the walls are leveled. After puttying, the wall should be perfectly flat and ready for finishing, so the chasing should already be completed when you pick up a spatula and putty.
How to ditch walls: basic rules
- Before you start chasing the walls, take a sheet of paper and draw on it the layout of sockets, switches, outlets for connecting lighting fixtures, etc. Only after the gating route has been fully worked out, you can take up the tool.
According to SNiP, gating can only be carried out horizontally or only vertically, that is, parallel to the main structures of the house.An inclined arrangement of strobes is allowed only if you are laying wiring in the attic, where there are sloping walls.
Speaking about how you can ditch the walls horizontally, we note the maximum approximation to the floor slabs: it should not be over 150 mm. Horizontal strobes cannot be made in load-bearing walls.
Vertical chasing should be carried out at a distance of 400 mm from gas stoves and 100 mm from the corners of the room, window and door openings.
The maximum dimensions of the strobe are 25x25 mm. The maximum length is 3 meters.
How is it allowed to ditch the walls in terms of the trajectory of the furrow? It is desirable that it be straight, that is, it does not change at all from vertical to horizontal direction and vice versa, or it changes only once. This does not take into account the bends of the wiring in the corners of the room.
Preparatory work
The first thing to do is to make sure that no hidden wiring is already located along the gating route you have chosen.
At a minimum, you can damage the working wiring, as a maximum, harm your health by hitting the live wires with a tool.
If nothing interferes with gating, make markings on the wall. It is better to cover the exit from the room with a damp cloth or film so that dust does not spread throughout the apartment.
What can you do with walls?
The cheapest way is with a chisel and hammer. It will take a long time to gouge, the furrow may turn out to be uneven, but you do not have to spend money on the purchase of specialized equipment.
First, notches are made along the edges of the furrow for 1-2 chisel widths. After that, the chisel is installed across the furrow, and part of the wall is knocked out.Then you can immediately deepen this segment to a given level (by default - 25 mm), or you can remove the top layer along the entire length of the strobe and only then return to the deepening. We note right away that in this way strobes are made in the walls of more or less soft materials. A chisel and a hammer are unlikely to be able to cope with concrete.


A faster and cleaner way is with a rotary hammer or impact drill. However, the furrow in this case may not turn out to be very even.
Prepare the nozzle with a short wide drill and a spatula. First, make holes with a drill along the entire length of the furrow. Hole depth - 25 mm, pitch - 10-15 mm. After that, change the drill to the blade and create the furrow itself
Important: do not put the spatula across the strobe, otherwise you risk chipping off an extra piece of the wall. However, with all your desire, the strobe is unlikely to turn out neat, but there will be a minimum amount of dirt and dust
Chasing walls during redevelopment
LLC "MOStroyproekt" is coordinating the redevelopment, we will write about the chasing of the walls with references to the decrees of the Moscow government.
508 PP paragraph number 10:
You can still partially use this item:
What happens if the bearing capacity of the wall decreases?
If nothing collapses, then you're in luck. Over time, cracks will appear on the walls.
Most likely, the neighbors will not like it, they will call the representatives of the Moscow Housing Inspection. Moszhilinspektsiya will write you a fine. And the neighbors will sue you because their property has been damaged. Theoretically, you can lose your apartment and still owe (pay the cost of apartments in your section of the house).
After shtrobleniye, the house may collapse. We will provide some pictures:
Estimate the depth to which the builders went deep.
House collapse.
Crack on the facade of the house.
This picture is most likely not real, but it looks very menacing ...
A section of the house collapsed, two dead.
The Ministry of Emergency Situations disassembles the collapsed house.
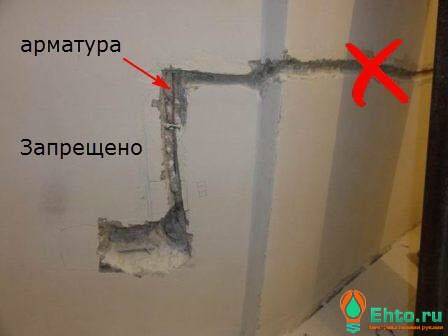
This reinforcement was obviously not made according to the project, it is dangerous to live in such a house. Photos of the correct reinforcement of the opening in the load-bearing wall.
So it’s definitely not worth chasing a load-bearing wall for an air conditioner.
You can see the armature that was cut.
Such reinforcement does practically nothing.
But the builders are "proud" of the work done. Here the width of the opening clearly does not correspond to the permitted dimensions.
At least it looks dangerous.
A section of the house collapsed.
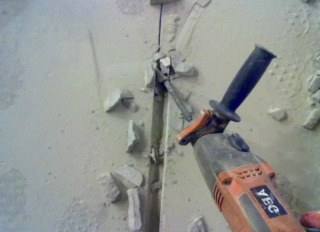
Horizontal and vertical strobes, which were made with a perforator.
A shredder is more practical.
…
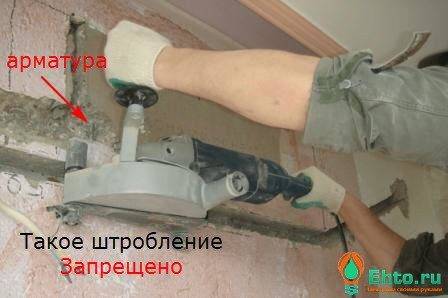
If you see rebar in the wall, this is a reason to stop sawing the wall!
The load-bearing partition was removed on the first floor, two people were killed. And the workers managed to escape ...
Partially destroyed house.
The shop on the first floor was being redecorated…


We hope you are thinking about chasing a load-bearing wall.
Bearing walls of a panel house
Before chasing, you need to determine the type and design of the wall. Bearing walls
Supporting vertical structures perceive the bulk of the weight of the floors or roofs above. Depending on the location, they may have openings for windows, balcony doors.
Bearing wall panels consist of the following layers:
- The outer layer is a huge mass of high-strength concrete grade M400 evenly covering the reinforcing cage.
- Rebar frame - a mesh that occupies most of the volume of the panel and gives it strength and rigidity.As a material for such a frame, reinforcing bars with a diameter of 12-14 mm are used, interconnected using a special steel flexible and corrosion-resistant wire.
- Protective layer - a thin layer of concrete of the same grade as the outer covering frame of reinforcement on the inner side of the panel facing the living room. It has a thickness of 10-20 mm and serves to protect the reinforcing cage from damage.
- Inner finishing layer - poured with easily processed finishing solutions. It has a thickness of 15 to 20 mm and is used for various repairs.
In many modern panels, between the outer layer with a reinforcing mesh and the inner finishing layer, there is a layer of insulation - stone or basalt wool.
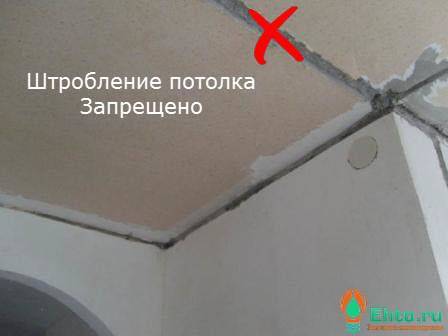
It is strictly forbidden by building rules to ditch the following structures of a panel house:
- ceiling or floor slabs,
- crossbar.
Inside the floor slabs there are ready-made oblong cavities through which wiring can be pulled. It makes no sense to ditch the crossbar, since they will still be covered with decorative trim, under which it will be possible to place electrical wires.
How to identify a load bearing wall
 Bearing walls include the following structures:
- facing the street or landing, into the entrance;
- separating two neighboring apartments;
- located perpendicular to the floor slabs;
- having a thickness of at least 20 cm, excluding finishing layers of plaster, putty.
All other wall structures are classified as partitions.
When determining the load-bearing walls in an apartment, I also take into account which project this residential building belongs to.Panel houses of the 1-464 series have not only external, but internal load-bearing walls, while the houses of the 1-335 series are characterized only by external panels.
Is it possible to ditch load-bearing walls and ceiling
According to all currently existing rules and building codes, regulations and legislative documents in the field of construction, laying strobes in load-bearing walls and floor slabs with a large number of voids is prohibited.
Chasing load-bearing walls in a monolithic house for wiring or other communications is prohibited. The same applies to the ceiling, since it consists of floor slabs. If the wall is not load-bearing, chasing can be done without any restrictions.
What can be difficult
Chasing the supporting structure is also not allowed for the reason that when the reinforcement is exposed, it may be susceptible to corrosion. Brick walls also fall under this ban, but if the laying was carried out in vain, then communications can be laid in an empty seam between horizontal rows. Such difficulties are often solved by laying an electrical communication line in the plaster layer. If the wiring is quite thin, they can easily be hidden in drywall walls as well.
If you want to take a closer look at the norms according to which the distribution of wiring in the walls is carried out, you should read SNiP 3.05.06-85. From these regulatory documents, you can find out that the grooves must be located strictly vertically or horizontally. The wiring should not run close to the floor slabs, but this problem can be solved by removing it by 15 cm.If at all costs you need to carry out the gating of load-bearing walls, then you must remember that laying horizontal furrows will be especially dangerous.
Danger of hidden pipe laying
Before you start chasing walls for pipes, you should familiarize yourself with what consequences this can lead to. For example, a wall material under mechanical action receives dynamic and static loads. This entails a change in the distribution of stresses, which causes the destruction of the material. With load-bearing walls, even subject to the rules that prohibit touching the reinforcing cage, such manipulations are prohibited. After all, even if the bearing capacity was reduced only slightly, and the margin of safety is still at a fairly good level, over time the walls can become cracked, because the pipes vibrate during operation, especially when they are poorly secured with clamps.
Of course, there are several bearing supports for building structures, but if one of them has a broken structure and a reduced level of bearing capacity, this may lead to the collapse of the entire building. The building acquires the status of an emergency.
Danger of hidden wiring
Despite the fact that there is a ban on the gating of load-bearing walls, many would-be craftsmen still continue to carry out such work, not paying attention to SNiP. They believe that brick walls that do not have a reinforcing cage can be used for laying electrical wiring.
But if the structure is made according to the masonry technique and does not accept a bearing load, it cannot be touched, because mechanical action may disrupt the connection between individual products along the body of the brick and along the seam.If the wall is not thick enough, this further increases the risk of laying communications.
Diamond discs
A very important thing when cutting strobes and cutting niches is the quality of the diamond blades. You can never save here and you should buy only well-known brands.
Even if your wall cutter or wall chaser is not Hilti, DeWalt, but some other little-known brand, buy only expensive consumables. On cheaper diamond discs, in the first place, it is not the diamond coating itself that can grind off, but simply tear out the seat for the mounting nut.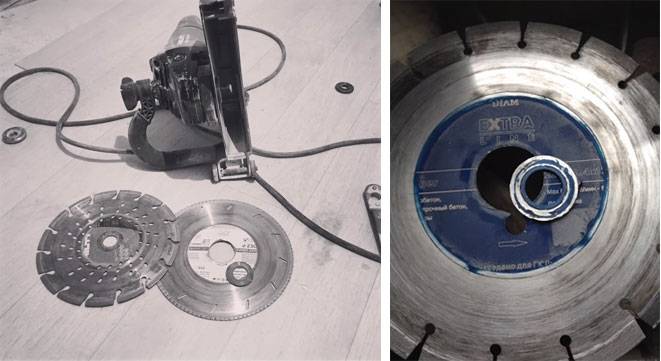
If the purchase of a wall saw is an unaffordable luxury for you, and in the meantime the hammer drill is already available and you don’t need to buy anything, then work the old fashioned way.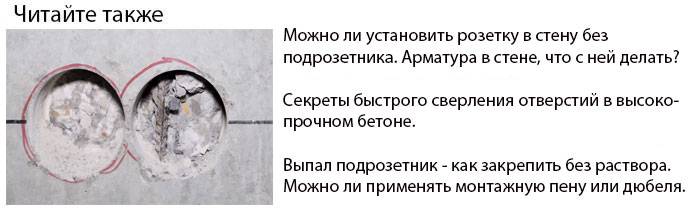
Features and rules of gating
There are no rules for chasing load-bearing walls for wiring, since these works are prohibited according to SNiP. If you want to follow the rules, and there are no supporting structures in your plans, you need to be guided by the following recommendations: the grooves should only be located parallel to the walls and ceiling. Inclined furrows should not be. They are allowed only on the attic floors, where the roof has an inclined structure.
The length of one gate should not be more than 3 m. If you work in an attic, then the grooves should be placed parallel to the junction of the surfaces. If there are gas pipes in the room, chasing should begin at a distance of 40 cm from them. It is necessary to move away from corners and window openings by 1.5 m.
Horizontal grooves should be 15 cm away from the floor slabs. Chasing a load-bearing wall for sewerage and any other communications is prohibited according to SNiP.If pipes still need to be laid near the load-bearing walls, they are placed side by side, near the floor, covered with a box and tiled.
Strobe in the wall
So, how to close the strobe in the wall? First, the shtraba must be treated with a primer for better adhesion of future plaster. Otherwise, the plaster will fall on the building dust inside the streak and will not grab the surface. Then the surface of the streak is moistened so that materials such as foam concrete or brick do not take a lot of moisture from the solution. Otherwise, the mortar will dry out before it sets and cracks occur. It is best to use ordinary gypsum plaster to seal the strobe. It is applied with movements at an angle of 45 degrees to the strobe - then it will well fill all the surfaces and walls of the strobe.


