- Repair of LED lamps: device and electrical circuits of various devices
- All the lamps in the bathroom went out: causes and solutions
- Elimination of the causes of blinking LED lamps
- LED lamp repair. detailed instructions
- LED lamp device
- The principle of operation of the LED lamp
- How to repair an LED chandelier or lamp with your own hands
- Do-it-yourself LED lamp repair
- Lamp LED test
- Why do LED lights flicker
- How to fix a failed element?
- A little about the tape
- LED lamp device
- Reasons for flickering
- How the LED strip is arranged and what can flash in it
- Flicker elimination
- Disable diode
- Switching device replacement
- Switching on the auxiliary lamp
- shunt resistor
- LED lamp blinking when off
- Why do cheap lamps flicker?
- Conclusions and useful video on the topic
Repair of LED lamps: device and electrical circuits of various devices
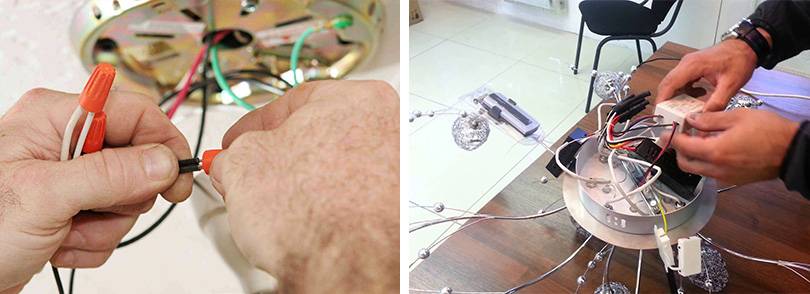
Having figured out how to fix a 220V LED lamp, it makes sense to deal with more complex devices, such as spotlights or chandeliers. Although there is not much difference in work. Experts say that repairing LED spotlights is even easier, because the drivers and their parts are larger. We subscribe to this opinion.It just seems that such devices are more high-tech and more complicated. In fact, having diagrams at hand (they are always contained in the technical documentation of the lighting fixture), for example, repairing an LED chandelier is quite simple. The same continuity of LEDs, driver parts. After - the selection of suitable ones to replace the burnt ones.
Important information! If the LED burns out and there is no suitable replacement at hand, you can slightly extend the life of the lighting fixture. The contacts of the burnt element are bridged with each other, and the light bulb lights up again. But you should be prepared for the fact that after a short time it will go out again. The LED next to the shorted one will burn out. If you continue to install jumpers, the time between repairs will be reduced exponentially.
 Several LED lamps will transform the interior beyond recognition, but for the better
All the lamps in the bathroom went out: causes and solutions
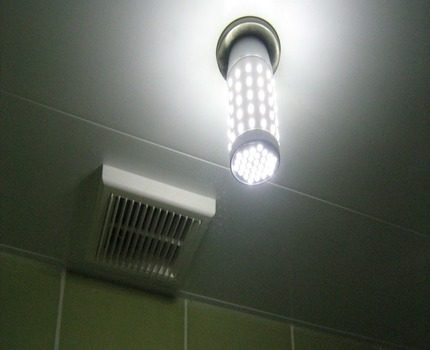
If all the LED lighting in the bathroom went out at the same time, you should start small. Remove the switch cover and check the voltage supply. If everything is in order, then the problem is in the power supply.
The bathroom is a room with high humidity, in which the use of 220 volt lighting fixtures is unacceptable. For this reason, a 12 volt power supply is installed. The reason that all the lighting stopped burning at once may be the failure of this device or a breakdown in the wiring, which is hardly realistic. Such a block will have to be bought. Having dismantled the old block, we look at the technical parameters, purchase a stabilizer with similar characteristics and install it in place.
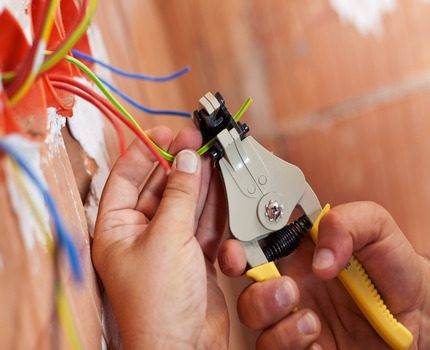
 When working with electrical wiring, you need to be extremely careful. Defeat is dangerous
Elimination of the causes of blinking LED lamps
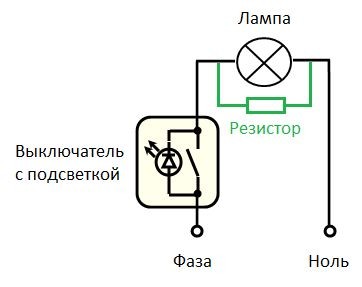
This is a common problem. It happens that people refuse to replace ordinary lighting in an apartment with LEDs due to the fact that when the light is off, the LEDs blink, in the manner of a strobe. There is only one reason for this - the backlight of the switch.
If the indicator is on, it passes a certain amount of electricity through itself, which has no effect on ordinary lamps. But in the LED lighting driver there is a capacitor that has the ability to accumulate electricity and then give it out. He then collects this energy “bit by bit”, and upon reaching a certain volume, it gives it out in the form of an impulse to the LEDs.
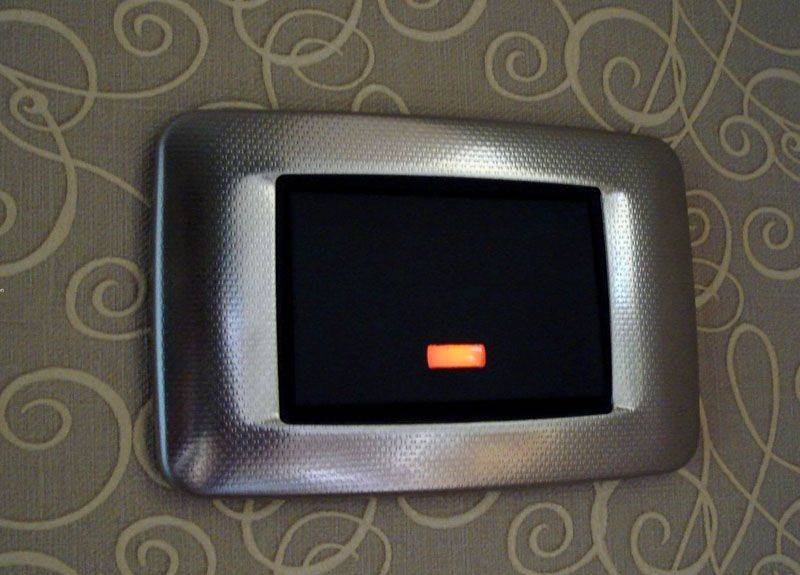 This indicator causes the LEDs to blink.
You can solve the problem very simply - turn off the backlight on the switch. However, flashing due to the indication on the key is a consequence. And what's the reason? There are no difficulties here either. The reason is the incorrect connection of the chandelier cartridges. It is known that when installing incandescent lamps, zero goes to the base thread, and phase goes to the center. The LEDs begin to blink if this order is violated and the wiring is done incorrectly.
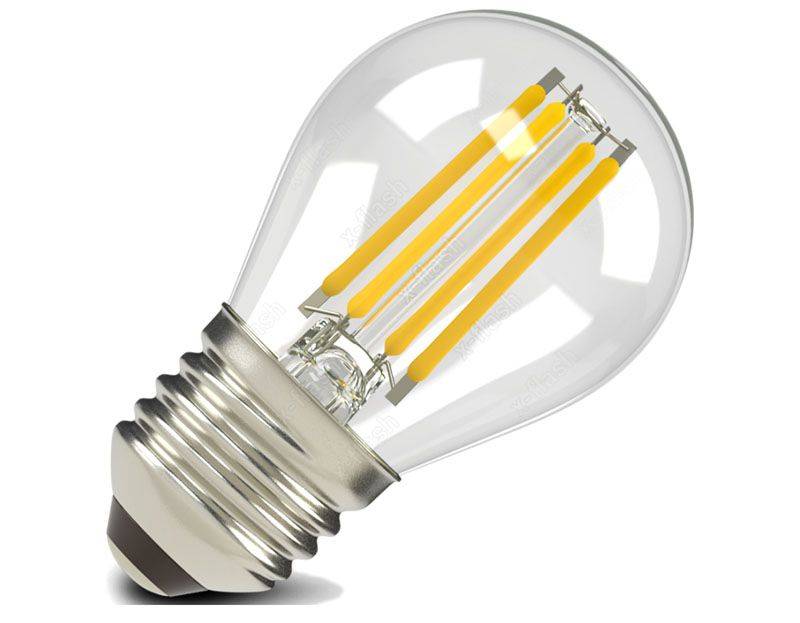 Filament lamps are new to the market. They are not repairable.
LED lamp repair. detailed instructions
DIY repair > Lighting > LED lamp repair. detailed instructions
Hello! Did your LED light turn off? Then this article is for you. After all, many people think that repairing LED lamps is difficult to do on their own and often throw them away.And in vain! After all, the cost of LED lamps at the moment relatively simple incandescent lamps is quite high.
From the practice of repair, it is easy to repair LED-based lighting devices without having a deep knowledge of electronics. At the same time, having repaired the LED lamp with your own hands, you can save a lot of money from your family budget.
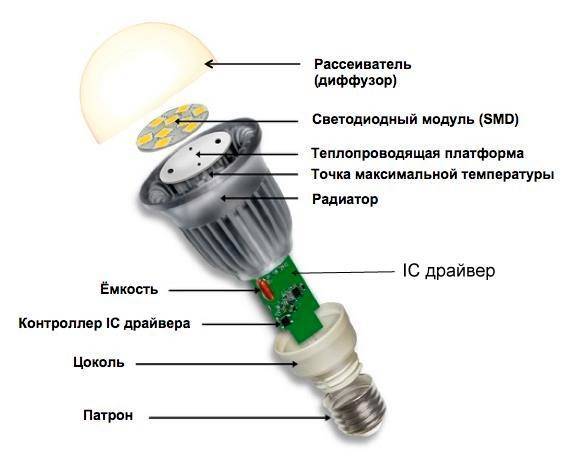
LED lamp device
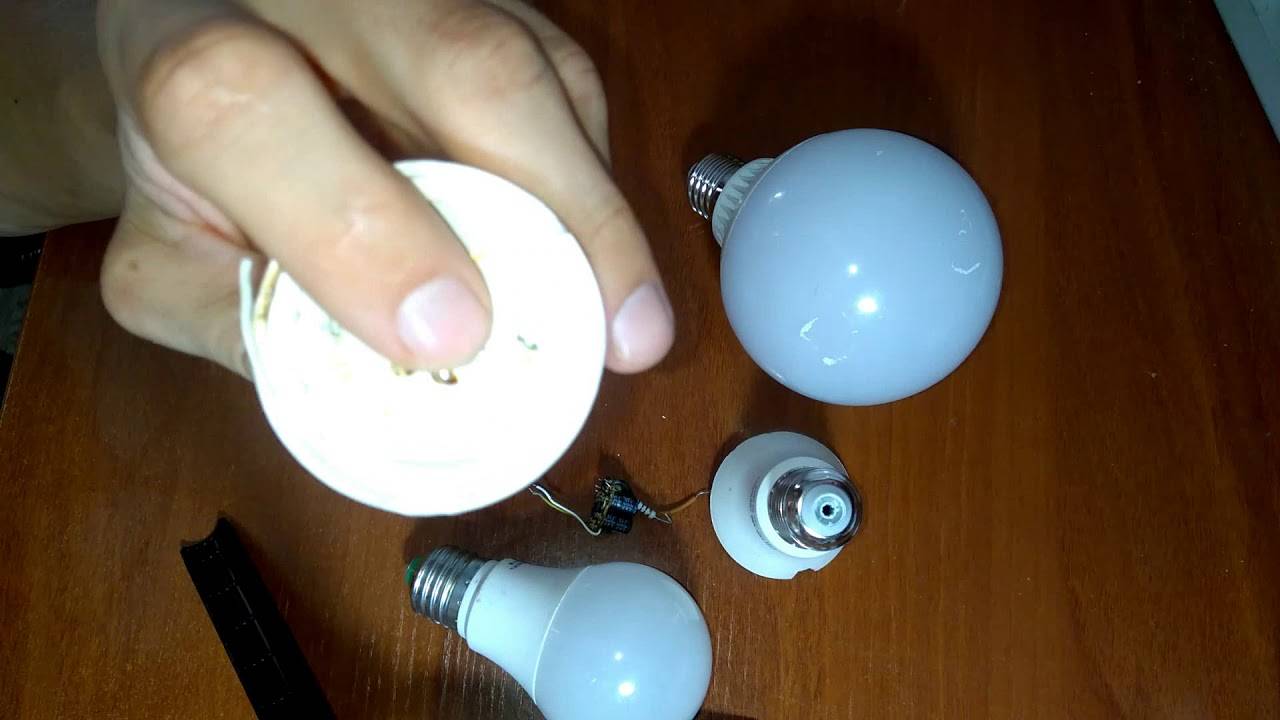
A simple low-power LED lamp consists of a body, a base, a matte light diffuser, an LED block, a power supply driver (cheap low-power LED lamps use a simple transformerless rectifier).
The principle of operation of the LED lamp
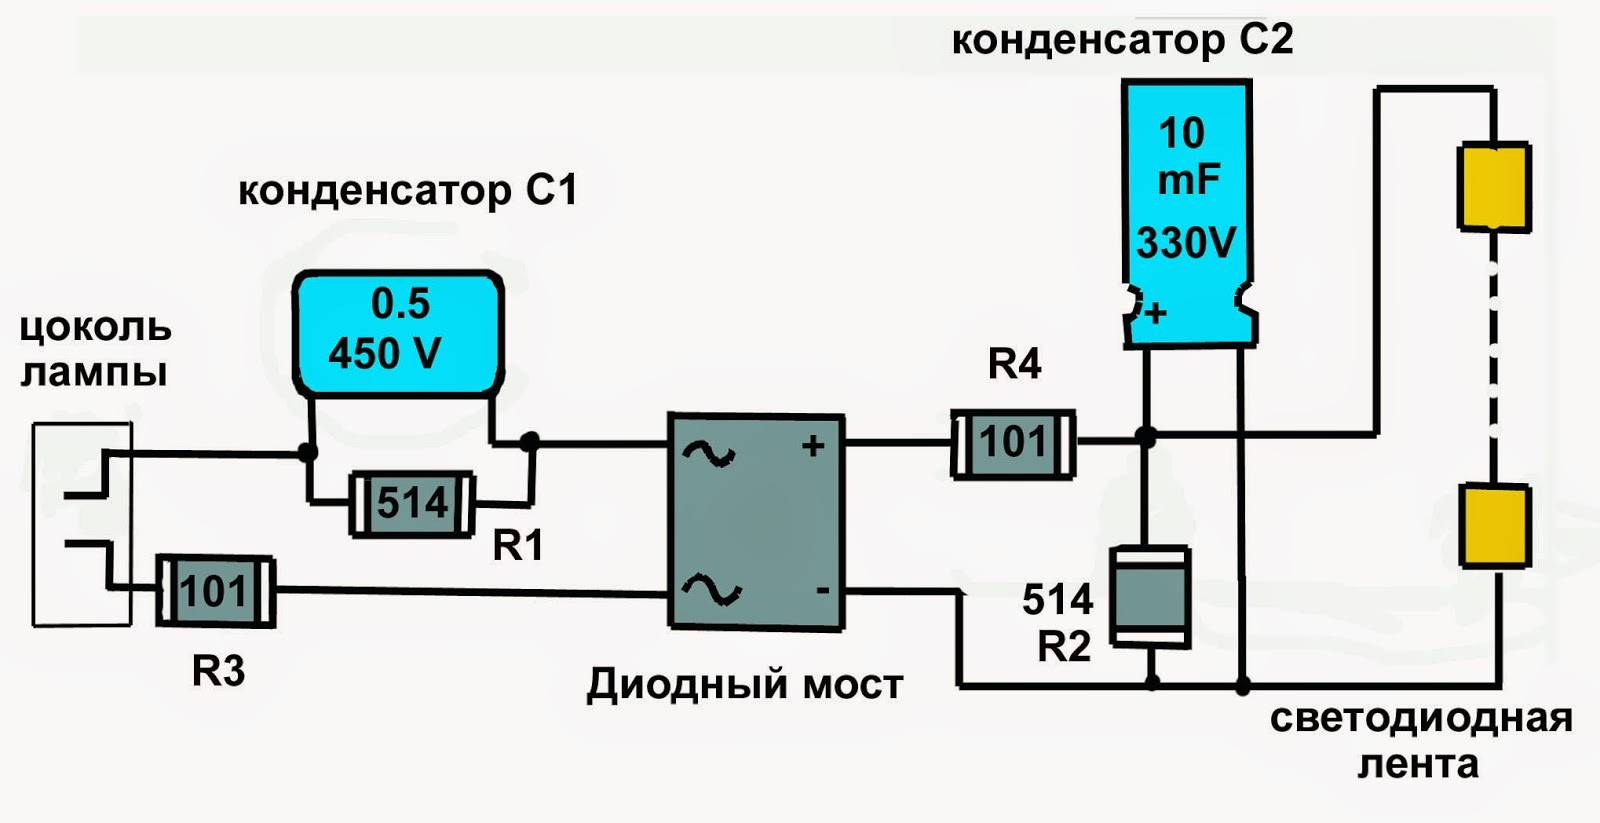
Consider the principle of operation of an LED lamp using an inexpensive Chinese example. To do this, look at the diagram below.
220V LED lamp circuit
The mains voltage of 220 volts is supplied to the diode bridge rectifier circuit through the current-limiting capacitor C1 and resistor R2. At the output, we get a constant voltage, which is supplied to the HL1 LED block through the current-limiting resistor R4. At the same time, the LEDs start to glow. Capacitor C2 is designed to smooth out the ripple of the rectified voltage. Resistor R1 is designed to discharge the capacitor C1 when the LED lamp is powered off from the mains.
How to repair an LED chandelier or lamp with your own hands
If the chandelier or lamp has ceased to glow, then first of all I recommend starting to check for the presence of the supply voltage supplied to the lamp. If there is no voltage on the chandelier when the switch is turned on, then it is necessary to carefully check the wiring.If voltage is present at the contacts of the cartridge where the LED lamp is wrapped, then the reason is in the lamp.


Do-it-yourself LED lamp repair
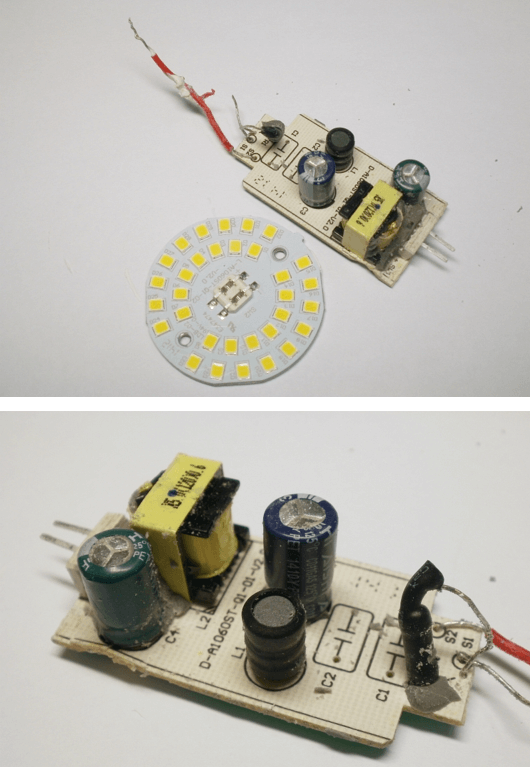
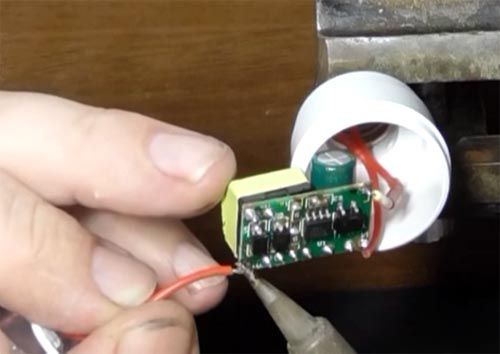
As I said above, an LED lamp consists of a power supply circuit and the LEDs themselves. You must first carefully disassemble the LED lamp and carefully inspect the power supply (rectifier) for external damage (burnout of parts, burnout of PCB tracks). If this is not visually detected, then we proceed to check the elements with a digital multimeter. Often the cause of the malfunction is a faulty current-limiting capacitor C1 with a capacity of 1 microfarad with a voltage of 400 volts. You can't check it without soldering it out of the circuit. It is best to replace it with a known good one.
Checking the rectifier diodes is carried out using a multimeter. We put it into the diode measurement mode and call
If the capacitor and diodes are in good condition, pay attention to the condition of the current-limiting resistors R2 and R4. Outwardly, they may seem undamaged, but when dialing, they may have a break.
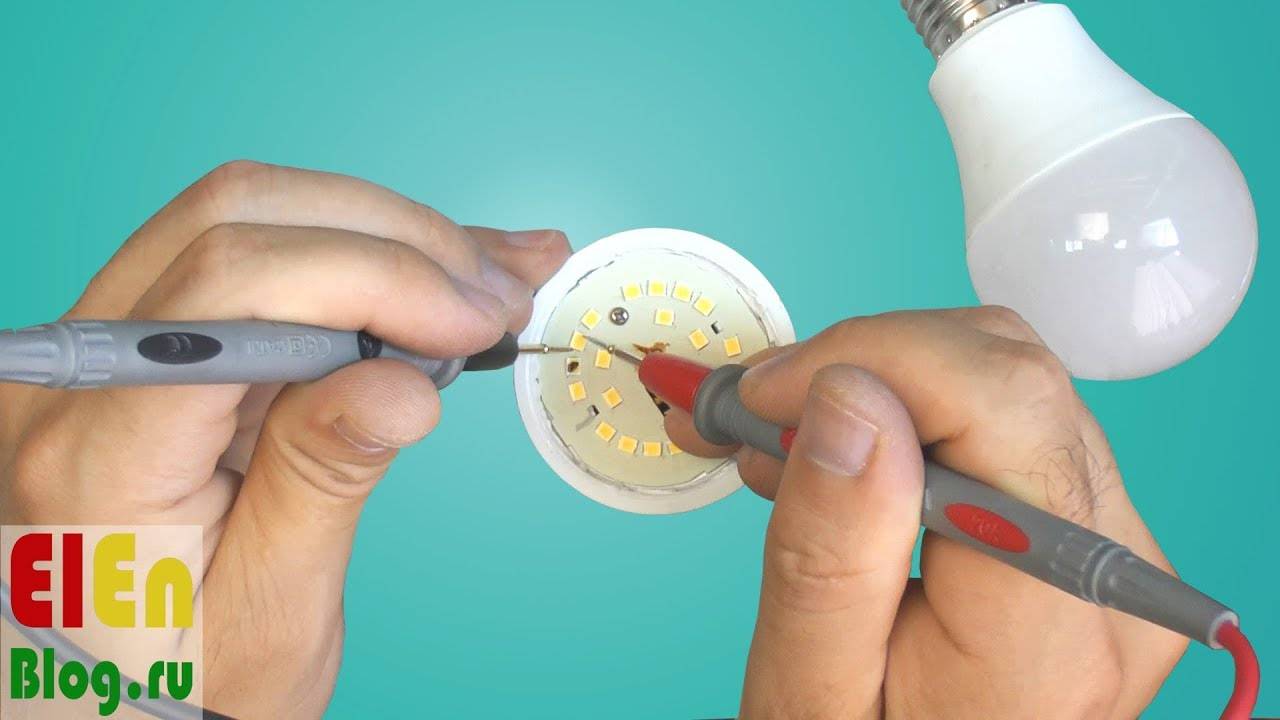
Lamp LED test
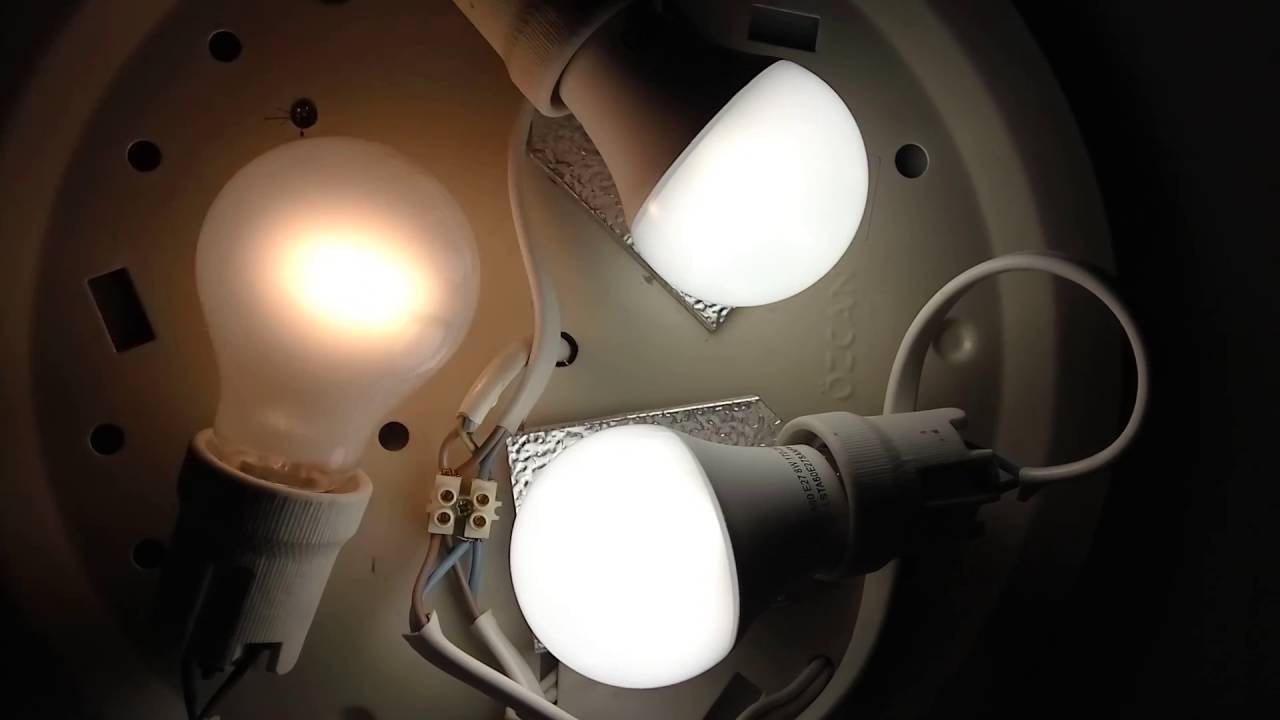
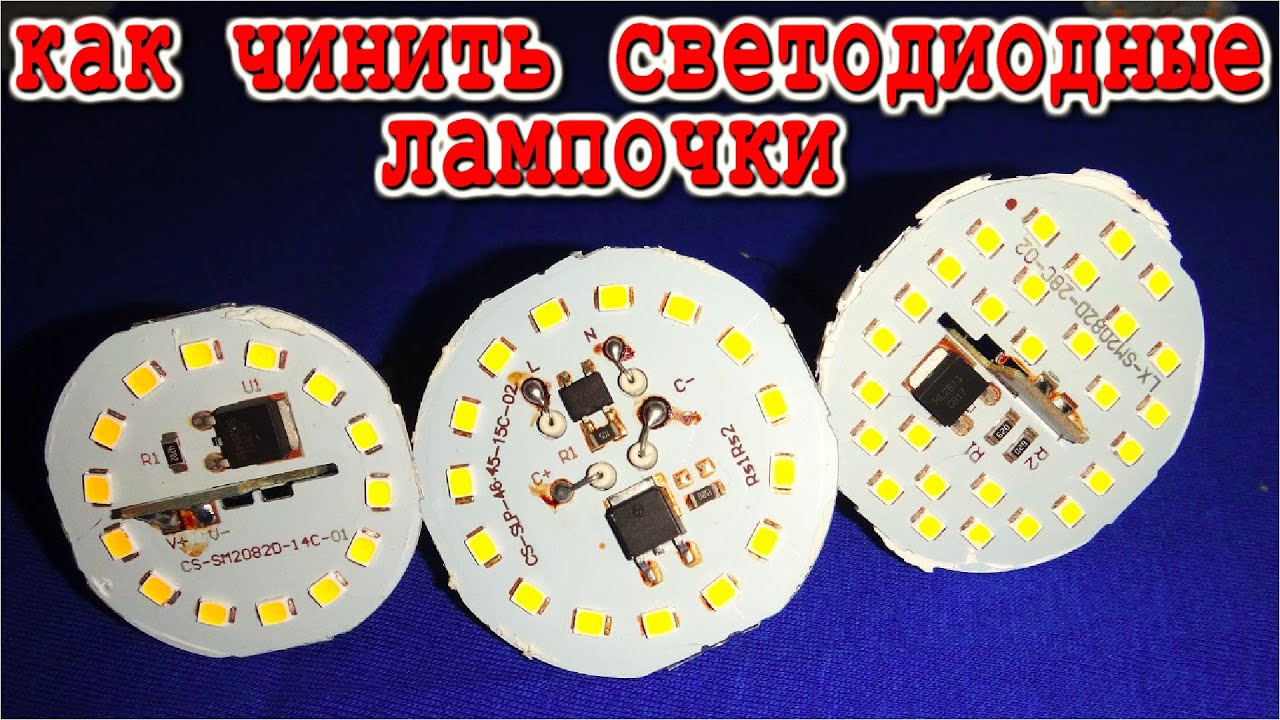
The lamp can have, depending on its power, from several LEDs to several tens.
Sometimes, when examining a board with LEDs, you can immediately see the burnout of some. These LEDs must be replaced. Other LEDs also need to ring with a multimeter or apply voltage to them from an external source of 2.5-3 volts through an ohmic resistance of 100-200 ohms. If they light up, then they are good. LEDs can be used from an old LED strip. You need to be able to work with a soldering iron.
Why do LED lights flicker
The reason is the use by the lamp manufacturer of low-quality current-limiting capacitor C1. Replace it with another one with a rated operating voltage of at least 400 volts. I don’t recommend putting it on a voltage of 250 volts, since it will quickly fail and the whole circuit will simply smoke. I have a lamp after replacing the capacitor, it shines cheerfully! ))
Good luck in repairing LED lamps and fixtures based on them!
How to fix a failed element?
So, having an idea about the design of the electronic circuit of our LED lamp, which does not work, let's consider how to repair it at home.
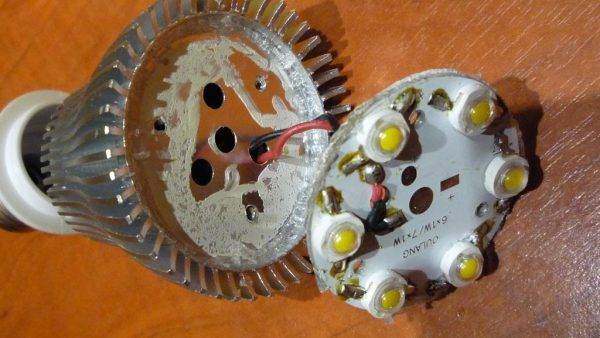
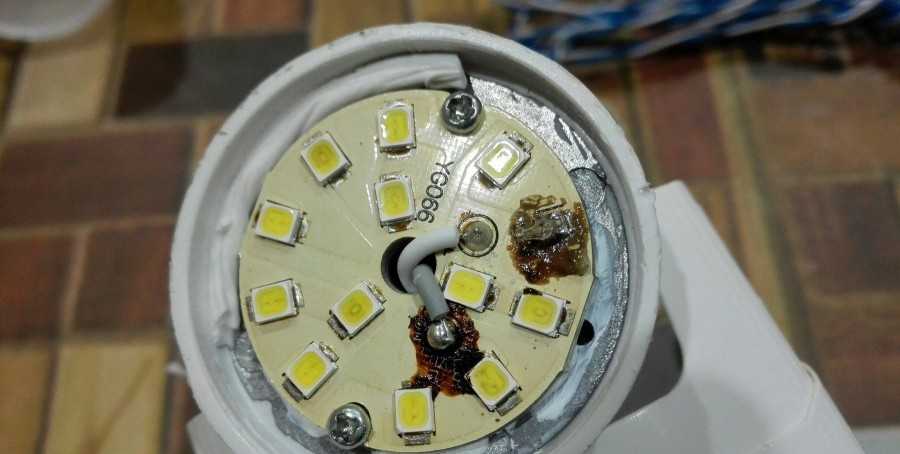
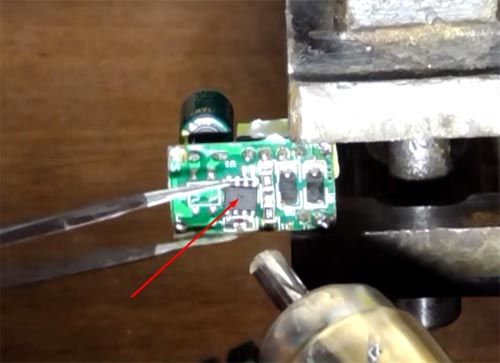
First of all, we make a visual inspection of the microcircuit and the diodes themselves. In 80% of cases, the failure is a burned-out LED. To carry out repairs, you must first find a diode that is visually different from the rest, for example, by the presence of a pronounced black dot, as shown in the photo below, and then replace it with a new one.
Video tutorial on repairing an LED light bulb in which the LED burned out:
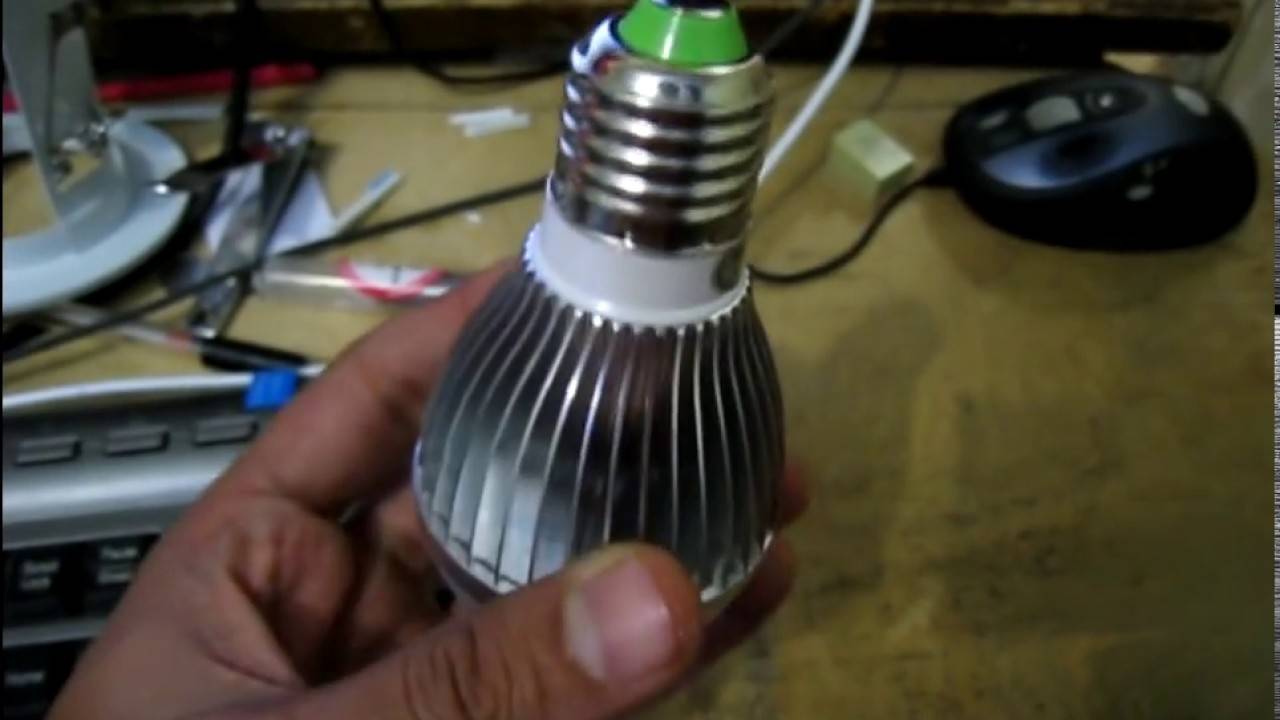
How to fix a burned out LED lamp with an E27 base
The current limiting resistor may also burn out. Rarely do working capacitors fail, disabling other elements of the LED device with their breakdown.
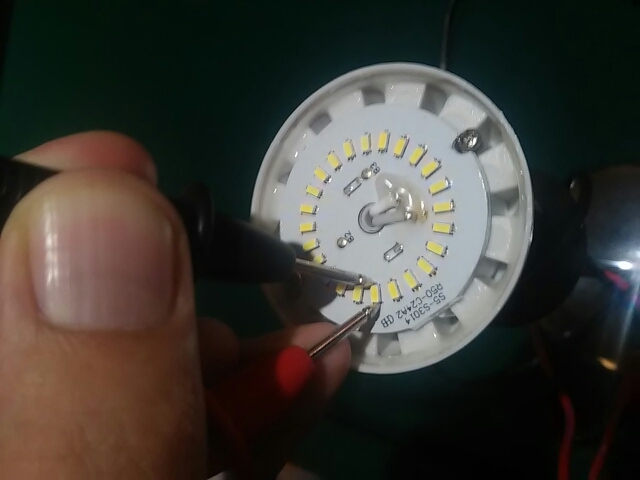
Since you are studying this page, we hope that you have a soldering iron and a basic understanding of electronics. Now about the troubleshooting technique. Diode testing is possible both with a multimeter and with a crown with a 1 kΩ limiting resistor. Alternately putting the wiring on the outputs of the LED, the serviceable one will shine. A multimeter in the test position will also cause the LED to glow, as long as the polarity is correct.
If no problems are identified with the light emitter, we check the limiting resistor with a tester, in most circuits its value is about 100-200 Ohms. We recommend watching a more complex repair on the video:
Also, the scourge of modern circuits is such a thing as "cold soldering". This is when, over time, the contact in a poorly filled tin soldering place is destroyed.
The circuit is physically destroyed and breaks the integrity of the circuit, resulting in the LED lamp not turning on. You can repair the breakdown by reheating the contact point with the flux applied to it.


Rarely occurring faults are the breakdown of the rectifier diode or capacitor, which happens during voltage surges. With the help of a tester, you can establish this thoroughly. By identifying the cause and replacing the burned-out element, you can return the bulbs to working condition. Learn more about how to test a capacitor. you can in our related article.
In more expensive LED devices, instead of a capacitor power supply, there is a switching power supply that automatically adjusts to the mains voltage, and adjusting it, keeps the voltage and current at the output constant, preventing the diode crystals from overheating, providing a long service life and a constant luminous flux.
The troubleshooting method is practically the same as described above, and most likely it will be cold soldering on one of the elements. Repairing an LED lamp in this case is not difficult.
If the diode bulb does not light up or flickers, it is far from always the reason for its malfunction. In most cases, the flashing is due to the fact that it is connected to a backlit switch.In this case, you can solve the problem by replacing the switch with a regular one. Also, as a repair, you can consider another simple way to fix the problem - turn off the backlight on the switch by disconnecting the diode bulb in it.
However, sometimes the lamp may still flash, because. something has moved away in it, for example, the wire from the base has been unsoldered. In this case, repairing it is quite simple, according to the following technology:
What to do if the table lamp flickers?
A little about the tape
Tape with LEDs
LED strip refers to energy-saving lighting fixtures. That is why this product is very popular today and is most often found in modern repairs as additional lighting for various rooms: living room, bedroom, kitchen, nursery, etc. Another positive quality that determined the leadership position of this product in the lighting market is the excellent luminous flux characteristics. In terms of light output, the LED strip is only slightly inferior to fluorescent lamps, but in all other respects it significantly surpasses them. This is primarily about safety.
In addition, the advantages of this type of light source include:
- aesthetics;
- functionality;
- profitability;
- universality;
- durability.
LED strip allows you to create a soft, eye-pleasing diffused light in the room. But during operation, it may start to work not quite correctly. This means that when it is on, it blinks or blinks. Why this happens can be found out by understanding the principle of operation of such a light source
Note! If the LED strip blinks when it is on, this does not mean that it will soon stop working altogether. But this situation requires a solution and investigation.
The LED strip is a special flexible strip on which LEDs connected to each other are located in a row.
Scheme of work
The principle of operation of LEDs is not based on a standard circuit. Unlike other light bulbs (incandescent, fluorescent, etc.), the LED used here as a light source is a semiconductor. When an electric current is passed through it, optical radiation is created. High light output in this case became possible due to the absence of intermediate elements in the circuit. In addition, the product has a low inertia. Thanks to this, the LED strip lights up immediately when the light is turned on. The entire design of the LEDs is based on a tape, which, on the other hand, has an adhesive backing. Therefore, such a light source can be used in almost any room and on any surface. Of the entire structure, the most important element is the electronic driver. Therefore, quite often the tape blinks when it is on due to the electronic driver. Why is the driver to blame? It contains a capacitor. Depending on the cause of the blinking of the tape in working condition, this capacitor accumulates voltage in itself. When a critical voltage value is reached, it works, thus causing blinking in the on or off state.
LED lamp device

The principle of operation of the LED is completely different from the usual circuit.In incandescent lamps, gas discharge lamps, and so on, there is always some element that, when heated or irradiated, generates light. A light emitting diode is a semiconductor device that, when an electric current is passed, produces optical radiation.
The absence of intermediate elements in such a scheme provides both high light output and low inertia - the lamp turns on at full brightness immediately. And since the LED does not heat up to create radiation, its application is much wider: the installation of LED devices is allowed on any surface.
An important element in the design is an electronic driver that converts current. It is this part of the LED that can cause the energy-saving lamp to blink.
Reasons for flickering
The first and main one is the use of switches with some additional option - backlight, motion sensor, regulator, and so on. Structurally, this function is implemented using an LED or a glow discharge lamp. Their interaction with the lamp driver causes the lamp to blink.
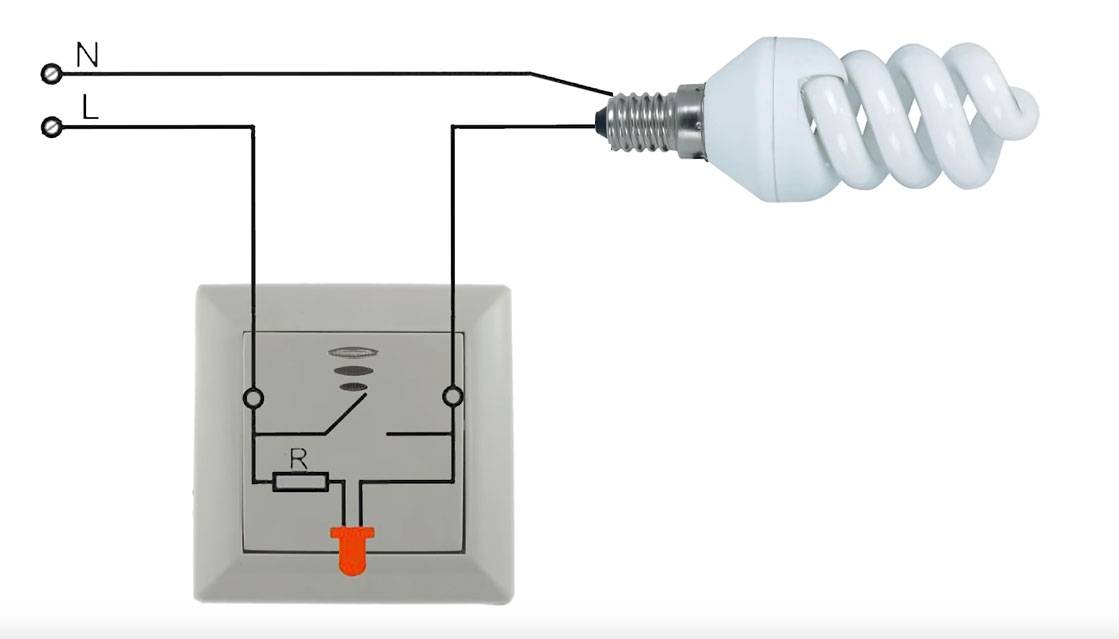
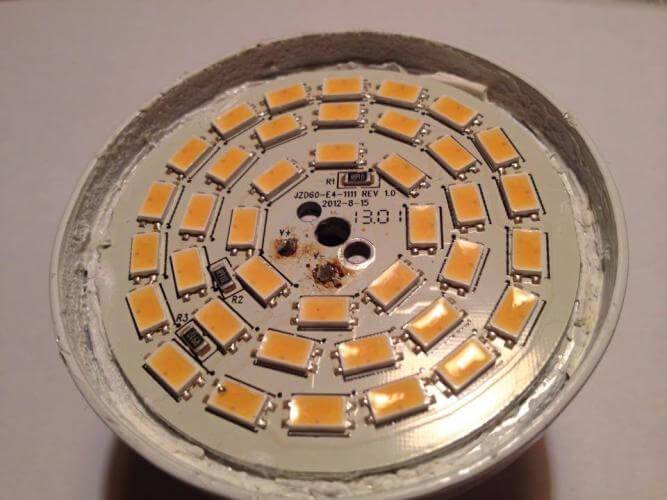
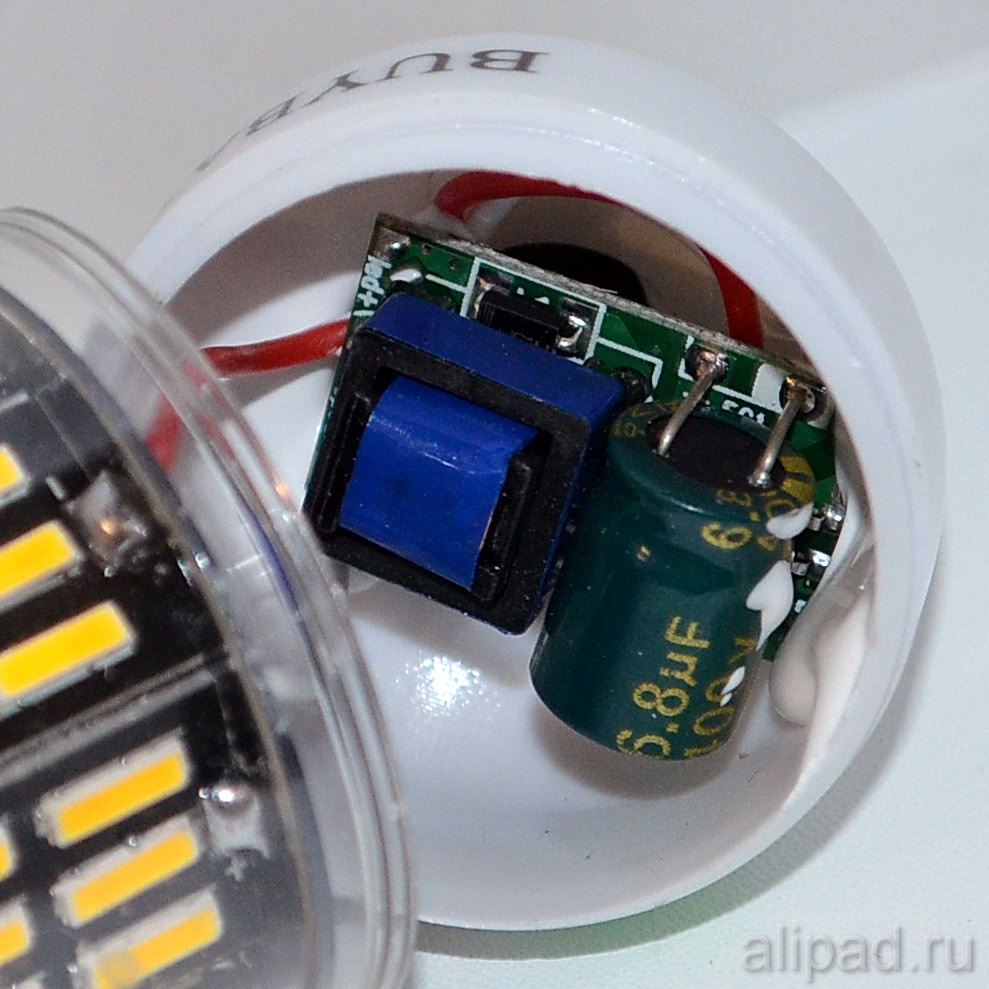
The electronic driver mentioned above contains a capacitor. When the switch is off, current flows through the backlight circuit. Gradually, it charges the capacitor, and when the voltage reaches a critical value, the capacitor fires. The device turns on, but, since the current strength is not enough for its operation, it immediately goes out - it blinks. Pictured is an LED lamp.


- Incorrect wire connection - quite often occurs in buildings with old wiring.The switch should interrupt the phase wire, but in cases where the cables are not color-coded, the probability of error increases dramatically, and as a result, a situation arises when the switch breaks the neutral wire.
- If the LED blinks when the switch is on, then the reason is most likely the exhaustion of the resource. Usually this phenomenon is accompanied by a decrease in the strength of the glow, and even a change in color.
How the LED strip is arranged and what can flash in it
 LED lighting is not only LED strip and connectors.
The system includes:
- driver;
- controller (amplifier and remote control);
- Dimmer.
The standard length of a flat dielectric LED strip is 5 meters. On one side of it are diodes connected by conductive paths covered with plastic. The tracks are the same as those on printed circuit boards, but supplemented with ballast resistors (resistors) to prevent flicker. On the other hand, the glue is covered with a film. To install the film is removed.
Light bulbs are grouped by 3 pcs. when connected in series and 6-12 pcs. when parallel, which allows, if necessary, to cut the strip (for this, it has images of a dotted line with scissors). For every circuit on LED strip separate track. The groups are equipped with contacts and indications regarding polarity and voltage. If the light bulbs are very small, they are soldered in pairs to increase the intensity of the glow. Multi-colored leads are soldered to the end intended for connection to the power supply:
- zero (black) and phase (red) - for a single-color strip;
- black, red, blue, green - for RGB (color) strip.
At the opposite end, soldering or connectors are used for connection.
When installing, it is important not to confuse the phase and zero.If you swap the green and blue wires, the tape will not fail, just the wrong tracks will turn on
Flicker elimination
Mounting on a zero break or errors when connecting the switch leads to an incorrect lighting scheme. In these situations, turning off the lamp does not stop the lamp, resulting in intermittent flashing.
Before correcting this shortcoming, make sure that you have eliminated all negative factors, since parasitic current pulses appear on the wiring even with high humidity in the room.
Disable diode
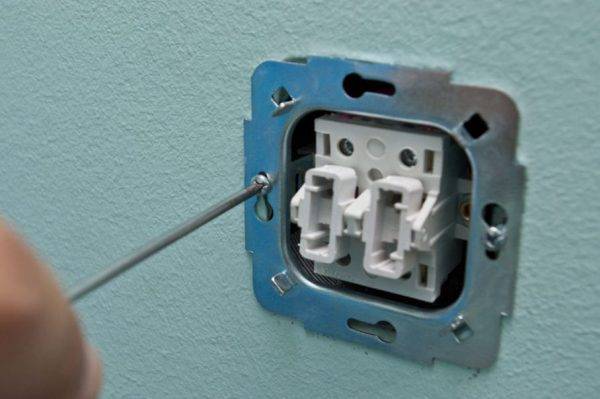
To perform the procedure, you will need a Phillips screwdriver with a slot, wire cutters, a voltage meter and pliers. Cheaper varieties of appliances are not equipped with anti-flicker devices when turned off. This is a resistor installed on the electronic board and protects against low current coming from the backlight of the switch. Try turning off the diode.
Turn off the power supply by de-energizing the machine - it is necessary to increase safety in order to avoid electric shock. Use a multimeter to measure the voltage across the pins. Remove the neon or LED light switch using a screwdriver. Remove the pads from the device and pull them towards the floor with light pressure.
Unscrew the two screws used to fix the switch and antennae, remove the wires from the diode power supply, or cut the desired wire with wire cutters.
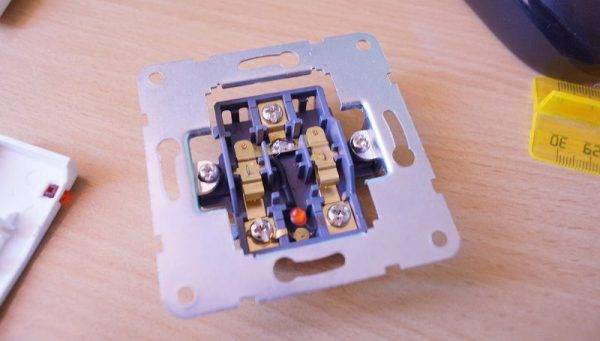
Switching device replacement
To perform the action, you will need screwdrivers, a multimeter, wire cutters and pliers. Large screwdrivers are needed to remove the switch from the socket in the wall, and small ones to de-energize the contacts.
The method is relevant if it is not possible to turn off the power to the diode, which may be due to the design features of the switch. Take the same security measures as in the previous method - de-energize the apartment by turning off the machine, and then make sure that there is no voltage on the contacts using a multimeter.
Remove the covers and pull the switch out of the wall (read the method described in "Turning off the diode"). Disconnect the cables at the switching device, replace the switch, maintaining the sequence of connecting conductors. Lay the cable and install the fittings. Slowly tighten the screws that secure the switch, avoiding getting the power wires under the clamps.
Before dismantling, number the conductors and sockets to avoid future confusion. Follow the reverse sequence when installing a new switch.
Switching on the auxiliary lamp
The method has already been described above - just screw an ordinary incandescent or halogen lamp into any socket of the chandelier. It is not necessary to enable it.
shunt resistor
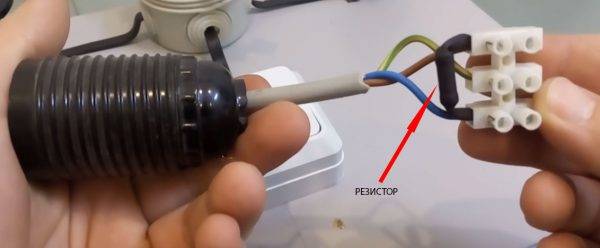
Connect the resistor to the electrical circuit by insulating it with heat shrink tape. The ideal option for installation would be a switchboard. Install a resistor between the "phase" and "zero" conductors, in parallel with the circuit with the lamp. To do this, use special clamps.
If it is not possible to connect the resistor to the junction box (hidden deep in the wall or there is no free space inside), solder it to the phase or neutral wire on the lighting fixture, and hide the ends in the terminal block.
This method has a serious drawback - the resistor heats up during operation, and if the power is not selected correctly, this can lead to a fire.A modern electricity meter will take into account the presence of a resistor, for which an additional fee is charged.


LED lamp blinking when off
Quite often there is such a phenomenon when the LED lamp continues to blink even when the power is off. This is usually due to faulty wiring or when using a backlit switch. Both of these factors lead to the same consequences. As a result of the passage of an insignificant pulse that recharges the starter, the LED light flashes. A full start does not occur due to the small amount of current, so the light turns on for a fraction of a second and then goes out.

The easiest solution to the problem is to replace the illuminated switch with a conventional device. If for some reason this is not possible, it is necessary to install an additional resistor with a power of 2 W, with a resistance of 50 kOhm. Due to it, the necessary resistance will be added, preventing random impulses. The resistor is connected directly near the switch or directly to the lamp. A special heat shrink tube is used to isolate and fasten the resistor.
One option would be to replace the single LED lamp located near the voltage entry point with a conventional incandescent lamp. It takes over all the impulses and thus prevents blinking. In another case, the backlight is installed independently of the switch, that is, the backlight diode is connected directly to the network. Its glow will be constant, even when the switch is off.The problem may arise due to poor-quality wiring, therefore it is recommended to check all connections, if necessary, to insulate all identified places with high quality.
Sometimes the cause of blinking is the incorrect setting of the switch, when zero is set on the gap instead of phase. The off state does not interrupt the operation of the lamp, and it will blink constantly under the influence of constant recharging. High humidity also contributes to the appearance of parasitic current pulses in the network, under the influence of which the LED lamp blinks. When choosing a lighting device, you should purchase products only from well-known and trusted manufacturers.
Reading time: 4 minutes No time?
A decade ago, such a rapid growth in the popularity of LED lighting for apartments and private houses was not expected. Today you will not meet a person who would not use these economical and bright lamps. The problem remains only in the cost of lighting fixtures - you cannot call such lamps cheap. What to do if the lamp is out of order? Buy a new one? Not necessary. You can try to repair the lighting fixture. It is the “device”, because it is a complex technical device, in contrast to the “light bulb of Ilyich”. Today we will figure out how to repair LED DIY lamps and how difficult it is.
Read in the article
Why do cheap lamps flicker?
Probably, there are no people who have not heard that it is not worth buying cheap products from little-known manufacturers, as this is fraught with negative consequences of varying complexity.
This is also the case with LED lamps, which often start flashing even immediately after purchase, which does not please the owners at all.
Flashing LED lamps is quite common. At the same time, in most cases, they remain operational and, if the cause is eliminated, will be able to function for years.
But this mode of operation in most cases does not indicate the presence of a breakdown. That is, the lighting device is usually in good condition, but it is exposed to any adverse factors that prevent it from functioning normally.
And if they are eliminated, then the flickering will stop, and there will be no relapses. But it is more practical to prevent such phenomena and all that is needed for this is to purchase quality products from well-known manufacturers.
At the stage of purchase, they will cost more, but high performance will ensure long-term operation. And without losing the best properties, and it is expensive. Since cheap lighting fixtures allow you to save only on price.
And then a person is faced with their predisposition to various malfunctions and other negative consequences, including a negative impact on health.
Modern LED lamps are always complex technological devices, consisting of many components. Among them is a driver whose task is to stabilize the electric current.
And this is an important task, since high-quality and long-term work depends precisely on its characteristics, and not on voltage, as many believe.
Additionally, the driver is able to cope with various side factors leading to flickering in the off / on position of the switch.
Each user should be aware that only cheap LED lamps made by various little-known manufacturers are prone to flashing. So just don't buy them.
But it is an obligatory part of the design of only high-quality and, therefore, expensive lamps. And in their affordable analogues of Chinese and even domestic origin, to save money, this key element is always replaced with a cheaper power supply.


Its basis is such structural elements as a diode bridge equipped with a capacitive filter and a quenching capacitor. Which are able to provide high-quality lighting only when the characteristics of the electric current are ideal.
In this case, the work cycle looks like this:
- Initially, alternating current passes through the diode bridge, where it is converted into a constant, but with high ripple, necessary for LED lamps.
- To give the electric current stable characteristics, it is fed into a capacitive filter. And from there to the quenching capacitor, which finally smooths out the ripple.
- The current with the desired characteristics goes to the lighting fixtures, allowing them to perform their duties normally.
But with non-ideal parameters of the electric current, the power supply with its cheap components is not able to cope with the ripple and its rectification, which ultimately causes blinking.
Both one lamp and a whole separate group can blink. However, the causes of this phenomenon are the same. And they should be removed promptly. Otherwise, in a short time, the resource of lighting devices will be exhausted
In addition, signs of such Faults can occur both in the off and on state.
And the features of each type of non-standard work should be known, as this will help to eliminate the defect. And quickly and often without any serious costs.
Conclusions and useful video on the topic
How to fix the characteristic breakdowns of an LED light bulb with an E27 base. Detailed instructions for disassembling the product, interesting practical tips on using improvised tools.
Tips on how to correctly remove the flask from the device without damaging it in the process.
2020-04/1585745834_remont-svetodiodnyh-lamp.mp4
An easy way to repair an ice-type light bulb without using a soldering iron. Instead of soldering, a special electrically conductive paste is used.
A full description of the work on products of the Kosmos trademark, which is owned by KOSMOS Group, which controls about 25% of the domestic market for progressive and economical products for creating high-quality lighting.
How to fix a Led corn light bulb. Features of the disassembly process, structural nuances and other cognitive points. A significant increase in the service life of the product after all work.
The LED bulb is a practical light source. The only disadvantage of this product is the high price compared to other modules. True, LED-devices are reliable and usually fully work out their life.
And if breakdowns suddenly occur during operation, most of them can be fixed by hand. Any home craftsman will have the necessary tools, and finding time for repair work will also not be difficult.


