- Leak detection
- Determining the location and nature of the leak
- heater radiator
- The main reasons why pipes leak
- Causes of a boiler leak
- 1. Weak connection of supply channels
- 2. Hull deformation
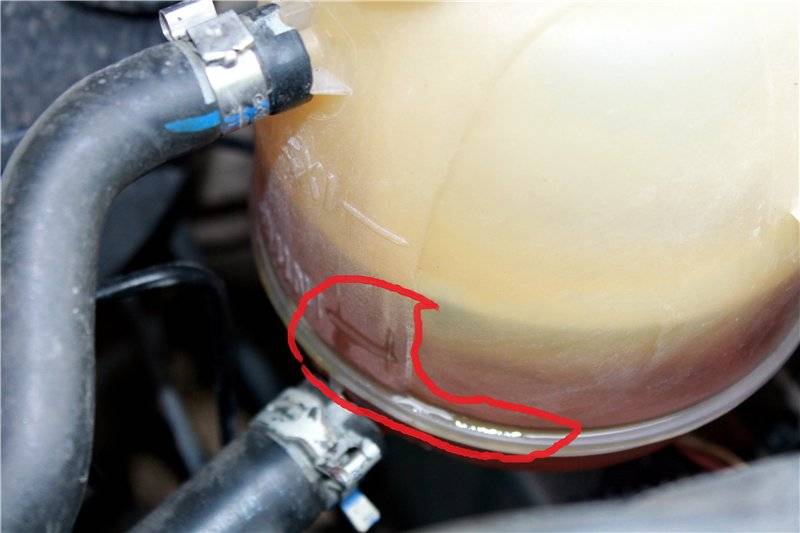
- 3. Tank leak
- 4. Reservoir cap leaking
- 5. Leakage in the heating element
- 6. Faulty safety valve
- 7. Problems with the heating element
- 8. Runs in the upper area without external damage
- 9. Neglect of prevention
- 10. Marriage or incorrect installation and connection
- DIY aluminum radiator repair tools
- Leak tight seal
- Causes and types of leaks
- Possible breakdowns and their elimination
- Gasket replacement
- Oil seal replacement
- Earbud Replacement
- What threatens the boiler leak
- Between battery sections
- Seal of a fistula on a pipe
- Search for a leak
- Repair Methods
- Required tools and materials
- On a running system
- On a stopped system
- The heating battery is leaking: what to do depending on the type of defect
- How to fix a leak between two radiator sections?
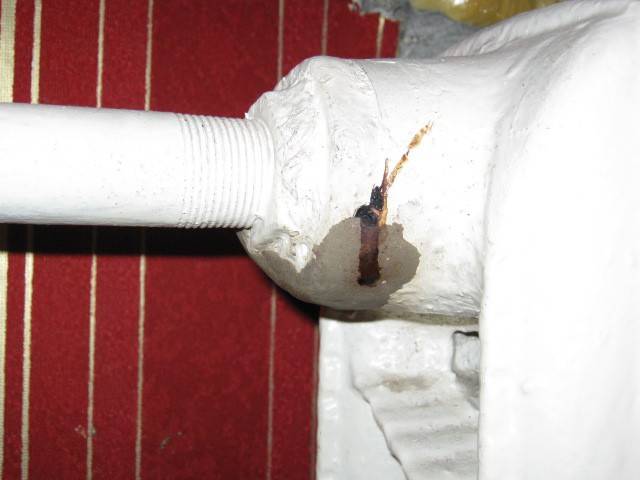
- Elimination of a defect at the junction of the riser with the pipe
- Fixing a cracked radiator
- Restoring the integrity of the heating pipe
- Replacing a faucet without blocking the riser
- TRV design
- The heating battery is leaking - what to do
- Leak at the junction: ways to eliminate
- Chasing joints of cast iron pipes
- Pipe joints are sealed with cement
Leak detection
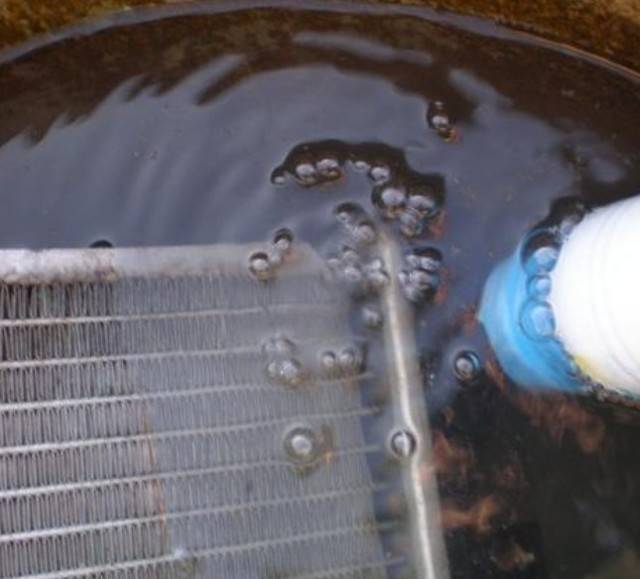
Most often, the place of leakage of the coolant is detected as follows. Remove the radiator, and close the openings of the nozzles. Next, the radiator is placed in a tank of water, and excess pressure is pumped up with a compressor or pump. After that, it is necessary to conduct a visual inspection, in which it will immediately be seen where the air bubbles come from.
If, nevertheless, it is not possible to accurately determine the location of the leak, then special devices must be used. They consist of a fluorescent additive, a special gun for introducing the additive into the cooling system, and a lamp that emits ultraviolet rays, in the light of which the antifreeze flowing from the radiator will glow. The disadvantage of this method is its high cost, and it makes no sense to purchase it for your own needs. It will be easier and cheaper to go to a car service.
To prevent the radiator from leaking, you need to monitor the condition and level of antifreeze, avoid oil penetration into the seals, and prevent excessive pressure in the system.
Determining the location and nature of the leak
At the stage of diagnostics of the unit, it is important to exclude the following causes of moisture:
- leakage of other household devices located nearby (washing machine or dishwasher, battery);
- spilled water, juice and other food;
- natural defrosting of the refrigerator due to a power outage;
- loose pressing of the door;
- the plug is incorrectly inserted into the socket.
Next, you should inspect and figure out exactly where the refrigerator leaked from. Based on this information, we can draw a conclusion about the nature of the breakdown, as well as how to eliminate it.Conventionally, all problems can be divided into external and internal - water appears under the refrigerator or directly in its compartments.
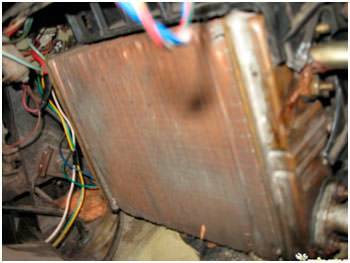
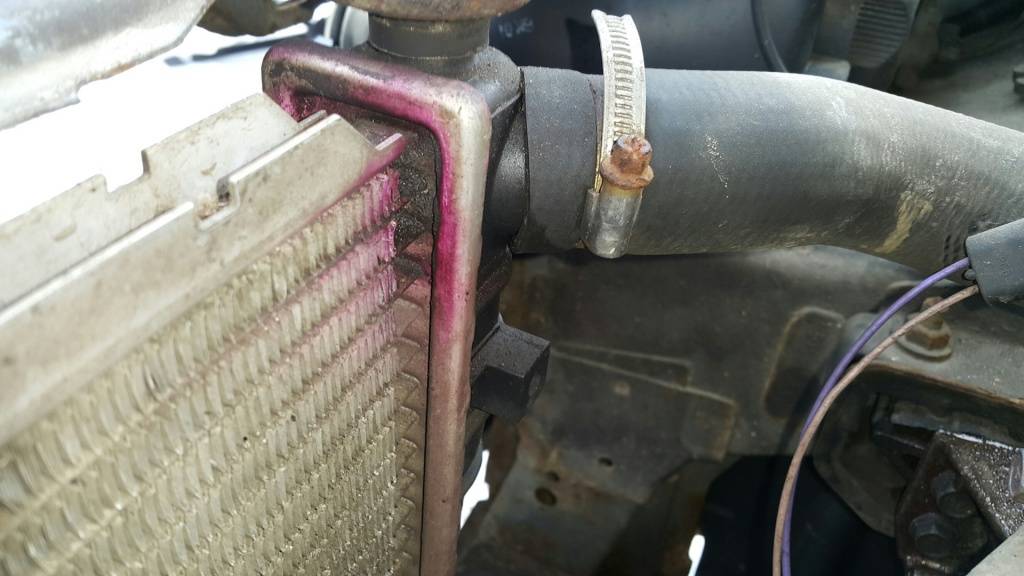
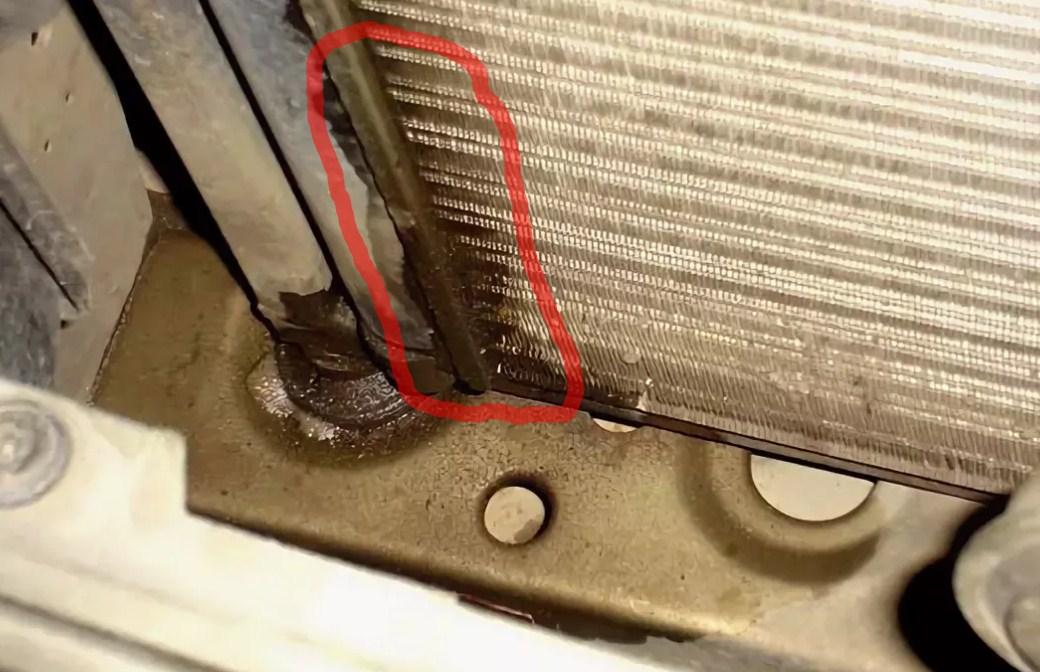
heater radiator
As in the case of the main VAZ 2107 radiator, its repair is possible provided that it is made of copper. Determining that it is he who is flowing is not as easy as in the case of a faucet. The specific smell of heated antifreeze can help determine the presence of a malfunction. Before removing the radiator, it is necessary to close the tap, then after assembling the cooling system, you will have to add antifreeze exactly as much as you have to pour out during operation.
Diagnosed by visual inspection. Nowadays, repairing a VAZ 2107 pump is not economically feasible, it’s easier to buy a new one and change it. Again, you don’t have to drain all the antifreeze; at the end of the work, add the missing volume to the system.

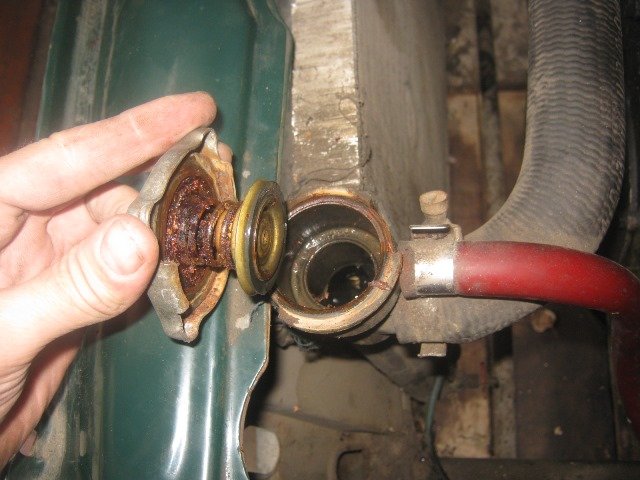
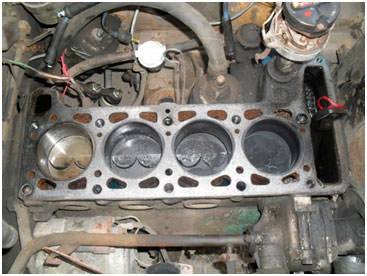
This is the most unpleasant of the malfunctions, as a result of which antifreeze flows out of the system. If the breakdown is on the outside of the gasket, the leak can be seen with the naked eye on the engine. Worse, if the gasket is pierced near the cylinder. In this case, the defect can be determined by indirect signs - an increase in the oil level in the oil pan, a large amount of water vapor from the exhaust pipe. Regardless of the location of the damage, only the replacement of the gasket can eliminate the identified drawback.
In any of the above cases, one of the signs of a malfunction is a decrease in the coolant level. Having discovered this, you should immediately start looking for the cause. Timely diagnosis and troubleshooting will help to avoid serious troubles with your car.
Catherine, hello.Many motorists face a similar problem, now we will try to help you.
The main reasons why pipes leak
The main cause of leakage is oxidation. Corrosion mainly occurs on the outside of the pipe. This is due to the fact that the material is constantly affected by adverse external conditions - temperature changes, air and water. All this contributes to the appearance of rust on the material. When such a problem occurs, a leak forms. It is typical for steel and cast iron devices.
The reason for the leakage of plastic pipes is the use of material for the heating system, not intended for this. In order to save money, pipes for cold water supply are installed. This is the main mistake. When a hot coolant is supplied, they are deformed or mechanical defects appear on the material, which leads to a leak. This problem also occurs on pipes intended for the heating system. Reasons for the reason - poor-quality material.
The leak also appears due to poor installation of the heating system. Poorly executed welding of butt joints leads to this trouble.
Another cause of leakage is the deterioration of the heating system. If the operational period of the material has expired, defects appear on it.
Mechanical damage provokes leakage. This applies to plastic materials.
Causes of a boiler leak
Most often, excess water is noticed on the top or bottom of the water heater. Before looking for a problematic leak, you need to turn off the water supply and disconnect the boiler from the power supply.
Here are 10 types of breakdowns that can cause water leakage.
1. Weak connection of supply channels
This situation is one of the most common water heater leaks. The supply channels are interconnected loosely.


You need to recheck the intake and exhaust pipe connections - see if they are loose. It is necessary to tighten the joints with a wrench or replace the faulty pipeline.
2. Hull deformation
Appears due to violations during the installation of the water heater. This is not the manufacturer's fault. Most likely, the safety valve is missing or defective. Therefore, dripping water from the boiler is noticeable immediately after the installation of the water heater.
During cooling, the liquid volume decreases and the boiler tank shrinks. When all the liquid leaves, a vacuum begins inside the tank. When there are problems with the safety valve, the container is deformed during these processes.
As a result, during the filling of the water heater, the water begins to warm up and expand, increasing the pressure. Due to the growth of the latter, the reservoir tank begins to swell, causing a leak in the body.
3. Tank leak
If the liquid comes down the line, then the reservoir tank is leaking.
This problem often appears due to:
- incorrect installation;
- violations during connection;
- resulting water hammer
The tank is designed for a certain maximum pressure. Exceeding this pressure can lead to water hammer, which can subsequently cause a leak.
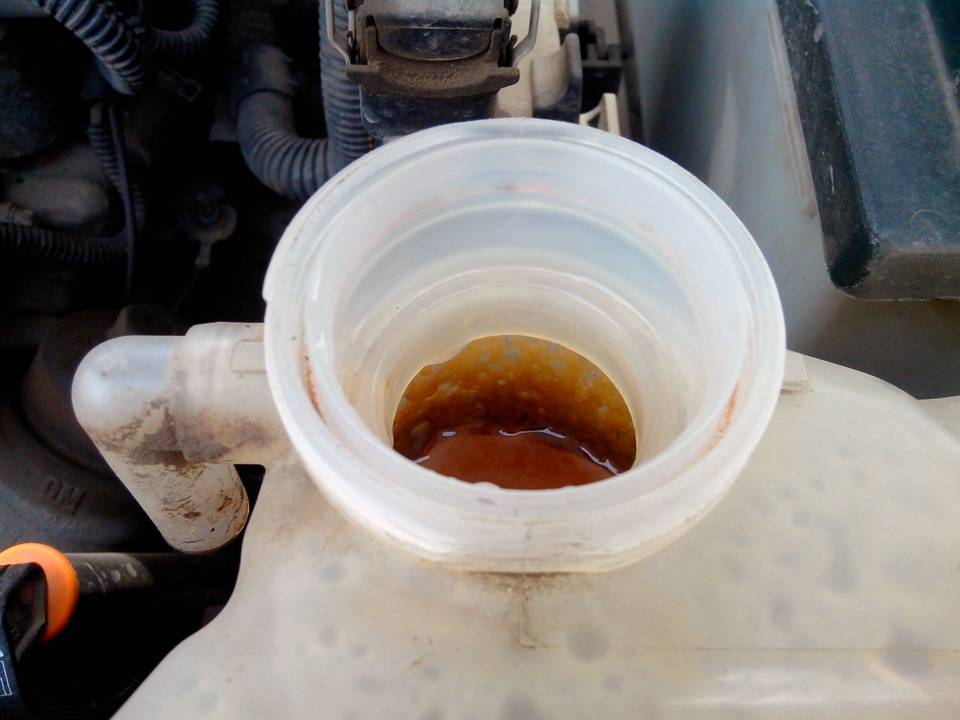
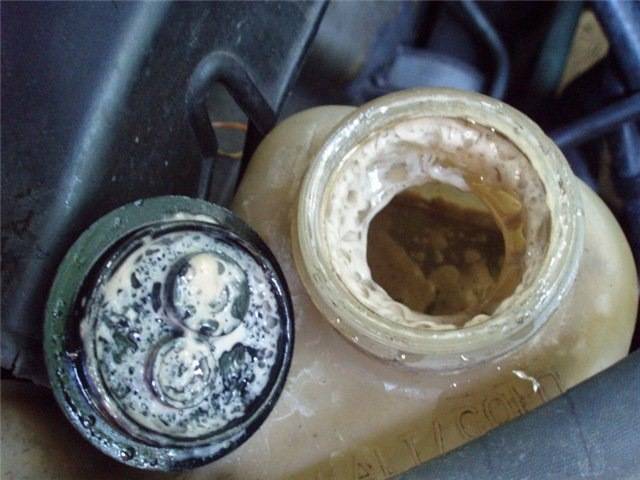
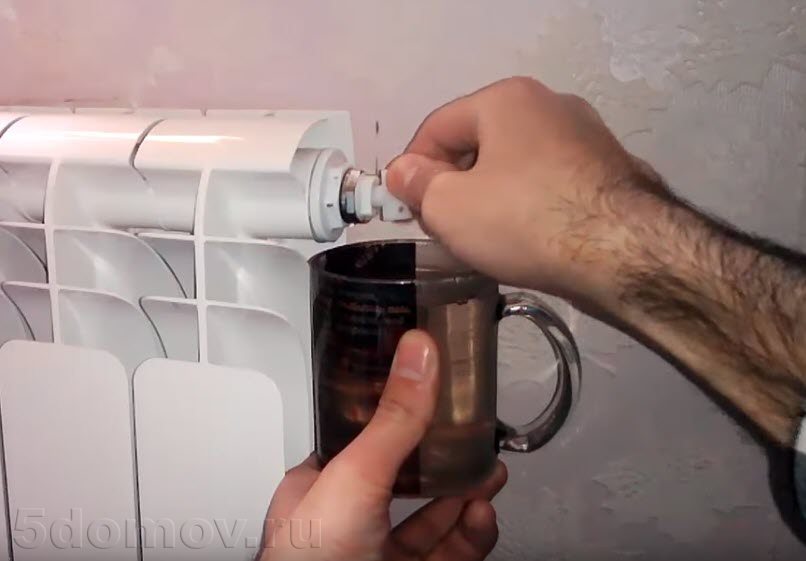
4. Reservoir cap leaking
For most, such a leak appears in the heating element. One of the reasons is a large accumulation of scale.
To solve the problem, you need to put a new heating element.
5. Leakage in the heating element
Some boilers do not have a special passage for draining water.It helps in case of leakage of a tubular electric heater (TEH).
Therefore, when choosing a boiler, it is worth checking its availability.
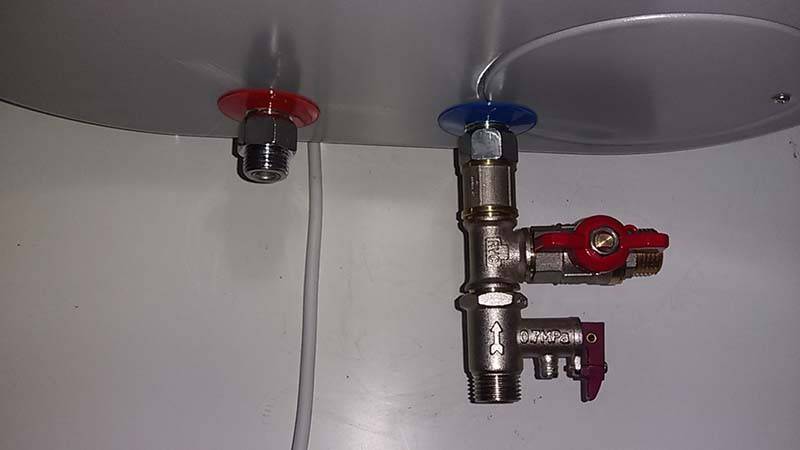
6. Faulty safety valve
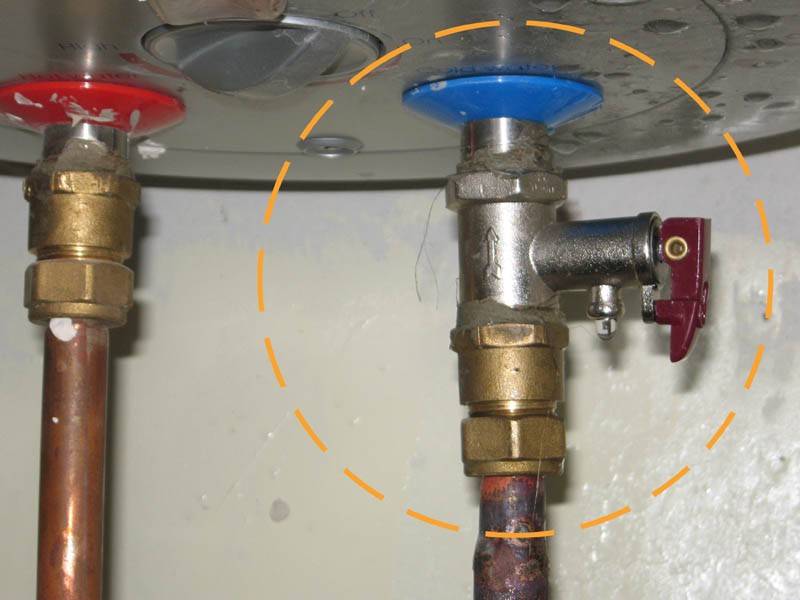
A safety valve is a faucet that is installed in case the water in the tank becomes too hot. There will be excessive pressure. The valve relieves pressure by releasing some of the water.
First look at the point where the valve connects to the tank. Then the faucet.
If the valve is in the closed position and water is flowing from the connected water heater pipe, the valve is faulty. Need to be replaced.
If the valve is in the open position, it is able to relieve excess pressure from inside the tank (causing the valve to open). Repair is possible, but it is better to call the master.
7. Problems with the heating element
There are two situations of leakage from the heating element:
- leakage from under the seal;
- hollow space for bolts.
In the first paragraph, tighten the nuts that secure the heating element.
In the second - to change the tubular electric heater.
8. Runs in the upper area without external damage
First you need to check the following conditions:
- when studying the elements of the boiler, no problems were found;
- installation / connection of the water heating system was carried out without violations;
- the magnesium rod was checked at least twice a year. If necessary, put a new one.
If the boiler is still leaking, it is better to return it to the store under warranty. Leakage is eliminated only when the boiler tank is made of stainless steel.
Important: it is important to replace the magnesium rod regularly with a new one. Otherwise, the surface of the water heater will deteriorate.
There will be a need to purchase a new one.
9. Neglect of prevention
Increased hardness of water, a large amount of impurities in it, not in the best way affect the operation of the water heater. Therefore, from time to time it is worth performing preventive work: clean the device from dirt, replace worn parts in time. So you minimize the occurrence of leaks in the water heater.
10. Marriage or incorrect installation and connection
If the device is defective, you must return it to the store before the end of the warranty period. The main thing in these circumstances is not to try to repair it on your own. Since the water heater will not be accepted in the store.


If the cause of the leak is a violation during the installation and connection of the water heater, it is worth re-reading the points above - check the elements of the boiler. And also read the installation and connection instructions again to find out where the mistake was made.
DIY aluminum radiator repair tools
They repair the radiator on the floor, and wash it in the bath. In the first case, you need to cover the floor with plastic wrap or a waterproof cloth. When washing, the bath is covered with a material that will protect the surface from scratches.
To clean, disassemble and repair the radiator, you will need tools:
- a set of wrenches with different heads or an adjustable wrench;
- nipple key;
- hammer with a soft nozzle;
- sandpaper;
- for repairing sections, neutral lubrication is needed;
- silicone pads.
It happens that wear of nuts and nipples is detected during the installation process, they are bought as needed.
Reference. Start radiator repairs on weekdays when you can visit a plumbing or hardware store.
Additionally, a basin or other container is prepared to collect dirty water that flows out of the radiator during the cleaning process.
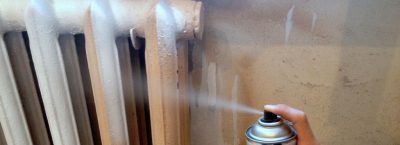
Leak tight seal
As for how to fix a leak in a heating radiator, in case of minor damage, you can use a powder or polymer-based sealant. They can be found in hardware stores.
Such a composition, upon contact with air, polymerizes, and as a result of hardening, a strong seal is formed, which gives time for significant repairs. Some sealants are two-component polymer formulations, and cure as a result of mixing their two components. The hardening of other products occurs as a result of a chemical reaction with air. With the help of sealants designed specifically to eliminate leaks, you can solve the problem in a matter of minutes.
Causes and types of leaks
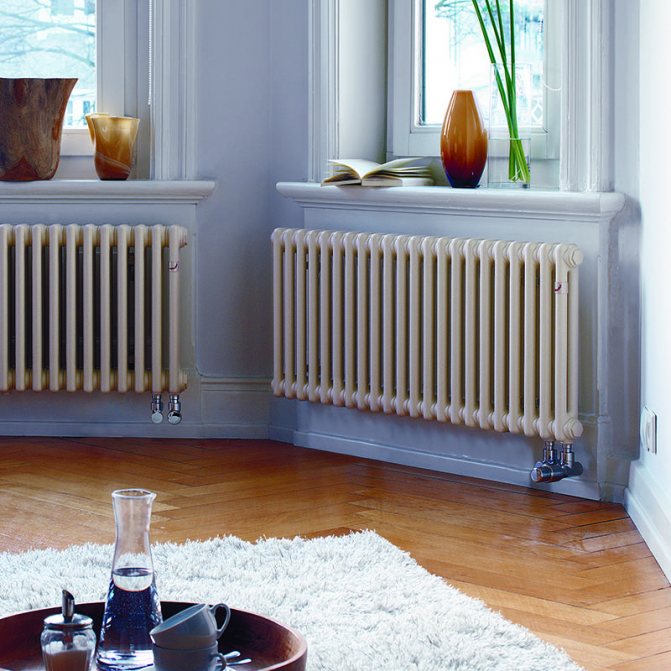
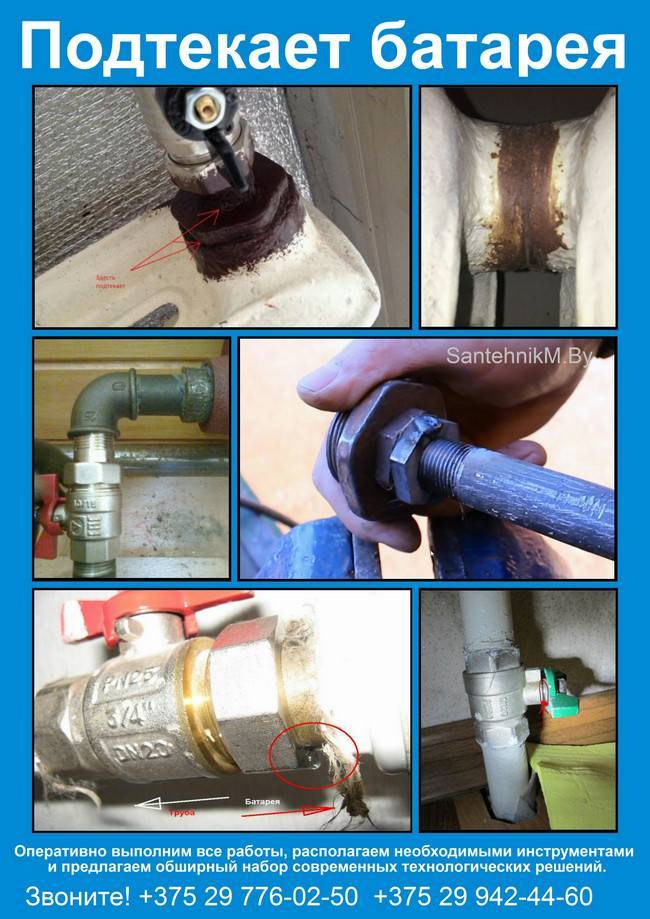
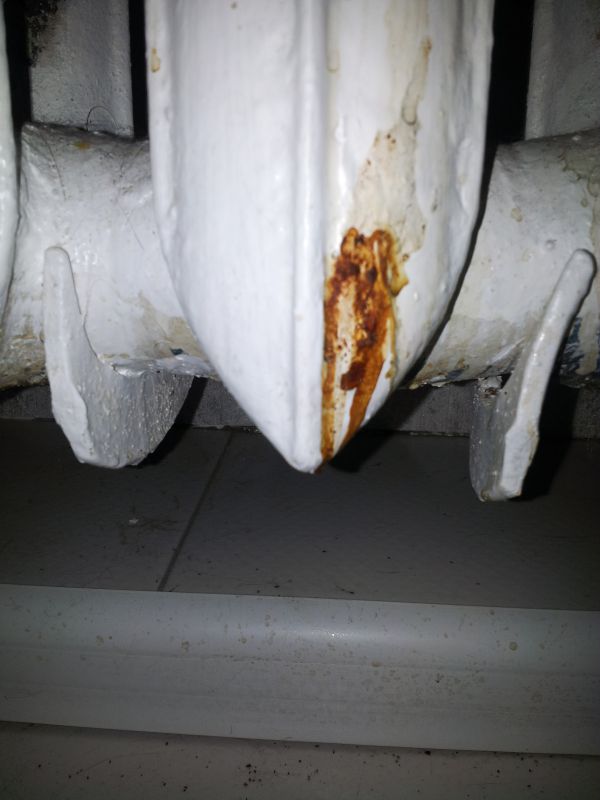
Elements of the heating system located in residential premises are pipes and metal radiators, the highest risk of depressurization is in the areas of their connections. A leak is a direct exit of the coolant to the outside, it can manifest itself in the form of rusty smudges on the battery and drops falling on the floor.
Experts identify 4 key types of defects that appear depending on the specifics of the installed connecting elements:
- cracks that have arisen on the radiator section;
- loss of tightness of pipelines leading from the riser to the battery;
- leak between sections of radiators;
- depressurization of the zone connecting the pipe and the battery.
When a heating battery is leaking, it is important to take immediate action to prevent flooding of the room and neighbors from below.
In accordance with the particular area where the problem arose, specific measures are being taken to eliminate it.
Possible breakdowns and their elimination
There are several reasons why a two-valve faucet may leak. One of the most common causes of leakage is the wear of the rubber gasket.
Gasket replacement
If the faucet is dripping, then perhaps the whole thing is the wear of the rubber gasket. The main sign that the faucet requires replacement of the rubber gasket will be the appearance of a leak. from goose mixer.
The rubber gasket should be replaced as soon as possible, otherwise the water flowing through will gradually destroy the inner surface of the housing. If the mixer is not disassembled in time and the old part is not replaced, then scours will appear on the important constituent components. In these cases, only a complete replacement of the mixer is required.
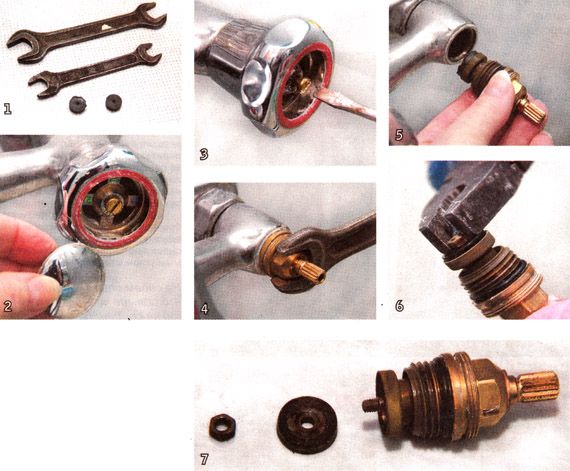
Gasket Replacement Features:
- The first step is to remove the flywheel from the spindle. Next, the core is unscrewed with an open-end wrench;
- the old gasket element is usually located at the opposite end of the core and is attached there in the region of a special protrusion. The old gasket element is removed;
- a new sealing element must be cut out of a piece of dense rubber base, while it is necessary to navigate according to the shapes of the old worn gasket element;
- the cut-out part must be installed in its original place of the old sealing element;
- the whole assembly is put together.
Oil seal replacement
If the faucet in the bathroom is leaking, then the whole thing may be the wear of the gland. Usually a leak is observed when the tap is opened.In these cases, the water will leak in the area between the stuffing box clamp nut and the valve stem.
If the faucet is dripping due to the wear of the stuffing box, then how to fix the faucet leak yourself? You can use the repair scheme:
- the gland nut is unscrewed with a screwdriver;
- the gland can be made independently from the sealing tape;
- the old oil seal, which has become unusable, must be removed;
- a sealing tape must be wound on the valve, which will later replace the old stuffing box and prevent leaks from the tap;
- tighten the nut in place.
If everything is done correctly, then water leakage after turning on the tap again will not occur.
Stages of oil seal replacement
Earbud Replacement
The reason for the breakdown of the mixer with axle box is the wear of the rubber gasket. Usually in the mixer it is available at the junction between faucet bushing and mixer. More often, the faucet leaks due to the fact that the gasket wears out, loses its elasticity properties, or completely collapses. You can fix a leaking faucet in the bathroom quickly enough, the main thing is that you need to clearly follow the instructions.
How to disassemble the faucet in the bathroom and how to repair:
- a decorative plastic plug is removed with a knife or screwdriver, which is used to indicate a cold or hot tap;
- you need to unscrew the screw, which is located under the plug. The screw is loosened with a screwdriver. If the screw does not unscrew, then it needs to be warmed up, for this it should be doused with hot water. After that, the screw can be easily unscrewed with pliers;
- after that, you need to remove the flywheel;
- unscrew the nut that secures the crane box. We remove the nut from the body;
- we clean the surface of the rod and sealing elements well;
- be sure to inspect all the details, they should not have hidden defects, damage;
- then the old liner is removed and a new one is installed in its place;
- the whole structure is assembled.
What threatens the boiler leak
In most cases, further operation of a leaking boiler is impossible. Even if it continues to heat water, you should not use it. The liquid contained in the heating system is able to extinguish the burner, which will lead to the filling of the dwelling with gas. And if electrical appliances are located in the immediate vicinity of the boiler, a short circuit may occur.


As a temporary solution to fix the leak before the arrival of the repair team, you can use cold welding or sealant. As a permanent solution, this option is not suitable: after a short time, the leak will reappear. Therefore, if you have a gall boiler dripping, call us urgently!
Between battery sections
If a leak appears between the sections, this means that the rubber or paronite gasket has become inelastic and / or the coolant has corroded it. There is another possible reason - corrosion "ate" the nipple. In any case, for a major overhaul, it is required to disassemble the heater into sections and change the damaged part.
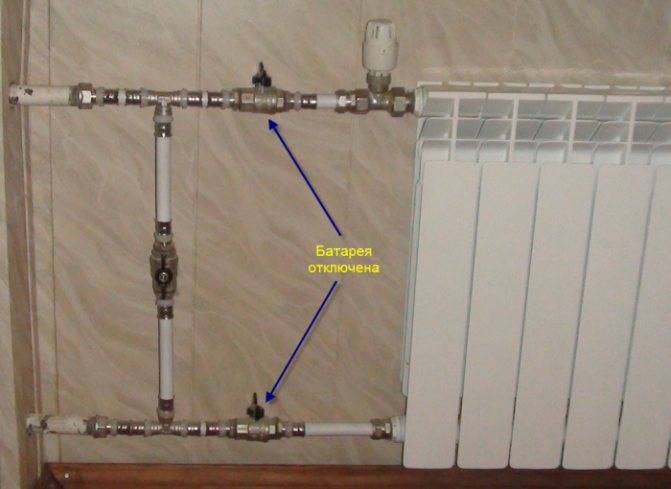
If the heating does not work or the radiator can be turned off without stopping the system, it is removed, disassembled, old gaskets removed, new ones installed and assembled again. How to assemble / disassemble the battery, read here.
If not, you can temporarily seal or close the leak.With aluminum or bimetallic radiators, this trick is very difficult to perform - the distance between the sections is very small. And with cast-iron type MS-140, this can be done really.
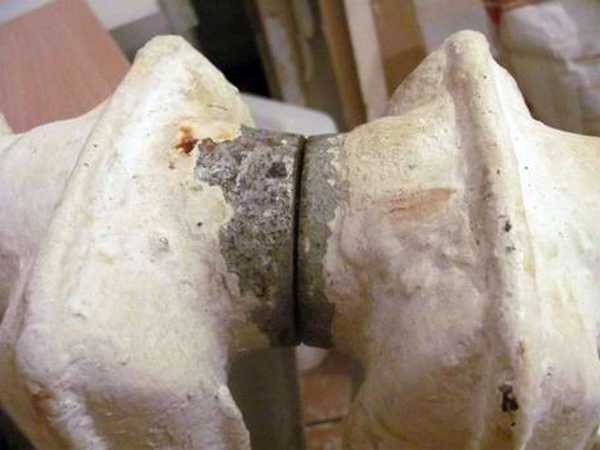
First you need to clean up the leak
First you need to clean the place where the coolant is leaking: remove everything to the metal. Where there is access, remove with a spatula or a brush with metal bristles. Where there is no access, we take a metal cable and peel it off with it. We pass it around the collector in the place where processing is required, and pull it from one end to the other. After a while, everything that can fly off, flies off.
We will lay the same composition on the cleaned surface as for pipe insulation: epoxy resin and metal powder or “cold welding”. Only strips of fabric are needed narrower and longer. Wipe dry and clean, apply the composition, wrap it with a cloth, spread it with glue, another turn. So 4-5 turns. Do not smear the top. For reliability, you can pull it off with a clamp.
If there is a ready-made iron putty, you can apply it (or make it). Then 3-4 turns of fabric smeared with the composition will suffice. The simplest recipe that is suitable for fixing a leak in a cast-iron battery: add drying oils to red lead, grind to make a slurry. And impose it between sections. If there is lead white - mix with minium, add drying oil. The consistency is the same: gruel.
In any case, such a radiator repair is only a temporary measure. After the end of the heating season, repacking is necessary.
Seal of a fistula on a pipe
At the moment, nothing better has been invented than the old-fashioned methods that allow sealing even large cracks in pressurized pipelines.
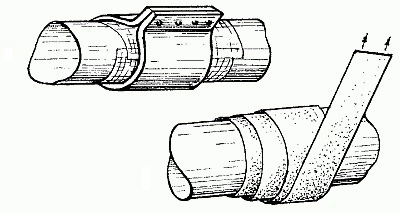
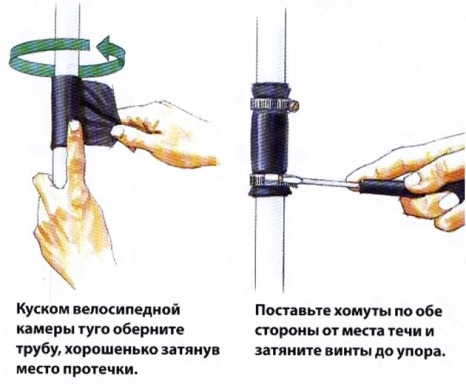
This requires rubber (from gloves, bicycle or car inner tubes) and soft wire. The rubber tape is wound around the fistula under tension in several layers, after which it is securely fixed with wire.
How this is done correctly is shown in the video:
It is much easier to apply a ready-made clamp, made from galvanized steel with your own hands. First, the pipeline is also wrapped with rubber, and then such a clamp is quickly put on top of the breakthrough site. It remains only to tighten the bolts well and even a home-made device will last a few more heating seasons. There are also factory-made clamps with rubber inside, it will be useful to keep one in stock in case of an accident. In extreme cases, a clamping car clamp is also useful.

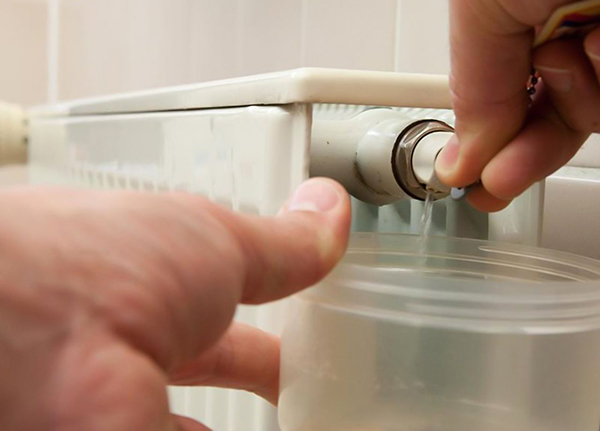
Search for a leak
The easiest and most effective way to find a leak in a radiator is to dismantle and immerse the radiator with clogged pipes in a bath of water. Where there is a hole, water will flow and air bubbles will begin to form.
If the leak is too small, it may not be detected naturally. Then you should connect a compressor or pump to one of the pipes to increase the internal air pressure in the radiator tubes.
A more reliable way to detect the smallest leaks is diagnostics using fluorescent components, which can detect even microscopic leaks in the radiator housing. But this is an expensive diagnostic that can only be done at a service station.

Repair Methods
It is possible to repair the heating pipe without draining the water only temporarily.In the summer, the water from the system will need to be drained, then the crack welded. You may have to completely replace the area with the damaged canvas with a new pipe.
ways to repair this kind of damage. there are several. Each of them requires basic knowledge and skills:
- method using chemicals;
- work with the welding machine;
- mechanical method, where various metal clamps are used in the form of a clamp and a bandage.
Required tools and materials
To work, you will need the following locksmith tools:
- sealant, epoxy resin and glue;
- rubber band and elastic gaskets for fittings;
- welding machine and electrodes;
- pliers, wrenches, steel wire and plumbing tape.
It is also worth stocking up on clamps of the desired diameter and picking up a bandage. When working with chemicals, it is recommended to wear rubber gloves.
On a running system
You can fix a leak in a heating system full of water in the following way:
- If the crack has a small, almost invisible diameter, then chemical agents can be used. Before applying active substances to a metal surface, it must first be cleaned with sandpaper. After that, moisten the bandage or cloth in the chemical and apply to the damaged area.
- You can use cold welding or make a bandage from a plaster-cement mixture. During such work, water from the pipes does not drain, but the pressure level in the heating system must be reduced.
- If the localization of the leak is in places with threads, then it is recommended to simply replace them completely or partially, as in the case of damage to the fitting or clamp.
On a stopped system
It is possible to independently and overhaul a damaged heating system only if it is in shutdown mode. Then, in order to eliminate damage, it is allowed to use any electric tools and replace metal pipes.


When carrying out repairs, it is always worth observing safety measures and, most importantly, correctly assessing the nature and extent of damage. This is necessary in order to make a competent and correct decision to eliminate them.
The heating battery is leaking: what to do depending on the type of defect
All recommendations can be specified in accordance with the location of the problematic phenomenon, in this case it is worth considering the 4 most common situations.
How to fix a leak between two radiator sections?
Here, additional sealing of the joint zone is required. The areas located between two sections of cast iron batteries, as a rule, have a rectilinear shape and are characterized by a small area, so that a defect can be quickly found and eliminated in a short time.
It is worth using the following algorithm:
- strengthen the guide screw with a conventional car clamp;
- you can make a clamp yourself using several steel plates (aluminum blanks will not work here). To tighten the loop, a bolted connection is used;
- the problem area must be isolated with a rubber gasket before applying the clamp. It can be replaced with a rectangular piece of fabric impregnated with epoxy glue.
It is necessary to wrap the joint between the radiators very carefully so as not to overtighten the connection, the same caution should be exercised when using the clamp further.
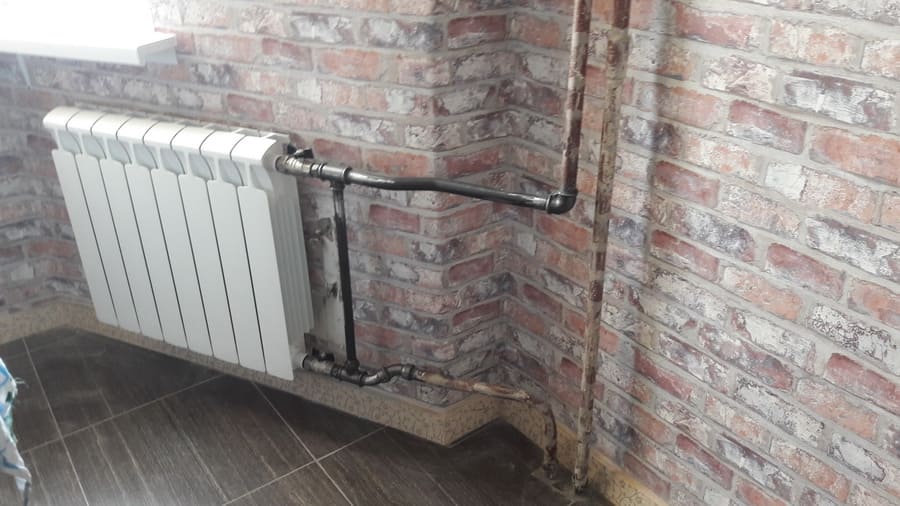
Elimination of a defect at the junction of the riser with the pipe
Here, the cause of moisture may be incorrect installation, the problem becomes noticeable after starting the heating system. The riser with the pipe is usually connected by welding or threading, in both cases, careless assembly, inaccurate welding, the use of pipes of different diameters cause smudges and necessitate immediate repair.
If strong mechanical pressure is applied to this one, for example, during children's play or when it becomes necessary to get to the top of the window, even small loads can cause a fracture at the joint or distortion. In this case, as in the previous case, a clamp in tandem with a rubber gasket can become a temporary measure.
Fixing a cracked radiator
The best solution may be to use classical welding, but this technique, firstly, is dangerous and time-consuming, and secondly, it requires the availability of equipment and relevant skills.
 Cold welding is an excellent method for repairing a cracked radiator
A suitable alternative is cold welding. The problematic area of \u200b\u200bthe radiator must be prepared - thoroughly dried and degreased. Next, you need to take a small ball of cold welding and press it firmly against the leak. The material polymerizes within a few minutes, half an hour is enough for it to solidify completely. This battery can be put into operation in a day, but after the end of the heating season, it will need to be replaced - cold welding is considered a temporary measure.
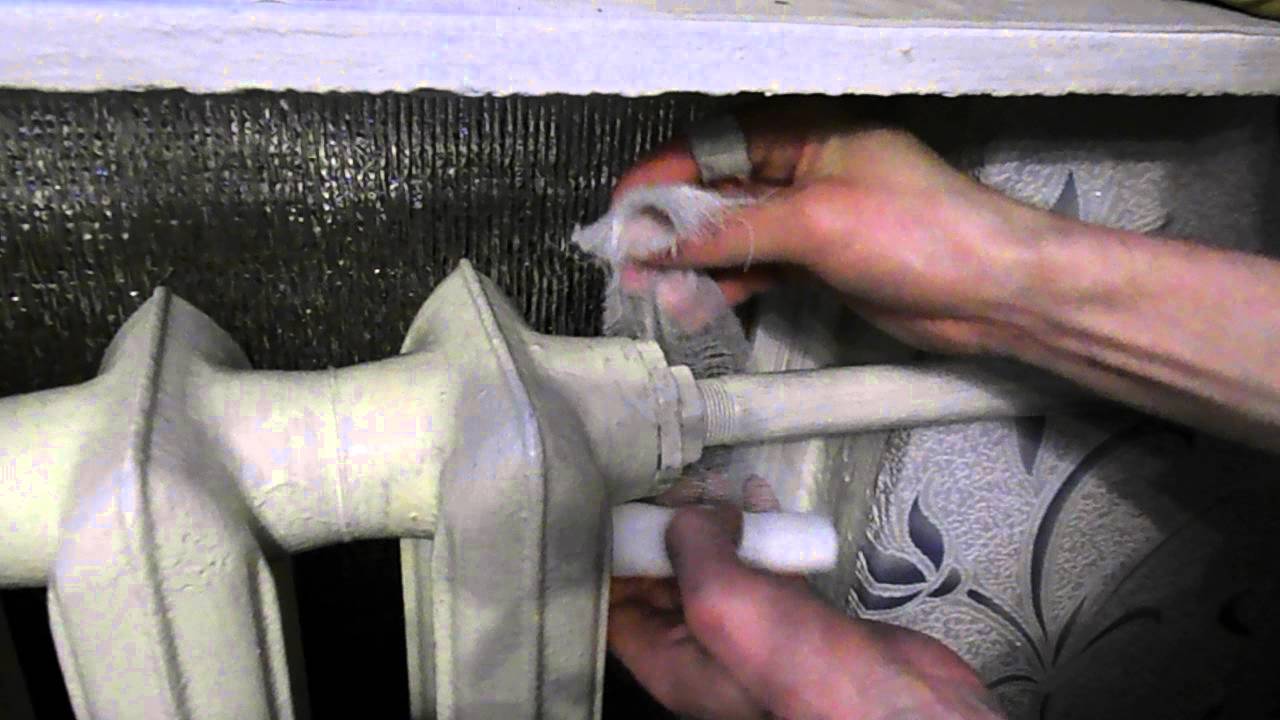
Restoring the integrity of the heating pipe
Steel pipes are used to supply the coolant, bandages with a gypsum-cement mixture are applied to them:
- cement is diluted in a small container to a medium-thick consistency;
- prepare bandage cuts about 30 cm long;
- bandages are soaked in cement mortar;
- the blanks are wound with force on the damaged area in several layers to ensure the strength of the connection.
If it is not possible to turn off the tap, the first bandage to be wound should be soaked in alabaster solution. The next layer can already be used with cement bandages.
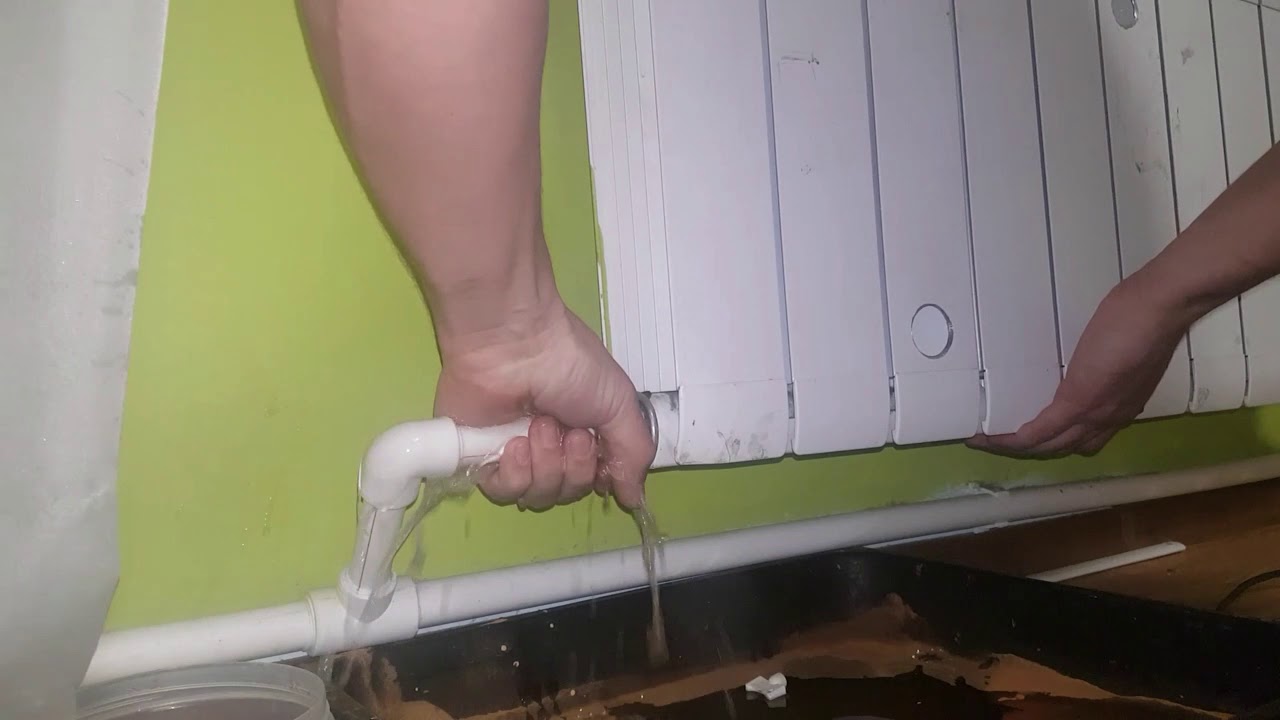
Replacing a faucet without blocking the riser
Is it possible to replace the stopcock without shutting off the water.
Do not practice on the upper floors! Do not do this with hot water and heating!
One of the readers of the site under the nickname, stefano asked a similar question:
Tell me how to proceed. The house has a riser and water outlets from polypropylene pipes. The crane flew on one of the outlets. Can I somehow replace it without shutting off the water in the whole house? And what is better to put? We turn off the water every day before leaving for work.
The first thing to do is to fix the pipes on which the meters hang. Meters should not hang on pipes. To replace the faucets, you will have to turn off the riser. Of course, you can install a duplicate if this one also overlaps, but this is only in a very extreme case.
In your case, it is better to disable the riser. If this is possible, then after disconnecting, you will have to solder something here, namely: if you look at the photo, then after the meters you have two 90-degree bends that lead the pipe closer to the wall. With the same two taps, take the faucet and meters to the wall immediately after the riser. Next, the meters must be put on clamps so that they do not hang on the pipes.
For example, use the following clamps:
They fit very well into the girth of the counters. After installation, they are almost invisible.
As for the valves, install reinforced faucets Valtek, or for example Bugatti.
There is a material about shutoff valves here and here.
TRV design
Recently, the installation of TRV has become quite widespread. In some regulatory documents, it is strongly recommended to ensure the presence of control valves in heating networks in order to avoid overheating of the premises and save electricity, as well as to be able to control the temperature and create comfortable conditions for work and leisure.


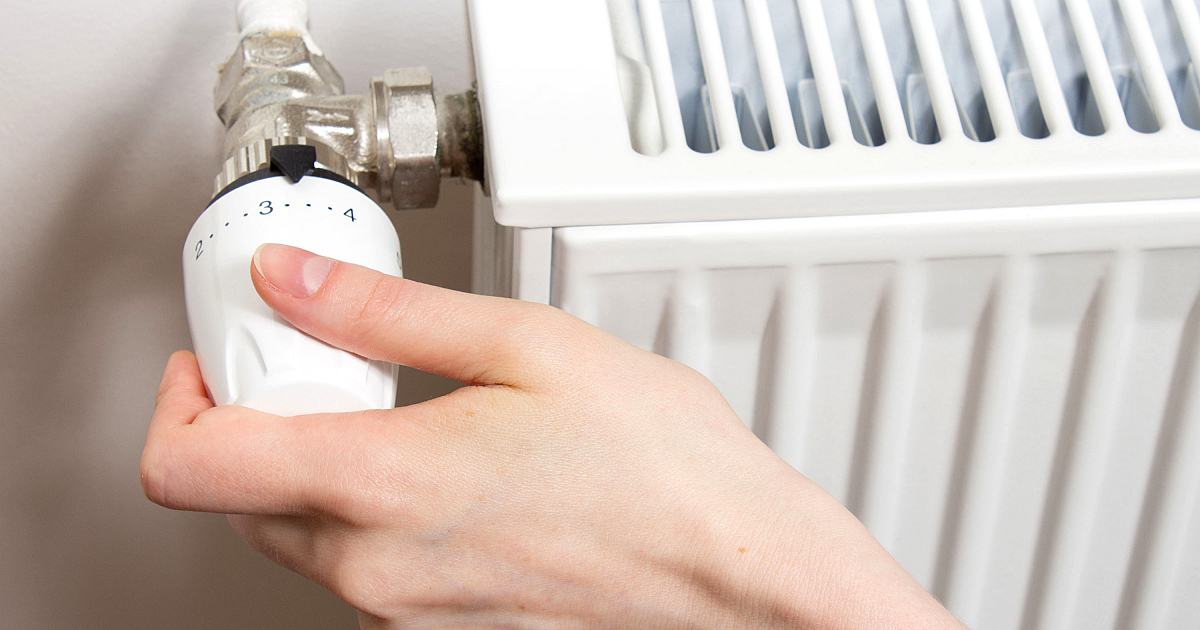

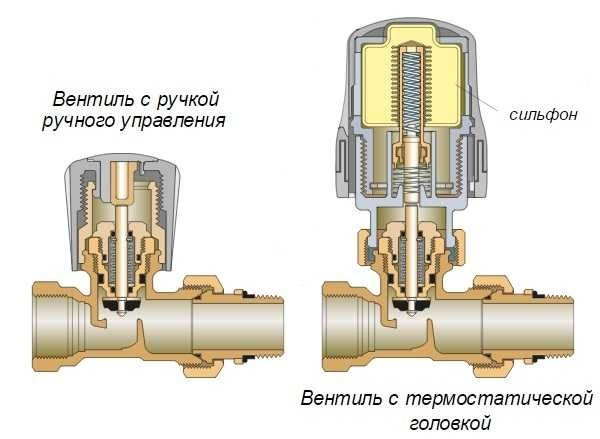
The heating valve consists of a body of a special design and a stem with a spool, which cover the working area. Temperature control is carried out in two ways:
- Mechanical - adjustment is carried out manually when exposed to the valve stem;
- Automatic - adjustment is carried out autonomously due to the design features.
In the body of such a valve is a thermostatic head, which contains a bellows. It is filled with gas, kerosene or a special substance. When the temperature rises, the expansion or change in the physical properties of the components occurs, the bulb expands and pushes the stem out of the bellows. Thus, the supply of heat carrier is reduced and energy consumption is reduced. When the air cools, everything happens in reverse order: the volume of the filler in the bellows decreases, the rod returns to its previous position, and the coolant flow is restored.
Before installing a heating valve, it is important to remember some things:
It is important to position the bellows horizontally so that it will pick up the temperature correctly. Its incorrect installation will lead to the fact that as a result of exposure to the sensor of heat flows of different directions, the operation of the device will not be entirely effective.
The thermostat should be positioned so that the objects surrounding it do not interfere with its operation and that it does not fall under the direct action of heating devices.
It is better to use the thermostatic valve and the head from the same manufacturer, even if the parts of different brands fit together.
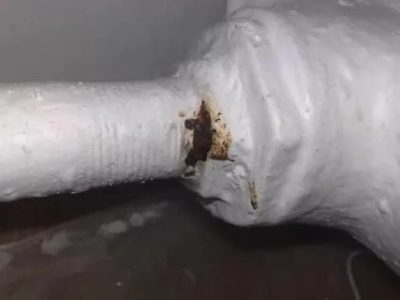
The heating battery is leaking - what to do
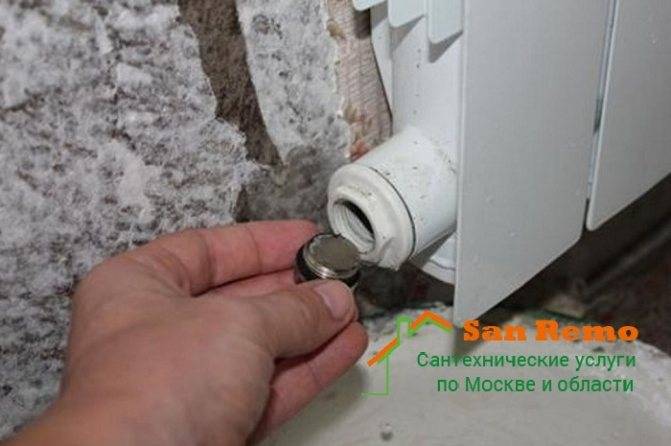
The first thing to do if the radiator is leaking, as in the photo, is to turn off the water. But if the leak is serious, then it is urgent to call an emergency team - the plumbers have all the necessary tools and materials to fix the problem if the battery has leaked.
Next, if possible, turn off the water. It is good if there is a tap or valve in the apartment itself - this will quickly turn off the water supply and save property. But what if there is no such valve, and the radiator is leaking - what should I do? Then you need to turn the coolant supply valve to the heating system, which is located on the main pipe near its entrance to the basement. If the leak is minor, then you can try to fix it yourself (for more details: “How to fix a heating pipe leak if it leaks”).
This is interesting: Hydrogen generator - economic feasibility (EFFICIENCY), installation cost, service life
Leak at the junction: ways to eliminate
- LiveJournal
- Blogger
Pipes often leak due to poor joint insulation. Most often, the user is faced with the fact that a plastic pipe is leaking at the joint.Eliminating a leak in a metal-plastic pipe will allow the installation of new connecting fittings (the line was incorrectly installed), or the replacement of the entire wiring (an unsuitable material was selected - for example, polypropylene was chosen for heating for cold water supply).
Tip: “It is recommended to coat all joints with sealant (for example, a universal heat-resistant sealant for heating pipes)».
A similar defect is also observed in cast iron pipelines, but it will be somewhat more difficult to deal with it. You can fix a leak in a heating pipe in the following ways.
Chasing joints of cast iron pipes
The joints of such highways can initially be sealed in different ways. Based on this, one or another algorithm of actions is selected.
If the pipes were caulked with lead, in order to eliminate a leak in the heating pipe, you will have to:
- Clean up to the base metal (joint).
- To mint the resulting gap, for which it is recommended to use a blunt chisel. The implementation of this repair option is explained by the softness of lead, which easily fills the gap.
It will be more difficult to fix a leak in a heating pipe, which was sealed with cement mortar:
- Remove the remains of the cement mixture with a hammer and a narrow chisel.
- Remove the seal and clean the resulting gap.
- Drive a new sealant into the gap (for example, tarred fibers), after which it remains to cover it with a cement solution (one to ten).
Pipe joints are sealed with cement
- LiveJournal
- Blogger
Cement is suitable for sealing metal pipes There are situations when there is nothing else at hand except cement. It turns out that this is quite enough to seal the leak in the heating pipe.
The sequence of actions is as follows:
- Clean up the joint.
- Remove the old seal, for which it is not recommended to use heavy tools, otherwise the pipe may be damaged.
- Prepare cement, water and a wide bandage.
- Dissolve the cement in a small amount of water - a slurry should form, in which the bandage (or a piece of gauze) is moistened.
- Wrap the heating pipe with a treated bandage. In this case, each joint is evenly wrapped.
- The design remains to harden, and after 2 ... 3 hours it is processed with sandpaper and painted over with a suitable paint.