- Installing a new heated towel rail
- DISMANTLING
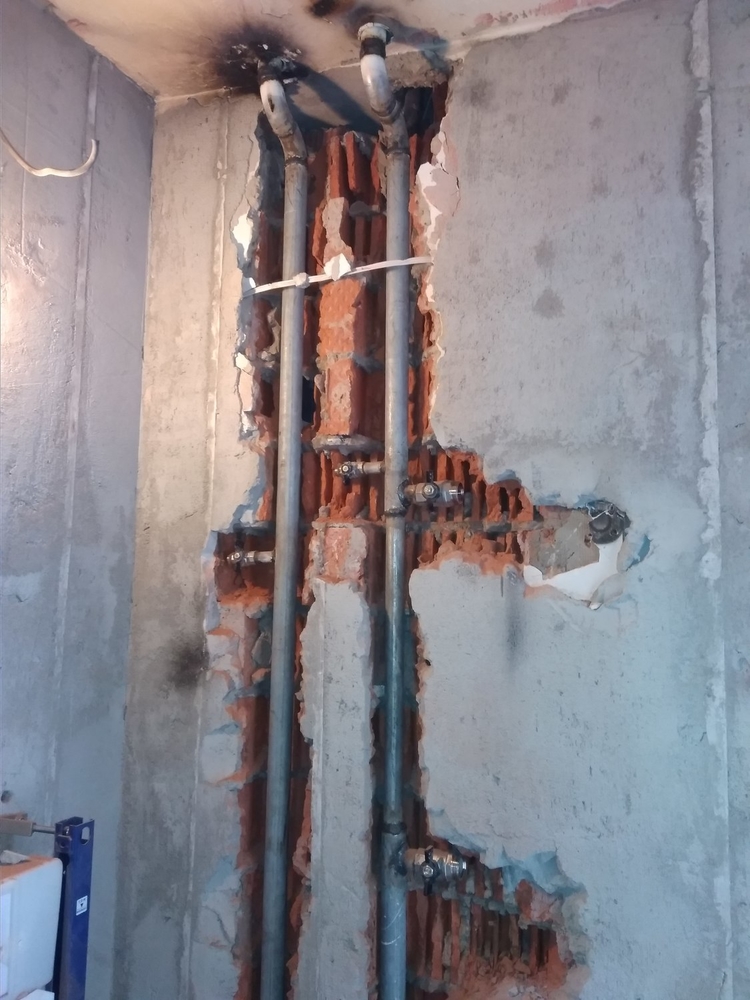
- ARRANGEMENT OF THE MAIN RISER, PIPE SUPPLY, INSTALLATION OF THE BYPASS
- FEATURES OF INSTALLING THE MAIN UNIT
- Relocating a toilet | GSPS.RU
- DIY replacement
- Stages of work
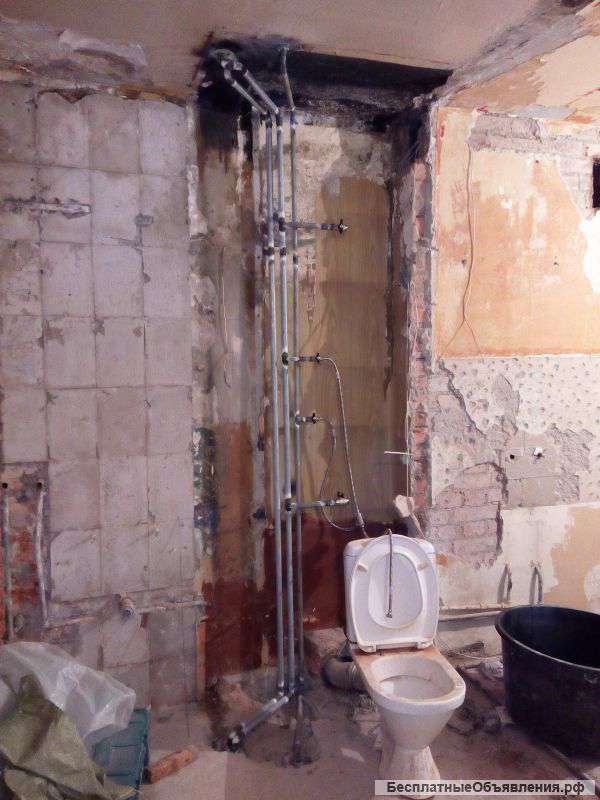
- Transferring a heated towel rail to another wall - an example of work
- Water heated towel rail: everything is somewhat more complicated
- A few practical tips
- Normative service life of water supply pipelines
- Where is the standard service life of water supply risers in an apartment building indicated?
- Steel pipes: operating nuances
- The service life of pipes is a direct dependence on the properties of the materials of manufacture
- Normative service life of water supply pipelines
- Replacement features
- Features of mounting the electrical model
Installing a new heated towel rail
- Mounting brackets on the wall;
- Polypropylene pipes;
- Apparatus for welding;
- Lerki for threading;
-Special wire cutters or pipe cutter;
- Connecting fittings;
- Three ball valves.
Installation work, which can be done by hand, involves several stages of their implementation.
1. Dismantling the old dryer.
2. Installation of taps on the outlets of the new dryer and arrangement of the bypass.
3. Welding of polypropylene pipes.
4. Attaching a heated towel rail.
5.Connecting it to the common coolant system.
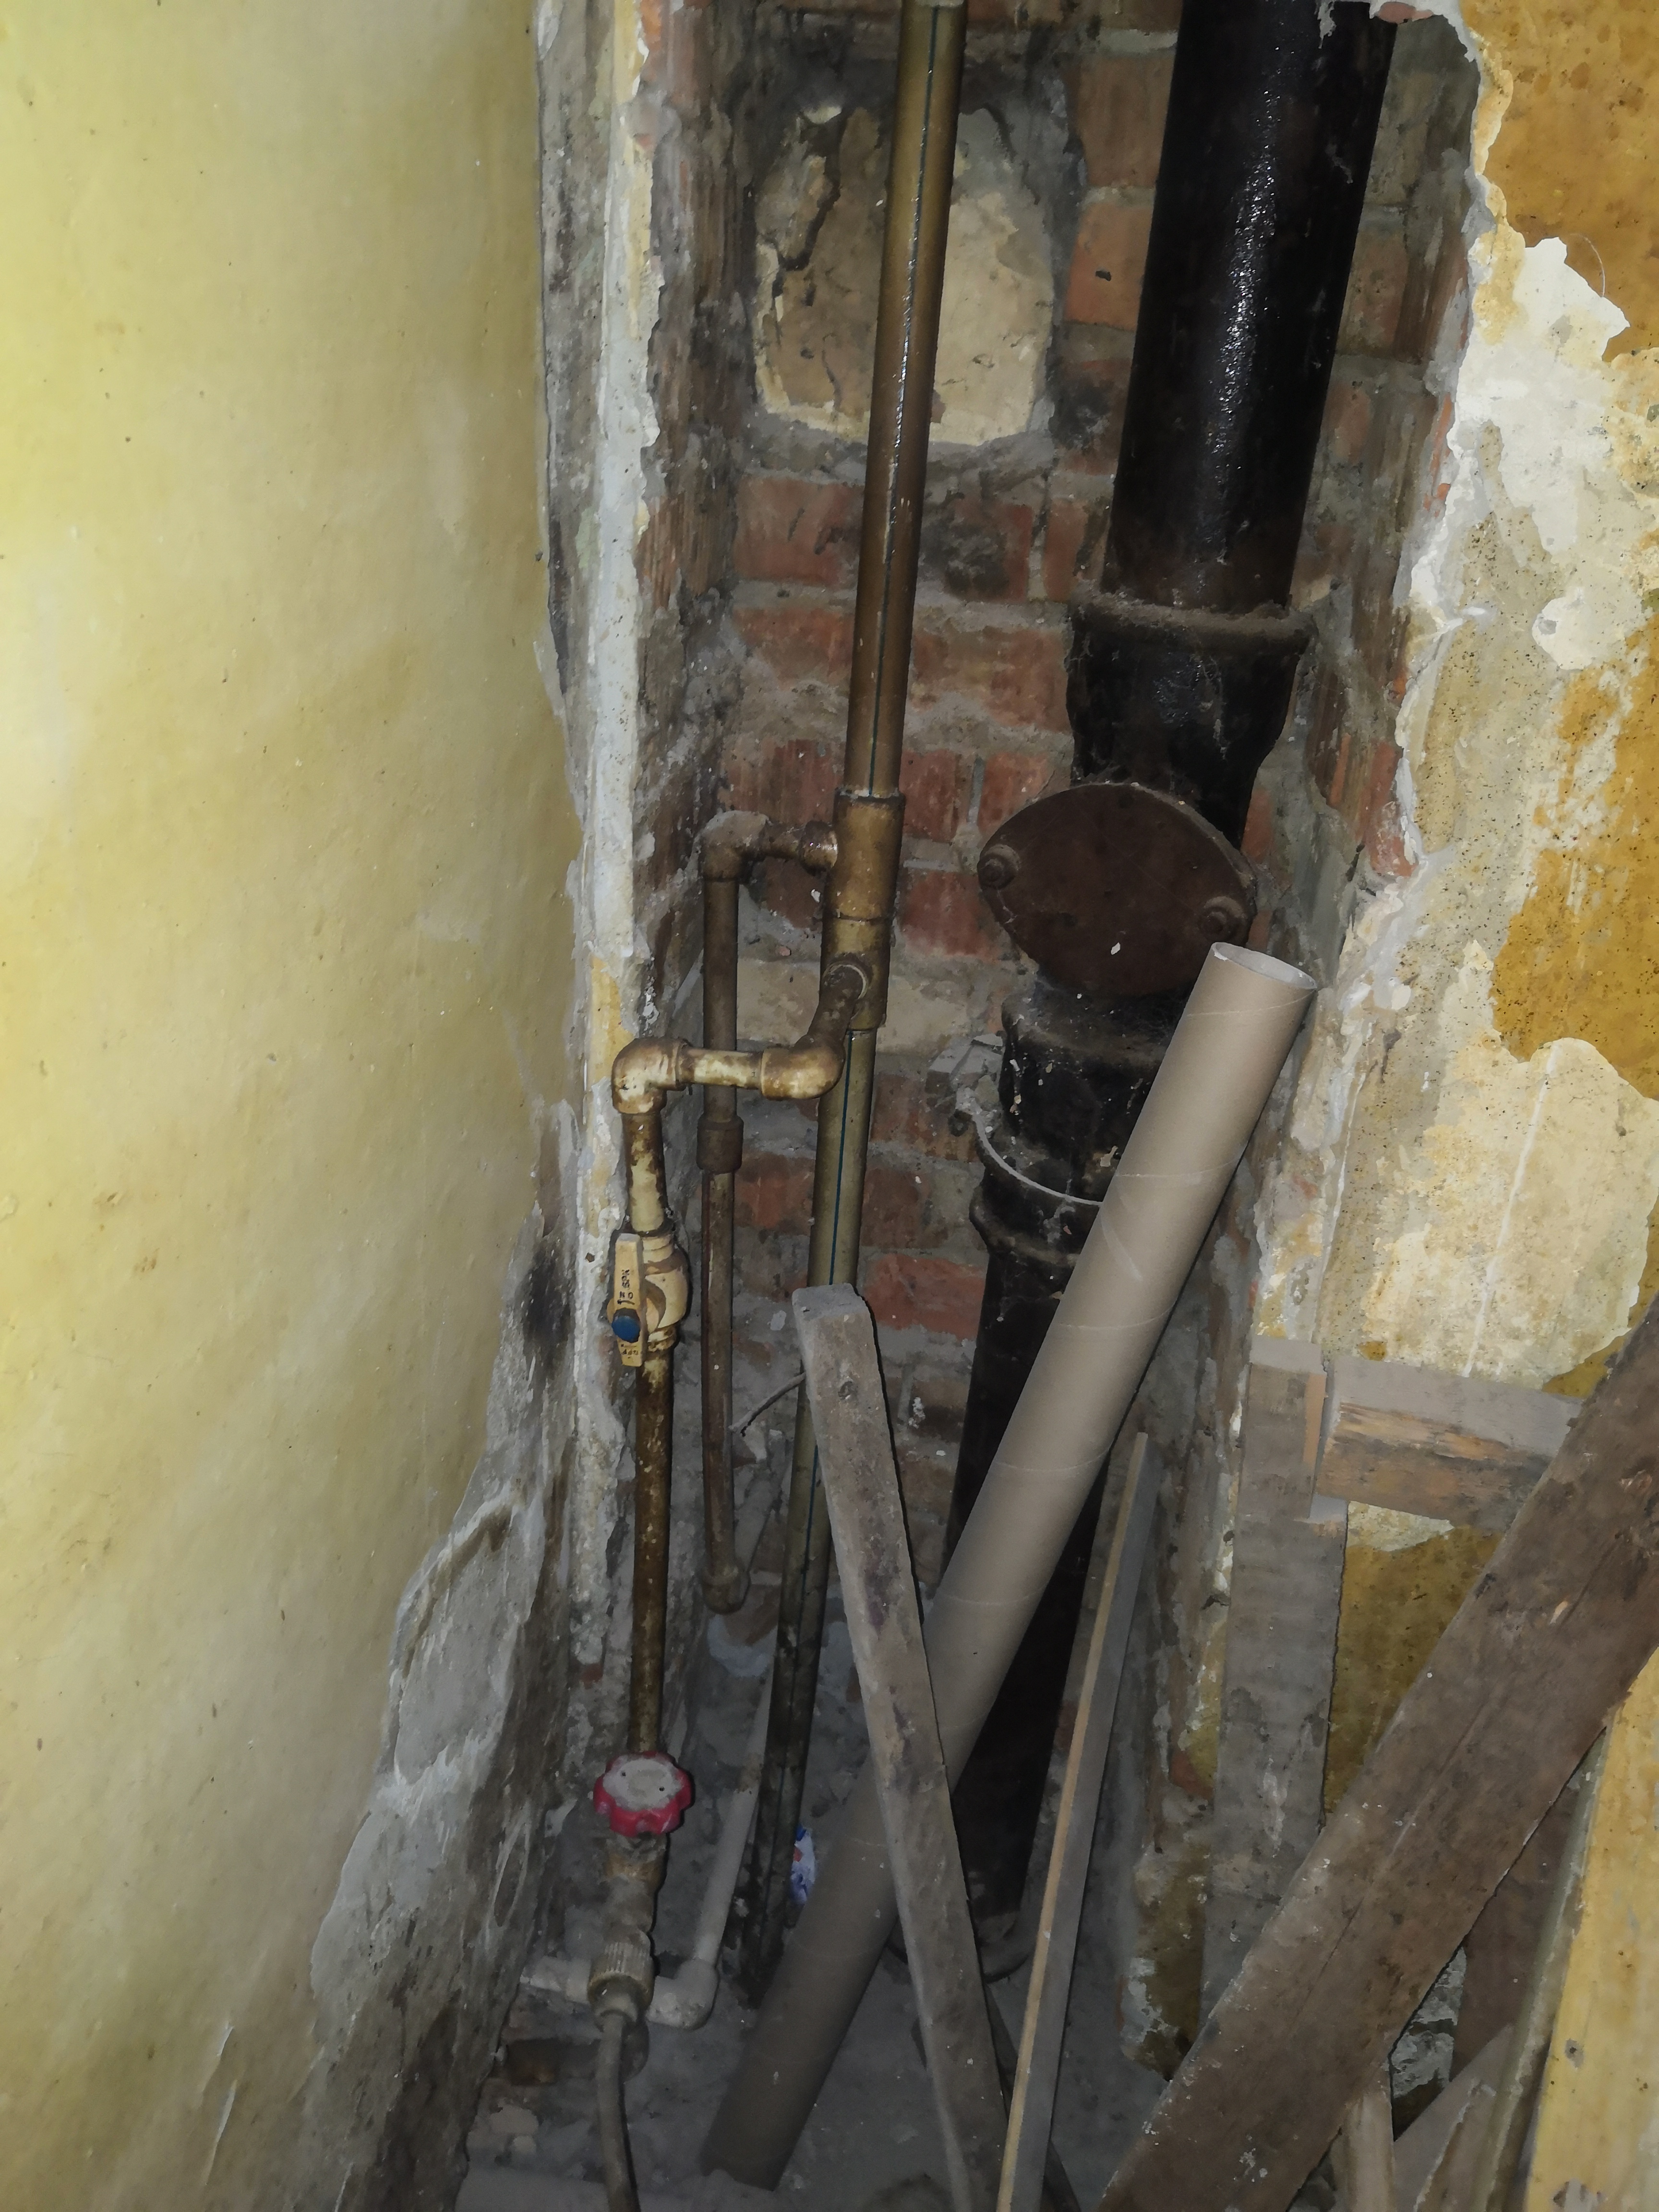
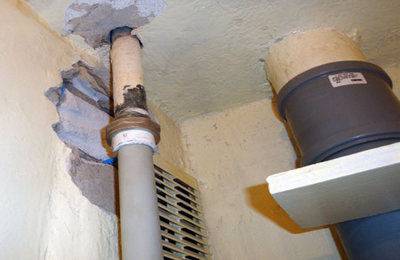
DISMANTLING
To dismantle the old heated towel rail, you must first drain the water from the main riser.To do this, they invite a plumber from the housing office to turn off the hot water riser or heating system.
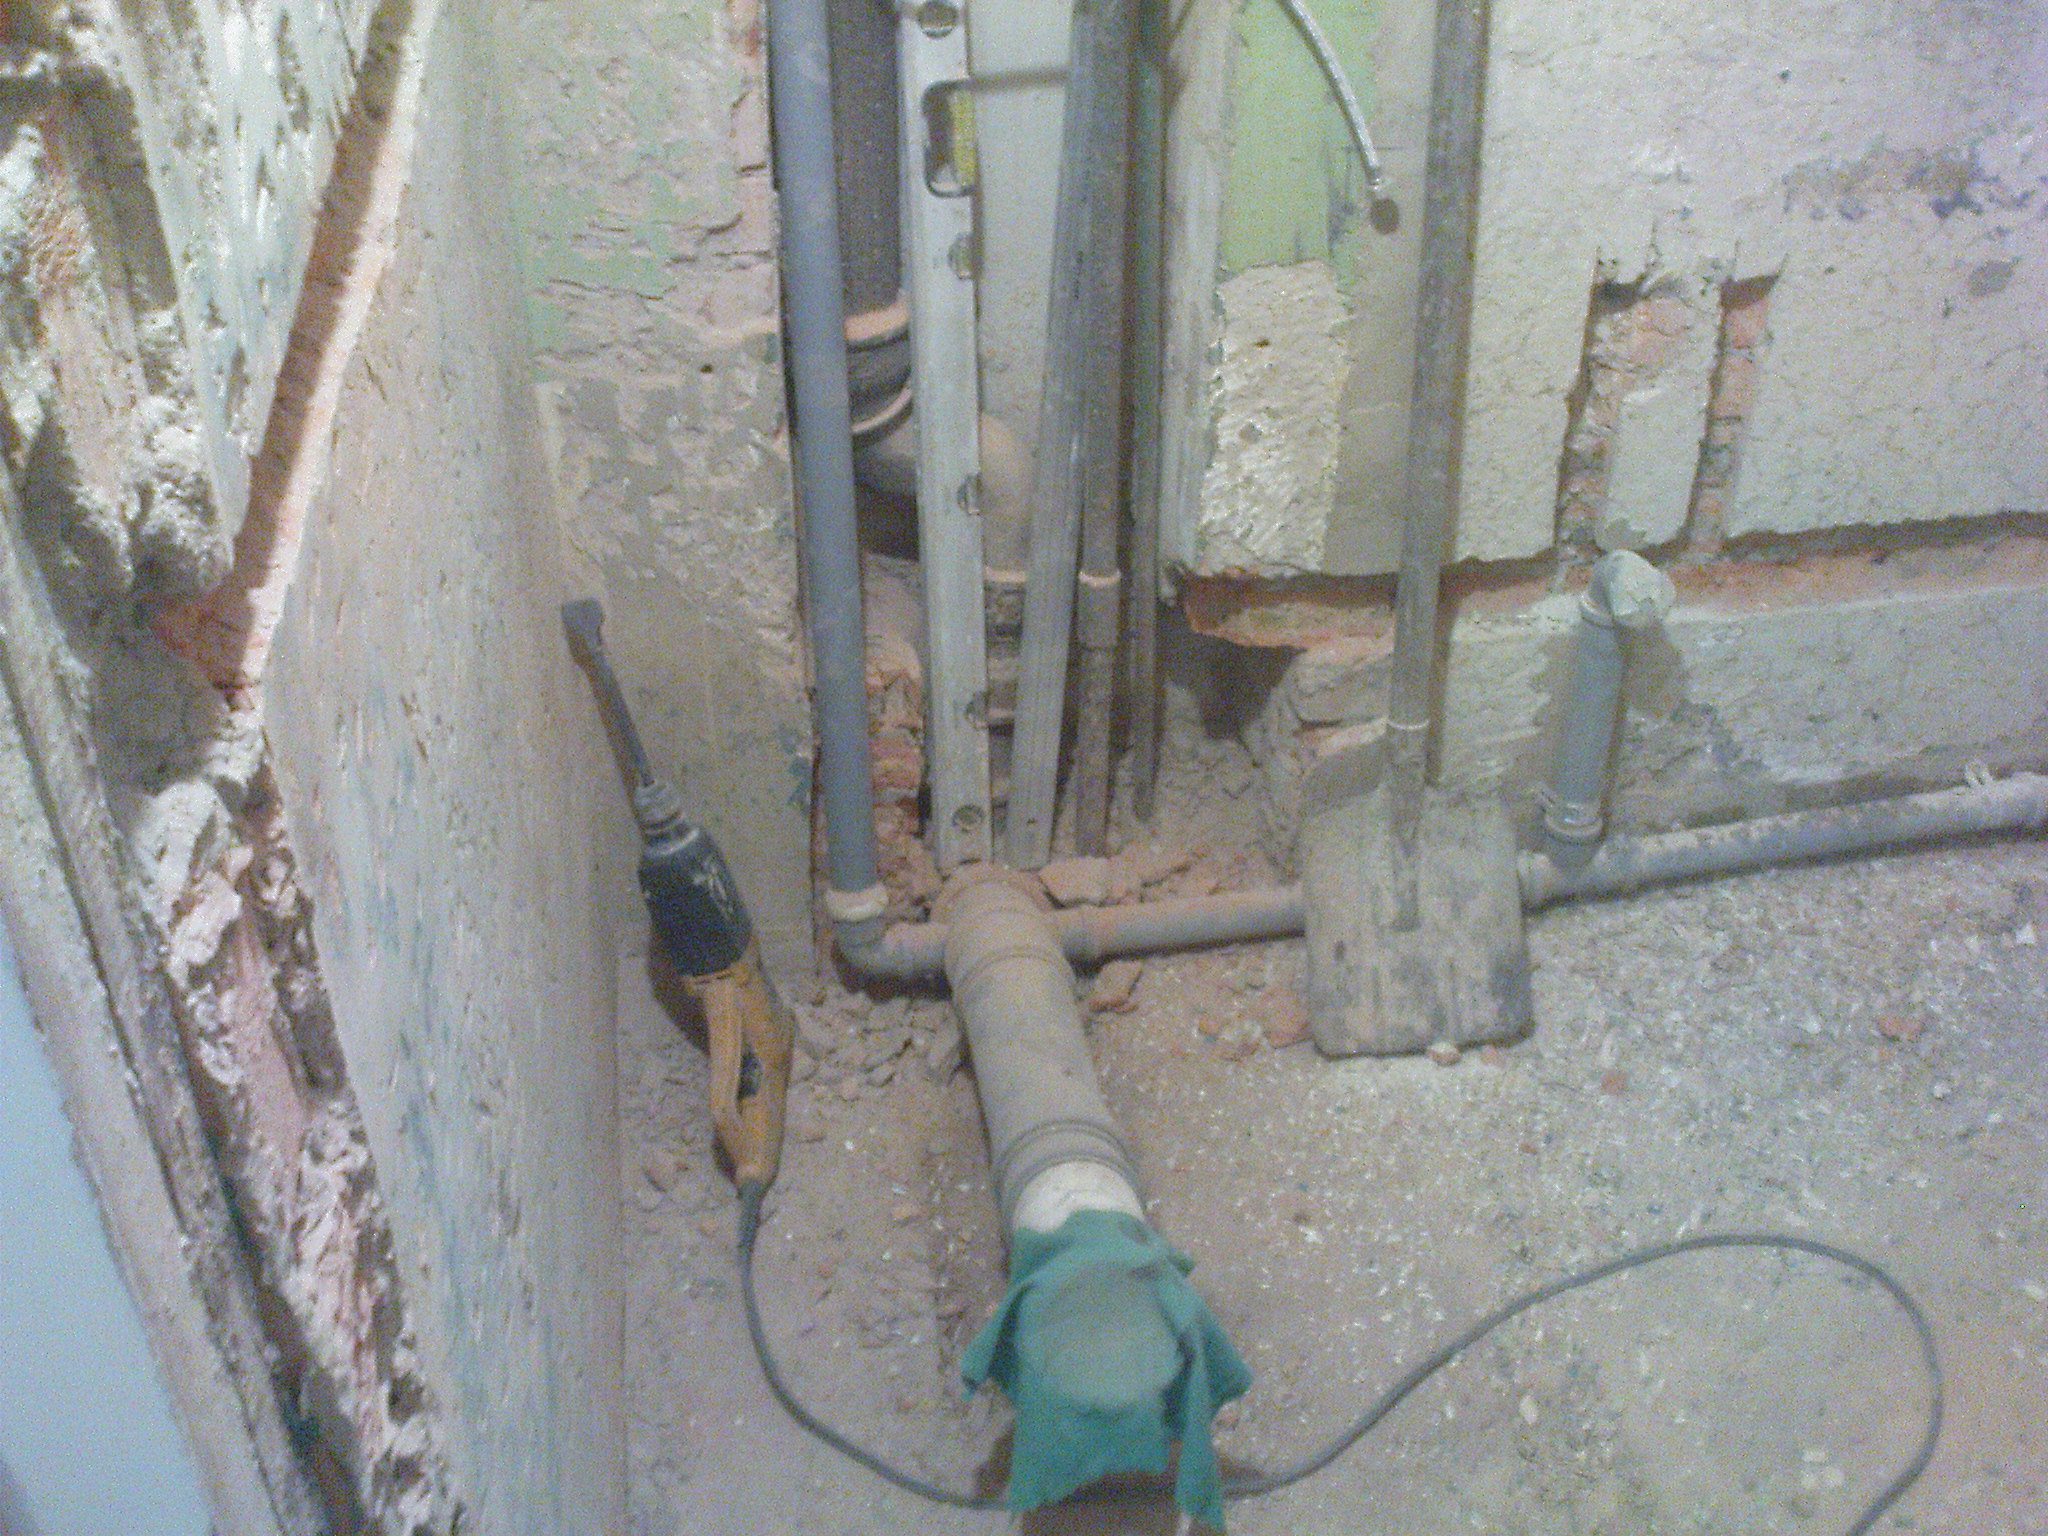
1. After draining the water, they begin to dismantle the old equipment. It is better to cut it with a grinder. First, the lower pipe is cut in it, and then the upper one.
2. For safety net for this work, it is better to invite an assistant to support the old device.
3. After cutting the inlet and outlet pipes, the old heated towel rail is released from the fasteners and taken out of the room.
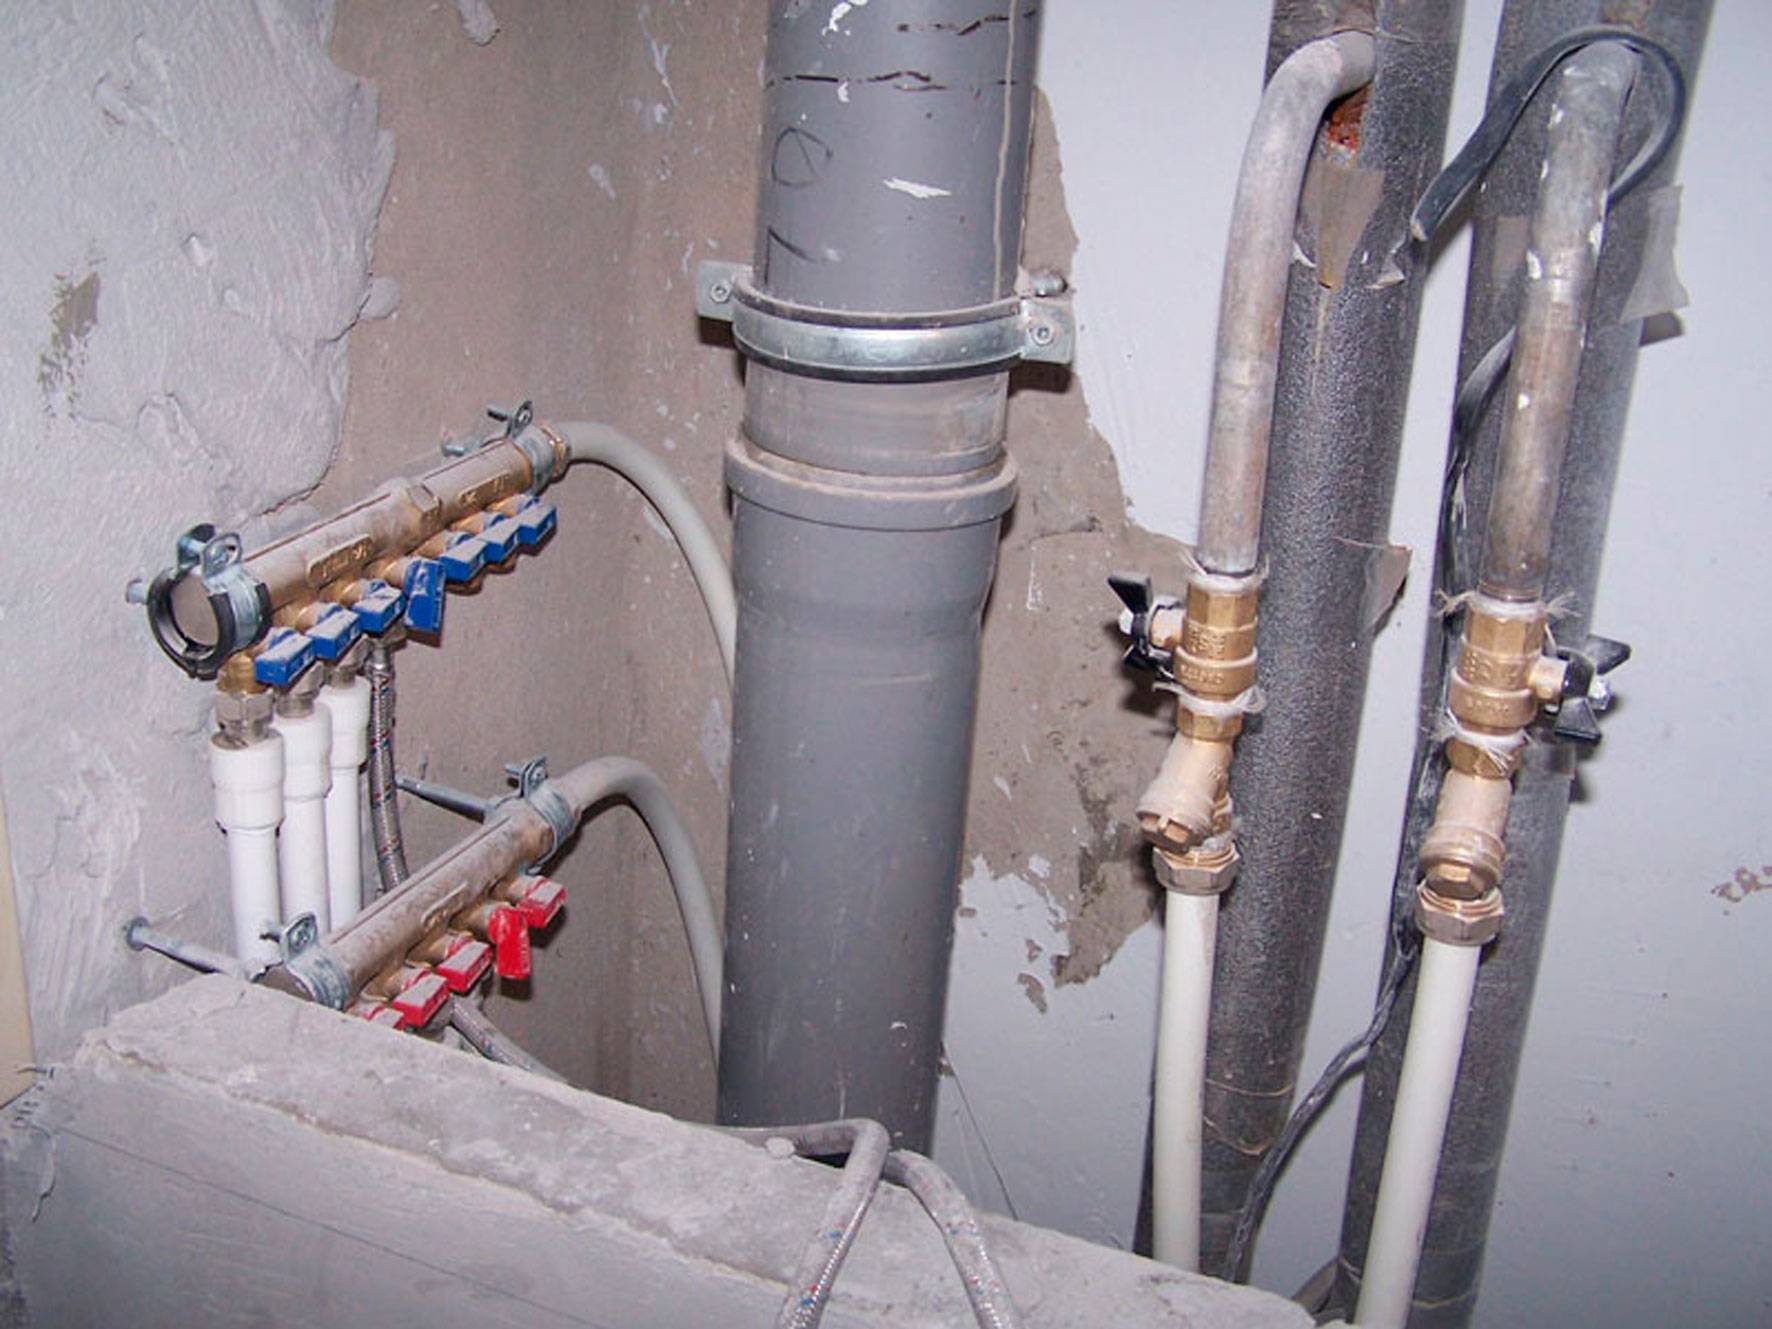
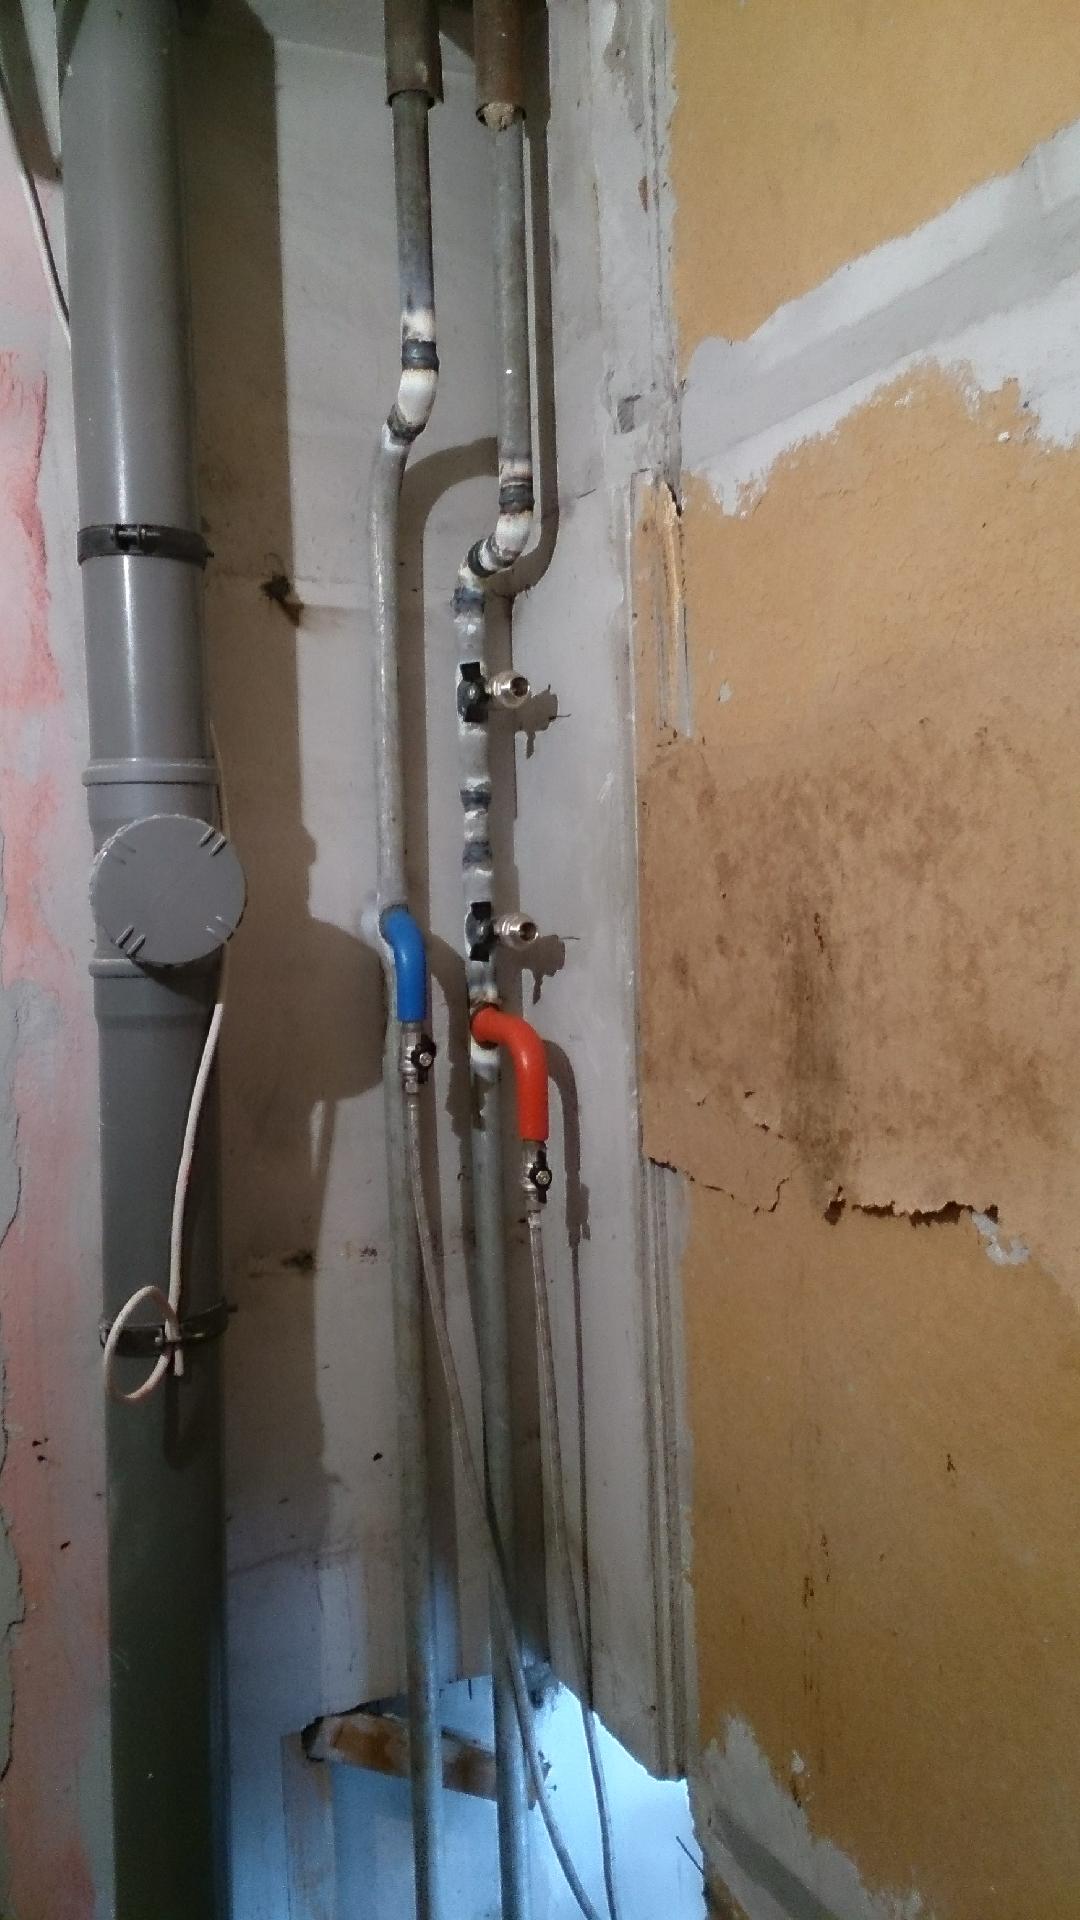
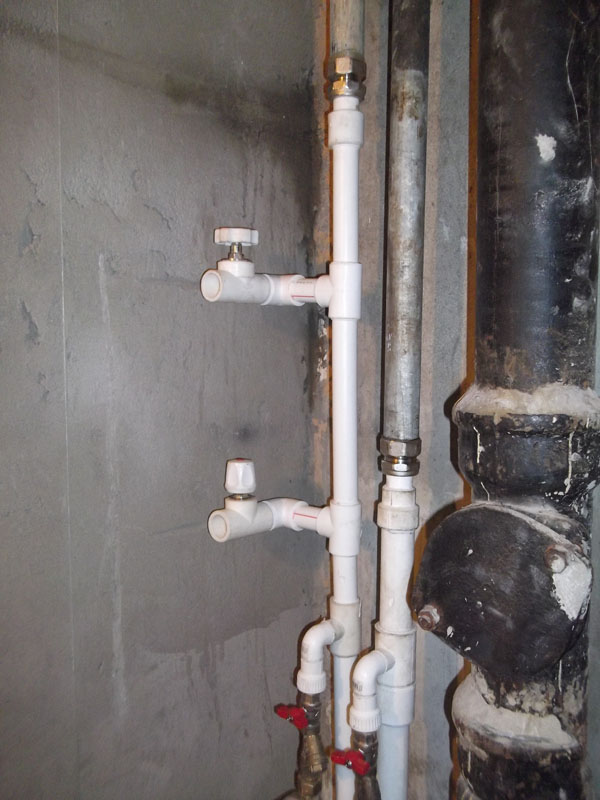
ARRANGEMENT OF THE MAIN RISER, PIPE SUPPLY, INSTALLATION OF THE BYPASS
- After removing the old heated towel rail, the apartment riser and the pipes of the entire wiring in the apartment are replaced with polypropylene ones. Usually their diameter is 25 mm. 2. At the ends of the cut pipes, the cut point is cleaned so that they do not have burrs and traces of old paint.
3. Then, having lubricated the lehrka with oil, it is put on the machined edge of the pipe and, turning, cut the thread to install the "American". This fitting is necessary for further connection of the general system with polypropylene pipes.
4. To prevent water leakage and the possibility of dismantling during repairs, all joints are sealed on threaded connections with linen winding or fum tape.
5. If the heated towel rail is transferred to another wall using polypropylene pipes, a special welding machine is needed to connect them.
6. The slope of the pipe is made in the direction in which the coolant moves.
7. For reliable tightness of the system, it is necessary to prepare individual connecting elements in advance in the form of:
-Cranes with a heated towel rail;
-Cranes with extension cord;
- Extension cords with MPH adapter.
-


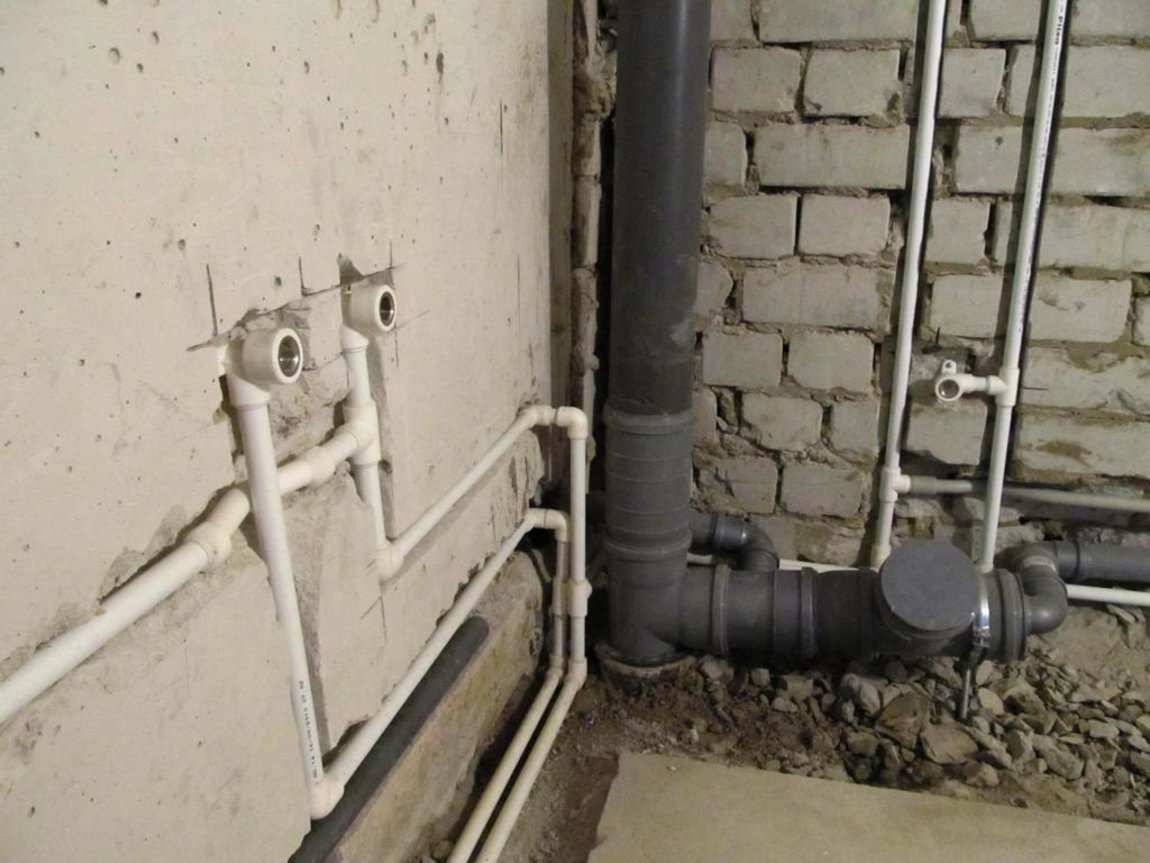
FEATURES OF INSTALLING THE MAIN UNIT
Having chosen a place on the other side of the wall where the transfer of the new heated towel rail is planned, it is fixed there along with pre-packed taps. The installation of the heated towel rail must be carried out on hanging brackets in order to avoid temperature deformations between the wall and the pipe.
Then, a bypass is installed to the outlet pipes, the so-called bypass section with shutoff valves. The task of the bypass is to ensure the operability of the heating or hot water supply system in the event that the water supply to the heated towel rail is cut off.
To equip the system for supplying and discharging the coolant to the dryer, there, depending on the design solutions, solder:
- Angle fittings MRV (couplings with internal thread);
-Necessary pipe parts;
-Tees;
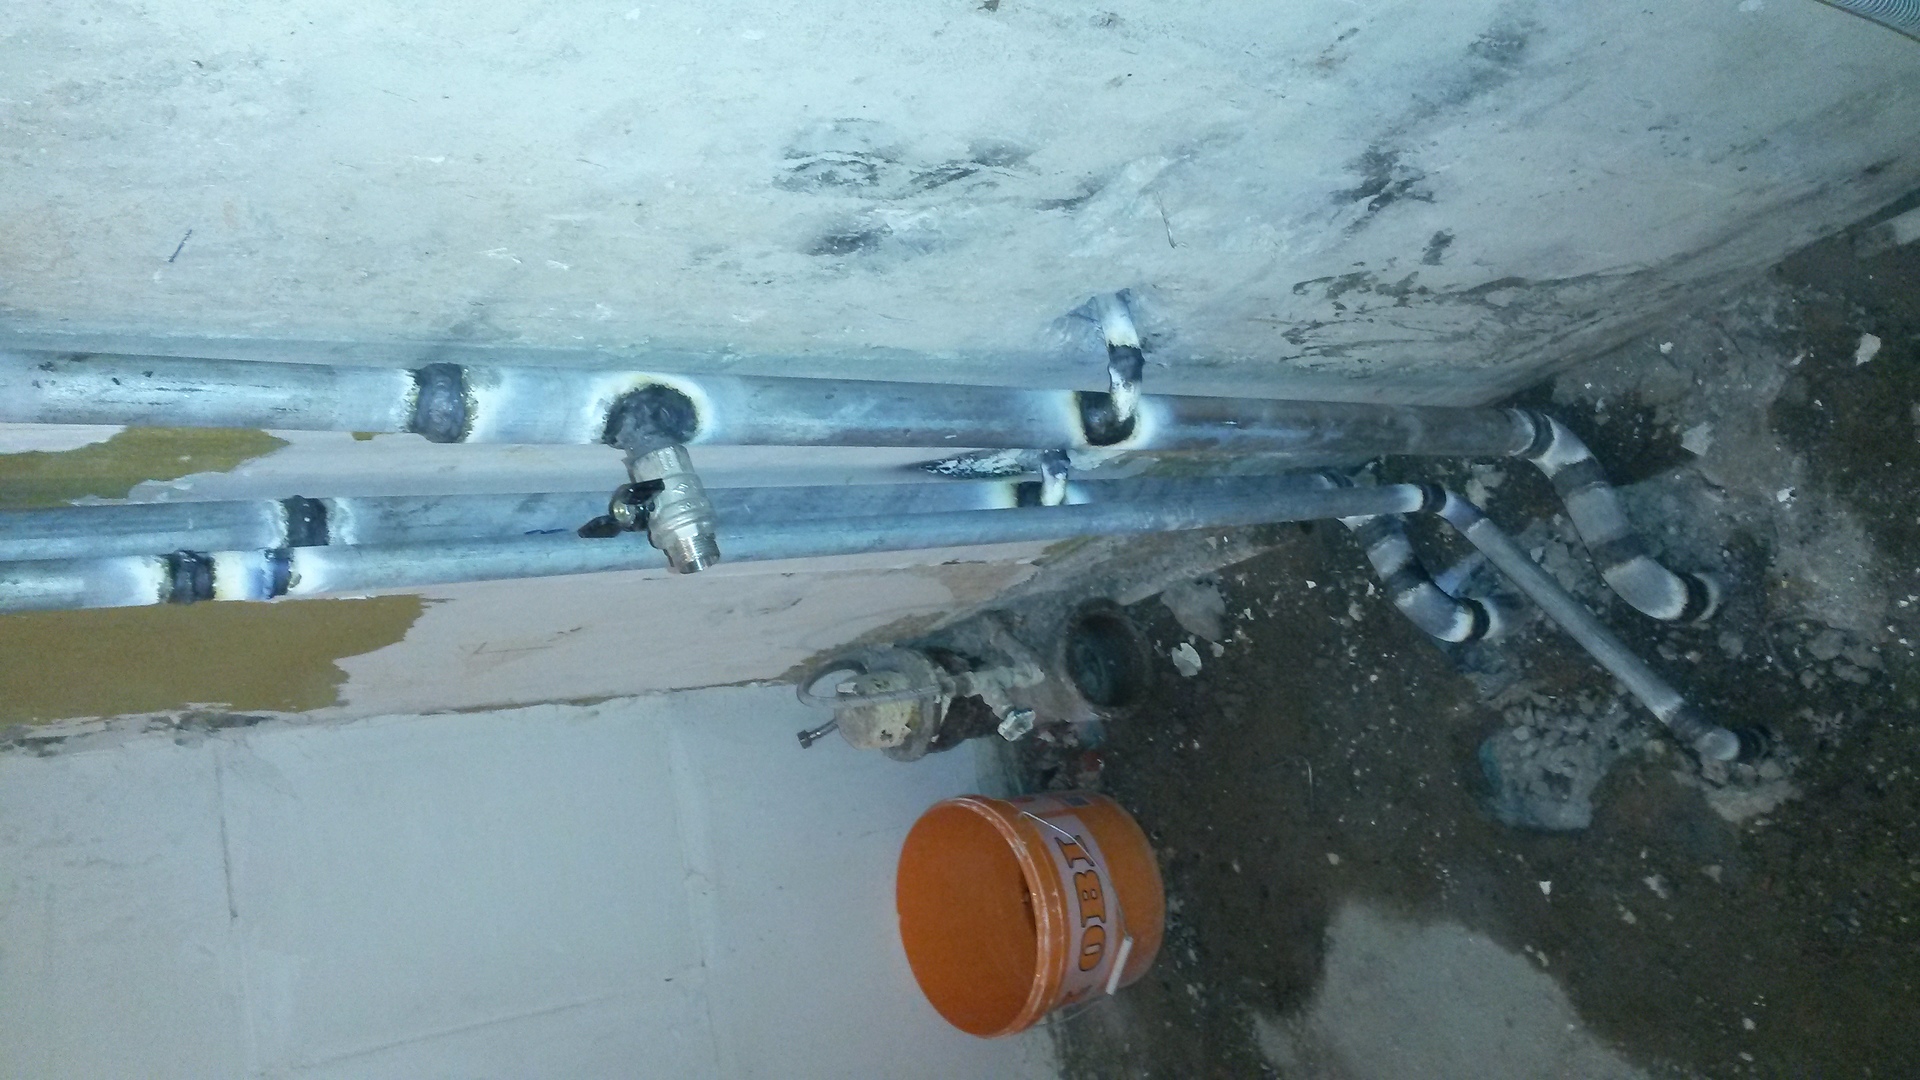
In the bypass-riser system, an additional ball valve is installed for emergency shutdown of the main intra-house riser. Completing the installation work with your own hands, the entire system is checked for leaks.
Relocating a toilet | GSPS.RU
Changes in the redevelopment of your apartment, imperceptible at first glance, can significantly increase the functionality of the area and make the life of the owner much more comfortable. In the conditions of limited footage of typical apartments in old-style houses, there are many problems with the arrangement of furniture in the kitchen, for example, or the installation of plumbing equipment.
With the latter, by the way, difficulties most often arise, especially if the bathroom is combined, its area is critically small, and the owner also wants to put a washing machine there. In this case, there is often a desire to change the location of the bathroom or toilet, or rotate them relative to each other.
Possible migration issues
It seems that the transfer of a toilet bowl is a simple process and unexpected problems should not arise, however, there are a large number of little things, without taking into account which, the operation of the equipment may deteriorate. For example, moving the toilet from the riser increases the risk of blockage due to the increase in the distance of the sewer channel.


In addition, when redeveloping the bathroom and moving the toilet from the riser, there is a problem with the appearance of an unpleasant odor, due to the suction of water from all plumbing fixtures nearby with each flush.
Moreover, the appearance of the smell is also accompanied by a gurgling soundtrack. To avoid such difficulties, the redevelopment of the bathroom should be carried out on the basis of building codes and regulations.
Rules and recommendations
On the basis of SNiP, the transfer of the toilet bowl from the riser is possible at a distance of no more than one and a half meters. In order to avoid blockages in the sewer channel, it is necessary to take into account the slope, depending on the diameter of the pipe.
For a 50mm channel, the slope should be at least 3 centimeters per meter, for 100mm - 2 centimeters, respectively. Failure to follow the recommendations can cause a decrease in the drain rate, which over time will lead to the appearance of "blood clots" in the sewer channel.
There are situations when, in order to comply with the slope, it is necessary to raise the toilet bowl above the general level of the floor. If the transfer distance of the toilet bowl is significant, then the rise can be significant. And taking into account the need to mask the pipe to the riser, it may be necessary to equip a full-fledged podium.
Also, all kinds of blockages in the new pipeline occur due to the installation of right angles, which should be avoided when transferring the toilet bowl from the riser. However, with an increase in the distance from the riser, it is quite difficult to follow the standards specified with SNiP, which one way or another can cause problems.
Transfer of the toilet bowl as a stage of redevelopment
The situation is completely different if the floor coverings were completely or partially dismantled in order to lay the pipeline to the riser. As a rule, in this case, it is necessary to carry out waterproofing work and, accordingly, draw up an act on hidden works. The absence of an act of examination of hidden works can cause difficulties at the stage of coordinating the redevelopment.
Directly to the process of waterproofing should also be approached responsibly. With a coating type of waterproofing, builders can skip some section, or ignore the overlap of the layer on the walls. If the waterproofing is glued, the elements must necessarily overlap.
Actually, the act of hidden work of the Moscow Housing Inspection is required to prevent such situations of damage to your repair and repair of neighbors on the floor below. The certificate of inspection of hidden works is the basis for signing an act on the completed redevelopment and making changes to the BTI plan.
Our company has many years of experience in preparing project documents, including acts of hidden work. Our specialists can coordinate these documents as soon as possible. If you need to agree on redevelopment, project development, as well as for a free consultation, please call the number listed on the site.
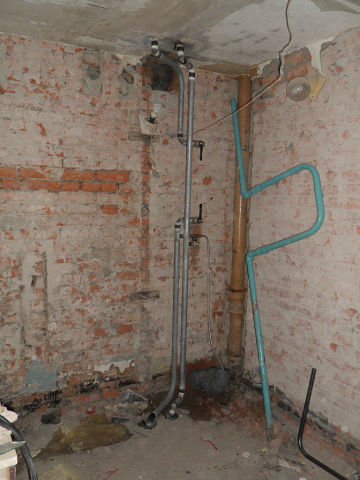
DIY replacement
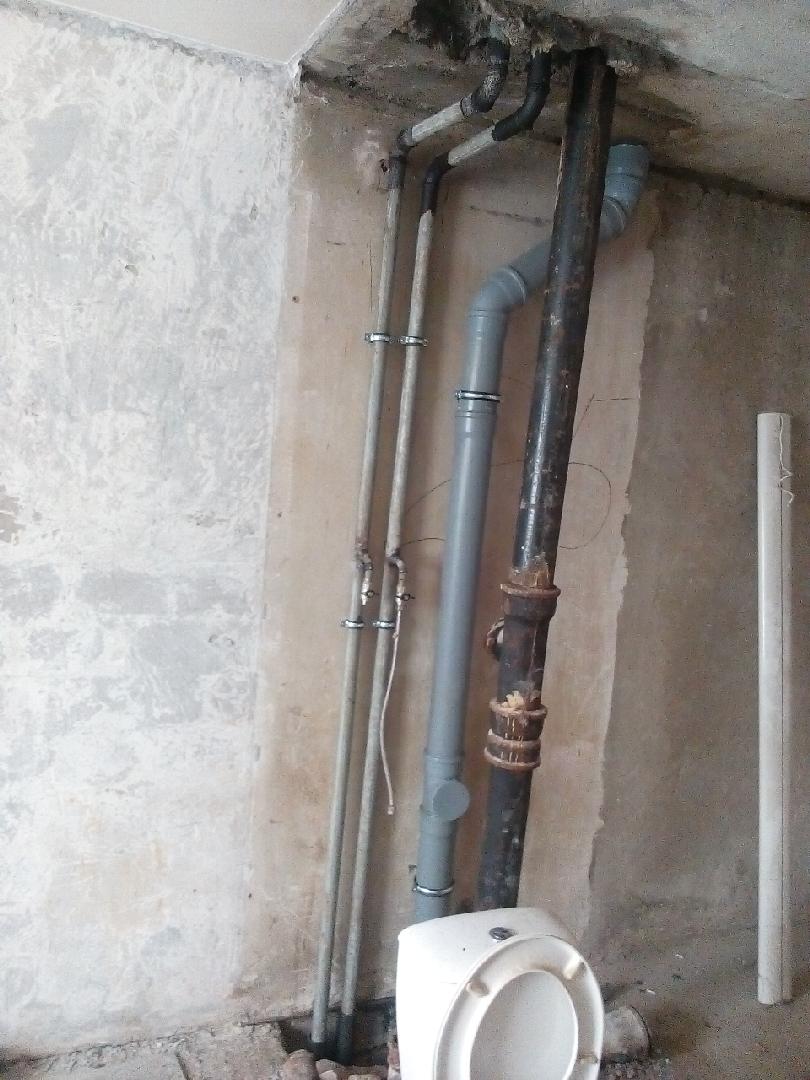
 A layman should be aware that in some cases, replacing one of the pipes of a cast-iron sewer riser with a plastic one can cause a serious accident.
If holes filled with cement are punched in the floor slabs for laying the riser, replacement can be carried out according to the described scheme. Being fixed in each floor, the riser will remain in place when a fragment is cut out of it.
But in some houses, shafts are arranged for laying sewer risers, so that the weight of the entire pipe is supported by a support located below and fastenings to the wall.
If, in this state of affairs, one of the cast-iron pipes is replaced by a plastic one, which has a much lower strength, then all the cast-iron located above it will soon begin to slide down.
In this case, the connections of horizontal wiring with tees will be depressurized, and the tees themselves may even burst. So, in the presence of a shaft, only the entire riser can be changed to plastic.
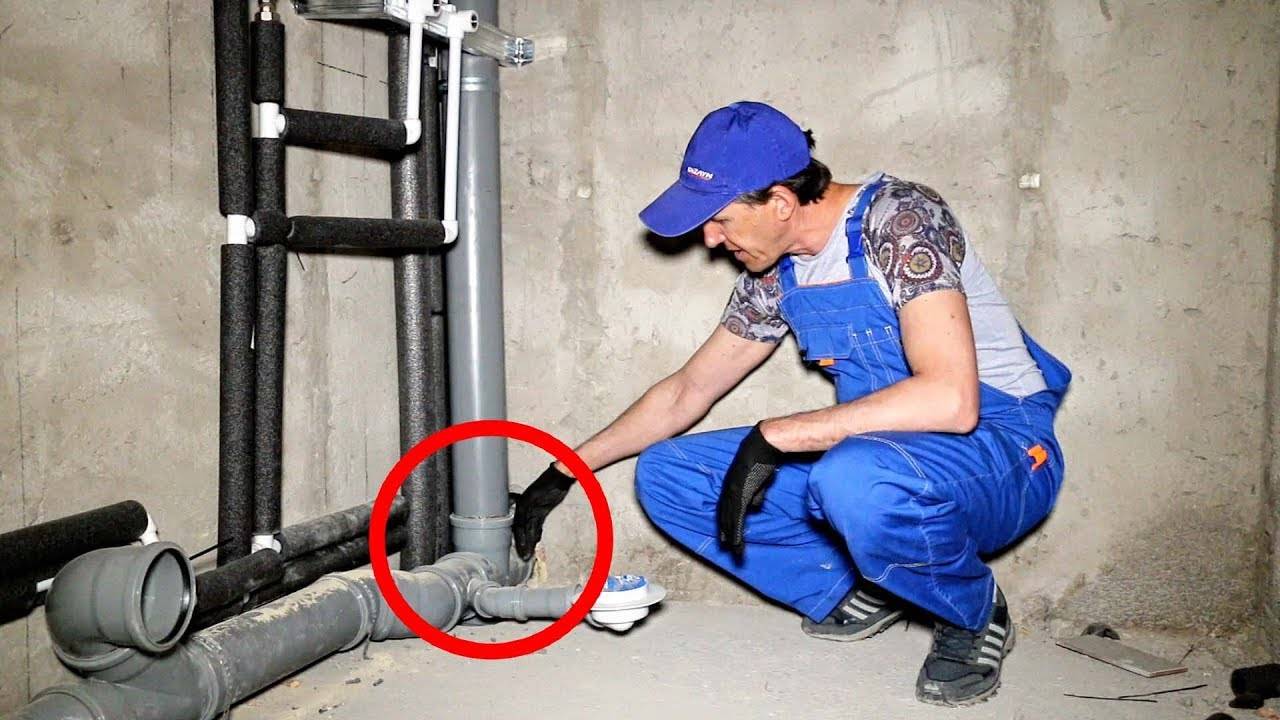
Difficulty may arise during installation: the pipe “does not want” to enter the mount or junction. In such a situation, liquid soap can be used as a lubricant.
Stages of work
To move the heated towel rail:
- Carry out preparatory work. First, the water in the apartment is shut off. Then the hot water supply to the entrance is turned off. It is desirable that this work be performed by a plumber of the management company. Only he knows how to turn off one riser without disturbing the water supply at home. The whole process takes about one and a half hours. In order to maintain good relations with neighbors, it is worth notifying in advance that it is planned to install a heated towel rail.
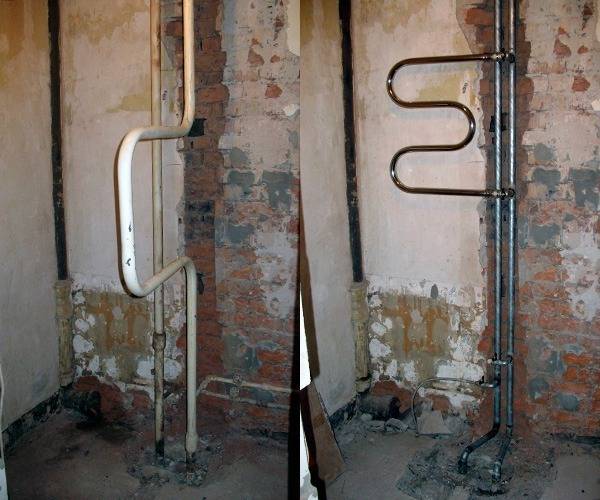
- Prepare the location of the equipment. It is better to place above the washing machine.The M-shaped cutout is set at a height of 90 cm from the floor, and the U-shaped cutout is set at 110 cm.
- Dismantle unnecessary equipment. A grinder cuts off a heated towel rail above the toilet. Segments of sufficient length are left to connect to the new pipeline. If there are threaded connections on the device, they are simply unscrewed.
- Place connectors, tees of a suitable diameter on the mounting holes.
- Mount a jumper - a bypass, which contributes to the unhindered operation of the system when the shut-off valves are closed. For its manufacture, a pipe of a smaller diameter is used than the main one. Shut-off valves are located on both sides. One of the ball valves from the equipment is mounted on the bypass. Now you can safely repair or replace gaskets.
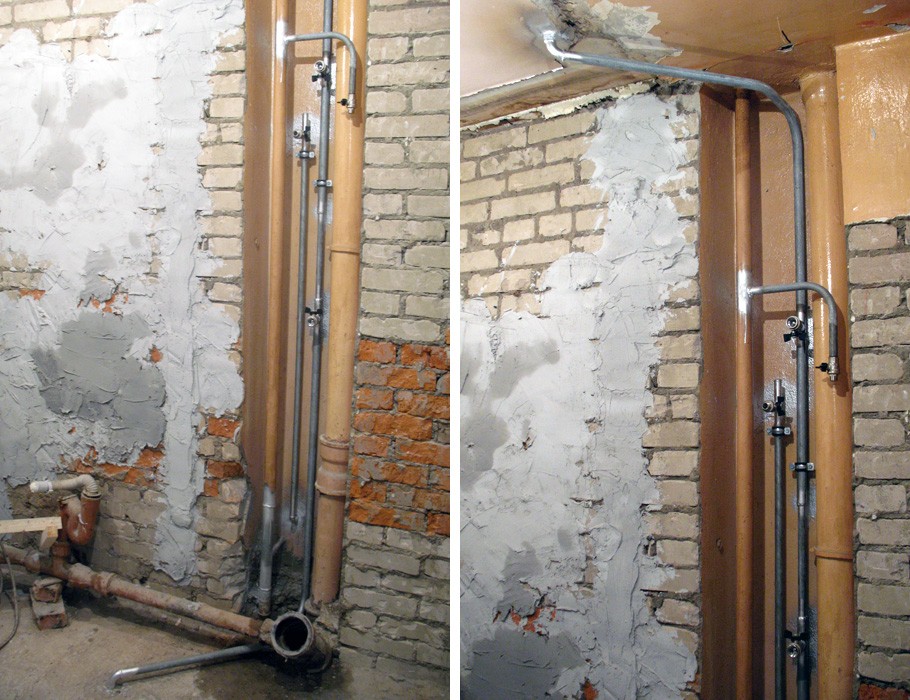
- Increase the length of the pipes to the new position of the heater. You will need hydraulic calculations for the location of the pipes to warm the device to the desired temperature. To install a heated towel rail, polypropylene reinforced pipes belonging to the category "heating" are used. The diameter is not less than the original pipes. Since pipes with a longitudinal weld do not withstand long-term operation, it is preferable to purchase heated towel rails from seamless seamless pipe. Installation is carried out at the same level in order to avoid the formation of a plug from the air. Laying is carried out horizontally with a slight slope in front of the device. The pipeline is laid along the wall or the pipe is hidden with a decorative coating. From the second method, the bathroom will only benefit.
- Accurately and evenly mark the places for fixing the heater.Drill holes with a drill, drive in dowels, fix the brackets, hang the heater.
- Connect the heated towel rail above the bathroom to the pipeline by welding or using threads and taps. The second method is not recommended if you intend to use a decorative finish. Because this connection is leaky. The heated towel rail in the bathroom must contain a Mayevsky faucet through which air descends.
- Check the operation of the device and carry out finishing work.
At the end of the above steps, you need to open all water taps. Since in apartments there are water drops in the system, water hammer, experts recommend purchasing a seamless heated towel rail.


WATCH VIDEO
Transferring a heated towel rail to another wall - an example of work
The heated towel rail in the bathroom is a small device, but very useful.
In addition to dry and warm towels, apartment residents receive additional bathroom heating, which will make the room even more comfortable, help get rid of excess moisture, prevent mold, fungus, unpleasant odors, etc.
In many standard houses built back in Soviet times, this detail is provided for by the project. However, the device is often located extremely inconveniently, for example, directly above the washbasin. In this case, as well as with a radical redevelopment of the bathroom, it is necessary to transfer the heated towel rail to another wall.
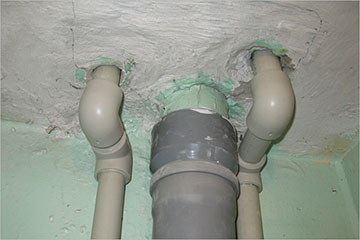
Water heated towel rail: everything is somewhat more complicated
Here are the works carried out during the initial installation of a heated towel rail:
But these are when transferring (it will be necessary to transfer the entire riser):
If you still decide to transfer the towel warmer, which is heated by hot water coming from a central heating or hot water supply system, then your workflow will be something like this:
It is necessary to turn off the hot water supply for a while. To perform this operation, a plumber from the ZhEK (or a similar organization) is usually invited, who knows exactly which lever and where to turn.
Tip: In order not to aggravate relations with neighbors, it does not hurt to warn them about the planned shutdown of hot water, informing them of the approximate timing of the work.
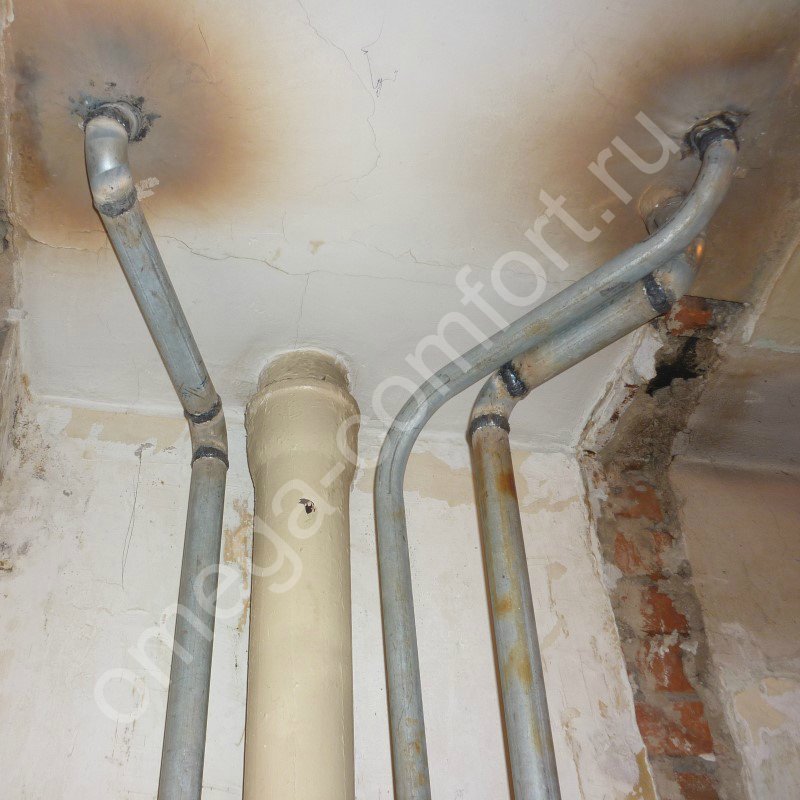
Mount a special jumper called "bypass", as well as a pair of ball valves. Thanks to this device, the maintenance of the heated towel rail will become many times more convenient. With the help of taps, the flow of water is diverted from the heated towel rail to the jumper. After that, you can freely remove the device, change gaskets, repair, replace it with a new model, etc.
The bypass is mounted from a piece of pipe, the diameter of which is one size smaller than the dimensions of the main pipe.
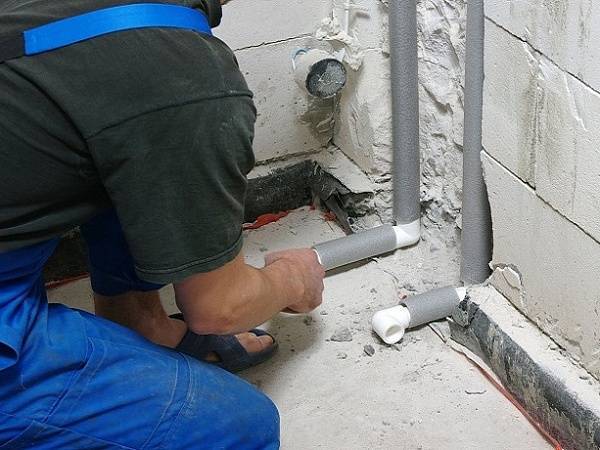
Lay pipes from the riser to the new installation site for the heated towel rail. If the distance is significant, it is necessary to seek the advice of a competent engineer who will carry out the necessary hydraulic calculations. The fact is that an incorrectly installed device will not heat up to a sufficiently high temperature.
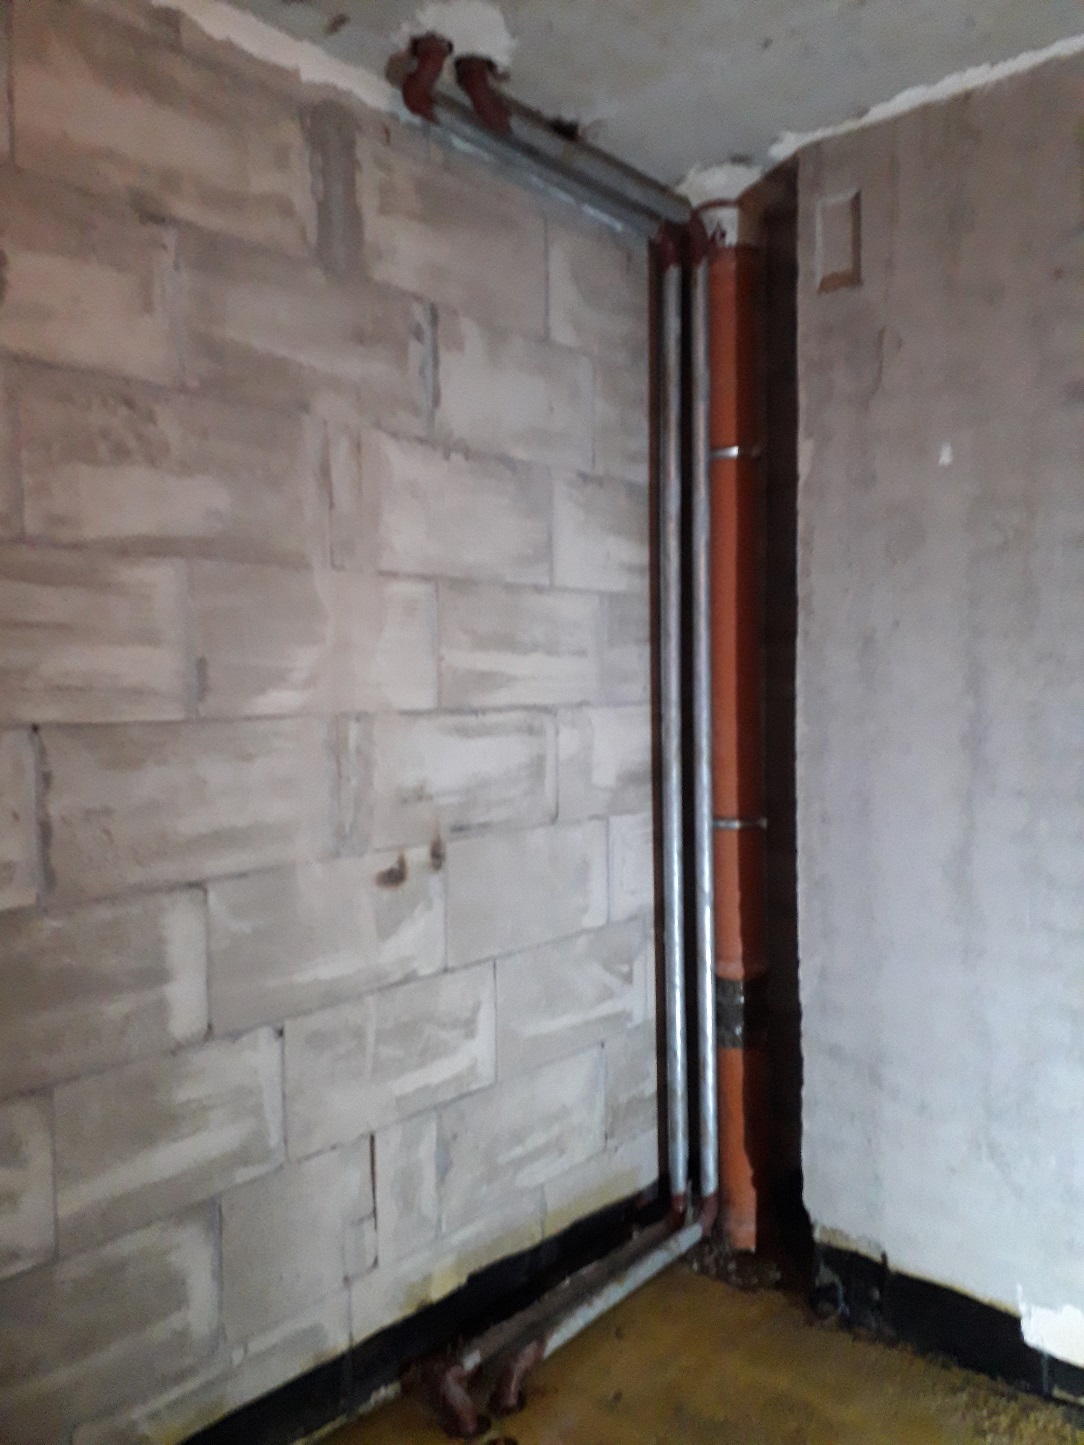
Tip: Pipes can be recessed into the wall and hidden under decorative trim. This is a more time-consuming installation method, but the bathroom interior will only benefit from such a solution.
- It remains to fix the heated towel rail in the right place and attach it to the pipes.
- Then the system is checked and the final finishing work is carried out.
A few practical tips
To ensure that the transfer of a heated towel rail in the bathroom does not become a disaster, a number of nuances should be taken into account. For example, experts recommend purchasing a durable steel heated towel rail made of seamless pipe for an apartment building. Such a model is designed for increased water pressure in the system, as well as for water hammer - a characteristic phenomenon for the urban water supply network. In private houses and cottages with autonomous and quieter water supply, you can use imported brass models designed for low pressure and careful operation.
Installation of a jumper-bypass facilitates the operation of the heated towel rail and possible repairs
An important point is the connection of the device with the system. There are two options: welding or threading.


A threaded connection is not recommended in combination with a welded riser, as well as in places that are inaccessible for maintenance, for example, if the connection is supposed to be hidden behind a decorative finish.
In addition to plumbing issues, a legal problem may also arise, since it is not possible to make such changes to the general house plumbing system everywhere. To resolve the issue, you need to make (i.e. order from specialists) the appropriate hydraulic calculations and coordinate them with the local management company, housing office, etc. In some places, such permission is not required, but if the transfer of the device is carried out with violations that affect the entire system, problems are inevitable.
Normative service life of water supply pipelines
Where is the standard service life of water supply risers in an apartment building indicated?
The standard service life of water supply risers in an apartment building can be found in Appendix No. 2 to VSN 58-88 (r) (departmental building codes, which are titled as follows: “Regulations on the organization and conduct of reconstruction, repair and maintenance of buildings, communal and social and cultural purposes"). In the section "Elements of residential buildings, communal and socio-cultural facilities" it is indicated that cold water pipelines from gas black pipes should be changed after 15 years, and from galvanized pipes - after 30 years.
The risers belong to the common property of the residents of the house, but the user is obliged to keep them in good condition, if your neighbors have the same story, then it is better to write a collective statement (written, in two copies) and attach photos of rotten risers to it.
Steel pipes: operating nuances
They can be either electric-welded and used for plumbing, heating systems and gas pipelines, or seamless. The fact is that the throughput of pipes with an equal inner diameter is lower than, for example, that of copper or polymer pipes.
The service life of pipes is a direct dependence on the properties of the materials of manufacture
One of the main regulatory documents.
governing the use are Departmental building codes VSN 58-88 (p), approved. by order of the State Committee for Architecture of the Russian Federation under the Gosstroy of the USSR of November 23, 1988 N 312. And also UDC 621.64: 539.4 + 62-192
It is very difficult to name those areas in which steel pipes are not used.
They are used in oil pipelines, heating mains, main water pipelines, heating systems and many others.
Many people are interested in how long a steel pipe can last.Their service life is very dependent on the operating conditions.
- suture.
This is the cheapest type of steel pipes. The choice of this type for heating is doomed to failure in advance, since its service life is only a few years and they will not live up to thirty years. This is because during the heating system it is very difficult to bend such a pipe and the seam simply bursts at the bend.
Also, it is not possible to process the seam well from the inside, a leak may appear and the pipe will need to be replaced. Therefore, it is not suitable for heating systems;
- seamless.
Such pipes are much more reliable.
For individual heating, such pipes with a diameter of 25 mm are recommended; during testing, they can withstand a load of up to 20 atmospheres. Therefore, for twenty years, at least, such pipes will serve without problems.
Remember that only steel pipes were previously installed for the heating system. And often, when autonomous heating installation and replacing steel pipes with plastic ones, it turned out that they could serve for a long time, despite the fact that they were installed about twenty years ago.
Normative service life of water supply pipelines
These connections must be located in places accessible for inspection and repair. 3.3.5 Connection of pipes made of dissimilar non-adhesive and non-weldable modified and composite polymer materials is carried out using mechanical joints, the design and technology of which are established according to their manufacturers and suppliers for a specific polymer material.
Replacement features
 Replacing risers in an apartment building is a procedure that is carried out jointly with the management company and the service provider.
As a rule, the dismantling and installation of each system has its own differences and features. In particular, the replacement of the heating system is distinctive.


Before starting the replacement, you need to remember the following:
- Blocking the riser and starting dismantling is possible only with the permission of the head of the management company.
- It is recommended to install separate taps for each battery. Thus, in the event of a leak or breakdown, it is not necessary to turn off the heating of the entire apartment, it is enough to turn off the water only to the radiator itself.
- It is impossible to reduce or increase the diameter of the pipes. The heating system has a certain pressure, calculated on the installed pipes. If the diameter is reduced, the pressure may cause bursting and flooding.
You also need to take into account the features of the replacement of risers:
- If a simple polypropylene pipe is sufficient for cold water, then reinforced pipes should be installed for hot water, because they are more resistant to thermal stress.
- The fewer fitin connections between pipes, the less emergencies will occur, and therefore experts recommend dismantling immediately in the entire entrance.
According to the law, the management company is fully responsible for the water supply and sewerage system, however, quite often, the apartment owners dismantle old pipes on their own, without waiting for the work of the organization. After unauthorized dismantling, the owner of the apartment is already responsible for the sewerage.In this case, any breakdown and flood will be paid from the owner's funds.
To avoid such situations, it is worth coordinating each step with the management company, as well as documenting the agreements.
Features of mounting the electrical model
If the owners of private houses choose where to place this element on their own, then residents of apartment buildings often have no choice, since in their apartments the appliances are placed in the bathrooms according to the original plan.
Often places for heated towel rails are chosen very inconvenient, for example, above the sink. In this case, at the first repair or redevelopment, the landlord will decide to move the device to a more comfortable place. But how to do it according to all the rules, with the least damage to the bathroom and without unpleasant consequences?
Transferring an electric heated towel rail does not cause any difficulties - it happens much easier than in the case of water-type counterparts. It is also not required to coordinate the transfer of the electrical model with documents, since in this case no types of communications will be affected.
There are only two conditions that must be met for a correct transfer or initial installation: a distance of at least 60 cm from water sources and a correct electrical connection
An electric heated towel rail is considered more practical than a water heated towel rail, not only because of the ease of installation, but also due to ease of use.
Advantages of electric dryers:
- Year-round operation. The closed circuit of electric dryers allows them to be operated all year round, even when the heating system is turned off or hot water is not supplied due to maintenance work.
- Wear resistance.Electrical appliances are not afraid of pressure drops, hard water and corrosion.
- Possibility to adjust the heating temperature. To do this, you only need to additionally install a rheostat, in some models it is present initially.
That is why many owners prefer electric water heated towel rails for arranging a bathroom.
There are different types of electric heated towel rails on the market - there are dry and oil models. In liquid, as a rule, tubular electric heaters are used.
In dry-type appliances, instead of a liquid filler, a special heating silicone cable is used, similar to those from which a warm floor system is mounted
In order to ensure the normal safe operation of electric dryers, you need to follow a few rules:
- wiring must be qualitatively hidden in the wall;
- it is advisable to install a residual current device on the wiring to the bathroom, ideally on the heated towel rail itself;
- the device should be grounded, as it is located in a room with high humidity;
The socket for the device, like any sockets in the bathroom, must also be grounded and have an IP4 or IP65 degree of protection (against dust or against direct jets of water and dust).


