- Stages of work
- Complex of preparatory works ↑
- User manual
- Electrical varieties
- In what cases is it necessary to transfer?
- Installation of jumper (bypass) and ball valves
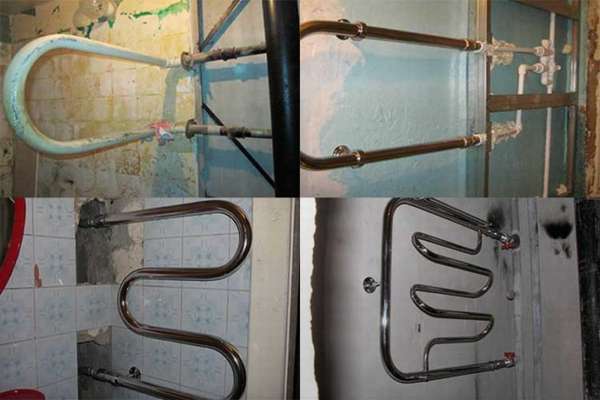
- old apartments
- Installing a new heated towel rail
- DISMANTLING
- ARRANGEMENT OF THE MAIN RISER, PIPE SUPPLY, INSTALLATION OF THE BYPASS
- FEATURES OF INSTALLING THE MAIN UNIT
- How to prepare for the transfer
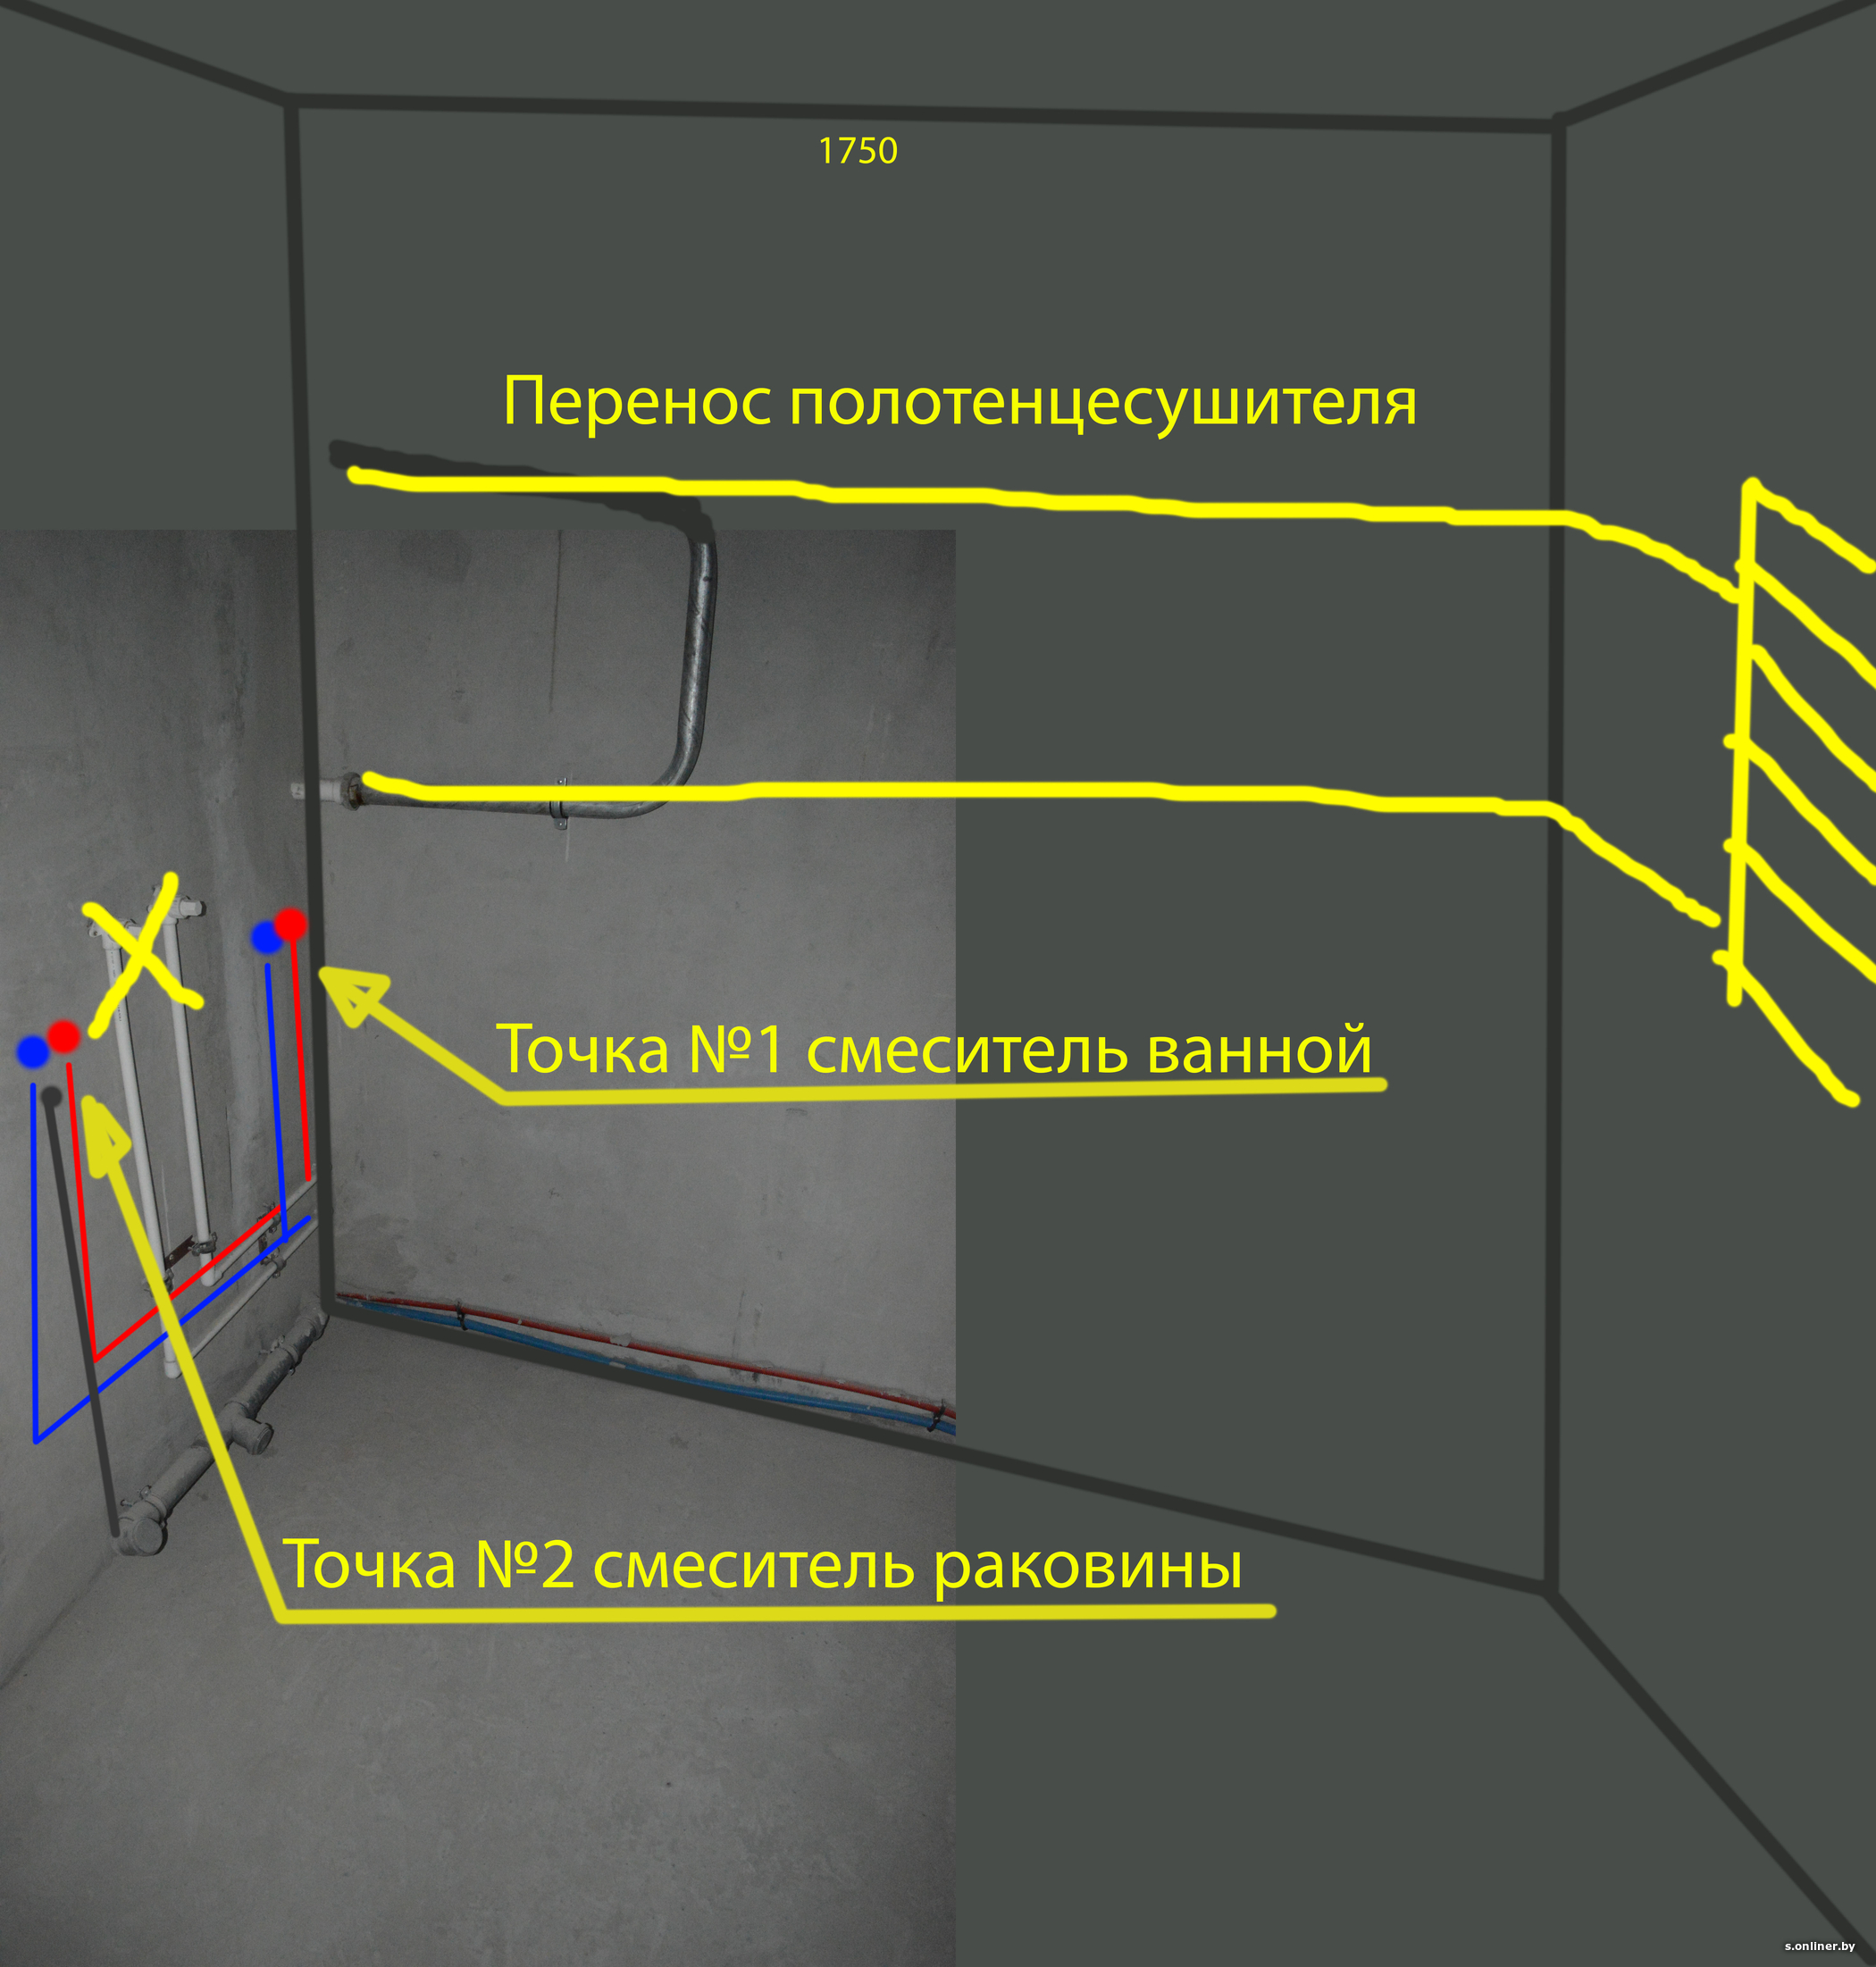
- Transferring a heated towel rail to another wall - an example of work
- Water heated towel rail: everything is somewhat more complicated
- A few practical tips
- Transferring a heated towel rail to another wall: coordination, installation procedure
- Towel warmer transfer: coordination
- Installing a heated towel rail on another wall
- Transferring an electric towel warmer
- Video instruction for transferring the heated towel rail
- Features of mounting the electrical model
Stages of work
To move the heated towel rail:
- Carry out preparatory work. First, the water in the apartment is shut off. Then the hot water supply to the entrance is turned off. It is desirable that this work be performed by a plumber of the management company. Only he knows how to turn off one riser without disturbing the water supply at home. The whole process takes about one and a half hours.In order to maintain good relations with neighbors, it is worth notifying in advance that it is planned to install a heated towel rail.
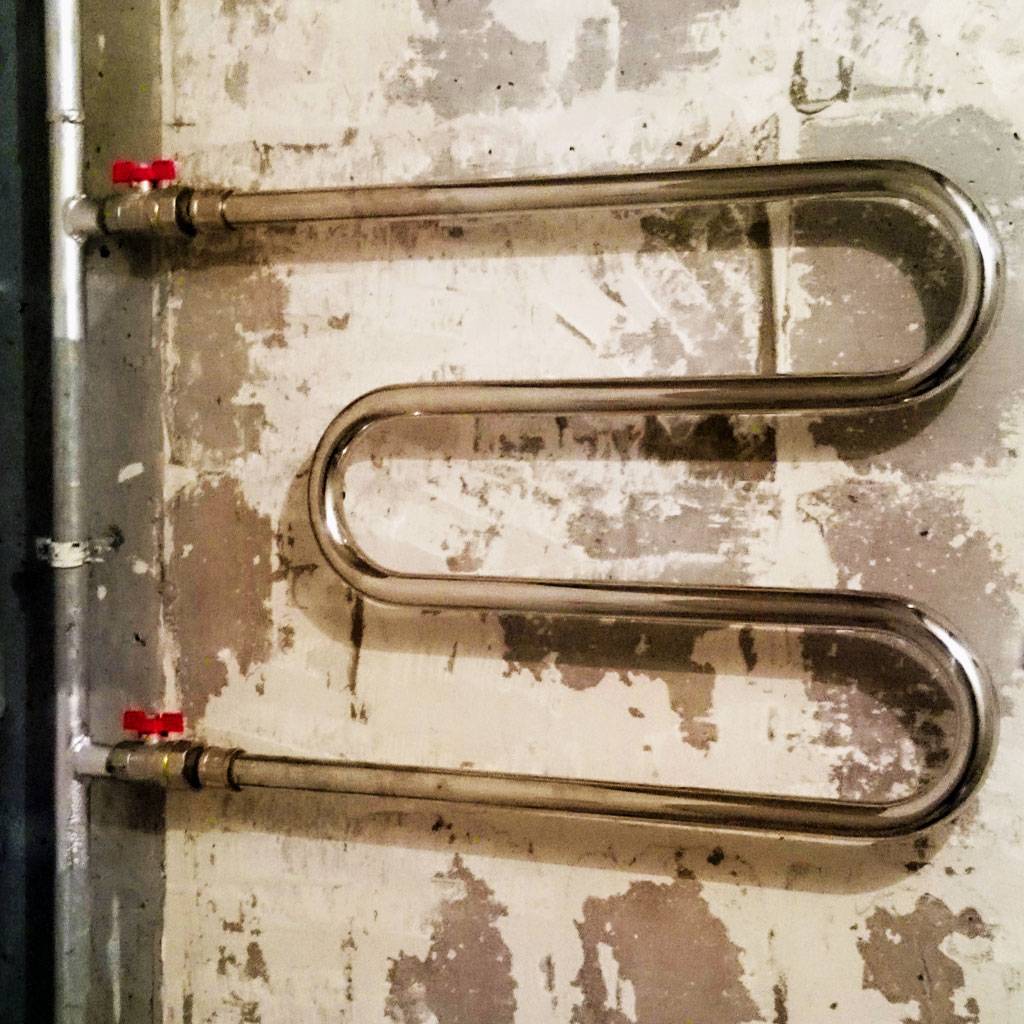
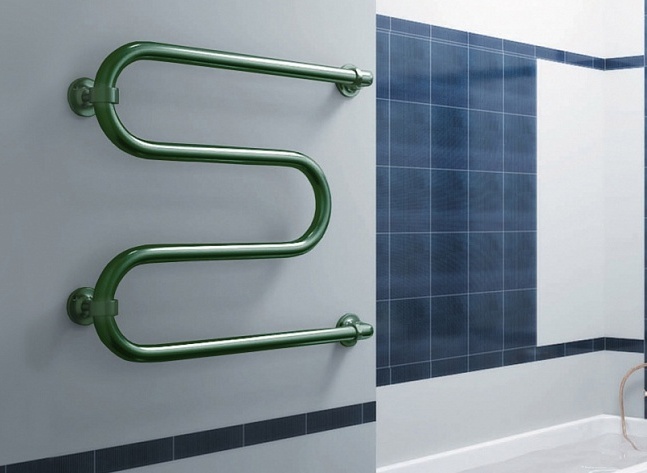
- Prepare the location of the equipment. It is better to place above the washing machine. The M-shaped cutout is set at a height of 90 cm from the floor, and the U-shaped cutout is set at 110 cm.
- Dismantle unnecessary equipment. A grinder cuts off a heated towel rail above the toilet. Segments of sufficient length are left to connect to the new pipeline. If there are threaded connections on the device, they are simply unscrewed.
- Place connectors, tees of a suitable diameter on the mounting holes.
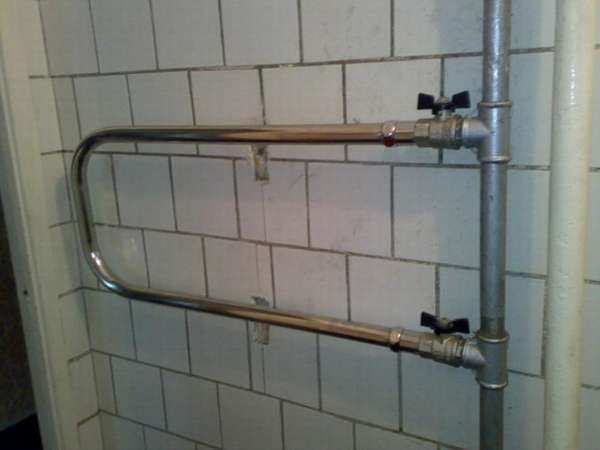
- Mount a jumper - a bypass, which contributes to the unhindered operation of the system when the shut-off valves are closed. For its manufacture, a pipe of a smaller diameter is used than the main one. Shut-off valves are located on both sides. One of the ball valves from the equipment is mounted on the bypass. Now you can safely repair or replace gaskets.
- Increase the length of the pipes to the new position of the heater. You will need hydraulic calculations for the location of the pipes to warm the device to the desired temperature. To install a heated towel rail, polypropylene reinforced pipes belonging to the category "heating" are used. The diameter is not less than the original pipes. Since pipes with a longitudinal weld do not withstand long-term operation, it is preferable to purchase heated towel rails from seamless seamless pipe. Installation is carried out at the same level in order to avoid the formation of a plug from the air. Laying is carried out horizontally with a slight slope in front of the device.The pipeline is laid along the wall or the pipe is hidden with a decorative coating. From the second method, the bathroom will only benefit.
- Accurately and evenly mark the places for fixing the heater. Drill holes with a drill, drive in dowels, fix the brackets, hang the heater.
- Connect the heated towel rail above the bathroom to the pipeline by welding or using threads and taps. The second method is not recommended if you intend to use a decorative finish. Because this connection is leaky. The heated towel rail in the bathroom must contain a Mayevsky faucet through which air descends.
- Check the operation of the device and carry out finishing work.
At the end of the above steps, you need to open all water taps. Since in apartments there are water drops in the system, water hammer, experts recommend purchasing a seamless heated towel rail.
WATCH VIDEO
Complex of preparatory works ↑
The owners of electric models will have the least difficulties during the transfer. They are completely autonomous and manipulations with them do not require additional investments or approvals from supervisory authorities. The actual dismantling and installation of the device is extremely simple and most often consists in the fact that the device is removed from one wall and fixed to another. If necessary, the socket is additionally transferred or strobes are made for wiring. This is where all the work ends.
With water equipment, there will be much more trouble. To carry out the transfer of the heated towel rail, coordination with the authorities responsible for the operation and condition of internal communications and buildings will be required.This is due to the fact that the independent movement of heating appliances, and a water heated towel rail can be attributed to them, makes the owner responsible for changing the technical parameters of the system and its condition.
Scheme transfer water towel warmer
Thus, in the event of problems, claims will be made specifically to the owner of the property. As a result, it is highly recommended that all changes to heating systems be formally approved.
Transferring a heated towel rail is best left to professionals.
When choosing new equipment, it must be taken into account that it should not give an additional load on the thermal system. Therefore, it should be only a certified device, correctly selected in terms of thermal power in strict accordance with the volume of the bathroom. The hydrodynamics of the heating pipelines should also not be disturbed. Therefore, the device is installed without the formation of an air pocket and without creating additional hydraulic pressure. All these conditions can be met only in the case of proper installation of the device, for which it is best to invite a specialist.
Do-it-yourself towel warmer installation
User manual
Before installation and further operation of the heated towel rail, it is imperative that you carefully read this document. In it, the manufacturer must describe safe installation practices for any type of heated towel rail, such as the absence of water in the system when connecting water appliances, the presence of grounding electrical wiring for electrical and other similar factors.Recommendations are given on how to properly operate the device during its operation, pictures and installation diagrams for water structures are given.
Compliance with the requirements of the instructions, which is mandatory for each heated towel rail, will help extend the life of the device and avoid disruptions in the hot water supply system.
Electrical varieties
The most important thing to consider when moving this type of equipment is that there is a power source nearby and that the product is far from water. The last point must be observed to ensure safety .. Remember that an electrical appliance in the bathroom, where there is always high humidity, is a source of increased danger
Therefore, the issue of placement should be approached especially carefully. The distance between the heated towel rail and the nearest source of water should be at least 60 centimeters.
Remember that an electrical appliance in the bathroom, where there is always high humidity, is a source of increased danger. Therefore, the issue of placement should be approached especially carefully. The distance between the heated towel rail and the nearest source of water should be at least 60 centimeters.
Having chosen the necessary place for installation, prepare all the necessary tools:
- wrenches of different sizes;
- screwdrivers;
- impact drill or hammer drill;
- drills suitable for concrete work;
- tape measure and marker for marking;
- fasteners, which are usually included with new equipment.
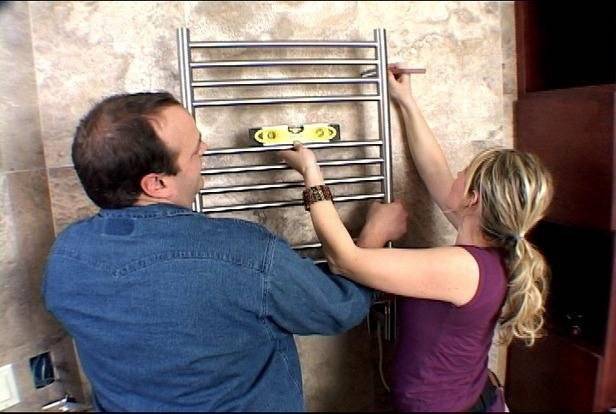
In the place where you plan to move the old product or hang a new one, make markings on the wall in the places where the fasteners will be placed. In the process, check with the building level so that the result looks aesthetically pleasing.
Drill the wall in the marked places. If it is covered with tiles, then do the work especially carefully so as not to damage the tiles. To do this, you will need not only a hammer drill, but also an ordinary drill with a special drill for working with ceramics. It should have a diamond coating and a very small diameter.
First scratch the glaze at the marked points on the tile. This is necessary so that when drilling, the nozzle does not slip along the surface of the wall. Then take a regular drill with a thin drill and make a hole. When you drill through the tile, take a puncher and a nozzle of the desired diameter, and then bring the hole to the required width and depth.
After that, install the fasteners in the prepared holes, and fix the heated towel rail on them. Actually, the procedure for transferring to another wall is over.
but it is important to consider one more nuance.
And it refers to the same topic of security. Keeping the required distance from the water source reduces the risks, but does not eliminate them completely. In order to reliably avoid danger, it is necessary to ground the equipment in the bathroom.


If there is already grounding - great, if not, then lay the bus and connect it yourself. It's not that hard to do something like this. But this is a completely different story, which you can read in detail in other articles on our portal.
After the heated towel rail has taken its rightful place, and security issues have been successfully resolved, you can safely plug the plug into the outlet, and then enjoy the warmth and comfort.
In what cases is it necessary to transfer?
According to SNiP, the riser is installed at a distance of 4 cm from the wall. However, these are old standards that do not take into account modern realities.
Many owners are faced with problems caused by the inconvenient location of pipes after redevelopment or transfer of plumbing fixtures to another location.
There are different situations when reinstallation becomes necessary:
-
Redevelopment of the bathroom, in which the location of the pipes is inconvenient for use or installation of plumbing.
- The need to move the heated towel rail to another location.
- The inability to hide the pipes with a decorative box.
- Inconvenient location of communications.
- Increasing the size of the bathroom, expanding its area.
- The complexity of the installation of metering devices (meters).
It must be taken into account that all work related to the transfer of pipes must be justified and technically feasible.
In any case, the points of passage of the riser through the ceilings will remain in the old place, only the configuration of the pipe inside the apartment will change. Simply put, the beginning and end of the pipe will still be in the same place as before.
Before starting work, it is necessary to carefully consider their meaning and decide whether the expected result will be achieved. If in doubt, it is best to abandon the changes and look for other options.
Installation of jumper (bypass) and ball valves
The sections of the DHW pipe into which the heated towel rail will be connected must be connected to each other with a jumper. The need for this complicating element is obvious:
It is better to make the connection to the bypass from stainless pipes.
- in the event of a malfunction in the operation of the coil, a visit to the housing office will not be required to apply for a new water shutdown;
- work on installing and connecting a heated towel rail does not have to be carried out strictly on time, for which the water was turned off.
This is especially true for those who are waiting for the replacement of the heated towel rail in the "Khrushchev" on their own and without sufficient experience.
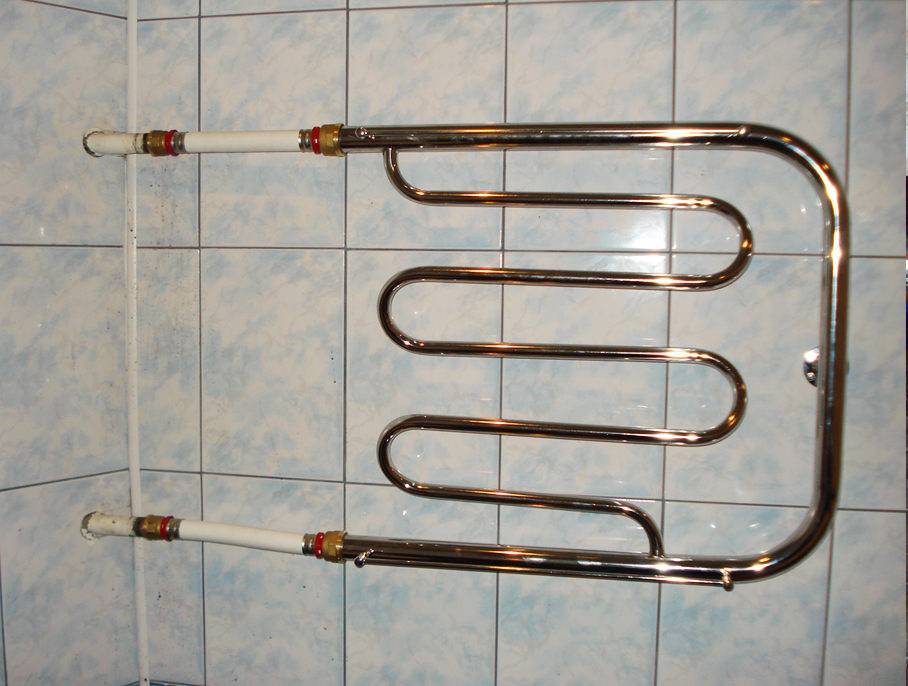
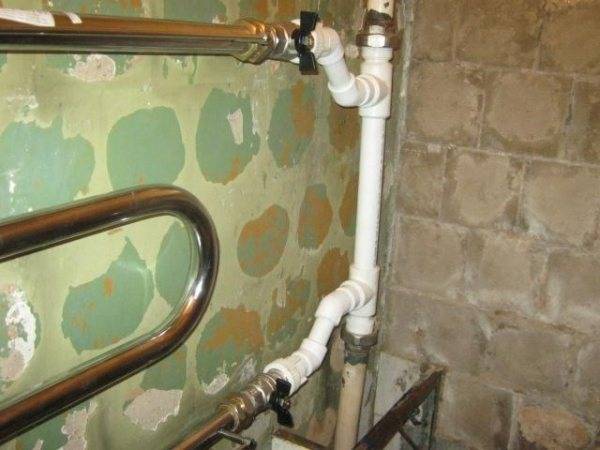
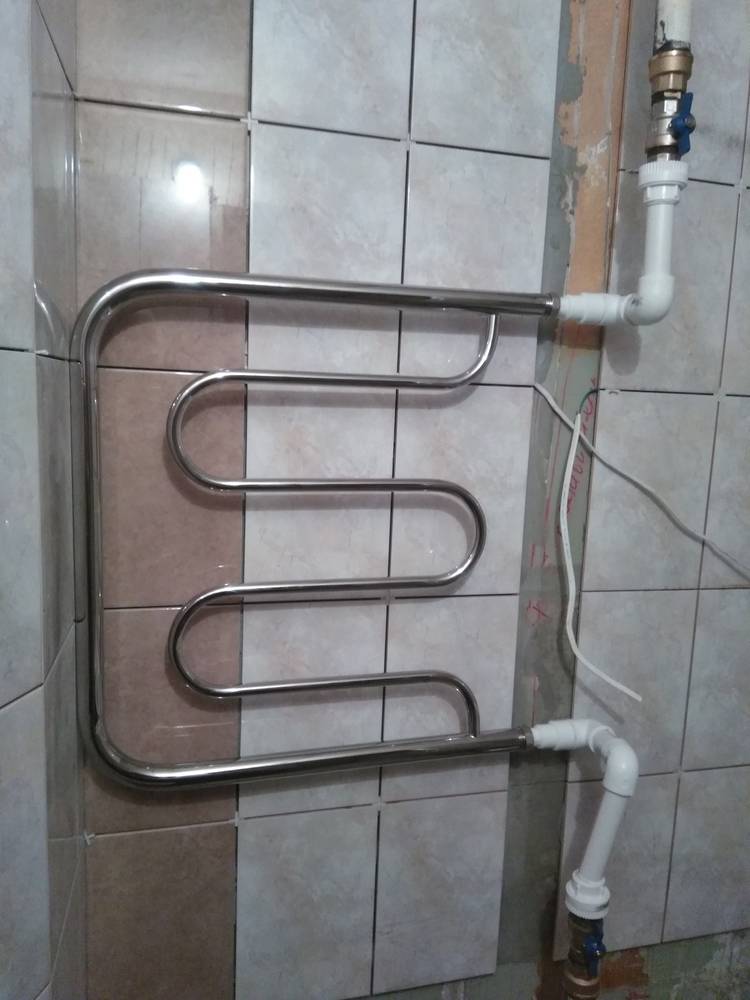
How is the bypass arranged (Fig. 1)? If it becomes necessary to turn off the heated towel rail later for repair, it is enough to close the ball valves at the inlet and outlet of the water flow from the coil. The open faucet on the jumper will allow not to deprive the housemates of hot water while the coil is being replaced or repaired.
What you need to install a bypass:
- three ball valves;
- pipe sections of the required length;
- connecting elements: tees with a diameter corresponding to the diameter of the pipeline, 2 pcs.;
- Adjustable wrench.
- Install tees at the ends of the pipe leading to the hot water supply system so that a pipe segment can be laid between them, connecting the water flow in them.
- Connect two short pieces of pipe with a ball valve and install this structure between the branches of the tees. Threaded connections should be sealed with FUM tape or linen winding. Crane open.
- Install ball valves on the remaining free ends of the tees, to which the heated towel rail will subsequently be connected. Move valves to "closed" position.
Related article: Triplex doors and their features: with photo examples
With this position of the three taps, water will pass through the jumper without entering the heated towel rail coil.
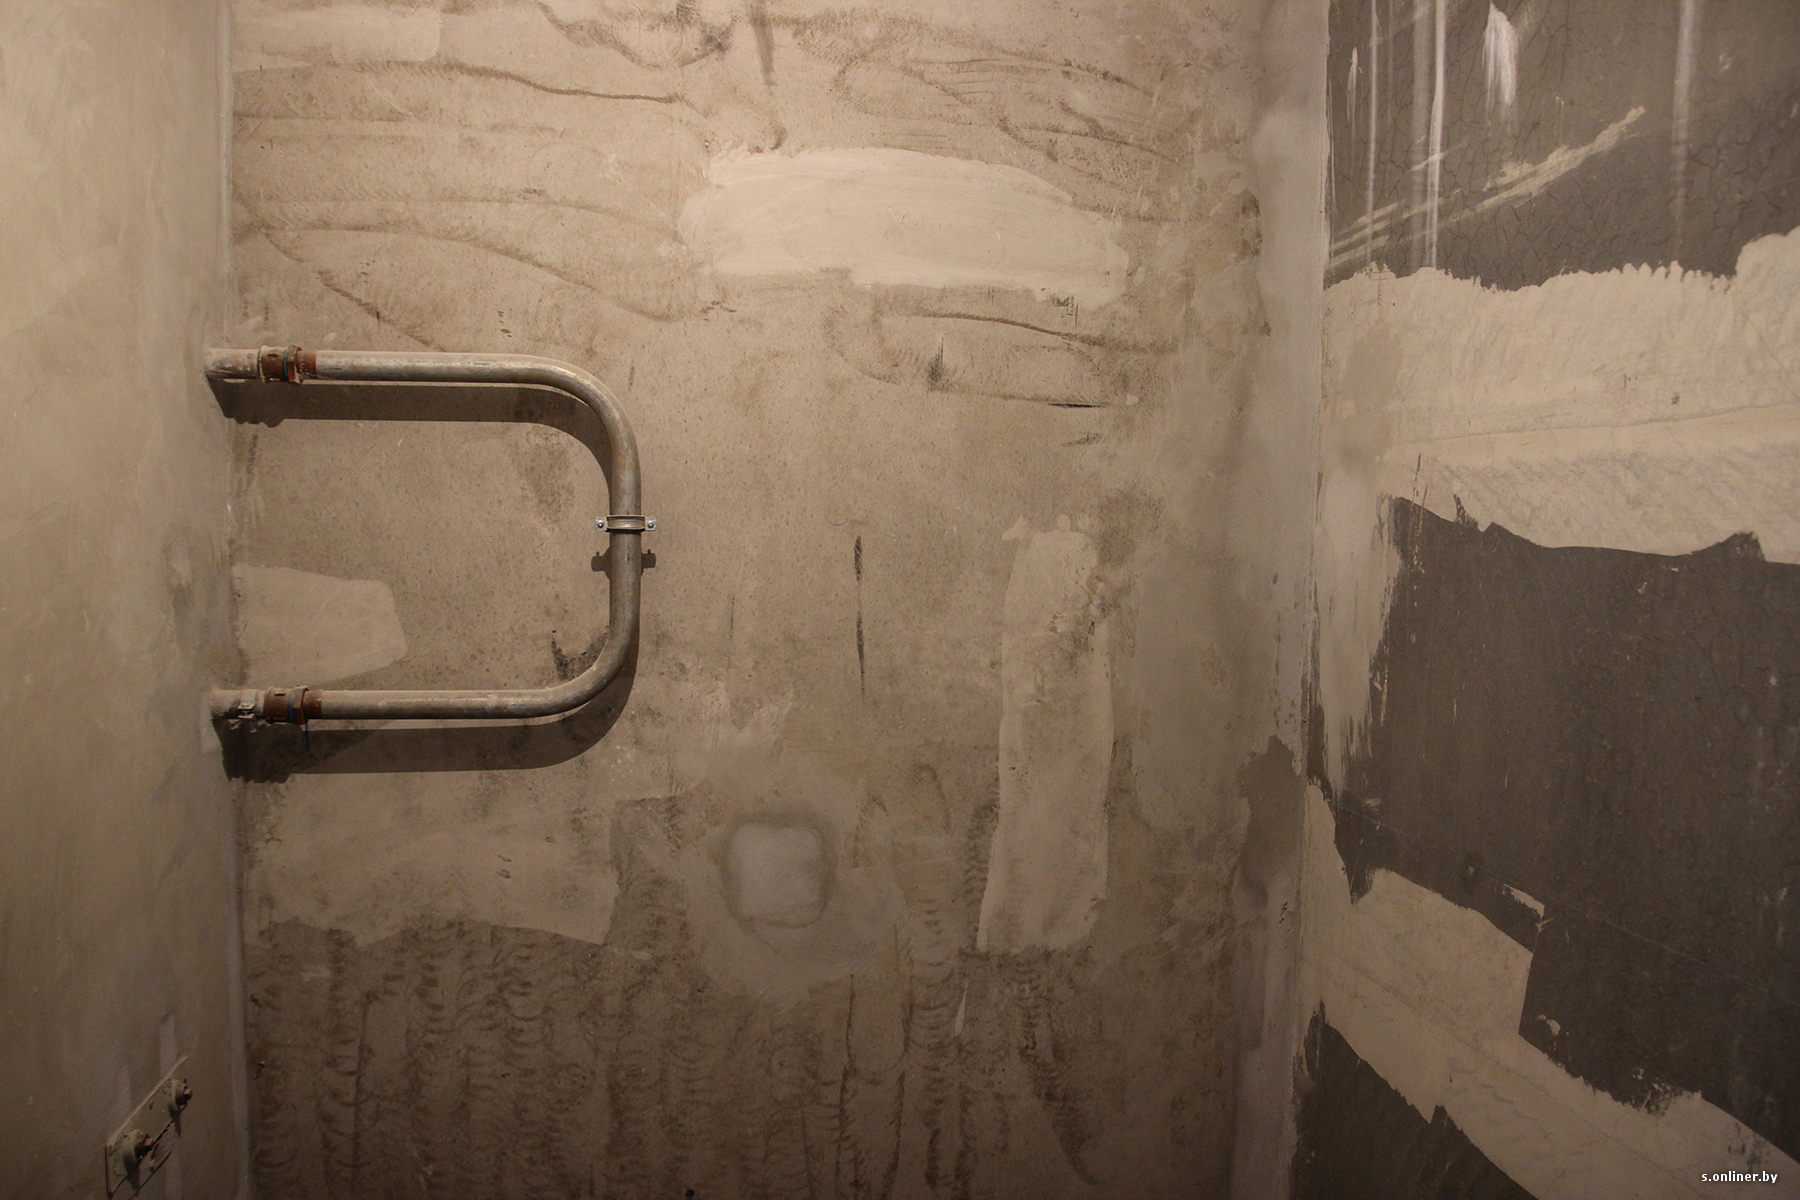
old apartments
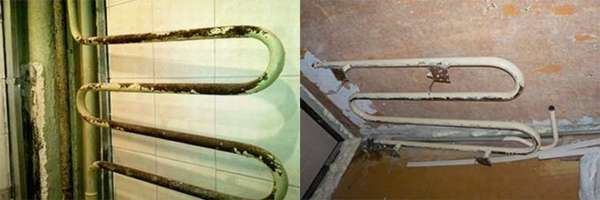
To change a heated towel rail in a bathroom in Khrushchev or another old apartment, you may need a few more skills. The main problems in this case are associated with the poor condition of metal pipes and risers.
Attempting to dismantle an old heated towel rail without first checking the general condition of the system can lead to the destruction of the riser and subsequent costly repairs. If you cannot determine the condition of the metal yourself, you should consult with a specialist. It will determine the possibility of cutting threaded connections or performing electric welding.
Self-replacement of a heated towel rail is a completely solvable task, the implementation of which, if you have the skills and tools, will save on the price that experts would indicate.
Installing a new heated towel rail
- Mounting brackets on the wall;
- Polypropylene pipes;
- Apparatus for welding;
- Lerki for threading;
-Special wire cutters or pipe cutter;
- Connecting fittings;
- Three ball valves.
Installation work, which can be done by hand, involves several stages of their implementation.
1. Dismantling the old dryer.


2. Installation of taps on the outlets of the new dryer and arrangement of the bypass.
3. Welding of polypropylene pipes.
4. Attaching a heated towel rail.
5.Connecting it to the common coolant system.
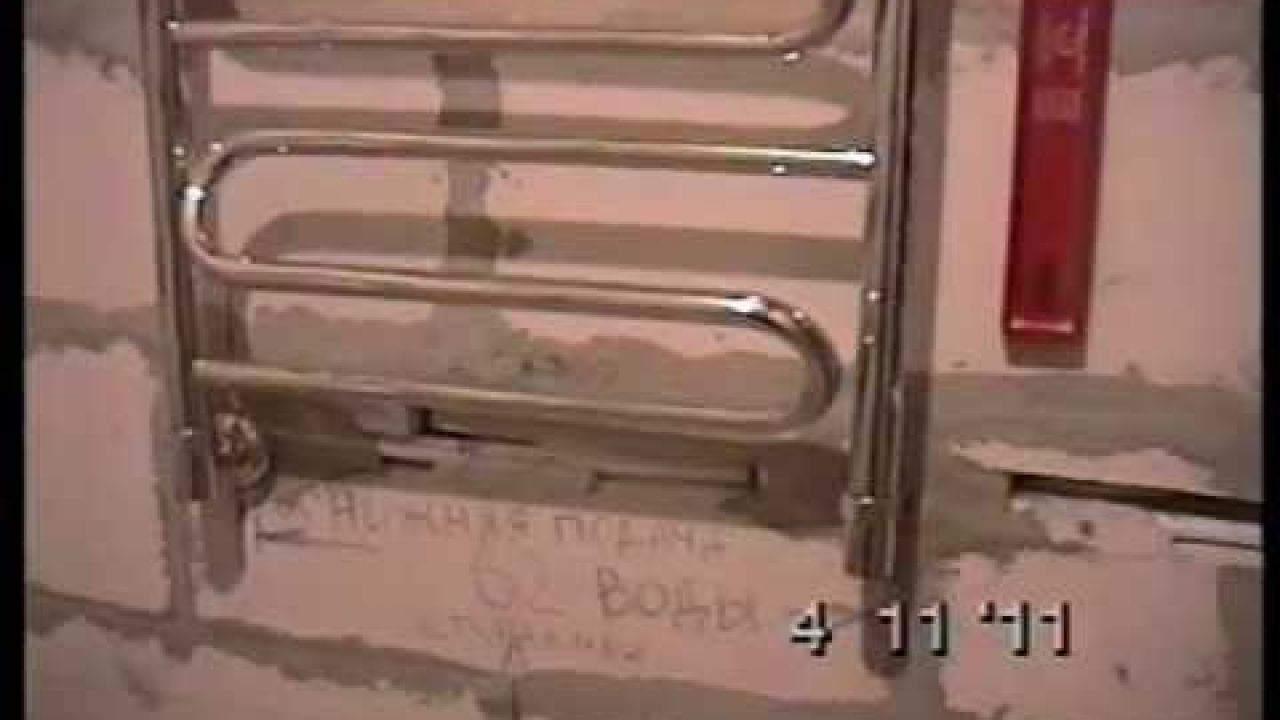
DISMANTLING
To dismantle the old heated towel rail, you must first drain the water from the main riser. To do this, they invite a plumber from the housing office to turn off the hot water riser or heating system.
1. After draining the water, they begin to dismantle the old equipment. It is better to cut it with a grinder. First, the lower pipe is cut in it, and then the upper one.
2. For safety net for this work, it is better to invite an assistant to support the old device.
3. After cutting the inlet and outlet pipes, the old heated towel rail is released from the fasteners and taken out of the room.
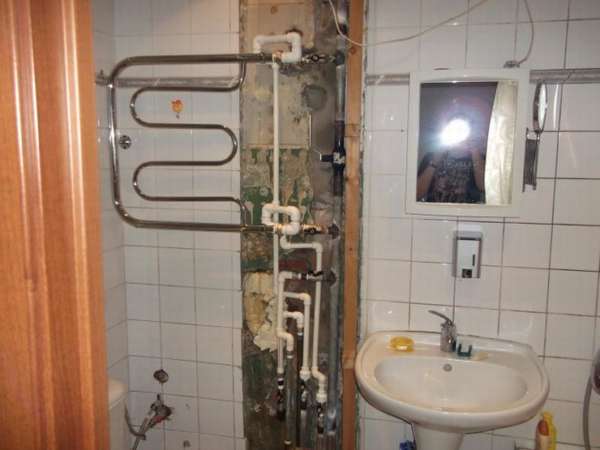
ARRANGEMENT OF THE MAIN RISER, PIPE SUPPLY, INSTALLATION OF THE BYPASS
- After removing the old heated towel rail, the apartment riser and the pipes of the entire wiring in the apartment are replaced with polypropylene ones. Usually their diameter is 25 mm. 2. At the ends of the cut pipes, the cut point is cleaned so that they do not have burrs and traces of old paint.
3. Then, having lubricated the lehrka with oil, it is put on the machined edge of the pipe and, turning, cut the thread to install the "American". This fitting is necessary for further connection of the general system with polypropylene pipes.
4. To prevent water leakage and the possibility of dismantling during repairs, all joints are sealed on threaded connections with linen winding or fum tape.
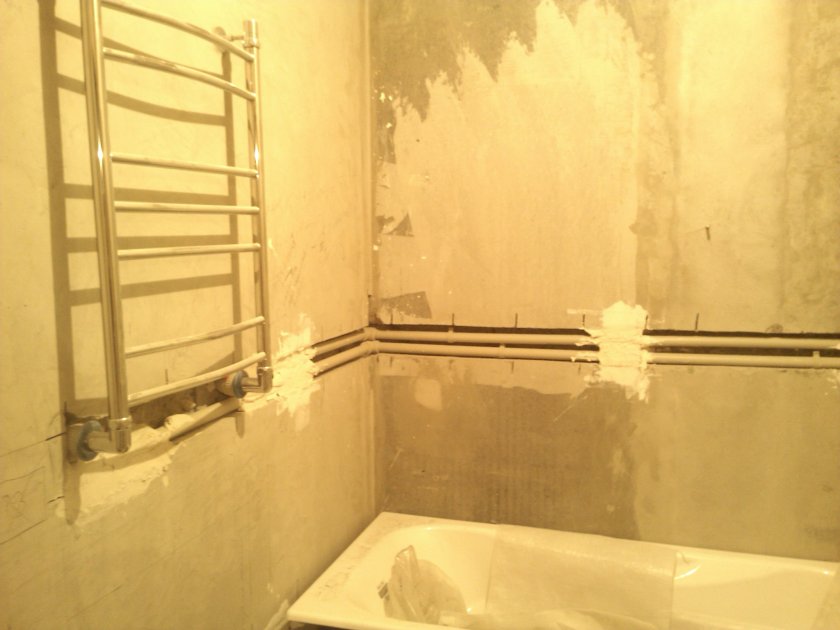
5. If the heated towel rail is transferred to another wall using polypropylene pipes, a special welding machine is needed to connect them.
6. The slope of the pipe is made in the direction in which the coolant moves.
7. For reliable tightness of the system, it is necessary to prepare individual connecting elements in advance in the form of:
-Cranes with a heated towel rail;
-Cranes with extension cord;
- Extension cords with MPH adapter.
FEATURES OF INSTALLING THE MAIN UNIT
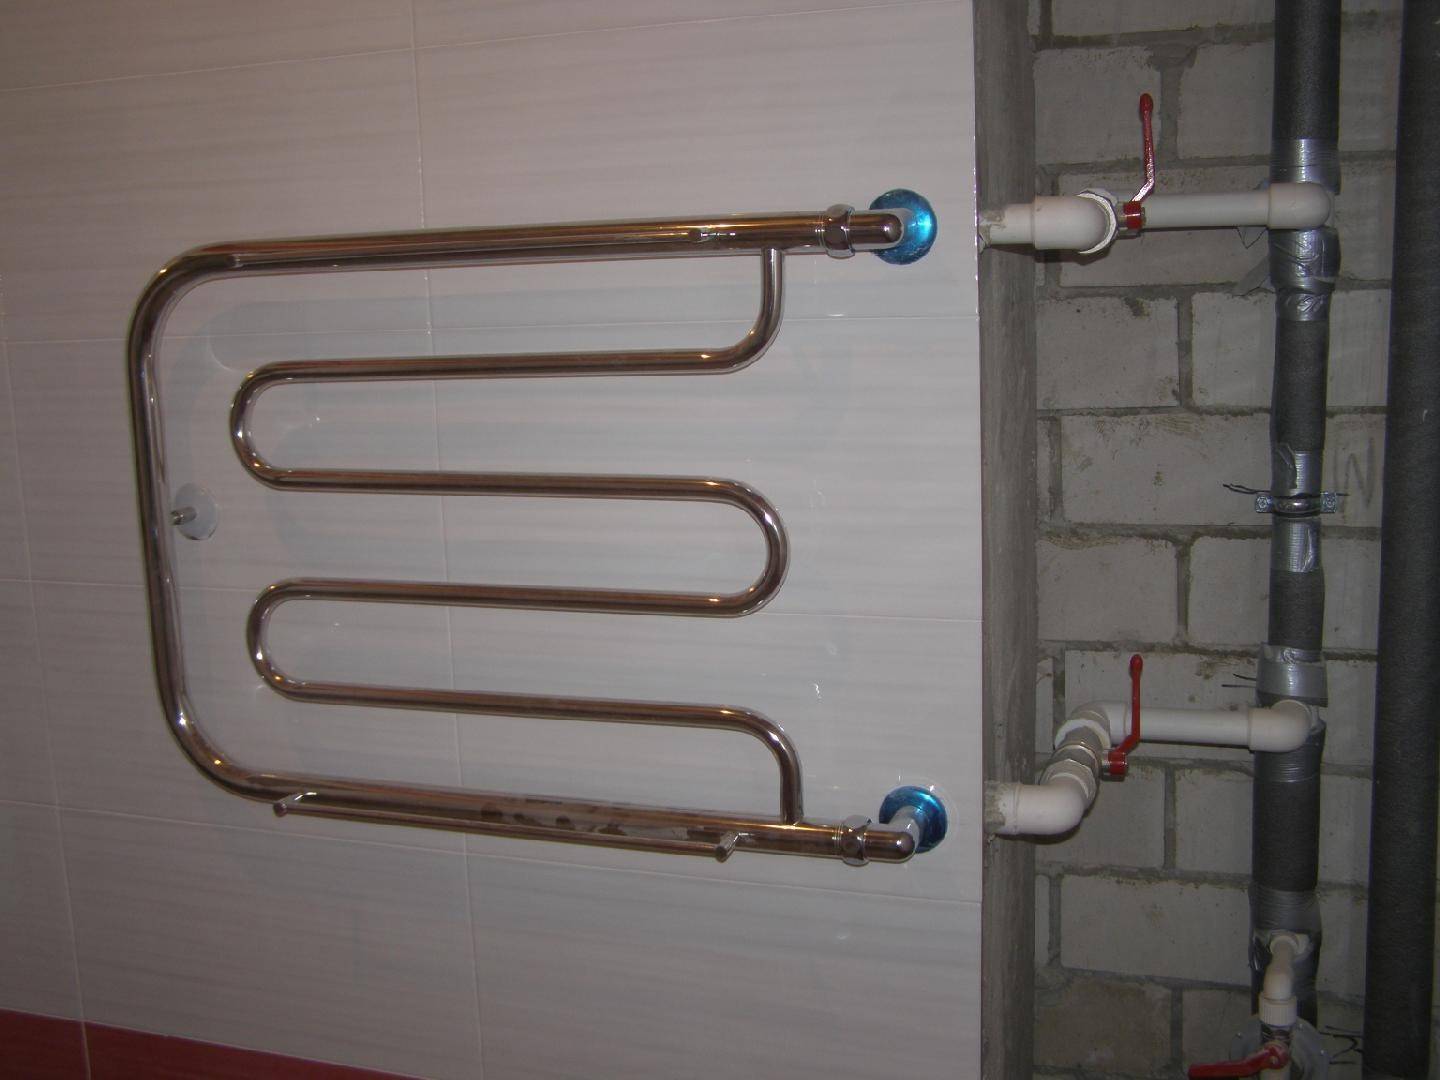
Having chosen a place on the other side of the wall where the transfer of the new heated towel rail is planned, it is fixed there along with pre-packed taps.The installation of the heated towel rail must be carried out on hanging brackets in order to avoid temperature deformations between the wall and the pipe.
Then, a bypass is installed to the outlet pipes, the so-called bypass section with shutoff valves. The task of the bypass is to ensure the operability of the heating or hot water supply system in the event that the water supply to the heated towel rail is cut off.
To equip the system for supplying and discharging the coolant to the dryer, there, depending on the design solutions, solder:
- Angle fittings MRV (couplings with internal thread);
-Necessary pipe parts;
-Tees;
In the bypass-riser system, an additional ball valve is installed for emergency shutdown of the main intra-house riser. Completing the installation work with your own hands, the entire system is checked for leaks.


How to prepare for the transfer
To transfer the heater to another wall, you will need:
- electric drill or puncher;
- drill or drill for concrete work;
- spanners;
- building level;
- tape measure or pencil;
- equipment for the installation of water pipes (welding machine or installation for soldering polypropylene elements);
- materials for connecting and sealing highways;
- test device (in case of connecting an electrical device).

A puncher will be needed for work. If it is planned to install a heater with an electric spiral, then a power outlet is brought to the installation point. The cable is laid under the finishing materials (for example, tiles), it is allowed to fasten the wires in plastic boxes located on top of the finishing walls. For switching, a cable of the VVG-Ng series is used, equipped with a residential ground.The cross section of the conductors is selected according to the power of the heating device.
Transferring a heated towel rail to another wall - an example of work
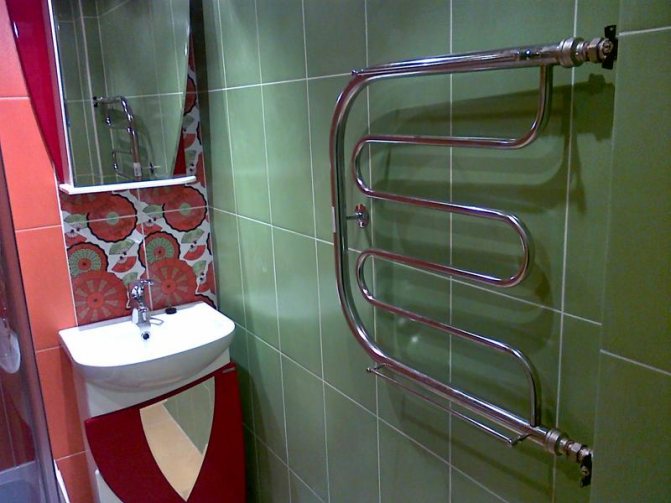
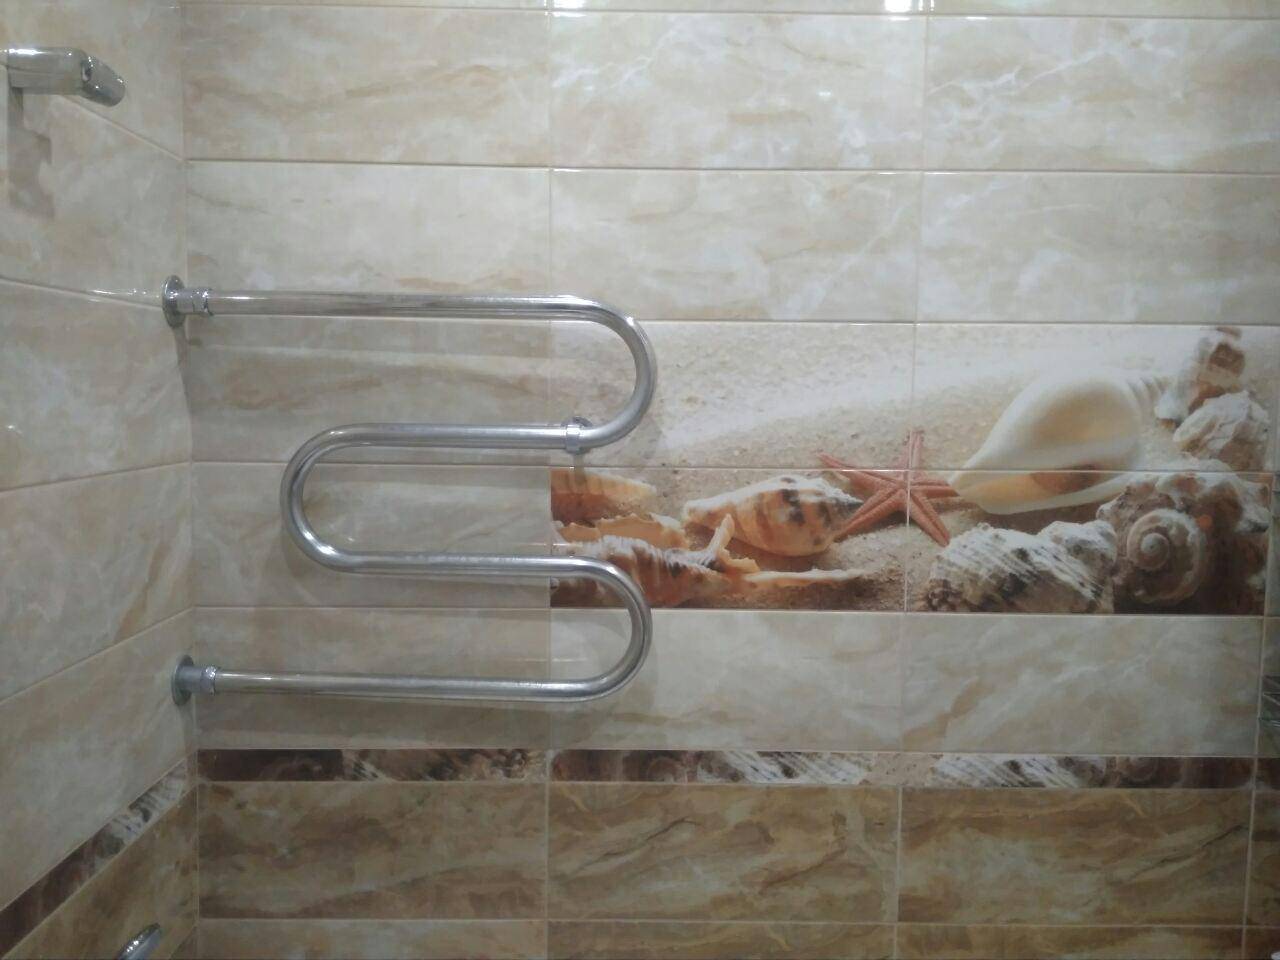
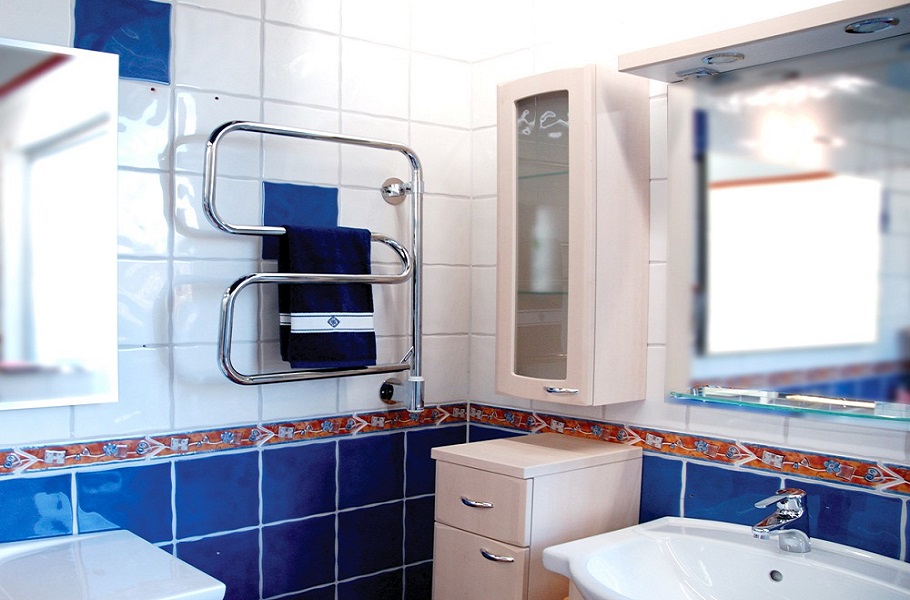
The heated towel rail in the bathroom is a small device, but very useful.
In addition to dry and warm towels, apartment residents receive additional bathroom heating, which will make the room even more comfortable, help get rid of excess moisture, prevent mold, fungus, unpleasant odors, etc.
In many standard houses built back in Soviet times, this detail is provided for by the project. However, the device is often located extremely inconveniently, for example, directly above the washbasin. In this case, as well as with a radical redevelopment of the bathroom, it is necessary to transfer the heated towel rail to another wall.
Water heated towel rail: everything is somewhat more complicated
Here are the works carried out during the initial installation of a heated towel rail:
But these are when transferring (it will be necessary to transfer the entire riser):
If you still decide to transfer a heated towel rail that is heated by hot water coming from a central heating or hot water supply system, then your work order will be something like this:
It is necessary to turn off the hot water supply for a while. To perform this operation, a plumber from the ZhEK (or a similar organization) is usually invited, who knows exactly which lever and where to turn.
Tip: In order not to aggravate relations with neighbors, it does not hurt to warn them about the planned shutdown of hot water, informing them of the approximate timing of the work.
Mount a special jumper called "bypass", as well as a pair of ball valves.Thanks to this device, the maintenance of the heated towel rail will become many times more convenient. With the help of taps, the flow of water is diverted from the heated towel rail to the jumper. After that, you can freely remove the device, change gaskets, repair, replace it with a new model, etc.
The bypass is mounted from a piece of pipe, the diameter of which is one size smaller than the dimensions of the main pipe.
Lay pipes from the riser to the new installation site for the heated towel rail. If the distance is significant, it is necessary to seek the advice of a competent engineer who will carry out the necessary hydraulic calculations. The fact is that an incorrectly installed device will not heat up to a sufficiently high temperature.
Tip: Pipes can be recessed into the wall and hidden under decorative trim. This is a more time-consuming installation method, but the bathroom interior will only benefit from such a solution.
- It remains to fix the heated towel rail in the right place and attach it to the pipes.
- Then the system is checked and the final finishing work is carried out.
A few practical tips
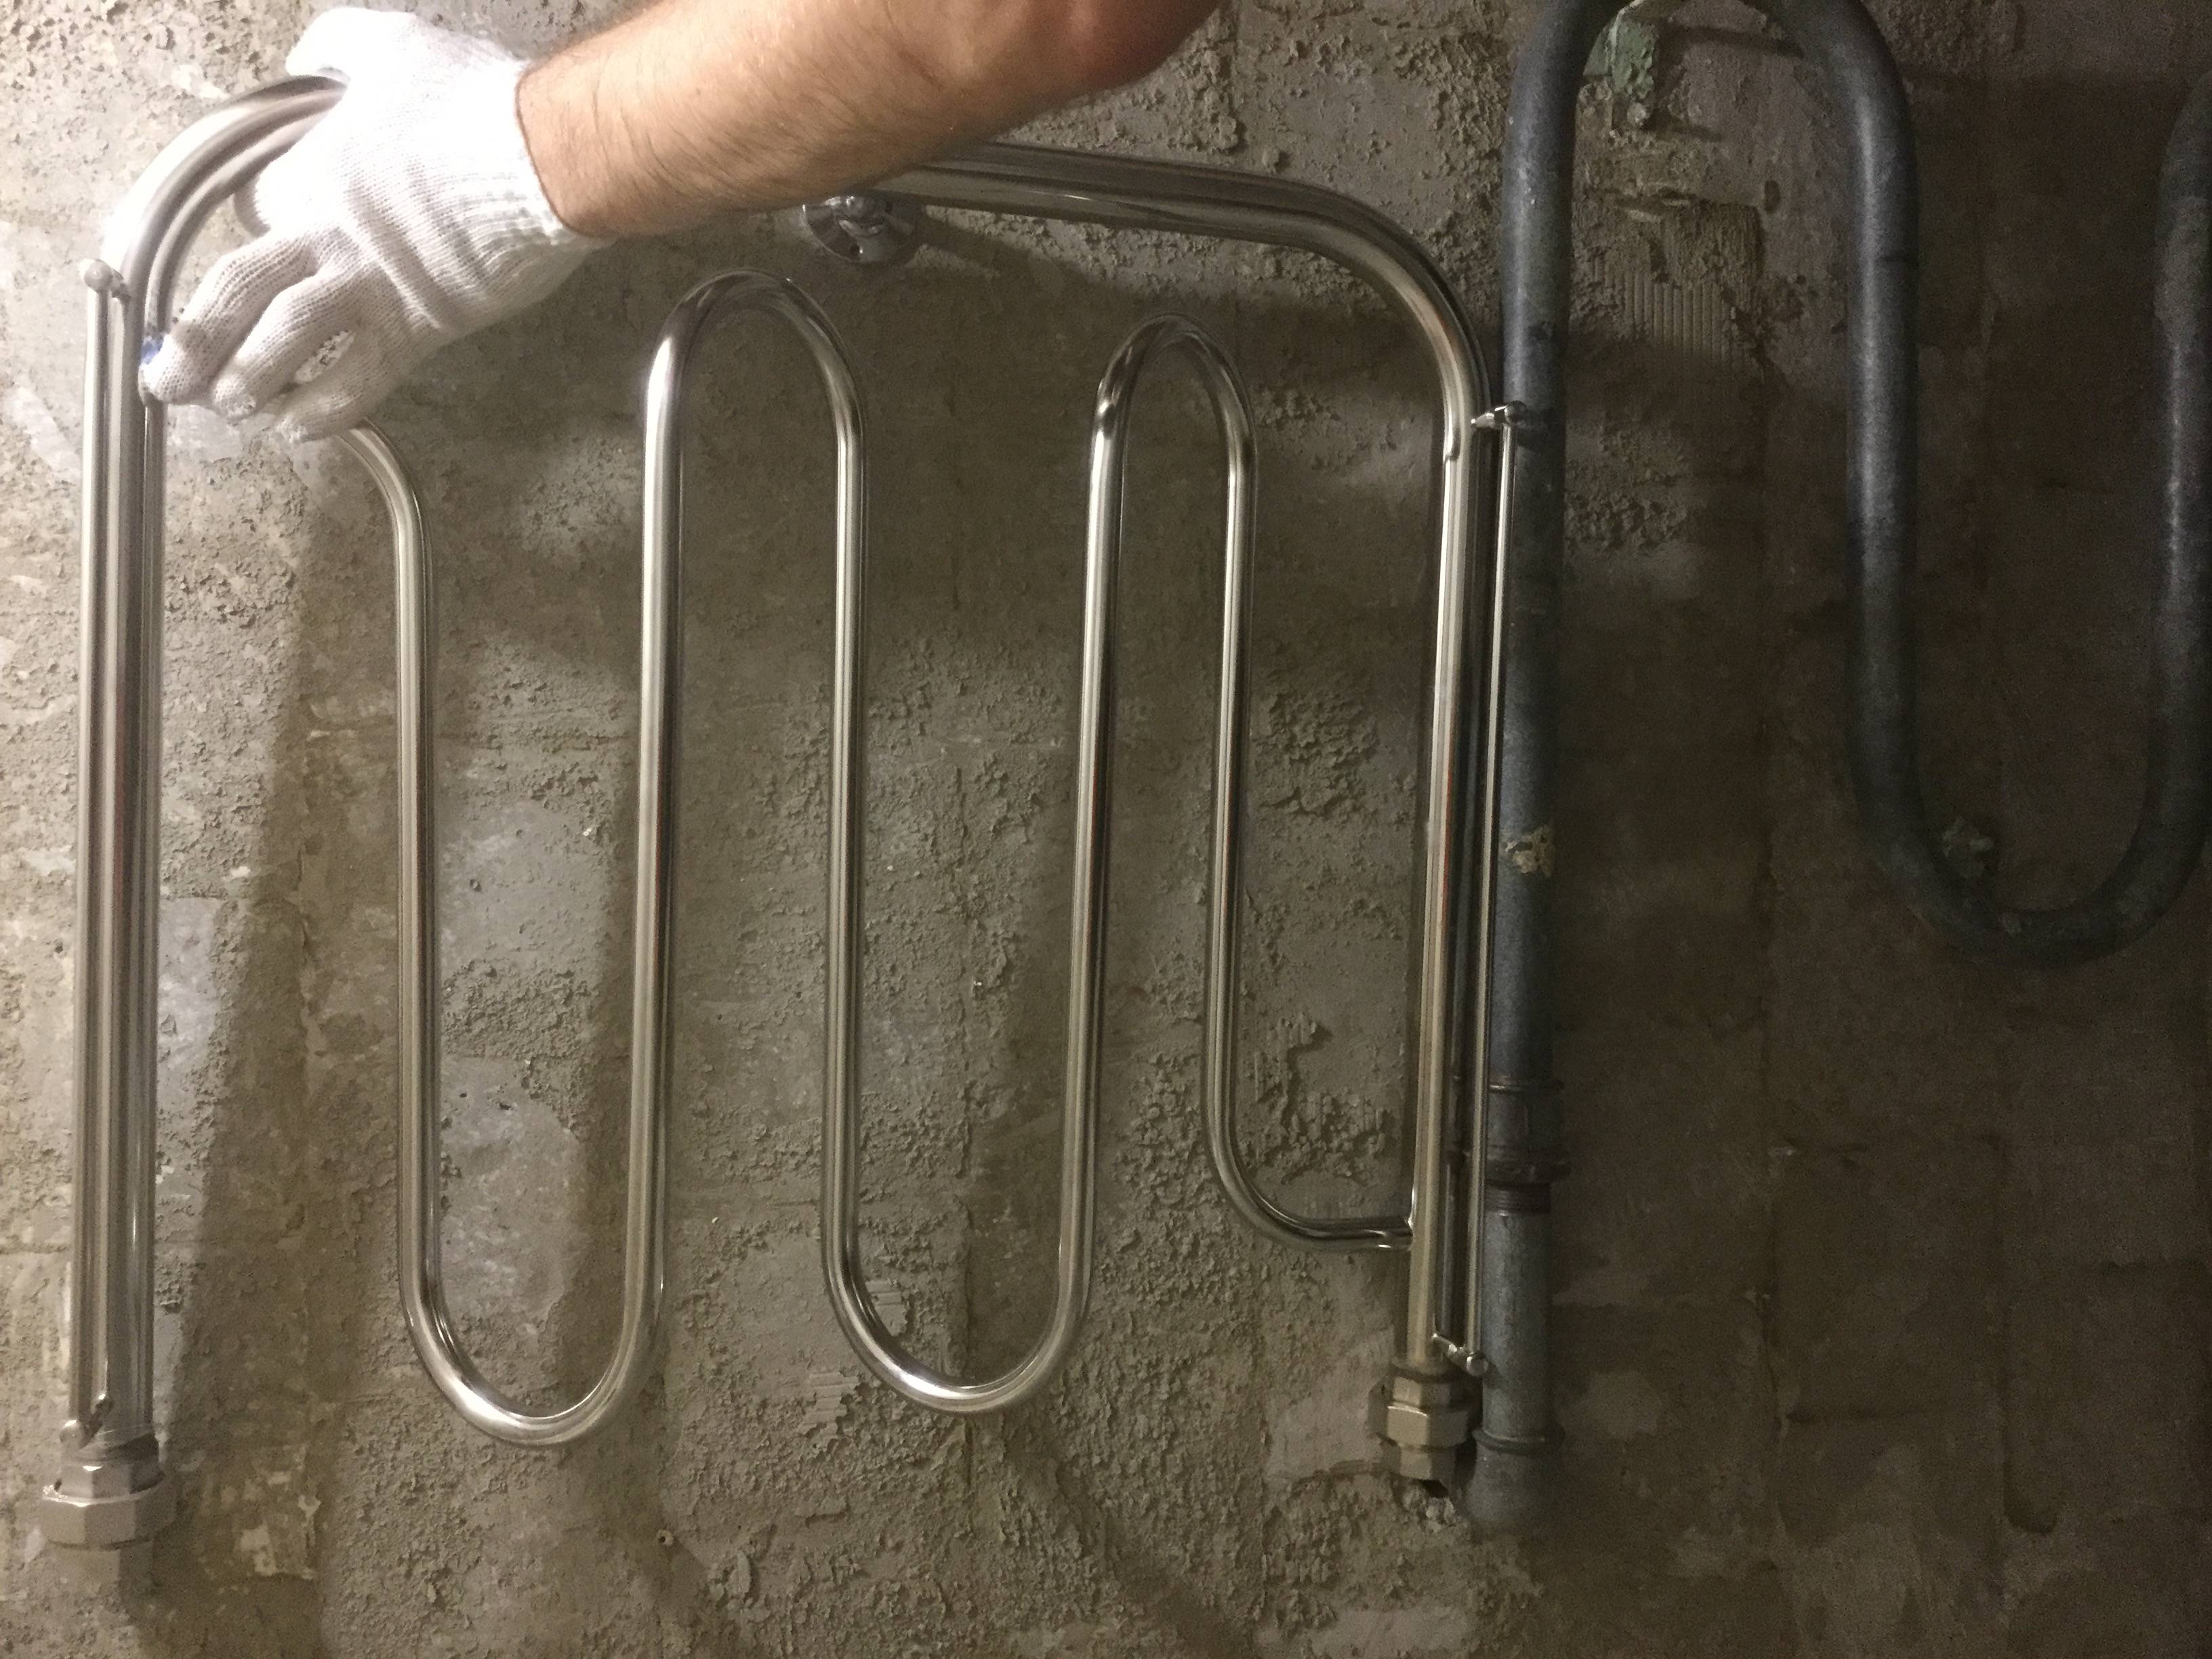
To ensure that the transfer of a heated towel rail in the bathroom does not become a disaster, a number of nuances should be taken into account. For example, experts recommend purchasing a durable steel heated towel rail made of seamless pipe for an apartment building. Such a model is designed for increased water pressure in the system, as well as for water hammer - a characteristic phenomenon for the urban water supply network. In private houses and cottages with autonomous and quieter water supply, you can use imported brass models designed for low pressure and careful operation.
Installation of a jumper-bypass facilitates the operation of the heated towel rail and possible repairs
An important point is the connection of the device with the system. There are two options: welding or threading.
A threaded connection is not recommended in combination with a welded riser, as well as in places that are inaccessible for maintenance, for example, if the connection is supposed to be hidden behind a decorative finish.
In addition to plumbing issues, a legal problem may also arise, since it is not possible to make such changes to the general house plumbing system everywhere. To resolve the issue, you need to make (i.e. order from specialists) the appropriate hydraulic calculations and coordinate them with the local management company, housing office, etc. In some places, such permission is not required, but if the transfer of the device is carried out with violations that affect the entire system, problems are inevitable.
Transferring a heated towel rail to another wall: coordination, installation procedure
A heated towel rail is an important element in any bathroom, as it not only keeps towels dry, but also heats the room while reducing humidity.
Typical projects include a heated towel rail in each bathroom, but often do not include one important detail - practicality. Therefore, sometimes when repairing a bathroom, it becomes necessary to transfer the heated towel rail to another wall.


Today we will talk about how to do this and whether coordination is required in this case (a video instruction for installation work is attached).
Towel warmer transfer: coordination
Unfortunately, at the moment there is no clear understanding of the issue regarding the transfer of the heated towel rail to another wall. In general, experts consider in practice two main options for resolving the issue:
Relocation of the structure without redevelopment of the bathroom. We are talking about mounting a heated towel rail in a new place. By the way, the installation process is carried out by the Management Company at the request of the tenant, who will only need to obtain a certificate stating that the organization carried out the transfer of the heating element on its own.
Relocation of the structure during renovation and redevelopment in the bathroom. If the transfer of the heated towel rail takes place in conjunction with other actions (updating the design and redevelopment of the bathroom), information about the transfer of the structure must be indicated in the project documentation. After creating the final project of the bathroom, the documentation is submitted for approval to the housing inspection.
Attention! Transferring the heated towel rail is possible on any walls, except for those that are common to you and your neighbors. So, we conclude that coordination is necessary only if you carry out repairs with redevelopment
In other cases, you will not need either a sketch or a project for transferring the heating structure.
So, we conclude that coordination is necessary only if you carry out repairs with redevelopment. In other cases, you will not need either a sketch or a project for transferring the heating structure.
In most cases, permission is not required to transfer a heated towel rail
But experts, nevertheless, advise that it is mandatory to notify the Criminal Code of your decision, since in some cases (for example, in very old houses), the location of all heating structures, which include a heated towel rail, is included in the project of the house.
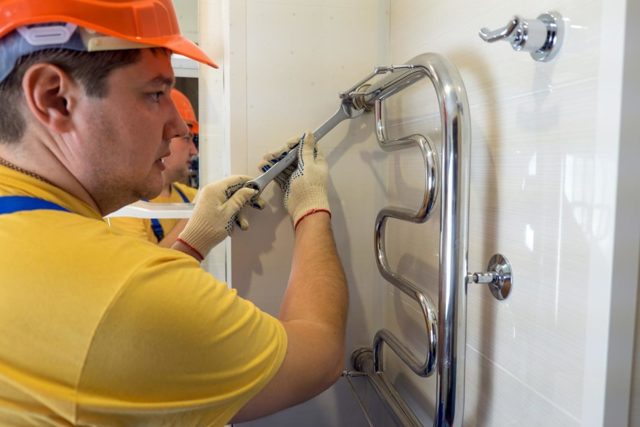
Installing a heated towel rail on another wall
The installation of electric and water heated towel rails is fundamentally different, so these processes should be considered separately.
Transferring an electric towel warmer
First of all, we determine the place for installation. Whichever place you choose, keep a certain distance (at least 0.6 m) from household plumbing installed in the bathroom: shower, washbasin, etc.
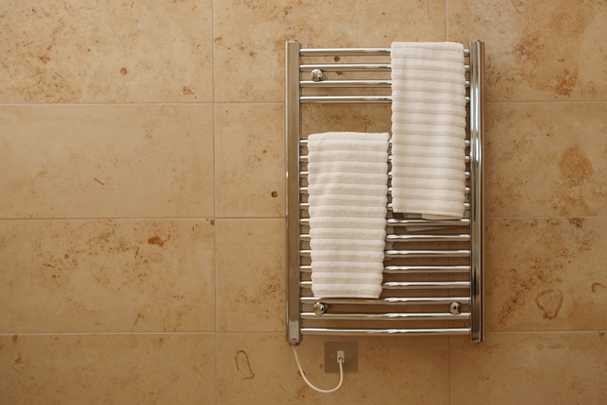
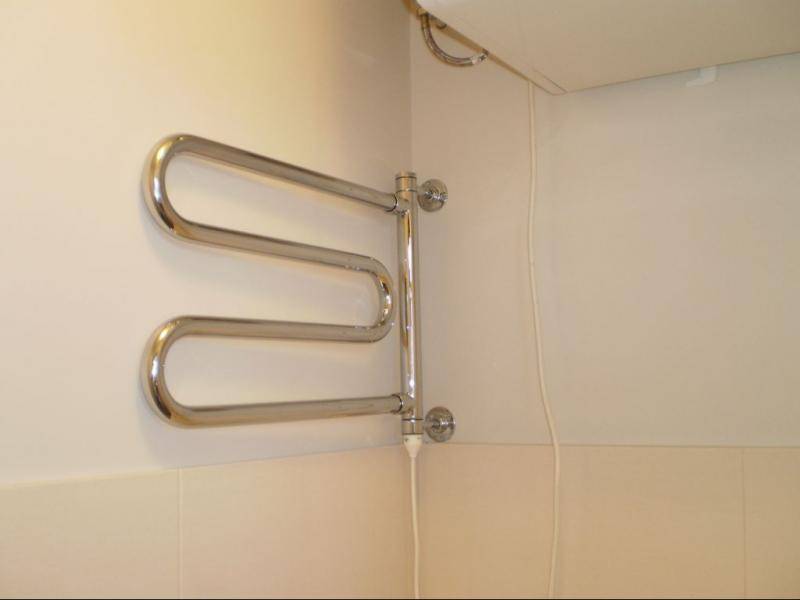
Electric towel warmer
Place the markings for installation strictly at a certain height from the floor: not less than 0.95 m and not more than 1.7 m. Such design height parameters are used for the purpose of ease of use by any member of the family.
Then another outlet is mounted or the already installed one is moved to a new location. The wire must be hidden under the decorative trim. And in the end, it remains to install the structure at the marked place.
Then you can connect it to the mains.
Attention! Since the bathroom is a room with high humidity, it is important to remember about safety when installing an electric heated towel rail: be sure to make grounding and install an additional machine in the electrical panel
Video instruction for transferring the heated towel rail
A few tips from an experienced builder:
Moving a heated towel rail in the bathroom is a rather complicated process. You need to approach it with full responsibility.If you are not confident in your abilities or do not have enough experience, it is better to turn to professionals, otherwise your amateur performance may lead to incorrect operation of the heated towel rail, and in the worst case, to an emergency.
If you are not a beginner in engineering work, then you can rely only on your own strength, experience and good instructions. Alternatively, you can buy an electric model and make your life easier (but lose in terms of paying electricity bills), but it all depends on your own wishes.
Features of mounting the electrical model
If the owners of private houses choose where to place this element on their own, then residents of apartment buildings often have no choice, since in their apartments the appliances are placed in the bathrooms according to the original plan.
Often places for heated towel rails are chosen very inconvenient, for example, above the sink. In this case, at the first repair or redevelopment, the landlord will decide to move the device to a more comfortable place. But how to do it according to all the rules, with the least damage to the bathroom and without unpleasant consequences?


Transferring an electric heated towel rail does not cause any difficulties - it happens much easier than in the case of water-type counterparts. It is also not required to coordinate the transfer of the electrical model with documents, since in this case no types of communications will be affected.
There are only two conditions that must be met for a correct transfer or initial installation: a distance of at least 60 cm from water sources and a correct electrical connection
An electric heated towel rail is considered more practical than a water heated towel rail, not only because of the ease of installation, but also due to ease of use.
Advantages of electric dryers:
- Year-round operation. The closed circuit of electric dryers allows them to be operated all year round, even when the heating system is turned off or hot water is not supplied due to maintenance work.
- Wear resistance. Electrical appliances are not afraid of pressure drops, hard water and corrosion.
- Possibility to adjust the heating temperature. To do this, you only need to additionally install a rheostat, in some models it is present initially.
That is why many owners prefer electric water heated towel rails for arranging a bathroom.
There are different types of electric heated towel rails on the market - there are dry and oil models. In liquid, as a rule, tubular electric heaters are used.
In dry-type appliances, instead of a liquid filler, a special heating silicone cable is used, similar to those from which a warm floor system is mounted
In order to ensure the normal safe operation of electric dryers, you need to follow a few rules:
- wiring must be qualitatively hidden in the wall;
- it is advisable to install a residual current device on the wiring to the bathroom, ideally on the heated towel rail itself;
- the device should be grounded, as it is located in a room with high humidity;
The socket for the device, like any sockets in the bathroom, must also be grounded and have an IP4 or IP65 degree of protection (against dust or against direct jets of water and dust).


