- Is it legal or not?
- General rules
- Unusual ways of disguise
- Checking the entire system for tightness and performance
- Options for hidden placement of a gas pipe in the kitchen
- Welding
- Penalty for moving the gas pipe in the apartment
- Instructions on the transfer of the gas pipeline
- Preparing to transfer pipes
- Provisions of SNiP on the arrangement of gas pipelines in an apartment
- Why can't you do it yourself
- The procedure for transferring pipes on site
- Obtaining approval
- Training
- Redesign of the gas supply system
- Validation and input
- The main reasons for the transfer
- Third party replacement
- Issue price
- Where and how to apply?
- Step-by-step instructions - how to transfer the DHW riser
- Tools and materials
- Preparation and coordination of works
- Dismantling the old
- Cart preparation
- Fittings
- Installation of inlet fittings
- Wiring connection
- Norms and rules for the location of gas pipes in the apartment
Is it legal or not?
The DHW riser belongs to the common house property. This means that all actions with it in one way or another may affect the rights of other owners, i.e. all residents of the house.
The work must be agreed with the management company, and the changes must be approved by the BTI and the architecture department, as the plan of the apartment changes.
The main document defining the rules for using the common property of an apartment building is Decree of the Government of the Russian Federation of August 13, 2006 N 491.
According to the requirements of this law, the actions of one owner of the apartment should not infringe on the rights of other people living in the house. This means that uncoordinated actions with life support systems, which primarily include DHW and cold water risers, as well as sewage, entail liability.
It is determined by the Housing Code of the Russian Federation (Article 29), which establishes various types of liability, up to the seizure and sale of a problem apartment.
As a rule, the transfer of risers is done over a short distance, within 1 meter (usually even less). Such a transfer is acceptable, and there are no problems when coordinating the work. However, some owners go much further and plan to move pipes to other rooms or corridors.
It must be borne in mind that the installation of plumbing fixtures above residential premises is prohibited. However, there is no such restriction for pipelines. At the same time, a tap is made from the riser to the water intake devices, which poses a certain danger of flooding the premises of the lower floors.
When agreeing on the project, it will be necessary to justify the need and provide guarantees for the safety of residents of other apartments.
The transfer of the riser is prohibited if, as a result, the water supply regime worsens.
For example, when installing pipes of a smaller diameter, or when using unsuitable materials.
In addition, when replacing metal pipes with plastic ones, the requirements of the EMP are violated (the general potential equalization system changes).
This poses a danger to all residents of the upper floors.Another problem may arise in the fact that plastic pipelines are not able to withstand working or pressure pressure, which not all users are aware of.
The approval procedure requires a lot of time (usually at least 2 months), money and nerves. Often, officials, trying to play it safe, require a lot of unnecessary documents and certificates.
We must be prepared for a long walk through the authorities and not plan work ahead of time. Because of this, many owners make inconsistent transfers at their own risk.
General rules
To begin with, it is worth finding out under what circumstances gas pipes in the kitchen are operated. The use of blue fuel in such a room most often means the installation of a stove. It's time to read the terms of use. So, remember the main postulates:
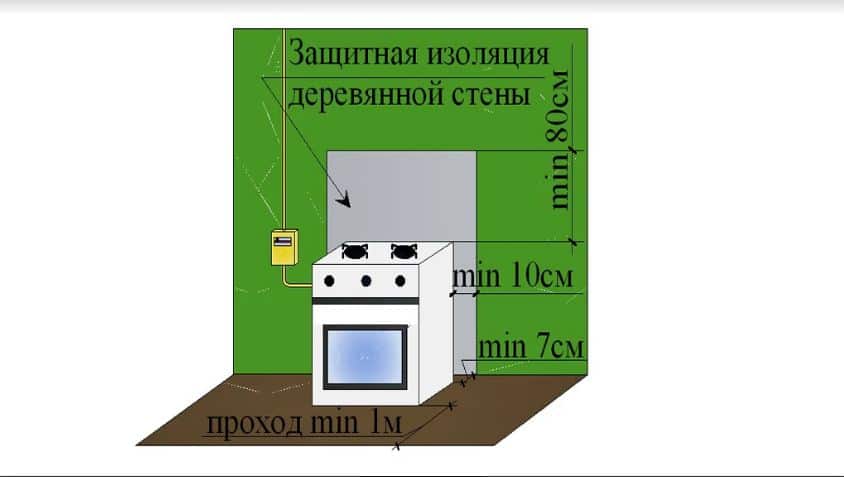
- gas stoves are allowed to be installed in kitchens with a height of 2.2 meters or more (if the ceiling in the room is sloping, then to install the stove, you should choose a place where it reaches the established norm);
- the kitchen should be equipped with a window with a window so that during the day repairs can be carried out without artificial lighting, ventilating the room (the presence of a functioning ventilation duct is welcome);
- between the slab and the opposite wall there must certainly be a passage with a width of 1 meter or more;
- the ceiling and walls made of materials prone to burning, according to the norms, must certainly be covered with plaster;
- the stove is allowed to be used in kitchens separated from the corridor by a reliable wall / partition and a door;
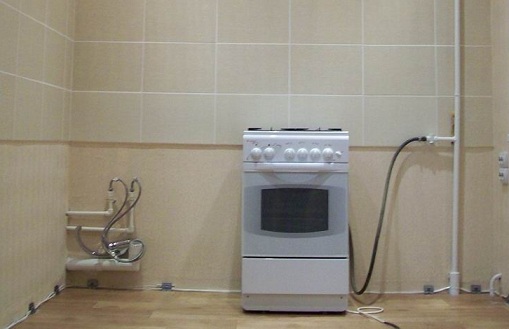
- the layout of gas pipes in the kitchen should be done so that the distance between the walls and the stove is from 7 centimeters;
- a branch to the plate is allowed only at the level of the connecting fitting;
- the shut-off valve should be installed at a level of 1.5 meters from the floor and at a distance of 20 centimeters to the side of the stove;
- for mounting the plate, it is permissible to use a special (heat-resistant - from 120 degrees) flexible sleeve and do not forget to change it, based on the recommendations specified in the product passport.
The handling standards are indicated mainly with already installed pipes and devices attached to them. If you plan to change, transfer, or even cut off the gas pipe in the kitchen, then let's move on.
This is how you can hide a fragment of the network if it bothers you - without any transfer
Unusual ways of disguise
In kitchens made in modern high-tech or techno fashion styles, pipes are not hidden, but on the contrary, they specifically focus on it with chrome plating, glossy shine, and metallic paint. Fans of non-standard and original ideas are advised to pay attention to unusual ways to hide the pipe:
Paint with patterns. The original painting of the surface with patterns creates an unusual decor and creates an atmosphere of individuality. It can be the most beautiful Khokhloma, Indian patterns, oriental ornament or geometric shapes. Patterned painting can be continued on the walls and then you get a unique design of a house or apartment.
With decoupage
Applying decor using the “decoupage” technique allows you to turn an unsightly detail into a unique masterpiece that attracts attention at first sight. It is necessary to prepare an ordinary paper napkin with a beautiful pattern or a special film with patterns and transfer it to a pre-cleaned pipe surface
From the back side, the picture is covered with glue, the front part is treated with a special acrylic varnish in several layers. In this way, the image is preserved and an unusual visual effect is created.
Textile decor. The pipe located along the window can be hidden behind a long curtain or thick curtain. The surface of the gas distribution is covered with paint to match the fabric, and then it will completely merge with the color of the textile. Despite the fact that this is the simplest way to decorate, it is also good because it does not restrict free access during repairs.
Bamboo. In ethnic-style kitchens, it is appropriate to hide the gas pipeline with natural material - bamboo, which is highly durable and has a beautiful natural texture. The bamboo column covering the gas pipe must exceed the diameter of the gas pipeline by 70-100 mm. It is not necessary to use natural bamboo, an artificial imitation of any natural plant will do. The trunk is cut along its entire length and attached to the communications with plastic ties or twine.


Where is the best place to hide a gas meter Small-sized kitchens of Khrushchev panel houses equipped with a gas meter present a big problem for creating a stylish and cozy interior. There are not so many directions for solving such problems for apartment owners:
- Move the gas pipe closer to the wall.
- Leave the meter in its original place.
- Hide the counter with original decor.
The first option is performed during a major overhaul and requires the call of a special service servicing gas pipelines. For lovers of stylish fashionable interiors, the second option is completely unsuitable.The third option is considered the most feasible and a lot of design solutions have been developed for it:
- A drywall box with a plastic screen-door.
- Hanging furniture cabinet with opening doors.
- Pencil case made of wood or durable plastic.
- Casing made of MDF or chipboard.
- Polycarbonate case.
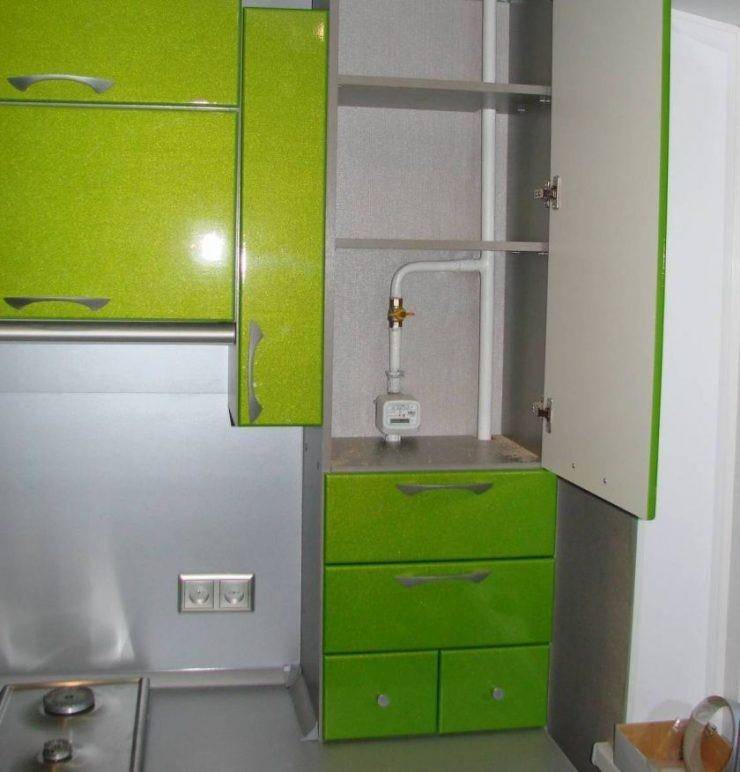 Ventilation holes must be provided in all masking structures. The installation is carried out in such a way that at any time there is access to this gas appliance. Dependence of choice on various factors The method of decorating and masking gas communications depends on the following conditions:
- The location of the apartment pipeline.
- Features of the layout of the kitchen and the passage of gas pipes in it.
- Interior design style.
- Decor wishes of the owner.

How to hide the pipes in the bathroom without mounting them into the wall under the tiles so that there is access No matter how original the design of the bathroom is, open pipes spoil the whole look. However, it is realistic to correct this shortcoming by hiding engineering communications. At the same time, not at all…
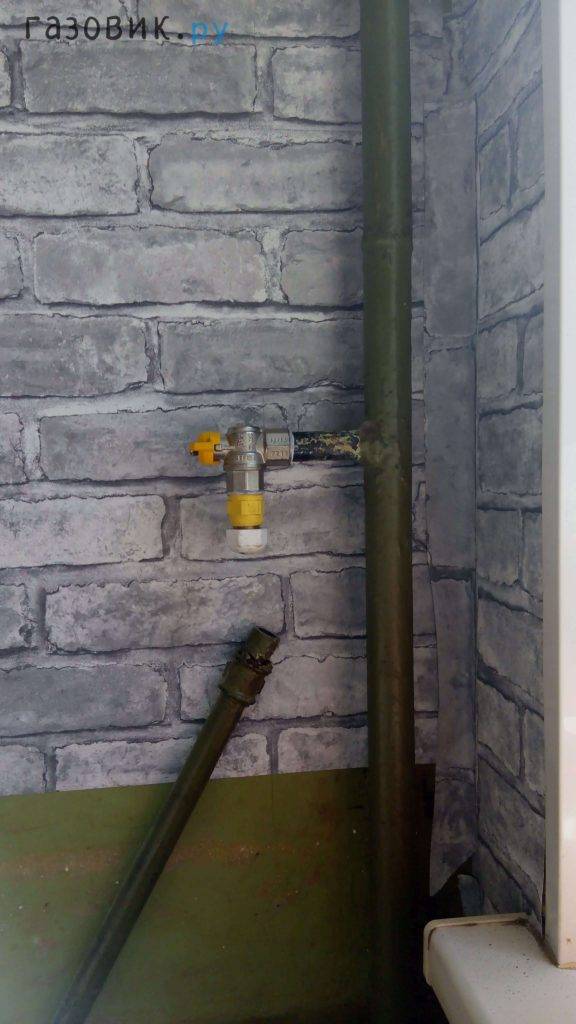
As an example, consider the situation of masking a pipe with a gas valve installed at a height of 1 meter from the floor. To hide such a gas line, it is enough to cover it with a tabletop with two holes for the gas pipe and valve.
Checking the entire system for tightness and performance
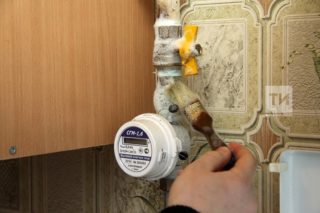 Leaks are checked with soapy water.
The test is done after the installation is completed, the tightness and performance are diagnosed.First, the general view of the system is examined, the piping, tightening of the fittings, and compliance with the design scheme are checked. Gas evolution is detected at joints and nodes.
A soapy solution is used, which coats the joints of pipes with a hose, the connection of a flexible liner and a stove or oven. If bubbles form, the assembly needs to be reworked and re-diagnosed. The master draws up an act of work performed with a description of the features, changes are recorded in the technical passport.
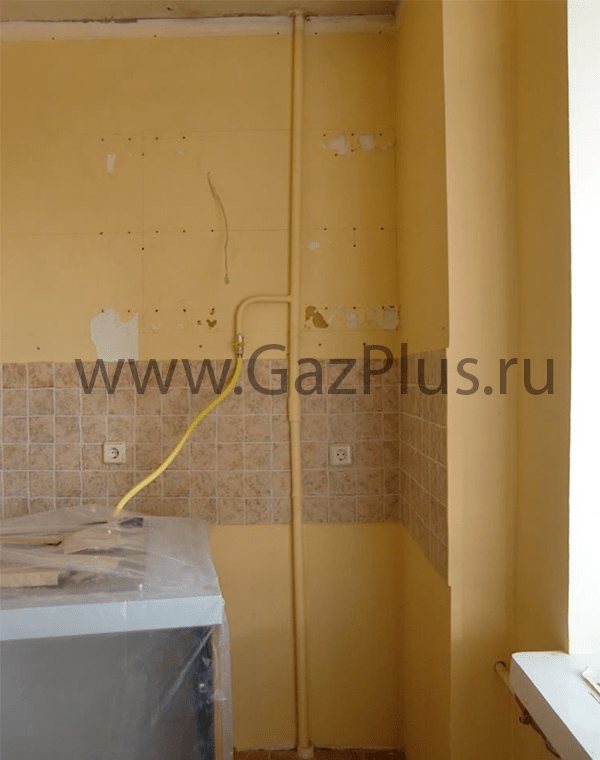
Options for hidden placement of a gas pipe in the kitchen
It is easiest to hide gas communications during the repair or replacement of a kitchen unit
In the course of masking pipes, it is also important to adhere to the above rules and requirements.
The most popular ways of hidden placement of pipes:
- shelter with furniture - the pipes are hidden under the headset, while providing free access;
- installation of a decorative box made of wood or metal profile;
- applying decor to pipes, if the area of \u200b\u200bthe kitchen allows (bright magnets, painting);
- the usual painting of pipes to match the color of the general style of the room;
- drywall structures.
Disguise communications
Regardless of the chosen method of disguise, the main rule is to ensure safety.
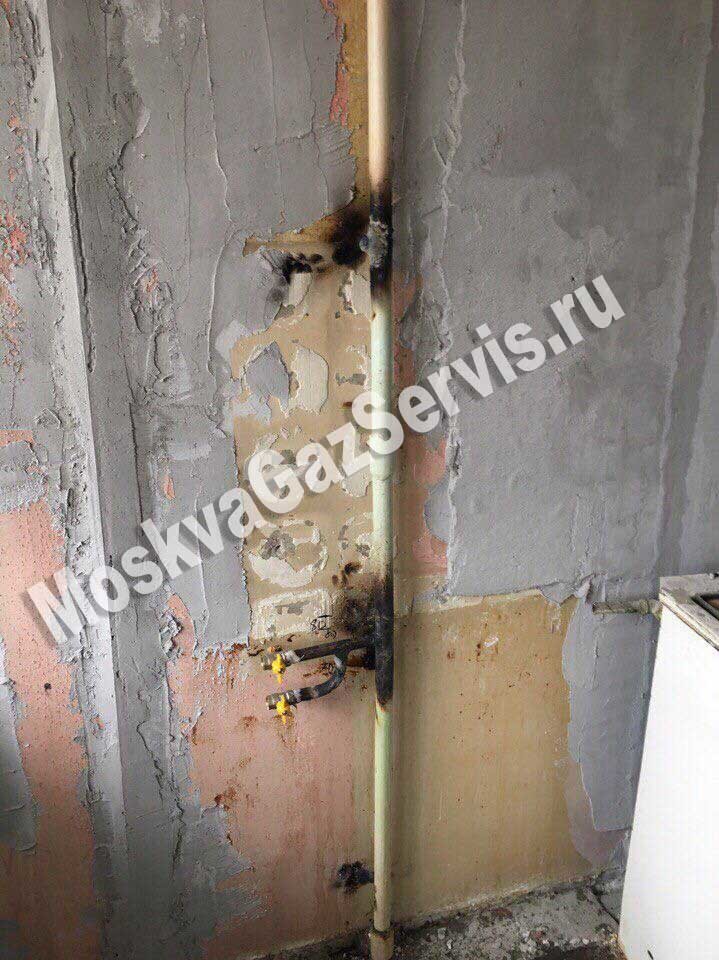
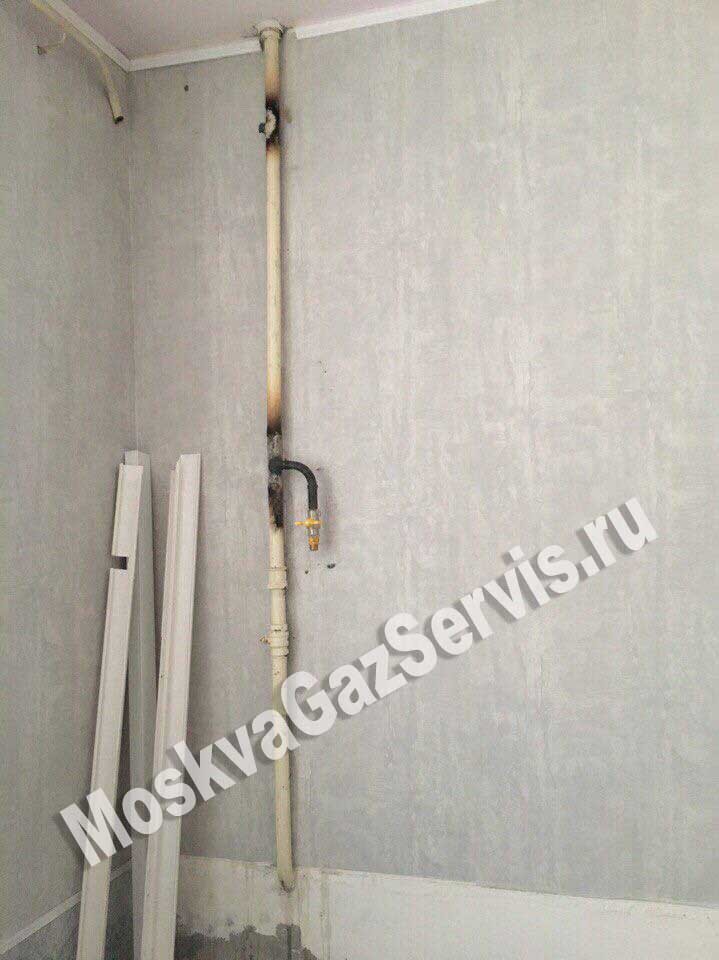
Welding
The SNiP standards provide: whatever changes in the position of gas pipelines, they must be carried out only by welding. Any detachable connections between two pipe sections are prohibited. Threaded connections are appropriate only on gas meters, valves and household appliances. When welding, the master is obliged to use only serviceable devices, tools, fixtures.
Personal protective equipment is also required:
- special welding gloves;
- mask, shield or goggles;
- working overalls made of dense non-combustible fabric.
When welding, it is necessary to use a mask. Sometimes on the walls, ceiling, equipment there are places burned by welding. Such phenomena have an unpresentable appearance, spoiling the design of the room, requiring protection against corrosion. After completing all the operations, the craftsmen must treat them with waterproof paint for metal. The color of the dye is selected for the main coloring of the walls.
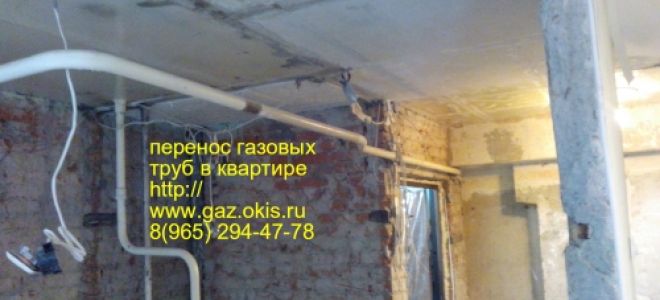
Penalty for moving the gas pipe in the apartment
Often a situation arises when it becomes necessary to move the gas appliance to another place. As a result, it is required to carry out the transfer of the gas pipe in the apartment. Such work should be approached responsibly and should be carried out by professionals with the appropriate skills and knowledge.
Such a service of specialists is not cheap, but the wrong actions can lead to very sad consequences.
It should be noted right away that the transfer of gas pipes in an apartment consists of two large and important stages:
- coordinating the movement of gas equipment in special services;
- performance of work on the movement of the gas supply line.
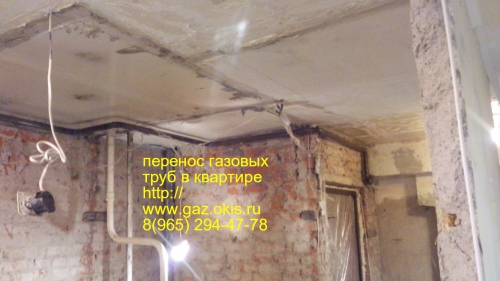
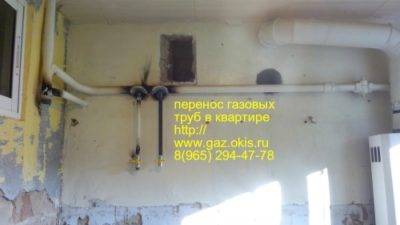
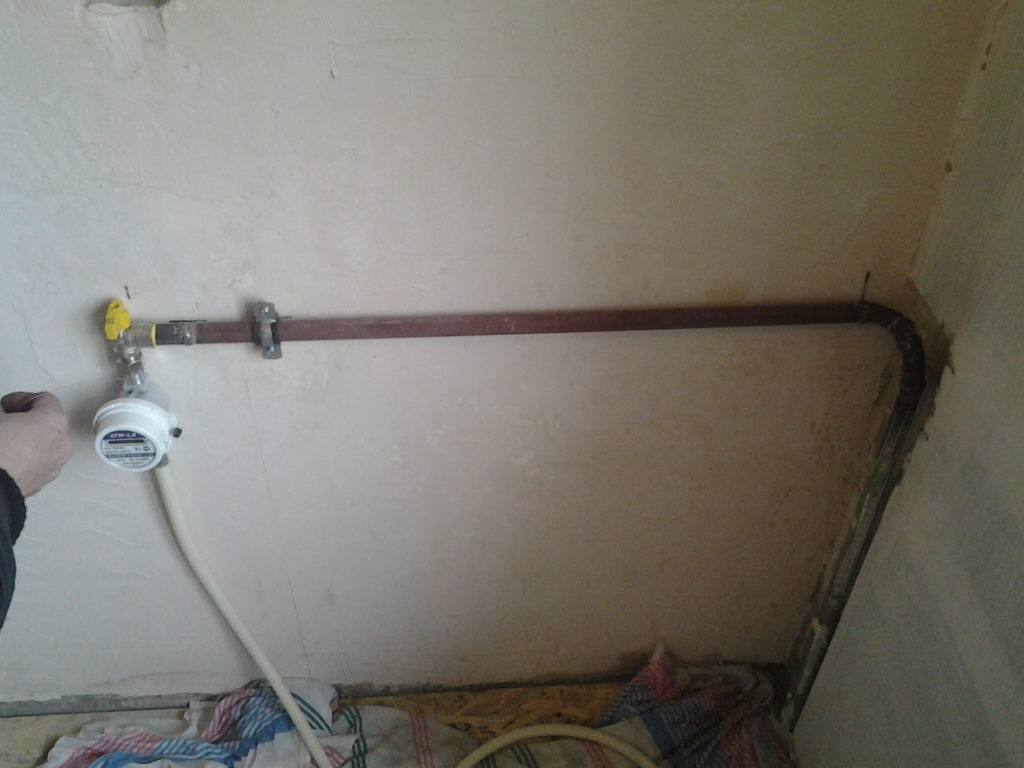
Instructions on the transfer of the gas pipeline
For professionals, the transfer of gas equipment is not an extremely difficult task, it is carried out in the following sequence:
- Using the gas cock, shut off the gas supply to the room.
- The gas pipeline is then purged to remove residual gases from it.
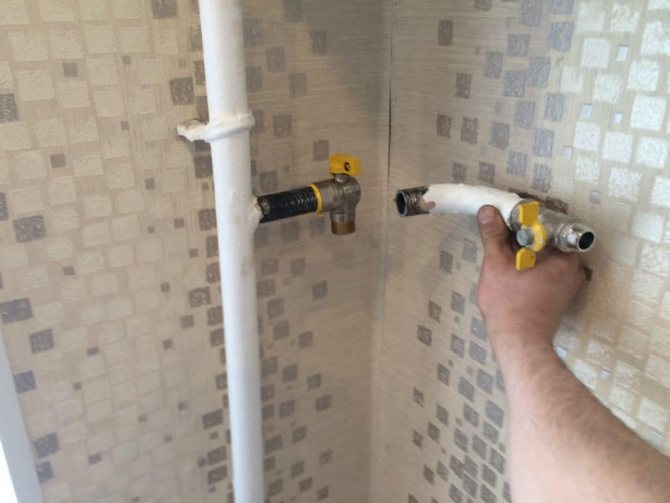
- In the place where there is a connection to the gas pipeline, an unnecessary piece of pipe is cut off and the resulting hole is welded (read: “How to cut a gas pipe - rules and recommendations”).
- A hole is drilled in a certain place and a branch is welded to the gas pipeline, which is a metal tube and a tap.
- Then they mount the outlet to the gas appliance by applying threaded connections.
- Before using the equipment, the installed gas valve and the pipe with welded joints must be checked for leaks.
To connect household gas units, a flexible bellows hose with a length of no more than two meters is used. Before moving the gas pipe in the apartment, it is advisable to think about the fact that perhaps such a length of the hose will be enough and this movement will not be required.


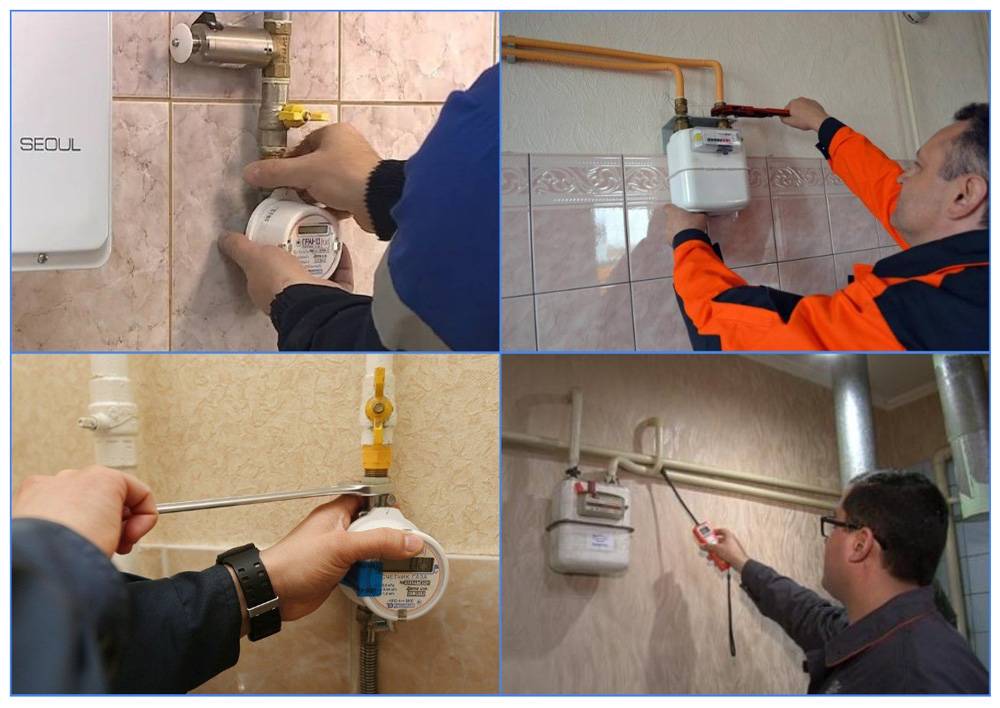
To work with gas pipelines, specialists must have a permit; they are re-certified at least once a year to confirm their qualifications.
Preparing to transfer pipes
Before proceeding with the transfer of the gas pipe, the owner of the property should contact the gas supply organization at the place of his residence with a statement regarding the desire to make changes to the gas supply system of the apartment. A technician will come to the specified address to inspect for the availability of conditions for moving gas equipment.
If possible, a representative of the organization will make the necessary calculations and draw up an estimate of costs. It is possible that there will be a need to draw up a new technical plan for the room where the gas pipe passes, in which the transfer will be taken into account. After making an advance payment for the services, the gas workers will appoint a day for the work to be carried out.
The owner of the premises needs to make sure that the gas company has certification - to demand from its employees the appropriate documentation, which should be provided to customers upon their request.
When specialists arrive to move the gas pipe, you should check if they have certificates that confirm their qualifications. Only then can the masters be allowed into the apartment. After the transfer process is completed, gas workers must draw up an act on the work done and make an appropriate entry in the gas passport.
Provisions of SNiP on the arrangement of gas pipelines in an apartment
According to the provisions prescribed in SNiP, the distance between a gas pipeline laid openly in a room or in a floor and utilities for other purposes (sewer, heating, plumbing systems) should allow for inspection and repair gas equipment and related fittings.
At the same time, gas pipelines should not be allowed to cross ventilation grilles, window and door openings.
Between the gas pipe laid in the wall and the means of wired communication and broadcasting, the minimum gap is determined taking into account safety precautions, which are provided for by the rules for working with cable lines.
The minimum distance and the permissibility of crossing between the gas pipeline and the electrical wiring located inside the premises is determined on the basis of the PUE.
The gas pipeline is laid in residential buildings at a height of at least 2.2 meters from the floor level to the bottom of the pipe, and if there is insulation on it, to the bottom of the insulating material.
Why can't you do it yourself
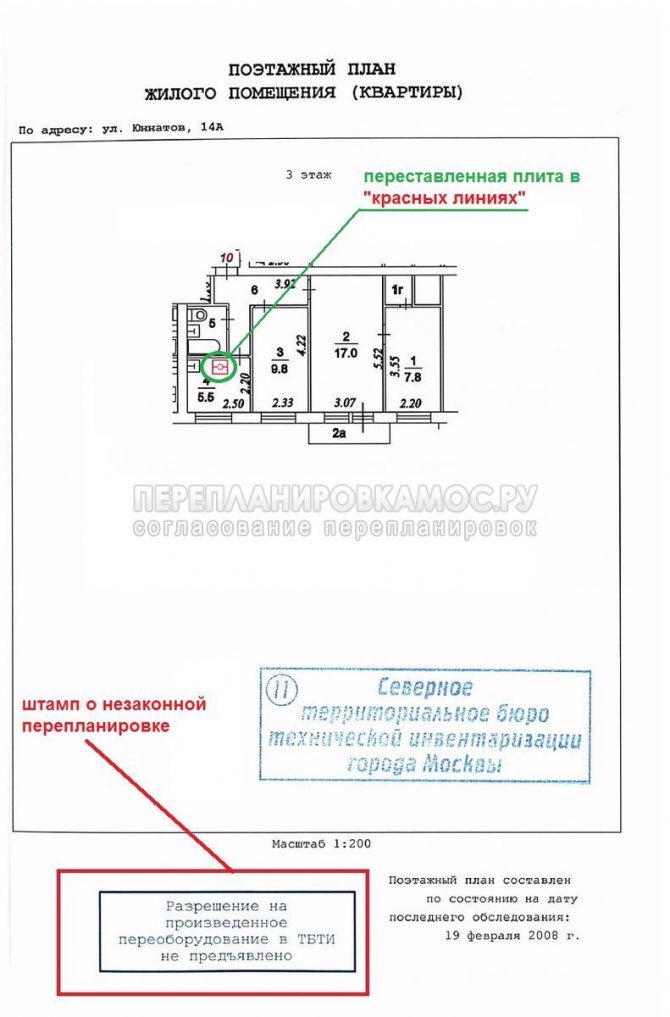
This is due to the fact that a gas stove is a priori a source of increased danger. There are strict regulations governing this issue. The location of the slab is always clearly marked on the plan of the BTI apartment: all changes and corrections in the plan are interpreted as redevelopment.
Moving a gas stove within the kitchen is a redevelopment, even if the displacement of the object is small. But even this question is divided into many small points. If you plan to locate the gas stove a little further than its initial location, then in this situation, only a certificate from Mosgaz (if you live in the capital) is required from the permit documentation.
If a large-scale rearrangement is planned, then it is necessary to make a project for the transfer of equipment, it is also ordered from Mosgaz. The rules also require an agreed transfer with the Moscow Housing Inspection. Residents of other cities should contact the relevant supervisory authorities of their locality.
The procedure for transferring pipes on site
Is it possible to move gas supply pipes on the site on my own? Work on the redevelopment of the gas system on its own or by qualified specialists is carried out in the following order:
- development and approval of the project in accordance with current safety requirements;
- acquisition of materials and preparation of a set of tools necessary for the performance of work;
- direct transfer;
- checking the quality of the work performed and putting the system into operation.
Obtaining approval
The first stage of the redevelopment of the gas system is the development of the project and the approval of the document.
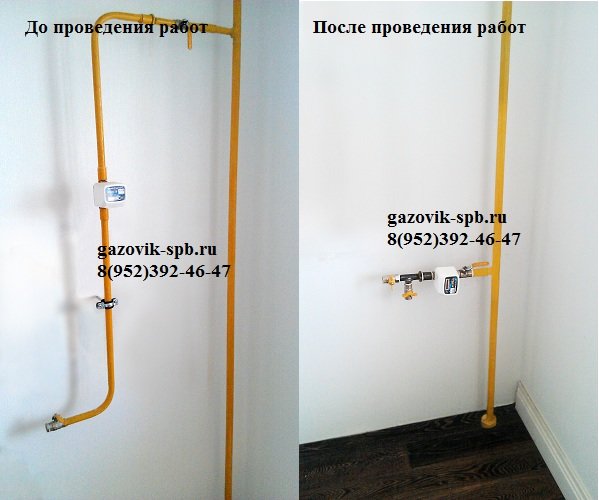
The layout of the gas pipeline on the site
Where to apply? Project of the future system gas supply of a private house can be developed:
- independently, taking into account all safety standards;
- in any specialized organization;
- at the regional branch of the gas supply company.
The cost of specialist services will be determined on the basis of:
- tariffs of the selected company;
- region;
- project complexity;
- a list of additional services (development of estimate documentation, document approval, carrying out transfer on the ground, and so on).
To agree on the developed project, you must contact the gas service of the region and submit a written application, to which attach:
- copies of title documents for the house and garden plot;
- technical passport for the house;
- a topographic image of the site indicating the location of buildings and communication systems (water supply, sewerage, and so on);
- a copy of the civil passport;
- transfer project;
- the consent of the neighbors, if the project documentation assumes the transfer of the system with a change in the neighboring site;
- documents confirming the compliance of the installed equipment with safety standards (passports, certificates, and so on).
Training
To perform the transfer work, you will need:
- Bulgarian;
- welding machine;
- wrench;
- shovel, crushed stone, insulating material, if the pipeline is supposed to be laid in the ground;
- supporting devices when laying an overground highway;
- pipes and connecting fittings;
- shutoff valves, meters and other devices provided for by the project;
- materials for isolation of threaded connections;
- flexible hoses for connecting a gas stove and other equipment;
- gas equipment.
Redesign of the gas supply system
The migration process is carried out in the following order:
- shutdown of gas supply;
Only employees of the service organization can disconnect a separate trunk from the central system. The application for disconnection is submitted in advance.


- dismantling of pipes not provided for by the drafted project. As a rule, the laying of external gas supply systems is carried out with steel pipes, for the dismantling of which a grinder is required;
Removing unnecessary pipes
- purging pipes (release from accumulated gas). The work is carried out in order to improve safety at the site;
- installation and fastening of new pipes and shut-off and control valves provided for by the project;
Implementation of a new gas supply system
To connect metal pipes to each other, it is recommended to use a welding method that is distinguished by the maximum level of reliability and tightness. Reinforcement can be installed using the threaded method with the obligatory use of sealing materials.
- equipment connection.
Validation and input
After carrying out all the work, it is necessary to check the tightness of the system and conduct a test run.
The tightness test is carried out using a conventional soap solution and a sponge (brush), which must be applied to the joints of pipes and fittings. Wherein:
if soap bubbles form on the surface when applying the composition, then a leak occurs in this place, that is, the system is not airtight;
Sign of poor connection tightness
the absence of bubbles indicates the complete tightness of the gas supply system.
How to install gas pipes on the facade of the building, see the video.
A test run allows you to determine if the system can withstand the declared pressure.
Only after all checks have been carried out, it is possible to bury pipes (when laying an underground pipeline) and draw up an act of work performed, which is necessary for putting the gas pipeline into operation, which is carried out by the regional gas service.
The main reasons for the transfer
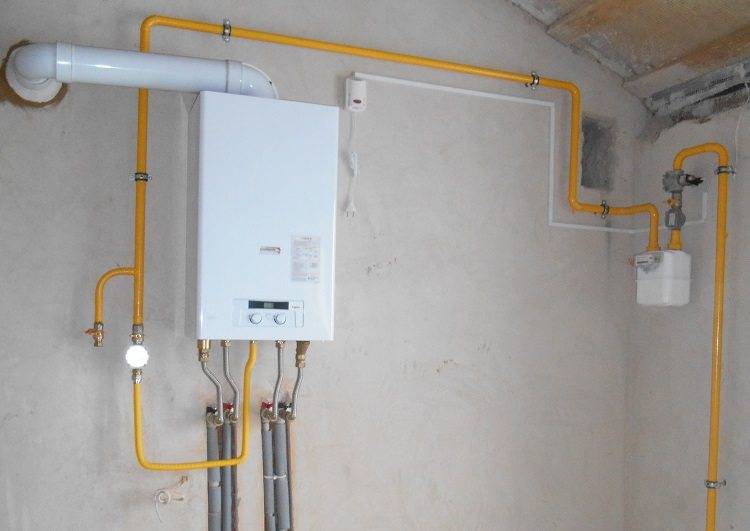
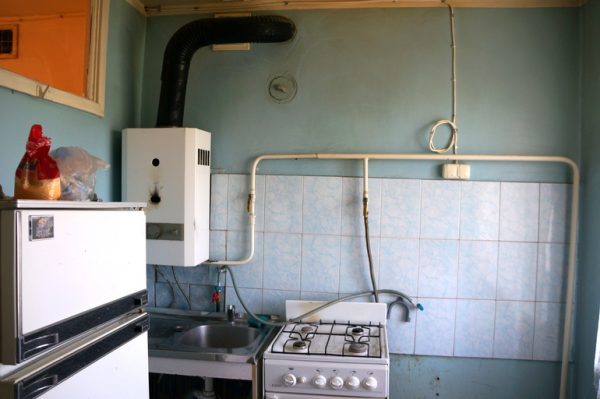
The placement of a gas pipeline in multi-apartment and individual houses is provided for at the design stage, choosing the best option for this. Typically, the gas riser runs close to the windows in such a way as to ensure ventilation of the area next to the gas stove. At the same time, the gas outlet should not be located too far from the water supply - this will lead to inconvenience when installing the kitchen set.
From the above norm it follows that it is forbidden to use a flexible piping of a greater length and if the rated distance between the shut-off valve and the gas consuming installation is exceeded, it will have to be compensated by lengthening the steel pipe.
If the owner needs to move the gas pipe, most often he does this for the following reasons:
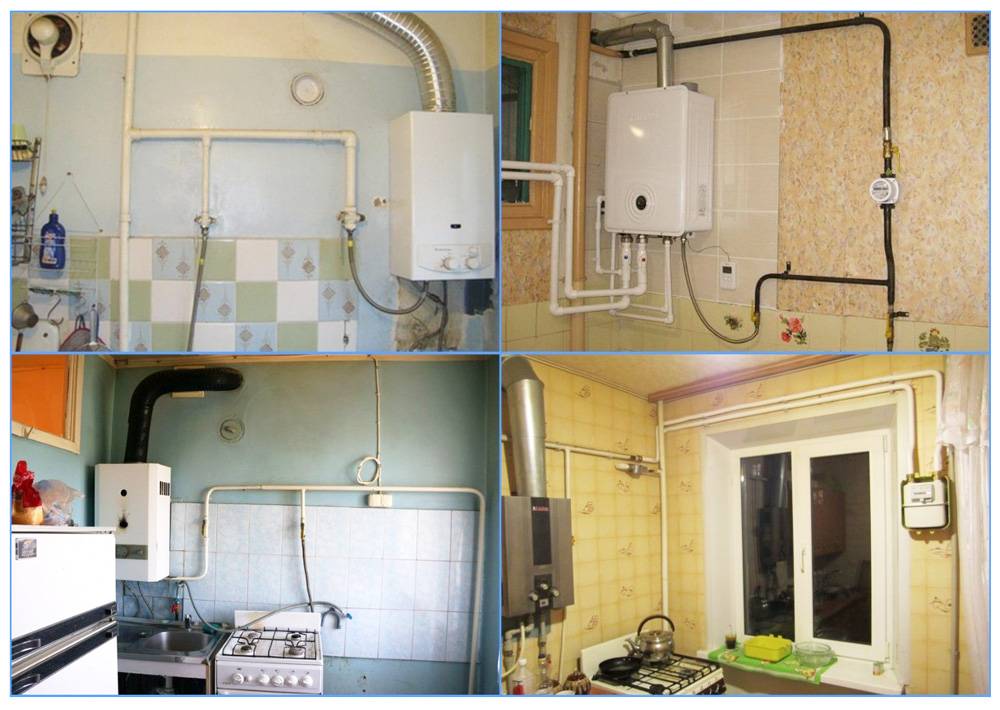
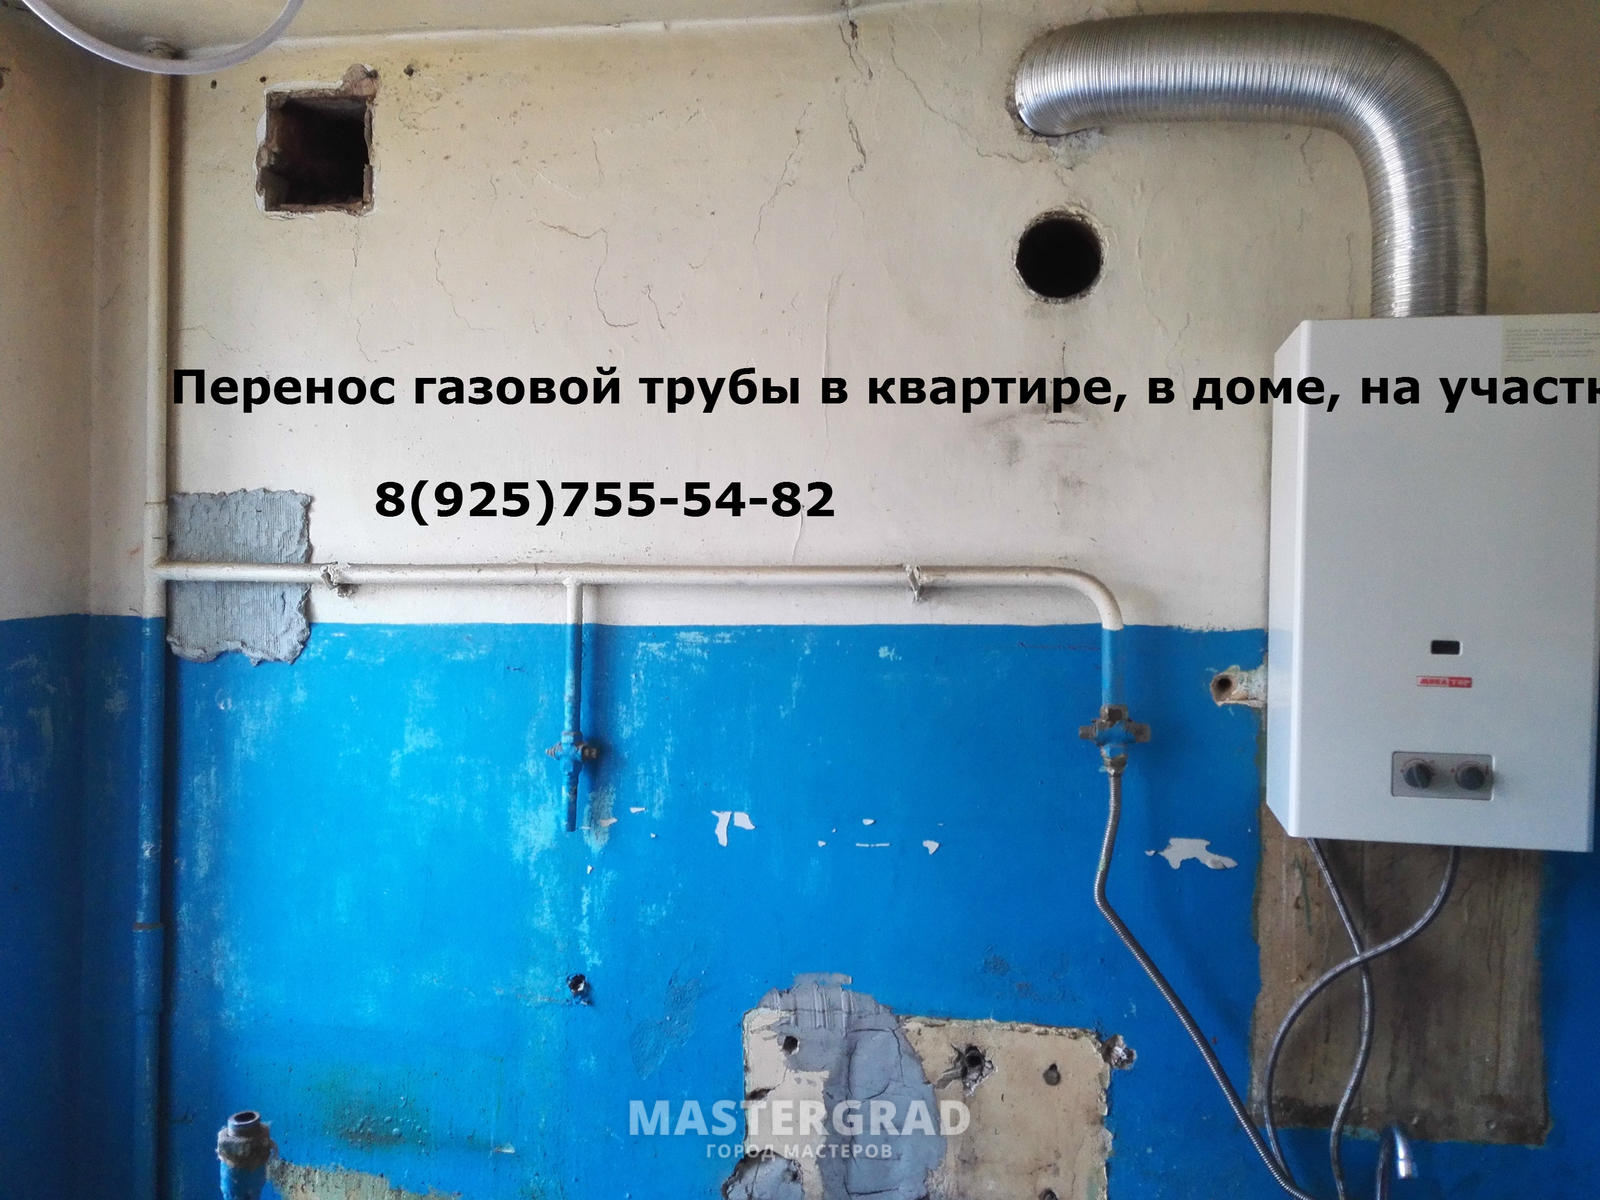
- Installation of new equipment to replace old or additional equipment. If a water heater is installed in the room (for example, in the bathroom of an apartment), you will have to pull a pipe from the kitchen to another room to supply gas. A similar situation may arise in an individual cottage when placing new or additional appliances: gas boilers, cooking stoves, columns.
- One of the common reasons for the transfer is related to regulatory requirements, for example, if the consumer previously had a single-entry stove, then when placing a separate hob and oven, each appliance will need its own supply.To provide two entrances, you will have to change the configuration of the pipe with cutting in the connecting fittings and performing operations equivalent to transfer.

Rice. 2 Ways to connect gas-consuming equipment
- Redevelopment. The gas stove is transferred if, for some reason, they change the plan of the kitchen, demolish or complete the partitions, increase the kitchen area by attaching a balcony or loggia to it. When implementing the latter option, the slab is sometimes taken out to an insulated balcony, leading a pipeline to it (an option that is not very acceptable from the point of view of legality and safety standards).
- Plate transfer. Sometimes the decisions of designers on the placement of the gas pipeline do not always coincide with the vision of the owners of the arrangement of the kitchen space, for example, they decided to make a cooking zone in the middle of a large kitchen. In this case, the gas pipes have to be moved or hidden to provide a convenient aesthetic gas supply to the hob.
- Acquisition of a kitchen set with built-in gas equipment. The gas pipeline riser in all city apartments is designed to connect one stove in a certain place, if the owners purchase cooking appliances built into the kitchen furniture, with a high probability the standard position of the riser outlet will not work for them - it will have to be moved.
- To enhance the aesthetic appearance. Mild steel gas pipes, painted in a light color that turns yellow over time, spoil the look of many modern kitchens, where the owners want to achieve a high decorative effect.If it is not possible to hide the gas pipeline in the upper cabinets of the kitchen set, consider one of the rare options for placing pipes in the strobes (channels) of the walls under easily removable decorative panels.
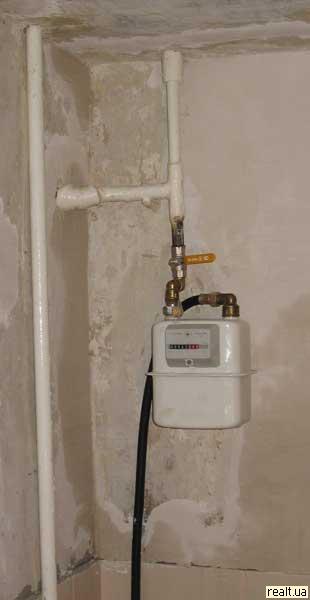
- Changing the location of the gas meter. A gas meter is a rather voluminous device that takes up a lot of space on the wall. If it creates inconvenience or violates the aesthetic appearance of the kitchen too clearly, it is not possible to place the appliance in a kitchen wall cabinet, consider moving it to another place (usually downstairs) along with a pipe connection.

Rice. 3 Pressure characteristics of gas pipelines for various purposes according to SNiP 2.04.08-87
Third party replacement
The qualifications of full-time plumbers from management companies are not always high enough. Often, apartment owners turn to specialized organizations that perform plumbing work.


Issue price
 The cost of work is determined by the material, the desired configuration of the riser and the presence of additional elements (for example, taps for a heated towel rail).
There are firms working on their own materials. The owner is only required to pay for the procedure.
It is possible to carry out the transfer using the customer's materials.
The price of the entire procedure in different regions of the country ranges from 6 to 9 thousand rubles.
Where and how to apply?
In every city there are specialized plumbing companies that perform any kind of such work. The easiest way is to take a local newspaper and find advertisements for such organizations with addresses and phone numbers.
You can also use the help desk of the city (if available).However, the most popular way is to search for contractors online. Serious organizations have their own websites where you can find prices, get advice and place an order.
Step-by-step instructions - how to transfer the DHW riser
After the project is drawn up and the forthcoming work is agreed upon in the UK, BTI and other responsible organizations, the time comes for the direct execution of the work. Consider the procedure for transferring the DHW riser.
Tools and materials
It is necessary to prepare the following tools and materials:
- Bulgarian for cutting the old riser and cutting the new pipe.
- Gas or adjustable wrench for installing shutoff valves on the outlet.
- Fittings (minimum set - 4 elbows and 1 branch tee).
- Ball valve or valve.
- Plumbing linen, FUM tape or other sealing material.
In addition, tools may be required to make holes in the wall, recesses in the floor. Please note that the manufacture of recesses in the ceiling plate is prohibited. Since this weakens its structural strength.
Preparation and coordination of works
These are the very first steps that are performed before the start of all work. A project is drawn up with a layout of communications before and after the transfer. This is a critical part of the work, which is recommended to be entrusted to knowledgeable and experienced professionals.
With the finished project, you must contact the Criminal Code. After receiving their visa, they go to the BTI, where it will be necessary to make changes to the plan of the apartment. The final stage will be the architecture department, where the project is stamped “for execution”. After that, you can start work.
Dismantling the old
Before starting work, you must contact the Criminal Code to turn off the water supply. This is a paid service.
In addition, it is necessary to indicate how long the work will take so as not to create unnecessary inconvenience to the residents of the entrance.
After the water is turned off, it is necessary to open all the hot water taps and drain the remaining water from the riser.
After that, the cutting points are marked (usually under the ceiling and near the floor), and the riser is cut off along with the outlet. The old pipe is immediately removed so as not to interfere in the room.
Cart preparation
The next step will be the preparation of the supplies. This is cutting sections of a new pipe, 2 short horizontal segments (they determine the distance by which the riser will be displaced) and a vertical section, which is a riser.
In addition, the vertical section may have to be cut and a tee inserted into it to drain to the apartment dead-end DHW supply line.
This step is not necessary, because sometimes the bend is welded directly into the riser without the use of fittings (for example, when installing stainless steel pipes).
Fittings
Fittings are elements that provide a branch, bend or other change in the direction of pipes.
They fully match the dimensions of the pipes, which allows you to create reliable and tight connections.
When transferring the riser, corner bends and a tee are used. The corners are attached to the ceiling and floor sections of the pipe.
Then horizontal pipe sections are welded, to which another pair of corner fittings is attached. After that, a vertical part with a branch (tee) is installed.
Installation of inlet fittings
The inlet fittings determine the boundary of responsibility - common house equipment remains on the side of the riser, and after the valve - the property of the owner of the home.
The stopcock is installed only on the outlet from the riser (horizontal section leading to the plumbing). Installation of valves on the riser itself is prohibited.


Valves or ball valves are used. The second option is preferable because these devices are much more efficient and durable.
When you need to quickly turn off the water, they are much more convenient. In addition, ball valves fail less often, which cannot be said about valve structures.
Wiring connection
The connection of the riser to the wiring is carried out after the installation of all elements, including the shut-off valves of the input, is completed.
Horizontal apartment wiring is connected to a ball valve (or to a DHW flow meter, if it is installed immediately after the valve).
This stage is the final stage, after which the work is considered completed.
After connecting the wiring, water is supplied (the valve is opened in the basement) and the riser is inspected.
The locksmith from the UK, who opened the water, should not be released yet, since leaks may be detected, requiring repeated shutdown and elimination of deficiencies. If there are no problems, the riser is put into operation.
Norms and rules for the location of gas pipes in the apartment
Since household gas, both network natural gas and bottled propane-butane, is a potentially hazardous substance, certain strict requirements are imposed on the location of gas pipelines to ensure their safe operation. Accommodation rules gas-using equipment in residential premises set out in the regulatory document SNiP 2.04.08–87.

SNiP 2.04.08–87 sets out safe placement rules gas-using equipment
The main standards of the current SNiP are as follows:
- the gas pipeline is laid only in an open way, that is, the entire system should be easily accessible for inspection and installation;
- it is forbidden to lay and wall up pipes in the walls, as well as to cover them with decorative sheathing (the only exception is easily removable structures);
- it is strictly forbidden to transfer gas outlets to residential premises;
- run gas pipes into ventilation wells and cannot be crossed;
- it is not allowed to lay a gas pipeline through door and window openings;
- the shut-off (shut-off) valve must be located at a height of at least 1.5 m from the floor level;
- gas pipes are laid no closer than 0.25 m from the electric cable, while leaving at least 0.5 m to the switchboard;
- all surfaces (walls, ceiling, floor, etc.) close to the gas equipment must be covered with non-combustible materials (plaster, metal sheets, etc.);
- in places where people pass, gas pipes are installed at a height of at least 2.2 m;
- the gas valve must not be located directly above the heating zone (stove), it must be at least 0.2 m away;
- the intersections of the gas pipeline with building structures are carried out only through special inset building cases;
- with other devices and structures available in the room, the pipes to be laid should not come into contact;
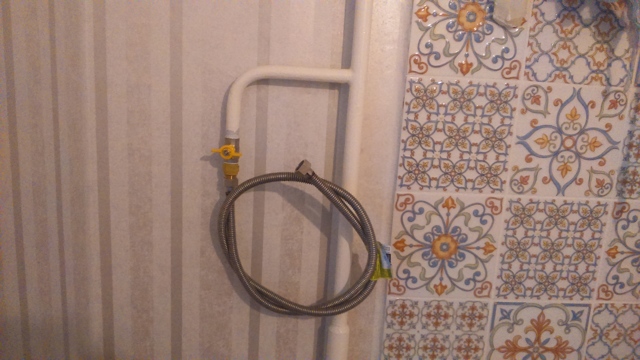
- it is allowed to use flexible hoses (rubber with fabric or metal braid, bellows hose, etc.) for connecting gas equipment (stoves, boilers, etc.), only from the tap to the appliance (their length is not more than 3 m);
- fasteners specified in SNiP (hooks, clamps, hangers, brackets, etc.) are used to fix gas pipeline elements on walls, ceilings and columns;
- the required slope when laying the pipeline - from 3%;
- all gas pipes must be coated with moisture-resistant coloring compounds in order to protect against corrosion.
It is impossible to transfer gas pipes arbitrarily, for this there are special standards and rules
As a flexible connection, in those days when there were no special reinforced hoses and corrugated stainless pipes, we used an oxygen hose to connect the gas stove, which was fixed to the fittings with simple aluminum clamps for a screwdriver.