- 1 Suitable garage options
- Important aspects of keeping warm in the garage
- Fire safety rules for garage heating
- Features and nuances of use
- Important factors for the location and operation of the furnace:
- Installing and testing the device
- General requirements for equipment in the garage
- Making a classic potbelly stove
- Types of chimney pipes
- Furnace operation
- Instructions for use
- Security measures
- Installation of a potbelly stove in a regular place
- Helpful Hints
- Economical and energy efficient garage ovens
- The sequence of manufacturing a stove in a garage, functioning at a test
- Disadvantages of a furnace for a garage for working out, features of operation
1 Suitable garage options
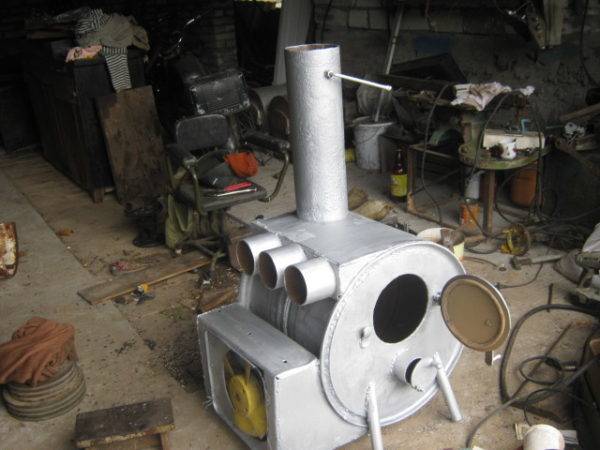
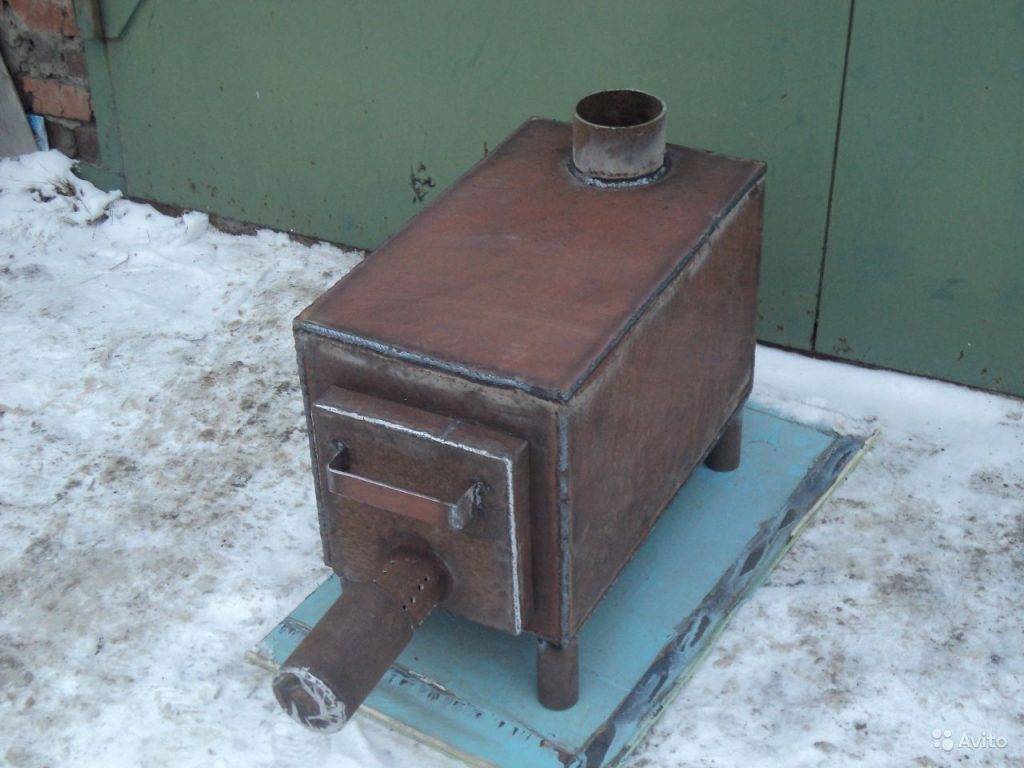
Homemade garage stoves are made of steel according to the scheme of a conventional potbelly stove. As a material for the main part, old gas cylinders, pieces of steel pipes or metal barrels are used. Using such spare parts, you can significantly save money and time, since the main part of the hull (sometimes even with the bottom) is already ready.
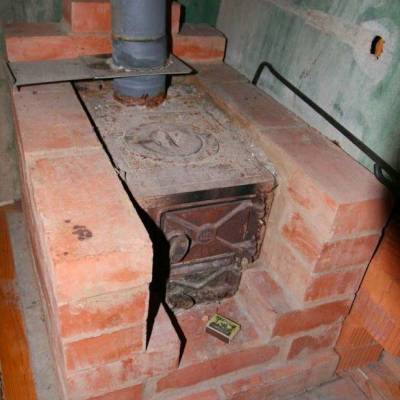
Cases are also made from metal sheets. Brick models are sometimes found in garages, but very rarely. This is due to large dimensions, slow heating and low efficiency. The most popular options are those that use firewood as an energy source.But you can use any fuel here (everything that burns).
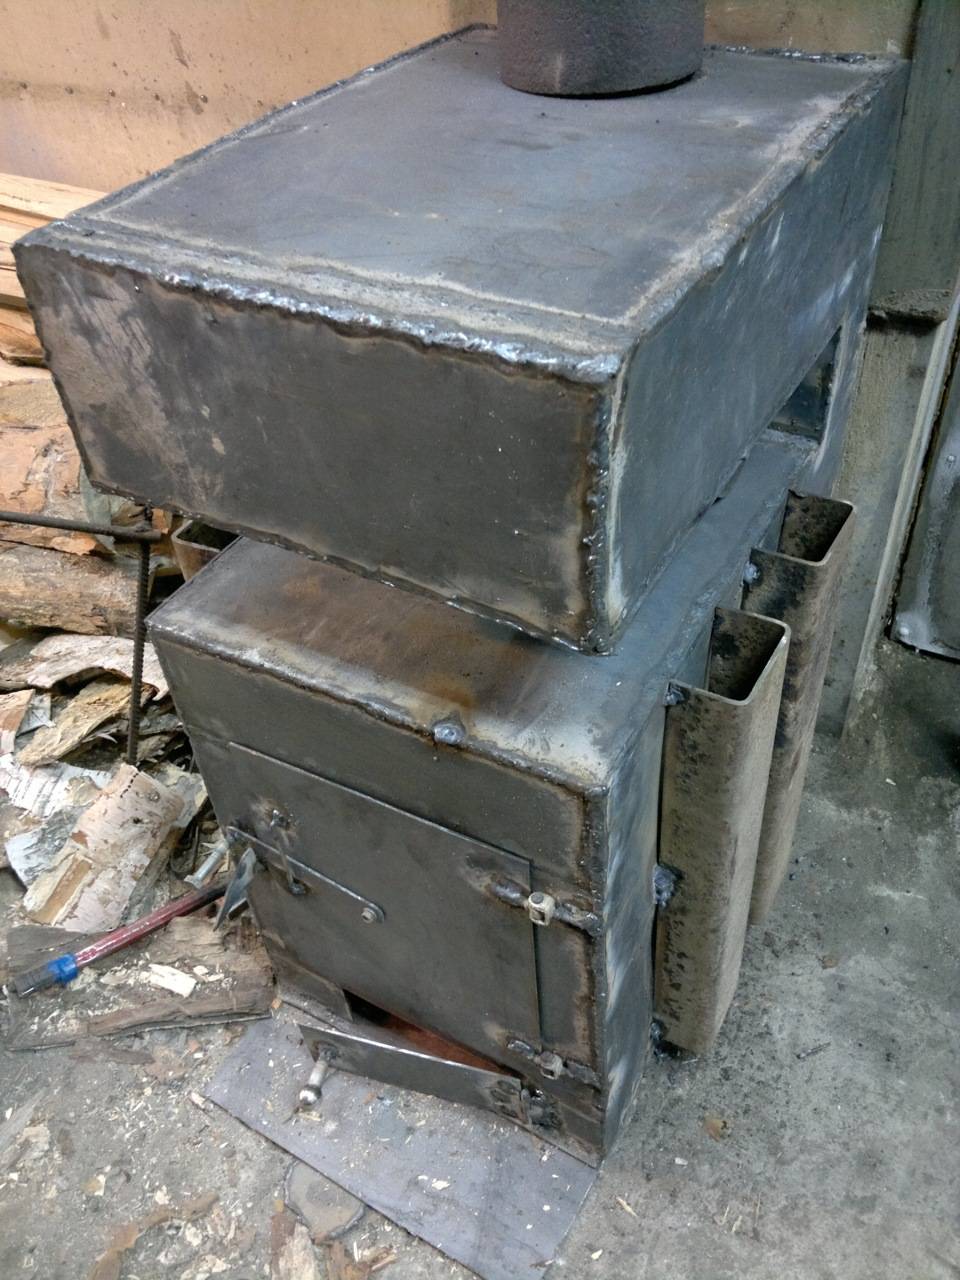
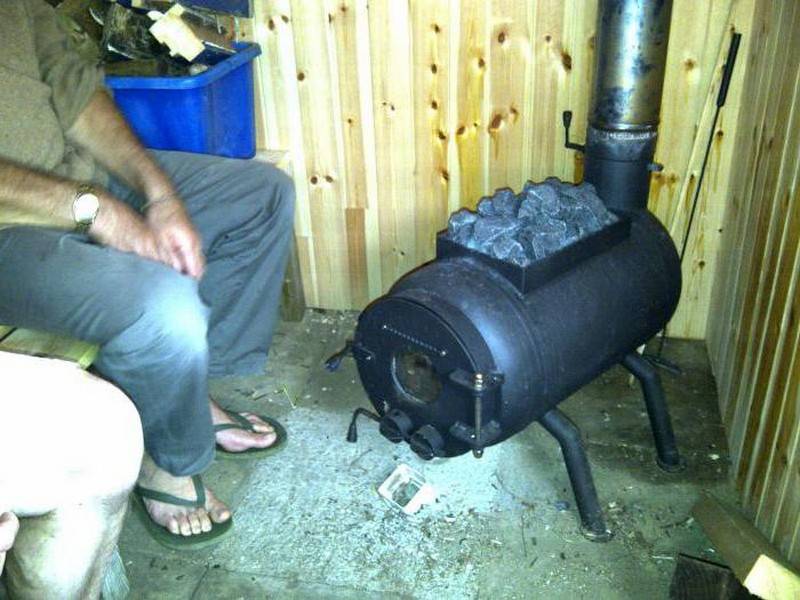
As practice shows, such designs have a number of disadvantages, one of which is a strong fuel consumption. Because of this, recently, long-burning stoves have quickly begun to gain popularity. Their efficiency is twice that of conventional models. The most economical of these are top-burning designs. A 50-liter tank from a gas cylinder, completely filled with firewood, can work from 6 to 9 hours. At the same time, the room will always be warm throughout.
Waste oil stoves are also used for garages. The designs are quite economical, since there is a lot of such fuel in garages. You should also remember about the harm that mining brings. It contains a lot of heavy metals. But the oil construction is one of the most popular.
Important aspects of keeping warm in the garage
Providing a traditional heating system in a garage is not easy, and quite expensive, but it is still necessary to maintain the optimum air temperature in such a building. After all, it is even better to store transport at a temperature of at least +5 degrees, and some work needs to be done at a temperature of at least +18.
 Long burning garage oven
For the most part, car owners, as well as motorcyclists, prefer to use small, economical stoves to heat the garage, which at the same time are highly efficient and allow you to warm up the room well.
It is also important that the stove not only saves the family budget, but is also safe and ensures that the garage heats up quickly. It is good if various wastes can also act as fuel - for example, oil waste or wood waste
This will also make the furnace less unprofitable structure.
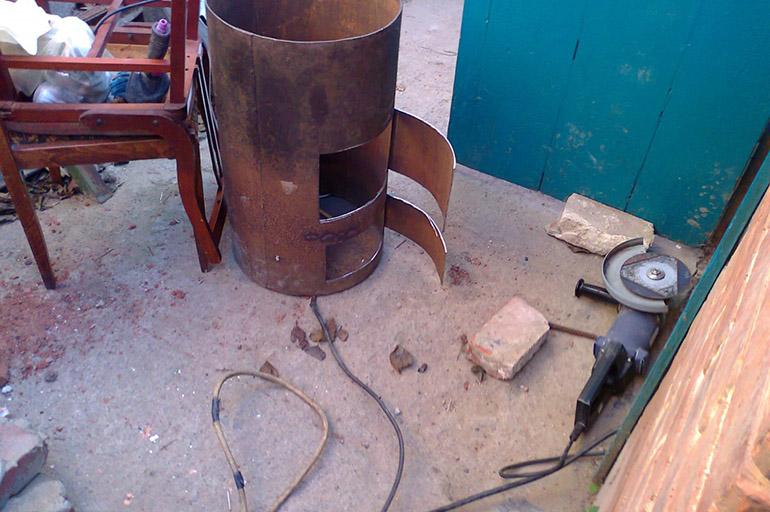
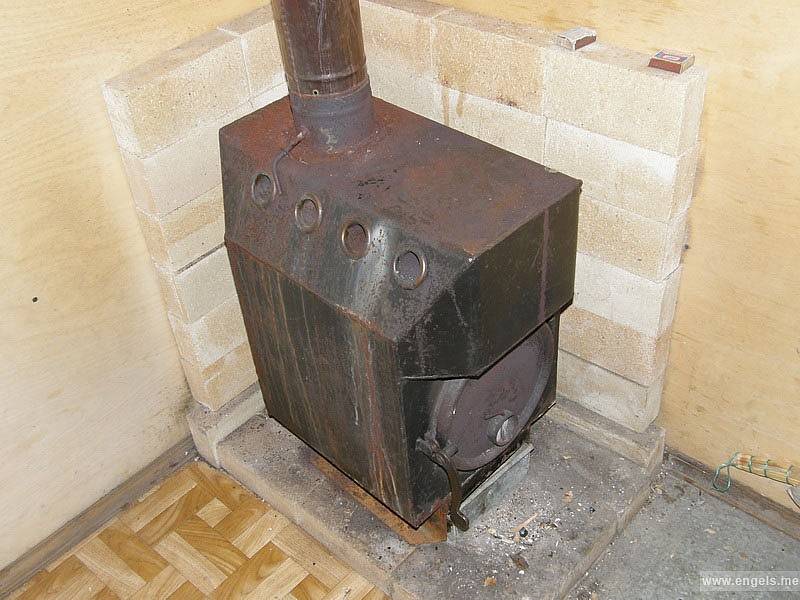
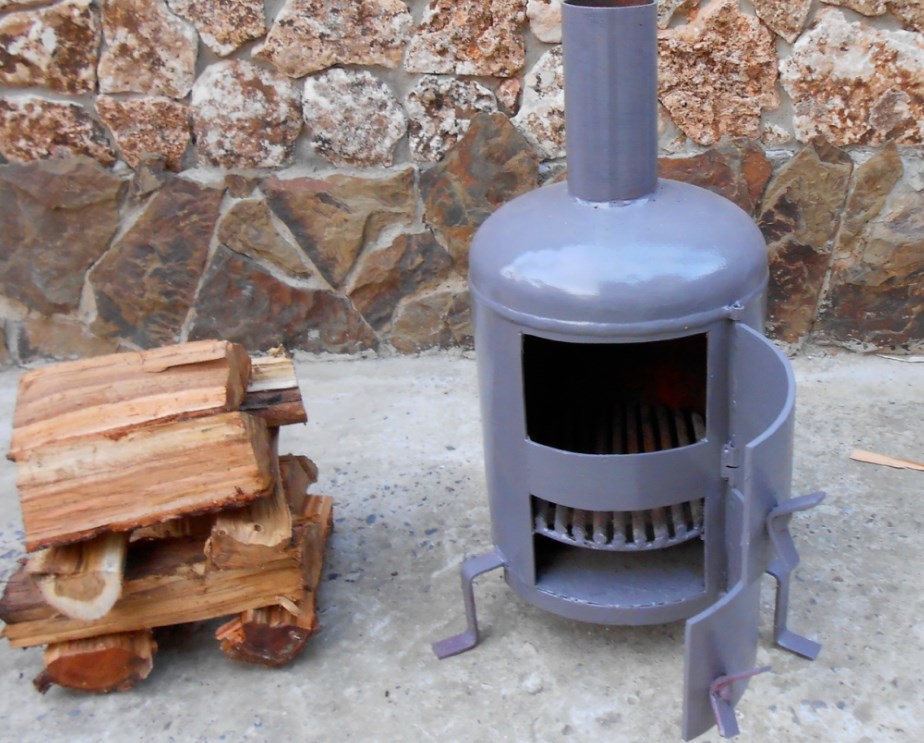
 Potbelly stove rounded
Features of the functioning of the furnace
Heat losses in the garage are always high - it is rare that a building of this type is qualitatively insulated with good thermal insulation materials
It is also important to understand that heating a small room often requires much more thermal energy than heating a house. To heat a house on two floors, you will need a device with a power of about 10 kW, but a standard-sized garage can be heated by a design with a capacity of 2.5 kW
If there is a desire to make sure that the temperature in the garage is always about 16 degrees, then you need to install the unit at 2 kW. Sometimes motorists, in order to save heat, try to heat not the entire garage, but only the place where they directly work.
A garage oven is an important piece of equipment that will create optimal conditions even in the cold season.
The best homemade garage oven
Fire safety rules for garage heating
When installing garage heating, it is strongly recommended to study the fire safety rules. There are 6 main points for mandatory execution:
- Each type of stove (without exception) must be installed and operated in accordance with fire safety rules.
- The garage must be well ventilated.
- The room should be equipped with a fire corner containing: a fire extinguisher, a piece of tarpaulin (3 * 3 meters) and several buckets of sand.
- The vehicle's fuel system must be in perfect working order.
- All fuels and lubricants must be outside the garage. Preferably outside, in a specially equipped metal cabinet.
- Filling the car with fuel and lubricants must be done on the street.
Advice for those who do not have the desire or ability to heat the garage. You can purchase a two-burner electric household stove (with a total power of 2-2.5 kW) and put the device under the car engine an hour and a half before departure. Even when it's -30 ᵒC, a car outside will start much easier. The car should be started 20 minutes before the trip to warm up the interior.


Features and nuances of use
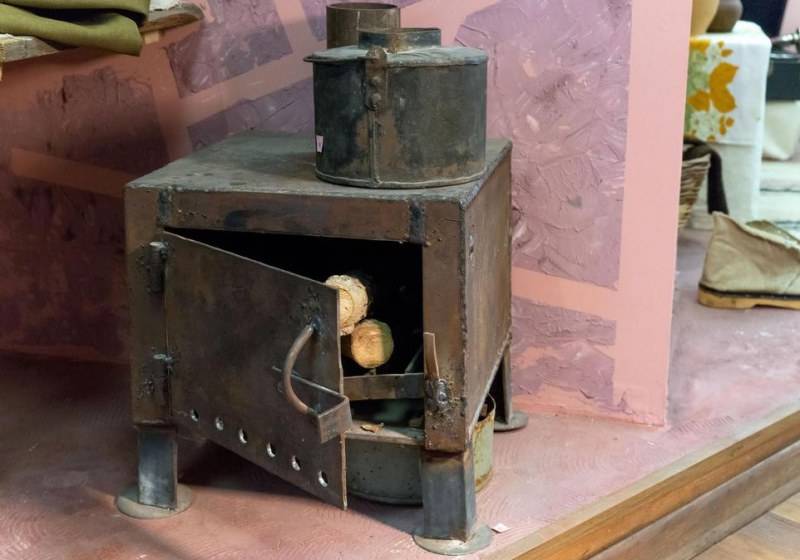
The design diagram of such a furnace does not need complex explanations: everything is simple and clear. The lower part consists directly of the firebox, the configuration of which can take on the most unexpected options. From above, you can additionally equip a place for cooking / heating food, as well as any household needs. In the upper part, you can also install additional devices, for example, a barbecue or a container for heating water. Of great importance is the chimney, which must not only be airtight, but also create good draft so that the smoke completely comes out.
Important factors for the location and operation of the furnace:
The location of the potbelly stove, it is necessary to choose arbitrary, but so that the heating occurs as evenly as possible. It is undesirable that she should stand directly next to the car or on the aisle.
Do not place combustible materials nearby. Even suitable fuel to sustain a fire must be left at a safe distance.
You can use the basement of the garage for this if food and vegetables are not stored there.
It is very important to ensure the tightness of the chimney outlet so that combustion products do not get inside.
It is desirable to run the chimney horizontally along one of the walls of the room.This will increase the efficiency of the furnace
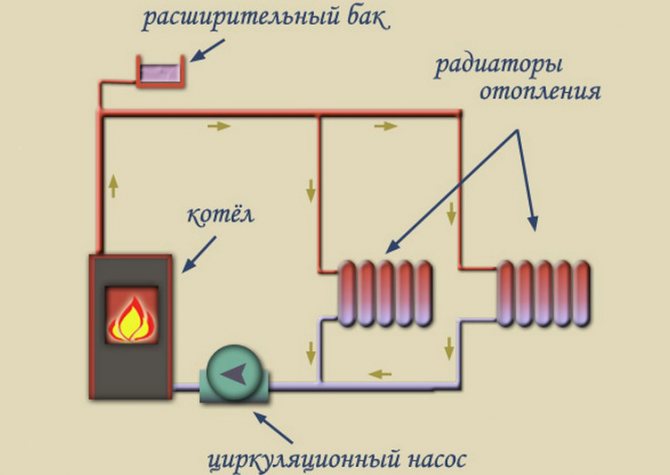
You can consider the location of the chimney with a water circuit. It will be almost a complete heating system.
Important nuances of installing a chimney: it must be fixed to the wall so that the stove is not subjected to additional loads. In addition, do not abuse the turns with bends, this will reduce the heating efficiency. It is desirable to insulate the outer area with non-combustible materials, for example, basalt wool, in order to prevent freezing and deformation from temperature changes.
Under the body of the potbelly stove, it is imperative to install a sheet of metal of sufficient thickness and dimensions. This is a necessary fire safety requirement. As an option, make a concrete screed that has similar fire-resistant characteristics.
It is advisable to protect the walls around the potbelly stove with shielding materials (metal) or build a brick wall.
The potbelly stove located in the garage should be in operation only after installation and checking the operation of the exhaust - supply ventilation.
If a water tank is located on top of the body, you can run a chimney through it to increase the heating rate.
Cast iron burners welded on top make the potbelly stove a great place to warm up or cook food.
The most comfortable location is in the opposite corner from the entrance. At the same time, the distance to the car and combustible materials must be at least two meters.
Fuel supply: firewood, coal and other raw materials should also be located in places inaccessible to elevated temperatures.
When operating a potbelly stove on wood, especially coniferous trees, it is necessary to increase the frequency of periodic maintenance and cleaning the chimney. This is due to the large amount of soot and resin from such materials.
A potbelly stove in a garage can use absolutely any fuel, and unlike a gas cylinder, it is less dangerous. Most often, traditional ones are used: firewood and coal, but with a significant rise in price or a shortage of such materials, any waste can be used. Sawdust and branches are well suited, as well as used oil and paint waste. In this regard, the potbelly stove is extremely economical, besides, it is an excellent reason to additionally get rid of trash and garbage, which is enough in every garage.
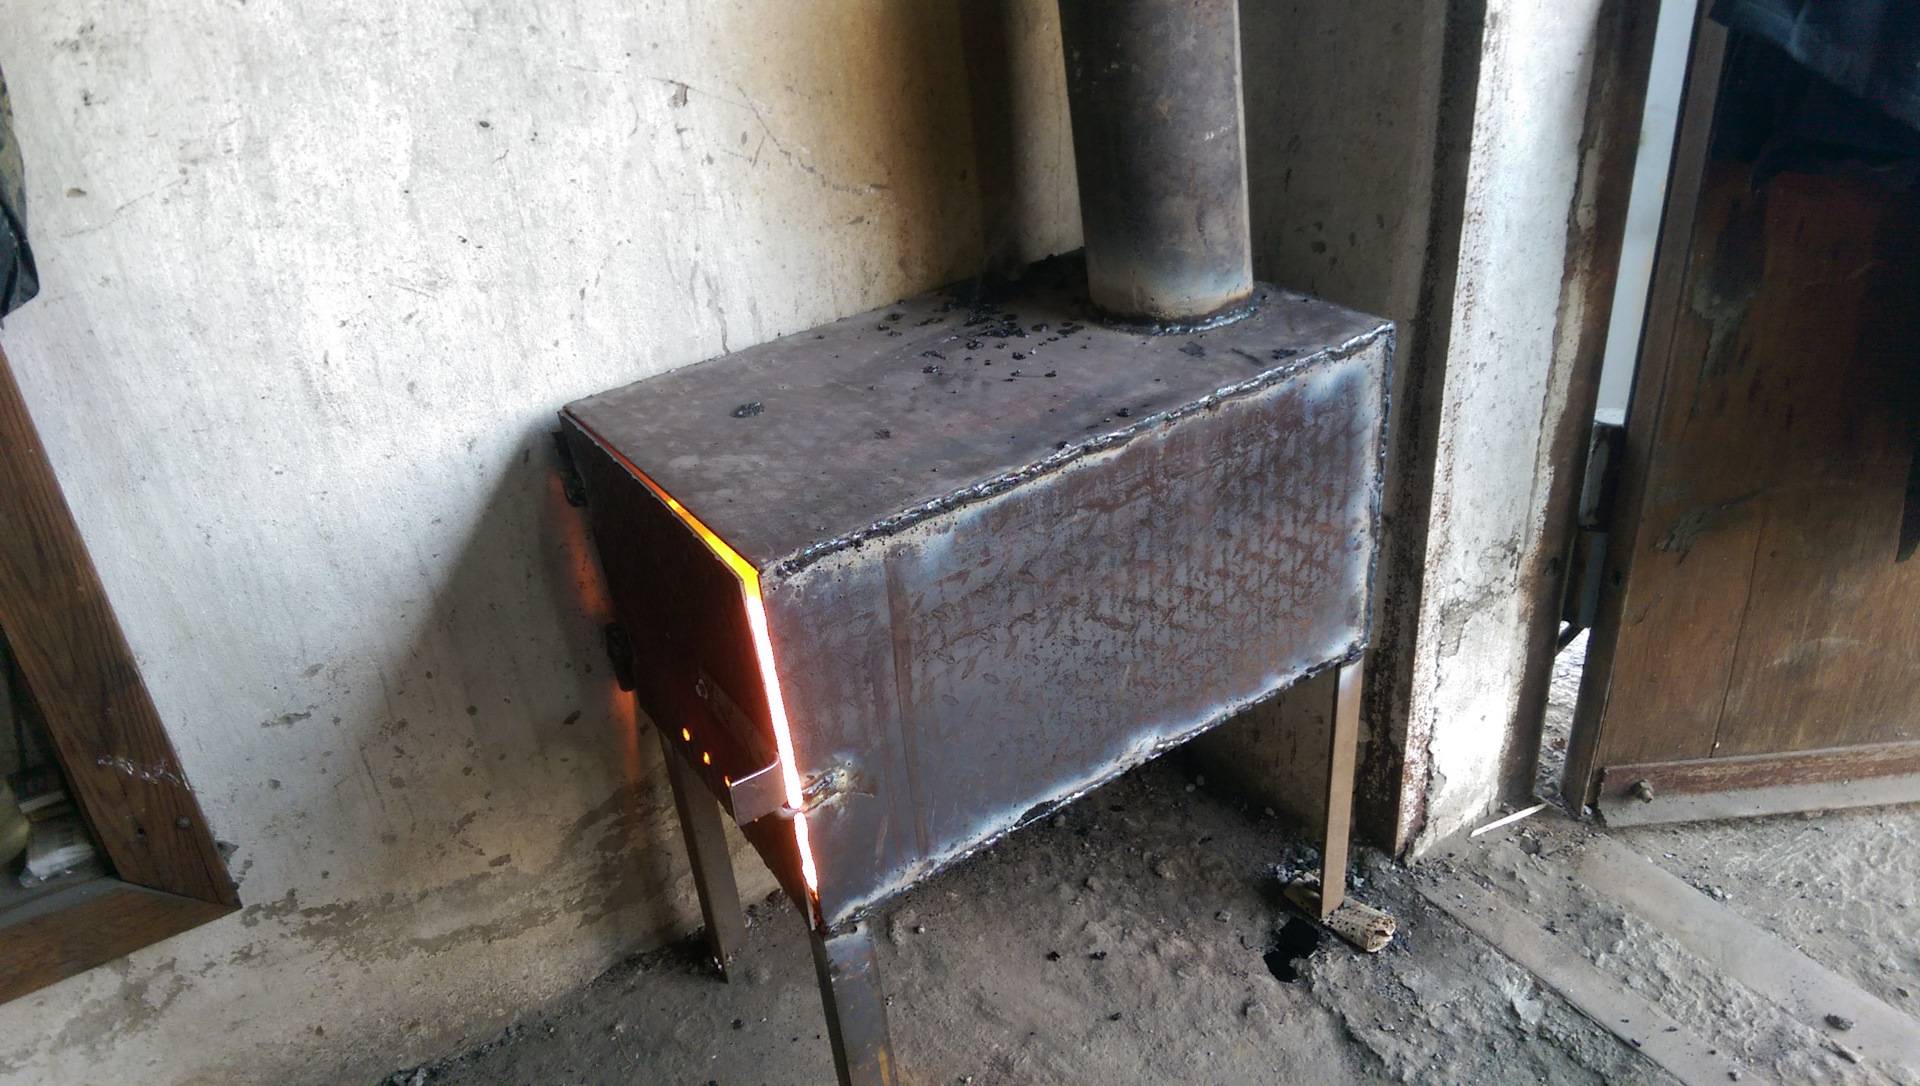
Installing and testing the device
The stove is installed in a fireproof place, not on a wooden (linoleum) floor. It is advisable to provide a container with sand in the garage in case of fire. Drafts, installation in cramped conditions (under hinged shelves, racks) are excluded. Pour oil into the bottom tank. It is advisable to clean it before use, let it stand.
A chimney must be installed, otherwise the stove in the garage cannot be used. Water impurities are not allowed in the oil. First, pour a small portion, a couple of liters. Then, with the help of a paper wick, the oil in the tank is ignited. By opening or closing the damper, stable traction is achieved. After 2-3 minutes, the stove goes into operation, the oil boils. The unit is ready for use.
General requirements for equipment in the garage
When planning to make a potbelly stove in the garage with your own hands, you should familiarize yourself with the basic requirements for equipment:
- Installation of the structure is allowed in those buildings where a supply ventilation system and a high-quality exhaust are provided.
- The air flow must not disturb the heat transfer.
- The design of the potbelly stove must contain safety features that prevent sparks from entering an explosive environment.
- Flammable materials and explosive mixtures must not be placed near the unit.
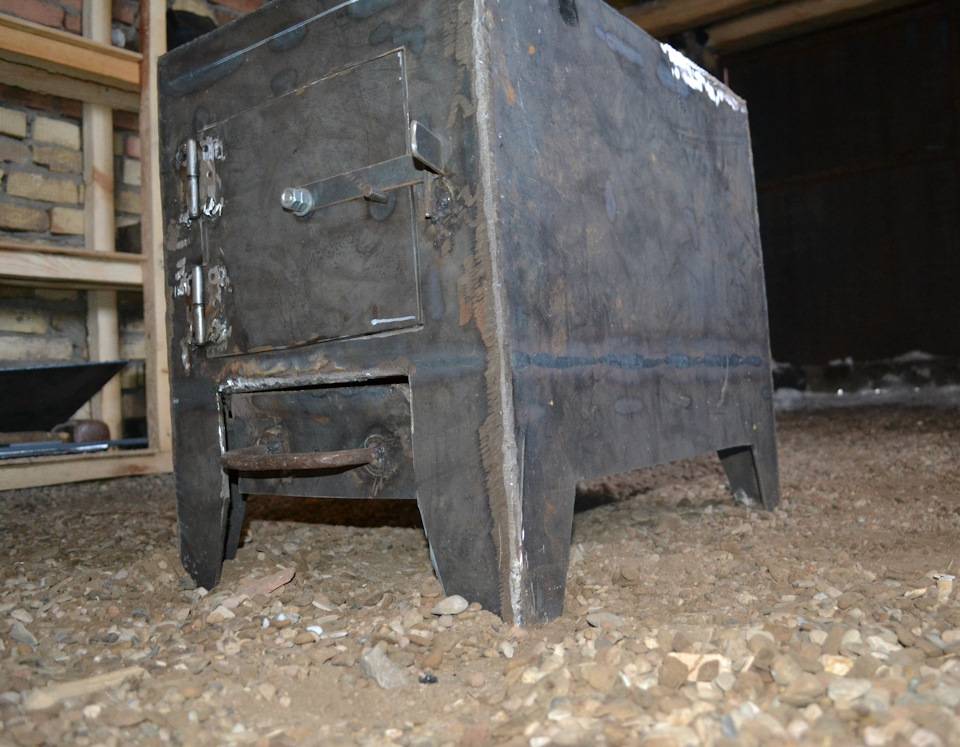
A potbelly stove for a garage or other structures has a simple design.
Making a classic potbelly stove
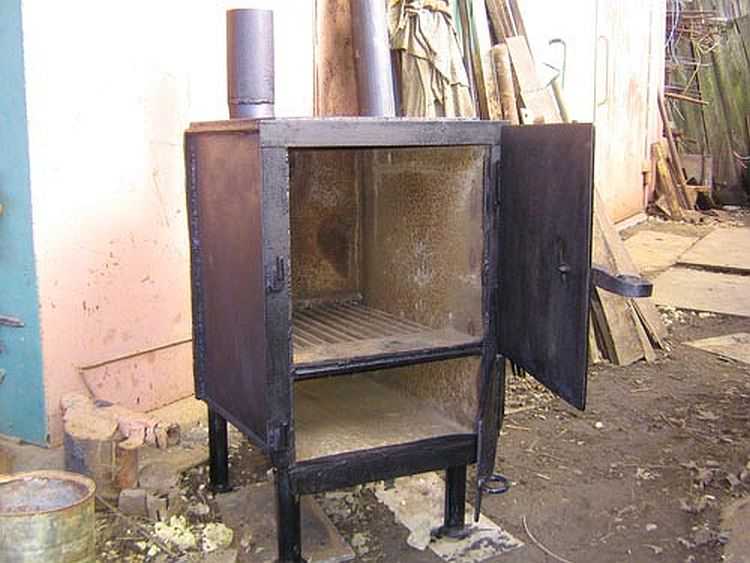
Since you need to make a potbelly stove in a rectangular shape, you will need sheet metal with a thickness of at least 3 mm. The work is performed in the following order:
- Blanks are cut from the sheet.
- The side walls are welded to the bottom.
- Weld the back wall.
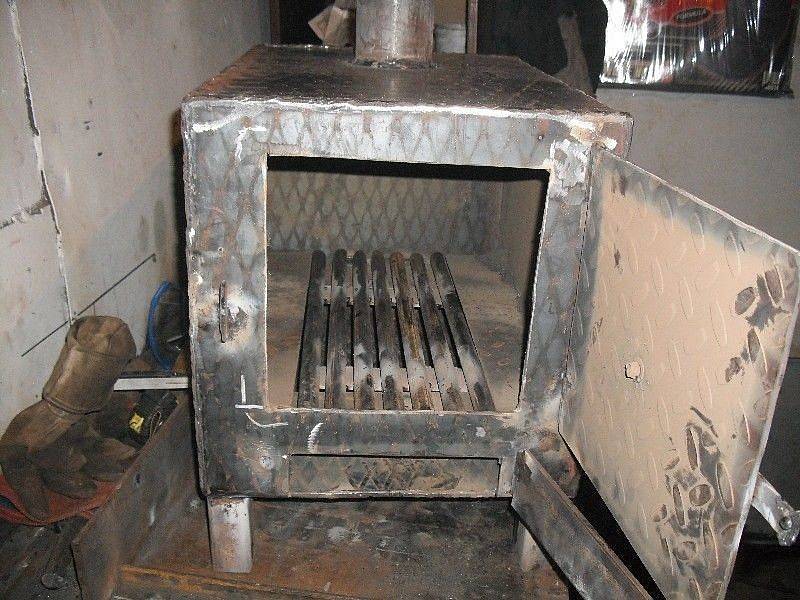
- Inside, they outline the boundaries of the division of space into an ash pan, a firebox, a smoke circulation. At a distance of 10 -15 cm from the bottom, 2 corners are welded to install a removable grate, which is assembled from reinforcement with a diameter of 10 - 15 mm.
- In the upper part, 2 rods are welded, on which a reflector made of a metal sheet for smoke circulation will be laid. There should be a gap between it and the wall for the passage of smoke.
- Weld a cover with a hole for a sleeve with a diameter of 15 - 20 cm to install a chimney pipe.
- For easy removal of the grate and reflector during cleaning, the door with a latch and a handle is made in a size close to the width of the potbelly stove.
- From the bottom of the furnace body, legs are welded from a pipe with a diameter of 20 - 50 mm and a height of 8 - 10 cm.
- The chimney is made of 3 pipe sections with a diameter of 15 - 18 cm, connected at an angle of 45 °.
- A sleeve is welded into the opening of the cover.
- Before mounting in the chimney, a rotary damper is installed with a size smaller than the inner diameter of the pipe.
After installation, the potbelly stove is adjusted in height. The pipe is brought out through a hole in the wall or roof. Simplified designs are assembled without a grate and a reflector.
Types of chimney pipes
Various materials are used for the manufacture of a smoke exhaust pipe.
Initially, depending on the material of manufacture, there are 2 options:
- Take finished pipes manufactured at the factory;
- Make pipes from stainless steel sheets or other sheet metal.
The cheapest way is to make pipes yourself
Here, the undoubted advantage is that the pipe will be of the desired diameter, which is especially important for home-made stoves
The second advantage of homemade pipes is the cost. For their manufacture, you can use improvised material, or purchase metal sheets with a thickness of 0.6 mm or more. And better in 1 mm.


An elementary option for assembling a chimney for a potbelly stove involves the use of finished steel pipes and a corner element. A smoke channel is assembled from them and welded to a homemade stove:
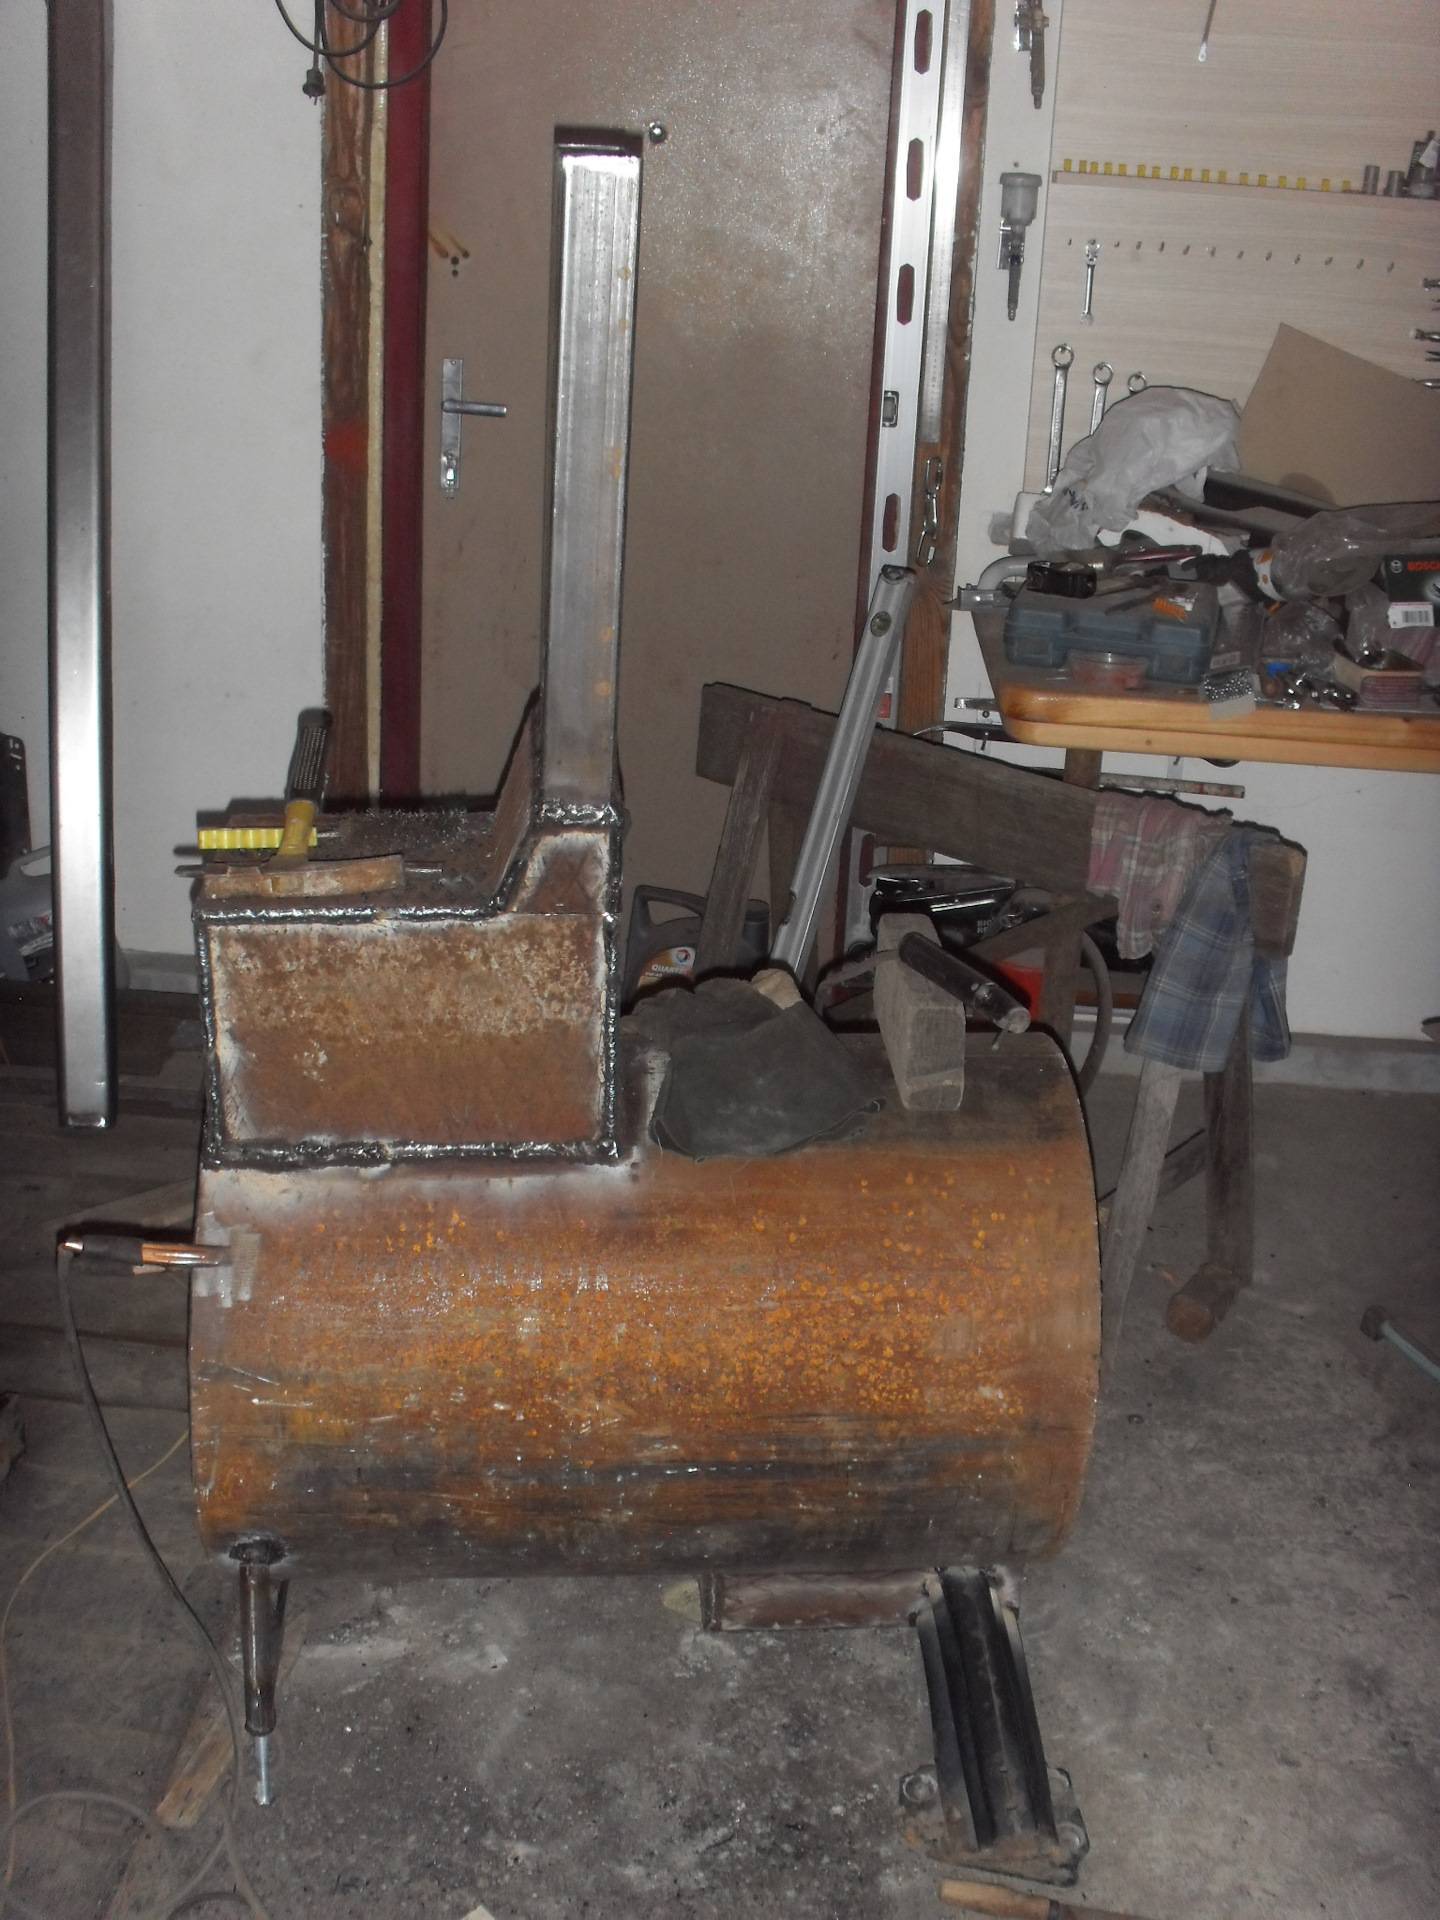
- A branch pipe is welded to the top of the stove, built from a used gas cylinder. The inner diameter of the pipe must be equal to the outer diameter of the pipe installed in it
- According to the design dimensions, a smoke channel is assembled. The assembly uses a 108 mm pipe and an elbow, the components in the example are connected by welding
- An assembled chimney is installed on the stove-potbelly stove. Through a hole in the wall, connect the outer part of the pipe and weld it to the main
The outer part of the pipe is assembled from separate links, taking into account the standard height. The pipe must be at least 50 cm above the roof, located near tall buildings or trees.
Step 2: Assembling the smoke channel
Step 3: Taking the chimney out of the potbelly stove
Step 4: Construction of the outer part of the pipe
Among the most common materials are the following:
In addition to these options, the market offers many other products. So, you can find pipes made of heat-resistant glass, from which it is quite possible to build an exotic chimney. But this is done extremely rarely - skill is needed to install and connect individual structural elements to each other.
Quite often it happens that the chimney pipe heats up to incredibly high temperatures.
This entails a danger, since the risk of fire increases several times!
In order to minimize it, first of all, you need to isolate all combustible elements nearby.
Next, the insulation is laid around the chimney pipe.
This must be done without fail, because without a high-quality thermal insulation layer around the chimney, you risk your life and health every day.
So, let's look at the main causes of the problem:
- The chimney is made of a single-walled metal pipe without a heat insulator, which is completely unacceptable. It is mandatory to replace single-layer chimney sections with sandwich pipes, or simply supplement them with a heat-insulating layer;
- There may be errors in the design of the sandwich pipe. It should be remembered that this design is installed in such a way that the condensate formed inside cannot get on the outer surface of the chimney.
Pipes for the chimney system can be made by hand or purchased at a specialized store.The main advantage of hand-made pipes is low cost. In addition, it becomes possible to make a pipe of the required diameter, which is perfect for any home-made stove.


For manufacturing, you need a metal sheet with a thickness of 0.6-1 mm. A sheet of metal is folded into a tube and fastened along the seam, using rivets and heat-resistant sealant. However, it is much easier to purchase a finished product. Chimney pipes made of various materials are on the market:
- become;
- bricks;
- ceramics;
- vermiculite;
- asbestos cement.
You should not opt for inexpensive asbestos-cement pipes, since asbestos-cement is not intended for use at temperatures above 300 ° C. A pipe made of this material is very heavy, which will cause inconvenience when assembling the system. In addition, the asbestos-cement product absorbs condensate, due to which the functionality of the chimney may be impaired.
The construction of a brick chimney will entail significant costs. Doing the right laying of a chimney for a potbelly stove with your own hands is very problematic, so you will need to contact specialists. The brick structure has a considerable weight, which will require additional reinforcement of the foundation.
For the device of a potbelly stove, metal pipes made of stainless steel or alloy steel are best suited. Metal products have a number of advantages:
- light weight;
- ease of assembly;
- long service life.
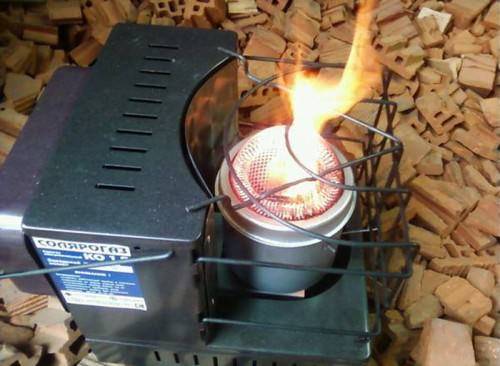
Furnace operation
Instructions for use
Before using such a miracle furnace, you must read the instructions for its use, which is given below:
- Initially, it is necessary to install a place in a place specially designed for it, after which diesel fuel is poured into it.
- The grate and burner are dismantled, which makes it possible to insert the wick into a special block.
- After installing the wick, the burner and grate return to their places.
- It is necessary to make sure that all removable elements are securely fixed, after which the adjusting screw can be opened.
- It is required to wait about 30 seconds, this time will be enough to soak the wick with diesel fuel.
- The burner is ignited.
- Wait until intense combustion begins, as soon as it occurs, the adjusting screw is tightened to the very end.
- You need to wait a bit, and after the flame settles, open the adjusting screw again. Now you can adjust the degree of heating by setting the desired parameters.
- If it is necessary to shut down the stove, it will be necessary to turn the adjusting screw all the way down again.
- Before completing work, it is imperative to make sure that there is no flame and that the diesel fuel is completely burnt out. Fuel consumption depends primarily on the size and power of the unit, the figure can be from 140 to 400 ml per hour.
Security measures
It is also necessary to know the precautionary measures, the non-observance of which can make the operation of the furnace dangerous. The basic safety rules are listed below:
- It is strictly forbidden to use the Miracle Oven indoors in the absence of ventilation.
- The oven should not be located in close proximity to furniture, as this may cause it to ignite.
- The oven must not be used in rooms where flammable materials or flammable liquids are stored, as this may cause a fire.
- It is not allowed to use other types of fuel instead of diesel fuel, if they are not indicated in the instructions attached to the heater.
- Only adults can use the oven, you must not leave a working heater in a room with children without adult supervision.
- Do not leave the switched on stove indoors unattended.
- It is necessary to avoid getting any liquids on the miracle oven, including ordinary water.
Do not leave the switched on stove indoors unattended.
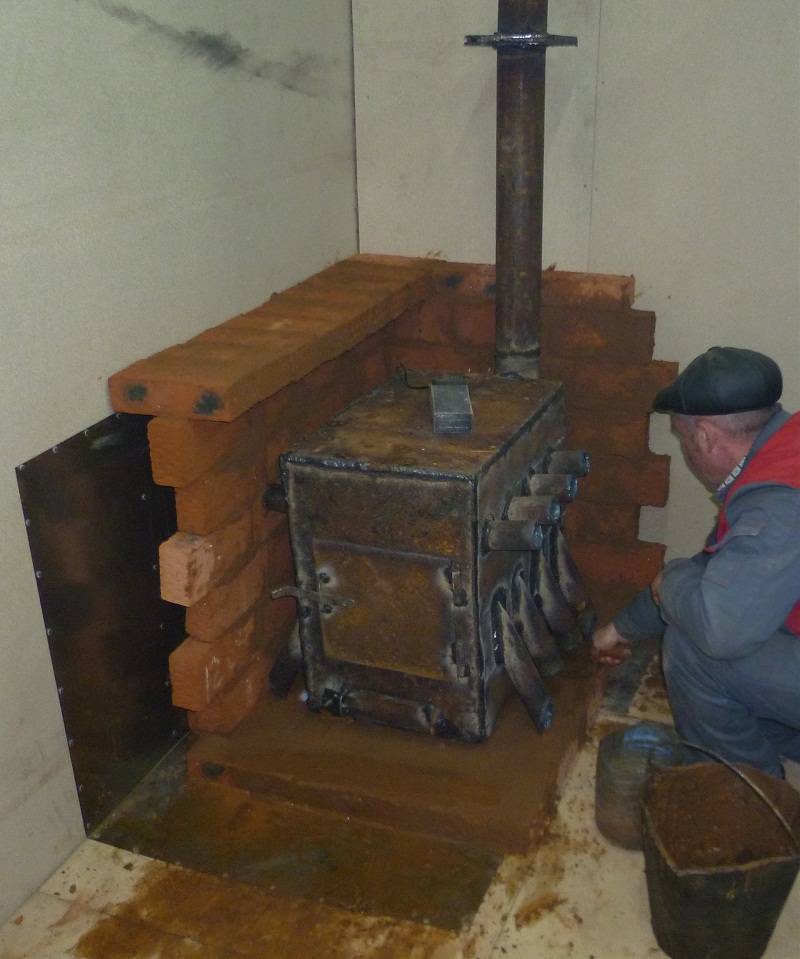
Installation of a potbelly stove in a regular place
We have assembled the potbelly stove, now let's install it. For this, the foundation is being prepared. The stove cannot be installed on earthen floors - it will gradually push through them. It is necessary to pour a concrete screed on which the furnace itself will stand. If concrete floors are prefabricated, there will be one less problem in the installation procedure. In the case of installing a potbelly stove on wooden floors, it is necessary to lay a sheet of metal 1-2 mm thick on them. The same sheet should be placed in front of the firebox - this will prevent fire in case of accidental loss of coals.
It is recommended to install a protective jacket made of bricks. It will prevent burns and ensure uniform heat transfer.
To make it as correct as possible install a potbelly stove in the garage, use the following recommendation - step back from the nearest walls 50-60 cm. Thus, you will avoid overheating them and reduce heat loss. The recommendation is valid for brick, concrete and wooden walls. In the case of wood, it becomes mandatory (the distance to the wooden wall should be 1 meter, brick lining or asbestos lining is recommended). You can also sheathe the walls with metal to reflect heat.The distance to vehicles is at least 1.5 meters (preferably 2 meters).
Heating a garage with a potbelly stove will be more efficient if it is located not at the garage door, but at the opposite wall
We pay special attention to the vent - make sure that the garage has an opening for outside air to enter. Otherwise, the oxygen level in the room will be too low. Do not forget to move cans of machine oil, gasoline and other flammable liquids away from the installation site of the potbelly stove
We also move away everything that can burn - rags, plastic, wood, etc.


Do not forget to move cans of engine oil, gasoline and other flammable liquids away from the installation site of the potbelly stove. We also move away everything that can burn - rags, plastic, wood, etc.
Helpful Hints
It is worth adhering to the following tips from professionals when making your own oven for a garage:
- to increase the thermal properties of the furnace, you can cut off the upper part just below the seam. This will increase the air chamber, but this can reduce the size of the firebox;
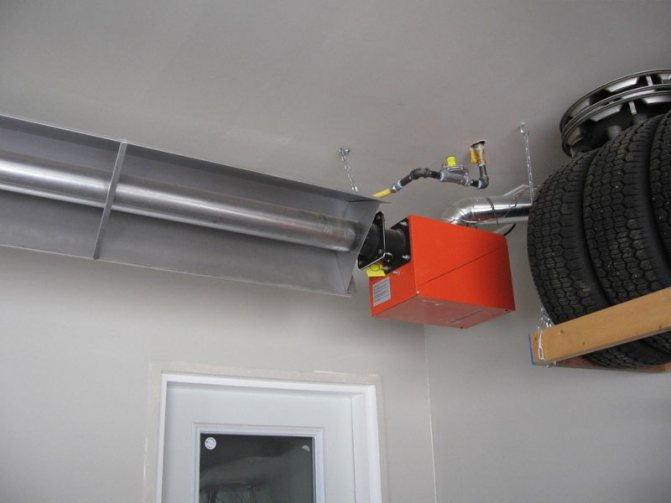
- electric models are the most convenient to use. They are fireproof, but are many times more expensive than, for example, wood-burning options;
- it is better to entrust the installation of gas models to professionals;
- droppers are recommended to be placed in rooms with good ventilation. Such a model does not smoke, but leaves an unpleasant smell, which cannot be eliminated with the help of improvised means;
- the walls near the potbelly stove can be sheathed with metal sheets. They will heat up, give additional heat.
How to make a garage oven yourself, see the following video.
Economical and energy efficient garage ovens
A waste oil furnace is considered the most economical, as it eliminates additional fuel costs. If you correctly calculate the materials and strictly follow the manufacturing instructions, then it will not smoke and pollute the air excessively. The operation of such furnaces on transmission, machine or transformer oil is provided. A diesel oven for a garage functions on the same principle.
Structurally, the unit consists of two containers, which are interconnected by a perforated pipe with many holes. If a decision is made in favor of installing a working furnace in the garage, then it is necessary that it meets the following requirements:
- maximum weight - 30 kg;
- capacity - up to 12 liters;
- standard size - 70x50x30 cm;
- average fuel consumption - 1 l / hour;
- exhaust pipe diameter - 100 mm.
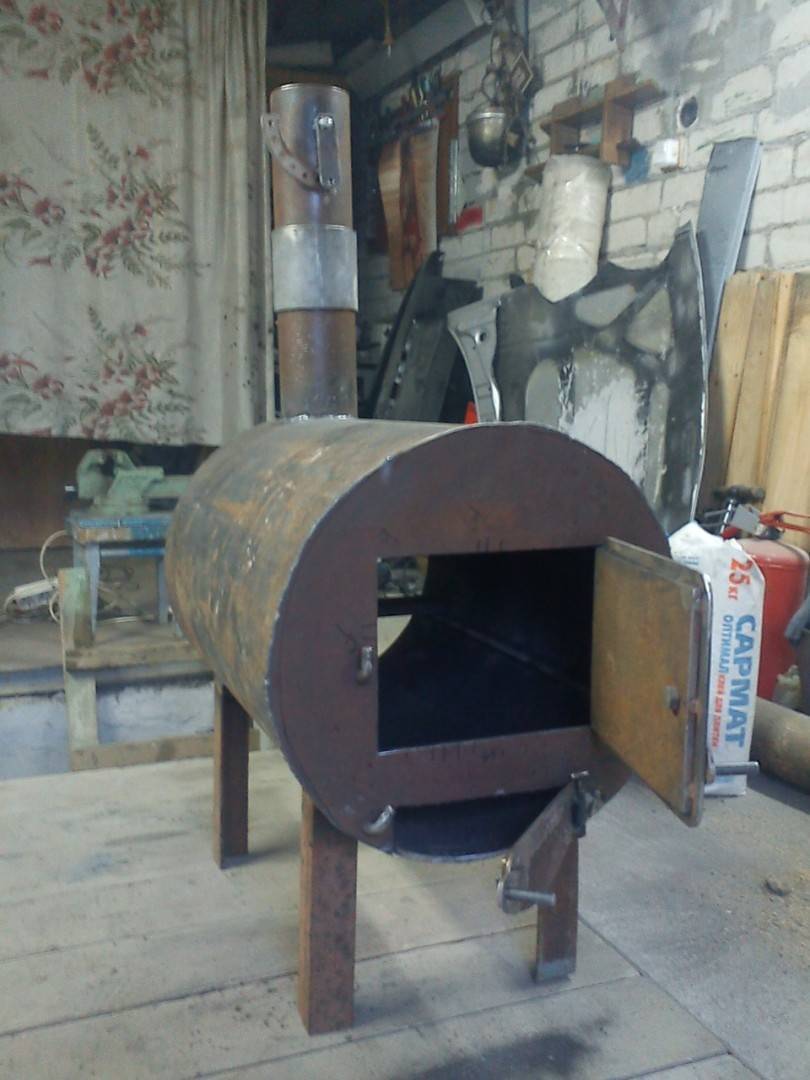
The wood-burning garage stove from two gas cylinders is very economical and easy to maintain
To build such a structure is quite simple. No nozzles and droppers are needed to create it, so special knowledge, skills or experience are not needed to make it.
Directly for the manufacture of the furnace will require the following materials:
- steel pipe;
- two metal containers;
- steel corner.
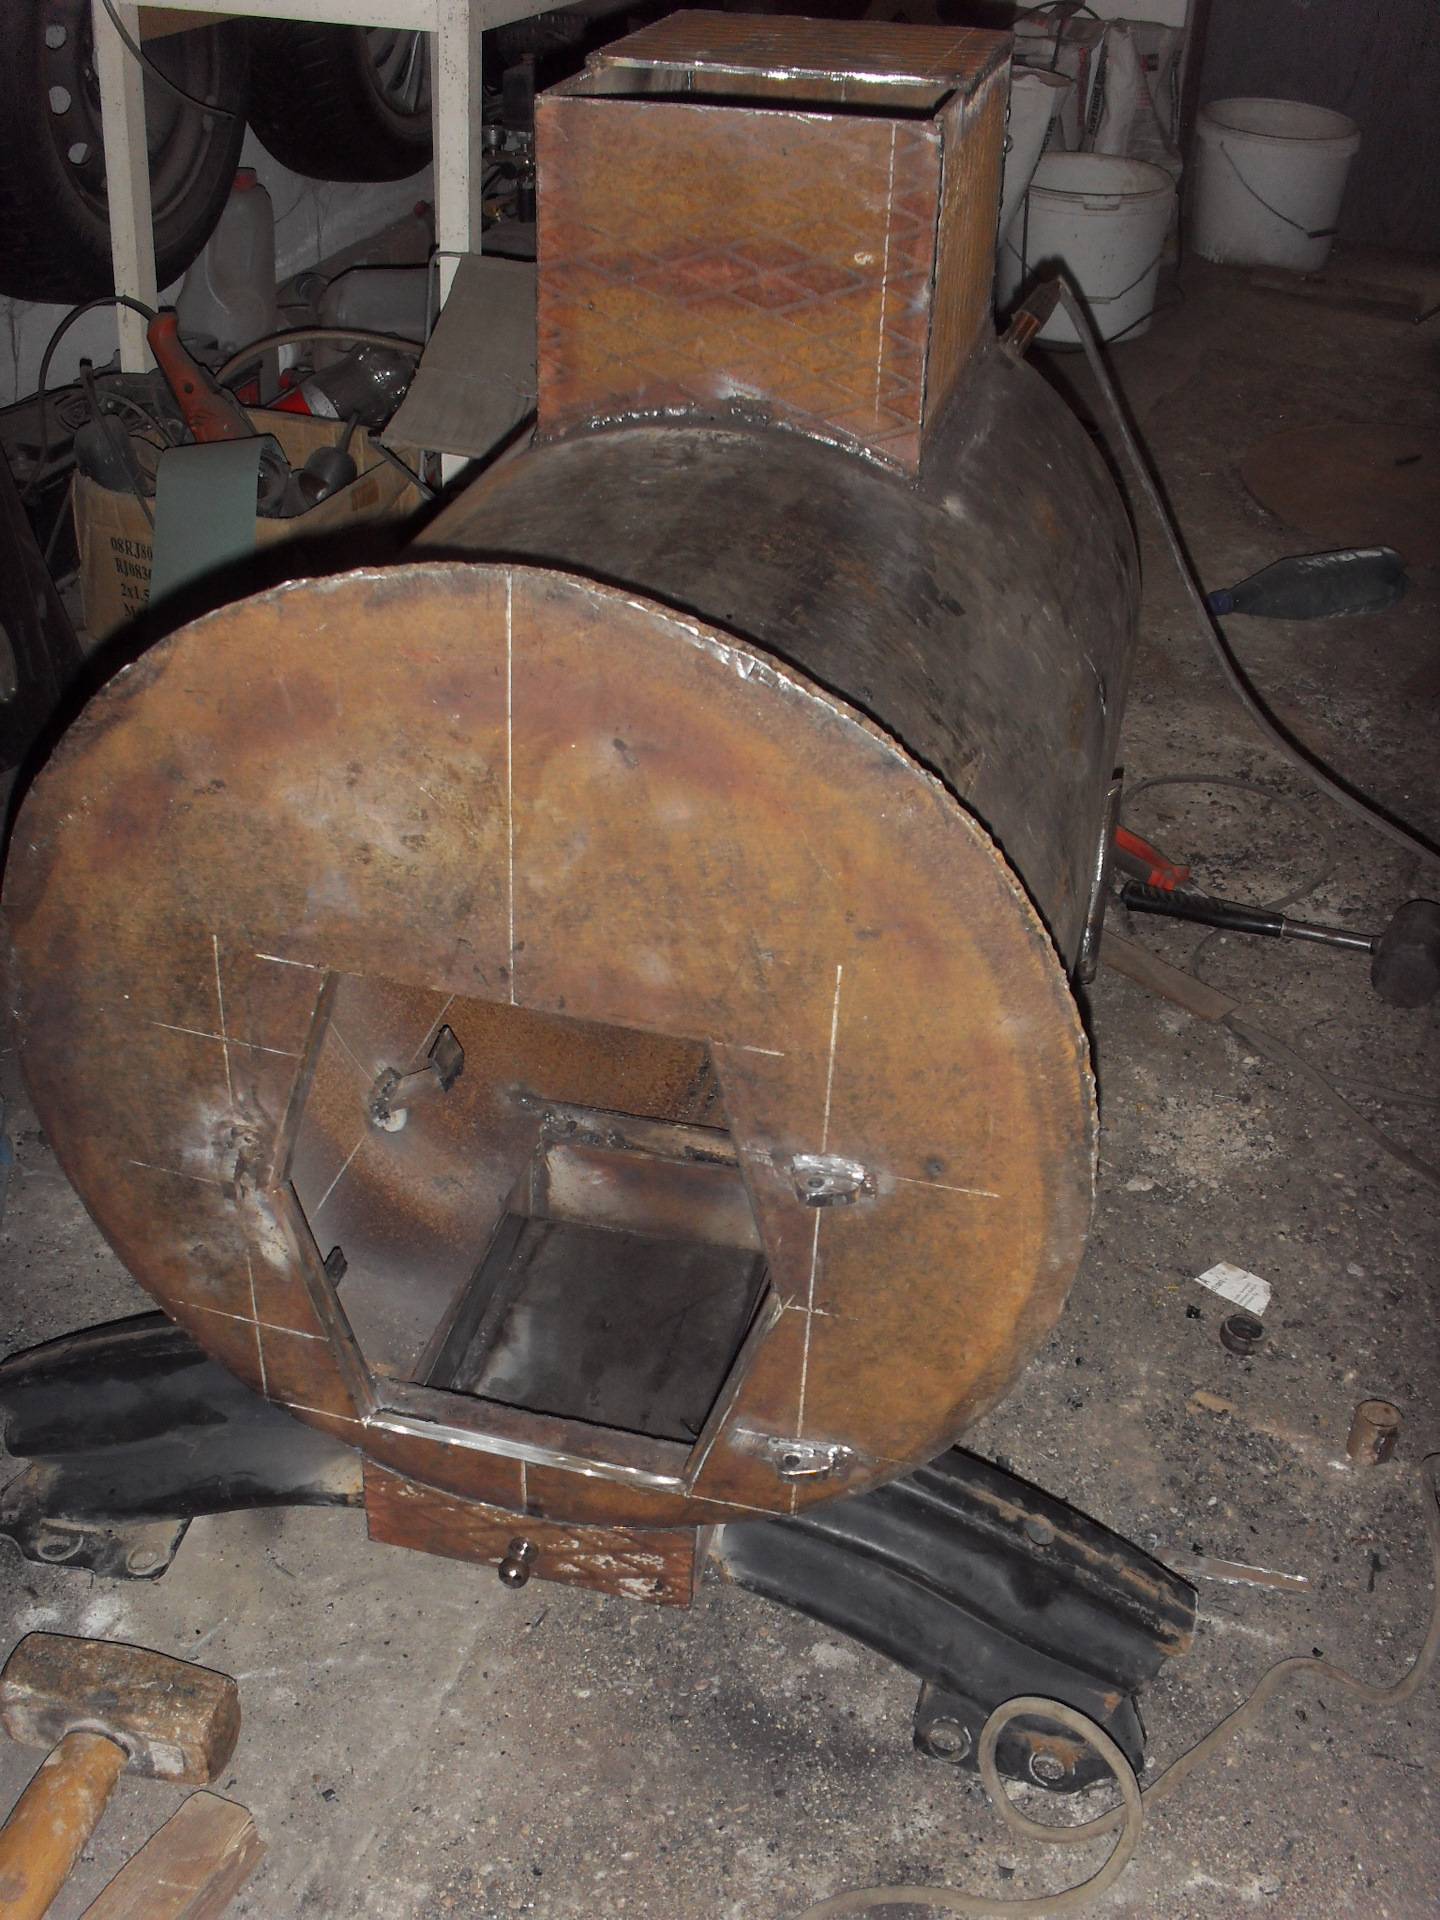
The container can be the case of an old unusable refrigerator compressor or a gas cylinder. A furnace for a garage for mining should be made of a material with a thickness of at least 4 mm, since it is supposed to be heated up to 900 ° C, so thin metal will simply burn out.
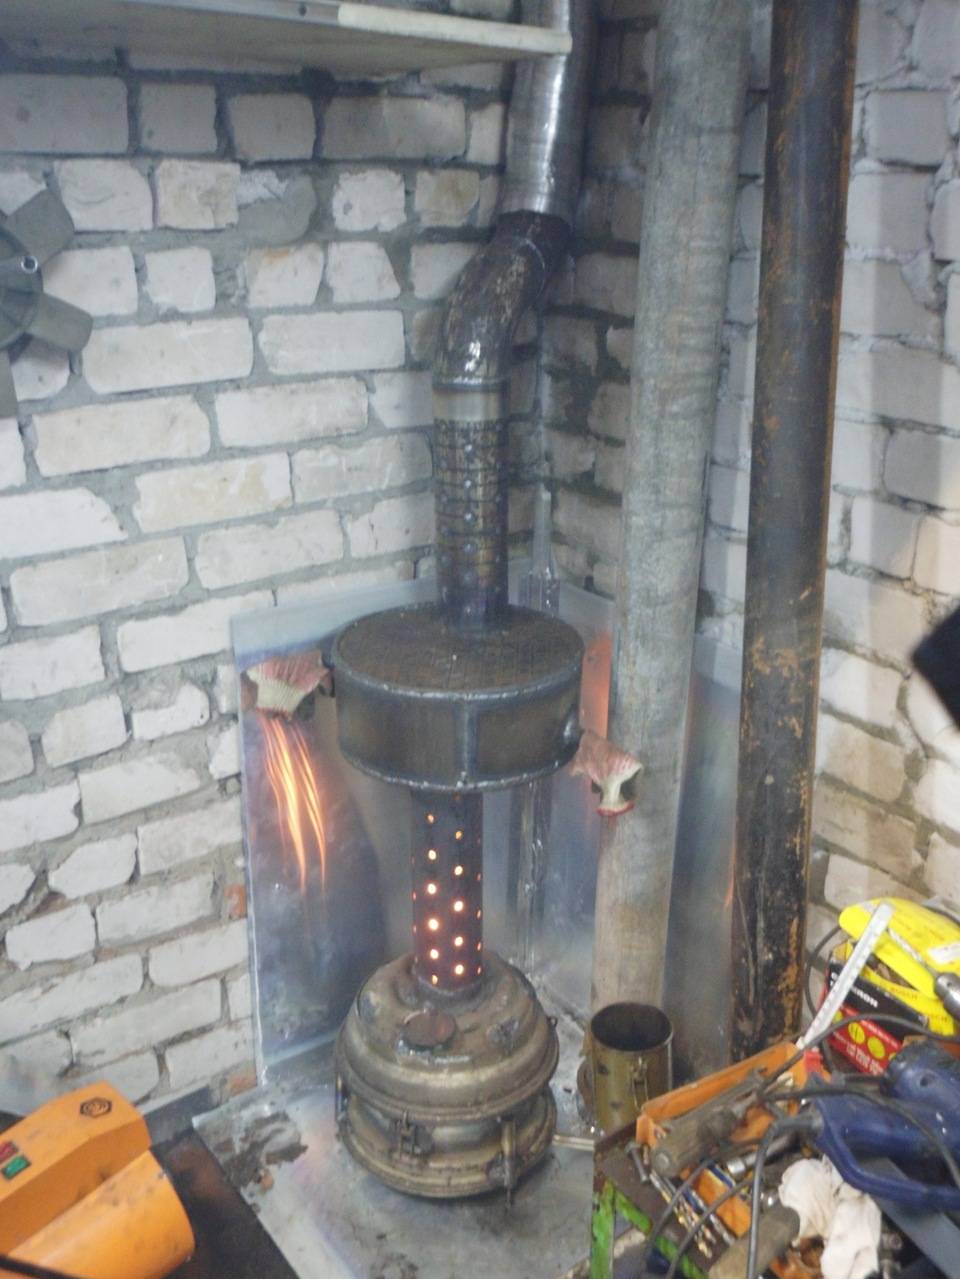
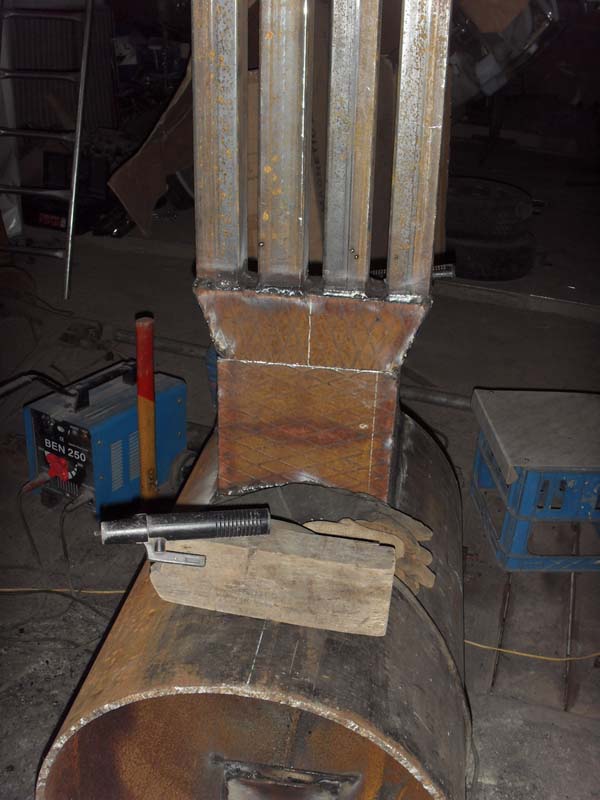
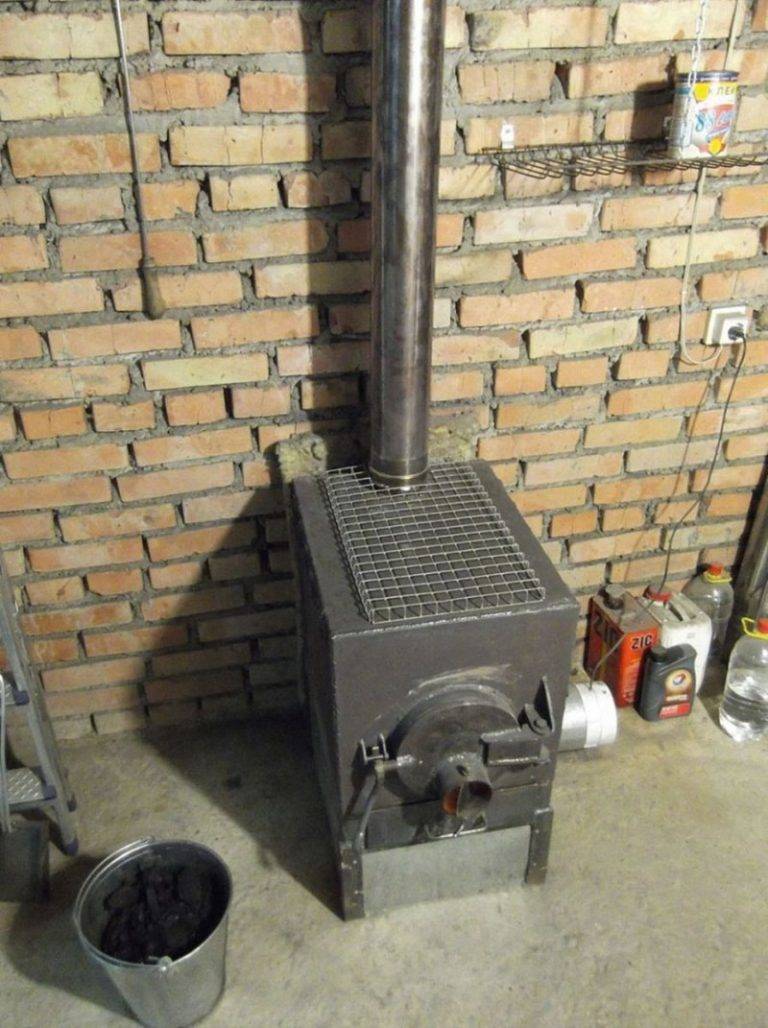
The sequence of manufacturing a stove in a garage, functioning at a test
A garage oven for mining is beneficial if there are large stocks
The process of creating this type of stove in the garage with your own hands includes the following steps:
- Installing the lower container on the legs. For this purpose, parts with a size of 20 cm are produced from a metal corner, onto which the container is welded in a horizontal position.
- Cutting a hole in the middle of the lower part of the body, which serves as a firebox and a fuel tank, welding a vertical pipe to it, connecting both containers. It is desirable that the upper part is removed. This is necessary for cleaning the burner.
- Drilling about a dozen holes in the pipe at a height of half a meter. The first hole must be at least 10 cm from the main body of the oven.
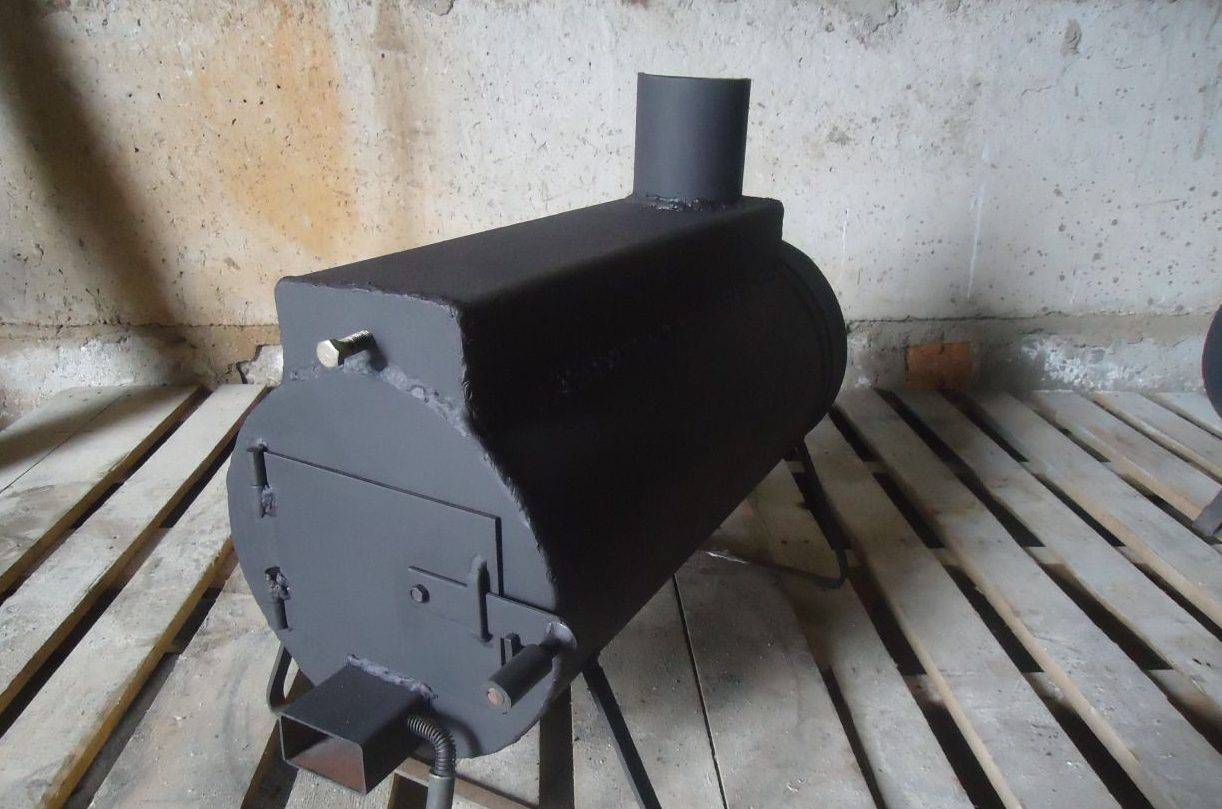
- Making a hole on the top of the furnace tank for pouring oil and a lid that will help regulate the level of heating of the room and the combustion process itself.
- Welding a branch pipe on the upper tank.
- Construction of a galvanized steel exhaust pipe at least 4 meters long and fastening it to the nozzle.
Painting will give a presentable look to the garage stove. For this purpose, a mixture of silicate glue, crushed chalk and aluminum powder is used.
Disadvantages of a furnace for a garage for working out, features of operation
To use such a stove, in order to avoid emergency situations, it is necessary in accordance with clear instructions. To do this, using the lower opening of the furnace, it is necessary to put a small amount of kindling paper into the fuel tank. Next, approximately 1 liter of used oil is poured. The paper is set on fire and wait a couple of minutes until the oil boils. When the oil begins to burn slowly, it must be added as necessary in the amount of 3-4 liters.
Despite the many advantages of this type of garage oven, it is necessary to mention their disadvantages, in particular:
- a very long chimney, which must be at least 4 meters in height;
- it is required that the chimney device be strictly vertical, without bends and horizontal sections;
- The oil containers and the chimney must be cleaned regularly - about once a week.
The oil consumption in the furnace during mining is regulated by the air supply damper and is 0.3 - 1 l. in hour
The process of creating a heating system in a garage must be approached responsibly so that such structures as a mining boiler, a brick oven, a do-it-yourself potbelly stove are profitable and bring maximum heat. It should be noted that economical options must be carefully looked after, and brick structures require a certain time for kindling. To create a long-burning metal furnace, certain skills and knowledge will be required. At the same time, any of the options considered, under the conditions of proper construction and subject to the rules of operation, will make the garage warm and comfortable.