- Project No. 2 - a simple heating fireplace
- The procedure for arranging a fireplace stove with your own hands
- Installation of a brick structure
- Stove or fireplace - what's the difference?
- open fireplaces
- closed fireplaces
- Fire safety requirements for chimneys
- Firebox installation steps
- How to calculate how much material is needed?
- Bricks for building a corner fireplace
- Sand for solutions
- Fireplace mortar
- Design features of fireplaces
- open
- Cumulative
- Convection
- Water heating
- Tips & Tricks
- How to make a fireplace yourself
- Design features
- Tips and secrets
- Do-it-yourself metal fireplace: drawings as the main part
- Benefits of a corner fireplace
- Corner fireplace masonry technology
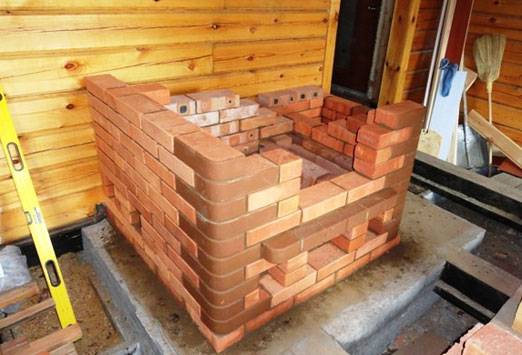
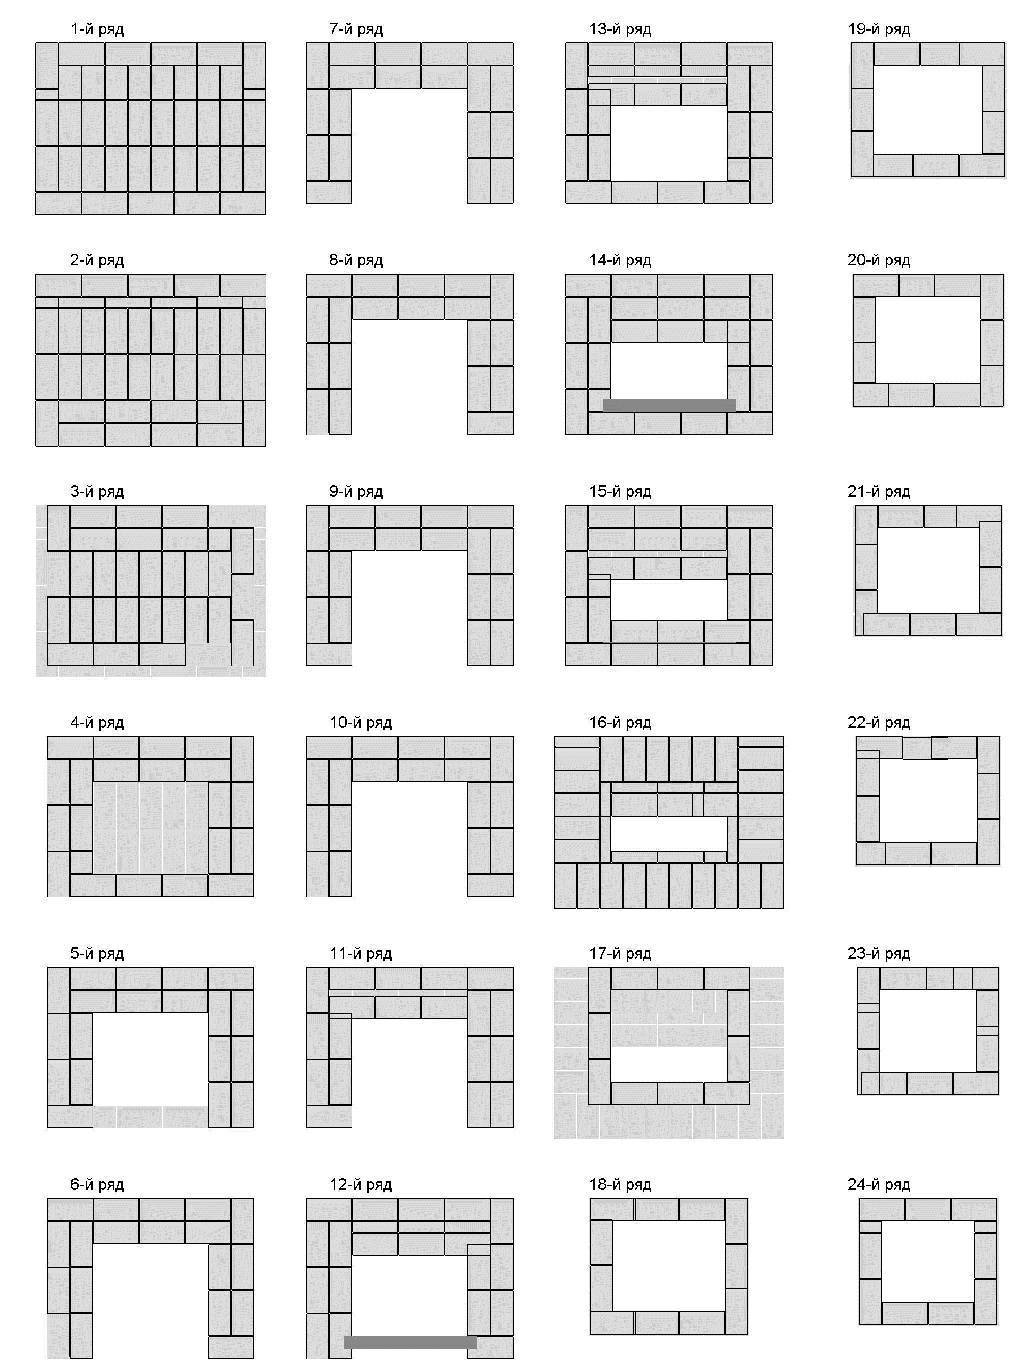
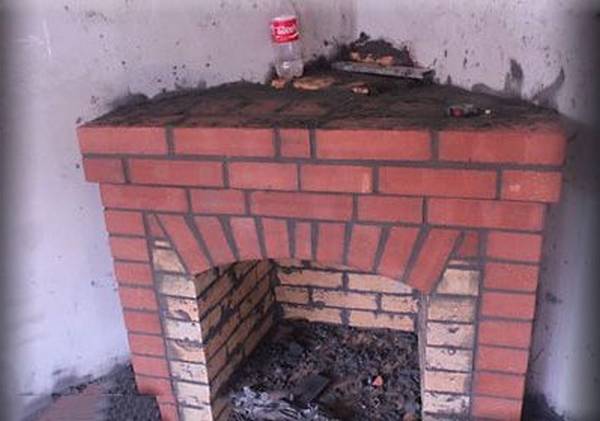
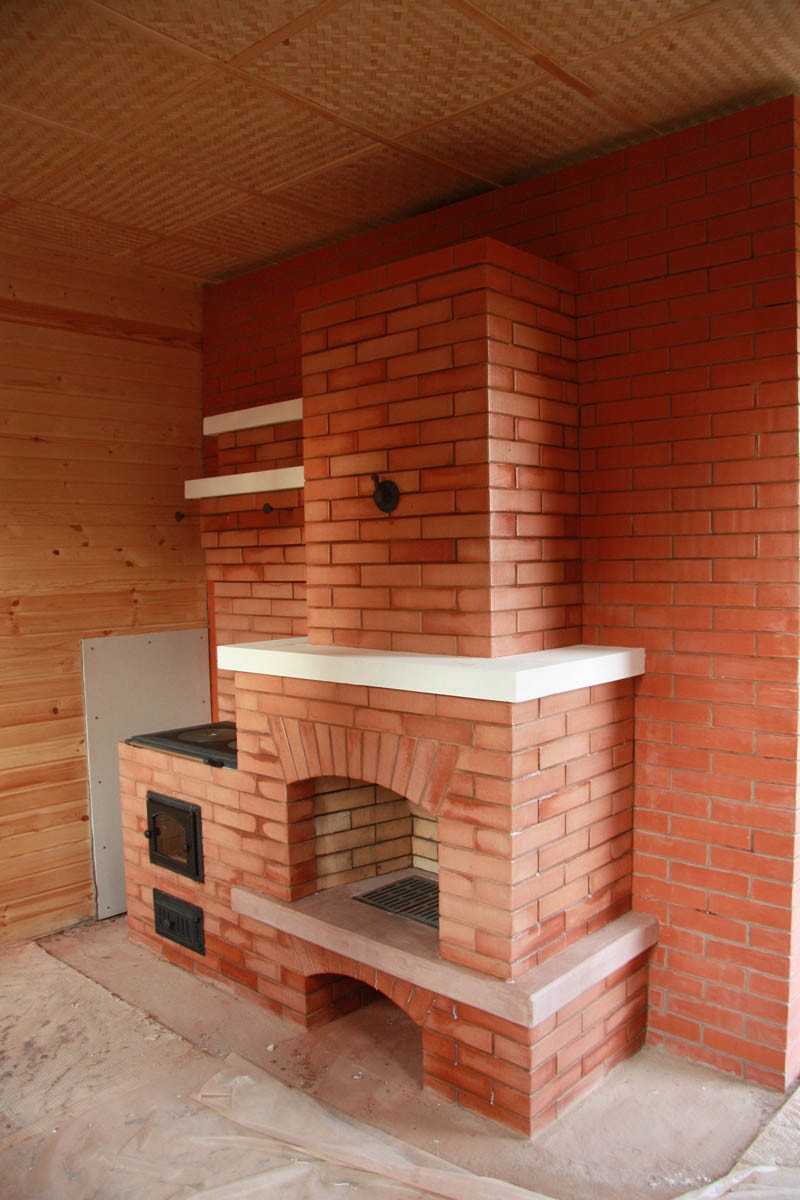
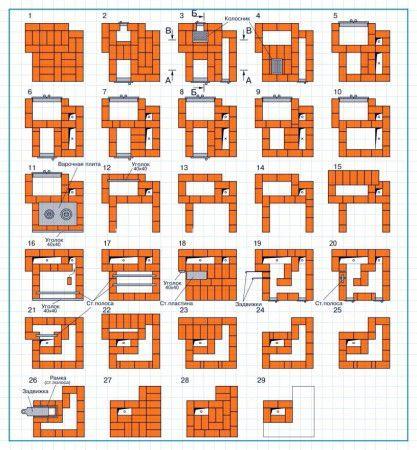
Project No. 2 - a simple heating fireplace
The dimensions of this building are 112 x 65 cm, the height is 2020 mm. The internal size of the portal is 52 x 49 cm. Accelerated heating of the room is provided due to the convective air channel. The building kit looks like this:
- clay solid brick - 345 pcs.;
- valve used in the chimney - 250 x 130 mm;
- 2 steel equal-shelf corners 45 mm wide, 70 cm long;
- metal sheet 500 x 700 mm.
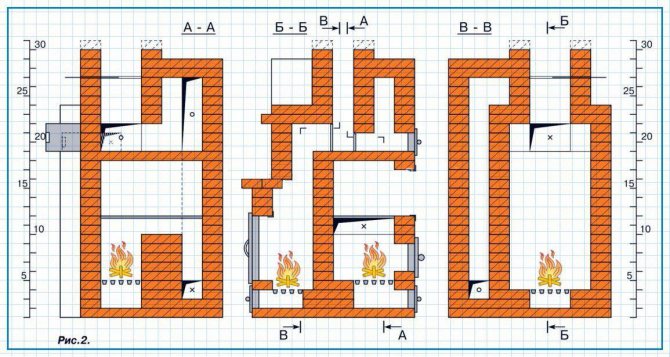
A feature of the laying of the fireplace shown in the diagram is the setting of a large number of bricks at the base on the edge.A narrow long channel is arranged above, where the heated air of the room moves. Let's move on to the construction algorithm:
- The first tier is solid, consisting of bricks placed “on the butt”. On the second tier, a heater channel with a cross section of 65 mm is formed, on the third tier, the base of the firebox is laid.
- From the 4th to the 9th rows, the walls of the portal are being erected. The air duct moves inside the rear wall of the fireplace. On the 9th tier, corners are placed - floor supports.
- Tier No. 10 - overlapping of the firebox. On the 11th row, the front stones are extended by 130 mm, the 12th tier is a mantelpiece. The convective channel is divided into 2 narrow shafts.
- Rows 13-25 make up the smoke box. The heating channel ends in the 14th tier.
- Row No. 26 covers the flue, narrowing to the chimney. The valve is installed on the 27th tier.
- The remaining rows 28-31 form the beginning of the chimney.
The method of trial kindling the fireplace is demonstrated in the last video:
The procedure for arranging a fireplace stove with your own hands
The following materials will be required for fireplaces and stoves of this design solution:
- solid and refractory bricks;
- steel strips;
- clay mortar;
- oven;
- cooking panel;
- steel doors.
Further, the installation of a fireplace stove with your own hands is carried out in the following sequence:
- The 1st and 2nd rows of bricks serve to level the structure under construction, since as a result of pouring the foundation, irregularities still form on its surface. After completing the second row, the building level should show an absolutely flat surface, otherwise the life of the structure will be short.
- On different sides of the fireplace stove, one blower and two cleaning windows are formed.
- A steel door is mounted on each window. A steel strip is additionally placed above the blower door. On the front side of the structure, a fireplace compartment is equipped, preferably with a side so that combustion products do not fall out of it.
- The doors are covered with bricks, and a portal is opened from the side of the fireplace.
- A grate is placed above the blower. The long narrow compartment is covered with a steel strip.
- The side channels are divided by bricks in half. Open the furnace window.
- Install the firebox door.
- The firebox door is covered with a steel strip and covered with bricks.
- The fireplace is also covered with a strip of steel.
- The channel above the firebox is connected to the nearest well. On the front side, the fireplace is covered with bricks and forms a smoke intake.
- The hob is placed above the firebox. The remaining space above the passage and the well is covered with steel strips.
- The channel above the fireplace is narrowed and the brewing compartment is formed.
- The 14th and 15th rows are performed similarly to the 13th.
- An exhaust hood is installed between the nearest well and the cooking chamber.
- A cleaning metal door is mounted in the hood.
- The rear well, located above the hood, is divided in half. The one that will go outside is covered with a summer damper. The well above the hearth acquires the size of 1 brick. Steel strips cover the cooking chamber over the entire area.
- The cooking chamber is covered.
- The 20th row is similar to the previous one.
- The 2nd rear channel is expanded to the maximum size and a cleaning window is removed from it. A damper is installed above the well with a fireplace.
- Install a cleaning door.
- A metal oven is placed in the cavity. A vertical smoke well remains on the far side.
- On one side of the oven, smoke is drained into the central pipe.
- Actions are repeated.
- They make a transition from the cavity to the pipe, since the oven has ended.
- The cavity and well are covered with steel strips.
- On top of the strips, the area is covered with bricks. In the last unused well, a winter valve is mounted.
- All wells are connected to the fireplace by using horizontal passages. Install a cleaning door.
- The 30th and 31st rows are similar.
- The area is covered. Install a common damper.
- 33rd row and beyond - the structure is narrowed - it goes into a pipe.
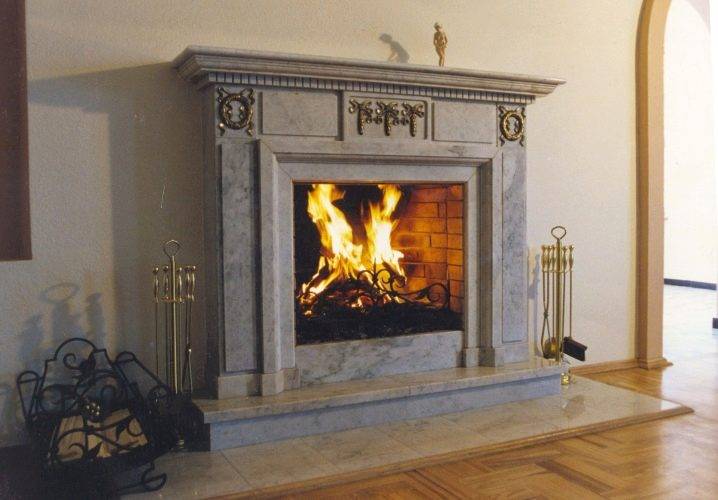
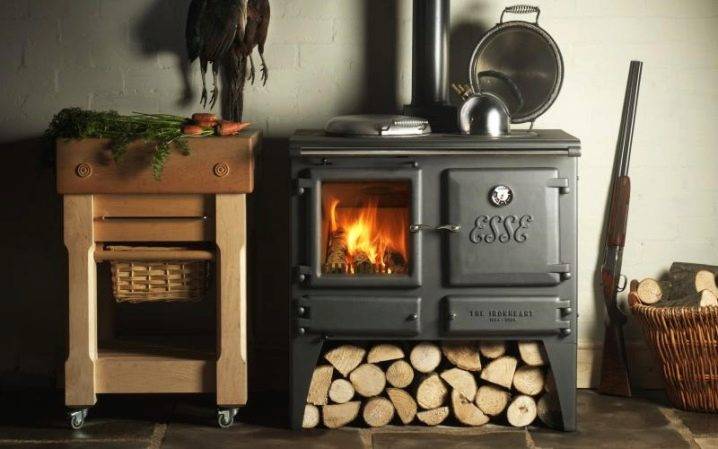
Today, conventional stoves can no longer be found in country houses as often as before, as there are more modern heating and cooking systems. Fireplaces come first, which can perform almost the same functions, but their appearance is more decorative. The fireplace can be placed in any room: in bedrooms, living rooms, halls. Such a hearth gives more comfort, gives soft warmth, which quickly heats a house of a small area.
How to make a fireplace durable and comfortable? It should be noted right away that the work differs not only in complexity, but also in significant financial costs. It is required to invite a professional master. You can save a lot if you buy a ready-made metal fireplace that requires only external decorative trim, but this option cannot be called the best.
Sometimes, when buying a country house, it happens that there is already an ordinary Russian stove in it, which is not used for its intended purpose. In this case, on the basis of this stove, you can make a fireplace with your own hands. Such an alteration consists in assessing the condition of the furnace, determining the plan of work that may be needed.As a rule, most often it is required to expand the firebox, install a door and a new chimney pipe.
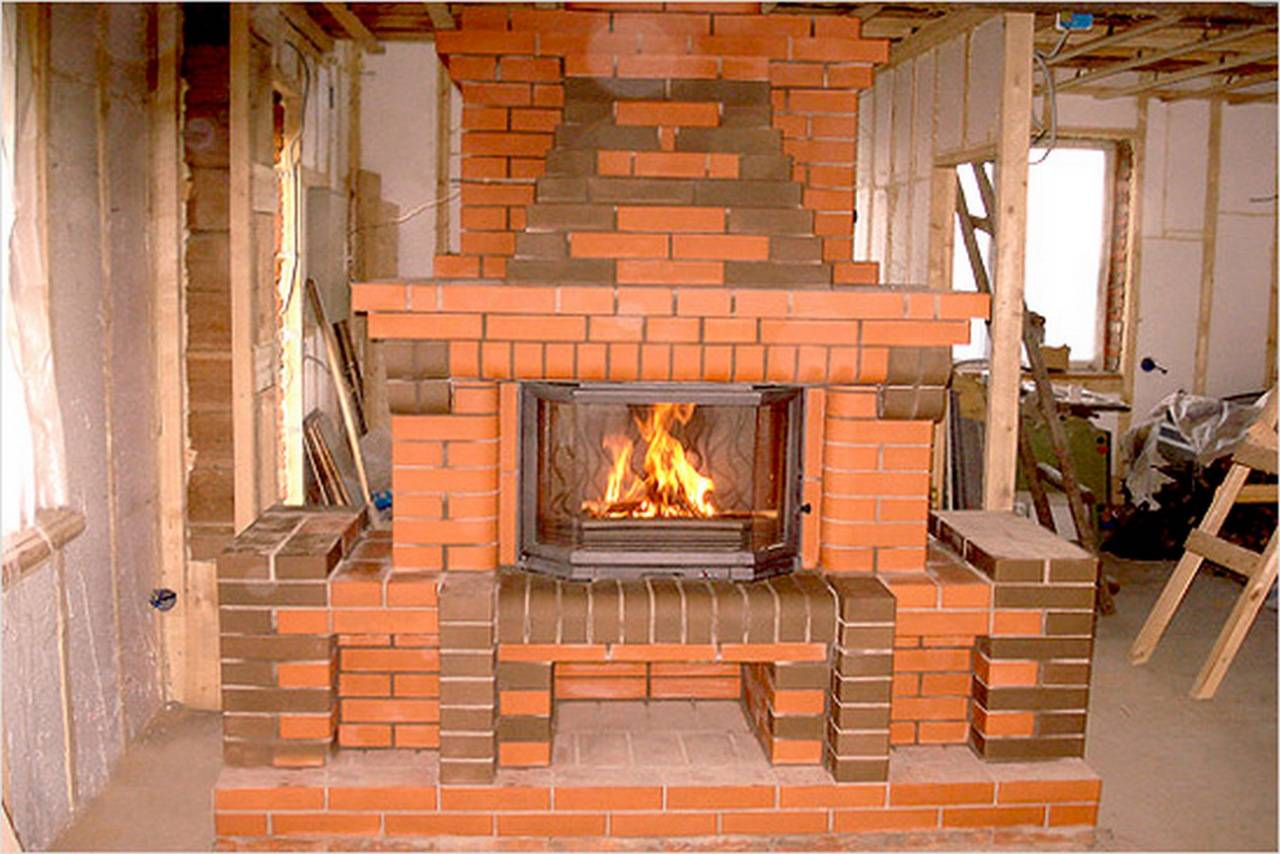
Installation of a brick structure
If a choice was made in favor of a classic stove, then it should be remembered that the construction must not only comply with safety requirements, but also with some technical requirements. Even before the development of informatization of society, it was believed that such work was inaccessible to people who did not have special training. Therefore, the profession of a stove-maker was considered one of the rarest and most sought after.
Today it is easy to find step-by-step instructions that will help you get a functional device with your own hands. However, compared to the installation of finished devices, the construction of a brick stove will take longer. We list only the main stages, since detailed instructions are available in sections called "finished projects".
Work begins with determining the dimensions of the structure. The area of the foundation will depend on them. After pouring the base, using a special ordering scheme, the furnace body with its main components is laid out. To appreciate the work of professionals who shared all the information, you need to know that, depending on the area of \u200b\u200bthe room, each furnace has its own dimensions. The calculation of such parameters as the height, width and depth of the furnace, the dimensions of the body, the height of the chimney, the area of the smoky channel is carried out.
Today, few of the novice masters are engaged in complex calculations, since all the data is presented in a ready-made tabular form. Laying out each row, we get a formed ash pan, a firebox, a smoke tooth and a smoke box.This is just a simple fireplace diagram, but the stove has a chimney channel system. In these channels, hot air gives the maximum possible share of energy to the body of the stove. It is almost impossible to complete the construction of this part without a scheme.
Stove or fireplace - what's the difference?
To answer this question, we need to define these terms.
In simple terms, a stove is a household appliance designed to heat a room. It absorbs heat from the fuel (wood, coal) burning in it, then gradually gives it away, maintaining a comfortable temperature in the room. To maintain heat, the unit must be heated as needed. A good stone stove is able to maintain the optimum temperature for up to 12 hours. Smoke channels are installed inside it so that maximum heat can be retained. Hot flue gases released during the combustion of firewood, flowing along the walls of the smoke channels and in contact with them, give off their heat to the stove material.
There are a number of elements that are unique to the stove, but they distinguish it from the fireplace:
- The firebox of the stove, which is always closed by a cast-iron or steel door when it is heated. This is necessary to prevent smoke from entering the room.
- An ash pan located under the firebox and associated with it. When burning the stove, the ash pan door is slightly opened, thereby letting the air necessary for the normal combustion of firewood into the firebox.
- The presence of a grate in the bottom of the firebox for the penetration of air from the ashpit into the firebox.
Although the fireplace appeared with us not so long ago, it has already managed to gain popularity.
Fireplaces can be divided into two types:
- open;
- closed.
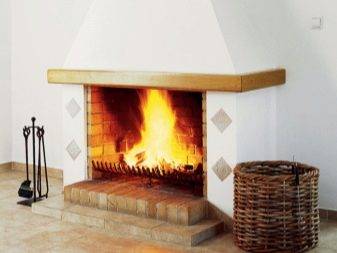
open fireplaces
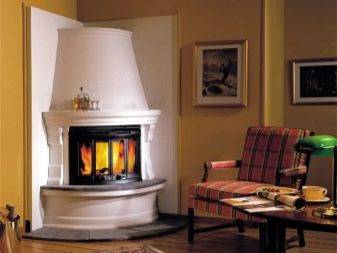
Such fireplaces are traditional.Most often they are used for interior decoration, without carrying a heating capacity. This type of fireplace can only warm the people sitting next to it. His firebox is located either directly in the wall, or in a special extension to the ceiling. It is a small indentation.


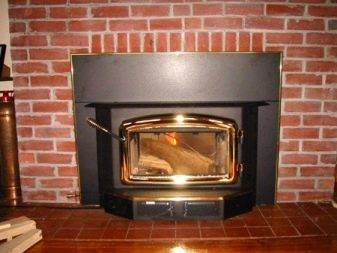
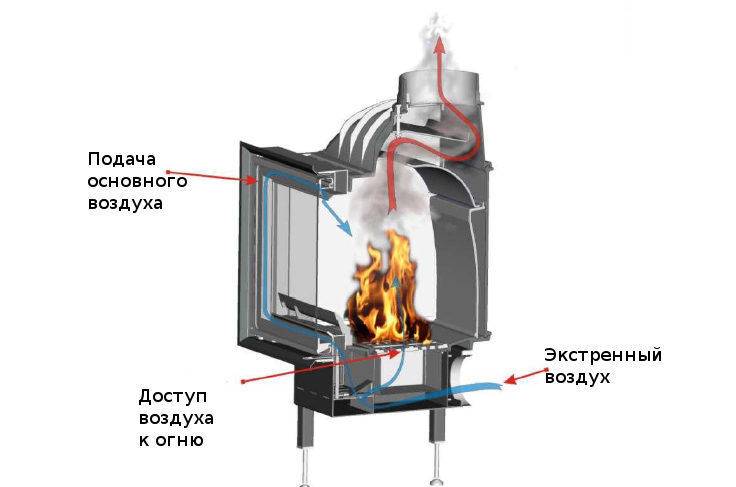
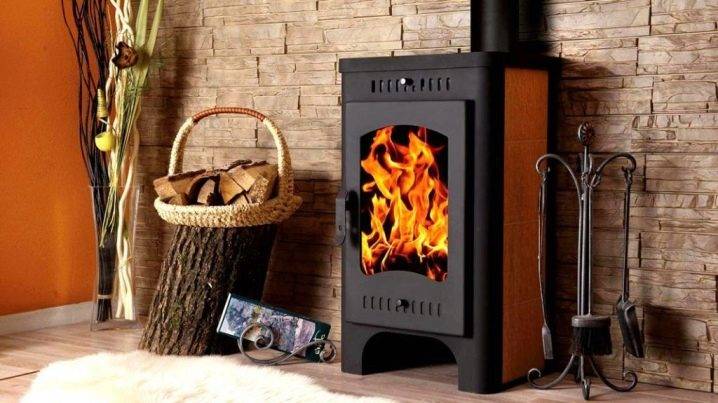
closed fireplaces
Unlike open type models, these fireplaces have heat-resistant glass that completely covers the firebox, which prevents sparks from spreading. One of the advantages of such a unit is that it is able to heat rooms with high quality, since it has a high percentage of efficiency. Installing such a fireplace is more expensive. This is due to more stringent requirements for the chimney, the necessary thermal insulation, as well as other factors that affect the complexity of the design. However, such an object will soon justify the funds spent on it.
Fire safety requirements for chimneys
The fireplace and chimney to it are sources of increased danger. Therefore, compliance with fire safety measures is the main condition for their installation and operation.
Sections of the floor, walls and ceilings in contact with the chimney are insulated with refractory materials (metal, asbestos cement, plaster, basalt wool, etc.).
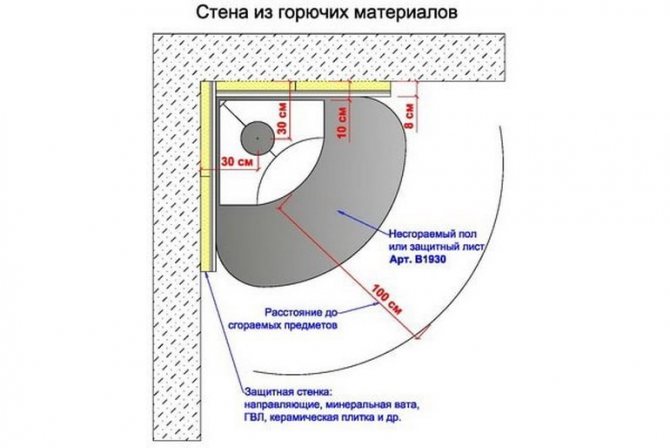
- The thickness of the insulating layer is at least 13 cm for sandwich chimneys and 25 cm for single-walled chimneys.
- In the area between the cladding and the ceiling, a convection chamber with a thermal screen and ventilation outlets is installed.
During the operation of fireplaces and chimneys, it is prohibited:
- Produce kindling with flammable liquids and other flammable materials and substances.
- Use for kindling firewood that exceeds the size of the combustion chamber.
- Use the chimney to dry clothes or shoes. Q = C A 2 g H T i − T e T i {\displaystyle Q=C\;A\;{\sqrt {2\;g\;H\;{\frac {T_ {i}-T_{e}}{T_{i}}}}}}
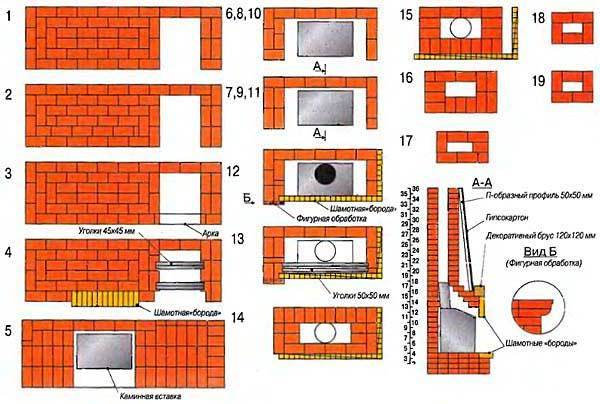
Firebox installation steps

Cast iron firebox
Practice and time have shown that cast iron is considered the best firebox. Do not try to make complex heating do-it-yourself equipment, better earn money and get a quality product.
Fireplace installation: expert advice
Foundation preparation
For a cast-iron firebox, it is necessary to properly prepare a reinforced foundation or screed. A heat-insulating material is laid on top of the floor - a fire-resistant brick or aerated concrete block. Fire-resistant materials are laid with their own hands on ordinary cement mortar or special mastic sold in hardware stores.
Firebox installation
A properly selected firebox for the overall design will be a harmonious addition to the design of the house. Before installing it, you need to decide on the facing material. The firebox often comes with a facing material, however, not all manufacturers provide such a service. In some cases, buyers have to choose their own facing material. Before choosing it, consider its compatibility with a cast-iron firebox.
The second step is to get acquainted with the instructions and the features of the furnace device.
Cast iron firebox
The third step is the installation of heating equipment. Brickwork is covered with cast-iron U-shaped tiles. The plate is fixed with heat-resistant glue or mastic. The side legs of the device must be mounted a few centimeters into the fireplace wall. The tile is checked with a building level until the glue and mortar have had time to set.
The fourth step is to install the fireplace insert on the stove. Keep a distance of 4-6 cm between the firebox and the wall. After work, the distance between the wall and the heating equipment must be checked again, since it is often violated by one's own hands.


The fifth step is the lining of the firebox. After installation, the fireplace must be beautifully overlaid. First, the joints are processed - with sealant and gypsum plaster. After the gypsum has dried, you can proceed to the cladding. It is worth noting that the cladding is done by hand exclusively from heat-resistant materials.
Scheme for mounting a sandwich chimney
Step six - installing the chimney. After facing work, it remains to attach the chimney to the stove. Its installation is accompanied by additional work - in the furnace it is necessary to cut a hole of the required diameter for a metal pipe (in most cases this is a circle of 70x50 centimeters). The same cut is made in the canvas.
If the corner fireplace is too close to vertical, then watch closelyso as not to damage the wall when working with a puncher.
Step seven - sealing the joints. Practice has shown that ordinary silicone sealant cannot cope with the constant action of high temperatures, therefore, for high-quality sealing, it is necessary to select only heat-resistant materials. The slots treated with sealant are covered from above with heat-insulating material with their own hands.
Step eight - finishing. After bringing the chimney to the roof, you can start finishing the stove with your own hands. The foot of the firebox is traditionally sealed with decorative stone or ceramic tiles.You can choose any building material you like.
Professionals recommend not to lay laminate or linoleum close to the fireplace, especially for open fireboxes. The distance between the open fireplace and the floor covering should be more than 80-100 cm.

Figured grate of the firebox
For additional security, it is recommended to install an openwork metal grate in front of the fireplace. The wall must also be protected from fire. Behind the fireplace, the wall is sealed with fire-resistant decorative elements.
The decor is completed with fireplace tongs, a stand, a poker and other accessories. Very beautiful, and, most importantly, right, the following decor elements look on the mantelpiece: statues, toys, vases, paintings or homemade trinkets.
How to calculate how much material is needed?
Bricks for building a corner fireplace
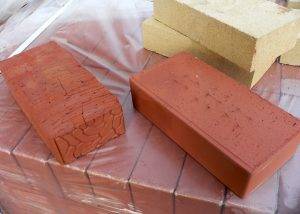
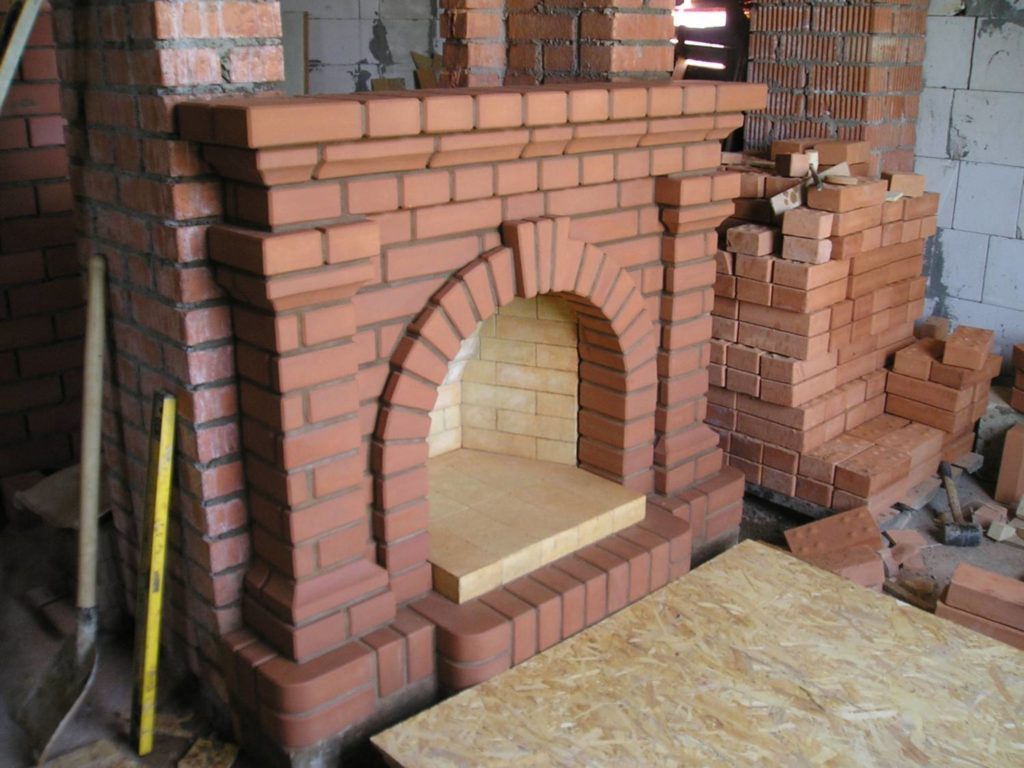
The dimensions of the fireplace and the layout of the masonry at the initial stage make it possible to understand how many materials are approximately and what variety is needed for work. In places where the temperature is maximum, a brick fireplace is laid from reliable refractory raw materials. Otherwise, at the first firebox, the walls will crack. Almost all the rest is based on the usual red clay brick. If there is an arch in the structure, then fireclay bricks are independently trimmed for this and purchased with wedge material.
Sand for solutions
Fireplace projects include the use of sand as the main material for mixing masonry mortar. There may be several options, most often quarry sand of the furnace area, arch and lower area of the chimney is used. For all remaining elements, it is permissible to use lake and river material
Before use, it is important to sift the sand through a sieve to remove excess stones.
Fireplace mortar
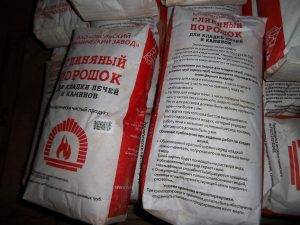
The ordering of the firebox and chimney involves the use of a clay solution that would ideally withstand high temperatures and not spoil the structure. Depending on the degree of fat content of clay, sand is added in proportion. The brickwork of the base provides for the inclusion of cement in the mortar. Before starting work, the solution is tested for the degree of quality.


Design features of fireplaces
Different types of fireplaces installed in private homes have different efficiencies. For this reason, before installing them, it is necessary to determine the desired ignition frequency, the size of the area that will be heated, the regularity of turning on the stove and finding a place. for storing firewood.
Depending on the functions and structure, fireplaces are divided into open, cumulative, convection and water heating.
open
The main function of such a unit is to decorate the room. Compared with other devices, the use of such a heater will be accompanied by a lack of control over the combustion mode.
Hot gases, which carry the bulk of the heat, will escape into the chimney too quickly, and the efficiency of the fireplace with air heating will decrease significantly.
Cumulative
Cumulative type fireplaces combine an open fire and a duration of heating. A similar effect is provided by short furnace channels and bell-shaped cumulative mass. It consists of special ceramic circles that absorb the heat of furnace gases passing through them.
The heat capacity of a wood-burning fireplace is increased by the use of bricks and ceramic panels, which constantly accumulate the energy produced in the firebox and release it for many hours. Due to the participation of large volumes of oxygen in the combustion process, the fuel burns very quickly and gives an even flame, and the glass of the fireplace door remains clean and does not become covered with soot.
Convection
Convection heaters lead the market due to the large volumes of warm air produced. Getting through the hole in the bottom of the unit, oxygen enters the combustion chamber and blows over the fuel cartridges. The heated air exits through the lattice openings in the upper part of the device.
These types of fireplaces have hot air transmission systems, passing through the ventilation ducts a large amount of heat produced and bringing it to all areas of the residential building. An additional advantage is the high burning rate.
Water heating
For a private house, not only a fireplace with air heating is suitable, but also a device with a water heating function. Its peculiarity lies in the transfer of part of the energy produced during the combustion of firewood to the coolant.
The captured heat supports the central heating system and is partly used to heat domestic hot water. Transportation is carried out through plate heat exchangers or layered buffer tanks.
Tips & Tricks
The service life and heat transfer of the heating unit depends on the operating conditions. The best reviews were received by solid fuel stoves-fireplaces of long burning. Regardless of the type of unit, fireplaces must be installed in accordance with fire safety requirements.They should not come into contact with furniture and wooden partitions. Stoves should be regularly cleaned of soot, prevent moisture ingress, monitor the temperature regime to avoid cracking the case from both overheating and hypothermia.
Use only dry material for kindling. Firewood for an active hot fire is used small, of the same size. The larger the logs, the slower the combustion process. It is impossible to heat the stove with waste wood boards with harmful synthetic impurities. For heating, birch, oak, maple or larch logs are better suited. Pine emits too much resin when burned. This will lead to the need for frequent cleaning of the chimney. The logs should be a quarter shorter than the firebox, and in no case should they rest against the glass screen.
Families with children should not be left unattended next to a working stove. The fireplace should not interfere with movement around the room. In the absence of traction, the kindling of firewood is stopped until the cause is eliminated. Poor draft can be caused by a foreign object getting into the chimney pipe. Do not fully close the gate damper during active combustion, this can cause carbon monoxide poisoning.
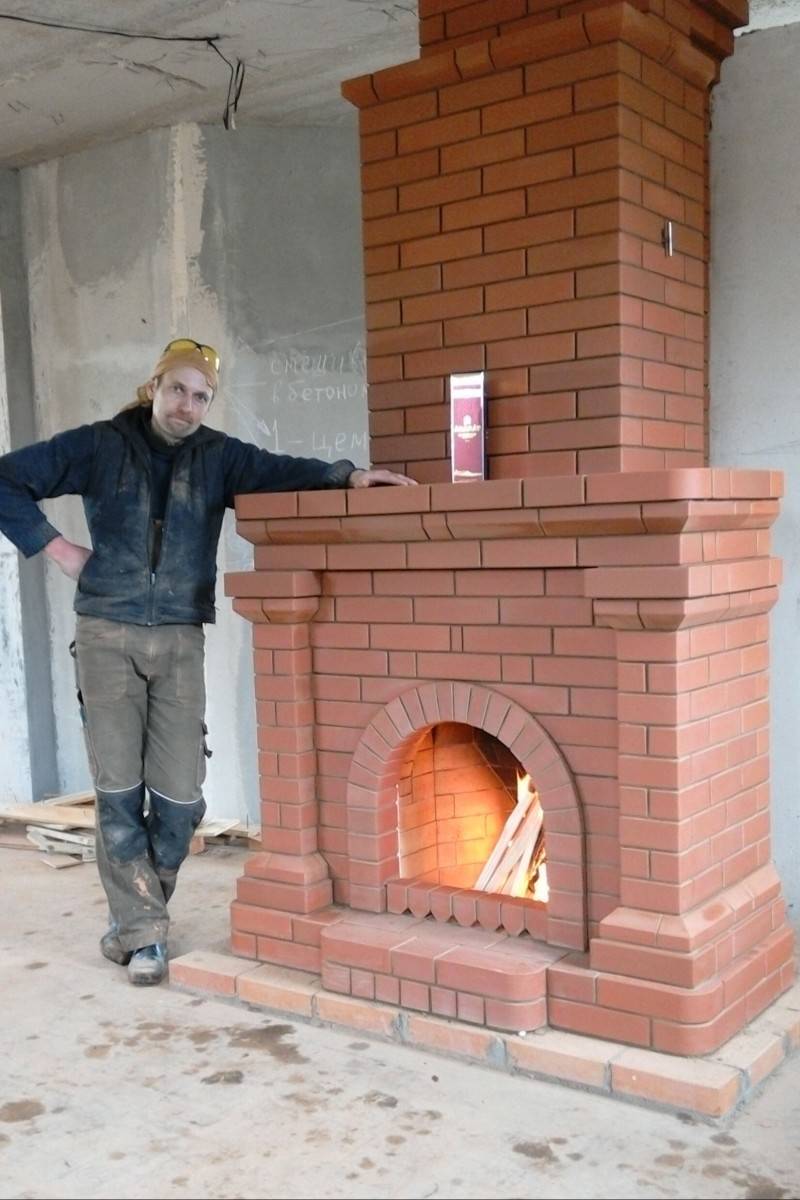
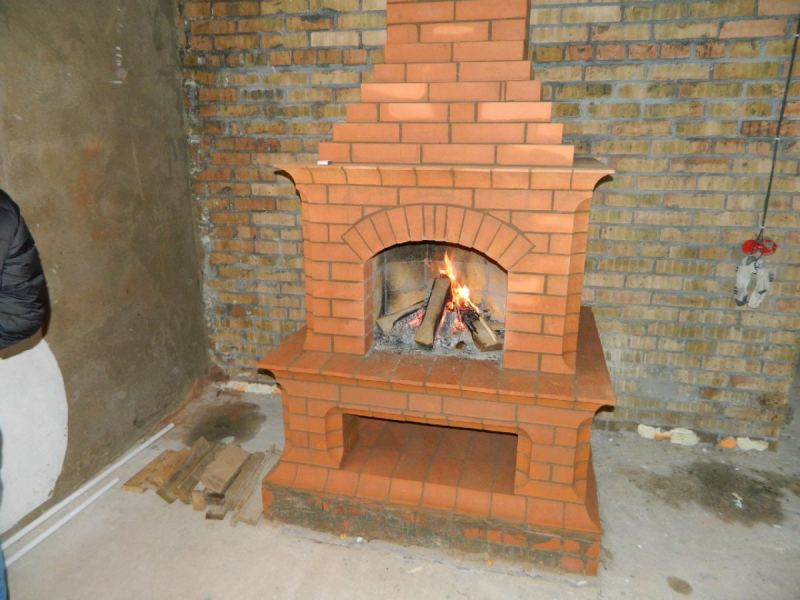
How to make a fireplace yourself
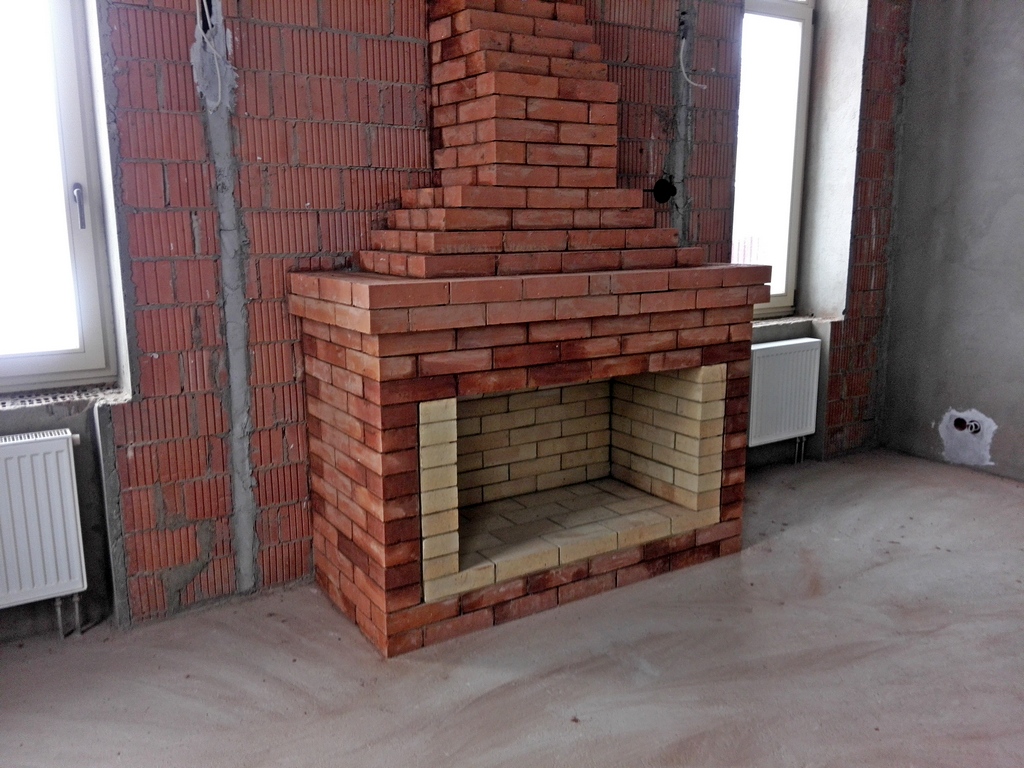
Step-by-step instructions for creating an English brick fireplace with your own hands in a room with an area from 20 to 25 sq.. m.

Work order:
- Preparing a site for building a wood-burning brick fireplace with your own hands;
- Purchase of building materials;
- Creation of a foundation of reinforced concrete or brick;
- Preparation of cement mortar and masonry;
- Test ignition and heating of the fireplace.

The best place for a fireplace is in the center of a load-bearing internal partition. It is desirable to conduct a chimney without affecting the roof ridge.


Required materials:
- Ceramic brick - approximately 300 pieces;
- Refractory bricks - about 120 pieces;
- Gate valve (for the chimney);
- Composition for refractory masonry - approximately 150 kg;
- Sand-clay composition for the construction of furnaces - about 250 kg;
- Steel corner 5 x 0.3 cm, length 2.5 m;
- Furnace door.

It is forbidden to use low-quality and used materials for stove masonry.

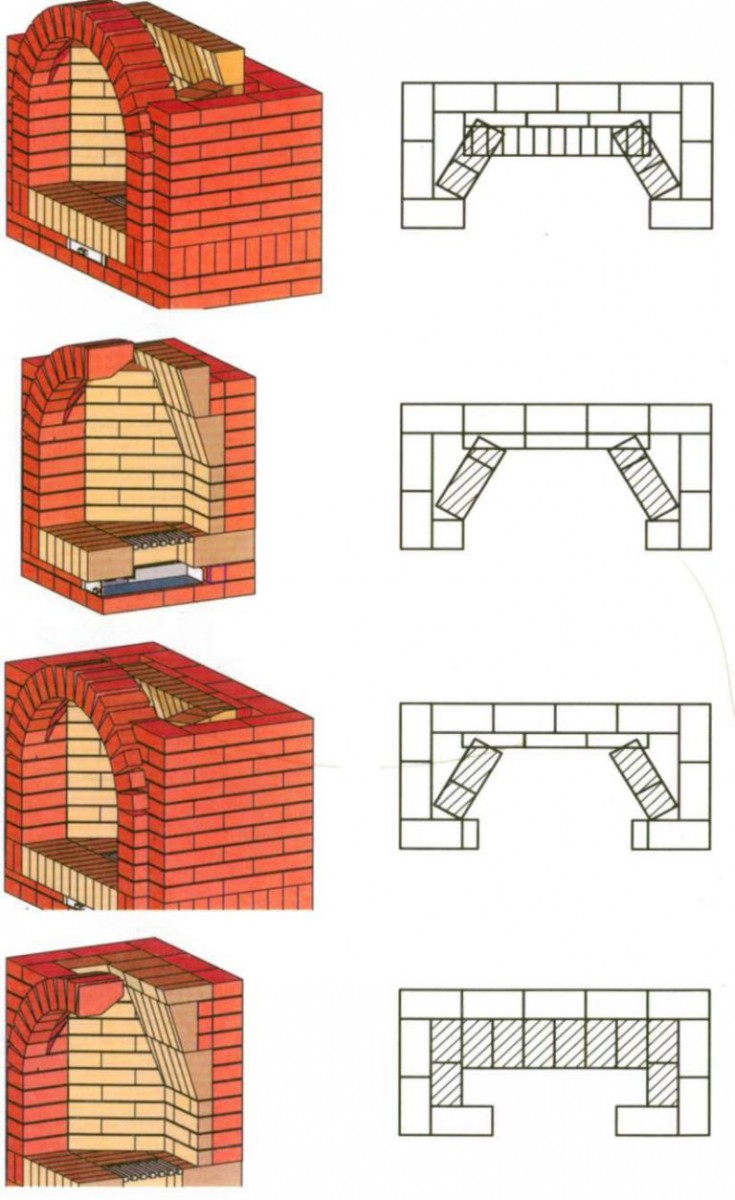
Design features
The design of the fireplace consists of a chimney and a firebox. Do not make the firebox too deep. If you do not follow these rules, the room will not be warm enough. Inside the fireplace, where the firebox is connected to the chimney, a gas threshold is set. Its function is to prevent a drop in the flow of air entering the fireplace and prevent sparks from flying out of the furnace. Thanks to the regulation of the air flow, which is carried out by this threshold, soot and smoke will not enter the room.
The width of the threshold is designed in accordance with the width of the chimney, or made a little larger. An excess of 1-2 cm will be enough. The gas threshold should not narrow the chimney, in order to avoid smoke, it is erected strictly horizontally.
Tips and secrets
Heating a fireplace with wood is a big responsibility. Incorrect operation may result in heat loss or fire. It is necessary to correctly assess the intensity of combustion. You can adjust it by slightly opening or closing the ash pan door. Usually, the correct combustion mode is accompanied by crackling of firewood and a slight buzz of warm air escaping in the chimney.A strong hum is a sign of excessive draft and will cause the firewood to burn out quickly, and all the heat will escape into the chimney.
You can estimate the position of the blower door by the color of the flame of a kindled fireplace, it should be bright yellow. An increase in brightness, up to white, indicates an excess of oxygen, a dark flame indicates its deficiency.
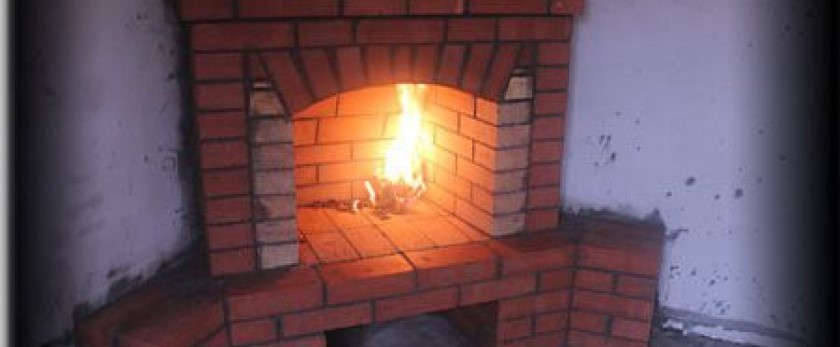
Live fire in an open hearth
You cannot use different methods to put out a fire in a fireplace. From the temperature difference, the finishing materials of the firebox can burst. The logs should themselves burn out and go out. As a last resort, if you urgently need to leave the house, you should take out the smoldering coals and put them out outside the fireplace.
The chimney valve must not be closed immediately, as carbon monoxide is still released from the embers. But an open view will lead to heat loss, so you should look for a neutral solution - close it a couple of hours after the fireplace has cooled down.
The rules that tell you how to heat a fireplace correctly are also relevant if this fireplace is on coal. The difference is only in the process of kindling. To kindle a coal-fired fireplace, you should light the chips and torches, on which a special coal for the fireplace is superimposed in a small layer. After waiting for a steady flame, feel free to add large coarse coal and adjust the draft as described above.
Charcoal is much harder to ignite than firewood, so it is often necessary to use chemicals in the form of tablets. Modern fireplaces are equipped with electric and gas igniters.
Everyone should think about how to properly heat a fireplace stove. This question addresses safety, not just energy efficiency.First of all, improper use of the firebox can lead to irreparable consequences when a fire destroys everything that is most precious.
Do-it-yourself metal fireplace: drawings as the main part
It is very difficult to imagine a country house or a summer house without a hearth. However, unfortunately, a brick fireplace, which is able to bring a note of attractiveness to the interior, puts forward a large number of conditions that can be very difficult to fulfill. In order to fulfill your dream, you can install a metal fireplace. But if you want to create it yourself, you will definitely need the appropriate drawings.
Before proceeding with the construction of the fireplace, it is worth drawing it on paper, indicating the dimensions of all elements
When planning and drawing up a drawing, be sure to consider that the fireplace will require some free space, and of course a quality foundation for the house. All the details are very important, because only if all the rules are followed, the fireplace will be able to please you with a real, live fire.


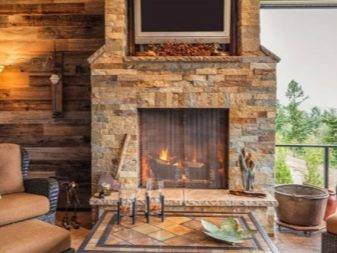
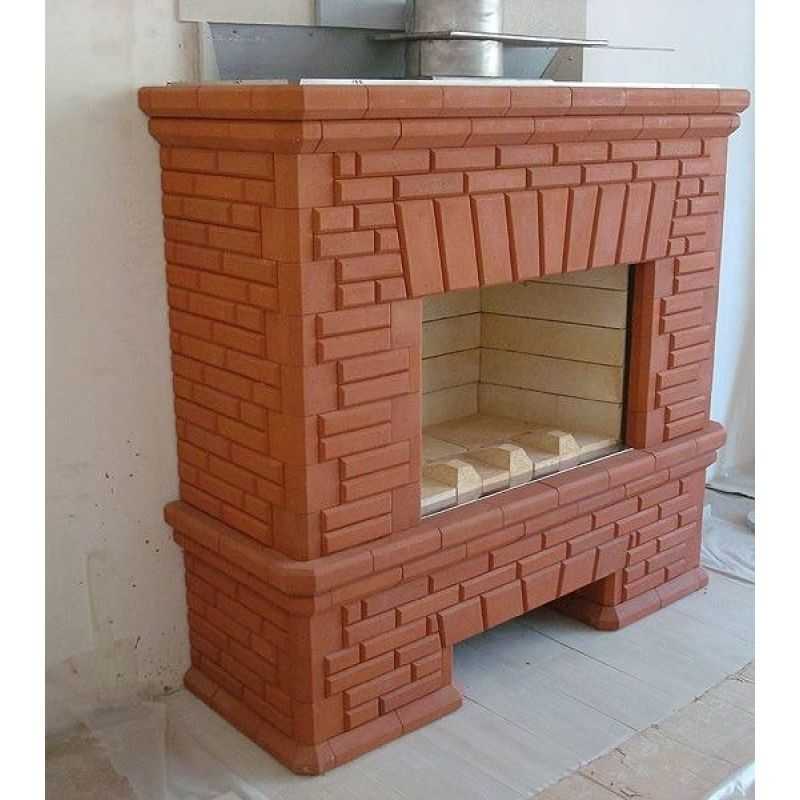
Benefits of a corner fireplace
- in terms of room design, the corner structure opens up new possibilities for interior design, it does not come to the fore, but serves as the basic basis for the rest of the finishing elements;
- the corner version of the fireplace for small houses is very relevant, this model does not require extra space and serves as the main heating hearth of the dwelling;
- in an already finished room, a corner fireplace is being built without restructuring existing structures, which cannot be done if the owner chooses the built-in option.
In order for the hearth to please the owner and his household on cold winter evenings, it must be aesthetically designed, not emit smoke and other combustion products into the space of the room, and be powerful enough to heat the air.
Corner fireplace masonry technology
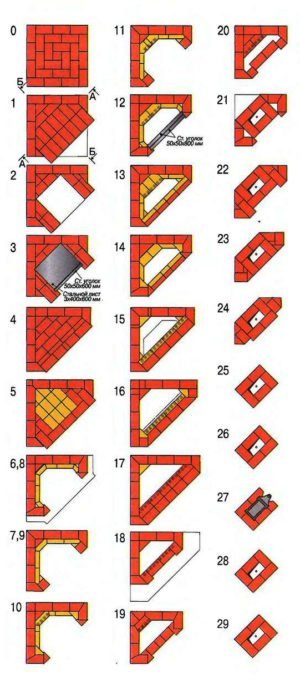
can be folded corner fireplace from do-it-yourself bricks, but for this you need to use a different technology. The work related to laying the first 4 rows is carried out according to the traditional method, and starting from the 5th row, the arrangement of the blower begins and the gratings are installed. The laying of the 6th row is associated with fixing the supports, while a grate is mounted on the upper segment.
The laying of the portal is carried out when laying the 7th row, and the dressing of the seams is carried out from the 8th to the 13th. It is during this period that the direct formation of the portal takes place. Mirrors related to the rear wall are formed at a slight slope. The dressing continues on rows 14-15, and the slope of the mirrors increases, in general, their formation ends on the 16th row.
The front of the fireplace will be rows 17-19, after which the formation of the chimney begins, up to the 22nd row, when the valve is installed. You can choose how to decorate a fireplace made of this type of brick based on your own preferences.
You can choose a masonry technique based on the conditions of the room in which the fireplace will be operated.


