- Principle of operation
- We make a "bourgeois" on our own
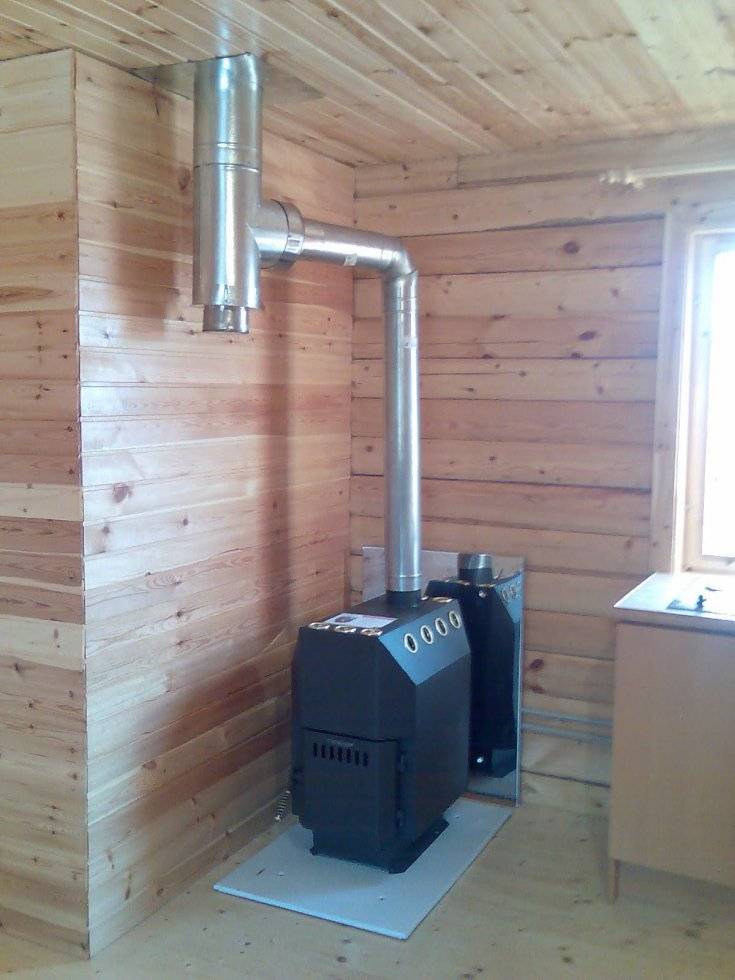
- Long burning wood stove
- Which oven to choose?
- Stove "dropper"
- Solid fuel stoves
- How to create a do-it-yourself oven
- Choosing a furnace: what requirements to follow
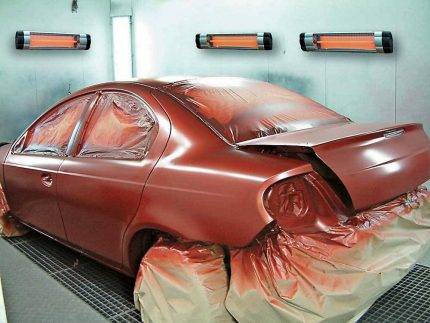
- Garage heating features
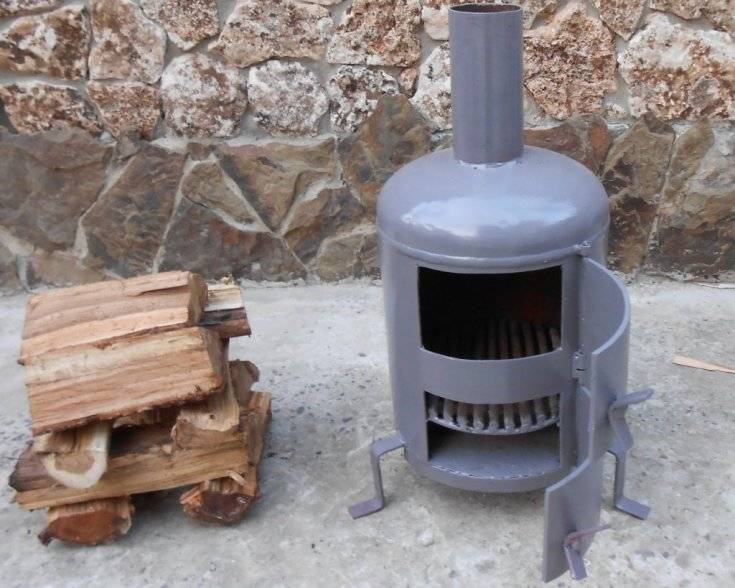
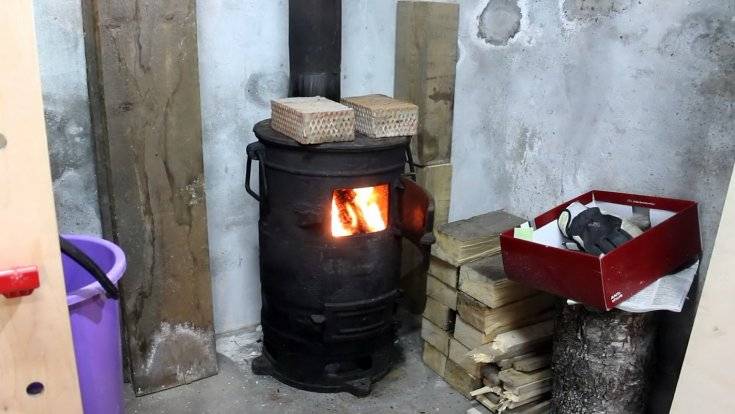
- Potbelly stoves - proven and simple designs
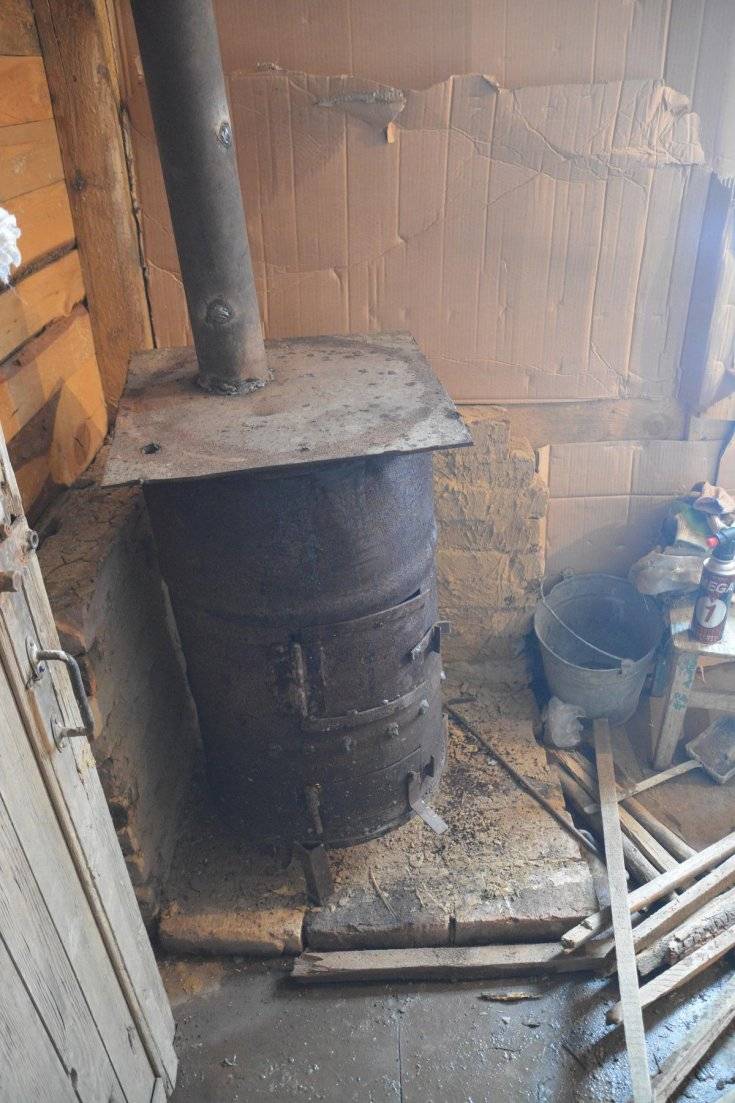
- Potbelly stoves from a cylinder, barrel or pipe
- vertical
- Horizontal
- From two barrels
- Rocket furnaces
- Heating device for burning waste oil - "gratuitous" heat
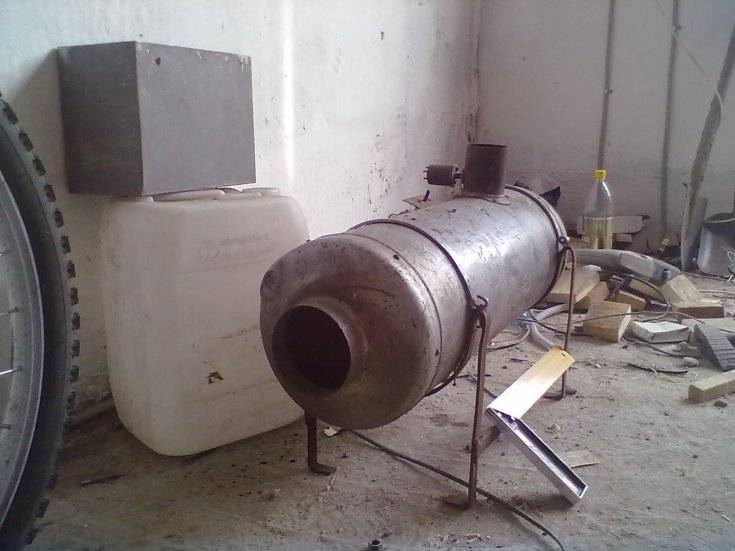
Principle of operation
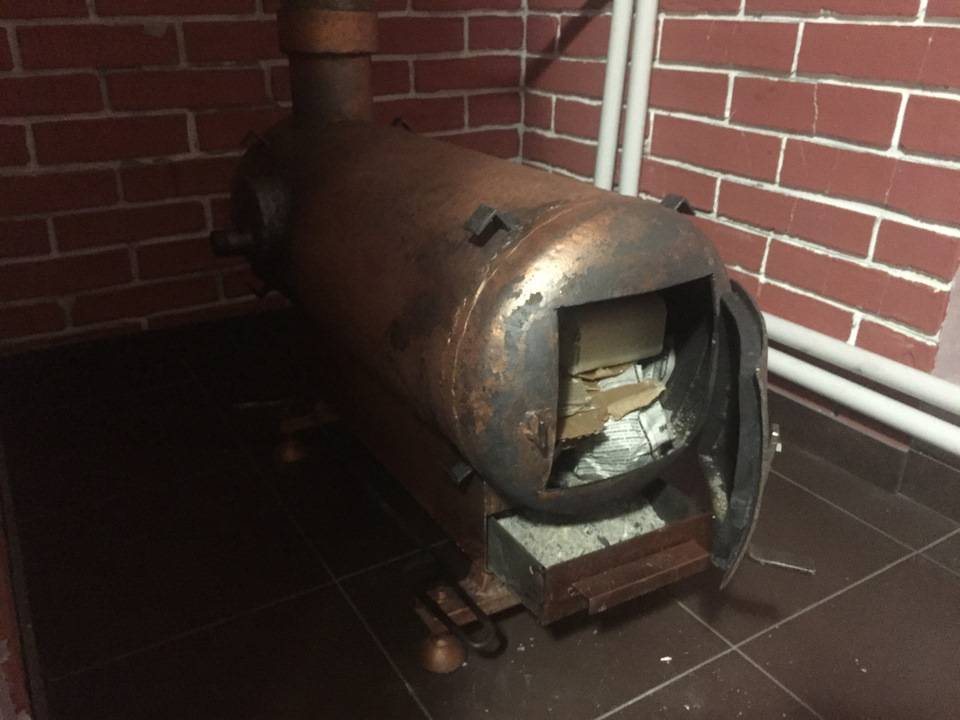
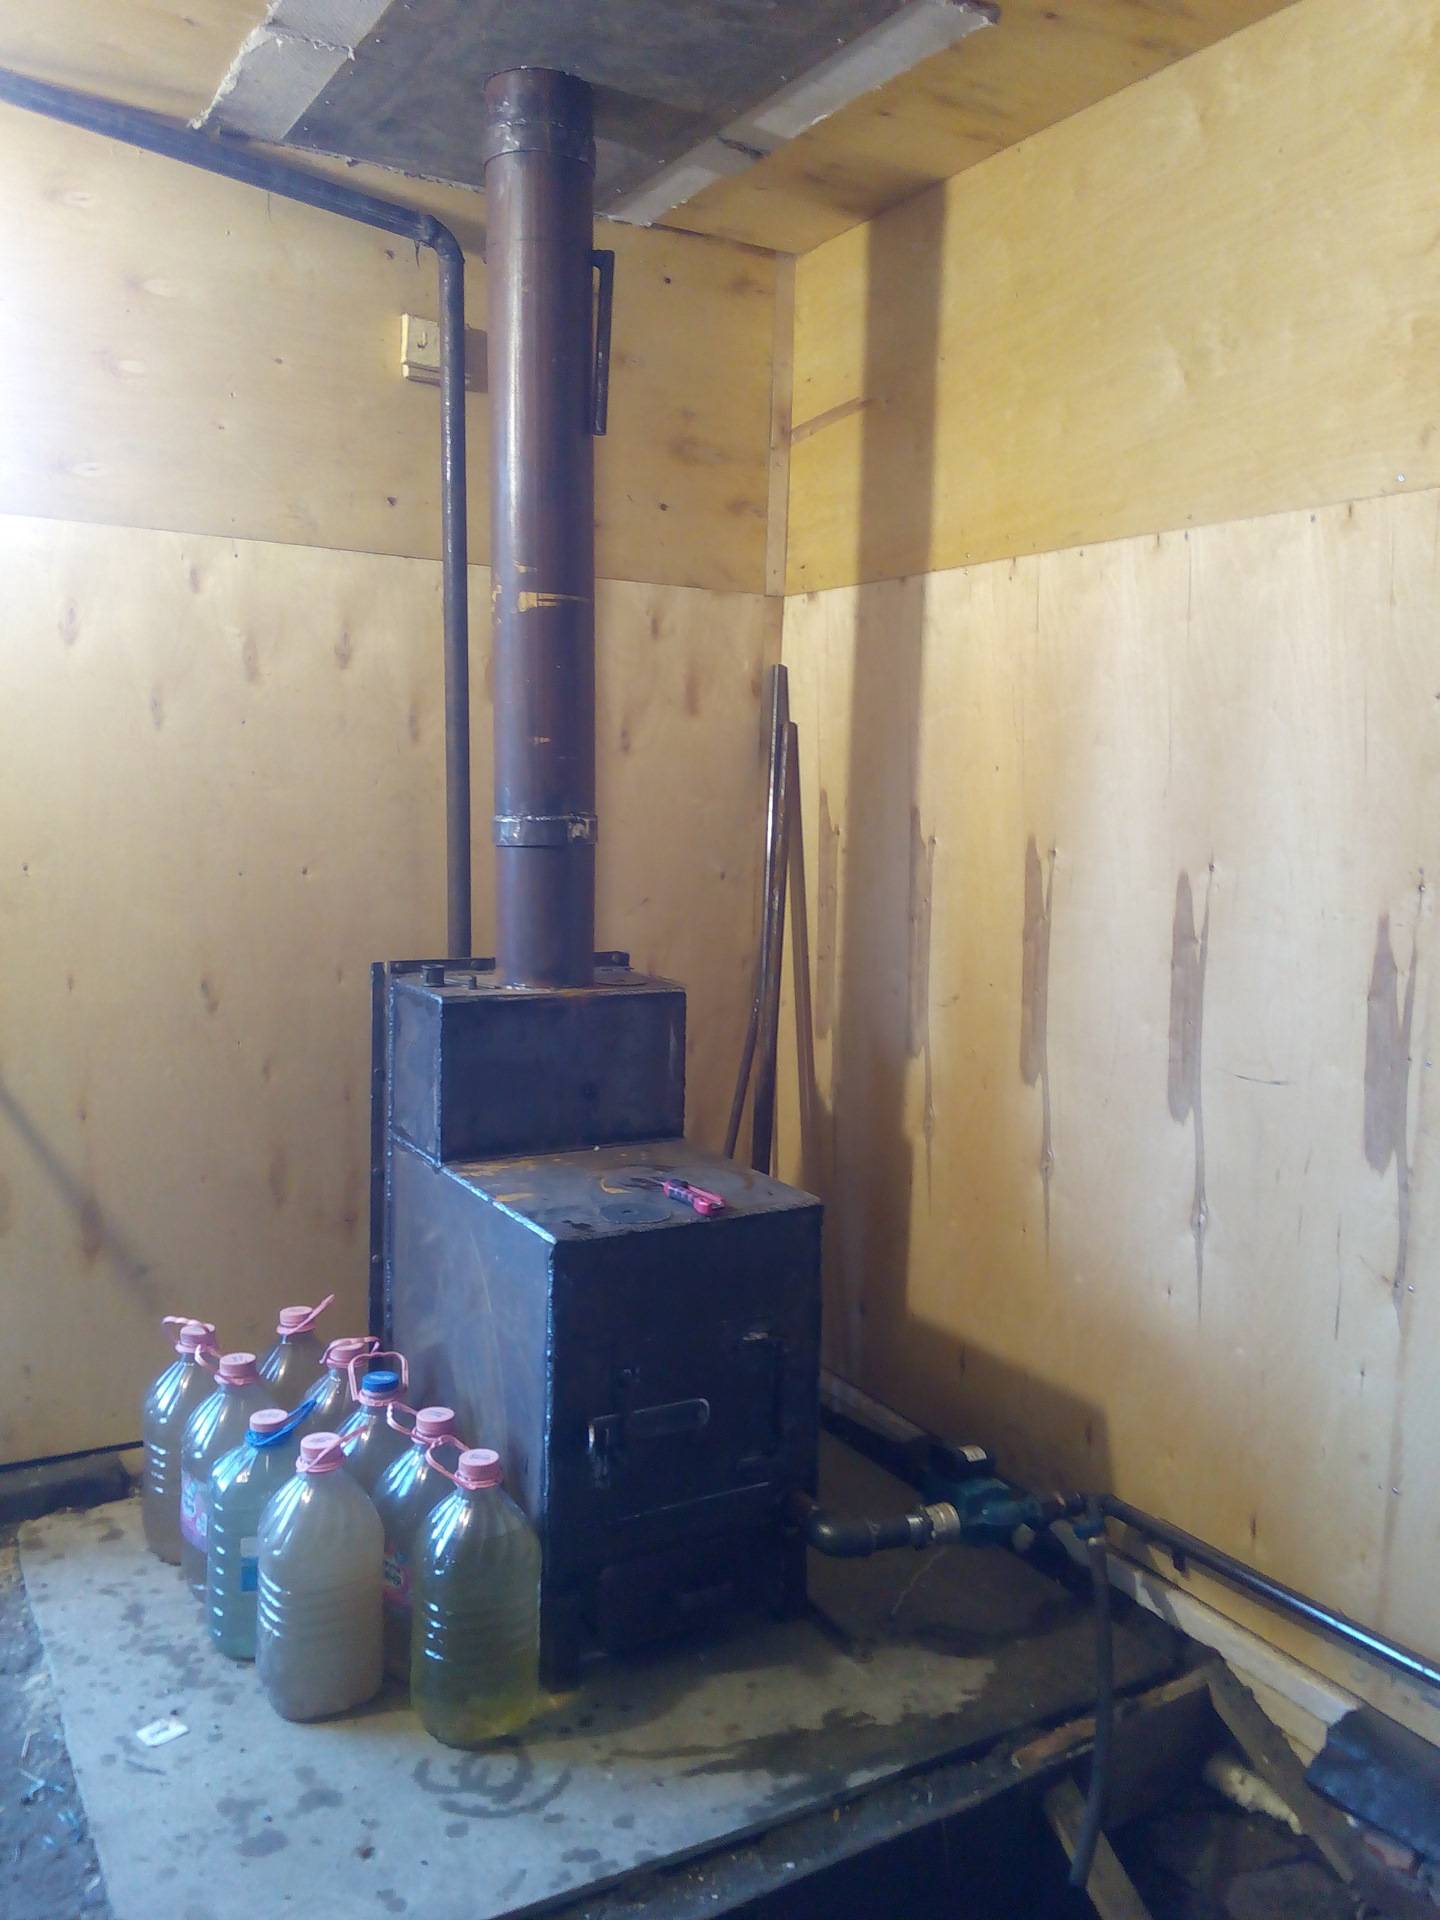
The operation of the furnace is based on the combustion of engine oil vapor in a closed container. The product is not just the cheapest, but junk. Most often, used oil and its disposal is a headache for service stations, garage owners. After all, it is absolutely impossible to pour mining into the ground, domestic sewage. And here "harmful" oil is poured into the stove, and serves for the benefit of man.
The design of the most common modification, made of metal, consists of cylindrical tanks, lower and upper, a short transitional compartment and a chimney. It's easier and harder to imagine. First, the fuel is heated in the first tank: the oil boils, begins to evaporate, the gaseous product passes into the next compartment (short pipe).Here, oil vapors mix with oxygen, ignite intensely and burn out completely in the last, upper tank. And from there, the exhaust gases are released into the atmosphere through the chimney.
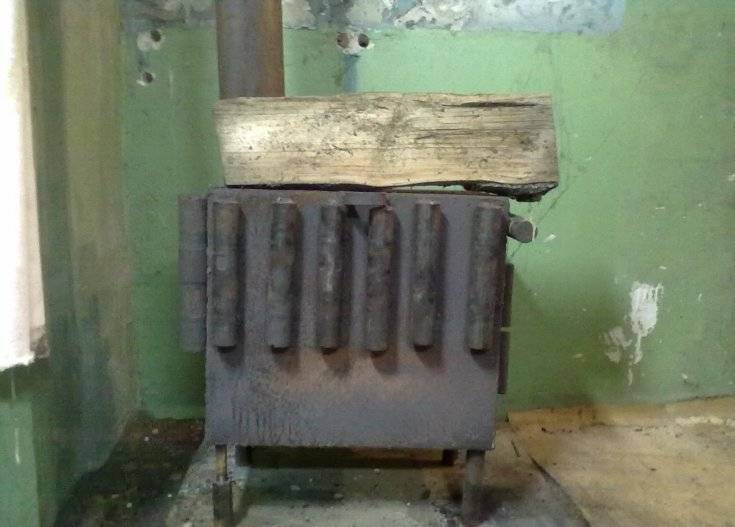
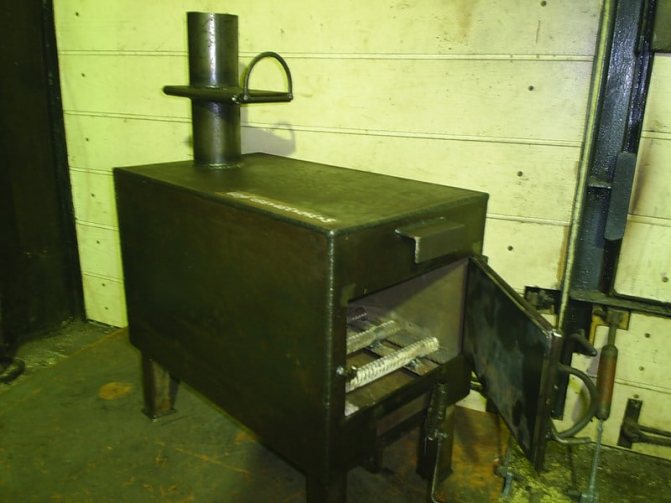
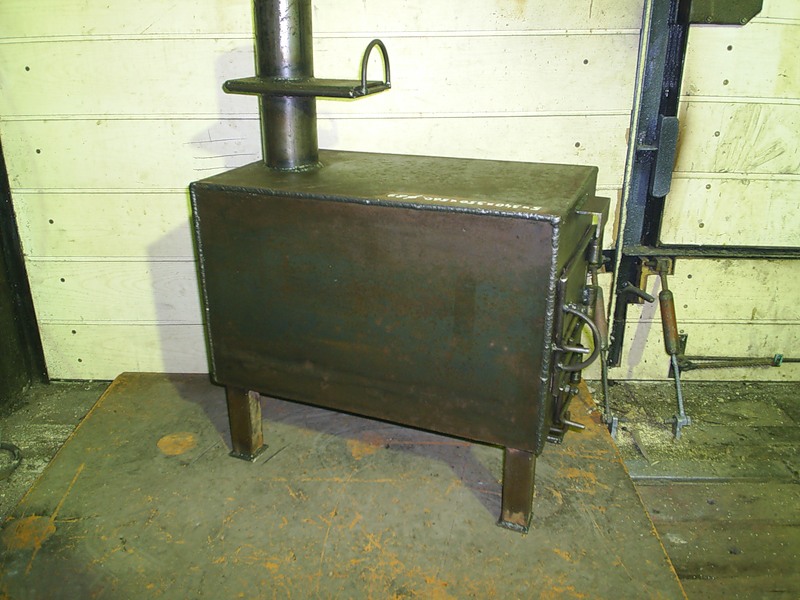
We make a "bourgeois" on our own
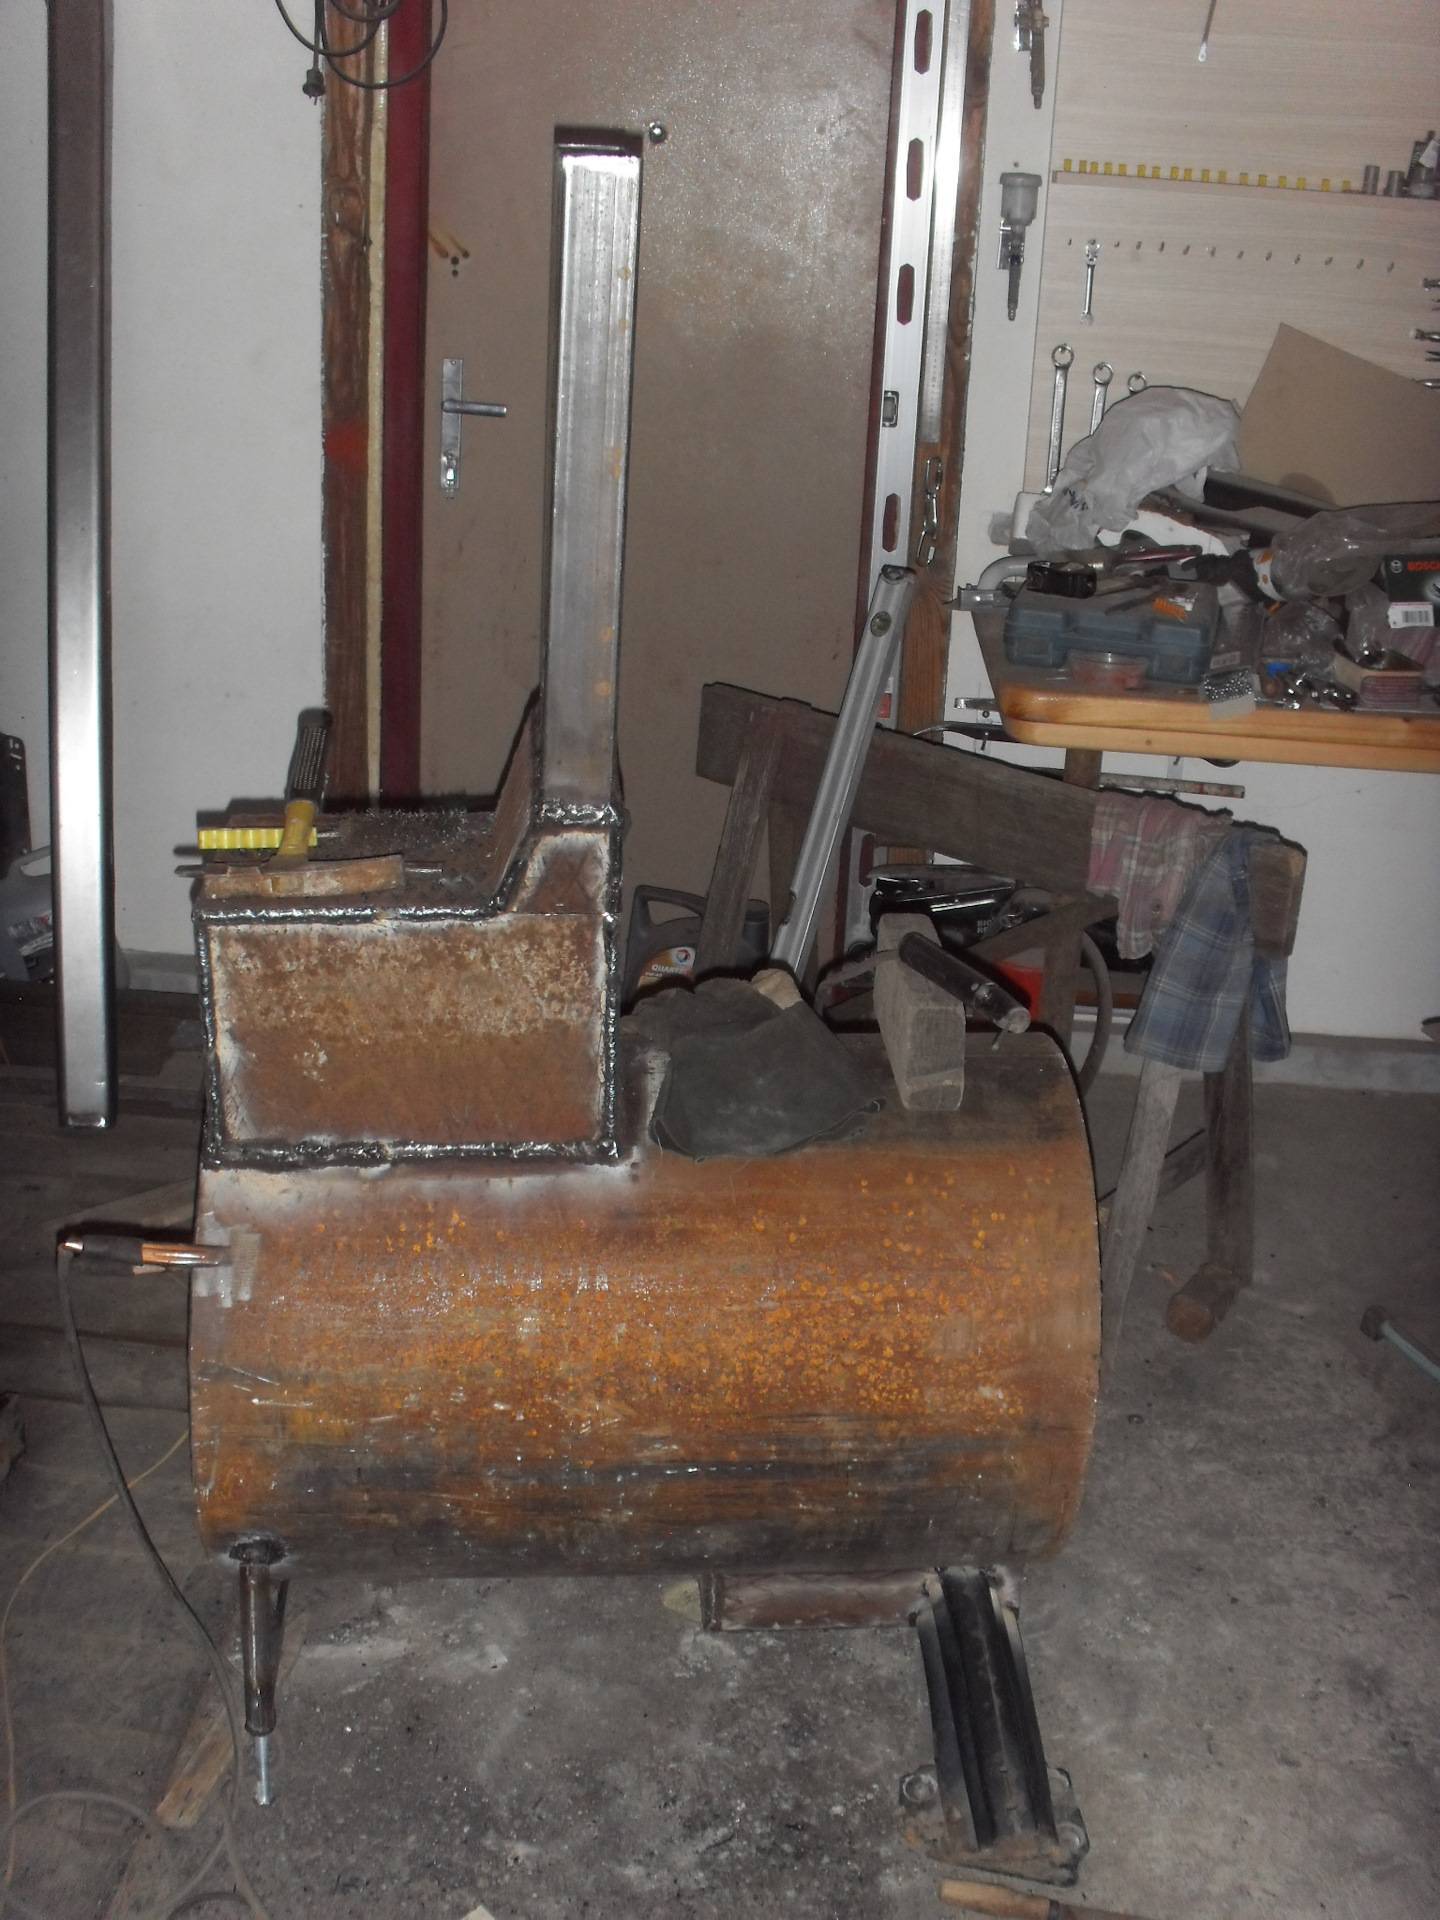
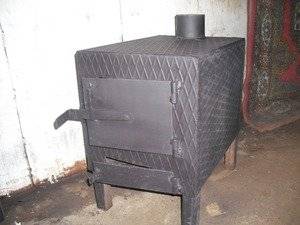
The wood burning stove is made of metal. Can be used:
- pipe with a cross section of 30 cm;
- metal sheets 5–8 mm thick;
- barrel with walls from 5 mm thick.

Wood burning metal stove
Sheets of metal should be cut with a grinder into the pieces you need in size and connected into a cubic structure using a welding unit. A barrel or pipe is used in the form in which they are, cutting them to the specified geometric parameters. On the back wall structure (or on its top), you need to mount a pipe to remove smoke. The diameter of the tubular product is taken about 12–16 cm. The thickness of its walls is 2–3 mm (otherwise the pipe will simply burn out).
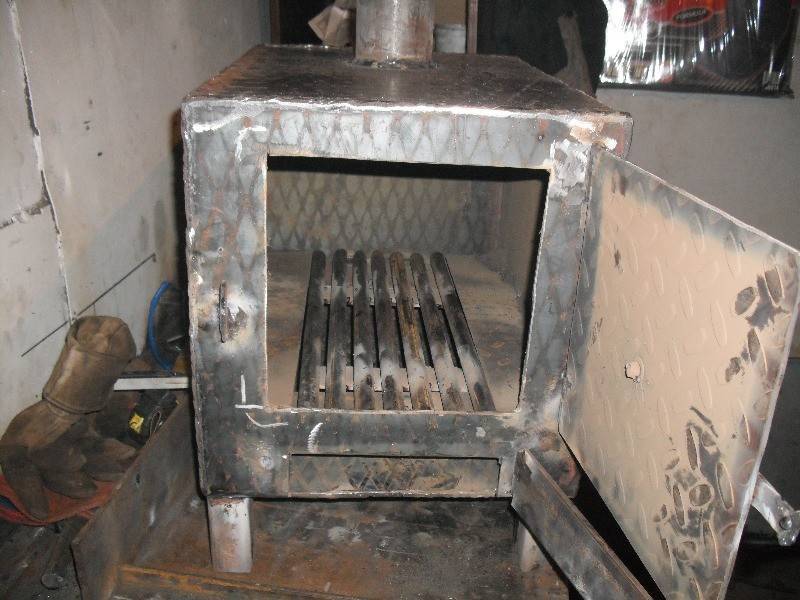
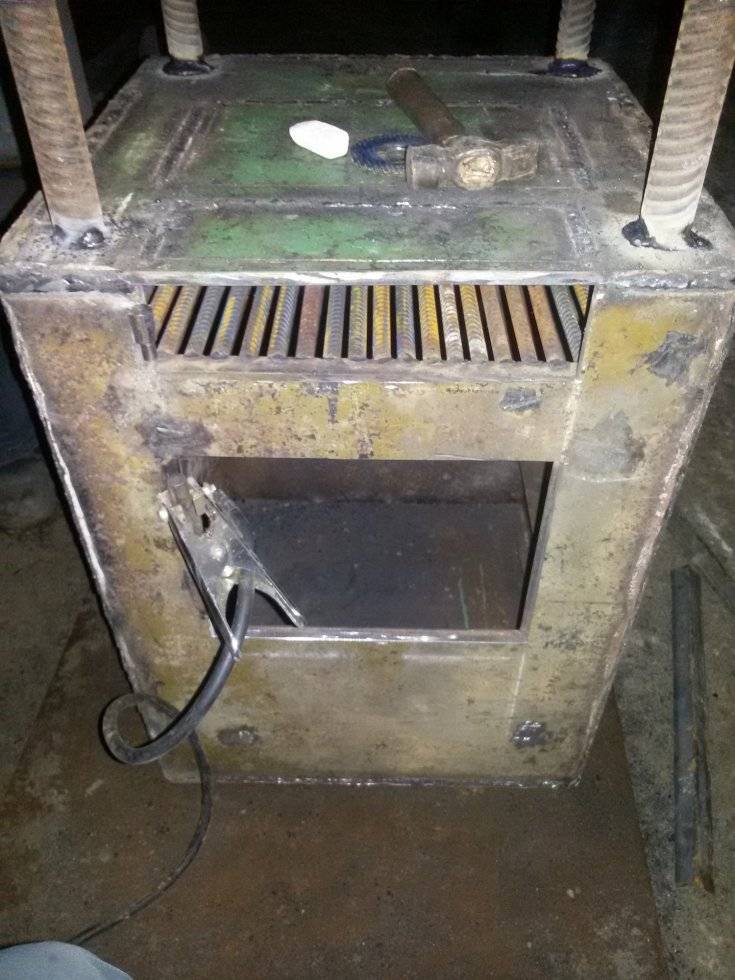
Then we cut out a section for the firebox in the structure, and under it we make a place where the ash from the burnt fuel will fall. These two sections are separated from each other by grates, which are made of a metal horizontal plate with several slots (the finished product can be bought on the market or in a hardware store).
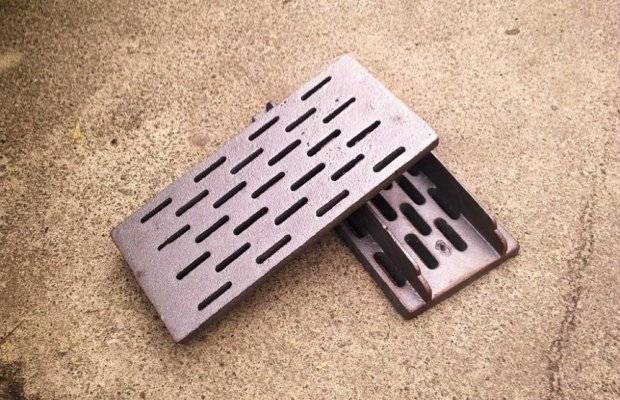
Grate for ash from burnt fuel
The ash pan itself is usually made in the form of a removable metal container. It is made of steel (sheet) 3 mm thick. Such a box is easy to remove as needed and free from ash. To improve the efficiency of the device, experts advise welding 4–5 mm steel plates to the sides (perpendicular to them) of a self-made structure.Due to this, the area of \u200b\u200bcontact of the stove with the surrounding air will increase, and the garage will heat up much faster.
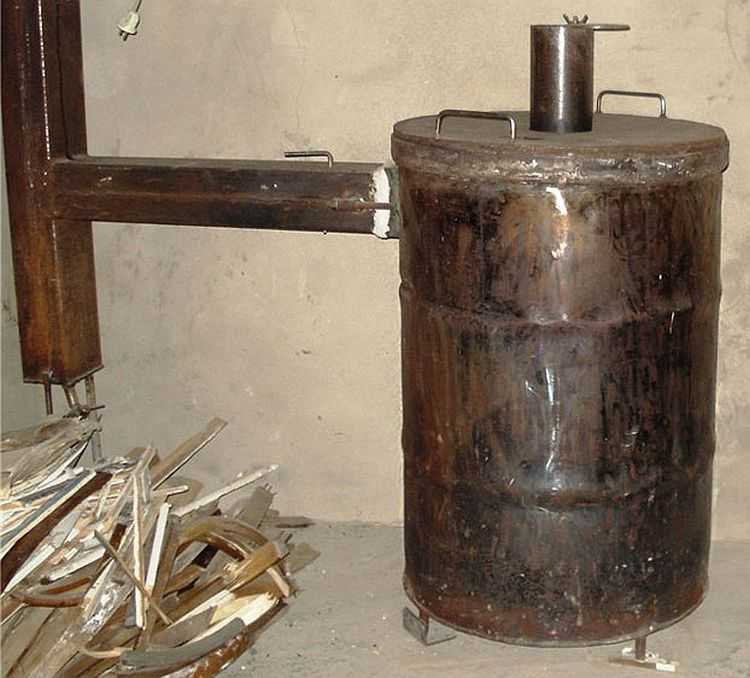
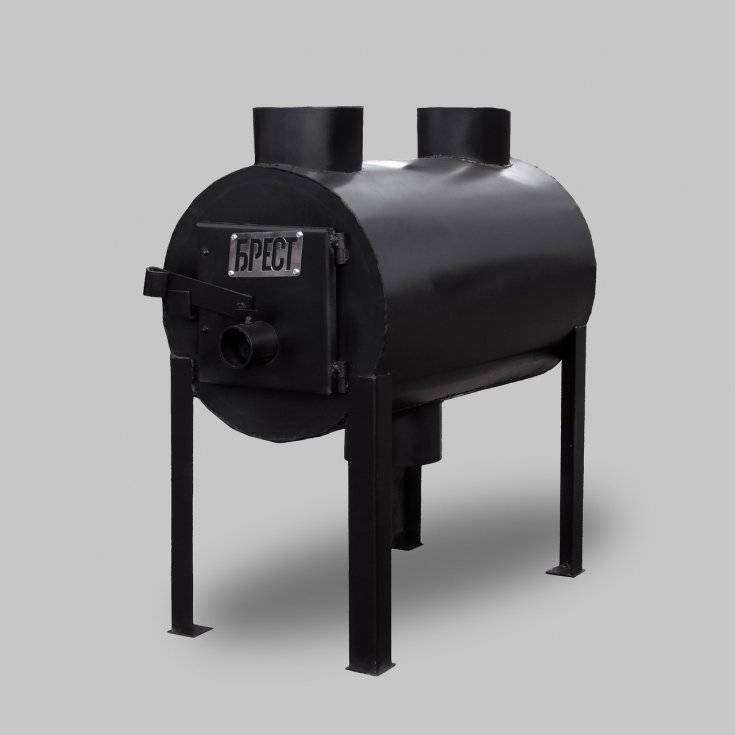
Long burning wood stove
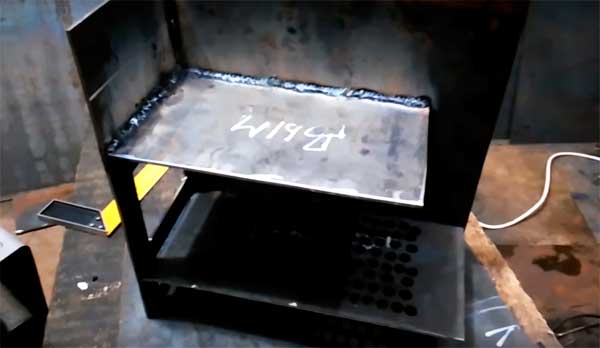
This is the most economical, efficient, but at the same time the most complex unit. The principle of its operation is based on the combustion of pyrolysis gases. They have a very high combustion energy and generate a large amount of heat. Pyrolysis occurs as a result of the slow decay of wood with limited access to oxygen. In this case, organic substances decompose into solid and gaseous. Solid smolder, and the gas rises into the upper chamber and ignites, releasing a large amount of energy.
The advantage of such a furnace is its very high efficiency. One armful of firewood is able to maintain the performance of the unit for 15 to 20 hours. In addition to firewood, any wood processing waste can be used in such a furnace: sawdust, bark, knots. As a more expensive option: fuel briquettes, pallets and other modern solid fuels.
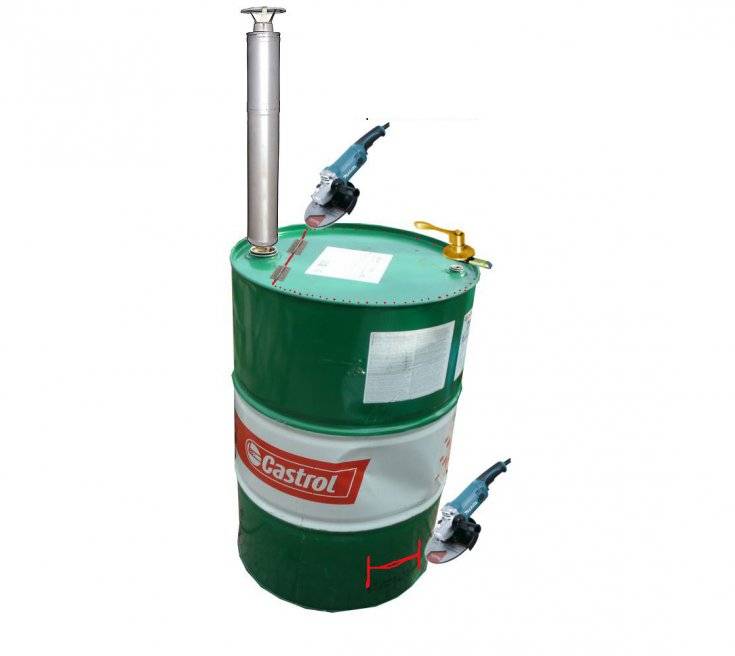
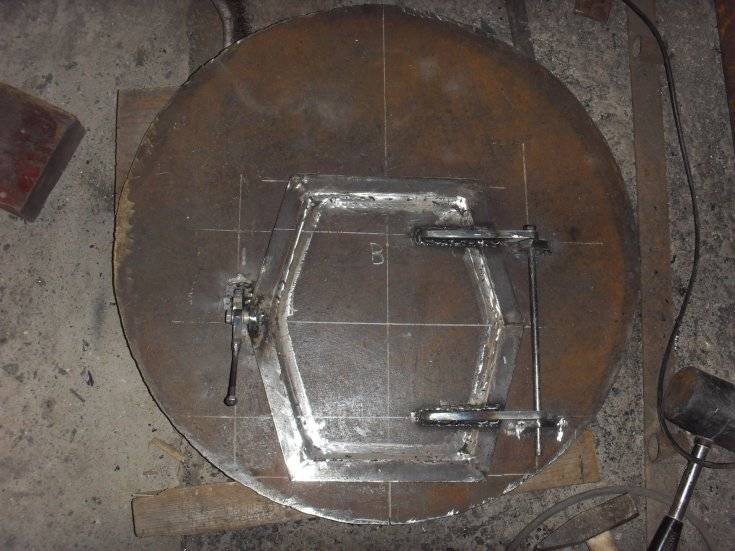
The main task in the manufacture long burning stoves is the creation of conditions in it that make it possible to separate pyrolysis and ignite them separately from firewood. Most often, a ready-made 200 liter metal barrel is taken for this. The top of the barrel is cut off and a hole is made in it, where a chimney with a diameter of at least 150 mm will enter. Another hole is cut with a diameter of 100 mm. There will be a pipe for air intake. Then they make a heavy piston. For this sheet metal cut out a circle slightly smaller in diameter than the barrel. A hole is cut in it for the air supply pipe and this pipe is welded. From below, a couple of pieces of a heavy channel are welded to the resulting piston.The piston together with the pipe is inserted from above into the barrel and the entire structure is covered with a lid so that the air pipe comes out into the hole prepared for it. They also make a damper to regulate the flow.
At the bottom of the barrel, holes are cut out for hatches for supplying firewood and an ash pan. They must close tightly to prevent air from entering there, since it must be supplied through a pipe in the piston. Install the entire structure on a concrete foundation or brickwork.
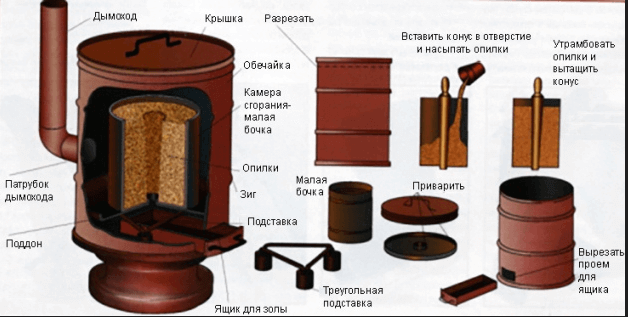
An improved version of the long-burning barrel furnace.
To fill the stove with firewood, the piston must be lifted by the pipe to the upper position and fixed there. To do this, you can come up with some fixers. Firewood is put into the firebox “to the eyeballs”. Then the piston is lowered, pressing the firewood with it. Produce ignition using any combustible liquid, except gasoline. When the firewood flares up well, oxygen access is limited. The released pyrolysis will enter the chamber above the piston and ignite there. They will burn, releasing a lot of heat, although the firewood will only smolder.
When choosing an option for installing a furnace in a garage, it is necessary to be guided by the principle of simplicity and economy. All proposed options meet these criteria and can be successfully accepted by motorists.


- How to overlay a metal furnace with a brick - instructions
- Do-it-yourself oven for working out
- Soapstone furnaces
- How to weld a stove for a bath from a pipe
Which oven to choose?
There is no definite answer here, it all depends on the goals and pastime in the garage.
Conditional classification:
- Come indoors from time to time for a few hours (usually on weekends).In this case, a potbelly stove or a mining oven will be optimal. An open flame from burning oil fumes in a small garage can be dangerous because there is a car nearby, a highly flammable liquid. Usually, a furnace for mining is used by service stations. So the potbelly stove is the best choice.
- The garage is everything. A person can be retired, use the premises for primary or secondary work, even keep small animals (rabbits, broilers). In this case, you need not be stingy and create a brick structure. In this case, a long-term effect is obtained at the lowest cost. A long-burning furnace is suitable for these purposes, its production is cheaper. But fire safety in this case will suffer somewhat.
Stove "dropper"
Such a stove is ideal for a small garage in which there is no heating and electricity. Such an effective design can be assembled with your own hands.
It has the following advantages:
- saves fuel;
- easily moved to a new place;
- easy to use;
- also used for cooking.
To assemble such a unit, you will need the following materials and elements:
- metal in sheets;
- copper pipe;
- pipe branch;
- rubber hose;
- gas cylinder;
- screws;
- burner.
When designing such a model, the following tools will be needed:
- welding machine;
- drill;
- clamp.
The work on the manufacture of this model will be safe if the structure is located in a place without drafts, away from flammable objects.
Solid fuel stoves
Portable stoves are popular at all times. Car owners are equipping their garage in this way of heating more and more often, since the device not only gives great heat, but also looks quite aesthetically pleasing.
Advantages of solid fuel stoves:
take up little space, which allows you to equip even a small garage with the help of such equipment;
easy to assemble and dismantle if necessary
For example, in the summer it can generally be removed from the garage to free up more space;
safe to use;
They have a high level of heat transfer, which allows you to heat a garage with a large area.
Important! The only significant disadvantage of such heating may be that during your absence there will be no one to throw firewood, which means that the stove will cease to perform its function. However, this problem is easily solved, since there are several options for acceptable fuel.
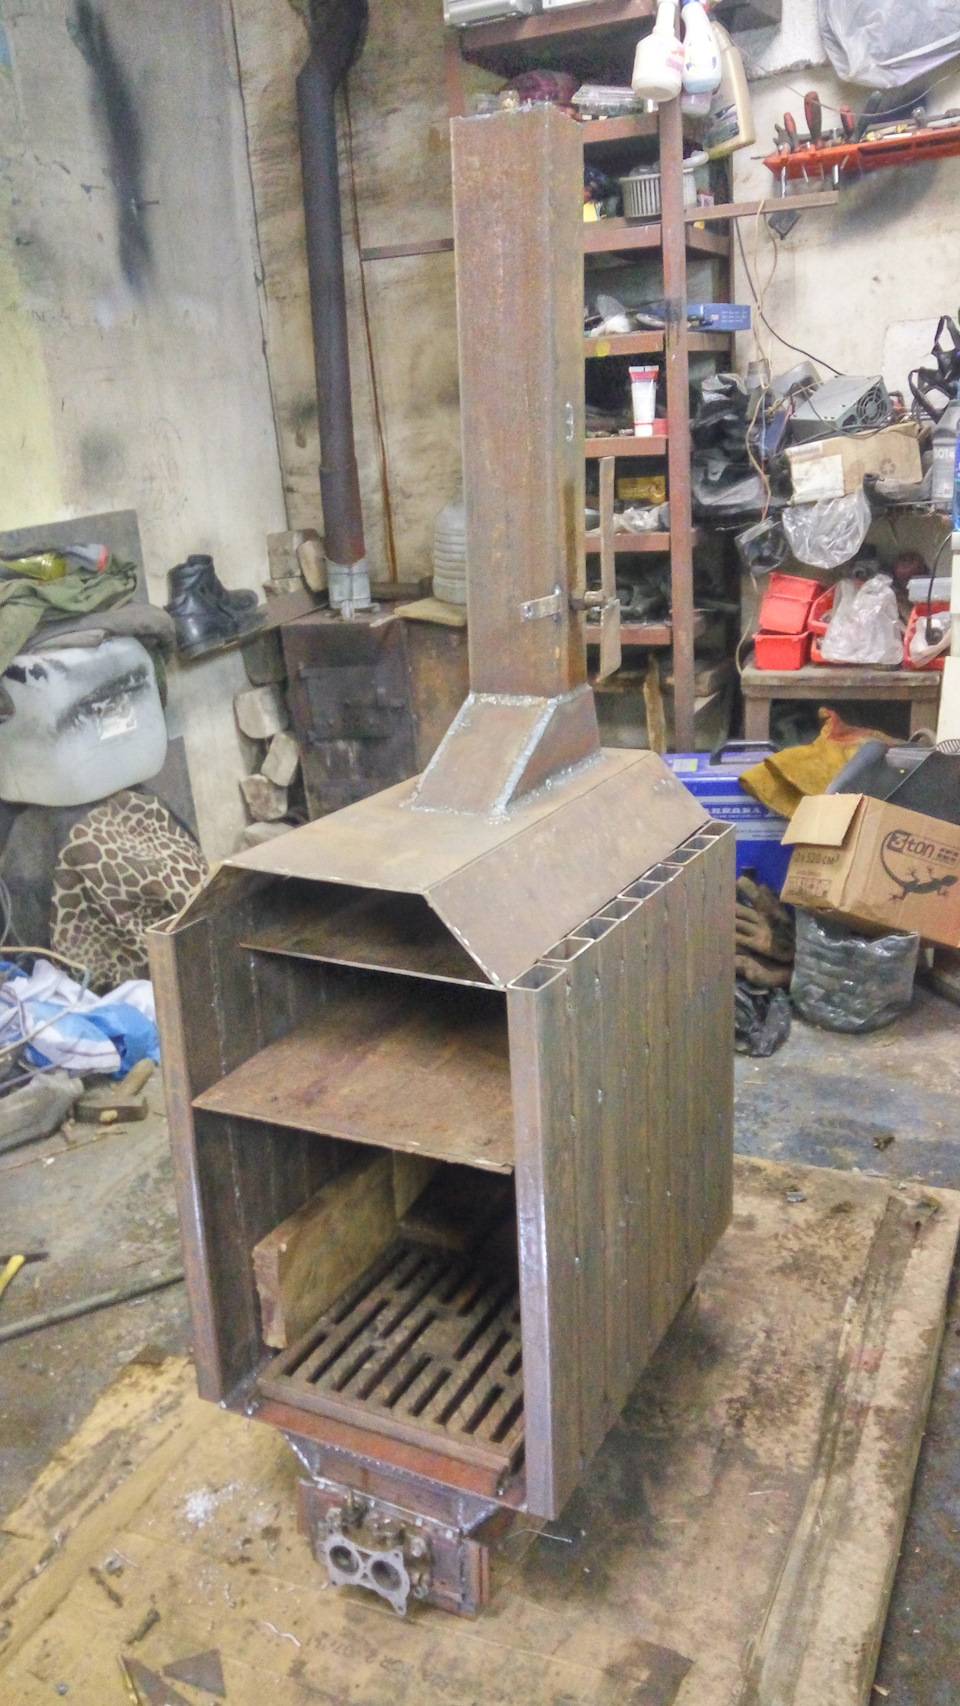
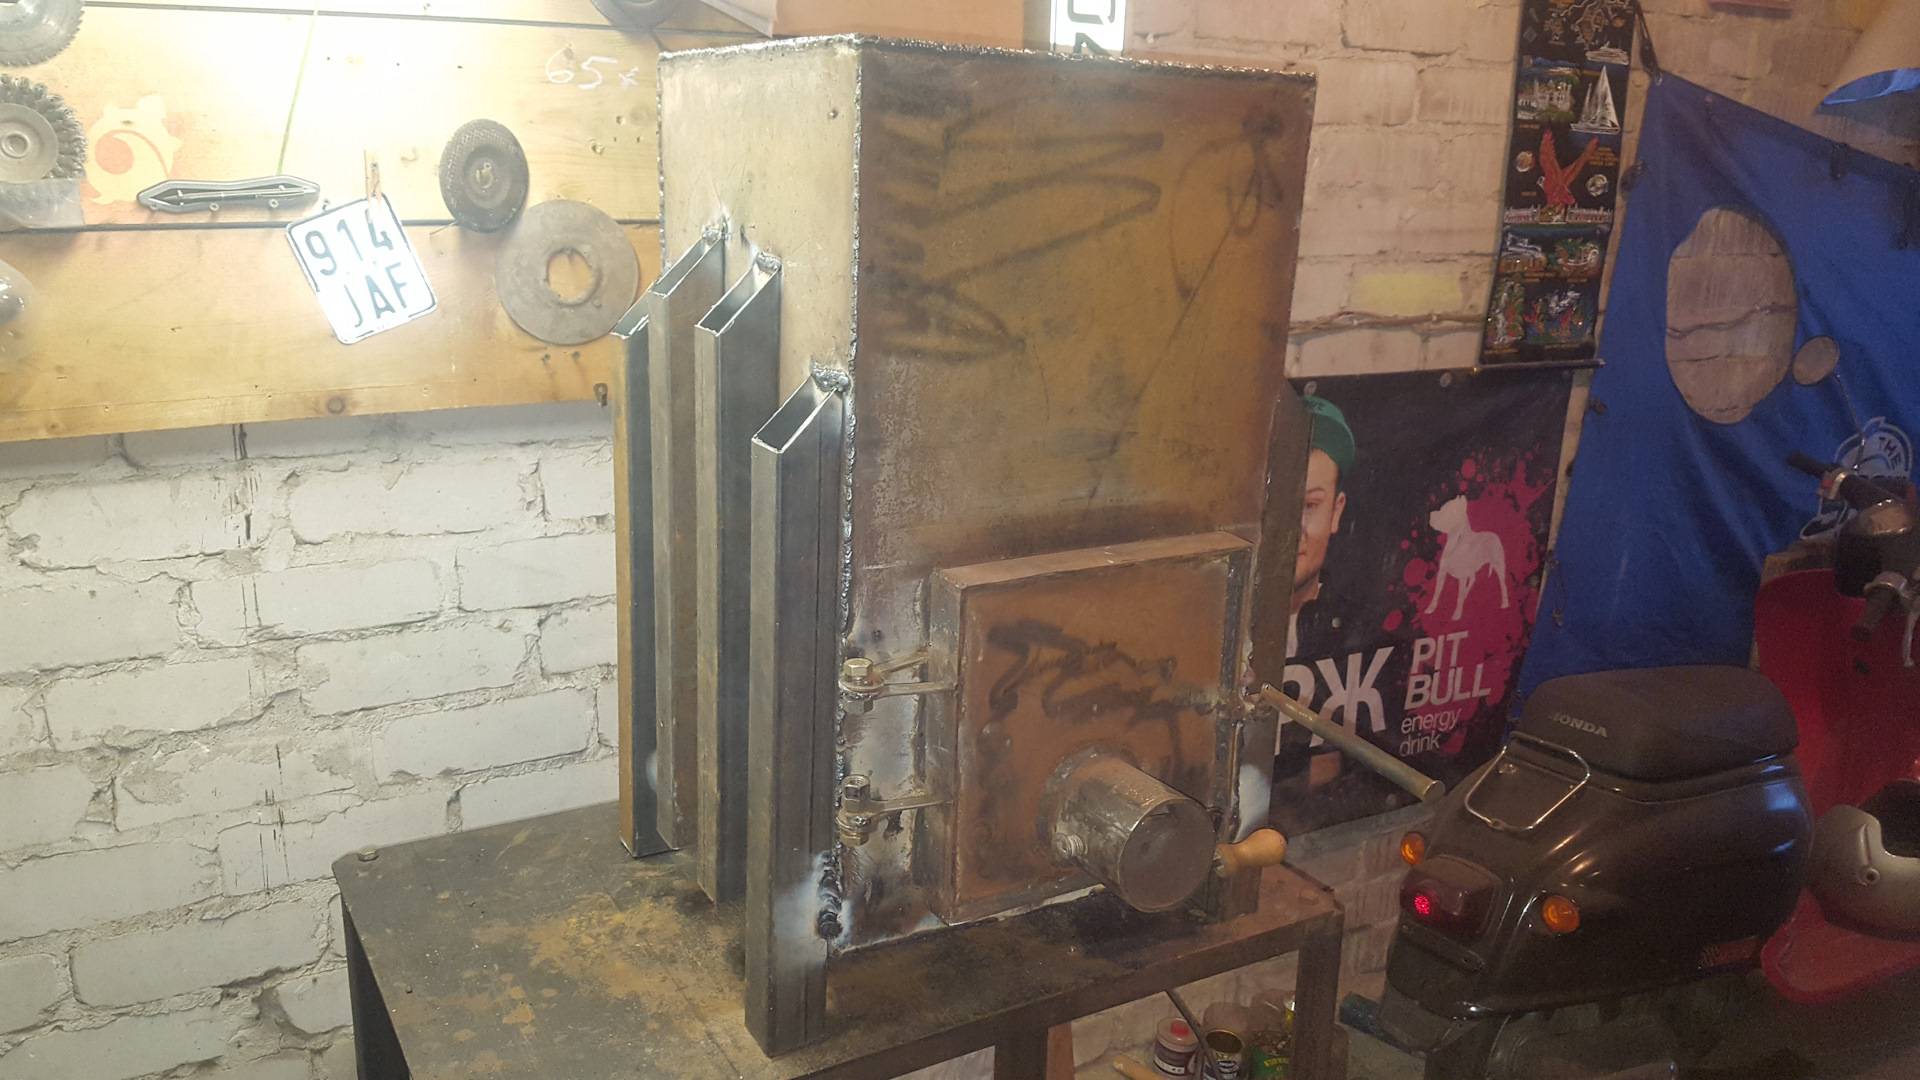
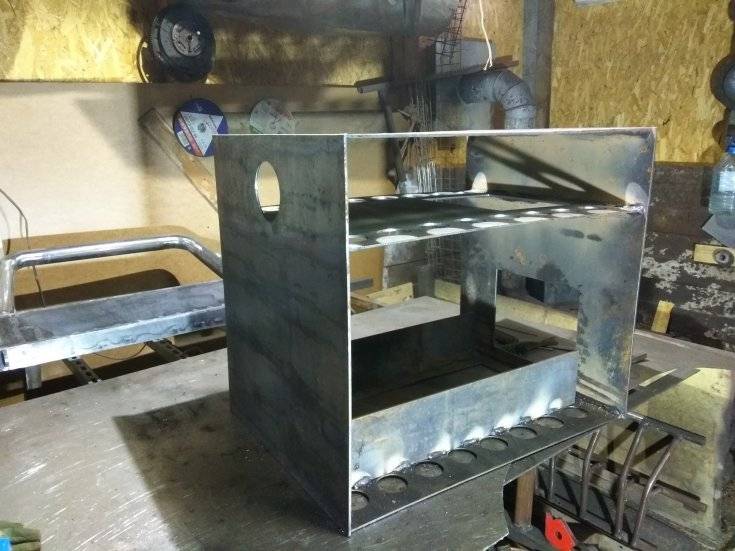
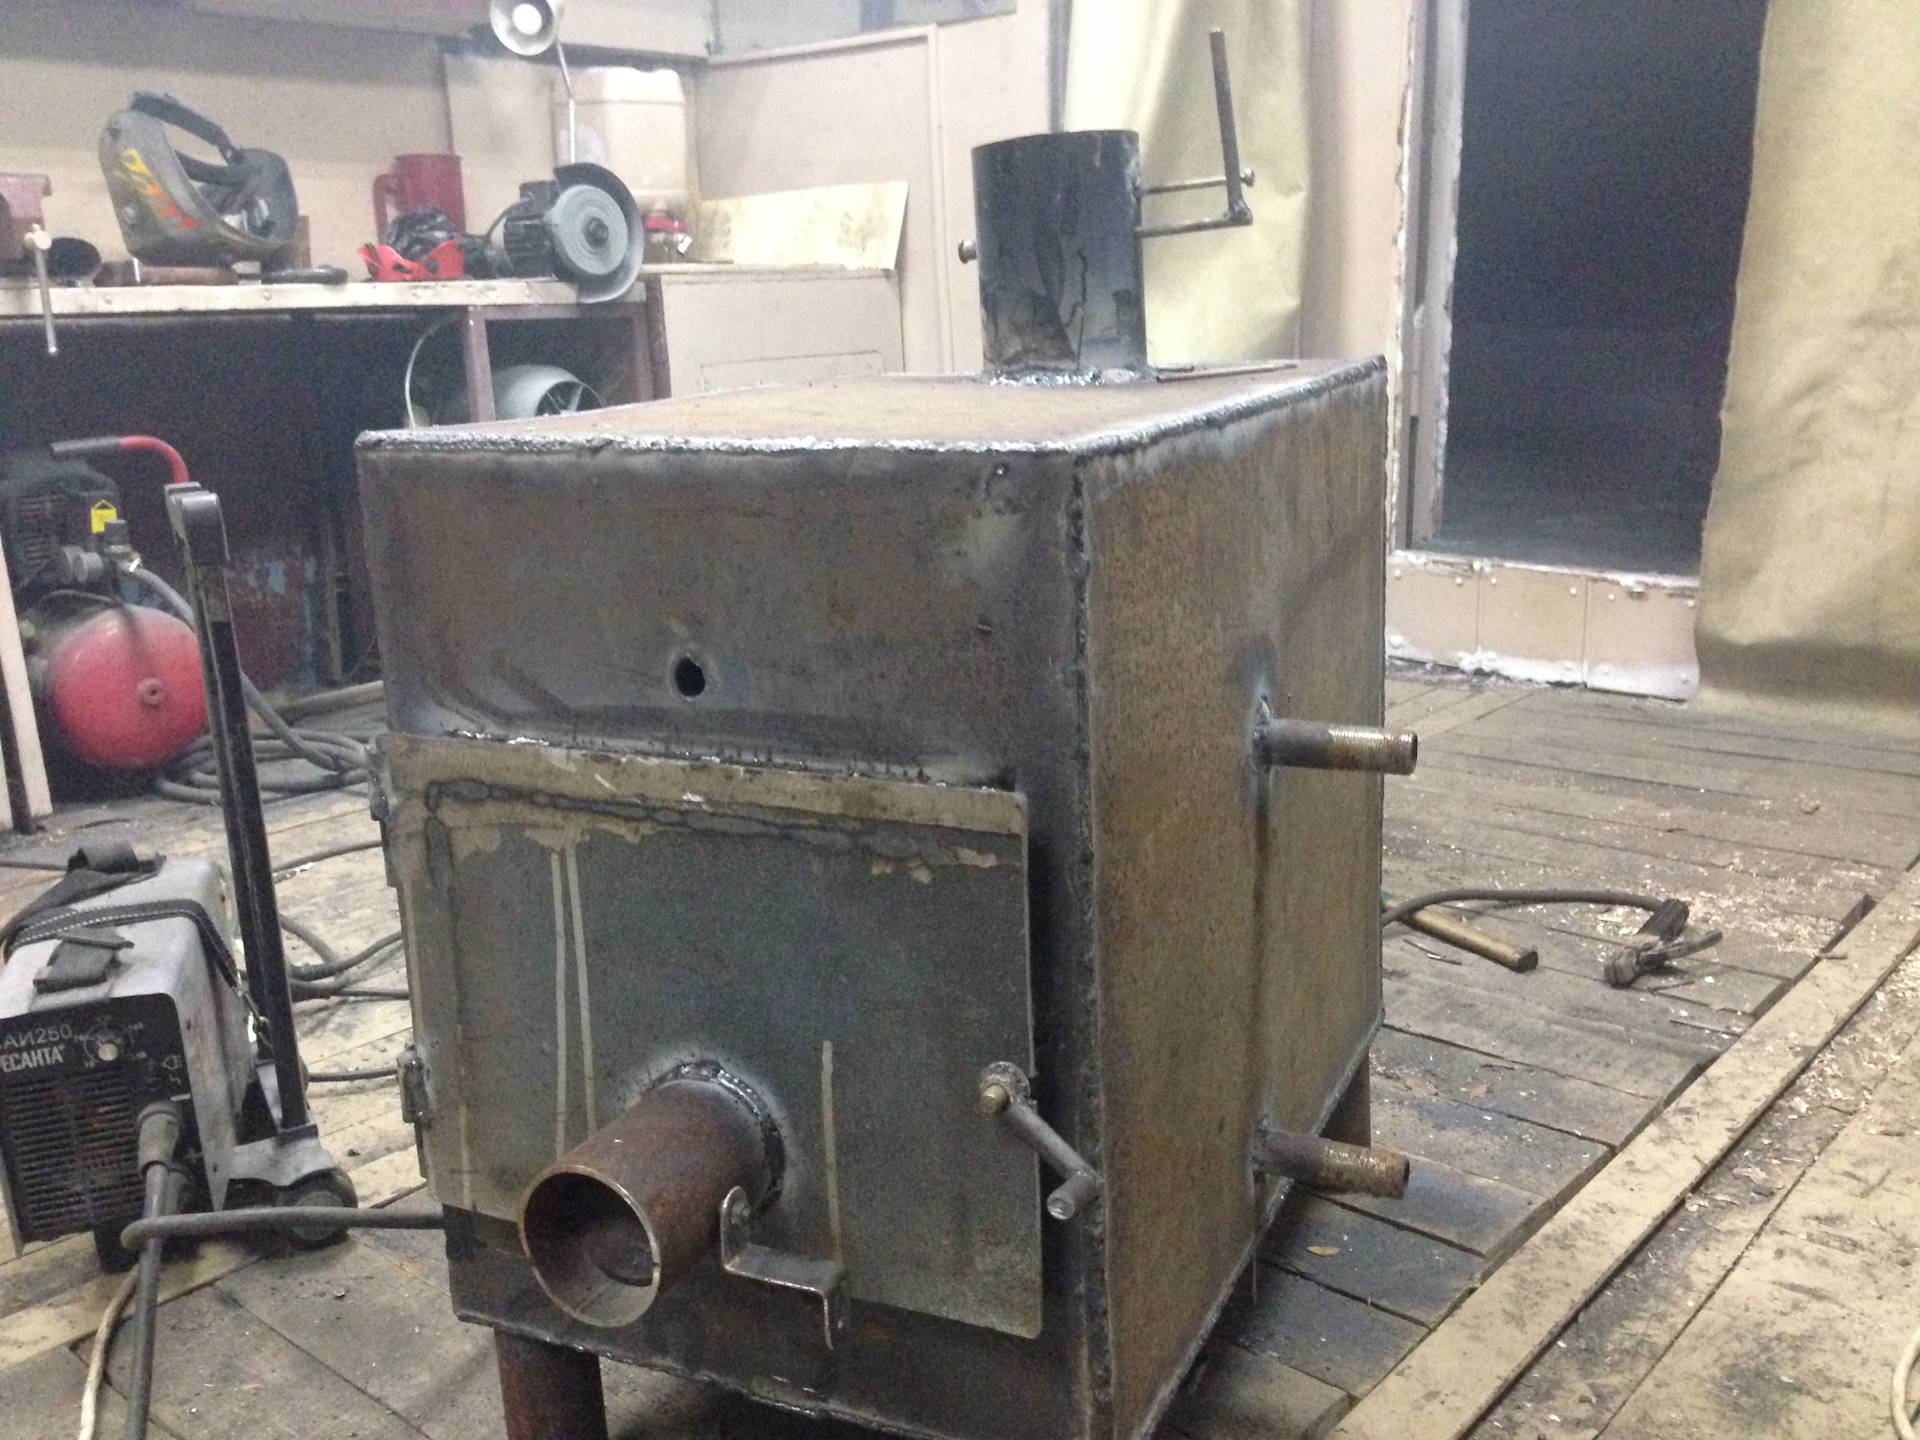
How to create a do-it-yourself oven
Self-made ovens and working on waste oil are the most popular units for garage heating. No special skills or knowledge are required to make the simplest model of such a furnace. The fuel for this device can be any oil (shale, machine, industrial, transmission), diesel and heating oil, waste paint and varnish production. All this can give heat transfer, which is similar to an electric heater.
The whole furnace consists of two containers, which are interconnected by a vertical pipe with many holes. It is recommended to adhere to certain standards:
- General dimensions of the furnace - 70 * 50 * 35 cm;
- Make the cross section of the hood within 105 cm;
- The capacity of the containers is about 12 liters;
- Total weight - 30 kg;
- Fuel consumption should not exceed 1−1.5 l/hour.
To make such an oven, you need:
- Two metal containers;
- Steel pipe;
- Metal corner;
- Pipe branch;
- Galvanized or finished chimney.
Important tools:
- Bulgarian;
- Welding machine;
- measuring tool;
- Bolts or rivets, small tools.
Choosing a furnace: what requirements to follow
The most common source of heating for sheds and garages is the so-called. potbelly stove. It is compact, does not require expensive materials for its manufacture, and is easy to manufacture.


To make a potbelly stove, you must be able to work with a welding machine and have 6-18 mm sheets of steel or cast iron. For convenience, a potbelly stove is made from worn-out devices - iron boxes, gas cylinders, etc.
For reference. In addition to the potbelly stove, the garage can be heated with a brick stove assembled from bricks. This design is impractical due to its long-term heating and impressive dimensions.
In addition, under a brick stove, it is necessary to arrange a thick metal lining in advance so as not to destroy the floors with temperature.
The design for heating the garage should be selected based on the following provisions:
- The area to be heated;
- Regularity of use of the furnace;
- Allowable budget for the manufacture of autonomous heating.
Potbelly stoves are heated by burning wood or coal inside their chambers.
If the potbelly stove is finally chosen as a firebox, then for safety it should have 10-16 mm walls, and also be away from the wall, which is between the garage and the house.
Garage heating features
A capital garage with insulation is not available to every car owner. Most often, at the disposal of the owner of the vehicle is a metal structure, devoid of any insulation. Any thermal energy leaves such a structure almost instantly.
When solving the problem of heating a garage, you should not evaluate its need for heat based on a similar experience with a residential building. And it's not just the lack of insulation.
There is a so-called square-cube law, which states that when the dimensions of a geometric body decrease, the ratio of the surface area of this body to its volume increases.
For normal storage of the car in the garage, the temperature inside the box should not fall below +5º and rise above +18º during the presence of the owners and the performance of repair work. Requirements are regulated by SP 113.13330.2012
This affects the size of the heat loss of the object, therefore, to heat one cubic meter of a small room, for example, a garage, more heat is needed than when heating a large house.
If for a two-story building it may be enough and heater power 10 kW, then a much smaller garage will need a unit with a capacity of about 2-2.5 kW of thermal energy.
To maintain a very modest operating temperature at 16 ° C, a 1.8 kW stove is enough. If you need to maintain only the optimum temperature for storing the car in the parking lot - 8 ° C - a 1.2 kW unit is suitable.


It turns out that the fuel consumption for heating a unit volume of garage space can be twice as high as for a residential building.
To thoroughly warm the entire garage, its walls and floor, even more heat energy is needed, i.e. more powerful heater. But even with insulation, heat will leave the room too quickly.Therefore, it is recommended not to heat the entire garage, but only the so-called workspace.
 Efficient heating of the garage can be performed using the so-called "warm cap", formed in the process of naturally limited convection of warm air in the room
The idea is to concentrate warm air in the center of the room and around it in such a way that a layer of cold air remains between the walls and the ceiling. As a result, equipment and people will constantly be in a cloud of air at a comfortable temperature, and the consumption of thermal energy will be noticeably reduced.
Experts call this phenomenon a warm cap, it occurs due to naturally limited convection. An intense stream of heated air rises, but does not reach the ceiling a little, since its kinetic energy is extinguished by denser cold layers.
Further, the hot stream is distributed to the sides, slightly touching the walls or at a short distance from them. Almost the entire garage becomes warm; under the influence of convection processes, even the viewing hole warms up.
To achieve this effect, garage stoves of relatively low power are suitable, creating an intense, but not particularly dense flow of warm air.
 The natural convection of the air mass in the garage ensures the formation of a temperature favorable for work even in the inspection hole
An alternative garage heating option is to use various infrared heaters. For a garage with metal walls, such equipment is not particularly well suited. Infrared radiation is poorly reflected from metal surfaces, it penetrates through them, as a result, all the heat will simply go outside.
For a brick garage with half-brick walls, experts also do not recommend an infrared heater. This material does not transmit infrared waves, but does not reflect them. The brick absorbs this type of heat energy and releases it over time. Unfortunately, the process of accumulating energy and returning it takes too much time.
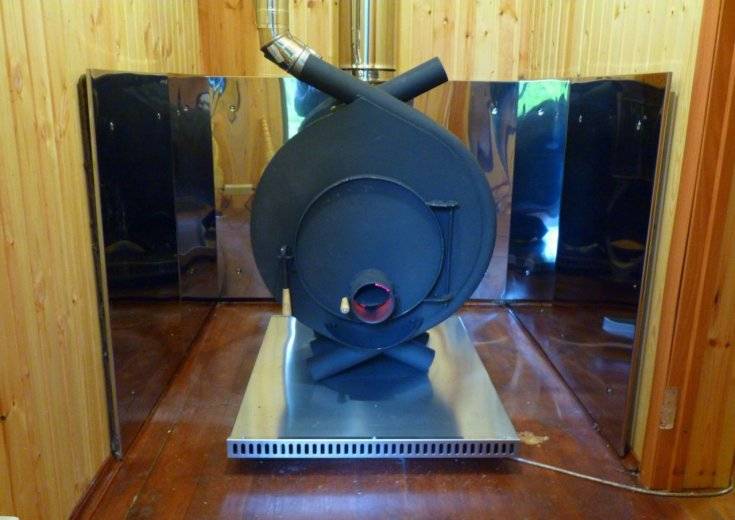
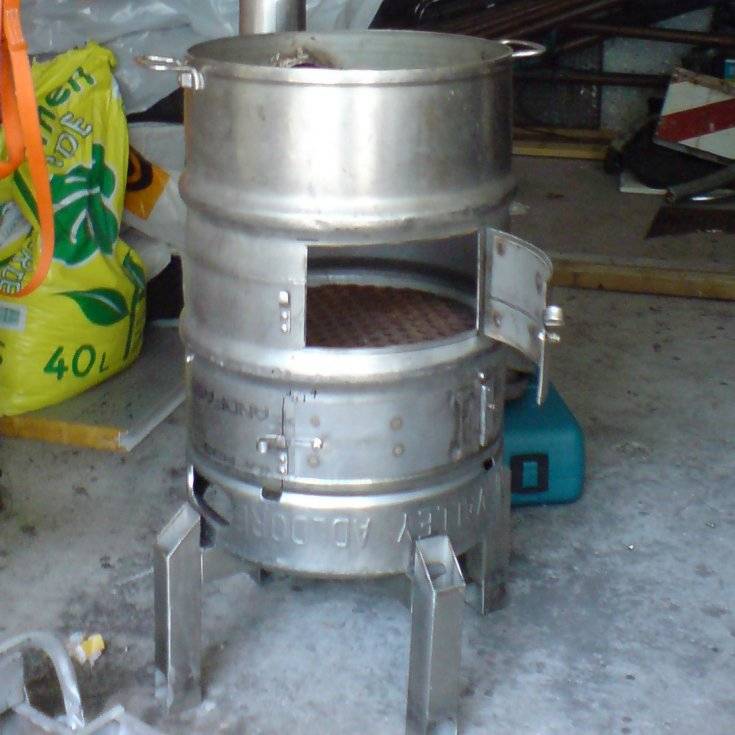
Potbelly stoves - proven and simple designs
Potbelly stoves - a hit of the 20s of the last century. Then these stoves competed with brick ones and stood everywhere, even in apartments. Later, with the advent of centralized heating, they lost their relevance, but are used in garages, summer cottages, for heating utility or outbuildings.
sheet metal
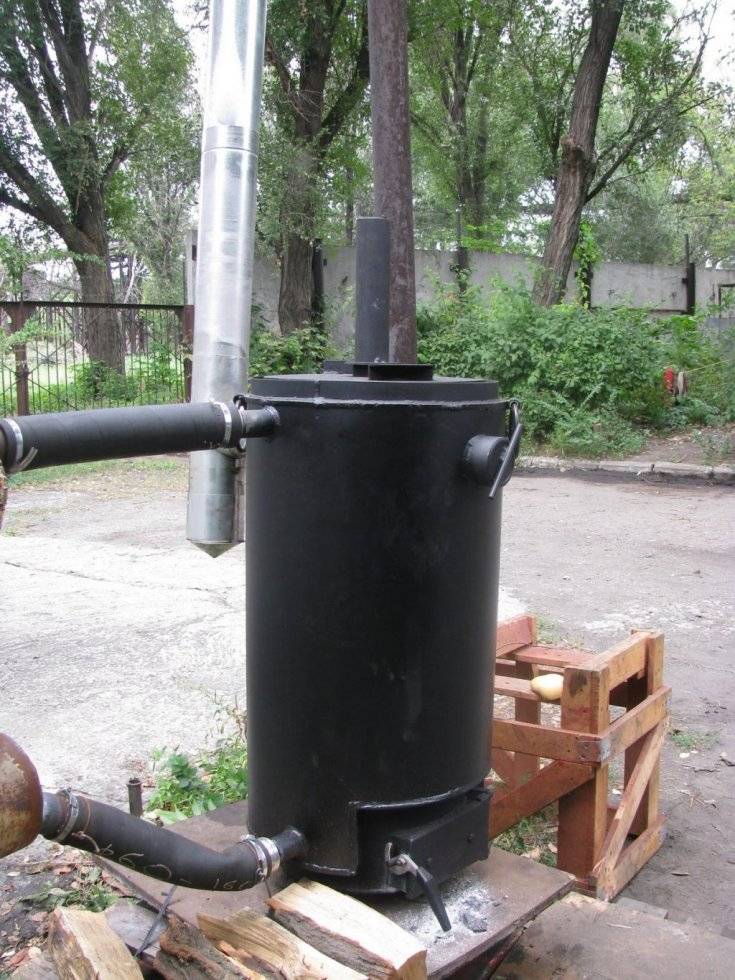
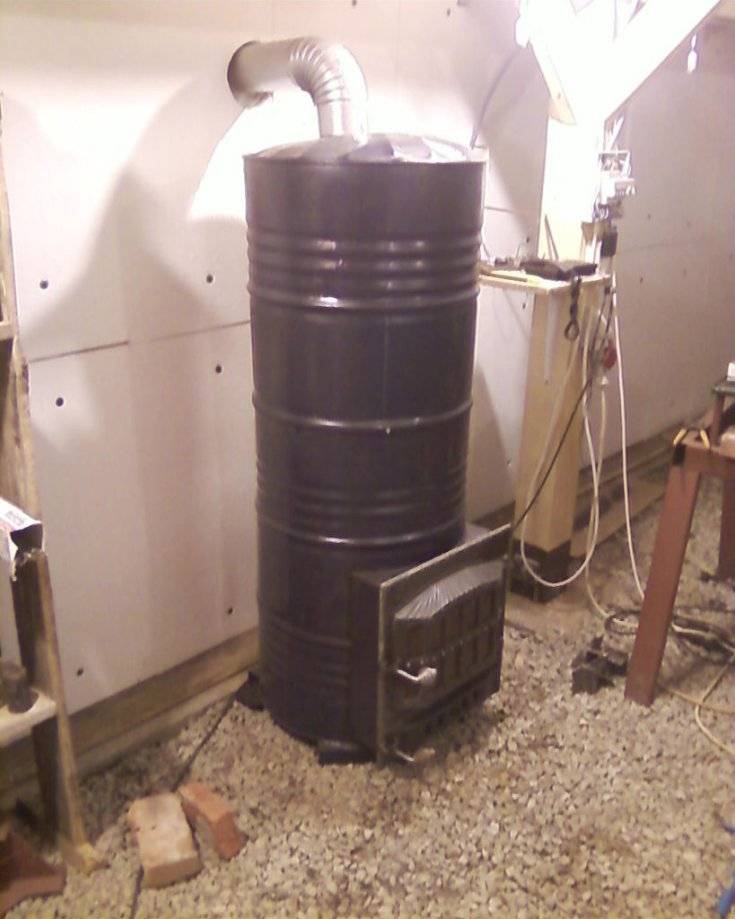
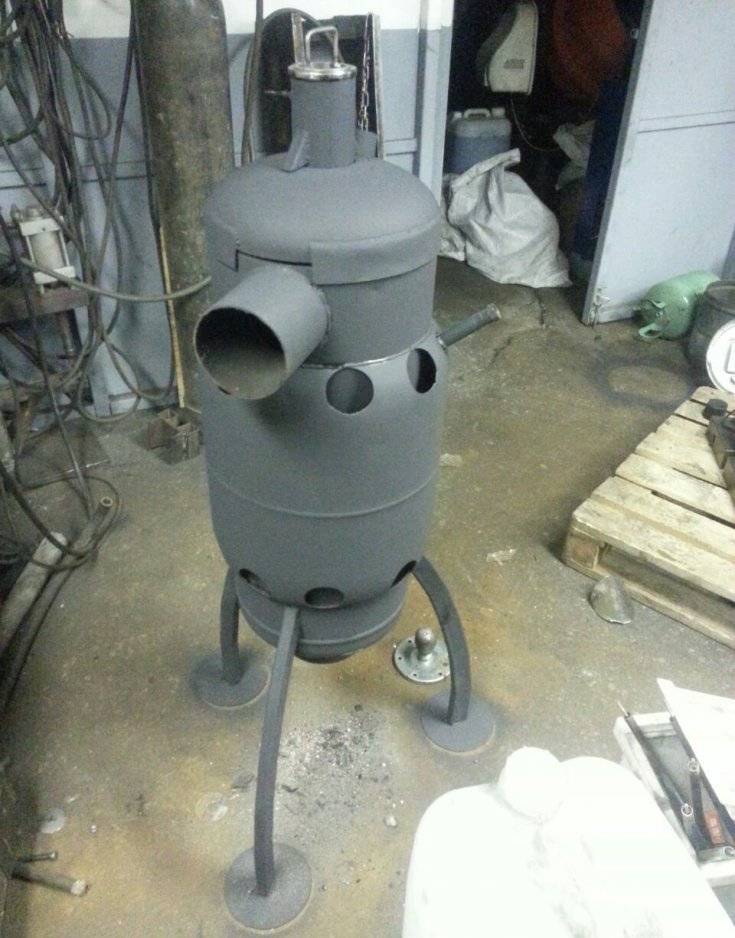
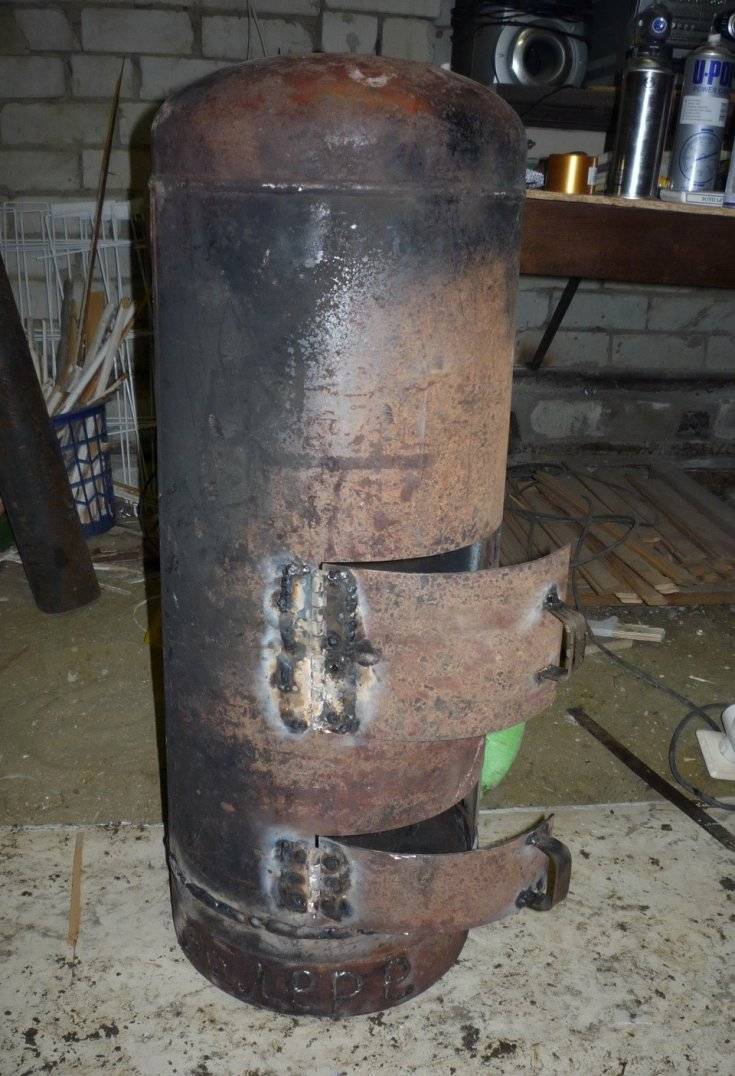
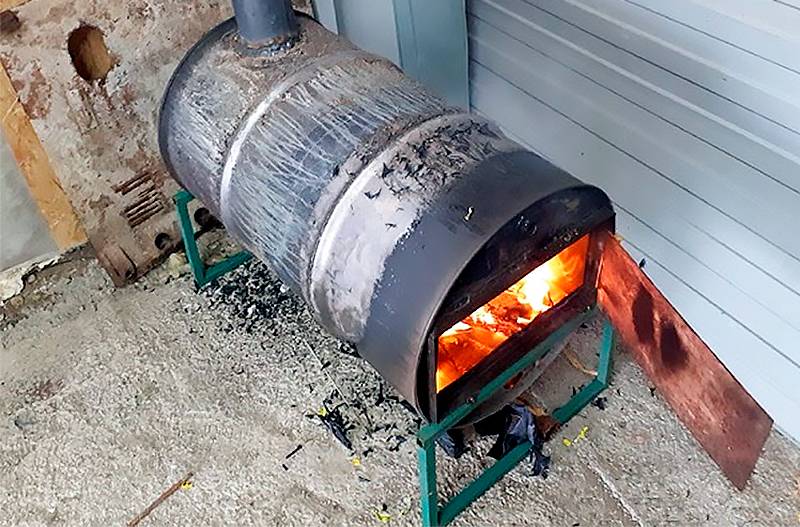
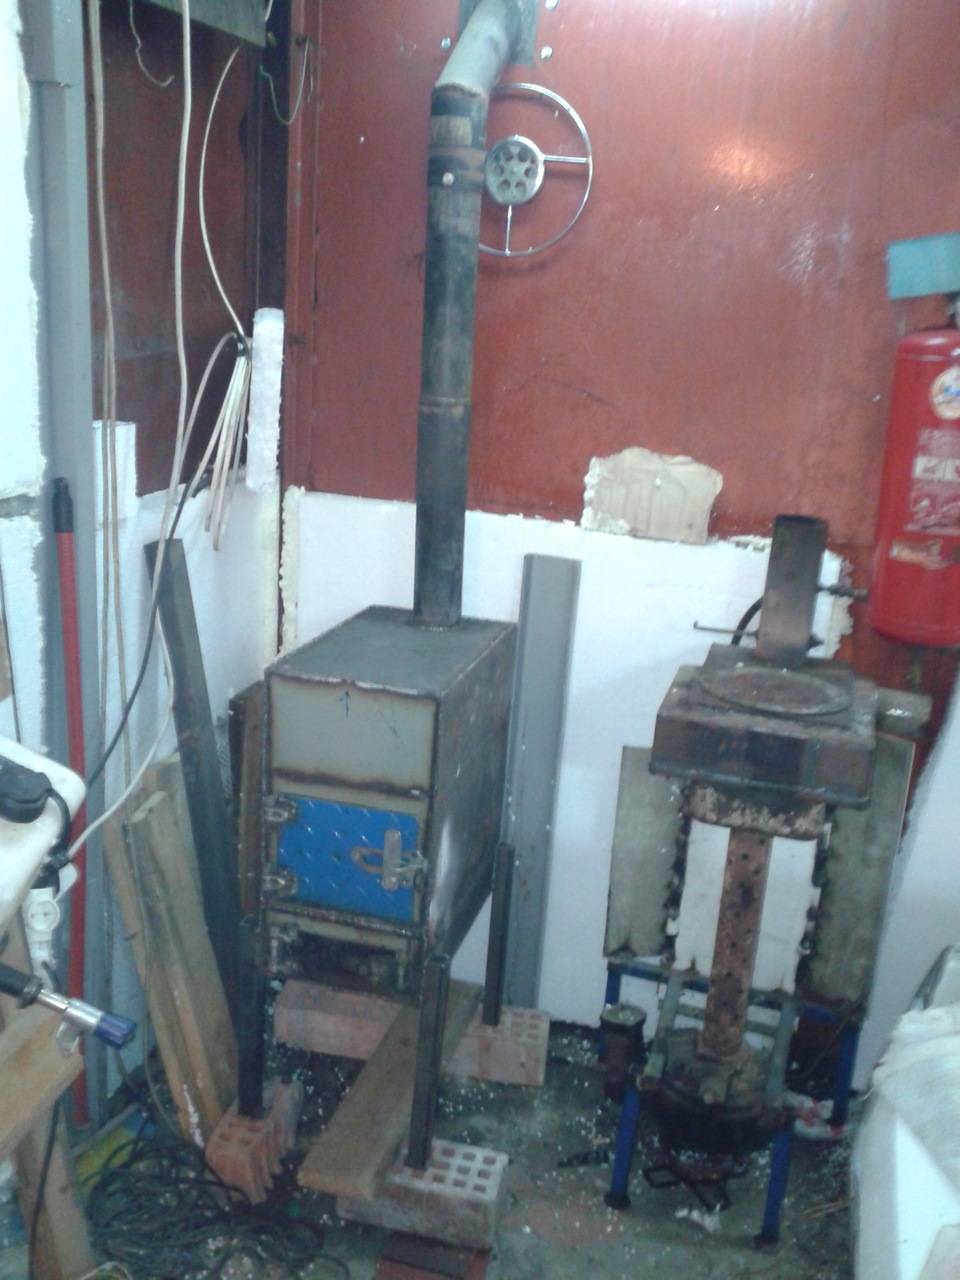
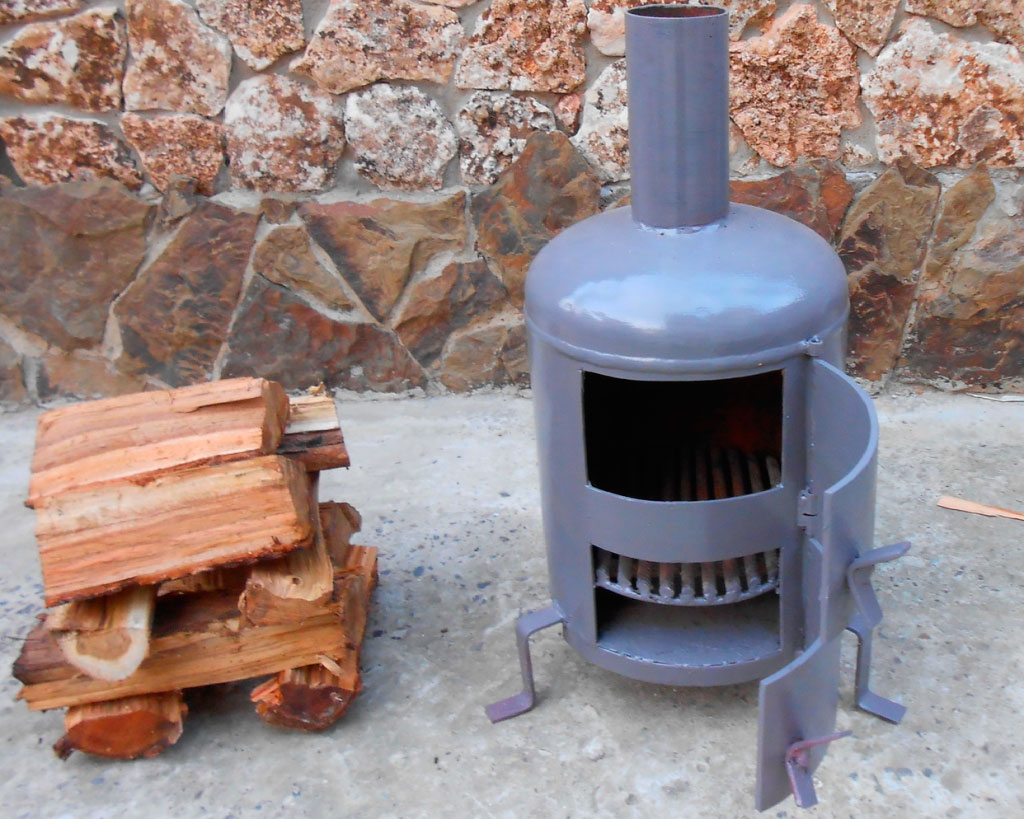
Potbelly stoves from a cylinder, barrel or pipe
The most suitable material for making a potbelly stove for a garage is propane tanks or a thick-walled pipe. Barrels are also suitable, but you need to look for a not very large volume and with a thick wall. In any case, the minimum wall thickness is 2-3 mm, the optimal one is 5 mm. Such a stove will serve for more than one year.
By design, they are vertical and horizontal. It is more convenient to heat a horizontal one with firewood - longer logs fit. It is easier to make it elongated upwards, but the firebox is small in size, you will have to cut firewood finely.
A potbelly stove for a garage can be made from a cylinder or a pipe with a thick wall
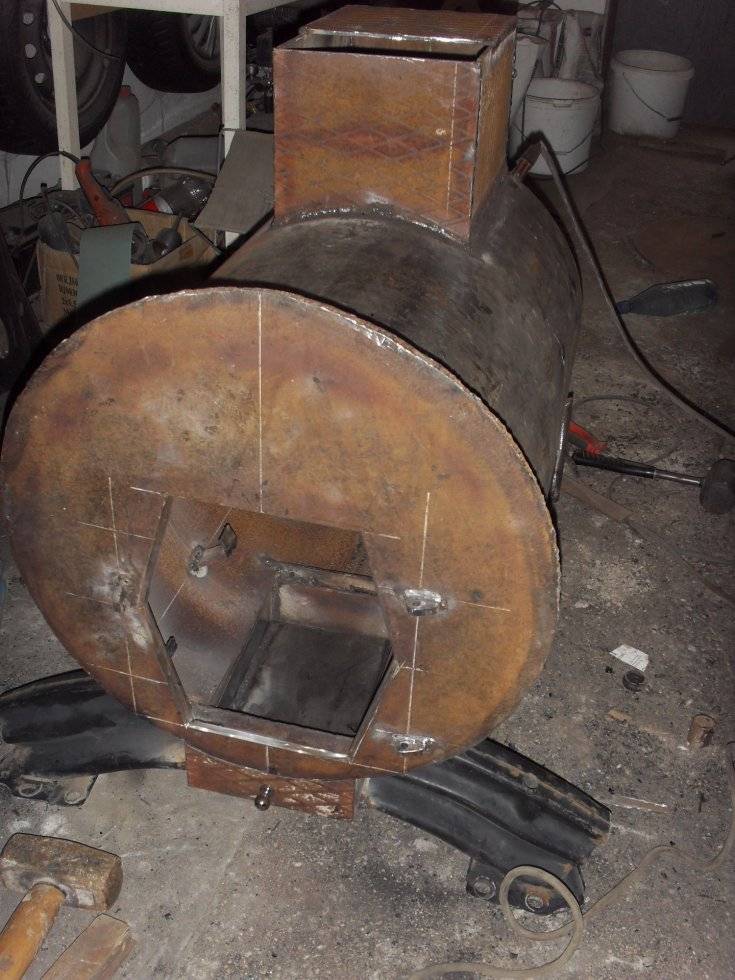
vertical
First, how to make a vertical garage oven from a cylinder or pipe. Divide the selected segment into two unequal parts. Below is the smaller to collect ash, above is the main for laying firewood. The following is the order of work:
- Cut out the doors. Small at the bottom, large at the top. We use the cut pieces as doors, so we don’t throw them away.
- We weld the grates in the chosen place. Usually it is steel reinforcement 12-16 mm thick cut into pieces of the desired length. The fitting step is about 2 cm.
How to make grates - We weld the bottom if it is not.
- We cut a hole in the lid for the chimney, weld a strip of metal about 7-10 cm high. It is better to make the outer diameter of the resulting pipe for standard chimneys. Then there will be no problems with the chimney device.
- The cover with the welded pipe is welded into place.
- By welding we fasten locks, hinges to the cut-out pieces-doors and put all this in place. As a rule, potbelly stoves are leaky, so seals can be omitted. But if desired, a strip of metal 1.5-2 cm wide can be welded around the perimeter of the doors. Its protruding part will close a small gap around the perimeter.
All in all, that's all. It remains to assemble the chimney and you can test a new stove for the garage.
Horizontal
If the body is horizontal, the ash drawer is usually welded on from below. It can be welded to your required dimensions. sheet steel or use a piece of channel of a suitable size. In the part of the body that will be directed downward, holes are made. It is better to cut something like a grate.
How to make a potbelly stove in the garage from a gas cylinder
Then in the upper part of the case we do chimney pipe. To do this, you can weld a cut piece from a pipe of a suitable diameter. After a piece of pipe is installed and the seam checked, the metal inside the ring is cut out.


Next, you can make the legs.Corner segments are best suited, to which small pieces of metal are attached from below to stand stably.
The next step is to install the doors. On the blower, you can cut a piece of metal, attach loops and constipation. Here without any problems. The gaps along the edges do not interfere - air for combustion will flow through them.
There will be no difficulties even if you make a metal door - welding the hinges is not a problem. Only here, in order to be able to at least slightly regulate combustion, the door needs to be made a little larger - so that the perimeter of the opening is closed.
How to install furnace casting on a metal stove
It is problematic to install furnace casting. Suddenly someone wants to have not a steel door, but a cast-iron one. Then it is necessary to weld a frame from a steel corner, attach a casting to it with bolts, and weld this entire structure to the body.
From two barrels
Everyone who used a potbelly stove knows that very hard radiation comes from its body. Often the walls are heated to a red glow. Then next to her is impossible. The problem is solved by an interesting design: two barrels of different diameters are inserted one into the other. The gaps between the walls are covered with pebbles, clay mixed with sand (calcined on fire, covered only when it has cooled down). The inner barrel acts as a firebox, and the outer one is only the body.
This stove will take longer to heat up. It will not immediately begin to give off heat, but it will be more comfortable in the garage and after the fuel burns out, it will warm the room for a couple more hours - giving off the heat accumulated in the tab.
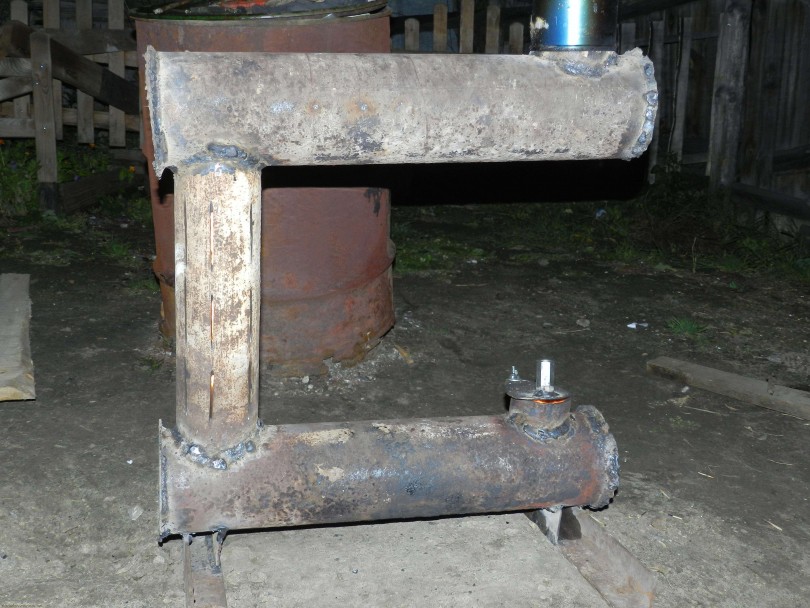
Rocket furnaces
These garage heating systems are two pipes - horizontal and vertical.
Both elements are welded to each other, but you can limit yourself to one curved pipe. The horizontal pipe is used for laying fuel, the vertical one is for removing smoke.
The rocket stove has several positive features:
- Simplicity of design;
- Possibility of use as a plate for heating food;
- Burning one bookmark for 5-6 hours.

However, if you are going to make a rocket furnace manually, you must also know its disadvantages:
- The need to use thick-walled metal in the manufacture (if the rocket oven will be used in the garage);
- Impossibility of combustion control;
- Strong incandescence of metal walls;
- Powerful fiery exhaust;
- Impossibility of installation in separate places.
Regarding the last point, it is worth noting that the rocket oven can be small. This design is easy to weld from channels, shaped pipes or rounded pipes.
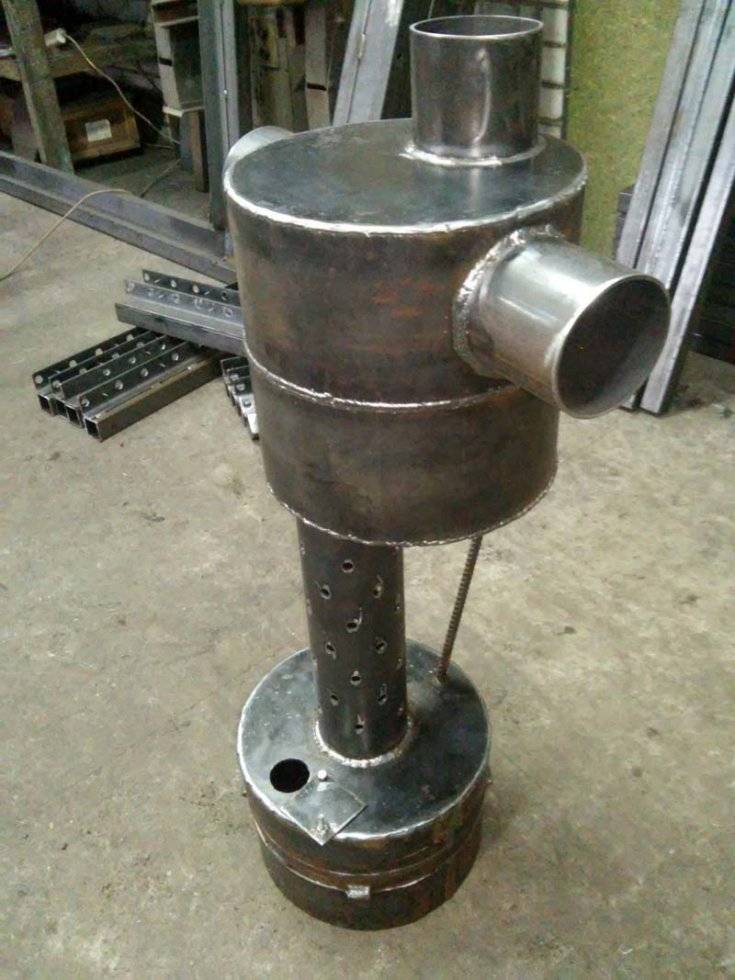
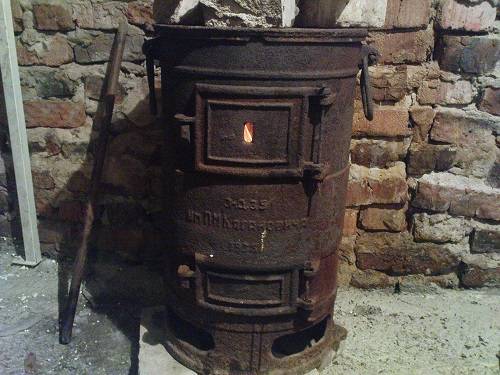
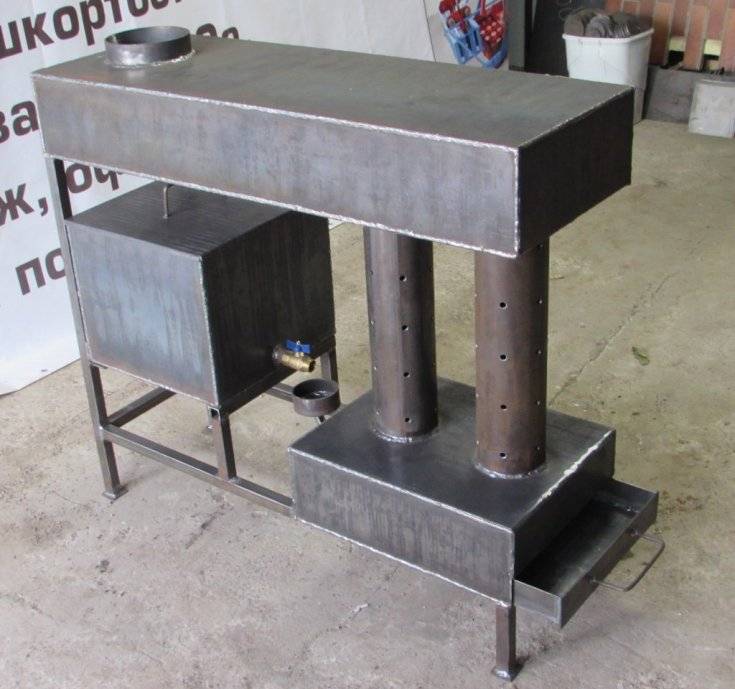
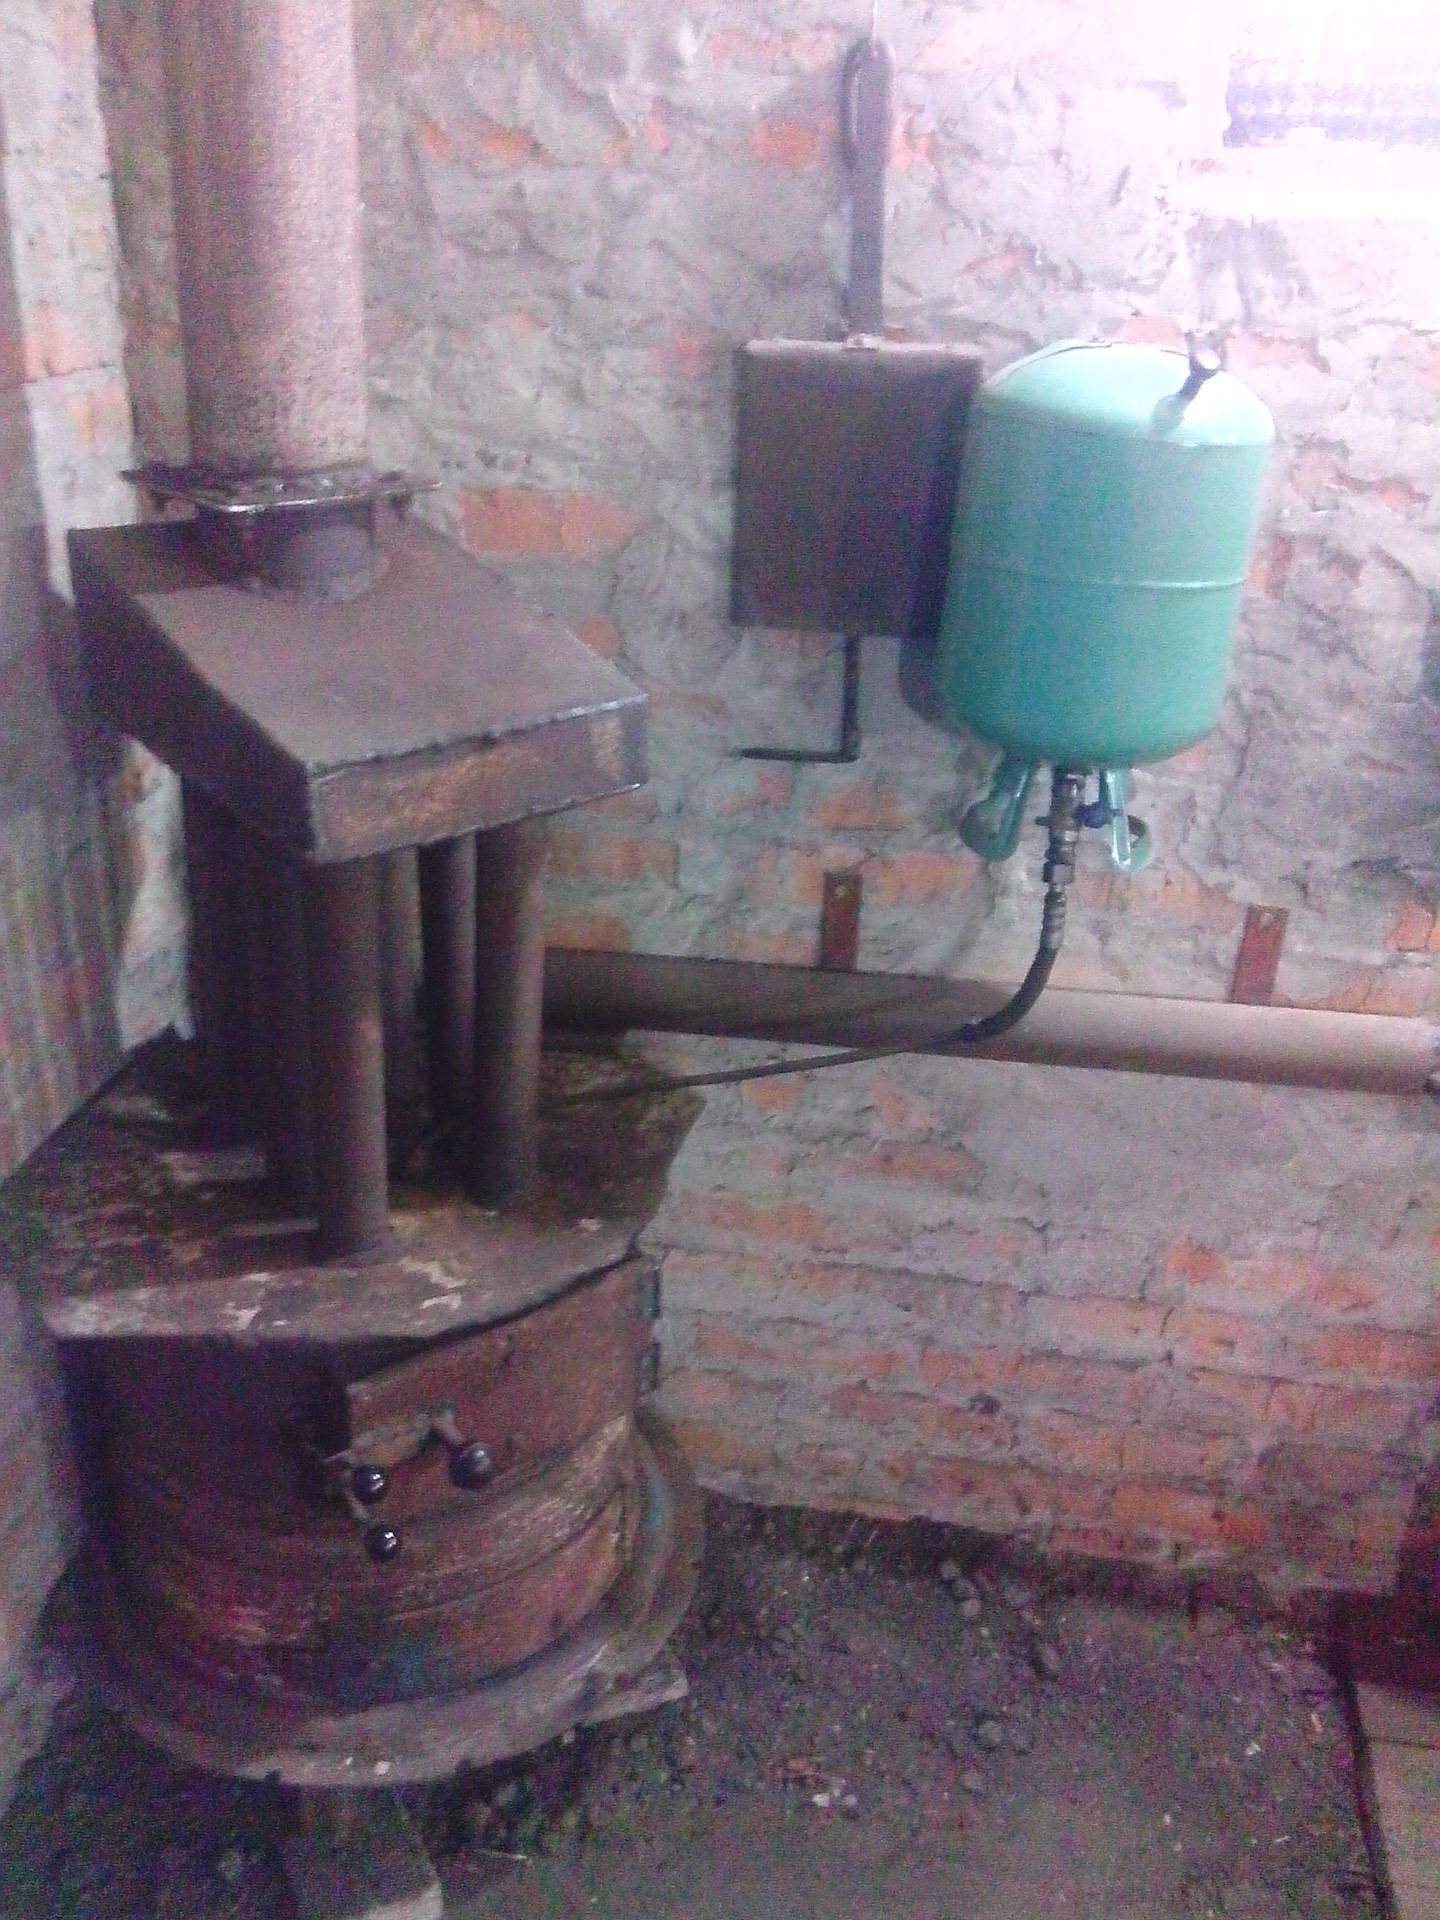
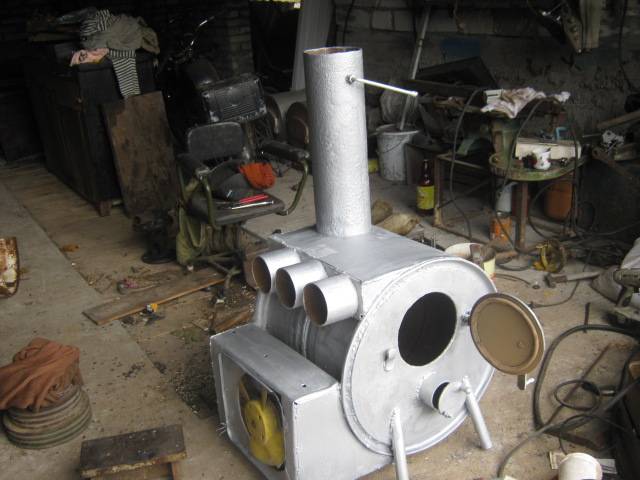
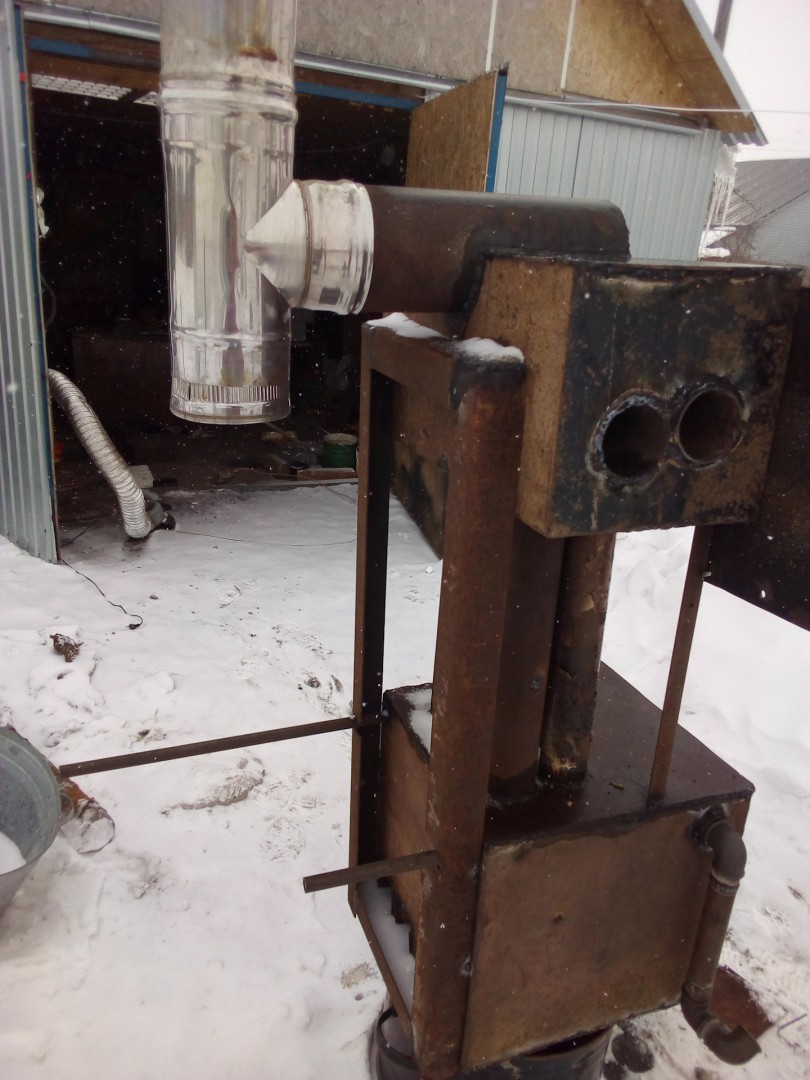
Heating device for burning waste oil - "gratuitous" heat
A homemade garage stove of this type is very popular among motorists. It works on any type of oil (gear, engine, shale, industrial), on stove and diesel fuel, and even on the remnants of paint and varnish materials. In terms of heat transfer to the air, such a design is identical to a conventional heater operating on electricity.


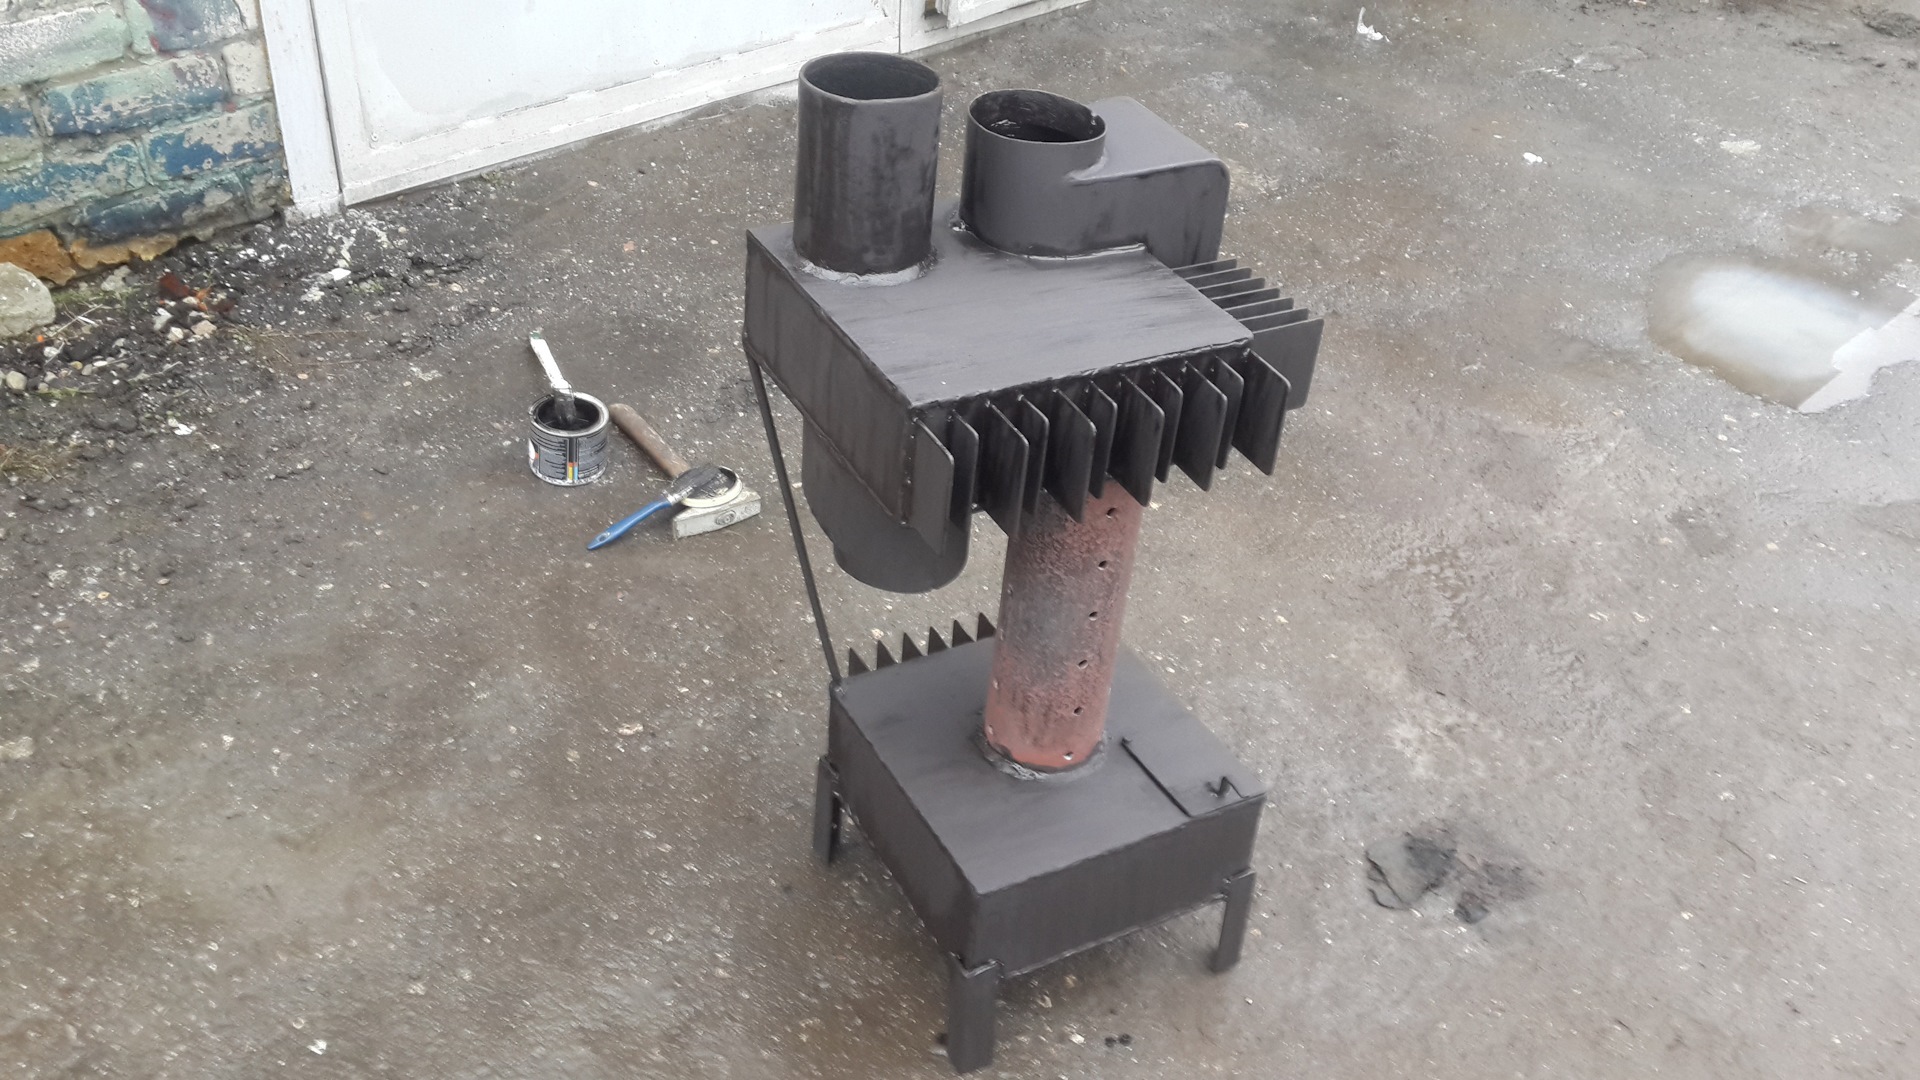


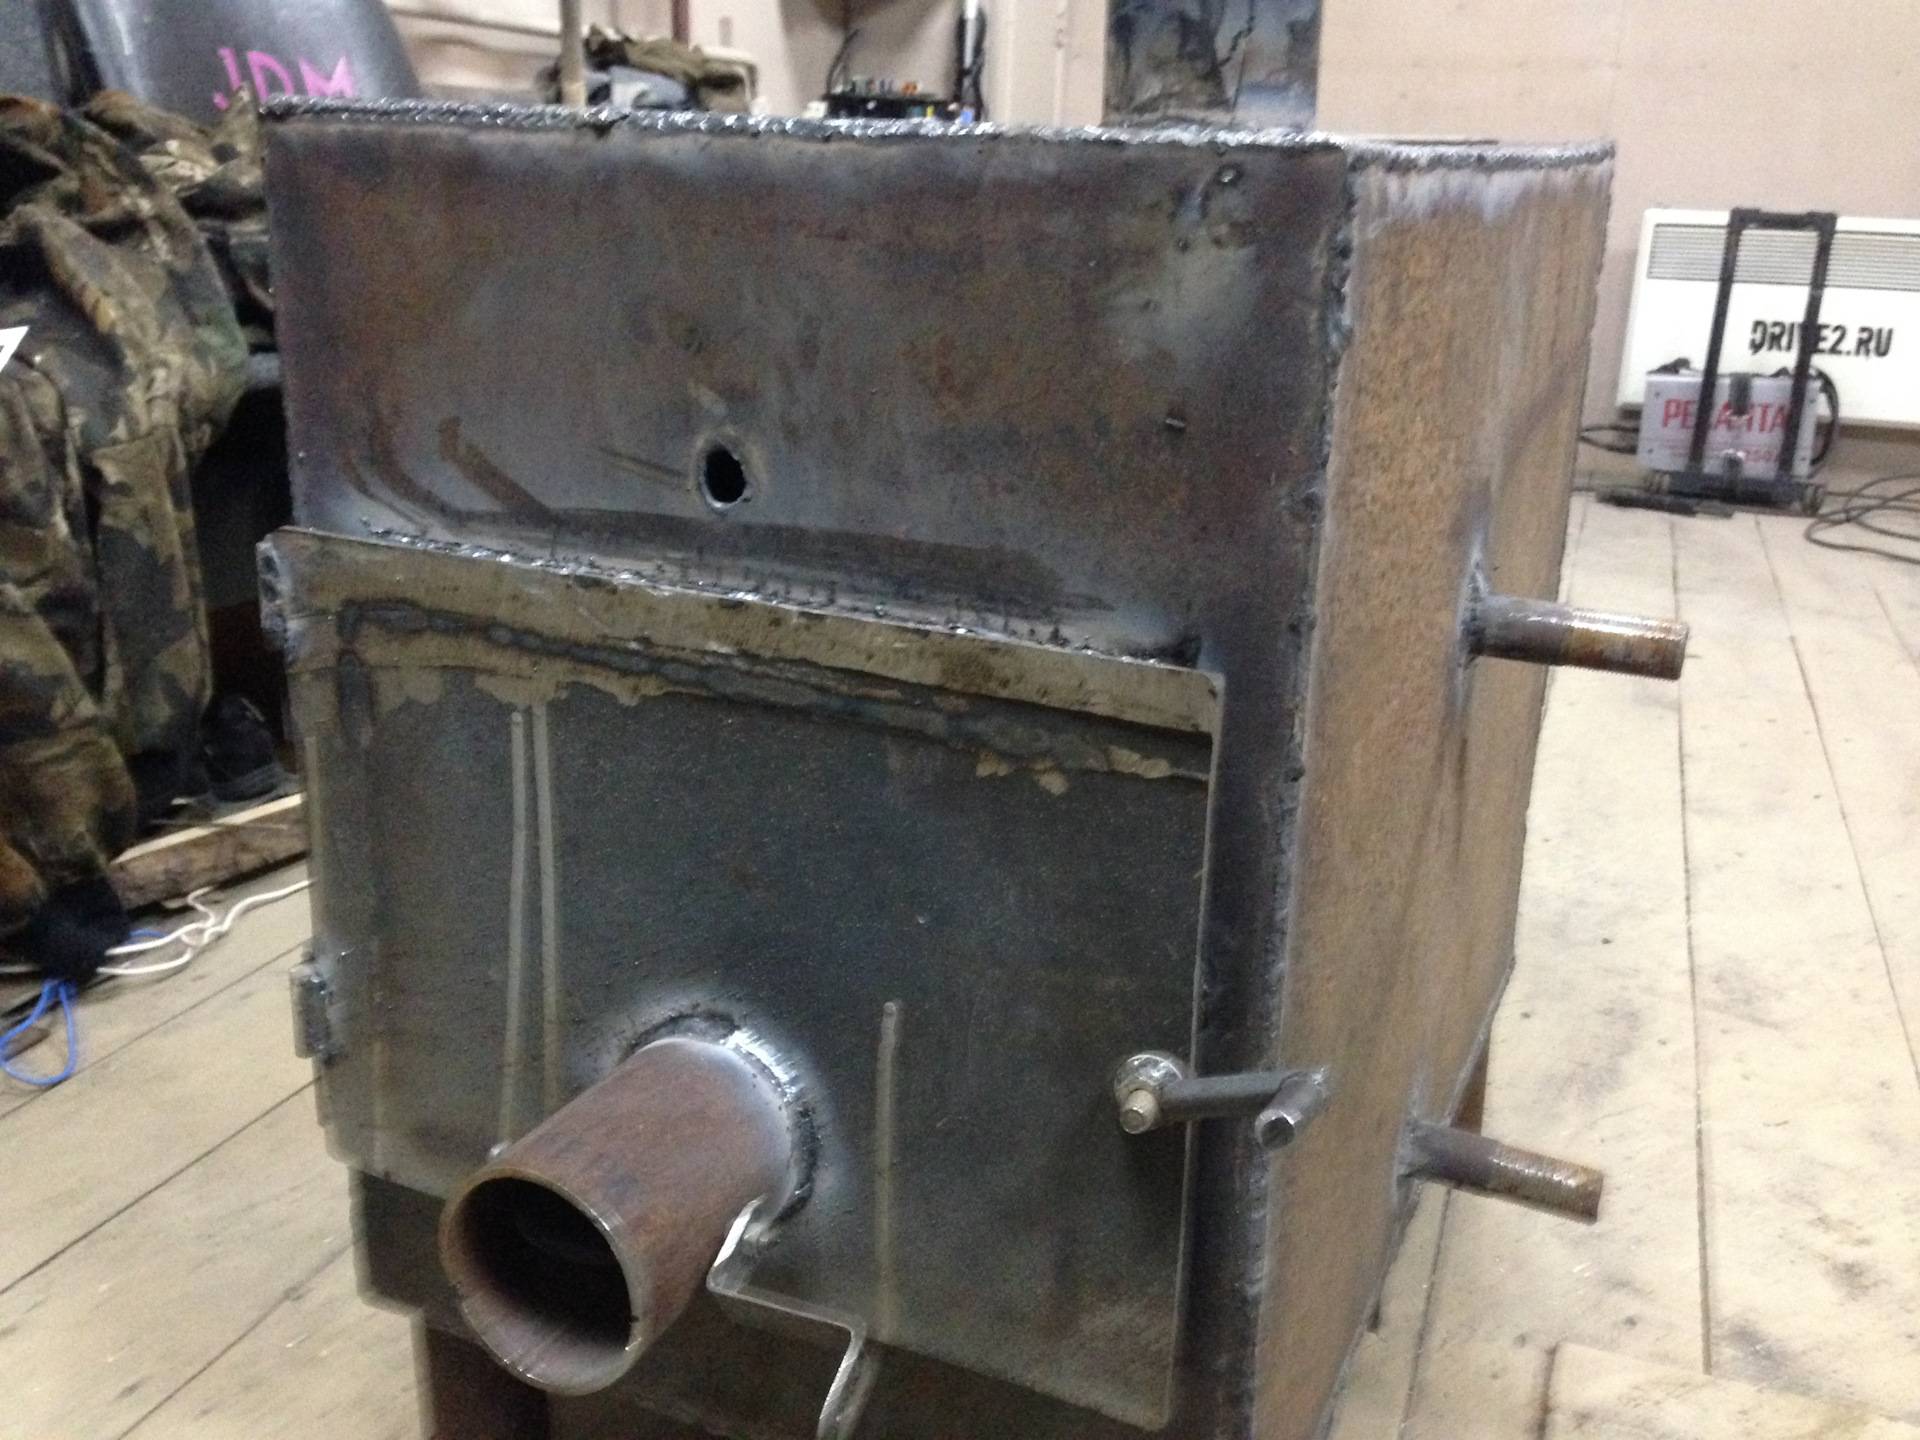
The scheme of the described device is simple. The stove is made of two containers. They are connected by a pipe located vertically. In this pipe, it will be necessary to make holes with an electric drill. The recommended geometric dimensions of such a furnace are 0.7x0.5x0.35 m, the total weight is within 30–35 kg, the volume of containers used is 12 liters. As the latter, the old ones are most often used. compressors from Soviet refrigerators or cylinders in which propane was stored.
From a metal corner you make 20–25 cm legs, on which you horizontally install one tank.
Weld the container to the legs-supports.
Drill holes on the top of the first tank and on the bottom of the second (approximately in the middle) and weld a pipe vertically to them, connecting the two containers into one structure. The thickness of the tubular product is 5–6 mm. Even better - make a collapsible design. In this case, you weld the lower part of the pipe to the lower tank, and fit the upper one tightly onto the opening of the second container. A collapsible device will be much easier for you to clean from soot and soot.
Drill 10-14 holes in the pipe (in the middle section)
Please note that holes are not made within 9-10 cm from the containers.
Cut a small hole in the top of the lower tank and fit it with a simple lid that is easy to open and close. This hole is necessary for filling oil (another used fuel).
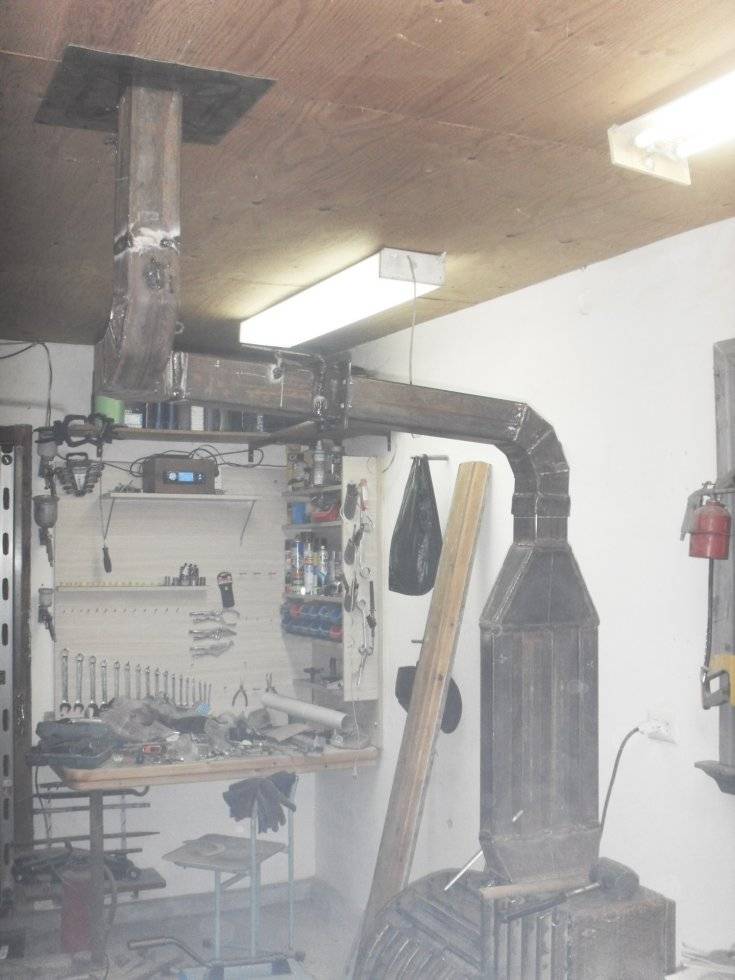
At the top of the second tank, you also make a hole, weld a pipe to it and mount an exhaust pipe on it
The latter is best done from "stainless steel" (galvanized).
We hope that the drawings and videos with which we have provided this article will help you quickly make an effective stove for the "home" of your car.


