- Choose the right type of lamps
- General Rules for Bathroom Lighting
- What to consider when choosing appliances?
- Types and types of fixtures
- Mounting
- Briefly about the main
- Location Tips
- Main
- Lighting of functional areas
- Work zone
- Bath and shower
- Storage systems and equipment
- decorative
- In the kitchen
- 1. Directional light over the dining table
- 2. Illumination of the working area
- 3. General light
- Versatility
- Floor and decorative lighting
- How to make lighting in the country toilet
- Installation steps
- Installation
- Chandelier installation
- Installation of spotlights
- Installation of LED strip
- Bathroom lighting requirements
- Natural light in the rooms
- What is layered lighting
- Choosing a bathroom fixture
Choose the right type of lamps
Our comparison table will help you make the right choice.
| Lamp type | Description |
|---|---|
| Ordinary incandescent lamps | The most budgetary lamps, but do not work for a long time, the period reaches 1000 working hours. Install them in rooms where the light is not constantly on, such as in the hallway or bathroom. |
| Reflector lamps | This type of bulbs is screwed into wall spots, the service life reaches 30,000 - 40,000 hours. |
| Halogen lamps | These lamps contain halogen gas inside, due to which their power is higher than standard incandescent lamps. |
| Fluorescent lamps | They are also much more powerful than conventional light bulbs, but they give cold lighting and can make a crackling sound when working. Often used in non-residential premises, offices. |
| LEDs | Very economical lamps, have a pleasant light and last a long time, but are quite expensive. |
And in this video, 7 more simple rules for good lighting are collected. You will need this information.
General Rules for Bathroom Lighting
For bathrooms, lamps are purchased that are resistant to high humidity. On the packaging of any device, the marking of the protection class is affixed. In the case of wet rooms, the luminaire rating is chosen below IP54. Insufficient protection of the device leads to a short circuit, possible fire. If the marking on the box is not available, the light source is evaluated for the following qualities:
- The thickness of the glass on the ceiling. Dense glass prevents the accumulation of moisture and the effects of temperature.
- The junction of the plafond and the body is rubberized.
- Details of the lamp are secure, do not move.
- The case does not contain extra holes.
To organize a safe lighting system in a room, care must be taken when installing appliances. Regional legislation has compiled lists of prohibitions for the installation of parts of the circuit
They may differ in small details for cities, but the general prohibitions are the same.

When installing the system in the bathroom, you must not:
- Lay the trench in the seams between the panels and through the reinforced concrete slabs. It is allowed to install them in finishing parts and under stretch ceilings. The bars are placed under the plasterboard sheathing.
- Use metal pipes for laying.
- Fasten the parts with tape.This material is best put aside - in the bathroom environment, it provokes heating, and due to moisture, it loses strength in a matter of days.
- Install a metal coating without insulation.
- Install open wiring. Be sure to take triple wires. Each core in them is in an insulating sheath, and a common layer of protection goes on top.
- Connect copper and aluminum parts.
- Conduct "handicraft" grounding by contacting the wire with a radiator or water pipe.
- Install shields, switches and distribution boxes in the bathroom.
The plan for the installation of the lighting system is drawn up in advance. You can not work with electricity on; to avoid impact, the energy is preliminarily blocked.
What to consider when choosing appliances?
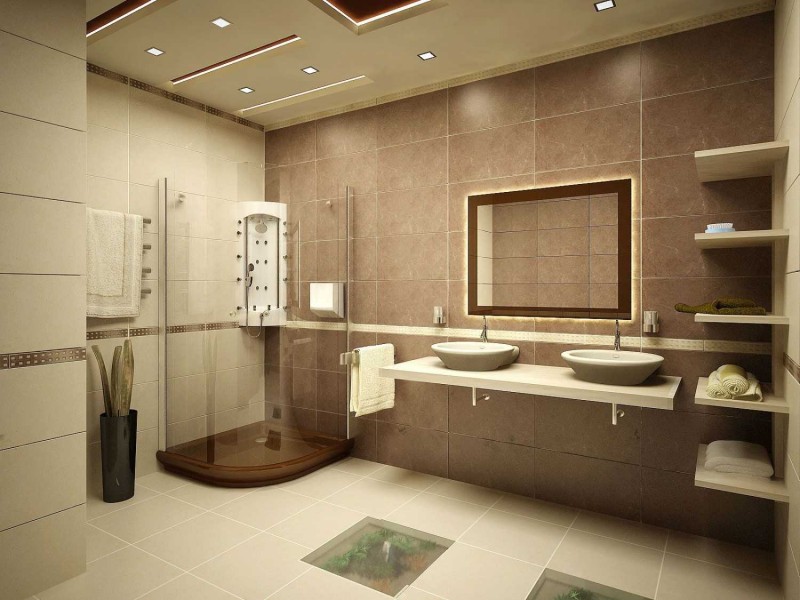
In the process of creating a design project, it is necessary to choose the optimal model of the lamp, taking into account the characteristics of the room, the design and texture of the finishing materials.
For example, built-in models are not suitable for arranging a bathroom with a concrete monolithic slab ceiling. In this case, it is better to use overhead appliances or ceiling fixtures in the form of chandeliers.
In an effort to create a stylish interior and a comfortable environment, you will have to pay special attention to the choice of lighting equipment. In this case, it is necessary to take into account the design, characteristics, dimensions, lamp power, methods of fixing the electrical appliance and the need for additional structural elements.
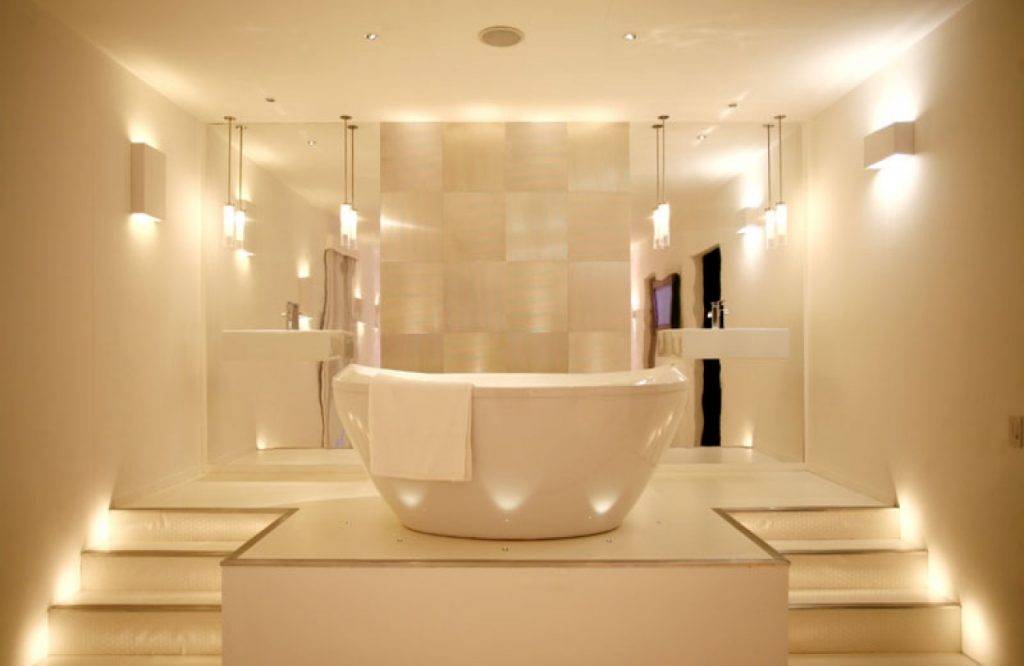
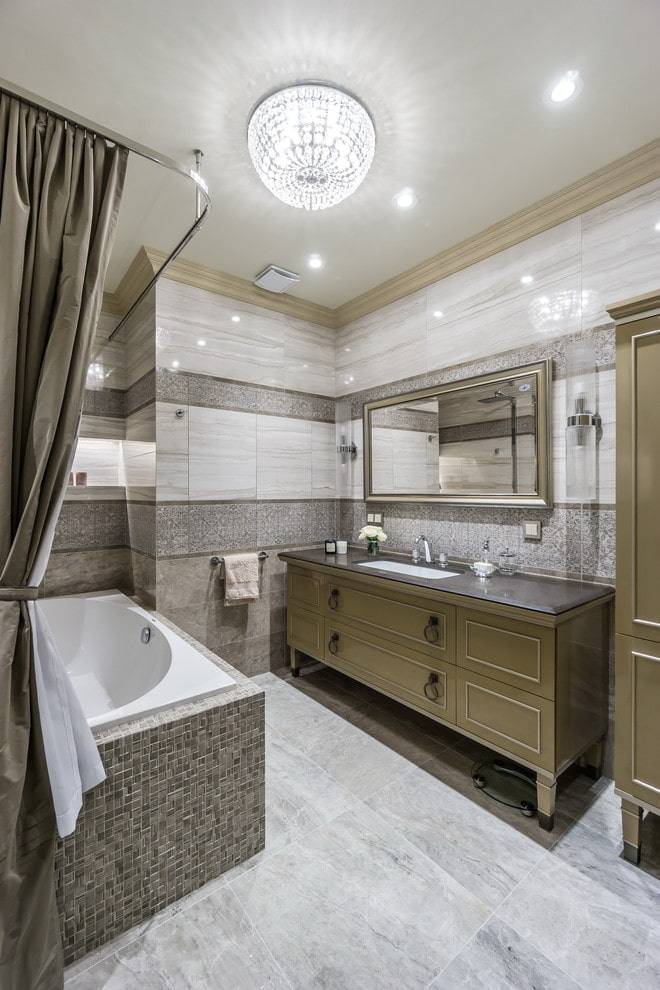
When arranging a spacious room, designers advise to focus on traditional lighting solutions that fit perfectly into the interior.
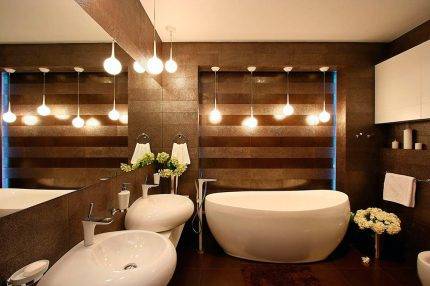
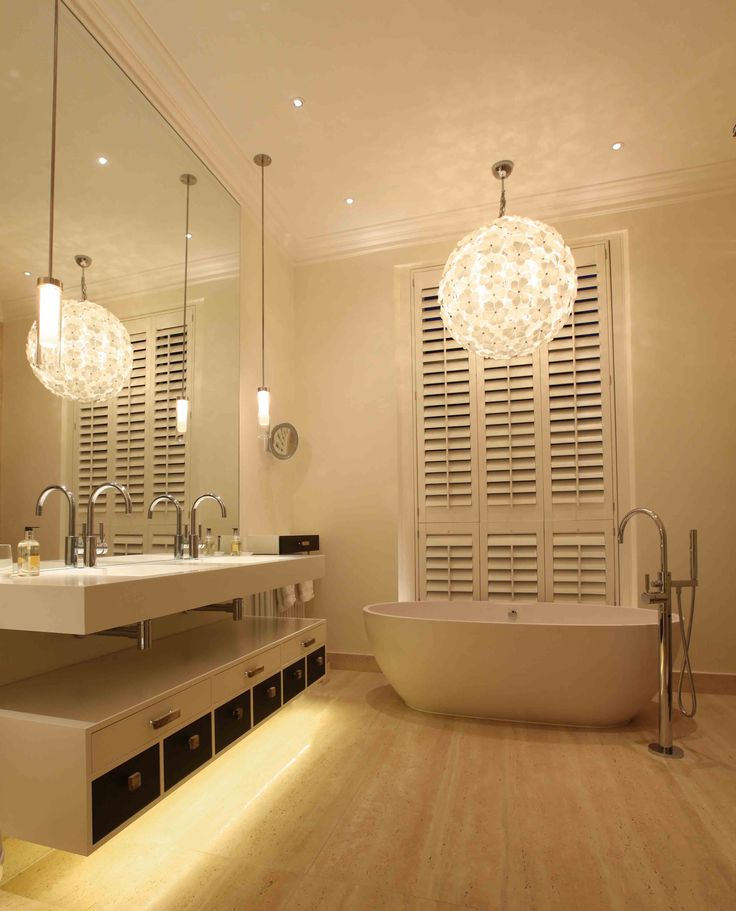
If the bathroom is large, then a beautiful chandelier will look organic.But point models, correctly and evenly distributed over the space of the ceiling, will allow you to create a stylish interior that takes into account trend trends.
When choosing fixtures, the following factors should be considered:
- area of the room and the distance between the lamps;
- zoning of the room, the need to allocate separate sections;
- level of arrangement of devices;
- style direction of the interior;
- colors of walls, floors, furniture and plumbing;
- the presence of mirrors, tension structures, ceramic tiles and other surfaces that reflect light.
Before proceeding with the installation work, it is necessary to consider the layout of light sources and the nuances of laying cables. Some models offered by manufacturers in the range need to create special conditions.
The quality of products directly affects their service life. Expensive branded models of built-in or overhead lights compare favorably with cheaper ones. They are of better quality, wear-resistant, so they retain an aesthetic appearance for a long time.
In an effort to create a stylish and original interior in the bathroom, we must not forget about safety. Electrical appliances intended for installation in rooms with high humidity must have a maximum degree of protection, which corresponds to the IP65 marking.
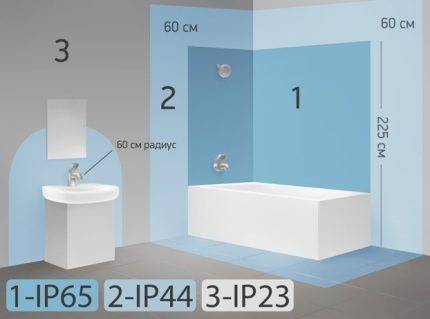
The bathroom is divided into zones with different humidity levels. The bright blue area is most exposed to splash water.
When arranging rooms with a high level of humidity, certain rules must be observed.
The following recommendations will help organize safe room lighting:
- only moisture-resistant electrical appliances with a degree of protection from IP24 can be used;
- in a zone of high humidity, install low-voltage devices up to 12 V;
- next to the bathtub or shower cubicle, use lighting devices of the 2nd protection class;
- it is desirable that all metal parts are made of stainless steel or have anti-corrosion properties;
- light bulbs and other heating parts of electrical appliances must be equipped with protective covers or shades.
You should also remember about the features and properties of light rays. So, next to the washbasin it is better to use lamps with softer yellow light. Otherwise, the mirror will reflect rather pale skin, which will prevent you from applying makeup correctly.
The article recommended by us will acquaint you with the rules for choosing a color temperature and with the nomenclature designations of lighting devices that allow you to choose an LED bulb in accordance with this important characteristic. Proper lighting should be bright, soft and diffused.
This will emphasize the color scheme of interior elements and finishing materials, create a cozy atmosphere.
Proper lighting should be bright, soft and diffused. This will emphasize the color scheme of interior elements and finishing materials, create a cozy atmosphere.
For a bathroom with dimensions of 5x2 m, 2 lamps of 60 watts are enough. You can use 2 lamps spaced apart on the sides, but in this case, the mirror will require additional lighting. An informative article will acquaint you with the guidelines for selecting lighting fixtures for the bathroom, the content of which is completely devoted to this issue.
Types and types of fixtures
Manufacturers offer a huge range of lighting products.It will be much easier to choose the right one if you do it after the decoration of the room is completely finished, all plumbing equipment and furniture filling are installed, and decorative accessories are hung.


All lamps that can be used to illuminate the toilet and bathroom are divided into three large groups.
Embedded models are the most popular and practical. They are usually mounted in suspended ceiling systems. They are simply inserted into pre-cut holes and fixed in them with the help of special latches. The case heats up weakly, so the trim elements do not heat up. This feature of recessed luminaires allows you to choose lamp models with minimal depth.
Recessed oval luminaire
Overhead models are the second most popular lighting fixtures. Their design consists of two parts: a thin base made of metal, and a ceiling made of translucent plastic. Such a device weighs almost nothing. It is attached to concrete, to the ceiling with self-tapping screws. It is inexpensive. When turned on, it creates an even diffused light, soft, not cutting the eye.
Surface-mounted model with a metal body and a matte shade
Suspended models (single-arm or multi-arm lamps). Their main advantage is the variety of forms of execution. Design can be very different. And all because everything is used for their manufacture: metal, glass, and plastic. Difficult execution options require reliable fastening to the base.
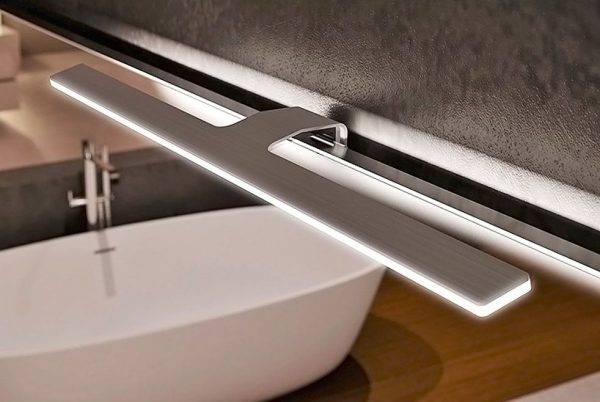
Strict pendant lights above the sink
The choice of something specific is usually dictated by the style of bathroom design.
It is important to take into account the features of the base on which the equipment is mounted.
In the video, the specialist tells how to make the right lighting in the bathroom:
Mounting
The material of the ceiling covering in most cases becomes the determining criterion for choosing a luminaire. If there is no overhead finish and the ceiling is a painted concrete slab, an overhead model in the form of a plate with a matte shade is best. Lighting in a small bathroom will be quite intense if the lighting fixture is designed for two 7W LED bulbs. It is installed as follows:
- A drill or puncher makes holes in concrete for self-tapping screws.
- The metal base of the lamp is applied to them and screwed to the base with self-tapping screws.
- Completely with the help of the machine, the electricity in the house is turned off.
- An electrical wire is connected to the ceiling.
- Light bulbs turn on.
- Plafond snaps on.
- The electricity is turned on and the operation of the device is checked.
Scheme of mounting the overhead lamp
It will be more difficult to attach lighting equipment to a drywall base. If multi-level light is installed in the bathroom, the design of the room only benefits from this. But to implement such an idea is not so simple. To begin with, a lighting project plan is drawn up, then, according to it, the location of the light bulbs is marked. Double-insulated wires are led to it, they are laid along a metal profile, with the help of which a frame is formed for installing drywall.
The wires are fixed with ties.Before installation, holes are drilled on a sheet of drywall for ceiling lights of the desired diameter. After attaching the sheet, wires are threaded into them, which are then stripped and connected to the terminals of the ceiling. At the final stage, a light bulb is inserted into the lamp. The toilet is illuminated in the same way if drywall is used as a ceiling finish.
The video clearly demonstrates the installation steps of a spotlight:
Scheme of mounting the device on a stretch ceiling
The video demonstrates ready-made lighting placement ideas:
Briefly about the main
Even in a small bathroom, lighting must be properly organized. First of all, experts carry out calculations that show the number and power of the installed fixtures.
Since the bathroom is a room with high humidity, safety requirements must be taken into account.
Not all lighting fixtures are suitable for the bathroom - in addition to brightness and safety, you need to choose lamps depending on the finish of the ceiling.
Location Tips
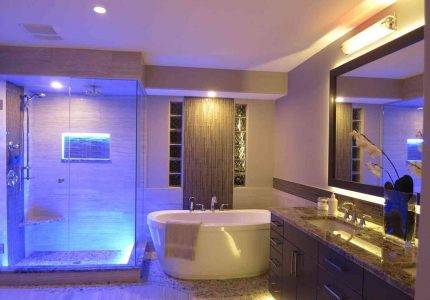
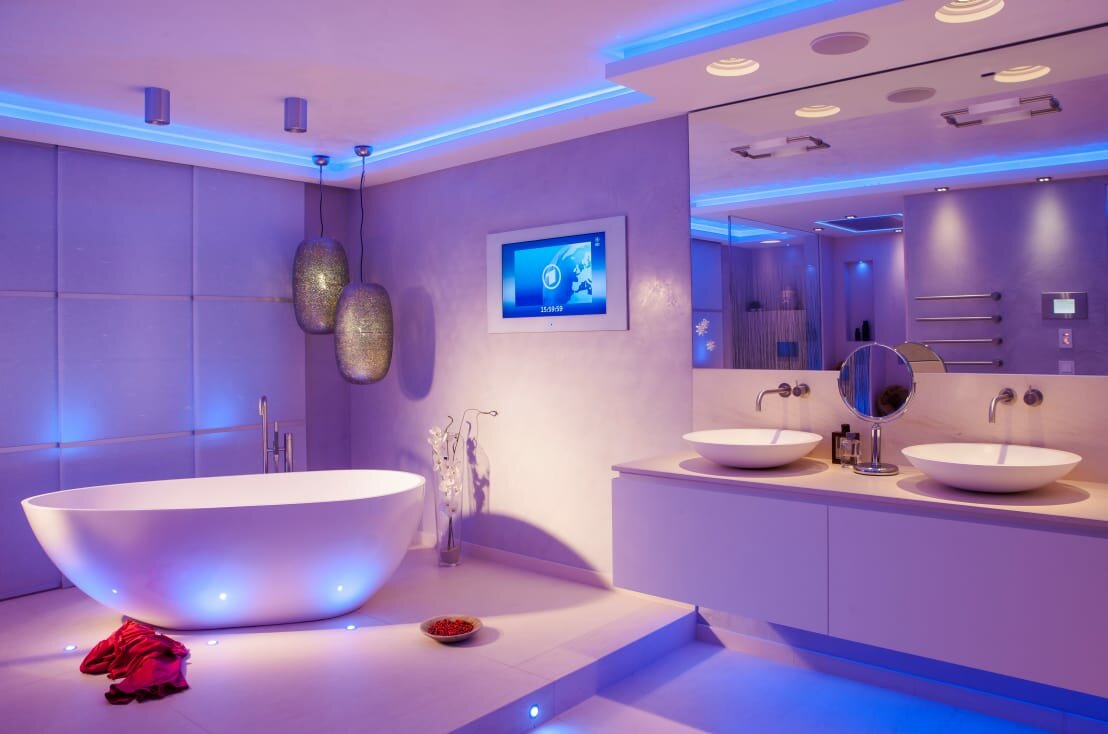
With a lack of light flux in the room, a multi-tiered lighting system in three levels is considered an ideal option.
Main
Depending on the location, ceiling, wall and floor lighting fixtures with manual or automatic activation are distinguished.
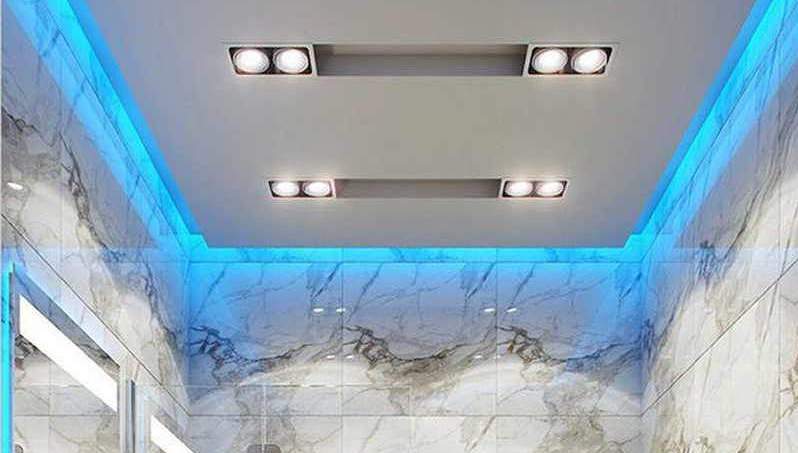
On an ordinary painted ceiling, pendant lights with increased moisture protection are often installed. For a ceiling plane decorated with a plasterboard structure, plastic panels or slats, built-in lights are preferred. They are very convenient, aesthetic and safe, as they have hidden wiring.In the case of a stretch fabric, spot lighting is suitable, and LED lamps will be appropriate for a multi-level ceiling.
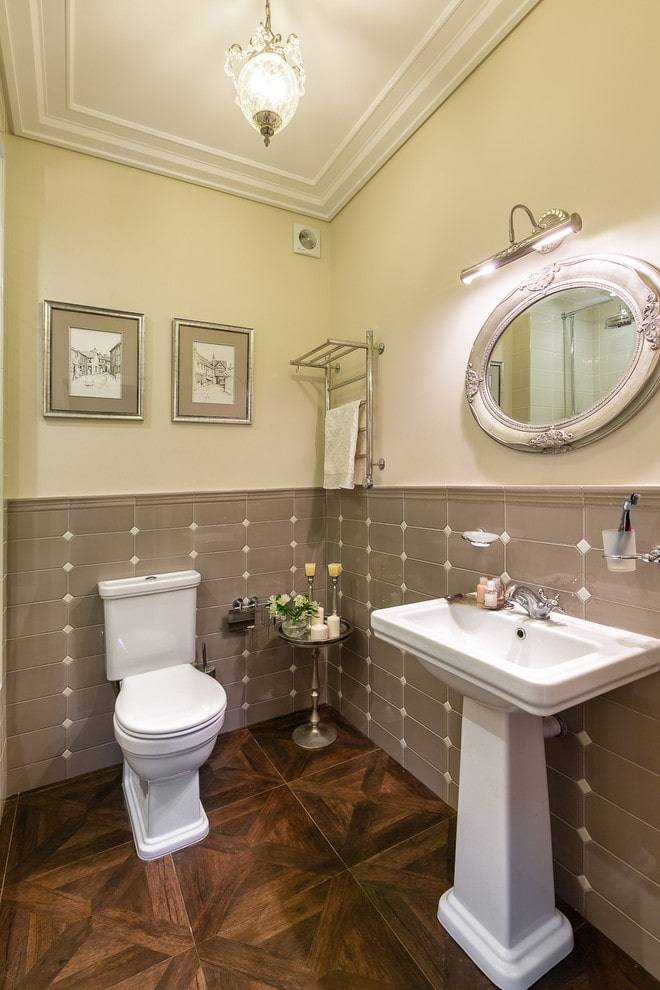
A classic solution for small rooms is the location of the central chandelier.
If ceiling lighting fixtures are not enough, wall light sources are used. The placement is chosen depending on the height of the walls. Lamps should not blind the eyes, so they are usually installed at a level of two meters from the floor plane.
When purchasing sconces for the bathroom, pay attention to lampshades, they should resemble a sphere or flask in shape and be closed.


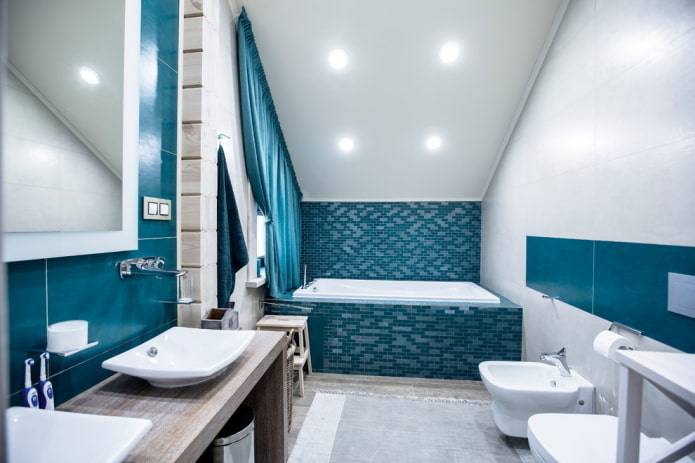
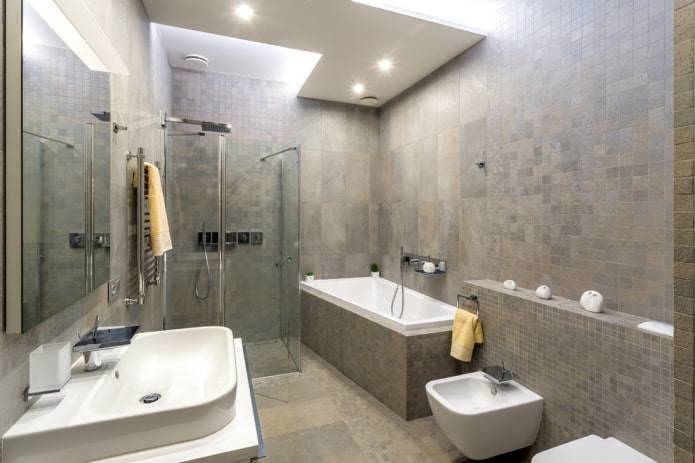
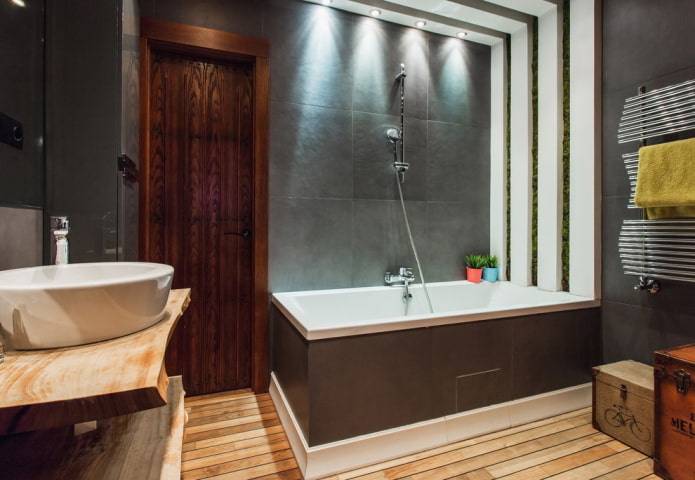
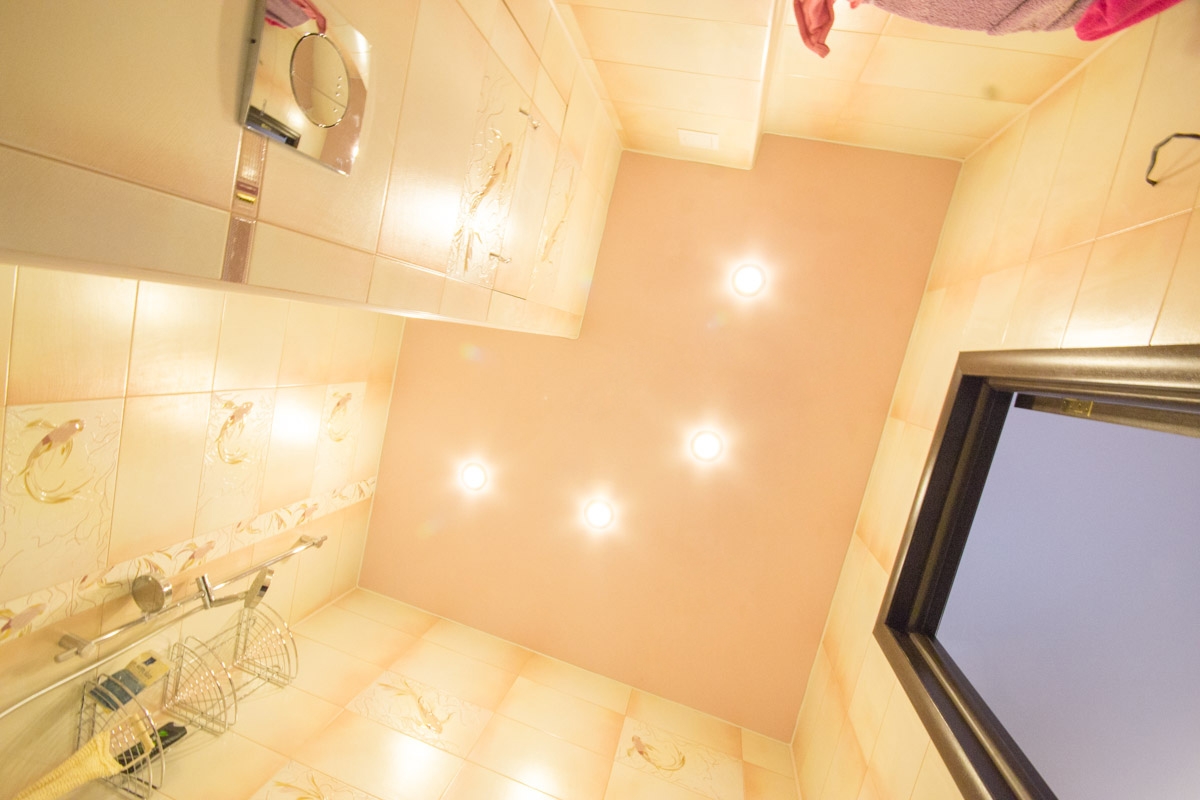
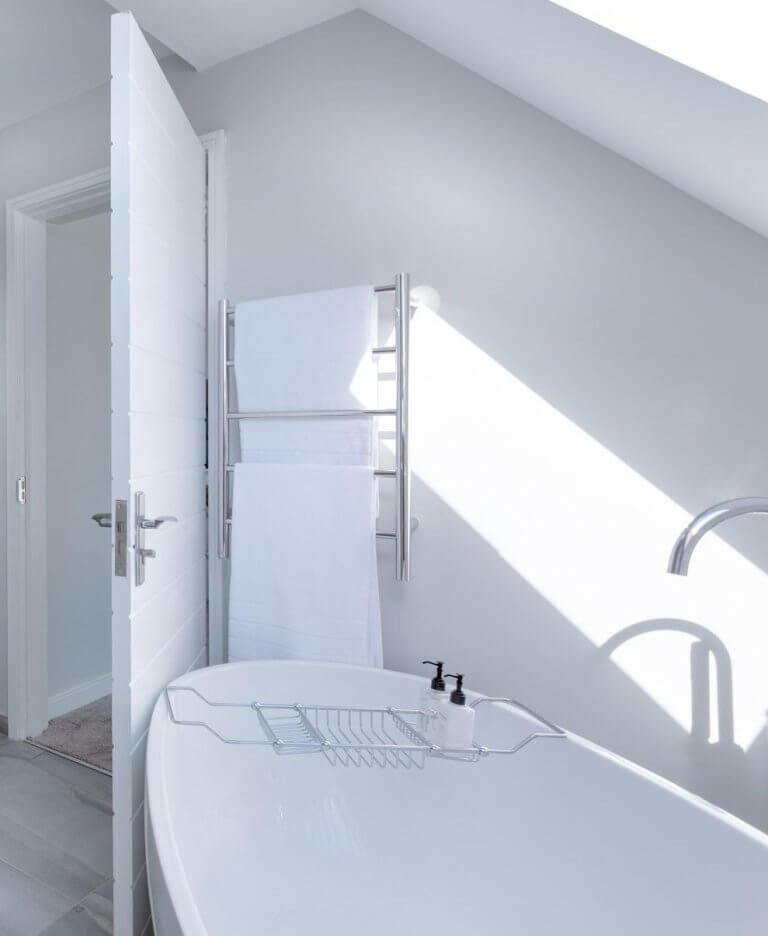
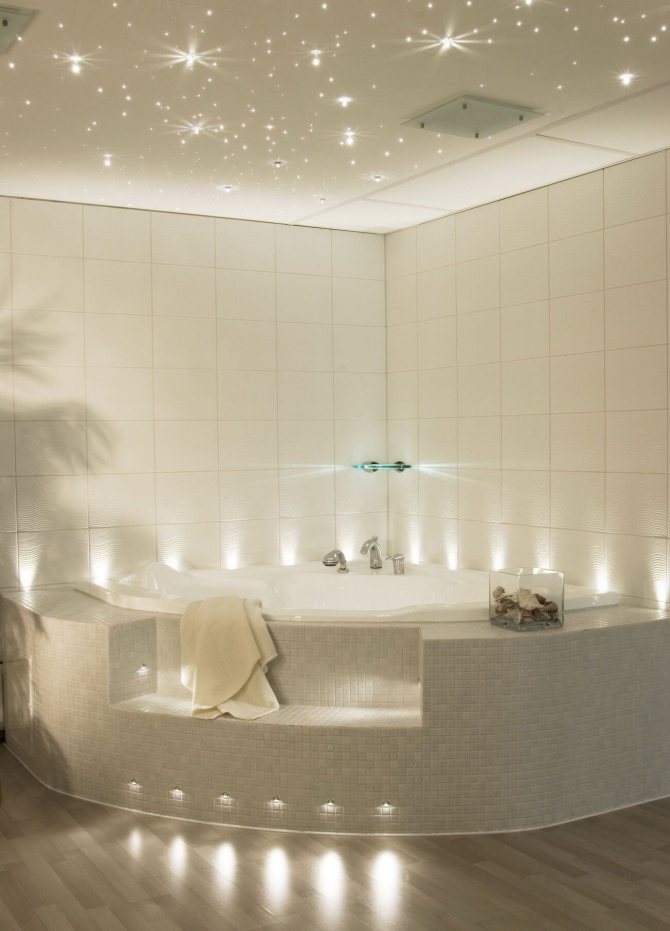
The photo shows the interior of the bathroom in the attic with spotlights built into the stretch ceiling.
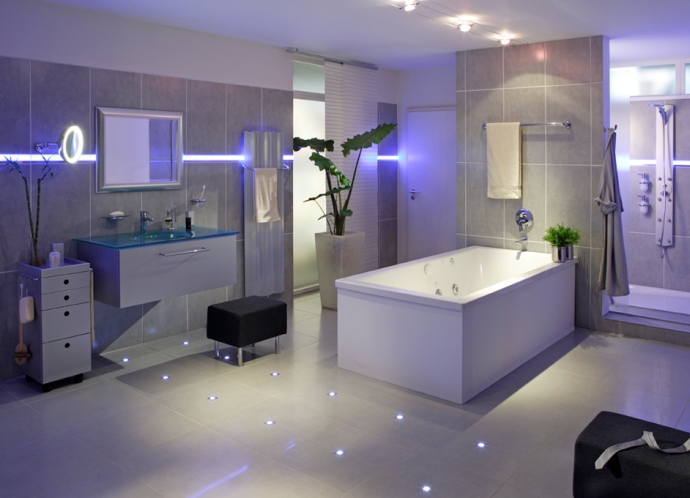
Floor lighting is most often a backlight, such as LED strip or sealed fixtures. To create a peaceful atmosphere in the room, it is possible to use closed flashlights, translucent lamps or portholes. Floor recessed lamps will add an unusual entourage to the bathroom and add mystery to the atmosphere.
Lighting of functional areas
Each section of the room requires the organization of auxiliary light. Thus, you can not only visually change the perception of space, but also add a touch of originality to the monotonous atmosphere.
Work zone
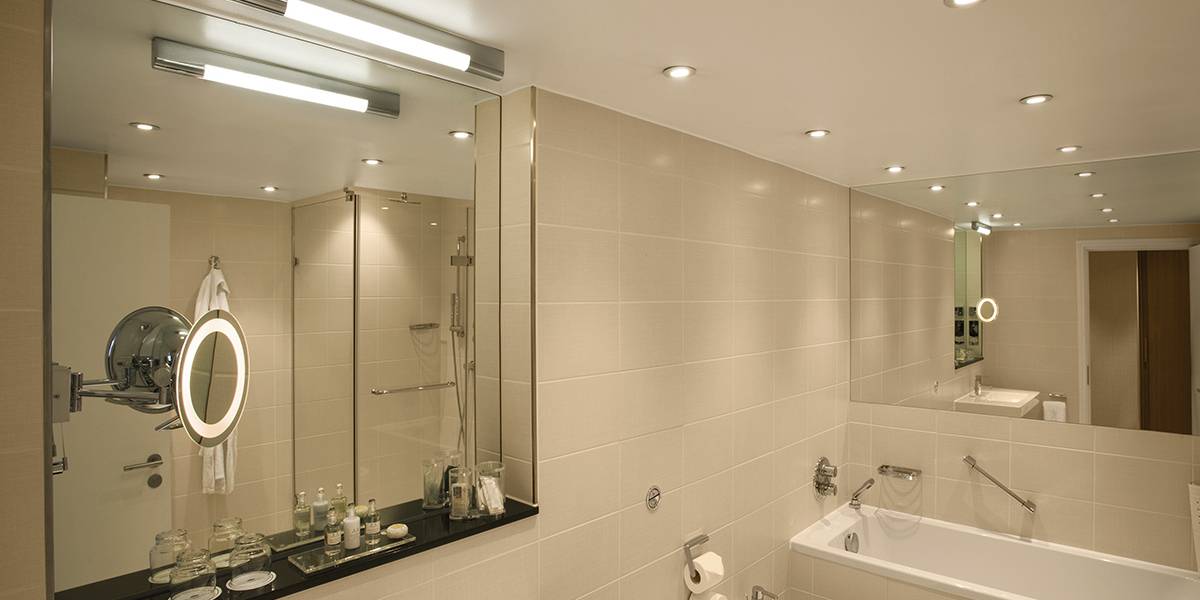
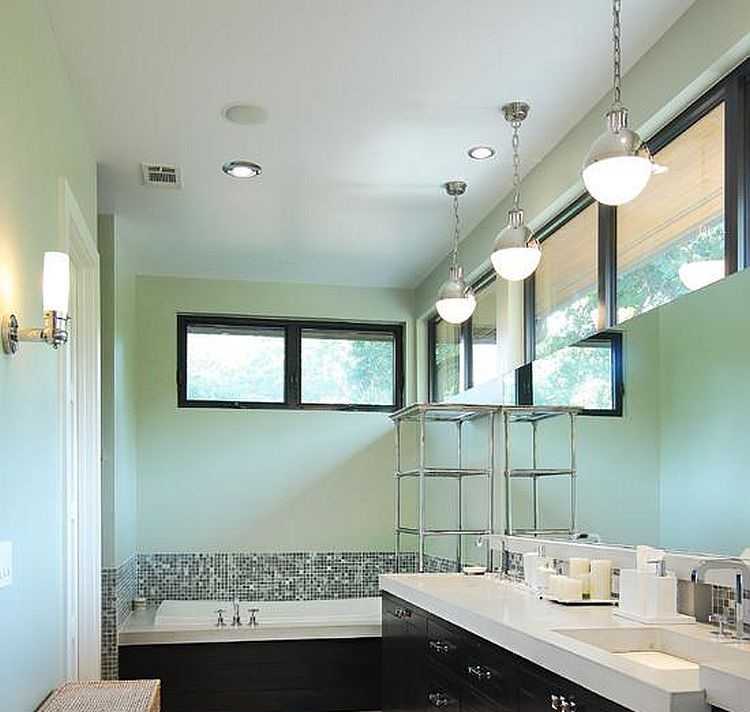
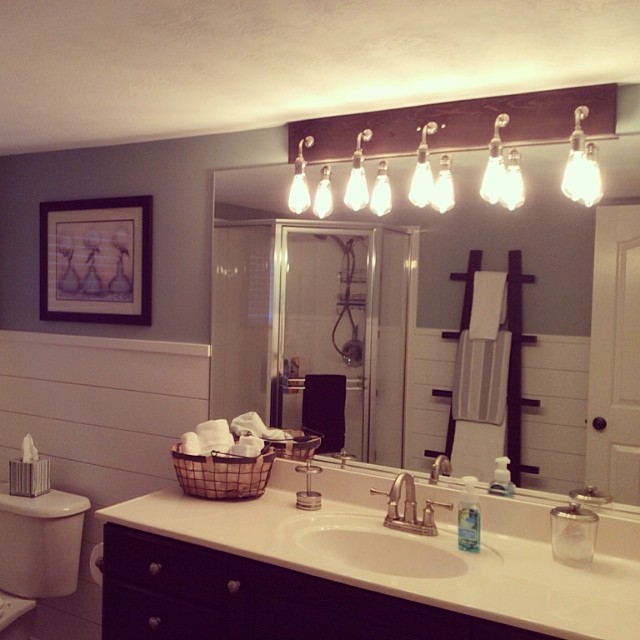
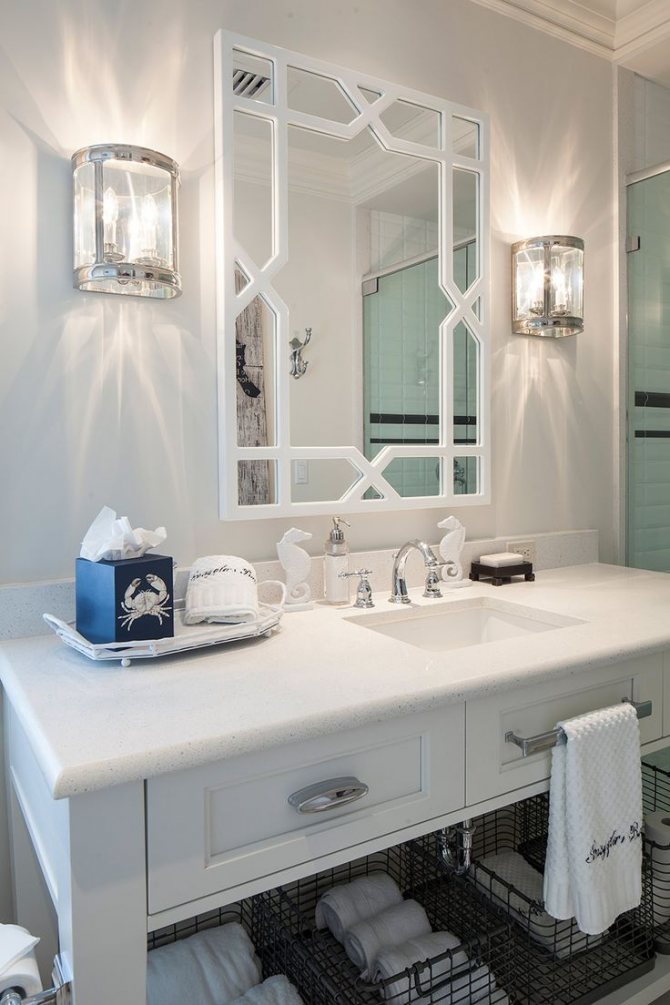
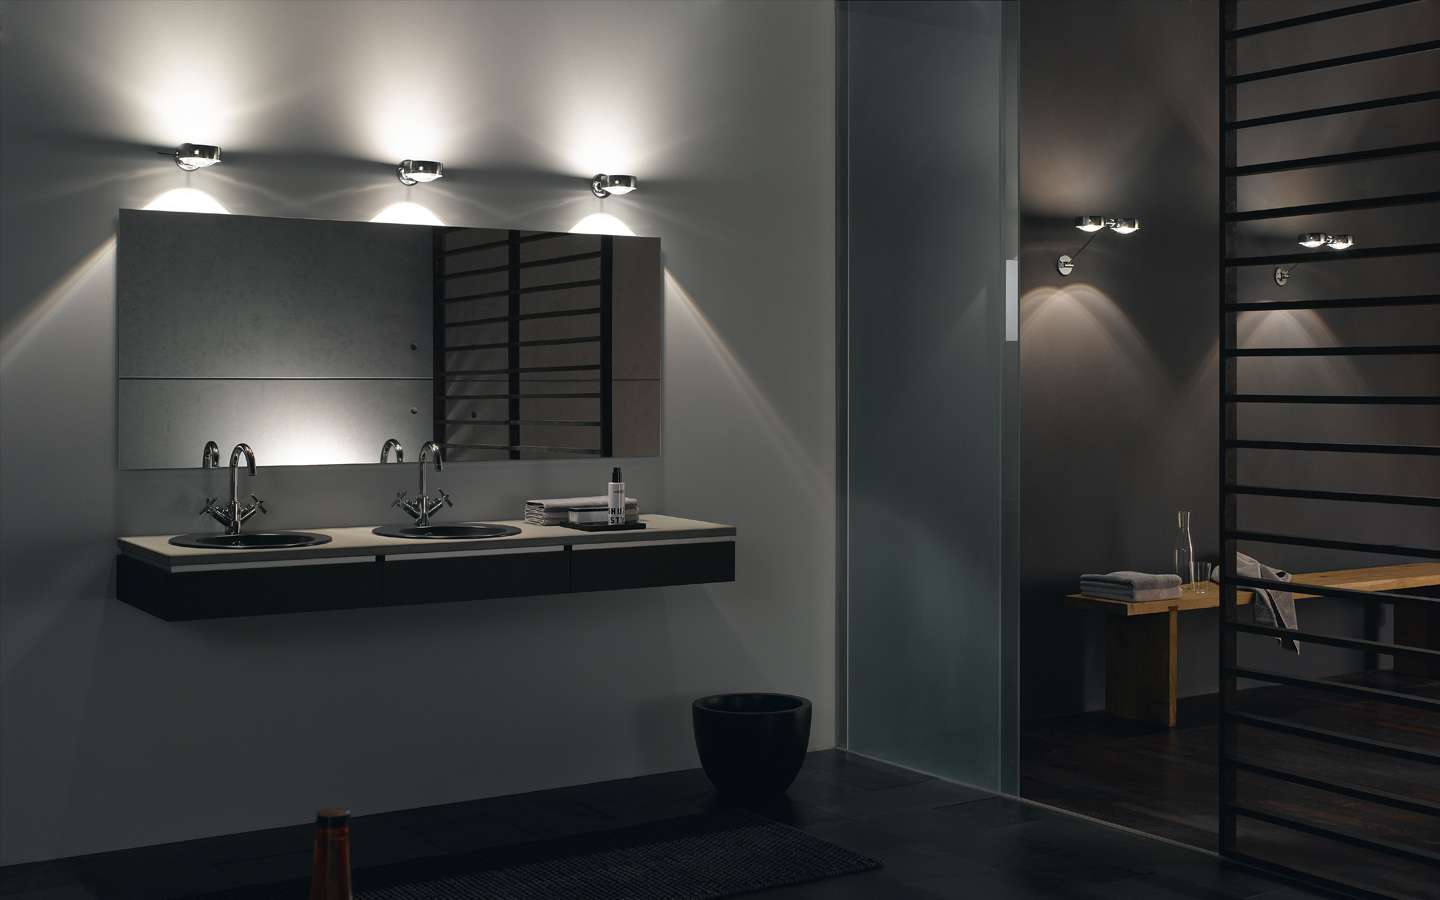
This area with a mirror and a washbasin requires high-quality lighting, which should fall evenly from both sides. For this, it is best to install two side lights with a symmetrical arrangement, slightly higher than eye level. This option is especially appropriate when applying makeup, as it provides the desired brightness and does not create a shadow on the face.For shaving, one lighting device above the mirror will be quite enough.
Lamps with flexible arms with the ability to adjust the direction of light are considered especially convenient.
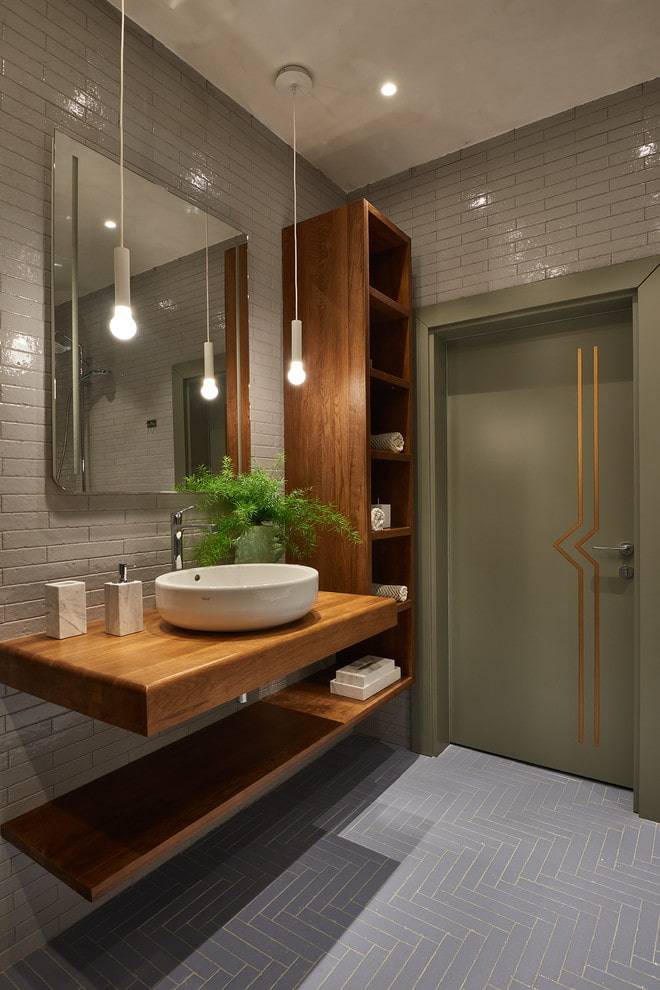
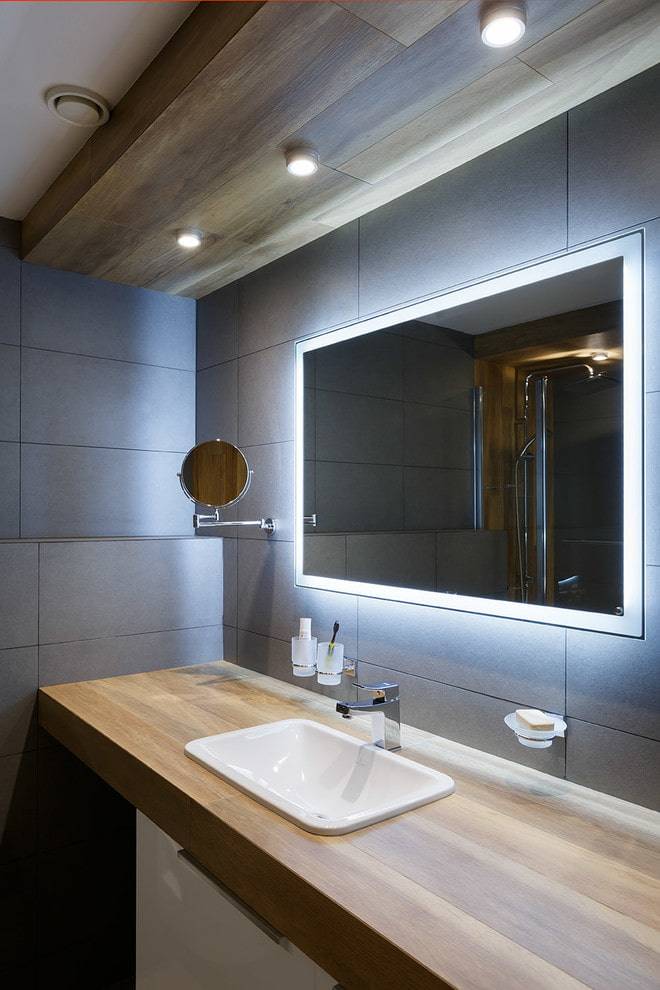
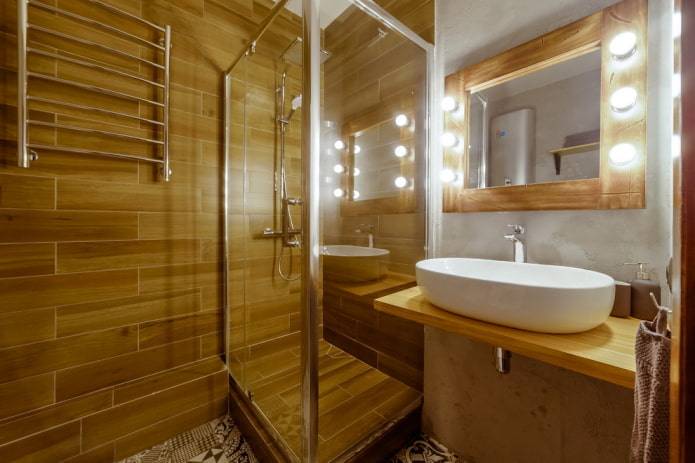
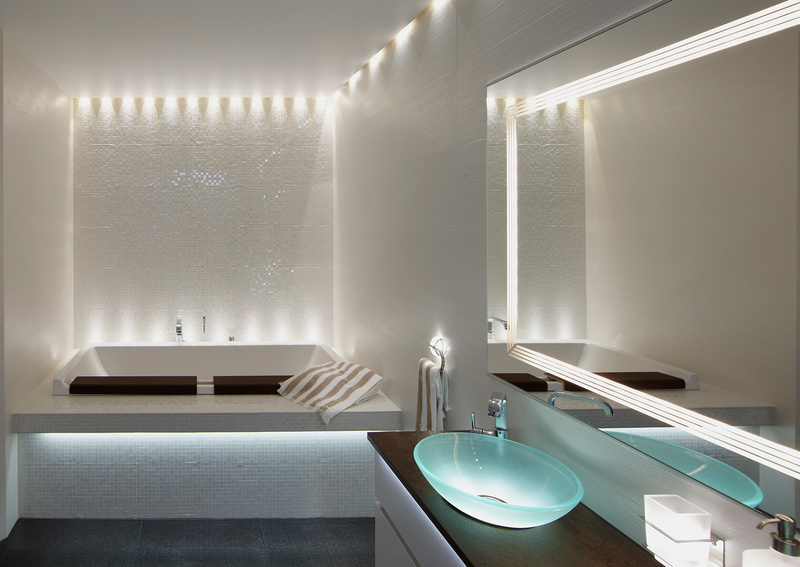
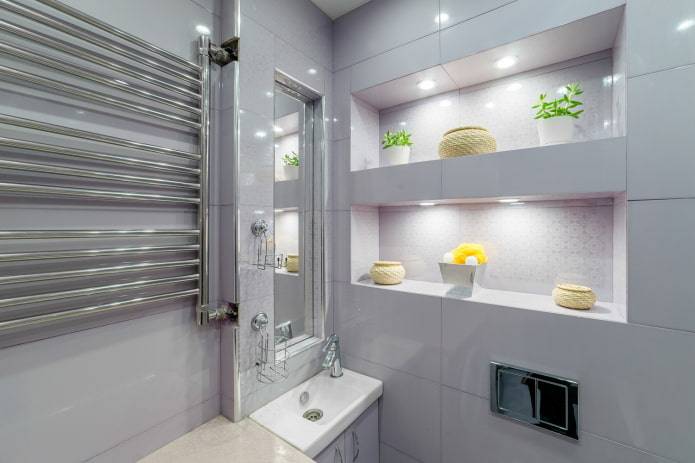
The photo shows a working area in the bathroom, decorated with a mirror with built-in side lights.
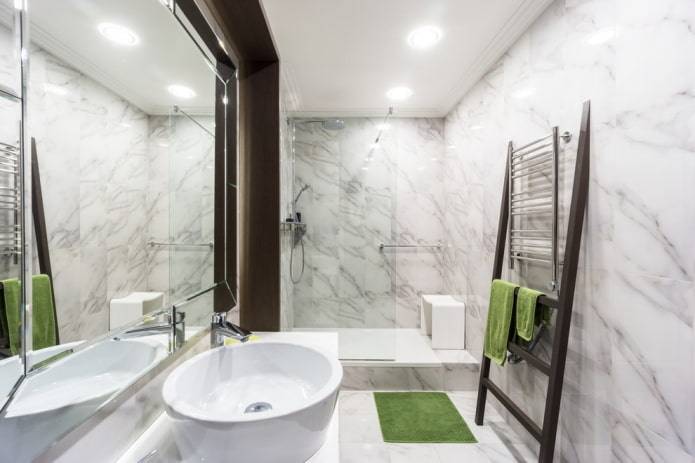
Bath and shower
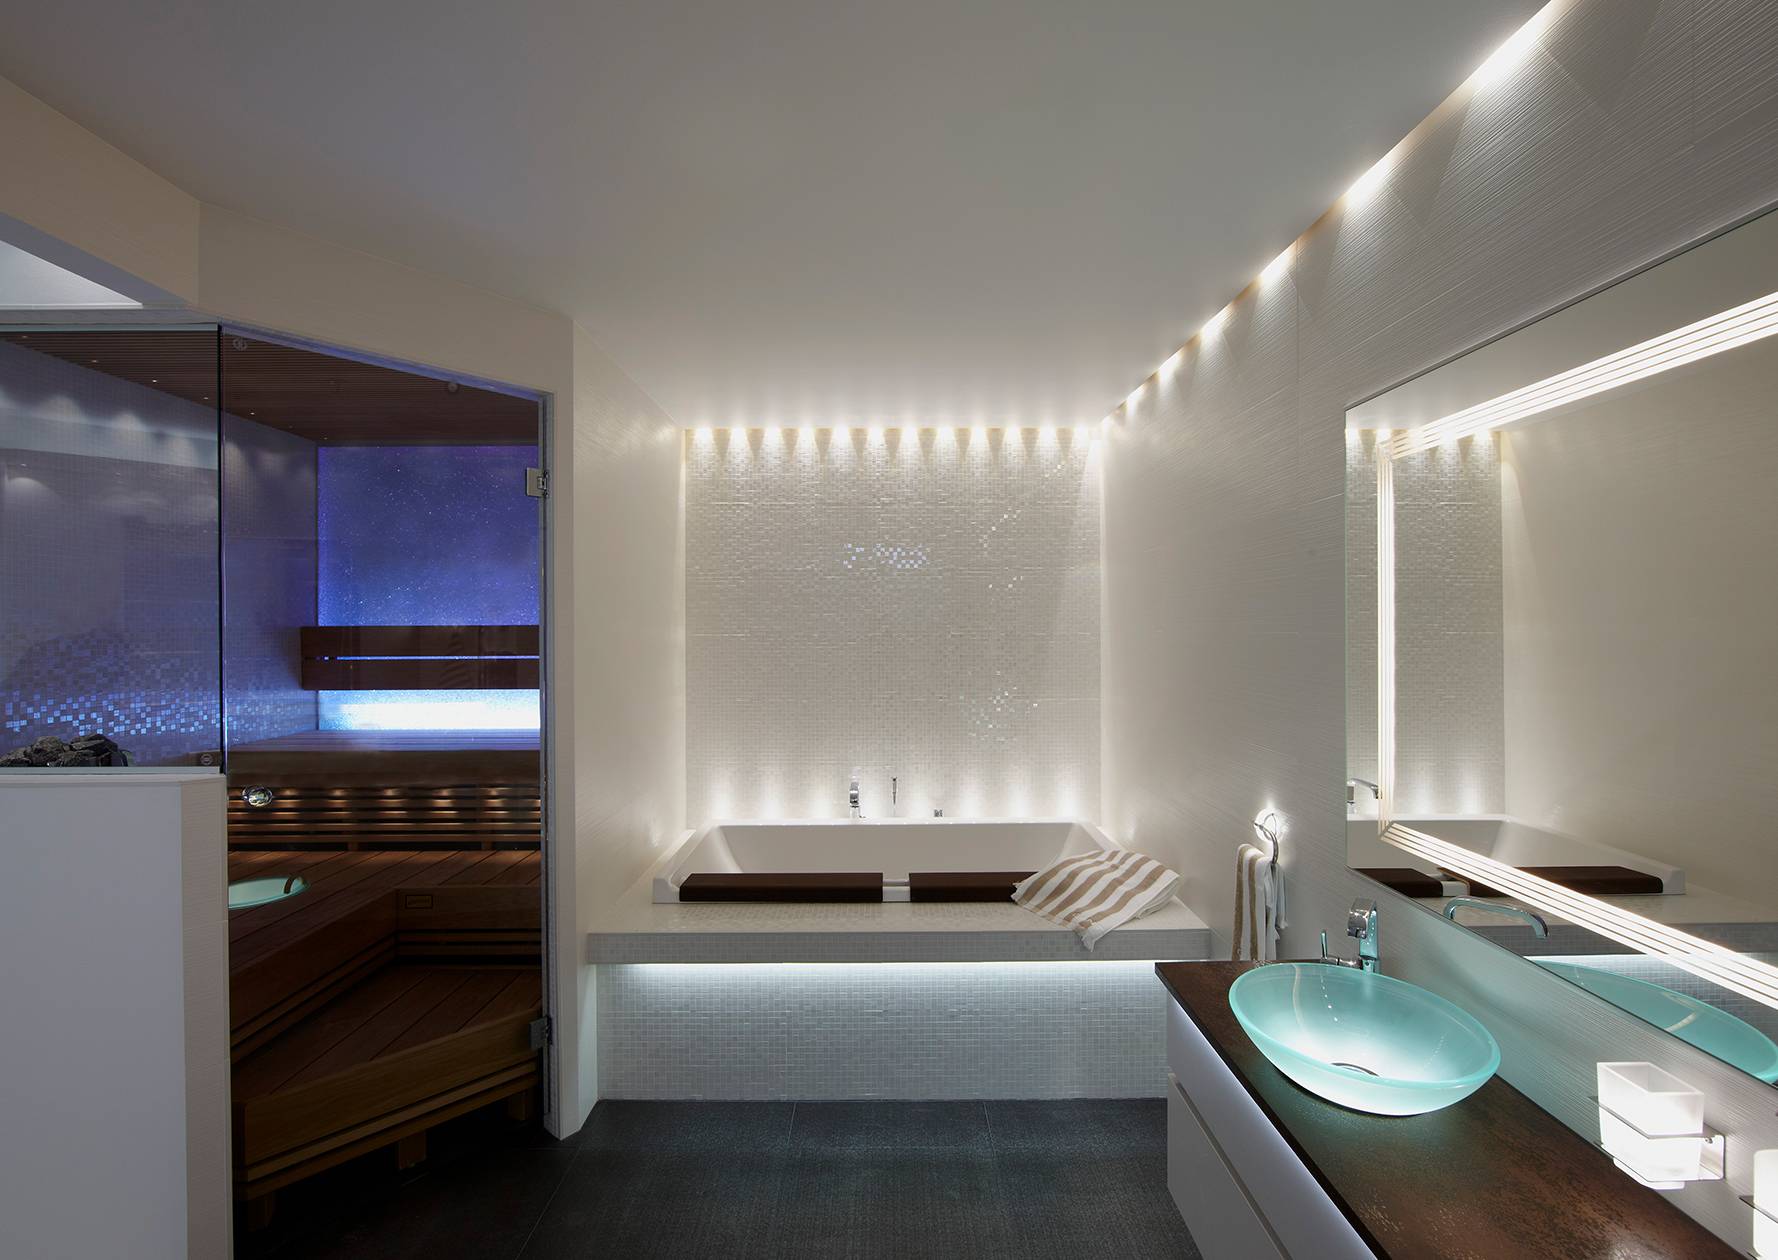
For lovers of relaxing baths, the installation of one or two devices with a muffled diffused glow is suitable. With the help of LED lighting, you can also decorate the bath itself around the perimeter or, if there is a lack of lighting, place several lamps in the shower area. The best option for the humidity zone will be devices with the ability to change the brightness and direction of the light flux.
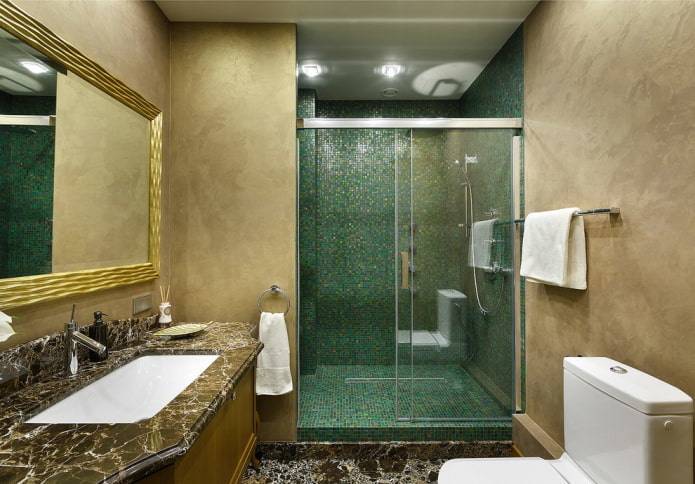
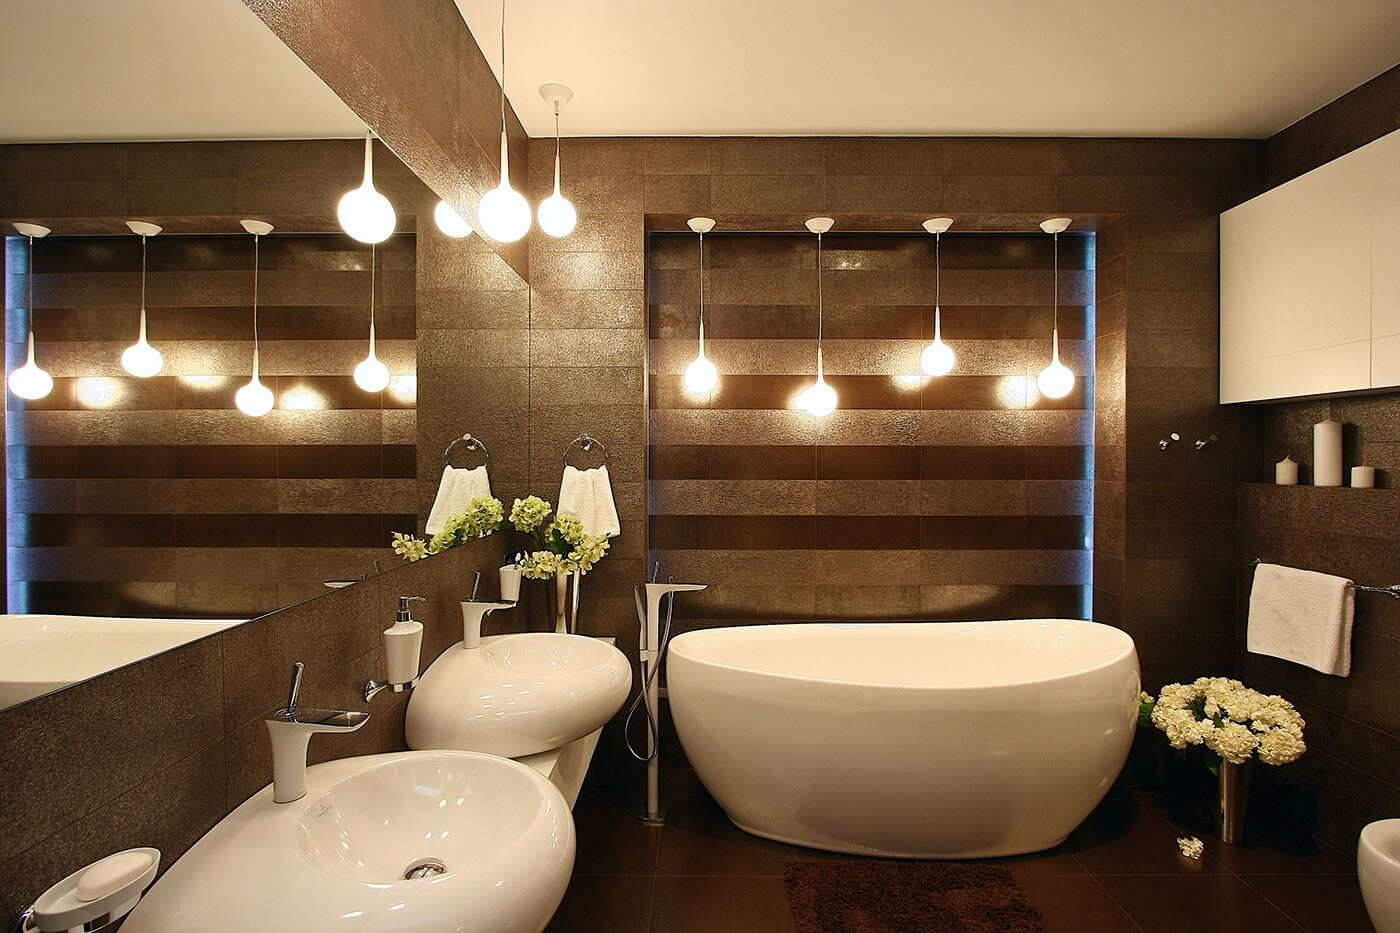
The photo shows spot lighting located above the bathroom in the interior of the bathroom.
Storage systems and equipment
To create an unusual romantic mood and give the environment a certain elegance, light highlighting of individual elements of the interior is used. Such a decorative solution allows you to highlight shelves, cabinets, drawers for things and other items. Such illumination can be carried out using LED strip or spotlights. As additional lighting in the room, an area with hooks for towels or a place where there is a washing machine is equipped with a separate source.
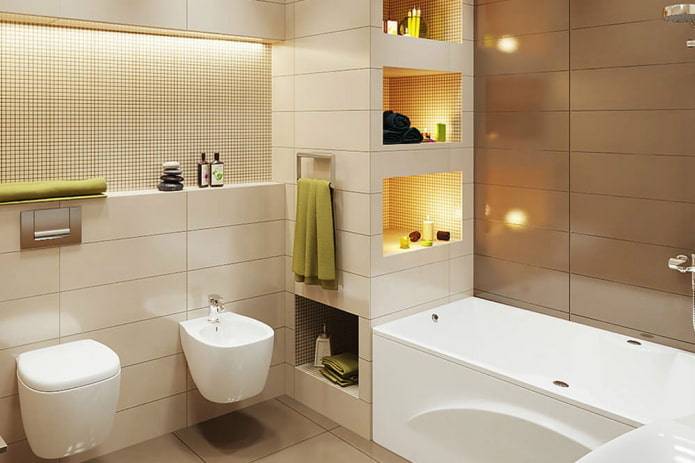
The photo shows the shelves in the bathroom, equipped with spotlights.
decorative
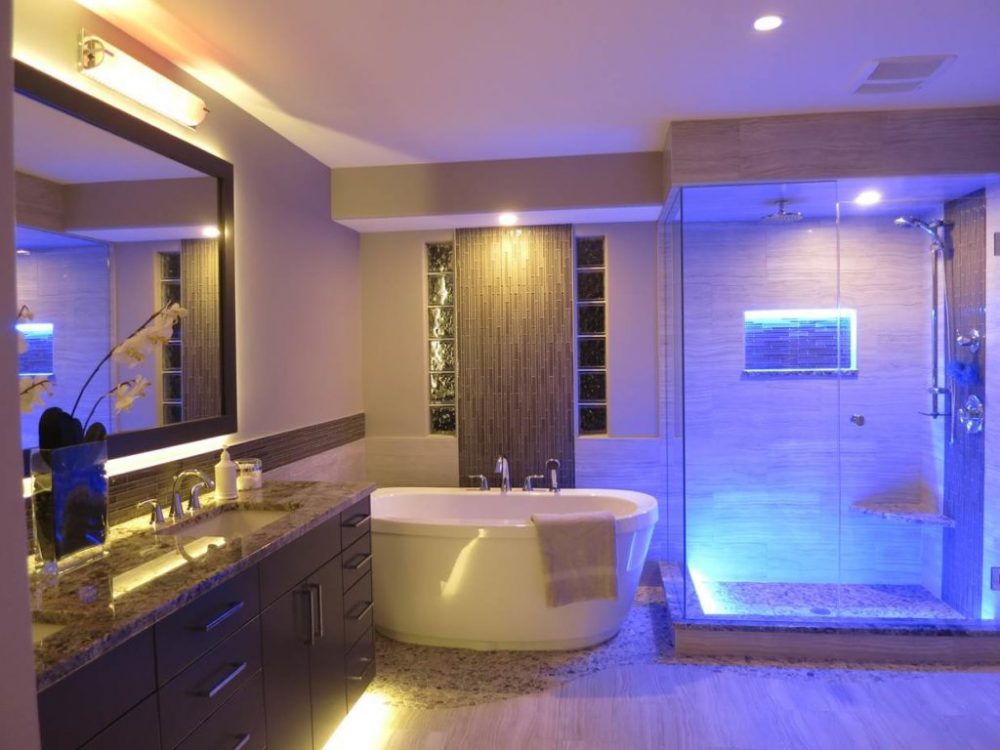
Thanks to autonomous tape lighting, spotlights framing the bathroom, a nozzle on the faucet that changes shade depending on the temperature of the water, it turns out to give the room even more light and space.
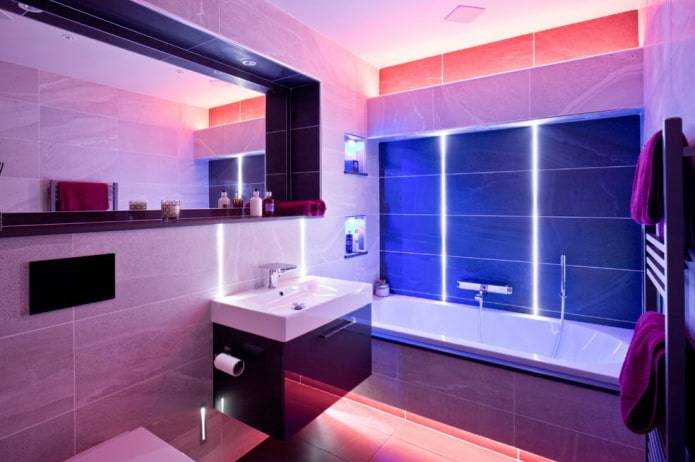


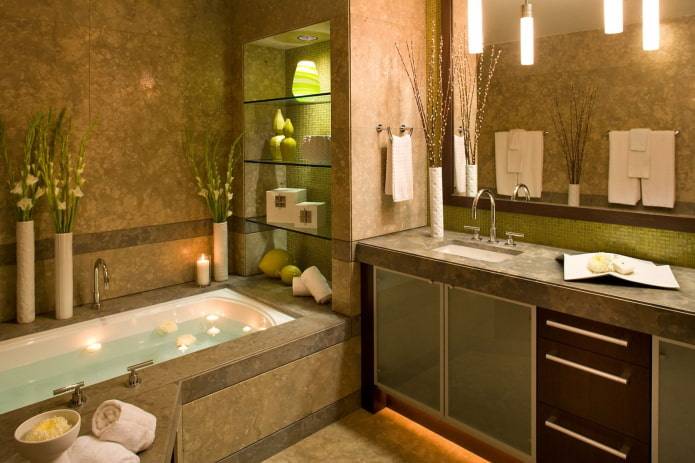
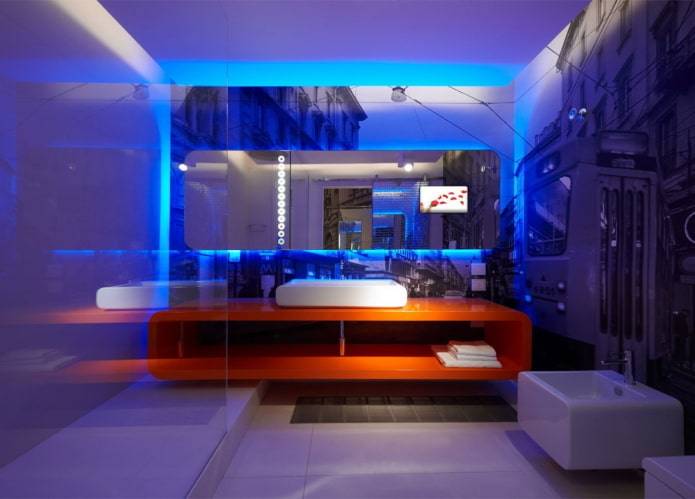
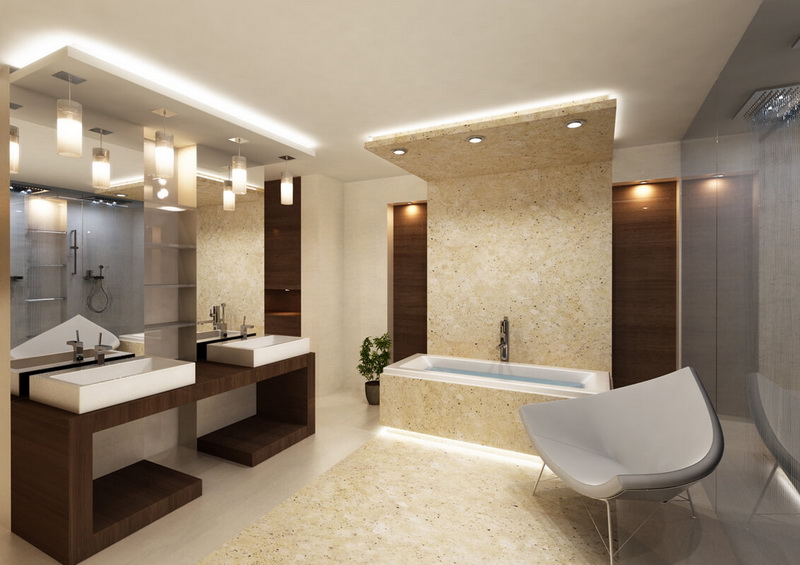
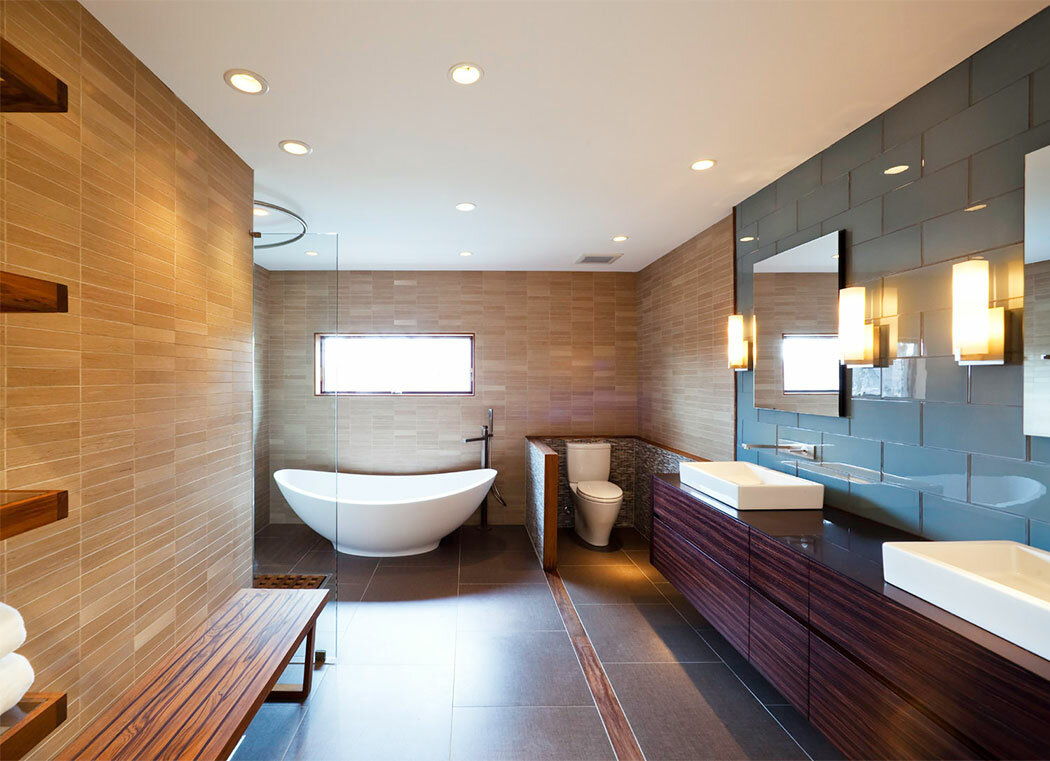
The photo shows decorative lighting in the interior of a high-tech bathroom.
One of the popular solutions for the bathroom is a false window. It is made of frosted glass, which is decorated with moisture-resistant patterns and equipped with built-in fluorescent lighting.

In the kitchen
And the kitchen is more difficult. And it's much easier to make a mistake. Here are the necessary areas that require proper lighting.


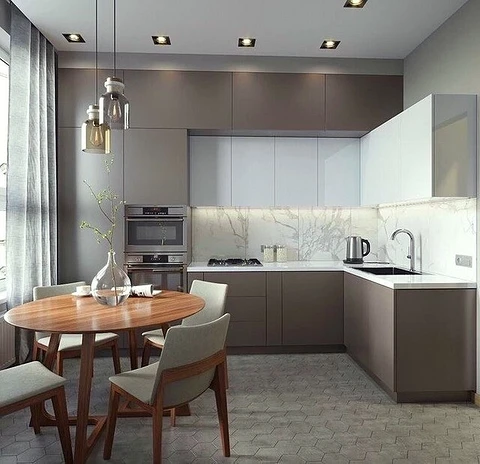
1. Directional light over the dining table
Firstly, it is convenient - a pendant lamp creates a more secluded and cozy atmosphere in the evening. Secondly, it's beautiful.
 Instagram @design_interior_idei
So be sure to consider the possibility of bringing light to this area. If you realized it late and do not plan global work with an electrician, put at least a table lamp.
2. Illumination of the working area
IKEA
Don't skimp on this item. After all, an illuminated countertop is not only beauty, but also safety, since in the kitchen we work with sharp objects
And you need to be very careful.
3. General light
You can make it only in the work area, above the headset or around the perimeter of the room.
 Instagram @design.is.good
Or you can provide a common light using a lamp with spots that go in different directions.
Versatility
It is important to decide on the main light sources and auxiliary ones. Lighting should be sufficient with a spectrum close to natural, not distorting the appearance of a person. A combined approach is also required - the system should combine different levels of luminaires and the possibility of their targeted inclusion
For example, dots near the mirror help when applying makeup.
A combined approach is also required - the system must combine different levels of luminaires and the possibility of their targeted inclusion. For example, dots near the mirror help when applying makeup.

Floor and decorative lighting
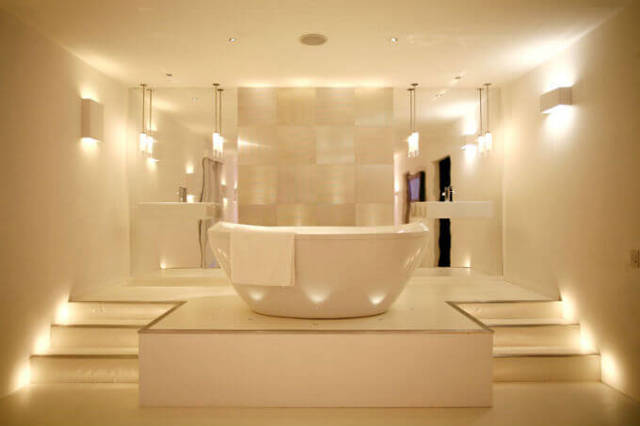
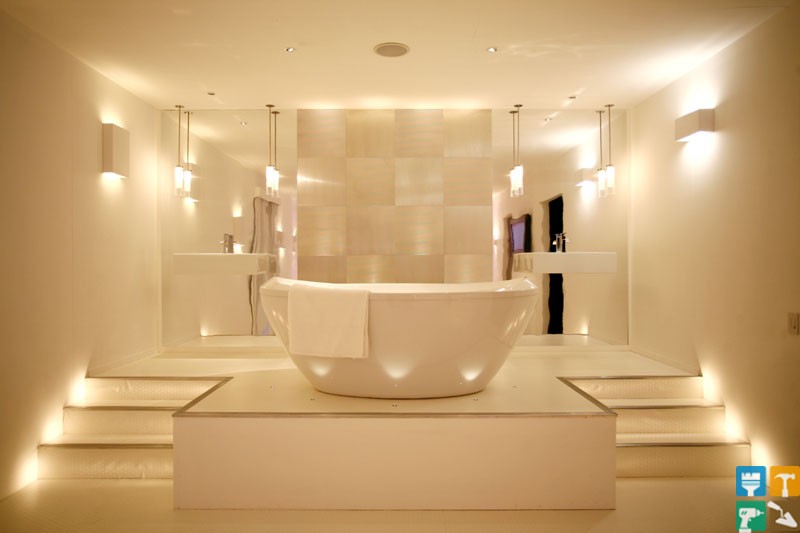
It is decorative lighting options that will provide spiritual harmony. They can be located in steps, ramps, lifts, which are built in the bathroom and have a functional role. Often the bathing tank itself has built-in outdoor, water-proof lighting.

Furniture skirting board lighting in the bathroom

Lighting in the bathroom, which is reflected in the stretch ceiling

Interesting bathroom with lighting around bathing containers
With the help of lighting, the contours of the shower stall, mirror, bathtub, steps on the floor are successfully emphasized. Creating a starry sky is also considered decorative lighting. It is easy to organize it in a stretch ceiling with the help of pre-installation of plasterboard structures.
Please note that this method of lighting will cost more than usual.
How to make lighting in the country toilet
According to the current classification, country toilets are classified as rooms with high humidity. Therefore, the following rules must be observed.
- When organizing lighting in the toilet in the country, you need to choose fixtures of protection class IP 55 to IP 66.
- Wiring should be carried out in pipes that will provide additional protection against damage.
- The switch must also be waterproof.
- Sometimes the best solution to the question of how to make lighting in a country toilet is to use stand-alone battery-powered lamps.
If, nevertheless, you decide to make lighting for the toilet in the country from electricity, then first you need to carry it out. This can be done in two ways: by air and underground. It is easier to conduct a current-carrying line through the air. If there are no limiting conditions, this method is recommended for lighting a country toilet.
For wiring you will need:
- Screwdriver Set.
- Perforator with various nozzles.
- Mounting knife for cutting insulation.
- Insulating tape.
- Pliers.
- Round nose pliers.
- Side cutter.
- A hammer.
- Crimping pliers.
- Multimeter.
- 3-core wire brand VVG with a cross section of at least 1.5 mm.
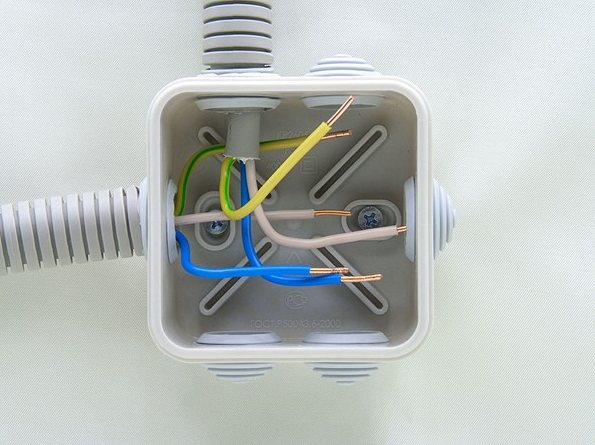
- Junction box and switch.
- Metal insulated cable with hooks for fastening the cable line.
- Corrugation to protect wiring from moisture.
- porcelain insulator.
Installation steps
So, step by step instructions on how to lead the light to the toilet in the country.
1. We close the fastening structures into the walls and fix the cable on them.
2. We pass the wire into the corrugation.
3. Turn off the voltage on the input shield.
4. We drill inlet holes in the walls and lay pipes in them that will protect the cable.
5. We install a circuit breaker or RCD to which the wire will be connected.
6. We mount junction boxes, switches and fixtures, we stretch the wire, we carry out all electrical connections.
7. Check the correct connection with a multimeter.
8. Apply voltage.
Installation
The installation of fixtures in the bathroom on the ceiling depends on the type of lighting fixture chosen.
Consider separately the installation of various types of fixtures on the ceiling of the bathroom.
Chandelier installation
Suspended chandeliers are attached to the ceiling with a tube made of metal or plastic.The pendant version of the chandeliers may consist of one or more shades, or the shades may be absent.


Models of surface-mounted chandeliers are mounted on the ceiling in such a way that maximum adhesion to the surface is obtained.
Installation of spotlights
Spot lamps are swivel and non-swivel. Fixed models have a rigid type of attachment to the ceiling. In this case, the light will fall on a certain place.
Swivel type luminaires can change the direction of illumination. You can change the lighting angle manually.
Installation is carried out as follows:
electrical wiring is installed. After installation of all wires, a suspended ceiling covering is installed;
holes are made for lamps in the suspended cover using a special hole saw
It is important to correctly calculate the hole for the diameter of the lamp;
wires are brought out and connected to the lamps. Spotlights do not have cartridges. Instead of a cartridge, there is a double terminal connector;
after connecting the wiring to the connector, mount the lamp
Each lamp has two tendrils. During installation, the antennae are unclenched, then held. Having installed the lighting device in the prepared hole, the antennae are released, and the lamp is fixed in the right place. You can adjust its position.
Instead of a cartridge, there is a double terminal connector;
after connecting the wiring to the connector, mount the lamp. Each lamp has two tendrils. During installation, the antennae are unclenched, then held. Having installed the lighting device in the prepared hole, the antennae are released, and the lamp is fixed in the right place. You can adjust its position.
Installation of LED strip
LED strip for the bathroom is installed in the following sequence:
the surface of the ceiling is being prepared. The old coating is completely removed;
all defects on the ceiling surface are eliminated
This is important, otherwise it will not be possible to correctly install the LED strip;
before applying the primer, the surface is treated with an antiseptic against mold and other microorganisms;
a primer is applied;
the tape is laid out on the floor in the same sequence as it will be located on the ceiling;
it is immediately allowed to connect 5 meters of tape, the remaining elements are connected in parallel;
the controller is connected to the transformer;
when the transformer is turned on, the operation of the lamps is checked.
If everything works, you can glue the tape, after disconnecting it from the network.
A bright light that does not hit the eyes is ideal. If necessary - scattered or directed. The ability to control lighting is a huge step forward from technological progress.
The bathroom is a frequently used room, so it is very important to choose the optimal lighting that can be controlled. Make it brighter if necessary, muffle it. Modern manufacturers produce a large number of different lamps and fixtures of various shapes, types, designs.
The difficulty lies in the fact that it is not easy for a beginner to understand which ones are better to choose in order to emphasize the interior, feel comfort and coziness while in the bathroom
Modern manufacturers produce a large number of different lamps and fixtures of various shapes, types, designs.The difficulty lies in the fact that it is not easy for a beginner to understand which ones are better to choose in order to emphasize the interior, feel comfort and coziness while in the bathroom.
For the design of slatted, stretch ceilings in the bathroom, spot, overhead and built-in lamps with LED lamps are used.
This kind of illumination has its significant advantages:
- Energy saving of the highest level.
- Long terms of operation;
- Lamps are economical;
- The presence of high-quality transformers that protect the entire device from power outages.
- The ability to create panoramic lighting in a tiny bathroom.
A huge disadvantage of such LED lamps and the equipment necessary for their installation (transformers, ventilation system) is their high cost.
Bathroom lighting requirements
There are three main requirements, or tasks that must be completed when deciding how to properly make lighting in the bathroom.
Knowledge and understanding of the issue of how to make lighting in the bathroom will be useful and will allow you to do many types of work with your own hands or easily control the quality of someone else's work.
The implementation of safe and high-quality lighting in the bathroom will require:
- The use of high-quality materials for wiring, lamps, switches, terminal boxes.
- Competent wiring and laying the required amount of wiring in the walls of the bathroom.
- Installation of fixtures and connection of wires with mandatory additional sealing of contacts and junctions.
Important! Absolutely refrain from using old aluminum "noodles", or wiring in PVC insulation without additional protective sheath. Most professional electricians and people who are familiar with the operation of electrical appliances in a humid atmosphere are well aware of how to properly make bathroom lighting.
Sometimes it’s just too lazy to do it according to the rules, but often they save on materials and work.
The operation of the fixtures will be as reliable and stable as you spare no effort and money to get rid of the "bottlenecks" in the wiring. Making light in the bathroom is not God knows what a difficult task. But if we neglect the features of the operation of an electrical appliance, there is a chance that the power supply in the bathroom will “get sick” with the so-called “disappearing” contact.
It does not matter whether a hired electrician does the work, or do the lighting in the bathroom with your own hands, it is important to do everything methodically competently and efficiently, your health and comfort depend on it:
- all the wiring updates in the bathroom that we plan to do, we draw on paper in the form of a drawing or diagram. According to this scheme, we count the number of wires, lighting points and additional equipment. It is better to watch a video about lighting in the bathroom with your own hands, this will help you understand whether it is realistic to realize your plan and whether it will be safe;
- The question of whether it is necessary to replace the old wiring with a new one should be decided based on the conditions of repair and the condition of the old wires. If conditions allow, it is better to make a whole new electrical wiring in the bathroom. But in no case do not change individual cores or pieces of wire, this will only worsen the situation.
- Buy wire, fixtures and components of good quality.Forget about spliced pieces of wire or individual strands typed into a bundle, sometimes even made up of dissimilar metals - copper and aluminum.
Important! The first thing to do in any layout is a reliable and properly working ground. The ground conductor should not be laid in close proximity to the main wiring, it is better to make it from a thick copper wire with a cross section of about 10mm2 and lay them at the bottom of the wall in a separate channel
Grounding is better to bring it yourself to the ground loop of the house
The ground conductor should not be laid in close proximity to the main wiring, it is better to make it from a thick copper wire with a cross section of about 10mm2 and lay them at the bottom of the wall in a separate channel. It is better to bring grounding yourself to the ground loop of the house.


Natural light in the rooms

Human circadian rhythms, on which our health directly depends, are regulated by various qualities of light: its color, direction, quantity. The sun and the rotation of the earth are the principal conductors of this orchestra.
The famous Roman architect of the 1st century, Vitruvius, proved that light can even heal, and insisted on the importance of a certain orientation of the building to the cardinal points. The following requirements are imposed on modern buildings:
The following requirements are imposed on modern buildings:
- from the beginning of spring to the beginning of autumn, all living rooms in the house should receive direct sunlight for at least 2.5 hours a day;
- 60% of the rooms in the house should be well lit;
- the window area should be about 1/5 of the area of \u200b\u200bthe room;
- the top of the window cannot be placed below 1.9 m from the floor (the higher the ceiling, the higher the window should be);
- the distance from the window to the opposite wall should not exceed 6 m, and the distance between the windows - one and a half meters.
When deciding in which part of the room to locate a particular room, be sure to consider the intensity of lighting. So, for nurseries, living rooms, study rooms and other rooms where we spend most of our waking hours, it is preferable to choose more lighted rooms, with windows oriented to the south or east.
When zoning rooms, attention is paid to functionality: work surfaces, writing and dining tables are located in the brightest areas of the room, but recreation areas can be less lit.
What is layered lighting
The answer lies in the concept itself: this is not one level of lighting (the same notorious chandelier or spotlights), but many. Experts divide them into 4 types - upper, middle, lower, internal. Each performs its own tasks and is built according to its own principles.
Let's name the main advantages of multi-level lighting:
Zoning of the premises. With the help of various lamps and their proper location, even a small room can be divided into several functional zones. In this case, you do not have to resort to repair work, rearranging furniture and competent arrangement of accessories.
Changing the space to eliminate defects. Light illusions alone will allow you to expand the room, raise the ceilings, give a rectangular room a square shape, etc.
Decoration and accent. Thoughtful lighting will help create an atmosphere that matches your mood at the moment.
For example, a relaxing atmosphere, a feeling of comfort, coziness, if you want to relax, or, on the contrary, a businesslike attitude, when it is important to concentrate and keep yourself in good working shape. Receiving guests, watching TV shows, doing your favorite needlework - all this requires its own lighting.
Multi-level lighting is an opportunity to create any interior, from business to romantic and intimate, to bring aesthetics, beauty, freedom to it, while retaining all the functionality.
Choosing a bathroom fixture
Before choosing lamps, it is necessary to determine the combination of colors and the style of decorating the room. The type of lamps, their design and installation methods are influenced by the number of functional spaces and the dimensions of the room.
 bathroom lamp
Bathroom appliances are divided into types.
- According to the level of location, you can choose among floor, ceiling, wall devices.
- Features of placement on the surface determine open and built-in models.
Functional zoning provides space above a closet or mirror, door or bathroom, etc.
Various lamps are installed in the lamps.
- halogen;
- luminescent;
- LED;
- metal halide.
Popular and standard incandescent lamps. Depending on the scope of use, lamps are distinguished for general use, with directional or decorative functions.
The choice of lighting fixtures is carried out in accordance with the color combinations of the room. In rooms with orange, red, yellow-green scales, lamps of warm shades of white can be used.
Cool-coloured interiors require LED, fluorescent, metal halide fixtures and neutral white lamps.
- color temperature for the range of green tones - 3300-4000 K;
- green-blue shades will need 4000 K;
- for rooms in blue tones, 4000-5000 K is needed.


