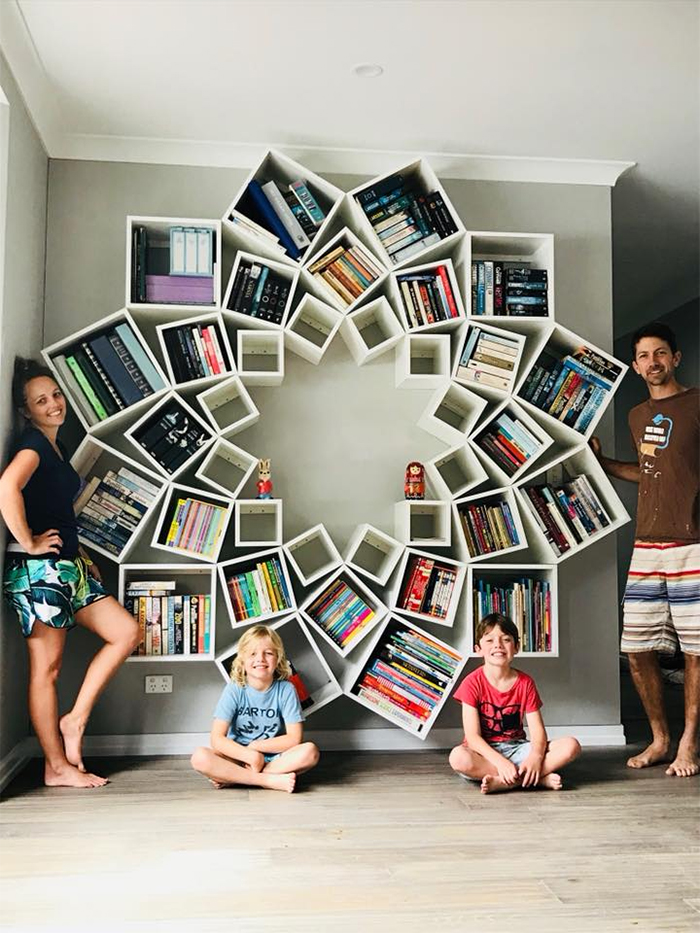
- Modern Choice
- How to make a DIY book shelf
- We make a bookshelf made of wood or chipboard with our own hands
- DIY bookcases
- First book shelf
- What you need to create a bookshelf from textiles
- Work description
- How to make shelves with your own hands
- Wooden shelf (chipboard)
- wood shelf
- Drywall shelf
- Soft shelves
- Action #5 Varnishing
- Making a simple wooden shelf
- Step 1. Markup
- Step 2. Cutting the boards
- Step 3. Processing blanks
- Step 4. Assembly of the product
- Pinta Bookshelf
- Pulseline Bookshelf
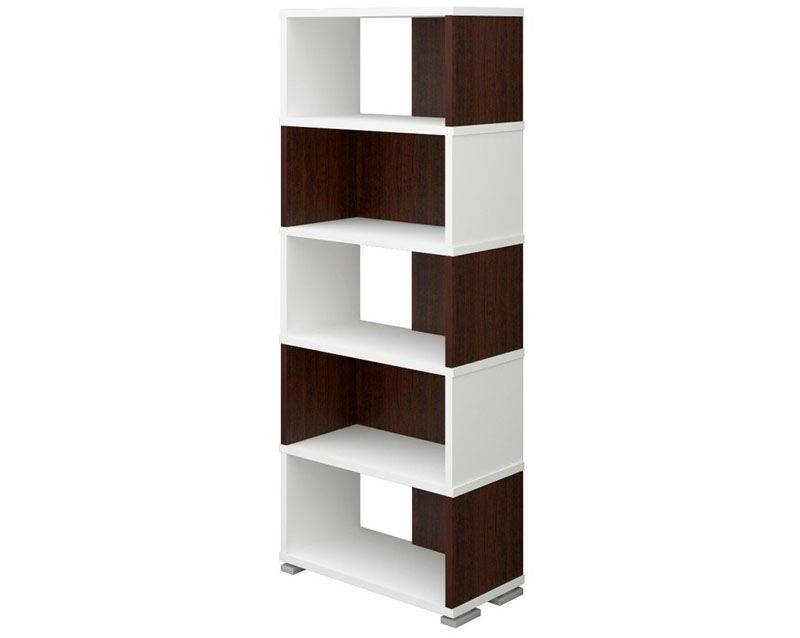
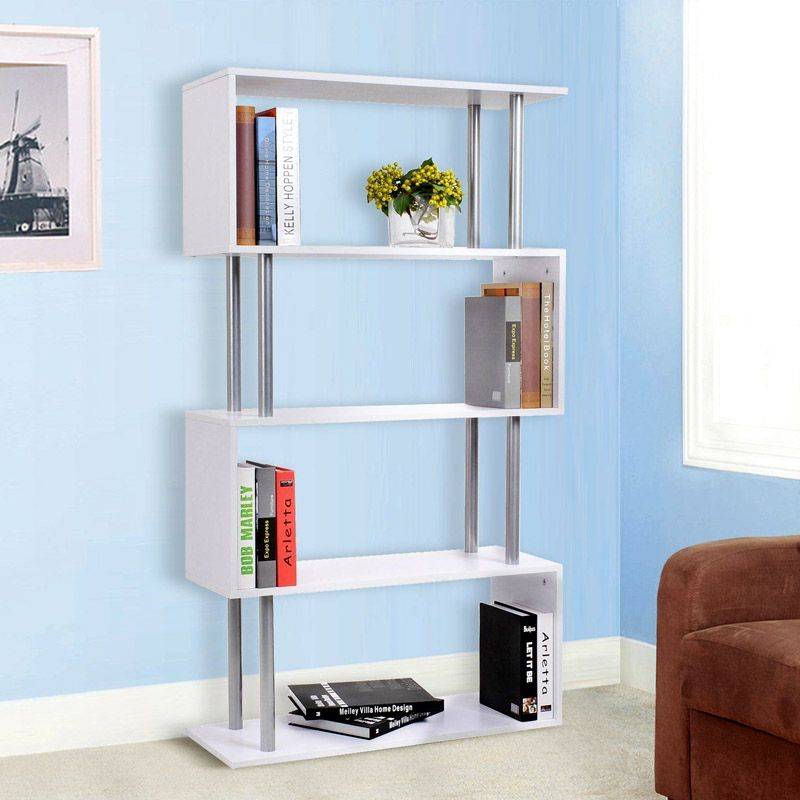
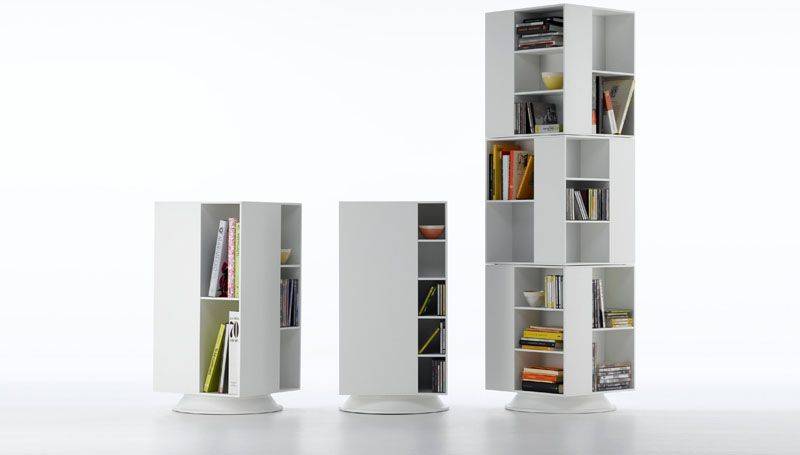
- Shelves and bookshelves: photos, descriptions
- Wall mounted bookshelves
- Floor shelf for books
- Bookshelf Montessori
- Portable bookshelves
- Action #2 Pretreatment of the material
- Master class number 4: Do-it-yourself laptop stand
- DIY manufacturing
- Summing up
Modern Choice
Everyone knows what a “wall” is, which consists of many cupboards and lockers, on the shelves of which there were very often sets and crystal. Often, these showcases shared usable space with bookcases. This model of using space in the house has long been morally obsolete, although it was once acceptable and modern.
Now people are buying more racks or shelves separately. The latter can often be glass, especially if they fit the interior of the house. No less good are separate sections - niches, which can be either just in the house or in cabinets that are built in certain places.
Such solutions are good for saving space, which has become especially relevant in the last ten years. Not surprisingly, in such a flow, the sizes of book shelves begin to play with new colors.
Thinking back to my student years, during which I lived in a hostel, one of the first details that looms in the mind is just a bookshelf. There is no extra free space in the dorm room, and there was no escape from textbooks.
To be honest, I used it far from only for textbooks and notes. She was both a towel rack and a piggy bank for small change, and what she didn’t serve.
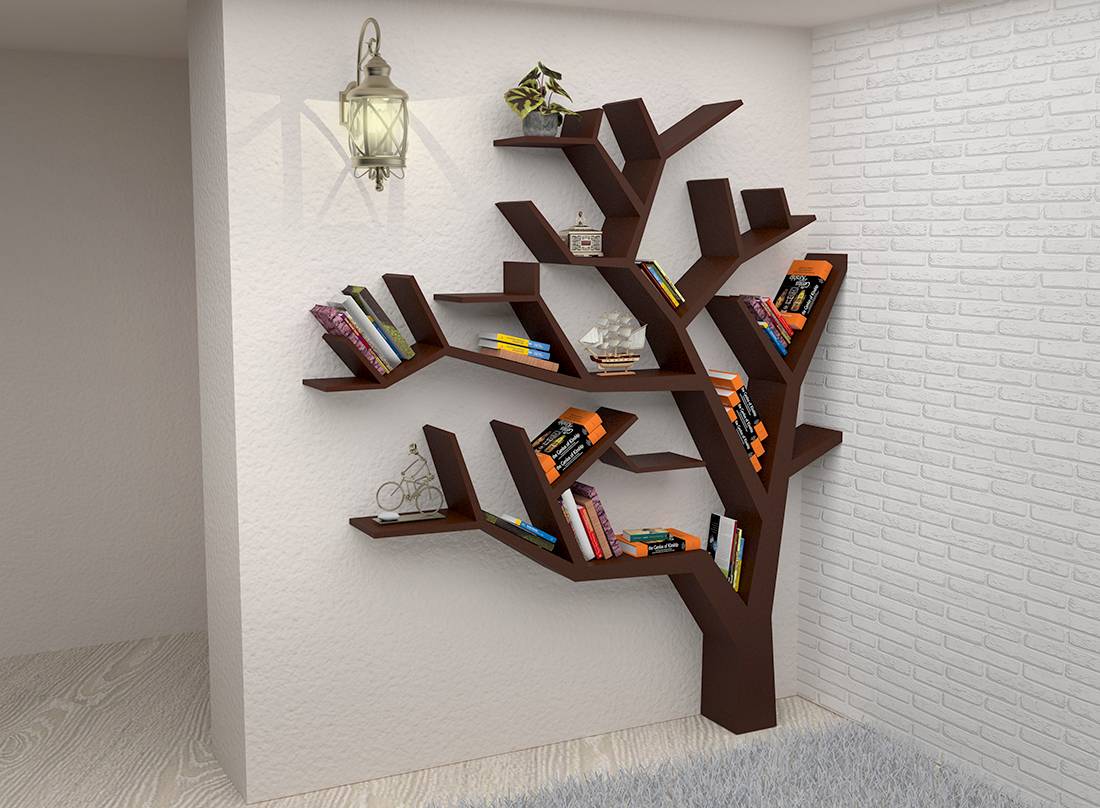
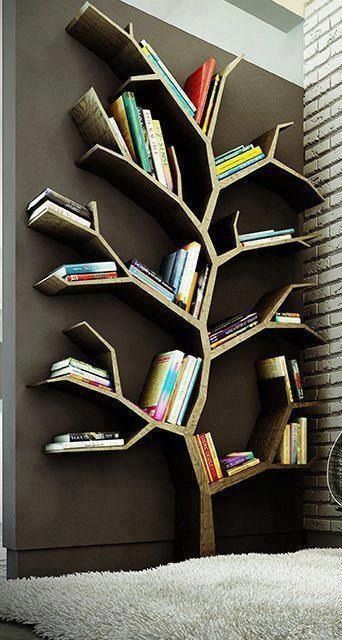
In addition to functionality and convenience, modern bookshelves can become a very attractive part of the interior of the room. Such decisions can be made even with your own hands, because a shelf of even a relatively simple shape can be beautiful.
How to make a DIY book shelf
Furniture manufacturers offer a fairly large range of bookshelves, racks and cabinets of various designs and prices. You can buy shelves for books, or you can make them yourself, which is not difficult at all. To independently make a bookcase, cabinet or shelf, it is enough to draw up a project, buy material, have the necessary tools and minimal experience with it.
 The easiest shelf you can make yourself
So, in order to make a bookshelf with your own hands, you may need the following materials:
- chipboard or MDF;
- wood or plywood;
- plastic;
- glass;
- metal.
Related article:
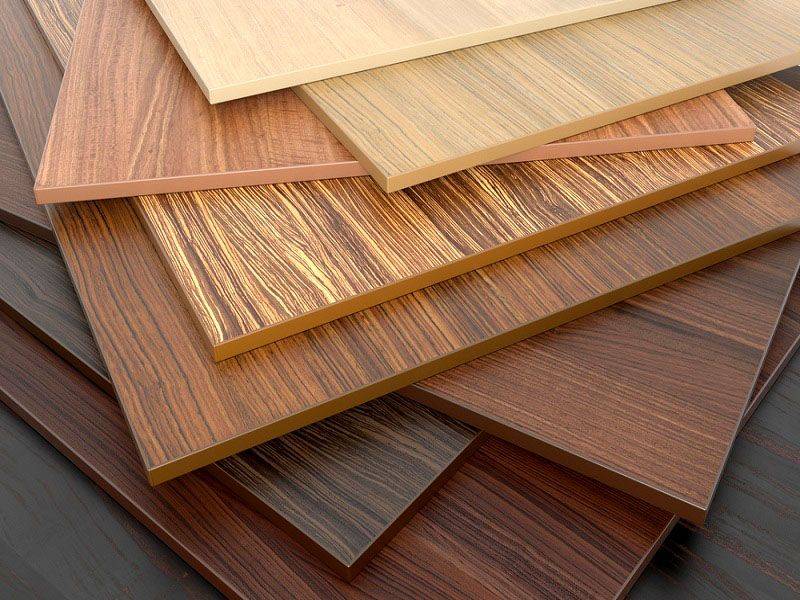 Chipboard - the most common material for the manufacture of bookshelves
You can use one of these materials or combine them to create some pretty original book shelves. As for tools and accessories, you will definitely need:
- tape measure and ruler;
- electric drill and screwdriver;
- Screwdriver Set;
- nozzles for tightening fasteners;
- stainless steel furniture pipe with Æ16 or 32 mm;
- confirmations;
- screws 16×3.5, 20×3.5, 30×3.5 and 50×3.5 mm;
- edge;
- iron or building hair dryer;
- PVA glue.
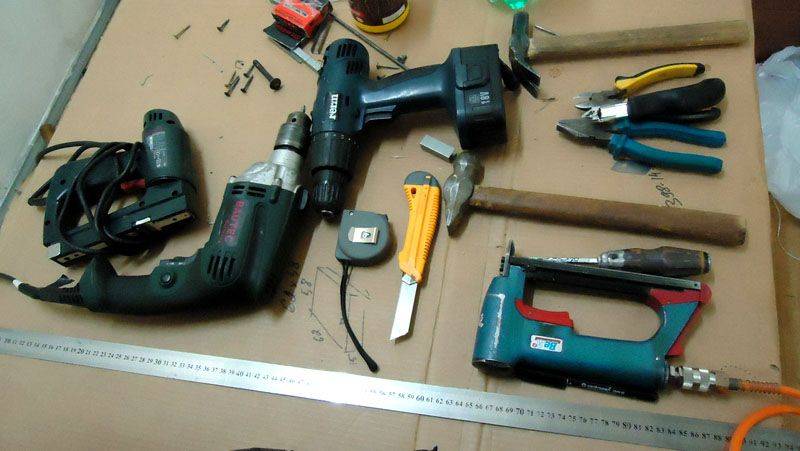 Necessary tools for making furniture
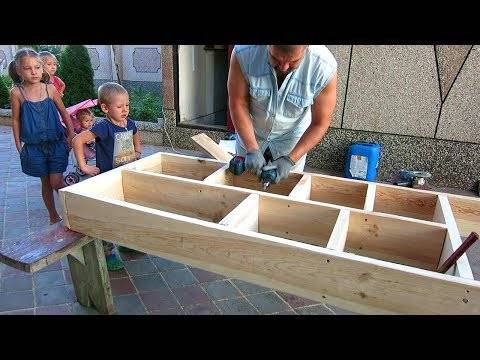
We make a bookshelf made of wood or chipboard with our own hands
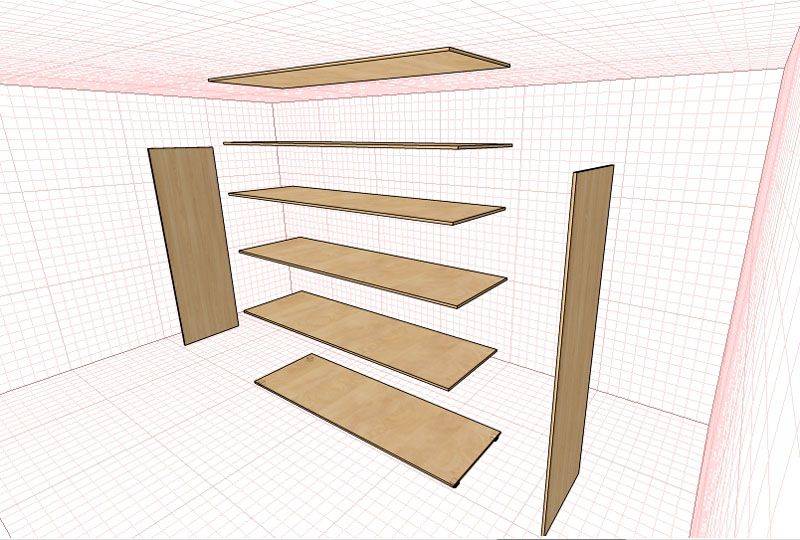
In order to make any furniture, you must first create a sketch and drawing. We already wrote about how to do this using the PRO100 program on the pages of our online magazine in the article "How to make a wardrobe with your own hands." If it is not possible to use the program, then the drawing can be made on a regular notebook sheet in a box, where each cell will indicate 10 mm. We will show you how to make a designer shelf for books using the PRO100 program as an example. As already mentioned, a designer thing is something that is made in a very limited amount.
A photo
Description of works
First, let's model our rack. Such visualization will help to imagine how the finished shelf will look in the interior.
For convenience, you can divide the sketch into separate parts. At this stage, you can definitely determine the dimensions, which means that you can choose the right raw materials and accessories for assembling the shelf.
The sketch shows the base attachment points
Connecting with cokes (cylindrical wooden pegs) is the most difficult option, since additional devices and maximum accuracy and attention are needed.In principle, the same can be said about raffixes and minifixes.
Assembly scheme on minifixes
This method is difficult for a novice furniture maker, since it is necessary to perform a very accurate marking of the junction of two parts. However, the advantages of this type of fastening are that, if necessary, the shelf can be disassembled and assembled many times, and the structure will not loosen over time. In addition, the feature of this fastener allows you to make invisible from the side of the junction, which cannot be said about confirmations.
Assembly scheme using a minifix and additional reinforcement with cokes. On narrow parts, when there is only one fastener on each side, additional fastening is needed, which will be provided by wooden pegs (cokes), completely hidden.
Beginners can master this, a simplified version of the shelf. And if you have carpentry experience, if you have material, tools, imagination and desire, you can make the most unusual shelves for books on the wall.
The cost of home-made designs is much cheaper than purchased ones, and besides, you get the pleasure of the fact that they are made by yourself and are unique.
Related article:
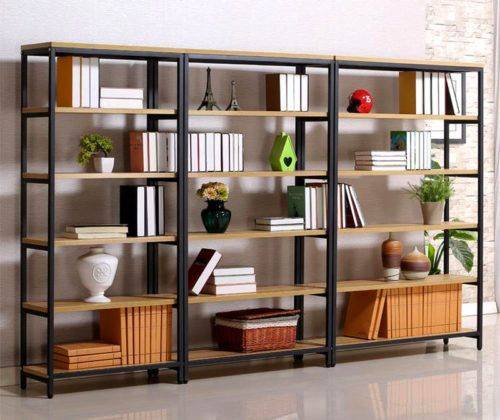
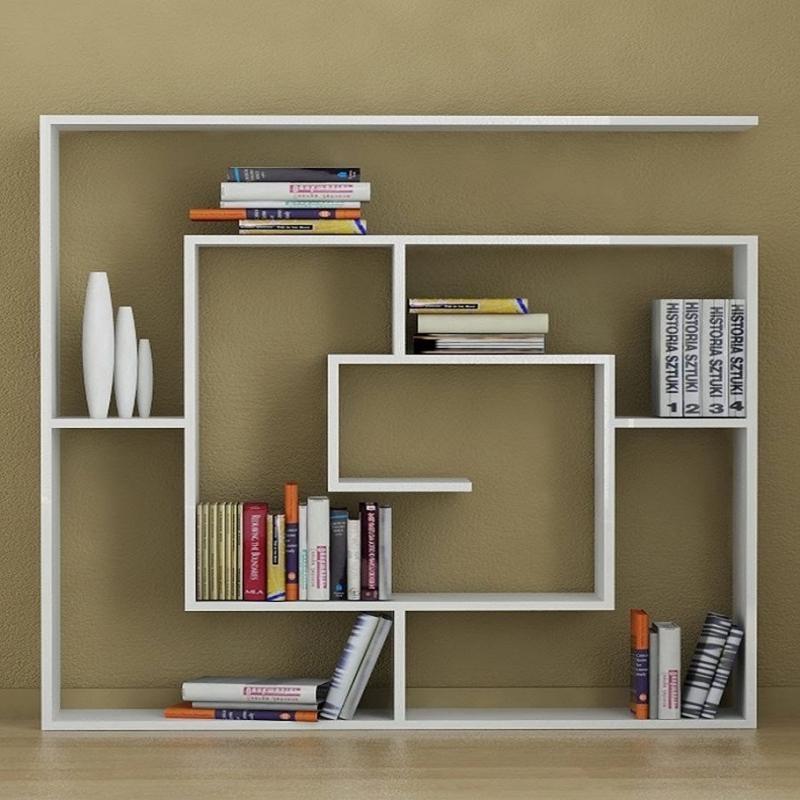
DIY bookcases
By the same principle as described above, you can make bookcases. The difference lies only in the dimensions of the structures. Shelves can be made in almost any size and used as partitions, as well as for zoning space in studio apartments. Similar book storage systems can be made of wood, chipboard, metal, and even scrap materials (pipes, pallets or logs).
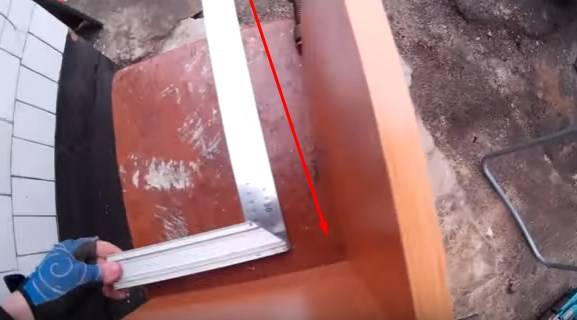
 Rack detailing
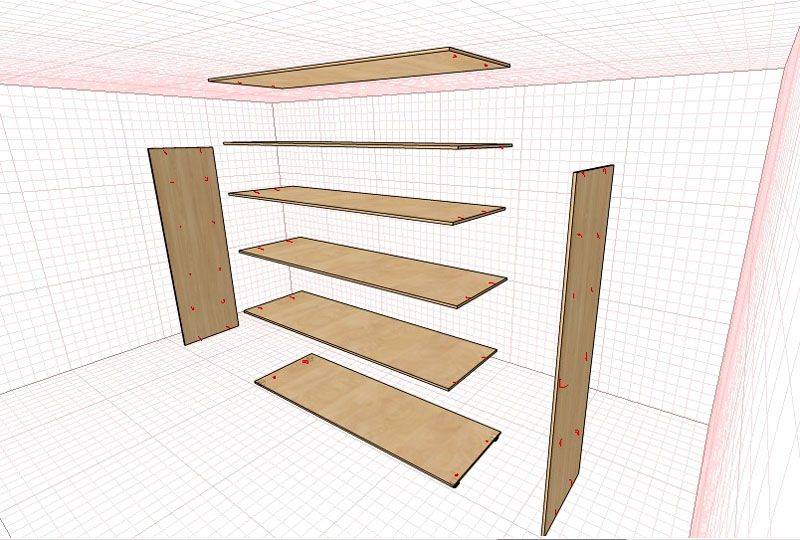 The points of connection of parts are marked in red
1 of 4

 Watch this video on YouTube
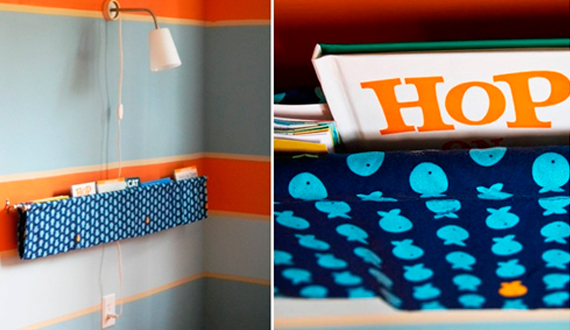
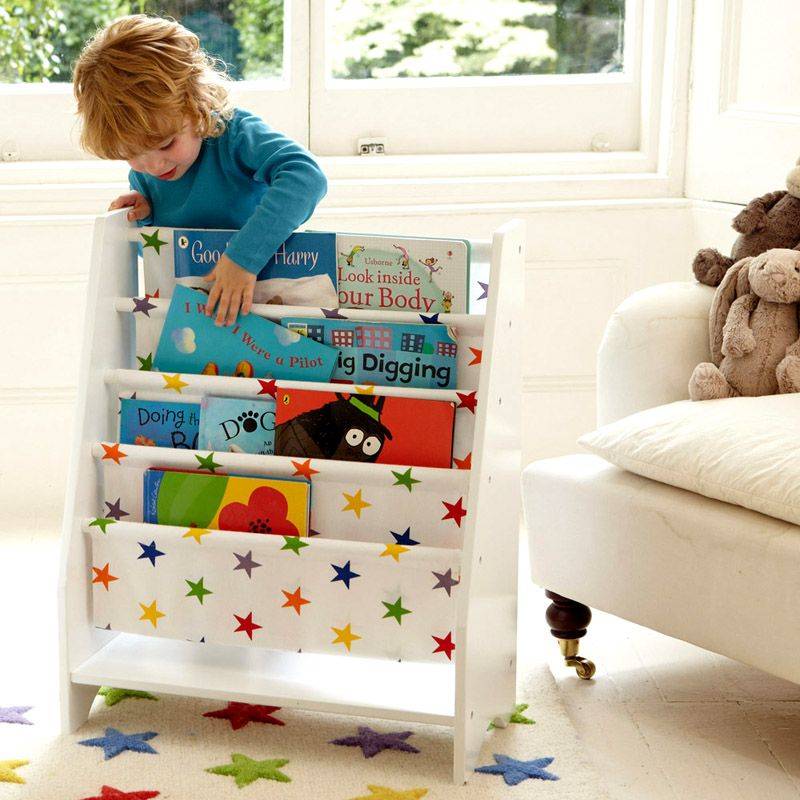
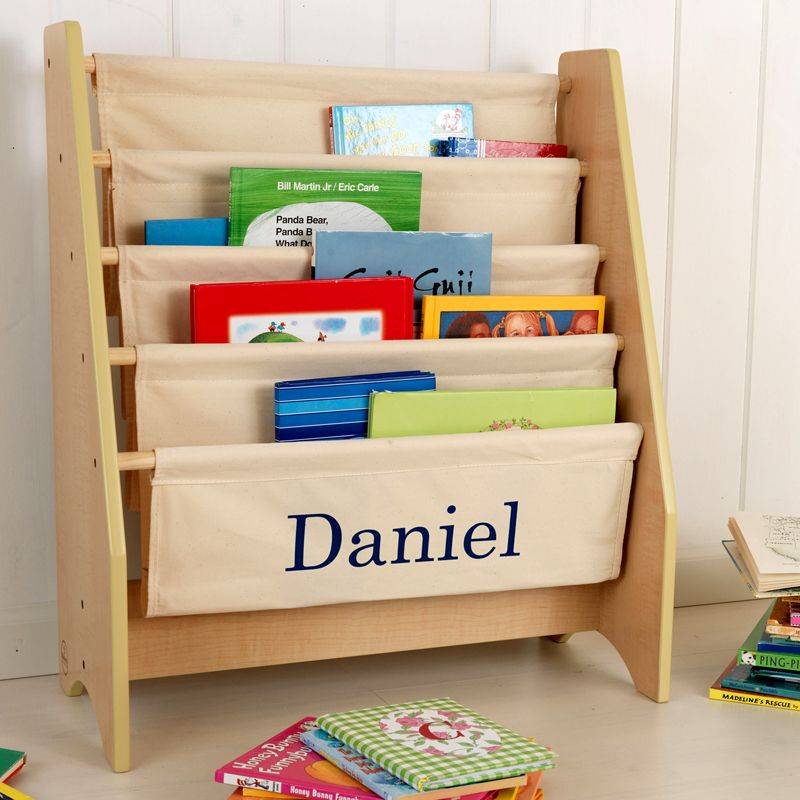
First book shelf
To equip the room of a 1-5-year-old child with a safe and convenient shelf for favorite books, it is not at all necessary to master carpentry. In fact, any mom can build such an original and useful device. To work, you will need a piece of durable fabric, a sewing machine, a cornice with brackets and a desire to make the children's room more accessible for your baby, and for him to be independent and organized.
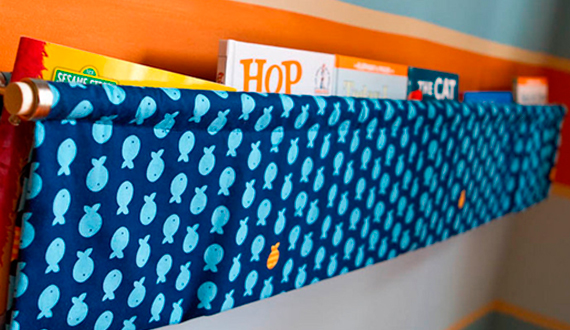
Such a shelf can be safely placed on the wall next to the bed or in the play area. DIY baby will be able to get the desired book or album, and then put it in its original place.
The parameters of the sling shelf for the nursery depend on the master's wishes and on the size of the free wall on which it will be placed. Therefore, everyone can adjust the length of the fabric and the cornice used.
What you need to create a bookshelf from textiles
- 1 wooden cornice with a diameter of 19 mm and a length of 122 cm;
- 1 wooden cornice with a diameter of 16 mm and a length of 122 cm;
- 2 double brackets with holes corresponding to the diameter of the eaves;
- about 120 cm of natural (linen or cotton) durable textiles in bright colors that are in harmony with the decor of the children's room;
- sewing machine;
- scissors;
- drill with drills;
- screws with dowels for attaching the brackets to the wall;
- building level;
- roulette;
- pencil.
Since the main material for the shelf will be natural textiles, we advise you to moisten it well with warm water before starting work, then dry it and iron it.

Work description
- Prepare a place to work, a large tabletop or a clean floor will do.
- Lay the fabric out on a flat surface.Measure with a tape measure and cut a piece with parameters of 1.194 × 1.067 m.
- Fold the fabric lengthwise right side in. Now you have a double shelf blank, the size of which is 119.4 × 53.4 cm.
- Make a 10-15 mm seam allowance and sew the fabric along the two long sides and one of the short ones. Sew the remaining short side only halfway.
- Turn the resulting rectangle right side out through the open hole. Use a pencil to straighten the corners from the inside. Once finished, fold the raw edges inward and sew.
The sling shelf for the children's room is almost ready! Now you need to make pockets to put textiles on the cornices.
- On the long side of the workpiece, measure with a tape measure in several places 50 mm each, fold it in half and sew on a sewing machine. Repeat the same steps on the other side.
- Place the curtain rods in the fabric pockets prepared for them.
- Calculate the distance between the fasteners so that the textile web remains even. We advise you to step back from the edge of the eaves by 20-30 mm.
- Drill holes in the wall for mounting the brackets. Place dowels in them, pre-lubricated with glue. This will make the mount more secure. Fasten the brackets to the wall with screws.
- Place the shelves with the shelf into the holes on the brackets.
The work is done. Finally, some helpful tips:
- We advise you to purchase or make yourself 4 tips for cornices (2 for each), then they will not move in the holes of the bracket, and even the most active child will not be able to get them.
- Additionally, a colored fabric elastic band or colorful small pockets for pencils can be sewn onto the front of the sling shelf.


How to make shelves with your own hands
Often housewives want to add something unusual to the interior, and relatives undertake to make this fantasy. To help them, consider how to make a wall shelf with your own hands from different materials.
Wooden shelf (chipboard)
We take blanks 25 * 25 cm. You need eight pieces of such parts. And four parts 30*20.
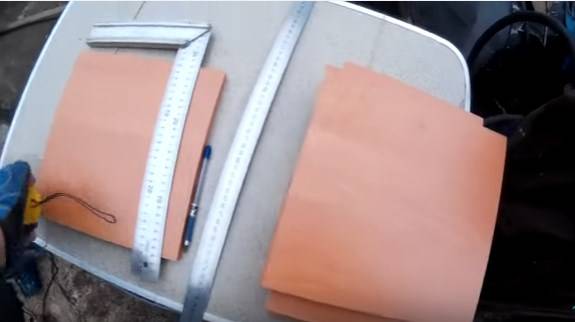
All sides of the shelf must be trimmed. At home, this can be done with an iron.
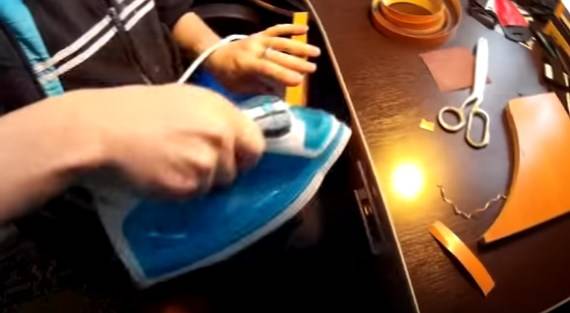
We cut the protruding edges of the edge with a knife and skin it so that there are no hooks.
We take two did 25 * 25. We twist and check the inner goal with a corner.
If everything is good, we drill and connect two more parts to make a cube.
In the same way we connect the second cube.

We connect two parts 25 * 30 at a right angle and drill them to the sides of the shelf.
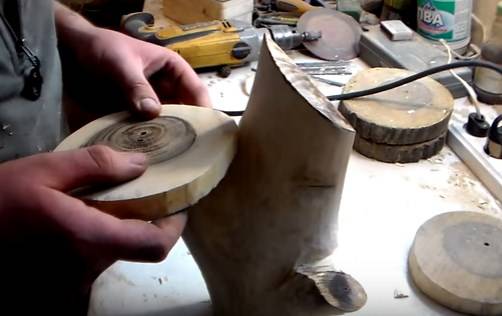
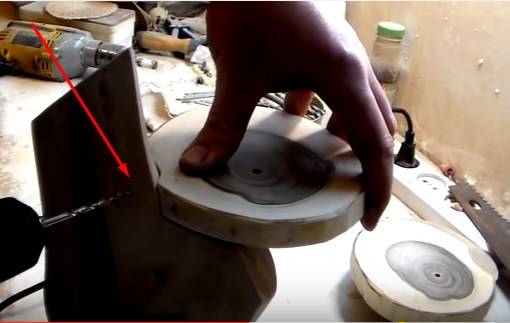
wood shelf
We make blanks: three round and one trunk.
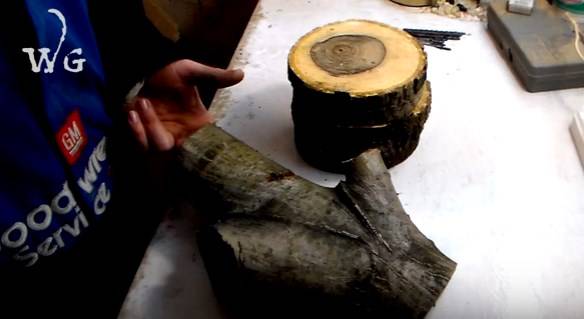
We remove the bark from the blanks and skin them until the roughness is completely eliminated.
The basis for the shelves must be prepared; for this, the protrusion on the trunk is made perpendicular.
It is necessary to adjust all the cuts and make indentations at the points of contact.
We assemble with self-tapping screws.
If necessary, the shelf can be covered with stain, varnish, paint.
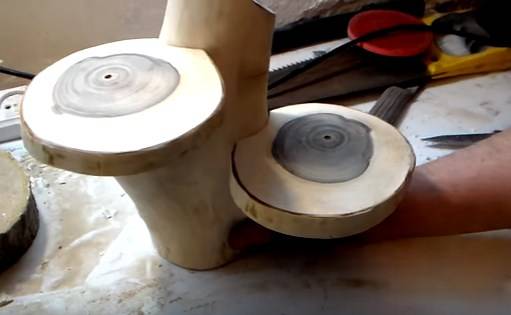 Firewood hanging shelf
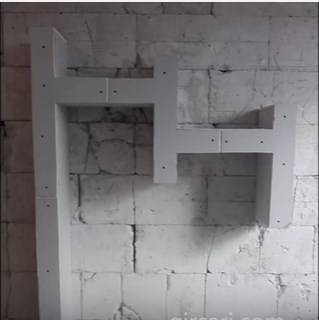
Drywall shelf
We make a drawing with dimensions.

We drill the first profile to the wall vertically.
Sheathed with drywall.
We drill a short section of the profile into the inner part and drill a parallel wall.
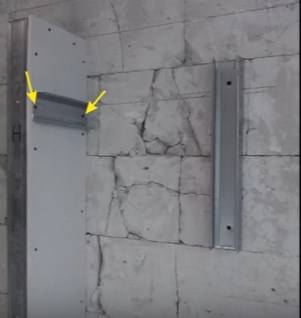
We cover the wall with drywall.
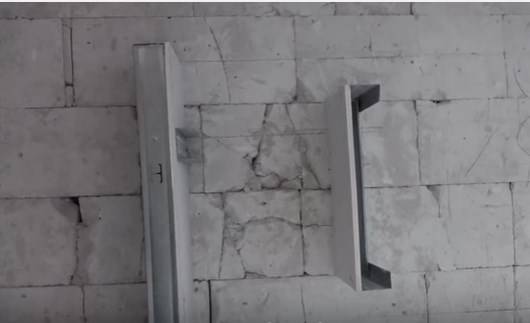
We make horizontal profiles and drill them to the wall.
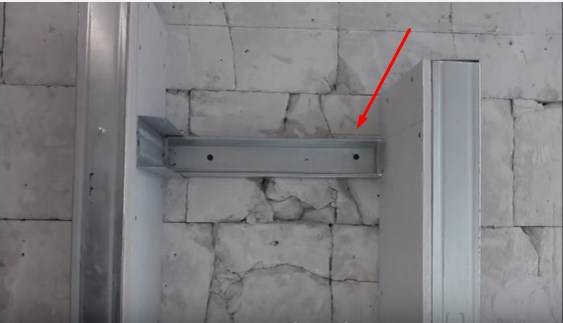
It turned out the basis for the first shelf.
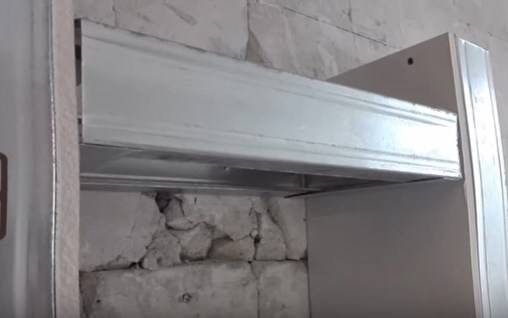
Sheathed with drywall.
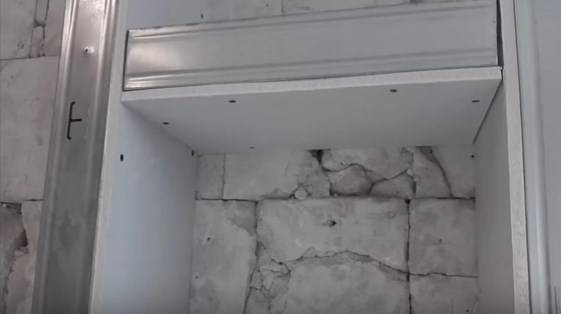
We make a frame for the second wall.
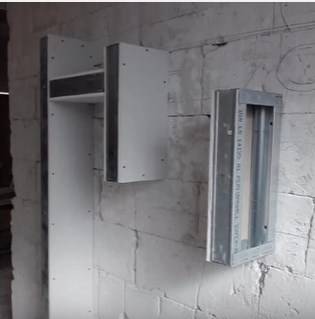
We close the sides of the profile with drywall, putty the joints and decorate.
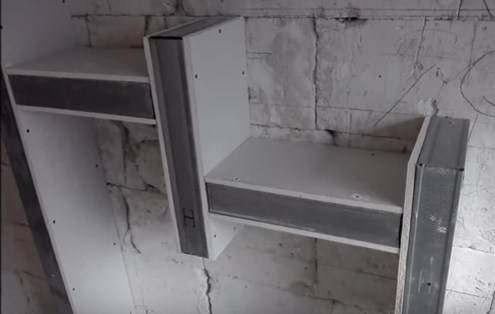
The drywall shelf is ready!
 Shelf hinged plasterboard
Soft shelves
Can be used in children's shelves-bags. To do this, in a durable fabric, we sew two armholes along the edges, where sanded sticks are inserted.


Attached to the wall with a cornice base.
 Soft shelves for books
I would be grateful for your comments!
Action #5 Varnishing

Shelving varnished
1
When the design of the rack is assembled and cleaned of roughness, it is advisable to open it with varnish to give a beautiful appearance and extend the service life.
2
An alternative may be painting the structure with paint or stain. The choice in this matter depends on the aesthetic needs of the owner. The main thing to remember is that at least something, but the wood should be processed. This material does not like dampness and will not last long without a protective layer. In addition, do not forget about the burrs and other troubles that an untreated tree carries.

Drying the rack after varnishing
3
After the structure is painted or varnished, it should be dried for several days.
How to make a children's house with your own hands: from wood and other materials. Dimensional drawings | (80 Photo Ideas & Videos)
Making a simple wooden shelf
Do-it-yourself bookshelf
Wood is the most convenient material for work. Wooden shelves are simple, complex, open and closed, vertical, horizontal and angular. Taking the basic version as a basis, you can assemble a shelf from several modules and give it the most incredible look. In order for the product to serve for a long time, you should choose the right wood: the boards must be perfectly even, completely dry, without cracks, voids and mold.
Wood for shelves
During the assembly process you will need:
- hacksaw;
- drill;
- building level;
- pencil and ruler;
- boards 16 mm thick;
- stain;
- varnish for wood;
- grinder;
- screws, brackets, dowels.
As an example, a simple rectangular shelf 250 mm wide, 300 mm high and 1100 mm long is used.
Scheme of a hinged shelf
Step 1. Markup
The boards are laid flat on the table and measurements are transferred from the drawing. The height of the side walls should be 268 mm as they will be located between the top and bottom: wall height + board thickness x 2 = 300 mm.
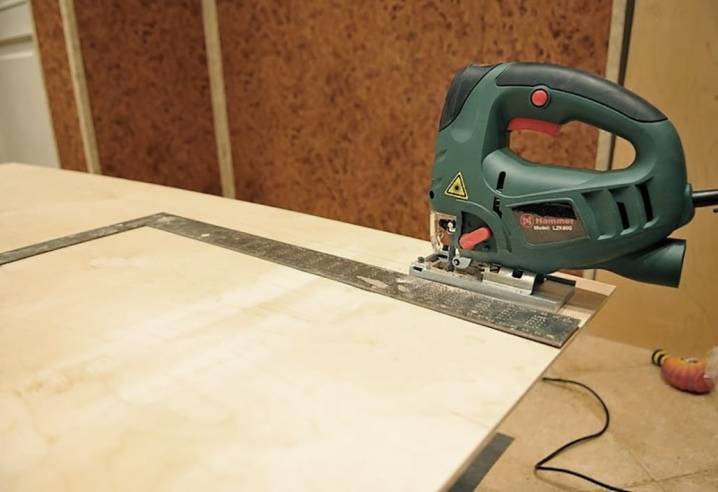
Step 2. Cutting the boards
sawing boards
If the markup exactly matches the pattern, you can start cutting. It is best to use a jigsaw for this, then the cuts are perfectly even and neat. You should get 2 long blanks and 2 short ones.
Step 3. Processing blanks
Board sanding
Before proceeding with the assembly, each workpiece must be sanded, stained and varnished. If you plan to simply paint the shelf, the blanks are treated with an antiseptic primer - this way the service life increases, and the paint lays down more evenly.
Step 4. Assembly of the product
Shelf Assembly
The bottom board is laid flat on a flat surface. 8 mm retreat from the ends of the workpiece and draw 2 straight lines parallel to the cuts. Now on these lines you need to mark two points at a distance of 5 cm from the edge, and drill holes for the screws there. Do the same with the top piece. When all the holes are ready, side blanks are installed on the bottom board and screws are screwed in. A second board is applied from above and the side walls are also fixed with self-tapping screws.
Shelf Assembly
Brackets are fixed at the ends of the side walls, holes for dowels are drilled in the wall, self-tapping screws are inserted and twisted so that they protrude by about 5 mm. The dowels must be located strictly horizontally, therefore, before drilling, a line is drawn using a level. Now it remains only to attach the brackets to the fasteners and hang the shelf. If desired, the back wall of the product can be hammered with a piece of plywood, and glass can be inserted in front.
ShelfBookshelf
To make such a simple shelf more original, you can replace one side wall with a stump of a thick branch. To do this, choose an even branch with a diameter of about 7-8 cm with a smooth clean bark, saw off a piece 28 cm long, cut off all the lateral processes. Chock is treated with a primer, dried and varnished. The bark does not need to be removed. After the varnish has dried, the workpiece is inserted between the upper and lower boards and screwed tightly with self-tapping screws.


To make such a simple shelf more original, you can replace one side wall with a stump of a thick branch
Based on this drawing, you can make various variations of wall shelves. For example, reduce length up to 400 mm and make 3-4 blocks at once. Then install them Each other in a checkerboard pattern and fasten together with metal plates. Or simply fix them on the wall separately, placing them at a short distance from each other.
How to hang shelves
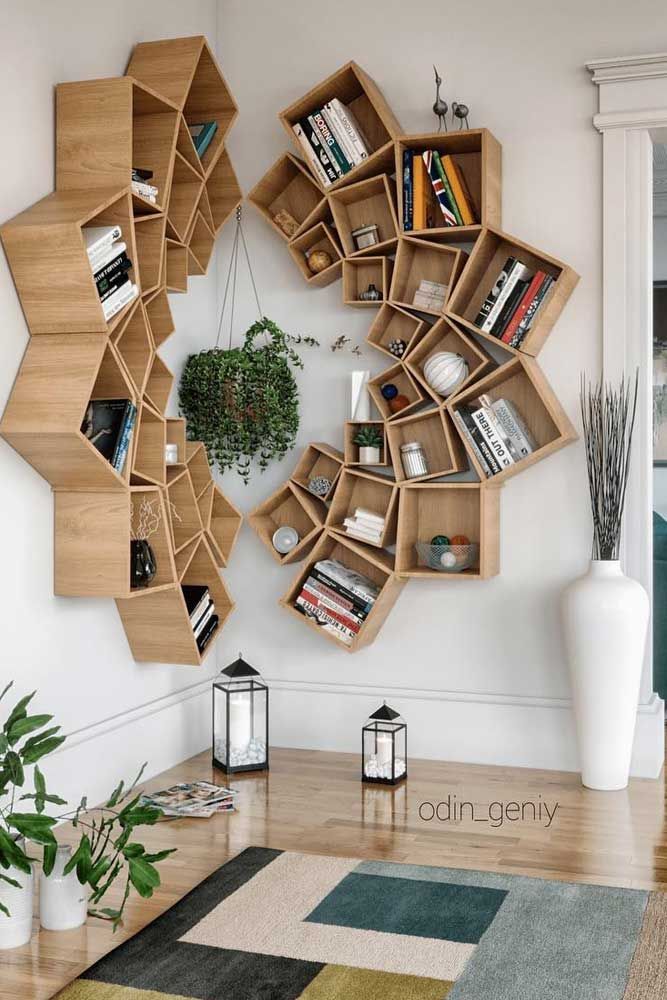
Pinta Bookshelf

Modern design never ceases to amaze us with new discoveries of all sorts of combinations of modular bookshelves of various shapes. They are universal, abstract, easy to use. One of these modular bookcases is tentatively named "Pints"."Pint" is a measure of liquid, which in good old England is about 0.57 liters. A liquid, as you know, has one special property - to flow from one point to another.

The designer, creating the book composition "Pints", used the principle of fluid flow to place the modules one relative to the other.
It is noteworthy that with the help of the same modules, you can create a perfectly symmetrical composition.
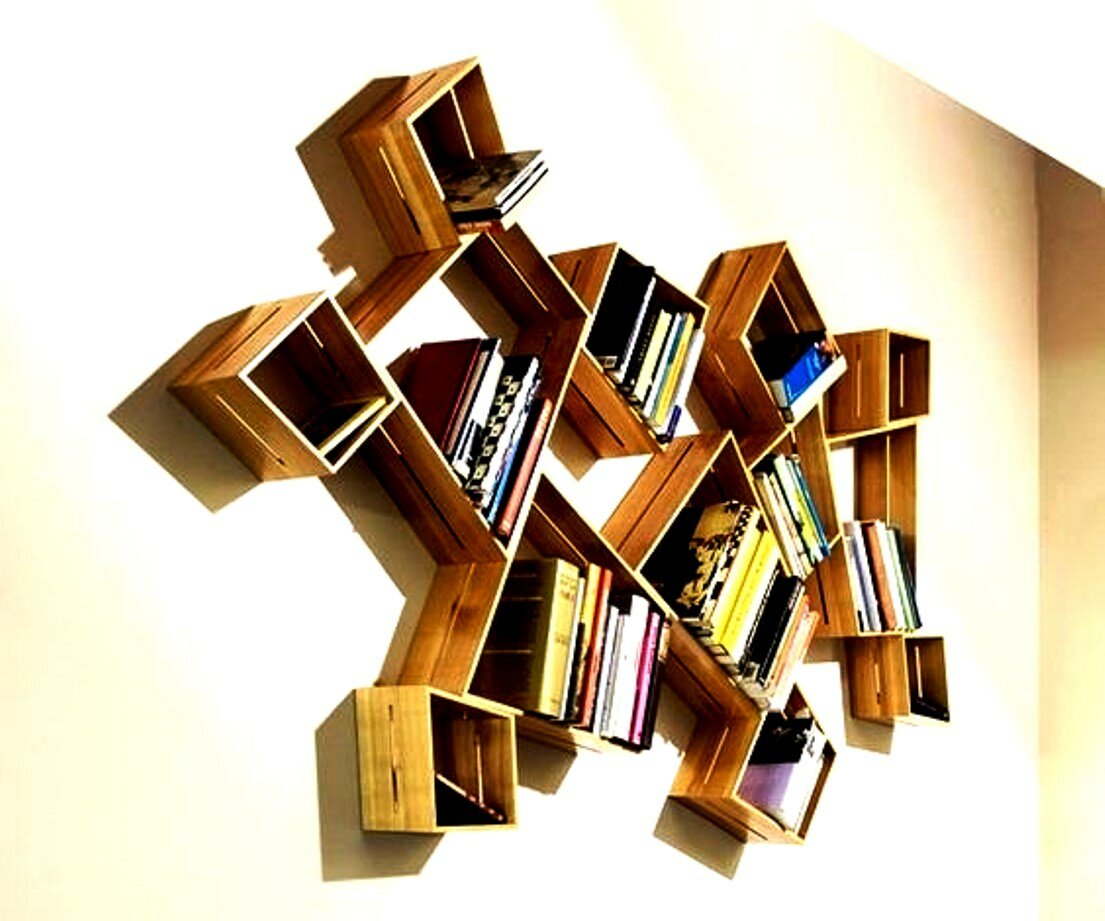
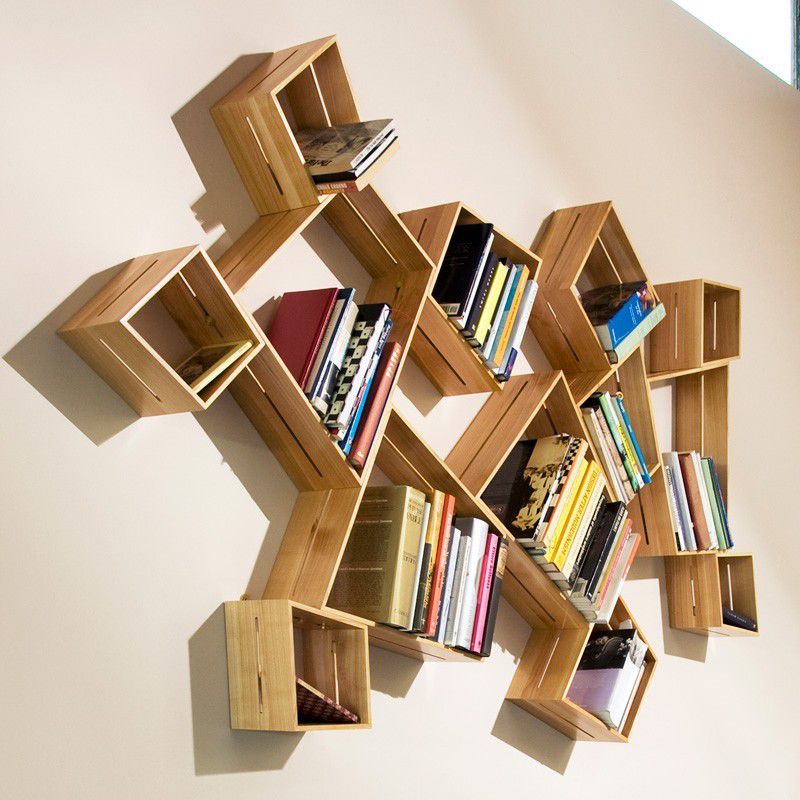
Pulseline Bookshelf
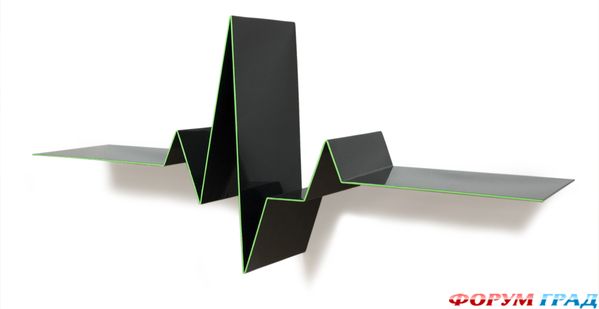
The bookshelf by Swedish designer Måns Salomonsen is very specific and is a fragment of a human cardiogram made of aluminum. Just one beat of the heart. Just one impulse.
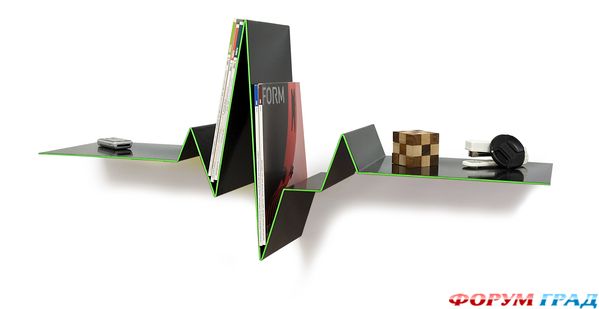
Covered in dark fluorescent paint, tinted with a graceful green edging, the shelf looks very stylish and presentable. In addition, it glows in ultraviolet light. What was the Swedish designer thinking when creating her layout? It is possible that his shelf will be bought by sympathetic, generous people, about whom they say that they have a “big heart”.

Or maybe he wanted to convey to us the idea that in difficult life circumstances you should rely more on your heart than on your mind.
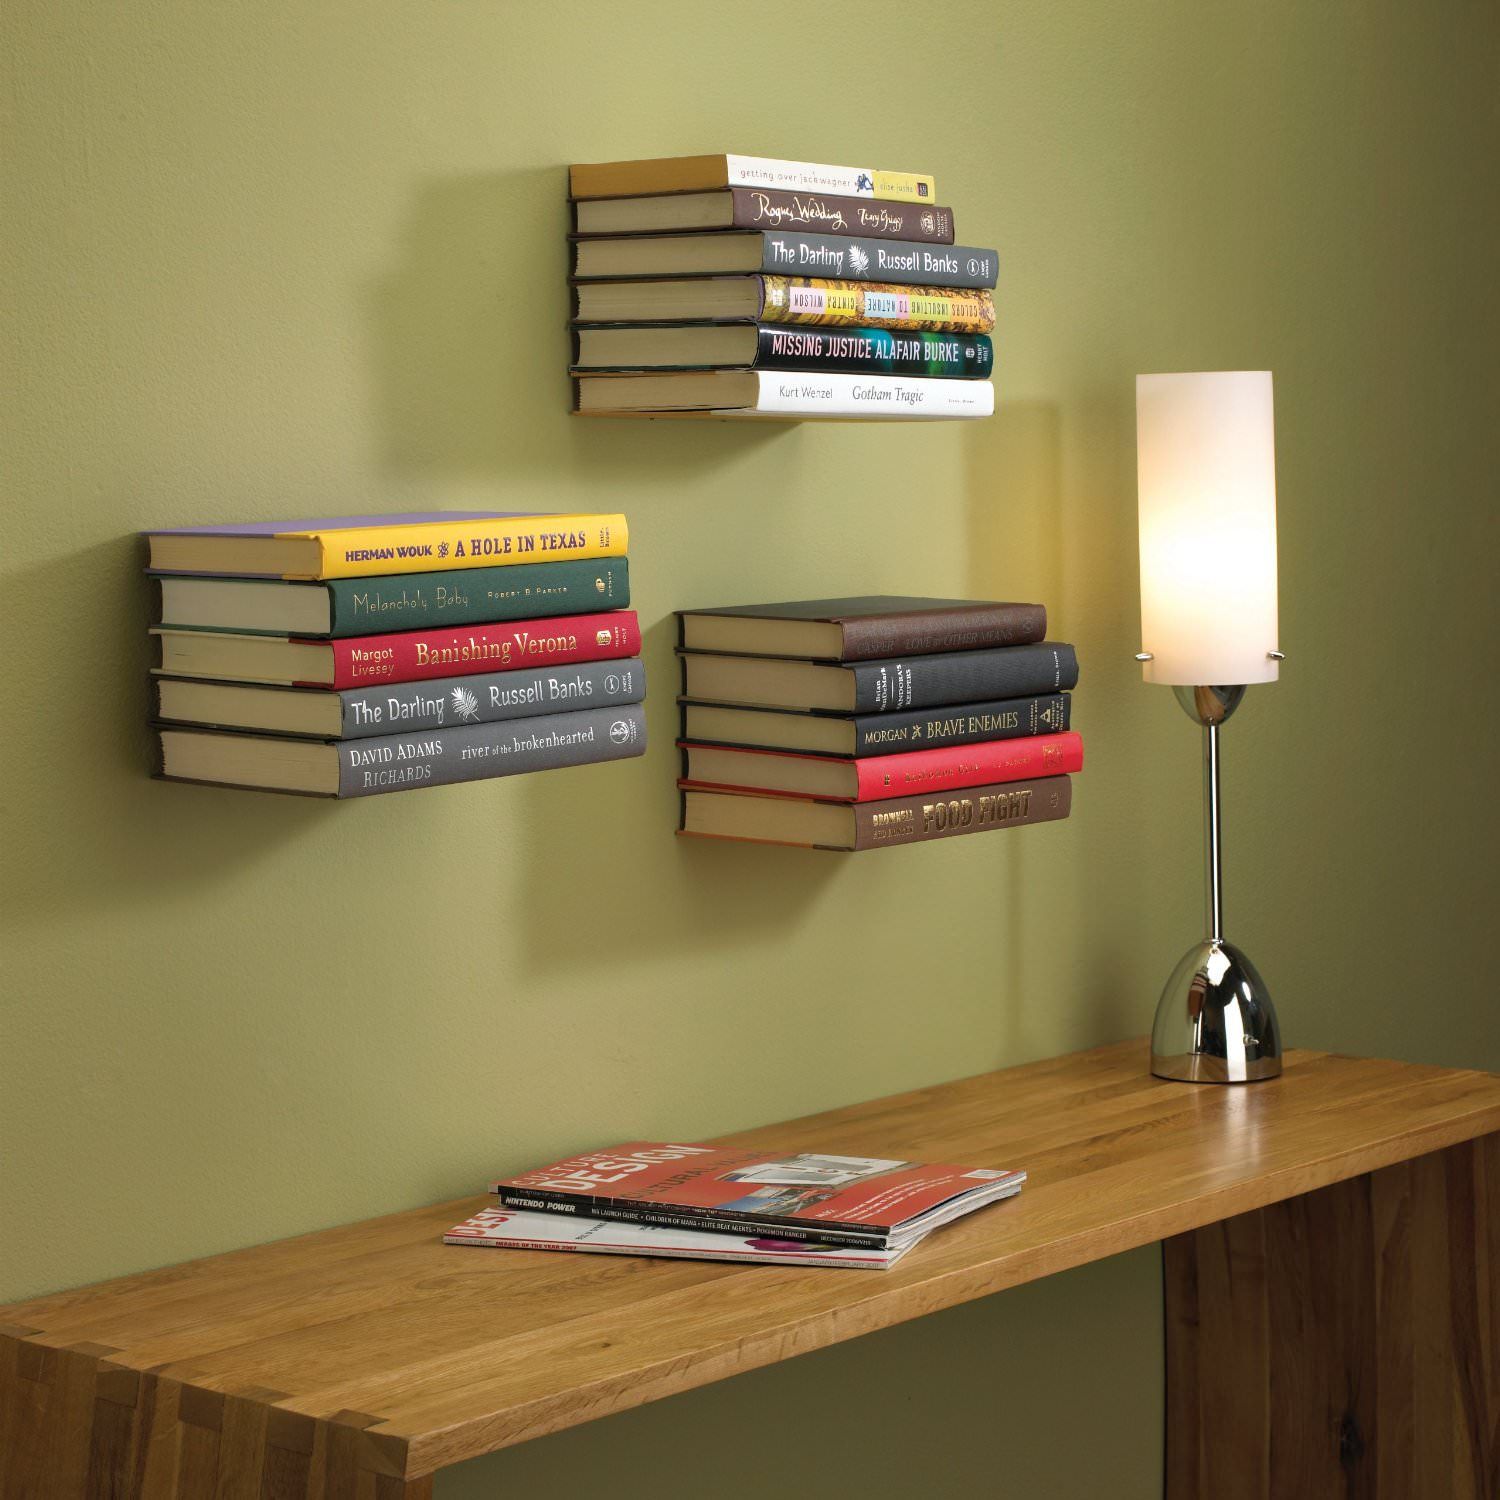
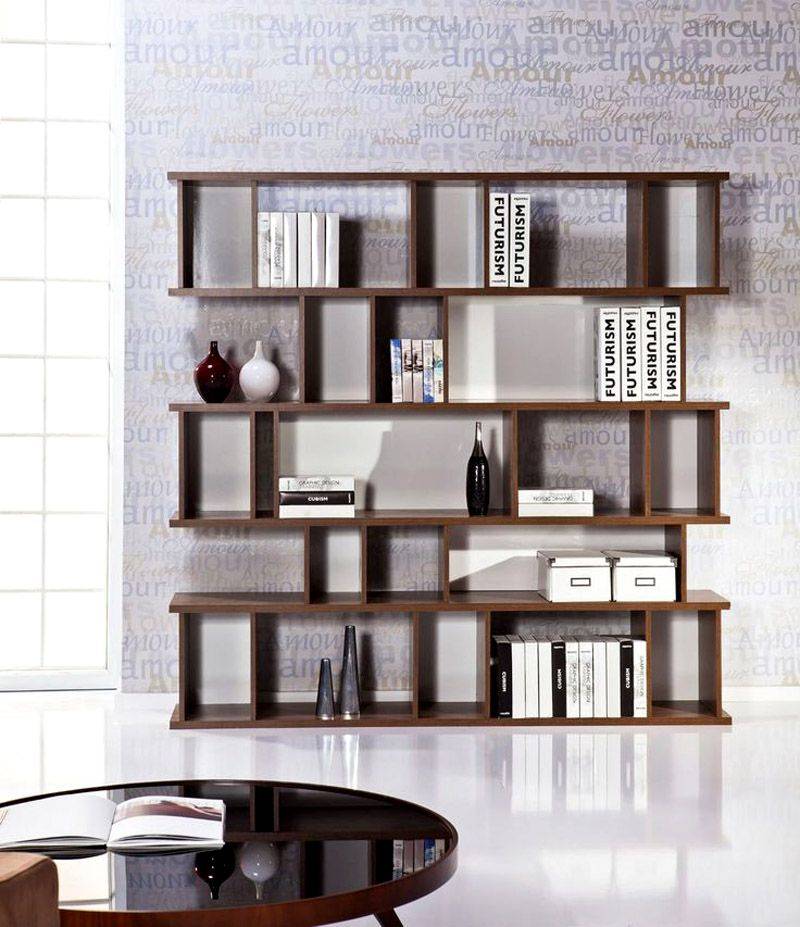
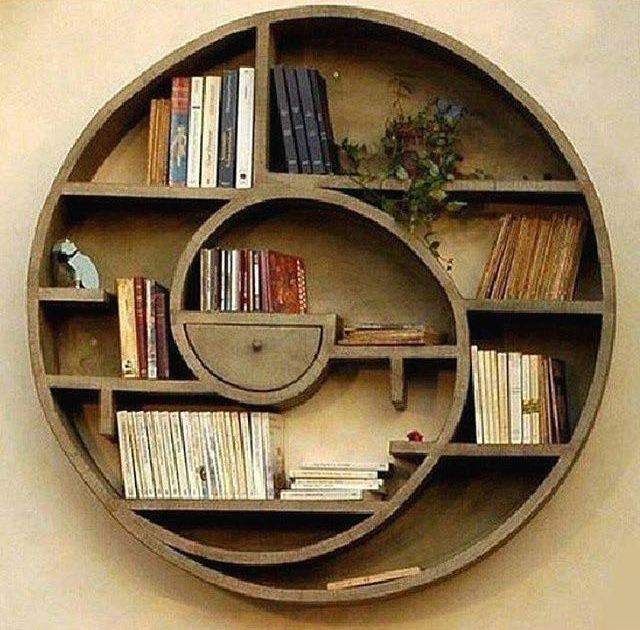
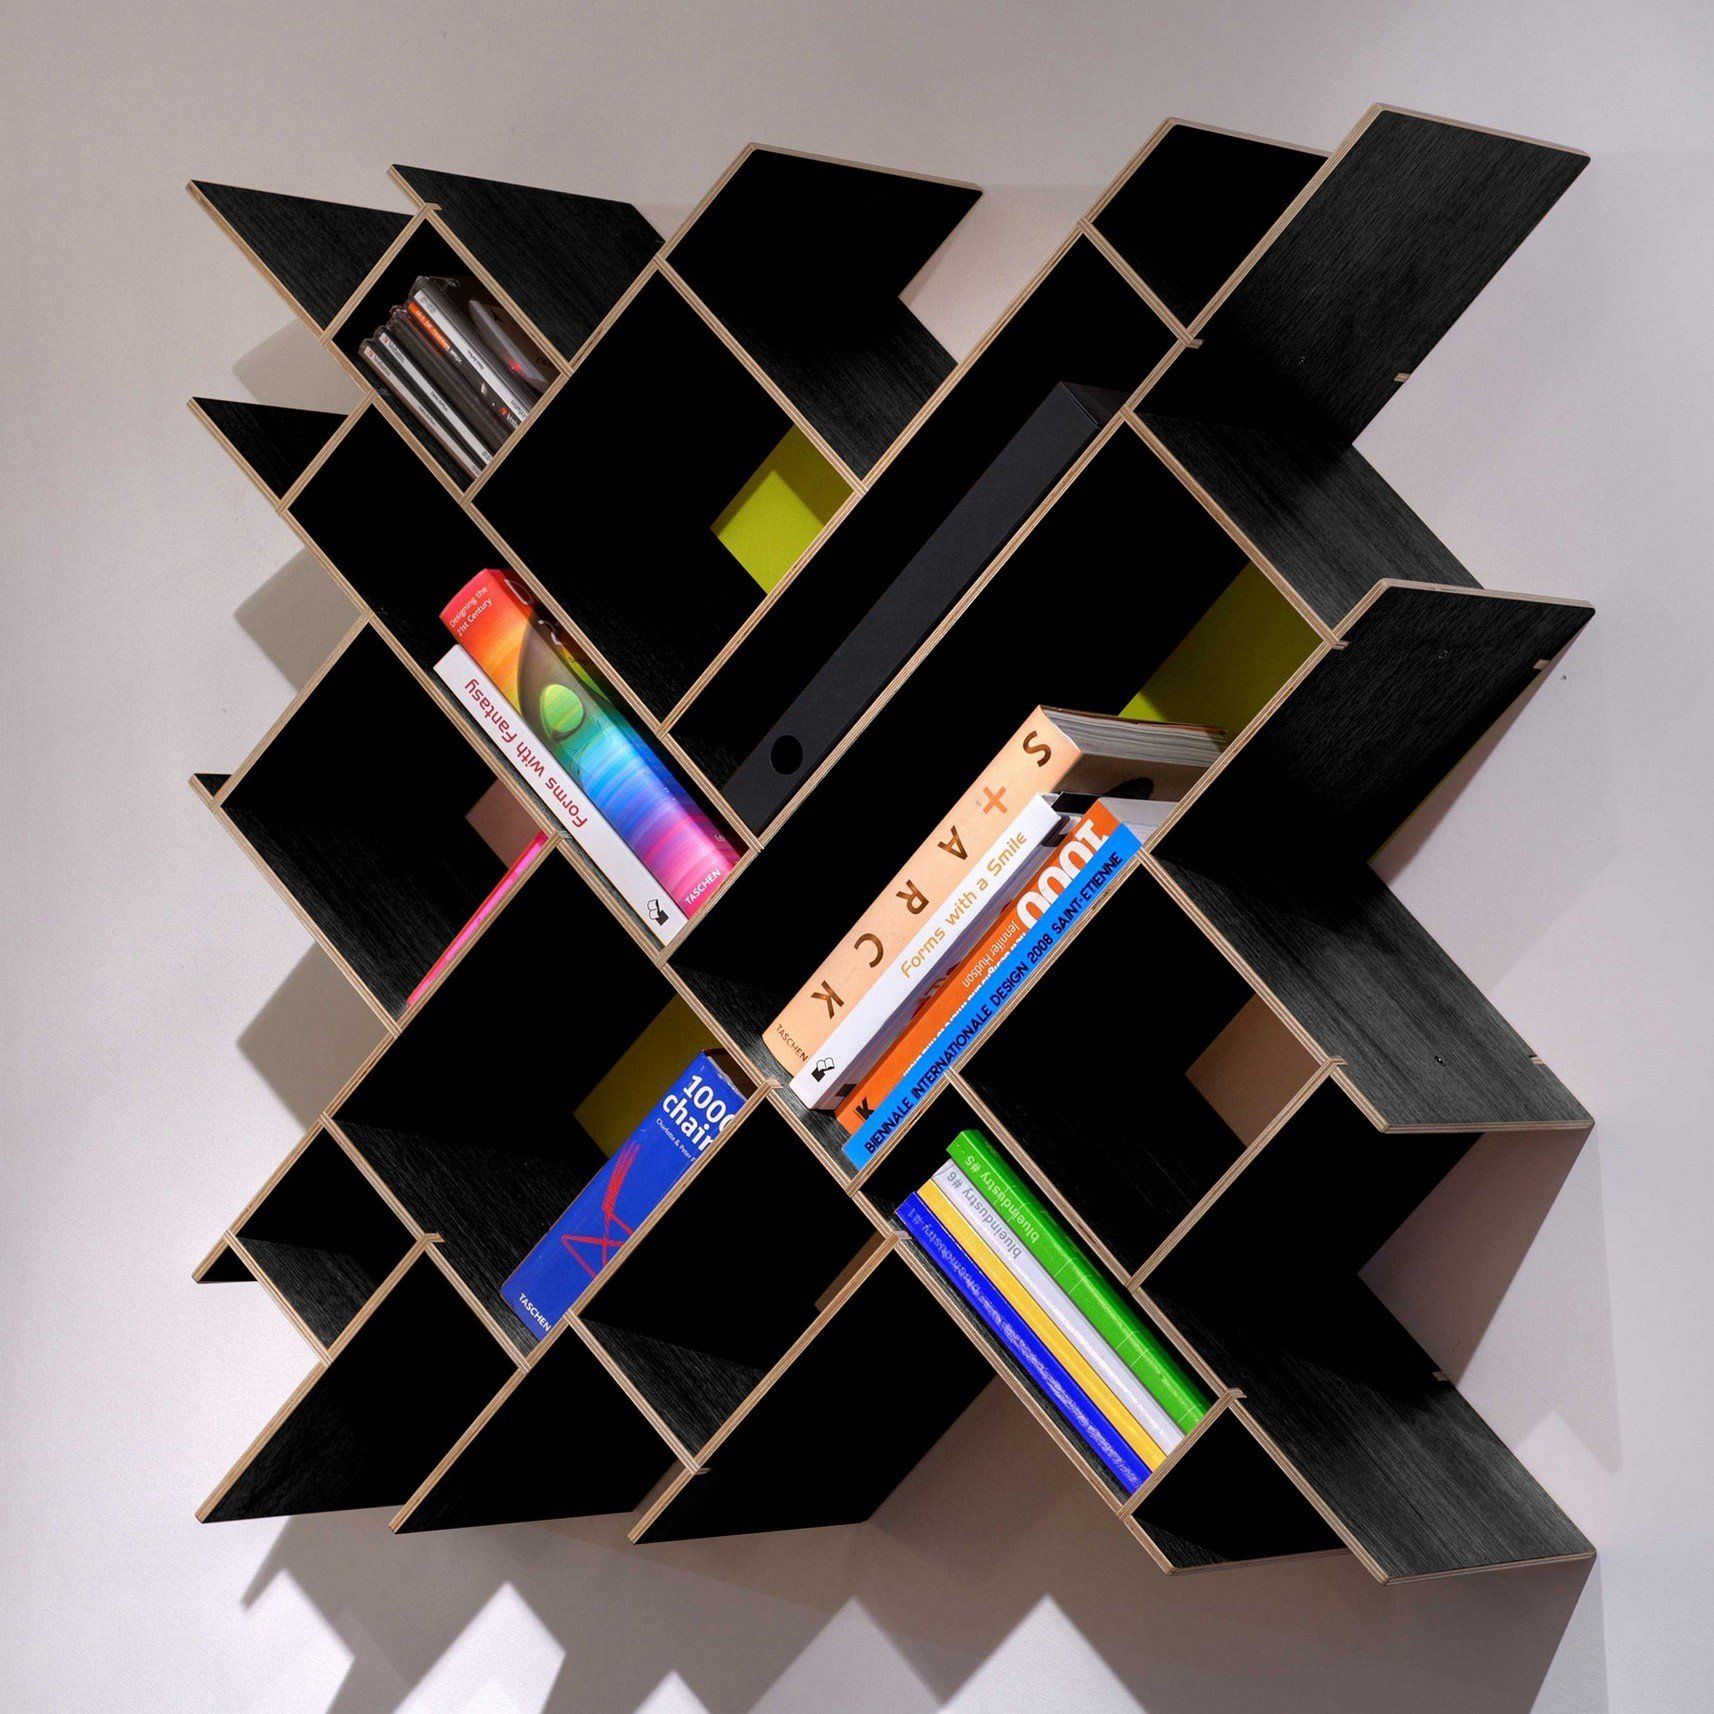
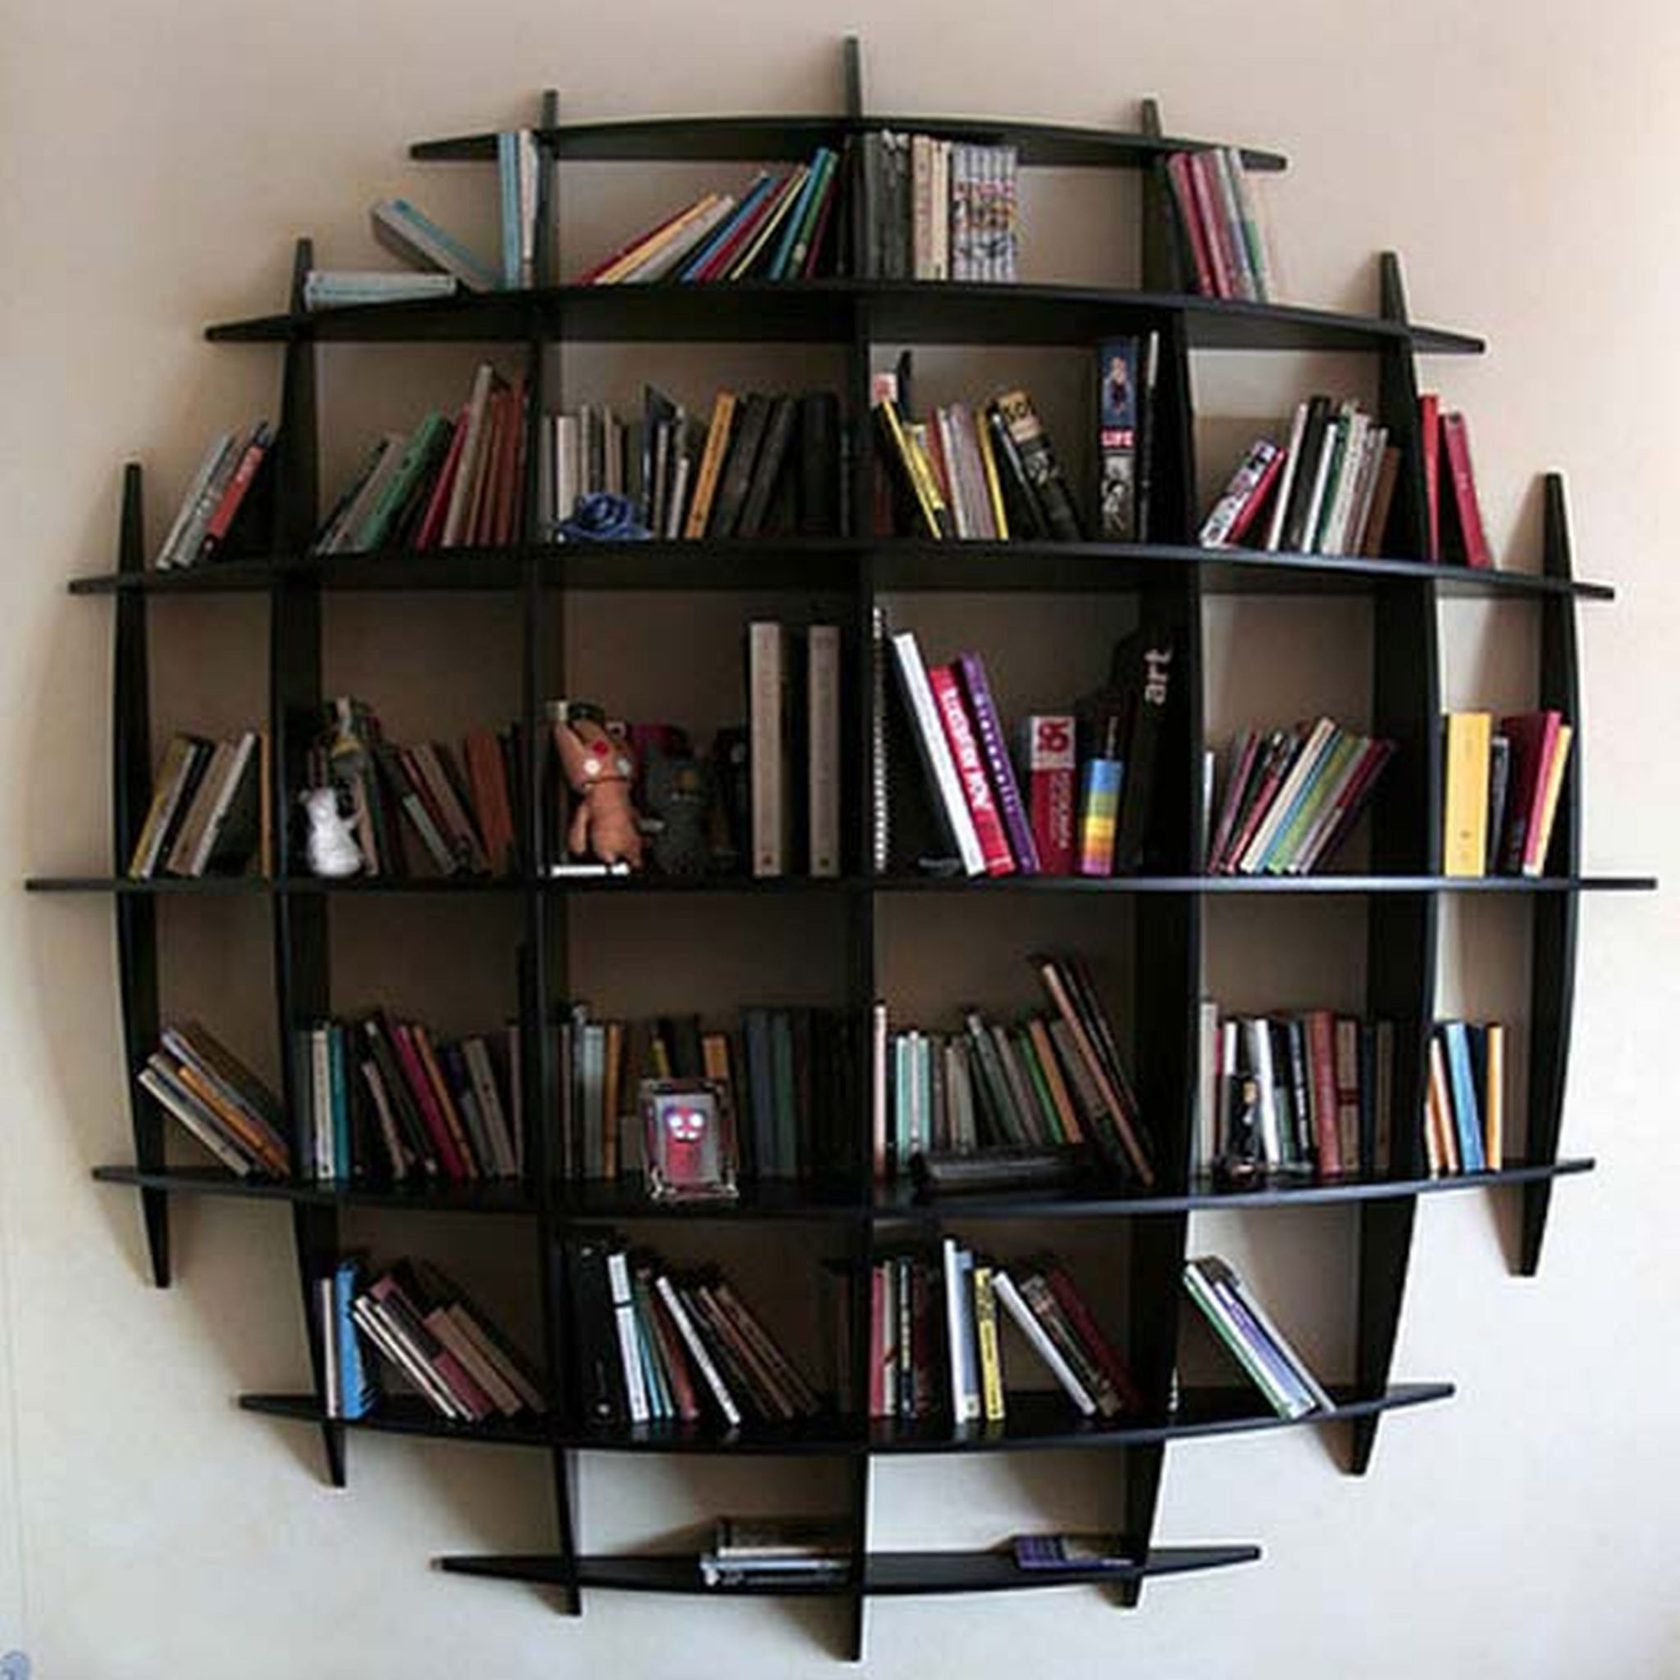
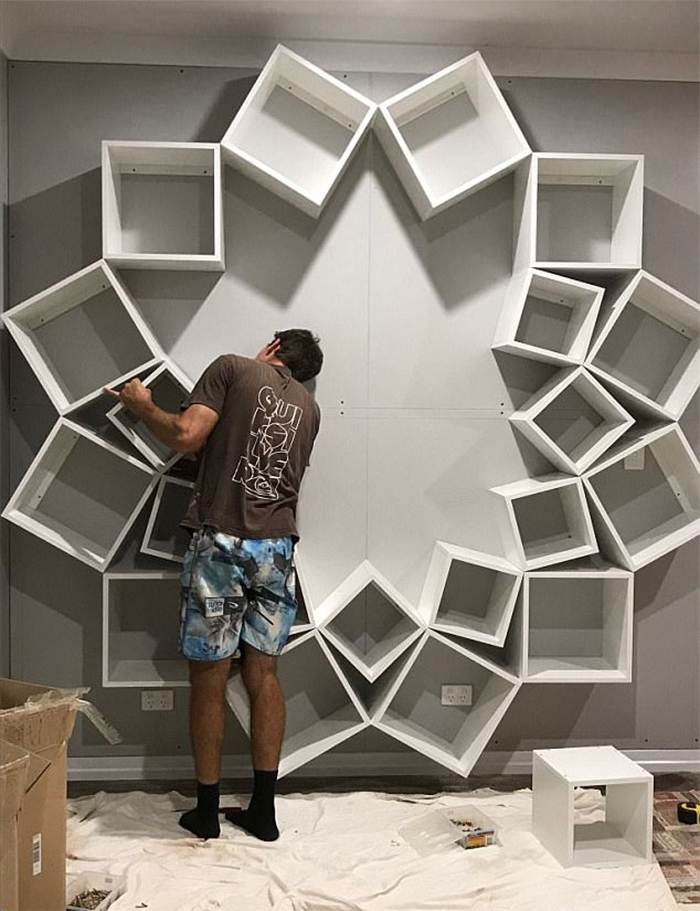
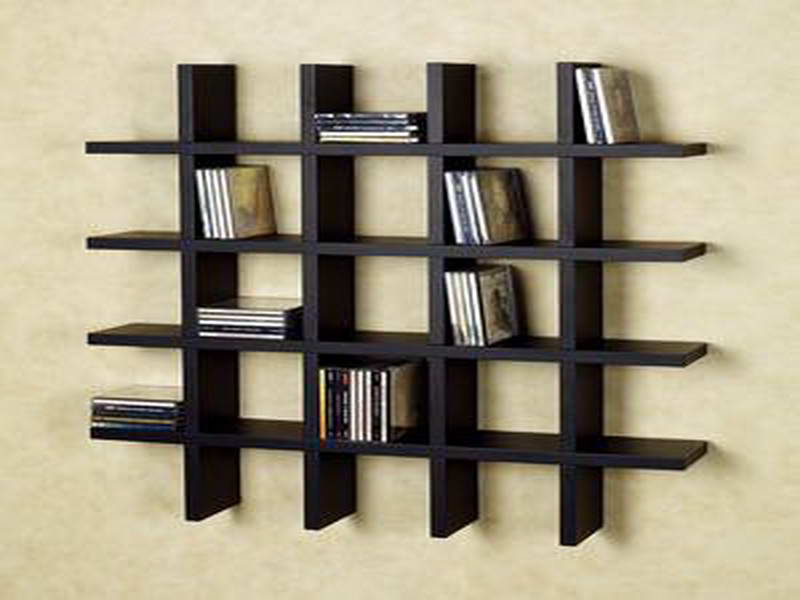
Shelves and bookshelves: photos, descriptions
Cabinets, shelves and racks differ in both volume and type of construction, as well as their characteristics and functionality largely depend on the material from which they are made.
Types of shelves at the place of installation:
- wall;
- floor;
- portable or mobile;
- suspended.
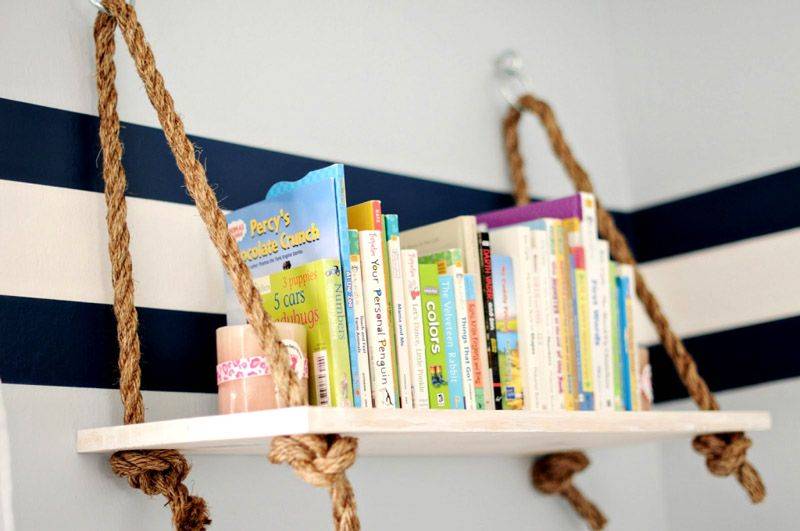 Using a board and a rope, you can make an original bookshelf
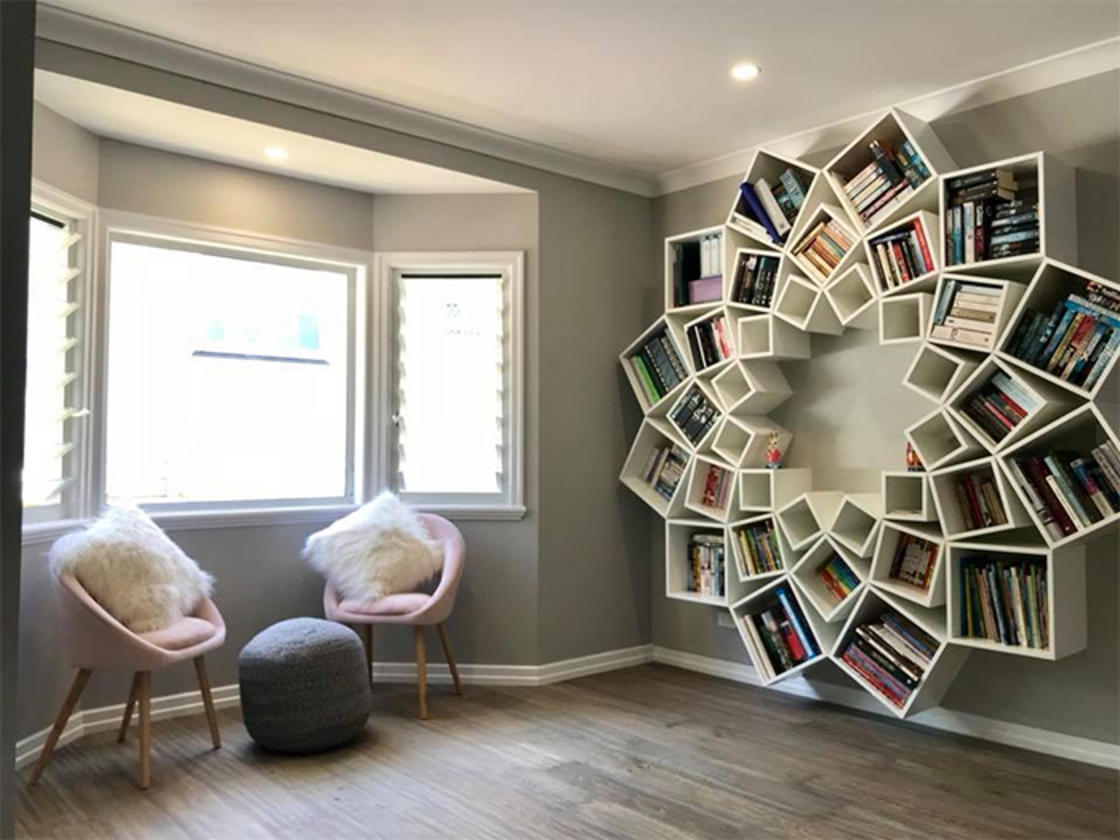
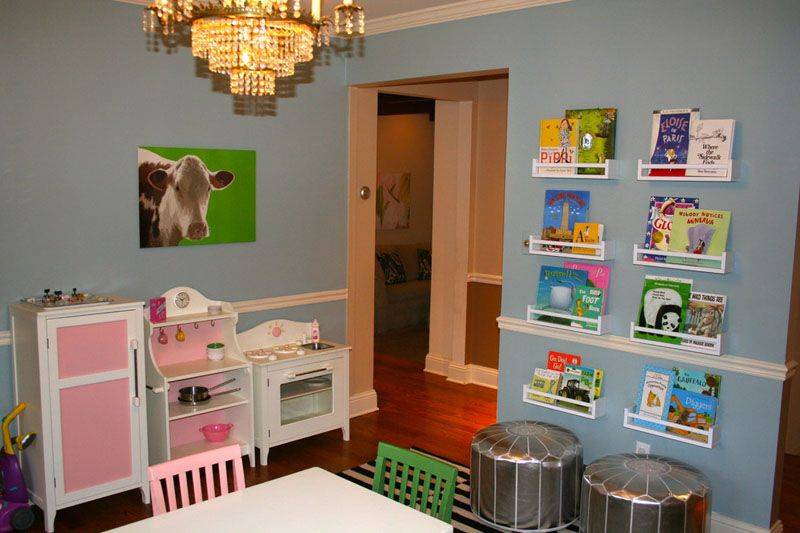
Wall mounted bookshelves
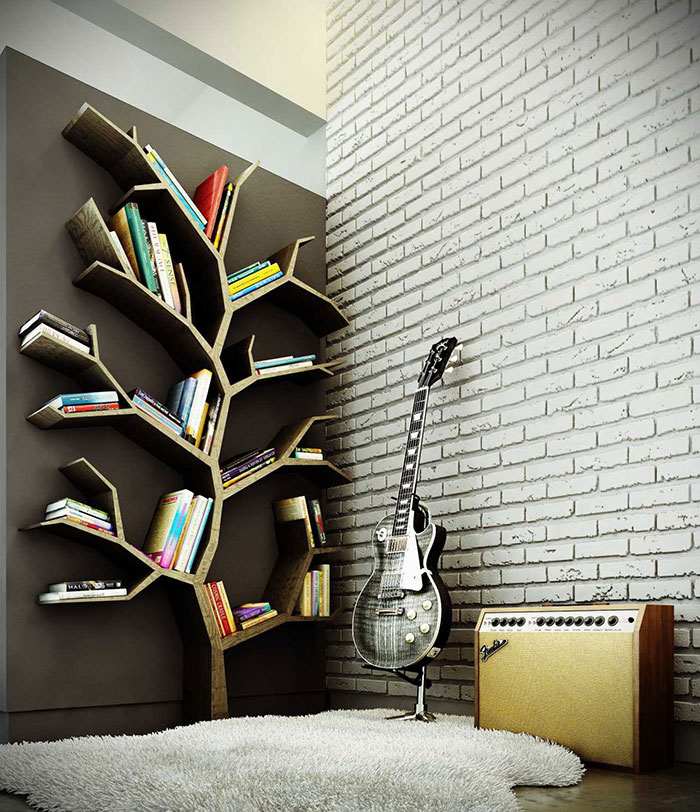
Wall-mounted book shelves are the simplest and most common option for storing printed publications.The most primitive design is an ordinary board with brackets for attaching to the wall, a little more complicated - four boards forming a rectangle or square and multi-tiered structures of various geometric shapes.

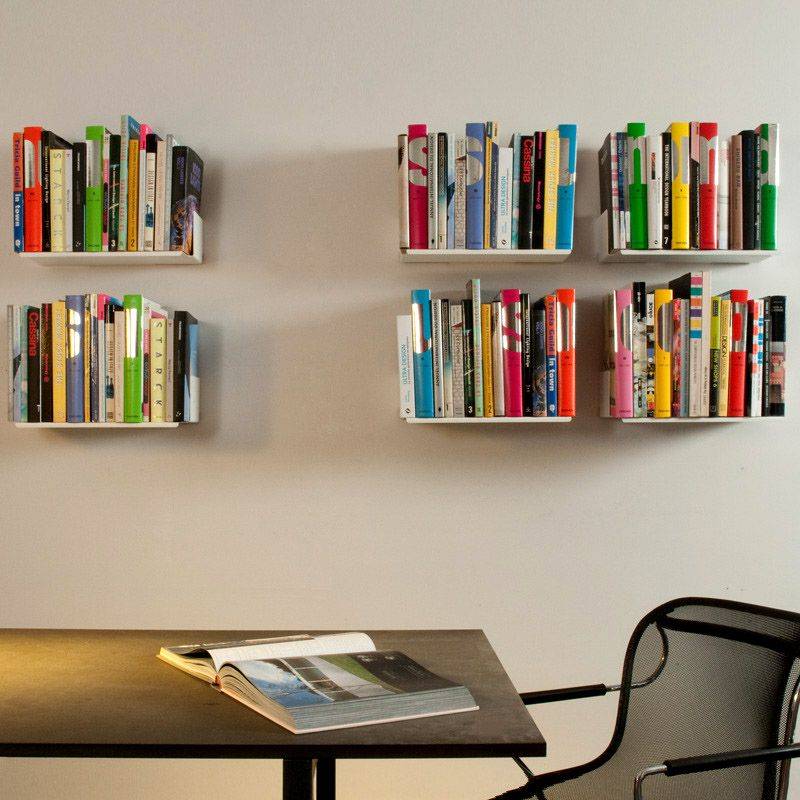


bookshelves
Floor shelf for books
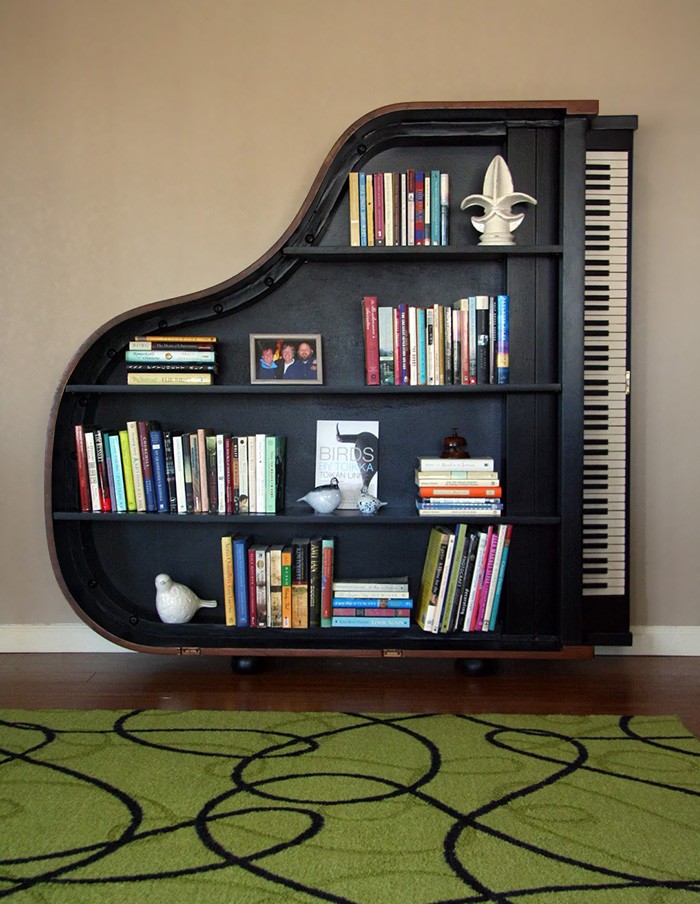
Floor structures or whatnots are a combination of a closet and open shelves and are designed to store books, place photos and decor items. This piece of furniture should have good stability and can be easily moved to any place in the apartment or house. Floor bookshelves can have a classic rectangular shape or be angular.
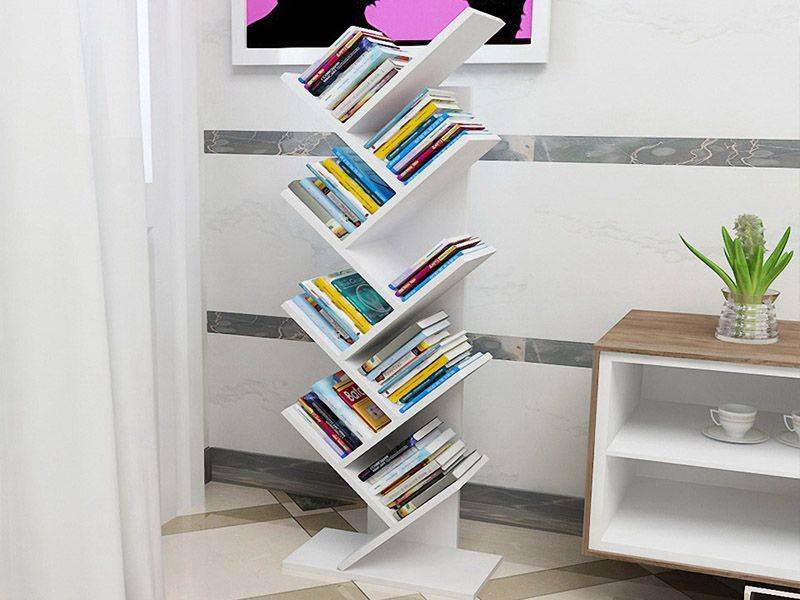
book shelves floor
Bookshelf Montessori
At the beginning of the last century, the Italian teacher Montessori proposed a method for the early development of children, which soon gained great popularity throughout the world. This pedagogical technique involves the use of special furniture and teaching materials that help the child develop independently. One of these elements is the Montessori bookshelf, which consists of two sides and pockets or shelves with crossbars for books that are most relevant at the moment for children's development.
Montessori book shelves
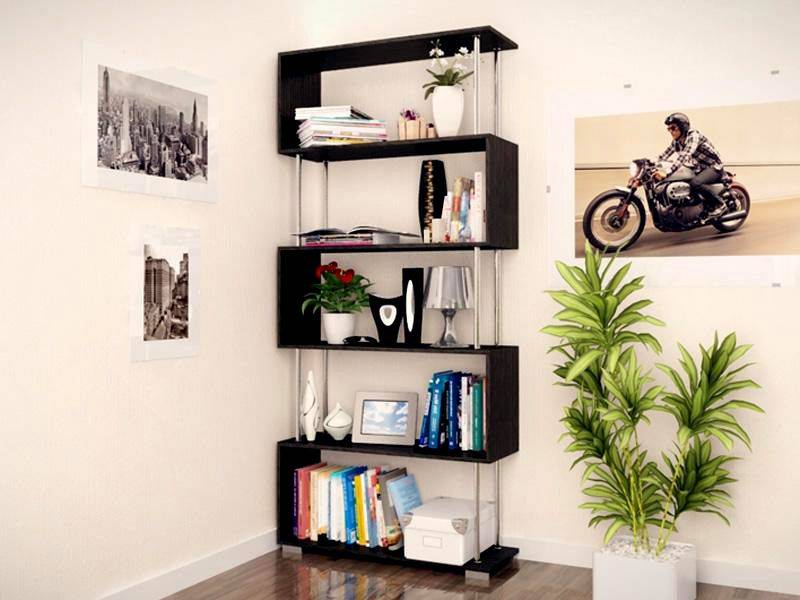
Portable bookshelves
Portable or mobile shelves in the home library and living room make it easy to change the situation by simply moving them to another place. As a rule, these are structures in the form of a horizontal rectangle or a small column, mounted on legs or special wheels or rollers. Mobile shelves are mostly open type.


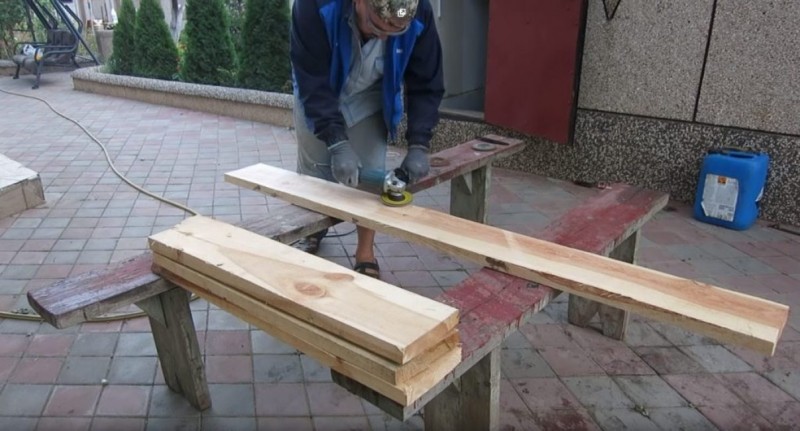
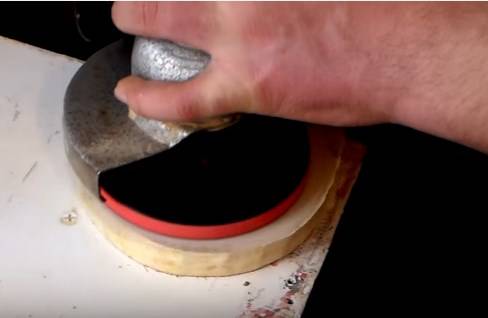
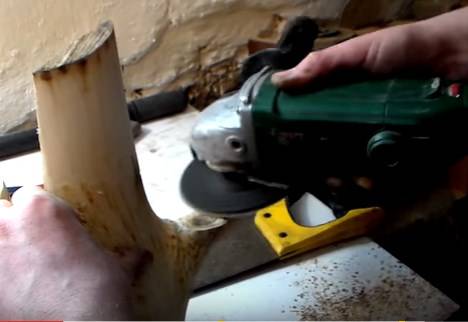
Action #2 Pretreatment of the material

In order to make the boards smooth, you can use, for example, a grinder with an appropriate nozzle for working with wood
1
Before starting the manufacture of a bookshelf, it is necessary to carry out the initial processing of wood. It consists in planing the boards so that they do not have burrs and roughness.
2
Alternatively, you can use sandpaper or a planer. In the most extreme case, you can use a thicknessing machine for this purpose - with this, you are guaranteed to get boards of the same thickness.
Veranda attached to the house - expanding the living space: projects, tips on how to create your own hands (200 original photo ideas)
Master class number 4: Do-it-yourself laptop stand
Almost every one of us has an indispensable tool for work and communication - a laptop. And we have to buy all sorts of peripherals for it (mouse, flash drives, removable hard drives, etc.). And so, when there is a desire to put it on a stand for the convenience of work, we are forced to go to the store and spend extra money. For those who want to avoid unnecessary expenses, but do not want to give up the stand, there is a great way out - do it yourself. And how to do it - you will read in this article.
Materials and tools:
- Notebook for measuring the size of the stand;
- yardstick;
- several sheets of paper or newspaper for a stencil;
- thick cardboard for the stand itself (you can use an unnecessary box);
- long line;
- marker or pencil;
- large scissors or utility knife.
You have already understood that we will not need any special materials - all of the above is probably in any home. Let's start manufacturing.
Step 1.
We take paper or newspaper and spread it on a flat surface. It is better to perform all actions for measuring the dimensions of the stand and making a stencil according to the principle “measure seven times, cut once”, because at best the stand will be crooked, and at worst it will not hold the laptop.
- First, we will make a proleg (this is a crossbar between the legs to make the stand more rigid). We take a tape measure and measure the length of the laptop along the keyboard, from corner to corner.
- We mark with a marker on paper exactly half of this length.
- We draw a line - this will be half the base of the proleg. It is better not to draw this detail entirely. Make a slight inaccuracy - and the laptop will stand crooked.
- We measure up from the edges of the segment 4 cm and 7 cm. Draw a rectangle.
- We mentally divide the rectangle into 3 parts: the first third is an almost straight line at a height of 4 cm, the second third - with a pattern or hand we make a bend at an angle of 45 degrees to a line of 7 cm, the last third - from the right end of the segment we draw a line to a line of 7 cm at an angle 45 degrees.
- All this is simply and clearly shown in the photo (det.1). At the point of contact of two curved lines, a narrow sleeve is made - in this place there will be a cutout to match the parts.

Step 2
The same photo shows the template of the legs of the stand (det.2).
The angle of inclination of the stand you select based on personal preferences. This will add up the height of the right and left sides of the leg.
When drawing a template for the leg, pay attention to the clove, which will subsequently keep the laptop from falling.
In height, it should be at least a third of the thickness of the laptop.The slot in the leg for engagement with the proleg should not be in the middle, but at a distance of about 1/3 from the far edge. This also affects the stability of the structure. Curves are up to you.
The slots in the legs and prong can be no more than 3-4 cm in height. They can be 3-5 in width. mm depending on thickness cardboard, but in both parts to be the same.
Step 3
Cut out paper templates. We apply the template of 1 part with the lower cut to the even edge of the box chosen as the future stand. It is desirable that the stable parts of the stand are perfectly flat (the stand will not swing on the table).
- Carefully trace the template on one side, then flip it over to the other side and continue to trace. We get one inseparable symmetrical part (prong). Attach parts only to smooth parts of the box (pieces of cardboard) where there are no folds.
- On another cardboard (for example, the bottom of the box) we put a paper template of part 2, i.e. leg. Circle and repeat the same a second time. The legs must be exactly the same.
Step 4
Cut out all the details with scissors or a clerical knife. We shift them along the slots, as shown in the photo.


If everything is combined correctly, then you can be glad that a simple (like everything ingenious), functional, strong stand for your digital friend is ready! Install a laptop on it and attach additional keyboards to it, watch movies at a comfortable height, sweep cookie crumbs under the stand - you are now the proud owner of a laptop stand of your own making!
DIY manufacturing
Making plywood shelves with your own hands is not as difficult as it seems.Using a jigsaw, even novice craftsmen can easily create an original curved shape. A good clean cut can be made with masking tape
Important when using an electric jigsaw:
- turn off the pendulum motion;
- put a quality file;
- cut first from the rough side;
- moisten the cut line with water (then there will still be burrs, but they are small);
- or use PVA glue (this option is much better).
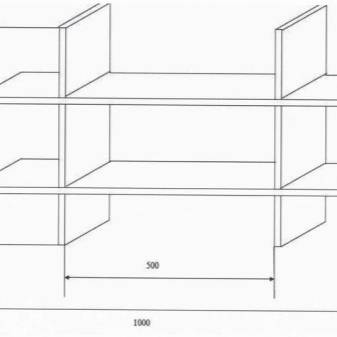
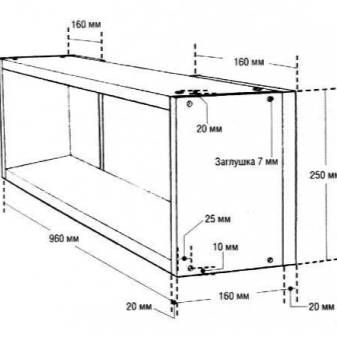
This drawing shows a multi-tiered sophisticated design. It consists of shelves with a height of 300 mm. Their length is 500 or 1000 mm (at the choice of the owner). An alternative solution is 960 mm long, 160 mm wide and 20 mm thick support legs. In the case of a hinged shelf designed for limited loads, you can use 8 mm plywood without any hesitation, otherwise a more resistant material is needed.
Closed side walls are always used on book shelves. An open option is chosen to install the decor. In any case, the blanks are laid out flat on the table. So it will be easier for them to transfer the exact dimensions from the drawings and perform other necessary preparation.
It is easiest to get a classically shaped case from 4 standard blanks. They should be clear paired elements. The connection of parts can also be done with self-tapping screws, but confirmations are much better suited for such work. For any screw, it is better to drill a hole in advance. When you try to screw it into an unprepared material, cracking is inevitable; in the closed version, the back side is made of a chipboard sheet.
Sometimes they do without fasteners. Just "according to the designer's scheme" they adjust individual elements to each other.The back wall is usually made of fiberboard, nailed with furniture nails. To give an optimal appearance, plywood is most often painted. But you can also decorate by using a self-adhesive film.
How to make shelves from plywood hands, see the next video.
Summing up
In fact, these are only a small part of the ideas and solutions that you can use to make a book holder.
Think about how you see this limiter. Calculate in advance how many books it should hold.
By the way, I advise you to consider the option of manufacturing a holder that is combined with a stand. The bottom line is that this will be a place to store several books in an upright position, as well as a special stand on which you can put an open book and read it at a comfortable right angle.
Show imagination, turn on the imagination.
 Watch this video on YouTube
I have everything on this.
Thank you all for your attention!
Subscribe, comment, ask questions and tell your friends about us!


