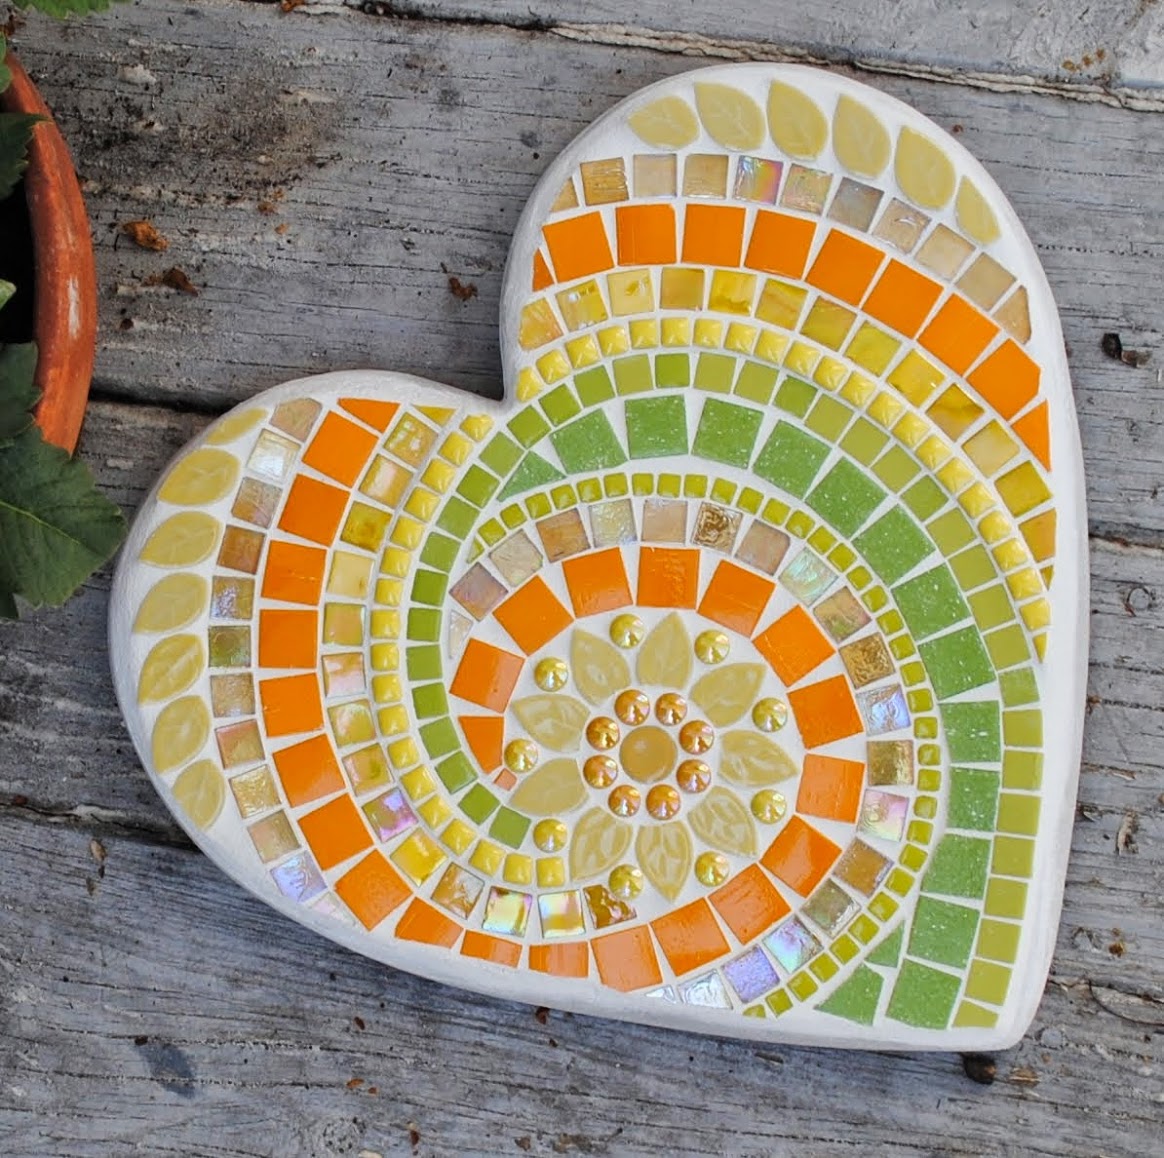
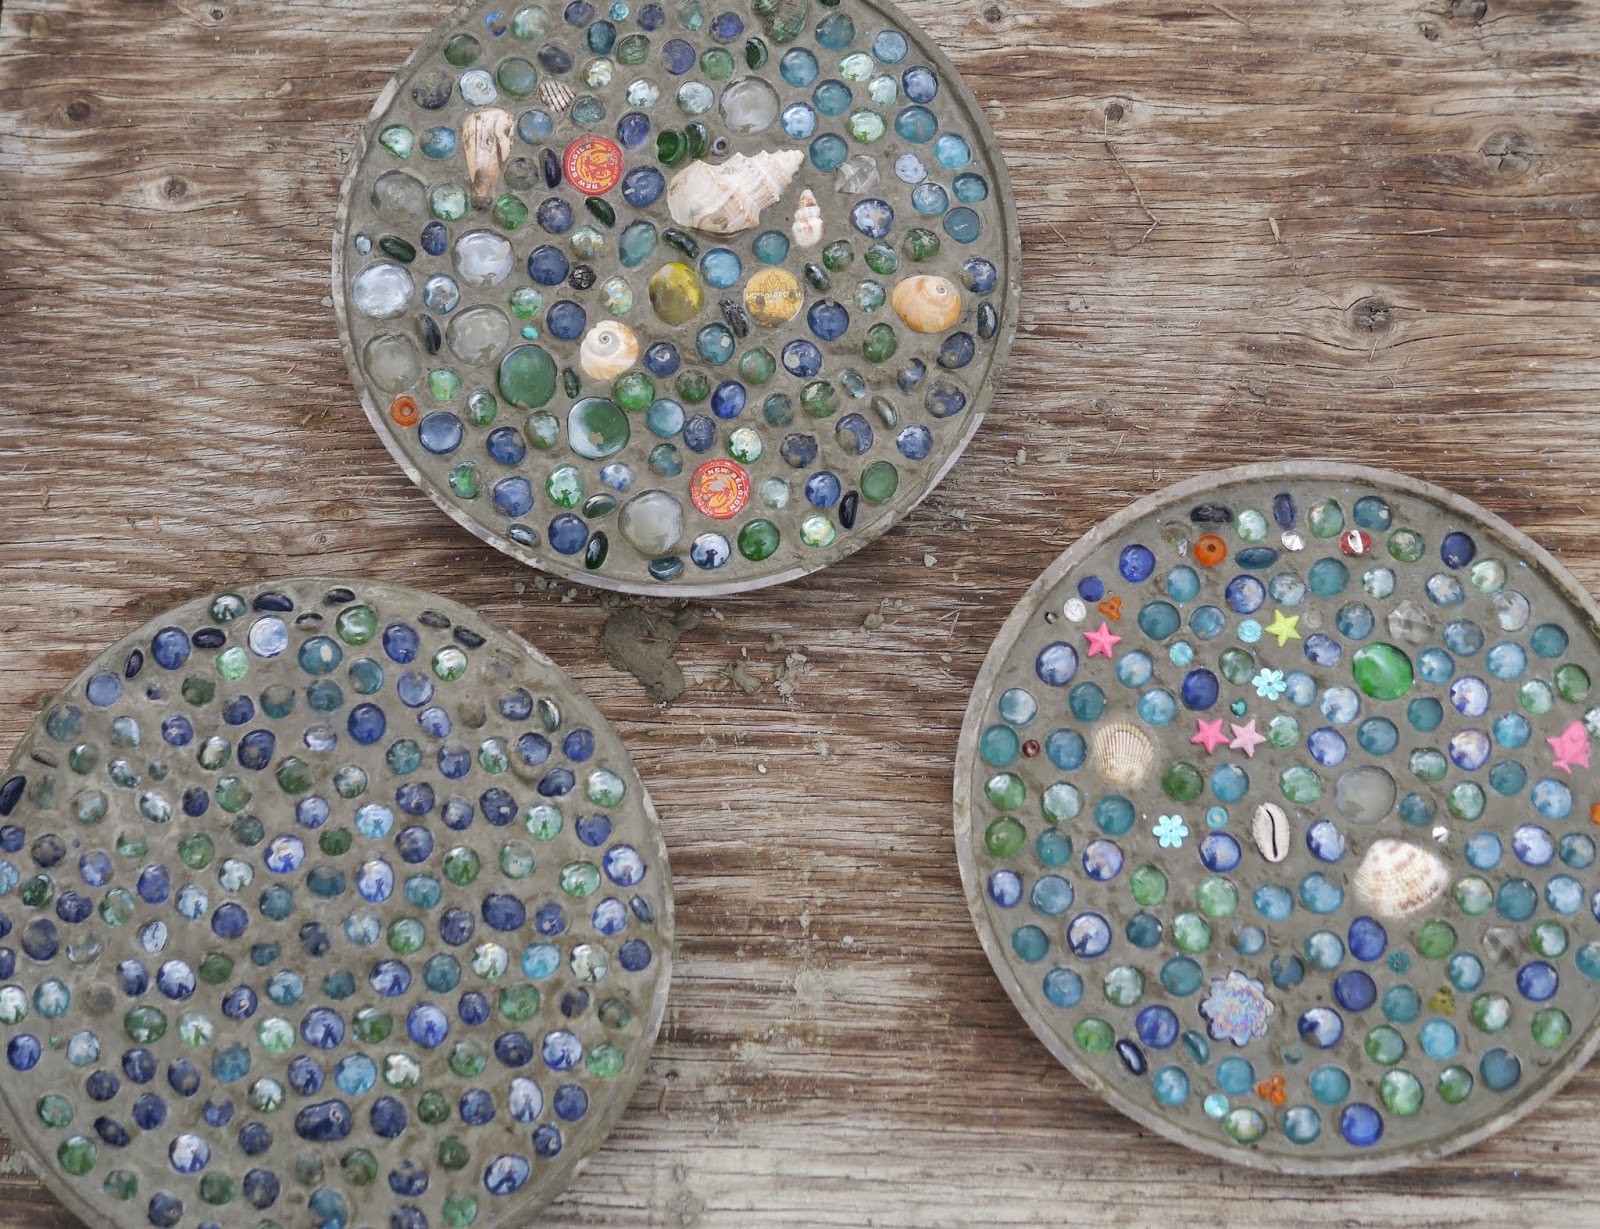
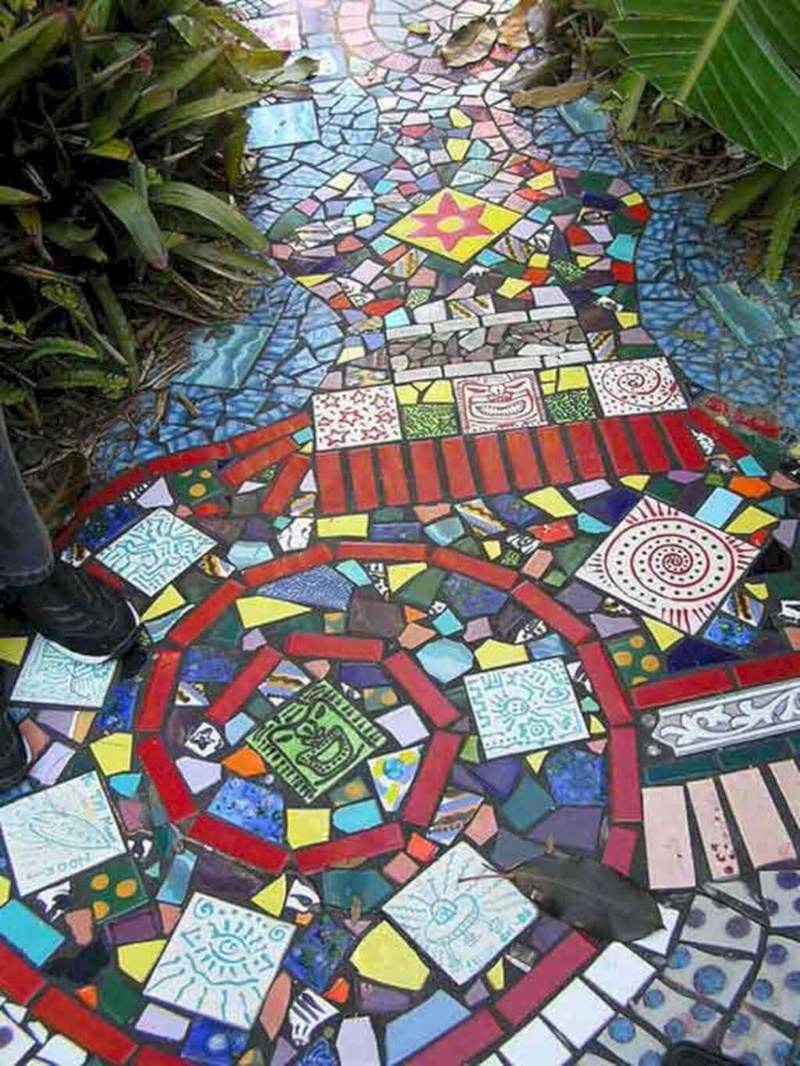
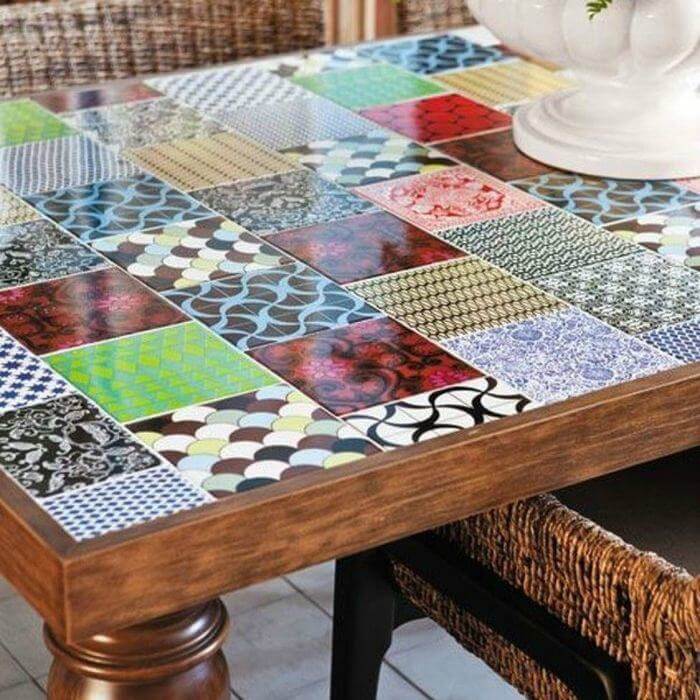
- Mosaic from broken tiles
- We paint an apron
- Necessary tools and materials
- Vibropressed or vibrocast tiles
- Which paving slab is better - vibrocast or vibropressed?
- How to distinguish a vibrocast tile from a vibropressed one?
- Existing manufacturing technologies
- Pouring into a removable formwork
- vibrocasting
- Vibrocompression
- Briefly about the main
- factory technology
- Pressing
- We determine profitability
- Choice of grout mix
- Tile molding
- Do-it-yourself mold for pouring
- factory technology
- 5 Instructions for making paving slabs using a plastic mold
- Proportions, composition and rules for preparing the solution
- What are the benefits of homemade tiles?
- Approximate recipes for paving slabs.
- Conclusion
Mosaic from broken tiles
Such work does not require special skills, but perseverance will come in handy. And if you, like me, want to try yourself in this field for the first time, then for a start it is better to choose something not very grandiose. As experience is gained, it will be possible to move on to more complex fantasy decor elements.
- What a great frog! It is somewhat reminiscent of the famous Gaudi lizard from the Park Güell.
- The original solution for the restoration of the old table. An interesting effect can be achieved by adding a layer of glass on top.
- A wonderful idea for decorating a working corner in a country kitchen.
- Your breakfasts and dinners at such a table will be even tastier!
- I just fell in love with this table!
- This is truly a unique piece of work...
- You will obviously have to work hard on the decor of such small architectural forms, but the result is worth it!
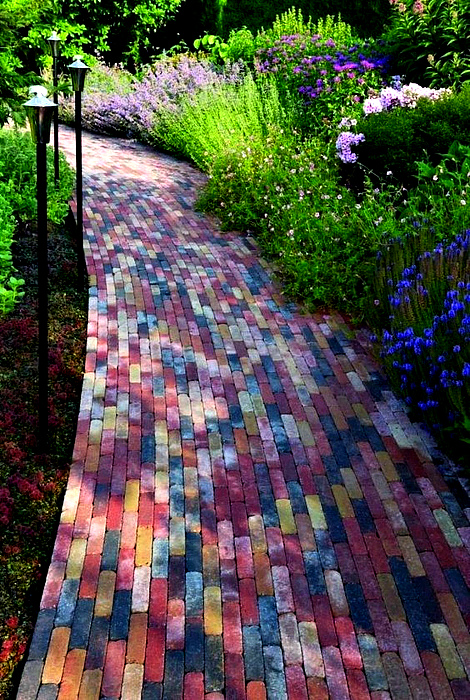
- A broken tile walkway is a great solution if you recently had a renovation and have a lot of damaged or unused material left!
- Amazing magnificence!
- On such a bench you want not only to sit, but also to take a picture!
- There's something about it!
- What a wonderful fragment of the image of a snail from the remains of a broken tile.
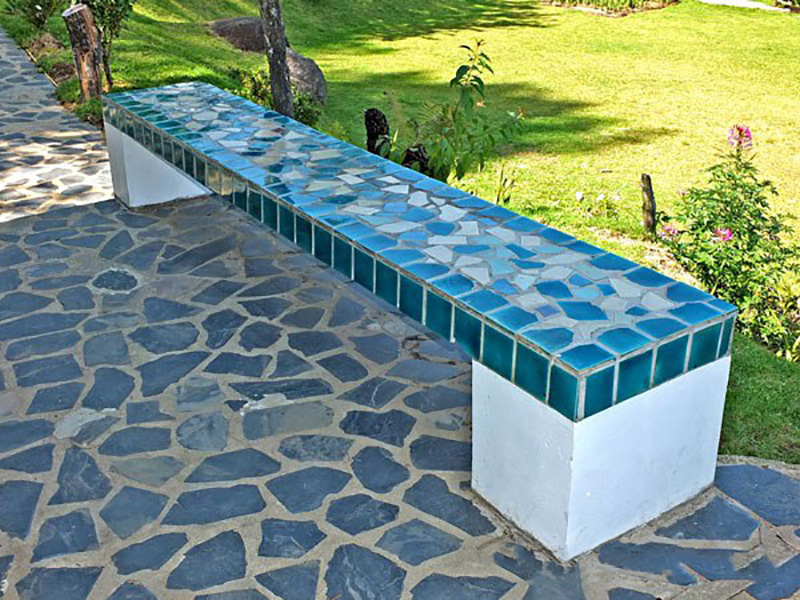
- Here is such a garden sofa you can create if you wish. Beautiful and practical!
- A bright and unusual solution for the facade of a country house or cottage.
- Thanks to the combination of colors, they look very stylish.
- There are simply no words ... I did not expect such a decision!
- Very interesting and unusual approach. Inspiring!
- What a great dragonfly. Just a sight!
- With the help of the remnants of broken tiles, you can decorate almost any furniture.
- Exclusive coasters for flowerpots: no one has these for sure!
- And it is not at all necessary to invest a lot of money in buying expensive tiles for the kitchen. Here is just a wonderful solution for a kitchen apron that does not require special expenses.
- Creating such a decor is not at all difficult, but the effect is impressive!
- Very gentle and pleasing to the eye combination of colors.
- An interesting idea, plus your perseverance, and a real designer thing is ready!
- A painstaking, but very interesting solution for cladding a balcony wall.
Comfort in the house is created with the help of fancy details, selected with taste. And better - made with your own hands with soul and boundless love for creativity.I hope these ideas have inspired you to create your own decorative solutions for your home.
After all, it is not at all difficult to find materials to create such masterpieces. In many hardware stores, there are always leftover tiles or ceramic battens, which are sold as raw materials at a small price. You can also use the tiles that you have left from the repair.
So it remains only to catch fire with a certain idea, find time for this and start doing it. Fantasize and create!
We paint an apron
Hand painting will help to give the existing tiles a completely fresh look and make your kitchen even more original.
If you have artistic skills, you can transfer any drawing you like to the apron in a simple way: print the image, shade the back of the sheet tightly with a soft pencil, attach the drawing to the surface - and circle with pressure along the contour with a pen or hard pencil. The desired silhouette will be “imprinted” on the tile, which you will paint with paints.
Instagram @dariaageiler_shop
Instagram @dariaageiler_shop
Instagram @dariaageiler_shop
For those with artistic brushes on "you", there are stamps, stencils, as well as simple geometric patterns that can be brought to life with masking tape and a roller.
Instagram @dariaageiler_shop
Instagram @dariaageiler_shop
Necessary tools and materials
For production you will need:
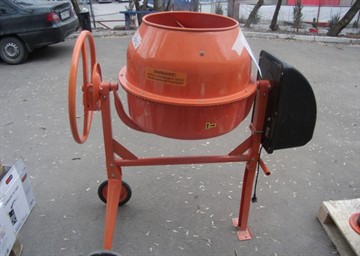
- concrete mixer. In extreme cases, you can replace it with a powerful drill with a mixer nozzle;
- vibrating table. How to make it yourself - is described below;
- forms. Sold in stores, but you can make your own;
- building level: they control the horizontality of the vibrating table and racks for drying.When skewed, the tile will turn out uneven;
- shovel, trowel, bucket;
- brush.
Materials used:
- cement. Sulfate-resistant (with a reduced content of 3-calcium aluminates) Portland cement grade not lower than M400 is used. Suitable PTSII / A-Sh-400. The preferred color is white: gray looks messy when stained. The date of production is important: 3-month-old cement, even with proper storage, loses 20% of its strength, 6-month-old - 30%, annual - 40%;
- filler: large - granite screenings, pebbles or slag 3 - 5 mm in size; fine - sifted clean river or quarry sand with a fineness modulus. The purity of the sand is checked by trying to make a lump out of it: if it works out, the material contains a lot of clay inclusions;
- pure water. In terms of quality, in most cases, ordinary tap water is suitable;
- plasticizer. Makes concrete durable, moisture and wear resistant. Good reviews from tile manufacturers received "Superplasticizer C-3". Also used are the compositions of the brands "Component", Master Silk, Plastimax F.
 The function of reinforcement is performed by:
- crushed fiberglass;
- polypropylene fiber Micronix 12 mm;
- basalt fiber MicronixBazalt 12 mm.
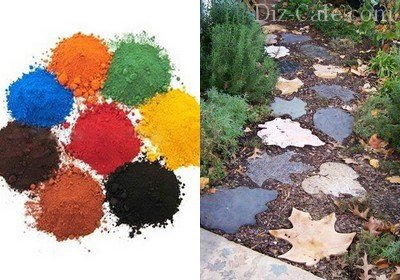
To give the tiles the desired color, dyes are used:
- mineral: give a bright color, resistant to chemical attack and temperature extremes;
- organic: give soft, natural shades.
Paving slabs are painted in two ways:
- surface. Dry dye is rubbed into the surface of still wet modules or painted with a solution using an airbrush. The method gives a bright color, but is labor intensive. In addition, as abrasion and chipping, the tile loses color;
- volume.The dye is added to the solution during mixing, in an amount of 7% by weight of dry substances, which, due to the high cost, is associated with costs.
In order to save money, the modules are poured in two layers: first, a third or a half - with colored concrete, then the rest - colorless. The maximum allowable time interval between pouring layers is 20 minutes.
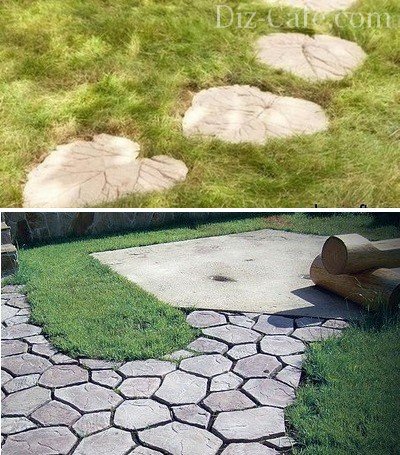
Vibropressed or vibrocast tiles
From the point of view of industrial manufacturing technology, tiles can be made in two ways:
Vibrating table for the production of vibrocast paving slabsVibrocast paving slabs (costs less, is used in private construction).
Manufacturing technology: concrete mortar is poured into molds that are placed on a vibrating surface. In the process of vibration, the solution evenly fills the mold and air bubbles come out of it. After, the molds are placed on drying racks. After 2-3 days, the tiles are removed and dried.


Production line for vibropressed paving slabsVibropressed paving slabs
The production technology is similar, but the solution is additionally pressed down with a press (vibropress). The result is a more compact mixture and, accordingly, a stronger material structure. The tiles are dried in special chambers.
You can only make vibrocast tiles for paths, paths on your own
We immediately focus attention - home-made paving slabs are not intended for laying in places of heavy traffic, but will become indispensable for the formation of garden paths in the country
Which paving slab is better - vibrocast or vibropressed?
According to reviews on the forums, 80% of users agree that the best paving slabs are those that are factory-made by vibrocompression. It is more expensive (~20%), but more durable. The point is that more dense concrete is obtained, which has fewer pores, respectively, the tile absorbs little water, does not crumble and is resistant to abrasion.
But, pressed tiles have a limited choice of colors and
forms, and cast, on the contrary, is easy to manufacture, which means that
more affordable, plus, you can cast almost any shape, and a large selection
shades.
The greatest destruction of the tile is subject to winter, when
Water entering the concrete freezes and expands. Of course, it is possible to protect the vibrocasting
tiles with hydrophobic compounds, but this will not make it eternal, the service life is shorter,
than the pressed one. Nonetheless, for private use in conditions
limited budget, you can perfectly do with homemade paving slabs.
How to distinguish a vibrocast tile from a vibropressed one?
Visually. The first will have an inhomogeneous smooth structure,
the second is homogeneous, rough. Paradoxically, vibrocasting is more beautiful
externally (at the time of sale) - bright, smooth (examples in the photo). Difference
appears during operation.
vibropressed paving slabsvibrocast paving slabs
Existing manufacturing technologies
Tiles and paving stones, which you could see from your neighbors, are made using only three technologies: pouring into the formwork, vibrocasting and vibropressing.
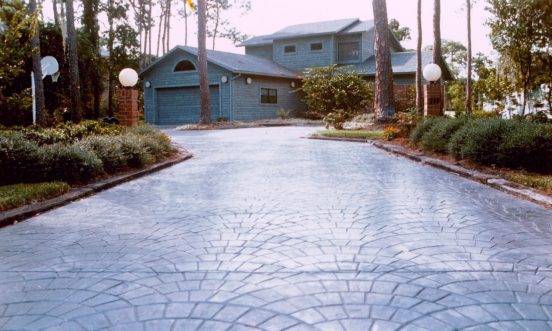
Driveway with imitation paving slabs by stamping
There is also a technique for imitation of paving slabs, when the texture is created with stamps on a wet concrete surface.At first glance, the path may look like a paved path, but in fact it is a monolithic concrete slab with all its shortcomings. Looking closely at the seams, it is easy to see that they are inseparable from the plates and are not able to ensure the drainage of water into the ground. Therefore, if you liked the version with imitation seen in the photo, we recommend reproducing it in classical technology, from separate plates. In this case, your copy will last 3-4 times longer than the original.
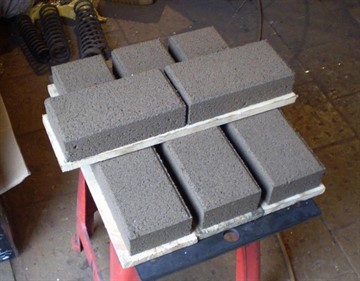
Pouring into a removable formwork
Production of paving slabs by pouring into the formwork
Formwork pouring technology is the simplest and least time-consuming way to manufacture paving slabs. Products are cast directly at the place of use over compacted soil, so there is no need to spend any effort on drying and moving the plates. Since the mold is removed while the concrete is not completely cured, you can use only one mold and prepare small portions of the mortar in a bucket with a construction mixer (no concrete mixer). The form can also be filled incompletely, forming neat bends of the garden path.
But there are also disadvantages:
- the texture of the front surface of the plates is always the same, since the form is open and sets only the edge along the perimeter of each fragment;
- the concrete mixture cannot be compacted by vibration, so more plasticizer should be added to ensure strength;
- despite the addition of binders, the service life of such a tile is several times less than that of a vibrocast one.
Distinguishing a track from such a tile is quite simple. As a rule, it imitates the layout of a wild stone with irregularly shaped fragments, but the repetition of the pattern is easy to notice.Grass often grows in the seams of such tiles, since they are mounted directly on the ground without a sand and gravel cushion and often without backfilling the joints.
vibrocasting
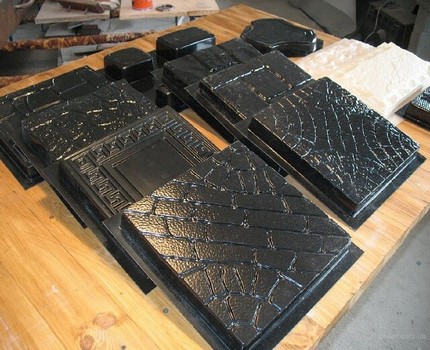
Vibrocast paving slabs - the most common option
Vibrocast slabs are the most common option for paving private areas. The easiest way to distinguish a product of this technology is by design. Neither filling nor vibrocompression creates a complex shape of a tile and a small textured pattern on its surface. The front side of vibrocast tiles is usually more glossy, and the color is brighter than that of vibropressed tiles.


Among other advantages of this finishing material:
- the service life of the tile is several times longer, since the vibration during casting expels air bubbles and enhances the water and frost resistance of the product;
- lower plasticizer consumption (compared to pouring into the formwork);
- the possibility of manufacturing durable high-quality tiles at home with minimal equipment;
- a wide variety of ready-made forms from different price categories.
Among the shortcomings, only a small thickness of the plate can be distinguished, which does not allow the finish to withstand high mechanical loads. On a smooth tile, the risk of slipping also increases, so we recommend that you select textured shapes for manufacturing.
Vibrocompression
The paving stones in the parking area are vibropressed paving slabs
Vibrocompression is a complex technological process. Its main difference from vibrocasting is that the solution in the form is subjected to powerful blows of a special press. As a result, the density of the concrete-cement mixture increases by an order of magnitude; in terms of its properties, the material is an analogue of an artificial stone.Therefore, it is it that is used for paving city sidewalks, paths in squares and parking areas in private areas. Due to its high density, the tile is very frost-resistant, it can withstand up to 300 freeze / thaw cycles.
The method is most often used for the production of paving stones, not tiles. It is easy to distinguish it by its increased thickness with small dimensions (it looks more like a brick than a tile). In addition, such material is usually rougher, and its color is paler. Since it is impossible to make a pattern on a separate fragment, to enhance the decorative effect, the paving stones are laid in beautiful ornaments (at home, you can use the cross-stitch pattern).
Among the disadvantages of vibropressed tiles, only the high price and considerable weight can be distinguished, which complicates transportation and installation.
Briefly about the main
So, the topic was sorted out, how to make paving slabs yourself. This process is actually not the easiest. It is still possible to make forms yourself from boards, but to assemble a vibrating table is possible for a specialist who knows the skills of an electric welder and a locksmith. As for the manufacturing process itself, if the concrete mortar formulation is correctly maintained, if all the operations indicated above are accurately maintained, then the high quality of the final result can be guaranteed.
| A little more attention! I would like to hear from you your own history of the production of paving slabs with your own hands. What is the result of the end result, did it satisfy you, were you disappointed that you yourself took steps to make paving slabs. What difficulties did you encounter or, on the contrary, was everything easy and simple? |
factory technology
The technology used in the factories provides for the availability of special equipment. The quality of the finished product depends on various factors. The path is created from clinker paving stones, which can withstand high loads and environmental influences. Other features of the factory technology are the following:
- Vibrocasting involves pouring cement into special figured forms, the compaction of the composition occurs due to the effect of vibration. Such equipment is sold in specialized stores, can be made by hand. The disadvantage is low frost resistance, since the structure is porous, the water in the voids expands when freezing and violates the structural integrity.
- Vibrocompression involves the use of concrete, which is subject to vibration and pressure. Paving stones obtained in this way can withstand prolonged mechanical stress. However, the complexity of the pressing equipment determines the high cost of the resulting product.
- Clinker is considered the most durable, but also the most expensive tile. Its production involves firing the composition after its pressing, as well as drying. Clinker tiles are durable and attractive, not inferior in durability to natural stone, and serve for several decades.
The manufacturing process in an industrial environment involves the installation of special machines that are difficult to manufacture on their own. However, it is almost impossible to exert the required effect on the mixture used without it.
Pressing
Forms are installed on the surface of the vibrating table, which are filled with the prepared concrete solution with the help of a trowel.
Production can be represented by single-layer and two-layer technology:
- a feature of single-layer pressing is filling the mold with concrete mortar, followed by compaction on the surface of the vibrating table and holding until dry. At the final stage, the formwork is stripped and the finished material is removed. Of course, with this method of production, the strength and aesthetics of paving stones are an order of magnitude lower than those of tiles obtained by means of two-layer vibration casting, but the resulting material is distinguished by an affordable cost;
- two-layer technology consists in pouring a concrete solution with pigment dyes with a layer of 10-20 mm in the process of vibrating the table, and then topping up the main concrete composition. After about a couple of days, the product is removed from the mold by stripping, after which it is laid out to dry.
 The final stage of manufacturing is represented by the correct drying of the tiles at a temperature range of 20-35 ° C.
The material removed from the mold after drying must be dried for several days in a cool room.
To facilitate the extraction process plastic tiles or silicone mold, it should be placed for a few minutes in a container filled with warm water. As a result, the casting mold expands and the material can be removed without problems.
With any method of vibrocompression, all forms filled with concrete mortar are necessarily covered with a layer of ordinary polyethylene, which helps prevent premature evaporation of moisture and has a positive effect on the strength characteristics of the manufactured paving slabs.
We determine profitability
Knowing the technology, you can calculate whether the game is worth the candle.
| Material | Price |
|---|---|
| Cement (M500 Portland) | 300–500 rubles/bag 59 kg |
| Crushed granite fraction 3–10 mm (the larger the cheaper) | RUB 1,500–2,000 per cube |
| Seeded sand | 600 rub./m.cu. |
| Plasticizer (S-3) | 80 rub/l |
| Dye | from 1500 to 8600 rubles/25 kg Cost depends on environmental resistance |
| fiberglass | from 98 to 165 rub/kg |
| Mold lubricant | from 0 to 100 rub/l |
| Shapes (price varies depending on shape, size and material) | from 30 rub/piece. up to 1,500 rubles / piece. |
On average, it turns out that 1 m2 of homemade paving slabs is 55% cheaper than purchased. And given that the resource of forms is enough for 100-200 cycles, subsequent batches will be even more profitable. Of course, with the current level of competition, creating a business for the production of paving slabs is no longer profitable, but it is worth making it for your own needs on your own.
Now you have all the necessary knowledge to successfully make and lay beautiful and durable paving slabs on your site.
Choice of grout mix
The cladding will acquire a finished aesthetic appearance if its seams are well rubbed. The final stage of finishing the floor will help hide the resulting defects, protect the cracks from the penetration of dust and moisture. When carrying out work on grouting, it is necessary to strictly follow the technology.The choice of material will depend on the size of the gaps.


If the seams between the elements are wide, more than 5 mm, it is better to choose a resin-based mastic for grouting. A small space at the joints must be sealed with cement-based moisture-resistant compounds. Places in contact with the wall must be treated with silicone sealant.

Grouting performs not only practical, but also decorative functions. The material of the desired shade can be bought ready-made or made by hand. Pure white grouts are used if it is necessary to hide uneven laying and other defects. With perfect styling, the design of the seams in contrasting colors will look beautiful.
Tile molding
Most home craftsmen do not lubricate the forms with anything. Tiles usually come out easily and have a smooth surface. Traces of concrete from the form are easily removed with acid. Lubrication can significantly degrade the quality of the product. So, when using used engine oil as this, many small shells remain on the surface of the tile.
If it is impossible to pour tiles without lubrication, it is important to use a composition with the correct fat content - purchased or prepared from the following ingredients:
- 1.5 liters of water;
- 2 tbsp. l. liquid soap;
- 100 g of machine oil.
The solution is applied with a trowel into forms with a slide, then they are placed on a vibrating table and the motor is turned on. As the mixture settles, it is topped up.
After a few minutes squeezed out by vibration from a solution of air and water appear on the surface in the form of a white foam. At this moment, the vibrating table is turned off, the molds are removed and placed on the rack.
If the vibration effect is not stopped in a timely manner, the separation of the components of the solution will begin. It will become inhomogeneous and lose strength.
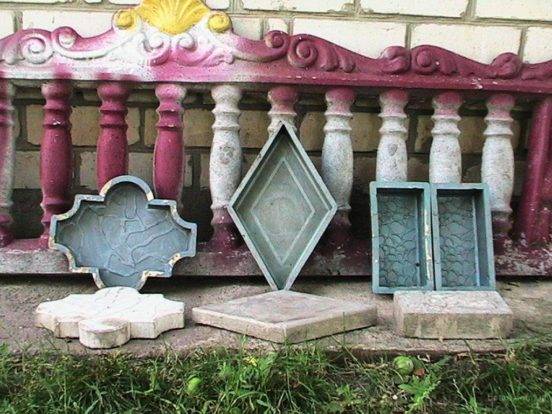
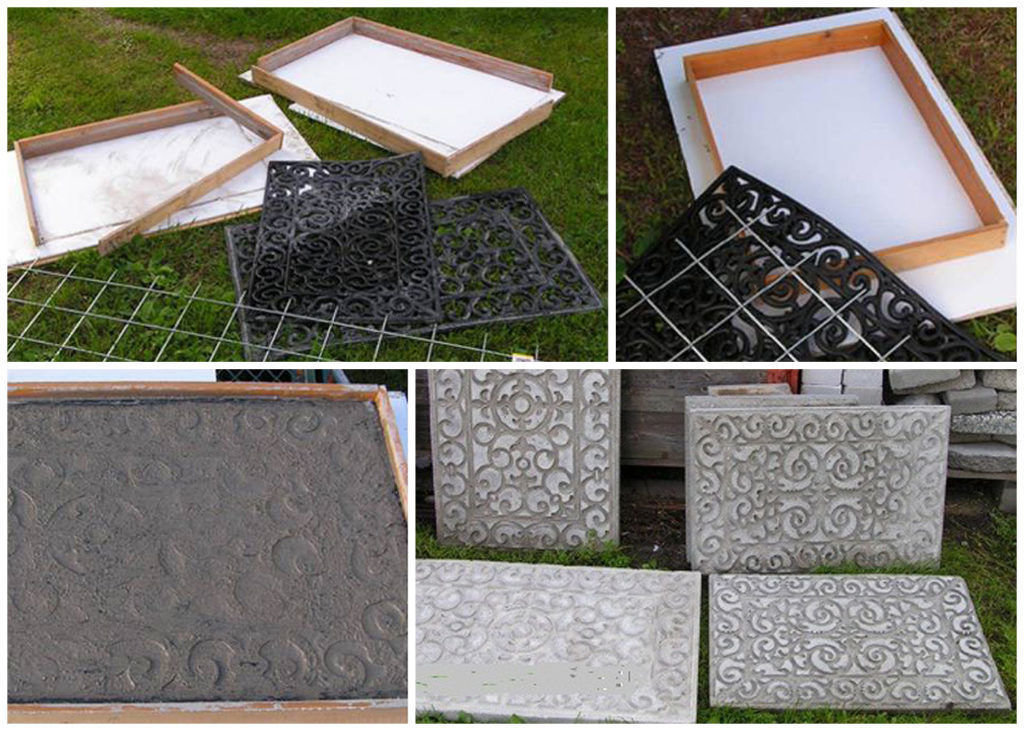
Do-it-yourself mold for pouring
Of course, you can buy a do-it-yourself mold, but this will be the easiest. And since it was decided not to look for easy ways, we will make it ourselves. Forms are different rubber, plastic, silicone. Craftsmen make them from any materials from wood to children's sandbox molds. We will consider the liquid silicone or plastic method, because it is not difficult or expensive.
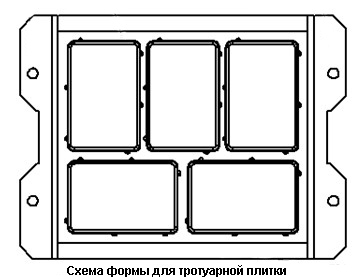
Forms are different rubber, plastic, silicone. Craftsmen make them from any materials from wood to children's sandbox molds.
We will need:
- Lumber.
- Liquid plastic (silicone).
- Building level.
- Saw.
- Screws.
- Drill.
A frame in the form of a box is constructed from lumber, it is checked by a building level so that everything is smooth, since the evenness of our shape directly depends on this. The parts of the container-box must be glued so that there are no gaps, otherwise the plastic will flow out. Inside, you need to carefully lay the sculptural clay, the children's clay will not work, because it is too sticky, we lay it almost to the middle. A mold model is placed in plasticine. Holes are made in the plasticine with a pencil so that later the layers do not move, these will be locks. It is measured how much silicone is needed, for this any bulk material is poured into the container, then it is poured into a measuring container, this will be the amount of silicone required. After everything is ready, the model is lubricated with vegetable oil. Silicone is kneaded, it should be homogeneous, without bubbles. It is poured in a thin stream along the contour of the model. Full curing will occur after 24 hours.
factory technology
On an industrial scale, the production of vibrocast, vibropressed and clinker tiles for paving sidewalks is carried out. At the same time, depending on the manufacturing technology, the quality of products varies greatly.
Vibrocasting technology is quite simple to use. It is built on the fact that the solution based on cement poured into curly molds and compacted on a special surface by vibration.

vibropress.
Such products are distinguished by rich color shades and are sold at a low price. However, the strength and frost resistance of such paving slabs is an order of magnitude lower than that of other types.
Vibropressed tiles are made on special equipment that compacts the concrete mixture with high pressure. Such paving stones are stronger, but also more expensive due to the use of a press and increased power consumption.
The best tile is clinker. Clinker production of paving slabs occurs by firing specially prepared clay in a kiln at a very high temperature. The final product turns out to be very durable, frost-resistant and beautiful, while not yielding in terms of durability even to hard natural stone.


But the high energy consumption for the manufacture of paving slabs and the need to use expensive industrial equipment raises the cost of this material several times.
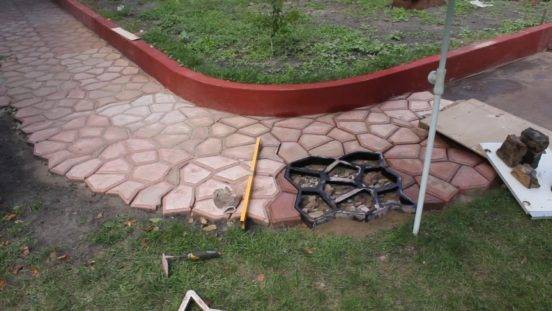
5 Instructions for making paving slabs using a plastic mold
Consider the option of making tiles using a plastic square shape measuring 30x30 cm. This pattern has a "California shagreen" relief. A big plus of such a matrix is that it is quite rigid and does not deform when the solution is poured, however, it is quite difficult to get the finished product out of it.To make it easier to cope with this, you must first lubricate the form with either a special lubricant or vegetable oil.
The mixture prepared in advance according to the instructions that was given earlier, is poured into the mold. First, it is only half filled, then lifted and shaken, and then the rest of the solution is poured, carefully distributing it with a trowel or spatula, while pressing it.
After that, the template needs to be “shaken” for some time so that the entire solution is well compacted. If you have a vibrating table, use it for this purpose. You can understand that the solution is well compacted by its flat surface and the air bubbles that have come out.
Then the molds are left for a day so that the mixture dries well. As a rule, this time is enough, but if the air temperature is low, it is better to leave the tiles for two days.
After this time, the matrix is carefully turned over and the product is removed - it should literally slip out, since the form was smeared beforehand. If necessary, press a little on the bottom of the mold so that the product just falls behind.
It is quite easy to make tiles using plastic molds into which the finished mortar is poured.
Proportions, composition and rules for preparing the solution
As a rule, the following means are used:
- cement;
- sand;
- water;
- plasticizer;
- rubble.
Optionally add pigments and dispersant.
Since tiles for private if it makes sense to paint, then you should adhere to or at least focus on the proportion where there will be 57% crushed stone, 23% cement and 20% sand. The plasticizer is added in an amount of 0.5% by weight of cement. All dry ingredients are diluted 40% with water.As for pigments and dispersants, they are allocated 700 ml/m² and 90 g/m², respectively.
The composition of the water for the solution does not hurt to investigate for the content of inclusions in excess, which can affect performance. Drinking water for the preparation of the mixture is suitable. Before use, the solution is stirred, as its components gradually delaminate. The ready-made solution can also not be used if it has partially set. At a temperature of +30 ° C and above, humidity below 50%, water-retaining particles, lime or clay are added to the mixture.

What are the benefits of homemade tiles?
The production of paving slabs with your own hands is a rather laborious and rather long, but at the same time quite an exciting process. The result of the work is exclusive products, successfully combined into picturesque paths.
Such unusual paths serve as a worthy frame for flowering garden plants.
In addition, making paving slabs with your own hands will significantly save money in the family budget, because the purchase of a finished coating is many times more expensive.
Homemade tiles may not be suitable for covering areas that are designed to accommodate heavy structures or vehicles, but they will be an excellent solution for walking paths in the garden. With the correct manufacture of the concrete mixture and exposure to all stages of production technology, you can get a product with 100% durability.
Using colors and pigment dyes, you can create tiles of various shades.
By experimenting and coloring solutions with colorants, you can get incredible combinations and patterns.The very process of making and arranging paths is an interesting activity that allows you to unleash your creative potential, bringing a lot of pleasure and positive.
Approximate recipes for paving slabs.
Components of the simplest solution:
• sand - 30 kg;
• plasticizer - 100 g;
• Portland cement not lower than М-500 – 15 kg;
• water about half the volume of cement.
Solution using granite chips:
• Portland cement not lower than М-500 – 10 kg;
• sand - 15 kg;
• small crushed granite - 15 kg;
• plasticizer - 100 g;
• water up to half of the volume of cement.
Instead of granite, fine gravel is quite suitable. In addition to these components, it is possible to add up to 1 kg / m3 of a solution of special reinforcing polyamide, basalt or glass fibers used in the manufacture of foam fiber concrete. Painted tiles are obtained by adding pigments, according to the instructions for a specific type of dye. To obtain a uniform color, the solution must be thoroughly mixed.


Conclusion
It is unlikely that it will be possible to ennoble the area around the house in a month or two. But during this time, theoretically, you can have time to lay out beautiful sidewalks, paths and ways for traffic. Craftsmen rent small equipment, collect improvised materials, bring raw materials from nearby places and create a tiled floor. In what version it will be, simple or artistic, depends on the time spent. Before the start of the main stages of work, the shape of the tile and patterns for its manufacture are selected. As for the method of manufacture, vibrocasting is mainly preferred, because it is easier, more convenient and simpler. In this case, the physical characteristics of the products will only slightly yield to those of vibropressed tiles.The selection of methods and materials does not end there. The question of color remains open. The mixture is either tinted in the process, or the already solidified tile is dyed.


