Installation
Now it’s worth dwelling on how to install the head for the well with your own hands. In the context of the fact that the design of the head is extremely simple, it can also be installed without any problems. But still there are certain rules that should be observed in the process of installation work.
The order of work will look like this:
- preparation of the edge of the casing;
- the flange is put on the tube so that the side looks down;
- installation of a sealing ring;
- fixing the pump cable;
- an electric cable is passed into the corresponding entrance;
- a part of the falling pipe or hose is attached to the fitting, and the other end of the pipe is attached to the pump;
- the pump is lowered into the well;
- now you should close the cover under the action of the mass of the submersible pump;
- flange and cover are connected with bolts, which are tightened evenly.
The preparation of the edge of the casing pipe starts with the fact that its edge is cut clearly horizontally. This makes it possible to place the tip in a plane perpendicular to the casing string.When the pipe has been cut at the correct level, its edge must be carefully polished. You can use an ordinary grinder with the appropriate set of nozzles.
Many people want to get water from a well almost immediately. For this reason, some owners immediately lower the pump, postponing the installation of the head. It shouldn't be done that way. First, a flange and an o-ring are put on, after which the pump can be lowered into the well. Otherwise, in order to install the head, you will have to get it, and then lower it again. This is also not the best solution, because the risk of damage to the column and equipment increases. And the complexity of the procedure itself is too high.
Now you need to fasten the cable to the pump. This can be done with the help of special carbines. The length of the cable must fully correspond to the immersion depth of the equipment. It is not necessary to lower the pump until all other elements are located in the corresponding slots in the head cover. There is a special clamp on the hole for the electrical cable, which must be loosened so that the cable can slide freely. If the wire is pinched or incorrectly located, then it can break.
Now the lower end of the hose is attached to the submersible pump, after which you need to fix the waterfall pipe or hose on the head
When the pump is lowered into the well, the cable should be released gradually and carefully. When the equipment has been lowered to the required depth, the cover should be closed so that the weight of the pump presses it against the flange. In this case, the seal will be in a special groove and will be tightly pressed against the casing, which will ensure reliable sealing of the entire structure.
If the head has been mounted correctly, the sealing ring will be evenly pressed by the flange against the cover, and the connecting holes will be located opposite
In this case, the seal will be in a special groove and will be tightly pressed against the casing, which will ensure reliable sealing of the entire structure. If the head has been mounted correctly, the sealing ring will be evenly pressed by the flange against the cover, and the connecting holes will be located opposite.
If this effect was not achieved, then it is necessary to look for the cause. The lid may need to be repositioned slightly. The connecting screws must be tightened as evenly as possible so that there is no distortion to one side. There is no great need to try to make great efforts.
If the bolts are not tightened too tightly, then the head can simply be dismantled from the pipe, their installation simply loses its meaning.
If a cable with a heavy pump is attached to the head cover, then it is best to install it with two people to carefully lower the pump into the well and install the cover in place. When the cover is installed and fixed, sagging of the electrical cable will almost always be observed. For this reason, the wire must be chosen so that it does not sag, but is not too tight. Now you can connect the water pipe to the fitting. Then, the pump is usually turned on, which allows you to evaluate the correct installation of the head and its condition under working load.
Casing installation
The casing is installed in one of two ways:
- The well is drilled with a drill larger than the casing, with a diameter, after which it is lowered into the already finished shaft, gradually increasing and holding with a drill collar. The space between the pipe and the walls of the well is filled with gravel, clay or concrete. This method is used on dense, non-flowing or viscous soils at a depth of up to 10 m.
- Penetration is carried out with a smaller diameter drill. In parallel with drilling, the casing pipe is forced into the wellbore with force, for which its lower end is provided with a cutting element - a milling cutter. This method is more reliable. But it can not be used on viscous soils.
Today, both metal and polymer casings are used.
Casing pipe installation
In both cases, you should not take an ordinary water pipe, but a specially made one for this function. Plastic casing can be easily damaged by a drill or a string from the inside. Therefore, in cases where casing is carried out simultaneously with drilling, spring centralizers should be installed on the drill rod every 3–5 m.


Metal casing pipes are built up with the help of threaded couplings or electric welding, plastic ones - with a socket connection or couplings, which are put on glue or welded. In the latter case (it is the most preferred), a special tool is used - a soldering iron, which melts the walls of the pipe and coupling, after which they are combined into a single piece.
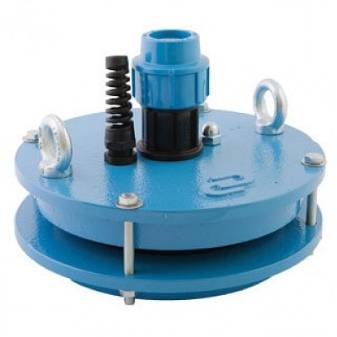
Homemade head for a well
Since the head is not so complicated, you can make it yourself. For this, sheet stainless steel 10 cm thick is used. A head made of less thick metal will not be strong enough.But too large dimensions of the material are not needed, since this creates an unreasonably high load on the structure.
The wellhead is best made from stainless steel sheet. The thickness of the material must be at least 10 mm
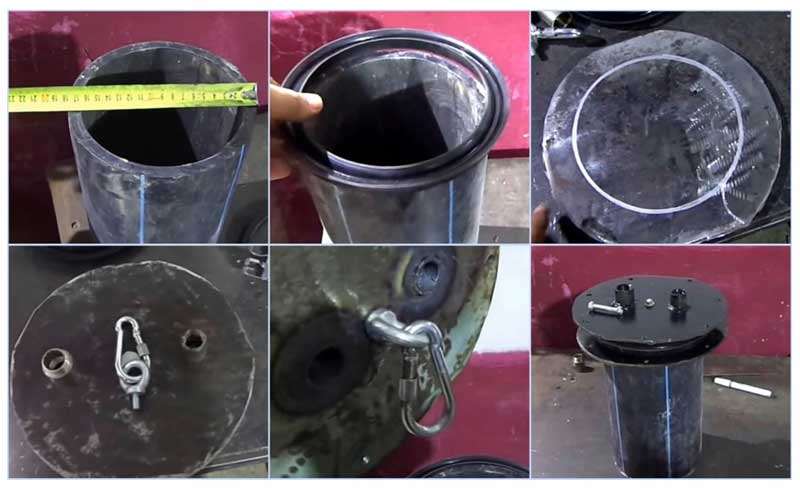
First, a flange is cut out, i.e. round element with a hole inside. The dimensions of this hole must be such that the casing pipe passes freely into it. The lid is another metal circle, but the holes in it are made in completely different ways. A hole is usually made in the center for a water pipe fitting.
Then a hole of a smaller diameter is cut out, it is intended for an electric cable. The hole for the fitting needs to be made quite large, it can be cut using a welding machine. The hole for the cable can be drilled with a drill with a suitable size bit.
At the end of cutting and welding work, the holes and other elements of the head should be processed with a file to eliminate bumps, burrs, etc. You will also need to weld three eye bolts to the cover. One of them is welded to the underside of the cover, it will become a loop for attaching a cable from which the pump is suspended.
An eyebolt is fixed on the underside of this head. A carabiner is attached to it, designed for a cable holding a submersible pump.
Two eye bolts are welded to the top side of the cover. They will become a kind of handle with which the head can be freely opened. If desired, eye bolts can be replaced with an eye nut, sometimes it is even more convenient to use it than a bolt. Some craftsmen have successfully replaced this element with a piece of a metal bar of suitable diameter rolled into a circle.
It is also necessary to drill holes for the mounting bolts in the cover and flange. It is recommended to drill both elements at the same time, connecting them with a vice or clamp. This will ensure a more accurate match of the holes during installation of the finished head.
Also, experienced craftsmen advise first making all the necessary holes in the flange and head, and then welding the adapter, eyebolts, etc. Of course, mounting bolts should be purchased in advance. Their diameter must match the holes, and the length must be sufficient to connect the cover, flange and gasket installed between them.
If cutting and welding sheet metal usually does not cause difficulties, then even experienced craftsmen can have problems finding a suitable gasket. The most reliable way to purchase the required element is to buy it from the manufacturer or in a specialized store.
Unfortunately, commercially manufactured gaskets with standard sizes are not always suitable for a homemade head. The gasket can be cut from a piece of thick rubber, if one is at hand. It is believed that a layer of rubber 5 mm thick will be enough. The inner diameter must be made such that it fits snugly on the casing.
This will ensure sufficient sealing of the head after it has been assembled. Some craftsmen recommend using a ring rolled from an old car chamber as a gasket. A non-standard idea for making a gasket is to cast it from silicone. True, in this case, you need to make a form of the appropriate size and configuration.
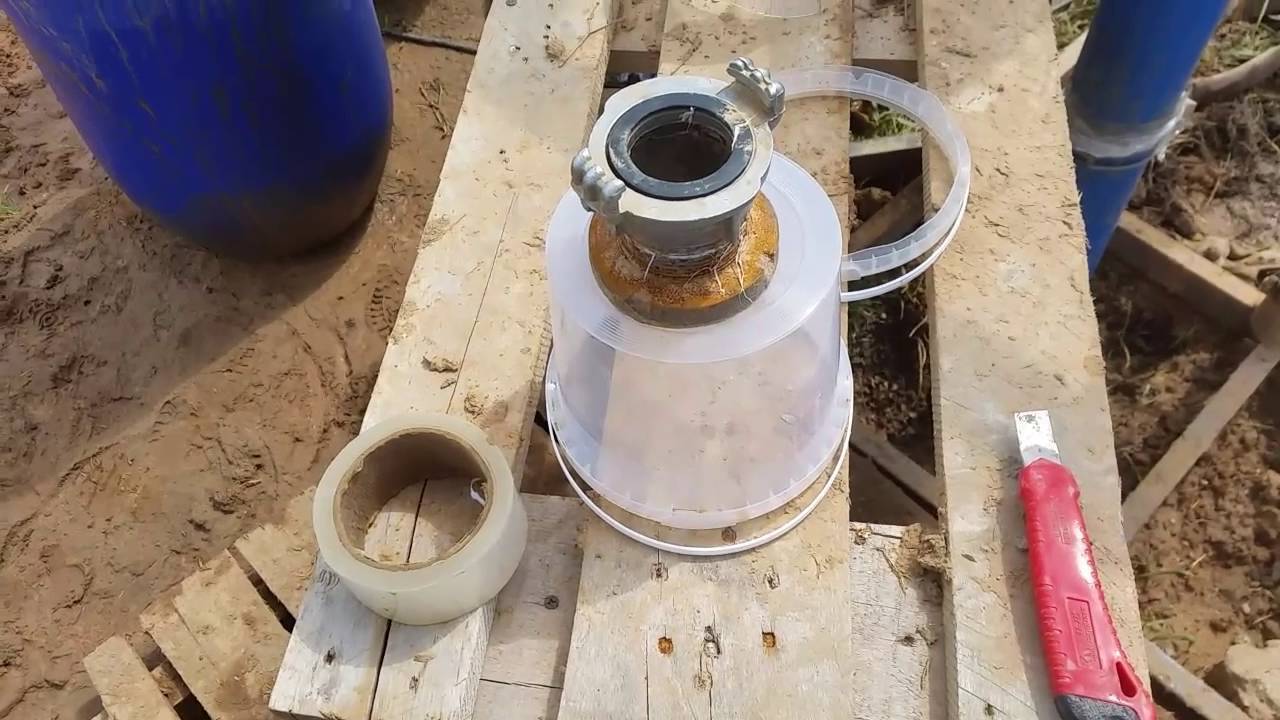
To make a headband with your own hands, you can use any suitable materials.But a headband made of plastic and tape will never be as reliable as an industrial model.
In any case, the gasket must be strong enough to ensure a reliable seal of the head and last for a long time. This element is under constant compressive stress. Poor quality rubber can soon collapse, which will weaken the connection of the structure.
When installing a homemade well head, it is recommended to protect the electric cable with a special heat-shrink sleeve. For its installation you will need a building hair dryer. Some craftsmen use three metal corners instead of the bottom flange, which are simply carefully welded to the metal casing. The design of the cover in this case remains the same, and mounting holes are drilled both in the corners and in the cover.
Manufacturers
If we talk about manufacturers of caps for wells, then today on the market you can find products from both domestic and foreign manufacturers.
Among domestic companies, it is worth highlighting Aquarius and Dzhileks, and if we talk about foreign manufacturers, then you should pay attention to Merrill
- The company "Vodoley" is one of the most famous manufacturers of well heads and similar equipment in general. The company's product range includes various models of heads, both plastic and metal. This allows customers to purchase a solution that is ideal for their particular well, taking into account all its features.
- The company "Dzhileks" has been producing high-quality caps for wells for several years now.It produces exclusively cast iron and plastic solutions that can be used in various types of wells and ensure their high-quality and stable operation. If we talk about which company's products are better, then this cannot be given an unambiguous answer due to the fact that all the solutions of these companies are of high quality.
- The choice depends more on the well itself and the features of its work. There are other solutions from domestic manufacturers on the market. For example, the Aquarobot model from Unipump. This model is universal and suitable for casing pipes of wells with different diameters. Cast-iron solutions such as Aquarobot have long earned a reputation as reliable devices for ensuring high-quality well operation.
- Merrill is based in America and manufactures plastic and cast iron heads to foreign standards, which is a guarantee of the highest quality and trouble-free operation. Models from Merrill are respected by customers and buyers primarily for the stability of their work. It is known that they rarely need repair and can work even in rather difficult environmental conditions or under the influence of very serious loads. In general, today on the market you can find a lot of both domestic and foreign wellheads, which allows almost everyone to find a solution that will allow the well to work smoothly and ensure the normal supply of water to a house or building.
Homemade head for a well
Since the head is not so complicated, you can make it yourself. For this, stainless steel sheet 10 cm thick is used.


A head made of less thick metal will not be strong enough.But too large dimensions of the material are not needed, since this creates an unreasonably high load on the structure.
The wellhead is best made from stainless steel sheet. The thickness of the material must be at least 10 mm
First, a flange is cut out, i.e. round element with a hole inside. The dimensions of this hole must be such that the casing pipe passes freely into it. The lid is another metal circle, but the holes in it are made in a completely different way. A hole is usually made in the center for a water pipe fitting.
Then a hole of a smaller diameter is cut out, it is intended for an electric cable. The hole for the fitting needs to be made quite large, it can be cut using a welding machine. The hole for the cable can be drilled with a drill with a suitable size bit.
At the end of cutting and welding work, the holes and other elements of the head should be processed with a file to eliminate bumps, burrs, etc.
You will also need to weld three eyebolts to the cover. One of them is welded to the underside of the cover, it will become a loop for attaching a cable from which the pump is suspended.
An eyebolt is fixed on the underside of this head. A carabiner is attached to it, designed for a cable holding a submersible pump.
Two eye bolts are welded to the top side of the cover. They will become a kind of handle with which the head can be freely opened. If desired, eye bolts can be replaced with an eye nut, sometimes it is even more convenient to use it than a bolt.
Some craftsmen have successfully replaced this element with a piece of a metal bar of suitable diameter rolled into a circle.
It is also necessary to drill holes for the mounting bolts in the cover and flange. It is recommended to drill both elements at the same time, connecting them with a vice or clamp. This will ensure a more accurate match of the holes during installation of the finished head.
Also, experienced craftsmen advise first making all the necessary holes in the flange and head, and then welding the adapter, eyebolts, etc. Of course, mounting bolts should be purchased in advance.
Their diameter must match the holes, and the length must be sufficient to connect the cover, flange and gasket installed between them.
If cutting and welding sheet metal usually does not cause difficulties, then even experienced craftsmen can have problems finding a suitable gasket. The most reliable way to purchase the required element is to buy it from the manufacturer or in a specialized store.
Unfortunately, commercially manufactured gaskets with standard sizes are not always suitable for a homemade head. The gasket can be cut from a piece of thick rubber, if one is at hand. It is believed that a layer of rubber 5 mm thick will be enough. The inner diameter must be made such that it fits snugly on the casing.
This will ensure sufficient sealing of the head after it has been assembled. Some craftsmen recommend using a ring rolled from an old car chamber as a gasket. A non-standard idea for making a gasket is to cast it from silicone. True, in this case, you need to make a form of the appropriate size and configuration.
To make a headband with your own hands, you can use any suitable materials.But a headband made of plastic and tape will never be as reliable as an industrial model.
In any case, the gasket must be strong enough to ensure a reliable seal of the head and last for a long time. This element is under constant compressive stress. Poor quality rubber can soon collapse, which will weaken the connection of the structure.
When installing a homemade well head, it is recommended to protect the electric cable with a special heat-shrink sleeve. For its installation you will need a building hair dryer.
Some craftsmen use three metal corners instead of the bottom flange, which are simply carefully welded to the metal casing. The design of the cover in this case remains the same, and mounting holes are drilled both in the corners and in the cover.
Mounting technology
The installation process itself is carried out without difficulty, since there is no need for welding. But the work must be done in stages.


The head should be mounted according to special technology
Namely:
- The first stage is to prepare the upper cut of the casing pipe for the installation of the head. To do this work, you need to clean the upper edge of the pipe and its side walls from all kinds of dirt and rust. And then cover the pipe with a primer and thus protect it from possible corrosion.
- The second stage consists in unwinding the head into the main parts and then putting it on the pipe. When performing such work, it is necessary to make sure that there is a gasket on the lower and upper flanges. It should fit into its groove with effort. To facilitate putting on the gasket, you can use grease.
- After that, fastening elements for equipment are attached to the cover. In order for them not to corrode, for these purposes it is better to install eyebolts, pipes made of plastic, and the cable for insuring the pump must have an anti-corrosion coating.
- At the last stage of installation, it is necessary to lower the pump with a winch and connect the flanges. For this, bolts are used, which must be alternately tightened.
But with such a tightening, it is important to know the measure and not overtighten the bolts, as this can lead to plastic breakage, which will disrupt the casing structure.
Mounting the head for the well is not a laborious task. If you follow all the rules, the advice of experts and adhere to the technology, then such a device can be installed independently. But still, you first need to get acquainted with the basic nuances of installation.
The main element of the design of the upper part of the well
Why is this detail needed?
With a deep occurrence of the aquifer, the well becomes the main source for autonomous water supply. And in order for this source to provide a stable supply of water (and even of the right quality), it should be properly equipped.
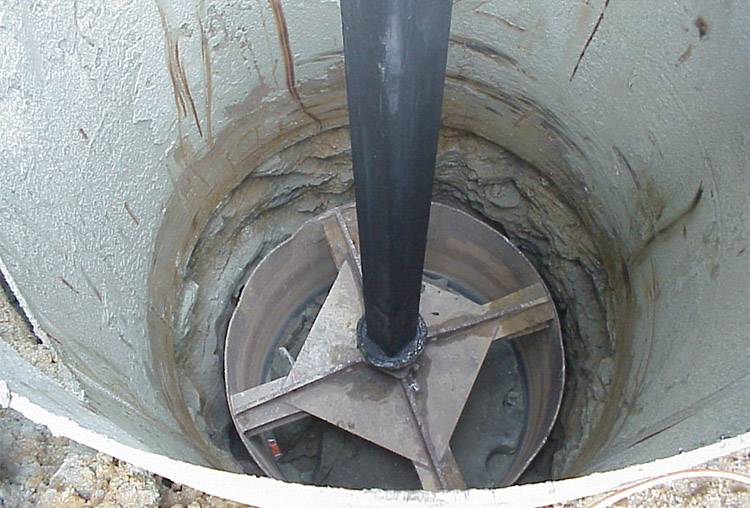
This is what an unformed pipe looks like: anything can get into it
One of the most important parts that affect the performance of the entire system is the head for the well. This is a strong sealed cover, which is fixed on the upper cut of the casing pipe.
Well heads perform a number of functions:
- Source sealing. Installation of the head allows you to block the wellhead, protecting the aquifer from both pollution and moisture ingress. This is especially true during the autumn rains and spring snowmelt.
- Formation of an optimal microclimate. Hermetically blocking the pipe, we reduce heat loss in the cold season. Thanks to this, even sections of the cable, hose and cable close to the surface do not freeze, which significantly increases their reliability and service life.
The protective design ensures the operability of the entire system, isolating the aquifer from the external environment
- Improving the efficiency of the pump. Wellhead sealing creates tension inside the casing pipe, due to which water is literally “sucked” from the horizon. For wells with a small debit in dry seasons, this becomes literally a salvation!
- Improving the reliability of fixing equipment. By installing the head on the well, we get the opportunity to fix the pump on a cable attached to the eyebolt in the cover of the device. Such a mount will be much more durable than fixing the pump with improvised means.
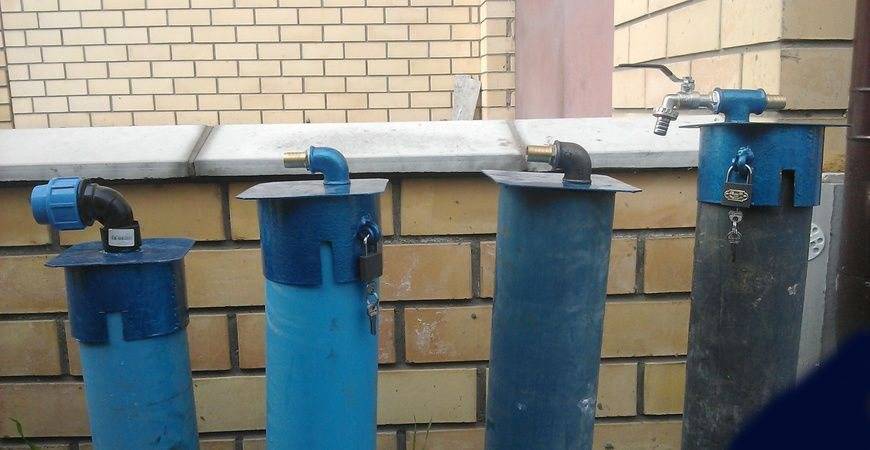
Thanks to the fastening with several bolts, the pump is reliably protected from theft
- Theft protection. Fixing the head on the neck of the pipe is carried out with the help of bolts, which are not so easy to unscrew even with a special tool. Yes, when dismantling the head, you will have to tinker, especially with old fasteners - but on the other hand, an attacker is almost guaranteed not to be able to get to the well pump.
This method of sealing the pipe, as in the photo, is cheaper, but its effectiveness is doubtful
In general, the installation of a well head is a completely justified decision. Of course, it is possible to seal the upper edge of the casing pipe at a lower cost (for example, by wrapping it with polyethylene).But such an approach will not provide us with the necessary protection against the ingress of ground and surface water, not to mention other factors.
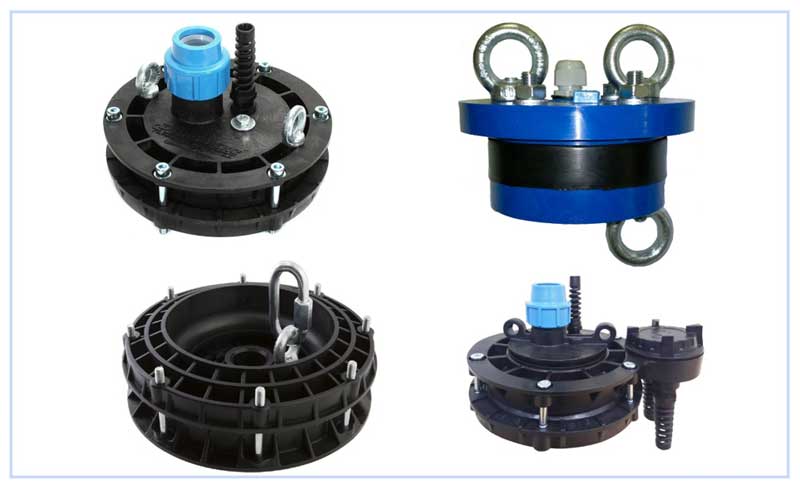
Types and design of heads
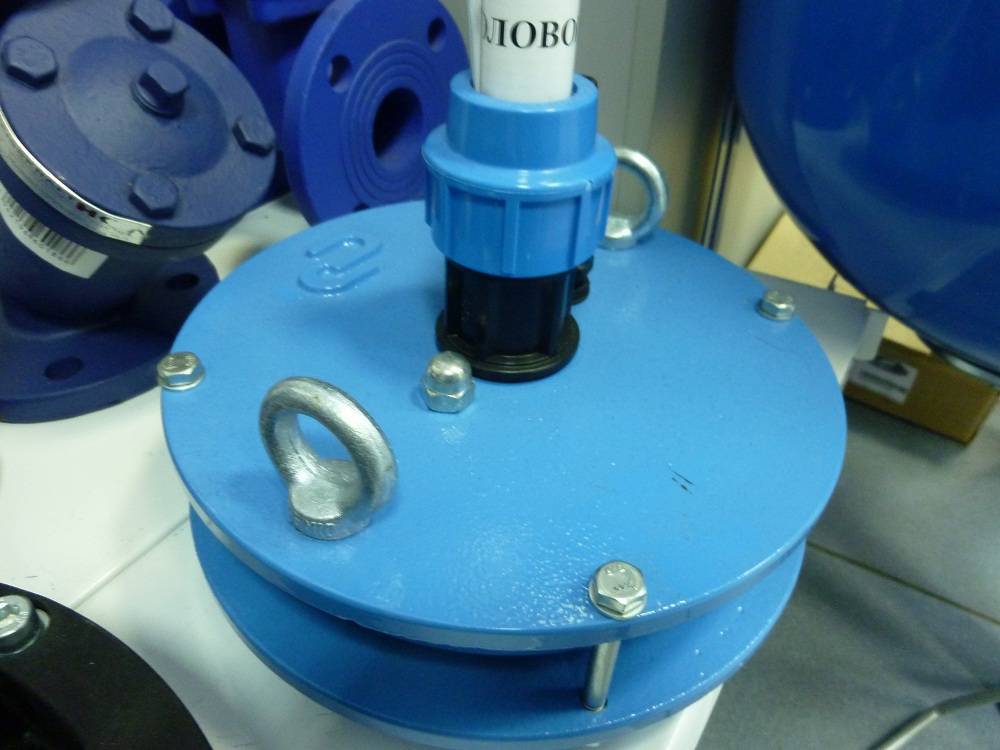
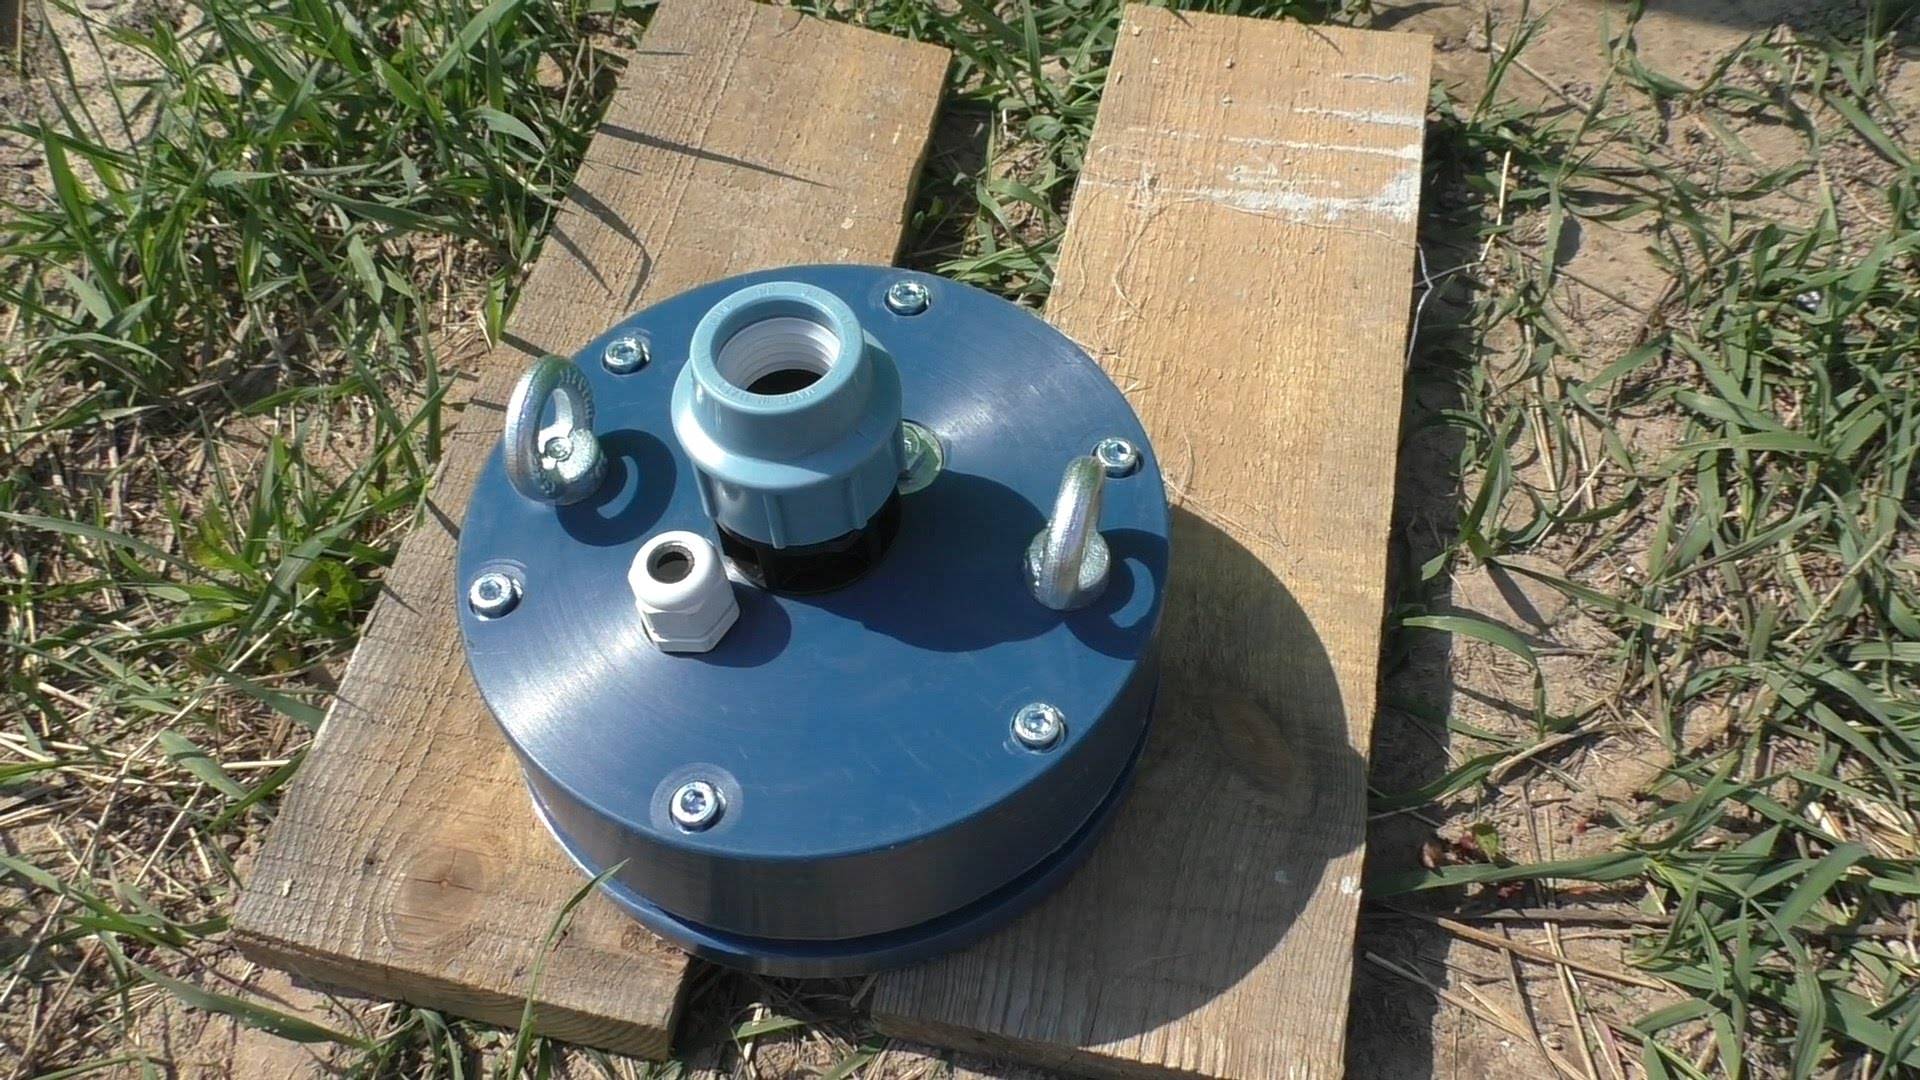
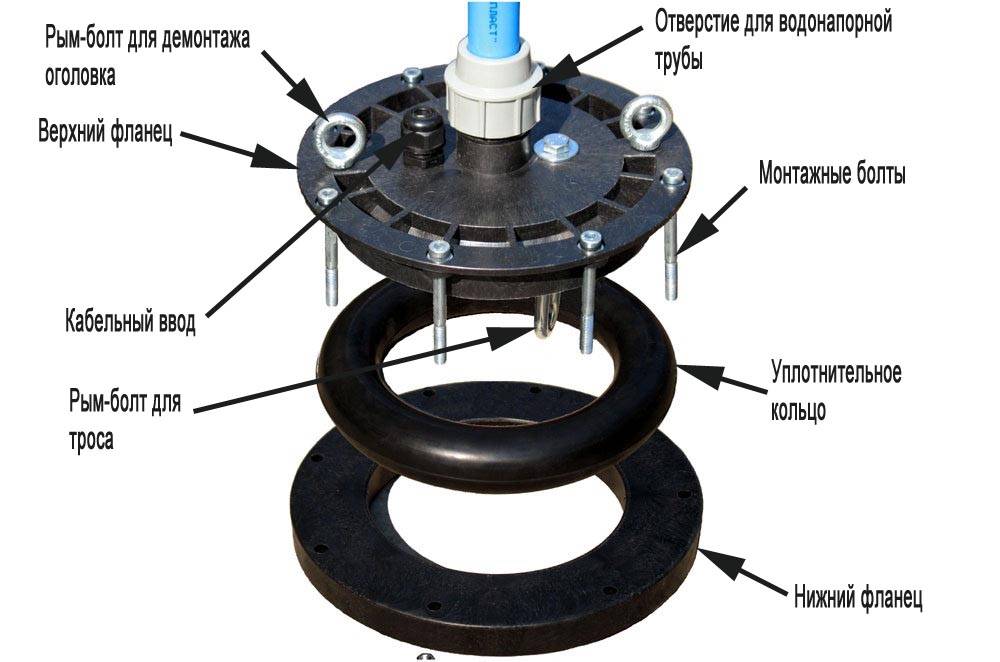
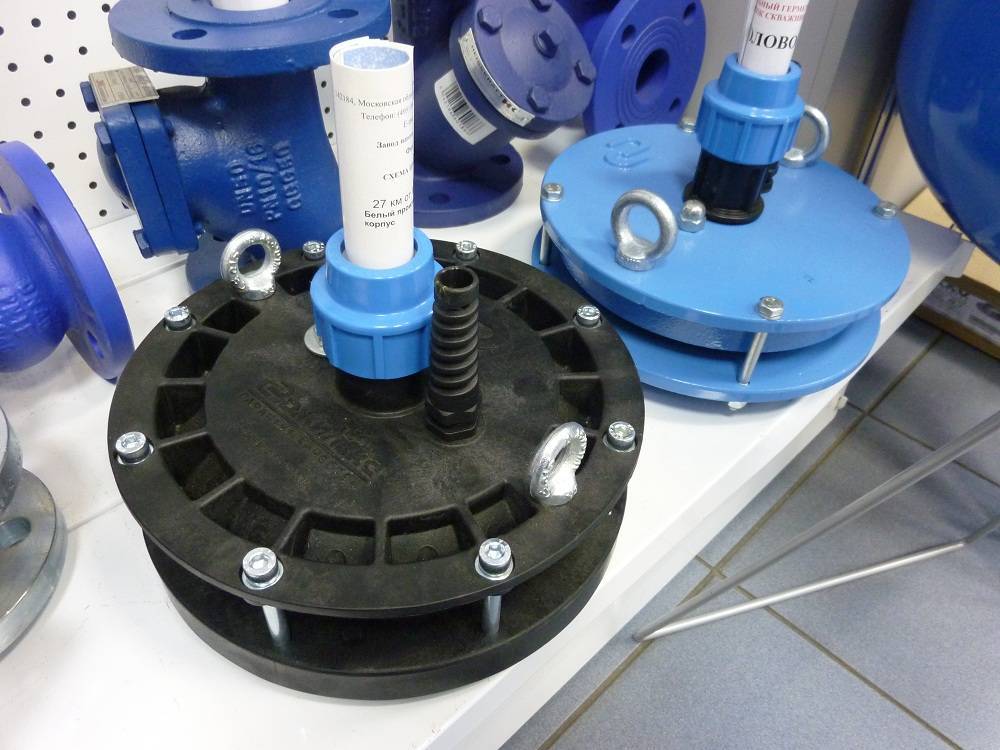
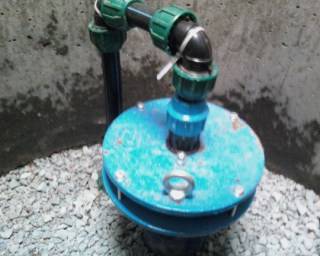
Plastic models (pictured) suitable for most domestic wells
Installation of the head begins with the selection of a suitable model. Today, products are produced for the most common casing diameters, while they can be made from such materials:
| Material | Advantages | Flaws |
| Plastic |
|
|
| Steel |
|
|
| Cast iron |
|
|
Steel models combine low weight with a sufficient margin of safety
If you need maximum strength, choose a cast iron model
By and large, you can choose any borehole head - subject to the manufacturing technology, the role of the material will be secondary.
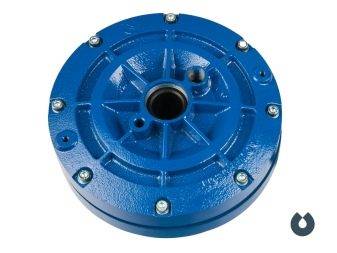
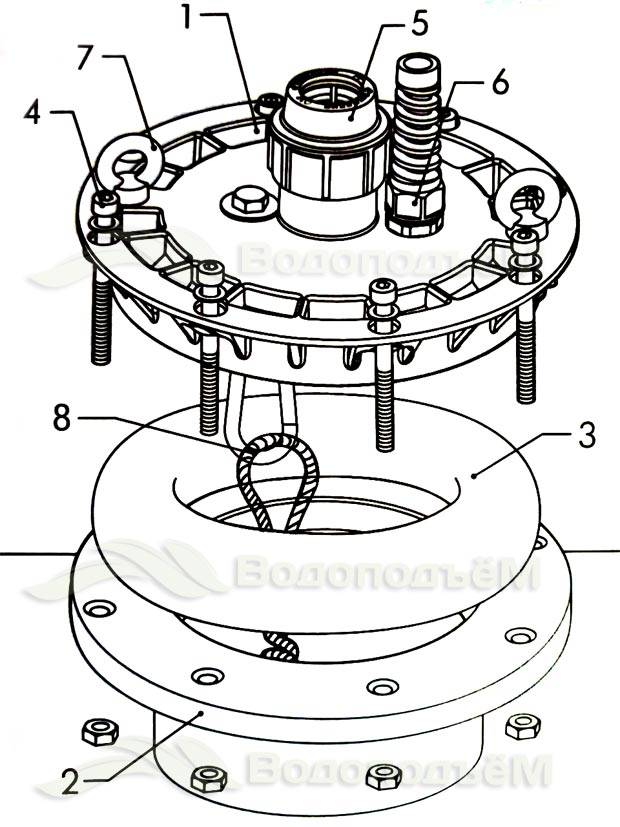
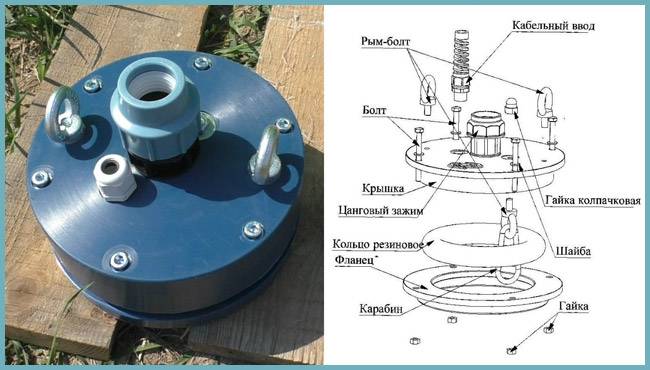
Scheme of the design of a typical head
The design of the head for the well is also not too complicated.
When choosing a model, you should pay attention to the following elements:
- Flange - an annular part that is put on the top of the casing and is used to fix the cover. The most common diameters are from 60 to 160 mm.
During installation, we pass the pump on a cable with a hose through a flange with a sealing ring
- Sealing ring.It is located between the cover and the flange, used to seal the connection.
The seal provides sealing of the joint between the flange and the cover
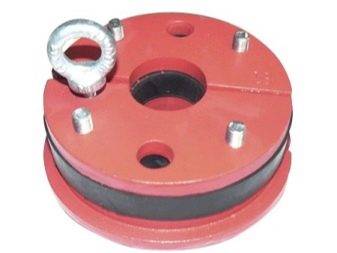
- Lid. The upper part of the structure, during installation, is pressed against the flange through an elastic seal. The openings in the cover are designed to allow the passage of the power cable and water supply pipe/hose. In the lower part there is a bolted carabiner - a pump is suspended on a cable from it.
Cover with fixing ring on the bottom surface
- Mounting bolts (4 or more) - connect the cover to the flange, provide the necessary clamping force.
Head types
There are several types of heads. The differences are in the material of the product and the mode of operation, and the basis of their design remains unchanged.


So:
- The most popular are cast iron and steel heads. For shallow wells, these covers are made of plastic.
- When designing the design of the product, the weight load of the equipment installed during the operation of the well is provided. The properties of plastic allow it to withstand a load of up to 200 kg, and metal - up to 500 kg.
- In addition, the choice of material is determined by the depth of the well. If its depth does not exceed 50 m, then the minimum weight of the equipment is 100 kg. In the case of deep wells, it is necessary to use a powerful deep well pump, as well as a steel cable and wires, the length of which can be tens and hundreds of meters. The weight of such complex equipment is sometimes more than 250 kg.
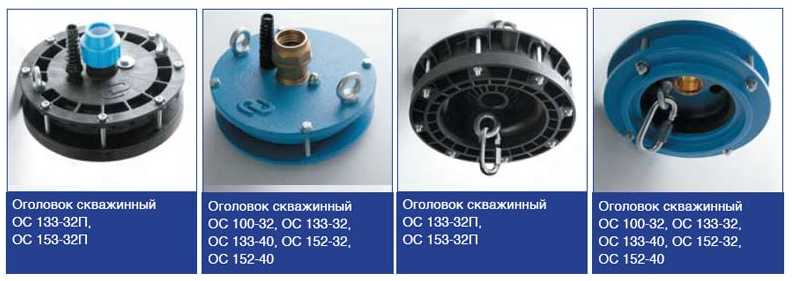
Marking
The cap designation contains a series of letters and numbers indicating its parameters.
For example, OS-152-32P (or OS-152/32P), where:
- OS - borehole head;
- 152 – casing pipe diameter in mm;
- 32 - diameter of the adapter for connecting the water intake pipe;
- P - head material (plastic), if "P" is absent, then the head is made of metal.
Some tips can be designed for several casing diameters. In this case, the size range is specified. The head, which has the designations OS 140-160 / 32P, is suitable for pipes with a diameter of 140 ... 160 mm.
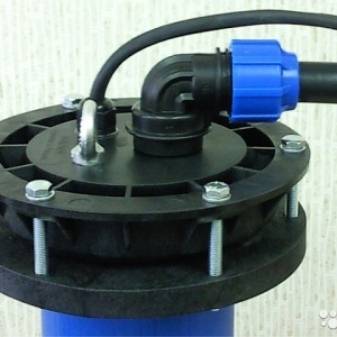
Head mounting
Mounting the head on the casing pipe is not particularly difficult. There is no need for welding and other complex operations. And yet, before proceeding with the installation, it is advisable to get acquainted with the sequence and nature of the work.
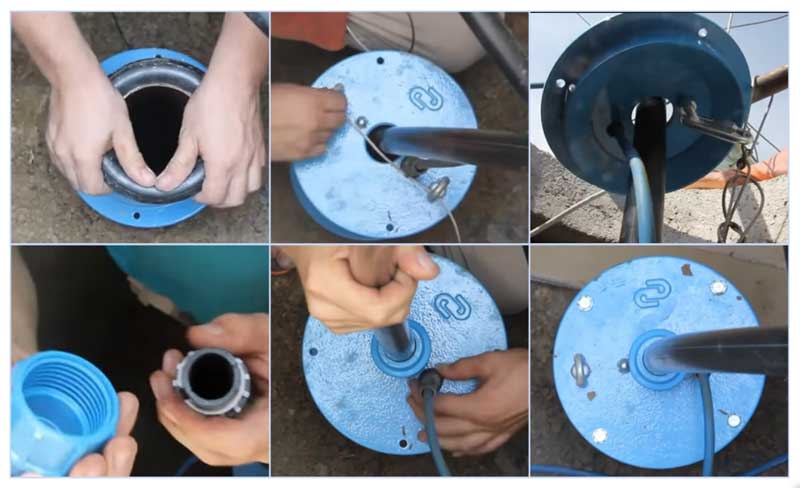
Header installation
So:
- First of all, you need to prepare the edge of the casing pipe. Its end should be strictly perpendicular to the axis, it should not have burrs. If the pipe is metal, it is advisable to prime and paint it with a suitable paint for metal to protect it from corrosion. It is best to cut (if necessary) and clean the pipe with a grinder with a circle corresponding to the material of the pipe.
- The flange is put on the pipe with the shoulder down, then the sealing ring. If it is put on and moves along the pipe with difficulty, it can be carefully lubricated with oil or autosol.
- Now you need to attach all the elements to the lid. The cable for hanging the pump is attached at one end to a carabiner, which is attached to an eyebolt wrapped in a cover from below, and at the other end to the pump. By the way, it is desirable to purchase it in a version protected from corrosion, i.e. covered with plastic.
- The power supply cable is passed through the inlet intended for it in the cover. The cable entry clamp must be loosened so that the wire slides easily into the hole.We attach one end of the hose to the pump, the other to the fitting installed in the center of the cover.
- The pump must be lowered into the well, holding it by the cable. Once it is down to the correct depth and the cable is taut, the cover is carefully placed on the casing. The sealing ring is pulled up to the cover and pressed by the flange. When doing this, make sure that the holes on the cover and the flange coincide.
- Now you need to install the connecting bolts in the holes of the flange and cover and tighten them evenly from all sides. In this case, the ring will fall into the groove on the cover and flatten a little, tightly sealing the gap between the pipe and the cover.

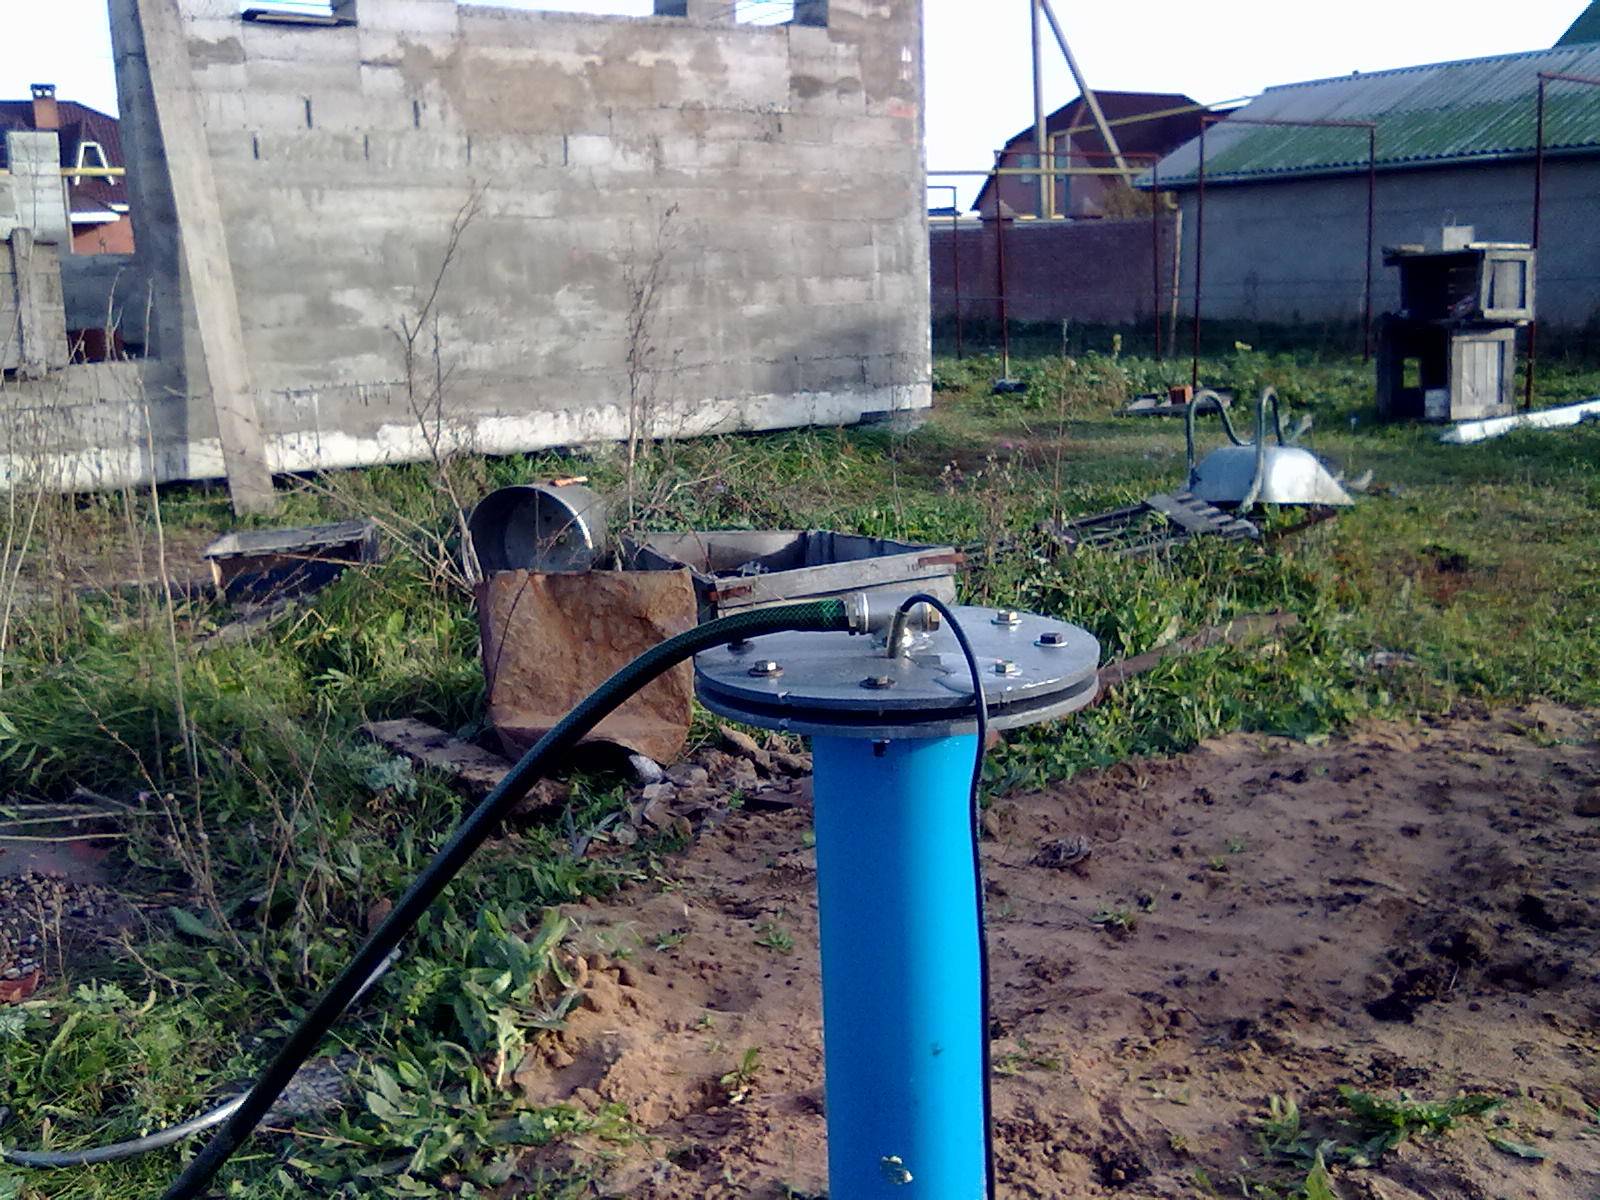
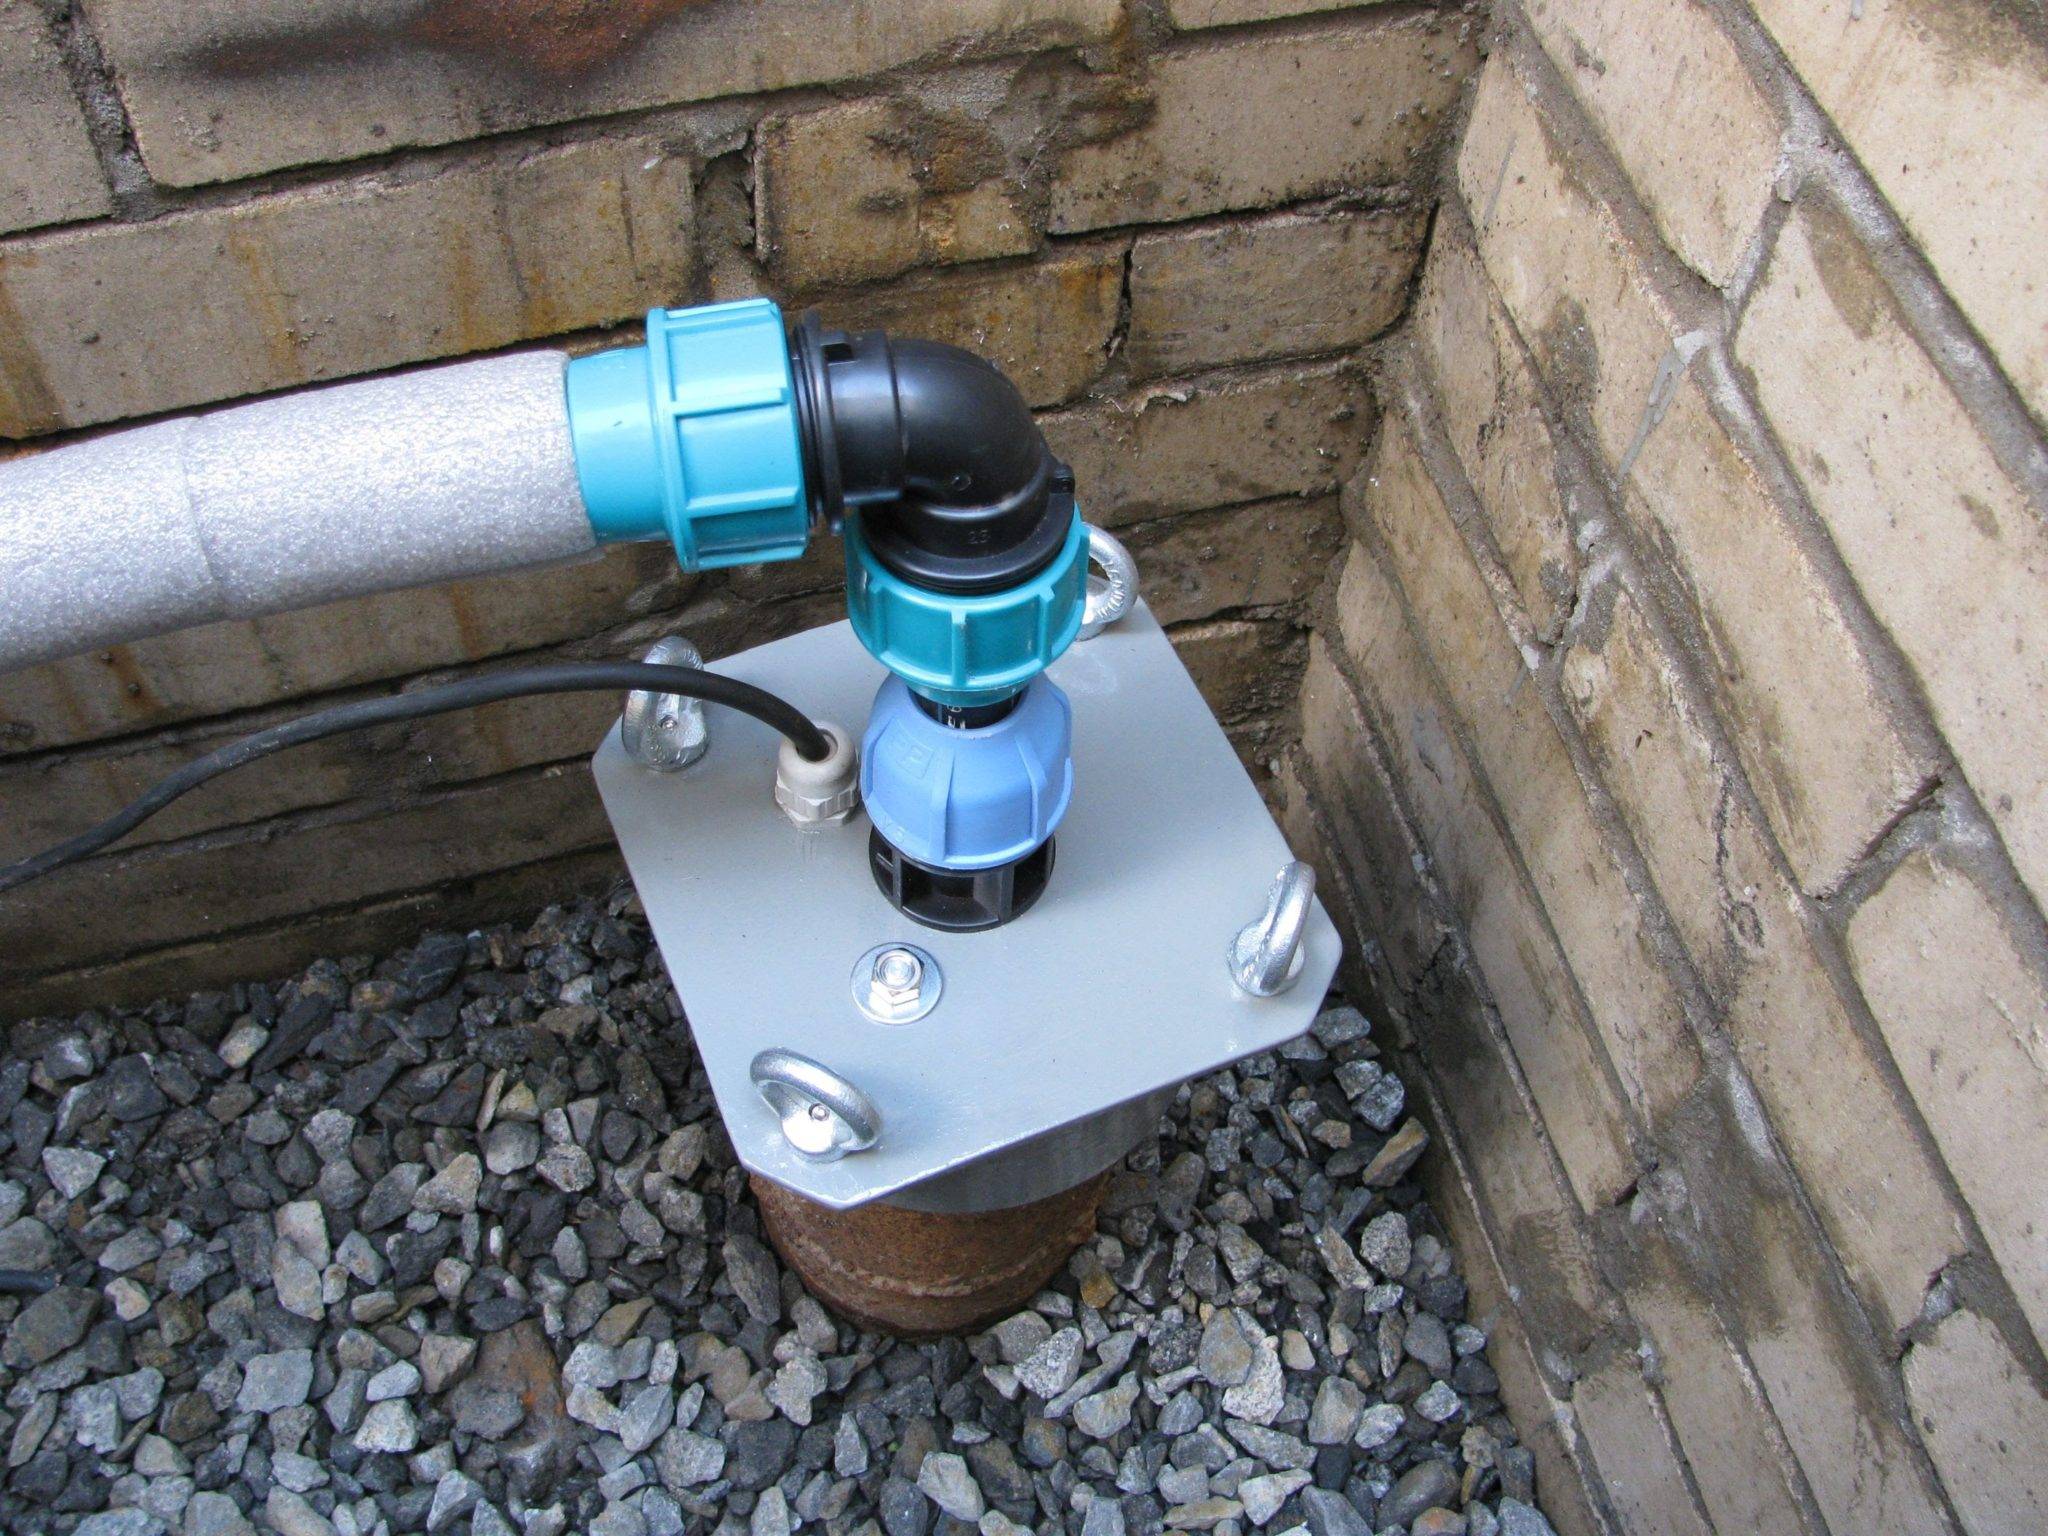
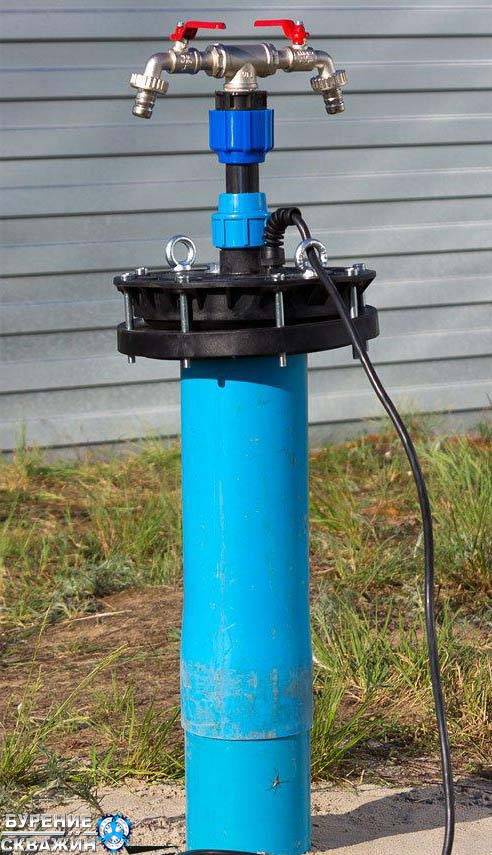
Connecting the head to the water supply system
In conclusion, the sagging of the electric cable is selected, which is fixed with a special clamp at the input. Pipes are connected to the adapter, and the assembly is checked for correctness.


