- Known pros and cons of sewer pipes
- System construction process
- Circuit design or development
- Detailing and assembly of the system
- Ventilation duct design
- Materials and tools
- Chimney Ventilation
- Installation rules
- Types of ventilation in the chicken coop
- Natural
- Forced
- Priority air exchange volume
- Advantages and disadvantages of the solution
- Ventilation principle
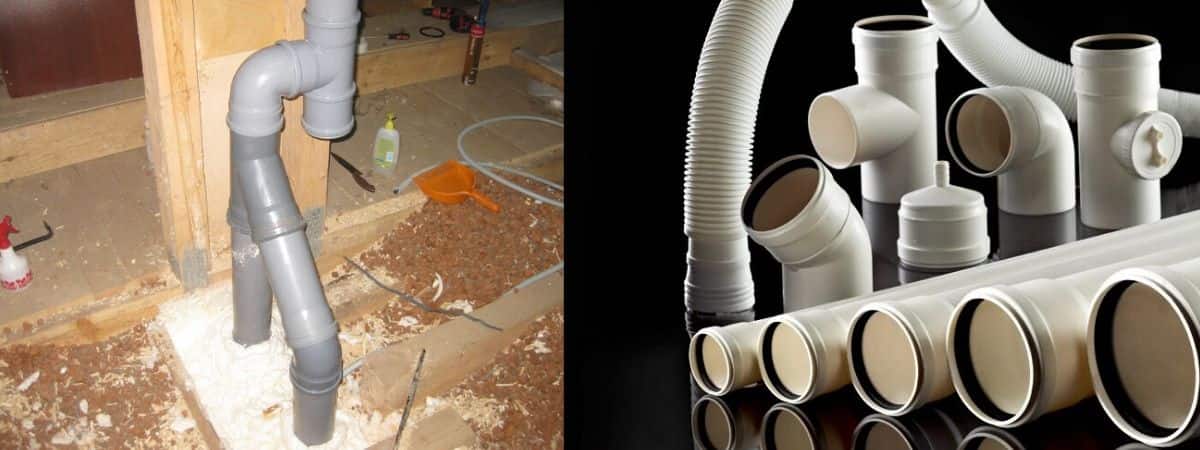
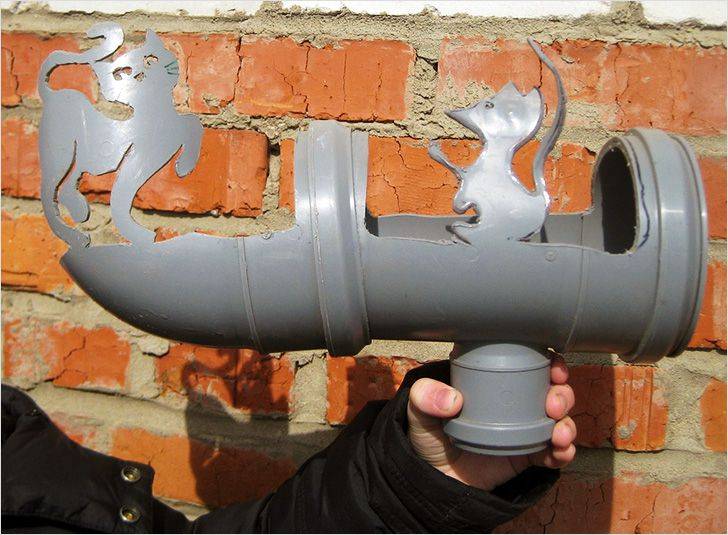
- Why sewer pipes?
- Advantages and disadvantages of sewer pipes
- When is the best time to buy sewer pipes?
- The working process
- Is it possible to use plastic sewer pipes for ventilation
- What are the shaped elements?
- DIY installation instructions
- Conclusion
Known pros and cons of sewer pipes
Disputes about the applicability of sewer pipes to create ventilation systems have arisen due to the large number of their advantages.
Before you make an extract from the sewer pipes, you must consider the following:
- Products are not subject to corrosion and do not lose their main characteristics over a long period of operation.
- With their help, you can install almost any air exchange systems, regardless of the degree of complexity.
- The inner walls are absolutely smooth, and therefore nothing interferes with the air flow. Also, due to this quality, the number of regular system cleaning procedures is reduced, and the equipment power can be reduced due to better channel patency.
- Installation of the system is simplified due to the low weight and the unique technology of fastening products, which allows not to use various types of connections.
- Technical characteristics are in many ways superior to those of metal counterparts.
- When laying in a hidden way, you should not pay attention to the strength of the products.
- At a cost, sewer pipes are 2-4 times cheaper than their plastic counterparts intended for ventilation installation.
Among the disadvantages of sewer pipes, it is worth highlighting:
- low melting point, which does not allow their use in industrial conditions, if the premises can warm up to temperatures exceeding 80 degrees Celsius;
- high brittleness.
System construction process
The exhaust ventilation device in the kitchen or in the bathroom begins with the layout of the entire system. After that, materials are selected and calculated. Never rush into calculations. Everything must be done in a measured and calm manner.
When designing, keep in mind that what matters in ventilation is its functionality, with the ability to make the most of all the conditions in each room. If you make a mistake, you will have to use mechanical air blowers, which will significantly increase the cost of the system.
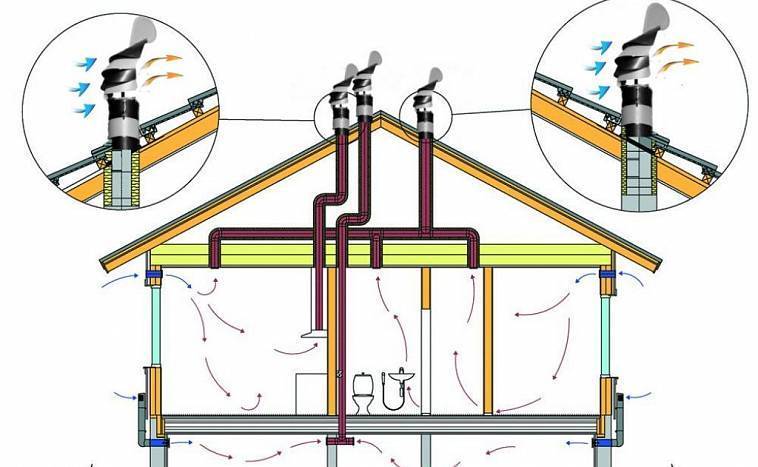
For normal operation of the gravity type system, it is desirable that the ducts have as few turns as possible. It is recommended to install turbine deflectors on chimneys towering above the roof - they will increase the outflow
Installation steps:
- Ventilation design.
- Purchase of equipment: sewer pipes, installation products, fasteners, fittings, mounting metal tapes.
- Installation of brackets and clamps at the places of ventilation communications.
- A ventilation riser is assembled from large pipes.
- Assembly and installation of air ducts.
- Connecting all branches to each other.
- Sealing connections. There is no special need for this, but it does not hurt.
- Installation of fans and valves, if provided.
- Installation of ventilation dampers.
The finish of all types of installation work is testing the system for performance. All actions are to check the traction. To do this, attach a piece of paper or a napkin to the exhaust channels.
Circuit design or development
The creation of a ventilation project begins with elementary calculations and the collection of information, then:
- Calculate the rate of air exchange throughout the house. This indicator depends on the volume of all premises, their purpose and the number of residents. In living rooms, the air must be completely replaced 1 time per 1 hour, and in technical rooms (toilet / bath) - at least 3 times per 1 hour. Adding the resulting numbers, we get a performance indicator, taking into account which the diameter and height of the ventilation equipment will be selected.
- Draw a diagram of the movement of air currents. Immediately estimate the position of the intake and supply channels.
- Draw a duct diagram. For now, ignore the details, stick to the rules and try to fit the system without complicating the design. This is the most difficult stage of the work. Hiding ventilation from bulky plastic pipes is not so easy.
Sketches are ready.Take some time to think about what devices you will have embedded in the system and where they will be located.
Detailing and assembly of the system
Having solved all the questions on the scheme and giving it a final look, it's time to move on to detailing.
First, calculations are also carried out, the components of the system, equipment are selected and the budget is reduced, then:
- The cross section and area of air ducts are calculated. The maximum speed of quiet air movement is taken into account - otherwise there will be a rumble in the house.
- All dimensions are transferred to the diagram.
- Detailing. A list of all the necessary elements is compiled, indicating the sections.
- The total cost of the components of the ventilation system is calculated. Match your desires to your budget. At this stage, you will have to change the components several times, abandoning the desired in favor of the real.
- The final project is drawn. Do not forget about the nodes of the passage of ventilation channels through the roof, ceiling, walls, insulating and consumable materials, ventilation grilles, fasteners and all other little things that will eventually result in a decent amount.
It remains to find, buy and install. Not much has been written, but it will take a lot of nerves, time and effort to implement the plan. Having mounted the entire system, it is still impossible to say that everything is ready.
Air ducts from sewer pipes are assembled in accordance with the draft. PP pipes and fittings are connected by butt soldering, PVC by cold welding
The ventilation system made of plastic sewer pipes still needs to be tested and refined during operation. It is also not so easy to achieve coordinated work of each element of the system.If the natural ventilation option is not effective enough, it is worth upgrading by installing exhaust valves or their supply counterparts.
Ventilation duct design
All exhaust systems are built using the same technology. The differences are in their length, the presence of control sensors and other auxiliary devices. In all cases, the design provides for the capture of all premises in order to prevent the occurrence of stagnation.
A typical ventilation duct at home consists of the following parts, assemblies and mechanisms:
- Outdoor grille with mosquito net fixed on the facade of the building. The place of attachment is chosen in the farthest room. Depending on the layout and configuration of the room, the grate is installed on the end wall, above the window or behind the heating radiators.
- Air valve. The purpose of this device is to prevent the outflow of air in the opposite direction when weather conditions change.
- Air channel. It is assembled from links of different lengths, tees, elbows and plugs. Docking is carried out using sockets, inside of which rubber gaskets are located.
- Pocket filter. The device is designed to collect dust that is sucked into the exhaust duct. Garbage removal is carried out as the drive is full.
- Main fan. It is used constantly or in the absence of traction. Devices with a diameter of 100 mm fit tightly into sewer pipes with an outer diameter of 110 mm.
- Flexible inserts. They are used in those places where there are obstacles on the way of the route or it is necessary to make a smooth turn.
- output block. It consists of pipes, pressure plates, sealing gaskets, grating and umbrella.
Depending on the location of the ventilation duct in the house, it is finished with soundproofing devices to reduce noise from the fan and moving air.
Materials and tools
It is recommended to purchase plastic sections and fittings made by one manufacturer. This way the parts fit together best. Despite uniform standards, products from different companies may differ in size.
To assemble a ventilation duct from a polymer material, you will need the following tools and fixtures:
- perforator;
- hacksaw for metal;
- oil level;
- roulette;
- marker;
- sharp knife;
- mallet;
- a hammer;
- screwdriver;
- marker.
To assemble the ventilation system, you need to purchase the following materials:
- plastic pipe with an outer diameter of 110 mm;
- flexible inserts made of aluminum or silicone;
- fittings (corners, tees, plugs, contours);
- sandpaper;
- plastic dowels;
- clamps corresponding to the size of the diameter pipes;
- screws;
- Silicone Grease.
It is recommended to purchase materials with a reserve of 10-15% based on possible marriage and errors.
Chimney Ventilation
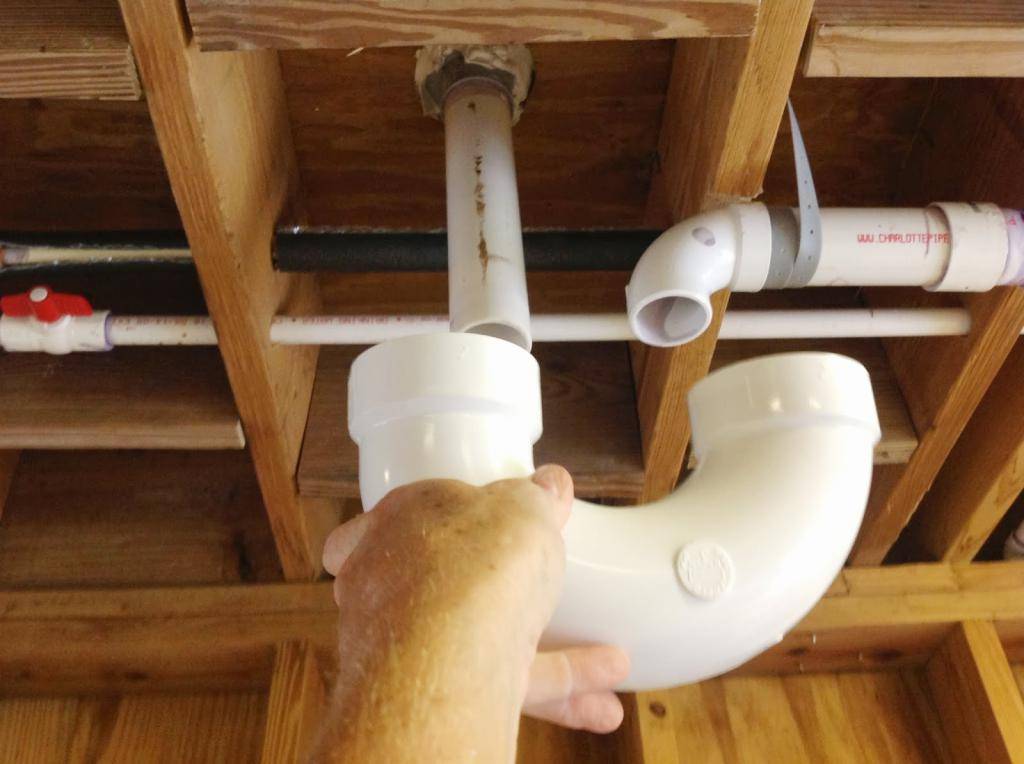
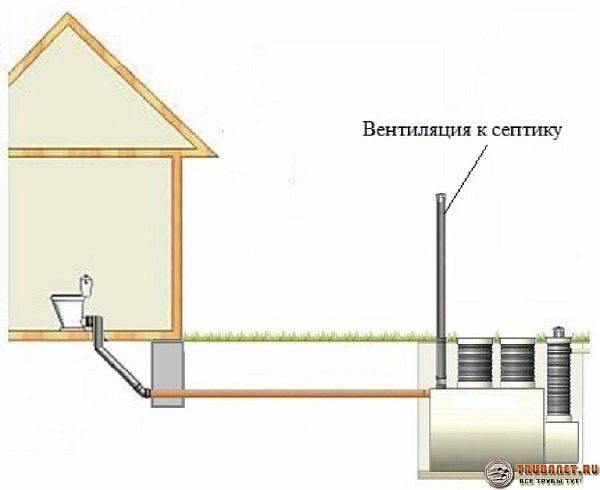
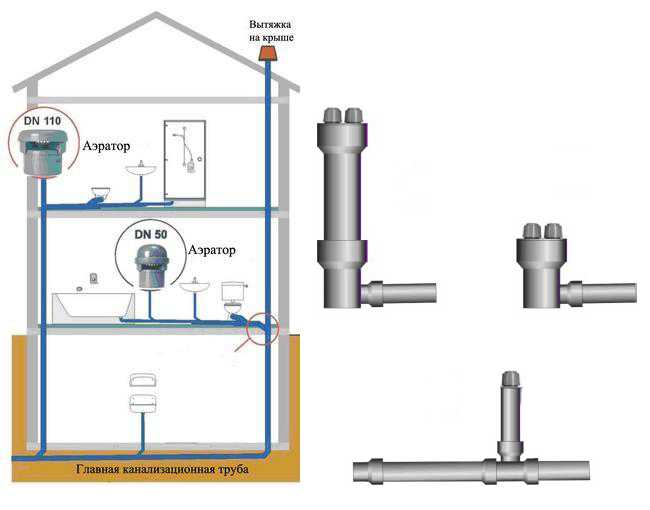
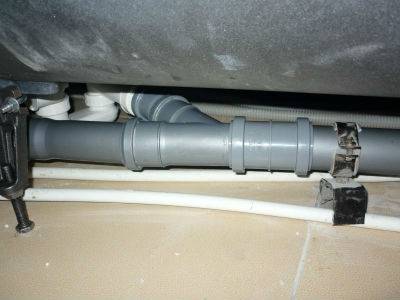
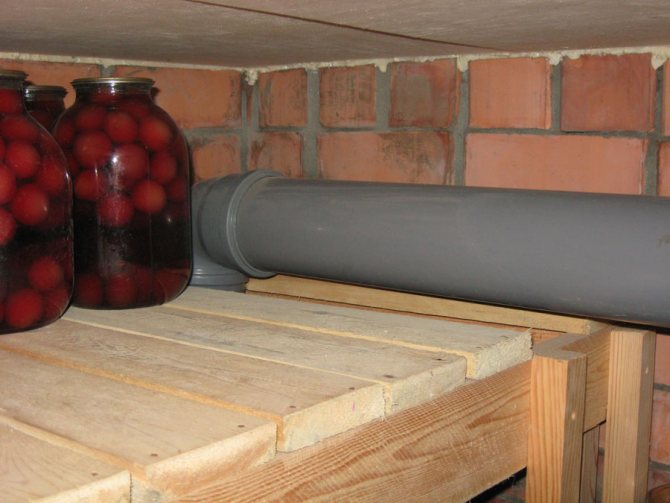
In addition to the advantages listed above, ventilation systems with fan pipes ensure the correct operation of the sewage system, for which, in this case, the drying of siphons becomes less dangerous. If the plumbing has not been used for several days and the siphon (water seal) is dry, if there is a ventilation pipe in the system, warm air from the sewer will rise and exit up the pipe. Since dry siphons cannot perform their functions as a hydro-barrier between the sewer and the room, in the absence of a fan pipe, odors will enter the house.
Water seal and ventilation pipe together protect the house from unpleasant sewer odors
Installation rules
The ventilation pipe can be of the same material as the sewer pipe. This makes it easy to seal the joints. Due to their low weight, which is important for the installation and operation of vertical structures, plastic products are often chosen for these purposes. When choosing, it should also be taken into account that the diameter of the ventilation outlet should not be less than the diameter of the largest riser.


Following certain rules, it is not difficult to understand how to make sewer ventilation in a private house.
- Risers and fan outputs are connected into a single system. With a large horizontal distance between individual risers, it is advisable to install several fan pipes.
- It is advisable to carry out the installation of a fan sewer at the construction stage. This will reduce labor intensity and make the system more convenient.
- During the construction of a building for the installation of a ventilation pipe, a special channel and hatches are organized. If sewerage and its ventilation are arranged in an already built house, it is possible to lay a line not through ceilings (this option can reduce the strength and reliability of structures), but through a wall.
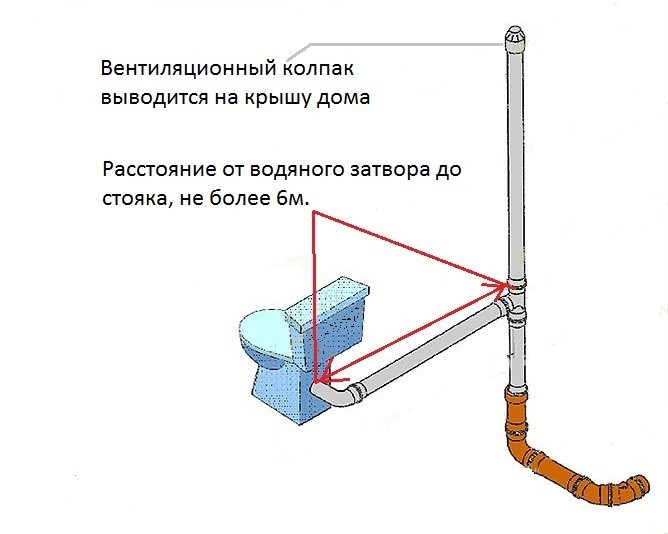
- When sewer ventilation is being developed in a private house, the scheme should provide for maintaining a distance from the outer sections of the pipe to balconies and windows horizontally, at least 4 m, otherwise it cannot be guaranteed that unpleasant odors will not enter the house.
- The height of the outlet of the exhaust pipe to the roof depends on the roof structure and varies from 0.2 to 3.0 meters.In particular, for flat roofs, it is sufficient that the upper part of the pipe is 300 mm higher than the roof level, and for a pitched structure, the height must be at least 500 mm. And if the roof is used - 3 meters.
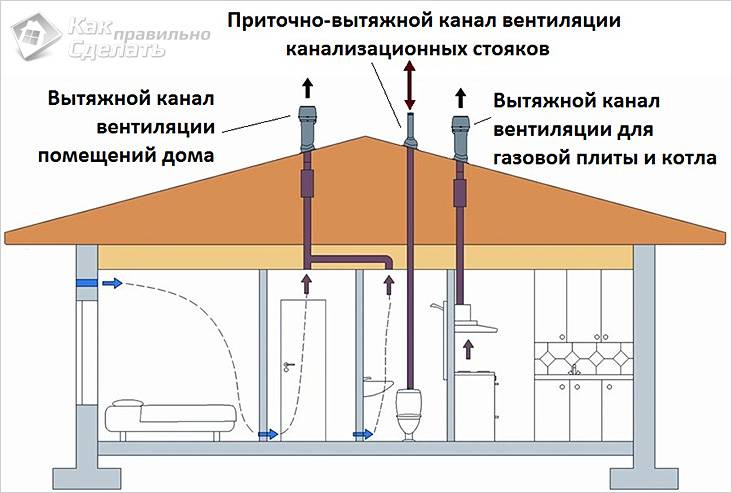
- If ventilation pipes from living quarters or chimneys are led to the roof, the sewer chimney must be higher than all the others in order to prevent unpleasant odors from entering the house from the sewer.
- Installing a deflector on the pipe does not increase the efficiency of the ventilation of the sewer system, but can cause ice formation from frozen condensate during the cold season.
Types of ventilation in the chicken coop
There are several options for ventilation, but all of them can be combined into two groups - natural (without installing additional mechanisms) and forced (artificial). Each of them has its pros and cons, which should be considered when choosing a project.
Natural
The natural system is of two types:
- Summer version (doors, windows).
- Capital option (supply and exhaust pipes).
In the first case, it is enough to design 2 windows under the ceiling: one of medium size (50 * 25 cm), the second - small (20 * 20 cm). They are made on opposite or adjacent walls at a maximum distance from each other. This method has several advantages:
- very easy to do - no additional equipment is needed;
- natural ventilation in summer, early autumn and late spring;
- both air and solar bill enter the windows;
- easy to adjust - windows can be opened and closed at any time.
But there are also weaknesses:
- in winter, it will not work to ventilate the barn in this way;
- it is necessary to constantly monitor the process, especially in the heat;
- windows must be well insulated, otherwise in winter they will become an additional source of cold.
When designing ventilation in a chicken coop with your own hands, you can take the diagram shown in the photo as a basis.
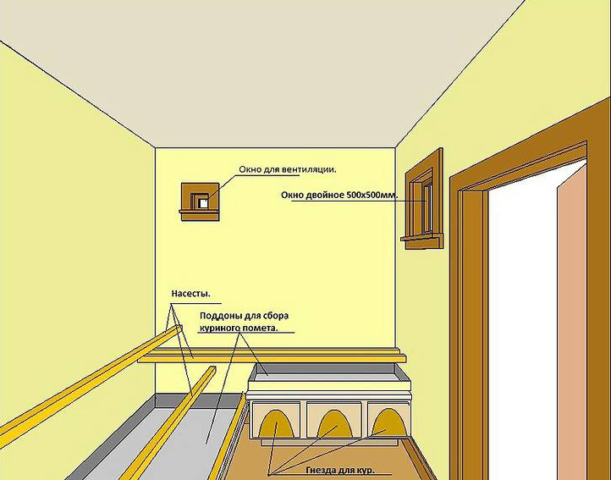 Airing the barn with windows is relevant in the summer
The forced-air and exhaust natural ventilation system is deprived of all these shortcomings. In this case, two pipes of the same diameter (20 mm each) are installed. One should be close to the floor, the other - under the ceiling (on the roof, it rises above the first). The advantages are obvious:
- air is constantly circulating;
- there is no need to control the process;
- it is possible to adjust the flow force by installing a valve.
The disadvantages include the following points:
- installation is required (but it is simple, materials are available);
- the system is not suitable for large sheds - the air flows are weak;
- in winter, you need to periodically block the pipes so that the chickens do not freeze.
Forced
A forced system is installed in cases where the population is large enough (500 birds or more). When calculating the power, it should be assumed that 5 m3 of fresh air should come per 1 kg of live weight. At the same time, the room maintains a constant temperature of at least 18 degrees and a moderate humidity of 60-70%.
Forced ventilation involves the installation of a fan, which is mounted to a small round window under the ceiling. Outside, a grate is installed to control the volume of inflow. The fan sucks in air from outside and transfers it inside the room. After that, the flow exits through the window on the other side. Depending on the area, 1, 2 or several fans are installed at once.
- stable ventilation in any weather;
- the ability to regulate the flow force;
- lack of drafts and cold - the fan can always be turned off.
There are also disadvantages:
- comparative high cost of construction;
- the need for maintenance and repair of equipment;
- if there are no electrician skills, then for installation you will have to seek help from specialists.
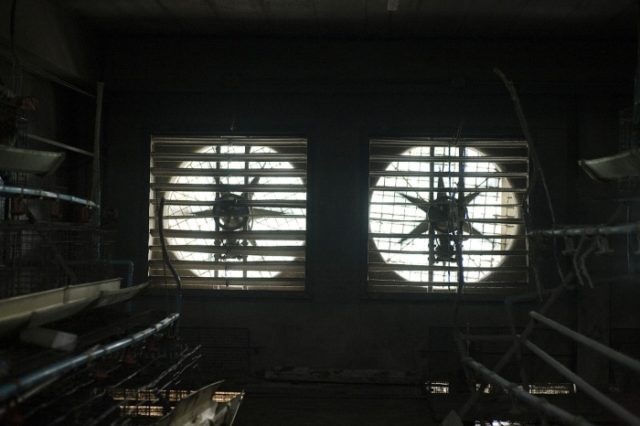 Installing fans is effective in large chicken coops
Important! In some cases, forced ventilation must also be arranged in small sheds.
This is done in the heat, as well as in a small room, if there are a lot of chickens in it.
Priority air exchange volume
Regulatory documents are intended to determine the parameters of natural air circulation. For a dwelling with an area of 30 m2, air exchange should be 4.5 m3 of air per 1 m2. With a larger room volume, each person needs 30 m3 of fresh air per hour.
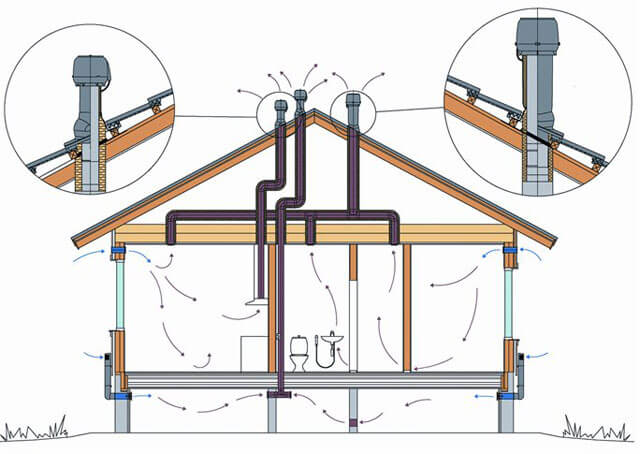
According to the laws of gravity, warm air, saturated with the vapor of our breath and other household vapors, moves up. This property is taken into account when designing the system. The supply components are located below the exhaust
In the kitchen and bathroom, the indicator should be in the range of 110-140 m3 / h. For forced ventilation, the indicators will be higher.
Plastic pipes with a diameter of 160 mm are excellent for arranging ventilation in your home. This parameter provides air flow of about 30 cubic meters per 1 hour with a duct height of 3 meters. With other indicators, the efficiency will be less.
If you need to increase the throughput, you can increase the cross section of the duct and its length. To ensure maximum draft in each room, the same length of duct must be on the same floor.
Advantages and disadvantages of the solution
Engineers do not have a consensus on whether a ventilation system using pipes is justified. Some argue that such a solution has more disadvantages than advantages. Others believe that ventilation must meet the conditions of building codes, in which case it can be made of any suitable materials.
In fact, the owner of the house should proceed from the realities. They lie in the fact that sewer pipes are environmentally friendly, and the systems created with their use are tight, reliable and durable. Sewer pipes are made from the following materials:
- polyvinyl chloride;
- polyethylene;
- polyurethane;
- polypropylene.
In all cases, the size range is wide enough, which allows you to choose products with the desired diameter. Products have a different configuration, and this is another plus: the homeowner has the opportunity to mount ventilation of any complexity, including with non-standard wiring.


When choosing pipes by cross section, it is advisable to give preference to round or rectangular. They have thin walls, due to which the structure is not too heavy, and the assembly process is greatly simplified. Products are interconnected by joining sockets. Tightness is ensured by rubber seals.
The unconditional minus is the formation of static electricity. The charge arises due to the movement of air. Over time, because of this, dust settles on the inner walls. If no action is taken, the system may become clogged. The solution to the problem is the use of an antistatic agent. They need to process pipe products immediately before installing ventilation.
Types of plastic pipes for the heating system
This is interesting: We straighten a pipe made of low-pressure polyethylene with our own hands: we set out the points
Ventilation principle
And what will be the ventilation from the sewer pipes, you ask. This question can be answered only by fully evaluating the properties of sewer products, as well as comparing them with the requirements for domestic ventilation systems.
Let's start, perhaps, with an assessment of ventilation in any private house. Ventilation in a private house is a cleverly laid piping, where each duct is designed according to a specific scheme.
If the ventilation of the premises is supposed to be performed in a natural way, then the task of the air ducts is to draw in stagnant oxygen and replace it with fresh, from the street.
All this is possible due to the pressure difference, as well as the influence of the pressure level on the air masses inside the room.
The principle of operation of ventilation in a private house is actually very simple. From low pressure zones formed in rooms behind stagnant air, oxygen flows to high pressure zones and then is replaced by fresh air. The process happens synchronously, never stopping.
Properly designed ventilation does not require the installation of supply or exhaust fans. However, in large buildings you still cannot do without them, since the efficiency of the air ducts is affected by their length, cross-sectional area and several other factors.
In any case, you should have already understood that ventilation is not a complex mechanism.This is simply a grouped piping system, and it works on a non-pressure system.
No pipe sealing required Simply assemble the duct, lay it through the rooms, and then bring it to the main ventilation riser. As you can see, it is not much different from the same sewer, except that the carrier in the pipes is slightly different.
Why sewer pipes?
So why do we draw your attention to sewer pipes? Why change something when there is a mass of products for their intended purpose?
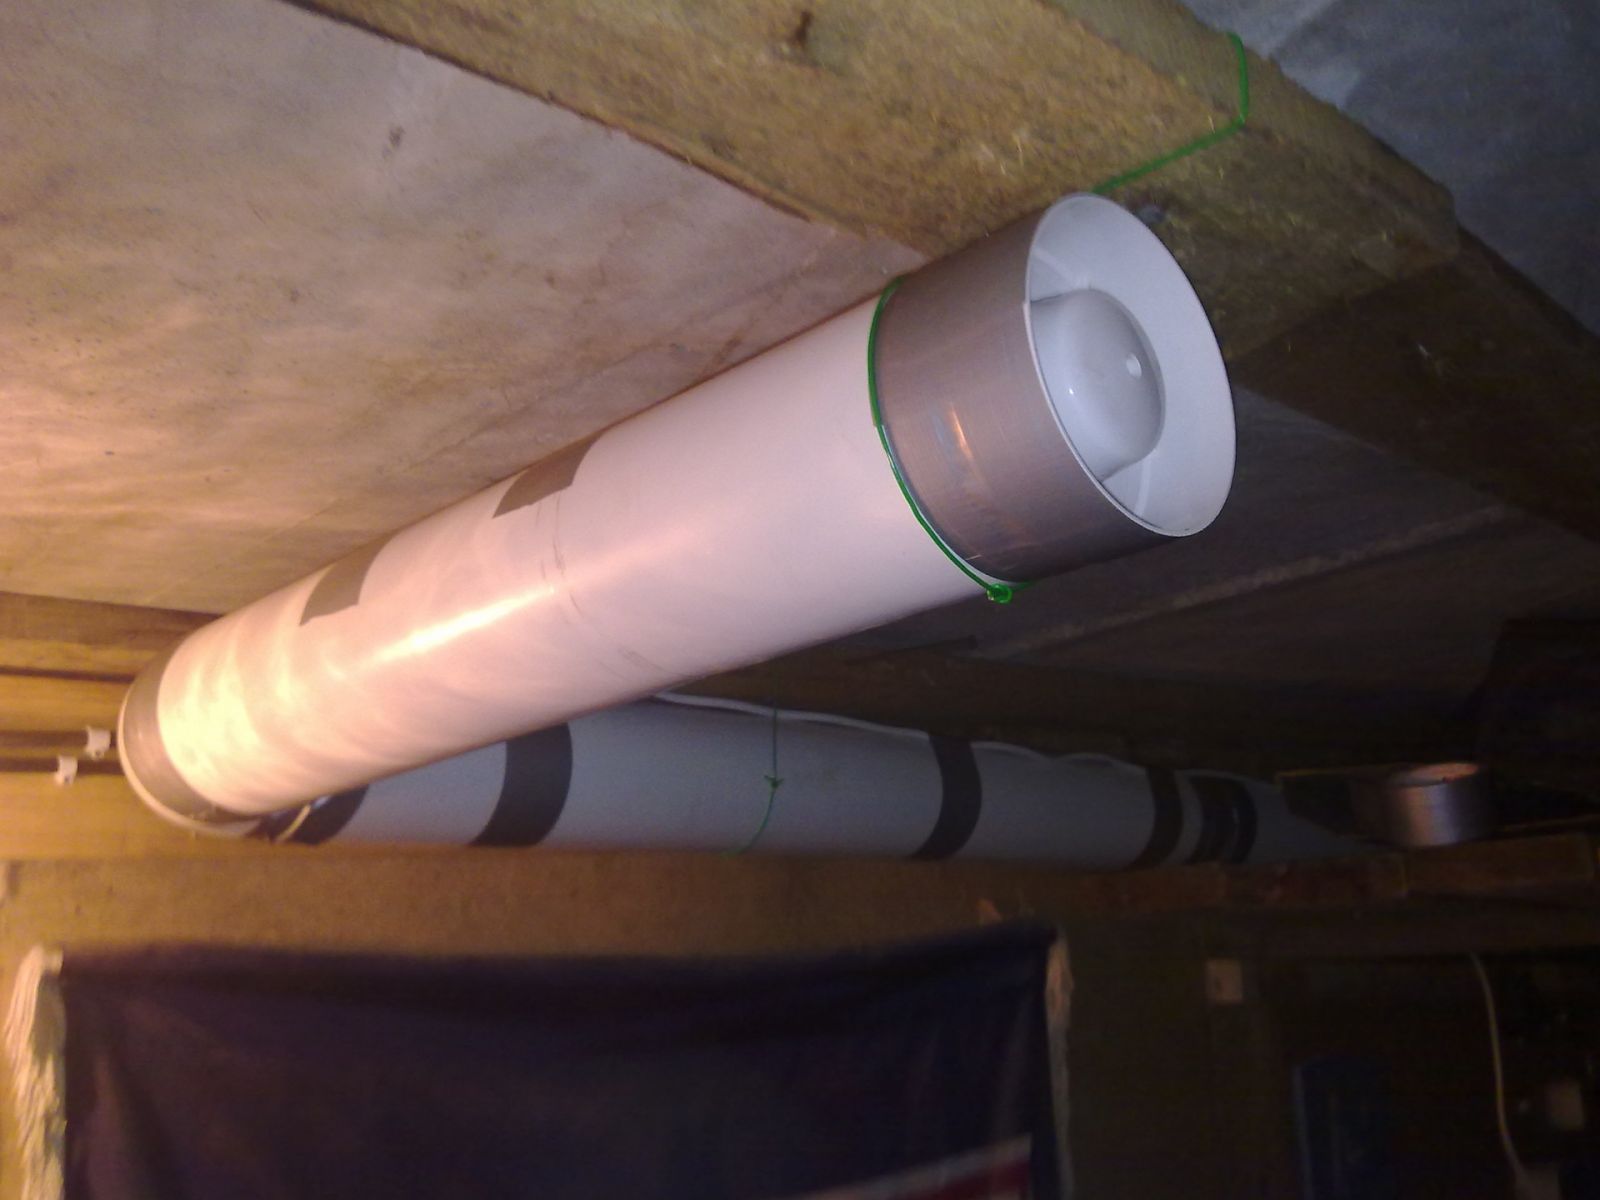
And then that using sewer pipes and fittings. you will be able to assemble ventilation personally, with your own hands, while spending a minimum of resources (but you still have to sweat). The cost of the final work is also significantly reduced.
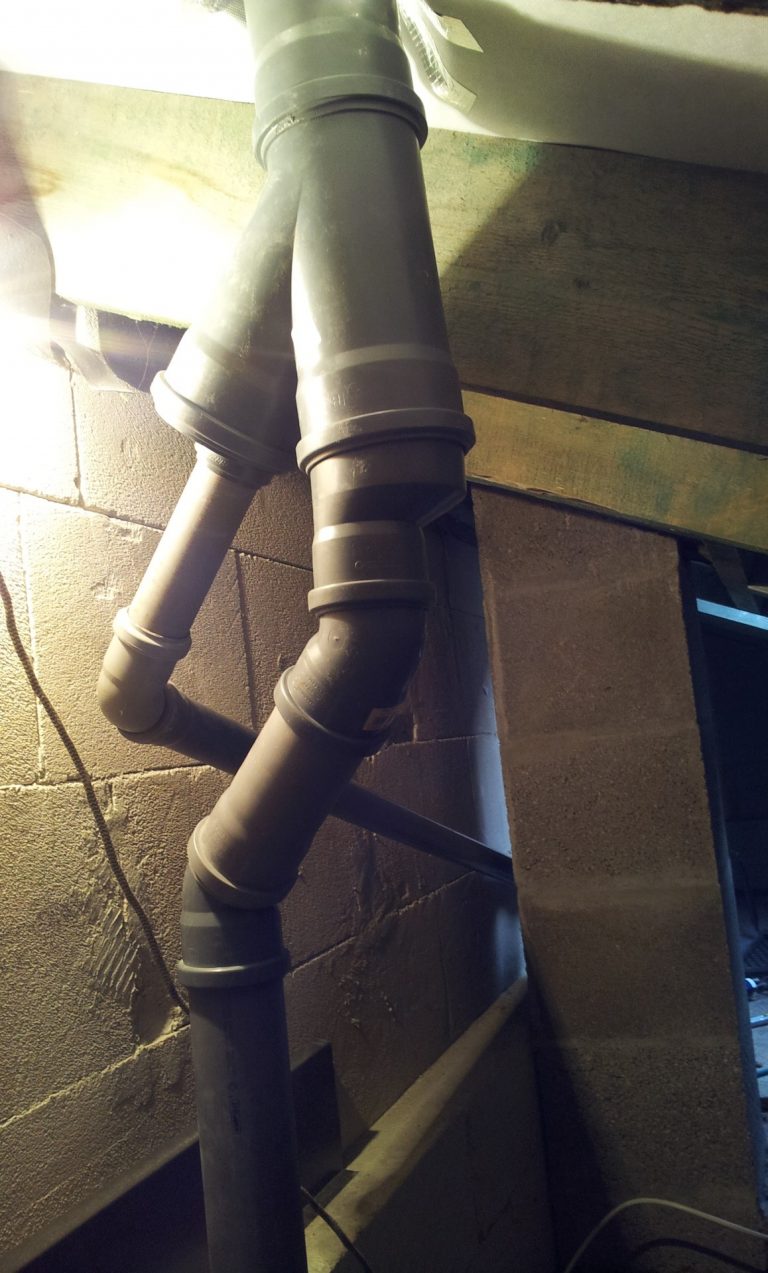
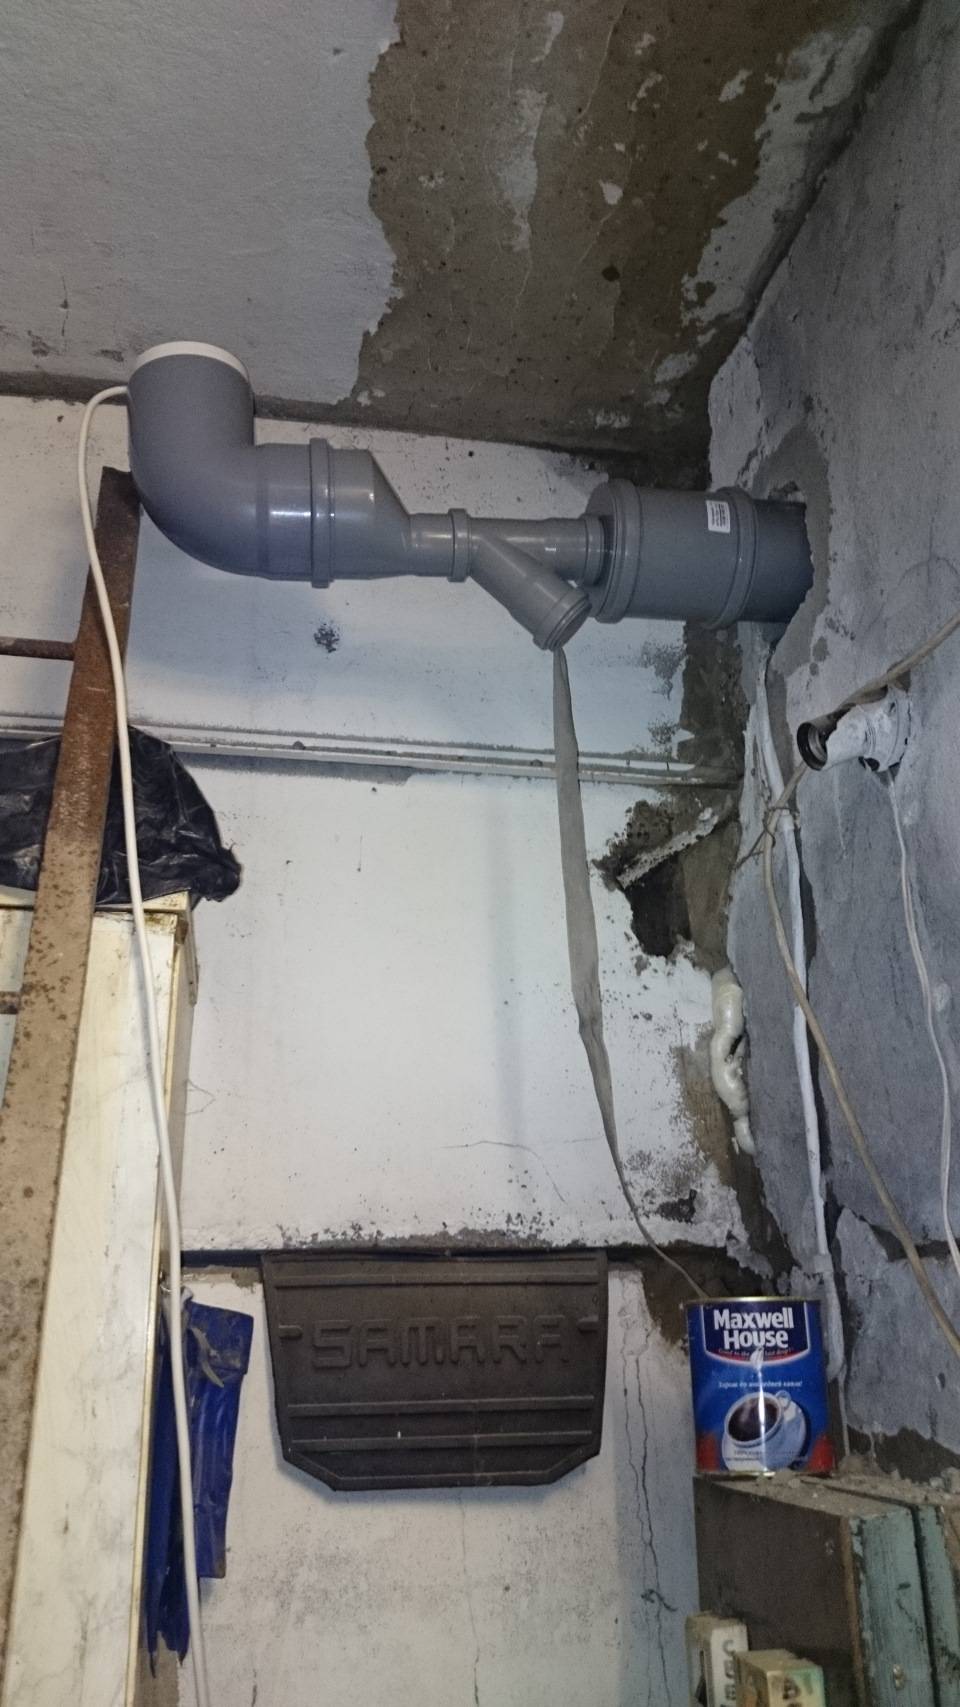
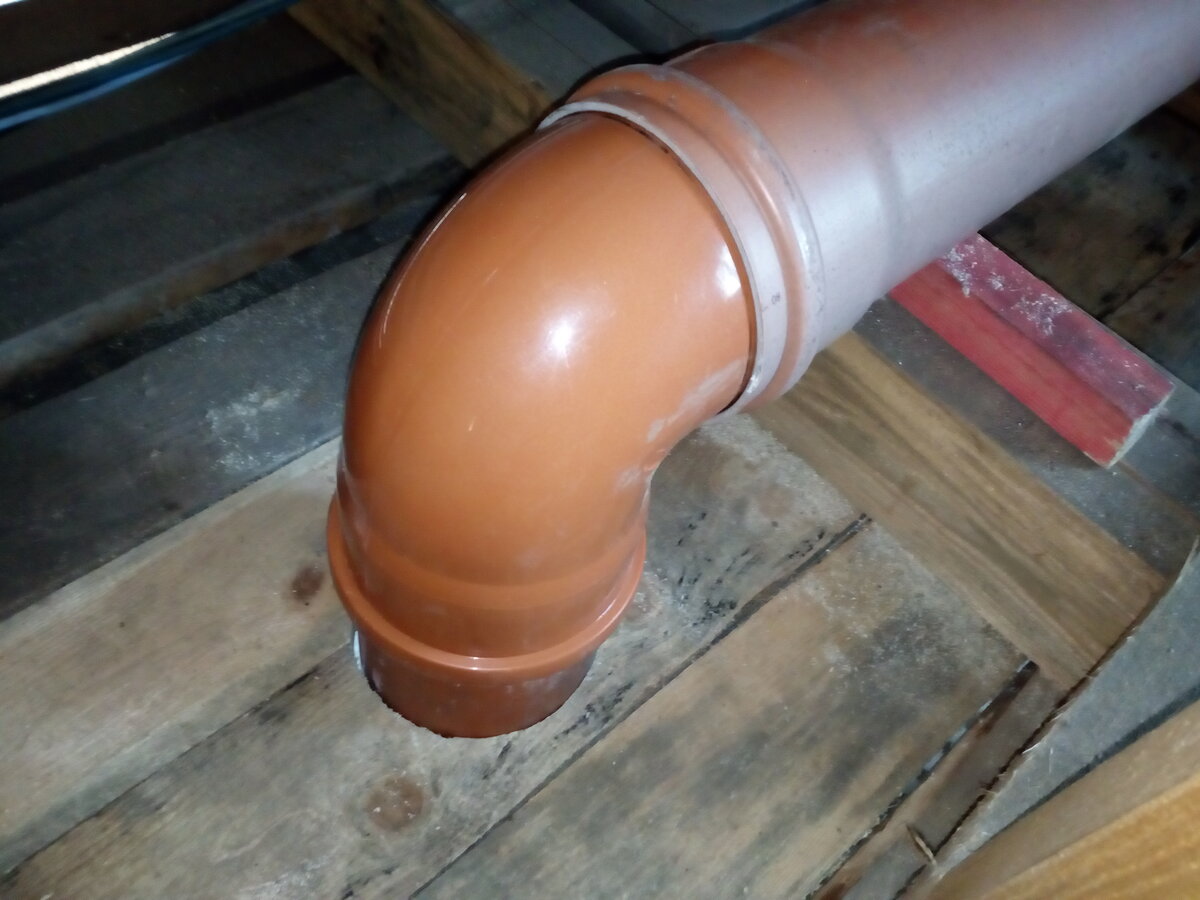
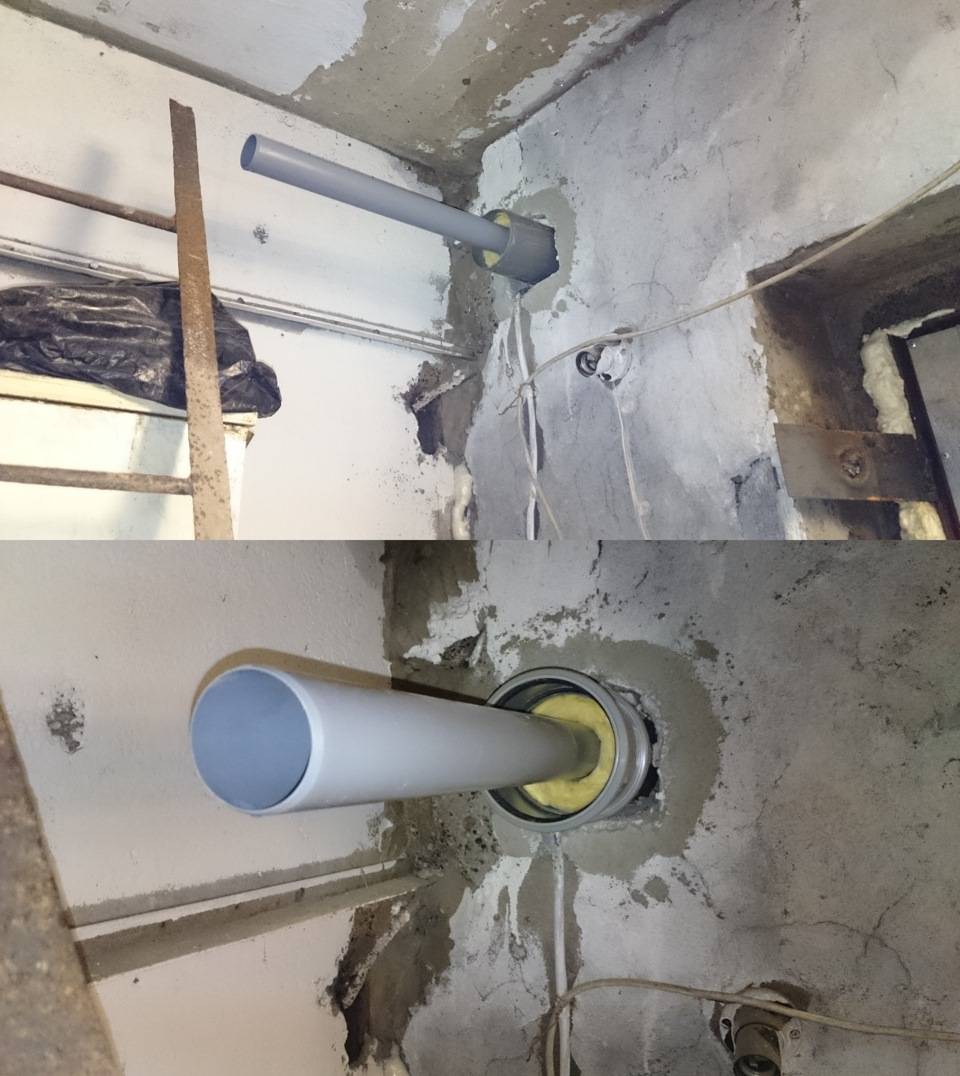
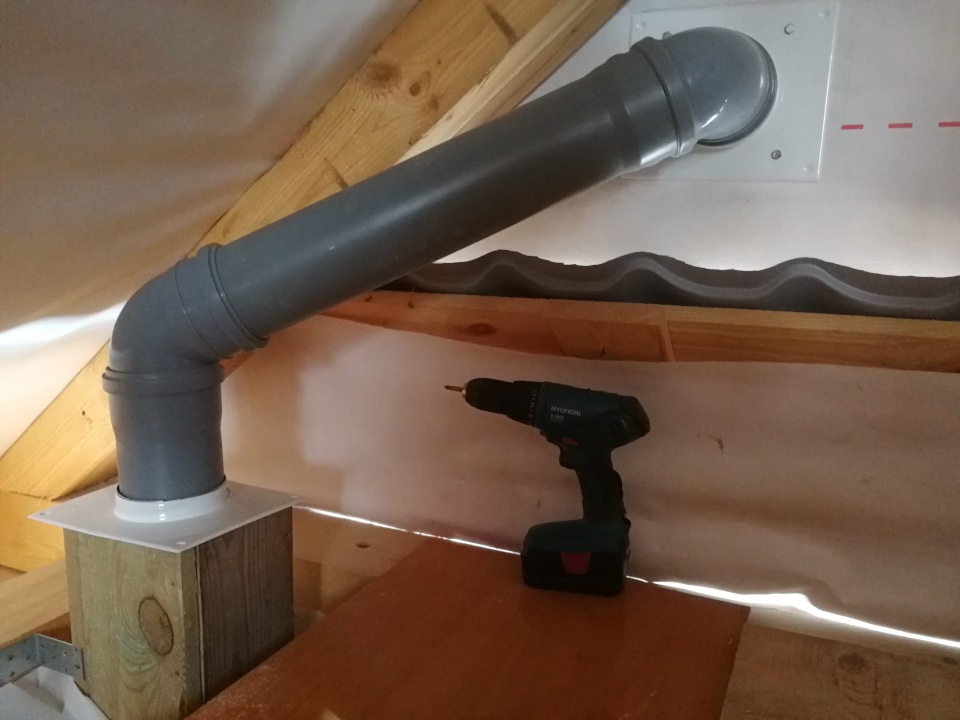
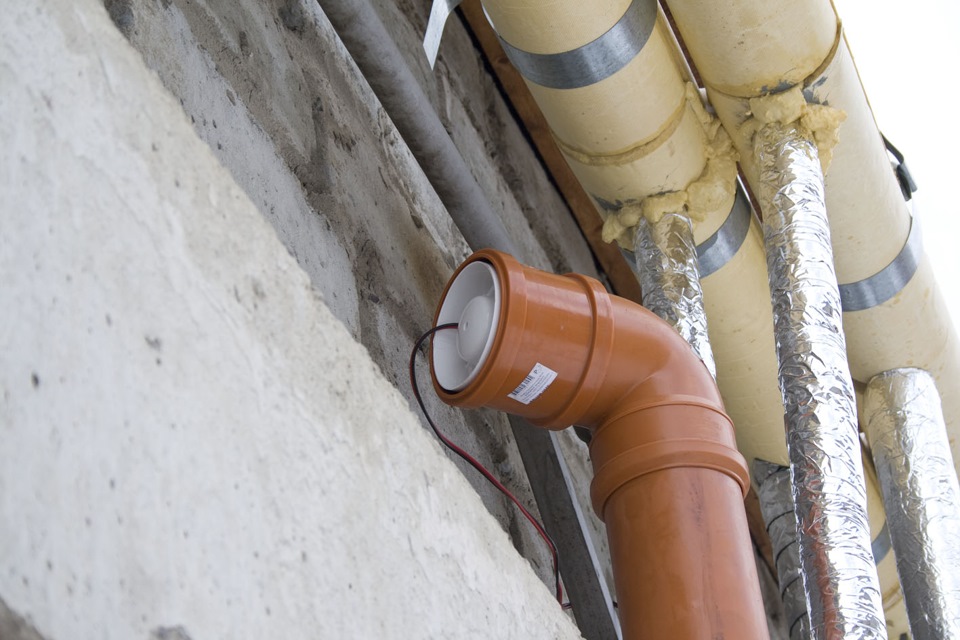
Conclusion of the ventilation riser from PVC pipe
Not only do you assemble it with your own hands, which means you don’t pay installers (in fact, installation is the lion’s share of the cost of ventilation systems), you can also save on materials.
The decision to use sewer analogs instead of specialized duct elements is also dictated by a mass of identical properties, both in the first and second.
Let's clarify this point in more detail. Previously, ventilation systems were assembled exclusively from tin and metal. The air duct was made of tin, assembled by welding or fastening with fittings. Any changes are not welcome.
Then came the age of plastic and everything changed. Plastic air ducts appeared on the market, much cheaper and more practical, although we admit that they are not so reliable.
They were inferior to metal in many respects, in particular, in terms of temperature indicators, final strength, etc.But at the same time, they leveled their shortcomings with a lower price, ease of installation and unpretentiousness.
In a small private house made of plastic, it is permissible to assemble ventilation of any type, from the usual supply and exhaust to mechanized.
The second important point that allows you to work with sewer pipes as ventilation ducts is their similarity in almost everything.
Both in ventilation and sewerage, the same groups of plastic are used. Polyvinyl chloride is in the lead, polyethylene is less popular.


Ventilation plastic, of course, will be stronger and more expensive, but the difference there is not so significant as to pay serious attention to it.
Advantages and disadvantages of sewer pipes
So, we have dealt with the fact that it is quite possible to construct ventilation in a private house not only from special pipes for ventilation ducts, but also using a handicraft method from sewer pipes, and the second option is in many ways even preferable.
However, the assessment will be incomplete if we do not pay attention to both the pros and cons of pipes. The advantages of ventilation from pipes under the sewer include them:
The advantages of ventilation from pipes under the sewer include them:
- cheapness;
- practicality;
- ease;
- convenience in work;
- antistatic (contrary to many myths);
- antibacterial;
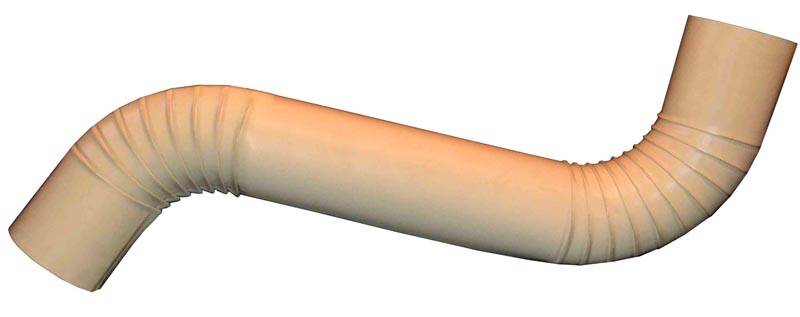
- the ability to bend pipes in any direction;
- a large selection of fittings, sizes and shapes;
- opportunity to work with your own hands.
There are more than enough advantages to this option. Almost all of them somehow resonate with similar characteristics of plastic products originally produced for ventilation.
However, there are also some downsides. Sewer pipes:
- lose in strength;
- withstand ambient temperatures up to +50 (in rare cases +70 degrees);
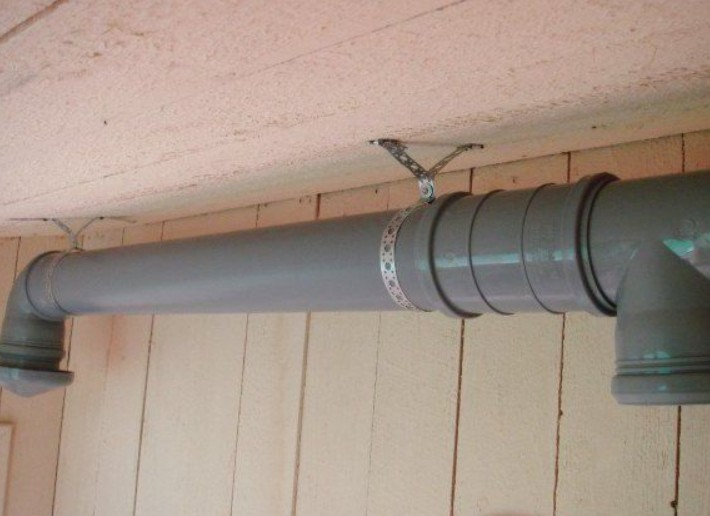
- not well suited for installation under the ceiling.
So what does the list of cons tell us? And he says that using sewer pipes, we get a system that is not adapted to transporting hot air and at the same time more fragile.
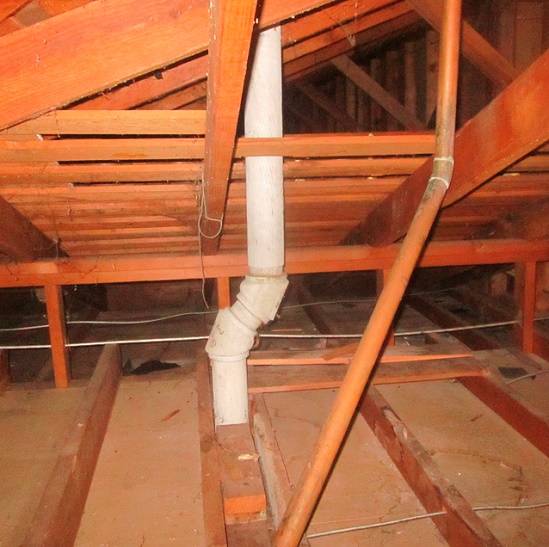
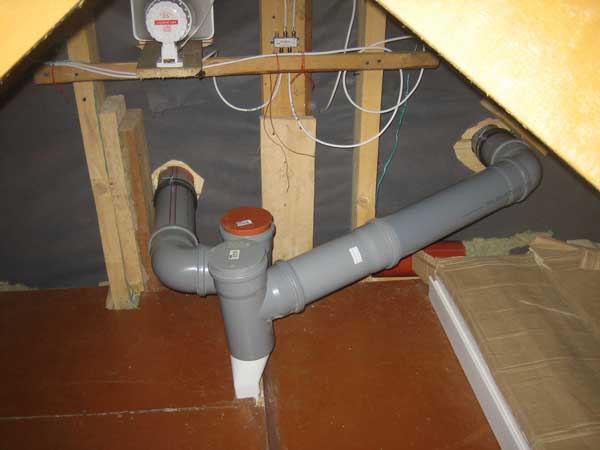
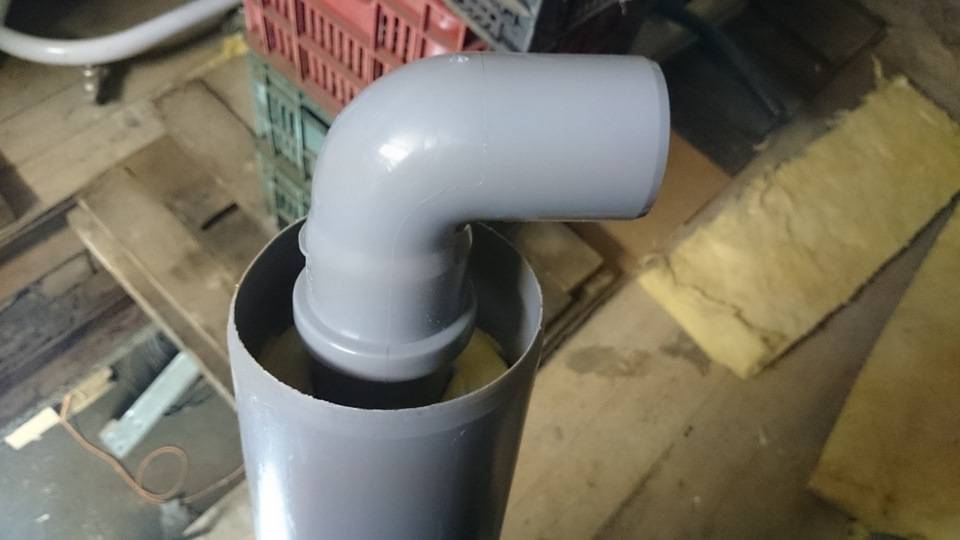
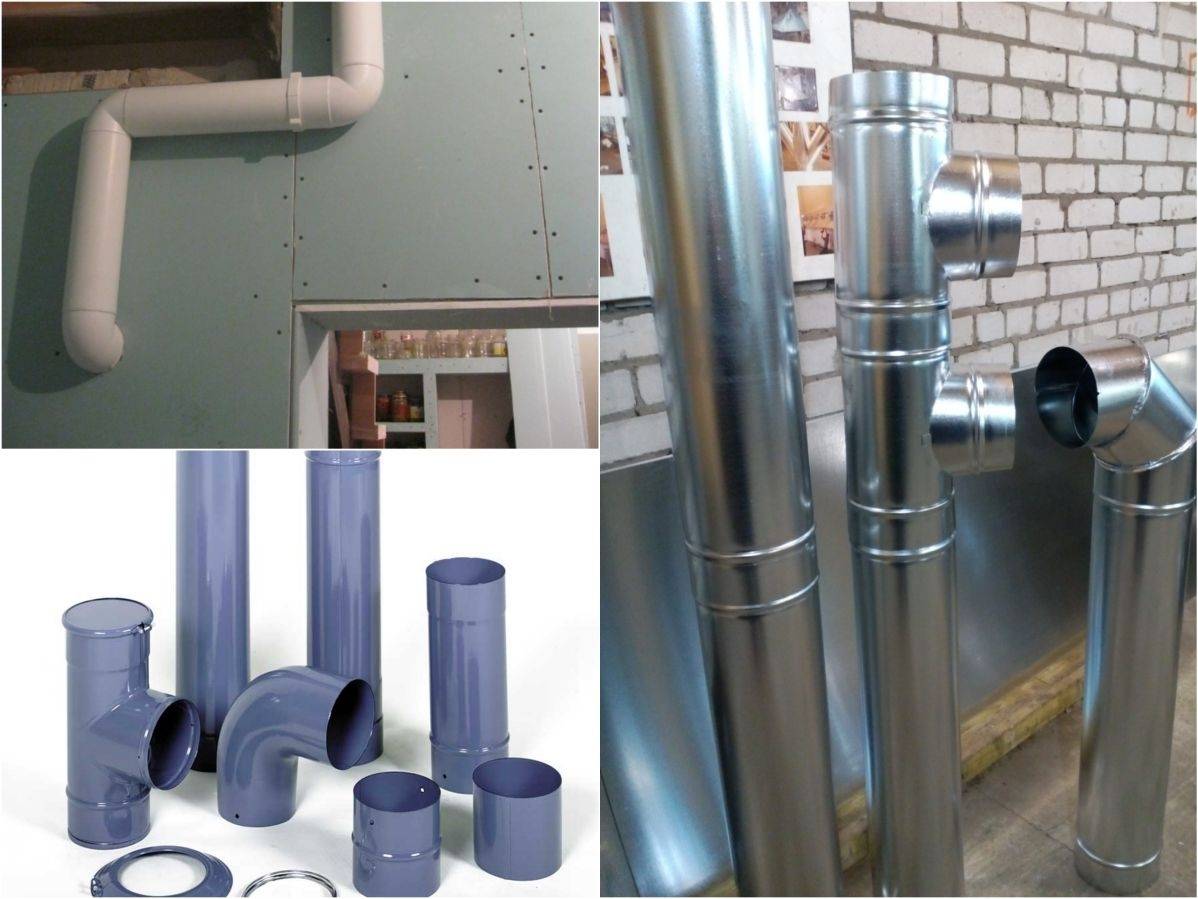
PVC sewer pipe ventilation in the attic
Accordingly, pipes cannot be used for fire ventilation; they are also not suitable for the kitchen. And this is only part of the requirements.
As for the nuances with fasteners, there is a double-edged sword here. On the one hand, collecting sewer pipes is very easy. And if you also take into account the lack of complete tightness as a priority, then the process turns into a cakewalk.
On the other hand, fasteners for hanging under ceilings, mounting inside walls, etc. are simply not produced for sewer pipes. That is, when working with your own hands, you will have to think of something and adapt already on the spot, based on the materials at hand.
When is the best time to buy sewer pipes?
After evaluating all the pros and cons of such systems, it becomes clear that the option of using pipes for sewerage is ambiguous.
Yes, you get cheap ventilation assembled “on the knee” at the exit. Yes, it is able to function in the same way as a conventional system. At the same time, an inexperienced user needs to spend more effort on its installation.
We recommend that you use this method when all conditions are suitable for this. For example, ventilation from sewer pipes is ideal for installation in non-residential premises, such as closets, workshops, warehouses, corridors.In medium-sized private houses (especially one-story ones), in small enterprises, etc.
That is, where ventilation is also required, but the high cost of production does not allow resorting to traditional methods.
The working process
The process of installing ventilation with your own hands begins with the marking of the future system. Then materials are selected and all related work is done. Don't rush into calculations.
Do everything calmly and deliberately. Remember - when designing ventilation, its functionality and the ability to make the most of all the conditions that have developed in each room are important.
If you make a mistake, you won’t be able to do without mechanical air blowers. And this increases the cost of the entire system, which is desirable to avoid.
Stages of work:
- We design ventilation.
- We purchase equipment, pipes, fittings, installation products, fasteners, etc.
- We install fasteners along the route of future communications.
- We assemble a ventilation riser from large pipes.
- We collect and install air ducts.
- We connect all the branches to each other.
- If possible, we seal the connections (there is no particular need for this, but it will not be superfluous either)
- We mount fans, valves and other mechanical devices, if any.
- Install ventilation dampers.
- We are testing the system.
Since you work in a private house, it is advisable to hide the ventilation ducts in the walls, under the ceilings, etc. Unfortunately, this is not always possible. Sometimes ventilation is put in after all construction work has been completed in the house. In this case, there is only one way out - the installation of suspended ceilings and plasterboard walls.
As a result, an empty space is formed behind the cavity of the decorative wall or ceiling. It is recommended to fill it with insulation. Then you will kill two birds with one stone: you will hide the ventilation from prying eyes, and insulate the house.


Is it possible to use plastic sewer pipes for ventilation

The idea of installing a ventilation system in private households is most often associated with laying ventilation ducts in masonry walls or installing metal air ducts.
And if the first option is associated with a large amount of construction work during the construction of the building, then the installation of air ducts requires not only less labor, but also the amount of materials.
However, if we compare the main features and technical characteristics of polyethylene or PVC products, it becomes clear that they are perfect for making an air duct channel.
After all, if the sewage system installed from them is airtight and successfully removes liquid effluents, then why not use them for ... for gas removal?
What are the shaped elements?
In any case, no matter how long, wide and even shaped the air ducts are, they must somehow be connected to each other. Yes, and if a rigid pipe is chosen for installation, because in any case it has to be bent along the way. Or, air ducts of 2.5 m were purchased, and the length of the line was 3 m. When installing ventilation with plastic, these problems will not cause any special problems.
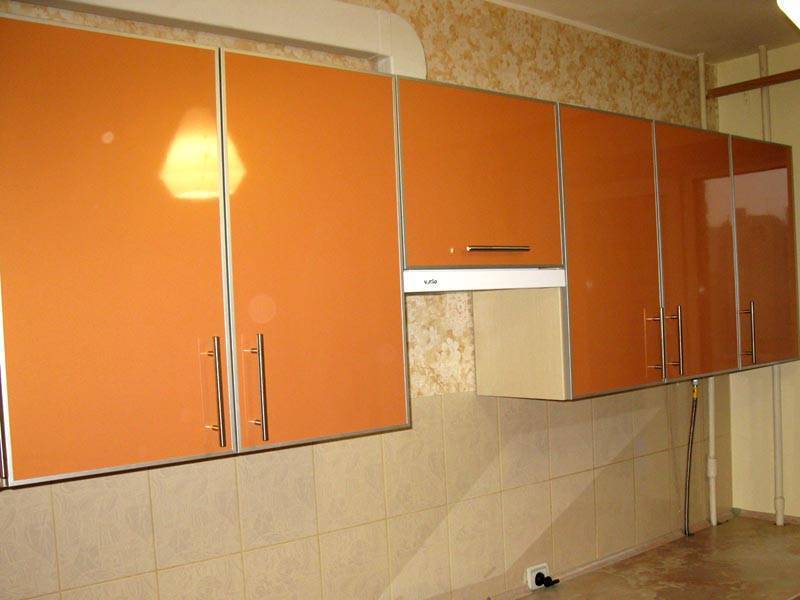
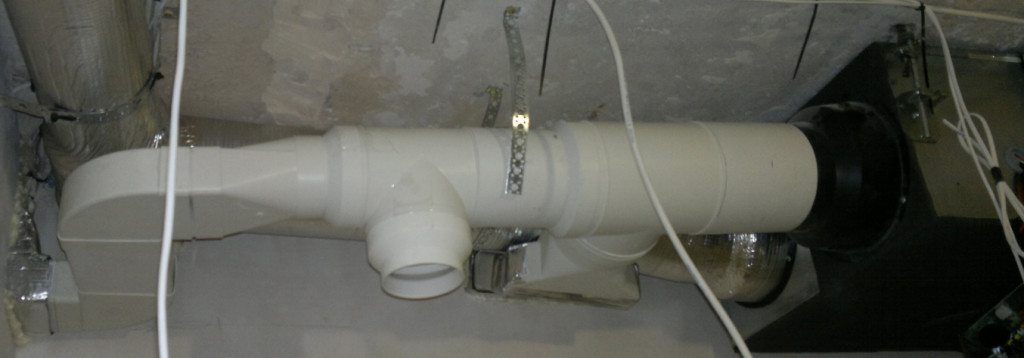
If you pay attention to the catalog of shaped elements for plastic air ducts, then you can find any necessary components of the route in it. For example, consider the situation where built-in kitchen hood it is necessary to conduct a rigid line to the ventilation shaft.At the same time, it is planned to install a flat duct
In this case, an adapter is purchased from a circle to a rectangle (“hood-route” connection), a rectangular corner and a tee-adapter “rectangle-circle” for entering the mine. In this case, the tee is needed to ensure air exchange in the room at a time when the hood is turned off
At the same time, it is planned to install a flat duct. In this case, an adapter is purchased from a circle to a rectangle (“hood-route” connection), a rectangular corner and a tee-adapter “rectangle-circle” for entering the mine. In this case, the tee is needed to ensure air exchange in the room at a time when the hood is turned off.
Important! Do not rely on the fact that when the hood is turned off, there will be enough draft to ensure normal air circulation. The blades of a non-working fan will greatly hinder performance, which means the system will not work as expected
Plastic ventilation elements can be different:
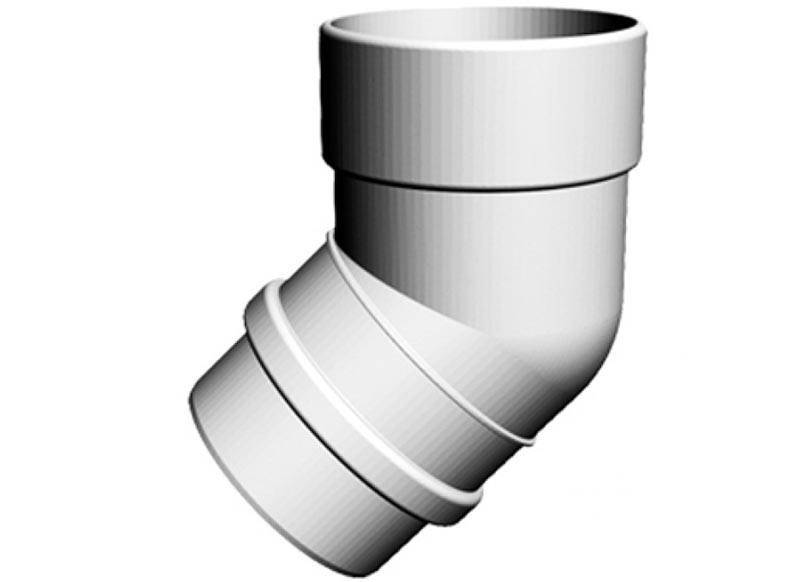
- Angle - 90° rotation.
- Angle - 45° turn.
- A tee is a 90° or 45° branch.
- Cross.
- Direct connection.
That is why you can turn the highway in any direction. In this case, the cross-sectional shape of the duct does not matter.
DIY installation instructions
The primary and key stage in the arrangement of the ventilation system is the preparation of the project and the calculation of the system parameters
For air exchange in the house, it is important to correctly calculate the required volume of air flows or the multiplicity (how many times the air in the room should change per hour). Based on the parameters of the required air volumes, the ventilation power is calculated
The ventilation power will allow you to set the required pipe diameters.
So, let's calculate the diameter of the ventilation ducts for a room with the following parameters: length - 6 meters, width - 5 meters, height - 2.7 m. The volume of the room is 81 cubic meters (6 x 5 x 2.7). The average air exchange in the room is calculated by increasing the volume by 1.5-2 times (average statistical multiplicity).
We get the value - 162 cubic meters per hour. Using a special table, we look at the required cross-section of pipes. With a movement speed of 1 meter per second and an air exchange of 162 cubic meters per hour, a diameter of 250 mm is required.
Inlet channels under normal conditions are made in the form of small technological slots in the walls. Pipes are not used for this purpose. Natural circulation through the cavities in PVC windows allows you to provide the necessary volume at a speed that does not allow all the heat to be blown out.


Exhaust ventilation is installed in three rooms: in the kitchen, in the toilet and in the bathroom. In living rooms and other premises, channels are equipped at discretion. The circulation of flows between rooms occurs due to doorways and cracks under the door leafs.
It is worth installing a forced system with an exhaust hood in the kitchen and wall-mounted axial fans in the toilet and bathroom. Models should be selected taking into account the required power.
Consider the installation of ventilation from sewer pipes in a wooden house with plastic windows that have a high-quality supply system. To install ventilation, you will need the following tool:
- Screwdrivers.
- Perforator.
- Drill.
- Pliers.
- A hammer.
- Self-tapping screws.
- Clamps.
- Hacksaw.
For installation of ventilation you need a hacksaw
- Pipes of the required length.
- Transition couplings.
- Tees 45 degrees.
- Cross.
- Blind revision.
- Branches.
- Deflectors.
- Check valves.
- Rubber pads.
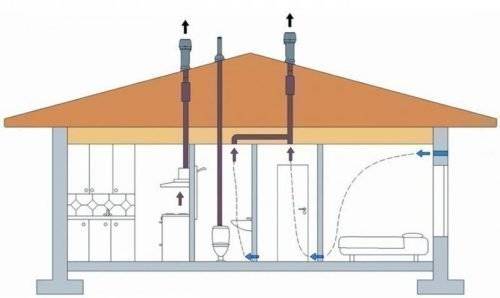
Ventilation scheme in a private house
- In the kitchen, toilet and bathroom, a hole is made in the wall or ceiling (it all depends on the layout).
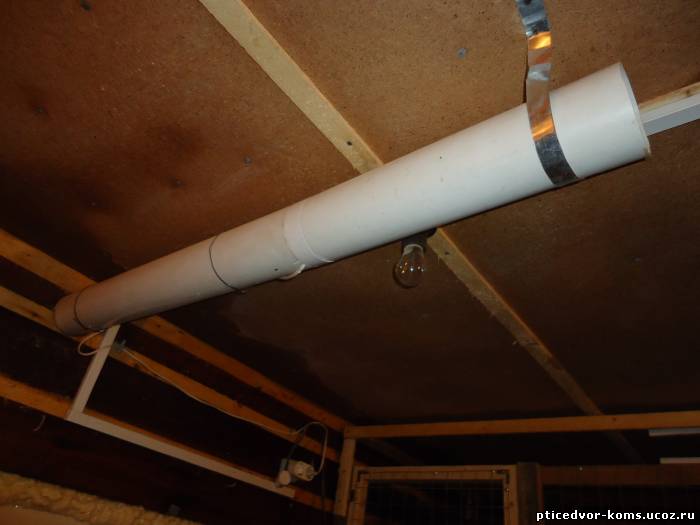
- Pipes are brought into the holes. You can bring each pipe vertically to the roof (this is better, but there is a lot of work on making holes in the roof, a large number of them will not add beauty to the structure). In the attic, a pipe from the bathroom is led by a branch to the toilet vertical structure. With the help of a tee, the lines are connected. From the kitchen, the pipe goes separately (strictly vertically) to the roof.
- A check valve is installed in each line. It is needed to avoid reverse thrust into the apartment.
- The openings between the walls of the ceiling (walls) and the pipe are neatly sealed, thermally insulated, soundproofed and sealed.
- On the roof, pipes are brought out to a height of at least 50 cm above the ridge.
- At the discretion, inspection holes with plugs are mounted. They will be needed for cleaning.
- In the attic and in the roof area, pipes are insulated with mineral wool or other similar material. You can make a special box filled with insulation. If the attic is warm in winter, then you can do without insulation.
- Deflectors are installed. They will protect from leaves, dust and dirt, as well as enhance the circulation of air currents.
- Fan lines should be located at a distance of at least 200 cm from the chimney, if such is provided for in the design of the house.
- An extractor hood and fans are installed in the exhaust openings. The devices are connected to the power supply.
The ventilation system should not be combined with the sewerage system, since in the event of a malfunction, all the smell will go into the apartment. Subject to the basic rules, ventilation will work efficiently and for a long time.
Conclusion
Today, the use of plastic air ducts has greatly increased. This can be explained by the fact that, according to their technical characteristics, these products are distinguished by high strength and long service life. In addition, they are not subject to corrosion, so they are not afraid of any small scratches.
From this article, you learned about what air ducts are and how install them correctly and use. Remember that their choice must be taken with special care, because a properly selected air duct will ensure the almost complete absence of any problems associated with it.
Attention, only TODAY!
Plastic air ducts are a novelty, which, due to a number of advantages, has become very popular. They are used in everyday life to organize a kitchen hood, and to create a ventilation system in public buildings.
Application: from apartments to shopping malls.
Air ducts are used:
- For kitchen hood. In this case, air ducts are used to provide an outlet to the ventilation shaft. Advantages: ease of installation, aesthetic appearance, the possibility of painting in different colors, noiselessness;
- For ventilation. They are mounted in private houses, apartments, shopping centers, restaurants and other public and commercial buildings. Advantages: non-conductivity of electricity, corrosion resistance, aesthetics, efficiency.
Usually decorated in order not to spoil the view of the room with unnecessary details. It can be painted in a color that matches the tone of the kitchen, or wallpapered. A decorative box is often used for camouflage purposes.


