- Solid fuel garage heating
- Buy or make your own?
- Video
- 12 V
- IP and UPS
- The right homemade heater for the home
- Potbelly stove from a used cylinder
- Vertical design
- Model with a horizontal body
- How to make a gas gun with your own hands - step by step instructions
- How to assemble an induction boiler yourself
- Device with a welding inverter and plastic pipes
- Device with transformer
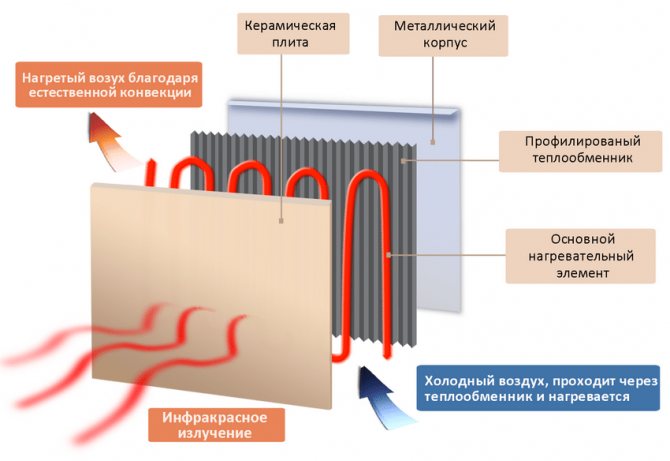
- 3 Oil system
- Idea No. 1 - Compact model for local heating
Solid fuel garage heating
Economic heating of the garage in winter is easiest to organize using solid fuel equipment. Firewood is quite cheap, it is very easy, simple and relatively safe to heat it. And for their burning, you can build a stove of any type
If you need to organize home-made heating in the garage as cheaply and quickly as possible, it is best to turn your attention to a potbelly stove. The potbelly stove is the simplest heating unit. Structurally, it consists of two parts - a combustion chamber and a chimney.
There is an ash pan door and a loading door at the front. The chimney is removed from the back. You can create a potbelly stove for organizing heating in the garage from a variety of materials:
Structurally, it consists of two parts - a combustion chamber and a chimney. There is an ash pan door and a loading door at the front. The chimney is removed from the back. You can create a potbelly stove for organizing heating in the garage from a variety of materials:
A simple stove-stove is usually the most commonly used unit for heating a garage, due to its unpretentiousness and cheap fuel.
- From an old gas cylinder;
- From a steel can;
- From an old barrel;
- From sheet metal.
There are dozens and even hundreds of drawing options, so there will be no problems with assembly.
The most economical way to organize autonomous heating in a garage is to use a Buleryan solid fuel stove. This oven is convection, it is characterized by a very high performance and can be used to heat any technical premises. Buleryan can be purchased ready-made or assemble it yourself. When creating garage heating with your own hands, remember that Buleryans are pyrolysis - this ensures maximum heat transfer and long-term burning.
It is not difficult to make heating in the garage with your own hands - it is enough to have at your disposal the right equipment or tools for its manufacture. For example, we can assemble a fireplace-type stove in the garage. Having found the drawings, nothing will prevent you from making a home-made Buleryan or installing a fireplace stove with a water circuit - this option is useful when creating heating in large areas.
If you want to heat the garage as economically as possible, use ready-made factory equipment - solid fuel boilers, including those of the pyrolysis type, will be waiting for you here.In addition to them, it remains to lay pipes and mount batteries, for example, heating registers from large diameter pipes. Factory equipment for heating systems has a higher efficiency, which will affect the economy.
Buy or make your own?
Typically, such coolants are used in garages, cottages or country houses - in a word, where there is no access to a public heating system. In apartments, household electric heaters have to be turned to for help in the process of repair and construction work or in the autumn-spring period, when the batteries are not yet turned on or the centralized heat supply has already been stopped.
Please note that home-made electric heaters are an order of magnitude cheaper than factory-made counterparts. This feature of this household appliance usually attracts home craftsmen, forcing them to conjure over wiring, heating elements, thermostats and other materials that can be found in the pantry .. Remember that any work related to electricity must be performed at a professional level in accordance with safety requirements!
Remember that any work related to electricity must be carried out in a professional manner in accordance with safety requirements!
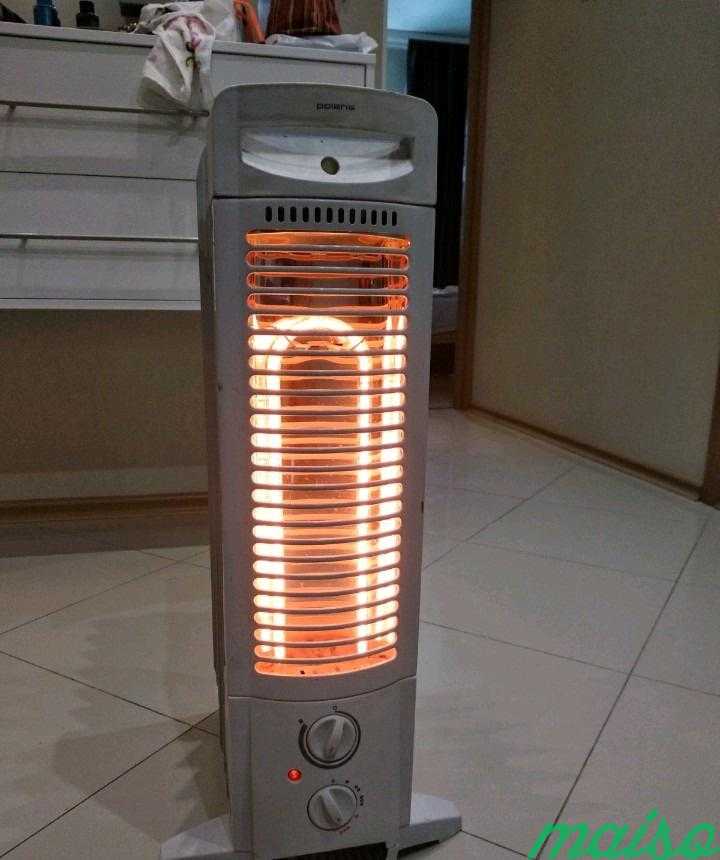
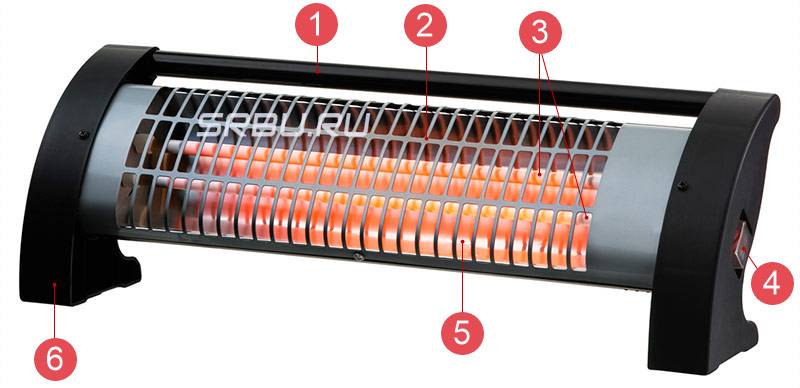
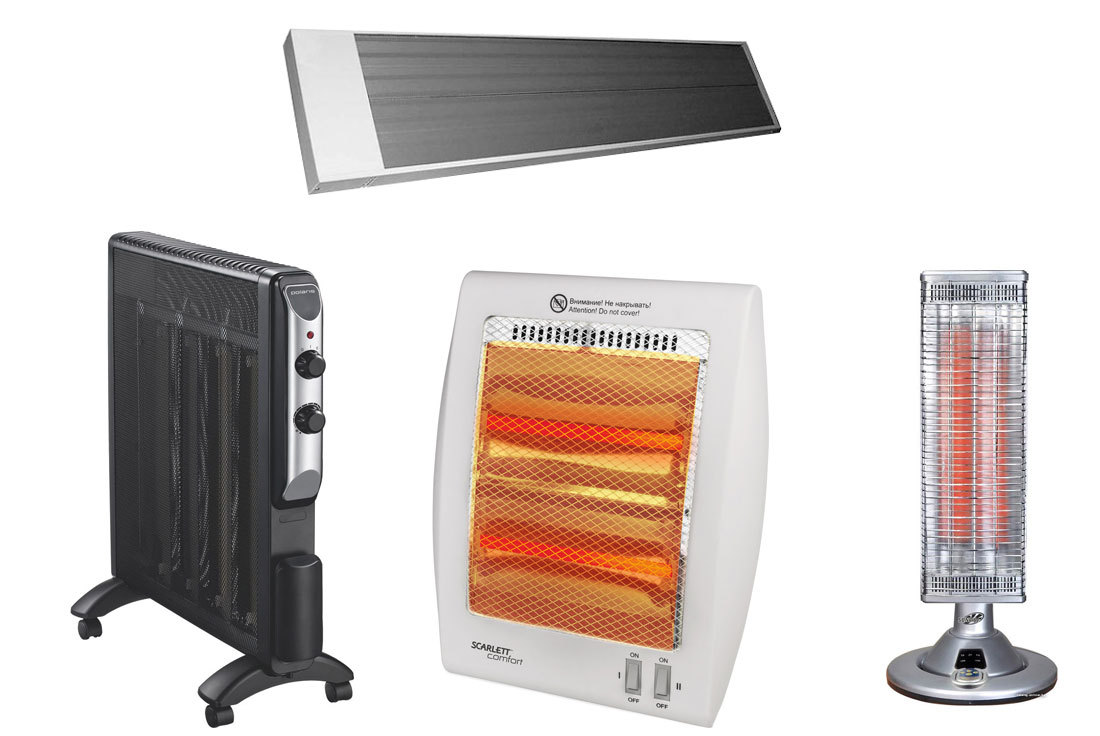
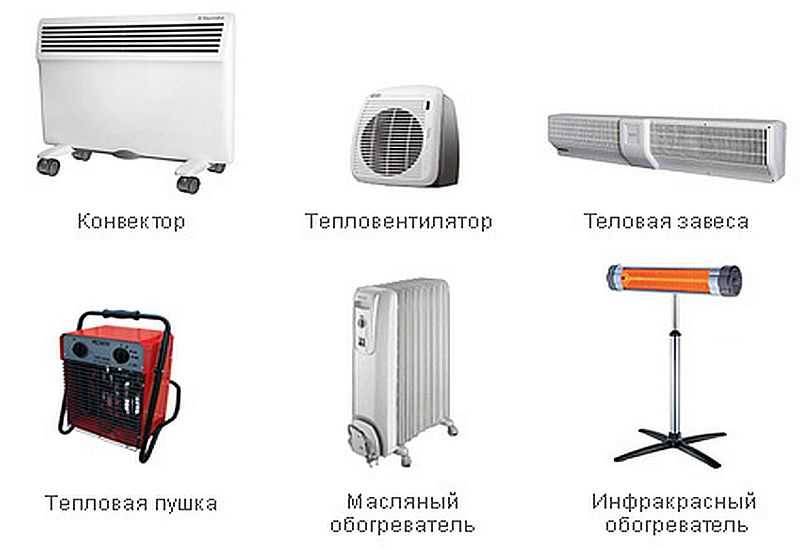
Among the variety of electric heaters, experts distinguish several types that can be quite safely and efficiently made by hand:
- oil cooler based on a cast-iron radiator;
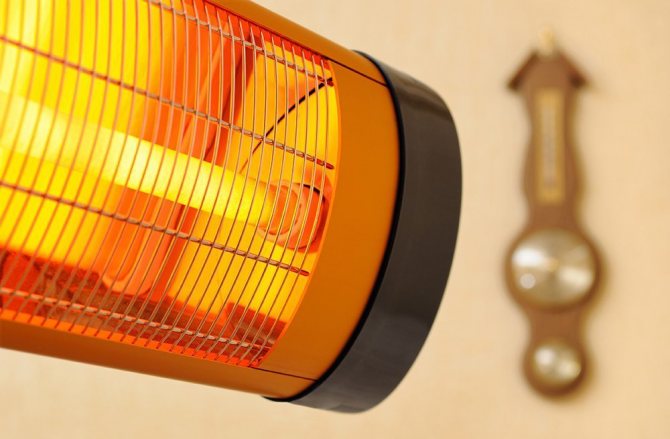
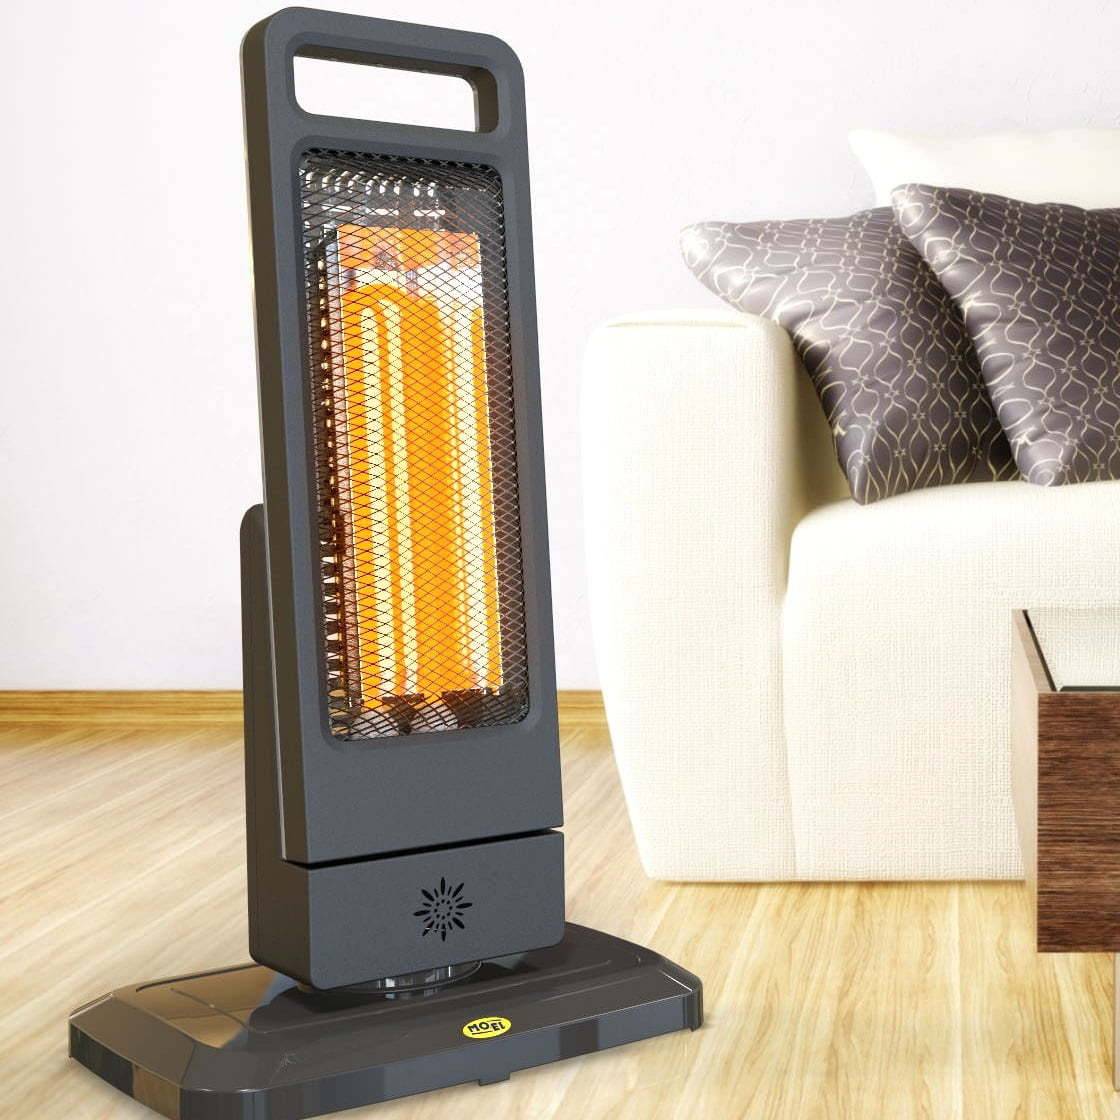
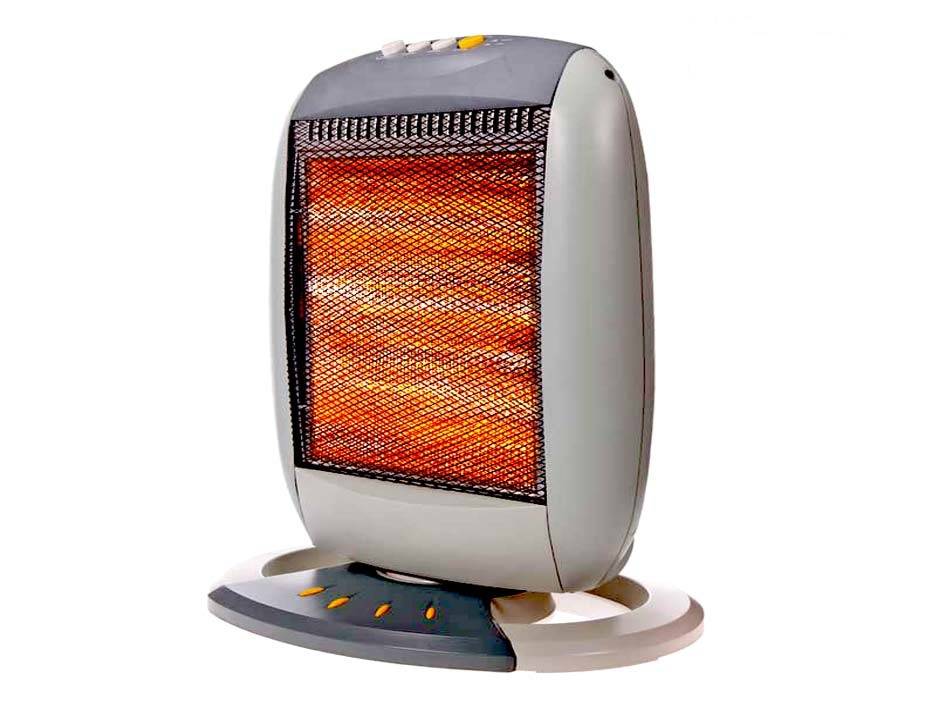
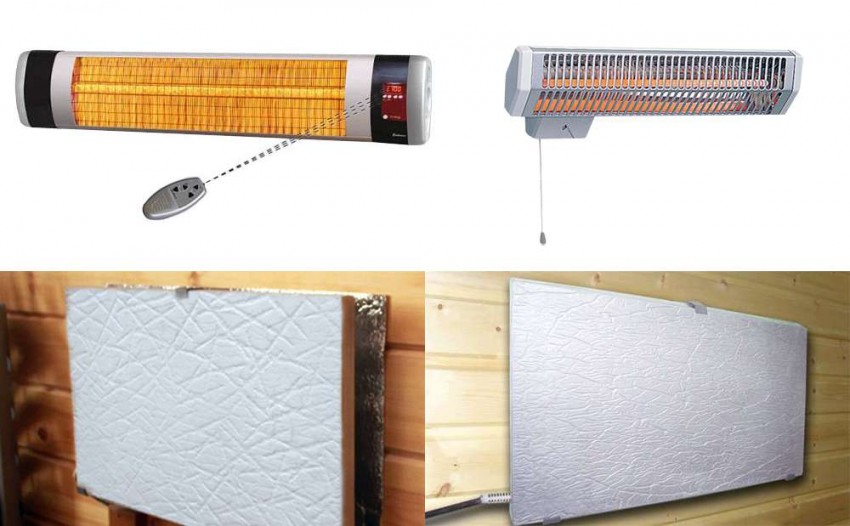
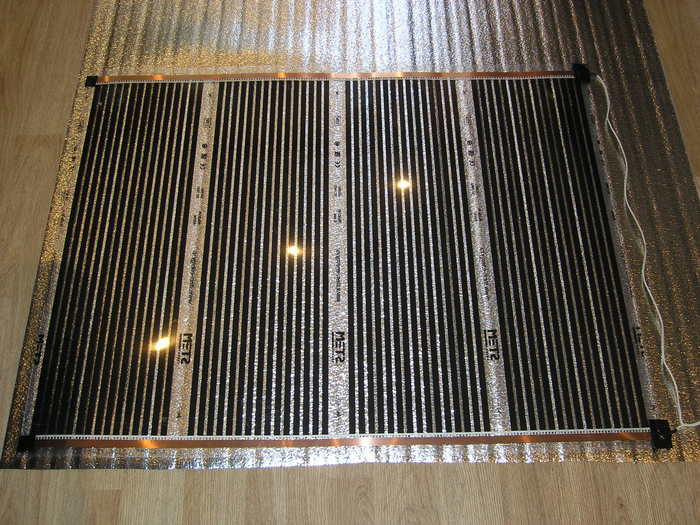
- infrared film heater;
- small fan heater.
Video


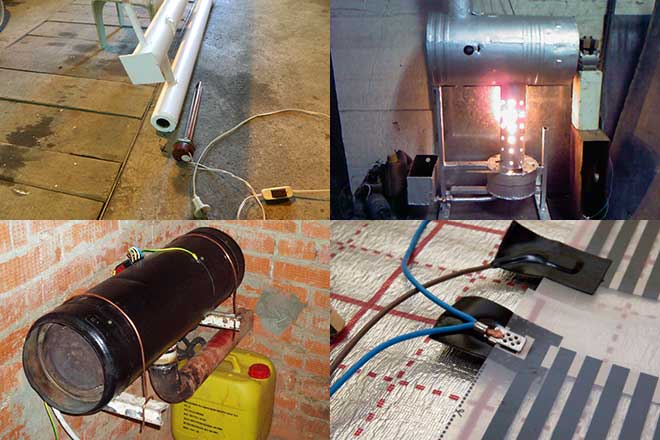
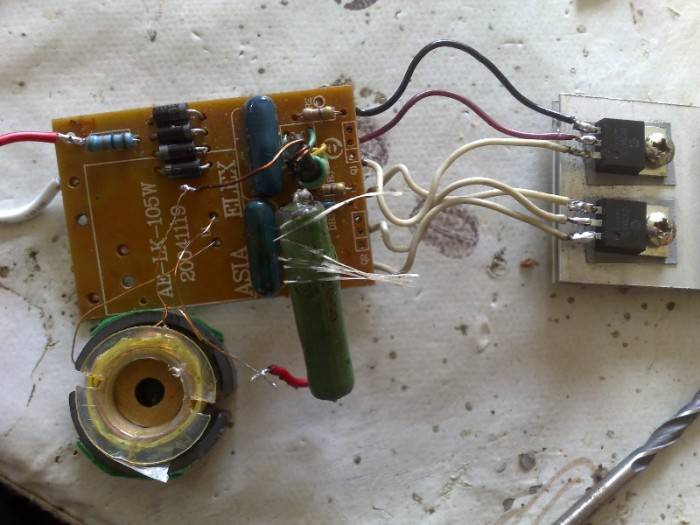
This is the first stage of the coating, the second after 10 minutes of drying.In principle, you can not do it, everything is decided by visual control with a magnifying glass. The nichrome coils should not be visible.
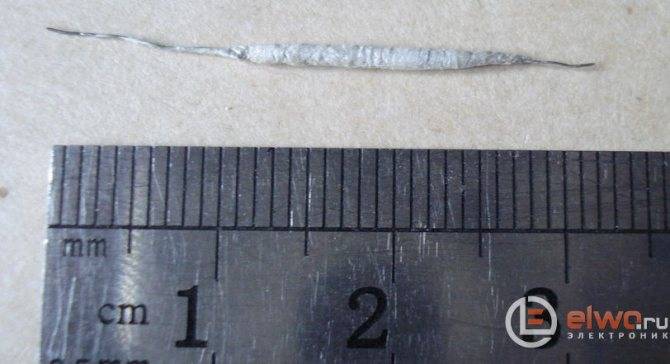
Almost finished heating element (drying left), length 15 mm, diameter 2 mm. Optimum supply voltage 12 V, power 8 watts. Drying - on a hot radiator, the next day connected to the power supply unit, applied voltage sufficient to heat up to 50 degrees (control with a multimeter in temperature measurement mode) - let it cool and warmed up to 100 degrees, then up to 150. Can be put in place, operational tests the next day.
12 V
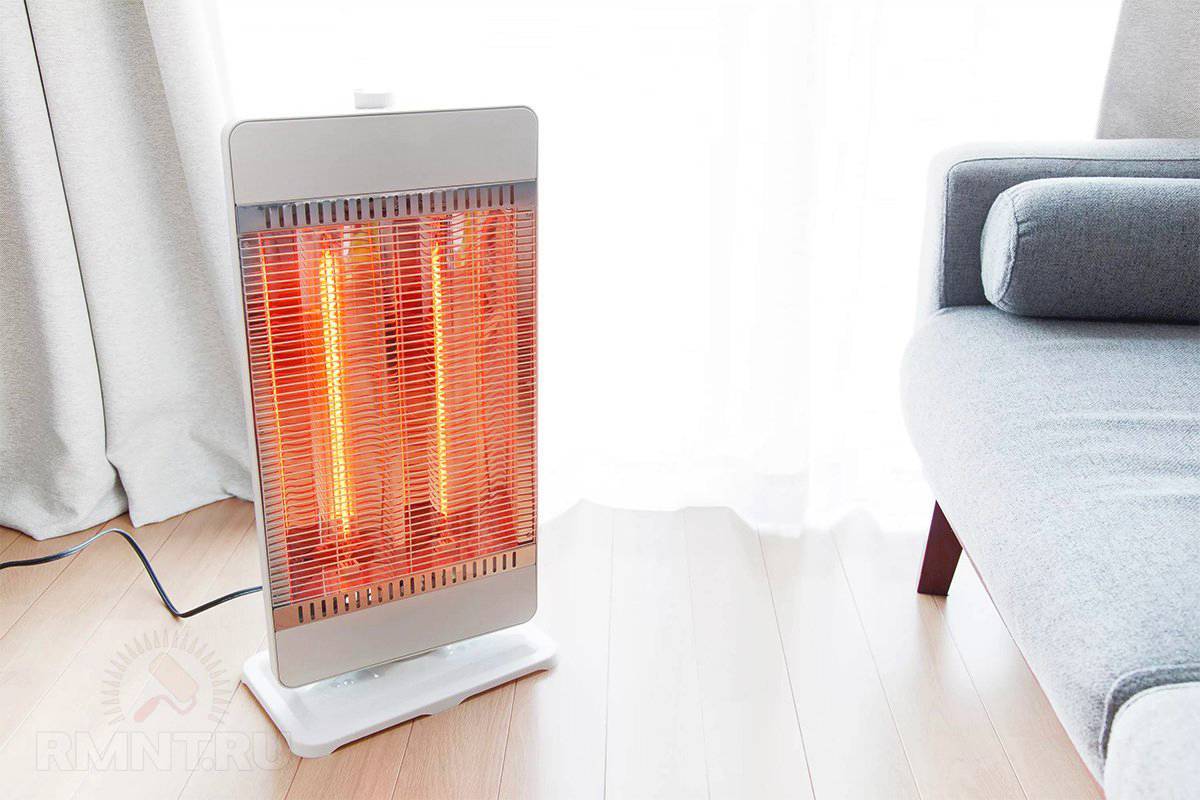
A homemade fan heater can be quite safe in a low-voltage, 12 V version. Power over 150-200 W cannot be achieved from it, too large, heavy and expensive, you will need a step-down transformer or power supply. However, 100-120 W is just enough to keep a small plus in the basement or cellar all winter, which guarantees against frozen vegetables and jars of homemade preparations bursting from frost, and 12 V is the voltage allowed in rooms with any degree of danger of electric shock. More can not be served in the basement / cellar, because. they are electrically dangerous.
The basis of the heater-fan heater for 12 V is an ordinary red working hollow (hollow) brick. One and a half thickness of 88 mm is best suited (top left in the figure), but a double thickness of 125 mm will also work (in the same place below). The main thing is that the voids are through and the same.

A homemade 12 V heater device for the basement and garage.
The device of a "brick" 12 V fan heater for the basement is given in the same place in fig. Let's count the nichrome heating coils for it.We take a power of 120 W, this is with some margin. Current, respectively, 10 A, heater resistance 1.2 Ohm. On the one hand, the spirals are blown. On the other hand, this heater should work unattended for a long time in rather difficult conditions. Therefore, it is better to turn on all the spirals in parallel: one will burn out, the rest will be extended. And it is convenient to regulate the power - just turn off 1-2-several spirals.
There are 24 channels in a hollow brick. The spiral current of each channel is 10/24 \u003d 0.42 A. Not enough, nichrome needs very thin and, therefore, unreliable. This option would fit for a household fan heater up to 1 kW or more. Then the heater must be calculated, as described above, for a current density of 12-15 A/sq. mm, and divide the resulting wire length by 24. 20 cm are added to each segment for 10 cm connecting "tails", and the middle is twisted into a spiral with a diameter of 15-25 mm. With "tails" all the spirals are connected in series with the help of copper foil clamps: its tape 30-35 mm wide is wound in 2-3 layers on folded nichrome wires and twisted for 3-5 turns with a pair of small pliers. To power the fans, you will have to install a low-power 12 V transformer. Such a heater is well suited for a garage or warming up a car before a trip: like all fan heaters, it quickly warms up the middle of the room without wasting heat on heat loss through the walls.
But back to the basement. Let's see how much nichrome is needed for a reduced to 10 A / sq. mm for reasons of reliability current density. The cross section of the wire, clearly without calculations - 1 sq. mm. Diameter, see calculations above - 1.3 mm.Such nichrome is on sale without difficulty. The required length for a resistance of 1.2 Ohm is 1.2 m. And what is the total length of the channels in the brick? We take one and a half thickness (weighs less), 0.088 m. 0.088x24 \u003d 2.188. So we just need to pass a piece of nichrome through the voids of the brick. It is possible through one, because channels, according to the calculation, 1.2 / 0.088 = 13, (67), i.e. 14 is enough. So the basement is heated. And it is quite reliable - such a thick nichrome and strong acid will not corrode soon.
IP and UPS
It is better to take (make) a transformer on iron for basement heating with powerful winding taps for 6, 9, 12, 15 and 18 V, this will allow you to adjust the heating power over a wide range. 1.2 mm nichrome with blowing will also pull 25-30 A. To power the fans, then you need a separate winding for 12 V 0.5 A and also a separate cable with thin cores. To power the heater, wires from 3.5 square meters are needed. mm. A powerful cable can be the crappiest - PUNP, KG, 12 V leaks and breakdowns can not be feared.
Maybe you don’t have the opportunity to use a step-down transformer, but a switching power supply (UPS) from an unusable computer was lying around. Its 5 V channel is enough for power; the standard is 5 V 20 A. Then, firstly, you need to recalculate the heater to 5 V and the power of 85-90 W so as not to overload the UPS (the wire diameter comes out 1.8 mm; the length is the same). Secondly, to supply 5 V, you need to connect together all the red wires (+5 V) and the same number of black wires (GND common wire). 12 V for fans is taken from any yellow wire (+12 V) and any black one. Thirdly, you need to short the PC-ON logic start circuit to a common wire, otherwise the UPS simply will not turn on.Usually the PC-ON wire is green, but you need to check: remove the casing from the UPS and look at the designations on the board, from above or from the mounting side.
The right homemade heater for the home
Regardless of the type of heating equipment being manufactured and the type of energy carrier used, the equipment must meet the following requirements:
- be easy to manufacture;
- have a low cost of structural materials and elements;
- have high performance;
- sufficient power;
- be safe to use;
- be cost-effective in terms of production and consumption of energy;
- as compact as possible;
- simple and convenient to use.
Any factory-made heater can boast of safety, economy and efficiency. Homemade technology is characterized by increased power, performance, ease of use, but safety is a controversial issue. That is why any homemade heater for the home needs to be checked before mass use.
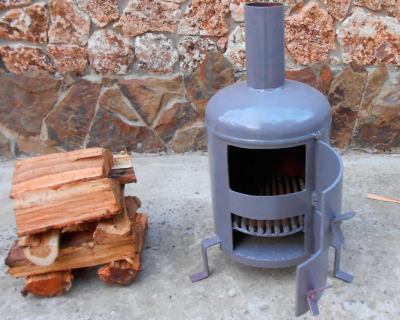
Potbelly stove from a used cylinder
Potbelly stoves, popular a hundred years ago, still do not give up their positions today, acting as the main source of heat in garages and utility rooms. And their main advantage is that they can work not only on wood, but on everything that burns.
Potbelly stoves are made from gas cylinders containing propane before emptying, with a volume of 40-50 liters, pieces of steel pipes and thick-walled barrels with a small volume
The minimum wall thickness of such structures should be 2-3 mm, but still the best option is 5 cm, so that any type of fuel can be used.If we compare the models of horizontal and vertical execution, then the former win in terms of ease of loading logs.


Vertical design
The simplest option for manufacturing a potbelly stove involves the use of a gas cylinder: the body of the heating structure is already ready, it remains only to equip the compartments for laying fuel and an ash pan. The height of the cylinder is about 850 mm, the diameter in the girth is 300 mm, and the sufficient wall thickness allows the use of any type of fuel.
To build a vertically mounted structure, the balloon is divided into two parts unequal in volume:
- upper - occupies 2/3 of the structure acts as a receiving chamber for laying firewood;
- lower - occupies 1/3 of the structure and serves to collect ash.
For the manufacture of a potbelly stove in the wall of the cylinder, holes are cut out for the arrangement of doors to the size of each of the two sections. The doors themselves can be built from a cut piece of the balloon wall or cut from sheet metal.
On the border between the upper and lower compartments, grates are mounted. But since it is difficult to find a ready-made cast-iron grate of a suitable size, thick rods are used for its manufacture.
The basis for the manufacture of grates is steel reinforcement with a thickness of 12-16 mm, the cut rods of which are placed at a distance of 2 cm from each other
A hole for a chimney with a diameter of at least 150 mm is cut out in the upper part of the cylinder. This element can be welded from a cut of sheet metal. The main thing is that the diameter of the resulting pipe matches the size of the chimney in order to simplify the docking process.
The doors are equipped with locks and attached to the body by welding.If desired, the loops can be made from several links of a thick steel chain.
Since the potbelly stove was not originally one of the hermetic heating structures, there is no need to use seals
To close the gap formed along the perimeter of the door, it is better to weld a small side along the perimeter of the blanks from the outside - a strip of metal 1.5-2 cm wide. The finished structure can only be connected to the chimney and tested.
Model with a horizontal body
With a horizontal arrangement of the body, the ash collection compartment is welded from the bottom of the structure. The main compartment is designed for laying fuel and unloading burnt coals. It is equipped with a chimney pipe with a diameter of 10 cm.
It is fashionable to build an ash collection compartment from a suitable channel size or weld it according to the given dimensions from a cut of sheet steel
A hole is made in the side wall of the housing for the installation of a furnace door. Its size should not exceed the diameter of the chimney pipe. The door itself is equipped with a latch and mounted on hinges.
Holes are made in the wall of the housing, which will be directed downwards. They will perform the function of a grate.
To improve the heat transfer of a red-hot furnace, the chimney can be made in the form of an elongated broken structure. The main thing when arranging a stove chimney is to avoid horizontal sections. Some craftsmen build casings made of sheet metal around the cylinders to improve the heating of the room.
But do not forget that the potbelly stove carries a potential danger. Therefore, the room where it will be installed should be periodically ventilated.
On our site there are several articles on making potbelly stoves with your own hands. We advise you to read:
- Do-it-yourself potbelly stove from a gas cylinder: diagrams, drawings + step-by-step guide
- Do-it-yourself potbelly stove: a diagram of a home-made potbelly stove for a summer residence and a garage
- How to make a potbelly stove with used oil with your own hands: options and examples of making a stove
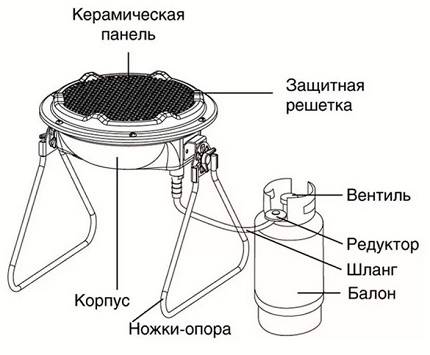
How to make a gas gun with your own hands - step by step instructions
Knowing the principle of operation of the simplest gas gun, you can understand that making the same design at home on your own will not be a problem. The main thing is to choose accessories. As a body, you can use either a piece of a pipe galvanized on the outside, with a diameter of 100 mm (recommended - 200 mm), and any primus is suitable as a burner (preferably with adjustable intensity of fuel supply to the burner). All this can be purchased at a building or household goods store.


Another nuance is forced convection. With a powerful gas flow, it is not necessary to install a system that will independently blow out heated air. The main thing is to use a pipe not with soldered ends, because in this case the air flow is created automatically (due to the difference in air temperatures at the ends of the cylinder).
If convection is still necessary, then an ordinary household fan is simply installed from the back of the pipe. The main thing is to adjust the speed of the blades in such a way that the generated air flow does not lead to the extinguishing of the burner. As a rule, 200 - 300 rpm is enough.
In total, to create a gas gun with your own hands, you need:
Step 1. Choose a suitable case.Ideally, a steel pipe with a diameter of 200 mm and a length of at least 80 centimeters.
Step 2. In the upper part of the pipe, prepare a hole for installing a nozzle with a burner. It can be done with a step drill. The standard entrance under the nozzle is about 25 mm (then you can also put a water tap, but it is recommended to use a gas one - they are structurally different).
Step 3 Mount the burner. All this is fixed on a washer or coupling, which is tightened outside the pipe. A refractory sealant (automotive, the one used when installing gaskets in the cylinder block) must be added under all fasteners to avoid gas leakage and reverse thrust in the combustion chamber.
Step 4. If necessary, mount a fan behind the pipe. It is not necessary to make everything airtight, the main thing is to create a directed air flow.
Step 5. Connect the resulting gun to a gas source (propane or methane - depending on the type of burner installed) and conduct a test run. Auto-ignition in such a system, of course, is not provided, so the burner will need to be started manually.
During a test run, the most important thing is to make sure that there is no gas leakage (recheck all connections), as well as that the burner is heating up normally (it should not overheat, become covered with soot or turn red).
Test run and performance checks are carried out outdoors, not indoors. But it should be remembered that such devices are very dangerous, therefore, without proper experience, trying to make them yourself is not the best solution. And when working with them, someone must be nearby so that in the event of any breakdown, immediately turn off the device.


You should not use self-made heat guns for heating. They are better suited for quickly drying a room or for heat treatment of surfaces (for example, to combat mold and fungus).
How to assemble an induction boiler yourself
The modern market for heating devices represents a large selection of different models of induction heaters for both domestic and industrial use. Despite the fact that today such equipment has not reached the level of widespread use in heating systems, its cost is high. The price for household boilers starts from 25,000 rubles, and for industrial ones - from 100,000 rubles.
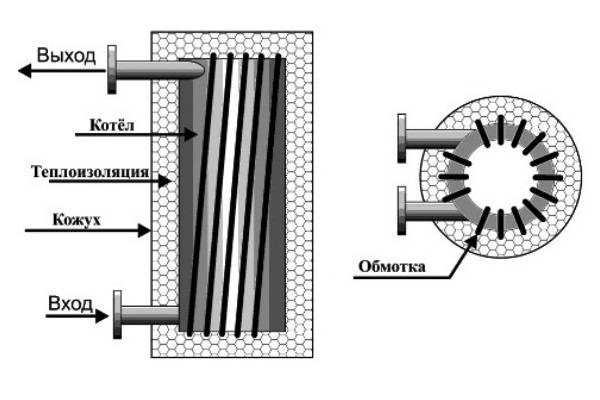
In order to save money, you can make an induction heater with your own hands. Even a non-specialist can do such work.
Device with a welding inverter and plastic pipes
All materials and components that are used for assembly are available and are often at hand. What is needed for this:
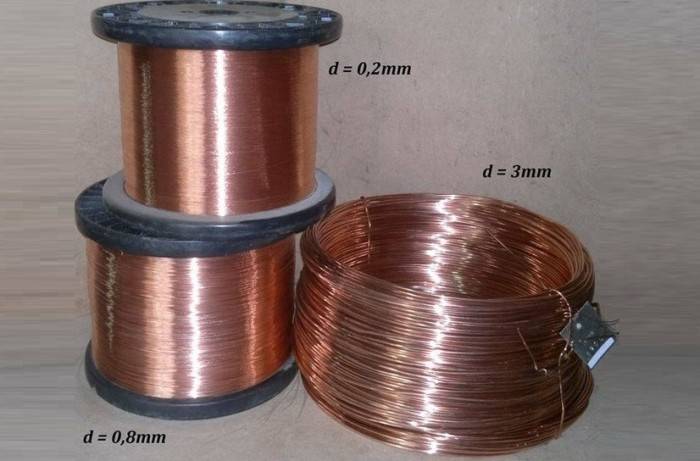
- wire rod or stainless steel wire (diameter up to 0.7 cm);
- copper wire;
- metal grid;
- a fragment of a plastic pipe with thick walls for the heater body (inside diameter 5 cm);
- welding machine;
- adapters for mounting the boiler to the heating system;
- tools;
- pump to circulate water.
Stainless steel wire must be cut into pieces 0.5-0.7 cm long. Fill the plastic pipe tightly with them and close it on both sides. It should not have free space. A metal mesh is installed at the bottom of the tube, which allows you to keep the steel particles inside.
Next, you should make the main heating component - an induction coil. Copper wire is wound on a plastic pipe. It is necessary to make at least 100 neat turns at the same distance from each other. Then the induction coil is connected to the individual heating system. The boiler is installed in any part of the pipeline. To pump water, you need to build a pump.
A home-made device is connected with an external copper winding to the inverter. Be sure to carry out work on electrical insulation and thermal insulation of the boiler. All open areas are covered with special material. Basalt wool is used for insulation. This is necessary in order to heat the pipe without losing heat energy to the air.
Device with transformer
This option is easier to assemble than the previous one. What you need to make your own hands:
- three-phase transformer with the possibility of mounting;
- welding machine;
- copper winding.
It is necessary to insert the pipes one into the other, weld. The sectional design should resemble the shape of a donut. It performs two tasks at the same time - a heating element and a conductor. Then the heater body is wrapped with copper wire and connected to the transformer. To prevent heat loss during operation, a protective casing can be built on the boiler.
Induction heating is a good alternative to standard heating systems. Its efficiency is about 97% efficiency. Such systems are economical, operate on any liquid, operate silently, do not emit harmful substances.


If the assembly rules are followed, the boilers are safe to operate. They are durable. But if any element becomes unusable, replacing it will not be difficult.All materials are easily replaceable and available.
3 Oil system
Homemade oil units are characterized by reliability and safety. In addition, you can make a heater from a battery with your own hands. Such structures can be used both for heating residential and some technical premises. The product includes a metal case, which is subsequently filled with a coolant (water, technical oil).
To make a powerful oil heater with your own hands, you will need certain materials. Among them:
- tubular heater;
- electric pump with a capacity of 2.5 kW;
- temperature controller;
- tubes that can withstand temperatures of 160 ° C;
- a used battery (if any), if there is none, you can make a base out of pipes yourself using a welding machine;
- technical oil;
- conductive cord with plug;
- metal corners.
All manipulations are carried out using an electric drill and a welding machine. step by step manufacturing guide oil heater:
- 1. First, a rectangular frame of the right size is made to install the unit. To do this, the corners are cut into segments of the required length and welded together to form a rectangular structure. Legs are welded at the bottom of each corner.
- 2. In a container prepared in advance, a hole is made for mounting heating elements. They are located at the bottom of the product. Additionally, you will need a hole at the top to fill the oil. For work, a grinder is used.
- 3. Then the electric pump is mounted on metal plates.
- four.To fix the latter, heat-resistant pipes are used, which are fixed to the body by welding and connected to the pump with shut-off valves.
- 5. Next, install the heating elements in the holes made. Fastening is carried out with bolts.
- 6. A threaded outer fitting is welded onto the inlet for mounting a protective cover. The simplest design can be made from a piece of pipe with an internal thread, which is then screwed onto a fitting. A rectangular metal plug is welded onto the second end of the tube to prevent the coolant from pouring out.
- 7. At the final stage, install and connect the thermostat and conductive cable. Next, the container is mounted on the prepared frame and the coolant is poured.
How to make a heater from a cast-iron battery with your own hands
Idea No. 1 - Compact model for local heating
The easiest way to make an electric heater is this one. To get started, prepare the following materials:
- 2 identical rectangular glasses, each with an area of \u200b\u200babout 25 cm2 (for example, 4 * 6 cm in size);
- a piece of aluminum foil, the width of which is not greater than the width of the glasses;
- cable for connecting an electric heater (copper, two-wire, with a plug);
- paraffin candle;
- epoxy adhesive;
- sharp scissors;
- pliers;
- wooden block;
- sealant;
- several ear sticks;
- clean rag.
As you can see, the materials for assembling a homemade electric heater are not at all scarce, and most importantly, everything can be at hand. So, you can make a small electric heater with your own hands according to the following step-by-step instructions:
- Thoroughly wipe the glass with a cloth from dirt and dust.
- Using pliers, gently grab the glass by the edge and burn one of the sides with a candle. The soot should evenly cover the entire surface. Similarly, you need to burn one of the sides of the second glass. In order for carbon deposits to settle on the surface better, it is recommended to cool the glass before assembling the electric heater.
- After the glass blanks have cooled, carefully clean the edges with the help of ear sticks no more than 5 mm around the entire perimeter.
- Cut out two strips of foil, exactly the same width as the smoked area on the glass.
- Apply glue to the glass over the entire burnt surface (it is conductive).
-
Lay the pieces of foil as shown in the photo below. Then apply glue to the other half and connect them.
- Then seal all connections.
- Using a tester, independently measure the resistance of a homemade heater. After that, calculate its power using the formula: P \u003d I2 * R. We talked about how to use a multimeter in the corresponding article. If the power does not exceed the allowable values, proceed to the completion of the assembly. If the power is too high, you need to redo the heating element - make the layer of soot thicker (the resistance will become less).
- Glue the ends of the foil to one side.
-
Make a stand out of a bar by installing contact pads connected to an electrical cord on it.
Using this technology, you can make an electric mini heater with your own hands. The maximum heating temperature will be about 40o, which will be quite enough for local heating.However, for heating a room, such homemade products will, of course, be small, so below we will provide more efficient options for homemade electric heaters.