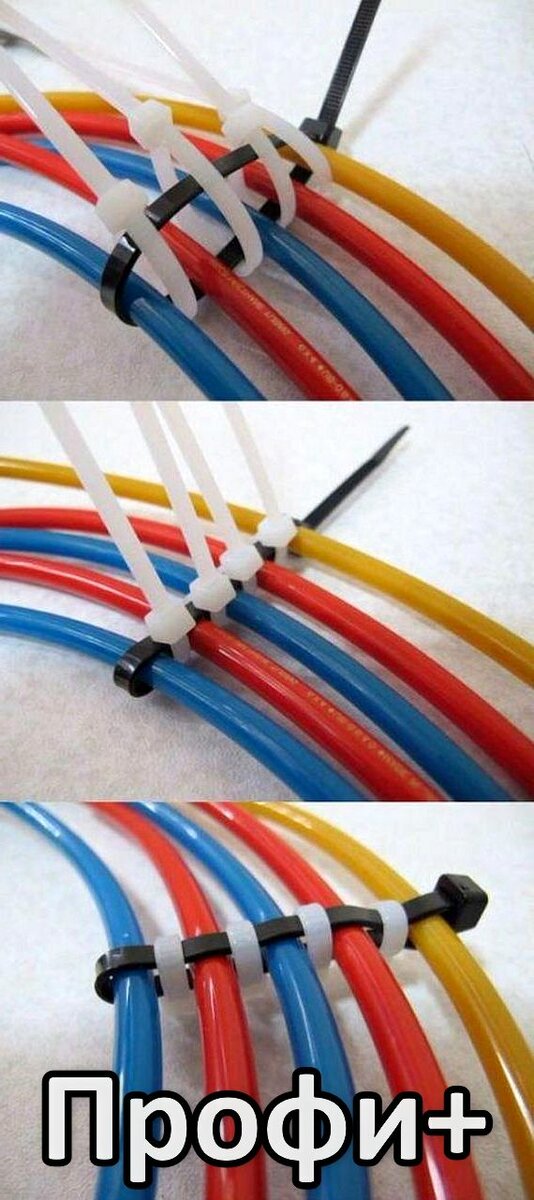
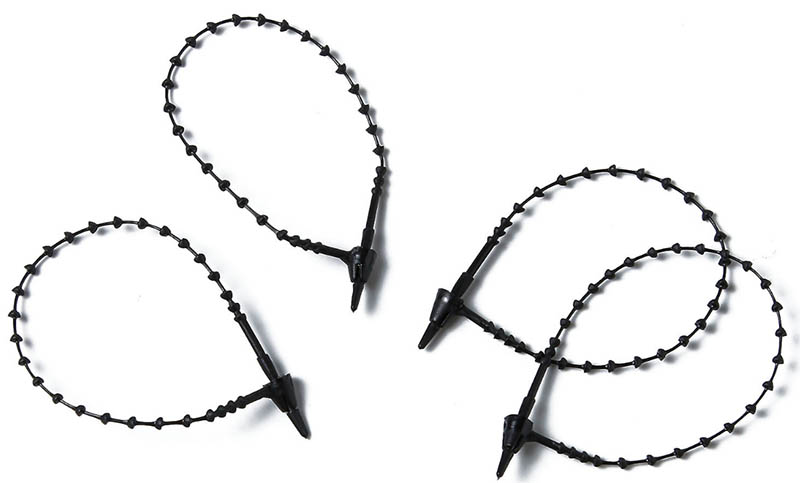
- How to quickly remove a plastic clamp without cutting it
- Using plastic clamps in the country
- Types of locking systems for disposable ties
- The principle of operation of a standard lock
- The principle of operation of the lock with a metal tooth
- How a ball lock works
- The principle of operation of the lock for a reinforced clamp
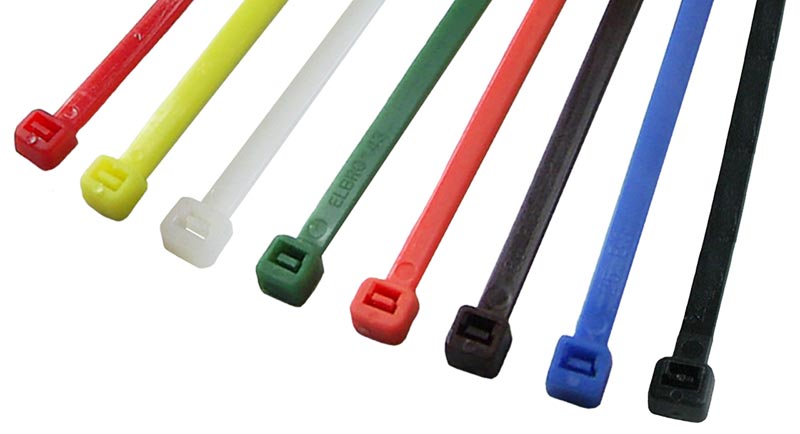
- Which cable ties to choose: types, types, characteristics, application features and rules of use
- Varieties
- For home and outdoor
- Disposable and more
- Design differences
- Problem - the floor burst
- Dismantling - relevance and features of carrying out
- The use of a grinder
- Selection tips and approximate prices
- Dismantling a concrete floor screed: an overview of methods and costs
- The problem of product fragility
- four ways
- How to get rid of cracks?
- What is a plastic screed, and how one of them differs from the other
- Differences of screeds according to the material of manufacture
- What are the locks on plastic ties
- Standard retainer with metal insert
- Clamp with reinforced lock
- Plastic ties with ball locks
- Velcro lock and its features
- Features of the dismantling of the floor screed
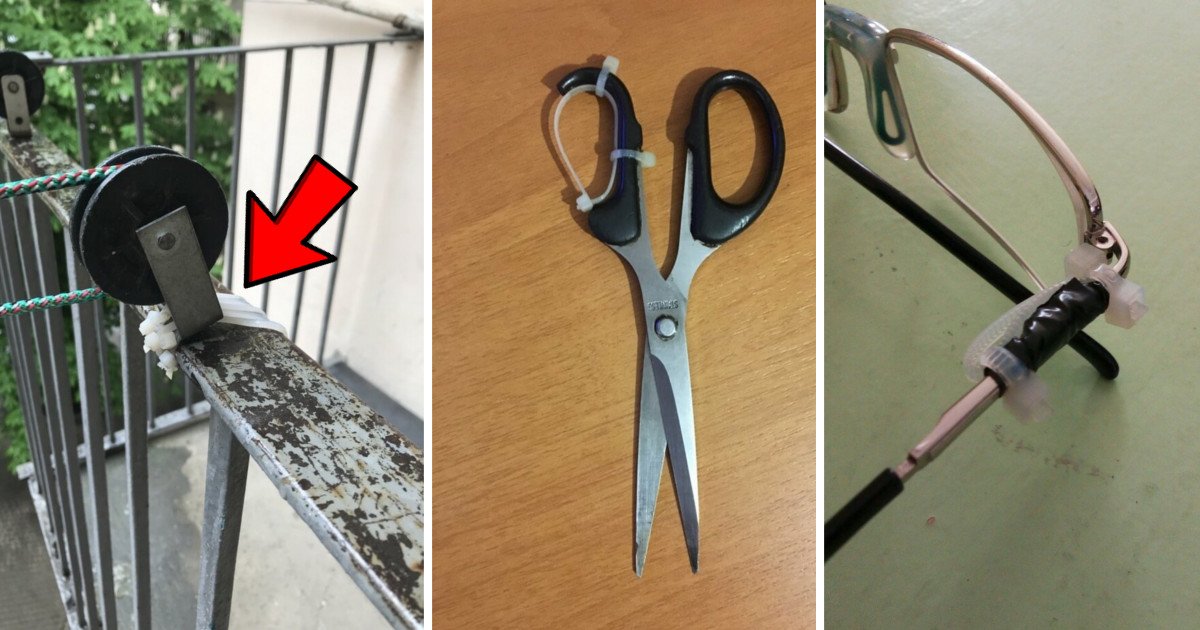
How to quickly remove a plastic clamp without cutting it
Hello to all do-it-yourselfers!
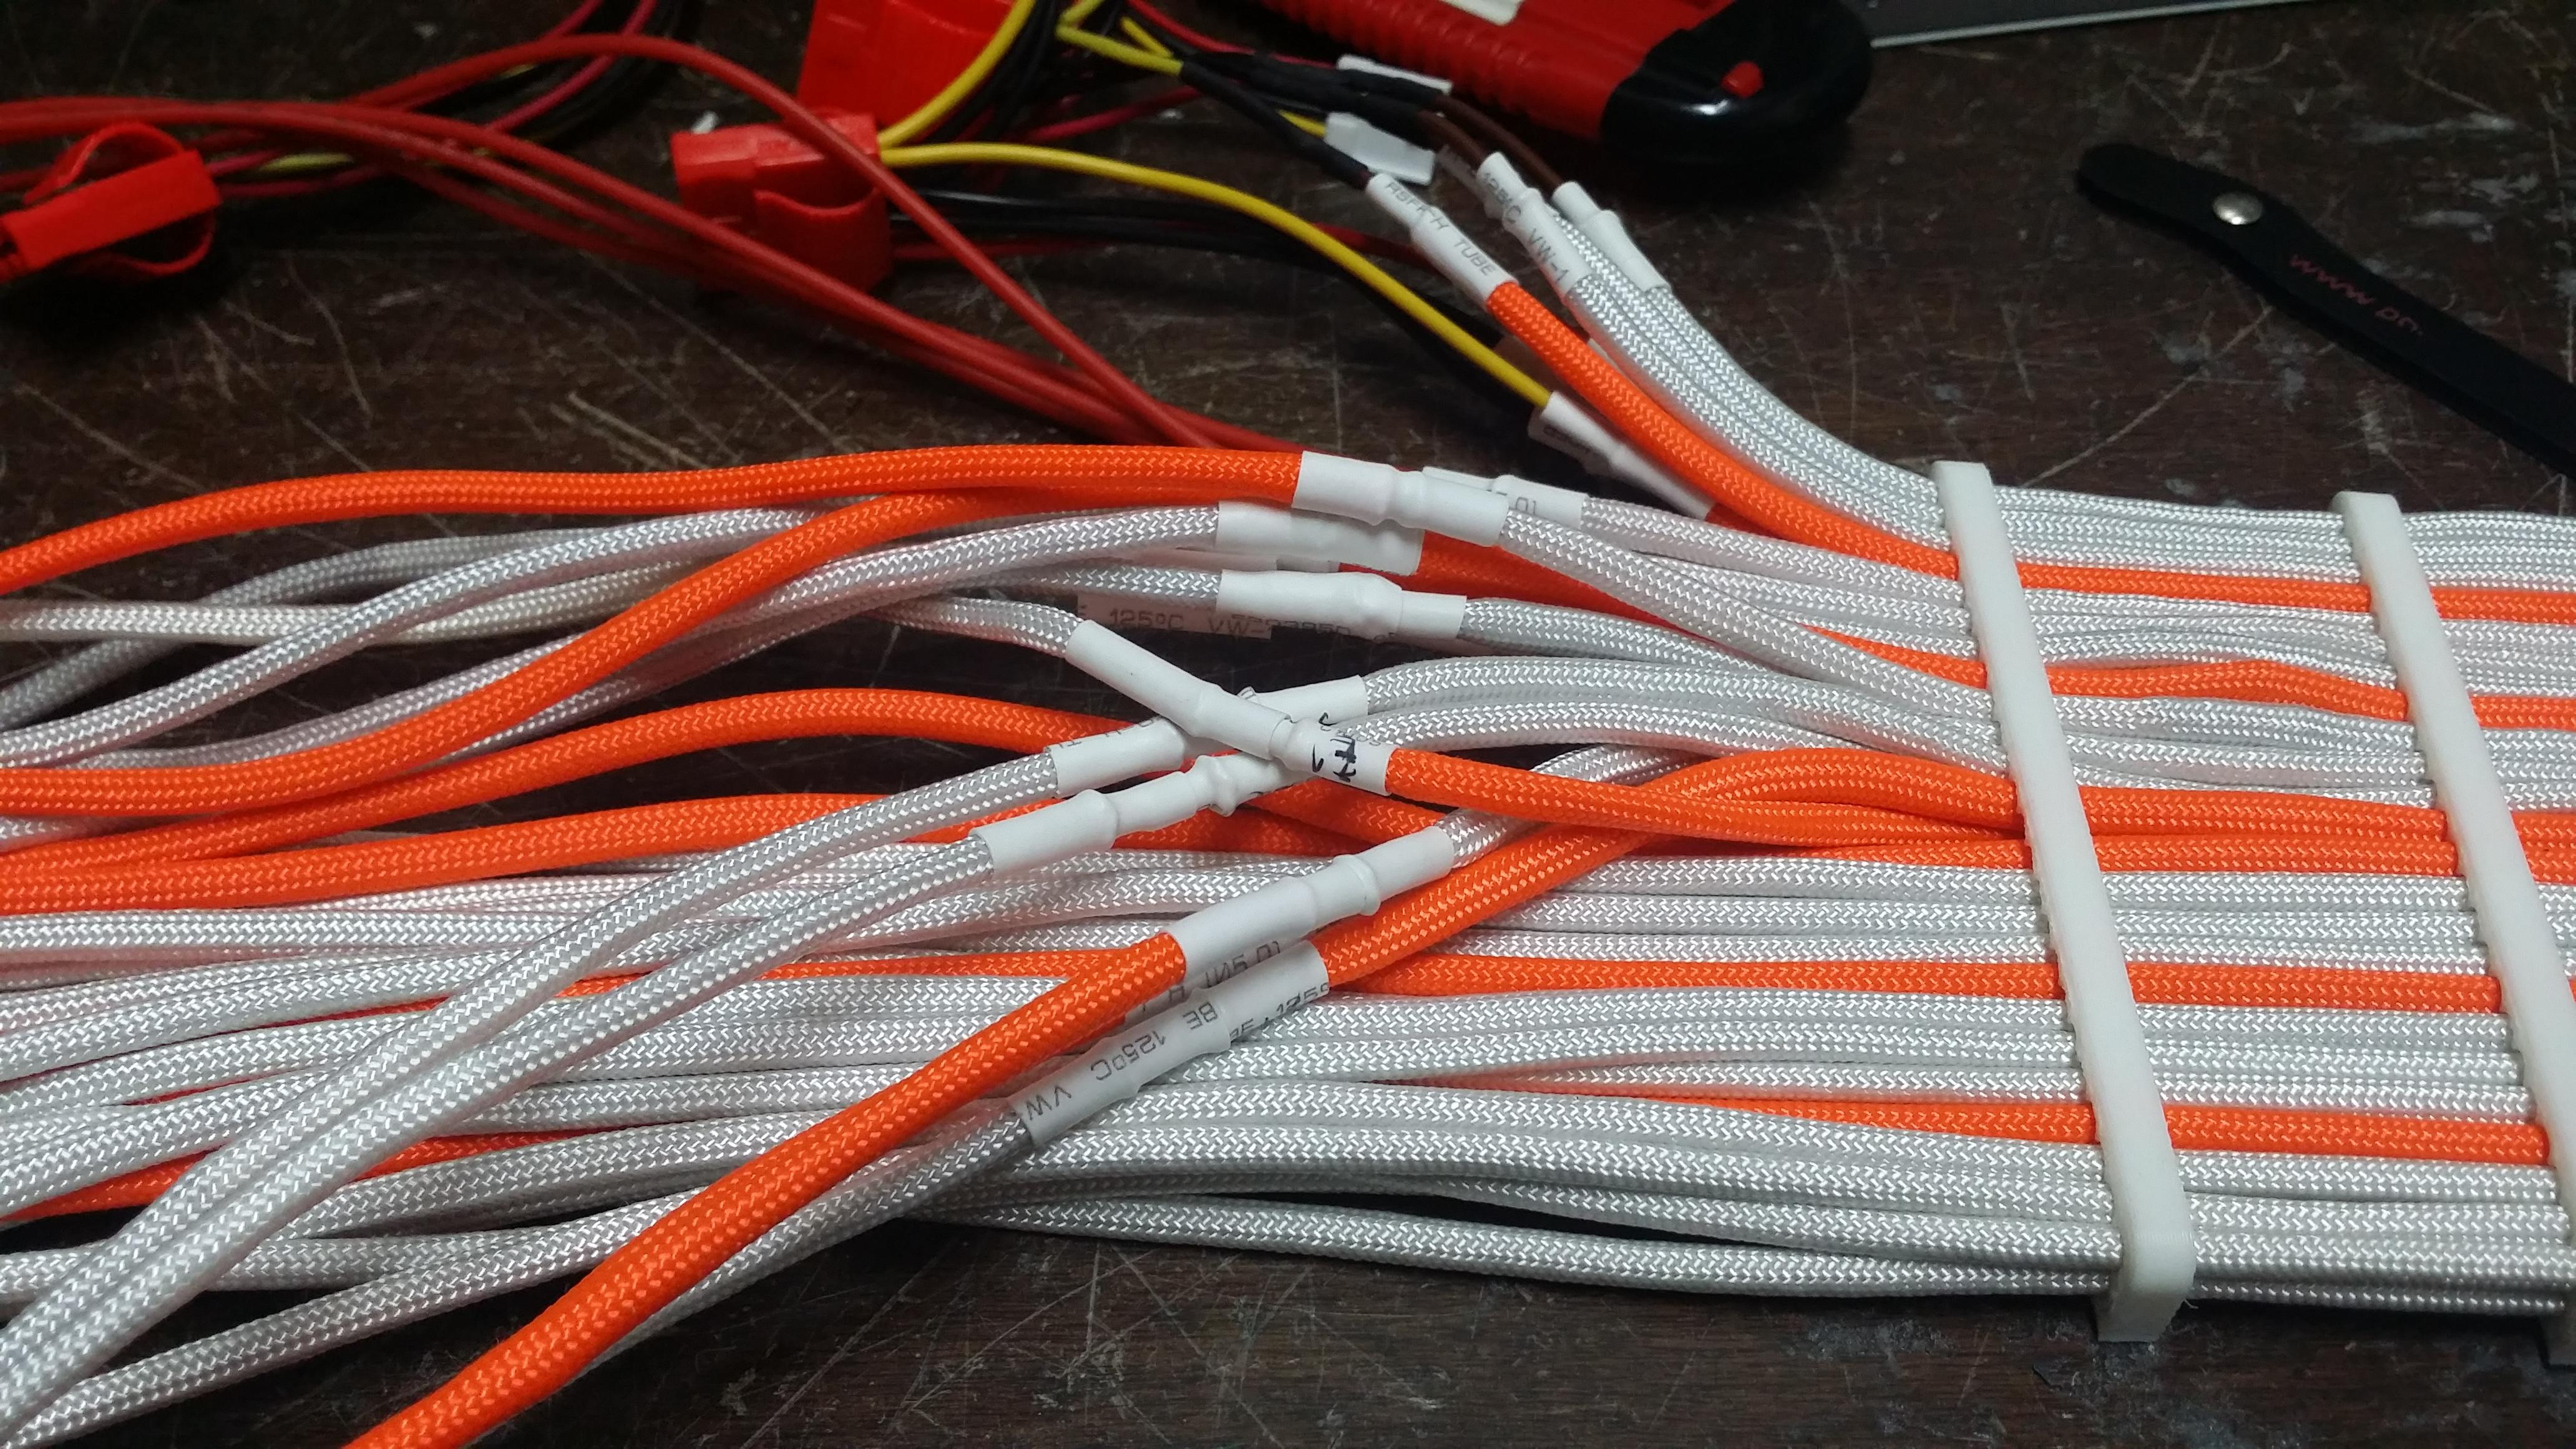
Currently, during repairs, as well as just in everyday life, plastic clamps of this type are very widely used.
They come in different sizes and are really very comfortable, as they tighten very quickly and hold quite firmly. They can be used to fasten and tie various wires and cables, fix long thin parts such as pipes or rails, and in many other cases.
And, perhaps, the only drawback of plastic clamps is that they are disposable. That is, if it is necessary to remove or replace any part fixed with such clamps (for example, a wire or cable in a bundle), then the old clamps have to be cut or bitten with wire cutters and then new clamps must be used to re-fasten.
However, sometimes there are situations when a supply of new clamps is not at hand. So recently I had to change an old electrical wire in a shed in the attic. And this wire was just fastened to several other wires with similar plastic ties. Naturally, at first I just wanted to bite these clamps with wire cutters, remove the old wire, and after installing the new wire, fasten it with new clamps, but it turned out that I had run out of clamps. In the meantime, it was already evening in the yard, so that it was already too late to go to the store, and I really did not want to postpone the matter for later.
However, as a result, after a little thought, I found a way to carefully remove the old clamps without cutting or damaging them, and then, after installing the new wire, fastened it to other wires with the same clamps.
Of course, after this incident, I bought a pack of clamps at the first opportunity, replenishing my supply.But most importantly, it turned out that plastic clamps can, if necessary, be very simply and quickly unfastened and removed, and then reused.
How It can be done, I want to share with readers today, especially since someone may well have a similar situation.
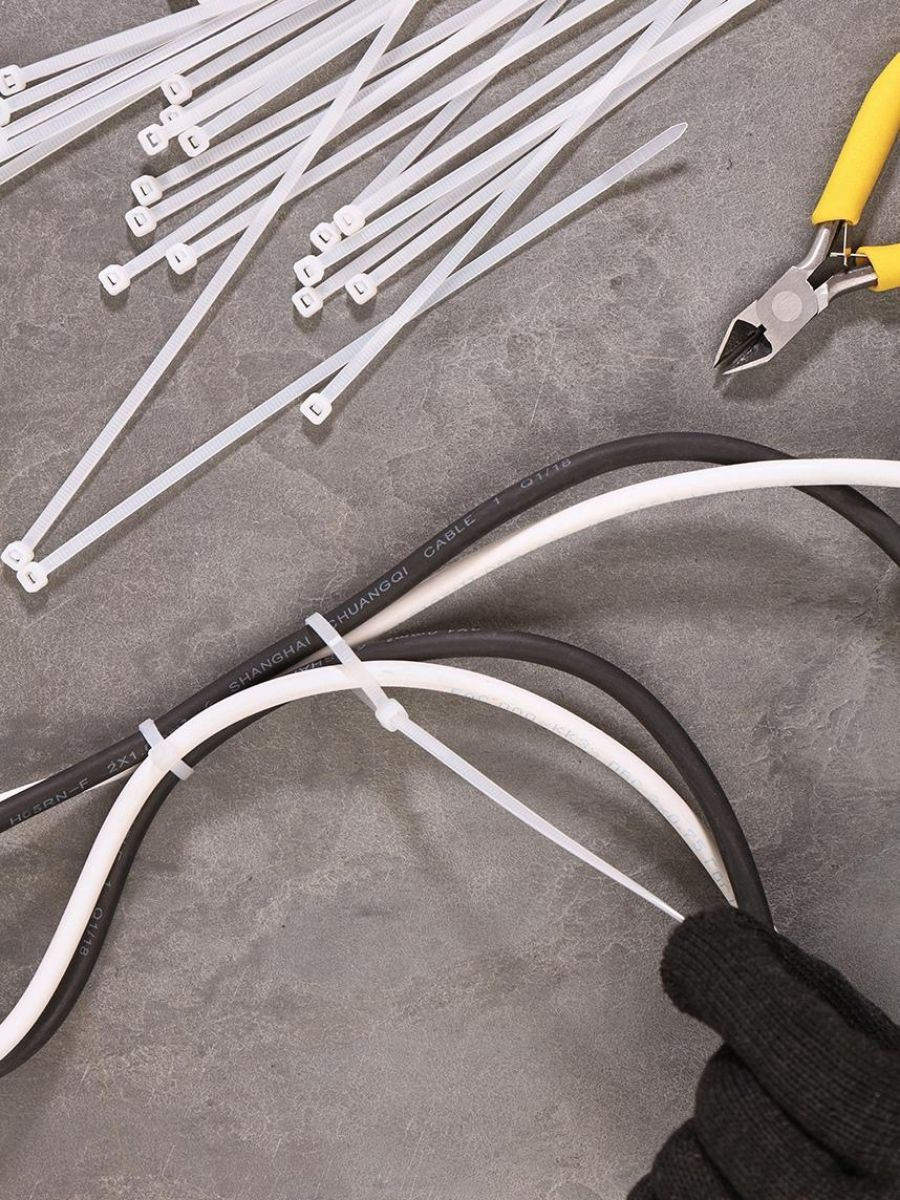
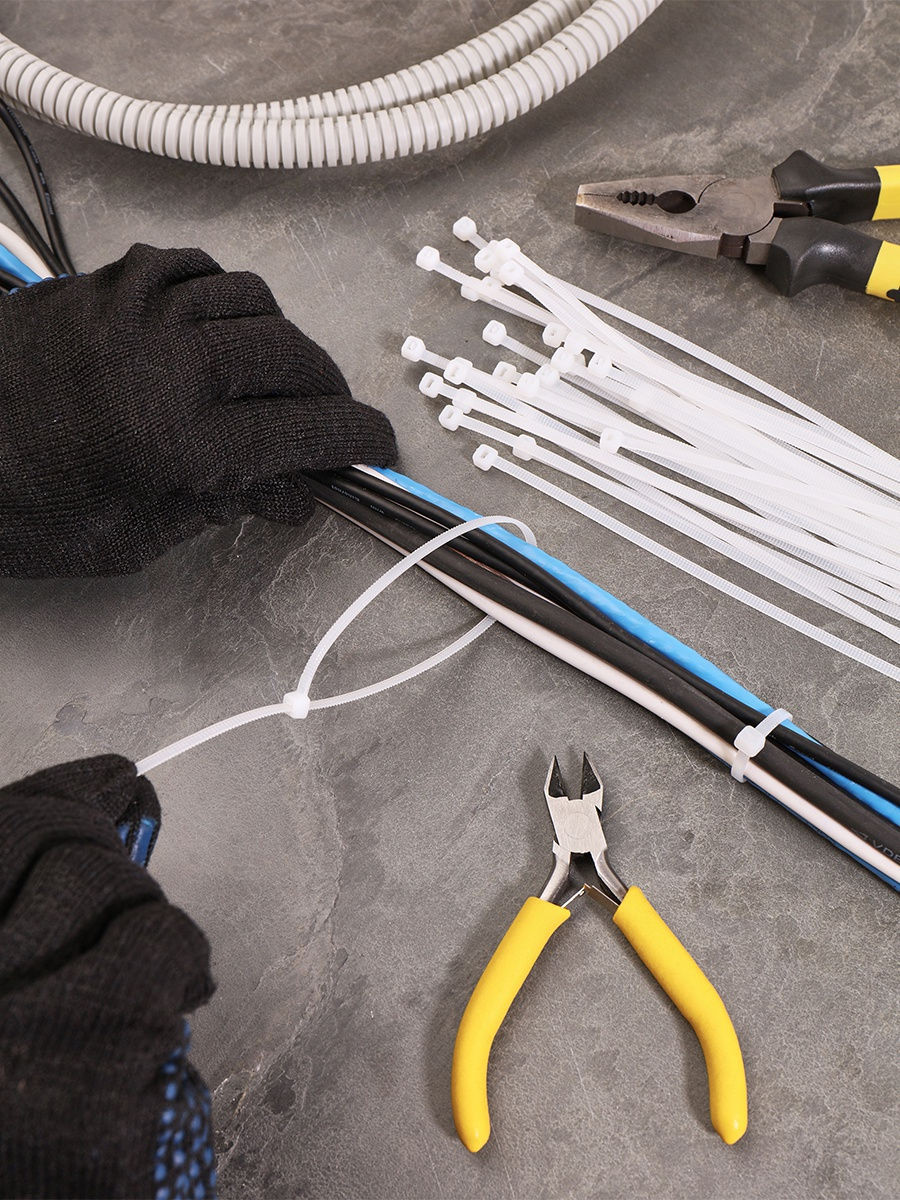
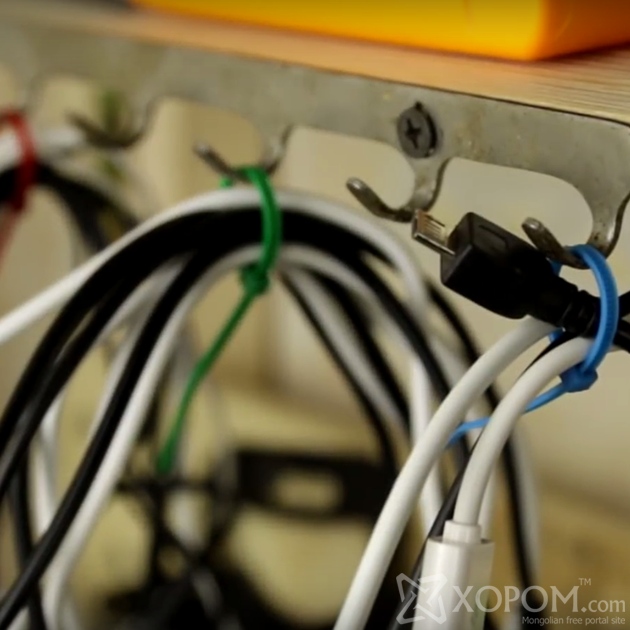
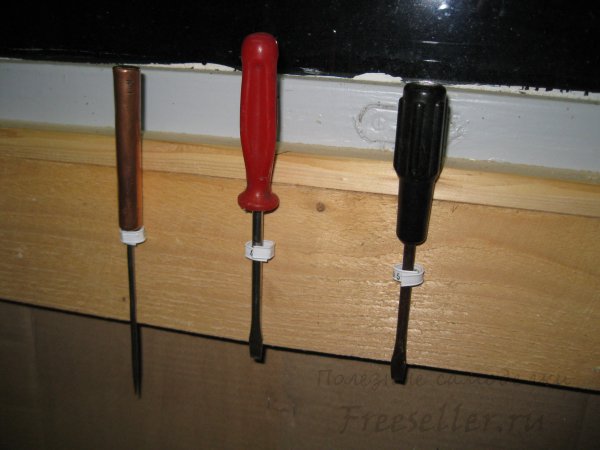
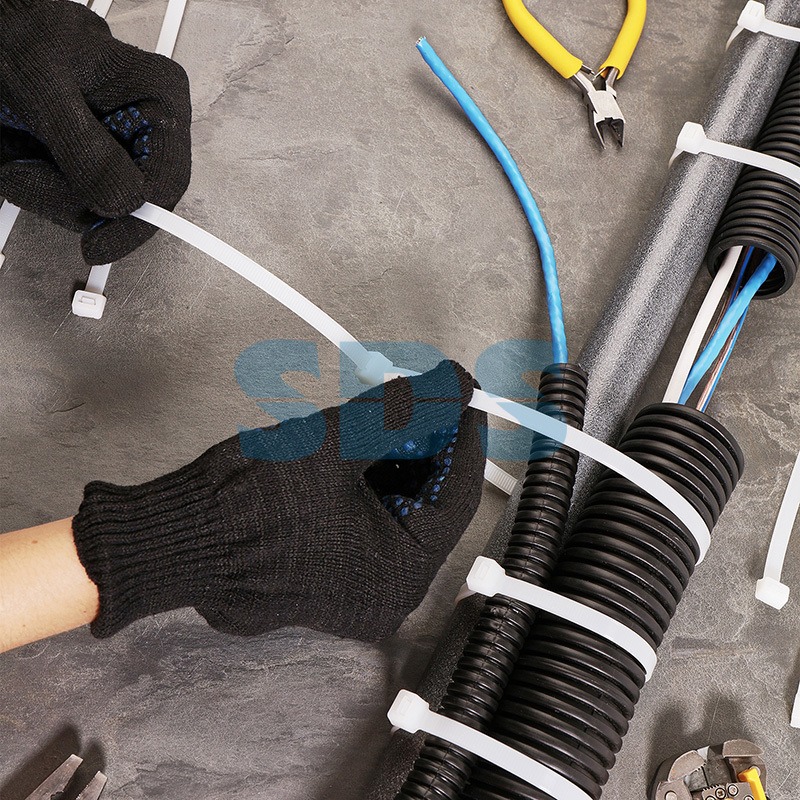
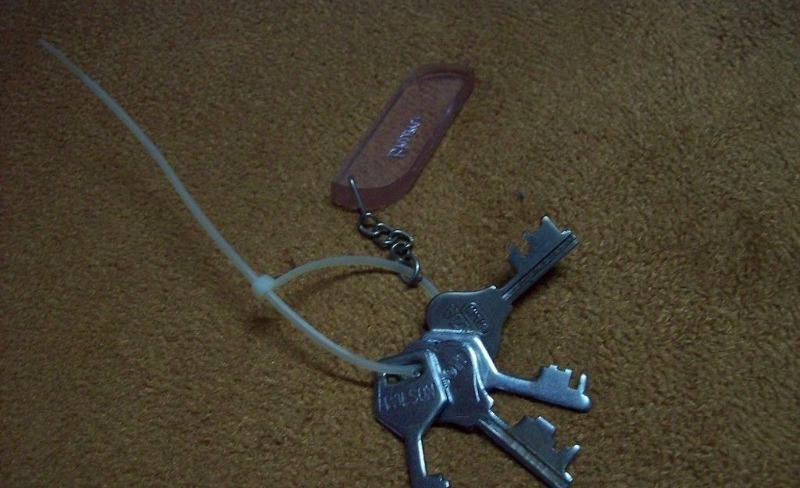
To do this, we need a set of small screwdrivers (watch screwdrivers work well). As an example, I tightened the coiled extension cord with four clamps.
So, we select a suitable watch screwdriver with a flat tip and carefully insert the tip of the screwdriver into the slot of the clamp lock from below, under the tip of the clamp emerging from there, so that the tip of the screwdriver presses the locking tab of the clamp.
At the same time, it is desirable that the tip of the screwdriver be thin enough and well pointed, and everything must be done very carefully so as not to damage the tongue and teeth of the clamp, since we will reuse it.
Thus, continuing to press the tip of the screwdriver on the tongue of the clamp, with the fingers of the other hand we take the clamp by the tip and carefully loosen it, and then completely disconnect the clamp. At the same time, since we did everything carefully and slowly, the tongue of the clamp turned out to be completely undamaged
At the same time, since we did everything carefully and slowly, the tongue of the clamp turned out to be completely undamaged.
In the same way, remove all other clamps.
To make sure that the clamps were not damaged, I hung an eight-kilogram weight from one of them. And as you can see, the clamp can easily withstand its weight.
So this method can be used if you have a shortage of spare clamps.True, I advise you not to get too carried away by removing and rearranging the same clamp many times, because after all, over time, the tongue and teeth of the clamp will be damaged, and it will not hold the load well, or even will not tighten at all. But, nevertheless, once or twice it is quite possible to use this technique by removing the clamp and using it again.
Well, that's all for me! For now, everyone, don’t despair if you don’t have the necessary parts or fasteners at hand, because you can always come up with something!
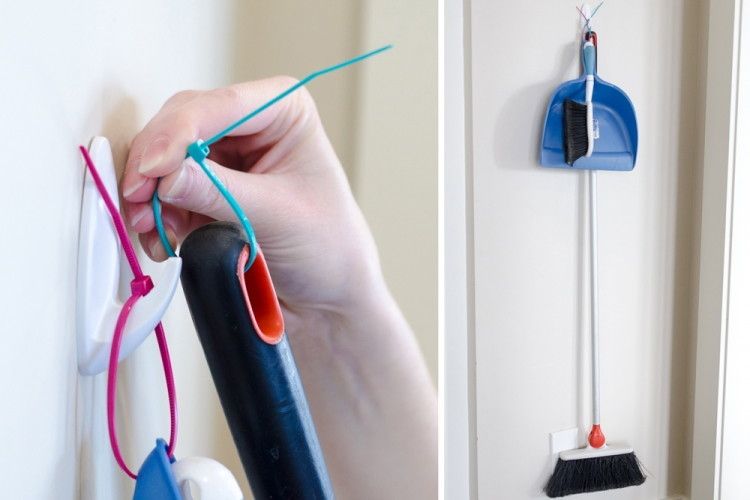
Using plastic clamps in the country
In the heat of summer shower at the cottage are actively used. Curtain rings are made in a few minutes from clips:
- pass through the eyelet;
- fasten the lock;
- cut off the unwanted tail.
With the help of plastic clamps, beautiful fences are built around seedlings of apple, pear, and plum trees. In addition to them, wooden pegs and a plastic mesh are used. Stakes (0.5 m) are driven in along the perimeter of the trunk circle, clamps are nailed to them with small nails, and the mesh is attached to the frame with them. Openwork fence protects young trees from pets and small children.
Note! For a summer terrace, it is easy to make a lampshade from multi-colored clamps, the shape of which will depend only on the imagination of the master.
Plastic clamps are used when preparing brooms for a bath. They quickly fasten birch, oak, linden branches into bunches. During drying, they are used to attach brooms to a wire, a thin pole, an iron pipe, or another horizontal support.

During a fun picnic with kids, plastic zip ties quickly make a bunch of bubble rings. To make it comfortable for babies, leave long ponytails.
You will need:
My beautiful paths in the greenhouse and gardenSafe and comfortable movement in the country will provide paths between the beds, made by hand. Exists…
Types of locking systems for disposable ties
Clamps are equipped with the following types of locks:
- standard;
- lock with a metal tooth;
- ball;
- reinforced.
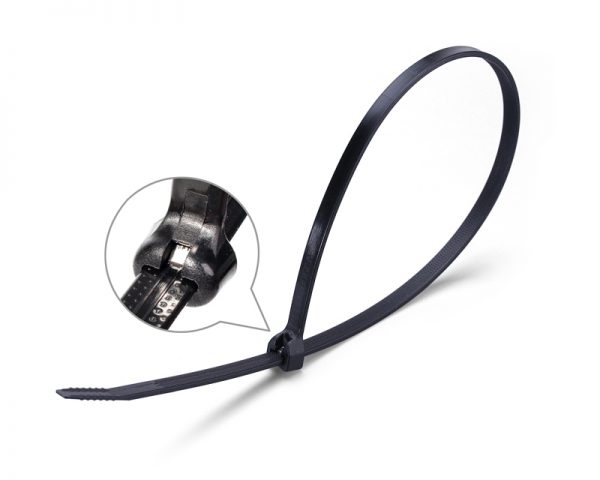
The principle of operation of a standard lock
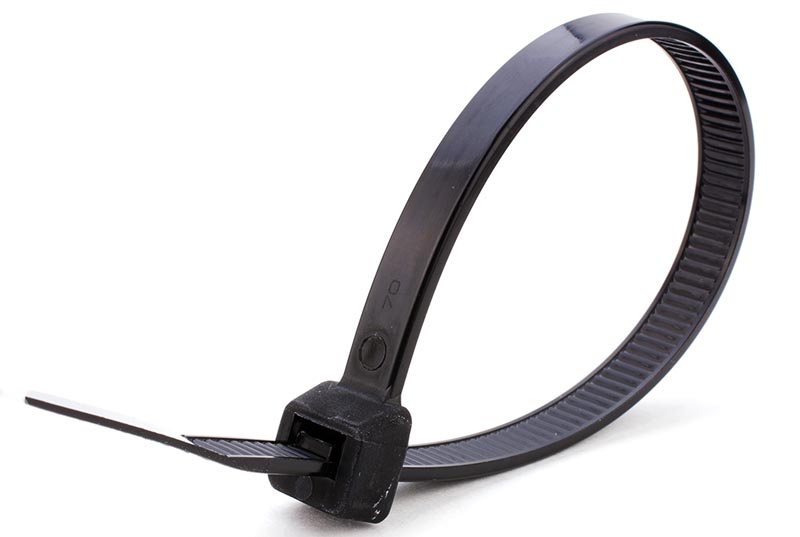
A cable clamp is a strip of plastic or metal with sawtooth protrusions on the inside. At one end there is a lock, which is a head with a built-in latch. On the latch on the inside, sawtooth protrusions are applied.


After it is wrapped around a bundle of wires, the free end is brought into the lock. For this, there is a special slot between the latch and the lock body. When tightened, the tabs on the strip engage with the tabs on the retainer. There is no reverse movement in the device. The tightening is done in steps.
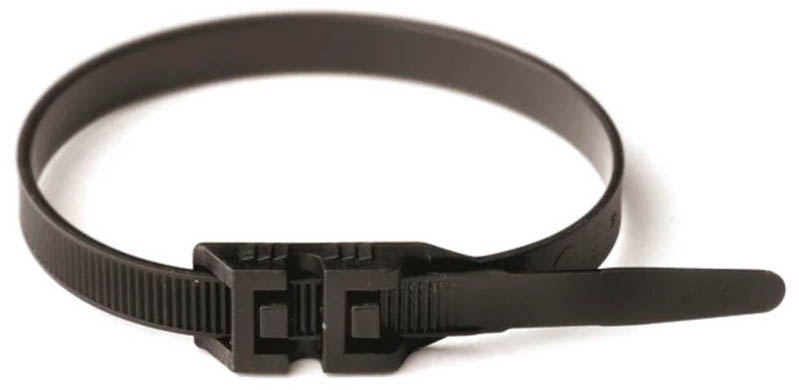
The principle of operation of the lock with a metal tooth
A metal plate, or tooth, is mounted on the inside of the locking system of the plastic bandage. The plate is made of stainless steel. The tooth is located at an angle of 45 ° to the strip and has a sharpening on one side.
Screed with metal tooth
During the tightening of the wire bundle, the strip moves freely in the lock. During the reverse movement, the tooth cuts into the strip and blocks its movement. The tightening is performed smoothly, which allows you to more accurately determine the degree of tightening.
How a ball lock works
Used in metal bandages.The lock system has a cone-shaped metal case, inside of which there is a metal ball. When contracted, the band pushes the ball out into a wider area. During its reverse course, the ball moves to a narrower part and jams the strip. Thus, a reliable fixation is obtained.
The principle of operation of the lock for a reinforced clamp
In these types, the sawtooth protrusions are on the outside of the nylon strip. The lock of such a system has larger teeth than in standard ties. Also, its design differs from the standard one (it has a parallel locking alignment). Clamps are available with single and double locks.
This is interesting: NShVI ferrule for crimping wires: we illuminate in detail
Which cable ties to choose: types, types, characteristics, application features and rules of use
When performing various minor installation work, cable ties sometimes become simply necessary. We will talk about which cable ties to choose, and what they are.
Varieties
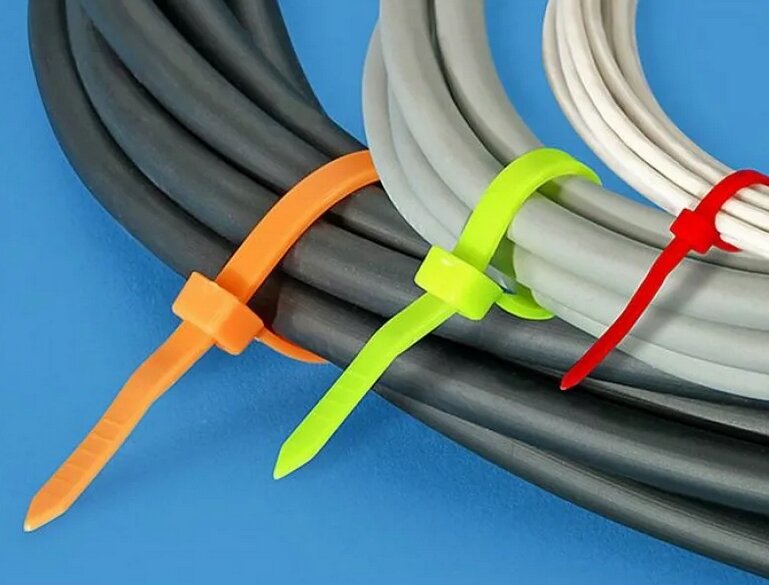
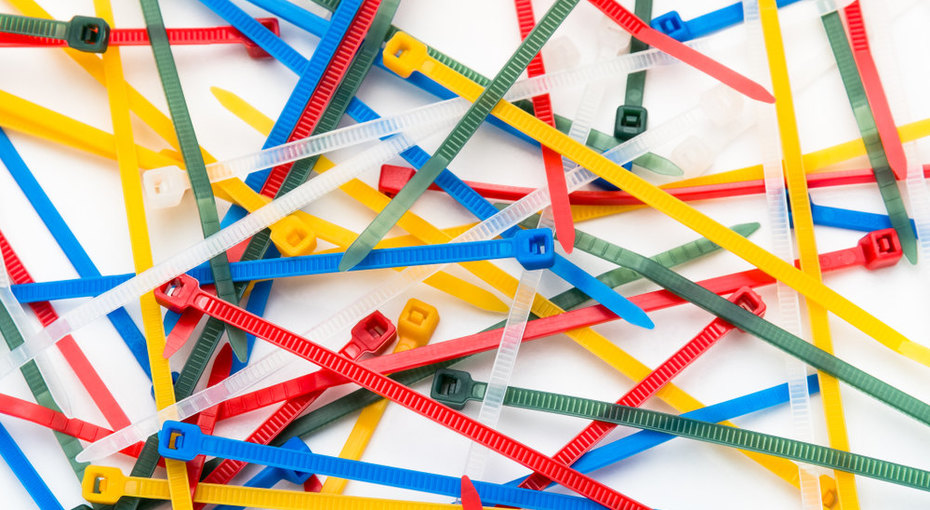
If you didn’t have to face it personally, then at least you should have seen a photo of a cable tie, and therefore you already know what they look like. They can differ in width and length. It is from these two characteristics that the load for which they are intended depends.
Surprisingly, such a trifle as plastic ties is a very handy tool for organizing cables and various wires.
If you do not have a large tie, then you can take several small ones, connect them together, and then use this design to attach several large wires or a whole bundle of smaller ones.
For home and outdoor
In addition to the load, there is a division according to the place where they are used. Screeds for outdoor work better tolerate solar radiation, moisture and temperature changes, since additional chemical elements are used in their creation. A similar result is most often achieved by adding charcoal powder, which causes the screeds to turn black.
It is worth noting here that not all black ties are suitable for outdoor use, there should be a special mark on the package, because the ties may simply be with a dye.
For interior work, simple zip ties can be used, and they come in a variety of colors to help you arrange different wires.
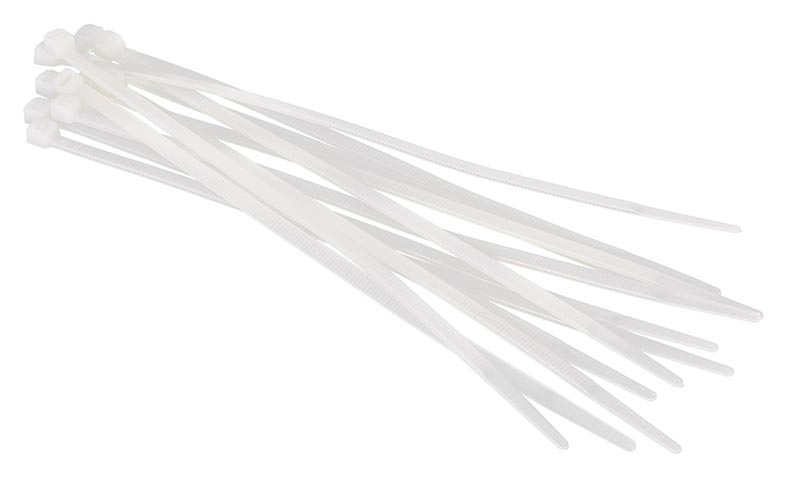
Disposable and more
Regardless of the size, cable ties are disposable, which means they will need to be cut to remove, and reusable, which can be opened and reused.
The disposable ones are cheaper, and are good for quick fixing or marking individual groups of cables. Their design is very simple - at one end there is a lock, which is fixed due to the grooves that are on the inside of the tie.
They are best used in conjunction with a special tightening tool, which can immediately cut off the excess part of the tightening near the base of the lock.
Reusable screeds are more expensive, since a special mechanism is added to the design of the lock, which helps to open it to deploy the screed.
In addition to the price, the disadvantages include the fact that such ties are not recommended to be cut, if desired, reuse, which is sometimes very inconvenient.
Design differences
In addition to all of the above, a cable tie clamp may also differ in its design, but more seriously than the presence of a lock pick.
To begin with, some screeds are made heat-resistant, to work in places with high temperatures for long periods. Usually we are talking about temperatures up to one hundred and twenty degrees Celsius. They are in the category for outdoor work.
Next come the clamps, which have mounting hole with a screw or screw. It is placed on the very edge of the screed, and after it comes the lock itself.
Reinforced clamps come with a slight improvement to increase strength. Such cable ties are reinforced with a metal base, or stainless steel, in addition, in such designs they get rid of the teeth.
No less interesting are the screeds, to the design of which a dowel is added. Usually it is located between the lock and the teeth, and first the dowel itself is installed in the hole, and only then the clamp is tightened.


If you need extra strong ties that can be used at high temperature, and at the same time be very durable, then pay attention to the clamps with a double lock. These cable ties come in nylon due to the strength of the material, while the double lock provides the most secure fixation in any external conditions.
Let's return to the topic of dowels, since there can be not only a built-in dowel, but also a platform for it. In the kit of such a screed there is a clamp, a dowel and a platform that is screwed onto it. This is a very handy tool when working with wood and concrete, since you can refuse to use self-tapping screws or screws when attaching wires and even some types of pipes.
There is another rather convenient, but at the same time very interesting option - ball ties. They can be reused due to the design of the lock, which has a tapered hole through which the ball tape passes.
In addition to everything that we have listed, there may be another small difference - the castle. It can be not only horizontal, but also vertical. These are also reusable ties, which have a less massive opening mechanism, and are also more convenient to use.
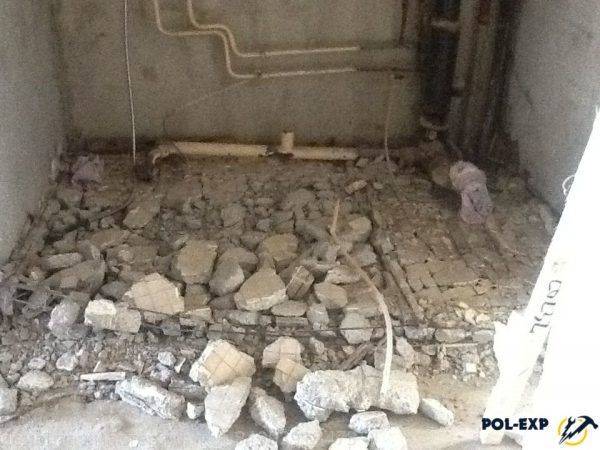
Problem - the floor burst
If the coating crumbles or bursts, it is important to quickly deal with the problem. Only after that you can lay the decorative material
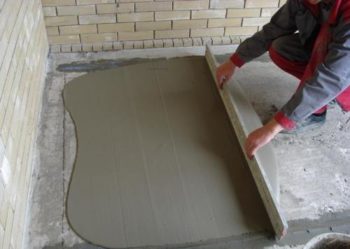
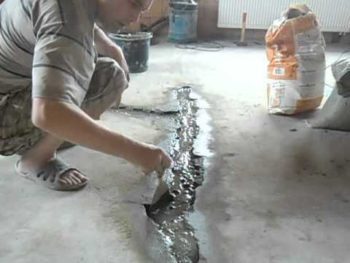
Cracks appear on the floor if the compaction of the concrete is done incorrectly. This leads to the appearance of air pockets. If a problem has arisen, it is worth removing the screed to the cavity, filling it with a solution.
Sometimes it is difficult to find a cavern. To do this, the crack is widened. The solution is knocked out with a pick, and the walls of the recess are primed, then re-sealed with a solution. The composition is represented by cement and sand in a ratio of three to one. Before pouring, the old concrete is moistened with water.
 floor repair
When the solution is filled, it is compacted by piercing with a metal rod. Before the screed dries, the room must be maintained at a low temperature to prevent cracks from reappearing.
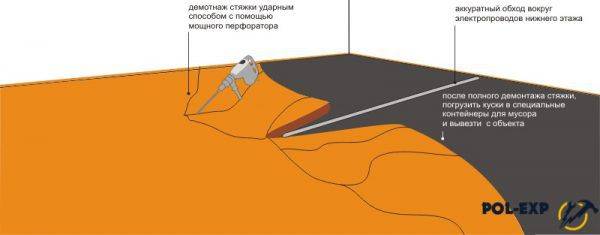
Dismantling - relevance and features of carrying out
If the screed is a solid and reliable foundation that can be used for a long time, then why does it sometimes have to be dismantled? Why do some homeowners decide that they need to remove this old foundation? The fact is that even the strongest and most reliable materials break down and deform over time. And the best option in this case is not to fix or repair the old screed, but to remove it and make a new base.
When required floor screed dismantling
In general, the dismantling of the screed is carried out in the following cases:
- destruction and deformation of the old foundation;
- the appearance of a large number of cracks on the surface;
- incorrect installation;
- floor level reduction is required;
- installation of a warm floor;
- repair of communications inside the screed or under it is necessary;
- long term use of the old screed.
Dismantling the screed is not an easy process. It requires the use of certain equipment, and it is also desirable to have some experience in parsing floors. However, not everyone has such knowledge, and therefore it is often necessary to study everything on your own, based on the experience of other people. Fortunately, you can study the dismantling of the screed yourself and carry out all the work without the help of specialists.
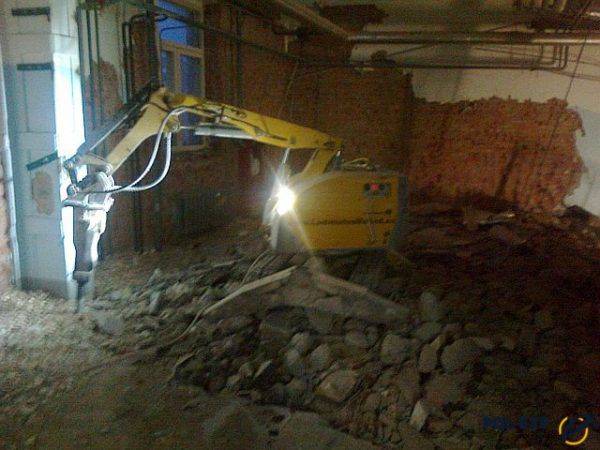
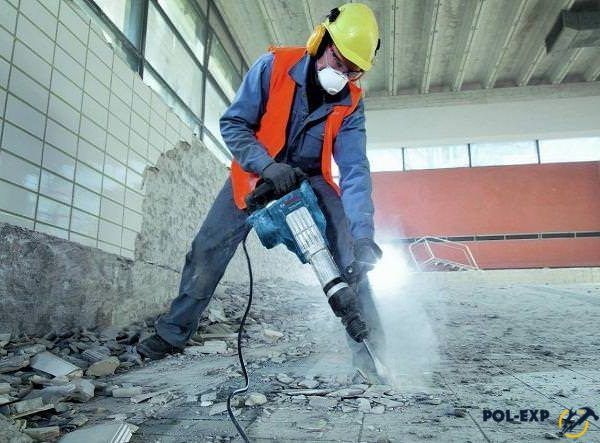
Dismantling the screed with a jackhammer
However, before proceeding with dismantling, it is important to make sure that the old screed is definitely no good for anything. When removing the old coating, it must be remembered that there is a high risk of damaging the main floor, as well as disrupting the communications system
Therefore, all work must be carried out very carefully.
Dismantling the screed - photo
In general, the requirements for the screed layer are regulated by documents - SNiPs "Floors" and "Insulating and finishing coatings".Also, for the dismantling of the base, in some cases it may be necessary to collect a certain package of documents.


All requirements for floor screed are regulated by the relevant regulatory documents
The use of a grinder
Using a grinder, you can fix defects in a concrete or wooden floor. Before grinding, the concrete base must be thoroughly cleaned of dirt, remove the top layer of the screed. Then the existing mixtures are repaired with ready-made mixtures. cracks or seams. The next step is to tap the base for voids. In the presence of tubercles and potholes more than 5 mm. they are knocked down before grinding.
Grinding itself is carried out in several stages, each of which uses different abrasives and impregnations. Coarse-grained abrasives are used for rough finishing. Then hard-to-reach parts of the room are processed. Finishing polishing (if necessary) is carried out with a fine abrasive tool.
Selection tips and approximate prices
What parameters should be considered when choosing plastic holders?
First of all, they proceed from the purpose and material of the pipe elements. Lightweight plastic clamps and clips are only suitable for polymer wiring. Clip-on clips are used for fastening only to walls and floors. You need to fasten the channels to the ceiling with strong metal clamps and bolt fixing.
In some cases, you should pay attention to the fact that many clips, clamps and brackets move the outlets away from the wall. This is necessary for ease of installation. shut-off and control valves, various fittings, possible putting on a heater pipe
Dismantling a concrete floor screed: an overview of methods and costs
There are several options for getting rid of the old screed.They differ in the complexity of the work and the use of certain tools.
Screed dismantling scheme
Table. Types of dismantling works (screed).
Way type
Description
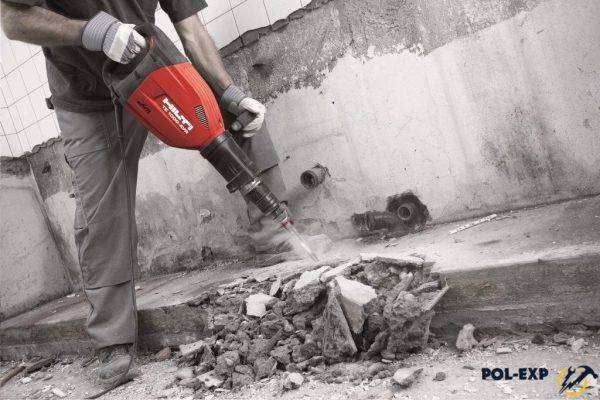
Shock
The most familiar and easiest way to get rid of the old screed. In this case, a jackhammer is used, a grinder and a perforator can also be used.
However, you should work with a hammer very carefully and carefully - in some situations, such a tool may be prohibited for use (for example, if there are reinforcing elements in the screed). Very noisy and dusty method, but the cheapest
The productivity of the jackhammer is 50 sq.m. for 8 hours.
Drilling and cutting
The amount of dust in the case of using this method is minimal. Yes, and the noise will less interfere with the neighbors to lead a quiet life, which is important for apartment buildings. It is most often used if it is necessary to remove not all, but only a small section of the screed. The risk of destruction of floors is minimal.
diamond cutting
The method is suitable for dismantling screeds of any thickness and strength. It is also quite often used when dismantling in apartments. To work on this technology, you will need a stable power source and access to water supply system - water needed to cool equipment and reduce the amount of dust in the air.
The screed can be dismantled either completely (removed from the ceiling cleanly) or partially (only a certain thickness of the layer is removed or a selected piece of the screed is removed).
Also, dismantling is sometimes carried out using special robotic machines.Of course, the productivity and efficiency of the whole process is significantly increased, but such machines can only be used to remove massive thick screeds with a reinforcing layer and a thickness of at least 10 cm. In other cases, the use of robots is impractical.
Using a special robot to dismantle the screed
The cost of dismantling works for specialists depends on the following factors:
- thickness of the screed layer;
- the material from which the base is made;
- are there communications inside the screed, a reinforcing layer and additional elements;
- dimensions of the room where the work is done.
Therefore, experts will be able to accurately answer the question only after assessing the entire scale of the work.
Table. Average prices for dismantling works (screed).
| Thickness cm | Cost, rub./sq.m. |
|---|---|
| Up to 4 | 150-400 |
| 5-6 | 220-500 |
| 7-8 | 300-600 |
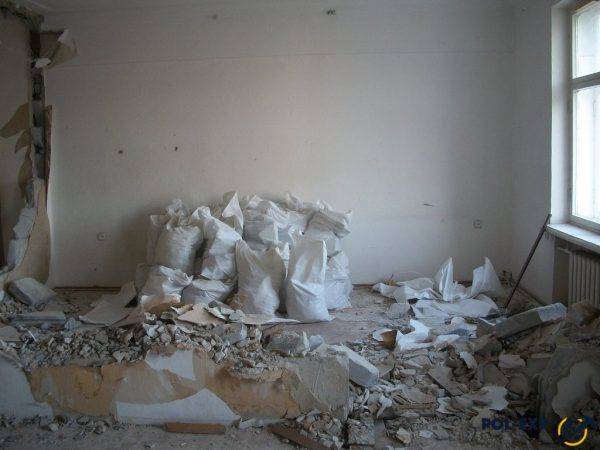
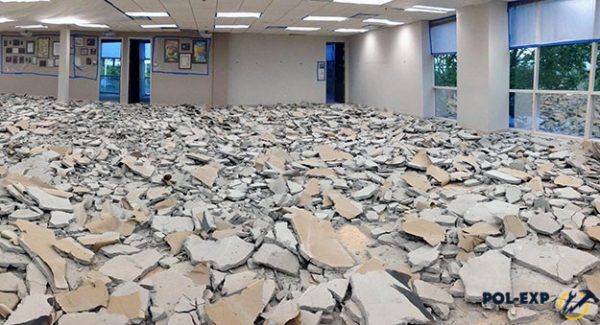
Garbage after dismantling the screed
Based on this, we can conclude that dismantling the screed is a very expensive job if the room is large. Therefore, many people decide to do the work themselves. Especially when you consider that, as a rule, you have to dismantle a reinforced screed, about 50-100% of the cost is added to the total amount.
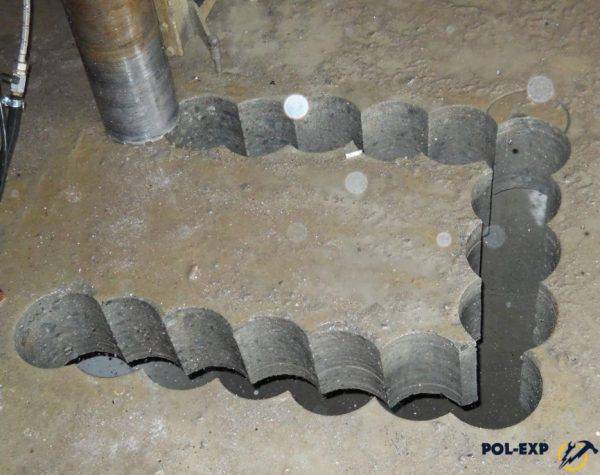
diamond drilling
The problem of product fragility
During the work process, defects in the product may appear. This refers to the fragility, or flexibility of the product.


The main danger lies in the strong temperature difference. After all, at low or high temperatures, the balance of humidity is disturbed. When choosing a product, it is worth focusing on the hygroscopic nature of nylon:
- before the direct start of the workflow, open the package;
- after use, it is worth sealing the bag hermetically.This applies to those cases where the subsequent use is postponed for an indefinite period of time;
- the photo of nylon ties shows that high-quality products should be stored at normal humidity temperatures, in a warm room. These procedures will ensure a longer shelf life.
four ways
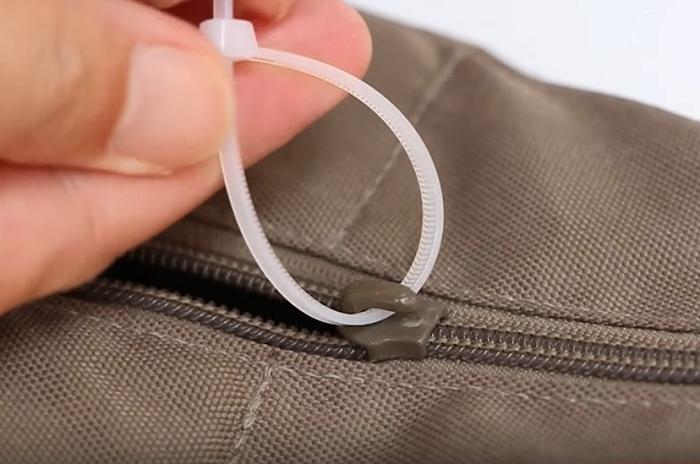
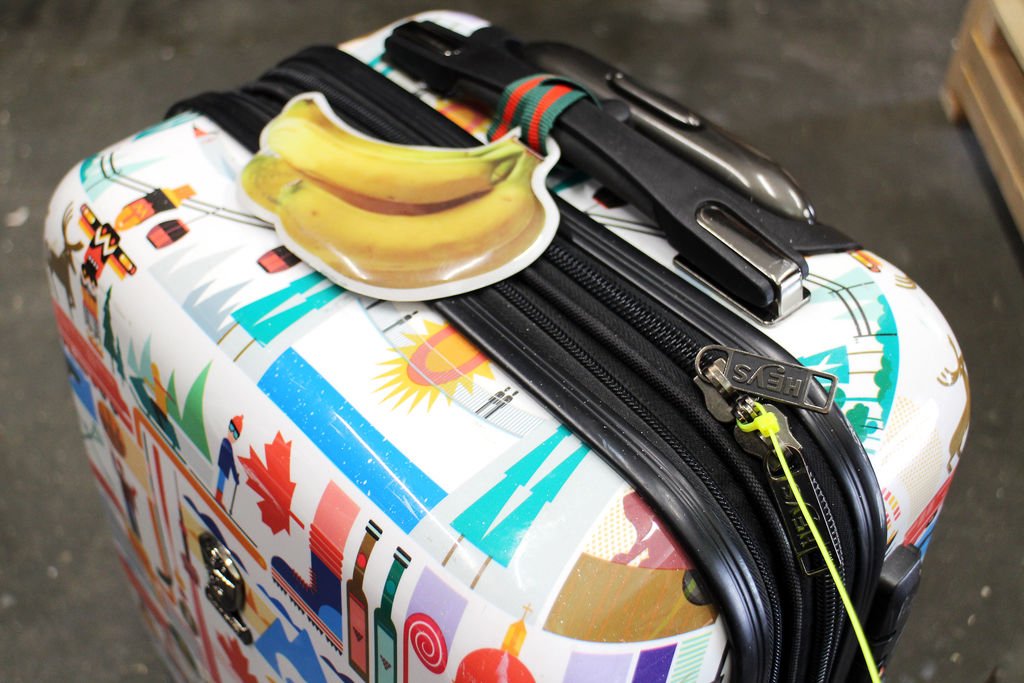
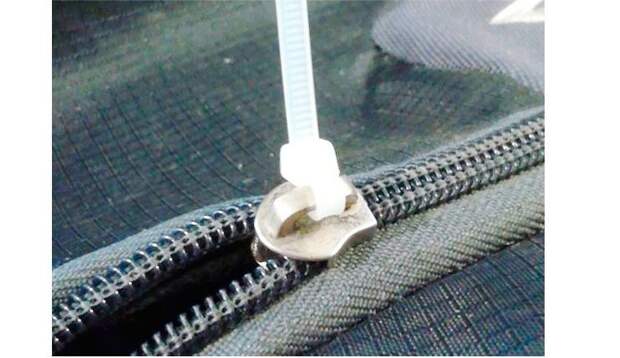
Going on vacation by plane, think about the safety of luggage. To prevent the runners on the travel bag from moving apart, the tongues are connected with plastic ties. Such fastening does not allow lightning to disperse.
Note! A broken bright latch on the luggage indicates a break-in.
A plastic collar is used by amateur photographers. It is fixed on the adjusting ring. Holding on to the tail, like a handle, it is easy to adjust the lens.
The screed is used in the kitchen. It helps protect your hands from burns. To do this, the clamp is attached to the handle of the pot (frying pan). The tail is made as long as possible so that when opening the steam does not burn the skin.
So that during operation, round-shaped tools (drill, screwdriver) do not roll out in different directions, they are put on a coupler, and the tail is cut off. To make it easier to distinguish between tools, you can use clamps of different colors.
You will need:
My version of a holder for a strawberry bushPractical and simple props for strawberries with your own hands will help preserve berries, get a rich harvest, improve ...
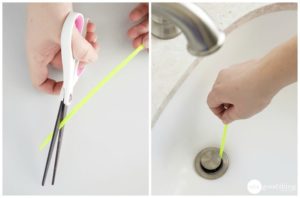
The use of plastic clamps is not limited to one time. Many people reuse them. Open the latch with a needle or other sharp object.
Important!
How to get rid of cracks?
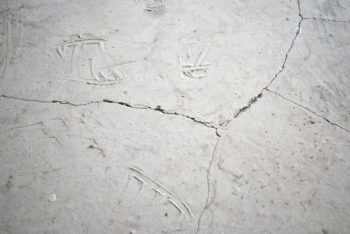
The floor screed can crack due to a variety of factors.Initially, you will have to determine the main cause of the formation of cracks and only then proceed with the repair. The screed crumbles if the composition is incorrect due to insufficient or excessive amount of water in the initial solution, or if it dries too quickly. Another possible reason is the lack of expansion joints or damper tape.
 Correction of floor defects
According to the cause, the methods for repairing a floor crack are different. To solve the problem with expansion joints, cuts are made on the shrinkage joints. It should be borne in mind that the depth of each of them should be more than a third of the thickness of the base
It is important to take care of the optimal step, reaching five meters. Subsequent sealing is carried out using polyurethane sealant
If a crack appears, it is expanded by making a strobe. Next, dust is removed from the walls and primed. For embedding, a non-shrinking mortar is used, which is applied with a spatula. Minor cracks can be left by choosing the right flooring. You can lay tiles that look spectacular and eliminate any flaws.
For sealing cracks a solution of cement, PVA glue and water is also suitable. The ingredients are mixed together, the solution is poured into the slot. Start laying the selected floor covering only after the mortar has hardened.
 How to fix the floor
What is a plastic screed, and how one of them differs from the other
Plastic ties are products with which you can collect several wires into one bundle and fix in this position. They are a narrow band with a lock.
 When choosing plastic ties, you should look not at the color, but at the material and design of the lock
Often, home craftsmen refuse plastic ties in favor of electrical tape or metal clamps. The reason for this is the purchase of extremely cheap products of poor quality. However, it happens that the craftsmen themselves use plastic clamps incorrectly, which leads to the fact that the lock breaks. Let's try to figure out how to choose plastic ties of acceptable quality at a low cost.
 Some craftsmen do not trust plastic ties, preferring the usual electrical tape to them.
Differences of screeds according to the material of manufacture
The material for the manufacture of the screed can serve as:
- Polyethylene.
- Nylon.
- Polypropylene.
As for the first option, such ties are only suitable for temporary fixation. Don't expect them to last more than a year. But nylon and polypropylene products have greater durability. In addition, they are not afraid of direct sunlight, which can also be called a plus.
 The cheapest polyethylene products are with a standard lock, you should not expect much from them
What are the locks on plastic ties
The most familiar for home craftsmen are standard locks. They look like a small loop located at one end of the clamp, inside it is a tongue. Along the entire length of the clamp, transverse notches are applied, for which this tongue clings. Plastic ties with similar locks are the cheapest, but their quality leaves much to be desired.


Standard retainer with metal insert
In fact, this option can be compared with the previous one, but it is more reliable. As a fixing tongue, not plastic is used, but metal (most often stainless steel). Be careful when tightening these clamps.You need to pull the clamp smoothly, in order to avoid a break.
Clamp with reinforced lock
This view can also be compared with the standard one, only two brackets are already used for the lock. This allows you to increase the reliability of fixation.
Plastic ties with ball locks
Probably the most convenient plastic clamp locks invented to date. The plastic ball (the entire clamp consists of them) passes into the hole, but it can no longer go back, falling into a narrower slot.
 Ball locks are very easy to install
Velcro lock and its features
This option is suitable for those cases when it is planned to add cables or wires to the bundle later. These reusable collars are extremely convenient.
 Velcro - the most convenient reusable lock of all listed
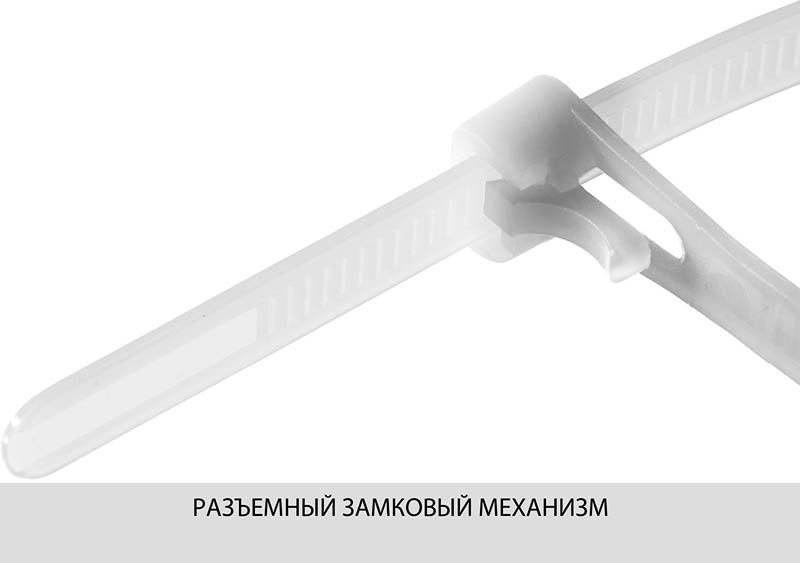 Reusable locks can be of a different design
Features of the dismantling of the floor screed
Dismantling the screed is literally breaking the coating into separate pieces of small sizes, which are then thrown away as construction waste. In this case, the process begins with a number of preparatory work, which will be discussed below.
Depending on the thickness of the screed and the material from which it is made, as well as on the amount of work, the choice of technology for removing the base is also made. It can be only hand tools (just a hammer and a chisel) or, conversely, equipment (a jackhammer). Sometimes an ordinary puncher and a special nozzle-shovel to it are enough to cope with the base. However, the perforator can only be used in small areas.
How to dismantle the floor screed
All work will have to be agreed with the neighbors if they are carried out in an apartment building, since in the process of dismantling the screed, in any case, there will be a lot of dust, debris and, most importantly, noise. Not everyone is ready to endure the roar of equipment over their heads
Therefore, even if the neighbors have given their consent to the work, it is important to carry it out during the daytime on weekdays, when everyone is at work.
It is good if, after laying the old screed, it was possible to save its scheme. The fact is that there may be communications inside the base and they are usually marked on the drawing, if one was created. Knowing where they lie, you can avoid damage to wires or pipes.
It is also important not to overdo it and not damage the floor slabs and walls during the work.
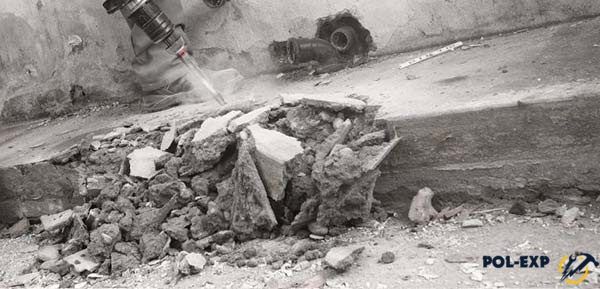
Photo of the dismantling process


