
- patterns on the windows
- Advent Calendar Making Tips:
- Tasks for the advent calendar:
- What gifts to put in the New Year's advent calendar?
- Master Class
- How to decorate doors and windows with your own hands
- Desk calendar
- pp. 50-51. Wonderful flower gardens in autumn
- Page 56-57. bird secrets
- Games with children for the New Year
- New Year's games for children 2-3 years old
- New Year's games for children 4-5 years old
- Decorating toys, walls and dishes with lettering
- universe, time, calendar
- Page 3 - 5 - We are the union of the peoples of Russia
- Calendar in Calendar Design
- We study the calendar with children. How to make a children's calendar
- How to make a children's calendar
- Some rules
patterns on the windows
To create a festive atmosphere without spending a lot of time and money, special easily washable glass paints and stencils allow. Of course, it is not necessary to do the painting exactly on stencils - you can try your hand at "free art". But templates make things a lot easier.
There are two types of stencils:
- from thin paper (foil, colored film), pasted on glass;
- made of dense material, used as a template for spray or conventional paint.
When choosing the first option, you will need:
- paper (film, foil) with outlines of future jewelry printed on a printer or translated using carbon paper;
- scissors and stationery knife;
- cutting board;
- "glue" based on soap solution. You can use regular or liquid soap.
The drawings cut out with scissors and a clerical knife (they can be pre-colored) are applied to the glass moistened with soapy water. After drying, the stencils are kept for a long time. To remove them, it is necessary to moisten the paper parts and carefully remove them from the glass, if necessary, scrape off stubborn fragments.
Ready-made or personally made stencils, combined with artificial snow, make an excellent decor for windows, door glass and mirrors. The decoration procedure can be carried out with children.
Interesting DIY Christmas decorations can be made with using ... toothpaste! Here you will also need already cut or purchased stencils and an aqueous solution of toothpaste.
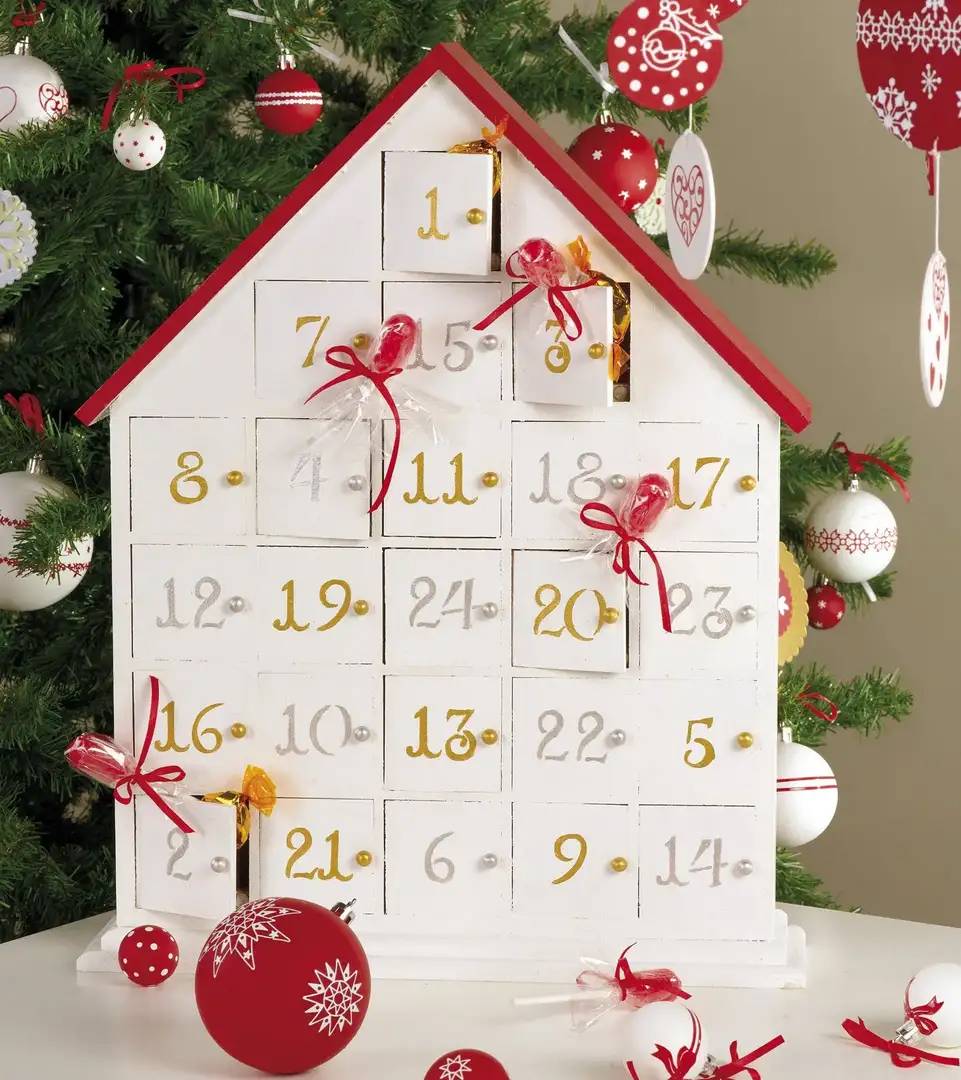
Advent Calendar Making Tips:
- Before you start making a calendar, carefully look at the list of tasks and buy everything you need: art materials, gifts for the child.
- Do not make a calendar for one day. Soon you will get tired of gluing boxes or signing worksheets. Schedule a few days for this.
- When choosing the number of days for New Year's tasks, consider the age of the child. The younger the child, the fewer days should be. For example, for a baby of 2-3 years, 5-7 days are enough, for 4-5 years - 10-14. A calendar with tasks for a whole month is better to start from 5-7 years.
Tasks for the advent calendar:
(Here you will find a detailed list of tasks, part with photos, links and tips on where to buy).
-
- Learn a New Year's poem.
- Reading Christmas books. In the Labyrinth:
- Make Christmas cards with your own hands and send to relatives and friends.
- Creativity on the theme of winter: make crafts, draw a Christmas tree using homemade stamps, do modeling (templates here).
- Make ice Christmas decorations and hang them on the Christmas tree in the yard.
- Try painting in the snow.
- Write a letter to Santa Claus. A set with a mailbox, envelopes and letterheads can be found in My Shop, in the Labyrinth.
- Make a bird feeder.
- Using a special rolling pin (Aliexpress), prepare cookies with a New Year's pattern. Children will appreciate!
- Prepare children's winter drinks (fruit tea, cocoa or hot chocolate)
- Solve New Year's riddles.
- Make a snowman.
- Go to the New Year's Fair or the most elegant New Year's Eve square in the city.
- Watch cartoons and family films about New Year and Christmas.
- Learn about the traditions of celebrating the New Year in different countries.
- Make and color salt dough Christmas tree ornaments (recipe here).
- Arrange a shadow theater by cutting out fairy-tale characters from paper and inventing a New Year's story.
- Take the whole family to the skating rink or go skiing.
- Arrange a family photo session.
- Decorate your home for the holiday: make a garland, stick snowflakes on the windows, etc. A great idea is to decorate mirrors with ready-made reusable glass stickers (Labyrinth, My Shop, Aliexpress).
- Make an Antarctic sensory box.
-
- Assemble the "winter puzzle".
- Make a wish and launch a sky (Chinese) lantern together.
- Use logical and creative tasks from books like these:
- Make a New Year's photo book.
- Make snow-covered twigs with a saline solution.
- Make a "Christmas tree of desires" - the baby leaves prints of green palms on paper, then cut out the palms, stick them on cardboard in the form of a Christmas tree and fill them with wishes.
- Do a good deed (for example, take part in charity).
- Paint a large New Year's coloring book (download here).
What gifts to put in the New Year's advent calendar?
- Sweet gifts;
- A ticket to a Christmas tree, a performance, to a circus;
- Carnival or elegant costume (immediately before a matinee in kindergarten or a festive tree);
- New Year's books (in the Labyrinth);
- A set of New Year's coloring cards (in the Labyrinth);
- Crayons, stamps, stickers, stencils and other art supplies;
- Coupon (made by you) for 3 purchases in the Fix price store;
- A large box with balloons inflated with helium (when the baby opens it, the balloons will scatter very beautifully around the room);
- Beautiful candle;
- Chinese sky lantern, sparklers;
- Children's calendar for the next year;
- Christmas tree toy;
- Beautiful children's mug or plate with your favorite character;
- Set for painting on ceramics or plaster;
- Set for soap making;
- Crystal Grow Kit;
- Sets for growing Christmas trees and toys from crystals (in the Labyrinth, in the Mai-Shop);
- Figures for the shadow theater (pre-prepared by you);
- Torch;
- Binoculars;
- fridge magnet;
- Fan;
- Hourglass;
- Children's cosmetics;
- The game "Christmas tree. Ancient fun ";
- New Year stickers;
- Hair clips for girls;
- Puzzle on a winter theme;
- Lip balm for girls;
- Funny socks and mittens;
- New Year's coloring poster;
- Face painting set;
- Rubber bands for weaving;
- Magnifying glass to view snowflakes;
- Glasses, nose, carnival wig, mask;
- Confetti, serpentine, crackers, sparklers;
- Temporary tatoos;
- Slimes, rubber jumper balls, expander balls.
- Board game:
Surprises can be much larger than calendar windows / boxes (probably books in the first place). Then you need to prepare a map in advance or just hints, according to which the children will find a gift hidden in the house.
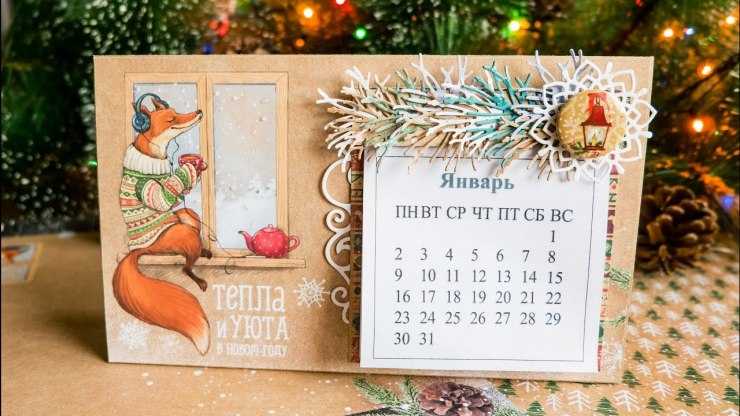
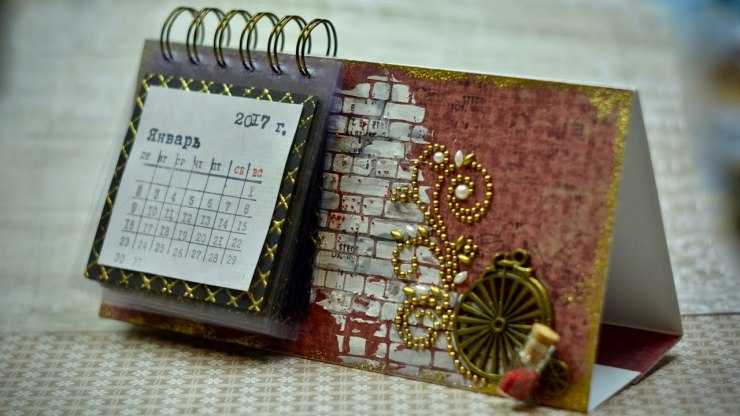
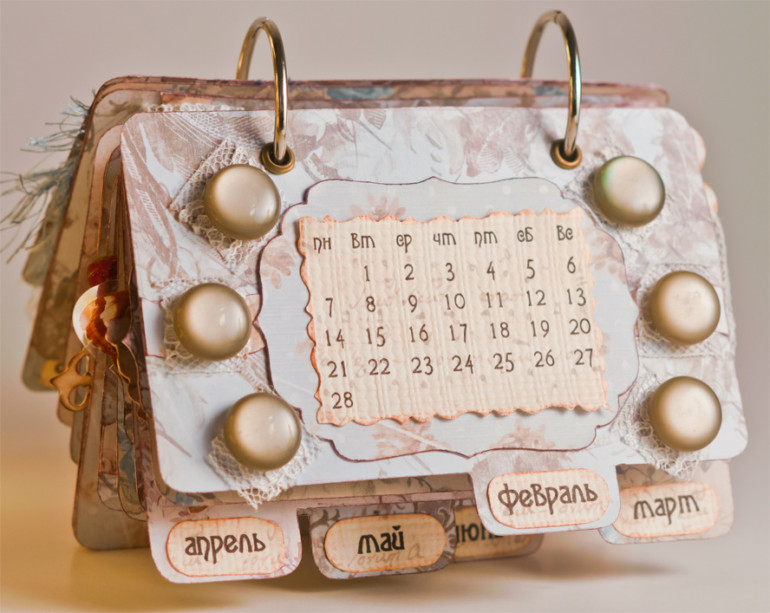
Master Class
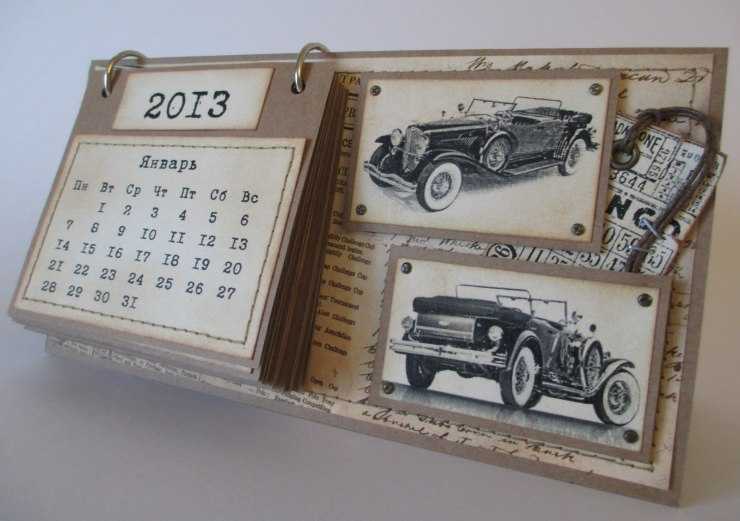
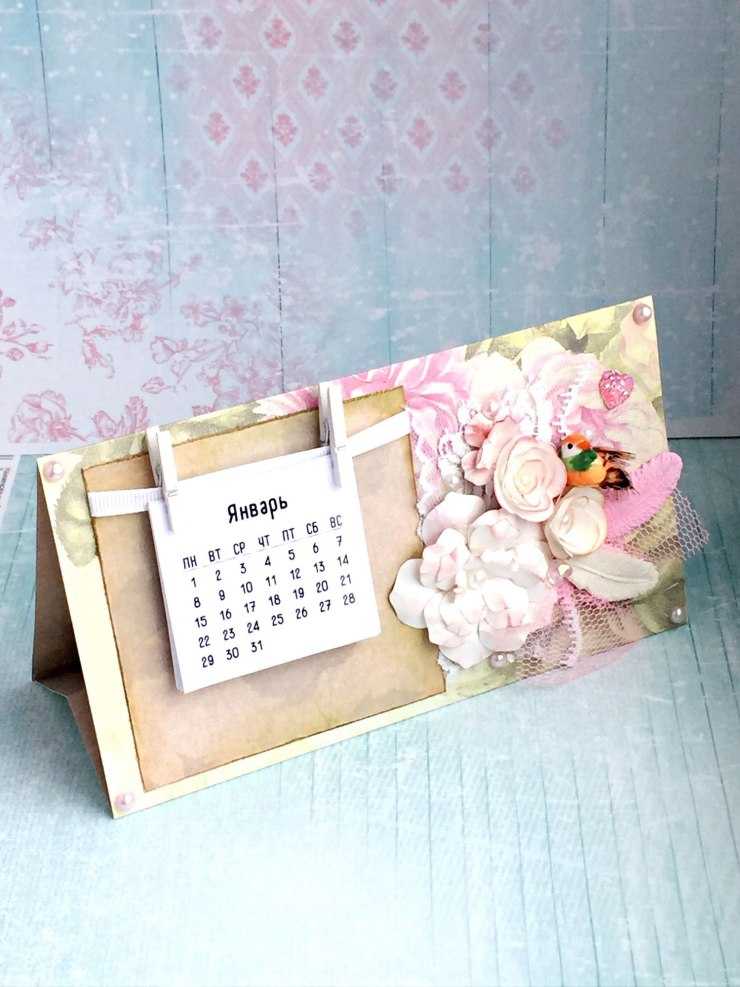
The simplest option is a small desktop scrapbooking calendar. We create it in the following way. Cut out 2 rectangles from cardboard. from kraft paper we do the same, but the blanks should be larger (by 3 cm). We glue the blank to the cardboard with glue, bending the edges.
Next, take the scrap paper and cut out 2 rectangles (4 mm less than the cardboard blank). We cut the braid into two pieces (13-14 cm). We connect it with cardboard blanks with glue. Then we attach the scrap paper to one of the blanks (this will be the “back” side).
Now let's proceed to the outer one: glue lace, metal pendants and a picture with an image. We take a thick needle, pierce a hole in the upper right part of the calendar and tie it with a dense thread (string will do). We perform similar actions on the left side. Next, take a clothespin, attach it to the outside of the calendar with double-sided tape. She will "hold" the calendar grid. On the back of the product, you can from colored paper make a "pocket" for storing calendar pages.
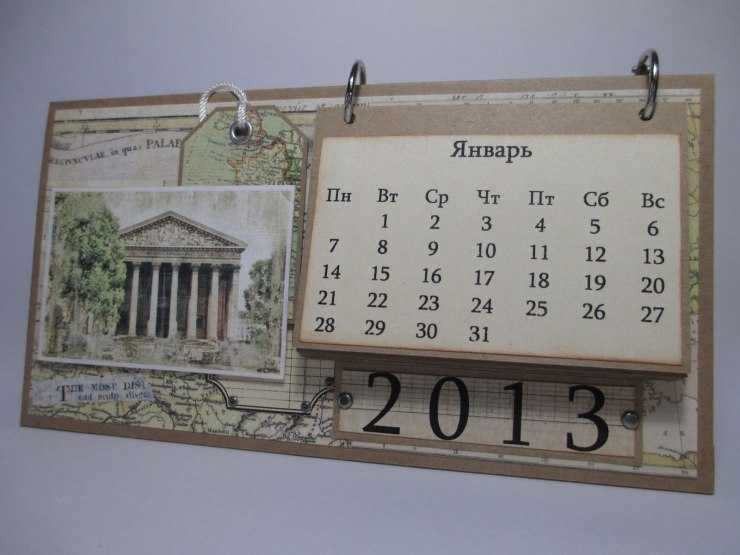
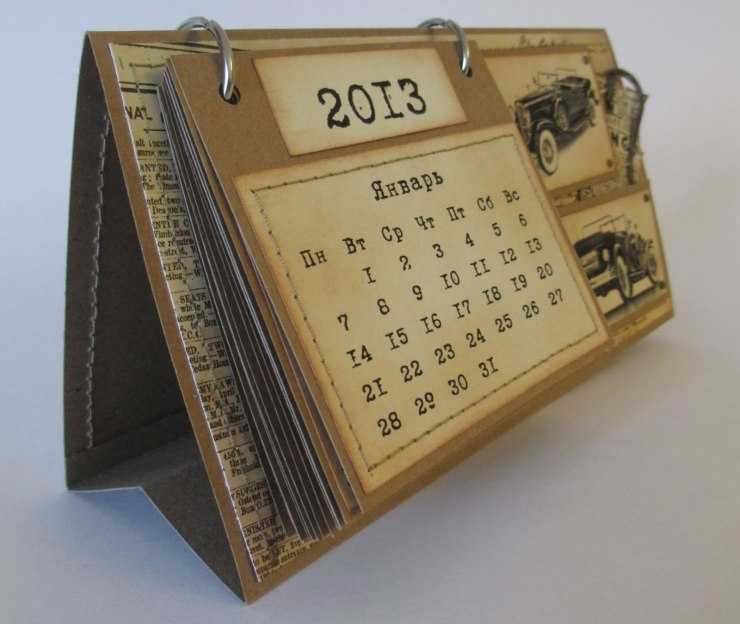
This technique also involves the creation of flip and wall calendars. It's easy to make them. The main thing is to show imagination and be patient. Such a handmade product will look great not only in the living room, but also in the kitchen or in the children's room.
To create a flip calendar in the scrapbooking style, we take:
- scrap paper with the effect of "old times";
- transparent glue "Moment";
- miniature beads, satin ribbons and lace;
- "calendar" papers;
- ruler;
- Images;
- cutter;
- stamp pad;
- double sided tape;
- decorative flowers;
- hole puncher;
- lace stripes.
Cut out 12 rectangles from cardboard, round the ends. We do similar manipulations with scrap paper. We customize each background to fit cardboard blanks and paint with an ink pad. We glue scrap paper on cardboard and proceed to the design of each "sheet". They will be made in a theme that corresponds to a certain time of the year. For example, we decorate the summer months with decorative flowers and sunny images, and the winter months with snowflakes or Christmas decorations.
So, in the right corner of each blank we attach a calendar paper with a certain month, and decorate the left one. We should get 12 different scrapbooking blanks. The thirteenth blank will be the front side of the calendar. We make it by analogy with the previous "pages" of the product. Glue a bright picture with red flowers on the right side.
Then we take a volumetric adhesive tape and glue the name of the calendar, tinting on the sides with scarlet acrylic paint. We decorate the left side of the cover with tulle roses and bright beads. Next, we connect all the pages and make holes in the upper corner on the right and left sides with a hole punch. We take special metal rings and insert them into the holes. We have a very colorful and voluminous flip calendar.
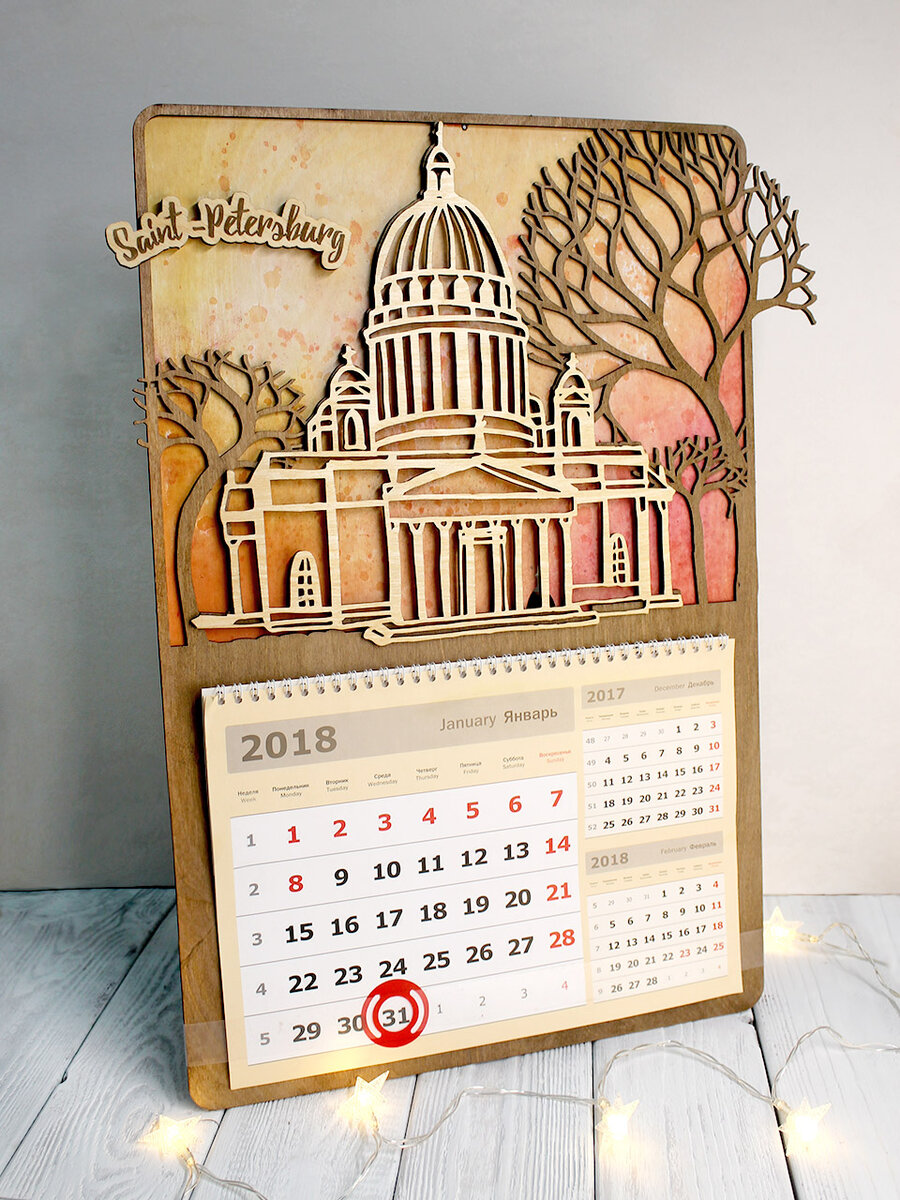
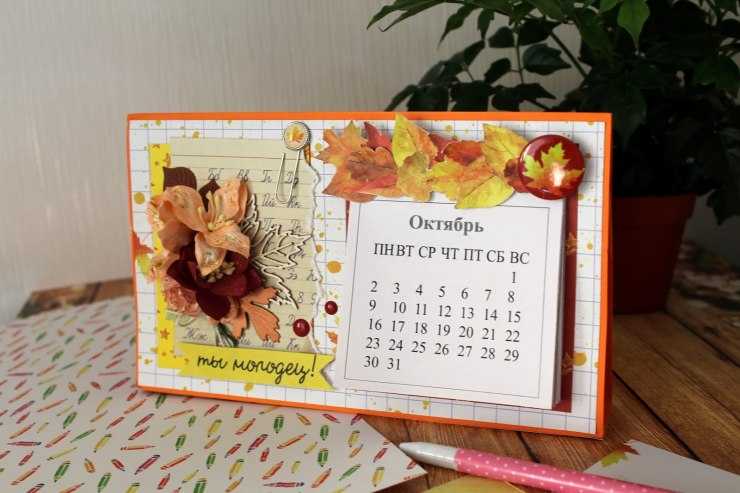
A similar product can be hung on the wall, only its design will be different. First of all, we cut out a rectangle (18X12 cm) from thick cardboard.Scrap paper is suitable for decorating, cut out a similar rectangle from it and glue it on cardboard. Next, we make 12 substrates from watercolor paper and paste on each original image in the upper part. We attach a “calendar” page to the bottom. We take scissors and give the calendar the effect of "old times". Next, we connect all the pages of watercolor paper, make a puncture. On a cardboard blank on the side, we also create an answer.
With the help of a dense thread, we fasten the pages to the cardboard, in the middle of which we make a small hole that will help to hang it on the wall. Next, we make a small "pocket" for pens and pencils. We cut out a blank from cardboard, bend the ends and glue it to the outside of the calendar. We let it dry and hang our masterpiece on the wall in the hallway. There are many options for creating scrapbooking calendars.
How to decorate doors and windows with your own hands
Windows, in addition to doors, are another gate through which the holiday comes to our house.
Therefore, they are always given great attention.
I remember myself from early childhood, and we always cut out snowflakes on New Year's Eve. The whole family sat down at the table, took scissors, notebook sheets and cut out snowflakes of unimaginable beauty. Boasted from whom it turned out better and more beautiful. They cut them out large and small, and then molded them onto glass.


![90 Home Decorating Ideas for New Year 2019! [+master class]](https://fix.housecope.com/wp-content/uploads/0/f/3/0f3aba8680c187d39c9cbc4c337fcbf4.jpeg)
There were no plastic windows, and the usual ones were almost always foggy. And so the snowflake could simply be attached to the glass and it held. It would seem that everything is so simple, but it always created the mood of the holiday.
And even earlier, frost painted patterns on the glass. Now he doesn’t draw anymore, apparently he doesn’t like plastic. And how beautiful the snowflakes looked on such a window!
But you can draw patterns yourself.Just the ones you want. By the way, you can entrust this to your children. First, give them the opportunity to draw such patterns on the window in the children's room. And do not forget to give paints with brushes. And if it worked out, then let them draw on other glasses. Yes, if it didn’t work out very well, let them draw anyway.
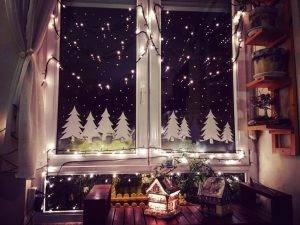
And so, great, there are patterns on the window, there are also snowflakes. Basically, you can stop.
But there are other design options. Where on the windowsill, for example, a snow-covered forest grows in snowdrifts. At the same time, trees are cut out of white cardboard and any forest composition is created on their basis. For example, I really like this option, where in the evening the forest is illuminated by flickering lights. And if somewhere in the room there is a similar light source, then such a composition makes you feel like you are in a fairy tale.
And you can create such a magical and beautiful fairy tale on your window. Like? I really like. I would like a window like this in my house for the New Year!
Or here's another miracle you can do.
Today, a large number of different jewelry can be found on sale. And if there is absolutely no time for creativity, then you can buy figurines of fairy-tale characters, Santa Claus, the Snow Maiden, a bull, hang and arrange all this beauty on the windowsill.
There is also such an idea. Usually after the summer season we have a lot of empty flowerpots. Why should they just stand. Put spruce branches in them, decorate with cones, fresh fruits, rowan branches with berries and tie a big red bow. Such beauty can be created in a matter of minutes, and it will set the mood for the holiday simply magnificent.
In general, there are a lot of ideas. One is better than one. Choose whichever suits you best.And most importantly, involve all your family members in its implementation. Let everyone try to put a piece of their skill into the design.
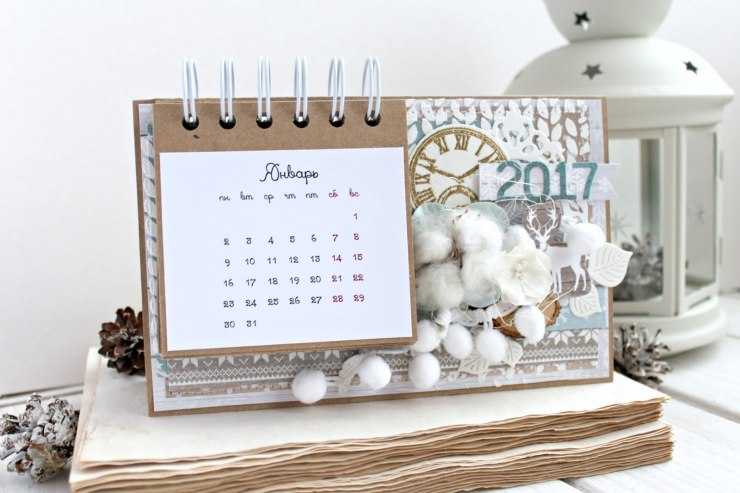
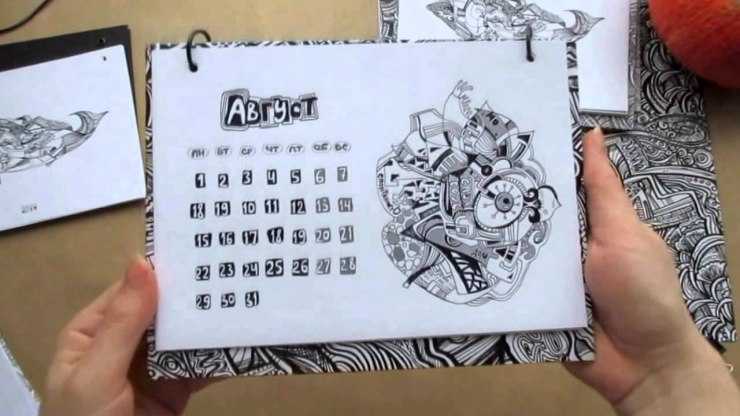
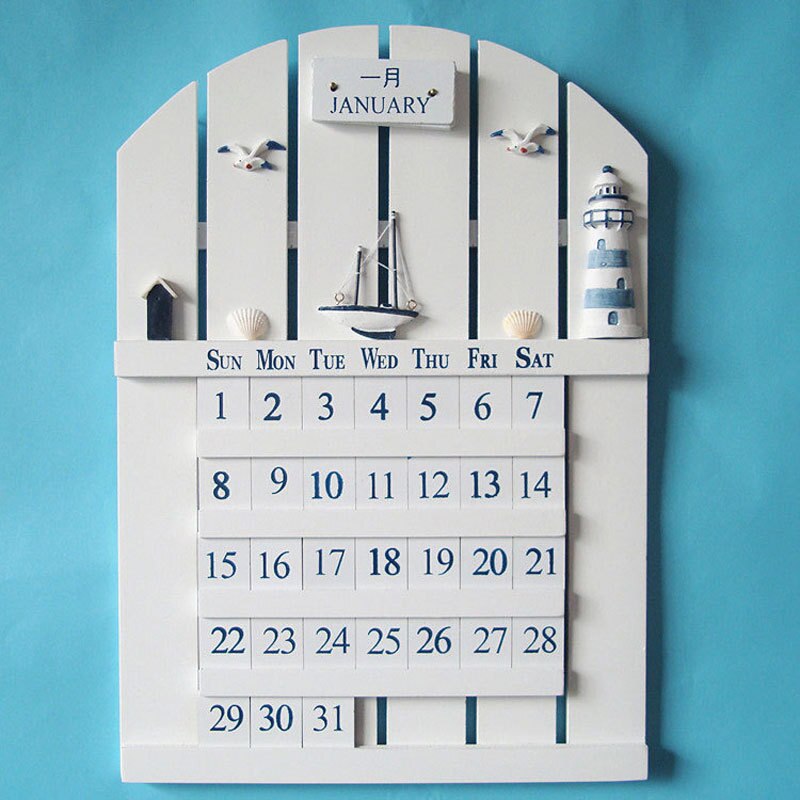
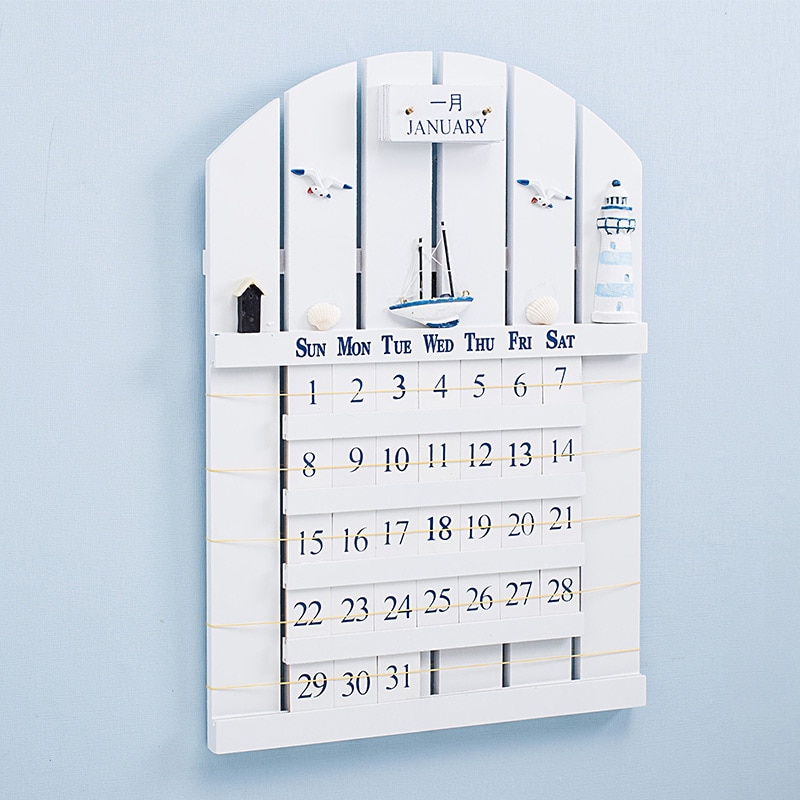
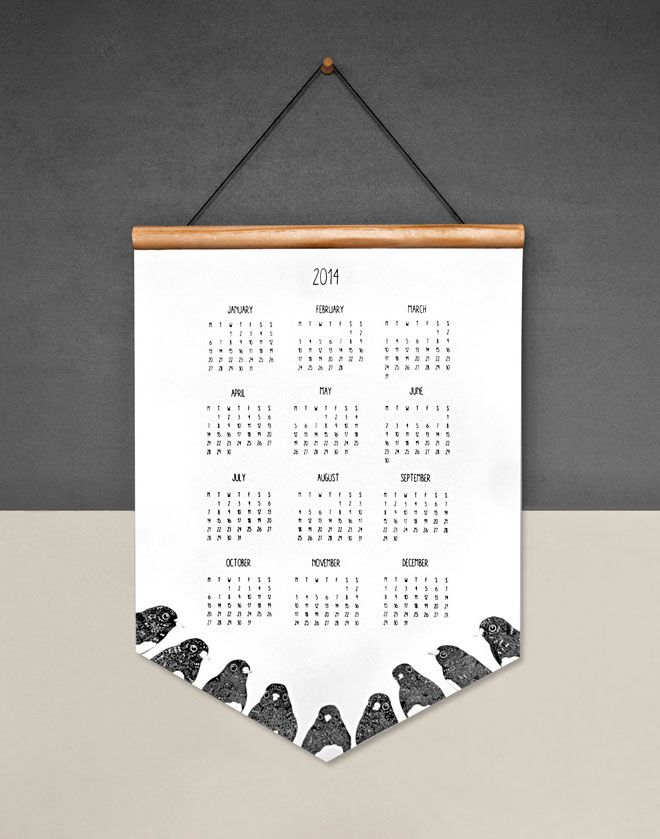
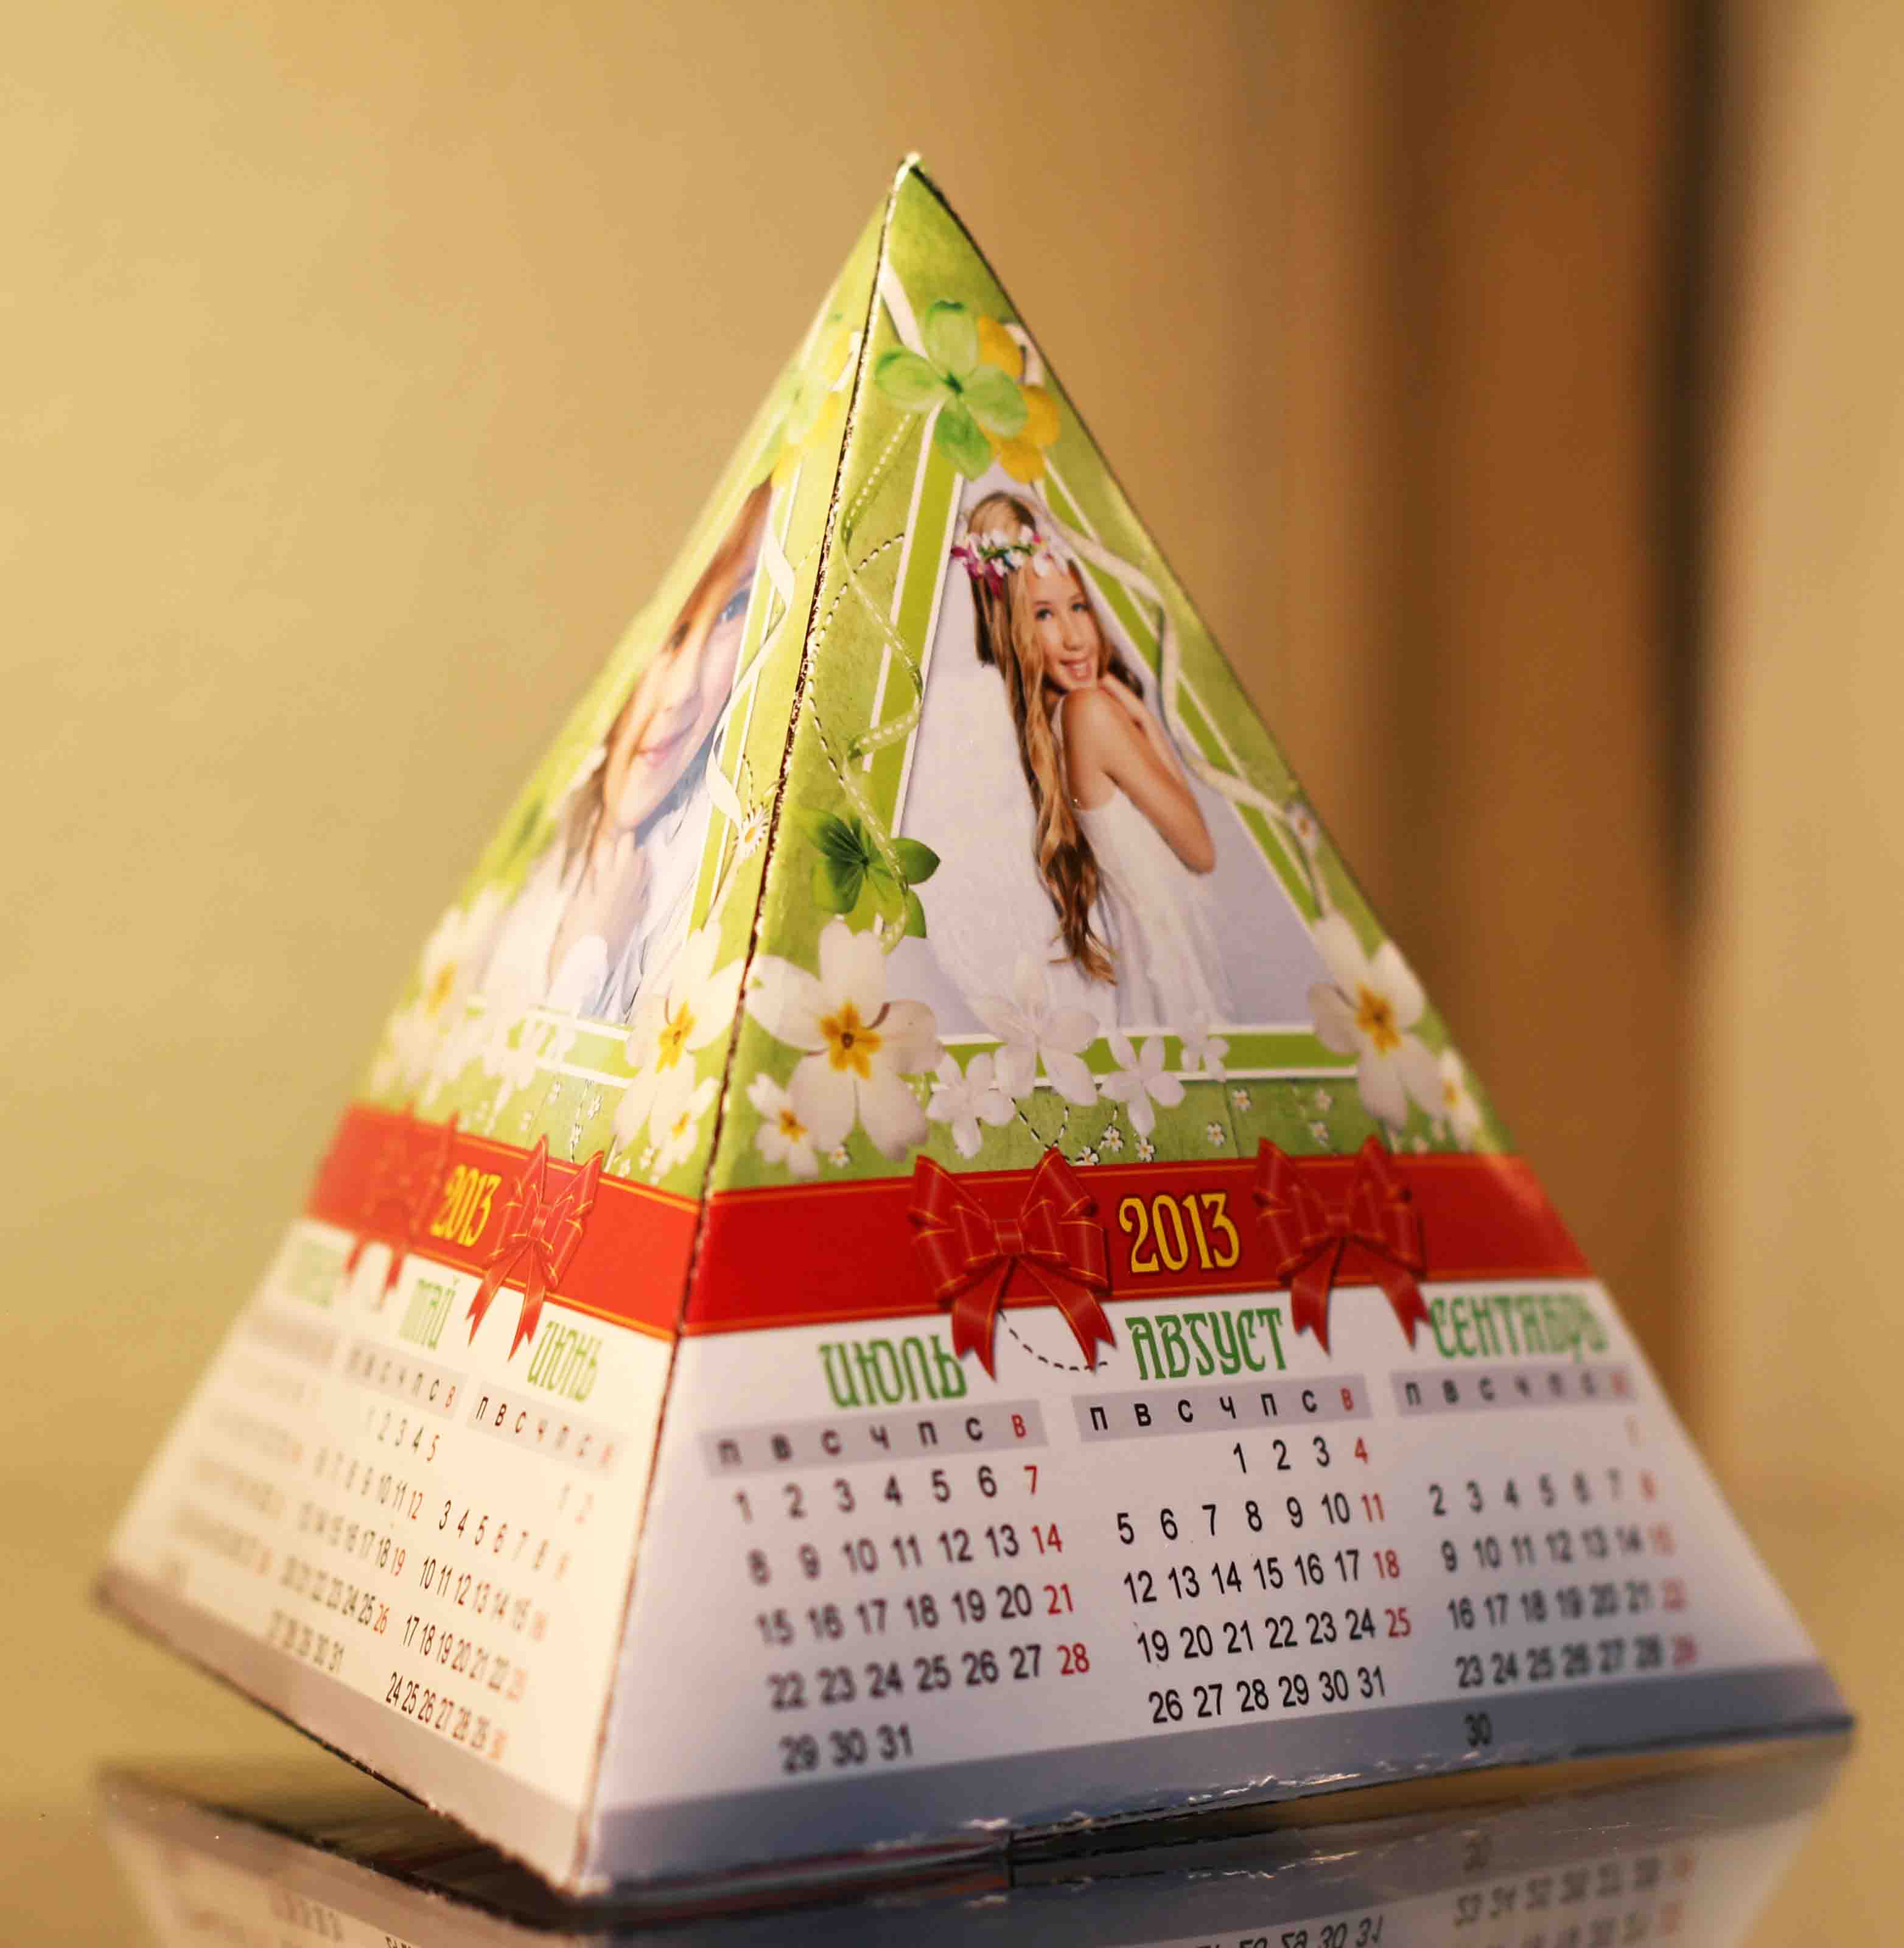
Desk calendar
This craft will probably be the easiest to make on your own. In the process, you will need cardboard, paper, ruler, pencil, paper clips.
First you need to create calendar leaves. The size can be absolutely any, but too large a size will be inconvenient for use.

The best option would be half a notebook sheet. On the sheet, you need to make a grid consisting of six rows and seven columns. The first line in each column contains the names of the days of the week.
Sheets should be 12, according to the number of months in a year. On top of each of them, you need to beautifully write a month, and write the numbers into the grid. In order not to be mistaken, it is better to rewrite them from a ready-made calendar.
Now we make the base-house. To do this, we bend the cardboard into a triangle so that two sides are equal to the sheets of the calendar, and the third can be of any size. On one of the sides, using ordinary paper clips, we attach all the leaves in order from December to January. Memorable dates can be immediately highlighted in a different color or background. The simplest calendar is ready.
You can make it more elegant by decorating the sheets themselves or the base with clippings from magazines or beautiful postcards corresponding to the seasons, photographs of a family or pretty animals. If the main drawing falls on the base, it needs to be made a little larger so that the drawings look good.
pp. 50-51. Wonderful flower gardens in autumn
3. Identify a few autumn flower garden plants. Write down their names.


We determine the Pleshakov determinant according to the atlas.
Answer: chrysanthemums, asters, dahlias, rudbeckia, gelenium, ornamental cabbage.
Photo for pasting:
Dahlia
1. The legend tells how the dahlia flower appeared on earth. Dahlia appeared at the site of the last fire, which died out during the onset of the ice age. This flower was the first to sprout from the earth after the arrival of heat on the earth and with its flowering marked the victory of life over death, heat over cold.
2. In ancient times, the dahlia was not as common as it is now. Then it was only the property of the royal gardens. No one had the right to carry or take the dahlia out of the palace garden. A young gardener named George worked in that garden. And he had a beloved, whom he once gave a beautiful flower - a dahlia. He secretly brought a dahlia sprout from the royal palace and planted it in the spring at the house of his bride. This could not remain a secret, and rumors reached the king that a flower from his garden was now growing outside his palace. The king's anger knew no bounds. By his decree, the gardener George was captured by the guards and put in prison, from where he was never destined to leave. And the dahlia has since become the property of everyone who liked this flower. In honor of the gardener, this flower was named - dahlia.
Page 56-57. bird secrets
1. What are these birds called? Write in the circles the numbers of their names.
See photo.
Migratory birds: swallow, swift, starling, duck, heron, rook.
Wintering birds: jay, woodpecker, nuthatch, titmouse, crow, sparrow.
2. Give other examples of migratory and wintering birds. You can use the information from the Green Pages book.
Migratory birds: crane, redstart, sandpiper, thrush, wagtail, wild geese.
Wintering birds: jackdaw, dove, bullfinch, magpie.
3. Watch the birds in your city (village). Use the identification atlas to find out their names
Pay attention to the behavior of birds. Does each bird have its own character? Write your own story based on your observation.
Make a drawing and stick a photo.
Jay.
The jay is a forest bird, but recently it can be increasingly seen in the city: parks and squares. This is a very beautiful bird. She has multi-colored feathers on her wings, with a blue tint. Jay screams sharply, piercingly. This forest beauty loves to eat acorns, picks up leftover food, sometimes destroys bird nests and even attacks small birds.
Games with children for the New Year
What do children do on New Year's Eve? Of course they play. So that you don’t get bored on the holiday itself, you need to think in advance about interesting games and entertainment. We hope you find something suitable for your company.
New Year's games for children 2-3 years old
Nose of Santa Claus
Santa Claus without a nose is drawn on a large sheet of paper. The nose is made separately - a ball of red paper with a piece of double-sided tape glued on. The players are blindfolded in turn and given a "nose". The player must stick it in the supposed correct place.
Divination
Prepare notes with questions and notes with answers in advance. In one jar (hat, sock, mug) put notes with questions, in another note with answers. Each guest pulls out one note from each jar and receives an answer to the question.
finds
Players are 3-10 years old. Children are divided into teams, taken out of the room. At this time, about 30 pieces of identical items are hidden in different places in the room - small sweets, tangerines, napkins. Then the children are launched and, on command, the search for the necessary items begins.The one who collected the most wins.
Nimble Christmas trees
This game is more suitable for young children. Even more fun if there are several children. Participants must transform into Christmas trees. The host speaks slowly at first: "Christmas trees are high, low, wide." Children raise their hands up, squat or spread their arms to the sides according to the leader's words. Then the leader accelerates and utters random words. The most attentive and nimble wins.
Find differences
On the Christmas tree, remove a couple of toys or, conversely, hang something new. And invite the children to find what has changed on the Christmas tree.


Sleeping Santa Claus
Santa Claus is chosen (you can choose the oldest or the most frisky). He sits down in the middle of the room on a chair and they blindfold him. Not far from Santa Claus put a gift. Each of the children in turn must quietly pass by Santa Claus and steal a gift. If Santa Claus caught the thief, then the family assigns the thief to fulfill a wish. If you managed to outwit Santa Claus, then the child takes his prize.
Nimble ball
A balloon is placed in front of each player and the players are blindfolded. You need to burst your balls with your foot. You can play a trick on an adult audience and remove the balls.
New Year's games for children 4-5 years old
Poetics
The host says the first sentence of well-known poems on the New Year theme, and the guests come up with a continuation so that the verse rhymes. For example, the presenter says: “A Christmas tree was born in the forest, it grew in the forest.” Guests: "Both day and night, prickly, she lived with me all year."
sparkler
Light a sparkler and pass it around. Whoever picks up the light must say the task for the next participant. On which of the players the fire goes out, he must fulfill the wish of the previous participant.
Homemade mascot
In advance, the names of all guests are written on pieces of paper. Each person pulls out a piece of paper with the name of another guest. For him, it will be necessary to mold a talisman for the coming year from a hardening mass for modeling.
Poets
In the bank, notes are passed in a circle with words on the New Year theme (snow, Christmas tree, Snow Maiden, etc.). Each participant recites a verse or sings a song with this word. You can come up with your own quatrain.
Happy New Year!
Each participant from improvised means lays out the inscription "Happy New Year!". Fruits, toys, jewelry, napkins, dishes, etc. are suitable as props. The winner is the author of the most beautiful or original inscription.
Snowflakes
The host throws snowflakes from napkins. Participants blow on them so that they do not fall. The owner of the longest playing snowflake wins.
Spiders
A long rope is taken, to the ends of which pencils are tied, and in the middle is a prize. At the same time, on command, the players begin to wind the rope around the pencils. The one who gets to the prize first wins.
Water procedures
Each player, using a straw, must pour water from a full glass into an empty one.
Painting
On a large sheet of cardboard, make two holes for the hands. Players put their hands through these holes and draw a New Year's picture on a blank sheet. For lack of cardboard, you can simply blindfold the players with a scarf.
When it's time to switch from outdoor games to calmer ones, invite the children to color the big New Year's coloring book. To do this, find Mega-coloring on the Internet in advance, print it on several A4 sheets, glue them on the back with glue or tape. You can buy a ready-made large coloring book.

Decorating toys, walls and dishes with lettering
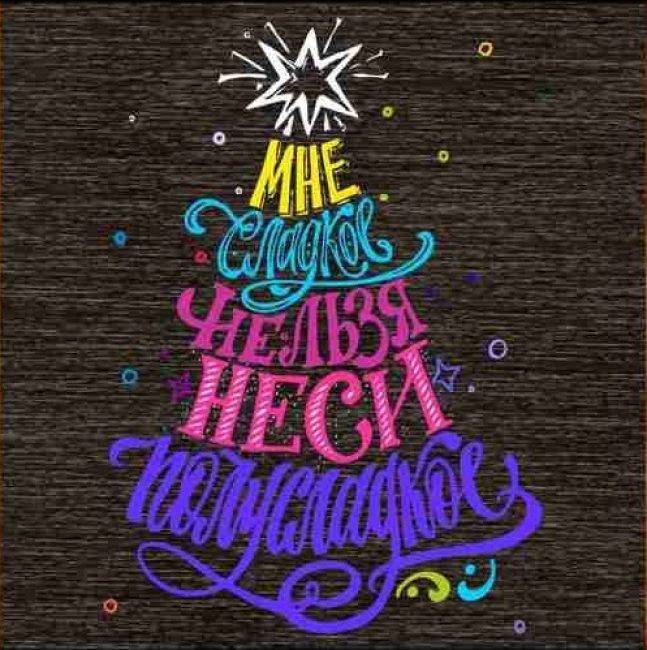
The fashion for the art of writing phrases and quotes in beautiful letters will come in handy when creating a festive style not only in offices, but also at home
On paper, you can write a phrase with a wish for good and love, put it in a frame and put it in a conspicuous place in the apartment. If a person is not strong in calligraphy, you can take free lettering samples in thematic communities.
Lettering - individual phrases written for a specific situation.
According to the patterns, the original letters from the phrase are sewn from felt, they are installed on furniture or randomly placed around the room. A quote is written on a Christmas ball with acrylic gouache or paints on glass.
On the dishes served to relatives, it is necessary to write parting words to a specific person. It's nice to take a glass with a wish intended only for you. For starters, you can practice on paper.
With the help of chalk paint, a slate board is made. On a matte surface, sincere congratulations are addressed to friends and family. The board is placed in the living room, leaning against the wall: each of those who come to the house will leave a message. The use of such things will be especially relevant for those who like interior items in the Scandinavian style.
window decoration to new year with your own hands: what will be relevant in 2020 | (110+ Photos & Videos)
universe, time, calendar
Page 3 - 5 - We are the union of the peoples of Russia
1. Cut out from the Application figures of people in costumes of some peoples of Russia. Make a fun round dance from the figures. If you are at a loss, look at the textbook.
In the center, write down the names of other peoples of Russia that you know.
2. Look at the map in the textbook on p. 4-5. Find on it the name of the part of the Russian Federation where you live.Complete the sentence with this:
I live in Moscow region.
3. Imagine the union of different parts of Russia in the form of a magical flower. On one of its petals beautifully write the name of your part of the Russian Federation.
On the other petals of the flower, write the names of the parts of Russia where your relatives or friends live. 4. Find out from your elders or guess for yourself how the name Russian Federation is sometimes abbreviated in documents.


Write down your answer: RF.
5. This is a frame - for photographs, drawings or a poem, a story about the most interesting things in your republic (region, territory, district, city, village). Together with the elders, decorate it for yourself as a keepsake.
Red Square in Moscow
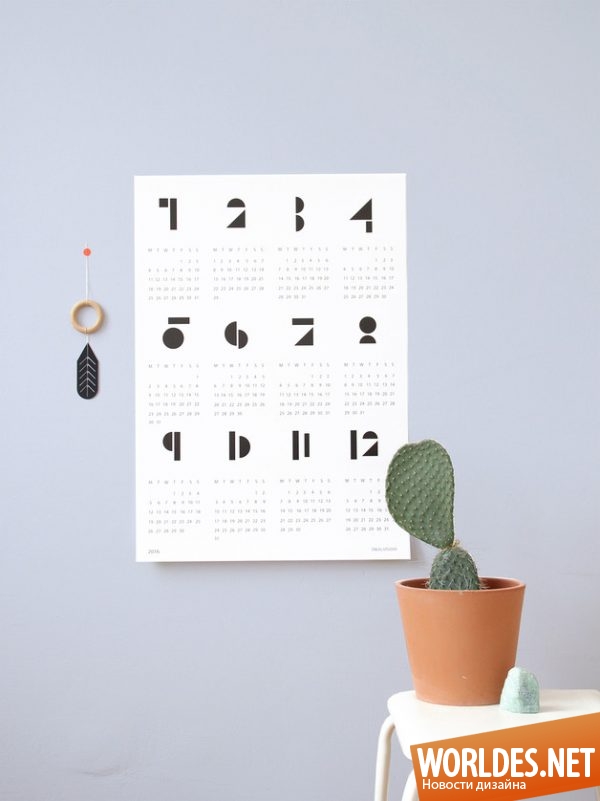
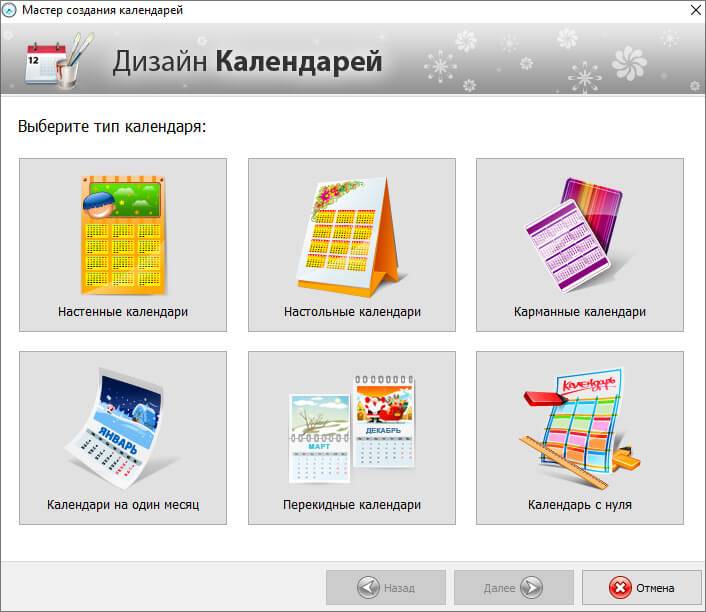
Calendar in Calendar Design
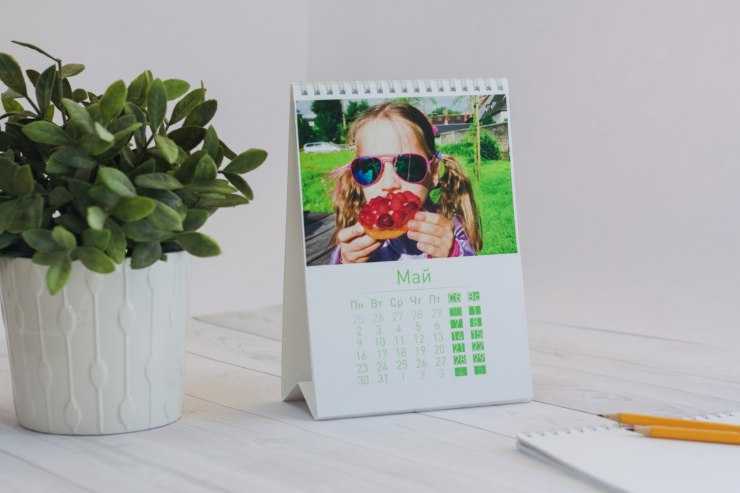
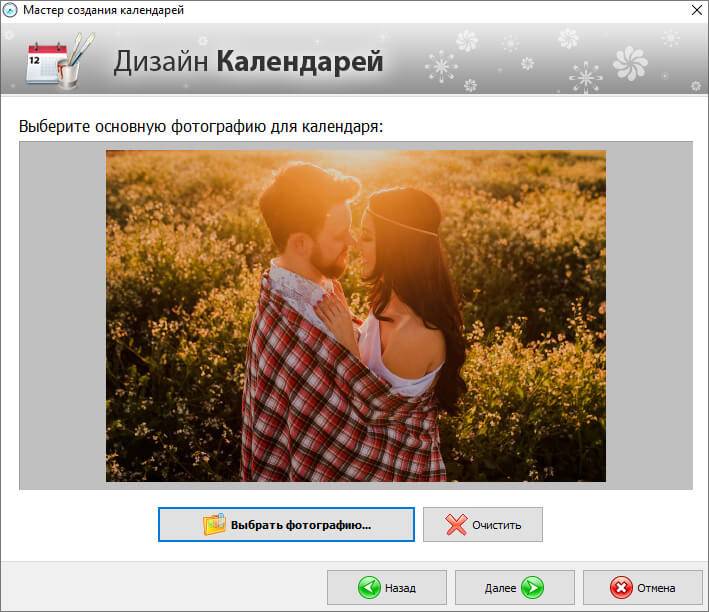
Use the Calendar Design program - this is the most convenient and fastest way to design a calendar. The software offers hundreds of ready-made designs, allows you to upload your photos, place text and mark important dates. To work on a photo calendar, you do not need to have special skills: a friendly interface in Russian is suitable for novice users. Download Calendar Design and create the perfect layout in minutes:
Run the setup file. During installation, read the user agreement, select a folder and add a shortcut to the desktop.
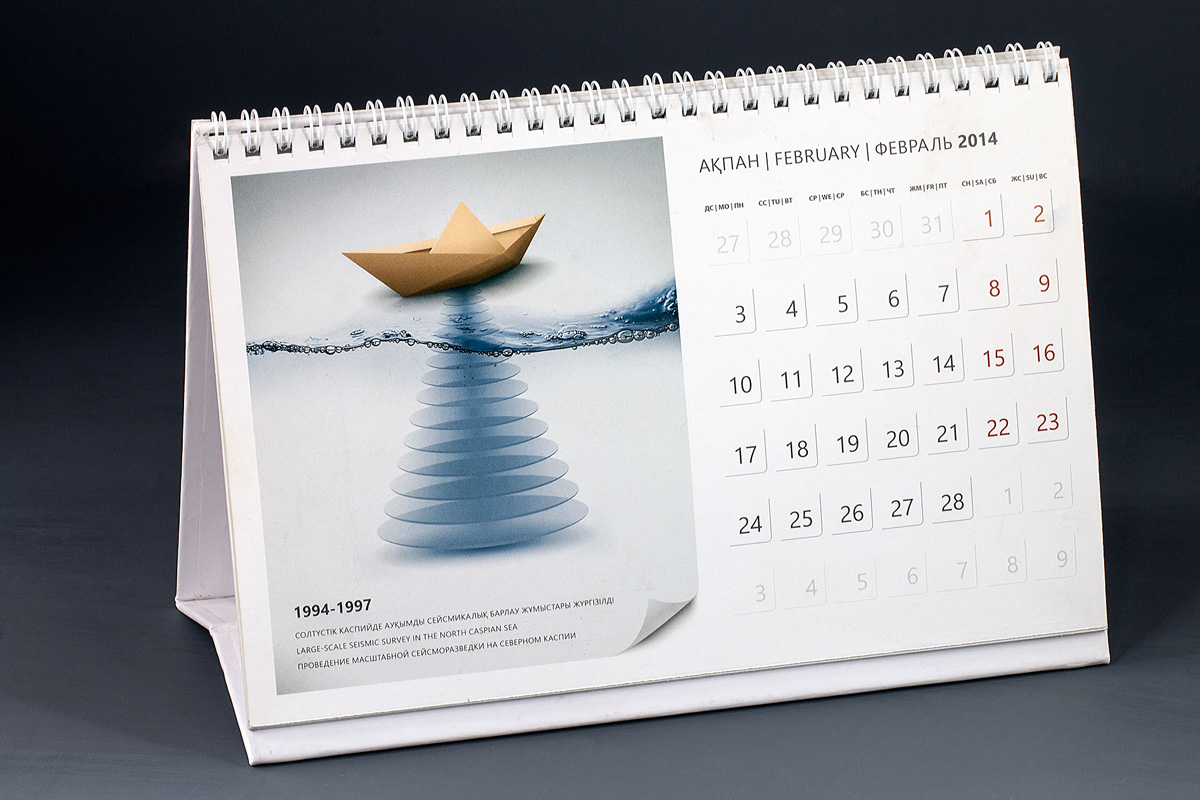
Choose type: wall, table, pocket, flip or monthly. You can also do everything yourself from scratch.
When choosing, consider how you plan to print and on what paper.
Specify the layout. The program has more than 300 templates, you can choose any you like and personalize it.
Workpieces are divided into vertical and horizontal
Import photos any format: JPG, TIFF, GIF, BMP, PNG, PSD and others.
You will be able to add more pictures while editing
Set a countdown date: Start from the first month or the middle of the year.
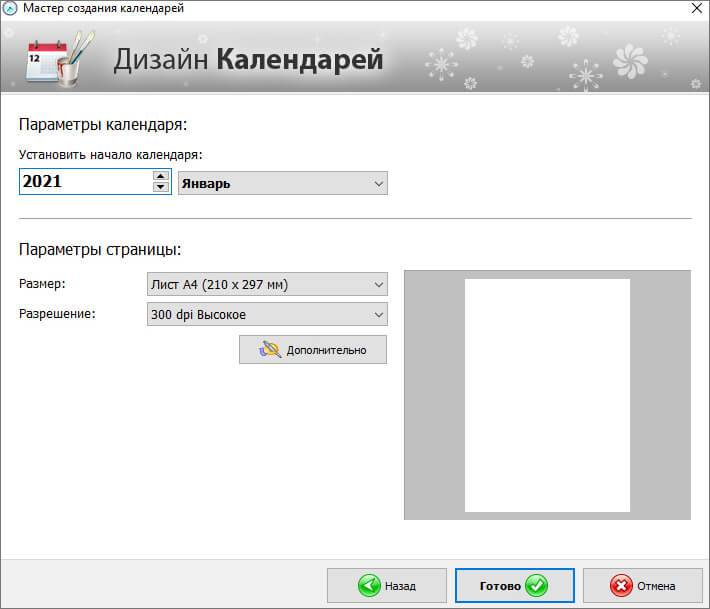
Also specify the page size and resolution (for printing - at least 300 dpi)
Adjust the details: You can change the appearance of the months manually or choose a different style, set holidays and highlight your own important dates, change the background color, add text, image, collage.
Set a countdown date: Start from the first month or the middle of the year.

It is also possible to change the language
Process your shots: Crop, apply shadow, outline, frame or mask to them. You can also adjust the brightness, contrast, and saturation settings.

You can change the transparency of the picture and rotate it
Decorate your calendar layout with clipart. They are divided into categories: tourism, romance, flowers, animals, beauty, zodiac signs and others. You will also have the option to upload your sticker and place it on the canvas.

Just drag the one you like onto the canvas
Save work as an image, PDF file, CMYK, export as PSD or print. For paper output, set the paper size, resolution, and orientation.

Set crop handles and margins if necessary
As you can see, the program offers all the necessary tools to make a calendar with your own hands. With it, you can easily arrange a gift, decorate your home or create a table planner. Download the editor and implement any idea!


![90 Home Decorating Ideas for New Year 2019! [+master class]](https://fix.housecope.com/wp-content/uploads/6/b/a/6bac9f2309ca1d83fd17718764167d91.jpeg)

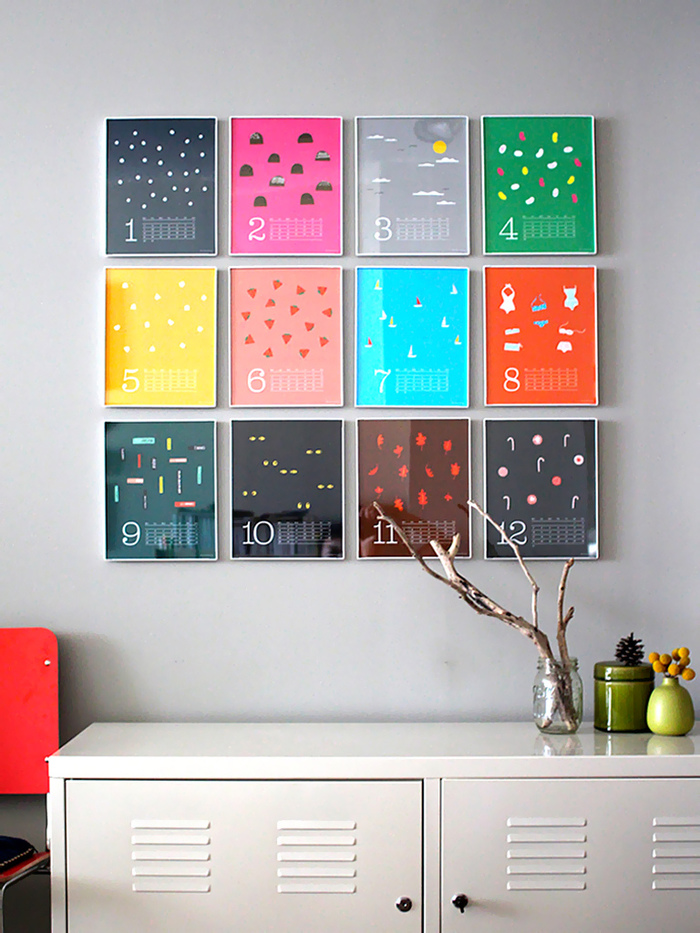
We study the calendar with children. How to make a children's calendar
Do you want to teach your kid numbers, repeat the days of the week and take up drawing? Create a real calendar. Play the game "Draw a calendar". This lesson is good because the baby remembers not just a sequence of numbers, but also divides them into weeks, learns the days of the week, and is also engaged in creative drawing. My daughter came up with the idea of creating this calendar after her younger sister tyrannized everyone in the family with the question: “Why are there no melons in April, although they are drawn on the calendar?”
You probably also paid attention to the photos in the calendars for each month. Sometimes they do not fit))) For example, in January there are no watermelons, and in July you will not see a snowdrop
The task of creating such a home calendar is not entirely simple, so it is better to complete a calendar sheet for 1 month, and if you like, then make drawing home calendars a tradition.
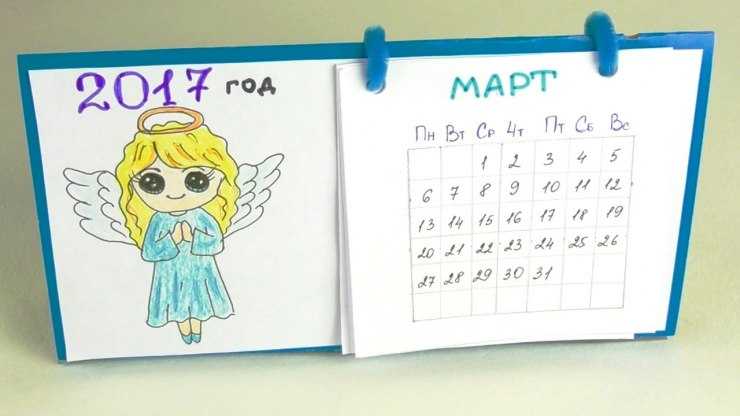
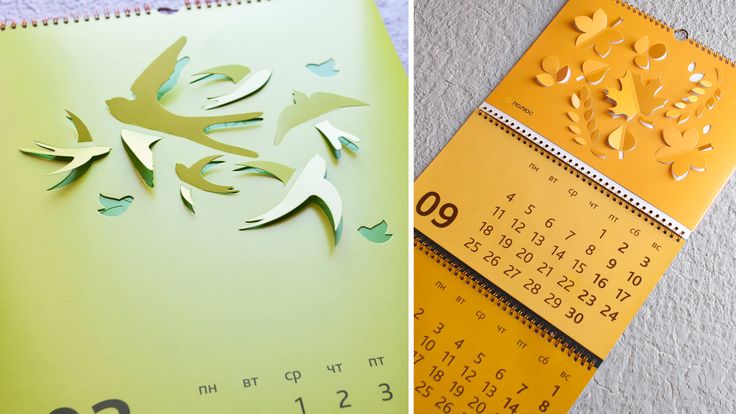
How to make a children's calendar
So, you need to draw a calendar for a specific month. It should not be just a grid of numbers, but a full-fledged calendar indicating the days of the week, weekends and holidays. In addition to the grid, the child can draw a picture suitable for a given month. It will not be possible to complete such creative work in one day, so drawing a calendar will stretch over “several approaches”.
First, choose thick paper. Suitable sheets for drawing or watercolor. The larger the format, the more beautiful the calendar will turn out. Yes, and what's the point of grinding. Then you can mark a grid of numbers on the sheet. A regular calendar can help with this.
Once the grid is ready, you can start adding numbers to it. A child can draw numbers by hand, or you can make a stencil, according to which the baby will enter the numbers into the cells.This work teaches the kid to memorize numbers, their sequence, to memorize the numbers of the second and third ten. In addition, the child will learn that there are only seven days in a week. It will also be useful to repeat the days of the week. Some parents believe that because they remember all the days of the week, the child knows it too, but this is not always the case. Often children at the age of 7 have no idea about the days of the week, they cannot tell in what order they go.
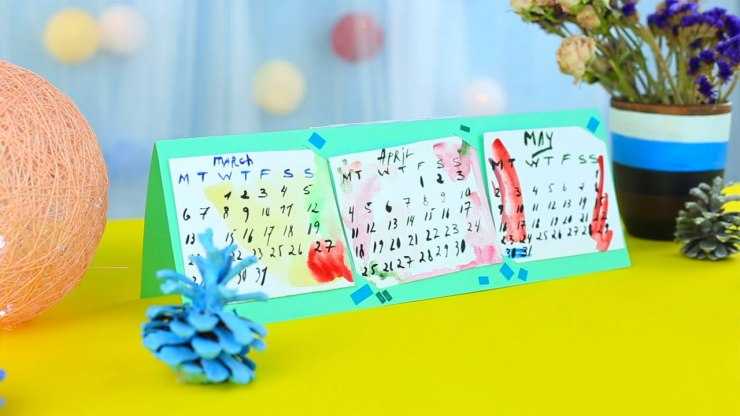
The most interesting and enjoyable moment in creating a calendar is drawing. The child must come up with what will be shown on the calendar this month. We have the main event in April - the flood of the Dnieper, so on our calendar the real underwater life)))
If the child likes to create a calendar with his own hands, then all the sheets made can be filed into a common folder, and next year the child will look and remember with surprise and joy what he drew. Oh, I almost forgot, in such a homemade calendar you should definitely mark holidays, birthdays and just significant days in your family. Good luck with your family calendar. I hope that not only the child, but also the parents will like such creativity!
I recommend you a new interesting video that can be very useful in your hobbies!
Some rules
In order for the decor for the New Year to look harmonious, you need to follow simple rules.

From their implementation depends on how stylish and tasteful the room will look:
- Do not combine too bright and catchy colors. Used at the same time, for example, bright red, yellow, purple in the interior, they will quickly tire and will be annoyingly full of. This also applies to metallic colors: for example, a bronze or gold hue cannot be combined with silver.This is considered a manifestation of bad taste.
- Do not use different styles in the design. For example, classic glass angels will not harmonize with homemade textile birds.
- Observe dimension. Do not place too small elements on large surfaces and vice versa.
- Always know the measure in decoration. Do not abuse the decor, arrange evenly around the room so as not to focus in one place. For example, a garland, a wreath with a Christmas tree in one corner will look over the top.
Properly selected decorative items can create a full-fledged holiday atmosphere.


