- The principle of replacing sockets
- If all the sockets in the apartment do not work
- Restoration of a socket that fell out of the wall
- Additional socket repair tools
- Starting the restoration work
- Performing repairs
- Main malfunctions
- Possible causes of malfunction
- There is light in one room, but the socket does not work
- One outlet is not working, but the rest are working in the same room
- The outlet in the kitchen near the stove or hood stopped working
- What to do if the outlet itself is broken, but there is voltage
- Carrying out repairs
- Pull-up contacts
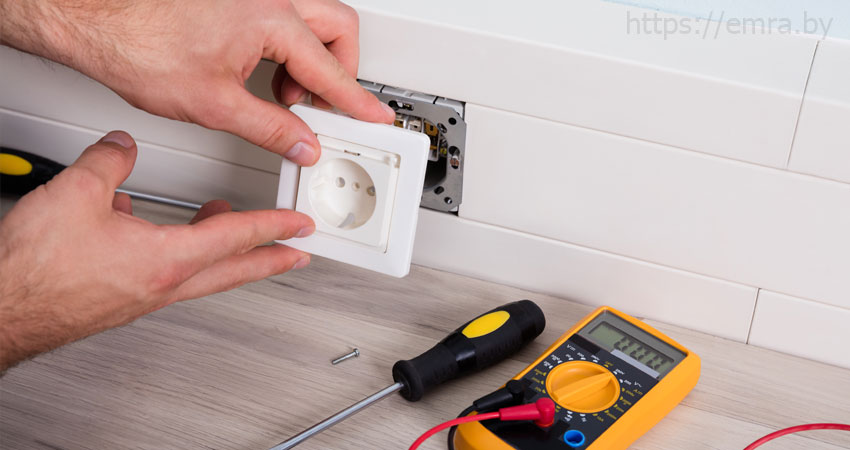
- Installing a new outlet
- When the socket fell out
- Tools and materials for repairing a dropped outlet
- Socket restoration work
- The principle of operation of an electrical outlet
- How do defects in sockets occur in everyday life
- Mechanical defects
- Electrical defects
- Troubleshooting Procedure
- All sockets in the apartment do not work
- Outlets not working in one or two rooms
- Problems with one outlet
- Conclusions and useful video on the topic
The principle of replacing sockets
Usually those outlets that are most often used fail.
There can be many reasons why you need to redo the outlet. It:
- violation of the operability of the connection point, for example, when the device body is melted or the socket falls out of the wall;
- in order to improve electrical equipment;
- when changing the design from a banal aesthetic point of view.
In any case, the replacement of the outlet must be carried out in strict accordance with the rules of SNiP.
By replacing the outlet on your own, you can not only solve the problem as quickly as possible, but at the same time save an expense item.
Regardless of the reason, when choosing a feeding device, it is important to consider a number of key factors:
- Connection point settings match. The performance characteristics of the outlet to be installed must exactly match the requirements for a particular room. So, for "powering" kitchens and bathrooms, you need to use devices that have an increased degree of protection of the case. Read on to learn how to choose such an outlet.
- Wiring method. When installing sockets, both open and closed mounting methods are used. To implement each of these options on the radio market, a wide range of built-in and surface-mounted sockets are presented.
- aesthetic qualities. A large selection of equipment, produced in a wide color palette, allows you to organically fit connection points into any stylistic interior solution.
When choosing and installing an outlet, you should focus on the type of network. So in a three-wire network, a conventional design cannot do without a grounding contact.
But even if the house has a two-wire network, electricians still recommend using sockets equipped with grounding terminals.The main argument for this decision is the fact that metal inserts will increase the strength of not only the connection point, but also the plug itself, thereby extending the service life of the product.
If all the sockets in the apartment do not work
In this case, the reasons may be as follows:
- the power supply is turned off at the initiative of local power grids;
- a malfunction in the electrical panel;
- the machine turned off, to which all the sockets of the apartment are connected.
It is necessary to inspect the condition of the circuit breakers in the apartment switchboard. Perhaps one of the machine guns “knocked out”. For example, due to the simultaneous inclusion of powerful consumers of electricity. If, when the machine is turned on, it turns off again on its own, then there is a short circuit on the line. Which needs to be eliminated.
If only individual sockets do not work
This can happen when the machine to which the line of this outlet is connected is turned off in the electrical panel. Sometimes there are several outlets per switch, for example, in one room. If the machine is in good condition, but there is still no voltage in the outlet, a wire break should be suspected. Power outlets are often implemented through junction boxes. It is in them that you need to look for the cause of the problem. It is possible that the connection of the wires has loosened, which often happens when using twists. It is likely that the contact in the outlet itself has loosened. It is necessary to de-energize it in the electrical panel, and then disassemble the socket housing, tighten the contacts. Or install a new outlet. When working with electrical devices, there is always a risk of electric shock. This is not uncommon when people with no experience try to repair electrical wiring and electrical outlets.So, the best solution is to call an experienced electrician.!
Restoration of a socket that fell out of the wall
A malfunction of this kind is not the most pleasant reward for the inaccurate use of household appliances. To get out of this situation, you can use the two most common options: short-term or long-term:
- The first method involves twisting the petals much more than usual. This will allow the product to stay in its place for some time and serve faithfully.
- A durable method requires significantly more time, as well as the availability of tools and new fixtures.
The main reason for the outlet falling out of the wall is, just, non-working petals. The solution in this case will be the modernization of the seat.
Additional socket repair tools
To return the outlet to its place, you will need:
- mounting box 68x45 mm;
- gypsum;
- construction knife;
- polymer primer;
- putty knife;
- tools that have already been written about.
Before starting work, it is necessary to de-energize the room and warn other people who, with a high degree of probability, can turn on the power supply on the machine again. If this is not possible, be sure to hang a sign: "Repairs in progress."
Starting the restoration work
When dismantling the socket and the old mounting box, be sure to mark each wire with a marker. Remove all plugs and screws. This will ensure free access of the wires to the box. The bottom should also be removed from it, since the dimensions of the box often do not match the parameters of the holes in the wall. A box without a bottom is easily trimmed, but it cannot be deformed by compression.


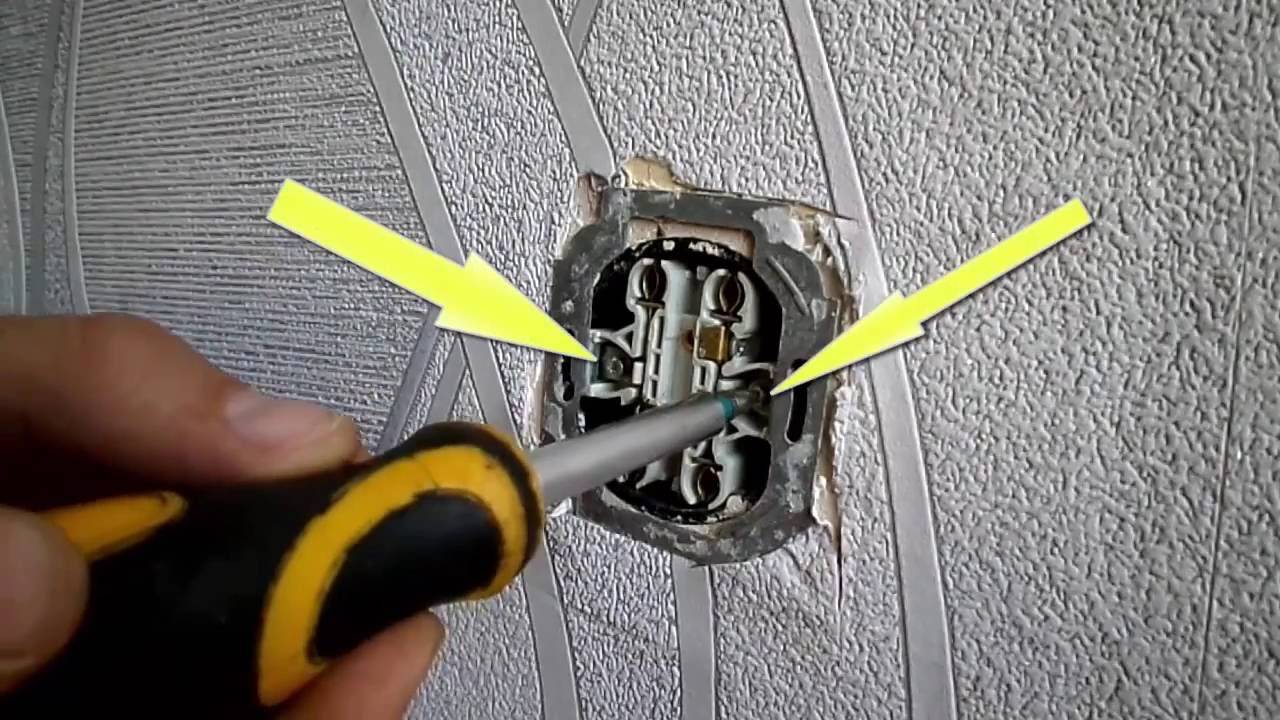
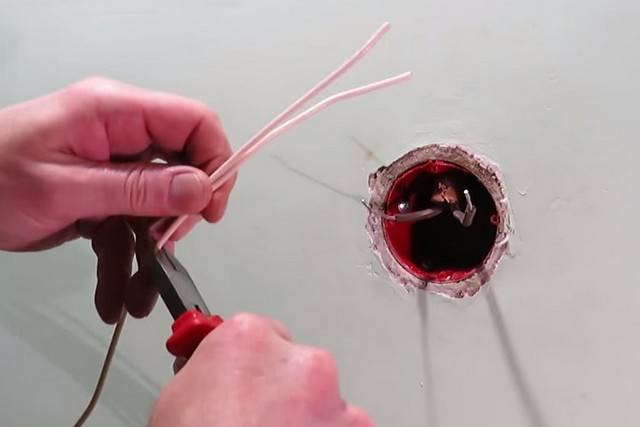


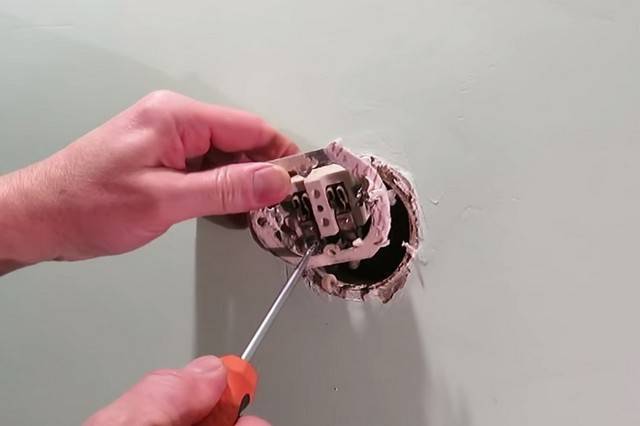
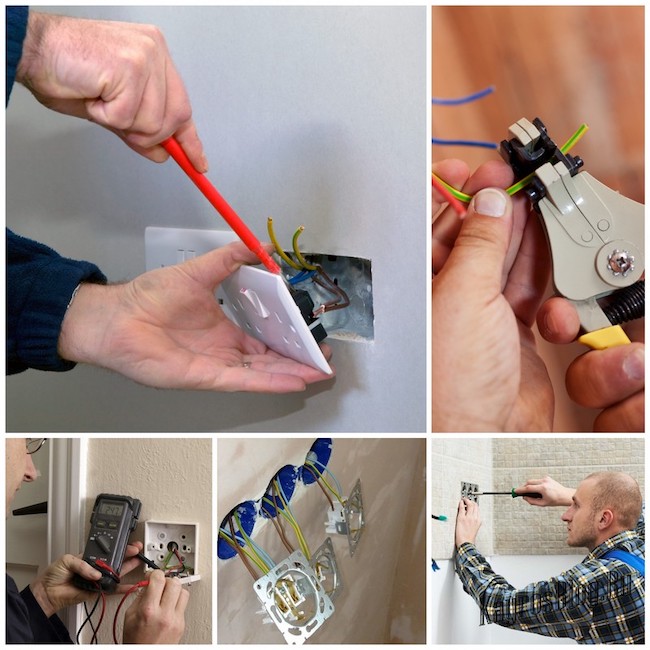
Image gallery
Photo from
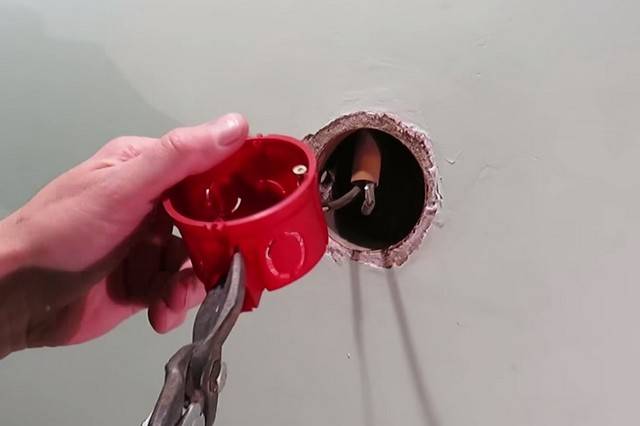
Step 1: If, when using the outlet, it falls out of the socket, then we disassemble the device and disconnect the mechanism from the wiring
Step 2: Most often it turns out that the socket is installed without a socket, we buy this mounting fixture and try it on the hole
Step 3: In the example shown, the hole is not deep enough to completely submerge the box. Therefore, we cut its bottom
Step 4: We try on the cut box again to the installation site, if necessary, we cut it again until the edge of the socket is flush with the wall
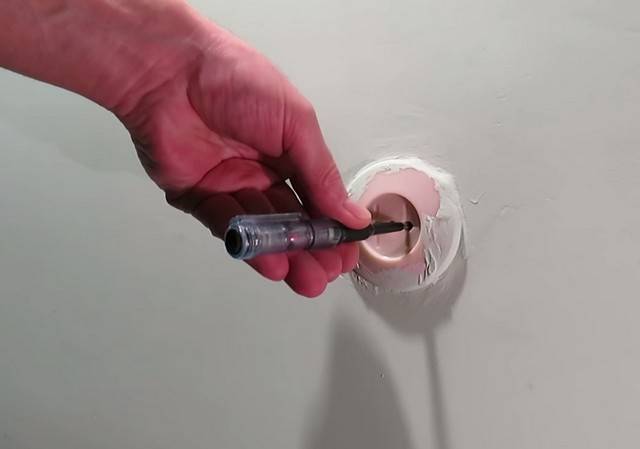
Step 5: We process the hole with gypsum diluted with water or ordinary alabaster
Step 6: We install the socket in the prepared hole, level it in the nest. Remove excess mixture immediately with a damp cloth.
Step 7: After waiting for the mixture to harden, we install the mechanism in the fixed socket and fix it with screws
Step 8: After fixing the socket mechanism, install the device frame and front panel
Disassembly of a socket staggering in the socket
Fitting the socket to the place
Fitting the mounting box after the fact
Fitting a trimmed socket box to the nest
Application of plaster mixture for fastening
Fixing the socket box on the binder composition
Installation and fastening of the socket mechanism
Installing the Frame and Bezel
The socket must be installed so that it sits "tightly" in the wall. To do this, the hole is primed. After that, gypsum is diluted in water and the hole is processed with this mixture, and the cracks are closed with a spatula.
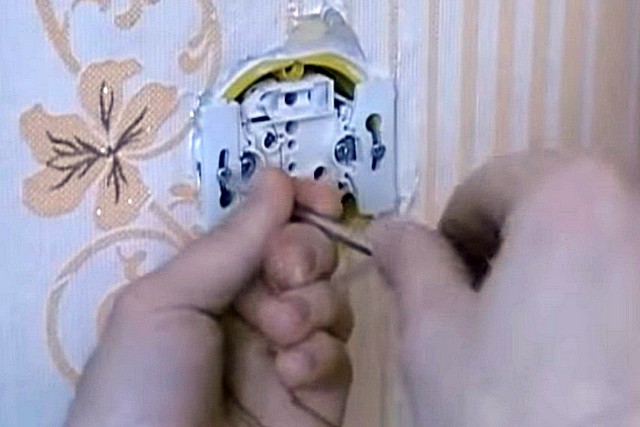
The mounting box is inserted there.After 15 minutes, when the gypsum firmly grabs it, you can start the process of installing the inside of the new outlet and start connecting the wiring. The final step will be the installation of the front panel.
Performing repairs
Once the preparations are complete, it's time for the main activities. The screws are removed and the decorative case is removed. Next, contacts are checked. If they look ugly, blackened or changed color, then the entire structure is dismantled. The presence of a green color indicates oxidation. What to do in this case? Contacts are cleaned when using a knife.

It also happens that the contacts are completely worn out. How to fix an outlet? In this case, a completely new design should be at the ready. What to do if contacts are weakened? There are simple manipulations. Need:
- Remove cover.
- Pull out the entire structure carefully, without disconnecting or breaking the wires.
- When using a screwdriver, fasten the screws.
- Charred wires are removed, and the rest are twisted and insulated with tape.
Next, the parts are installed in their places. When the structure is badly damaged, it is better to change it immediately. These are simple manipulations, the basis of which is the de-energization of the electrical wiring.
Main malfunctions
It is the sockets in the apartment that are most often repaired by electricians. The causes of failures can be different. Most often, the contacts in the terminals are broken or weakened. This leads to sparking, the complete absence of mains voltage, or its periodic shutdown. Sparking is dangerous because it can start a fire. Warming up from sparks, the wiring raises the temperature so much that it can melt the plastic of decorative modules and cause a short circuit.At the same time, a crackling sound is heard, the air is filled with the smell of burning.


The cause of a fire can also be the connection to one device of several powerful electrical appliances - for example, an electric fireplace, iron, vacuum cleaner and others. The consequences are eliminated by replacing sockets and electrical wiring, if necessary. To prevent such incidents, you should clamp the wires in the terminals very well, make sure that the pins of the electrical plugs fit snugly into the contact pads.
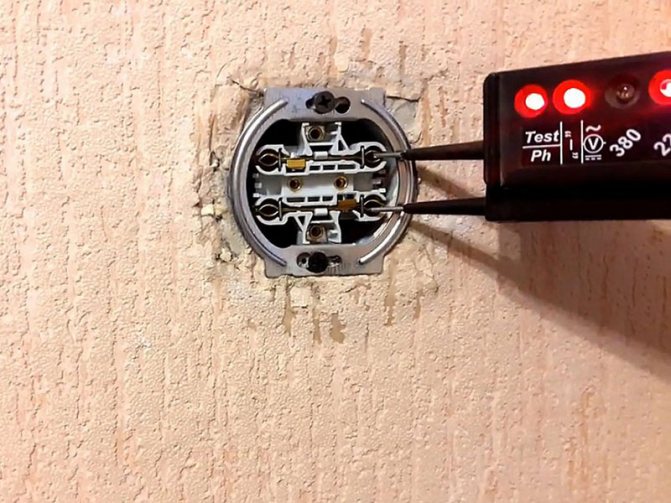
It also happens that the sockets in the apartment premises do not work completely. As soon as the sockets stop working, it is necessary to check the presence of voltage with an indicator. If it does not glow in the phase, it is quite possible that the package machine that protects against short circuits or the plug has been knocked out. There may be no contact in the switchboard.
An indicator screwdriver does not always help determine the nature of the malfunction if the outlet stops working. For example, when there is no zero connection, the probe will burn on phase, but not on zero. In this case, you should check the voltage with a multimeter - it will give an accurate answer whether there is voltage in the cable or not.
Why does the socket located in one room of the apartment not work, while in other rooms all other devices are operational? It is possible that different wiring comes from the switchboard. Electrical outlets from one room are connected to one machine, and the rest - to another. There may be several reasons for the shutdown - either this machine is faulty at all, or it is activated if you turn it off and on again. The third reason is a short circuit in the wiring. Then, when you try to turn on the machine, it will turn off again.It is necessary to check the junction boxes of the premises. They are usually hidden under plaster or wallpaper. There may be no contact.
If the apartment building was built a long time ago, sockets in the same room can be connected in series. In the case when contact is lost somewhere, some of the points will function, and some will not. If the sockets in the house do not work, but there is light, the reason must also be sought in the switchboard and a faulty or turned off machine.
Possible causes of malfunction
To start repairing, you need to act according to the following algorithm:
- Test all outlets. If one product does not work, they look for the cause in it.
- The electrical circuit is prone to breakage at weak points, for example, when connecting with a twist, unreliable insulation. If everything is working properly in the electrical outlet, the break is searched for in the junction box.
- Find out how the voltage disappeared - the devices stopped functioning or the machine worked before that.
- Determine if the outlet is a regular outlet or a special outlet for high power appliances.
There is light in one room, but the socket does not work
The most common problem is when the lights in the room turn on, but the sockets do not work. At the same time, voltage is supplied to other rooms. Possible reasons for inoperability:
- exceeding the permissible load;
- breakage of the cable section.
It is necessary to check the electrical wires in the shields, the working part of the power points. If the cable breaks or breaks, an electrician is called in, as new wiring may be required.
The most common problem is inaccurate mounting or damage to the insulation. In this case, the indicator will show a power failure in the faulty area.
One outlet is not working, but the rest are working in the same room
When one power point fails, the cause may be loose contact or melted insulation.
If, during a visual inspection, the cover is melted and the socket does not function, then the contact wire has burned out. When disassembling the device, the burnt area is visible.
The problem may be in the wire itself, then you need to inspect the cable, check the condition of the core and insulation.
If overheating has occurred repeatedly, there is a high probability of destruction of the core, so you will have to replace the faulty piece.
If the insulation breaks, a cambric or electrical tape is put on the bare area. The darkened contacts are carefully cleaned with sandpaper.
Another cause of failure is a short circuit (short circuit). Short circuit is determined simply - there is no closed section of the conductor, and the inside is covered with an oily coating. In this case, the socket cannot be repaired - only replaced with a new one.
The outlet in the kitchen near the stove or hood stopped working
Cooker, extractor hood, washing machine are appliances with a power of more than 2000 watts, which require separate sockets. The most common problem is the selection of an unsuitable power point, which is designed for less power. In this case, the electrical outlet is replaced with a new one with the required value.
If the permissible power is exceeded, a wire break may occur. Troubleshooting should be left to a professional.
For powerful devices, a separate machine is installed. It can work from a power surge. To return the voltage to the outlet, you need to look at the machine and turn on the toggle switch leading to the kitchen.
What to do if the outlet itself is broken, but there is voltage
Before starting repairs, make sure that the outlet is repairable. The burnt device is replaced with a new one. If there is no voltage when checking with a multimeter, the wires are checked. After making sure that everything is in order with the conductors, proceed with the repair.
For fixing you will need:
- screwdrivers;
- sharp knife;
- insulating tape;
- pliers;
- multimeter.
Procedure:
- Before carrying out work, de-energize the apartment. It is forbidden to repair a power point under voltage.
- Unplug appliances from the power outlet.
- Remove the housing with a screwdriver.
- Unscrew the clamping bolt and check the quality of the connections. Insecurely fixed contacts strengthen.
- Trim the melted ends with a knife or wire cutters. Repair damaged insulation with electrical tape.
- If the clamping bolt is broken, install a new one.
- After troubleshooting, assemble the socket.
- Turn on the electricity and make sure the problem is corrected. To do this, you need to connect a low power device. If the outlet works without uncharacteristic sounds and smells, the repair was successful.
This is interesting: After replacing the stator winding, an interturn circuit occurs: we explain in detail
Carrying out repairs
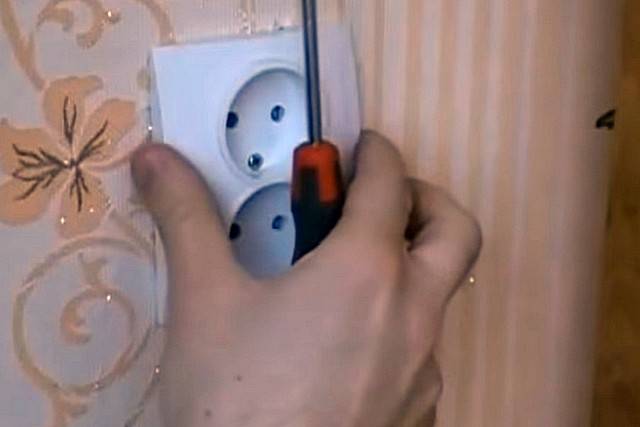
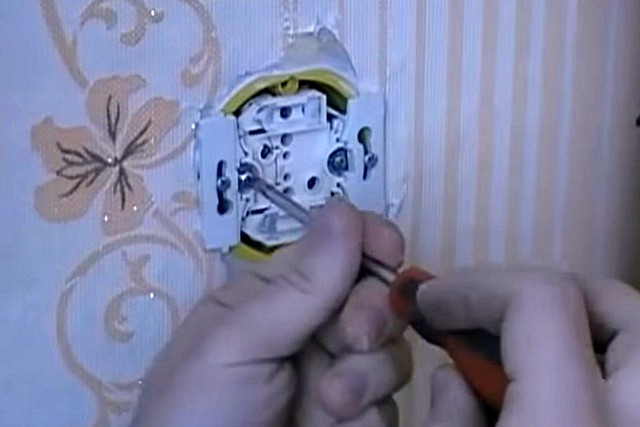
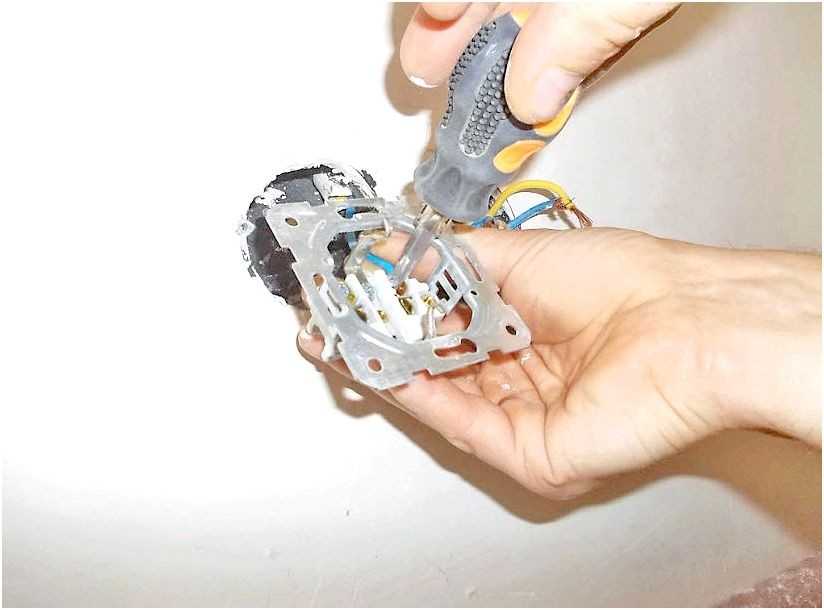
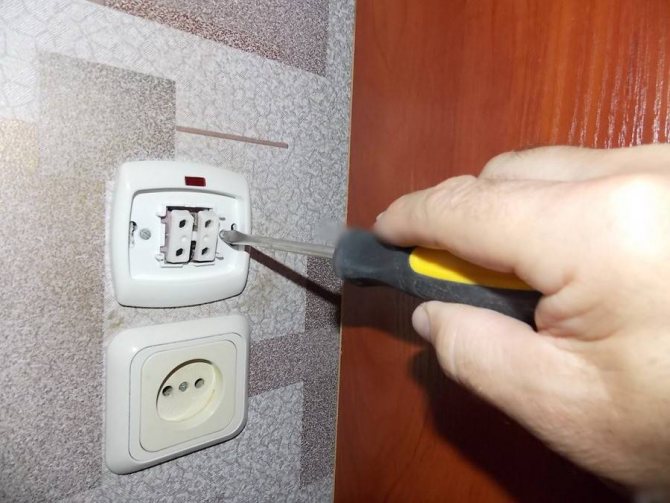
When the preparatory activities are completed, you can dismantle the outlet. To do this, unscrew the central bolt, remove the decorative cover.


After that, you can proceed to inspect the contacts. If they change color to black or brown, you will have to change the entire outlet. The greening of the plates means their oxidation - such contacts can be cleaned with sandpaper or a sharp knife.If the contacts are thinner down to the holes, the socket must also be urgently changed.
Pull-up contacts
When there are signs of loosening of the contact plates, the actions will be as follows:
Remove cover from socket.
Carefully remove the device from the recess in the wall without damaging the wires.
Tighten the screws with a screwdriver.
Cut the charred wires with a sharp knife.
Isolate the places of twists with tape.
Put the product in place.

If the contacts are too damaged, you should play it safe and buy a new electrical outlet. When the contacts are simply unbent, they can be bent by gently pressing with a screwdriver.
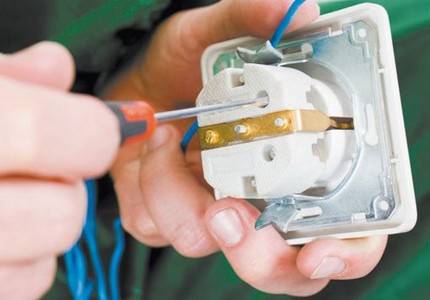
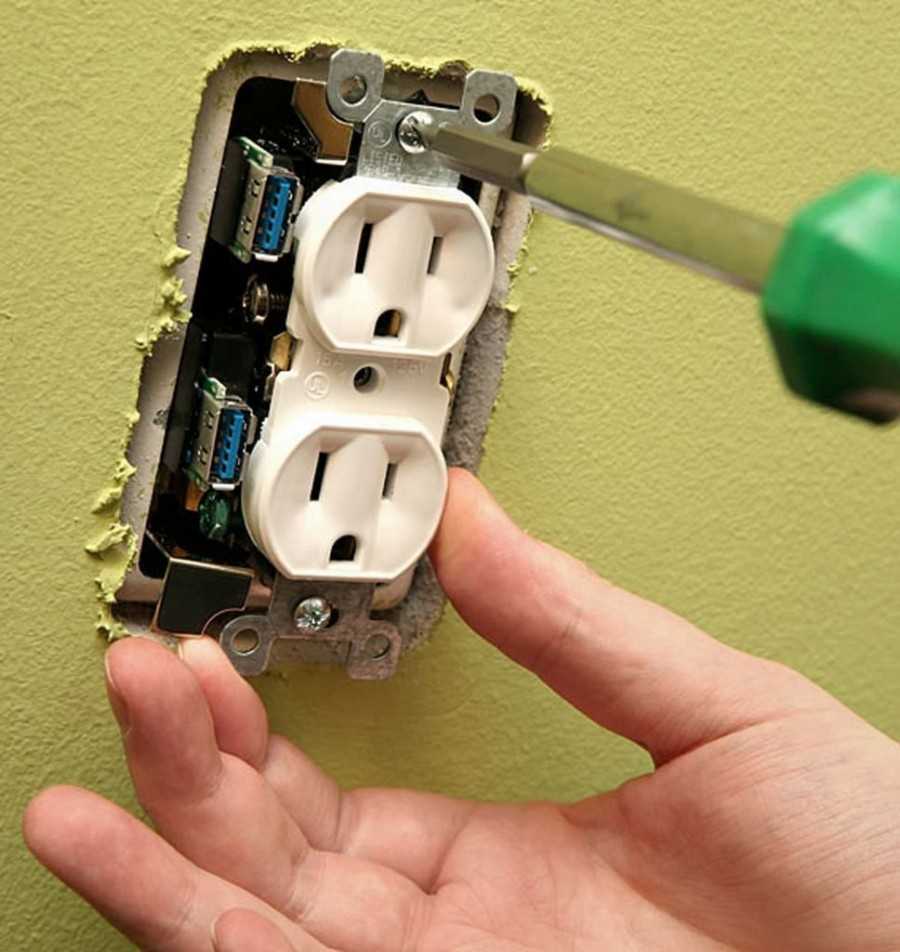
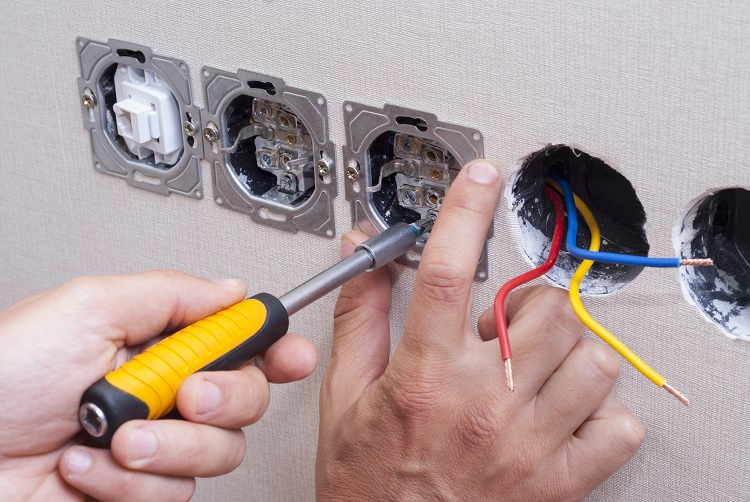
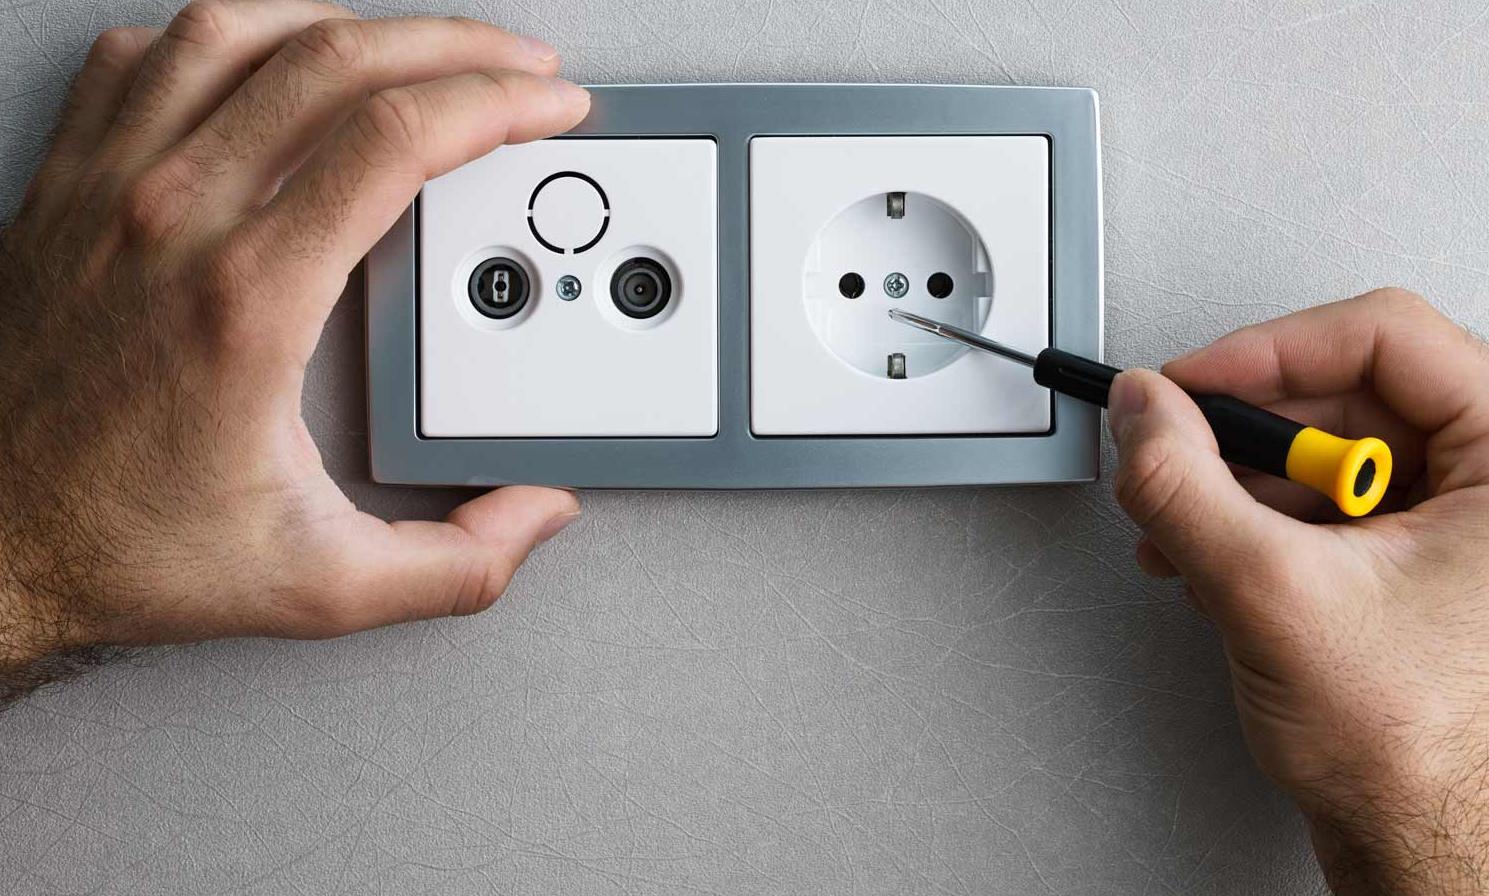
Installing a new outlet
The need to install a new electrical outlet often arises. First you need to disassemble the old socket, and then do the following work:
- Remove the insulation from the wires by 1 cm.
- Bend the bare wires with rings of 0.5 diameter.
- Connect the wiring in the wall and the wires of the socket in accordance with the diagram, clamp it with screw terminals.
- Once again, make sure that the ground wire is connected correctly (not to phase or zero, but to the ground wire).
- Plug the electrical outlet into the socket (the device should not stick out of the wall, be skewed, crooked).
- Gently bend the wires, hide in a glass.
- Fix the electrical outlet itself with the clamps on the sides or with special screws.
- Screw on the decorative trim.
When the socket fell out
Usually the cause of such a problem is improper operation of appliances and pulling the plugs by the cord. To prevent this from happening, the rosette petals are screwed tighter. But even this method does not always protect the device from damage if it is carelessly used.
Some put a piece of sandpaper or linoleum under the petals, then such methods are short-lived. It is better to carry out a complete repair by buying a high-quality socket box. The new electrical outlet will last a long time without complaints.
Tools and materials for repairing a dropped outlet
For work you will need:
- new socket;
- dry gypsum or cement, alabaster;
- sharp knife;
- putty knife;
- primer;
- mounting tools.
Socket restoration work
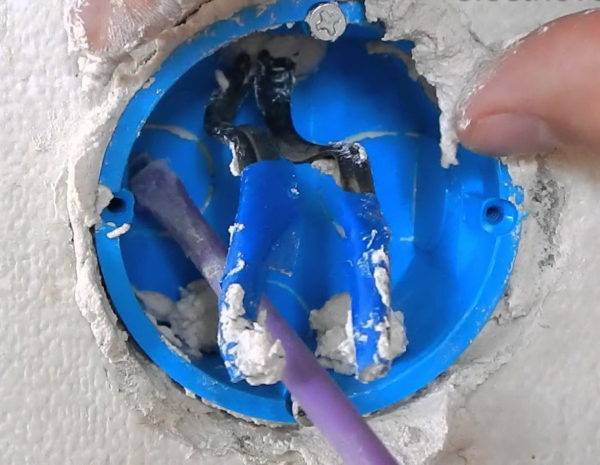
After turning off the electricity in the apartment, you need to remove the old outlet. If there is a metal glass, it must be replaced with a plastic one. If the device is in a concrete niche without a glass, you will have to deepen it and also install a new socket box that matches the shape. You can expand the niche with a perforator, a chisel with a hammer.
Next, you should dilute the alabaster or gypsum to the state of a thick slurry, fix socket box in concrete or drywallby planting on the mixture. The wall must first be moistened with a primer, and the wallpaper around should be pasted over with paper tape. After 10 minutes, the glass should be leveled, excess gypsum should be cut off with a spatula. After fixing the socket box with the screws located on it. Then you can mount a new outlet.
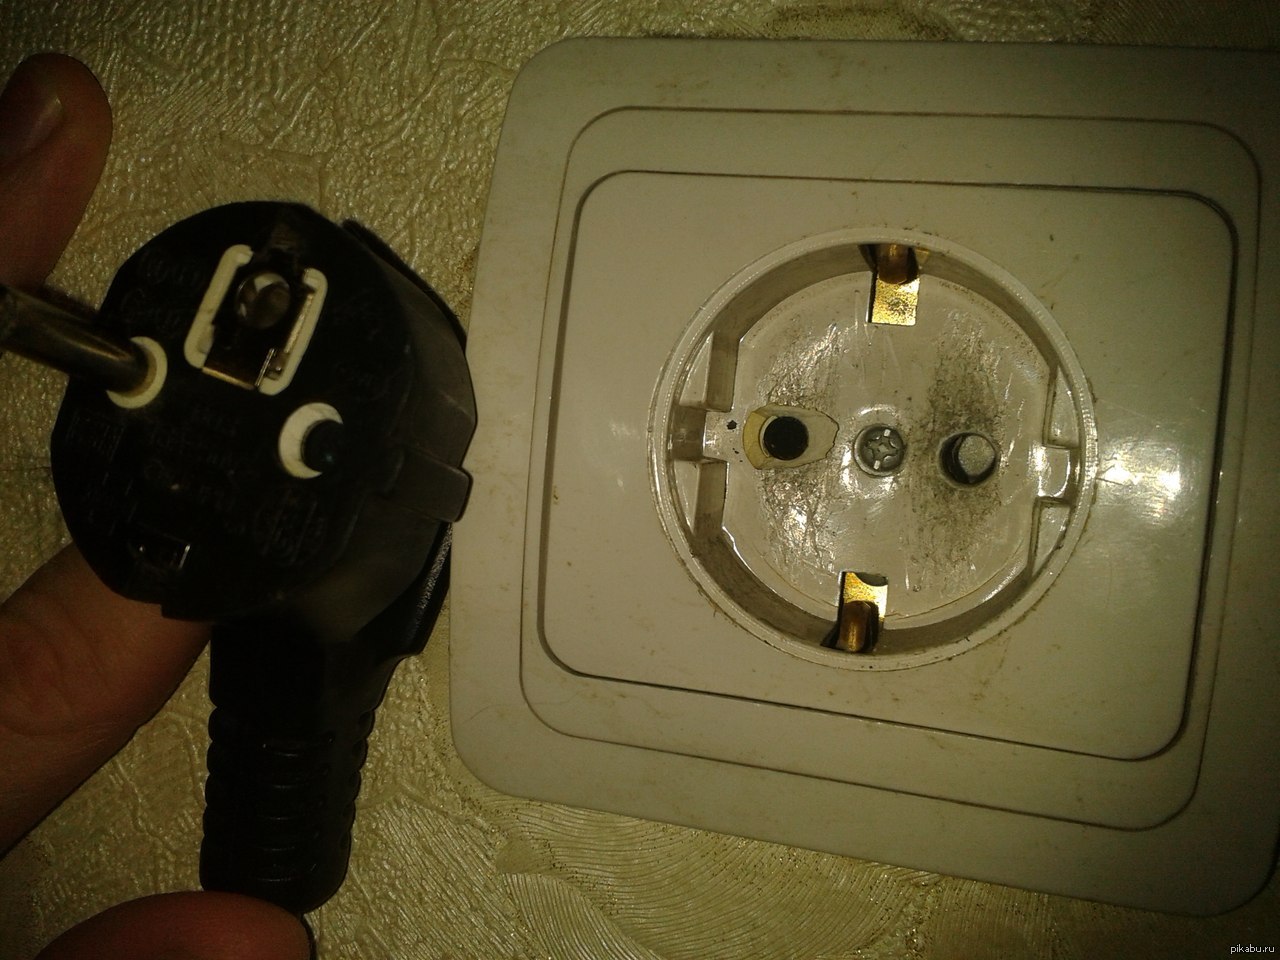
Breakdown of the electrical outlet can be attributed, perhaps, to the most tangible troubles for the owners.
You calmly turn on the household appliance, when suddenly a crackling is heard from the depths of the socket and a light smoke appears above it. It’s good if the fuses of the device or some important microcircuit do not burn out along with the socket! In response to the short circuit, the automatic protection of the electrical panel should work, but you should not wait for this moment. It is necessary to remove the load - immediately disconnect the device from the network.
Fortunately, repairing the outlet in the apartment can be done independently. Even a woman can do this, if she first spends a few minutes to figure out the intricacies of repairing an electrical outlet.
Before you start repair work, you need to provide yourself with the necessary tools and parts at hand:
- screwdriver (flat or cross-shaped, depending on the cover screws);
- pliers;
- vinyl tape;
- indicator for determining the phase (and the presence of voltage in the network).
The principle of operation of an electrical outlet
When the plug of an electrical appliance is inserted into a socket, electrical energy is transmitted through the contacts created from a remote voltage source to the consumer. In doing so, two important rules must be followed:
- the passage of the load current through the formed circuit with minimal heat generation;
- reliable isolation of the contact point, which excludes accidental access of a person to current-carrying parts or the occurrence of short circuits.
To ensure these rules, equipment manufacturers performed calculations, studies, experiments and created those samples that most fully meet these requirements. But, they cannot completely eliminate the occurrence of a malfunction in the outlet, because we, the users, simply violate the operating rules developed by them.
How do defects in sockets occur in everyday life
All violations are manifested:
- mechanical destruction of housing structures or clamps;
- incorrect wiring;
- overestimation of load currents due to the connection of more powerful, off-design consumers.
Mechanical defects
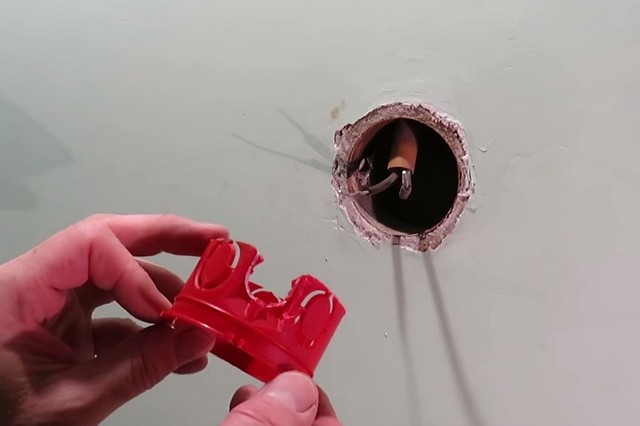
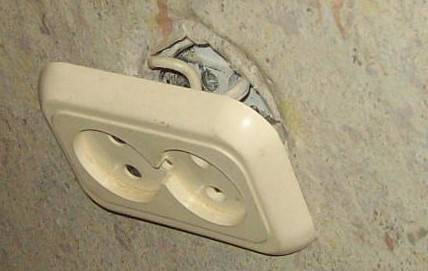
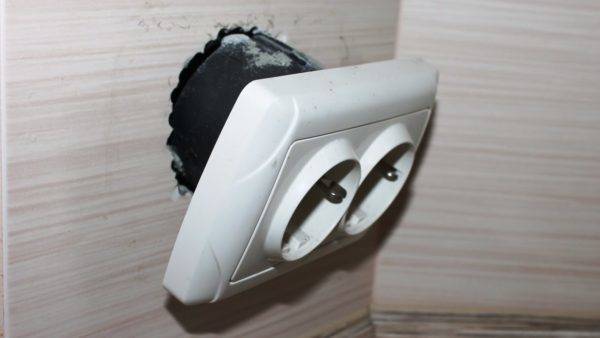
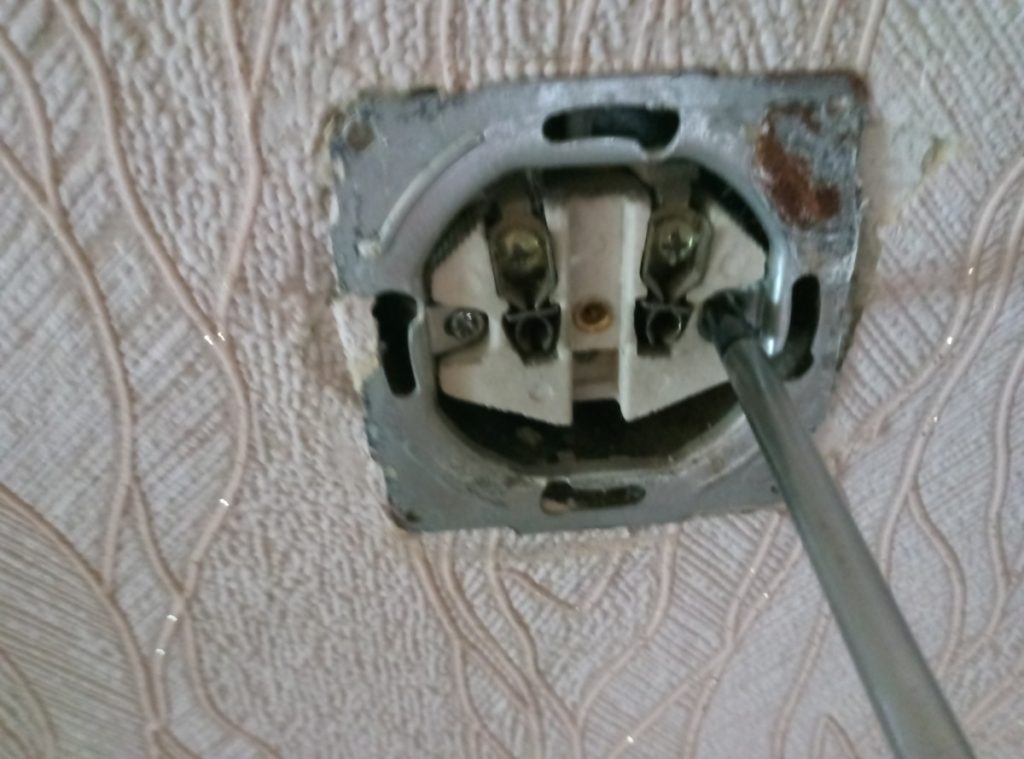
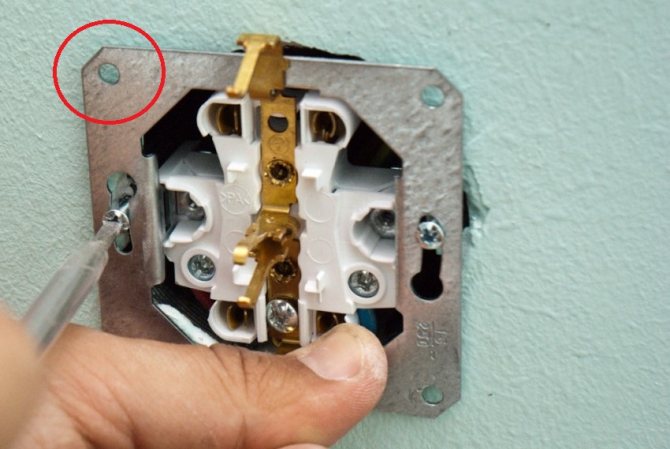
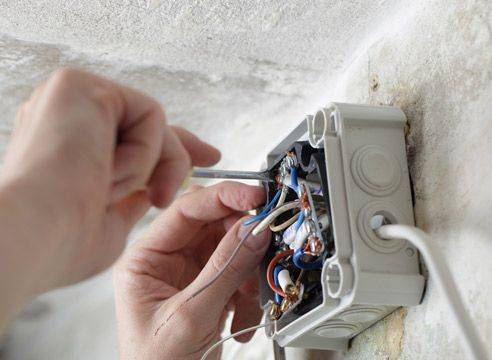
To mount the housing in the wall, special mounting boxes have been developed.The body is fixed in them with screws or expanding legs. If this principle is violated, then it is possible to pull out the socket along with the connected wires from the wall, as shown in the very first picture.


Damage to the hull is visible visually. If they occur, the defective part or the entire structure should be completely replaced.
Wire clamps most often use a screw connection, which can be damaged by threads due to the application of excessive force when twisting.
Electrical defects
Most often, they appear gradually as a result of errors made during installation or improper operation.
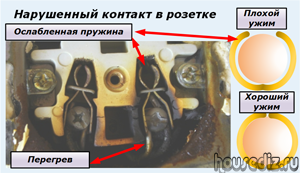 The picture shows the manifestation of a mechanical defect associated with a weakened spring of the right socket of the socket, when the contact of the plug is not completely covered by the pressure plates and due to this, an increased electrical resistance was created at the current transition from the household appliance to the household wiring.
This defect affected the increased heating of the metal wire, which caused the combustion of the insulating layer.
Working with electricity, the home master must constantly be aware that physical processes have long been described by Ohm's laws for the ratios of current, resistance, voltage and Joule-Lenz - the dependence of the heat generated on the magnitude of the load current I and the contact resistance R, taking into account the duration of work t.
Q=I2∙R∙t.
Heating increases as any of the components of this equation increases.
These laws should be considered in constant life.If, even for a short time, consumers of 2 kW are connected to an outlet designed to work with a rated load of 6 amperes, then a current of 2000/220 = 9.09 amperes will flow through it, which is one third more than the calculated value.
The above example is quite typical for most owners, who are not even aware of the malfunctions that they create with their own hands completely unconsciously, including a three-watt heater in a simple household outlet all night in cold weather.
Troubleshooting Procedure
All sockets in the apartment do not work
Possible causes of such a malfunction can be formulated as follows:
- there is no general power supply of the apartment;
- there was a malfunction in the input switchboard;
- all sockets of the apartment are powered from the shield from one group, the wiring of which turned out to be damaged or de-energized.
The general lack of tension is easily determined. If the input machine is turned on, the outgoing machines are also turned on, but the electrical appliances in the apartment do not work (including in the kitchen), while there is no light in any room, which means there is no power at all. We are finally convinced of this by checking the indicator for the presence of voltage on the introductory machine.

If there is voltage at the input terminal of the machine and its absence at the output terminal, turn off and turn on the machine again. If nothing has changed, the switch is defective and must be replaced.
In the same way, we check all outgoing switches. Among them we find the one from which the socket group is powered. If voltage is supplied to the line, and the socket group does not work, you should look for a wire break. The power supply of the socket group can be carried out through branching boxes, or by a loop.In the first option, you need to open the box first from the shield and ring the wires to determine the place of the wire break. In the second option, the socket closest to the shield is opened, the wires coming from the shield are disconnected.
Outlets not working in one or two rooms
If a switchboard is installed that has an introductory machine and several outgoing ones, we are trying to determine which of the machines feeds that section of the wiring where the sockets do not work. Most often, socket and lighting wiring in one room or in two rooms are combined into one group, powered by one machine. Sometimes sockets are installed on the same wall in different rooms. We check whether all the machines are turned on, if so, we check the presence of voltage at the input and output of the machines. If there is a disabled machine, we turn it on. If the lowered toggle switch does not rise in the shield, there can be two reasons:
- the mechanical drive of the machine is faulty and the device must be replaced;
- the circuit breaker has just been tripped by the protection and the thermal release has not yet cooled down.
In the first case, it is necessary to purchase an automatic machine of the required denomination and replace the faulty one with it. In the second case, we are looking for a place of damage. Since the wiring in modern apartments is hidden, access to the wires is possible only in shields, junction boxes (if they are installed and not walled up in the wall) and in the sockets themselves.
Armed with a multimeter, we measure the resistance between the phase and neutral wires of the found group, of course, turning off the voltage. This measurement is made from the introductory shield. Upon detection, we try to track the route of the wiring group of interest to us.You need to find a junction box into which two wires come, indicating a short circuit. If the found box has a lid, open it, remove the insulation from the twists, disconnect the wires and release the pair that showed a short circuit. We measure the resistance of this pair towards the input shield. A resistance close to zero means that the fault is in the wiring between the inlet shield and the junction box. If it is not possible to remove the wires, it remains only to lay new wiring in this area.
Damage to buried wiring rarely occurs on its own. It is not uncommon for a wiring fault to be detected after repair. When drilling holes in walls, for example to hang a cabinet or shelf, the wiring or its insulation may be damaged. To prevent this from happening in the future, we recommend that you read our tips on how.
A short circuit can occur after flooding the electrical wiring when heating or water pipes break, or after a flood in the bathroom of neighbors from above. Wiring insulation may have minor imperfections that do not show up when the wires are dry. When moistened, cement dust with water forms a conductive medium, resulting in a short circuit, burnout of the insulation and sintering of the wires with each other.
Problems with one outlet
If one outlet in the room does not work, one of the reasons may be a weakening of the contact, as a result of which the wire may simply fall off. In this case, troubleshooting comes down to what you need, remove the socket from the strobe and check its connection. The video below clearly demonstrates the repair technology:


Conclusions and useful video on the topic
Video #1 Installing a new outlet and dismantling the old one:
Video #2 How to properly replace a burned-out outlet:
Video #3 A step by step guide to replacing an outlet from a professional electrician:
Video #4 How to quickly and efficiently change the outlet with your own hands:
If problems with power points caught you unprepared, and the process of repairing an outlet will occur for the first time, it is important to remember to remain completely calm. It is imperative to de-energize the room, and, if necessary, eliminate the fire
Carry out repair and installation work with full concentration and care
If the results of the work do not suit you or you feel a lack of confidence in the success of the work done, immediately contact a professional electrician with experience
Carry out repair and installation work with full concentration and care. If the results of the work do not suit you or you feel a lack of confidence in the success of the work done, contact a professional electrician with experience immediately. Don't skimp on safety!
Don't skimp on safety!
Do you want to share your personal experience gained during the repair of the outlet with your own hands? Any questions in the process of getting acquainted with the information provided? Please write comments.


