
- If a switch is added to an existing outlet
- General safety rules
- Main types of switches
- Types and characteristics of socket boxes
- Choosing a socket according to the material of the walls
- What form are the products made in?
- Installation box size
- The material of the junction boxes
- Do-it-yourself installation in the wall of an apartment: instructions
- Power calculation
- Bathroom standards
- Installing a double outlet
- Installation of universal electrical sockets (power)
- Installation of the socket
- Socket connection
- The subtleties of connecting the socket block
- Tools and materials
- Preparing to install an outlet
- Sockets (switches) outdoor location
- Installation of sockets (switches) of a hidden location
- Varieties
- Making the necessary holes
- General wiring diagram of the switching device
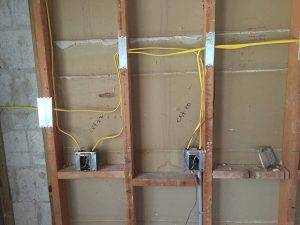
- Wall marking and cable laying
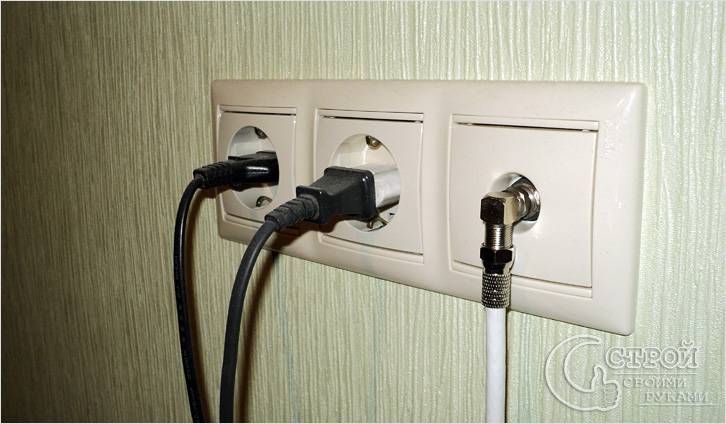
If a switch is added to an existing outlet
Minimizing the consequences - replacing the outlet with a block. The procedure itself is simple, we drill a hole for the box next to it, and carefully mount the new module.
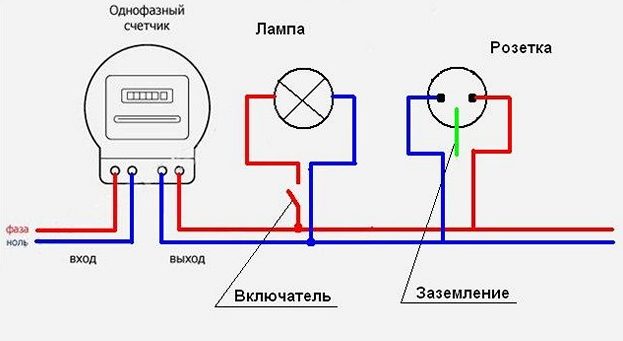
The incoming power cable does not need to be wound, it is already in the socket. But the output wiring, to the lighting device, will have to be stretched. This is an individual decision, there is no universal way.The connection diagram is very simple: both the neutral and phase wires are laid not from the box, but from the socket.

Naturally, you will have to install contact pads. Although many connect the output wire directly to the socket contacts: some models allow such a connection.
If there are several outlets in the group, any of them can be replaced with a common unit (socket - switch). You simply choose a convenient place (from which you can stretch the wire to the lamp), and connect the switch to the outlet.
If necessary, organize an additional light point in the hallway, you can use wall sconces. They are located in close proximity to the socket-switch block, and you do not have to destroy a large piece of the wall for wiring.

General safety rules
Of course, before starting such work (especially on a finished power supply system), you should de-energize the line and check the absence of voltage. The selection of a power cable will not cause difficulties: a cross section of 1.5 mm² is enough to organize lighting. Since we are connecting the switch to the socket, and not vice versa, the primary (outlet) cable will be more powerful: 2.5 mm².
Main types of switches
The time has long passed when all models were approximately the same and differed only in appearance. Today, the manufacturer produces a variety of types of switches. According to the type of off / on, all of them can be divided into several groups.
No. 1: Keyboard type devices
Very simple and reliable design. The basis of the device is a rocking mechanism, which is pressed by a spring. When a key is pressed, it closes the contact, which turns the electrical device on or off.
For the convenience of consumers, one, two and three-gang switches are produced. This makes it possible to control not only one, but several lamps at once.
No. 2: Switches or toggle switches
Outwardly, these devices are indistinguishable from their keyboard counterparts, but their principle of operation is completely different. When a key is pressed, the devices open one electrical circuit and transfer the contact to another.
This allows simultaneous lighting control from two, three or even more locations. Complex circuits, in which more than two switches are involved, are complemented by cross elements.
 Dimmers not only turn on the lighting, but also regulate its intensity. There are also multifunctional varieties of devices that can simulate presence, work on a timer, and much more.
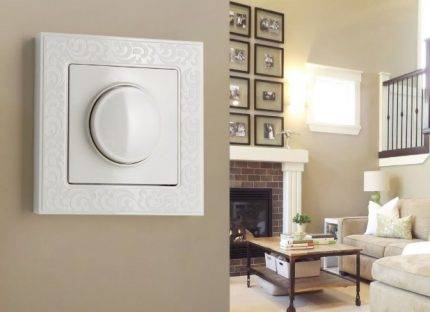
#3: Dimmers or Dimmers
A switch that allows you to adjust the intensity of lighting. The external panel of such a device is equipped with keys, a rotary button or infrared sensors.
The last option assumes that the device can receive signals from the remote control. Complex dimmers can perform several functions: activate the dimming mode, simulate presence, turn off the lights at a given time.
No. 4: Switches with built-in motion sensor
Devices react to movement. The appearance of people is registered by a sensor that activates the lighting and turns it off when there is no movement. To work with the switch, an infrared sensor is used, which is able to analyze the intensity of infrared radiation and distinguish a person from other objects.
Multifunction switches with a motion sensor can not only turn on lighting devices, but also activate video cameras, sirens, etc.
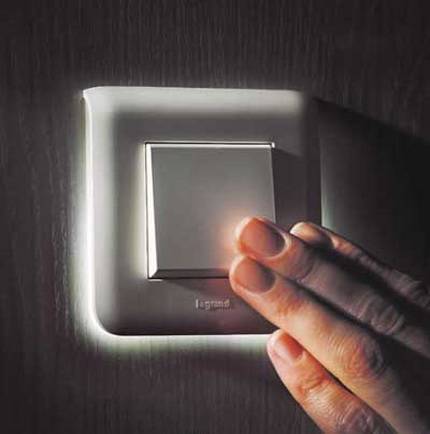
#5: Touch Devices
Turn off / turn on the lighting with a light touch of the sensor. Varieties are produced that work when a hand is passed near their body. The main difference between touch switches and traditional analogues is the presence of microcircuits.


This eliminates the risk of a short circuit, which significantly increases the life of both the switch itself and the lighting device.
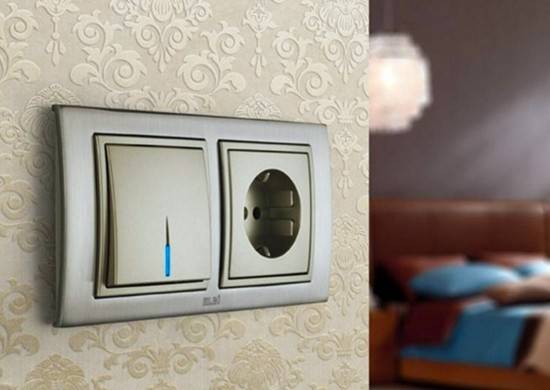
There are many types of switches. Illuminated models are designed to facilitate orientation in a dark room
Types and characteristics of socket boxes
Modern sockets, both in appearance and in the method of installation, differ significantly from those that were installed in the houses of the Soviet era.
If earlier they were simply embedded in the wall without the possibility of replacement, today it is not particularly difficult to install them and, if necessary, change the outlet.
And all this thanks to the socket, which, in fact, is a box that securely holds the socket in its bowels and at the same time ensures its fire safety.
Socket boxes come in different shapes and sizes, differ in materials of manufacture and installation method, so before you buy, you need to understand their types.
Choosing a socket according to the material of the walls
The main selection criterion is the material of the walls into which the socket boxes will be installed.
On this basis, there is the following classification of boxes:
- structures intended for installation in walls made of solid materials: concrete, reinforced concrete, aerated concrete, brick;
- glasses for walls made of composite materials: drywall, plastic boards, chipboard, plywood and others.
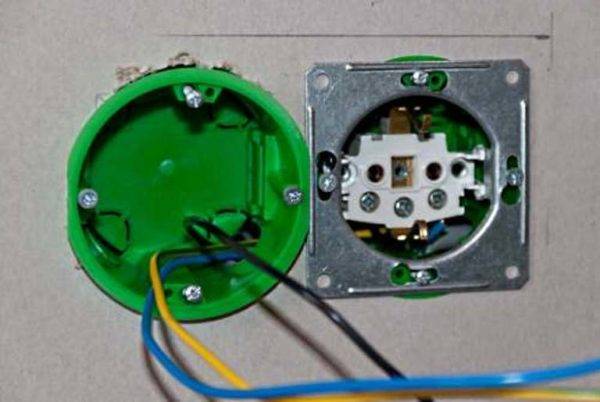
In the first case, the socket box is a round glass, on which there are no additional elements. It is fixed in the wall with mortar.
Its walls or bottom have mounting holes for electrical wiring. When installing the socket, it is enough to remove the jumpers and squeeze out the plug.
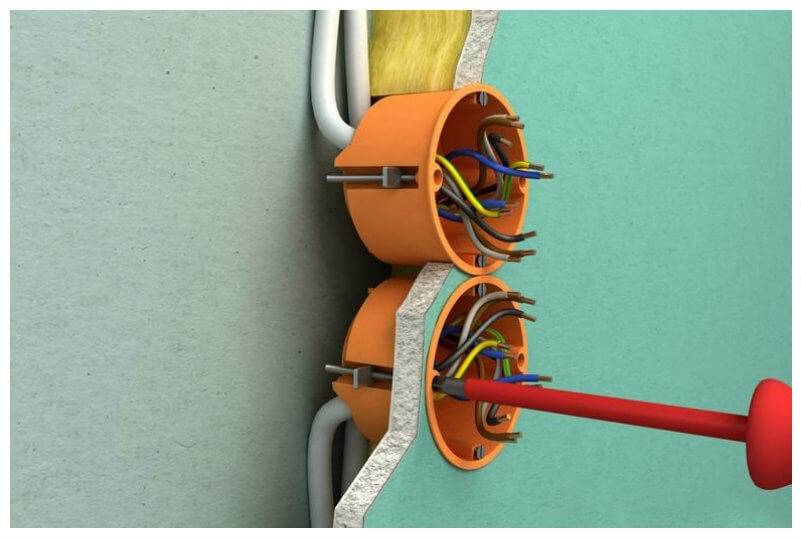
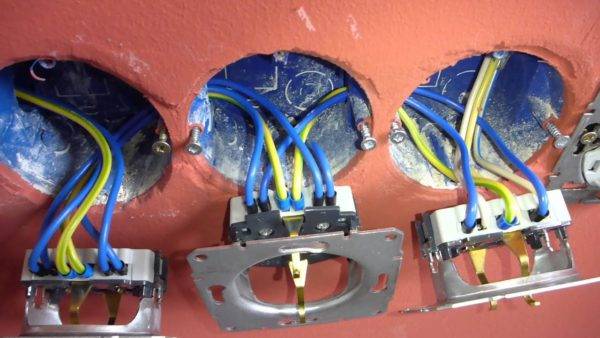
For mounting several nearby sockets, you can use the glasses, on the side of which there is a mounting mechanism. Socket boxes are connected to each other with the help of special grooves and combined into blocks.
Drywall boxes have special clamping plastic or metal tabs designed to secure the elements in hollow walls. The clamps are mounted on screws that rotate to adjust their position.
What form are the products made in?
The most widespread are round-shaped socket boxes. It is very easy for them to make a hole in the wall using a variety of tools.
Round glasses can be used both for mounting a single socket or switch, and they can be combined into groups by connecting to each other by means of docking nodes.
Square boxes, although not used so often, have certain advantages. Their volume is much larger, so you can hide a lot of wires in them.
Often they are used for the installation of elements of the "smart home" system.There are single and group socket boxes of square shape, designed for installation of up to five sockets.
Oval boxes are also on sale, which, like square ones, have a large internal space. They are convenient in that you can immediately connect a double outlet to them. All the products described above are mounted in walls and used for hidden wiring.
There is another type of mounting boxes that stand somewhat apart - plastic lining or in other words multiboxes designed for open installation on a baseboard. They are designed for one or more outlets and are usually square in shape.
External socket boxes have two modifications - designs with installation to the middle of the plinth or to the floor. Since the multiboxes are mounted on top of the plinth, their distinctive feature is their aesthetic appeal and original design.
Installation box size
An important parameter of the socket boxes is their dimensions, which are selected based on the specific installation conditions. The size fork in diameter is 60-70 mm, in depth - 25-80 mm.
Standard designs have external dimensions of 45 x 68 mm, while keeping in mind that the internal depth in this case will be 40, and the diameter will be 65 mm.
Glasses of enlarged dimensions, the depth of which is about 80 mm, are advisable to use when there is no junction box in the electrical wiring, and the socket box itself performs its functions. As for square products, as a rule, they have a size of 70x70 or 60x60 mm.
The material of the junction boxes
The most popular are socket boxes made of non-flammable plastic.They can be installed in concrete walls and structures made of composite materials.
There are also metal boxes, which in the old days were used everywhere, but today they have almost been replaced by plastic products.
Metal sockets are usually installed when installing electrical wiring in wooden houses. They are made of galvanized or non-ferrous metal and cannot be welded, so the connection with a metal pipe is made by soldering.


Do-it-yourself installation in the wall of an apartment: instructions
There are certain requirements for installing sockets in an apartment. First you need to calculate the power that is needed for the power point. Consider the nuances of installation in rooms with different microclimates. A special connection requires a power outlet.
Power calculation
Power is the main characteristic of an electrical device. Before buying an electrical outlet, calculate what total load it will withstand. Also consider whether the wiring can withstand such a load. Look for data in special tables that reflect the cross-sections of the cores, material, voltage, current strength and wire power.
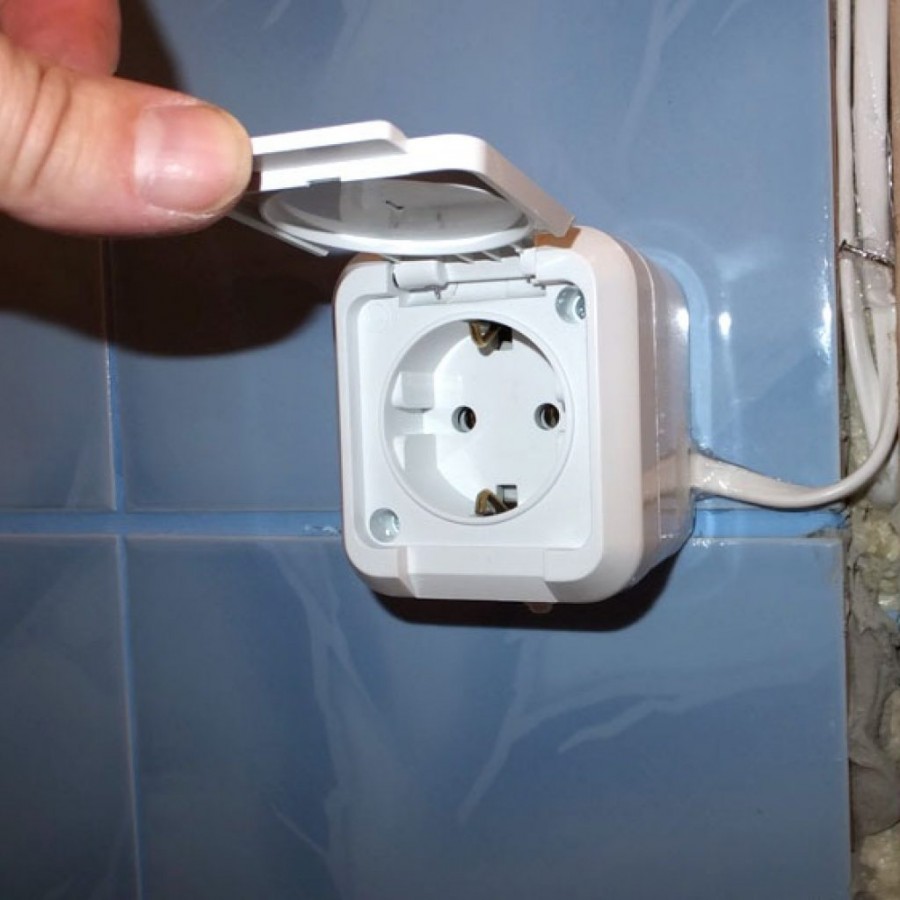
Bathroom standards
The bathroom is a room with a high level of humidity. If a power point is installed here, then adhere to the following rules:
- sockets must be installed at least half a meter from grounded parts (pipes, sinks, batteries);
- the electrical outlet is placed at a height of 50-100 cm from the floor;
- skirting devices are mounted no closer than 30 cm from the floor.
Also, the electrical outlet must be resistant, durable, with a certain degree of moisture and dust protection.
Installing a double outlet
A double electrical socket is used to connect two household appliances at once. They are stationary and prefabricated.
A fixed outlet is installed in the same way as a regular outlet.
It is important to ensure that the cables are connected to the conductive plates, otherwise a short circuit will occur.
The assembly is more difficult to install. For installation, you need a conductor of the same length as that connected to the main socket. This means that a network with three conductors (2 power and ground) requires three additional cables. Additional are stretched between the sockets. In the one in which there is an output of the main electrical wire, pairs of cables (main and auxiliary) are connected to the clamps. In the second socket, everything is connected as standard.
Installation of universal electrical sockets (power)
Power sockets are needed to connect powerful appliances: a washing machine, a water heater. The design differs from a conventional product: it is much thicker and designed for a load of at least 40 Amps.
Before connecting, make sure that the electrical wiring complies with safety requirements. Otherwise, do not connect the power outlet, or fire may result. It has a separate line leading to the switchboard.
A power outlet is installed in the place where the power cable exits. Usually it is next to the stove. Fastening is carried out with dowels.
Installation of the socket
Installing an outlet in a glass begins with a recess cutout. The depth depends on the type of socket. If the outlet is a pass-through, that is, other cables pass through it, then the depth should not exceed 7-8 cm.

In the event that the socket box is final, the recess should be no more than 5 cm
It is important that during installation it should be borne in mind that the wires must lie freely in the housing. Indeed, in a tightly kinked cable, they can be damaged
As a result, the entire structure will have to be disassembled and redone.

Sockets are divided into two types:
- For drywall
- For hard stone

In the first version, the design of the socket box consists of a plastic case and metal latches on the sides. Fixing on drywall, the latch enters the groove, tightly holding the socket body. For reliability, the structure is fixed with two dowels.

The second option is provided for stone or brick walls. In the same case, the body is made of polycarbonate with two lugs on the sides. In the recess, which was previously hollowed out with a puncher, the socket body is fixed.


Socket connection
Direct connection of the outlet when installing in drywall is performed immediately. If the back box is fixed with mortar, you will have to wait 2-3 days. The sequence of further actions is as follows:
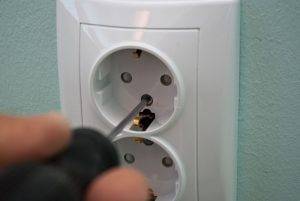
- shortening the protruding cable;
- stripping the ends of the conductive wires;
- screwing wires to socket terminals;
- socket installation;
- fixing a decorative frame.
The tail of the wire protruding from the socket is too long, so it will need to be cut. It is necessary to leave such a length that when folding it can be hidden in the remaining space of the box. The ends of the wires are cleaned of insulation. In the absence of a special tool, this can be done with a mounting knife, being careful not to damage the conductive core. In the instructions for the outlet, it is recommended to do a cleaning on clay of 10-15 mm.
 Wire stripping degree
To properly connect the wires to the socket terminals, you need to separate the ground wire, if any. Phase and zero have one-color insulation, and grounding is two-color. The supply wires are connected to the side terminals. Grounding is in the center.
 Wiring
In the next step, you need to carefully fold the wires to put the outlet in the installation box. Next, using a screwdriver, you need to screw it to the socket using screws. It is also possible to fix with spacers. They are located on the sides of the outlet. The more you twist them, the wider they move apart and provide rigidity of fixation.
 Attachment to the socket
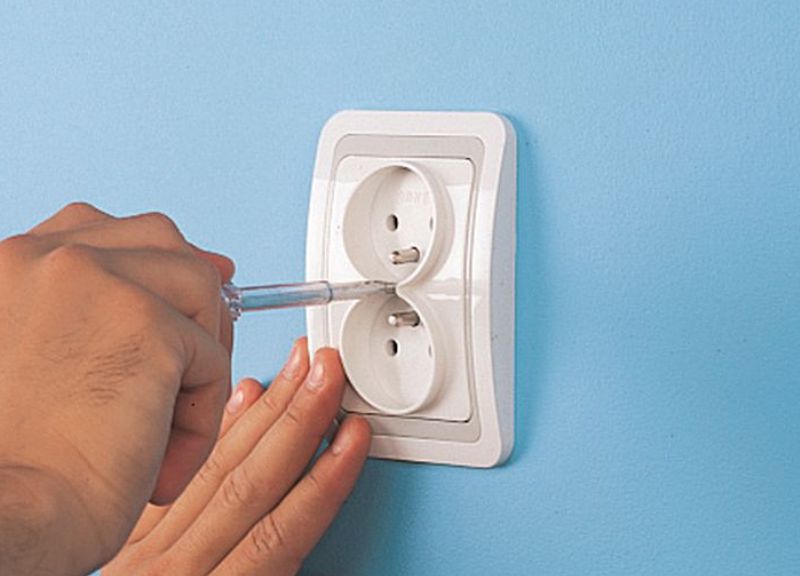
After fixing the socket, you need to snap its frame. In the event that it is not there, then screw the patch panel. It is held in place by a single screw in the center between the plug holes.
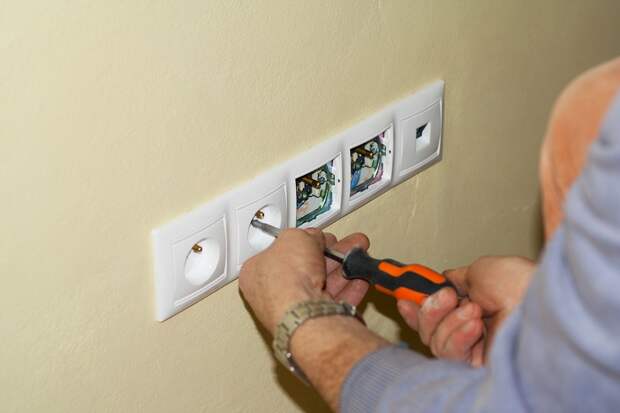
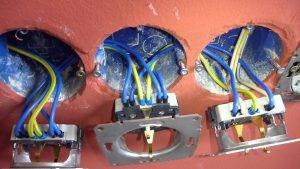
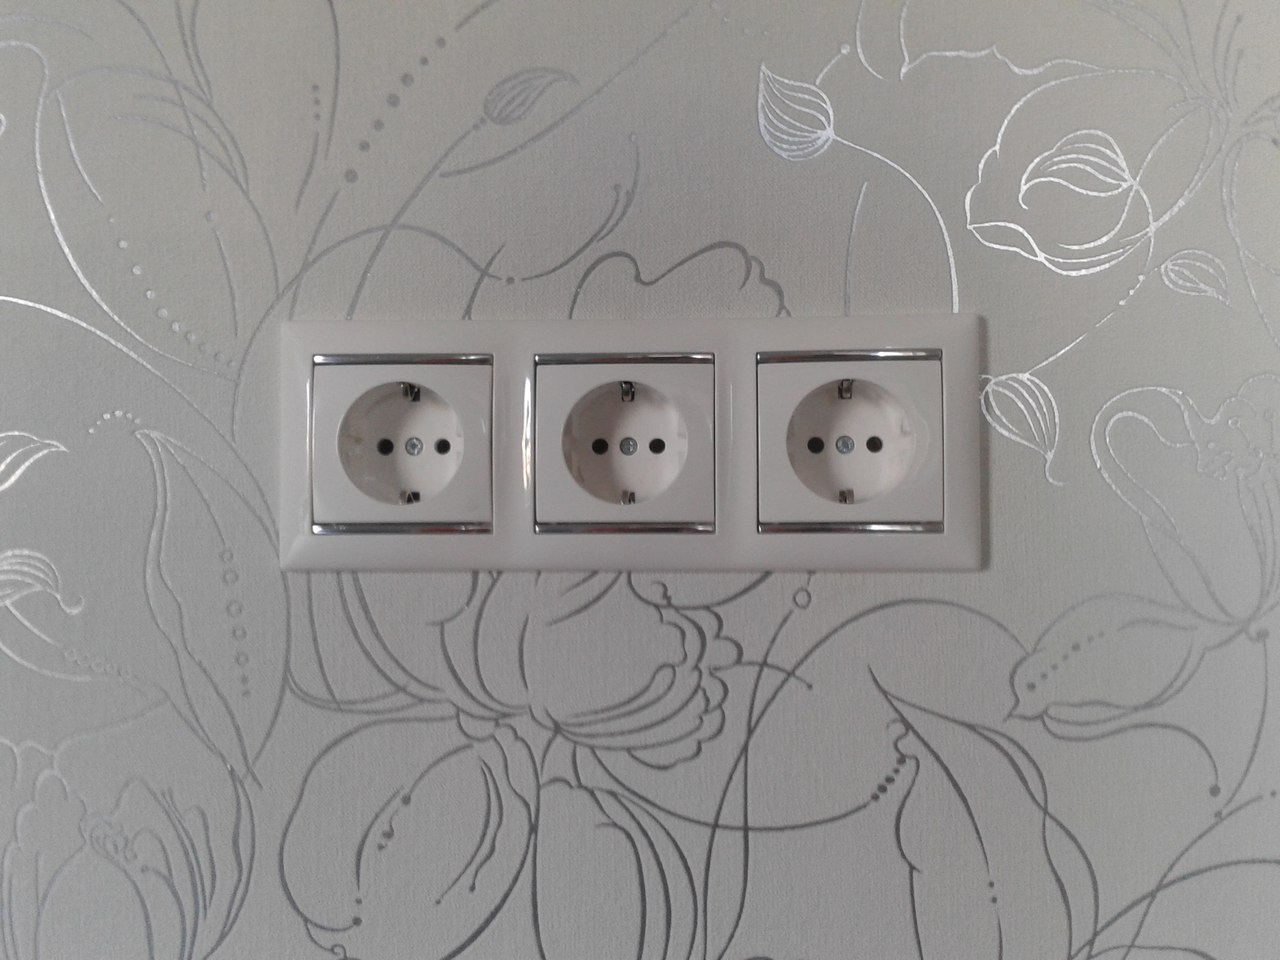
The subtleties of connecting the socket block
When connecting a double, triple or block of sockets, a parallel connection will be required. To do this, cut into small pieces of wire 15 cm in size. Their ends are stripped of insulation. Such segments are used to connect socket terminals. On sale you can find special blocks immediately interconnected.
 Block connection
Tools and materials
To work with electrical fittings in the apartment, you will need the following tools and materials:
- Phase indicator (phase indicator).
- Screwdrivers 4-6 mm, straight and Phillips.
- Pliers with insulating handles.
- Nippers-side cutters No. 1 or No. 2.
- Mounting knife.
- Insulating tape vinyl and cotton.
- For transferring sockets - C-type insulating caps (not for signal connectors, see the figure below in the center) and conductive paste (cold solder).
- Silicone sealant in the smallest package; consumption - grams.
- For installing new or transferring sockets - an electric drill.
- For mounting sockets on drywall - core drill 67 mm or feather drill 32 mm, depending on the installation method, see below.
- For installation on concrete - crown for concrete with a diameter of 70-75 mm and a height of 45 mm.
- Small drills, dowels for flea screws.
- For beginners - an insulation stripper.
On the removal of insulation and other work operations, you need to talk specifically.
Preparing to install an outlet
There are two main schemes for laying electrical communications - open, made on the wall surface and hidden - when all electrical wiring is located under the surface of the plaster or wall sheathing. Depending on this, the stages of installing sockets also differ.
In the first case, their installation does not require laborious preparation of a niche in the wall, in which the socket box and the socket itself will be located.
Sockets (switches) outdoor location
On the wall, at the location of the outlet, with the help of dowels (nails, screws), a wooden rectangular or round block (plywood 10 mm thick) is fixed in size by 20-30 mm. larger than the socket (switch).
Only sockets and switches for outdoor installation are suitable for outdoor installation.
Before installation, a decorative plastic box is removed and a plastic plug is broken off on it, at the point of entry of the electric cord, using pliers or a round file.
The terminal block is screwed to a wooden (plywood) block using self-tapping screws or screws. After that, the ends of the electrical wiring are connected.
The wires are pre-protected with an insulation stripper or a retractable construction knife with replaceable blades - in the absence of a stripper.
The wires are crimped around the terminal block in such a way as to freely pass through the hole in the cover in place of the broken plug.
After that, the socket cover is screwed over the terminal block.
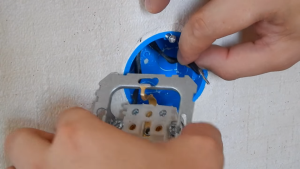
Installation of sockets (switches) of a hidden location
If the socket (switch) is installed in a standard socket in a brick (reinforced concrete) wall, then installation is not difficult.
The ends of the wires are pulled out of the niche and bent up. A metal or plastic socket box is oriented so that one of the wire entry plugs is located opposite the wire outlet. Using a construction knife or a flat screwdriver, one of the plugs is removed.
The ends of the wires are passed through the hole.
The socket box is fixed in a niche with a quick-hardening gypsum mortar or building mastic.
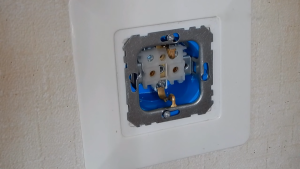
After reliable fixation, the gaps between the socket box and the niche opening are puttyed. To prevent the solution from getting into the socket, for the duration of work, you can fill it with crumpled newspaper or seal it with tape.


After the putty dries, the wall surface is polished with an abrasive mesh stretched over a sanding block.
It is necessary to deepen the socket so that it does not protrude above the plane of the wall. Otherwise, a gap will form between the outlet cover and the wall.
After completing this step, a terminal block or a switch key is attached to the wires. Excess wires are recessed into the cavity of the socket. The terminal block or key is fixed in the socket with the help of sliding legs located on the sides of the terminal block or with the help of the screws included in the socket set.
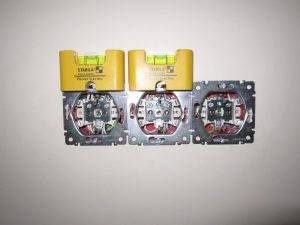
Lastly, the cover of the socket (switch) is mounted.The level checks the horizontality of the upper edge of the cover. If necessary, adjust with a slight twist. Then the fixing screw is tightened.
Varieties
Sockets and switches are usually classified on several grounds.
- Overhead or external. They are mounted on the surface of the wall. They are convenient to install or repair, but it does not always look good.
- Internal. The device is "recessed" into the wall surface with the help of a special recess made in advance - a mounting socket. From the outside, only the switch key or holes for connecting to the electrical outlet are visible.
By type of construction
- For internal and external wiring.
- Single, double or triple.
- Ordinary or with increased moisture protection. The latter are especially relevant for bathrooms or kitchens (how to properly position one or more outlets in the kitchen?).
- Equipped with a ground loop and without it.
- With or without closing covers or shutters.
- Special types - computer, telephone, etc.
- By type of voltage - 220 and 380 V for old power networks, since 2003, the transition to a 230 and 400 V system has begun. There are safe low voltage networks, but they are used in industrial premises (with a high level of moisture, fire hazard, etc.) , do not occur in everyday life.
Making the necessary holes
If you only need to replace the old one and connect a new switch, then this step can be skipped, but those who “from scratch” establish lighting in the house cannot do without construction work.

To install a hidden switch with wiring located inside the walls, you will have to do the following:
- Determine the location for the switch.
- Mark the line of future wiring from the nearest junction box to the immediate exit point.
- Drill a channel in the wall with a depth of 2 cm, and make a hole of the required size for the switch.
- Lay the wiring from the box to the switch straight, but without pulling, fasten with clamps and plaster.
- Installing and connecting the switch
The future place for the new device must be thoroughly cleaned, and the protruding wires should be cleaned one or two centimeters.

Next, proceed directly to the connection of the switch:
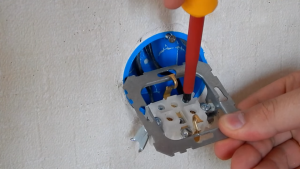
- We install a socket box in the prepared hole, not forgetting to bring the wires into special holes on the back wall.
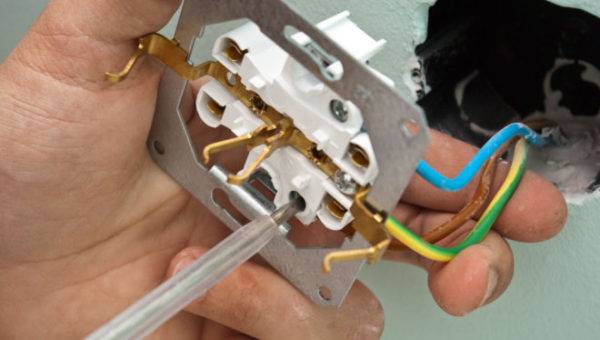
- We disassemble the switch into two parts: the core and the decorative cover.
- We fix the cores in special clamps, tighten the fixing screw and check the reliability of fastening (the outgoing contact will burn, provoke current leakage and, in the worst case, can cause a short circuit and fire).
- We twist the remaining elements of the device, making sure that the case does not change its position.
- We unwind the existing spacers or legs, insert it into the socket, adjusting the position strictly horizontally.
- We fix the support screws, check the stability of the structure.
- We fix the protective frame.
- We place the keys, following the combination of special buttons and grooves of the device.
More details should be considered how to properly connect a switch with one, two or three keys. The single-key is considered the simplest, since there are only two wires - zero and phase.


In the case of two keys, there will be three pins on the back of the switch housing. A lone input is intended for the input phase, and two adjacent openings are for outgoing phases to different groups of luminaires. Scheme triple switch connections similar to the previous one with the only difference that there will be three holes for three groups of light bulbs at once.
General wiring diagram of the switching device
Failure to follow the basic installation rules, even for such a simple device as a switch, can lead to very unpleasant consequences. Among which are overheating and sparking with a possible subsequent short circuit, as well as the voltage that is stored in the wiring.
This is fraught with electric shock even if you just need to replace the lamp with the lights off.
Therefore, before connecting the switch, it is worth remembering the main connection elements well:
Zero vein. Or, in electrician jargon, zero. It is displayed on the lighting device.
The phase assigned to the switch. In order for the lamp to go out and light up, the circuit must be closed within the phase core
It is important to remember that when the switching device is brought to zero in the opposite direction, it will work, but the voltage will remain. Therefore, to replace the lamp, for example, you will have to disconnect the room from the power supply.
Phase assigned to the lamp
When you press the key, the circuit will close or open at the point of breaking the phase channel. This is the name of the section where the phase wire ends, leading to the switch, and the segment stretched to the light bulb begins. Thus, only one wire is connected to the switch, and two to the lamp.
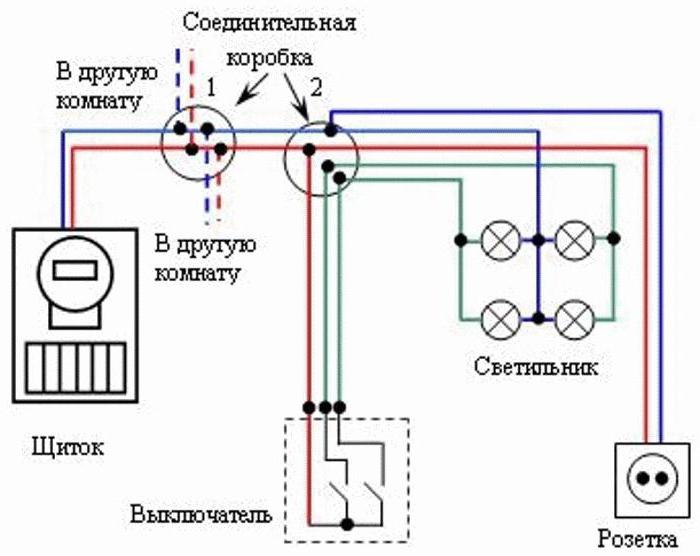
It should be remembered that any connections of conductive sections must be carried out in a junction box. It is highly undesirable to perform them in a wall or in plastic channels, since complications will certainly arise with the identification and subsequent repair of damaged fragments.
If there is no junction box near the installation site of the switch, you can extend zero and phase from the input shield.
The figure shows the connection diagram of a single-gang switch. Wire junctions are marked with black dots (+)
All the above rules apply to a single-gang switch. They also apply to multi-key devices with the difference that a fragment of a phase wire from the lamp that it will control is connected to each key.


The phase stretched from the junction box to the switch will always be only one. This statement is also true for multi-key devices.
Replacing the switch or installing it from scratch is carried out only if there is a fully formed electrically conductive circuit.
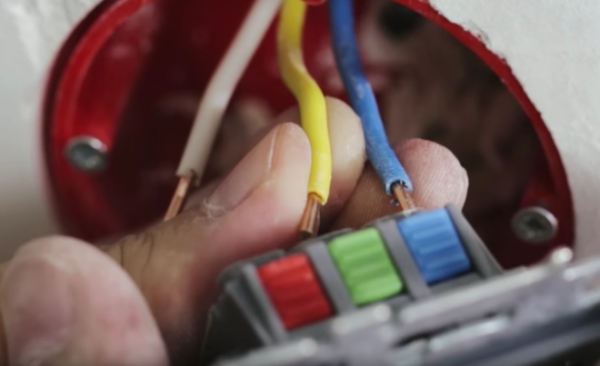
In order not to make a mistake when working with wiring, you need to know the marking and color of current-carrying channels:
- The brown or white color of the wire insulation indicates the phase conductor.
- Blue - zero vein.
- Green or yellow - grounding.
Installation and further connection is made according to these color prompts. In addition, the manufacturer can apply special markings to the wires. All connection points are denoted by the letter L and a number.
For example, on a two-gang switch, the phase input is designated as L3. On the opposite side are the lamp connection points, referred to as L1 and L2. Each of them will need to be brought to one of the lighting fixtures.
Before installation, the overhead switch is disassembled, and after connecting the wires, the housing is mounted back
Wall marking and cable laying
Do-it-yourself installation of an outlet begins with laying a cable. To do this, it is necessary to mark the boundaries of the recess where the wire will lie with a construction pencil.

This can not only save materials, but also make your work much more convenient. In order to make the workflow itself as simple as possible, you need to take care of a set of tools. So, we need:
- Perforator (can be replaced with a hammer and chisel)
- wire cutters
- Putty knife
- cement mortar
- Insulating tape
- multimeter

After making the strobe, you need to start choosing the cable itself. In consumer mode (that is, 220V), the current value ranges from 12-20 amperes. This means that the cable section must withstand this load with a margin in order to avoid a short circuit. For an outlet, a cable with a cross section of 2-2.5 is enough.

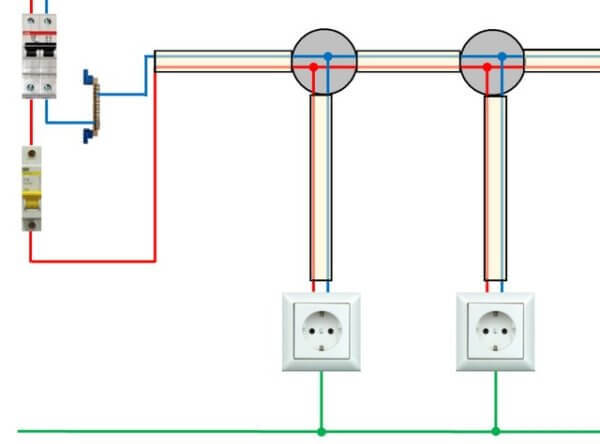
Also, the main rule for installing an outlet is a separate connection of the cable to the meter. This will protect you from short circuits. After all, with an overload (more than 4 kW), the current value increases rapidly. With a separate cable connection, the protection will be able to instantly disconnect certain parts from the power supply of the meter, thereby preventing fire.


After connection, it is necessary to lay the cable itself. We knead the cement solution, it should be a little thick. Then we lay the cable in the strobe and cover the recess with a solution using a spatula. The end of the cable, without insulation, is recommended to be wrapped with electrical tape or tape. This will protect the contacts from dirt during rough work.


