- Distinctive feature
- Advantages
- defect
- Common Sizes
- Overhead sink dimensions
- Variety of forms
- round bowls
- oval bowl
- Rectangular and square bowls
- triangular bowls
- Quirky exclusive bowls
- How to choose and install?
- How to fix the overhead sink in the kitchen set
- Built-in wash basin options
- Option #1: According to the installation method
- Option #2: Shaped like a bowl
- Installation
- Features of working with artificial stone
- Mounting
- How to install a countertop sink
- Installation instructions
- Installation
- What is the difference between overhead and mortise sinks
- Countertop sink installation in kitchen and bathroom
- Cutting the tabletop along the contour
- Processing saw cut countertops with silicone
- Washbasin fixing
- Sewer connection, mixer installation
- Conclusion
Distinctive feature
The main structural highlight of the bowl under the countertop is that it is an unusual continuation of the kitchen table with the ensuing advantages:
Advantages
Hygiene. There are no joints in which the accumulation of dirt, liquids and all kinds of debris is likely. This nuance also provides ease of care for this type of sink.
- Durability. The ingress of water under the bowl is excluded, which significantly extends the life of the structure.
- Large range of configurations and shapes. On the shelves of plumbing stores, you can find various models of countertop sinks and choose the most suitable for your case.
defect
The only drawback of the equipment under consideration is the difficulty of installing it with your own hands, during which very correct grinding and even cutting of the tabletop of the ends of the hole is required.
Common Sizes
Rectangular models are selected according to the measurements of the countertop, taking into account the free edges, the edge of the washing surface.
A full size sink is typically 45 to 85 cm long-width. The optimal depth is 18-24 cm, depending on the parameters of the countertop, the installation method, and the needs of the customer.
Mortise model under the countertop can be from 22 cm wide. It is usually mounted as an additional bowl for washing vegetables to a full-size sink.
Round, oval models usually have a diameter of 50-60 cm and a standard depth.
Angle models in average 100 cm long. They come with two wings for drying dishes and cooking. The corner sink can be completed with a drainer on one side and a mini bowl for washing vegetables on the other.
Overhead sink dimensions
The dimensions of the overlapping sinks are standardized to the dimensions of the perimeter of the produced kitchen cabinets. The most common size of an overhead sink is 50x60 cm. Overhead sinks (and, accordingly, cabinets) are most often used in sizes of 50, 60 and 80 cm in various variations.
- 50×50 cm;
- 50×60 cm;
- 60×60 cm;
- 50×80 cm;
- 60×80 cm.
The width of the sink can be 50 or 60 cm (sometimes 55 cm), the size of 80 cm will be too wide and inconvenient to use (you will have to reach for the tap).The length of the sink varies in wider dimensions and depends on the presence of a monolithic countertop. If there is a table for dishes, then the length of the sink reaches 80 cm, if there is only a bowl, the length of the sink will be 50 or 60 cm.
The depth of the bowl can be 16, 18 and 19 cm, while the 19 cm size will be more convenient for washing, since the walls of the sink will better restrict water from splashing onto walls and clothes.
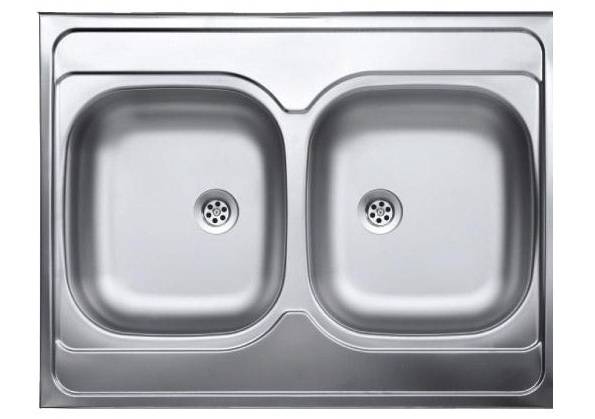
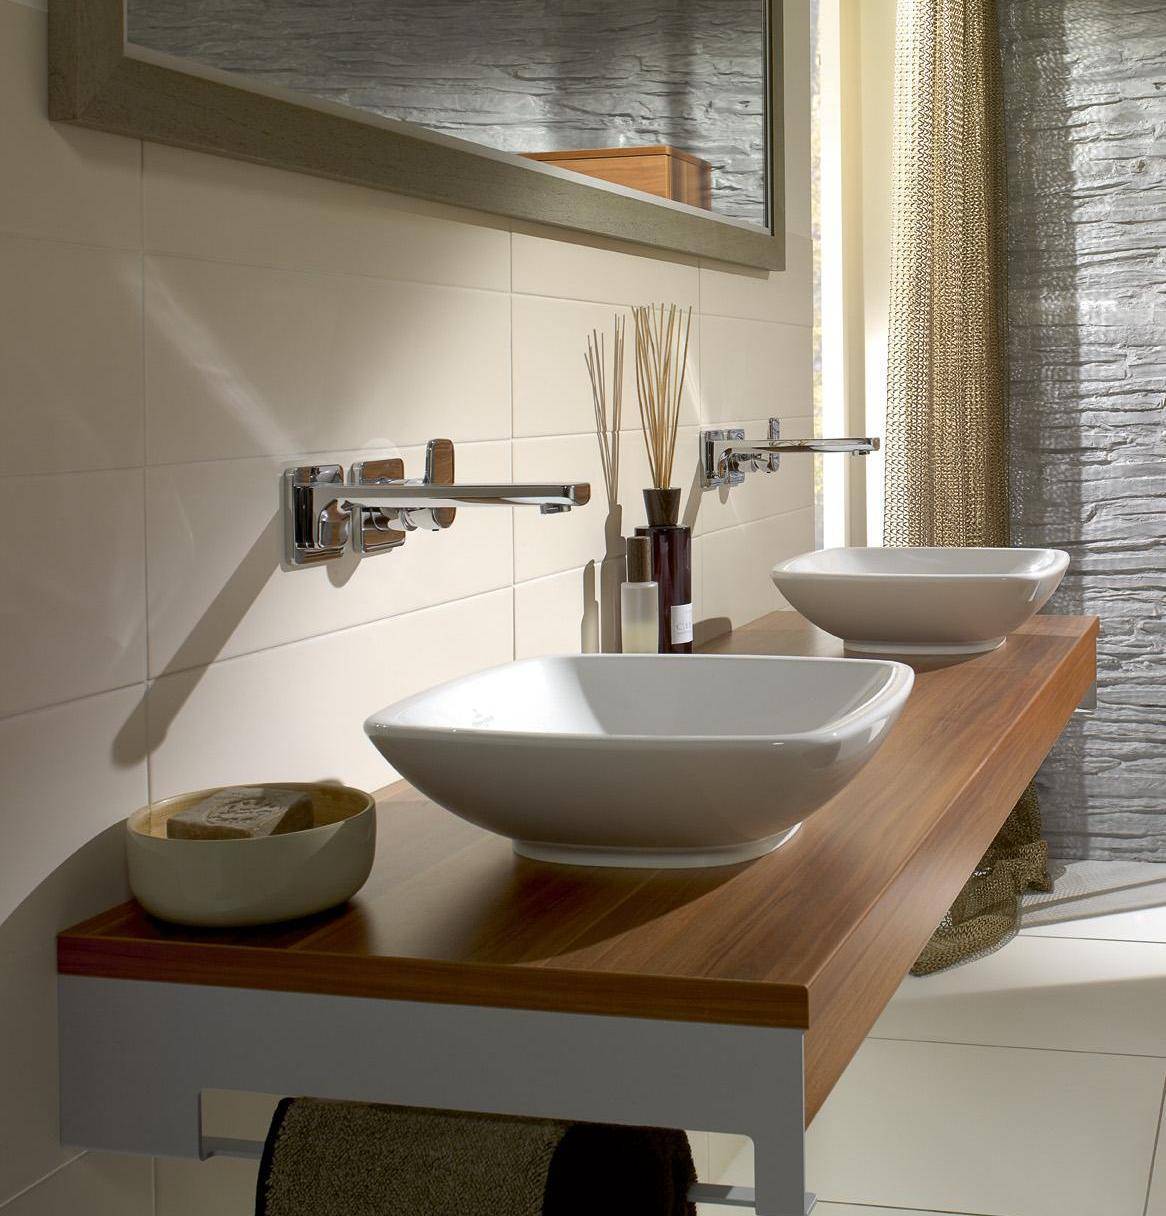
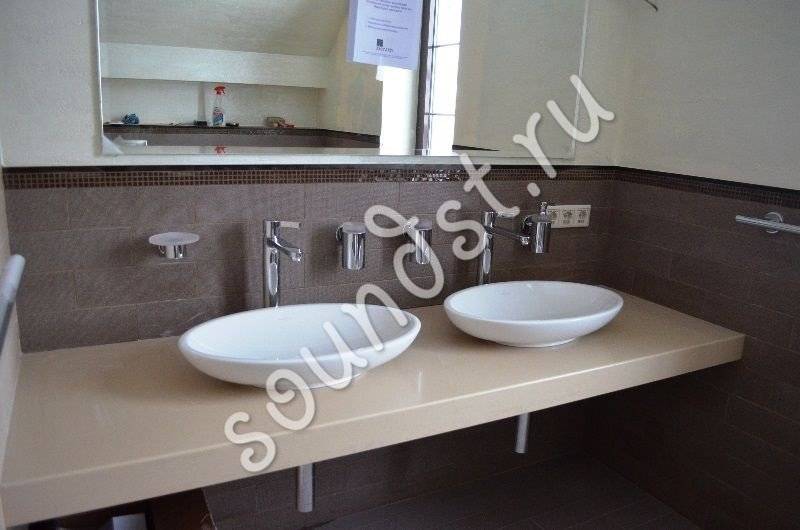
Double bowl overhead sink
Variety of forms
Surface-mounted sinks are available in stores in a wide variety of shapes. They can have bizarre configurations, so you can easily choose a product that harmoniously fits into the design of the bathroom.
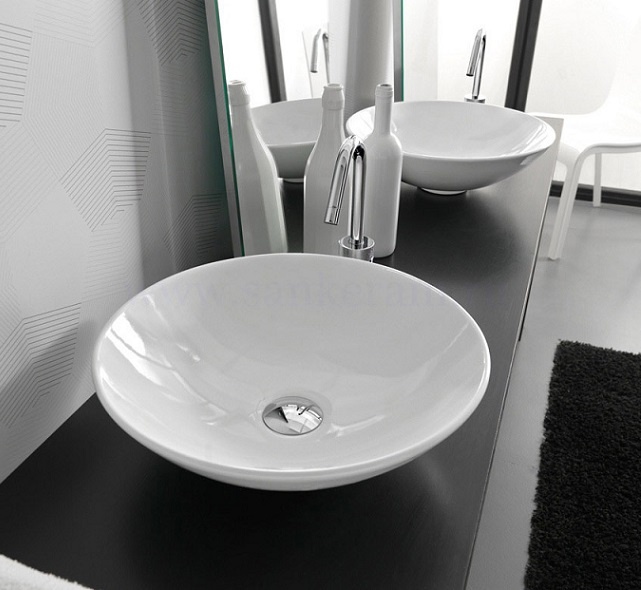
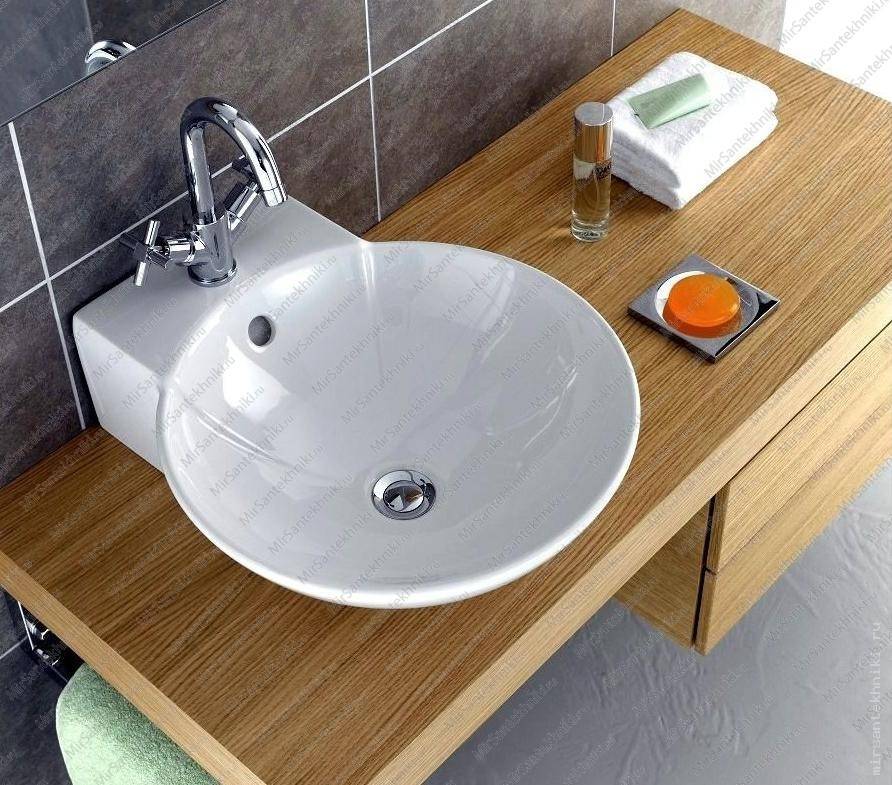
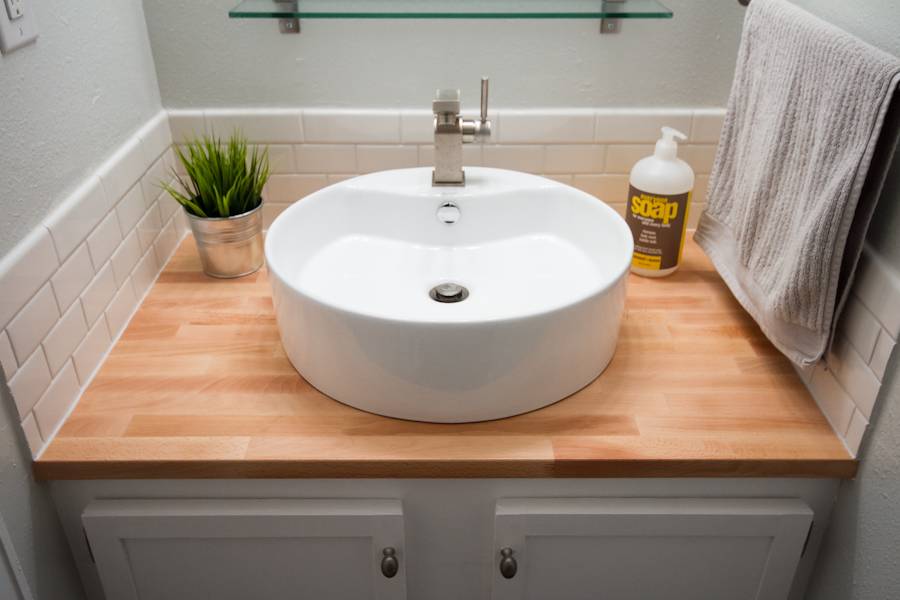
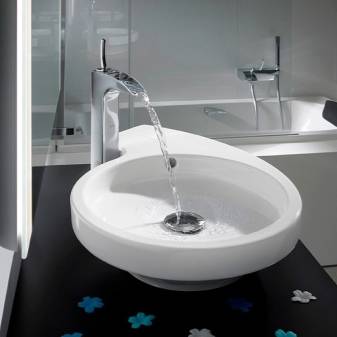
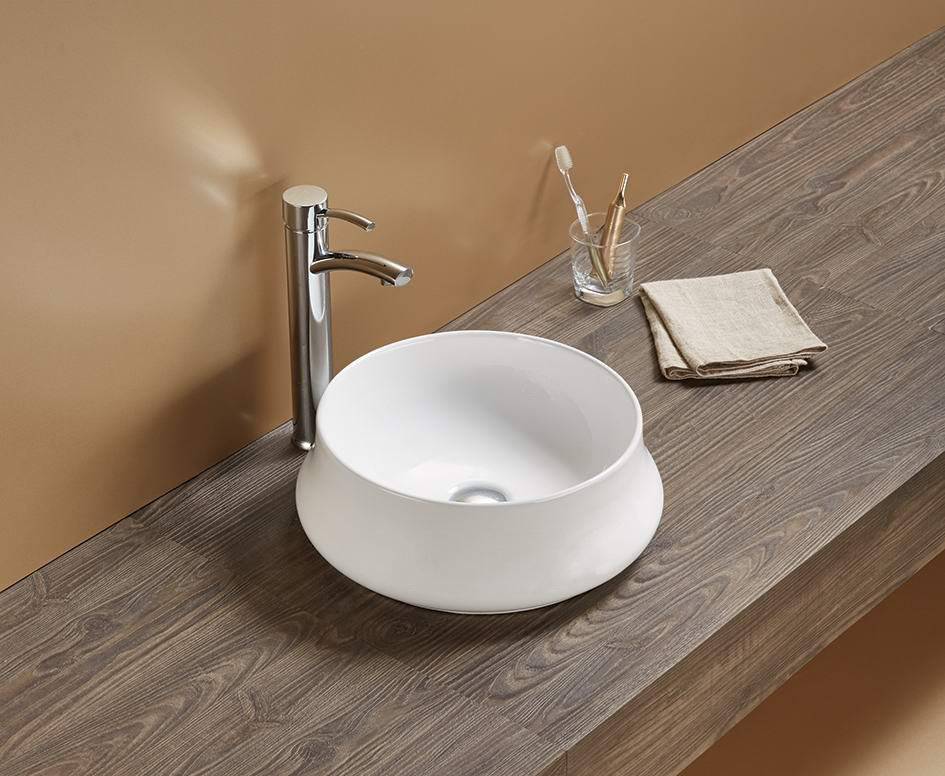
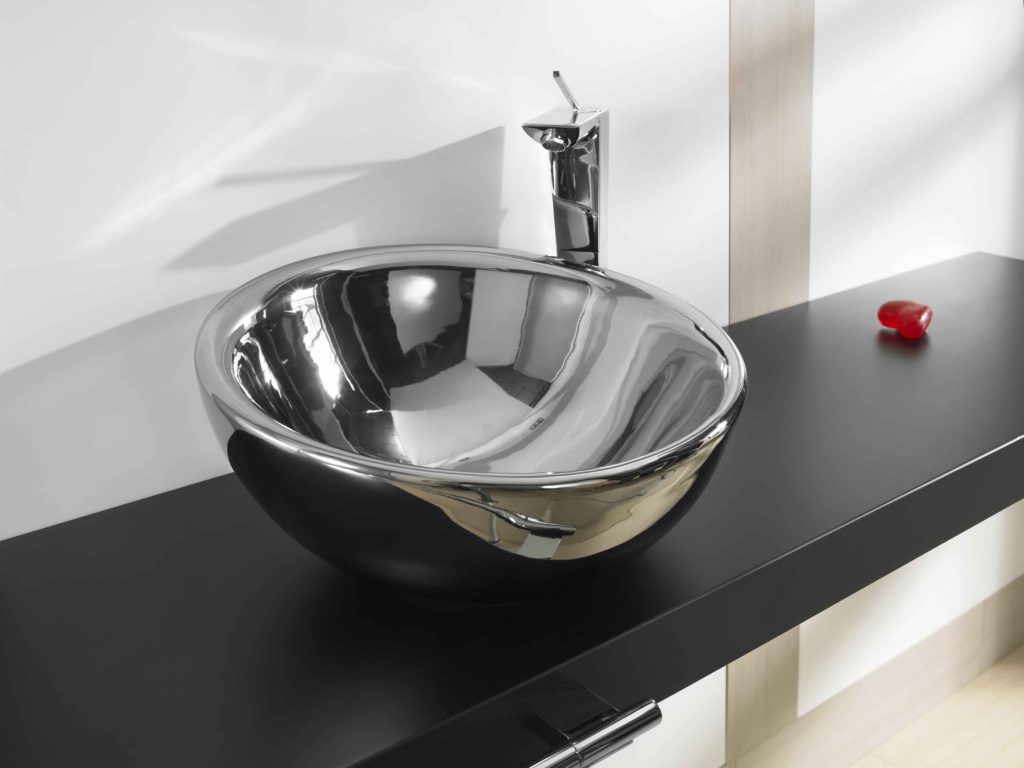
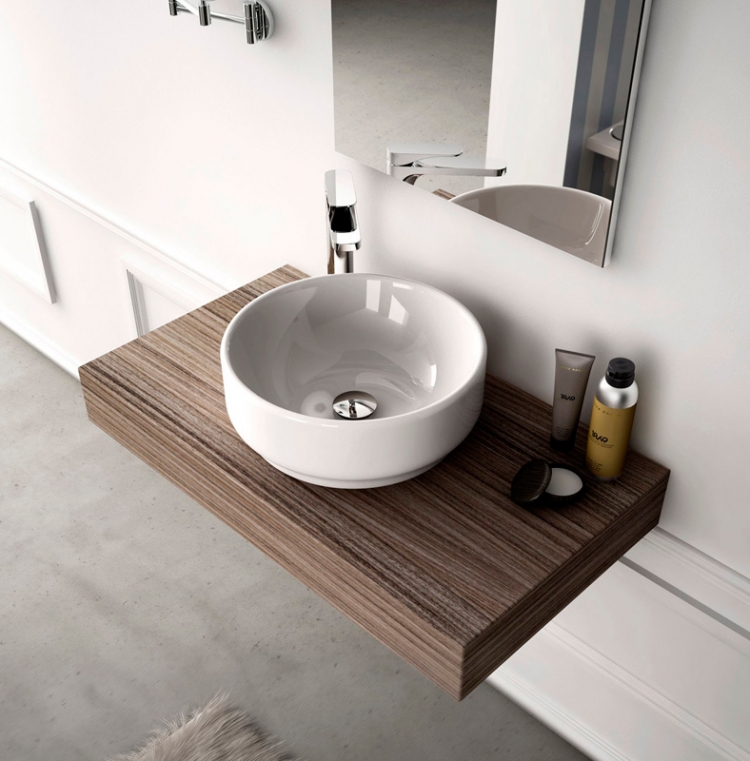
round bowls
These overhead wash basins have an interesting shape and are a direct reminder of the traditions of washing that existed in ancient times. In stores, such sinks are offered with different depths, so the buyer can choose the right product according to his preferences.
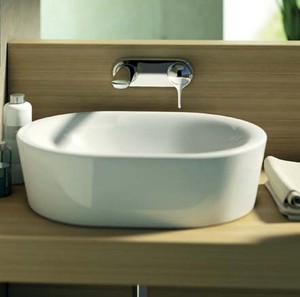
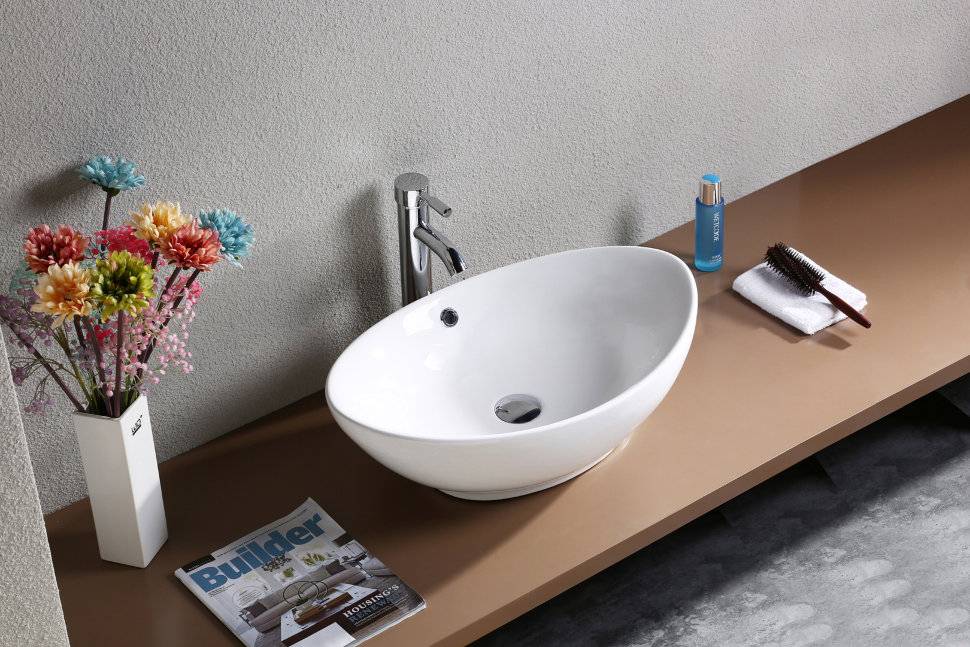
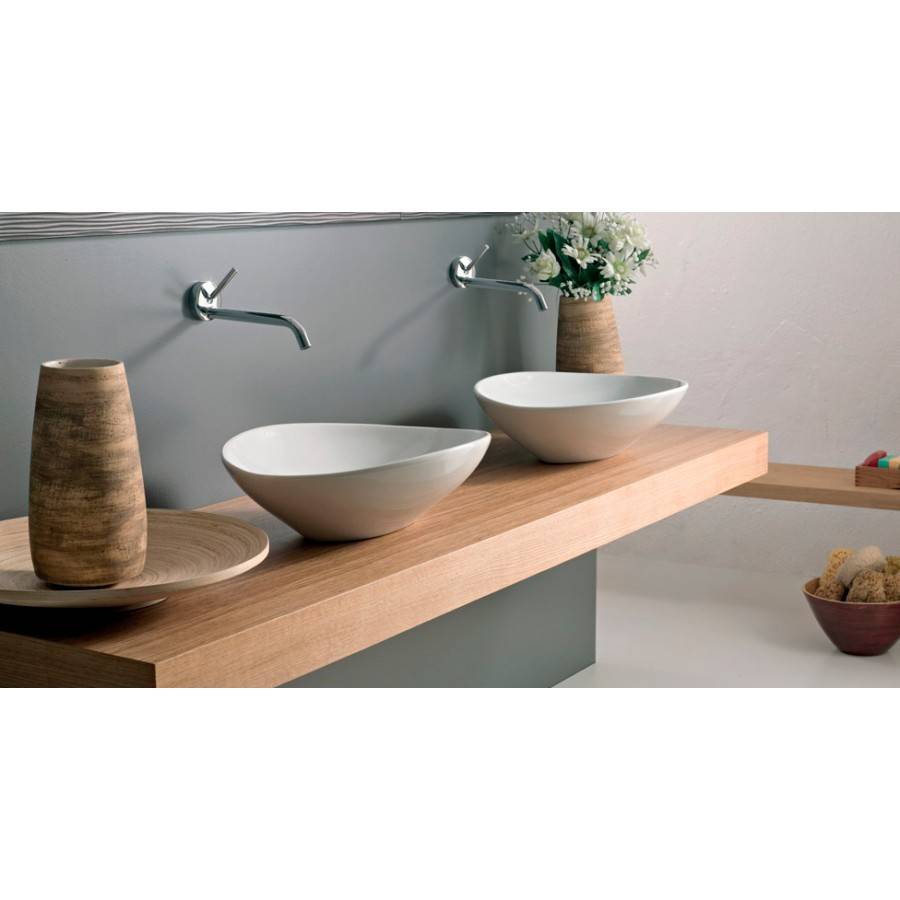
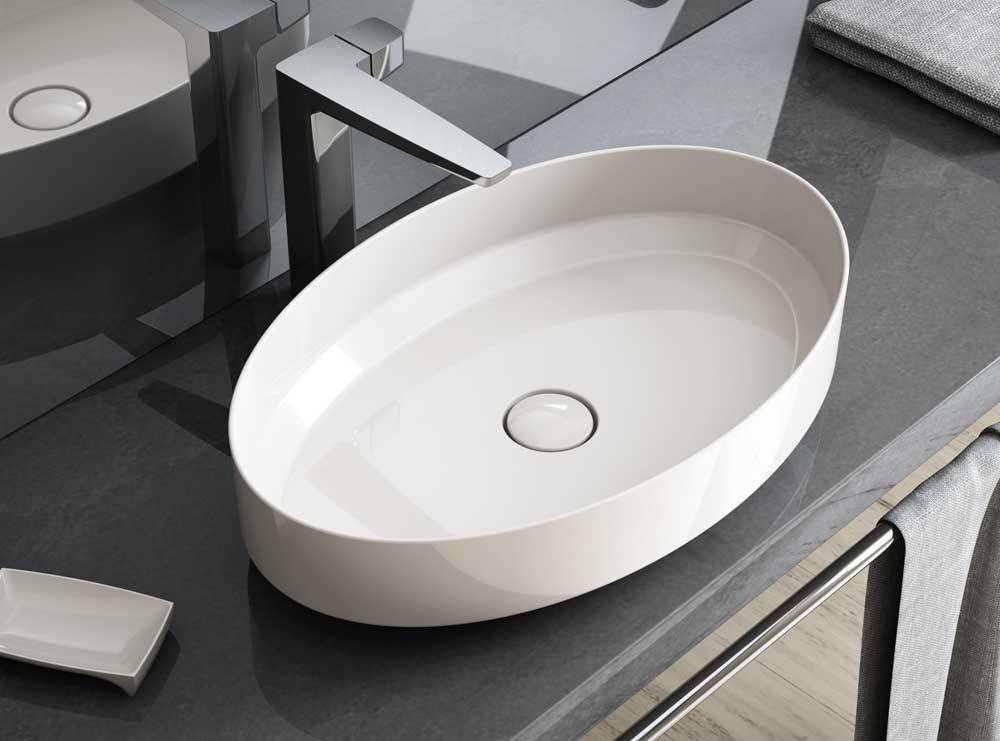
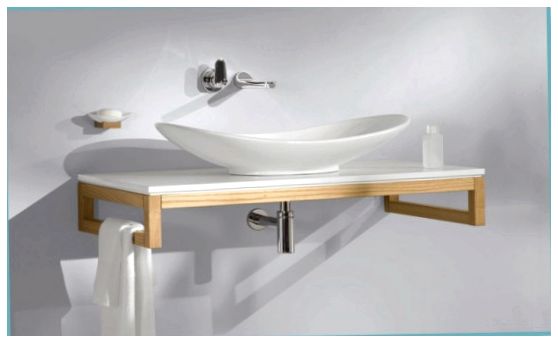
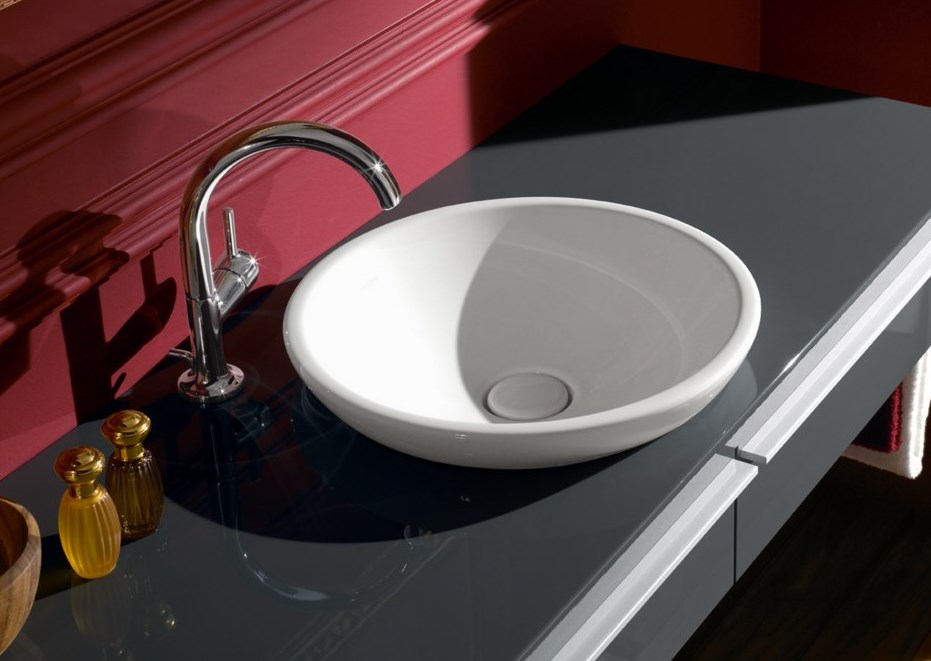
oval bowl
Oval bowls have the greatest convenience. According to their dimensions, they are products suitable for most consumers. Of course, when installing them, it is necessary to make a certain indent from the walls for their comfortable placement. Therefore, it is worth installing washbasins with such bowls only in spacious rooms. In small bathrooms, they will not provide the convenience of performing hygiene procedures.
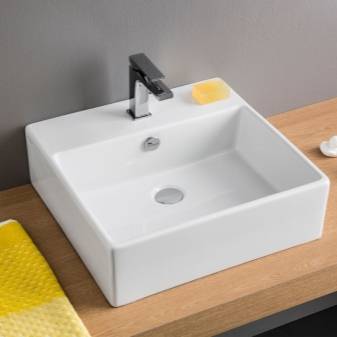
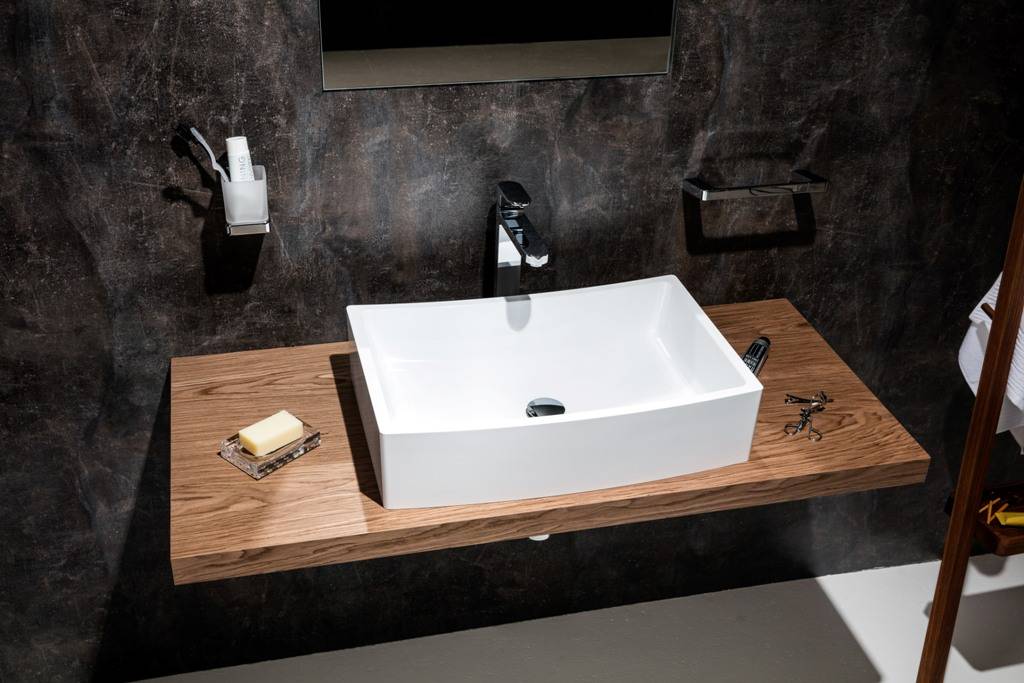
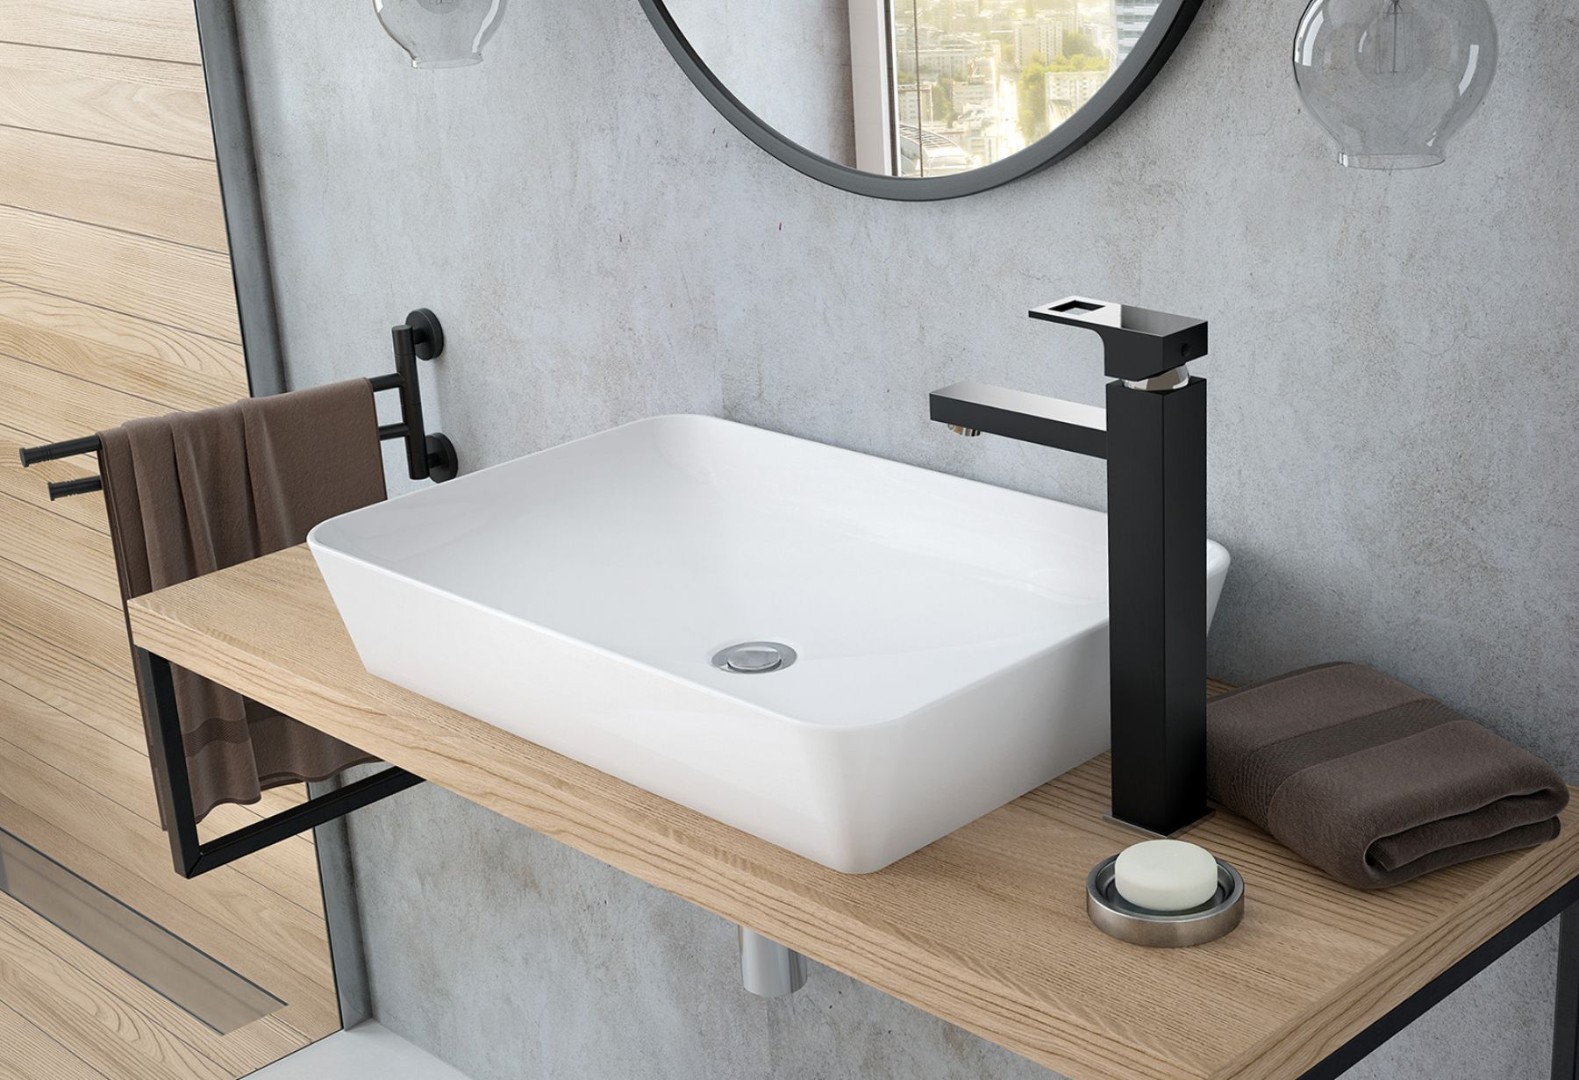
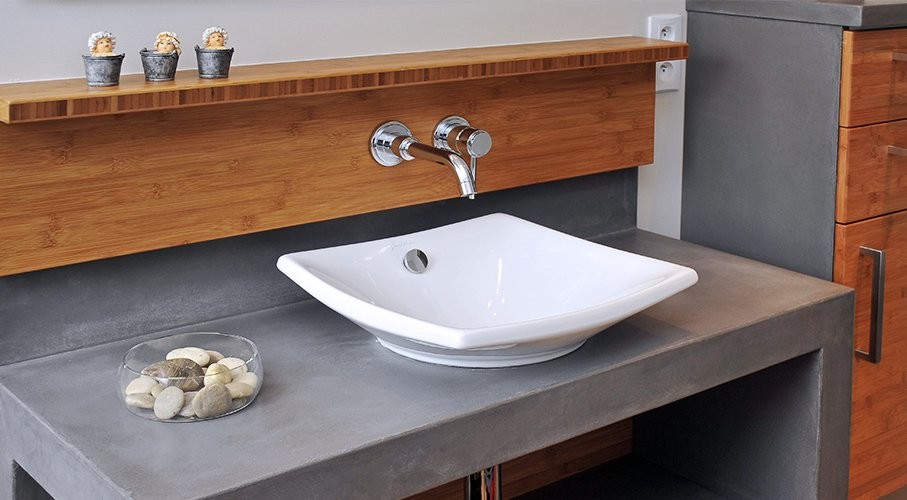
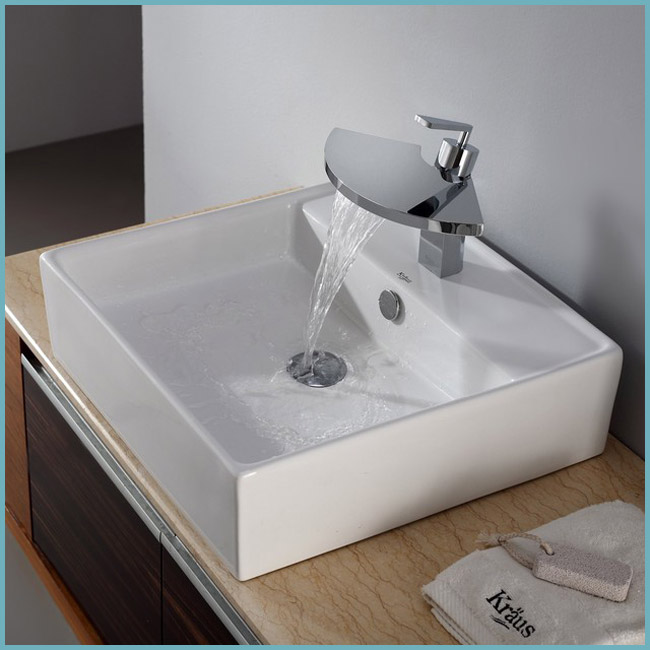
Rectangular and square bowls
Rectangular and square bowls are suitable for almost any interior. They are comfortable and are an excellent choice for small bathrooms where streamlined fixtures are needed.
triangular bowls
Such bowls have an unusual appearance.At the same time, we note that sinks with a bowl of this shape look quite elegant. At first acquaintance with such a sink, it may seem that it looks unstable. But actually it is not. It is quite stable on the tabletop and provides comfort when using it.
Quirky exclusive bowls
 If you want to create an original interior in your bathroom, the best way to achieve this is to install unusually shaped sinks. This will certainly decorate the design of your bathroom and make the interior in it more original. But this is not the only advantage of such products. They are easy to use, in which they are not inferior to shells of other shapes.
The shape of overhead sinks is not the only advantage of these products. In stores, you can also find quite unusual solutions for washbasins with a monochrome kaleidoscope and backlight. Such a product in the bathroom will delight the owner with an unusual play of light and water with each use of the sink.
The variety of washbasins of this type in sanitary equipment stores is quite large, which allows you to place this product in almost any part of the bathroom:
- middle;
- in the corner;
- between the bathroom and the toilet;
- at the bottom of the wall.
The color and texture of overhead washbasins may vary. This allows you to choose the right product, create an original interior in this room. In stores, you can find overhead sinks with unusual decor or embossing, which allows you to create a chic interior in this room.
How to choose and install?
Six immutable rules for choosing a countertop sink:
compliance with the uniform style of the bathroom;
special attention to the external condition and appearance of particularly fragile structures (they should not have scratches, cracks, abrasions and other unpleasant trifles);
choosing a model with an individual approach to each family member;
the selection of the mixer is necessarily made under the overhead sink both in height and in the method of attachment;
you must have with you the exact dimensions of the bathroom and the place where the bowl will be directly mounted;
for the least time-consuming, experts advise choosing sink models immediately with a countertop or cabinet.
The installation of the overlay bowl is carried out in almost the same way as the installation of the standard model. Therefore, any owner is quite able to do it on their own.


The first and foremost thing is to connect the sink to the sewer.
This is one of the most complex processes, but it is easy to carry out, knowing the algorithm of actions:
- clean the countertop from dust and debris, if any;
- a drain system must be connected to the hole in the surface;
- connect the bottom of the sink to it;
- install the bowl in its place on the countertop by twisting them with screws.
Expert advice regarding the faucet is a bit of a mixed bag. Some advise attaching it directly to the sink, if it has such a function. Others insist on mounting the faucet into the wall, as is usually done with bath faucets. In the first case, you will have to make holes in the surface on which the sink is installed in order to bring the water pipes. The backstage of the second option will be very neatly hidden behind the wall and the countertop will remain with a single drain hole.
The disadvantage of mounting the mixer on the surface is that over time there may be problems with the fastening of this device, especially if the installation was made in a wooden or similar surface.
Overhead sinks are often used not only in our houses and apartments. This design is also customary to install in beauty salons and hairdressers. Very comfortable sinks, equipped with a head wash pad, also become part of the composition, built into the countertop or cabinet. But such sinks are most often equipped with mixers that are attached to the bowl itself. They do not have a tap as such, but are equipped only with a shower head with a hose.
How to fix the overhead sink in the kitchen set
In the beginning, carefully inspect what you have included with the sink.
Should be like this
or similar fasteners, plus screws for them.
Sometimes they are not available, you have to buy separately.
If the underframe is already assembled, then we begin to mount the sink by marking these same mounts.
screws are screwed into the mount in the upper part of the underframe.
Usually 4-5 mounts are enough.
But it’s not worth it to twist “tightly” right away, you need to perform a number of more actions.
I usually install both the siphon and the mixer before attaching the sink, and not after, it’s more convenient.
The corrugation can be inserted into the sewer at the end, but it is better to assemble and install the siphon right away.
Before the final fastening, if there is no sealing tape in the kit (a common occurrence), coat with sealant, then wash at a permanent location and you can finally clamp the fasteners (holders).
The sequence may be different, the work is not at all difficult, it can present problems. or a mixer, or a siphon, but not the sink itself.
Excess silicone should be removed immediately.
Check the sink for leaks (I'm talking about a siphon and a mixer), it's better after 20 minutes when the silicone grabs a little.
moderator chose this answer as the best
Mortise and overhead sinks are mainly installed in ready-made cabinets of a kitchen set, with an empty opening, they do not provide for internal bulkheads, which means that there are no additional stiffeners.
On the sides and front of the overhead sink there are special, slightly protruding sides, they are designed to install the sink, and there is no side on the back side, instead of its raised edge, so that water does not get behind the cabinet with the sink.
The overhead sink can be fixed in two ways: with a sealant and with self-tapping screws.
If the overhead sink is light, for example from fragranite. it can simply be glued to a high-quality waterproof sealant. It is applied generously around the entire upper perimeter of the hole in the countertop and then the sink itself is installed on top. Support the sink under load for 1-2 minutes, then carefully remove excess sealant from the outside and inside of the sink and countertop. Do not use the sink until the sealant is completely dry.


If the overhead sink is metal and heavy, then this method is not suitable, you need to fix auxiliary bars or furniture corners from the bottom of the cabinet opening. Then the sink will not rely on a thin end, but on auxiliary bars or corners. Be sure to apply sealant between wood and metal.
The kit may contain special fasteners for washing (4 pcs.), They are in the form of an L-shaped plate with oblique holes. First you need to make a mark along the upper edge (on the inside) of the cabinet for attaching the plates. All holes must be the same height.Just below the mark, screw in self-tapping screws about 16 mm long, install mounting plates on them. Before putting the sink in place, apply a layer of sealant around the perimeter of the hole. Install the sink so that the screws are fixed in the recess.
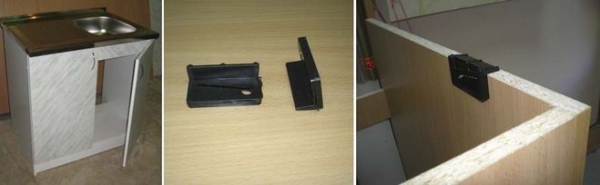
I don’t want to seem very smart if I say that to solve such an extremely difficult task, you will need a screwdriver, a sharp awl, 6-8 screws 16-20 mm long, the same number of furniture corners and 30 minutes of working time. The sink is installed on the workplace, then from the inside the sink itself must be pressed with a corner in an inverted position, and having outlined the place of attachment with an awl, tighten the screw there. Between the sink and the corner, you can and should lay a gasket made of rubber, cork or any other material so that the sink does not deform. This operation is repeated several times, and the sink will hold without fastening visible from the outside.
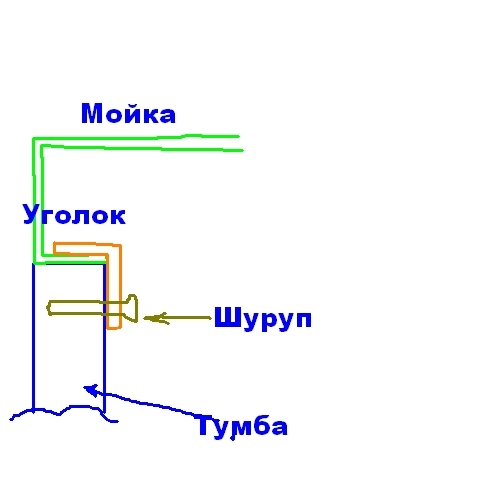
More tired of drawing than fixing the sink. I would be very happy if someone gave me a graphics tablet.
Built-in wash basin options
Built-in sinks of various configurations and shapes are presented on the construction market. Plumbing of this type is divided into two categories: according to the method of installation and according to the shape of the bowl.
Option #1: According to the installation method
There are two types of recessed washbasins depending on the installation method: built-in and semi-built-in. In the first version, the sink is, as it were, “squished” into the countertop, and in the second, it cuts only halfway.
In both cases, such structures do not require additional fastening on the adjoining wall.
 In semi-built-in models, only the rear part of the structure crashes, and the front remains free to hang over the floor surface
Built-in models according to the installation method are divided, in turn, into two more types:
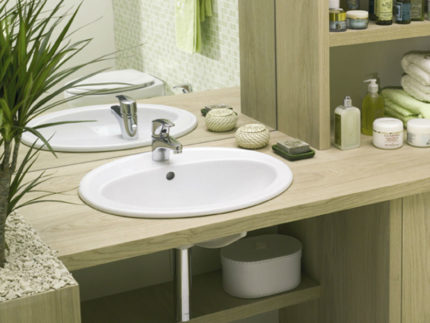
- Embedded on top. Models are placed on top of a pre-cut opening in the countertop, immersing only the lower part, and resting the top on the countertop. This installation method is good because the outer sides of the tabletop perfectly hold the bowl, preventing it from shifting and falling through.
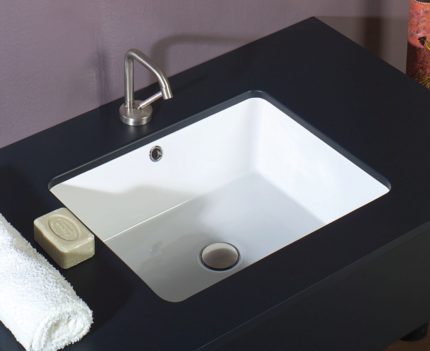
- Embedded from below. When installed from below, the bowl is positioned so that the edges become flush with the countertop. This installation option is good because it allows you to install the mixer from any side.
The vulnerable point of the top-mounted models is the junction of the washbasin with the countertop. You can solve this problem by laying a sealing compound in it.
On sale you can also find combined models, which are sinks integrated into the countertop and acting as a single whole with it. They come in single, double and even triple versions.
Some countertops can be equipped with additional panels, which increase the working surface area.
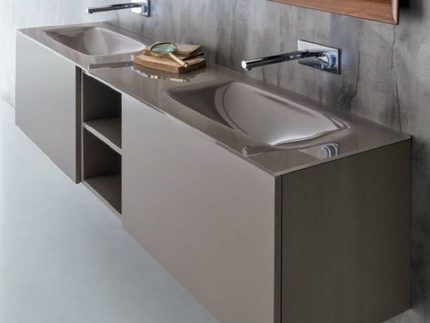 Integrated models are good because they allow you to simplify the installation process: there is no need to cut holes for the bowl and bring pipes to it
With a solid surface, washbasins with integrated bowls are subject to the least pollution compared to the same traditional counterparts.
The video shows how the sink integrated into the countertop looks like:
Option #2: Shaped like a bowl
If you focus on the shape of the sink bowl, built into the countertop in the bathroom, there are several types:
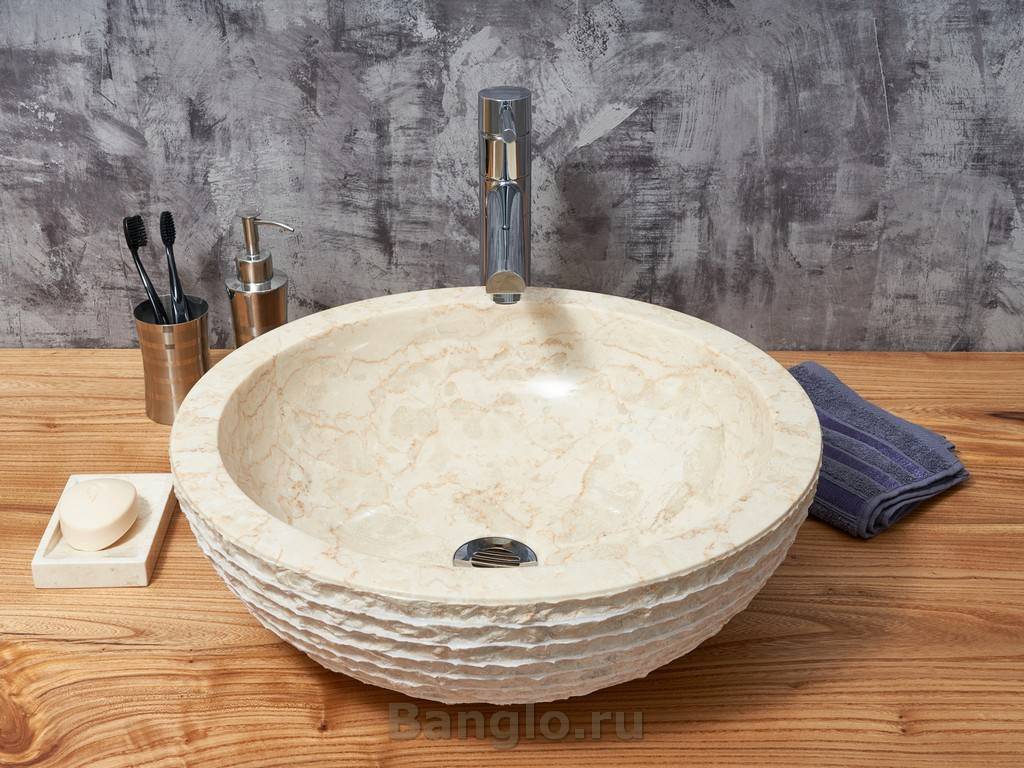
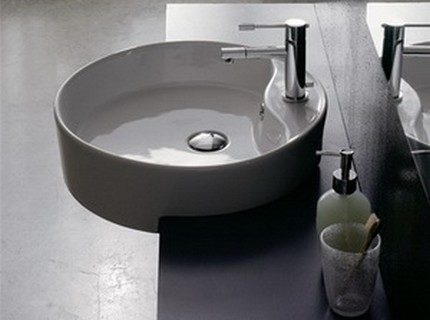
round and elliptical are traditional variations that are rightfully considered classic today.
 Their round and oval curves can bring a touch of softness and tranquility to the atmosphere of the bathroom, allowing sanitary ware to blend harmoniously into the interior, made in a classic or rustic style.
square and rectangular - sharp corners are now in vogue, they are an excellent addition when creating contrasts.
 Sinks of such forms are more used in the design of bathrooms within the framework of a minimalist direction.
asymmetrical - drop-shaped, trapezoid and other non-standard forms of washbasins are great for installation in the corner of the bathroom. They are chosen by connoisseurs of the exotic.


 Asymmetric bowls are chosen by the owners of bathrooms, the interiors of which are made in modern exclusive styles.
Asymmetric models can be found on sale not so often. They are made mainly for individual orders. Original design solutions provide an opportunity to harmoniously fit the chosen model into the bathroom of almost any style.
Installation
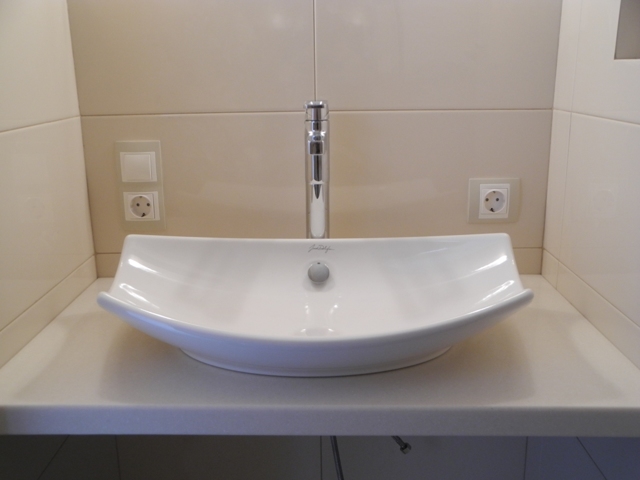
Surface-mounted sinks are installed on top of the countertop, that is, we are talking about its somewhat unusual and specific location.
As you may have guessed, there are differences in the installation of the overhead and built-in sinks. The main feature when installing overhead sinks is the correct organization of the plumbing system, which must be hidden (pipes, couplings, hoses, and so on). They can be located either inside the furniture structure, or directly under the countertop itself.
If you buy a model of a countertop sink without a faucet hole, you will need additional hardware that allows you to install the faucet in a concealed type so that all the necessary parts are nicely hidden and do not draw unnecessary attention to yourself.
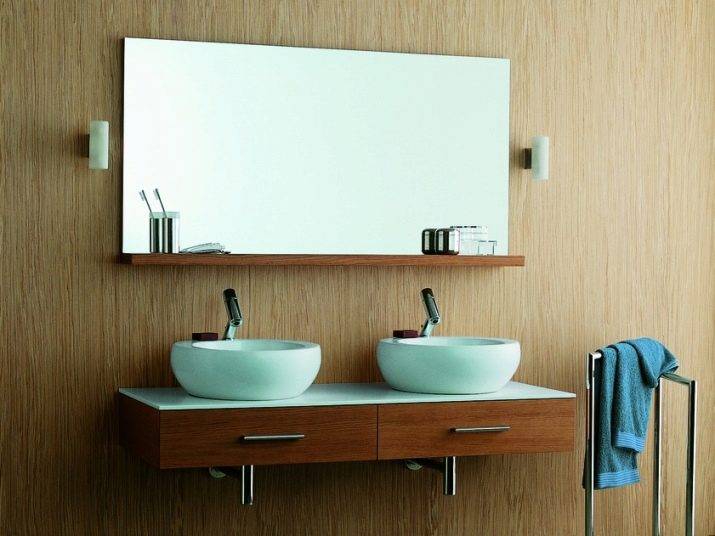
At the same time, countertops, cabinets and other furniture designs on which overhead sinks are installed can be very different:
- elongated, for example, on which the overhead sink is beautifully located above the washing machine;
- simple structures that take up little space.
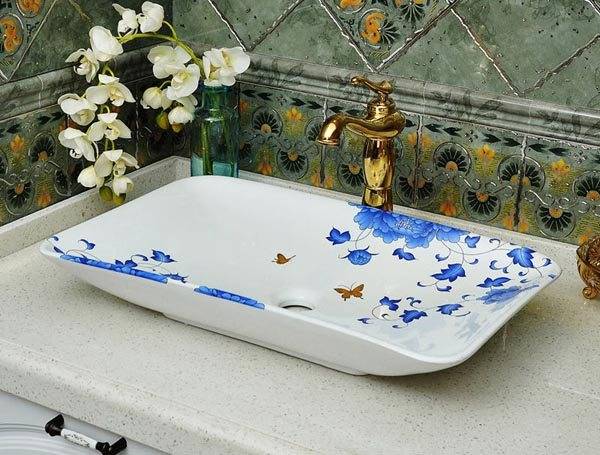
Ceramic sink with painting
Features of working with artificial stone
As a rule, stone countertops are made to order in accordance with the preferences of the buyer, and a hole for installing a sink in them is provided in advance. But there are also exceptional cases when, for example, it was originally planned to install an overhead sink in the kitchen, and the countertop had to be solid.
 A countertop made of artificial stone is quite difficult to process. It must be handled with care as the material is fragile.
For such work, it is better to invite a qualified specialist with a professional tool who will make a hole of the required diameter with a properly processed cut and install the sink in accordance with all requirements.
If you decide to make a hole for installing a sink on your own, saving on workers, instead of a jigsaw, it’s better to take a grinder and protect your eyes and respiratory tract from stone dust when cutting. The algorithm of work is not much different from installing a sink in a countertop made of MDF.
Mounting
As we noted above, installing a sink under the countertop on your own is not very easy to do, but let's still analyze the order of the work needed for this.
The instruction looks like this:
- Preparing everything you need. You will need:
| Name | Purpose |
| Milling machine or electric jigsaw | Tabletop cutting |
| Sample | Designation of the contours of the cut hole |
| Clamps | Fixing the correct position of the sink |
| Isopropyl alcohol | Degreasing cut edges |
| Modified silane | Attaching the bowl to the tabletop |
| Two-component resin | Final fixation of the shell |
- Before you cut the countertop under the sink, set the template.
- Strictly according to the pattern in a couple of visits, we cut a hole. Along with this, we try to avoid possible irregularities. In addition, the smallest error can lead to the fact that the edges of the sink will not fit well on the surface of the table, so be extremely careful at this stage.
- Remove the sharp edges of the holes. If you use milling equipment, then it is best to do this with a cutter with a radius of 2-3 mm.
- Now we select a groove on the back of the countertop for the actual size of the bowl. We also do this task in a couple of visits.
- We grind the ends, getting perfect smoothness.
- We process the edges of the resulting hole with isopropyl alcohol, this will improve their adhesive properties.
- After that, we apply a modified silane, which is not only the first step in fixing the bowl, but also waterproofs the material of the countertop.
- We install the sink in the opening, set it to the required position, controlling the process with a spirit level, and fix the product with clamps for at least twelve hours.
- After the adhesive solution has hardened, fill the edges with a two-component quickly hardening resin. When mounting a stone bowl, special brackets are also used for fixing.
- At a time when the casting mass is completely hardened, remove excess glue.
How to install a countertop sink
There are several options for mounting a surface sink. The simplest is mounting on a cabinet or a special table. The width of the surface of the sink in this case is slightly larger than the size of the underframe. This is a prerequisite so that the sides well hide the side ends of the nightstand. The complexity of the option is the choice of the desired size of the sink. It is best to purchase furniture and a sink at once. In another case, you need to carefully take measurements and buy a bowl, the inner size of which will ideally match the hole in the cabinet, and the width of the sides of the sink will cover the end walls of the bedside table.
Decided to start installation? Prepare everything you need for this process: a screwdriver, a set of screwdrivers, fasteners, a mixer, a siphon, sealant, plumbing tape, gaskets, flexible hoses for water supply.
First of all, prepare the ends of the cabinet. They are treated with silicone sealant. Use a spatula for easy application. Silicone will protect the furniture from moisture and securely hold the product in the "saddle". Choose a quick-drying sealant. You won't have to wait long before you can start using the sink. For wood and plastic countertops, use an alcohol-based sealant. After applying silicone, install the sink, press it around the entire perimeter. For reliable clamping use a clamp. Then remove the excess sealant.And after it dries, they begin to connect the bowl to the sewer and install the mixer.
To make it easier for yourself, you can install the mixer in advance, immediately before installation. And the siphon will have to be connected later, after the sealant has dried. The choice of a siphon must be approached carefully, especially the owner of a private house. The right choice of siphon and a number of measures will help eliminate unpleasant odors from the sewer. Before starting the sewer drain, check the tightness of each joint. We mount the mixer in a hole specially designated for it. For reliable fastening, use a rubber gasket, its diameter must match the diameter of the base of the kitchen faucet.
Installation instructions
Installation of a countertop sink is almost the same as installing an ordinary sink in the kitchen. The only nuance is the insert into the countertop.
The slot for the siphon in the countertop must be of such a size that a piece of the drain pipe passes into it, no more. It is not necessary to cut a large hole; the siphon flask is put on lower.

Sealing a countertop sink before installation
There are several options for installing cranes:
- If the sink has a faucet connector, you can put it there, but then the hole in the countertop will need to be cut a little more than just a piece of pipe.
- If there is no hole on the washbasin, then you can put a mixing device by cutting it into the countertop.
- Another installation option is a wall. Can be done in the same way as when installing a bathroom faucet.
Advice. When choosing a faucet connection option, please note that each slot of the countertop must be accompanied by the necessary further sealing.
Upon purchase, you may be recommended a specialized siphon with an auxiliary clamping nut. You can use it, or you can absolutely get by with silicone.


The mixer tap above the countertop washbasin can be built into the wall
As a rule, all this is what you need to know about installing a countertop sink. As we can see, it does not differ much from the installation of other washbasins.
Installation
Lay out the tools and accessories in advance so that they are at hand. It is also desirable to decide on a mixer and a siphon so that everything is installed immediately, otherwise it will be difficult to install later. How to attach a stainless steel sink to a cabinet? This is not difficult if the steps to assemble the frame itself have already been completed.
- L-shaped mounts are installed, both in the kit and purchased separately.
- Attach fasteners from the inside and mark under them the places where it is necessary to screw in the self-tapping screw. Drill a hole (not a through hole) 0.5 cm higher from the mark, screw in a self-tapping screw and put the mount. Do the same actions in other places of the structure.
- Next, a sanitary ware is assembled, a siphon with all gaskets is attached to it, and a mixer is fixed.
- Treat the ends of the walls with sealant. It is needed so as not to protect the furniture from moisture.
- Now you can proceed to fixing - put on a furniture frame, where the fasteners are placed on self-tapping screws.
- Do plumbing work to connect the water supply and drain in the kitchen.
- After the attachment of the stainless steel sink to the cabinet is completed, you can check it for leaks. The sink is filled with water. Check if water is leaking from the junction of the sink and siphon.
- Installing doors in the kitchen cabinet is the final stage, which will be the final point in plumbing work.
So the question of how to install a stainless steel sink on a cabinet has been resolved. With proper performance of work, it is able to stand for a long time.
Many attach the sink to the countertop. There are options when, when ordering kitchen furniture, the need for a hole in the countertop for installing plumbing is stipulated. Then there will be little work with the installation of the sink.
- Mark the contours on the surface with a pencil. Take into account the margins from the edges (5 cm). Take measurements under the bowl.
- Make a hole at the corners of the outline.
- Glue masking tape from the outer side of the contour so that the surface around it is not damaged during work. Before cutting the opening, fix the part to be removed from below so that it does not damage the surface under it when it falls.
- Treat the ends of the countertop with sealant, assemble the complete plumbing elements (faucet and siphon) and install. This will prevent moisture from getting under the structure, thereby spoiling the appearance of the furniture by deformation and delamination.
- Fix with clamps (included in its package when buying).
So, having considered how to fix a stainless steel sink on a cabinet with fasteners and on a countertop, you can see that doing this is not as difficult as it seems.
What is the difference between overhead and mortise sinks
If we consider the two most popular types of sinks - overhead and mortise - then between them you can find a rather big difference, which often inclines the buyer to buy.
The main factor will be the cost of the product. Overhead sinks are more affordable due to the material used.The variety of shapes and sizes allows you to choose the best option.
Ease of installation also speaks in favor of surface-mounted sinks - it is placed on top of the cabinet and is immediately ready for use. But the mortise sink should be installed in a carefully prepared place and additionally treated with silicone at the points of contact with the countertop.
If the surface sink is damaged, it is much easier to replace it with a new one, which cannot be said about the mortise one.
But the mortise sink has a more presentable appearance, it is stronger in itself and gives a sense of integrity to the entire kitchen set. At the same time, the choice of shapes and sizes is not inferior to analogues of the overhead type.
Countertop sink installation in kitchen and bathroom
There are several ways to install overhead sinks. It can be completely "drowned" in the cabinet, installed on top or made partially rising above the countertop. In all cases, the drain is located inside the cabinet. To perform installation work, you will need a standard set of tools:
- electric drill;
- hacksaw or jigsaw;
- screwdrivers;
- clamps;
- pliers;
- brush and spatula;
- pencil;
- level;
- rags;
- sanitary tow;
- silicone sealant.
The installation of the sink begins with the markup. Included with the sink you will find a standard template. It is used to apply the correct markup. Decide where you would like the sink to be installed.
Attention! You can not place the countertop sink right next to the wall and on the very edge. This is a safety requirement and a guarantee of your convenience!. Photo 3
Installing a sink in a countertop requires all the necessary tools and tools for installation
Photo 3. Installing the sink in the countertop requires all the necessary tools and tools for installation.
If there is no template, turn the bowl over and trace it on the countertop. To create a contour, take a simple pencil, it is easily erased and will not leave marks.
Next, measure the distance from the eyelets for fasteners to the edge of the sink. The resulting centimeters are the distance that you need to retreat from the previously outlined contour inward. Given these dimensions, we make a new markup. If the sink has a traditional shape, then simply step back from the 1.5 cm outline and draw a new smaller outline.
Cutting the tabletop along the contour
The “figure” obtained on the tabletop must be cut out. Here you will need a jigsaw or a fine-toothed hand saw. The hole for the sink cut with a jigsaw will turn out smoother. If there is no jigsaw, then to work with a hacksaw, you need to drill a hole inside the contour closer to the markup. With it, we begin to cut out the excess. Try to minimize the pressure on the countertop cover. Let the hacksaw slowly move almost on its own. Speed is your enemy here! Chips will appear. Tape the edge of the countertop with masking tape before cutting to avoid damaging the decorative finish.
Photo 4. Marking the countertop under the sink.
Processing saw cut countertops with silicone
All end edges of the countertop must be processed. To do this, we grind them with sandpaper and a file. Then the aligned edges are treated with a sealant. This manipulation is necessary to protect the product from water and eliminate problems of "bloating" from leakage. Processing is carried out with a spatula or brush. For wooden and plastic countertops, an alcohol-based sealant is suitable.
Washbasin fixing
After the ends of the table are filled with silicone, we insert the sink. The fit must be tight.To do this, move the bowl a little. Fastening is carried out on special fasteners


Please note that when the bowl is seated, some silicone will be squeezed out. Delete it
Leave the structure to dry.
Photo 5. Installation of a surface sink.
Sewer connection, mixer installation
The installation of the mixer is carried out according to the manufacturer's instructions. When purchasing a sink, make sure that it is equipped with a faucet hole. Otherwise, you will have to do it in the canvas of the countertop. In this case, the hole is made in advance, before the installation of the sink. We install hoses in the installed mixer, and connect them to the water supply. We fix all fastening screw elements with the help of sanitary tow.
The sewer connection is also carried out according to the standard scheme. We assemble the siphon, connect it to the sink, and then to the sewer drain. We check tightness.
This instruction is universal. It is also suitable for those who are looking for how to install a sink in a countertop in the bathroom. All stages of work remain the same, with the slightest exception, waterproof materials and types of countertops are used in the work. By following all the recommendations, you will mount a sink that will retain an attractive appearance and last for several years.
Conclusion
Choosing a sink for your own kitchen is required carefully, considering all the nuances. This applies not only to the materials used in the manufacture, but also to the installation methods.
The sink, which is installed in a kitchen of a certain style, can become not only an integral part, but also a special accent. It will emphasize both the severity of lines and transitions throughout the headset and countertop, and add a little modern style, as is the case with an integrated or undermount sink.
The main thing at the initial stage is to decide on the installation method and the material that will be used in the design of the kitchen, and then such a necessary thing as a sink will also become its main decoration.
Watch this video on YouTube