- How to insulate a wooden door?
- Installing the seal on the door frame
- Sealing with rollers
- Canvas insulation
- Warming methods
- Seal
- Threshold insulation
- sheathing
- Upholstery
- Vestibule device
- Do-it-yourself warming methods
- Insulation of a wooden balcony door
- What you need, materials and tools
- How to do the work, a brief step-by-step description
- Ready-made solutions
- door frame insulation
- Box inspection
- box insulation
- Threshold area insulation
- Insulation and restoration of the door leaf
- Mounting rollers
- Door leaf insulation
- Tools and materials
How to insulate a wooden door?
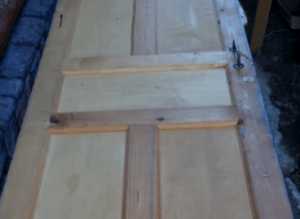
Warming of a wooden door begins with preparatory work:
- loosened loops are fixed with new elongated self-tapping screws;
- if a thick heavy insulation is used, an additional loop is installed;
- eliminate distortions of the box, defects in the canvas;
- check the condition of the seal around the perimeter of the door frame at the junction with the walls;
- change broken fittings: lock, handles, peephole, latch.
After all defects are eliminated, the installation of insulation on wooden entrance doors begins.
Often there is a question, is a vapor barrier necessary when insulating wooden doors? When arranging the mounting seams of the door block - needed. The gap between the box and the wall is sealed with foam.So that the thermal insulation does not deteriorate, the seam is closed from the street with PSUL tape. From the side of the room, the foam is destroyed by vapors. For protection, the seam is sealed with vapor barrier tape. Vapor barrier may be required for the product if it is installed in a damp room, and mineral wool serves as thermal insulation.
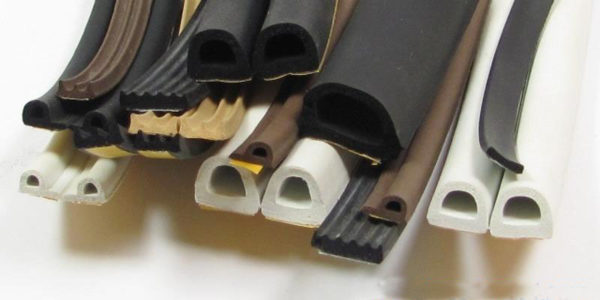
Installing the seal on the door frame
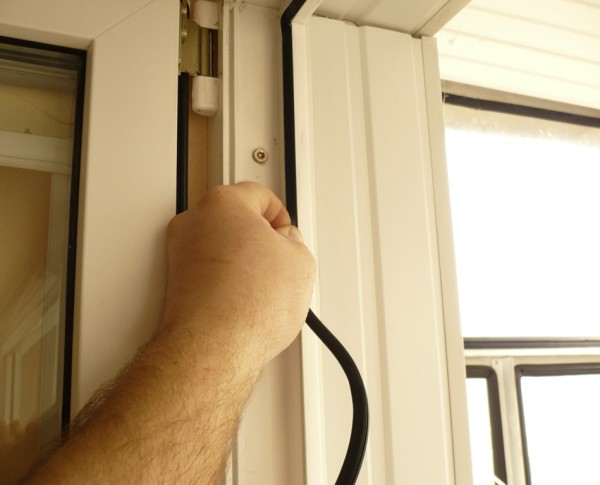
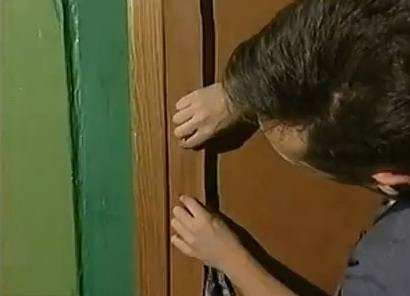
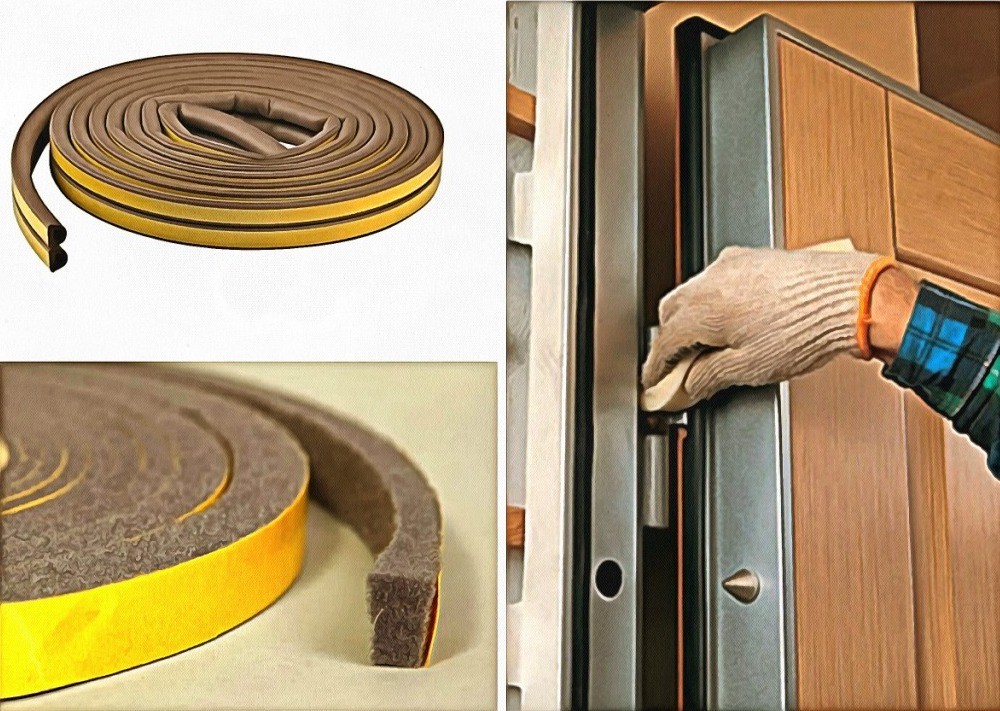
The first salvation from heat loss is the installation of a sealant on a wooden door to eliminate the gaps between the sash and the frame. The tape is selected according to the thickness corresponding to the size of the gap. A thin strip is useless, and a thick one will become an obstacle to the normal closing of the canvas. Installation of the seal consists of the following steps:
- Measure the gaps between the sash and the box, select the thickness of the tape.
- Self-adhesive sealant is glued into the groove along the perimeter of the boat.
- The silicone tape is fixed with staples of a construction stapler.
If the gap size is different along the perimeter of the door block, which often happens during deformation, the groove is expanded and deepened in the box. The edge of the canvas is passed by a grinder. A two-layer or three-layer tape is glued to the new groove.
A correctly glued seal should fit snugly around the entire perimeter of the sash edge and not interfere with its free closing.
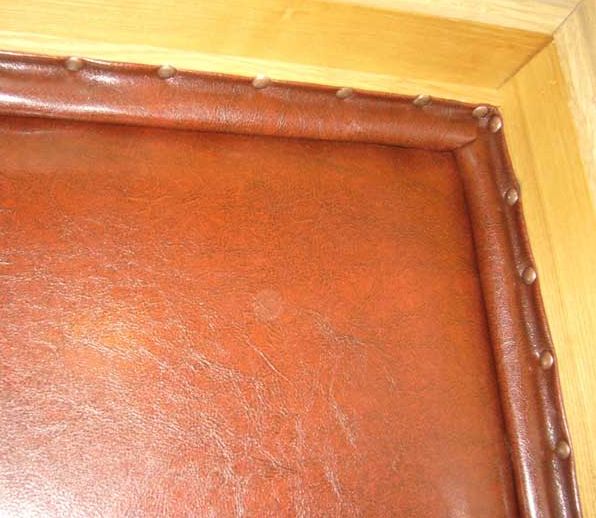
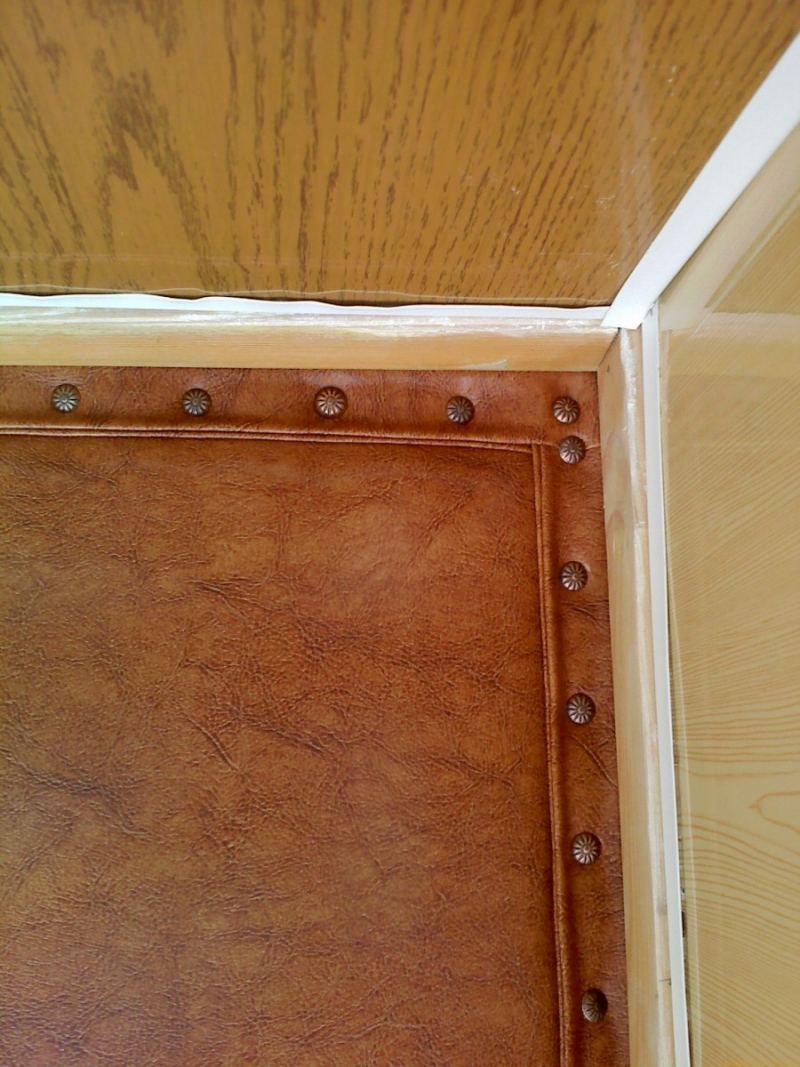
Sealing with rollers
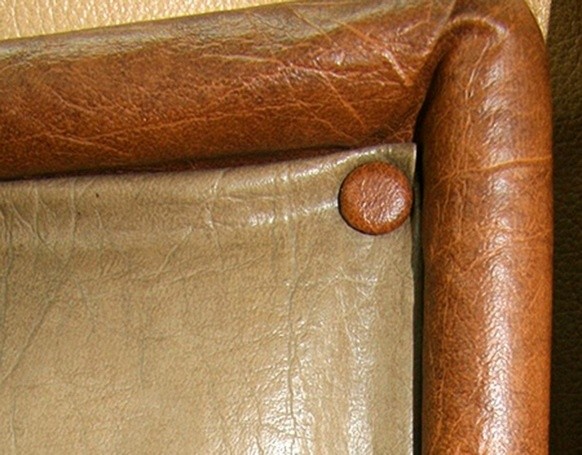
You can insulate the joint around the perimeter of the door frame with leatherette rollers with foam rubber inserted inside.
- Measure the length of all sides of the sash. According to the results, four strips 100 mm wide are cut out of leatherette.
- The strips are leaned against the edge of the sash upside down. Near the edge of the door leaf, leatherette is fixed with a stapler.
- A thick foam rubber is placed inside each strip, a roller is formed.
- Secure the second edge of leatherette with a stapler.
The door block becomes more beautiful, and all the gaps are hidden under the rollers.
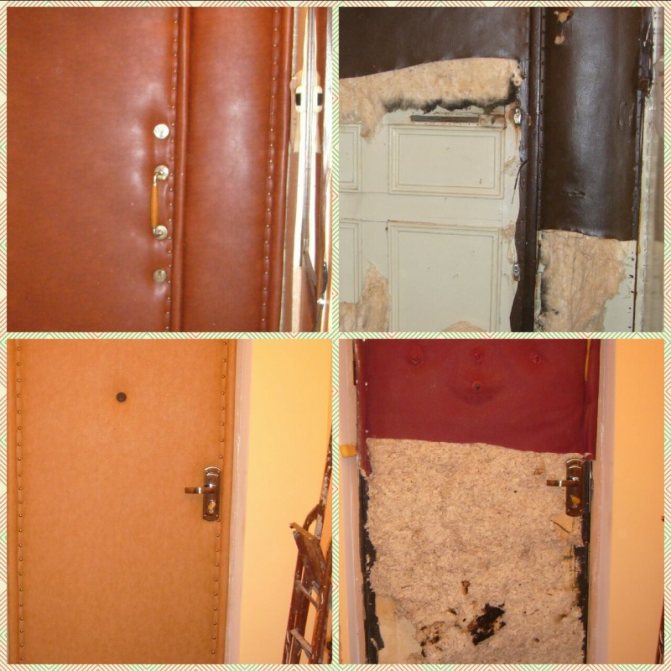
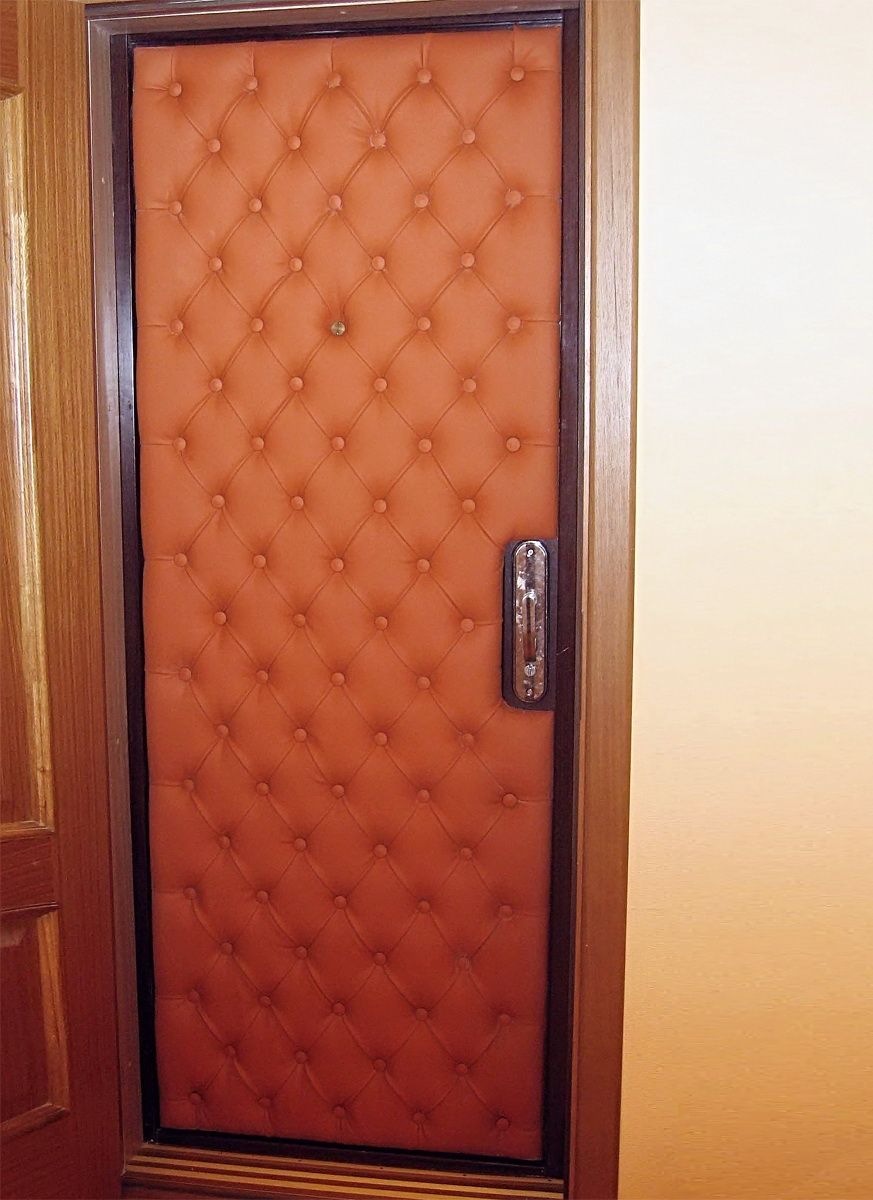
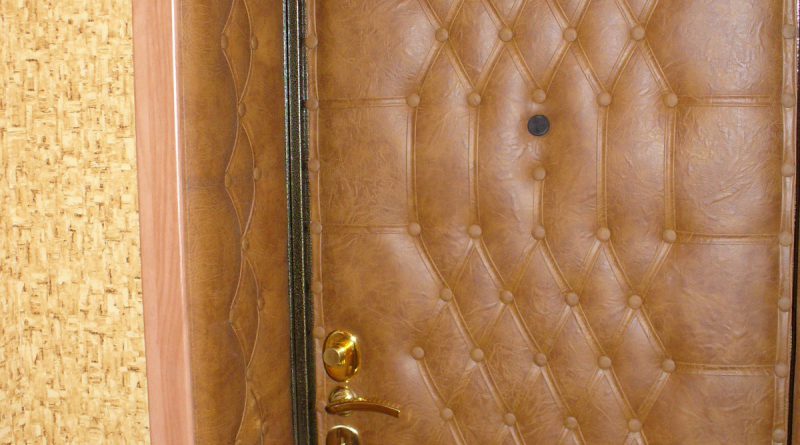
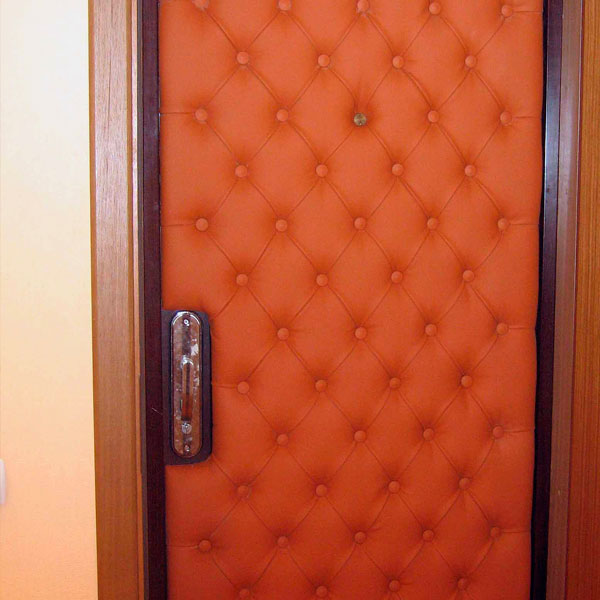
Canvas insulation
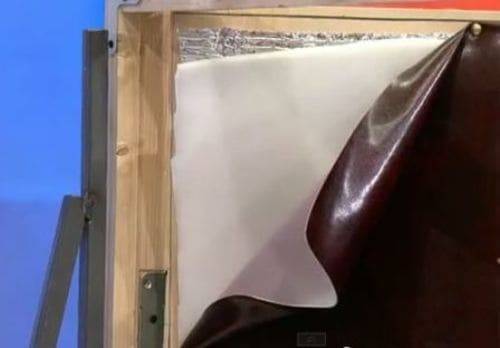
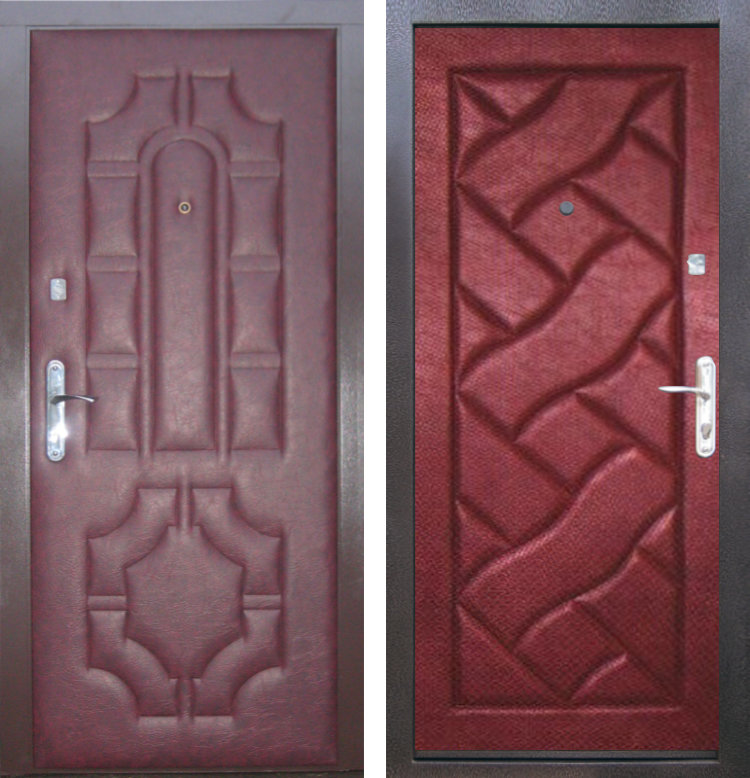
For maximum insulation of wood do-it-yourself doors use the method of double-sided thermal insulation. The sash is lined outside and inside. From the street, the thermal insulation is covered with a material that is resistant to aggressive weather conditions. To insulate the front door from the inside, foam rubber and artificial leather are most often used. Do-it-yourself warming of a wooden door with dermantin occurs in the following order:
- For the convenience of carrying out the work, the canvas is removed from the hinges, freed from the old insulation, handles, lock and other fittings.
- A fragment is cut out of the heat-insulating material, larger than the dimensions of the sash. It is good if about 100 mm of foam rubber hangs from each side.
- The insulation along the edge of the door is shot with stapler staples. The hanging ends are cut with scissors.
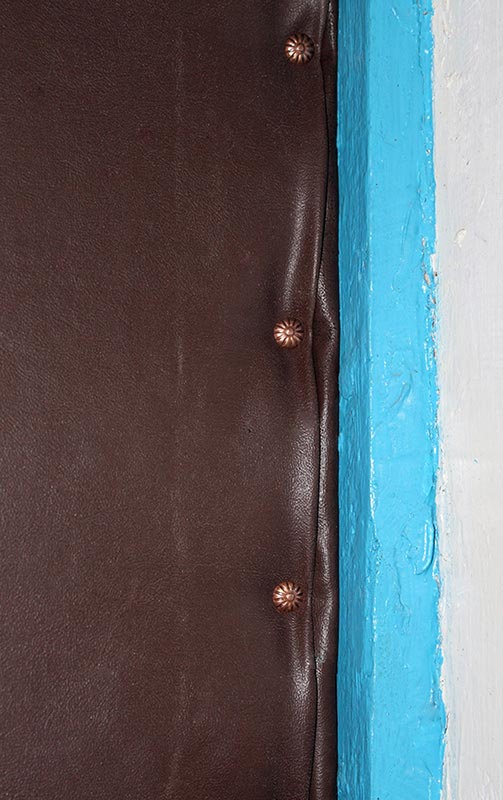
- On top of the foam rubber is covered with artificial leather. Rollers are formed from the hanging edges and fastened with furniture nails. The general plane of the canvas is decorated with a pattern. It turns out after nailing. Soft foam between wide hats forms beautiful bulges. Between the fasteners, you can stretch the wire or strips of dermantine sewn with a tube.
At the end of the work, all fittings are installed and the insulated product is hung on the box.
If polystyrene or polystyrene is chosen to insulate the door block, the final cladding is usually carried out by MDF. The sash increases in thickness and weight. The door block is additionally reinforced with hinges. A frame forming cells is nailed to the surface of the canvas from the rails. Foam boards are tightly laid, and the gaps between the slats are blown out with mounting foam. MDF is fixed on top.
You can glue thin foam boards to the door leaf without making a frame. For decorative finishing use artificial leather.
Warming methods
You need to choose how to insulate wooden doors based on what causes heat leakage:
- If these are cracks, then they need to be filled with sealant or puttied with a special wood putty. The appearance of the door after such a repair leaves much to be desired, so it will have to be painted or sheathed with decorative sheet material.
- If the design has become ill-fitting to the box, most likely the reason is its distortion or a change in geometric parameters. In the first case, it is necessary to adjust or change the hinges, and in the second - to trim the door with a planer, fitting the panel to the frame (see Repair of wooden doors - we are not in a hurry to throw away the old structure).
The last points require more detailed consideration.
Seal
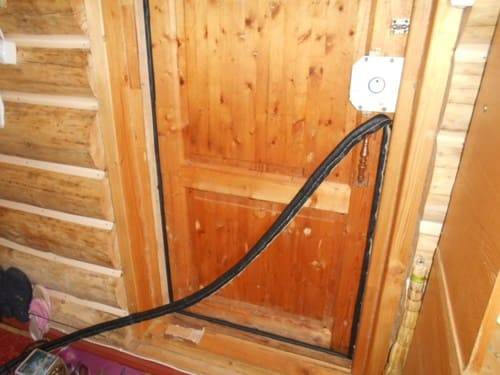
If you need an insulated structure, you should first of all eliminate all the cracks through which cold air can enter the apartment (see What to do if it blows from the front door). The easiest way is to install a factory adhesive rubber seal, choosing the desired profile and thickness.
As practice shows, home-made seals are much more durable and reliable. For their manufacture, they take a strip of foam rubber, wrap it with leatherette or other upholstery material to match the product, and nail the resulting roller with construction nails around the perimeter of the wooden box. And even if such warm wooden doors do not shine with an exquisite look, but the house becomes cozier and warmer.


Threshold insulation
You can do this in three ways:
- Dismantle the old threshold and install a new one in its place, adjusting the height exactly to the level of the canvas.
- Make the same roller of foam rubber and leatherette, as described above, but of greater thickness, and nail it to the bottom.
- Attach a sealing brush to the bottom of the product.
sheathing
The best insulation for wooden doors is foam. It almost does not weigh down the structure and is easy to mount. But the product with pasted Styrofoam on it - no the most aesthetic sight, so it will have to be decorated with either sheet finishing materials, or leatherette or vinyl leather.
When using leatherette, the stages of the warming process will be as follows:
- Remove the product from the hinges, lay it on a horizontal surface and dismantle the fittings.
- Make rollers of foam rubber or polyethylene foam, wrapping them with strips of leatherette, and nail them around the perimeter.
- Cut the insulation for wooden doors to size and cover it with leatherette. You can connect them with glue or "welding" with a hot knife.
- Glue the decorated foam to the door leaf with furniture glue or liquid nails.
- Cut holes for the handle, keyhole and peephole and fit them into place.
- Return the product to its place, lubricating the hinges.
If you want to use sheet finishing material, for example, laminated fiberboard, then around the perimeter you first need to fix a frame of planed bars, the thickness of which must match the thickness of the foam.
The foam is cut to the inside size of the frame and glued to the door. A sheet of HDPE is laid on the frame and nailed with furniture nails. The visible ends of the frame are painted in a suitable color.
Upholstery
Insulated wooden doors were made in this way back in Soviet times. Now it is not popular, but it can be used if you are limited in funds.
The upholstery process begins again with the manufacture of rollers and fastening them around the perimeter of the canvas. Then, a layer of insulation is glued or stapled onto a surface free from rollers, and upholstery is stuffed on top of it (see How to upholster an entrance door).
When choosing insulation, do not make it too thick, otherwise your construction will look ugly and poorly closed. A very dense and heavy insulation will increase the weight of the door leaf and can lead to skew.
Vestibule device
If your front door is set flush with the plane of the outer wall, and the depth of the slope allows you to install another box in it, take advantage of this and install a second structure. It can be interior and match the design with the rest of the doors in the apartment, but for better thermal insulation it is necessary to make a threshold to it.
The main thing is that fittings, especially handles, are placed in the space between the two products.
On the Internet, you can find a lot of detailed information and video stories on the topic of insulating front doors with each of the listed methods. All of them will help you significantly improve the microclimate in the apartment. And if you apply any combination of these methods, then the insulation will be maximum.
Do-it-yourself warming methods
First you need to understand exactly how much material is needed to insulate the door. To do this, the height and width of the canvas are measured, and then the perimeter is found out.
The house can be insulated with rollers if the landlord does not want to remove the door from its hinges.The rollers should be filled, following the perimeter of the canvas from the inside. In this case, the door will look attractive and keep warm. The rollers are created with the help of a heater wrapped in decoration material. These items should be nailed down using nails.
For the upholstery of the door you will need a decorative finish. It can be leather or its cheap substitute. To finish the door from the inside, measurements must be taken when the sash is closed. In this case, you need to retreat 1 cm from the box. For efficiency, it is recommended to insulate the canvas on both sides.
After you have made all the measurements and purchased decorative materials, you can proceed to the preparation and direct insulation of the door structure:
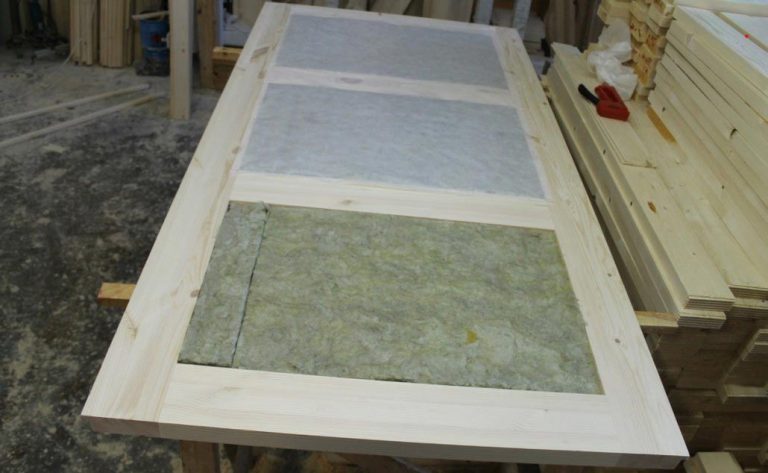
- The door needs to be prepared. It must be removed from the hinges, put on chairs. Then the fittings are dismantled, including the handle, peephole and lock. The door must be removed from the previous coating, treated with an antiseptic mixture and degreased. The canvas should be laid on a horizontal surface. In various cases, glue, metal staples and small nails are used. On the surface of the insulation, you need to attach an upholstery material that is larger in size.
- It is also recommended to stuff hardboard on the surface of the insulating material for aesthetics. Hardboard sheet can be covered with decorative veneer. Then the door leaf is framed with a profiled frame. That will hold the hardboard and decorating coating.
- Along the edges of the canvas, it is necessary to attach dermantin with a stapler. It is advisable to involve an assistant in the work, otherwise folds will appear on the decorative material.
- You can decorate the door for both a city apartment and a country house.During work, you should make a drawing from the side of the street with chalk on the upholstery and drive it in with nails. Leather strips are stretched between them.
If the owner of the house wants to insulate the door with foam, he can do this in two ways:
- To finish one side, the foam should be cut so that its dimensions are identical to the base, then the material is sheathed with dermantine and glued to liquid nails.
- To insulate the canvas from the inside, the foam must be cut out according to the parameters of the box clearance.
- Also, the owner can nail wooden slats along the perimeter of the box. The resulting area should be filled with foam, after which the structure can be sheathed with clapboard. The thickness of the rail must match the foam. But this method has a minus: the design adds weight and there is a need for additional loops.
- In addition, it is recommended to seal the opening. This requires a special rubber seal. It is a tape rolled up into a roll. It will not be difficult to buy it, as it is cheap. The installation of this material is facilitated by the fact that the tape has an adhesive base on one side.
On this material, you need to fill the strips with a thickness of 1.5-2 cm and attach OSB sheets to them. For efficiency, it is worth leaving a gap between the decorative coating and the foil insulation.
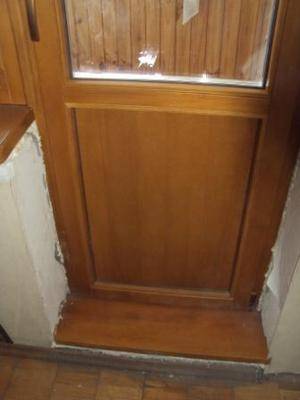
Insulation of a wooden balcony door
One of the most common reasons for the incoming cold from the street is the presence of a wooden door to the balcony. Moreover, if you take the wooden sheet itself, then it perfectly holds air.But, unfortunately, such doors are usually made of thin panels. And in some cases, they generally install a canvas that can be used exclusively for interior doors.
Therefore, when deciding to insulate a room, it is necessary to take into account what kind of door defects the work will be aimed at eliminating. It could be:
- Joint sealing.
- Warming of the canvas itself.
- Slope sealing.
Depending on this, both the methods used and the materials that will be needed may differ.
What you need, materials and tools
When deciding how to insulate balcony doors with your own hands, you should take into account that maximum efficiency can only be achieved through complex work. So, we need:
Warming a wooden balcony door will help keep the heat in the room
- Insulation. This material, depending on the destination, will be different. So, to insulate the door leaf, you will need foam rubber, for slopes you will need polystyrene foam or mineral wool, and for joints, a regular sealant (available at any hardware store).
- Wood putty.
- Upholstery for the door (can be made of leatherette).
- Expendable materials.
- Construction mixes.
Also, the following construction equipment will come in handy:
- Level.
- Spatulas.
- A set of standard construction tools.
- Wallpaper knife.
- Roulette.
The set of tools and materials may vary depending on what kind of insulation work is planned.
How to do the work, a brief step-by-step description
How to insulate a wooden balcony door with your own hands? To do this, it is important to understand that the essence of this procedure basically boils down to eliminating the unhindered penetration of cold air into the room. To do this, do the following:
- We remove the old paint, conduct a cursory inspection of the door leaf and determine for what reason the cold air enters the room. Cracks between the panels are carefully sealed with putty.
- Take off the door panel. We unscrew handles, hinges and other accessories from it. Lay the door leaf on a flat surface. We take the upholstery and attach it to the canvas on one side. The size of the upholstery should be slightly larger than the size of the insulated part of the door. To do this, we use special nails with a wide curly hat (usually come with upholstery).
- Further on the area of the door we fix the foam rubber.
- We begin to stretch the upholstery on the door. To do this, we fix it from the fixed edge. The distance between the nails should be about 15-20 cm. We tuck the edges of the upholstery so that the place of the fabric cut is inside. Insulation of a balcony door in this way can be carried out both on one external side and on both.
- Then we take the foam rubber and cut off three strips from it, with a width equal to the thickness of the door. Two strips along the length should be equal to the width of the door, the third - to its height. We are preparing three strips of leatherette of the same length as the foam rubber, and a width of about 10-15 centimeters. We nail leatherette on the edges of the door on three sides.
- For additional sealing, we roll up the rollers, wrapping the cut-out foam rubber with strips of dermantin, and attach them to the door with furniture nails so that they bridge the gaps between the box and the canvas on three sides.
- After completing these works, the canvas can be installed back. If necessary, apply sealing tape to the joints. But in most cases, it will not be needed if the upholstery work is done correctly.
- If the door has glass, then window putty can be useful to seal the cracks, and energy-saving window film can be glued onto the glass itself.
What plastic trim for windows And how do they affect insulation? You will find the answer on our website.
Ready-made solutions
If you do not want to rack your brains over which material is best to choose to insulate your door block, resort to the help of ready-made kits.
These are standard kits that include the most necessary components:
- insulation (most often it is foam rubber);
- sealant in the form of a rubber band;
- upholstery - leatherette as the most economical and practical option;
- decorative nails.
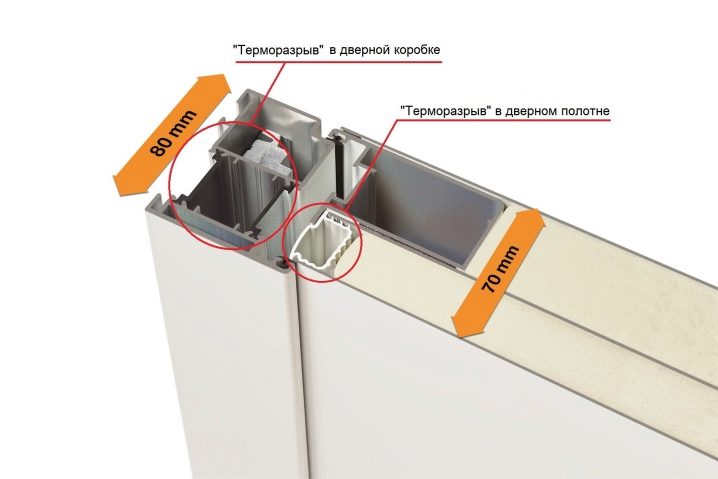
A good turnkey solution in all respects is a door with a thermal break. It consists of two heat-insulating materials, between which a polyamide insulating sheet with low thermal conductivity is laid. This reduces heat transfer between adjacent materials. Heat loss is also reduced by a steel closed circuit. Such doors, thanks to their layered structure, soften the temperature differences between the room and the street. Of the components in this product, cotton wool, polystyrene, wood, PVC can be used.


In order for this product to fully meet its purpose, it is necessary:
- install the canvas correctly, without deformation;
- provide it with thermal break handles;
- lay the seal.
door frame insulation
Box inspection
Insulation of the door frame - the process is simple
Before proceeding to the final stage of insulation, both metal and wooden entrance structures, you need to make a complete examination of the box. It consists in visual inspection and identification of existing defects.
If the box is made of wood, then over time it will crack and rot. If these defects are clearly visible, then you will certainly need to replace the door frame before insulation.
Also pay attention to the box, fixed with mounting foam. It has such an unpleasant property as chipping
That is, mounting foam, especially of low quality, may crumble over time, which affects both the thermal insulation properties and physical ones.
box insulation
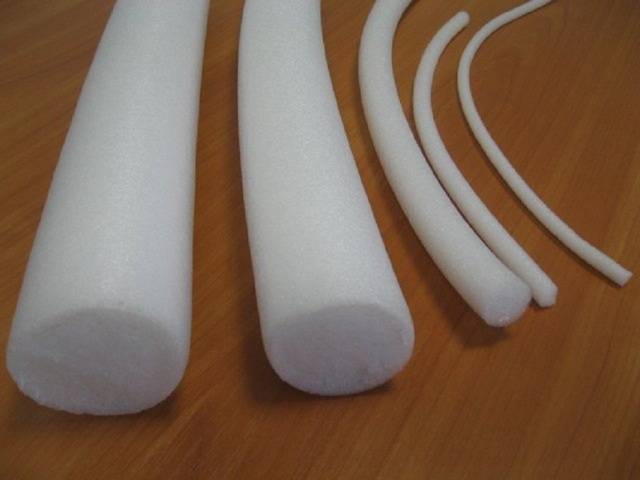
Tubular insulation
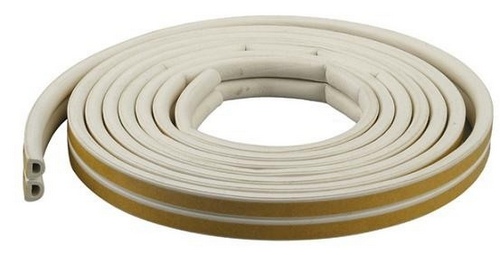
The process of thermal insulation of the door frame occurs with the help of tubular insulation, the price of which is not as high as for other types of thermal insulation materials.
This work consists of the following steps:
Buying a tubular seal
The most suitable for this work will be a heat-insulating self-adhesive rubber-based material.
When choosing a thermal insulation material, it is important to choose its thickness. This is done in such a way that, when compressed, the insulation fits snugly against the door and the box.
There should not be any visible gaps.
Fastening tubular heat-insulating material to the box. This work is done in such a way that the entire perimeter of the right box is covered with insulation.
Threshold area insulation
A common phenomenon is the occurrence of cracks at the base of the door in the space between the leaf and the threshold.There are several ways to eliminate this defect, which leads to heat loss in the house:
- Replace the old deformed threshold with a new product, the height of which ideally matches the level of the canvas.
- Make a roller with your own hands, similar to the one recommended for sealing the door contour, but with a large thickness value. Attach it with nails to the bottom of the canvas.
- To eliminate the excessive gap between the door base and the threshold, you can also attach a special sealing brush to the bottom of the leaf.
Insulation and restoration of the door leaf
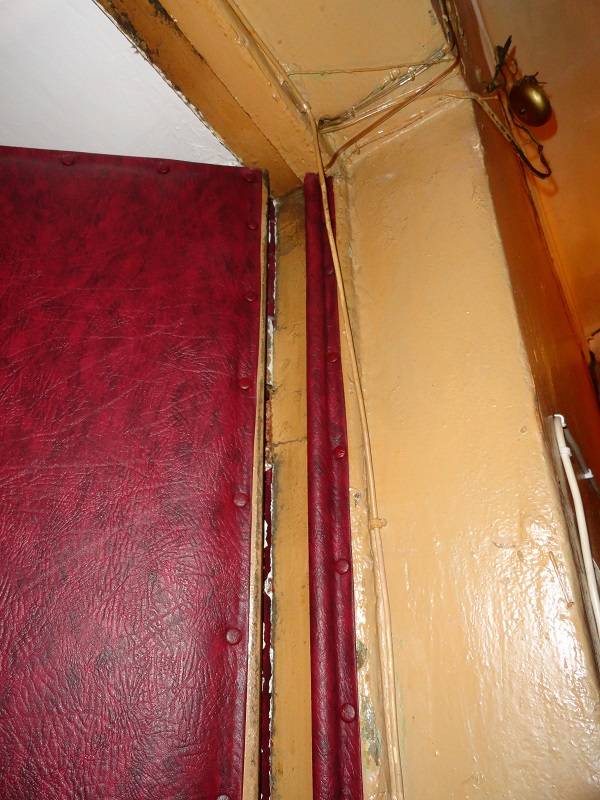
Mounting rollers

Mounting rollers
These devices are designed to seal the gaps between the door and the jambs.
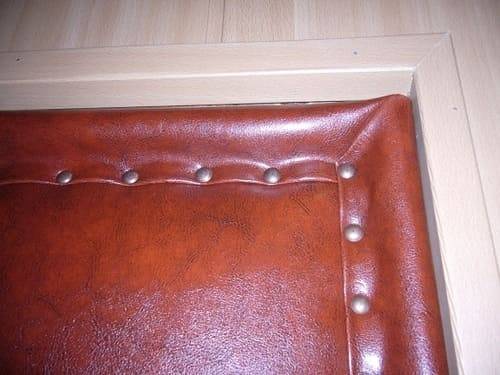
Step 1. Leatherette is cut into 4 strips, 10 cm wide. The length of the strips is equal to the width and height of the door leaf + a margin of 5 cm on each side.


Step 2. A strip of leatherette is applied to the edge of the door with the wrong side. Every 10-15 cm, the material is attached to the canvas with a stapler or upholstery nails.
A strip of leatherette is applied to the edge of the door with the wrong side
Step 3. Strips are attached around the entire perimeter of the door. Near the hinges, the material must be cut in a special way: the roller should not interfere with the closing and opening of the door. To prevent the roller from bulging, you can cut off excess material around the edges. The final installation of the roller is carried out after the insulation of the door leaf.
Foamed polyethylene roller, which must be inserted around the entire perimeter of the door into a strip of leatherette
Strips are attached around the entire perimeter of the door
Strips are attached around the entire perimeter of the door
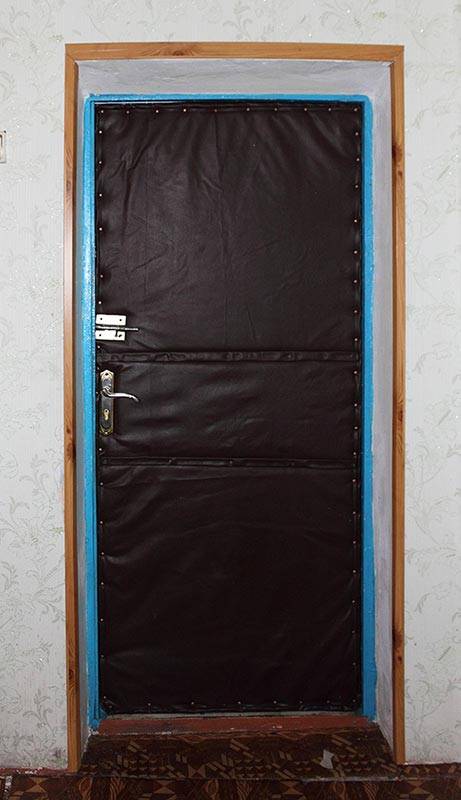
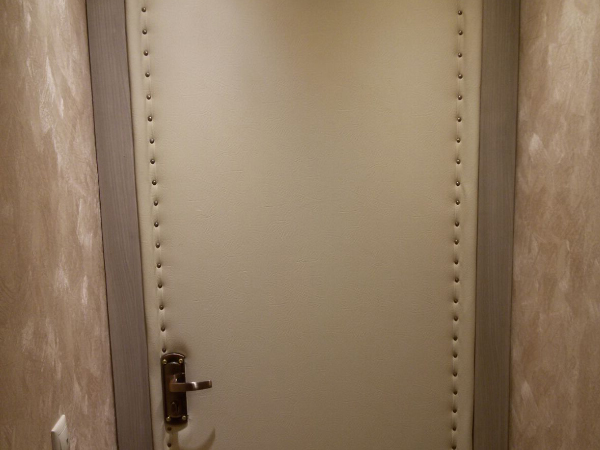
Door leaf insulation
You can upholster the door with leatherette both from the inside and from the outside.Also, the inner canvas can be decorated with a laminated MDF board. The color of the material can be chosen as desired. The canvas is fastened with self-tapping screws, around the perimeter
It is also important to pre-cut holes for the handle, peephole or internal lock, if any, on the door.
Most often, restoration is carried out using eco-leather or leatherette upholstery. It is not difficult, if desired, this process can be done independently.
cutting
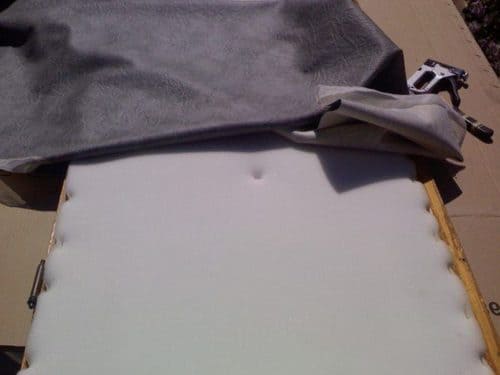
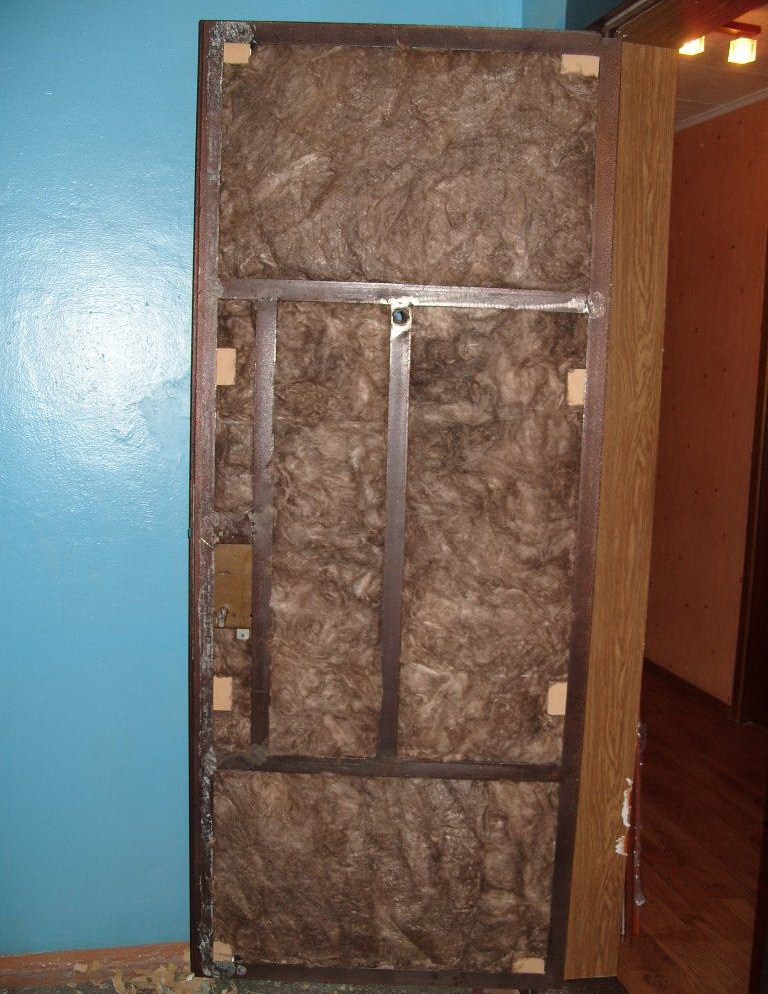
Step 1. Mounting on the insulation sheet
It is important that the size of the insulation on all sides be 10 cm larger than the dimensions of the door leaf. Most often, ordinary foam rubber is used for these purposes, having a thickness of 2-3 cm.
With the help of a stapler, foam rubber is aimed at the door leaf at small intervals.
Door with fixed rollers
Step 2 Excess material is trimmed around the perimeter of the door. The stock is needed so that there are no problems with fixing the insulation: it is easier to cut off the extra edges than to accurately shoot a sheet of material cut to size.


Insulation mount
Step 3. Additionally, it is recommended to attach a batting over the foam rubber. This material will improve the heat and sound insulation of the door structure.
Upholstery fastening
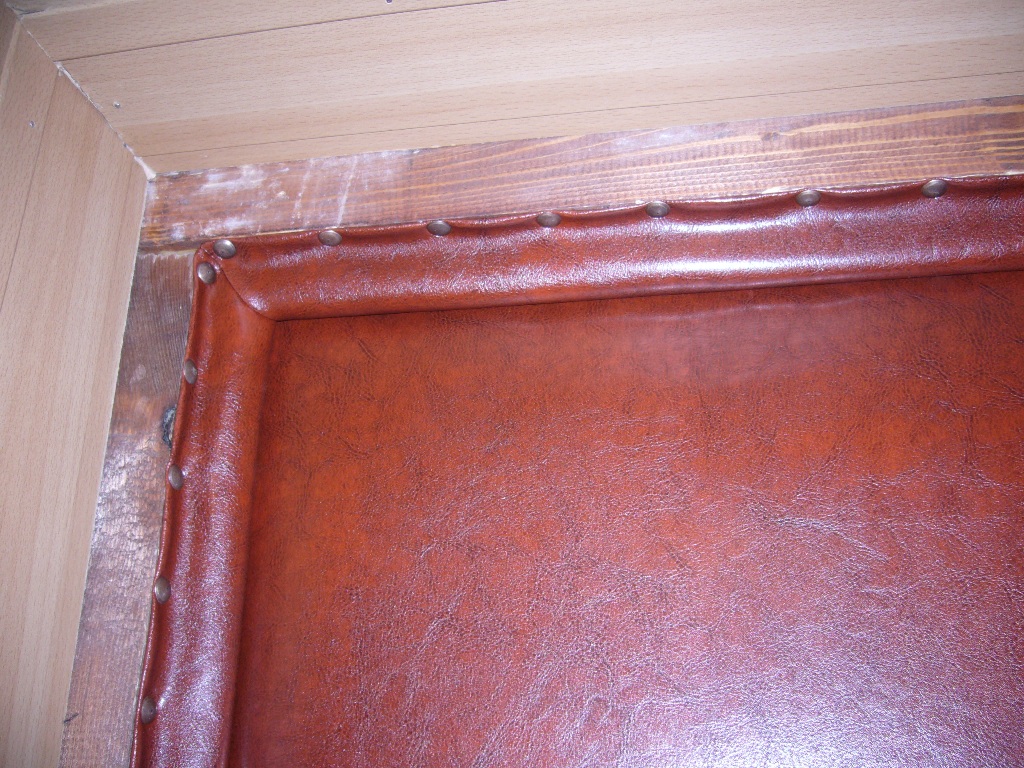
Step 4 Leatherette is cut with a margin: 4 cm on each side. It is necessary to nail the material to the canvas with insulation from the middle. This fastening method minimizes skew and wrinkling of the material.
Step 5. Next, leatherette is pointwise attached at the top, then at the bottom of the canvas. In this case, the fabric should not sag freely. The edges of leatherette are bent inward.
Step 6. Fastening leatherette along the edges of the canvas. It is necessary to stretch the fabric strongly to avoid the appearance of bumps.
Step 7Leatherette needs to be carefully fixed around the entire perimeter of the door. The gap between the location of the nails is 5-6 cm. It is advisable to drive in the nails at the same level and at an equal distance.
Step 8. Finishing the roller. The protruding ends of the fabric are folded into a tube and nailed. It is desirable that the roller be the same size on all sides of the door. This will improve her appearance.
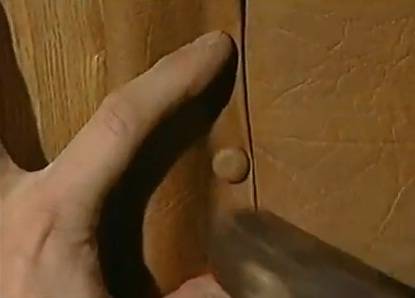
Step 9. Attaching the handle. In the place where the fittings are located, you need to make a hole in the leatherette, and then attach the handle using self-tapping screws.
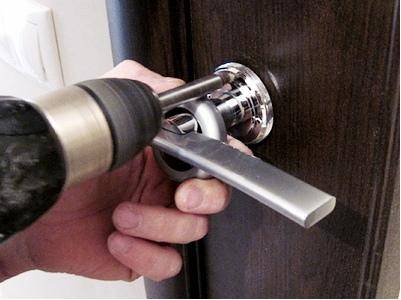
Handle attachment
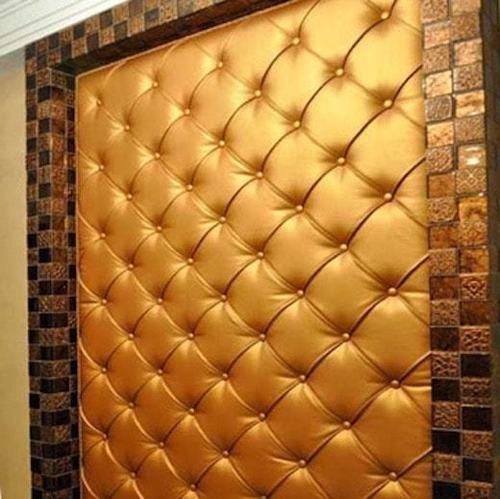
Step 10. Ennobling the appearance of the door. To prevent the canvas from looking too simple, you can decorate it with nails, wire or fishing line. To do this, markings are applied to leatherette: a grid, squares or other geometric shapes. Nails are driven into the corners of the figures, serving as fasteners for wire or fishing line. The wire is stretched between the nails, visually dividing the canvas into fragments
It is important to observe the geometry of the drawing
Tools and materials
In addition to insulation - the main material, you also need fasteners, cladding, etc.
 Polymer door seal
Table 1. All necessary materials and tools
| materials | Tool |
|---|---|
| Any chosen heater | Mounting tape |
| Mounting foam | square |
| Hardware, liquid nails or mounting foam (for mounting a rigid heat insulator) | Pencil |
| Wood-shaving sheet materials or lining (for sheathing a non-separable door) | Long ruler or rule |
| Adhesive tape, hydro and vapor barrier membrane (in the case of using soft insulation) | Jigsaw or saw |
| Leatherette, MDF or plastic (as a decorative finish) | screwdriver |
| Rubber or silicone polymer seal | Spatula and container for putty mixture |
| Universal mounting adhesive (having a good ability to adhere to surfaces of different textures) | foam gun |
| Putty for door frame insulation | stapler |
| Stapler staples or furniture nails | A hammer |
| Dry timber for making the inner frame of the door leaf in case of its absence | construction knife |


