- System health check
- Frame installation installation
- How to install a bidet with your own hands. Video
- Similar content
- The range of Geberit installations
- Choosing and buying a toilet bowl with installation
- Installations are of two types.
- Installation of a floor bidet
- Bidet attachment
- Connecting a bidet to the water supply
- Connecting a bidet to the sewer
- Features of installing a suspension device
System health check
When all installation activities are completed, and the installation elements are connected to the main communications, you need to make sure that there are no malfunctions in the system. To do this, first turn the valve of the water tap and monitor the flow of water into the tank.
As soon as the tank is full, press the drain button and repeat this action several times. Then carefully examine all parts of the system.
If the design works correctly, and water does not ooze from the pipes and connecting parts, proceed to the decorative finish. Dampness or water droplets detected are a clear indication of a problem that must be corrected before cladding can begin.
The most common causes of failures:
Water is leaking from the tank - perhaps the seals were not installed clearly or moved out of place during installation.It is necessary to shut off the water supply, unscrew the connecting bolts, check the location of the gaskets and correct them or replace them if necessary.
The toilet bowl staggers - you need to look at the fasteners of the toilet itself and the connecting elements of the installation, and then gently tighten them so that the position of the plumbing is clearly fixed
It is advisable to act very carefully, otherwise there is a risk of stripping the threads of the reinforcing fasteners or even splitting the ceramics.
Water stagnates in the toilet - a clear indication of the improper location of the drain pipe. To resolve the issue, the plumbing will have to be dismantled, the drain must be installed strictly at 45 degrees, and only then the toilet should be returned back.
Dampness on the floor and around the base of the toilet - most often this phenomenon is associated with poor sealing of the connecting corrugation
To eliminate the leakage, it is enough to cover the butt joints with another layer of sealant and let it dry well.
All these problems are not very difficult and can be easily fixed with your own hands at home. If the owner does not have the desire and time to do repairs, you can call a professional plumber, and he will quickly fix the problems that have arisen.
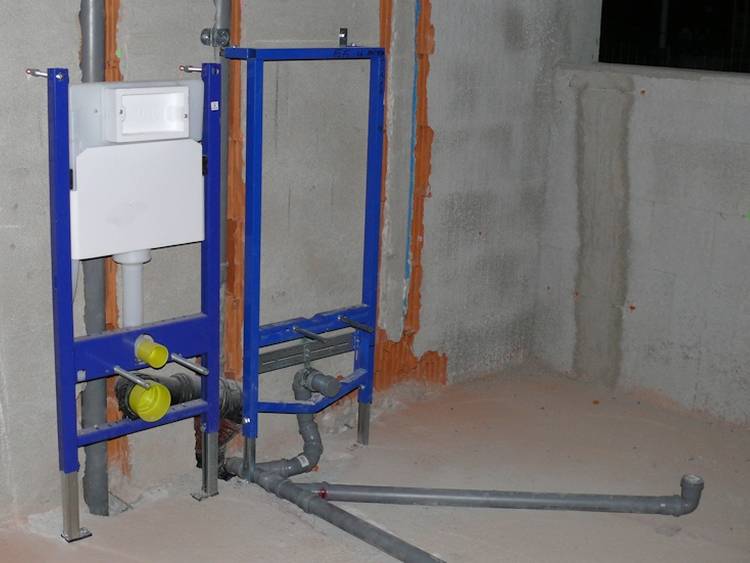
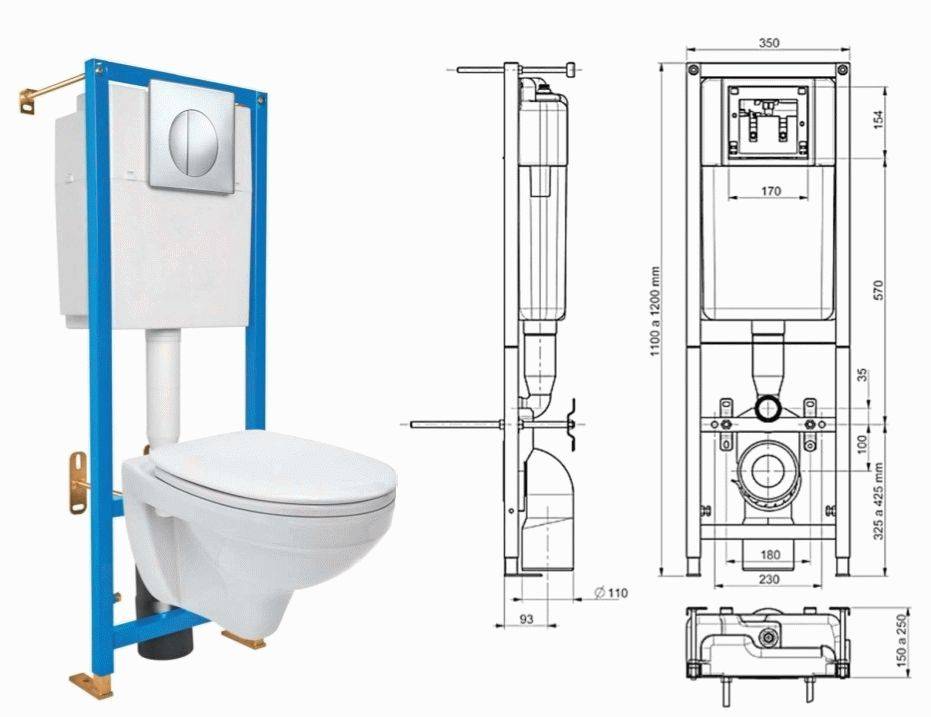
Frame installation installation
 frame construction
Installation of the frame installation of the toilet bowl is carried out in accordance with the step-by-step instructions:
- The frame is fixed at least at four points with dowels. First, holes are drilled under the fasteners slightly smaller in diameter than the dowel itself, and then, by changing the drill, they expand it to the dimensions corresponding to the diameter of the dowel. Then the hole will turn out to be the desired diameter with smooth edges.
- Fix the lower part of the structure.Then, after checking the evenness of the installation with a level, fix the upper part. Anchors and brackets are used as fasteners. Nuts are tightened with open end wrenches.
- The 90 degree bend is fixed with a plastic clamp-fastener. When connecting tubular elements, silicone sealant is used.
- Connect the water pipe to the toilet tank. The water supply point can be located on the side or on top. It is better not to use flexible hoses - they are short-lived. Preference should be given to polymer pipes or stainless steel bellows connectors.
- After installing the pipes, check the system for leaks.
- Upon completion of the installation of the frame, the openings of the pipes, the drain tank and the mounting studs are closed with plugs.
- The wall is covered with moisture-resistant drywall. The drywall profile is attached to the installation and to the wall.
- Install the tile, after cutting out the necessary holes in it for pipes and studs. Hanging the toilet after tiling is possible only after the tile adhesive has completely cured - after 7 days.
- The pipe included in the kit is connected to the toilet drain. Then, using a level or other even object, draw a line coinciding with the plane defined by the edges of the toilet bowl.
- Measure the depth of the pipe in the installation. From the markings on the pipe connected to the toilet, set aside this distance and cut it off. The same is done with the pipe for supplying water to the toilet.
- Silicone sealant is applied to the rubber cuffs and the rubber elements are inserted into the pipes, and the pipes themselves into the toilet. Moreover, the nozzles must be inserted first into the toilet, and then the device is fixed with them, and not vice versa. Otherwise, the rubber bands will let water through.
- An insulating gasket is fixed on the studs and plumbing is installed, having previously lubricated the reciprocal holes in the pipes with a sealant.
- Putting the toilet on the studs, mount the gum, washer and nut. The fastener is clamped, after which caps are put on it so that the bolts and studs are not visible. Do not tighten the fasteners as tightly as possible, due to tension, the bowl may burst.
Installing a wall hung toilet produced. Now, using a clerical knife, the insulating gasket is cut along the contour of the device.
How to install a bidet with your own hands. Video

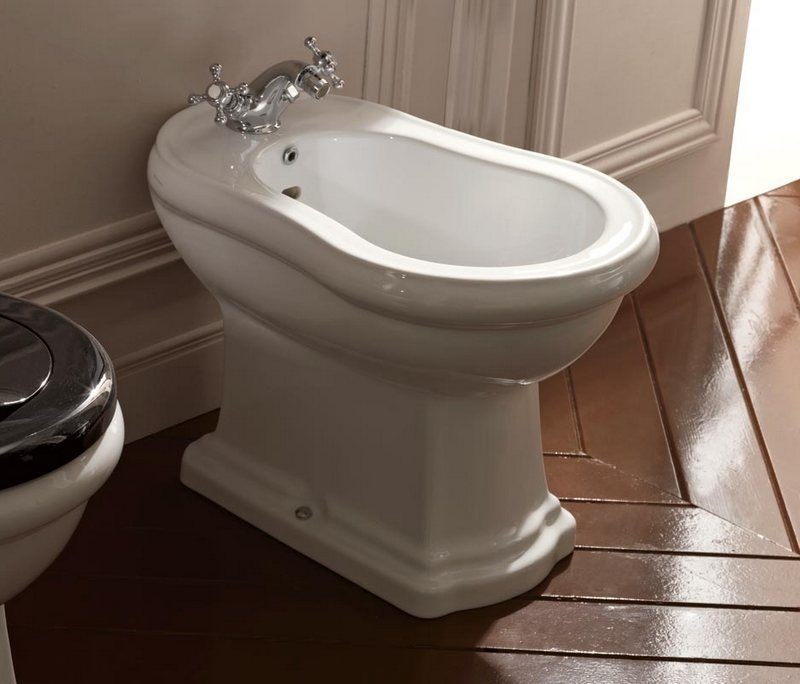
Rice. 8.128. Square bidet and toilet
A simple bidet model is a cross between a low sink and a toilet (Fig. 8.128). It connects to the sewer in the same way as a regular toilet. But instead of a drain tank, taps with a mixer are attached to its edge. The disadvantage of such a bidet is that it is quite cool to sit on it.
A simple bidet is mounted in much the same way as a sink. First, a mixer with taps is installed on the bidet and screwed on. Then a drain is inserted into the bidet, to which the siphon is connected, as well as when installing the sink. Now you can put the bidet in the planned place, but you should not rush and tilt it to the floor (Fig. 10.143-10.145).
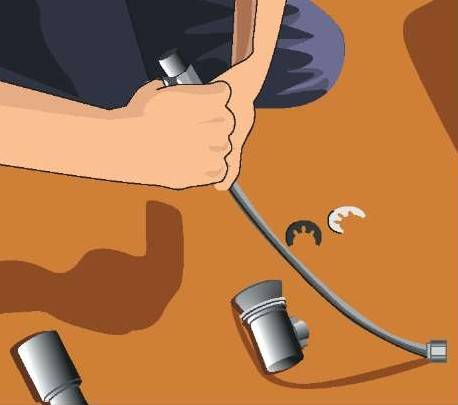
Rice. 10.143. Installing the mixer

Rice. 10.144. We fasten flexible hoses for hot and cold water
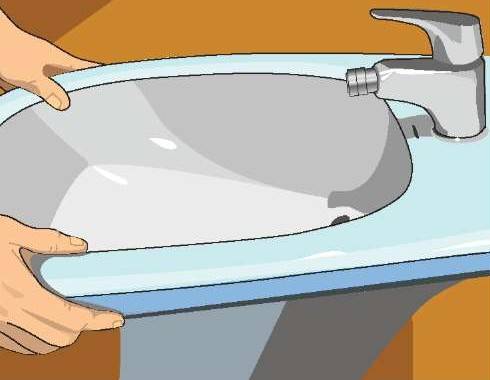
Rice. 10.145. We install the bidet in the chosen place
Connect the mixer pipes to the water supply pipes. In this case, it is most convenient to use a flexible eyeliner.A drain pipe is connected to the siphon pipe using a compression connection - it is inserted into the sewer socket (for a bidet, you can also make a drain from the sewer, which immediately provides for a threaded connection). Attach the bidet to the floor in the same way as the toilet (Fig. 10.146-10.151). There are wall-mounted bidets that are attached not to the floor, but to the mounting frame.
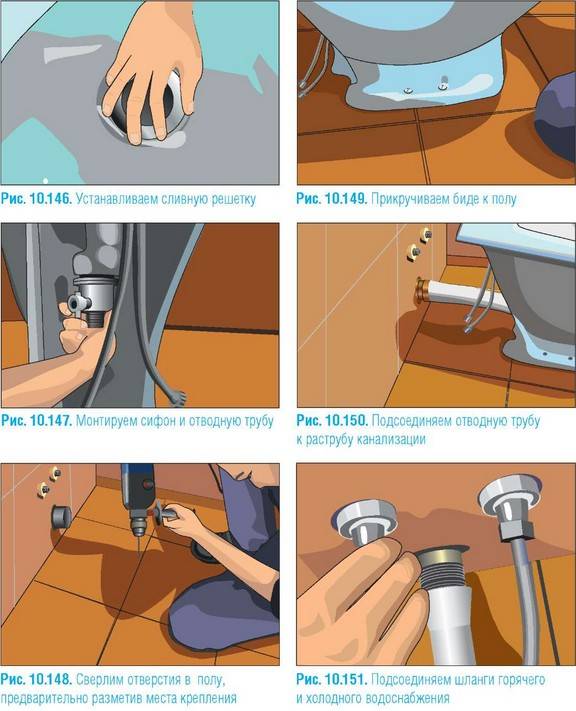
A bidet with an upward flow of water is more complicated. A stream of water passes inside the seat rim, heating it, then spouts upwards under the action of a special regulator. The fountain hole is at the bottom and dirty water flows directly onto it, so a special water supply is provided: the waste water is not sucked back and does not pollute the water in the water supply. Before installing such a bidet, you need to assemble and connect the adjustment mechanism, and only then connect the bidet drain grate to the water supply and sewerage.


Similar content
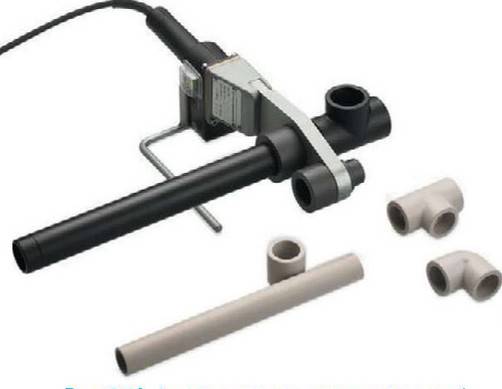
Do-it-yourself installation of plastic pipes. Video
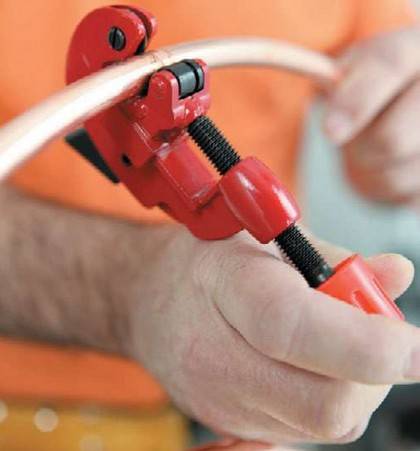
Pipe cutting and threading. Tools and Recommendations
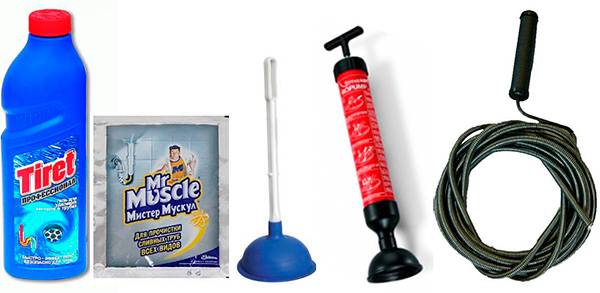
How and with what to clean the sink, toilet or bath from blockages
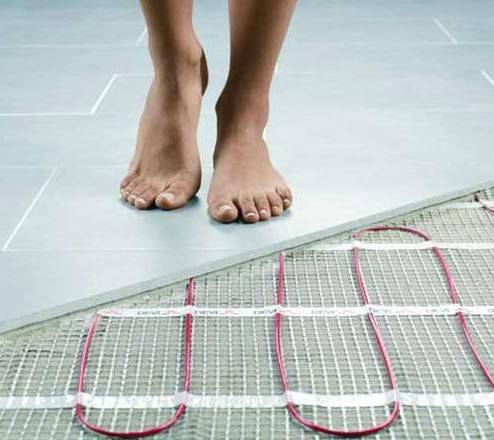
Do-it-yourself electric underfloor heating. Video, installation, device

Distribution of water pipes. Video. Scheme
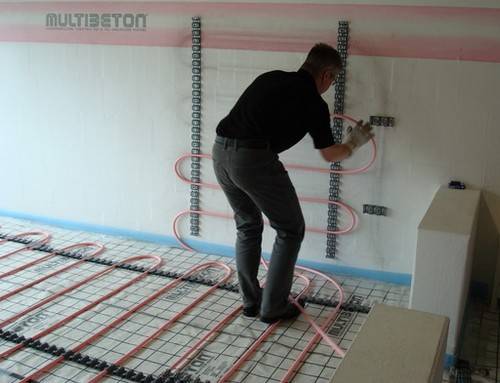
Water warm walls with their own hands. Video, instruction, photo
How to repair a damaged sink (chip, scratch). Video

Installing a heated towel rail with your own hands. Video, photos, tips
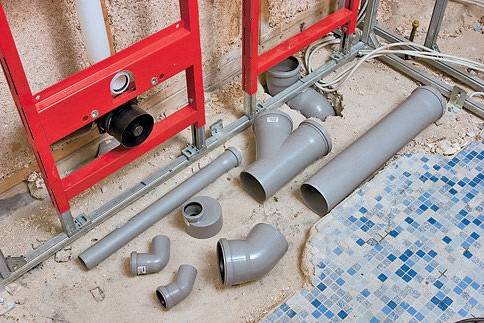
Laying sewer pipes inside the house (apartment), how to do it right. In and
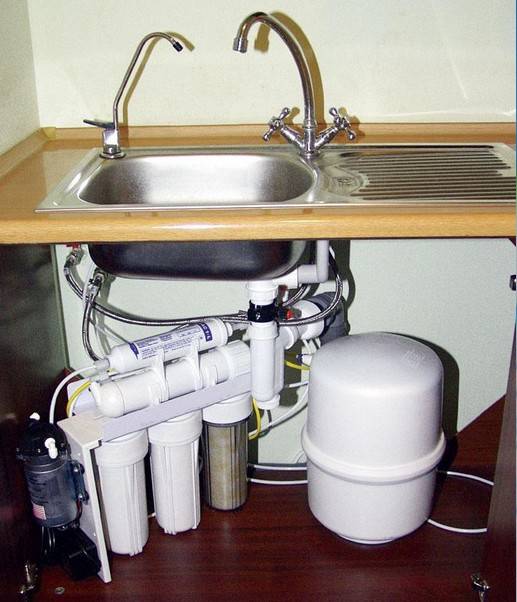
Purification (filtration) of water at home. Video
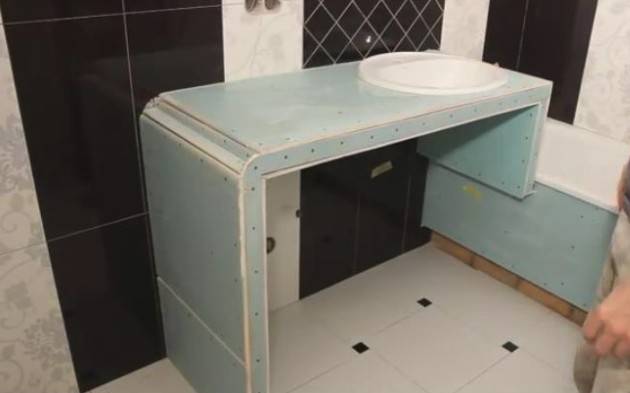
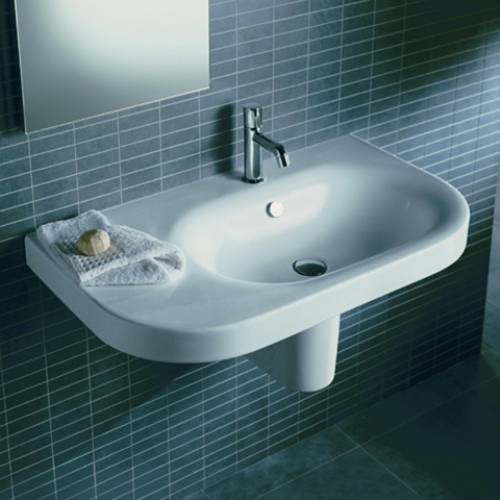
How to make and install a box under the washbasin
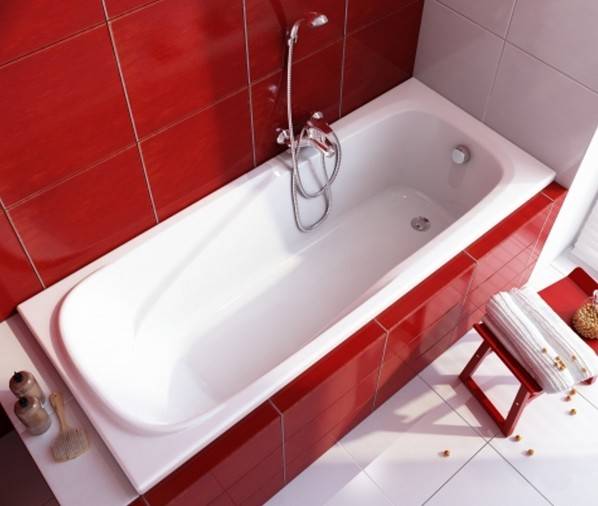
How to install a bathtub with your own hands. Video instruction

Do-it-yourself installation of a radiator heating system.Video, diagrams, photos
How to conduct plumbing in the house with your own hands. Video
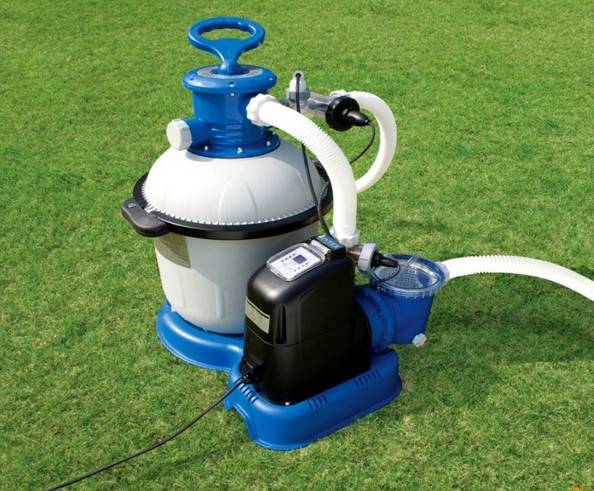
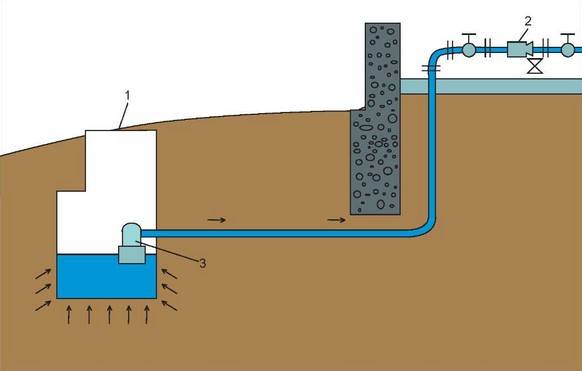
How to install a filter for do-it-yourself pool. Video
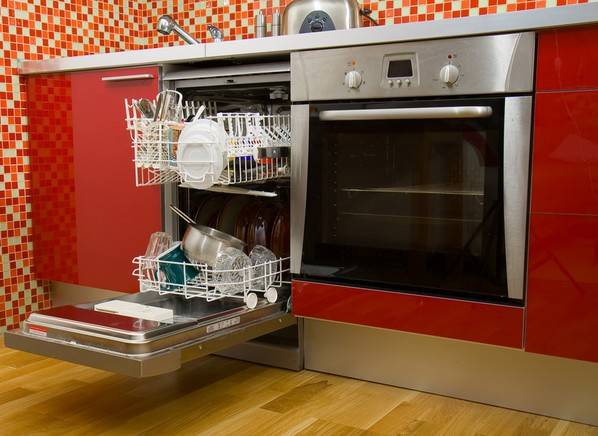
How to install and connect a dishwasher (dishwasher) yourself
How to repair a mixer and a faucet with your own hands. Video

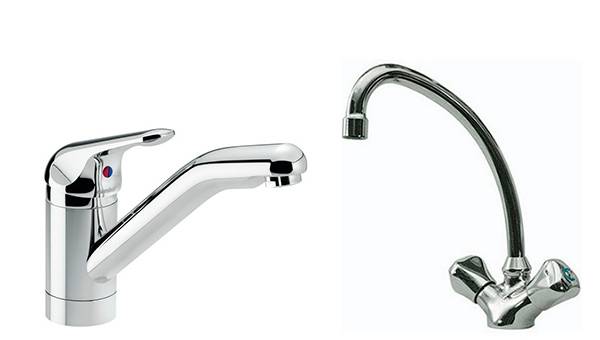
How to install a faucet in the kitchen, in the bathroom. Video, photo, instructions
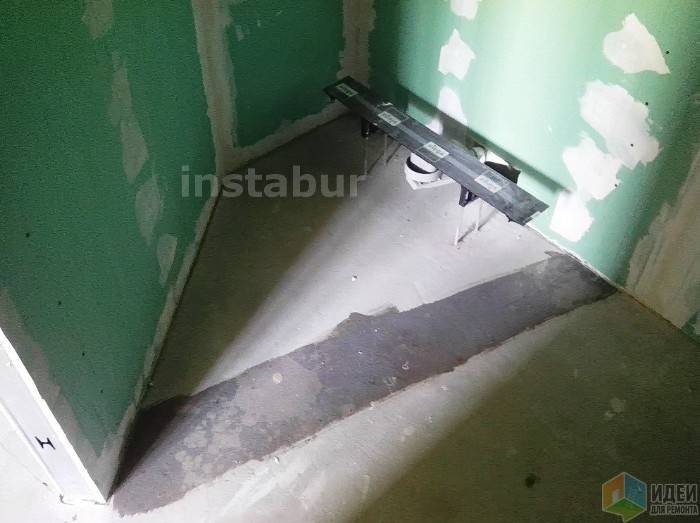
How to make a podium for the shower do-it-yourself cabins. Video. A photo


How to restore a bath with your own hands
Load More...
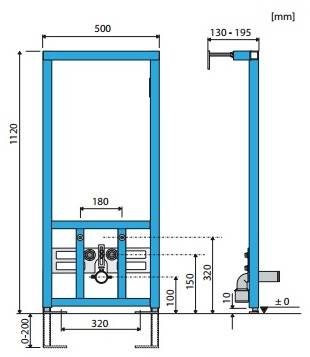
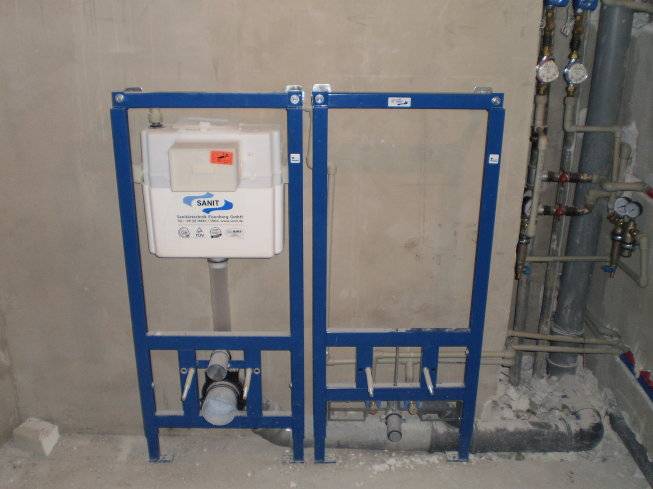
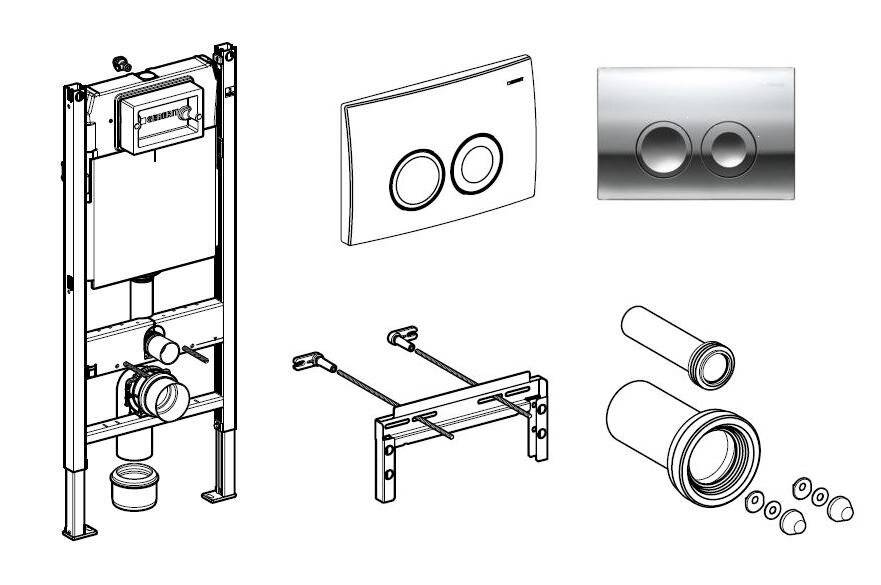
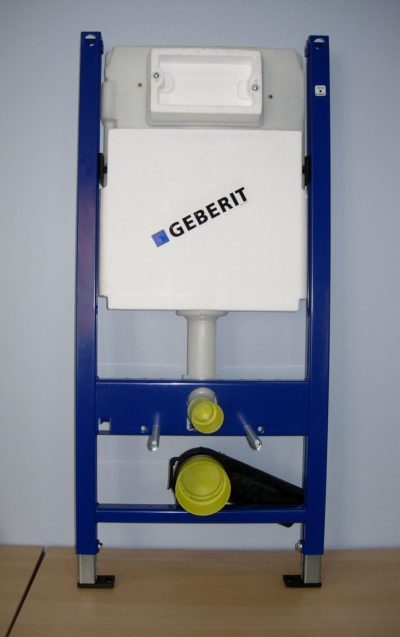
The range of Geberit installations
The installation system is a set of profiles rigidly interconnected into a single frame structure with the possibility of adjusting the spatial position of individual elements. The installation is used for attaching suspended plumbing fixtures, hidden plumbing to toilet bowls, urinals, bidets, sinks, cold water and hot water communications, sewerage, and electrics.
The Swiss manufacturer Geberit produces installations for fixing the following types of plumbing and fixtures:
- toilets and bidet toilets;
- urinals, bidets;
- washbasins, drains, kitchen sinks;
- bathtubs, shower systems;
- shower with sewerage in the wall;
- supports, handrails for the disabled.
The frame structure is separated from the wall at some distance or mounted as an island, sheathed on the outside with sheet material. This allows you to hide pipes, cables, flexible hoses, and other elements of engineering systems inside it.
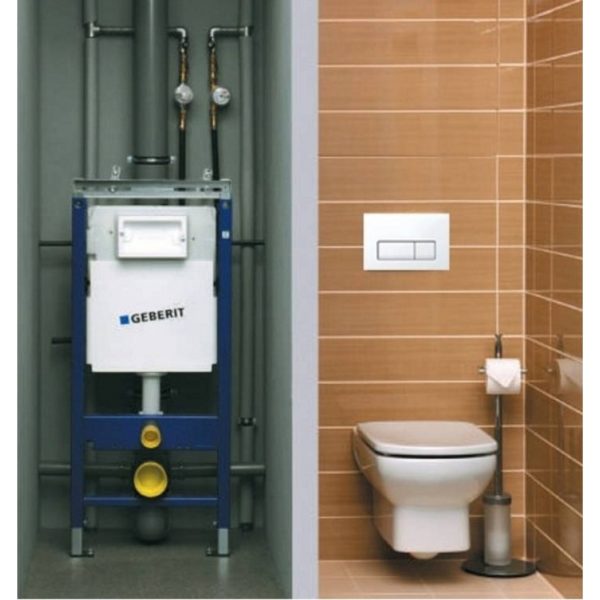
Users often get confused with the name of Geberit installations. The correct name for the frame structure is Geberit Duofix. However, the manufacturer initially uses several options for completing it with mounting elements for specific plumbing equipment.Therefore, other names of his products appear in the title. The marking of the frame structure is deciphered as follows:
Geberit Delta installation – a frame for a wall-mounted toilet bowl with a concealed flushing cistern Delta;
installation Geberit Sigma - frame structure for plumbing with vertical mounting, cistern Sigma 8 cm or 12 cm thick;
installation for the Geberit Duofix Omega toilet bowl - the installation height of the Omega cistern is 82 cm or 98 cm;

Geberit DuoFresh installation - frame with odor removal elements;
In other words, in the frame structures of the installation systems, the distance between the uprights and the horizontal bars can vary. The frame can be reinforced with two side posts for fixing handrails for people with disabilities.
In free-standing installations, racks are usually reinforced with additional elements. The flush cistern key can go to the front surface of the structure or be located on top or on the end.
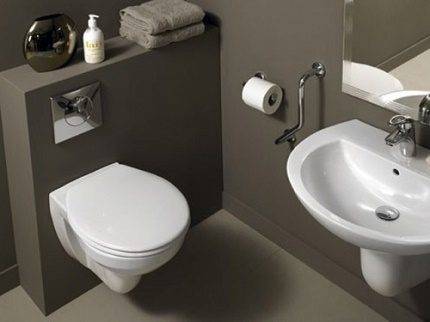
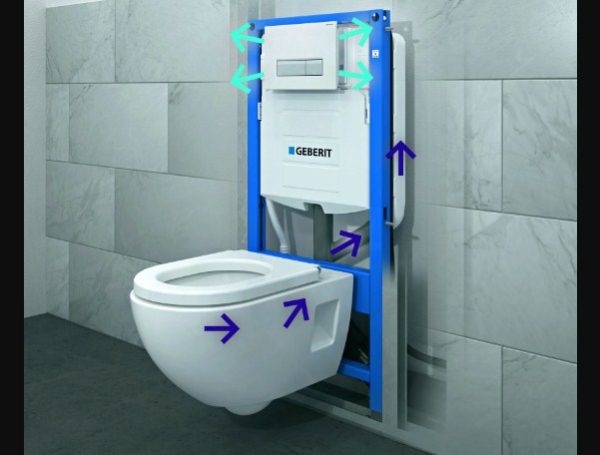
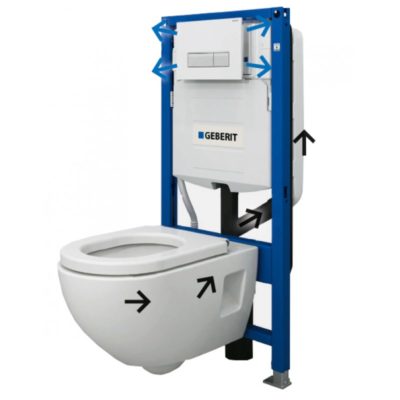
Choosing and buying a toilet bowl with installation
The main condition for purchasing an installation is that it must match the model of the toilet bowl you have chosen. Often, wall-hung toilets are equipped with an installation system initially, it is best to prefer this particular option.
Take measurements of the niche where the installation will be installed
The installation must match the size of the niche in which it will be placed.
Installations are of two types.
block - fastened to the wall using conventional anchor bolts, which are the main support of the entire structure.
Framework - is a frame on legs, thanks to which the height of the toilet is adjusted. The frame is attached in four places. It is possible that all four mounts are fixed on the wall - this mounting method can only be used in the case of solid walls.


If the wall is not stable enough, choose an installation with two mounts on the wall and two on the floor. The last two fasteners bear the main load.
- Provide a technological hatch just below the drain button. This will greatly facilitate if necessary.
- Use modern flush buttons that save water. It can be two separate buttons, one of which drains the full volume of water in the tank, and the other half. Another option is the presence of "Start" and "Stop" buttons.
- Consider the location of the drain button relative to the tile elements. Design the button either strictly between two tiles, or in the center of one of them.
- The top edge of the toilet must be no higher than 45 cm from the floor and no lower than 40 cm.
- The thickness of the wall hiding the installation system should not exceed 7 cm.
- A standard distance of 18 or 23 cm is maintained between the mounting holes of the toilet bowl.
- Control the correct installation at all stages of work. This will help to avoid gross errors during installation and problems during the operation of plumbing equipment.
The toilet bowl installed according to all the rules with the installation is able to withstand a load of up to 400 kg! If you doubt that you can do all the work correctly and efficiently, we advise you to resort to the help of qualified specialists. Well, to save the budget, of course, self-assembly of the installation system will help.Feel free to use technological and design know-how to create an original and practical interior.
Updated: 12/21/2017
103583
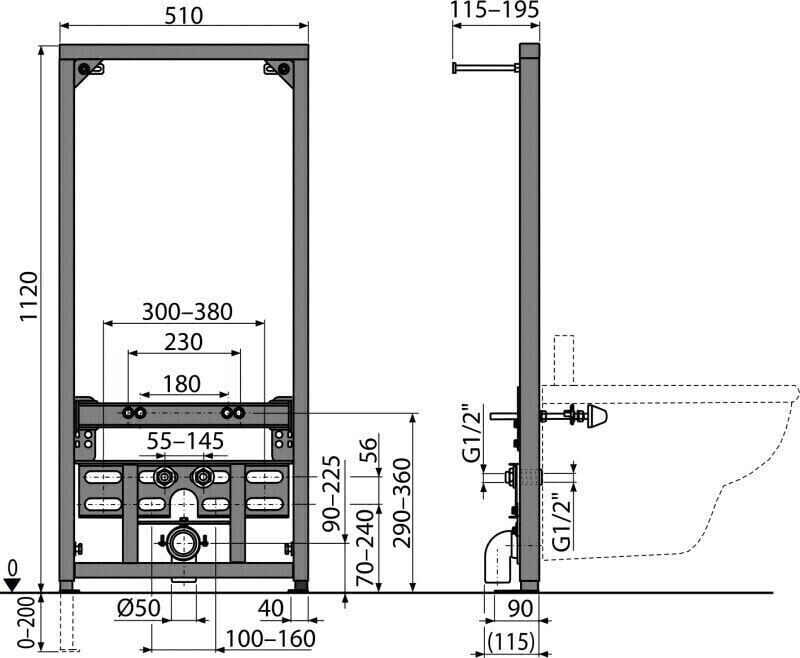
Installation of a floor bidet
To install a floor bidet with your own hands, you will need the following set of tools:
- drill with hammer function;
- a set of drills for concrete and ceramics;
- adjustable wrench or set of wrenches;
- sealing material (optional: FUM tape, linen thread, and so on);
- silicone sealant for wet areas.
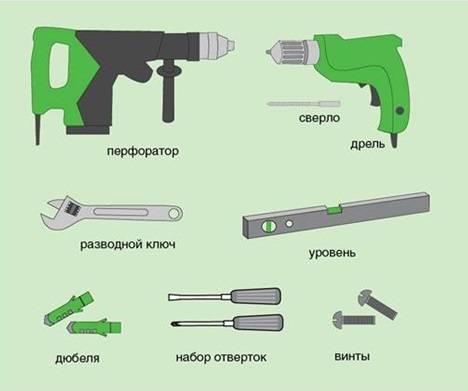
Bidet installation tools
Bidet attachment
Installation of a floor bidet is carried out in several stages:
- drawing markings in the installation area of the device. On the floor it is necessary to mark the location of the fixing bolts;

Determine the location of the bolts
When marking the installation area, it is recommended to take into account the distance required to connect the plumbing to the water supply and sewerage.
- hole preparation. If the bathroom floor is tiled, it is recommended to use a drill bit when drilling. Plastic dowels are inserted into the drilled holes;
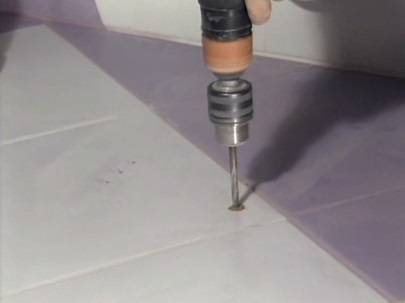
Preparing holes for mounting bolts
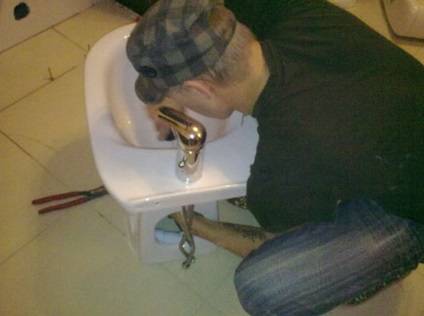
- a plumbing device is installed and it is fixed with fixing bolts included in the kit;
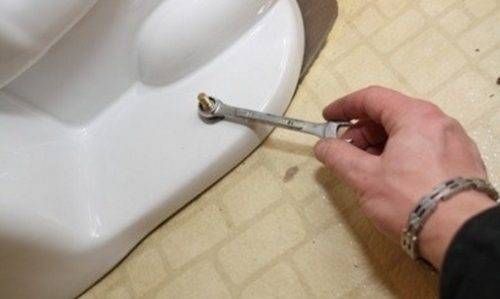
Fixing the device to the floor
In order not to damage the surface of the bidet between the bolts and the bowl of the device, it is recommended to install rubber gaskets.
- the joint between the bidet and the floor is treated with silicone sealant.
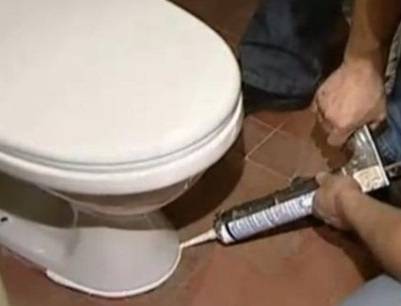
Sealing the joint between bidet and floor
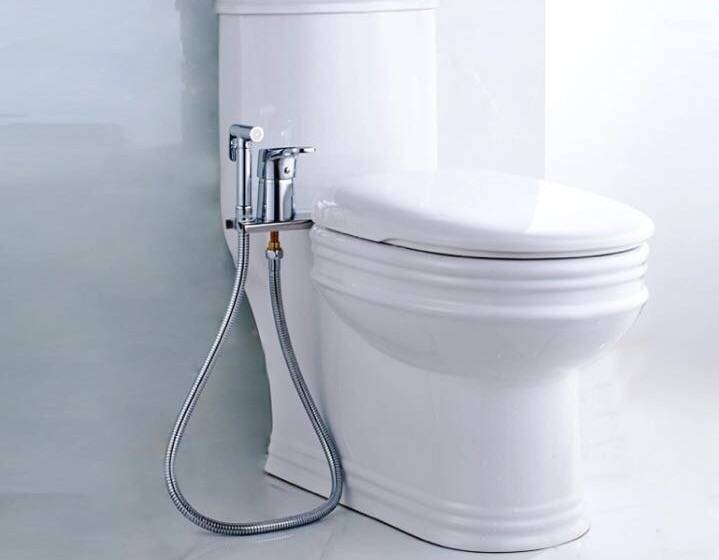
Connecting a bidet to the water supply
The bidet is connected to the water supply using a faucet. The mixer can be:
- ordinary hanging. Such a device is installed on a bidet, like a faucet on a sink;
- built-in.To install the built-in device, wall chasing will be required.
The mixer connection diagram is usually supplied with the device. If there is no such scheme, then proceed as follows:
- the mixer is fixed on the surface of the bidet or wall. Bidet fittings are included.
Installing the faucet on the bidet
- flexible hoses are brought to the mixer and attached;
- the other end of the hoses is connected to a tee mounted on a water pipe. All connections must be additionally sealed.
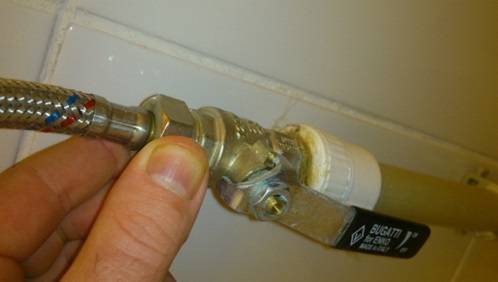
Connection of flexible hose and water pipe
Before connecting the bidet to the water pipes, it is recommended to install separate taps that allow you to independently shut off the water supply of the device for inspection or repair.
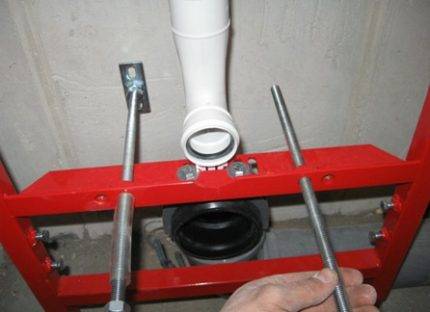
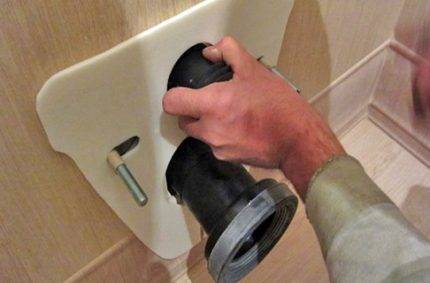
Connecting a bidet to the sewer
How to connect a bidet to the sewer system? To set up a connection you will need:
- siphon for bidet;
- corrugation;
- rubber cuff for transition from a siphon to the sewerage.
The connection is made in the following way:
- a siphon is attached to the bidet. Rubber gaskets are installed between the surface of the plumbing and the device;
- a corrugated hose is connected to the siphon;
- the second end of the corrugation is inserted into the sewer inlet. A rubber cuff is used for sealing.
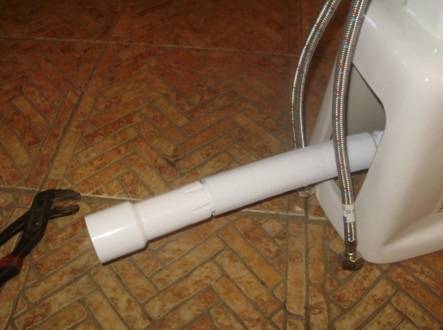
Connecting a plumbing fixture to a sewer pipe
The process of installing a floor bidet is presented in detail in the video.


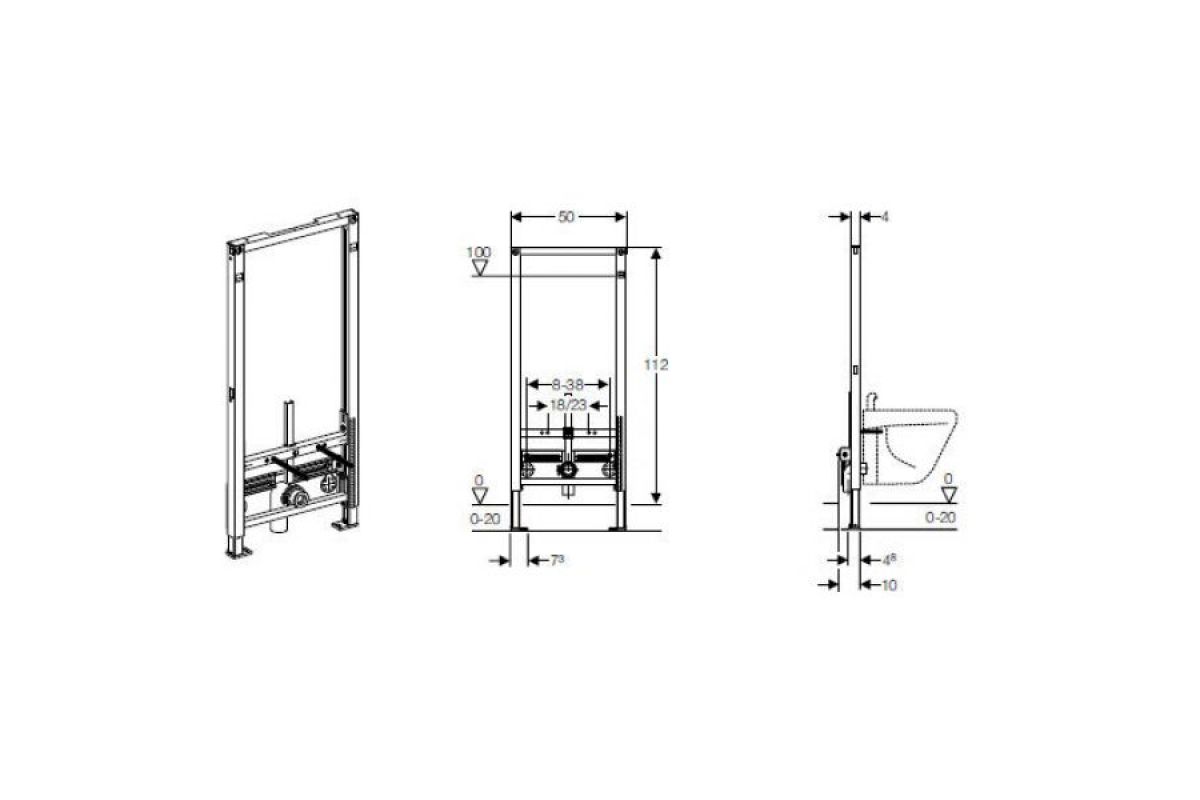


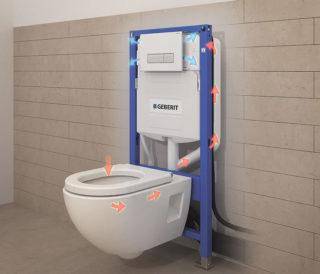
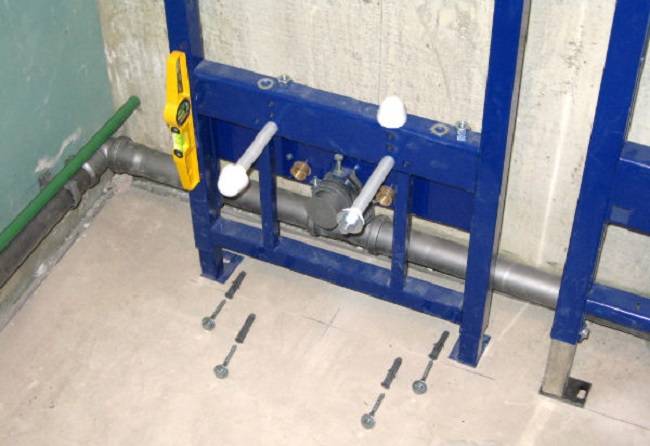
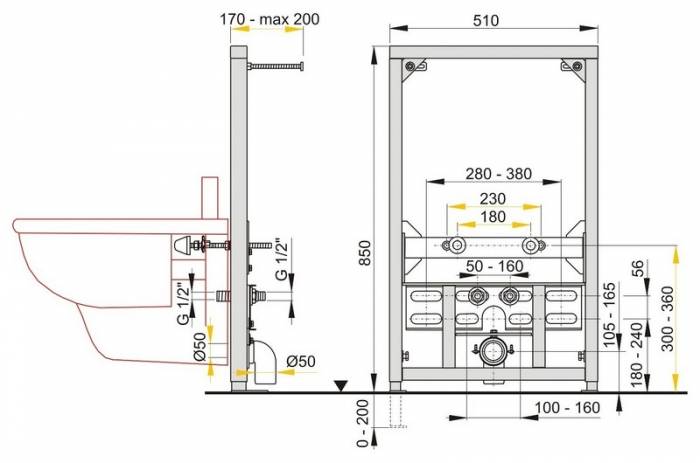
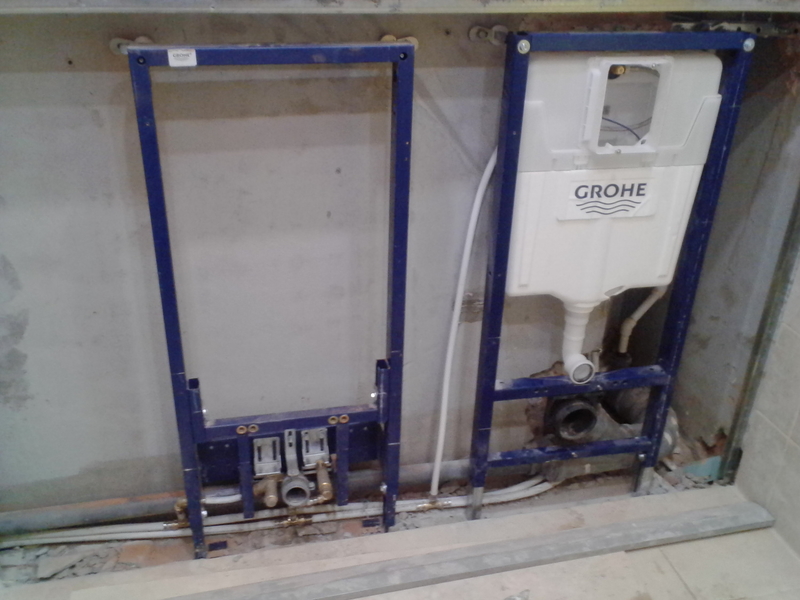
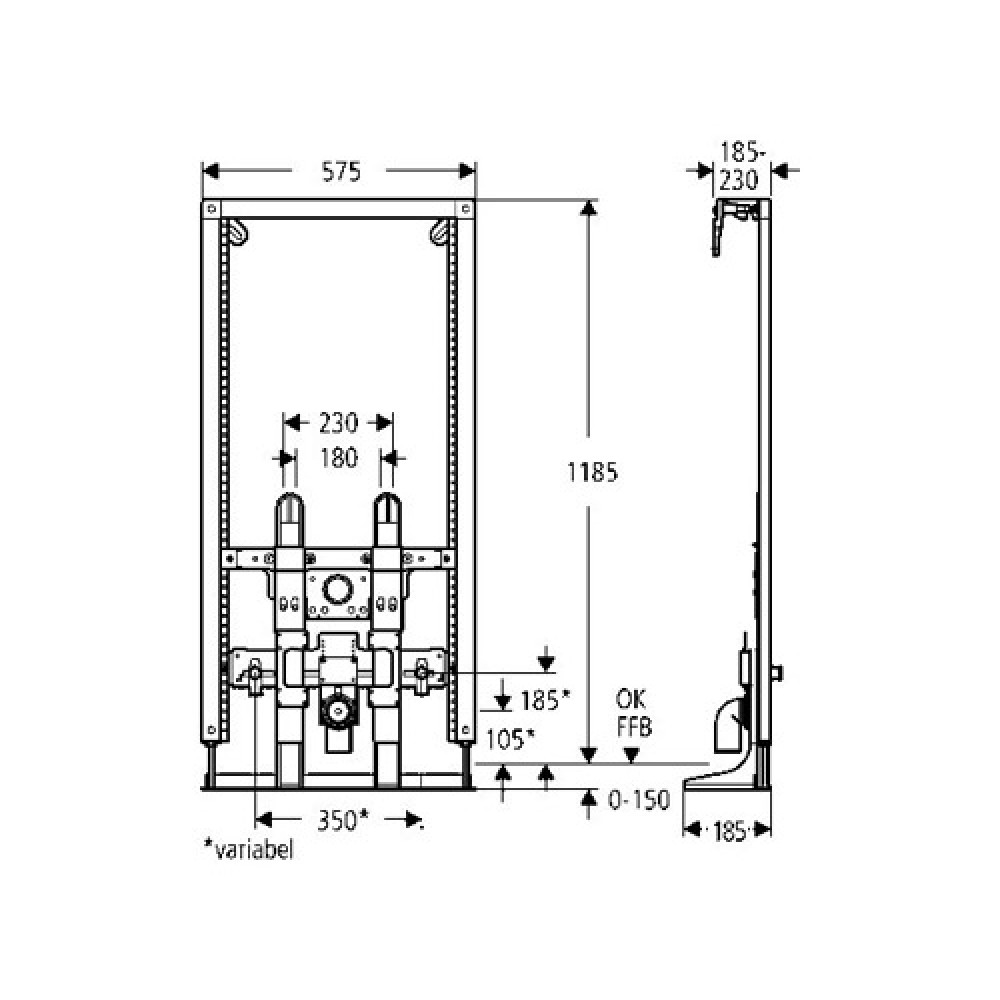
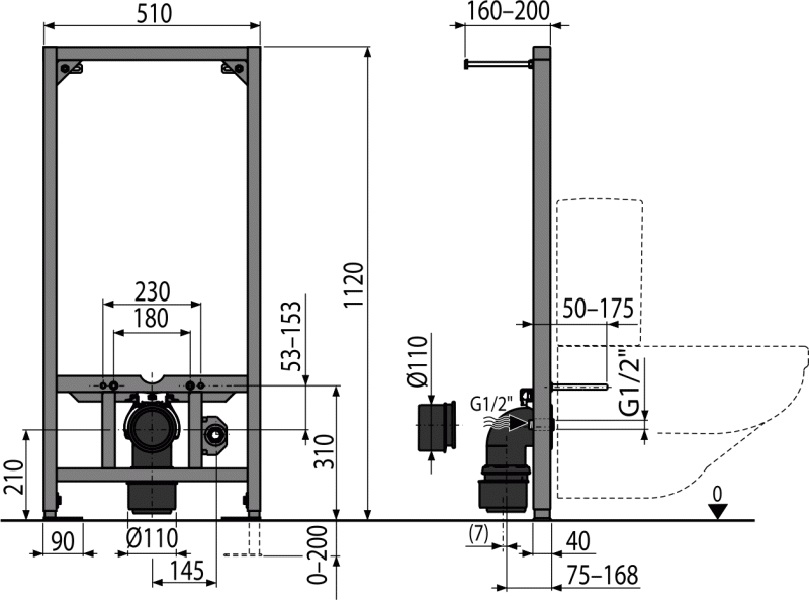
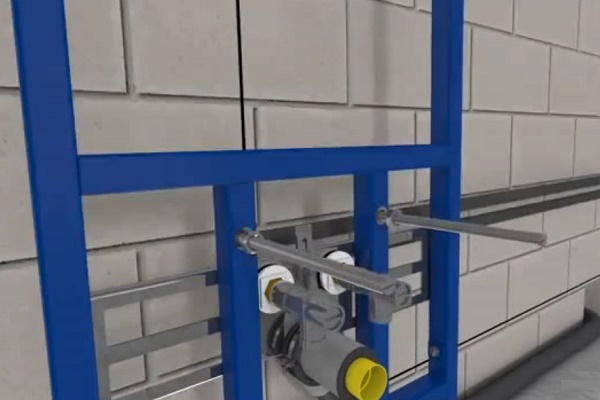
Features of installing a suspension device
The installation of a small hanging version of the bidet is performed as follows. First, the installation is mounted, and the bowl is already fixed on it.The mass of the product is distributed along the wall and frame. Often the partitions between the bathroom and the toilet are made of lightweight materials (say, drywall).
When choosing a point for mounting a bidet, you need to make sure that there is enough space nearby so that it is convenient for a person to operate the product.

It is better not to mount the installation on thin walls in order to avoid the possibility of collapse of the structure. As a rule, the frame is placed in the wall; for this, a compact niche is formed. It must be made somewhat higher and deeper than the dimensions of the structure itself. If the bathroom already contains a similar niche of proportionate dimensions, you can use it.
It happens that for a number of reasons it is impossible to equip a niche. Then the installation for a hanging bidet is attached to the wall, and after that it is masked with a panel of lightweight materials (in particular, drywall). This allows the product to look aesthetically pleasing and holistic. Before mounting the equipment, take care of the water supply and drainage. These outputs must be available so that the product can be connected without problems.
Initially, the frame in the kit was disassembled, so it must be assembled according to the manufacturer's instructions. As a rule, at this stage, the height of the bowl on the wall is adjusted so that the bidet is comfortable to use.
Then the installation is mounted with fasteners to the wall and floor. First, markup is made, holes are made, then the frame is fixed in the desired position. When assembling and installing it, a level is periodically used.
Before fixing the installation for the suspended version of the product, it is necessary to take care of the water supply and the outlet to the sewer. The suspension itself is done with the help of special studs.
If the installation details are skewed, then the bidet will not be installed correctly, which over time will lead to improper functioning of the device and cause it to break. After all, if repair is necessary, the installation will have to be removed, and the cost of getting rid of the problem can be very high.
If the frame is mounted correctly on both axes, then the niche can be closed with a decorative panel. It is clear that those details that are responsible for hanging the bidet must be left outside the niche. Almost always, these are special elongated studs that are located in certain frame holes and are attached to the wall.
When hanging on such studs, rubber gaskets are used - they protect the ceramic product from damage. An alternative to such a gasket is a sealant. It is applied to the fasteners, then they wait for drying, after which they hang and fix the bidet bowl. But still, the use of rubber gaskets is preferable and more convenient.
After fixing the installation, the wall must be masked, but elements for water supply and sewerage must remain outside.
The bowl, which is mounted with studs, is fastened with special nuts, the latter being carefully tightened to avoid physical damage to the ceramic. Subsequent installation is done by analogy with mounting the floor version. First, they put the mixer, then connect the water using a flexible connection.
It is necessary to ensure the tightness of all connections in which there are threaded elements. Sealing material will be required even where only rubber gaskets are normally used.
The installation system for a wall-mounted bidet is connected to the sewer only with a siphon.A rubber cuff is inserted between it and the hole in the sewer. Next, you need to turn on the water and check the functioning of all elements, and also make sure that there is no leak anywhere. If everything is working properly, then it is time for the finishing work.