- Faucet mixer installation
- Faucet installation cost
- Our advantages
- Mixer replacement
- Installation of a faucet in the bathroom
- Final operations
- Checkout
- Replacing the faucet: working with a wall faucet and its subtleties
- Features of installing mixers on an open water supply system
- How to change the faucet in the bathroom with your own hands
- Step-by-step instructions for installing a new faucet
- Installing a faucet on a bathtub or sink
- How to change the faucet in the bathroom
- Common bathroom faucet failures
- How to remove and disassemble?
- 1 How to change the faucet in the bathroom yourself?
- We recommend to read
- When is a replacement required?
- Installation of a mixer without eccentrics
- Instructions for dismantling the faucet in the bathroom
Faucet mixer installation
Due to the fact that the replacement of the faucet in the bathroom is a simple and short procedure, the price of this service is low.
from 550 rub. for mixer installation
OrderHow we work:
| Call or write to us | Tell us about your problem | Choose a convenient working time | The master will perform all the necessary work | All problems are fixed! |
However, we do not recommend doing this work yourself, as this provokes the occurrence of leaks in the future. Employees of the company "Masters of All Trades" guarantee you reliable sealing and long-term operation of plumbing without any complaints.
Faucet installation cost
| Installing a standard mixer (single lever/herringbone) | PCS. | from 900 rub. |
| Installing a faucet with a shower hose | PCS. | from 1100 rub. |
| Electric mixer installation | PCS. | from 1800 rub. |
| Replacing the standard mixer (single lever / herringbone) | PCS. | from 1300 rub. |
| Replacing a faucet with a shower hose | PCS. | from 1400 rub. |
| Installation of a ball valve (under the sink / toilet) | PCS. | from 200 rub. |
| Installation of a ball valve (angle) | PCS. | from 600 rubles |
| Installation of a ball valve (riser) | PCS. | from 550 rub. |
| Chasing walls in concrete for electrical cables | p/m | from 180 rub. |
| Shtrobleniye of walls in a brick for an electric cable | p/m | from 140 rub. |
| Repair (leak) | PCS. | from 700 rubles |
| Departure of the master | Is free |
Free master call
Price list for 2018
You can learn more about the prices for the installation of a mixer or a faucet in Moscow by contacting our operators.
Our advantages
Being engaged in the installation of faucets in the bathroom at a low price, we nevertheless value our reputation. Therefore, we offer our clients to evaluate the following advantages of mutual cooperation:
- conclusion of a formal contract;
- providing a guarantee of 1 year for all types of work;
- home visits to any districts of Moscow;
- the presence of only experienced plumbers in the state.
If you are interested in our offer and want to know how much it costs to replace a bathroom faucet, please contact our consultants or check the price list on the website. Keep in mind that the prices indicated in it are fixed, but if you combine several types of work, you can save a lot. For example, when replacing a faucet in the bathroom and in the kitchen, the final price will be lower.
Tel.: +7 (499) 350-77-02
Opening hours: from 10:00 to 21:000
Just give us a call. We'll do the rest for you!
Mixer replacement
Not a single, even the most expensive faucet will serve you forever. Sooner or later it will have to be changed, since repairs often do not justify themselves, especially for economy class models.
As a rule, when installing and replacing a faucet in a kitchen or bathroom, the price for work in Moscow starts at 1,000 rubles and depends on the design of the mounted faucet and the complexity of the work. It is better to carry out this procedure in advance, that is, approximately 6-8 years after the installation of the previous mixer, even if its operation is satisfactory.
Also, we are often contacted for the installation of a built-in shower faucet in the bathroom: the price and aesthetic appearance of such a design are very attractive. In fact, it is a familiar shower head, but all the water supply is hidden in the wall. Technologically, its installation is practically no different from connecting an ordinary shower.
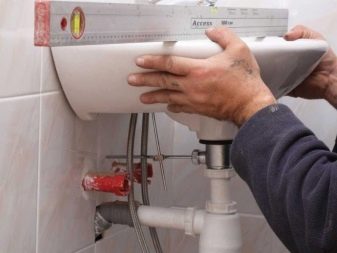
Installation of a faucet in the bathroom
When installing a new faucet in the bathroom, the cost of the work must necessarily include the dismantling of the old one, if any.
The new mechanism is usually wound on the old eyeliner, if it is in a satisfactory condition.
To calculate exactly how much it will cost to replace and install a faucet in your bathroom, contact us right now. We promise that the price will not seem too high to you.
Faucet installation in all districts of Moscow:
See also:
Final operations
- Pipes laid on the surface should be fixed to the wall with a bracket or clamp to prevent the pipelines from moving when opening and closing the control wheels or mixer levers. The fixing bracket is fixed to the wall with two anchors with decorative caps.
- After the installation of the mixer is completed, it is necessary to check the tightness of all joints and threaded connections with the working pressure of the pipelines. To do this, when the control components of the mixer are closed, the valves of the pipelines open. Qualitatively assembled connections should not let even the slightest amount of water through.
- It is also necessary to check the reliability of the mixer itself. This is done by a multiple cycle of opening and closing the stream. In the closed position, no water should drip from the nipple. The presence of drops or jets of water indicates a violation of the integrity of the sealing elements in the gran-boxes of the valves, the deterioration of ceramic locking elements. Rubber gaskets can be upgraded, while ceramic gran boxes and cartridges are beyond repair and must be replaced.
How to install a faucet in the bathroom if the center-to-center distance of the supply pipes does not match the dimensions of the appliance body? Such a question arises especially sharply in the hidden laying of pipelines. Solving this problem is simple: you need to install eccentrics with a large offset.


, as can be seen, is not very difficult. All that is required for this is accuracy, attentiveness and careful preparation.
Checkout
On our site you will find the following advantages:
- convenient way to order
- rating systems
- affordable cost of services
- checking plumbers
To order a horizontal installation of the mixer, place an order by phone or on the website. Specify the details of the order and requirements for the master.
Browse the catalog on the site, compare the profiles of the masters. Choose the best performer using the rating system.
Sometimes it seems that only professionals can install a faucet in the bathroom.Especially if this question was brought before an inexperienced owner. Everything looks complicated, incomprehensible and from this even more frightening. But you can cope with this task on your own, only having a little understanding of the intricacies of the process.
We will tell you how not to make a mistake in choosing a mixer, what parameters to look for when buying a device, and also provide a step-by-step installation instructions. We supplemented all stages of assembly and installation with detailed diagrams and visual photographs. For a better understanding of the process, video clips are provided with instructions for installing the crane
For a better understanding of the process, video clips are provided with instructions for installing the crane
We supplemented all stages of assembly and installation with detailed diagrams and visual photographs. For a better understanding of the process, video clips are provided with instructions for installing the crane.
The need to install a faucet in the bathroom can arise for various reasons - as a result of a full-scale repair, a breakdown of an old familiar unit, or you just want to change a boring model.
If this is one of the last two options, then it will be quite easy to deal with the issue. The main thing is to calmly deal with the device, installation features and the most common errors.
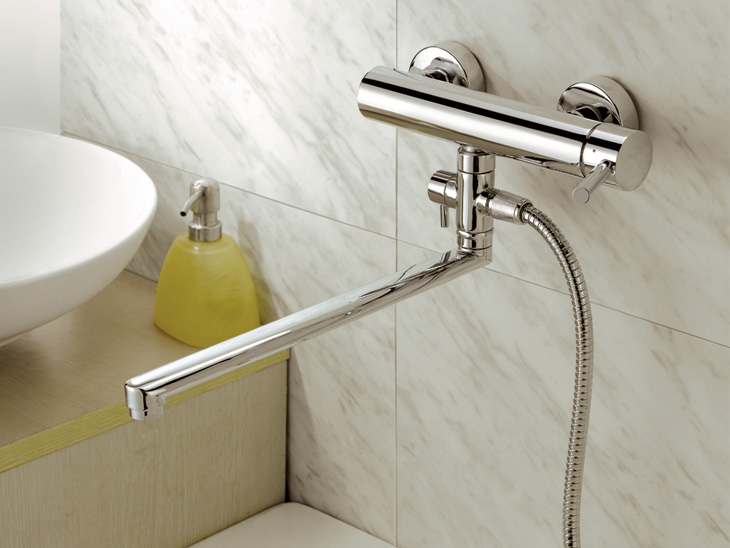
When installing a new faucet with a shower head on the wall, you need to focus on the convenience of the owner. The height of the attachment for the watering can depends on the individual needs of a particular person.
As for the variety of models, for the sink in the bathroom it is more expedient to choose not only a beautiful option, but also a comfortable one.
It should be noted that in the process of washing hands and washing it is convenient to put your palms under the stream of water.
Here, the original low models with a small tap lose an order of magnitude - after all, it is quite inconvenient to perform daily hygiene procedures with such a tap. A faucet without a tap is also not the best option for a washbasin, but for bath procedures it may be just right.
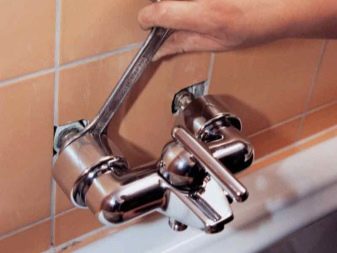
Replacing the faucet: working with a wall faucet and its subtleties
Replacing a wall faucet in the bathroom for a knowledgeable person is very simple and fast - to be specific, a normal master will do it within some 20-30 minutes, or even faster. There are practically no subtleties and nuances here, and all work is carried out in a relatively convenient place, where, as a rule, nothing interferes. They are performed in the following sequence.
To begin with, we turn off the water supply - we close two faucets on the cold and hot water supply riser. If there is no central hot water supply, then we close only one tap on the cold riser.
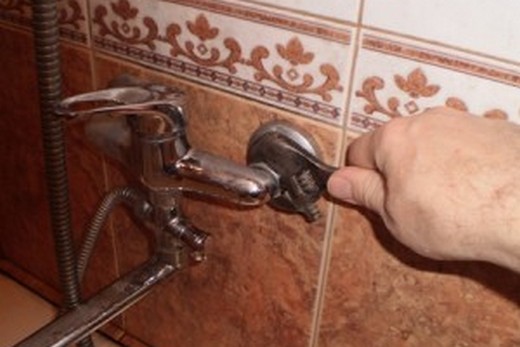
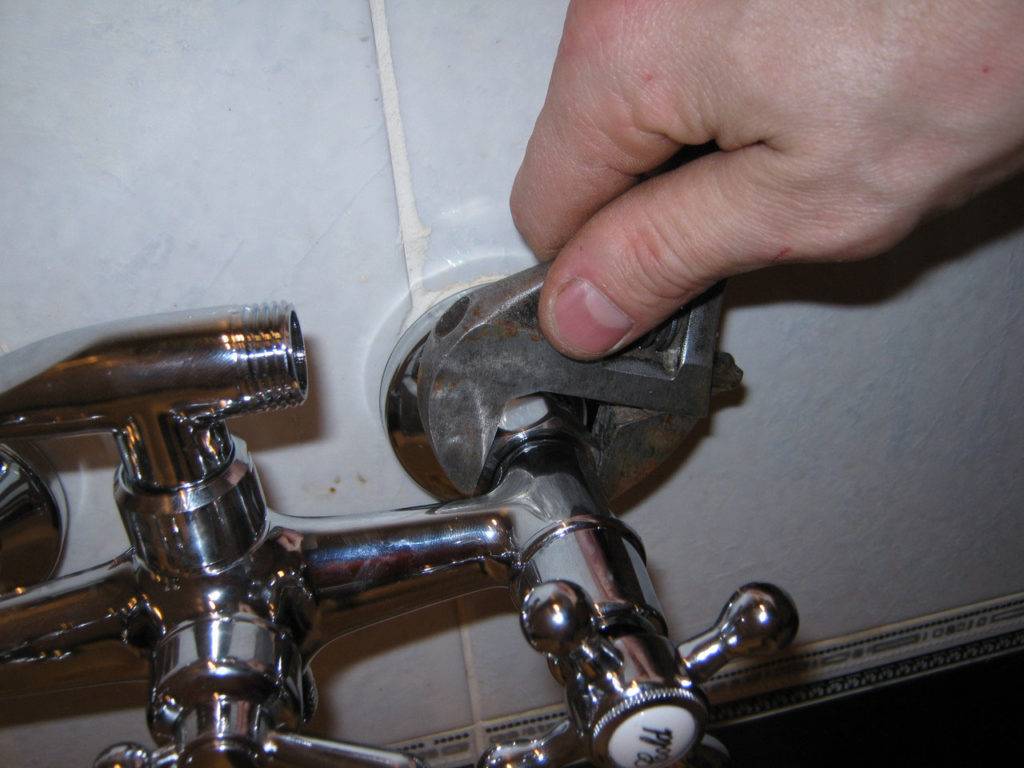
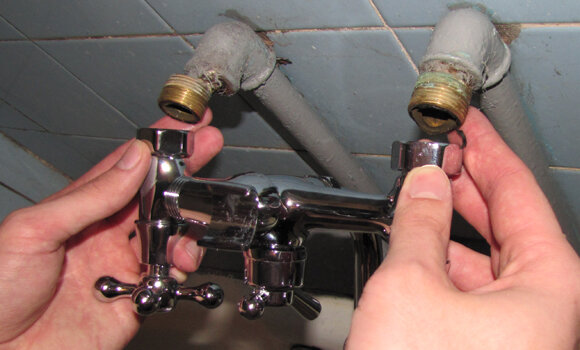
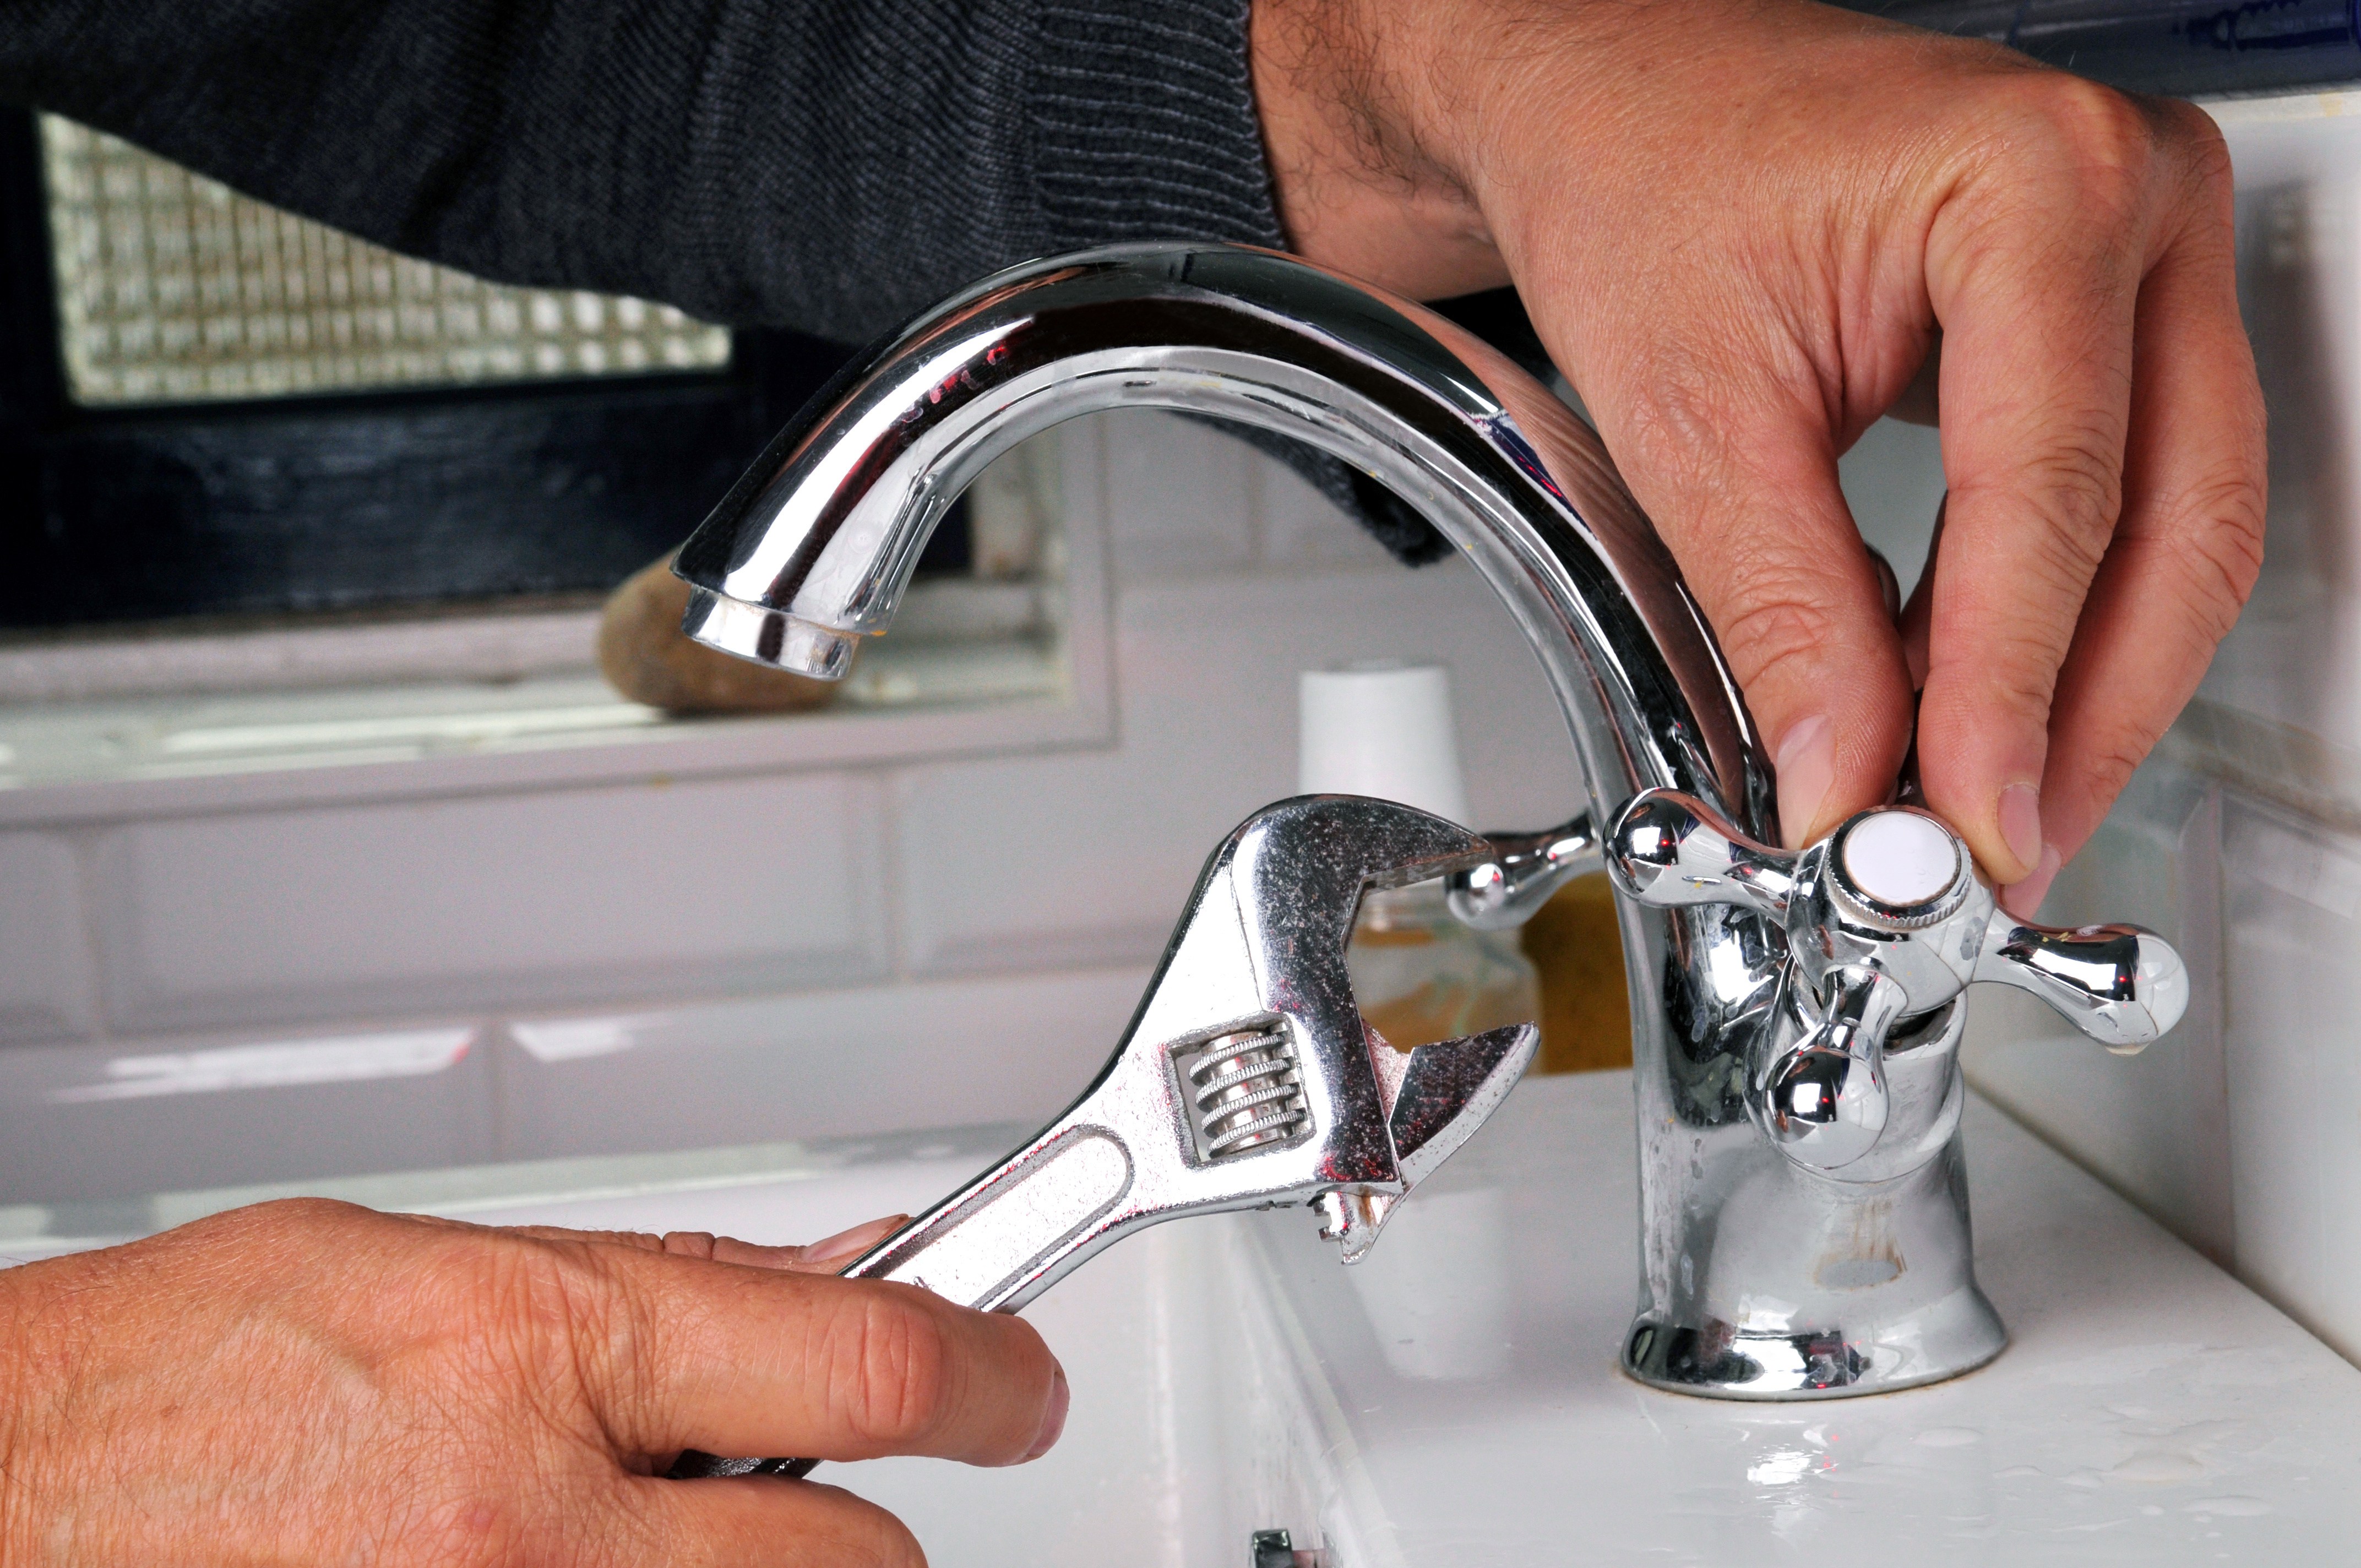
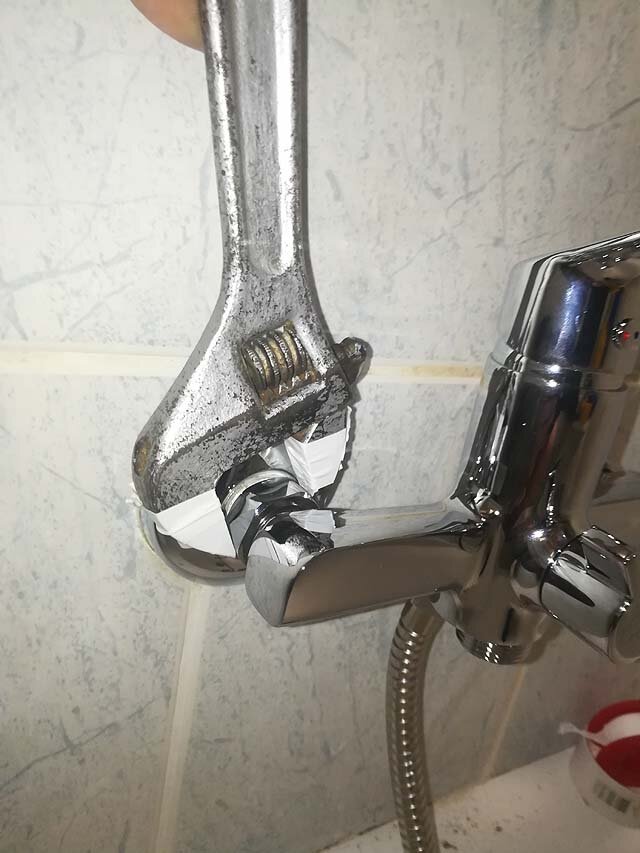
Now we arm ourselves with a wrench (Swedish adjustable) and remove the mixer from the eccentrics - the nuts are unscrewed counterclockwise. Following the nuts, in the same way, decorative cups are screwed counterclockwise from the eccentrics, after which the eccentrics themselves are unscrewed. Keeping the old eccentrics would be unwise, no matter how tempting it may look.
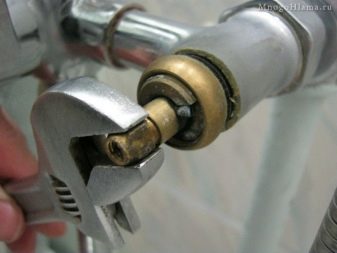
Now the installation of a new mixer - this is where all the nuances begin. It is produced in the reverse order described above, that is, first we install new eccentrics
There are two important points that need to be given special attention, or rather even three.The first is the quality of the threaded connection packaging: the tow (not the FUM tape) is wound very tightly in the direction opposite to the twisting of the thread
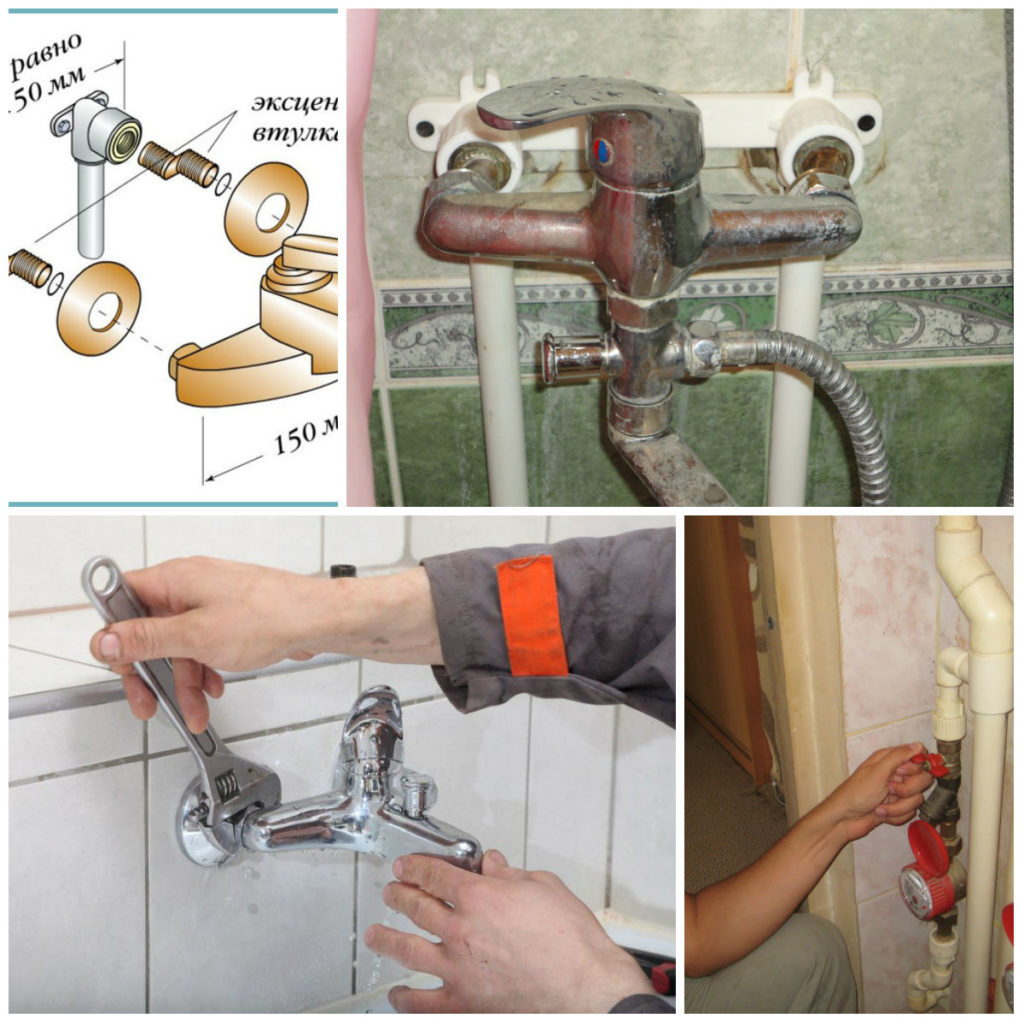
The second is the positioning of the eccentrics in the plane with the wall: the distance of one and the second eccentric to the wall should be the same. And the third point is the distance between the centers of the eccentrics: it should be clearly 150 mm.
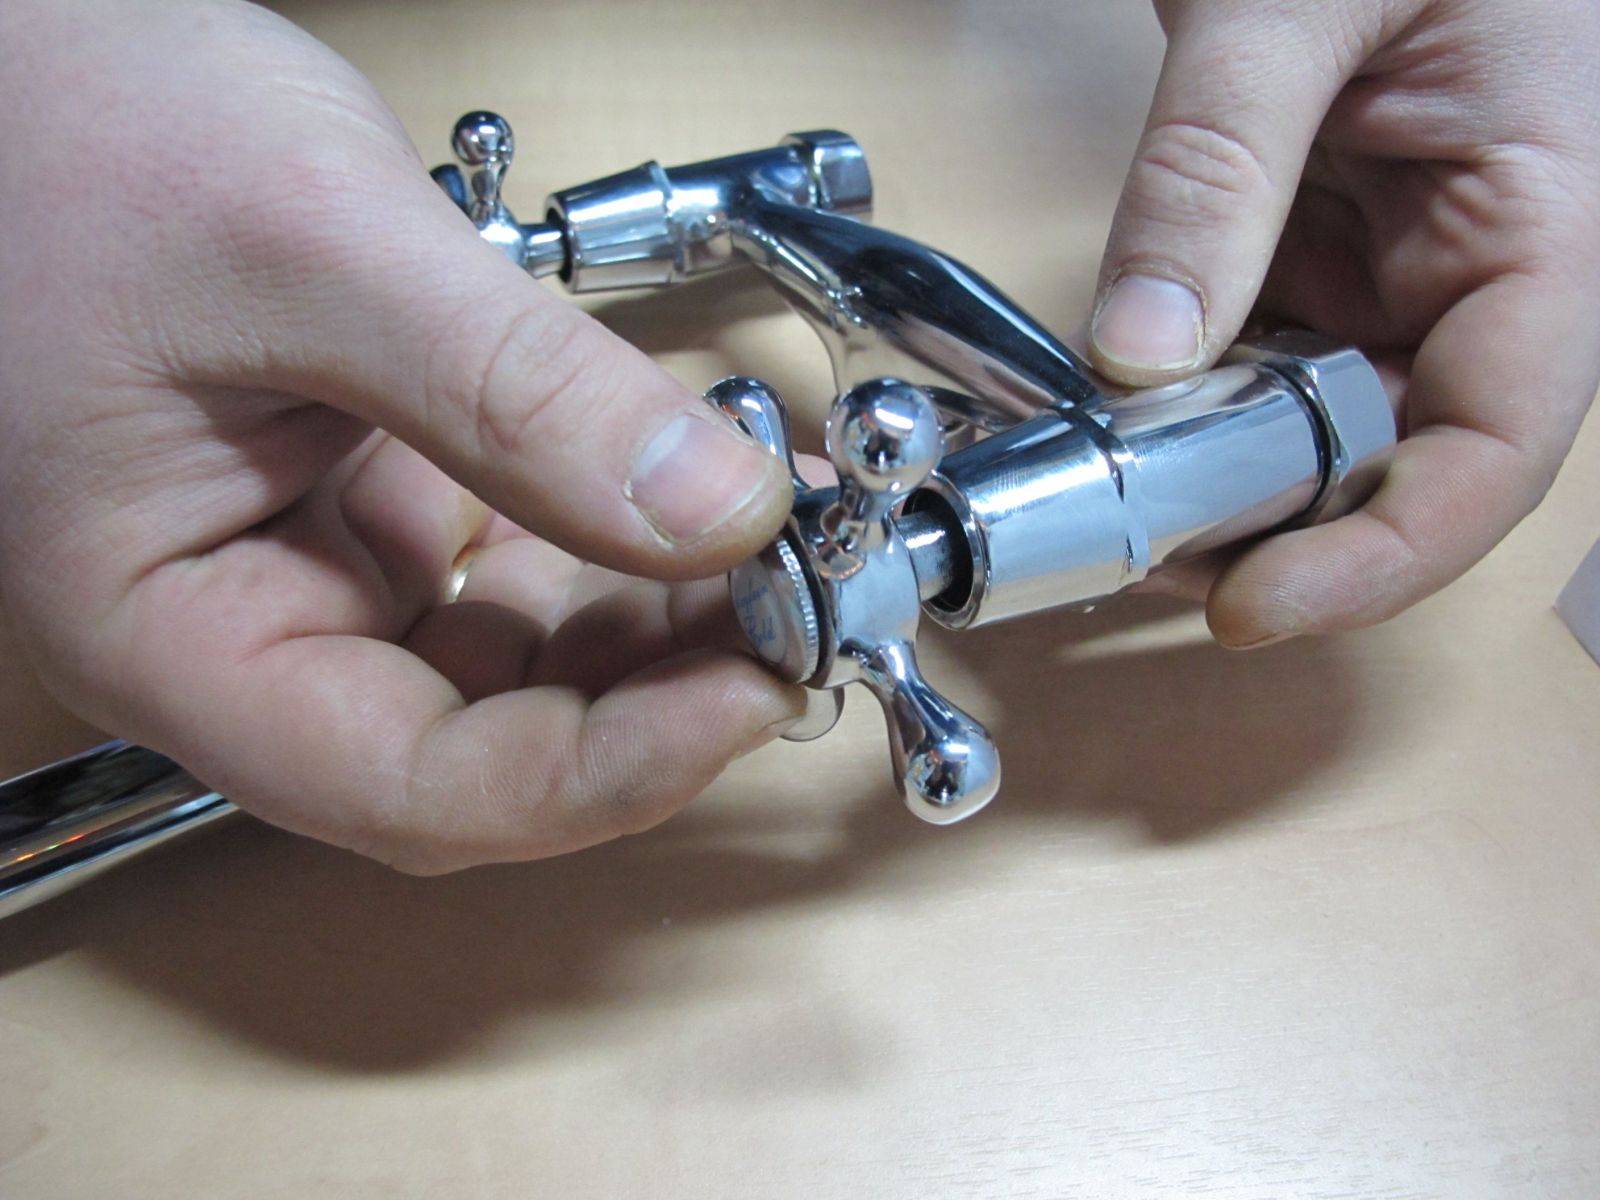
Further easier. We take the mixer and try it on the eccentrics - both nuts should be screwed freely. If everything is in order, and the mixer is twisted without distortions, then we put it aside for a while and wind decorative cups onto the eccentrics.
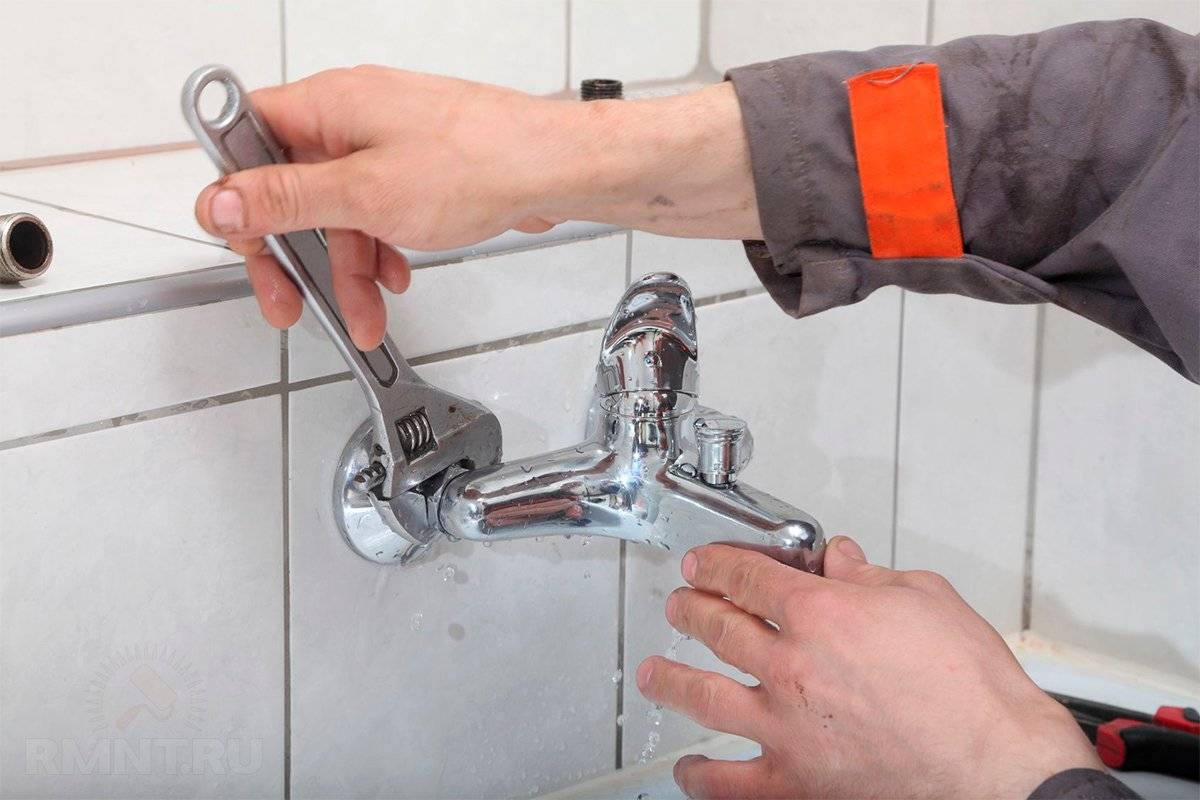
The next step is to finally install the mixer on the eccentrics. That is, we put rubber gaskets in its nuts and screw them onto the eccentrics. We twist by hand, as much as there is strength, after which we lightly (maximum one turn) tighten the nuts with a wrench. To prevent the key from scratching the chrome of the mixer, you can put a rag under his cheeks.
We turn on the water supply and at the same time look at what is happening - in any case, there should not be large leaks. If it digs somewhere under the nut, again we take the key and tighten it a little more. It is not necessary to pull very hard: firstly, the nut may burst, and, secondly, the gasket may cut through, which, again, will lead to leaks.


The whole faucet replacement process in the bathroom with your own hands can be seen in this video.
This is for the main part. If you understand it, then further work will seem very easy to you.
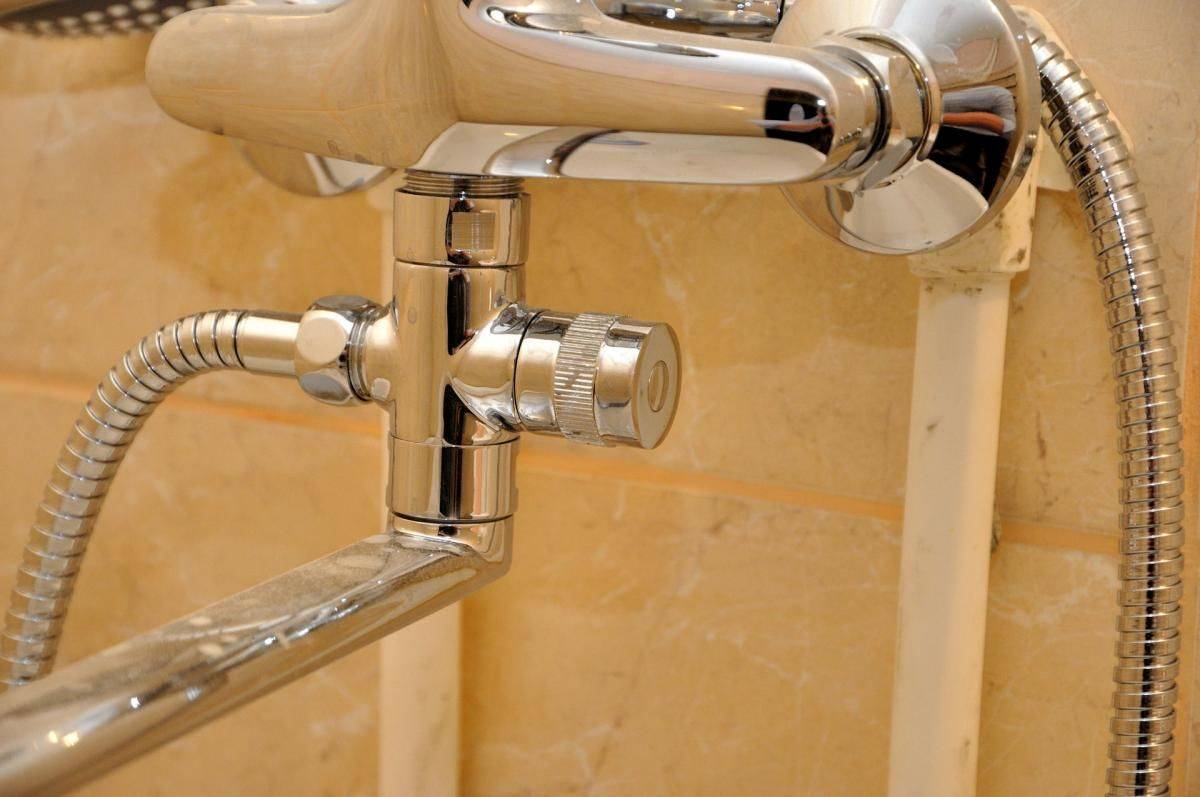
Subsequent work is the installation of a watering can with a hose and, if any, a spout with a switch.Here the rule is the same and it is the same for all joints - except for gaskets, you don’t need to insert anything there, as you will only make it worse.
The gasket holds normally, unless, of course, during the installation process it cut through due to the fitter's excessive efforts. Everything is twisted by hand, after which it is pulled up by a maximum of one turn with a key - if it digs, then squeeze a little more so that the drops disappear.
Features of installing mixers on an open water supply system
Faucets in the bathroom can have a hidden or open supply of cold and hot water, the latter option exists in old houses and is currently almost never used.
In addition to aesthetic problems, outdoor wiring has a very significant drawback: condensate constantly accumulates on cold pipes, often there is so much of it that drops fall on the floor and furniture. Such phenomena are not decorate the bathroom, we do not recommend installing faucets on open wiring. If you have such a variant of engineering networks, then you should not be too lazy and hide the pipes.
There is a large amount of work ahead, there will be a lot of noise and construction debris from wall chasing, you will have to deal with plastering or other finishing work. But the end result is worth it.
Condensation will accumulate on open pipes
According to the technology, installing a faucet in the bathroom on an open plumbing system has no differences from the one described above. The only remark - check the strength of the fixation of the outlets of the pipelines. They are fixed with dowels, often the length and diameter of the hardware is selected without taking into account the loads.
And more advice. You should not mount heavy mixers in this way, plastic fittings are not designed for heavy loads.
How to change the faucet in the bathroom with your own hands
Everyone at least once in their life faced with the need to replace plumbing in the bathroom. The most common reason for this is a broken mixer. A failed device can deal a significant blow to your wallet. Drop by drop, several liters of water flow out of the tap per day, which at the end of the month will become a significant increase in the rent. In addition, a broken faucet is not serviceable, and if you use it, then be sure that this is not for long. There is an urgent need to replace the mixer. And here the question arises, how to change a non-working faucet in the bathroom without resorting to the services of specialists. It is quite possible to make a replacement yourself. Any man can do this work with his own hands.
Related Article: Shower Switch
Step-by-step instructions for installing a new faucet
If you do not know how to change the faucet in the bathroom with your own hands, follow the algorithm below:
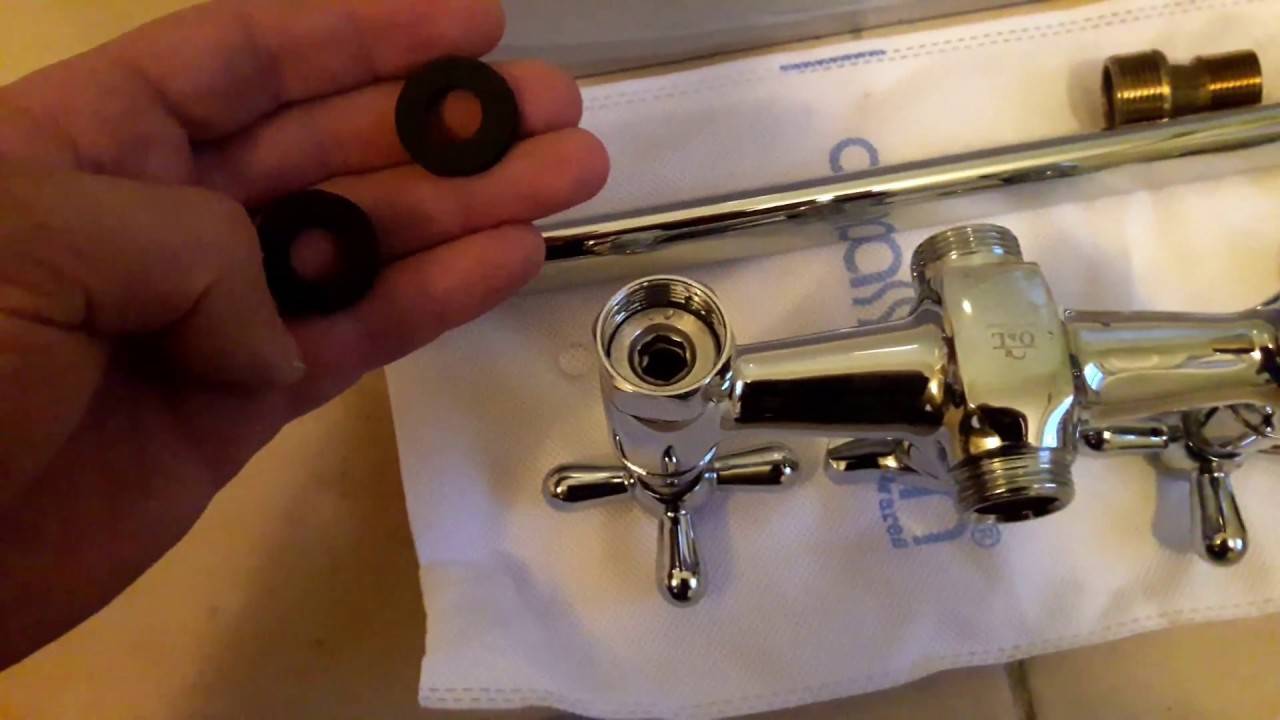
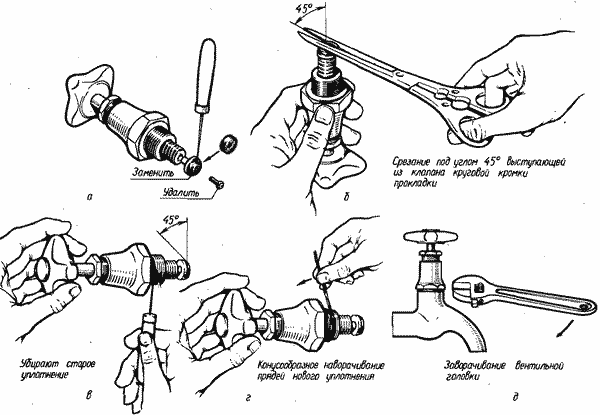
- If you had to change old eccentrics for new ones, you need to prepare a threaded connection before installing the latter. For this, sanitary tow is used, a segment of which about ten millimeters wide is wound onto the thread from its beginning to end and back, after which the edges are wetted, fixed, treated with Unipak grease or any plumbing sealant. In the absence of the above materials, you can get by with a fum tape.
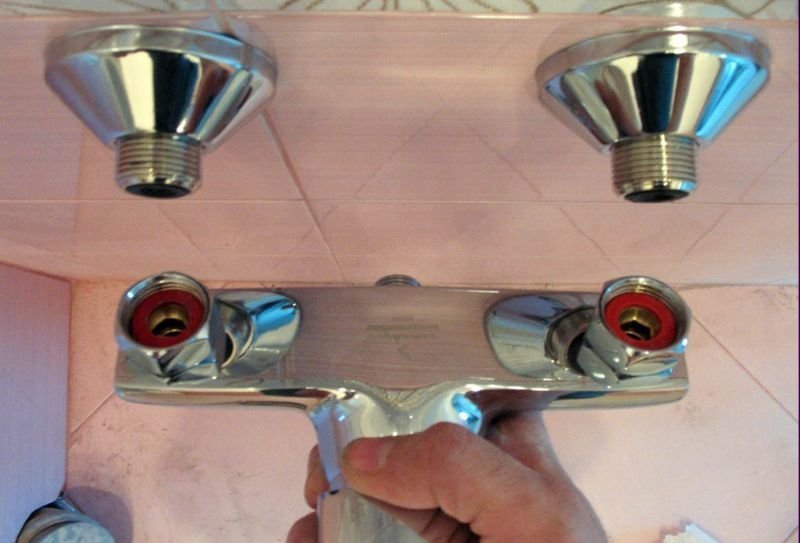
- Prepared eccentrics are screwed into the threaded holes of the fittings, cleaned from possible contamination, first by hand, then using an adjustable wrench.The end result should ideally provide the required center distance between the mating parts of these adapters and a horizontal position.
- Decorative cups are put on the installed eccentrics, covering the junction.
- Installing a new faucet. To do this, you first need to insert new half-inch gaskets, then tighten the nuts by hand until they stop. You can additionally slightly (no more than a quarter of a turn) tighten with an adjustable wrench.
This completes the process of self-replacing the faucet in the bathroom. It remains to make the final assembly by installing the spout and connecting the shower hose to the appropriate connection points. Then you need to check the quality of your work, for which you need to resume the supply of cold / hot water and test the mixer for leaks in the on and off state.
If you find any in the area of the fastening nuts, you can very carefully try to tighten them a little more with an adjustable wrench. If this measure does not lead to a positive result, it is not recommended to be overly zealous, it is better to repeat the procedure for dismantling and installing the mixer, while changing the sealing rings.
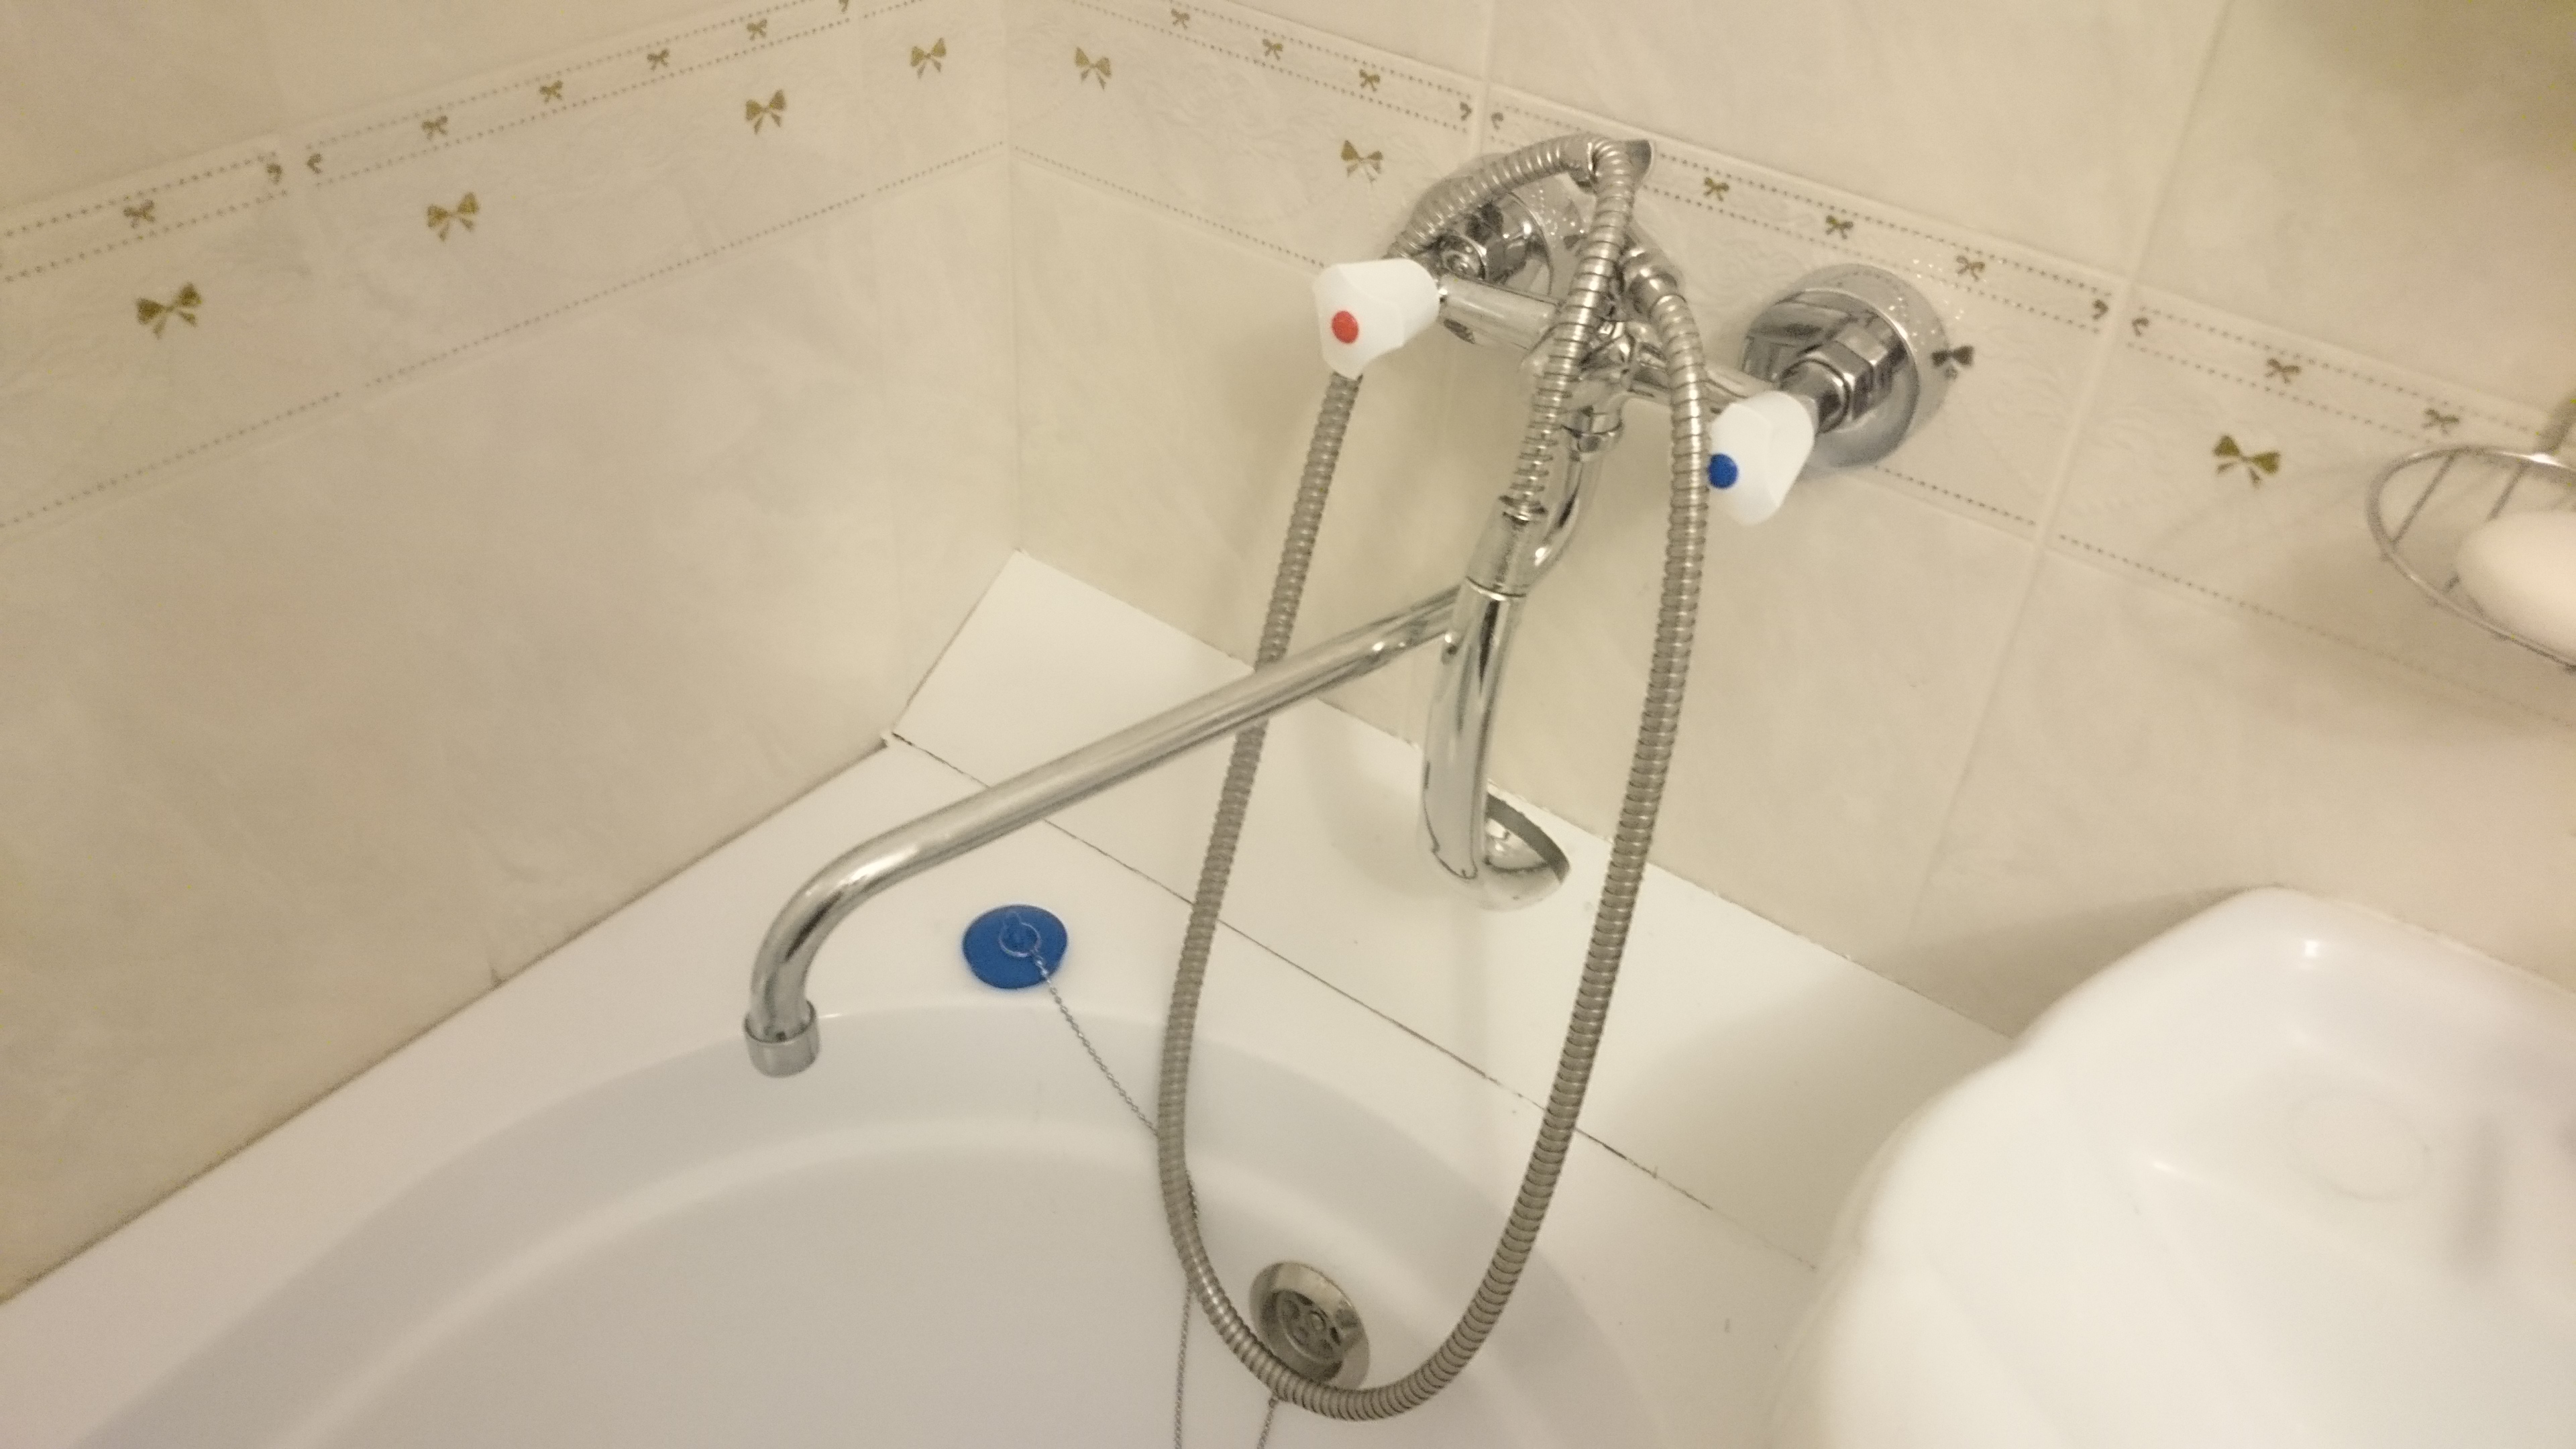
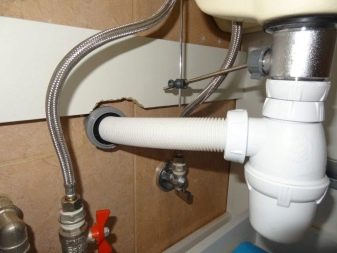
Installing a faucet on a bathtub or sink
 Installation of a tap on the side of the bath
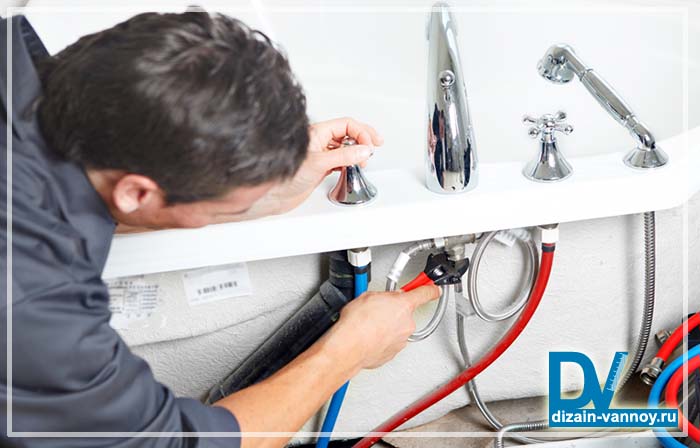
Replacing a faucet mounted on a bathtub or washbasin looks a little easier due to the fact that there are no eccentrics in this design and the faucet itself is connected to the water supply line through hoses.Before changing the faucet in this type of bathroom, you must also turn off the water supply to the system and drain it. Then, using two adjustable wrenches, disconnect the hoses from the water main.
As a rule, before changing the faucet in a built-in bathroom, you need to disconnect it from the surface on which it is located. In most cases, models of such cranes have a threaded body. This body is inserted into the technological opening of the bathroom or sink and is clamped from the bottom with a nut. Between faucet body and sink There is a rubber gasket for sealing.


Having disconnected the old mixer, you can proceed to install a new one, repeating all the steps in reverse order. For such minor operations as replacing the faucet gander in the bathroom, dismantling the product itself is not required at all. It is enough to unscrew the clamping nut with a wrench, remove the old gander, install a new one and tighten the nut back.
If you do not know how to replace the faucet in the bathroom yourself, then you can use this material as a guide to action.
How to change the faucet in the bathroom
In each apartment or house have devices and devices, the replacement and repair of which you can do yourself, without seeking help from a qualified craftsman. Bathroom faucet is one such device.
As a rule, it becomes unusable due to poor water quality or due to untimely replacement of the cartridge in the main filter.
If you encounter any problems, you should know how to replace the bathroom faucet without damaging the device.
Common bathroom faucet failures
Damage can vary, but the most common are:
- Leakage of water when the tap is closed. The reason for this is damage to the mixer cartridge by small particles that are in the water.
- Disruption of the threaded connection of the device.
- Corrosion that faucets made of brass alloy are exposed to over time.
The last two problems are typical for Chinese-made mixers, because a low-quality brass alloy is used to manufacture the device. Therefore, their cost is much lower, unlike European equipment, which is made of stainless steel.
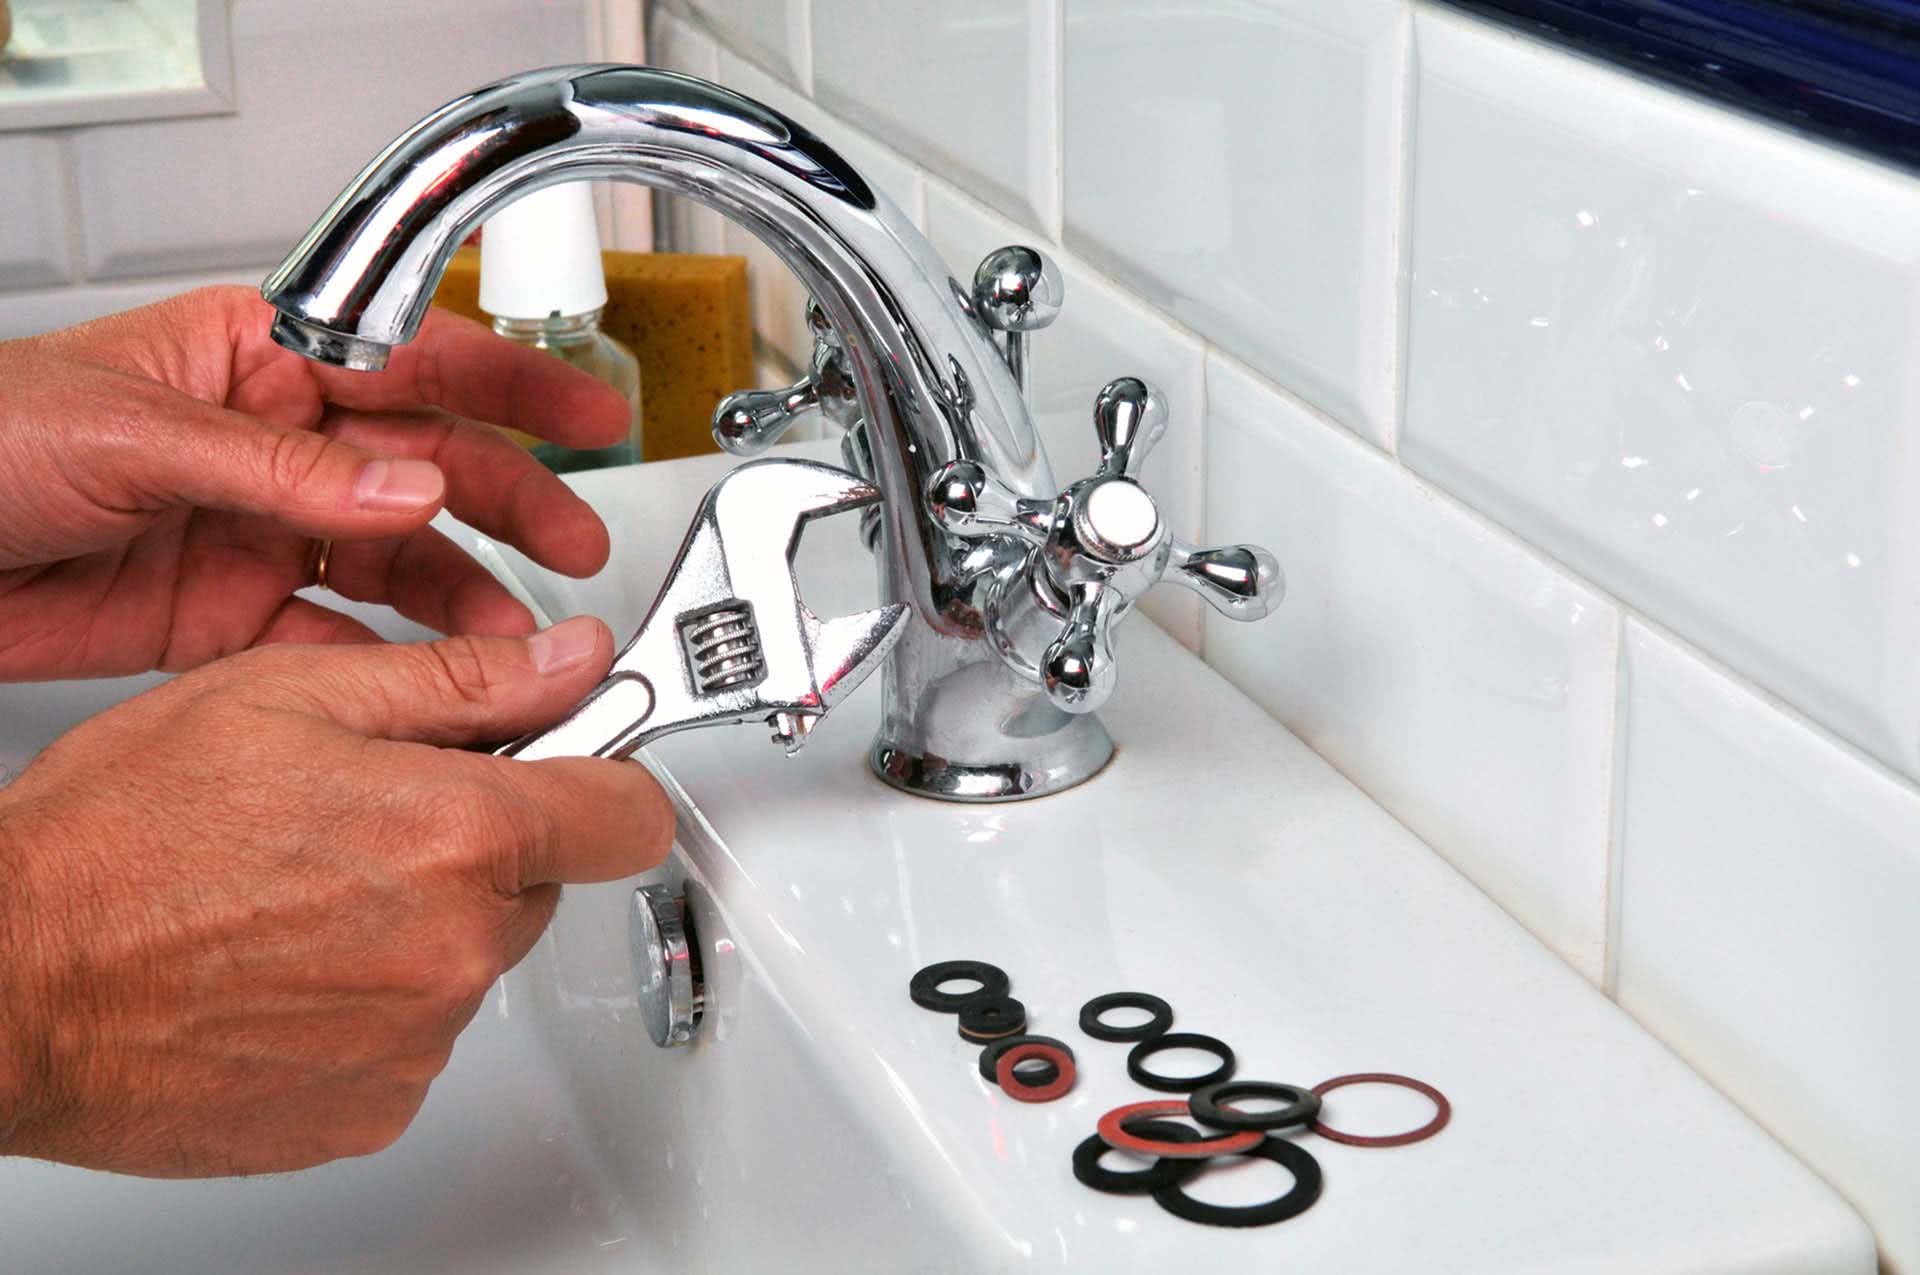
Before you change the faucet in the bathroom, it is worth preparing all the tools that you may need so that you do not have to constantly be distracted from the process to search for one or another inventory. "Arsenal" should be placed near the workplace.
To replace the mixer, you will need the following tools:
- pliers;
- several wrenches;
- tow or fum tape;
- sealant;
- sanitary linen;
- paranitic or rubber gaskets, ¾ and ½ inch;
- graphite gasket former;
- water container.
Most of the listed materials and tools are in household use, and the rest of the accessories can be purchased at a specialized store.
To understand how to replace the faucet in the bathroom, a step-by-step instruction is offered.
Shut off the supply of hot and cold water in the pipes of the plumbing system.
Drain the remaining water from the mixer and reduce the pressure in the pipes by opening the taps.
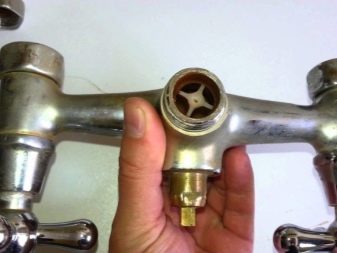
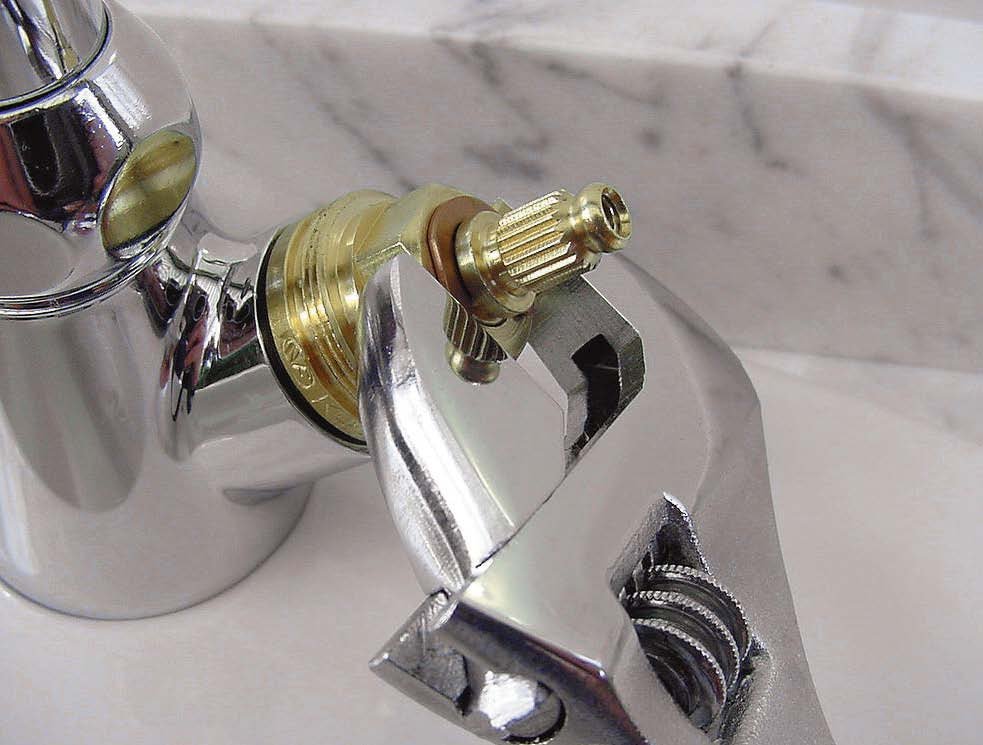
When air and water are completely out of the plumbing system, loosen the large mixer nuts that secure it to the eccentric adapters connecting the pipes of the plumbing system to the faucet.
Remove the old faucet.
Pay attention to the condition of the eccentrics - they may need to be replaced.
As a rule, the distance between regular places for pipes in mixers corresponds to 15 cm. In practice, this may not correspond to the indicated figures. Then the inaccuracy can be leveled to the desired size with the help of eccentrics that are released or tightened. Thus, the displaced part of the branch pipe will take the central or extreme position, while increasing the center distance or reducing it.
When the required distance is selected between the nozzles of the eccentrics, you can begin the installation of a new mixer. Installed eccentrics must be securely fixed using sanitary linen and a gasket former. To do this, a small amount of flax is wound on the external thread, after which a graphite gasket former is applied, a sealant can be used. In the absence of these materials, it is recommended to use a fum sealing tape.
Eccentrics must be screwed into pipes with mirror accuracy. The synchronization of actions is incredibly important, because at the slightest violation, the device will take the wrong position, and the installed mixer will be skewed. The installation of the mixer is carried out only after correctly fixing the position of the eccentrics and setting the required center distance, which will be equal to the size of the mixer.
The final stage is the tightening of the fixing nuts. In this process, there are also some tricks, using which the installation will be performed more efficiently. In order not to damage the coating of the nuts that attach the mixer to the eccentrics, it is recommended to wrap them with electrical tape, then tighten them using pliers or an adjustable wrench.Upon completion of work, the electrical tape should be removed from the nuts.
Knowing how to correctly change the mixer, you can not only do the job efficiently, but also save money on calling the master. Using simple recommendations and step-by-step instructions, the mixer will last a long time.
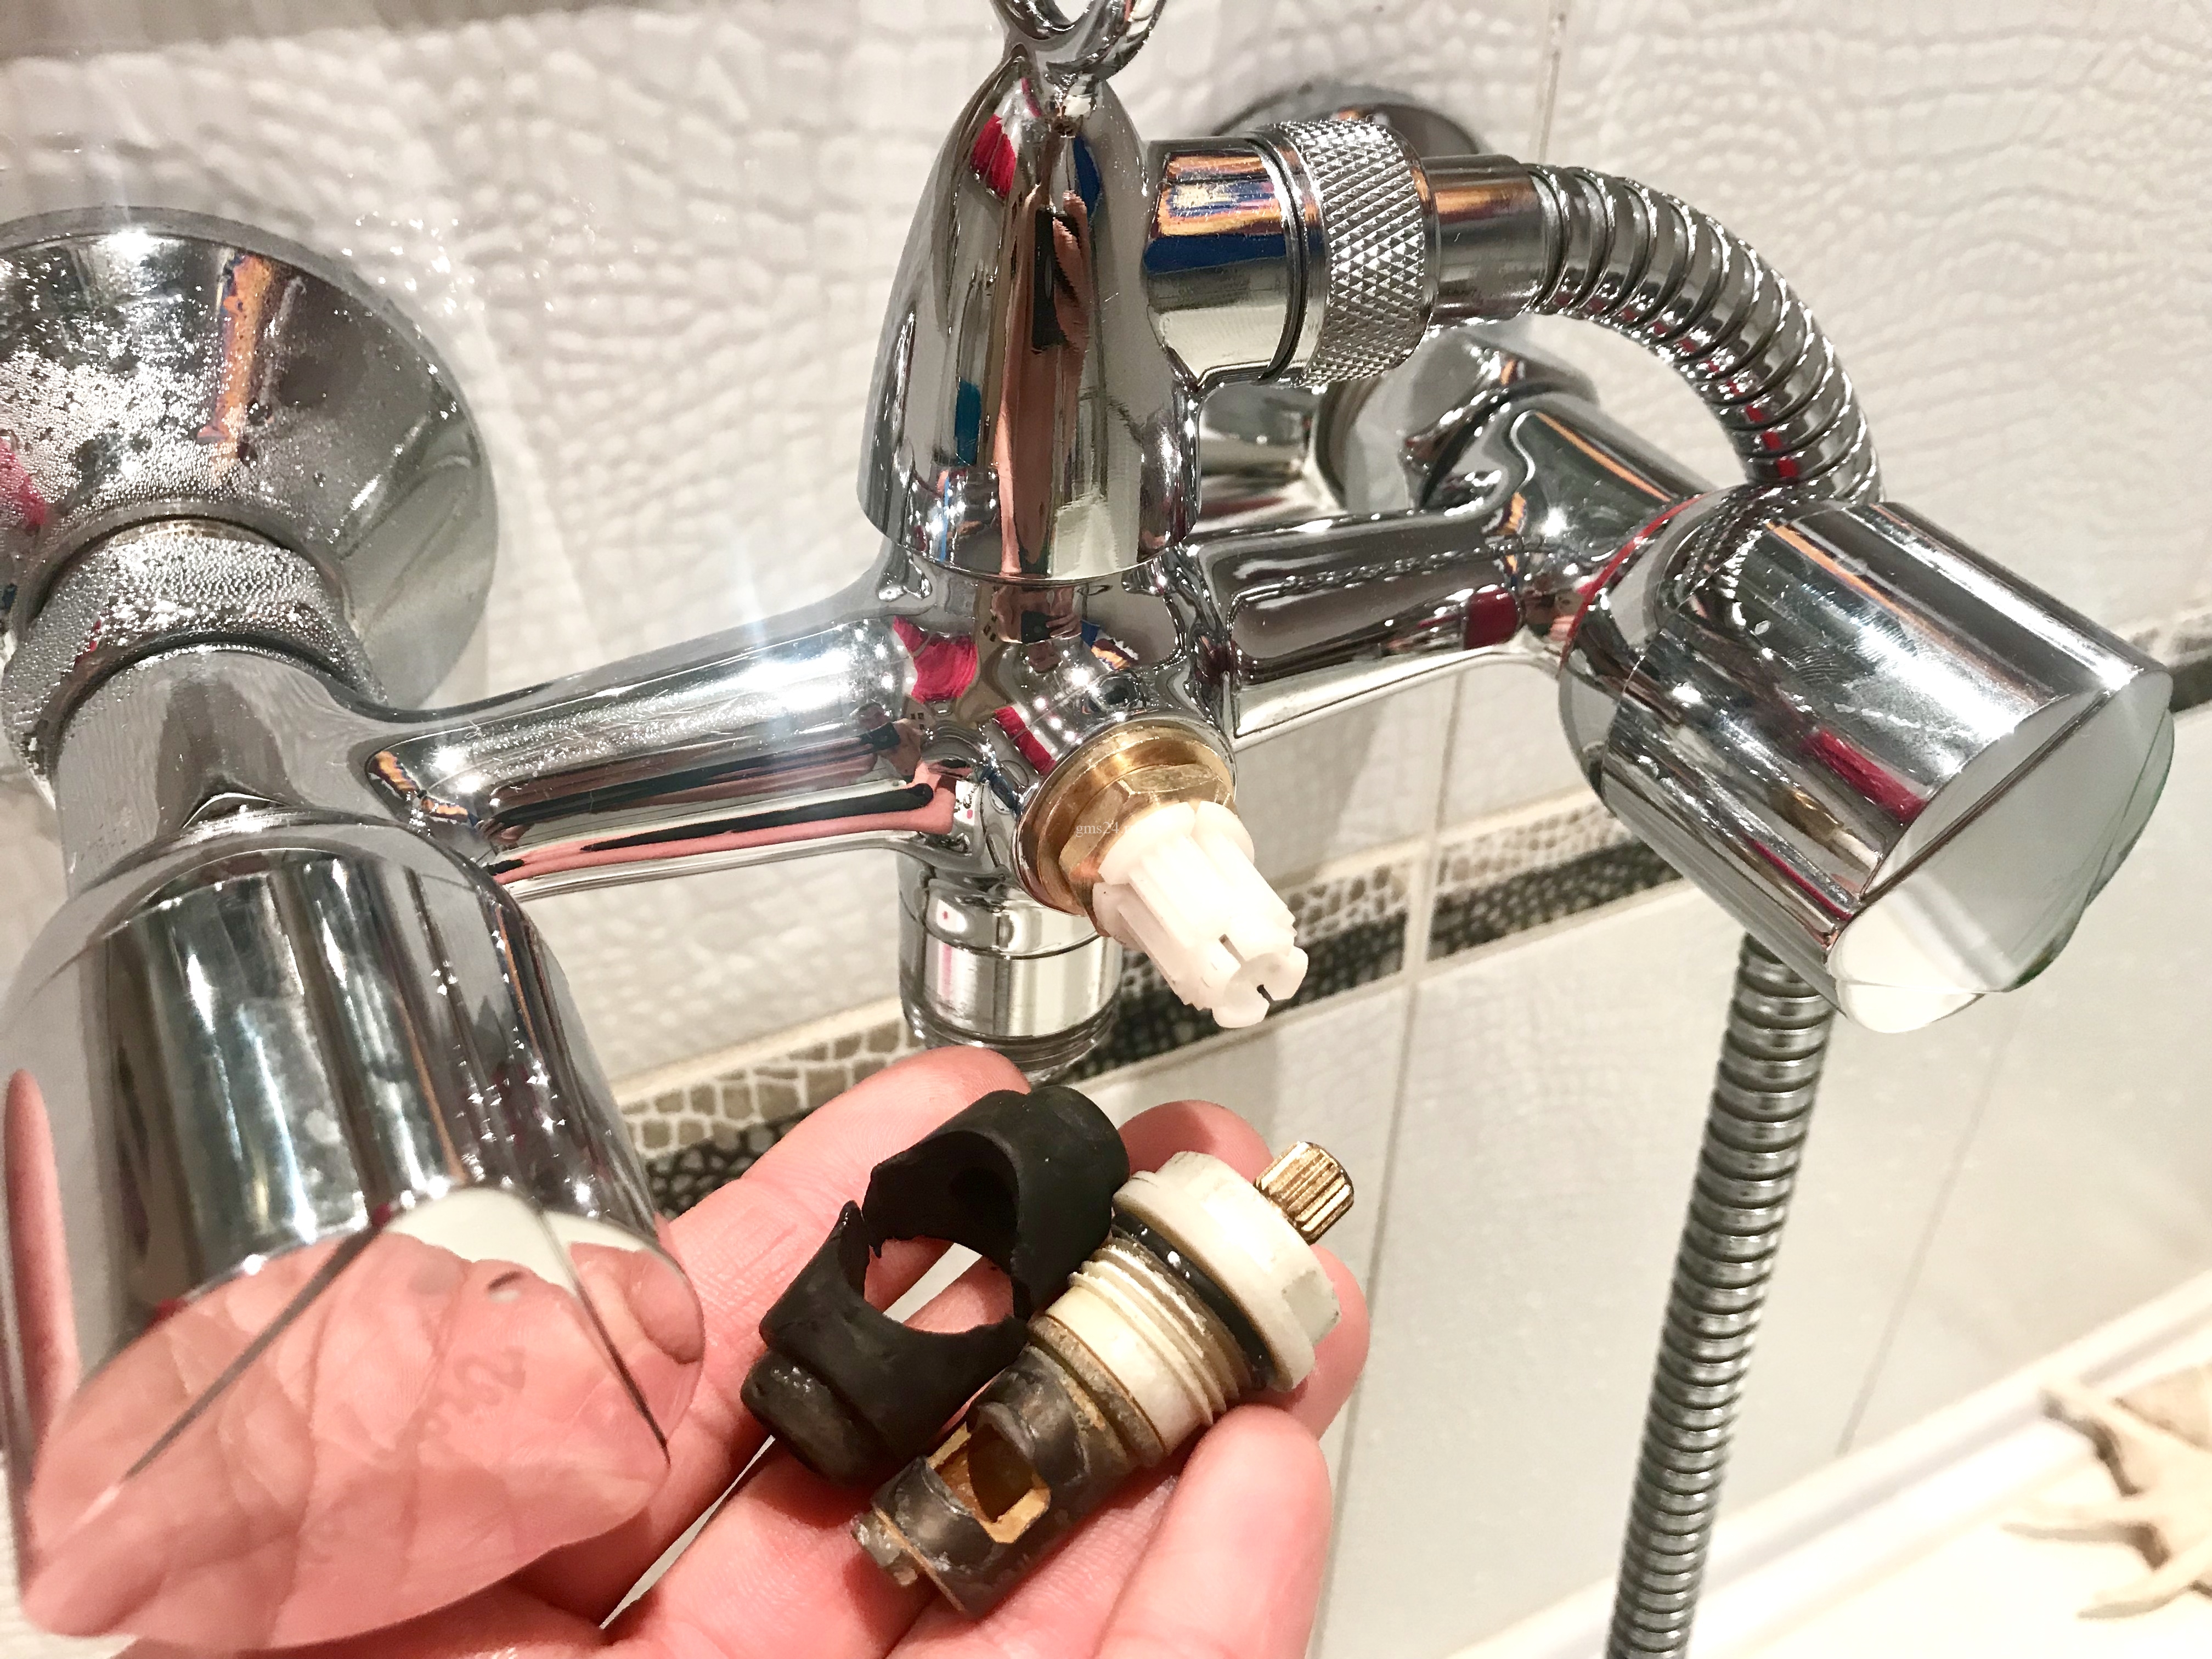


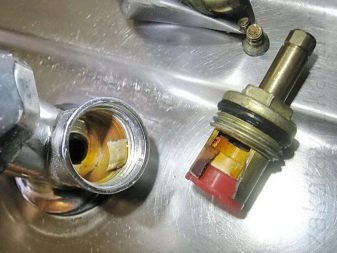
How to remove and disassemble?
Before installing a new faucet, it is necessary to dismantle the old plumbing fixture. The easiest way to remove the bath faucet, as it is removed entirely by unscrewing the two union nuts connecting it to the hot and cold water supply pipes. The only difficulty may arise in the case of pipelines made of polymers. Loosening the nuts will require a lot of force, so you need to hold the underwater pipes to prevent them from twisting and breaking. You can hold the pipes with a gas or clamping wrench for the metal fastening tips soldered into them.
It is not possible to remove sink mixers so quickly, the work is often associated with the difficulty of accessing the places of dismantling, and sometimes requires the removal of the bowl.
Most modern sink faucets will remove correctly in the following order.
- The water pipelines are turned off by the primary shut-off valve on the inlet manifold of the apartment or house.
- Valves are opened both at the place of work and in other places to remove pressure from disconnected sections. Under the open dismantled tap, if necessary, you can substitute a bucket to collect the remaining liquid on the supply lines of hot and cold water.
- After making sure that all the water from the pipes at the level of the taps has come down, you can begin to work on removing the sink faucet. To do this, you have to climb under the bowl, spreading something so as not to get dirty.It is better to disconnect the sewer pipes and the siphon - it will be more convenient to deal with the tap. To collect possible liquid residues in detachable sewer devices, it is good to use a bucket or basin.
- Unscrew flexible wires from hot and cold water pipes. There is still water in the hoses and pipes at the lower level, it does not hurt to substitute dishes to collect it. At this stage, you need a 22x24 adjustable wrench or open-end wrench.
- Immediately with a suitable tool (knife, screwdriver), you need to clean the fittings of the supply pipes from the remnants of the old sealant, if any.
- The next operation is the most difficult, especially if the valve has been installed for a long time. The lower fixture of the crane has two long steel pins with nuts screwed onto them. From moisture, the nuts become tightly stuck to the pins, and sometimes it is impossible to unscrew them. To facilitate the task, it is recommended to lubricate the entire thread of the pins and the places where they come into contact with the nuts with kerosene or a special solution sold in hardware stores, and allow a little time to soak the scaling of the joints. After that, unscrew the nuts completely with a tubular wrench for 10 (a box wrench is also suitable).
- Now it's time to get up off the floor from under the sink. Pulling the faucet outward as far as possible, unscrew the flexible pipes from the inlets in the lower part of the faucet body. This can be done with pliers.
- Pull up the entire faucet. This cannot be done before unscrewing the hoses - the lower mounting plate interferes, through the holes of which the nuts of the flexible hoses connecting the hoses to the pipelines do not pass.
- To clean the installation site of the mixer on the sink from dirt, not only from above, but also from below, under the sink.
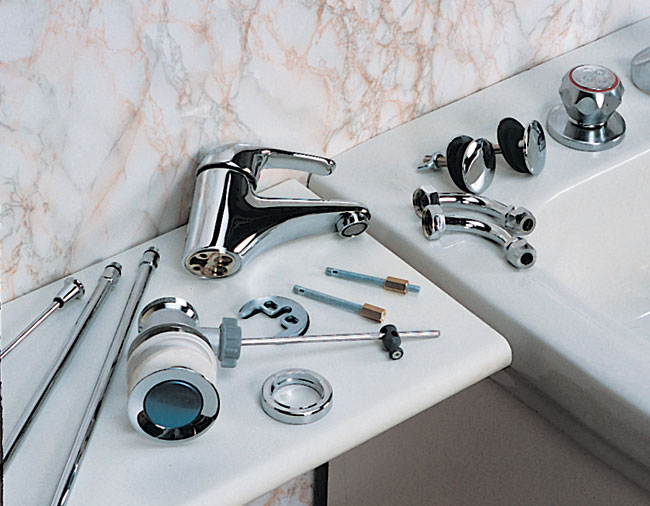
It is recommended that the removed cranes not be thrown away, but disassembled for spare parts. No one knows when gaskets, fasteners, valves and a crane box may be required. Even if they are old. Sometimes you may need an ordinary lamb, but it will not be at hand.
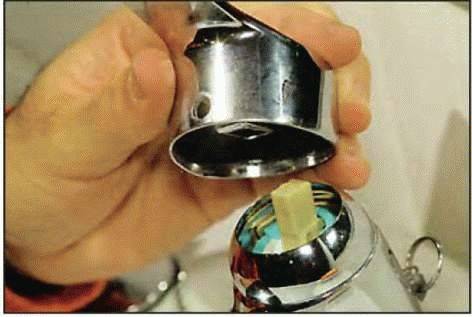
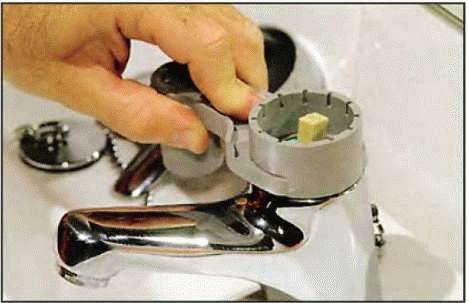
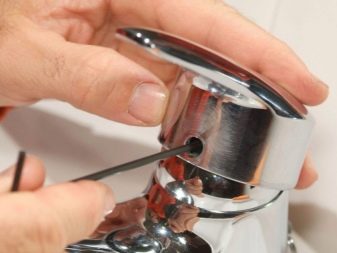
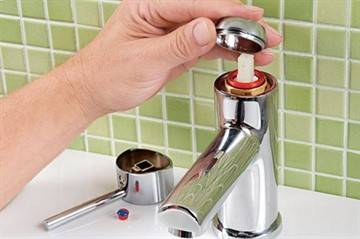
The handle (lever) of the crane or the flywheel is removed after unscrewing the screw with screwdrivers. The screws are under decorative caps that you just need to pry off knife or flat screwdriver. Having removed the flywheel or lever, unscrew the top cover of the valve mixer housing or remove the cartridge with cassettes and disks in ball valves. Other spare parts are easily removed from the valve body: valves, gaskets, crown (faucet box). All this can be very useful in the future.
1 How to change the faucet in the bathroom yourself?
First of all, do not rush to do it. Most often, if some trouble occurs, it will be cheaper to make repairs, but for this you first need to determine what the problem with the mixer is. In most cases, it looks like this.
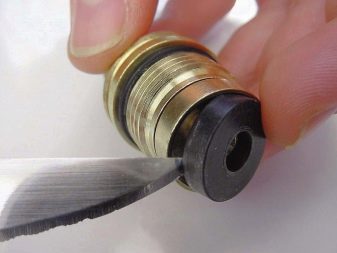
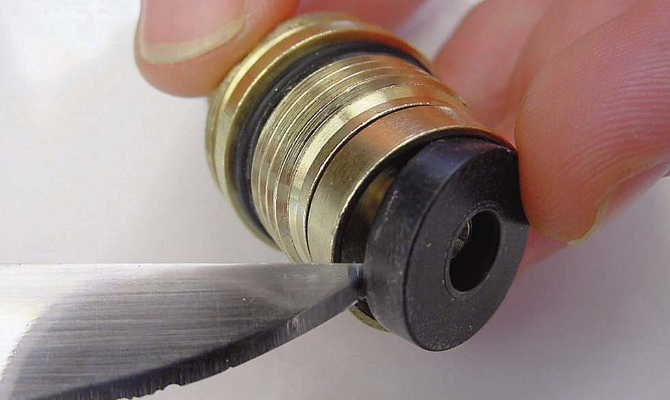
Usually people are faced with the fact that when the tap is closed, water still continues to drip. There may be several reasons for this, but most of them can be eliminated with the help of repairs, including those carried out independently. It is often enough to simply replace the gasket to fix this problem. A situation often arises when, when opened, the faucet emits a strong hum. There may be several explanations for this. One of the most common is air getting into the system.
 Faucet gasket replacement
We recommend to read
- Choosing and installing a cascade bath faucet
- Thermostatic bath faucet with shower.
- How to repair a bathroom faucet with a shower yourself?
The third most common violation is a decrease in the level of pressure. In this situation, you must first make sure that the pressure on other taps in the apartment or house remains the same and there are no leaks on the way of the pipes from the riser to the mixer.
When is a replacement required?
Not always improper operation of the mixer is the reason for its replacement.
If water drips or flows in a thin stream from the tap, you only need to replace the filling in it:
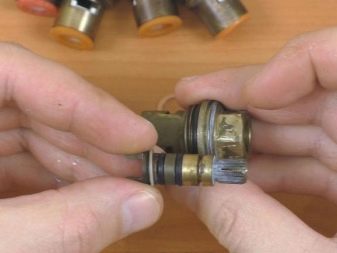
- in half-turn or lever: ceramic cartridge;
- in the classic (valve): gasket.
Some joystick faucets have a perforated metal ball instead of a cartridge. In such devices, the cause of leakage is usually the wear of the seat by abrasive particles - the soft polymer insert adjacent to the ball.
If the faucet of a classic valve mixer is torn off, the faucet box (valve head) is changed.
Replacement of the entire device is inevitable in the following cases:
hull cracked. This happens with cheap faucets;
The inside of the body is covered in rust. Happens with cheap faucets or fakes made from corrosion-resistant material;
the nut for connecting to the water supply has burst or the thread has been torn off on it
This is possible with careless installation or leaning on the mixer.
Installation of a mixer without eccentrics
Just want to warn that this is the wrong decision. However, under certain circumstances
this could be the way out. For example, when the threaded terminals protrude strongly from the wall


Important note:
the distances between the outlets from the wall and between the union nuts of the mixer must match.After all, the standard
in 150 mm. may differ with errors - in fact, eccentric transitions were invented for this.
may differ with errors - in fact, eccentric transitions were invented for this.
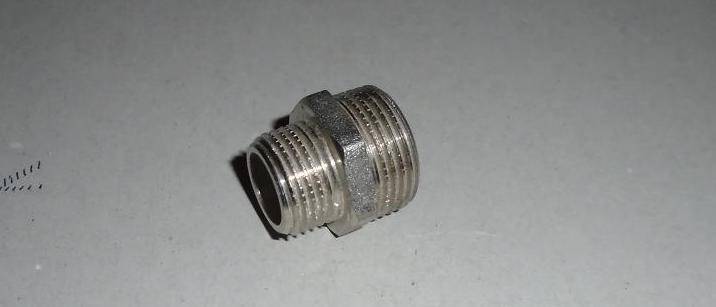
To change from a half-inch thread to a ¾-inch thread, an appropriate nipple is used, which is much
shorter than normal eccentrics. Actually, thanks to the adapter nipple, it becomes possible to install without
eccentrics.
An even more radical solution is the initial installation of water sockets with an external ¾ thread. With such
the implementation does not need nipples or eccentrics, the mixer is screwed directly onto the leads. However
in the future, problems with the installation of a new crane are quite likely when the axes of the outputs do not match. Solution
this is purely amateur.
Based on the above, installation directly on water sockets with an external ¾ thread is amateur
and "kolkhoz". Why reinvent the wheel when these things have long been thought out by engineers?
End.
Rate this post:
Currently 3.91
Rating: 3.9 (11 votes)
Instructions for dismantling the faucet in the bathroom

- Completely shut off the main taps that supply the bathroom or the entire facility (apartment, house), relieve the residual pressure in the system and drain the water remaining in the pipes by moving the mixer control to the open position. If water-intensive equipment (boiler, boiler) is connected to the water supply system, it is necessary to close the valves on them as well.
- We unscrew the fixing nuts of the dismantled mixer using an adjustable plumbing wrench. In some cases, manually performing this operation will not work, then you should lightly tap the hammer on the tool handle to break the "stuck" nut.
- Check out the eccentrics. Usually these connecting elements are quite durable, however, if traces of corrosion processes are found, they must also be replaced. Sometimes you can restore the thread by driving it a couple of times with a half-inch die.
To perform this operation, use pliers (pliers) by inserting one of the jaws of the tool into the hole, squeezing the handles and scrolling in a counterclockwise direction. In case of difficulty in unscrewing and the ability to get close with an adjustable wrench, you can also use it.


