- Do-it-yourself spare parts repair
- Repair sequence
- Self-adhesive patching
- How to repair shock absorbers of a washing machine
- Replacing the rubber seal
- How to remove the cuff yourself
- Preparing the installation site
- Installing a new cuff
- Tensioning the inner collar
- What is the difference between shock absorbers and dampers
- Health check
- When does a rubber seal need to be replaced?
- How to put an elastic band on the drum of a washing machine?
- Why does the rubber band fail?
- What is the rubber cuff for?
- Removing the facade
- How to seal a hole in a washing machine rubber band
- What might cause this
- Preliminary preparation and inspection
- How is a part replaced?
- Breakdown prevention
- Subtleties of cuff repair
- When might repairs be needed?
- How to choose and prepare a cuff?
- Instructions for gluing the seal
- Replacing the cuff of the hatch of the washing machine
- Rules for choosing a new cuff
Do-it-yourself spare parts repair
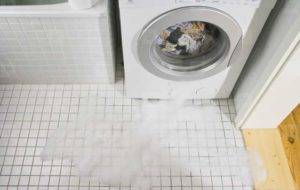
Damage to the cuff of the loading hatch is fraught with leakage. Undoubtedly, an ordinary rubber patch will help. It is allowed to apply a rubber patch without removing the cuff, however, it is more reliable and accurate if applied from the inside of the cuff.
Materials for repair work:
- A piece of thin rubber.
- Solvent.
- Super glue.
- Soft cloth or cotton.
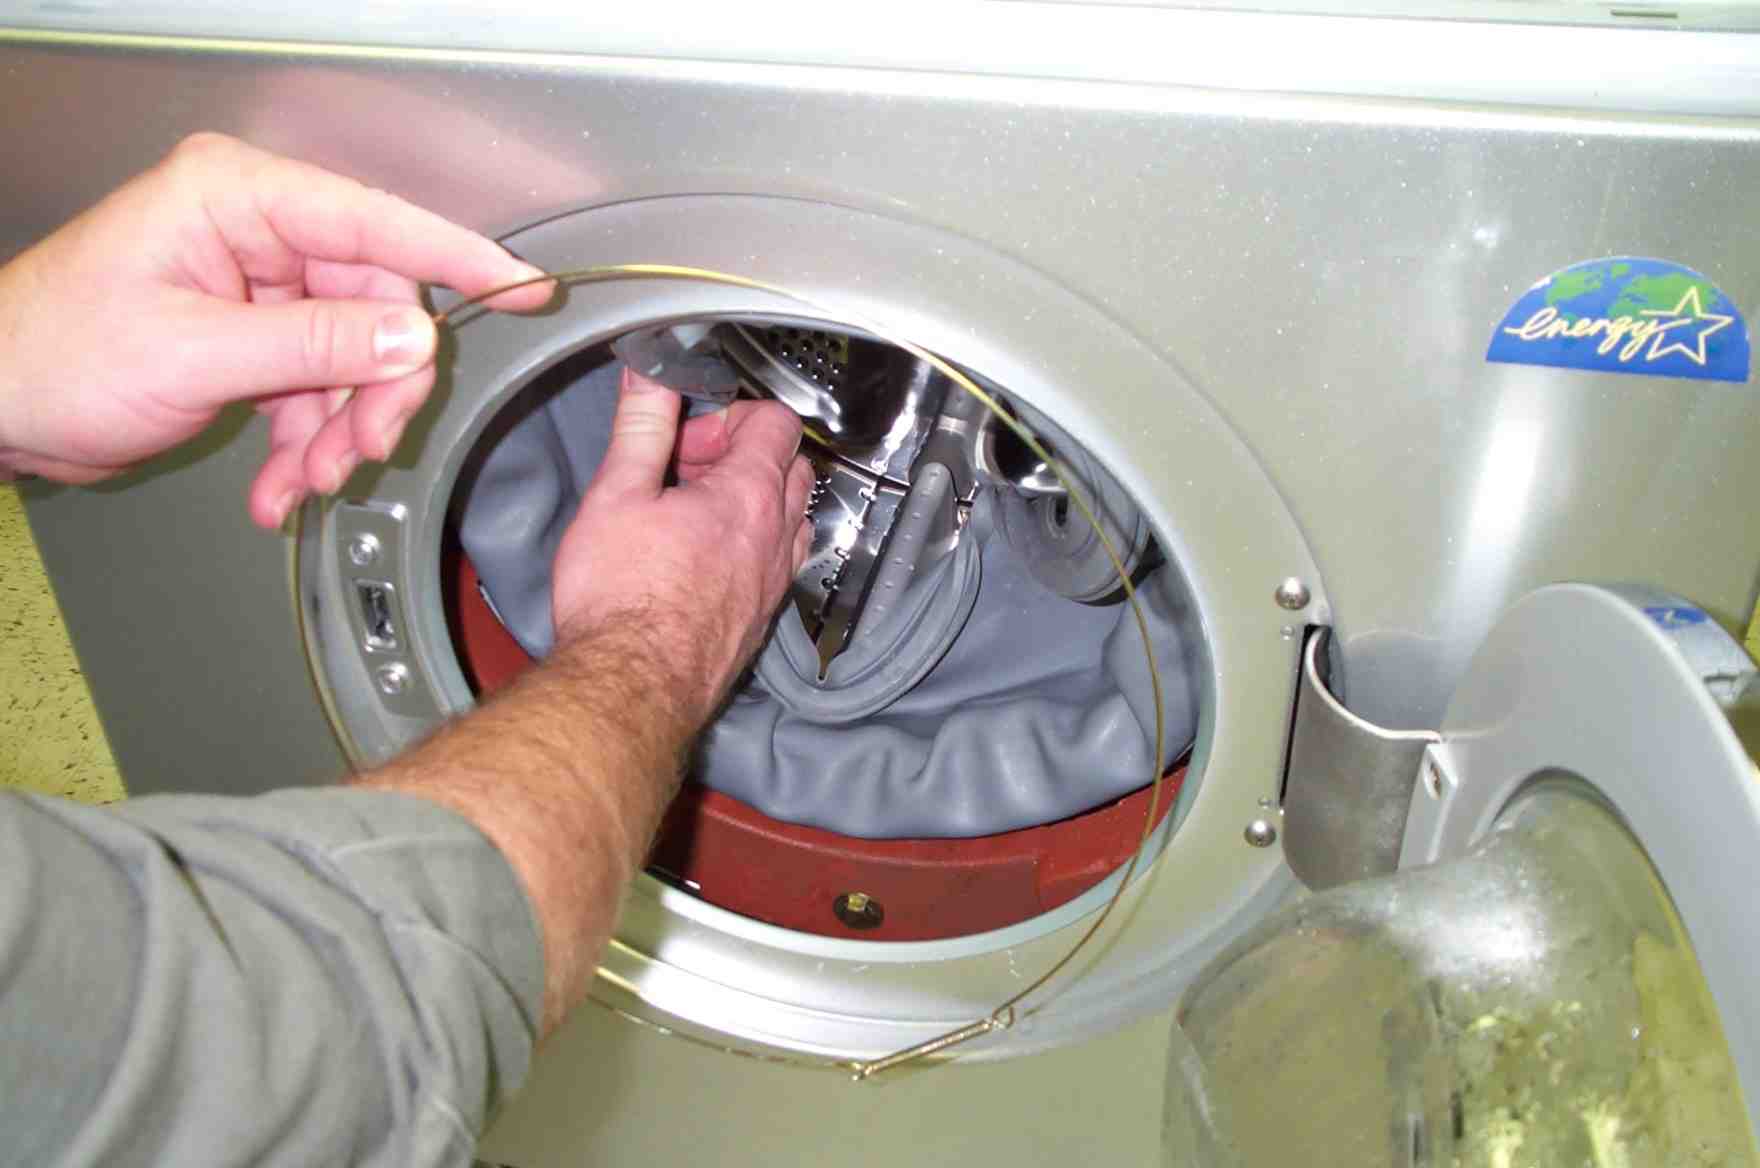
Repair sequence
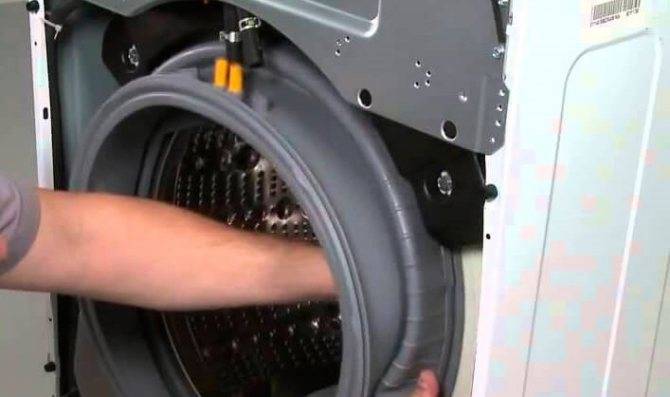
 The cuff is attached with two clamps: to the front wall and to the tank. We remove the first clamp, disconnect the cuff from the wall. Then remove the second clamp and remove the cuff out.
We straighten the folds of the seal in search of a problem area. Thoroughly degrease the damaged area with cotton wool soaked in white spirit. The degreasing area should cover the gap limits of 10-15 mm around the entire perimeter. We hold the sealant in a straightened state until the solvent is completely dry. For the patch, you will need a good quality flexible rubber. It also needs to be degreased.
Self-adhesive patching
We glue the patch by applying superglue to the damaged area with an overlap of 10-15 millimeters along its perimeter. Then we apply patches, having straightened it in advance. After a few minutes, the superglue will set, the cuff must be reinstalled, observing the opposite order of installing the clamps.
How to repair shock absorbers of a washing machine
New vibration dampers of modern cars cost from 500 to 3000 rubles per pair, depending on the model. Although this amount is not critical, in some cases it is possible to restore the old shock absorber. Owners of washing machines simply remove the remnants of the sealing elements from the body. Using the selection method, home-made parts from cut rubber pipes, leather belts or pieces of linoleum are installed in their place.

The main thing with such a restoration is to achieve a high-quality seal of the stem connection in the body. The cut parts are fixed in the body, for smoother operation, the connection is lubricated with technical or other grease.This type of repair can hardly be called reliable. At best, such a damper will last several tens of washing cycles, and a violation of its operation or jamming will lead to breakage of other parts.
Replacing the rubber seal
If, after examination, cuts, holes, cracks and other damage are found on the cuff, it is advisable to replace the part with a new one.
When choosing a new part, it should be borne in mind that it is impossible to purchase an "elastic band" from other models of washing machines, even if outwardly they have a significant similarity. Only a cuff designed for a specific brand of unit can be 100% suitable. Only the master can pick up analogues and only in a hopeless situation.
How to remove the cuff yourself
After removing the front clamp (how to do this was discussed above), the rubber seal is completely removed. This is also necessary in the case of replacing the old cuff with a new one, and if a minor repair of the part is necessary.
Proceed as follows:
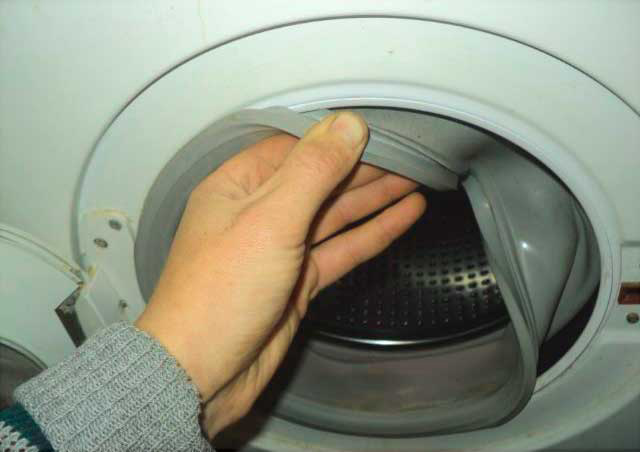
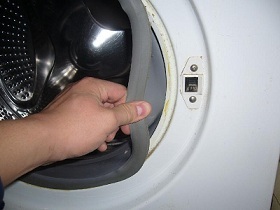
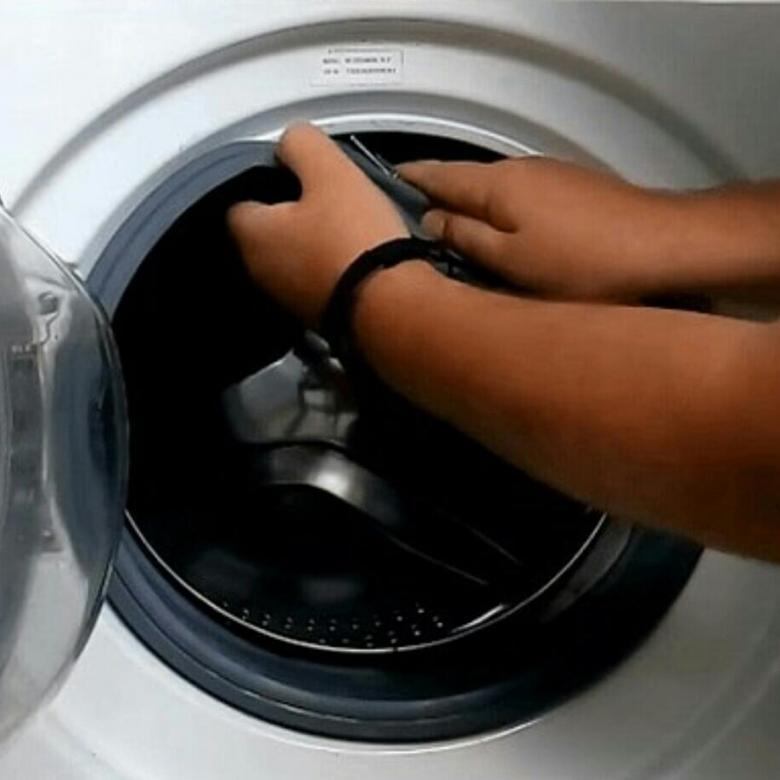
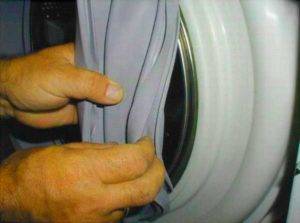
- Carefully pull out the front part of the rubber seal, which is held on the machine body, due to its own tension.
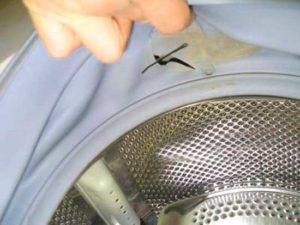
- Find a mounting mark. It is located on the cuff itself.
- Using a marker, mark the reciprocal mark on the tank.
- Remove the second clamp in the same way as the first.
After the work done, the cuff is easily removed from the machine. The part just needs to be pulled well towards you. Now you can safely proceed to the installation of a new "gum".
Preparing the installation site
The preparatory step before installing a new cuff is a thorough cleaning of the tank lip. Usually dirt and detergent residues accumulate in this place.
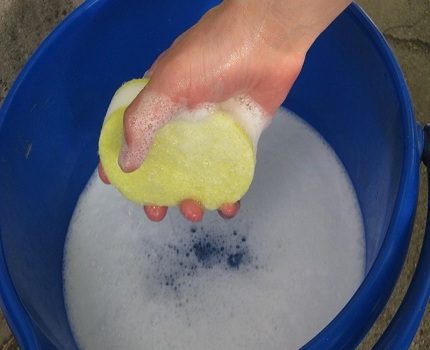
It is better to clean the edge with a sponge, wetting it abundantly in soapy water.At the same time, it is not necessary to wash off the remaining foam and wipe the part dry. Soap will serve as a kind of lubricant and will help to cope with the installation faster.
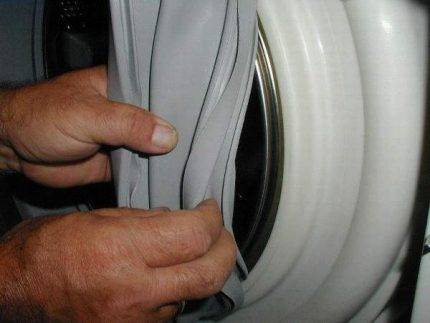
Installing a new cuff
Putting a new seal on the tank is not quite easy. The material is difficult to strongly stretch, besides, it "resists", stubbornly not wanting to fall into place.
The first step is to apply the cuff to the upper edge of the tank so that the mounting marks match. Further, sliding over the rubber with the thumbs of both hands, pull the seal on the edge. Movement follows from the center to the sides.
At the next stage, soap grease comes to the rescue. At the bottom, the cuff is stretched and it is quite difficult to put it in place. Therefore, here the seal is pulled with force on the tank. After these manipulations, the "gum" is tightly held on the edge.
The last point is to check the correct installation of the part. If the cuff does not adhere tightly to the metal in some places, leaks will occur during operation of the machine.
Tensioning the inner collar
Methods for installing internal clamps differ depending on the attachment. If the tension is spring, then the installation is carried out with a screwdriver. The tool is inserted into the hatch blocking hole and a spring is put on it. Thus, the fastening is freely stretched and the collar is easily put on the right place.
With a clamp with a screw, the task is somewhat simplified. The tension is almost completely unscrewed, and the clamp is laid on the seat. To strengthen the part, it remains only to tighten the screw back.


If the washing machine has a wire clamp without tensioners, round-nose pliers are used as an auxiliary tool.They gently tighten the metal ends, and the resulting knot is hidden in the recess on the cuff that is available for this.
The easiest way to put on a plastic collar. It is fastened with special latches. After the work done, the cuff is pulled onto the edge of the front panel of the machine and also fixed with a clamp.
Finally, check the seal for tightness. To do this, run the fastest wash program. If there are no leaks during the operation of the unit, the cuff is installed correctly.
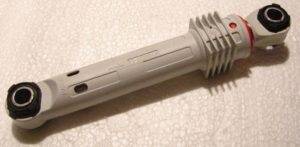
What is the difference between shock absorbers and dampers
The shock absorber is a cylindrical device, inside which a piston and a return spring pass. Between the cylinder and the piston there are gaskets, at the end there is a rubber piston and a rod. The damper has no return springs in its design. Springs in washing machines with dampers are taken out separately, a tank is hung on them.
Unlike a shock absorber, a damper dampens tank vibrations much better. Due to the fact that the springs are taken out separately, in case of breakage and stretching, they can be replaced without problems. The shock absorber will have to be disassembled, but we will talk about this later.
Health check
You can check the shock absorber or damper for performance without even removing it from the tank. To do this, you need:
- remove the top cover on the washer by unscrewing the screws holding it;
- press the top of the tank so that it moves down by 5-7 centimeters;
- then abruptly release;
- after this, carefully look, if the tank rose up and stopped under the action of the springs, then the shock absorbers are working, if the tank began to swing like a pendulum, then repair or replacement of the part is required.
- during washing and spinning, the machine creaks and knocks strongly;
- the drum of the machine is spinning tightly, perhaps there is no lubrication in the shock absorber.
The shock absorber or damper of the washing machine most often has one of these breakdowns:
- with constant operation of the equipment, the liner or gasket of the damper may wear out, in some cases replacement is possible;
- mechanical deformations resulting from improper transportation or defects during assembly, in this case, repair is inevitable;
- when the bolts on which the shock absorber is attached wear out, it simply flies and dangles.
When does a rubber seal need to be replaced?
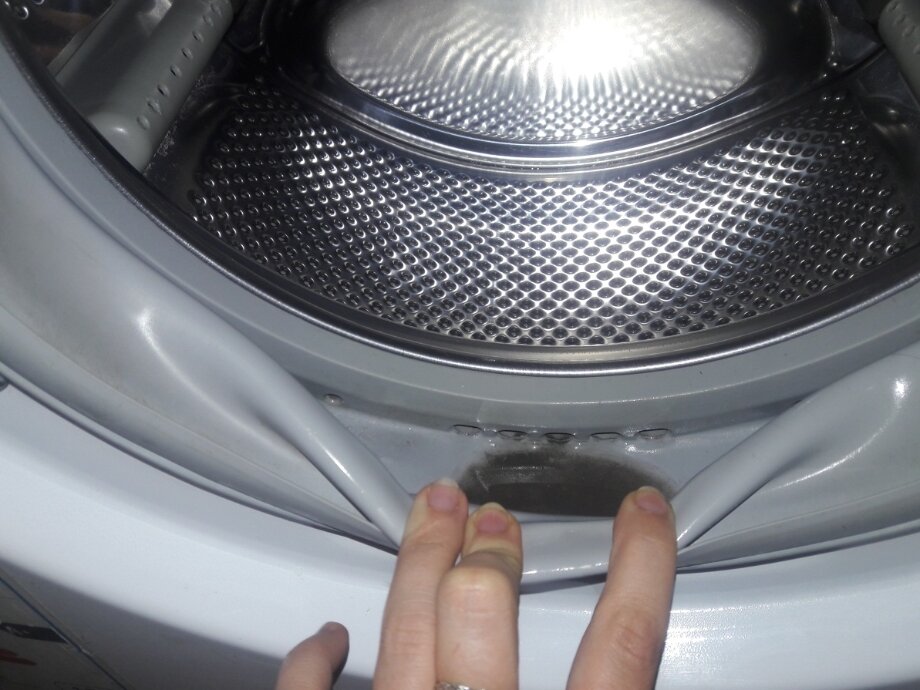
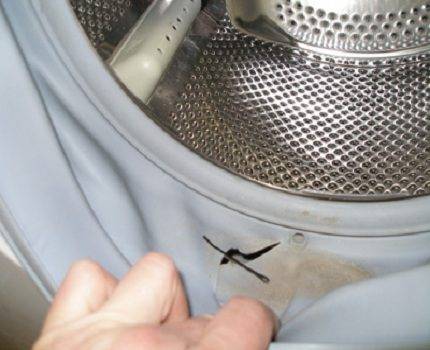
If a leak is visible under the loading hatch or body, the cuff is inspected first. If the upper outer part is damaged, water may flow directly from under the door. A more complex malfunction is damage to the inside. Then a leak occurs under the body of the automatic washing machine (CMA).
The causes of damage are various:
- Natural wear. The friction of the drum against the seal during rotation, thermal effects. Then the surface becomes brittle, cracks form through which water escapes.
- Poor quality powder, its excess. All this affects the state of the cuff, leading to its destruction.
- Wrong care. Mold and fungus eventually eat into the inner layers of rubber. A leaky product is not able to maintain tightness.
mechanical influences. Metal objects forgotten in pockets end up in the drum. When rotated, they damage the seal
Strong pops and careless closing of the door also affect
To replace the part, you need to dismantle the old one and install a new cuff. Prepare your tools and materials in advance.
How to put an elastic band on the drum of a washing machine?
The work is quite doable. All you need is a slotted screwdriver and pliers. Prepare materials in advance, ready-made repair kits are sold in stores.
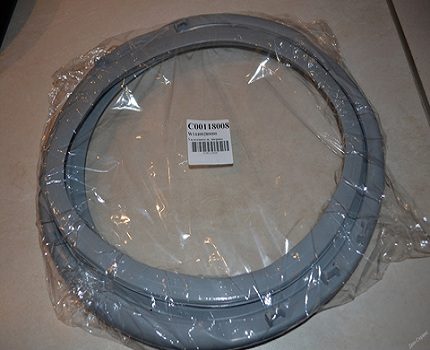
New seal. Buy specifically for your SM model.
Clamps. There are two of them: internal and external. Depending on the manufacturer of the washer, the clamps can be metal or plastic with a latch. If old parts remain after repair, they can be reused.
Fine sandpaper, sponges, rags, soap, marker - to prepare the seat and facilitate installation.
The removed front panel of the machine will simplify the task. Perhaps you had it removed during the repair, then it will be easier to carry out the work.
Specially remove the wall for a long time, so we will tell you how to remove the sealing gum in another way.
- Open the hatch door.
- Bend back the edge of the gasket until you see the clamp.
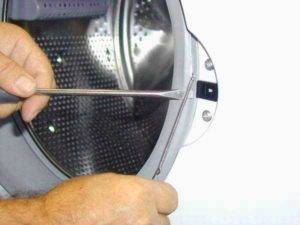
- Pry off its spring with a flathead screwdriver.
- Stretching a screwdriver in a circle, pull the clamp out of place.
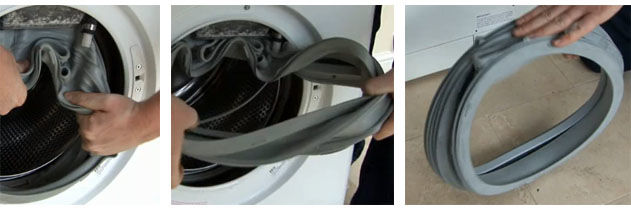
- Remove the cuff from the outer panel. This is easy to do by hand.
- Put it inside the tank.
- Remove the top cover bolts from behind.
- Slide it back and remove it from the case.
- Using a Phillips screwdriver, loosen the inner clamp bolt. Take it off.
- Now lift the cuff and remove from the machine.
Prepare your seat. Using sandpaper, remove stuck-on dirt, scale. Clean the hole with a sponge and detergent. Before putting the cuff on the washing machine, inspect it. There is a drain hole at the bottom.And on top is a rubber arrow, which should be combined with the designation on the hatch.


Now lubricate the fit with soap or detergent, especially the edges of the hole. Do the same with the rubber groove.
How to put on the cuff:
- Fully tuck it inside the case. Observe top and bottom.
- Slide the top onto the inner ledge of the tank.
- Moving your hand in a circle, tuck the elastic to the bottom.
- Install the inner ring.
- Tighten the fixing screw.
- Put the outer part on the body. Additionally, you can lubricate the landing with soap.
- Move from top to bottom.
- Install the outer ring.
- Holding the ring spring with your finger, refuel it in a circle.
- Replace the top cover.
Press the hatch door. It should close properly. If the closure is loose, then something went wrong. Inspect the installation, correct if necessary. The elements must be hermetically sealed to the body.
The video will help visually assess the complexity of the work:
How to prevent damage:
- Wash items with decor that can come off in special bags.
- Check pockets before loading.
- Leave the door open after every wash. Wipe the cuff to remove any remaining moisture.
- Remove mold and other contaminants from the surface.
At the end, run a short cycle to check the tightness. Happy repair!
Badly
4
Interesting
3
Super
5
Why does the rubber band fail?
In fact, with proper care and careful operation of the washer, the cuff will “last” for many years, its replacement will not be required. The rubber seal deteriorates mainly due to the fault of the user. Although replacing the gasket will not take much time and effort, it is better not to bring it to repair. The drum cuff is usually damaged if:
the user uses low-quality household chemicals. Detergents with aggressive ingredients used for washing can lead to damage to the seal.
Therefore, it is important to buy “safe” laundry powders and machine cleaners in order to eliminate the detrimental effect on the rubber parts of the machine;
periodically overload the washing machine. For example, by putting all 8 kg of things in the drum instead of the prescribed 6 kg of laundry, increased friction of the clothes against the sealing gum will be ensured.
So the cuff will deteriorate much faster;
do not check the pockets of things loaded into the washer. Often, keys, hairpins, paper clips and other metal objects that can pierce or cut an elastic band are forgotten there;
carelessly loading the machine and pulling clothes out of it. Things will “pull” the cuff, and buttons, decor and lock dogs can lead to deformation of the seal;
do not wipe the gum. Water accumulates in the cuff recess after washing. If you do not remove the liquid and do not “ventilate” the drum, mold will form on the elastic over time, the fungus will “settle”. Microorganisms will corrode the gasket, and it will soon become unusable;
The rubber band was replaced incorrectly. The cuff is very easy to pierce during installation, for example, with a screwdriver
That is why it is so important to carefully pull the elastic and insert the fixing clamps into the grooves.
If you do not allow a negative impact on the cuff, it will last 10 or 15 years, ensuring the tightness of the system. It is up to the user to delay the wear of the seal
However, having noticed that water began to drip from under the drum door, it is important not to postpone the repair of the “home assistant”.A new gasket must be installed immediately to prevent a more serious leak.
Share your opinion - leave a comment
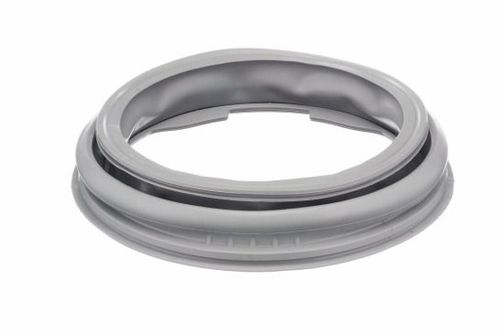
What is the rubber cuff for?
The rubber band on the drum of the washing machine provides a hermetic closure of the hatch during the operation of the unit, so that all the liquid is kept inside and does not leak out.
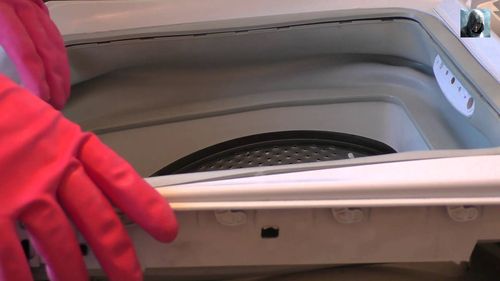
The location and shape of the seal will vary depending on the make and model of the appliance. So, in front-loading washing machines, the cuff is round, it connects the drum to the front. In top-loading units, the elastic is rectangular in shape, it connects the tank to the top.
In the absence of a sealing cuff, the hatch of the washing machine will not be able to close tightly. It is made of a durable, elastic material that provides complete protection against water leakage.
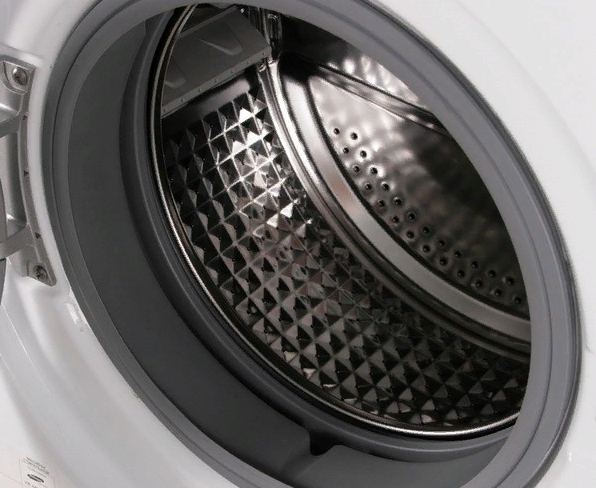 Usually the cuffs are made in a classic gray color.
On all older models, seals made of durable rubber were installed. Now, manufacturers prefer cuffs made of a similar artificial material - silicone, which is elastic. In addition, it remains in its original form even when exposed to boiling water and practically does not dry out over time.
Seals differ in shape and dimensions. So, if the device has auxiliary functions (drying, water injection), then additional recesses are made in the cuff.
Removing the facade
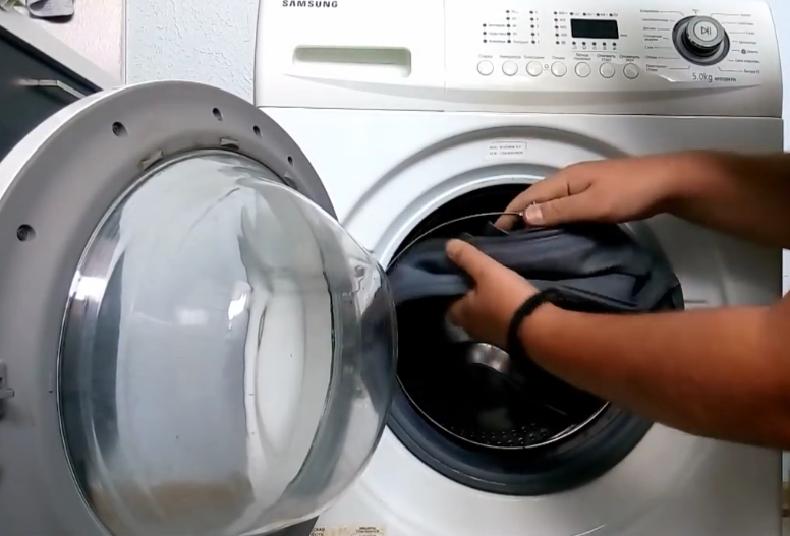
If the goal was to replace the seal, you will have to remove the front panel of the Samsung washing machine. This is necessary to gain access to the inside of the drum, to securely fix the cuff in the housing.
Using a screwdriver or screwdriver, unscrew the screws on the front of the machine.Three bolts are located in the lower area of the wall, it will not be difficult to find them. The top fasteners are covered by the control panel - you will have to disconnect this part and put it aside.
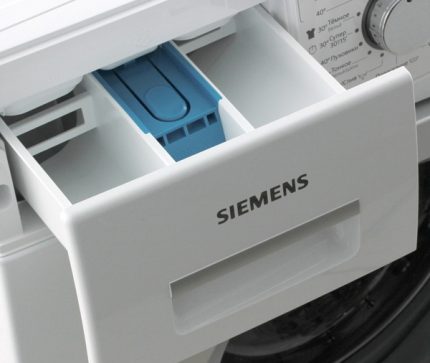
The last bolt is under the powder receptacle. When all the screws are unscrewed, it remains to disconnect the front wall of the case and remove it to the side. This will open direct access to the drum.


Experienced craftsmen change the seal without removing the front panel, thus saving time on repairs. However, it is much more difficult to install the gasket from the inside, so it is still better to get access to the drum.
How to seal a hole in a washing machine rubber band
 Quite often there are situations when not the brushes in the tank or the heating element become unusable, but the cuff of the hatch of the washing machine, which cannot always be replaced in a short time.
This will not greatly affect the operation of the washing device itself, but it can ruin a comfortable life very easily, since water will constantly flow near the hatch.
 That is why many users increasingly began to wonder "how to fix a cuff leak?" and is it possible to do it yourself, without contacting a service center.
You can seal the cuff, but this will most likely not work for long. These types of repairs can be done as a temporary measure until your machine is taken to a service center or until you raise money to repair your assistant.
A complete replacement of the part will still have to be carried out, so you should not hope much for gluing.
What might cause this
You can understand and prevent this breakdown at the very beginning.When examining the structure, it will become clear whether it makes sense to repair the device at home and how to avoid such situations in the future. There can be several reasons that can cause such a breakdown.
- Cracks resulting from very strong vibration of the drum of your washing machine. Of course, it is possible to make repairs, but this is just the tip of the iceberg. So that in the future such a problem does not bother you anymore, you should solve the issue with strong vibration, which is many times more difficult.
- Sometimes the problem lies in wiping the cuff, when something in the mechanism is broken, and the cuff begins to rub against some part. Drum displacement can lead to such a breakdown. Before starting the repair, you should fix the problem that caused this type of damage.
- Cuts or breaks, which, as a rule, are formed due to coins forgotten in the pockets of things.
- "Fatal" damage, which does not make sense to repair.
The last ones on the list may appear for some reason, for example, due to the initial poor quality of the cuff or cracks from old age, which in any case will appear over and over again. Such damage cannot be glued together in any way, and there is practically no point.
Preliminary preparation and inspection
 If you nevertheless decided to glue the cuff in the washing machine with your own hands (for example, at the moment you don’t have the money to buy a new part, or there are no options suitable for replacement, and you really need to wash), then you need to take a number of measures to prepare for repair.
They can help you avoid various troubles in the future.
 So, first you should carefully inspect the cuff and determine the percentage of expediency of its repair, as well as the cause and extent of damage. To do this, you will need to remove the spring clamp holding the cuff itself. In some models of washing structures, it will be necessary to remove the front cover completely, and in some cases even remove the drum.
 Then you should perform an analysis on the need to dismantle the cuff. If the damage is in the access zone and is located on top, then it can be sealed, and even without removing it. In some models, in order to remove the cuff, you will need to dismantle the drum, so try to soberly assess your strength in terms of reassembly in advance. It may be better for you to turn to a specialist or just an experienced person.
 And finally, we come to the patch and glue. If you don't have a thin rubber band under your arms, then you can use a condom or a medical glove, which will need to be folded in several layers. The glue with which you will repair the cuff must have high adhesion and elasticity.
Most of the people doing this type of repair work have also given good reviews of the simple instant shoe glue.
How is a part replaced?
The door sleeve for LG washing machine is manufactured under the same self-replacement plan, the same as the door sleeve for Samsung washing machine.
The plan is:
- The cover of the device must be removed in order to gain access to the inside, to the depth of the rubber and the insides of the mechanism;
- Remove the powder and detergent dispenser, unscrew the panel control screws;
- Remove the front wall, and for this you need to disconnect the hatch blocking system;
- The cuff and collar are removed;
- Directly installing a new part that needs to be fixed using the same clamps;
- All. This is followed only by assembly and test washing to identify possible errors.
Look at the photo.
The hatch cuff for the Indesit washing machine and Ariston will be attached using the same technology. The thing is that cars are made - Samsung, Ariston, Bosch, Indesit, Samsung, LG according to a single concept, and, therefore, their parts are similar. For you, this is only beneficial, you will not need to consistently delve into, look for a way to replace it, here it is, everything is already here.
Manhole cuff replacement for Bosch washing machine, Samsung, LG, Indesit - it's not so difficult if you follow a single rule for parsing and replacing a part with a new one.
Breakdown prevention
Although abrasion, damage to the cuff is inevitable, nevertheless, following some prevention rules that can save the washing machine from misfortunes for many years to come will still not become superfluous. Here are the rules:
- Things should be packed neatly, and not stuffed at random (as many people like to do with us, “if only it was washed off”);
- Before washing, check pockets for possible sharp objects or simple coins (they are the ones that can lead to a sudden breakdown);
- Items containing metal elements (bras, sweaters with numerous locks) should be washed from specially designed bags. Such bags will not only save the machine, they will also allow things to be carefully washed off without harming the shape;
- Don't stress the car. If the maximum amount of laundry is 5 kg, do not neglect the trust of the technique, do not put more;
- Washing powders and detergents.Make sure that the powder is necessarily automatic, and nothing harmful is written in its composition.
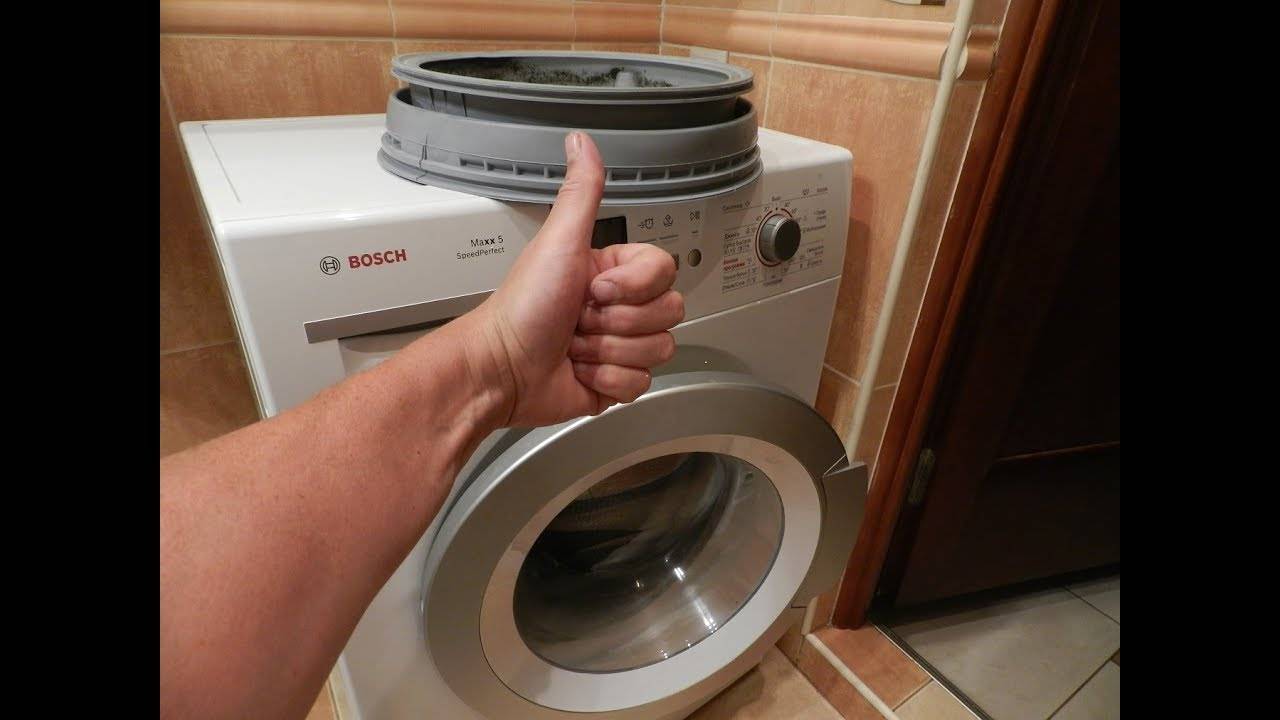
In order to reinforce the knowledge you have read, watch the video on how to replace the seal yourself.
And yet, most sources and the manufacturers themselves recommend contacting the masters for help. If you are generally uncertain about holding tools in your hands, and with technology you are somehow somehow, it is likely that if something doesn’t work out for you, in the middle of the process you will panic “what-where” and calling the master will already become a necessity. Still, be careful. That's it, now you are informed about how to replace the cuff, feel free to start repairing it, and let your washing machine live a very, very long life.
Subtleties of cuff repair
Sometimes situations arise when the “elastic band” located on the hatch of the washing machine is torn, and it is not yet possible to replace the cuff.
When might repairs be needed?
For example, at the moment it is impossible to find a part suitable for the existing model of the car, or it is ordered, and it takes a long time to wait for delivery.
There are also circumstances when right now it is impossible to allocate money from the family budget for the purchase of a new part. In such situations, cuff repair will help out, that is, sealing the damage site.
High temperatures, detergents and constant friction of linen will soon do their job, and the hole on the cuff will again make itself felt
It should be noted that gluing the patch is a temporary measure. Therefore, you should try to replace the worn seal with a new one as soon as possible.


How to choose and prepare a cuff?
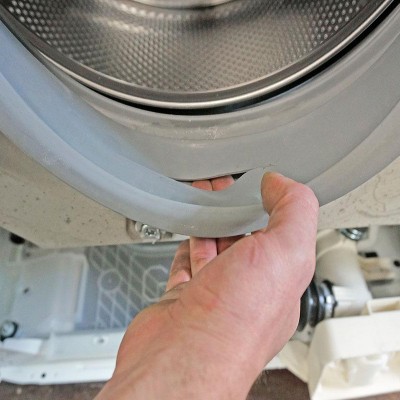
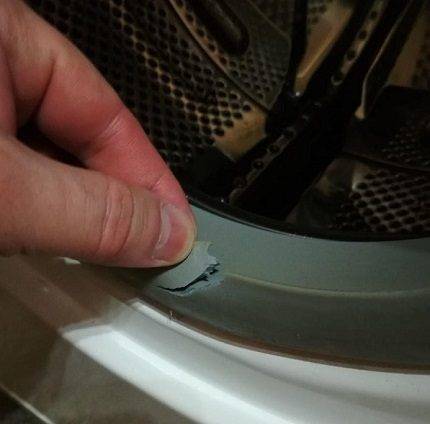
First of all, you need to inspect the leaky cuff and determine the cause of the damage.This is the only way to find out whether it is advisable to repair the seal or it makes no sense. To do this, you will have to remove the cuff from the machine in the manner described above.
Only by removing the front clamp and pulling the cuff towards you, you can detect damage, assess its size and the possibility of repair
If the cut, puncture or abrasion is small, then it definitely makes sense to repair. And when the damage is large or there are several of them, it is better not to rush with gluing.
After determining the cause of the repair, you should select the material for the patch. It must be strong and flexible at the same time. Some masters recommend using condoms or medical rubber gloves for this purpose.
A great option is special patches designed to repair swimming air mattresses. You can find them in sports stores.
The glue planned for work must have excellent adhesive properties. In this case, the substance must retain elasticity after complete drying. This is how the products intended for the repair of shoes and rubber products behave.
Instructions for gluing the seal
Sealing a rubber seal is a matter that does not require special knowledge and skills. However, so that the result does not disappoint, it is better to follow the instructions clearly.
We offer the first method of repair - gluing. It is performed according to the following scheme:
- Prepare the payment. Pieces of the selected material are folded into several layers and glued together. The size of the patch should be 1.5-2 times larger than the defect itself.
- The damaged area and the area around it are degreased.To do this, use alcohol, acetone, white spirit, etc. Wait until the degreasing agent dries completely.
- Glue is applied to the cuff and patch.
- Lubricated surfaces are pressed together either immediately or after a few minutes - it depends on the instructions on the tube of glue.
- The cuff is fixed in its natural position with suitable objects. So the detail is left for a day.
After the glue has completely dried, the seal can be installed in place.
The repaired cuff should be returned to its place according to the same procedure as putting on a new one. Since the rubber is already stretched, the effort will not have to be as much as in the case of installing a new part.
There is a second method, which is considered more reliable. It combines stitching and gluing.
Perform the procedure as follows:
- A thick synthetic thread is used to butt the damage. In this case, a football seam is used.
- After that, everything is abundantly impregnated with silicone sealant for rubber and plastic.
Further, as in the previous method, the cuff is left in its natural position for a day, after which it is installed back into the machine body.
After the repair, it is necessary to check the quality of work. To do this, load the drum with laundry and start washing on the shortest program. At the end of the cycle, the bonding site is inspected for repeated gaps.
You can change with your own hands not only the cuff that hermetically covers the hatch of the front-facing washing machine. Home craftsmen are quite capable of replacing the washer belt. Step-by-step instructions for carrying out this work are described in detail in the article we recommend.
Replacing the cuff of the hatch of the washing machine
With prolonged use of the SMA, the cuff of the loading hatch may be damaged, and it will need to be replaced. The purpose of the cuff is to hermetically isolate the loading opening of the tank during washing.
1. Causes of cuff damage:
Natural wear and tear of rubber.
Defeat, destruction by fungus.
Loosening of rubber by aggressive substances added during washing.
Abrasion of the cuff on the inner parts of the case.
Abrasion of the cuff on large hard laundry items and their metal accessories (sneakers, baseball caps, etc.).
Damage to cuff edges due to rough loading/removal of laundry items.
2. Removing the cuff
Almost all front loading CMA cuffs can be changed from the front without dismantling the washing machine. True, this requires some skill and patience. When starting a replacement, make sure that the new cuff is identical to the one being replaced.
Removing the front clamp
The outer edge of the cuff is recessed into the groove of the front wall with a curved part and is held there with a plastic or wire clamp. The wire clamp is tensioned with a screw, spring and hooks, the plastic one is fixed and tensioned with latches. The plastic clamp is removed by pulling the place where the latches are joined with force. The wire clamp can be removed by unscrewing the screw, or gently prying the spring with a flat screwdriver.
Remove the second (inner) clamp
Before removing the inner collar, you need to find the alignment mark on the cuff. The label determines the strict position of the cuff relative to the tank, which ensures proper draining and tightness. If the label is not found, you need to mark with a marker the location of the old cuff relative to the tank. This will come in handy when installing a new cuff.
3.Preparing to install the cuff
Thoroughly clean the mounting edges of the tank from dirt and deposits, generously lubricate them with soapy water. The slippery surface of the lip will facilitate the installation of a new cuff.
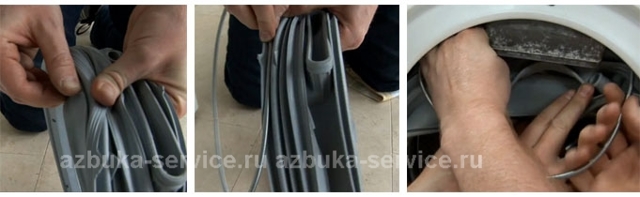
4. Installing the cuff
Pulling the cuff on the edges of the tank is the most important operation that requires some skill and effort. First you need to combine the alignment marks of the tank and cuff.


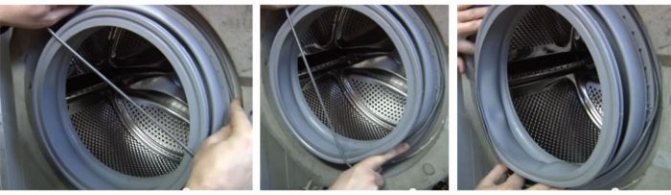


Our task is to pull a curly recess in the cuff onto the edge of the tank. We take the cuff from the inside and put it in a circle with two thumbs. On the lubricated edge, the cuff fits easily. When most of the cuff is put on, a situation will arise when further advancement becomes difficult due to slipping of the already put on part.
If you've ever installed a drive belt, you'll quickly know which direction to go. In our case, the remaining area must be planted, walking with two thumbs towards each other. Did you manage? Now run your fingers along the entire perimeter of the ring, checking the fit of the cuff to the edge of the tank.
How to put on the inner collar
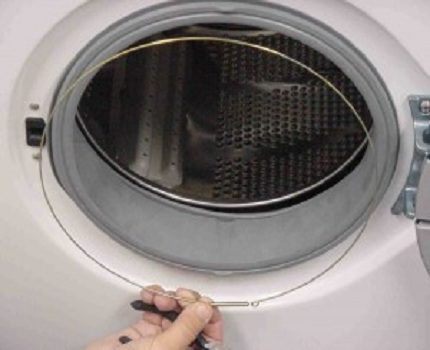
If the clamp has an adjusting screw, unscrew it to the required diameter of the clamp, put the clamp in place and tighten it by tightening the screw. The situation is more complicated if the spring-type clamp
It is important here that the clamp is fixed at the starting point of tension. To fix the spring clamp, we use a screwdriver, which must be threaded all the way into the hatch blocking hole
Putting the spring on the screwdriver, stretch it and put it on in a circle, gradually pushing it inward to the seat.
When about 2/3 of the spring is in place, it becomes difficult to hold the spring due to the change in tension angle. You will have to show skill and a little patience.
On older CMA models, the tension of the clamps is carried out only with the help of special round-nose pliers, since their clamps do not have adjusting screws and springs.
Installing the front (outer) clamp
After installing the inner clamp, this task is simple, since the installation site is open for manipulation. Only clamps that do not have tensioners in the form of a screw and a spring will require special L-shaped round-nose pliers. Round-nose pliers open and close the mounting spring hooks at the ends of the clamp.
Checking the work
Such labor-intensive work needs to be carefully checked. We start the CMA in the rinse mode, after 2-3 minutes we drain the water. At the end of the drain, we tilt the washing machine back and inspect the cuff from below (shine with a flashlight) for fresh traces of leaks. They shouldn't be.
Ask a question to the master - get advice on repairing a washing machine with your own hands!
Do-it-yourself washing machine repair - more than 50 detailed PHOTO INSTRUCTIONS for self-repair.
Rules for choosing a new cuff
In order for the cuff to be connected correctly and reliably, it is not enough just to buy and install it: you need the right approach to choosing a device
In this case, it is worth taking into account several parameters at once:
- first you need to determine the diametrical section of the pipe - outside and inside, so that the seal fits well to the walls;
- you should buy the product in which the elastic band is as dense as possible so that it tightly wraps around the nozzle, only with this approach can a reliable fixation be ensured, especially in the conditions of draining water and squeezing things.
If the cuff is bought separately from the tee (and they are usually sold as a set), you will need to be guided by similar rules. The main thing is that there are no cracks and holes in the product. Experienced plumbers say that it is worth buying a product that is made from modern alloys, because. they last a long time and are reliable.
After the purchase, a competent installation of the cuff will be required. The procedure for this is as follows:
- you need to insert the tee into the connector area, the rubber for sealing is not removed;
- after that, the device is securely fixed, and the cuff itself is installed in the hose connector;
- subsequently, a drain hose is threaded into it.
After that, the installation process is considered complete. If the cuff is installed in the tee itself, the seal is fixed on the sewer pipe. After that, the hose itself is inserted. So, the purchase is optional, but highly recommended. And since the device itself is inexpensive, saving on it is unacceptable.


