- Installation of a summer shower with heating
- Foundation laying
- cabin construction
- Tank installation
- Finishing
- "Pie" of 8 layers
- Location selection
- Frame erection
- Building a shower in the country: a photo report
- We build a summer shower
- 7. Country shower from corrugated board
- Do-it-yourself water tank for a summer shower (with photo)
- Size and design
- Do-it-yourself summer showers for giving: we take into account everything
- The right place for an outdoor shower
- Design options
- Tips
- How to make a summer shower with a toilet: the nuances of construction
- Preparation for construction
- Choice of frame material
- Wood
- Rolled metal
- Calculation of the dimensions of the shower
- Choosing a waste disposal method
Installation of a summer shower with heating
Foundation laying
First you need to decide on the type of future soul. The construction of a light frame structure will not be difficult. First, about 15-20 cm of soil is removed from the intended area, leveled and sprinkled with sand. For the construction of a capital structure, you will need to go deep to half a meter. Foundation laying includes the following steps:
- Carrying out the marking of the territory. Stakes are hammered in the corners, a rope is pulled between the threads;
- Digging a hole. Depending on the type of building to a depth of 15-50 cm;
- Conducting trenches for laying pipes or gutters for the outflow of water to the drain pit.
- Installation of pipes and gutters (do not forget to arrange a slope).
- At the end, if necessary, concrete work is carried out.
If the summer shower frame will consist of natural wood, it is desirable to treat it with special water-repellent impregnations, drying oil or paint. In addition, it is desirable to raise the structure by 20-30 cm from ground level. To do this, you can use a columnar foundation.
cabin construction
This stage is largely determined by the type of structure. For the construction of a frame-type structure, first of all, it will be necessary to lay the support posts, they must be as strong as possible, since they must withstand the weight of the filled storage tank. For the manufacture of supports can be used:
- A bar with a cross section of at least 100 × 100 mm;
- Aluminum profile;
- Metal poles.
If you plan to use a timber, it should first be treated with a water-repellent agent, the lower part, which will be in the ground, with bituminous mastic. The use of an aluminum profile is the most common option, it is a lightweight durable material, the installation of such a frame is not difficult.
Supports are mounted in the corners, as well as every one and a half meters. They are installed in pre-made holes (it is convenient to use a garden drill for this) with a depth of 60-80 cm and a size slightly larger than the racks themselves. If it is planned to equip the door, two supports are located from each other at a distance equal to its width. Attached to them is a door frame. After you can install the horizontal jumpers of the frame, they must be in the lower and upper parts of the structure.
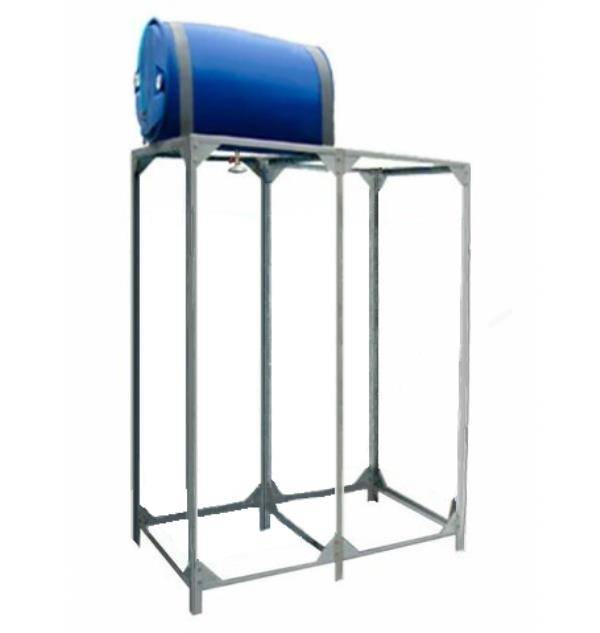
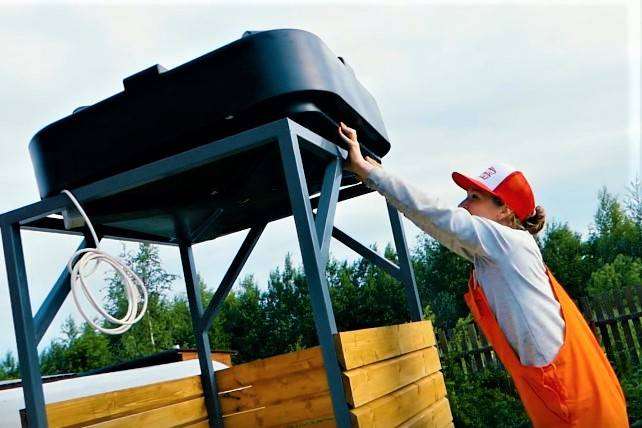
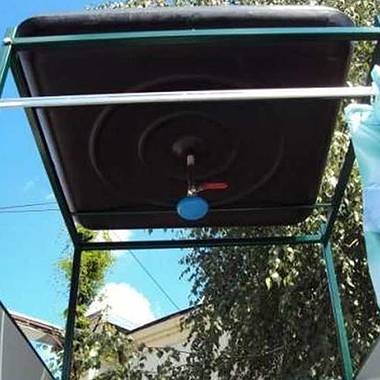
Tank installation
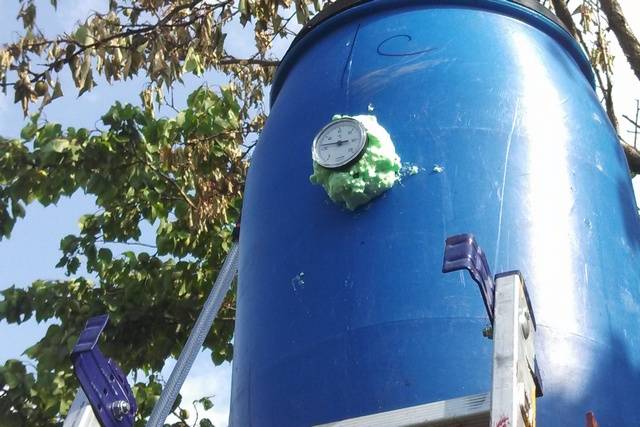
In order for the water in the tank to be heated from solar heat as efficiently as possible, it is advised to paint the container black. In addition, since the heating element can quickly become unusable from operation without water, its level must be controlled. To do this, a plumbing valve is installed on the tank. The tank can be installed on a prepared roof, on special holders or directly on a profile, in which case the frame must be exactly adjusted to the size of the tank. Water is being poured, a heating element is connected and a trial run of the system is being carried out.
Finishing
As a material for wall decoration can be used:
- Polycarbonate;
- Metal profiled sheet;
- Flat slate;
- Lining;
- Film;
- Wood;
- Moisture resistant plywood;
- Brick.
The most commonly used metal galvanized profiled sheet or polycarbonate. These are lightweight durable materials that are not afraid of any impact. Such a summer shower will be easy to install and unpretentious to use. Wood and wooden lining look very aesthetically pleasing, however, they require treatment with water-repellent agents. Racks can simply be covered with a moisture-resistant material, for example, with a dense plastic film. This option is suitable for the warm season.
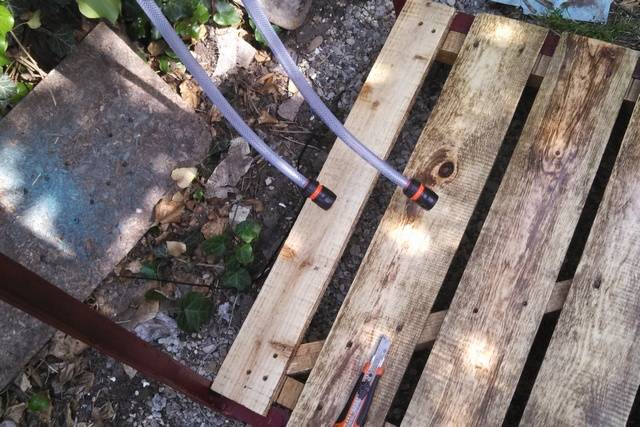
It is necessary to organize the floor of the cabin, it can be made of wood, in this case the usual flooring is mounted, however, in cold weather there will be an unpleasant feeling of a draft. Another option is a concrete floor, in which case a screed is installed, and a wooden grate with a rubber mat is placed on top of it. The third option is to use a ready-made pallet (most often these are models with a low steel bowl). In the latter case, do not forget to install a drain hose.The pallet can be attached using ordinary mounting foam.
If you plan to use the shower in cool weather, the walls should be additionally insulated, for this you can use polystyrene sheets. Do not forget about the organization of ventilation, for this, a gap is left in the upper part so that the air circulates freely.
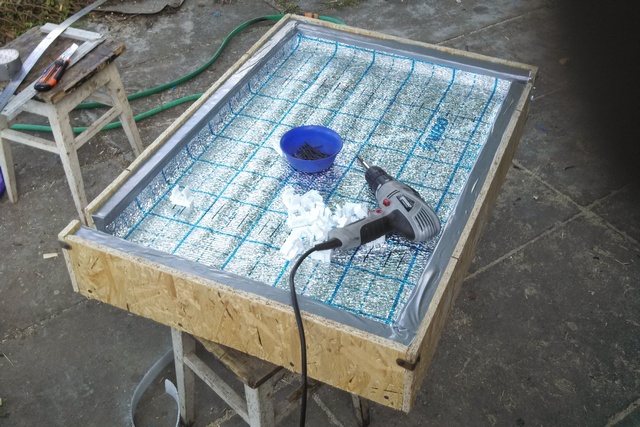
"Pie" of 8 layers
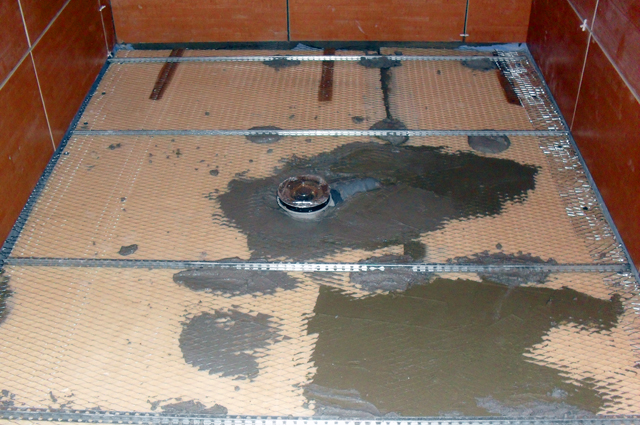
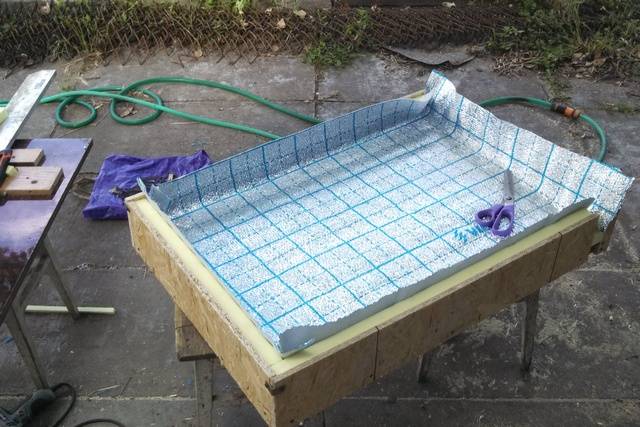
I leveled the surface of the slab at the base of the future shower tray by filling it with a self-leveling floor compound, after which I fixed sheets of insulation on it with tile glue - extruded polystyrene foam. The thickness of all layers was selected in accordance with the design of the drain: its grate should eventually be 1-2 mm below the surface of the pallet.
I finally leveled the drain of the shower tray and laid a plaster mesh over the insulation, fixing it with self-tapping screws. I installed beacons and poured a cement screed (photo 2). After gaining strength with cement (after 3 days at a temperature of +20 ° C), I once again smeared all the corners and joints of the planes with fiber rubber for additional waterproofing, and after it dried, I puttyed it with tile adhesive. At the exit of the shower cabin, I put a water barrier made of sand-lime bricks and plastered it with moisture-resistant cement plaster over the reinforcing mesh.
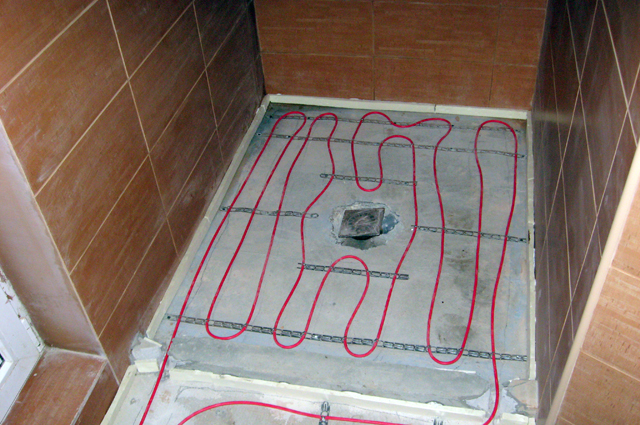
To make the shower really comfortable and the water splashes dry out faster, I decided to make a heated pan. To do this, on top of its surface and over the entire area of \u200b\u200bthe bathroom, I laid (photo 3) according to the scheme an electric cable for a heated floor (its total power turned out to be about 1.5 kW) and filled it with a rough self-leveling mixture (3). It is better to use a special leveling agent for heated floors - it has a high heat capacity and is less susceptible to thermal expansion.
Location selection
The location of the shower should be chosen carefully. It is selected taking into account the location of the sunny side: it is preferable that the shower is well lit by the sun, because this way the water in the tank will heat up faster. Shady areas under buildings and trees should also be avoided. They are also guided by their own preferences: for installation, you can choose the garden part of the allotment or the area around the pool or at home. The area under and around the cab must be perfectly level. Next to it, there must be a place for water discharge. Otherwise, complex wiring will be required. The shower cabin is ideally located close to the main building. To choose the right place, you will need to inspect the entire territory. It is necessary to take into account all the features of the construction and decide what kind of base will be needed for the cabin.
Frame erection
On the piles of the foundation, grillage beams should be laid, which at the same time will play the role of the lower strapping. Further, with the help of corners and self-tapping screws, racks are attached to them, the upper ends of which are connected by beams of the upper trim.
If the frame is assembled from wood, all elements must be treated twice with a water-polymer composition, then with biocides. The last stage of preparation is the treatment of wood with hot bitumen.
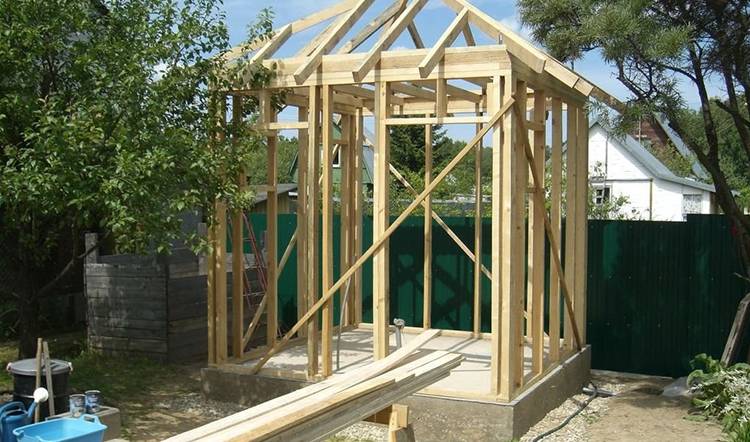
Wooden frame
It should be borne in mind that even with such precautions, high humidity will soon lead to the appearance of a fungus on the wood. To delay this moment, a wooden shower should be raised above the ground by 200 - 250 mm. The frame is sheathed with moisture-resistant plywood or plastic, then the walls are glued with foam, on top of which colored polycarbonate is fixed
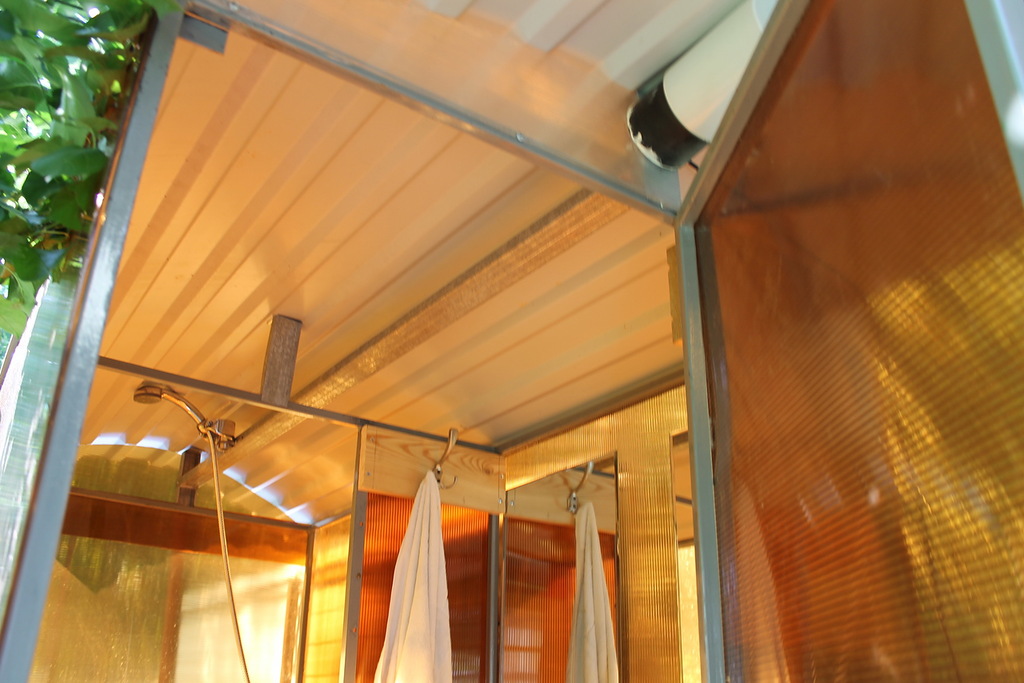
In the upper part of one of the walls in the dressing room and shower room there should be an opening covered with a transparent material
The frame is sheathed with moisture-resistant plywood or plastic, then the walls are pasted over with foam, on top of which colored polycarbonate is fixed. In the upper part of one of the walls in the dressing room and shower room there should be an opening covered with a transparent material.
It would be better if such a window opens in the shower cabin - this will make it possible to quickly dry it after water procedures.
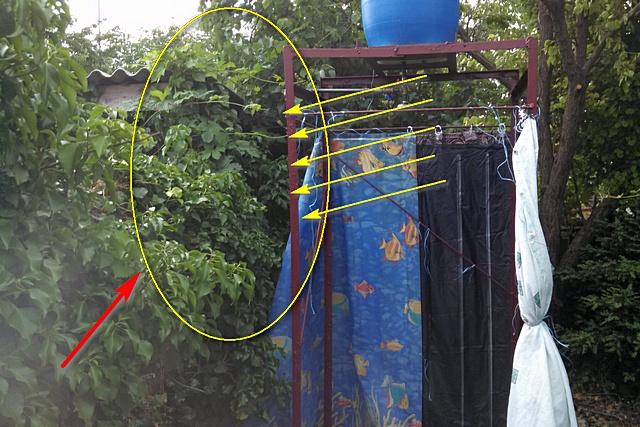
Building a shower in the country: a photo report
It was decided to use a fence at the far end of the site as one of the walls of the shower. It was decided to do a shower with a locker room - it's much more convenient.
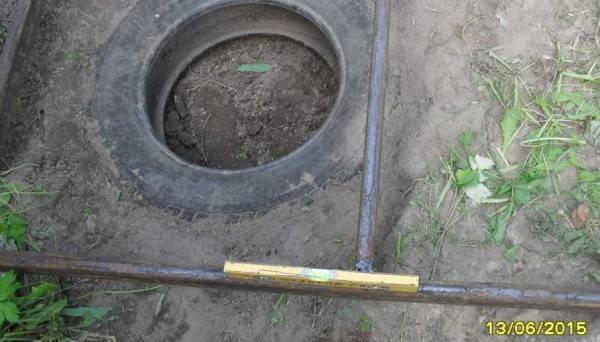
The soils are sandy, the water drains very quickly, so only one tire was buried for draining. Shower tests have shown that no more is needed. Much more water was poured than in my barrel, but no puddles were observed.
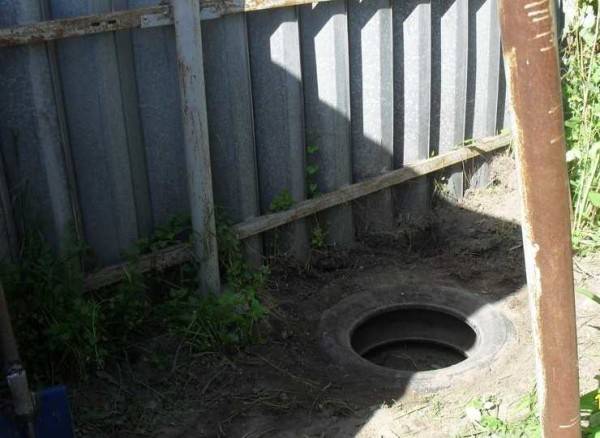
One tire was buried for draining
Three more were added to the existing pole (from the fence). We used a round pipe (it has been lying in a barn for a long time). Holes 70-80 cm deep were dug under the pillars. Pillars were installed in them, covered with rubble. The rubble was rammed and filled with concrete.


![[instruction] do-it-yourself shower in the country: dimensions and drawings](https://fix.housecope.com/wp-content/uploads/b/3/5/b35a2331e801ad1ce582731787dd175a.jpg)

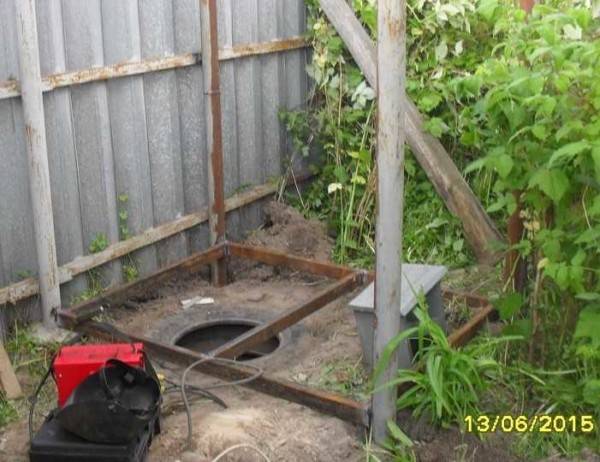
Three pillars buried
Then the frame was welded. A rectangular pipe 60 * 30 mm was used. It's a bit too much for this design, but they used what was: the remains of the construction of the fence.
During welding, the level was maintained
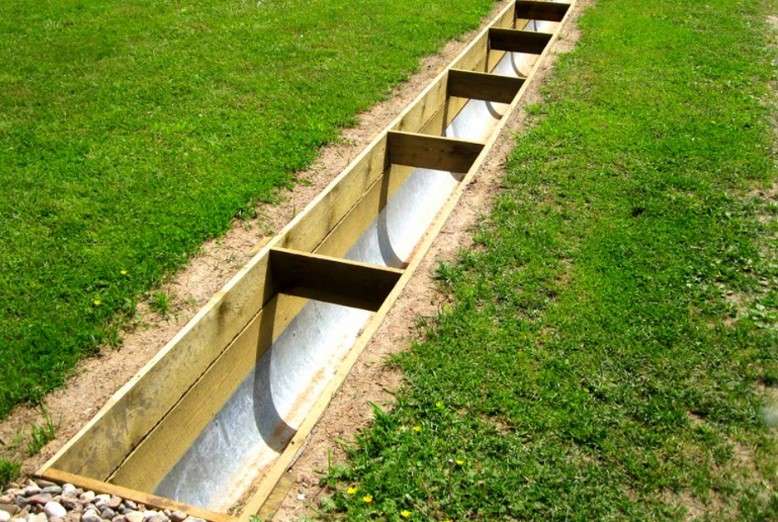
Having welded the floor frame, and having indicated its level, they formed a drain. They reported the missing height with a brick (battle, remnants). Everything was filled with concrete, forming a drain into the tire.
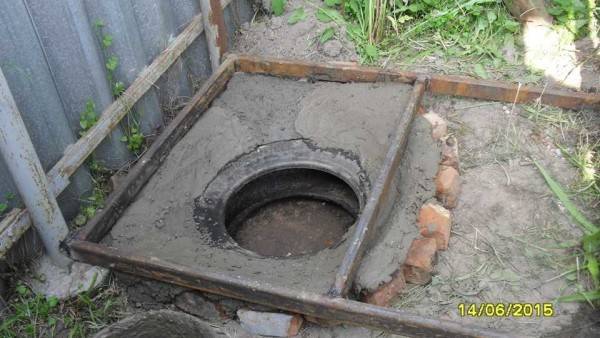
Runoff formation
Leveled the floor and in the second half, left to set.Started working on wood. Purchased aspen board. She was first treated with a skin fixed on a grinder. After impregnated with a protective composition.
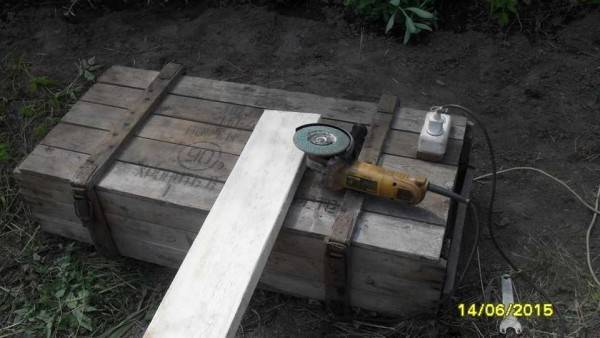
Board sanding
Impregnation
While the impregnation dries, we continue to cook the metal frame for the shower. The middle piping was welded from the same profile pipes. Then it was used as a scaffold for working at height. Already dried boards were placed on the strapping pipes. From this pedestal, the upper harness was cooked.
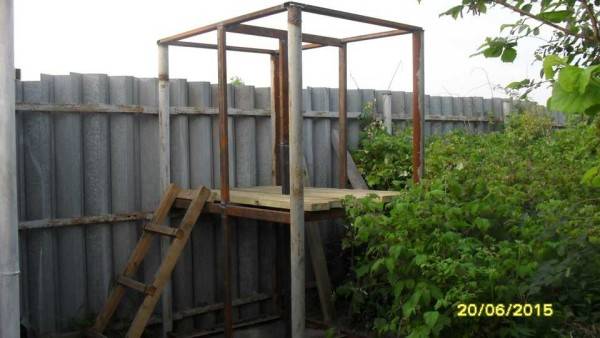
The middle harness was used to weld the top
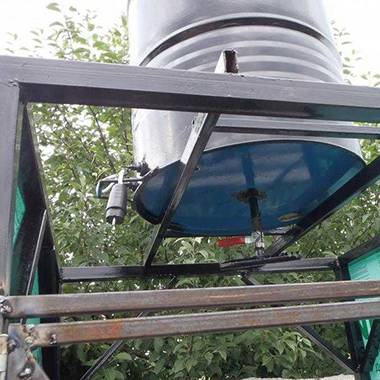
The frame is almost ready. It remains to weld the frame under the barrel at the top.
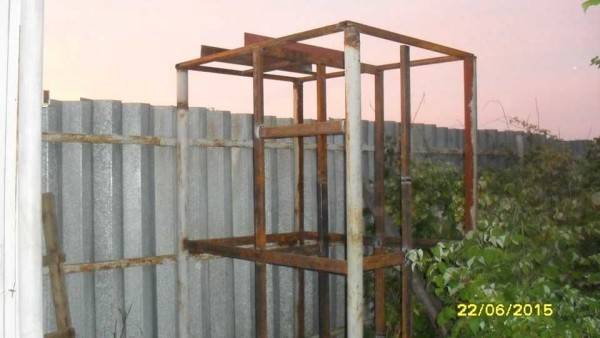
Finished shower frame
Above the shower area, a reinforcement of the upper strapping in the middle was added. Two corners are also welded on. The thickness of the metal is about 6 mm, the width of the shelf is 8 cm. The distance between them is less than the diameter: so that the barrel rests sideways on them.
The metal used is old, so it's covered in rust. She cleaned herself with a grinder Then the frame of the soul three times painted with rust paint. It was chosen in blue, as it was planned to sheathe the shower with blue polycarbonate.
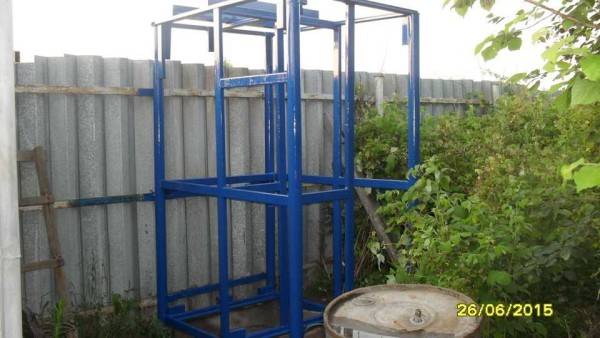
Rust painted blue
Polycarbonate was mounted on self-tapping screws. During installation, neither special nor ordinary washers were used. This is a violation of technology, which can lead to the fact that in sunny weather it will crack. This material has a large thermal expansion, which is enhanced, since in this case it is fixed on a metal frame.
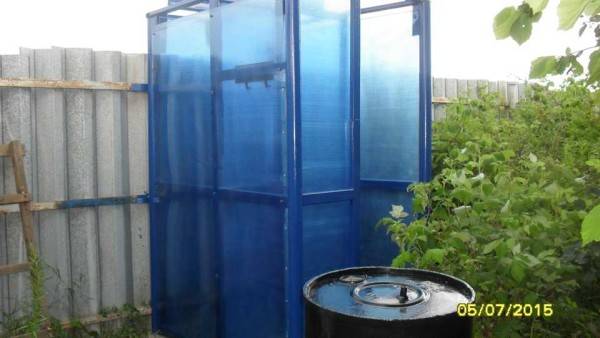
Mounted polycarbonate
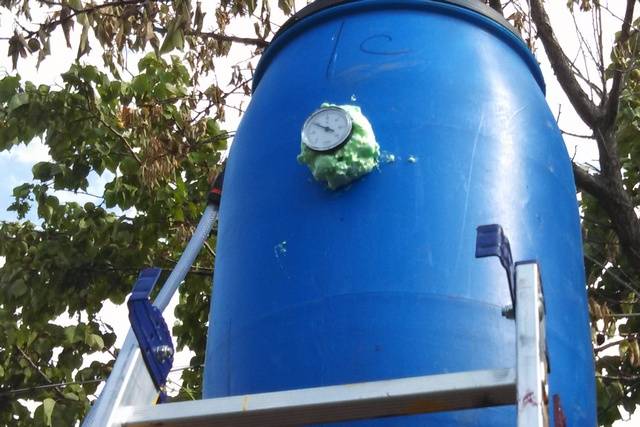
The barrel in the barn has been washed. Pipes are welded to it. One is for filling water, the second is for connecting a watering can. After that, the barrel was painted black.
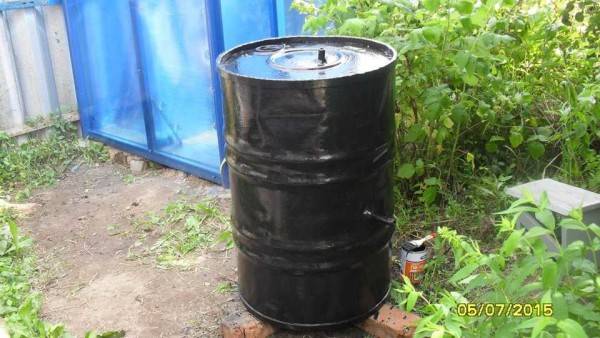
Barrel painted black for faster water heating
We build a summer shower
Getting down to practical advice, let's try to build a simple, but aesthetically beautiful and comfortable outdoor wooden outdoor shower for summer cottages, with a minimum consumption of materials.
It's nice to cool off with a cool shower on a summer evening.
Do-it-yourself summer shower is not only an oasis in the hot heat, but also a flight of your imagination
Let's cook:
- boards and slats
- shower set (faucet, curved tube, bracket, adapter and nozzle)
Climbing plants can be great walls for a do-it-yourself summer shower
- garden hose
- self-tapping screws
- fasteners
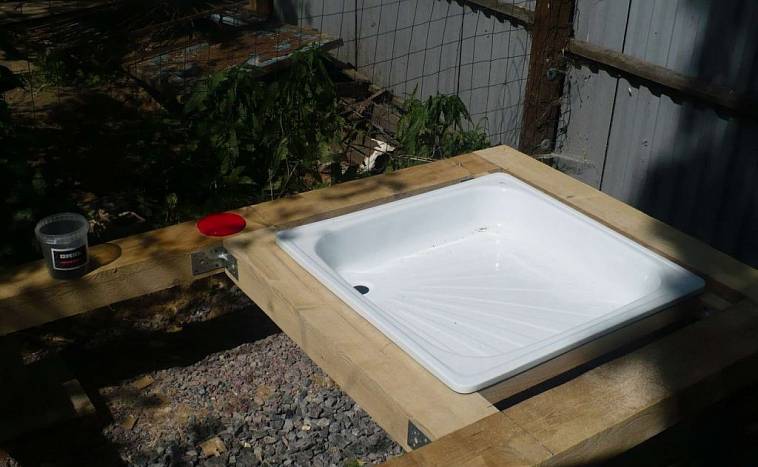
Outdoor shower with tub
Boards for the floor of a summer shower must be treated with special means
The figure shows the dimensions of each part of the shower.
Rice. one
Rice. 2
The next step is to assemble the pallet. Since the pallet is round, we need a drawing.


![[instruction] do-it-yourself shower in the country: dimensions and drawings](https://fix.housecope.com/wp-content/uploads/d/c/b/dcb73ca66943f845ba8e7b0a45af6e10.jpg)


Rice. 3
We assemble the structure in three stages:
From four boards we make an inner square.
Rice. four
We draw a circle on them.
Rice. 5
We saw off the parts of the boards that go beyond the circle with a jigsaw.
Stylish outdoor shower
Wooden shower cabin - a beautiful and durable option
We impose a second layer of boards diagonally to the first, draw a circle on them and saw off the excess parts.
Rice. 6
We put a mount for the shower support. We attach one part to the first layer of boards, the other to the second. We have a gap where we will insert the shower rack.
Rice. 7
We tighten both layers with self-tapping screws.
Rice. eight
Installing the support.
Rice. 9
We complete the pallet finishing by laying the top layer of slats. We repeat the operation with drawing a circle and sawing off excess parts.
Rice. ten
- We fix the pipe to the rack with a bracket.
- We mount the remaining parts of the shower set on the support. We fasten the atomizer to the top of the tube.In the lower part we fix the mixer and the adapter. Connect a garden hose to the adapter.
Summer shower with beautiful tiles and plant decor
Summer shower with a decorative path to the house
Summer shower with hydromassage
For adherents of solid buildings, we offer to build a capital summer shower. Let's prepare the tools:
- hacksaw
- a hammer
If you do not have the opportunity to build a summer shower for a summer residence with your own hands, then a portable summer shower with a bottom water supply will be the way out of the situation.
- level
- drill
- Bulgarian
Summer shower at the entrance to the house
- concrete mixer (tank for mixing cement mortar)
- shovel
- Master OK
Outdoor shower with decorative stone floor
The design of such a shower room will not only allow you to freshen up on a hot summer day, but also bring aesthetic pleasure.
Construction begins with the preparation of a pit for the foundation. We dig it according to predetermined sizes. Carefully align the walls and bottom of the pit.


We expose the formwork with a margin on the walls of the shower cabin. Mix and pour the solution. We wait until it is completely dry, and proceed to the construction of the shower walls.
An outdoor shower is one of the essential additions to a suburban area.
We mark the masonry, lay out three walls in half a brick, using a level and a plumb line.
When laying the walls, do not forget to leave a ventilation hole at the bottom of the shower and a niche for a small window closer to the ceilings.
Summer shower near the wall of the house with water from the public water supply
We lay floor bars along the upper row of bricks and securely immure them.
We close the floors with a layer of waterproofing material and slate, having previously made a hole in it for the pipe.
Summer shower made of wood in a modern style
An outdoor shower is one of the household facilities necessary for a comfortable pastime in a suburban area.
Let's start finishing work. The ceiling and walls can be plastered and tiled, you can use plastic fastening to a metal frame.
We run a drain pipe along the bottom. We make a frame from a metal profile or wooden bars. We lay out the bottom with wooden slats or plastic tiles.
We insert the door frame into the open wall of the shower, fasten it to the bolts, fill it with mounting foam and hang the door.
Shower panel stone wall decoration - a versatile option
Now you have an accurate idea of how to build a summer shower for a summer residence and what is needed for this. You do not have to follow our exact instructions, you can paint the shower, use other finishing materials. For an open version, you can install a frame with a curtain, and in the capital model you can do without a door, replacing it with a sliding wooden or plastic curtain.
A do-it-yourself summer shower will become an indispensable outbuilding on a personal plot
We offer you to watch interesting ideas for a summer shower in this video:
7. Country shower from corrugated board
Another good material for covering a summer shower is corrugated board. This material is characterized by high strength and durability combined with lightness. It is windproof. And when its walls heat up throughout the day, it will be comfortable to take a shower in it. Both wooden beams and metal profiles can be used as a frame. Metal, of course, is more durable. Therefore, if you still need to purchase materials, give preference to it.
The manufacture of the frame is similar to the examples from points 5 and 6.The only difference is that more crossbeams need to be added. This is necessary to securely fix the sheets and give the structure rigidity, since the corrugated board itself is considered a soft material. Fasten sheets with self-tapping screws. Be sure to use spacers to avoid damaging the sheet. You can cut the corrugated board with scissors for metal or using a grinder and a disk with teeth. Other circles are not recommended. During cutting, the polymer coating can burn through, which protects the coating from corrosion. The roof is also covered with corrugated board, and the tank is located under it. The gap between the walls and the tank will provide natural ventilation in the cabin and prevent the formation of mold and unpleasant odors. An unheated tank can be placed on top of the frame. Then the need to build a roof is eliminated.
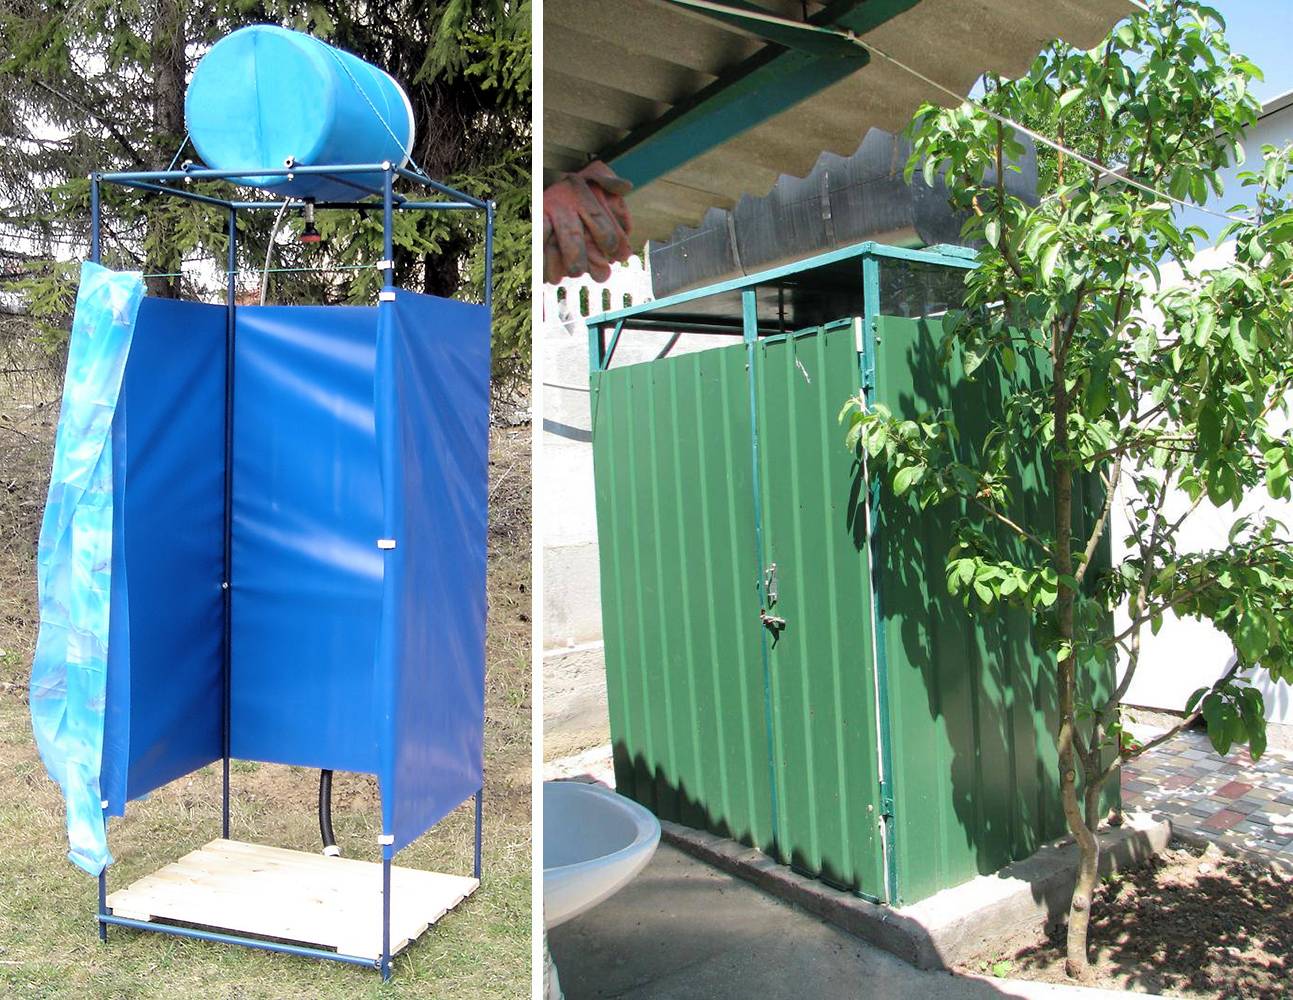
Do-it-yourself water tank for a summer shower (with photo)
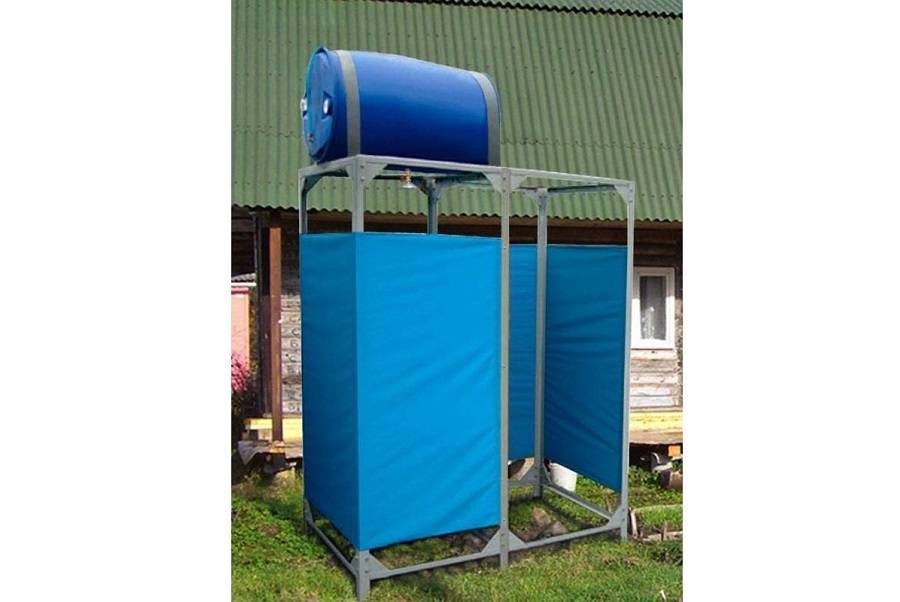
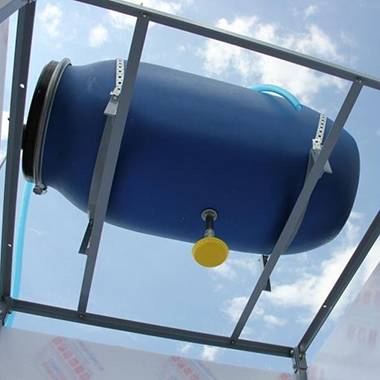
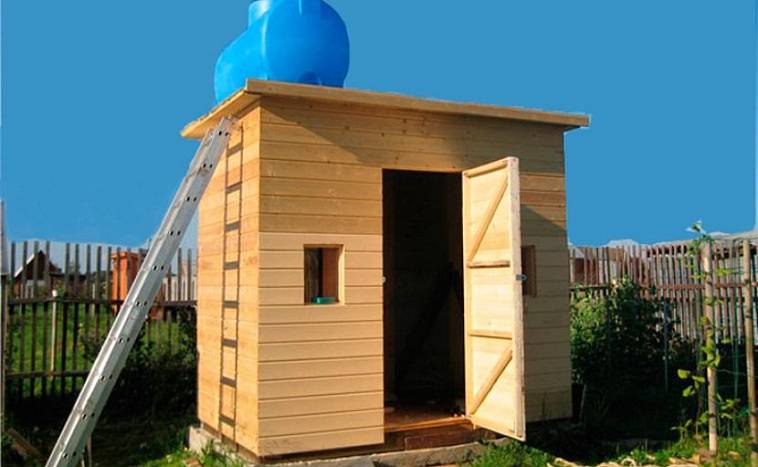
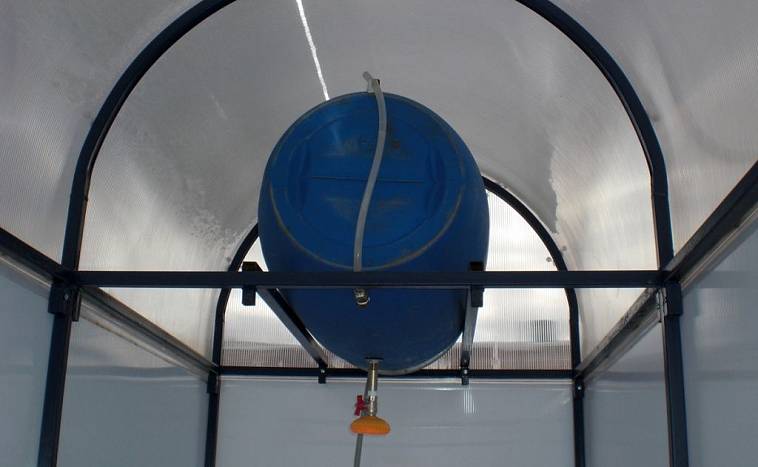
An important detail of a do-it-yourself summer shower is a water tank that is installed on its roof. A tube with a tap and a shower horn is diverted from the tank. If there is running water, water can be filled into the tank using a rubber hose, one end of which must be connected to a water tap. In the absence of water supply, a pump can be used. In order to control the volume of water in the tank and shut off its supply when the tank is full, it is necessary to set the water measurement level or a plumbing valve.
The roof of the shower cubicle should be flat, with a very strong frame that can support the weight of a full tank of 200 liters. If there are a lot of people who want to take a shower, you can install two tanks on the roof of the structure.But in this case, the frame should be made of stronger beams and have stronger connections, and the drain device should be 1.5-2 times wider.
See what it looks like tank for summer a soul built by one's own hands, in this photo:
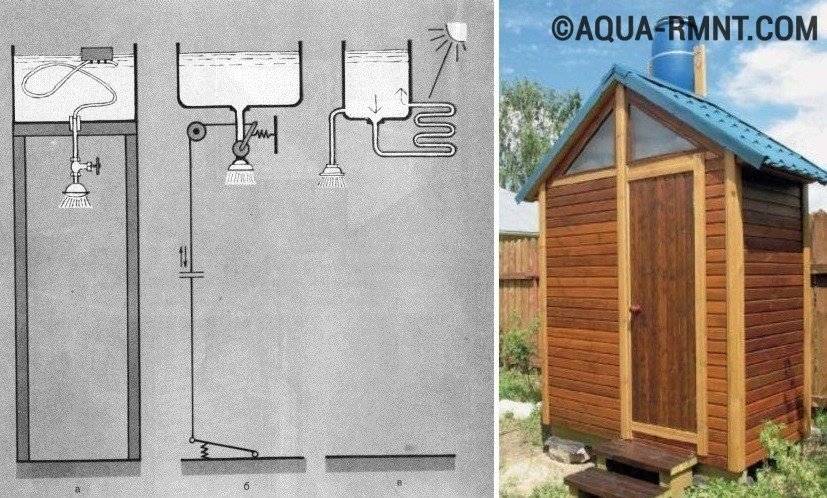
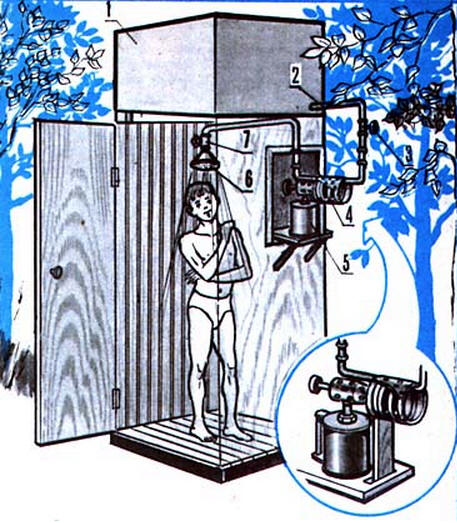
Usually in summer showers, the water is heated naturally by sunlight, but an electric water heater can be installed. This will require a special power supply. True, if the shower is attached to some building that already has electricity, it will not take much time and the shower can be used in any weather.
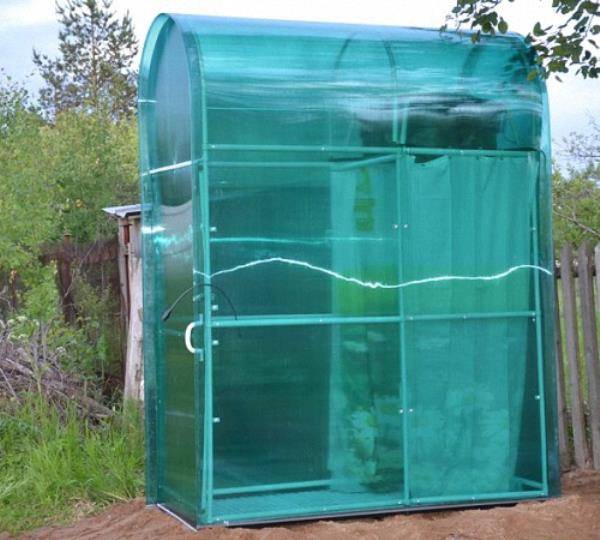
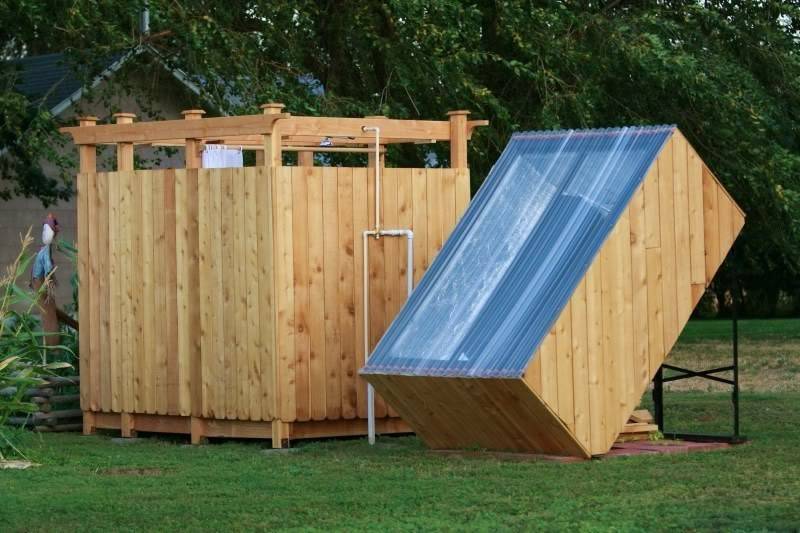
However, solar energy will allow heating water to the full without additional costs, however, only in sunny weather. In order for the water to not cool for a long time, there are different ways. For example, a tank or barrel of water can be covered with a self-made "greenhouse" made of polycarbonate or in the form of a frame made of wooden beams with a stretched plastic film. This will protect the tank or barrel from cooling in the wind and increase the water temperature by 5-10 °C. The north side of this so-called greenhouse should be covered with foil, creating a mirror effect, which will increase the water temperature by another 5-10 ° C.
The water in the tank will heat up faster in the sun if it is painted dark on the outside. The use of water only from the upper, already warmed by the sun layer will allow the device in the barrel of the float-intake. For economical consumption of heated water, the shower can be equipped with a faucet driven by a foot pedal. To do this, a fishing line is pulled from the pedal, which is thrown over the block and attached to the tap with an opening angle of 90 ° and to the release spring.You can also equip the tank with a curved tube through which water will circulate and warm up evenly.
All these simple additional design elements of the tank and water supply make it possible to use water heated by the sun more economically and rationally.
Watch a video on how to build a summer shower with your own hands, which shows all the main stages of this work:


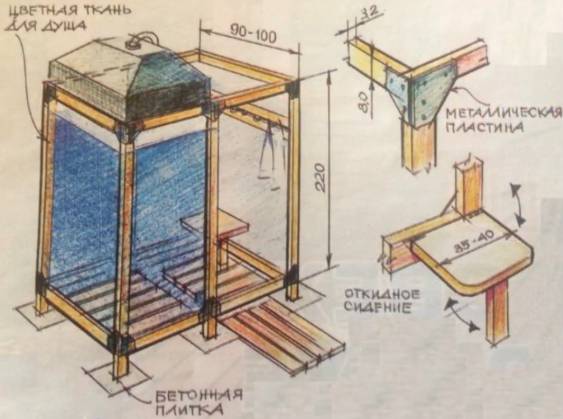
Size and design
Before starting construction of the object, you will need to draw a drawing. It is better to make a cabin roomy, at least 1.5 × 1.5 m. Its minimum allowable size is 1 × 1 m. It is necessary to provide for a locker room, 1.5 × 0.6 m is enough for this. construction, including the width of the timber and boards. Pipes are installed in the corners. The upper part of the structure is easier to assemble on the ground, and then attach to the side bars. All axes must match. For the final design, strength and reliable fastening are important, you need to take into account the load from a 150-200-liter tank. Between the pillars make mowing. They should be placed in the thickness of the wall. For the floor, it is preferable to install a pallet, a large selection of which is available in hardware stores. It is placed on a raised sand and gravel platform. There are gaps in the floor for drainage. Given these nuances, the foundation should have a height of 20-30 cm. If there is no such foundation, the water will eventually make a deepening.

Do-it-yourself summer showers for giving: we take into account everything
Before you start building a garden shower for your summer cottage on your own, you need to think it over carefully, plan thoroughly and design it correctly, find the right place to build it, and also purchase and bring all the necessary materials and equipment for construction.The construction you have built should be spacious enough, but not too large, strong, reliable and durable, if you really decide to use it for more than one year, and this is quite realistic.
Need to know
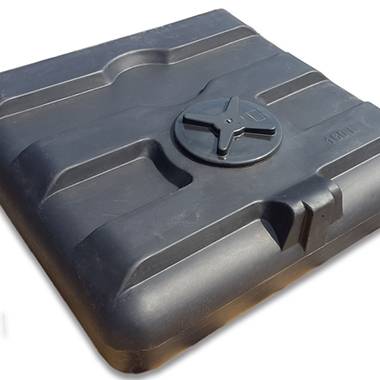
For those who vaguely imagine how to build a shower in the country with their own hands, and indeed do not have any applied skills in working with tools, there is a great way out - purchasing a portable compact design, which is an elastic water tank and a watering can, which can be attach anywhere, even on a tree, and wash in field conditions.
Buying a compact outdoor shower in a store is as easy as shelling pears and at first it will come down to extreme conditions. However, you need to draw already heated water into it or wash yourself with cold, which is not always and not suitable for everyone, because even in summer there is bad weather and rather low temperatures.
Yes, and you need to store such a collapsible tank carefully and carefully, it can be easily damaged by sharp objects and even crack from adverse conditions. Therefore, it is worth considering building a more reliable heated garden shower in order to provide yourself with maximum comfort on vacation.
The right place for an outdoor shower
Of great importance is the place where you are going to place a shower cabin for a summer residence, since dirty water needs to be provided with a quality drain. If the basic rules are not followed, you can eventually find many negative consequences, which is completely undesirable. A few simple rules that must be observed, you just need to learn and not deviate a single step from them.
- If your suburban area does not provide or have no sewerage, and you are not going to do a septic tank and / or proper drain, the shower must be placed no closer than fifteen meters from the house. The thing is that uncontrolled flows of water over time can erode the foundation and the consequences can be monstrous, up to the destruction of the structure.
- If there is a sewerage system or a special drain device, the shower can be placed even at the very wall of the building.
- Always choose a level area for a garden type shower that is on a slightly elevated area. If you put it in a lowland or, even more so, in a pit, then the water will not drain well, and the materials of manufacture will become moldy, succumb to corrosion and rot.
- Choose a site that is not obscured by trees or buildings, so you will get additional benefits and savings. In the summer, when the sun bakes with incredible force, it will not even be possible to turn on the heating elements in the tank, the water will heat up by itself.
It is also not very good to place a shower room too far from the country house, because after pleasant water procedures you will have to run through the entire area to get into the house. When it's warm, it's not scary, but in rainy weather and temperatures below 18-20 degrees, it will be, to put it mildly, not very pleasant.
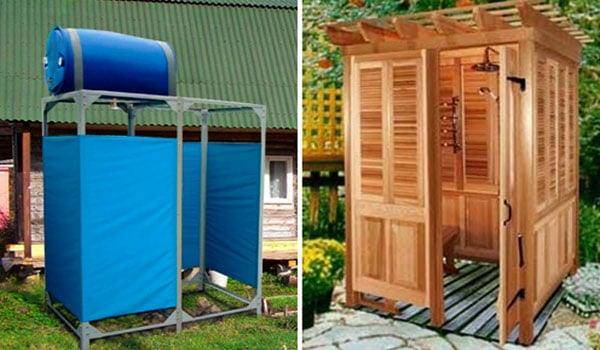
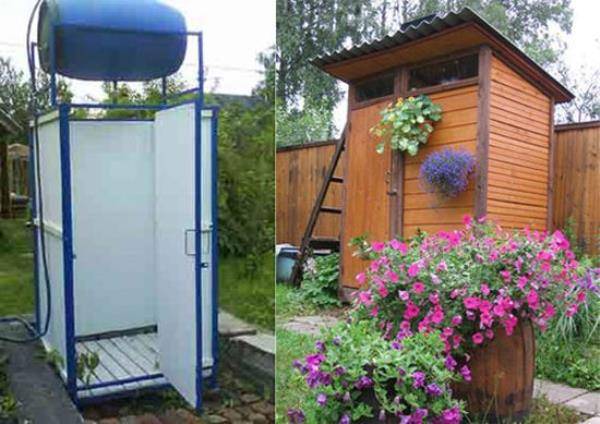
Design options

The second important factor that will have to be dealt with in detail and thoroughly before making a summer shower yourself in the country is its design features. Depending on what you want to receive and what requirements you have for the shower room, you will need to choose the design carefully and thoughtfully.
- The simplest, as we have already mentioned, are compact portable showers, which are a reservoir and a watering can.
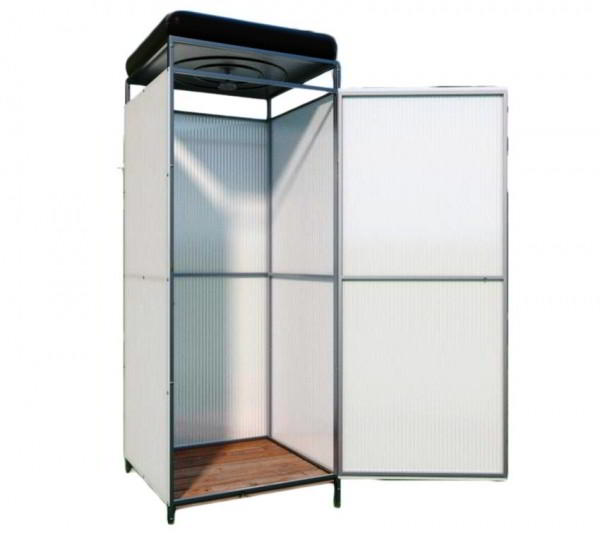
- A more complex design is a small booth made from improvised materials, for example, a tarpaulin stretched over a metal or wooden frame, with a tank brought out, which can be heated in the sun. Tanks are mainly used plastic and metal.
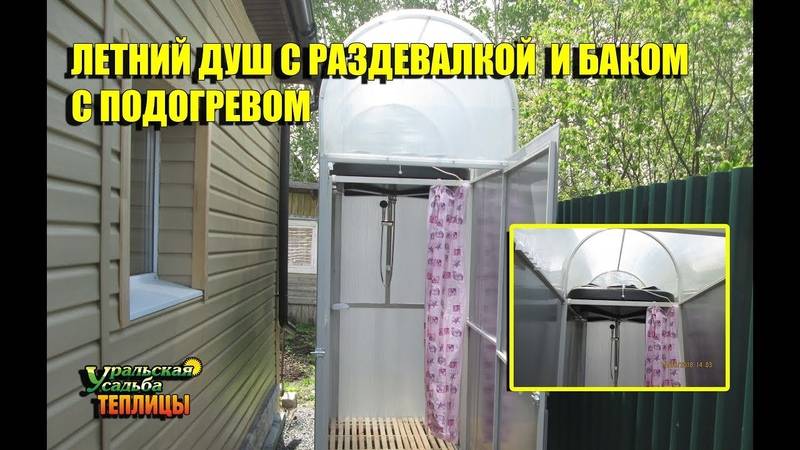
- Best of all, this is a shower cabin for giving, in which the main walls are made and a heated tank is provided, which today can be easily purchased at the store. You can wash in such a shower in any weather, and even in early spring and late autumn, since the water temperature will not depend on the weather.
They build such stationary structures, which are indicated in the last paragraph, from brick, wood, metal and even plastic plates, they are insulated, which allows you to take water procedures even in winter. The power supply can be brought on a permanent basis, but you can simply use a household carrier.
Tips
Recently, most owners of summer cottages prefer to install an outdoor shower on their own, since such a process is not particularly difficult. But in order for the design to turn out to be durable and convenient, you need to know how to do the installation correctly.
For beginners, the following tips can help.
- Before building a shower, you need to choose a place to install the structure. It should harmoniously fit into the overall design and be placed where there are no drafts.
- A drain pit should be made based on the volume of the tank, it should be 2.5 times larger than it.
- Do not install septic materials and drainage directly under the cabin, this must be done next to it, otherwise it will not be possible to avoid the penetration of an unpleasant odor.
- Covering the drain is best done with waterproofing materials.
- During the construction of the structure, it is not recommended to use clay, as it quickly gets wet and washed out, as a result of which the drainage system may become clogged.
- You can improve the flow of water by installing a shower cabin on an elevated place.
- The design should be comfortable for swimming and have free space, so its height should not be less than 3 m. In addition, 1 sq. m needs to be allocated for the locker room. The optimal width for a shower stall is 190 cm.
- The base and frame of the structure must be made strong and reliable, they must withstand heavy loads, since a water tank will be installed on top.

- The outer skin of a summer shower can be made with various building materials, but it is best to give preference to slate sheets, fiberboard, polycarbonate, moisture-resistant plywood or lining. At the same time, the finishing material should not only be reliable in operation, but harmoniously fit into the landscape design of the site. Therefore, if necessary, it can be painted or decorated with original drawings and patterns.
- It should be ensured that the doors of the structure are tightly closed and do not let cold air flows through. Additionally, thermal insulation can be installed on the door and sealing elements can be fixed along its contour. This will help keep the heat inside the structure and protect the doors from the negative effects of moisture.
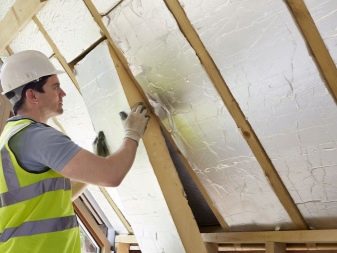
- An outdoor shower can also be used in winter, but in this case its design should be well insulated.To do this, polystyrene foam, polystyrene or mineral wool is applied to the walls and ceiling of the booth. Thermal insulation is fixed with a stapler and sheathed with decorative material.
How to make a summer shower with your own hands, see the following video.
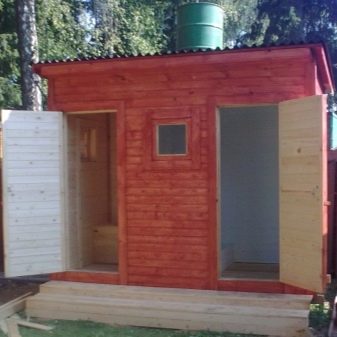
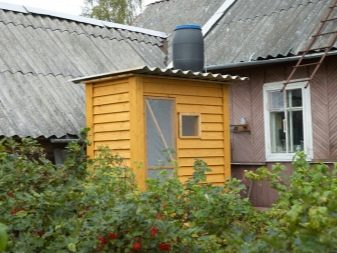
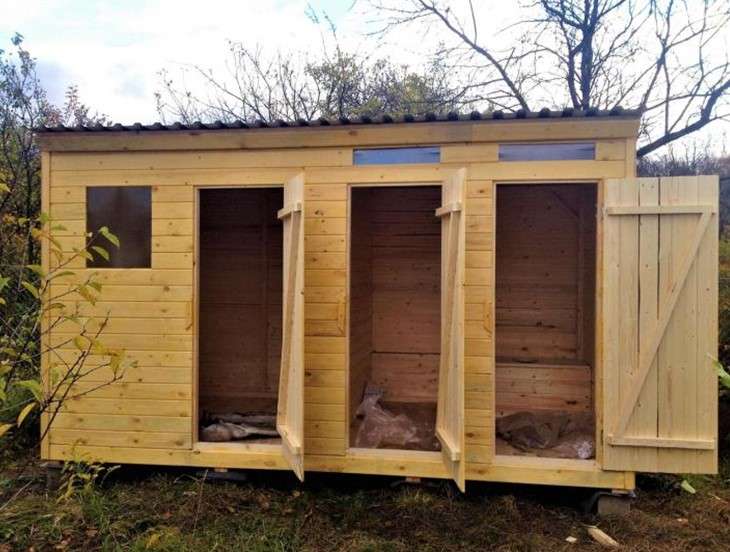
How to make a summer shower with a toilet: the nuances of construction
To save space on the site, as well as time and materials, many people want to build an outdoor shower together with a toilet. This has certain advantages - construction is carried out quickly, it is profitable on the budget, the premises are located compactly and conveniently, but some nuances must be taken into account.
The first is the sewerage system. It is not recommended to combine a septic tank for a toilet with a drain of water from a shower. The tank will quickly fill up, and you will have to pump out effluents much more often. Therefore, there must be a separation: a septic tank for a toilet, a drainage pit for a shower.
The second is smell. To get rid of it, the partitions are made as airtight as possible, and each room has its own ventilation. You can block the shower and toilet with a storage unit for inventory, placing it in the center of the complex.
Third, runoff can pose a hazard to drinking water wells. Therefore, the norms establish a minimum distance between objects of 20 m, and 10-12 m to a residential building.
Preparation for construction
Next, we will consider the process of building an all-weather shower, as the most in demand in most of our country.
Choice of frame material
Before starting construction, you need to choose the frame material. As it was said, plastic pipes disappear due to insufficient strength, so there are two options to choose from: wood or rolled metal.
Wood
Positive sides:
- low cost;
- ease of processing.
The disadvantage is a short service life, explained by susceptibility to decay and drying out.
Bars of a certain section are suitable for the frame
Specifically, you will need the following lumber:
- for the lower harness: insulated shower - timber with a section of 150x150 mm, light - from 60x60 mm (optimal - 100x100 mm);
- for racks, oblique connections and top trim: board with a section of 100x40 mm.
Rolled metal
It is important to understand that in this case we are not talking about galvanized metal profiles with a thickness of 1.5–2.5 mm - this material is not suitable for such tasks. A channel with a height of 50–80 mm is used as the lower trim, racks and other frame elements are made of a square pipe from 25x25 mm with a wall of 1.5 mm to 40x40 mm with a wall of 2 mm
A shower room with such a frame will cost much more than a wooden one, and it’s more difficult to build it - steel is more difficult to process, and electric welding will be needed to connect the parts. But on the other hand, the gain will be significant: the frame will be stronger and more durable.
Metal construction is more durable
Calculation of the dimensions of the shower
A building with dimensions in terms of 2x1.2 m can be considered optimal. The height can be taken equal to from 2 to 3 m. It must be remembered that the higher the water tank is, the stronger the water pressure in the watering can.


The drawing shows the dimensions of the shower
Choosing a waste disposal method
Even if a cesspool or a septic tank for a toilet has already been built on the site, the shower room must be equipped with a separate structure. This is due to the presence of a large amount of alkali and surfactants in the shower drains, which can destroy the beneficial microflora in the septic tank.
Another important question is to what depth sewage can be dumped into the ground so that the chemistry contained in them does not poison the fertile layer. With a volley discharge of up to 50 l or a gradual discharge of up to 100 l / h, the safe depth is two thicknesses of the fertile layer. The country shower in these figures quite keeps within.
Therefore, instead of a full-fledged cesspool, a drainage well can be made from a metal barrel 0.85 mm high and with a volume of 200 liters. It can be guaranteed that such a height will be enough for sure, since a fertile layer over 40 cm thick is quite rare in summer cottages.
With a small thickness of humus, you can also use a smaller plastic barrel, the main thing is that it should not be smaller in volume than a shower tank for water.
You can build such a well right under the shower.
The wastewater receiver must be at least as large as the storage tank
If you decide, as is often advised, to make a drainage well from old tires, then do not forget to periodically disinfect it with bleach: water will stagnate in the interior of the tires.
- pegs and a skein of twine - for marking the territory;
- garden drill;
- shovel and bayonet shovels;
- bubble and water (hose) levels;
- plumb;
- roulette;
- wood saw;
- grinder with a cutting disc for metal;
- drill;
- hammer, screwdriver (or screwdriver);
- marker, chalk or pencil for marking materials.


