- 4. The simplest ways to organize a summer shower
- Site selection
- Installation and equipment
- On the street
- In room
- 1. Where to start?
- How to make a summer shower with a toilet: the nuances of construction
- Pallet manufacturing
- Country shower lighting and ventilation
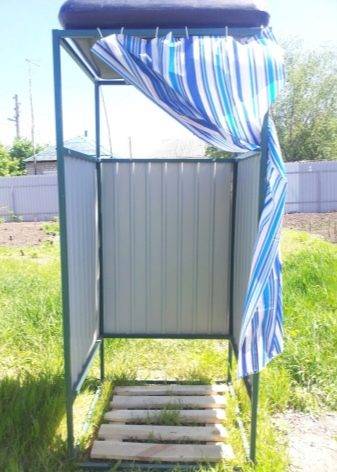
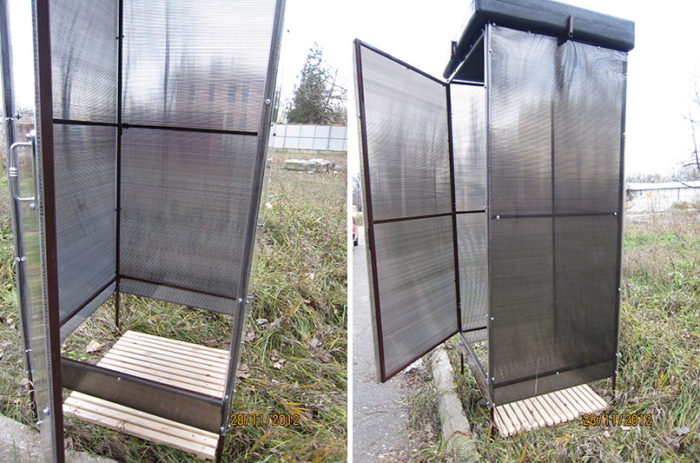
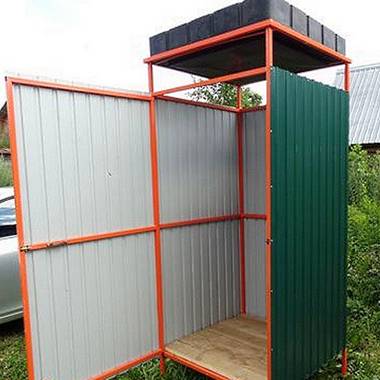
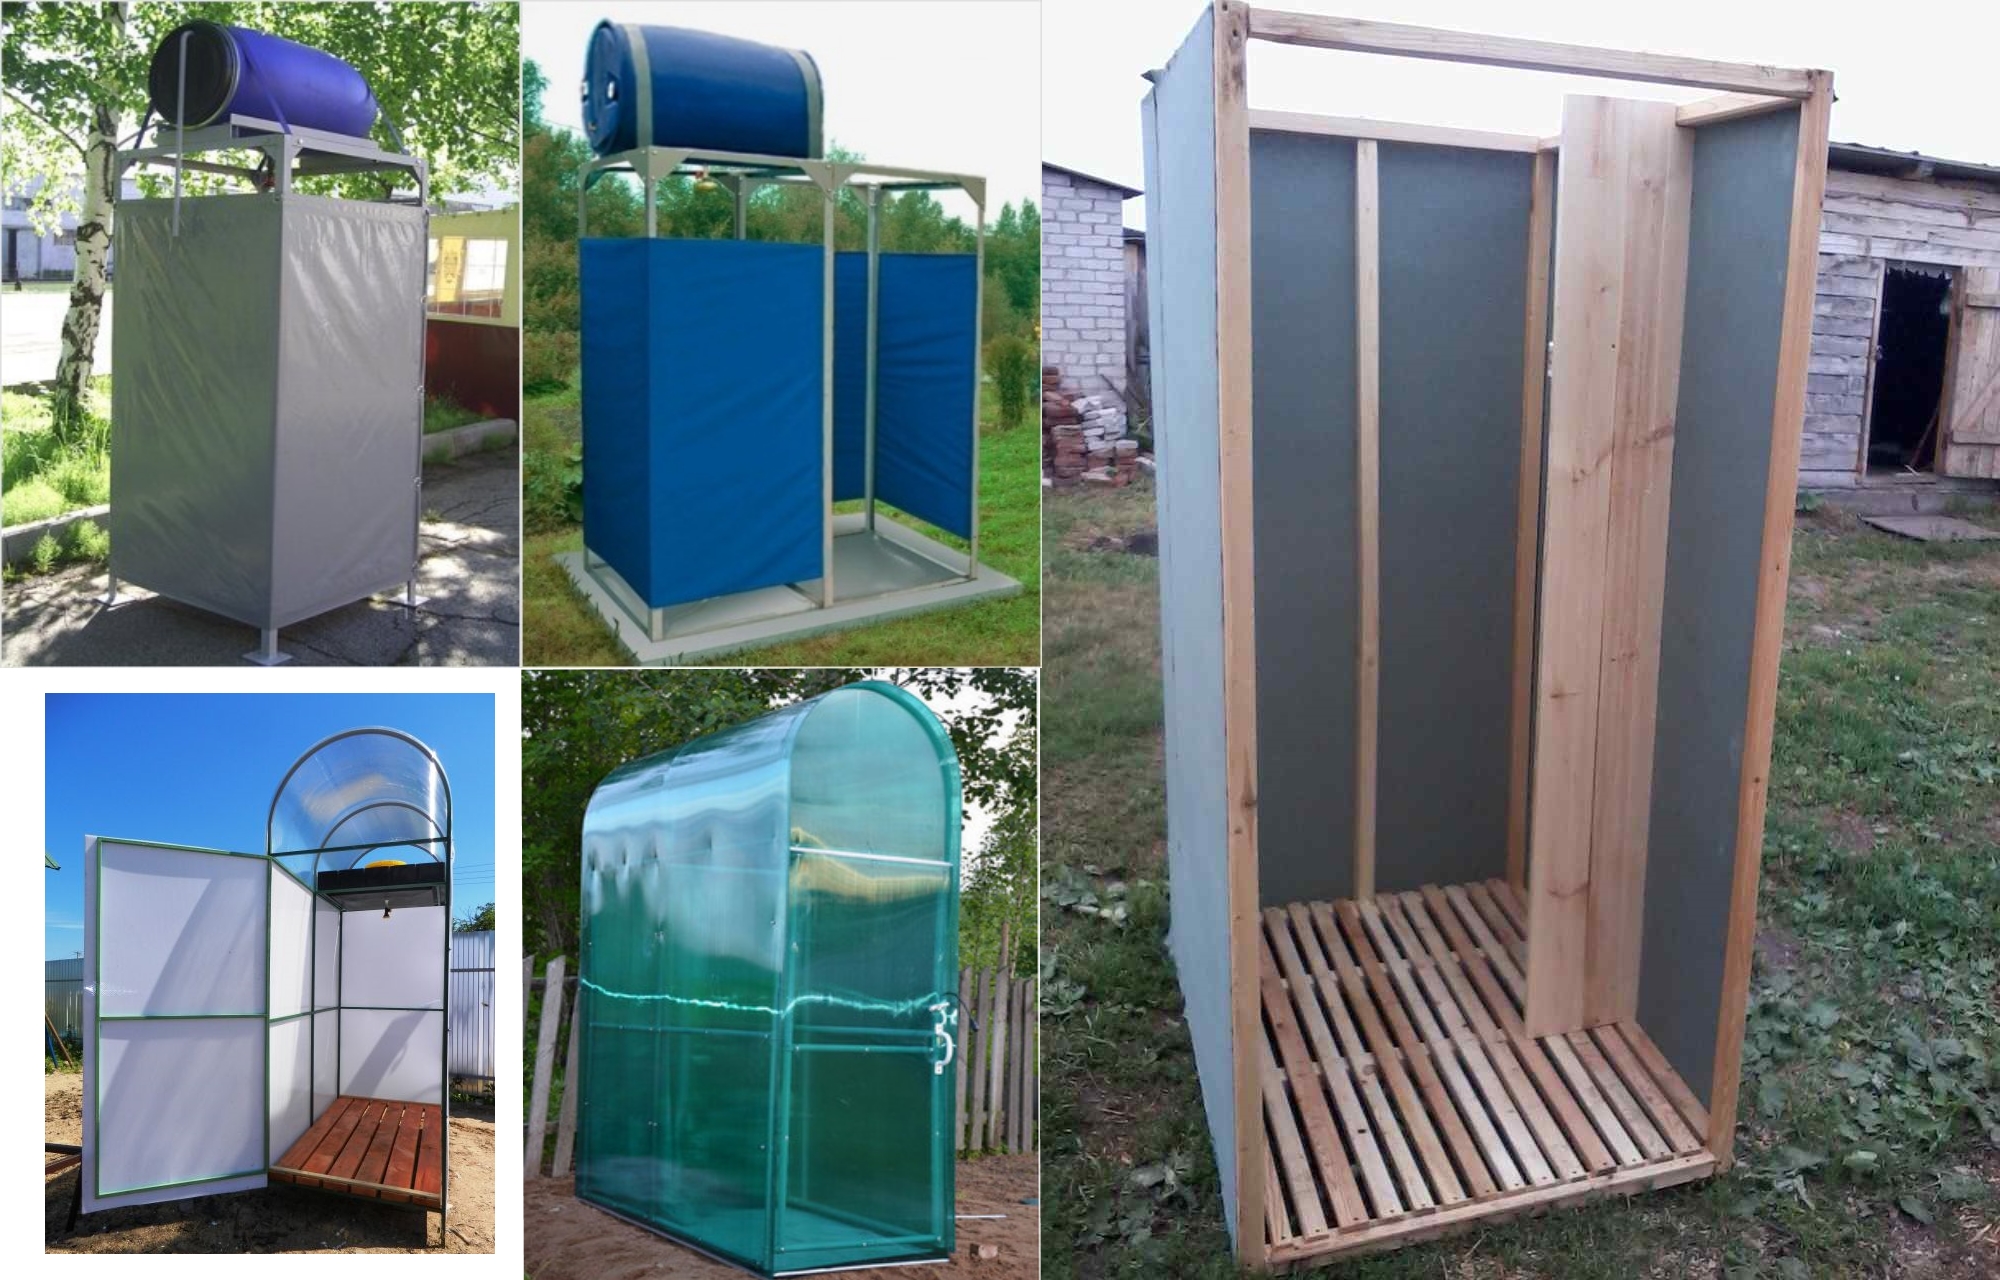
- Metal shower
- Production of a metal frame
- Sheathing the frame with corrugated board
- Sheathing frame with polycarbonate
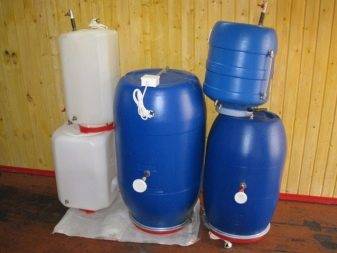
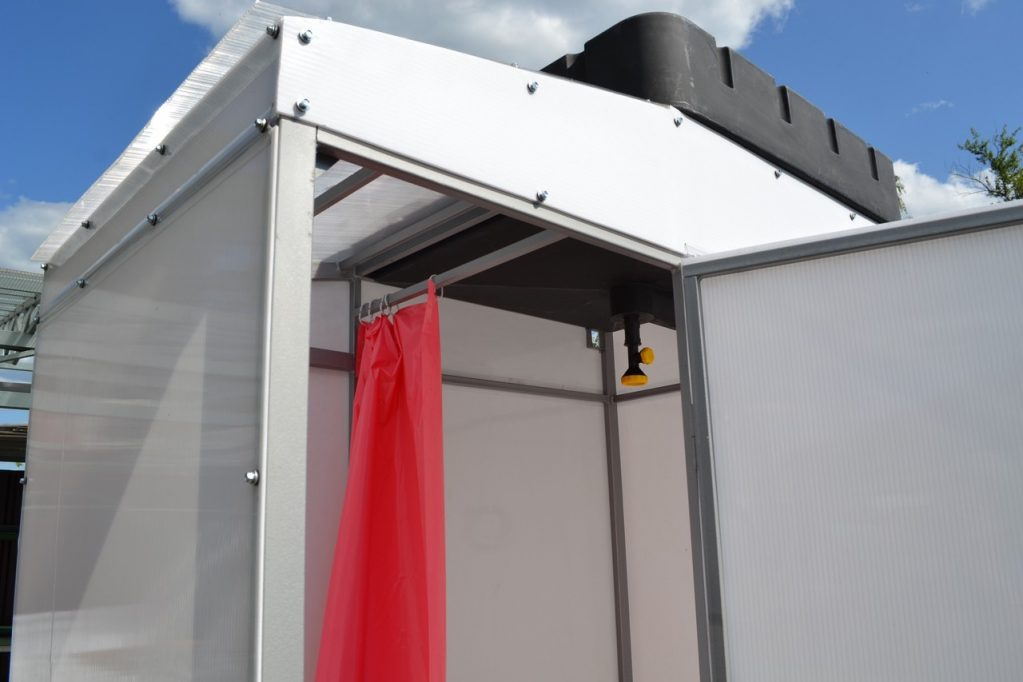
- Water tank installation
- Garden shower water supply installation
- Shower types
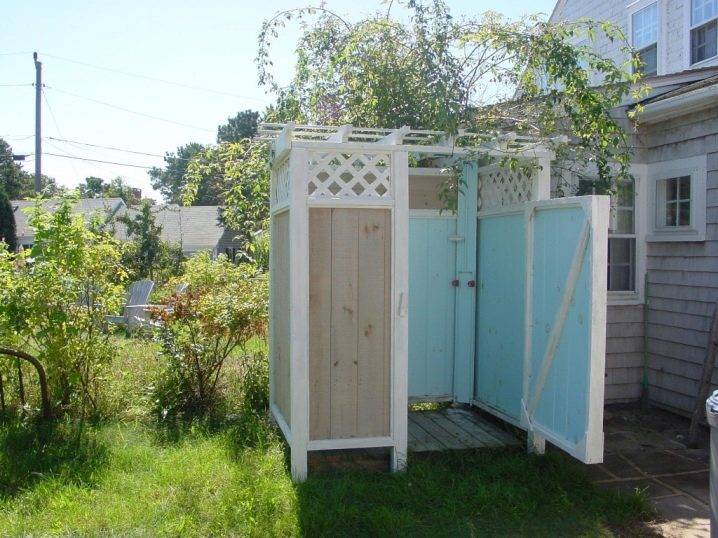
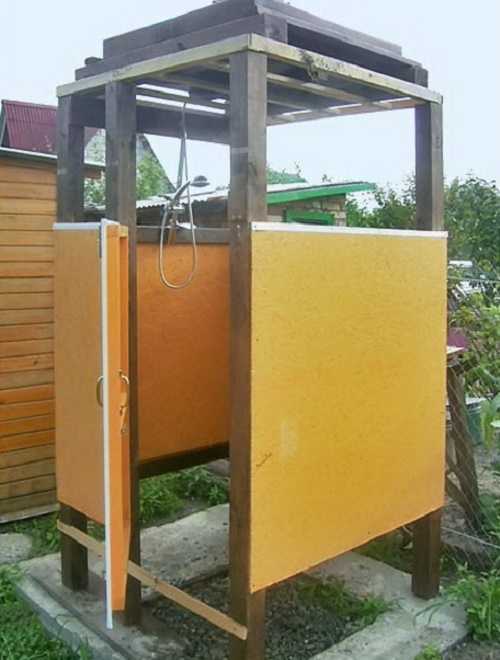
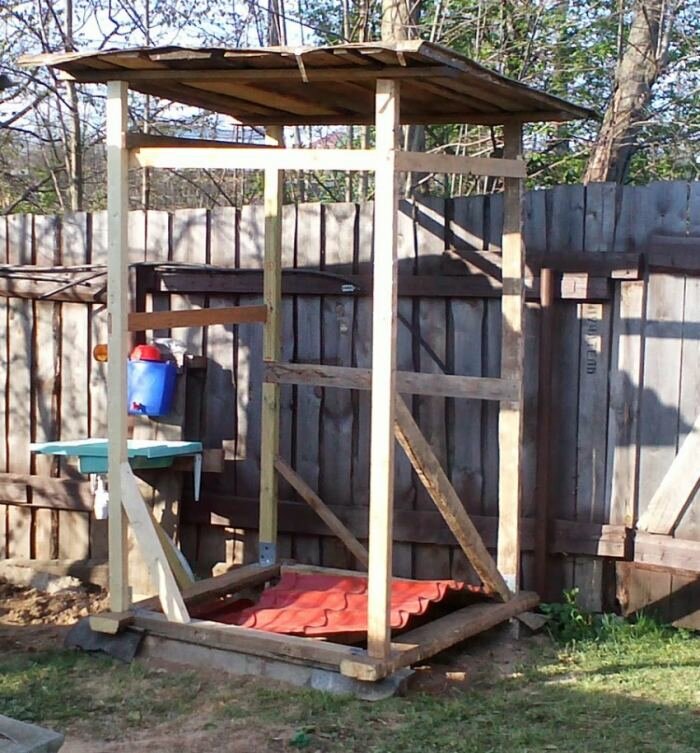
- We build a summer shower
- Materials for warming the shower in the country
- Frame erection
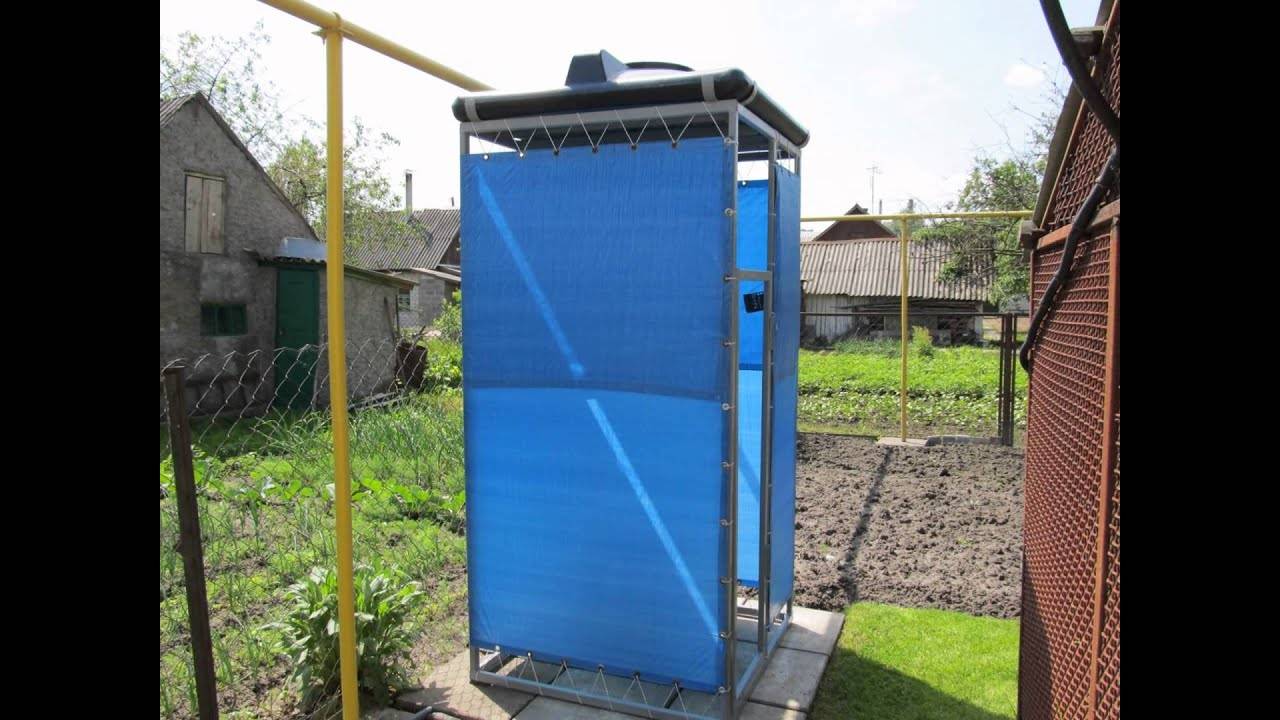
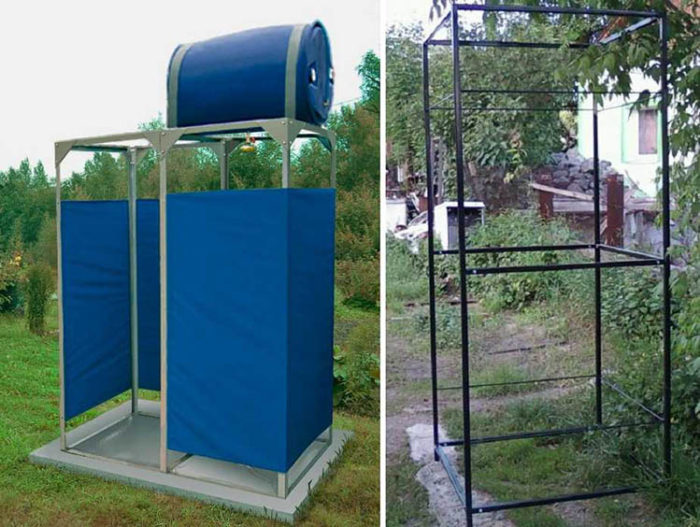
- Portable outdoor shower
- The interior of the summer cabin
- Arrangement of a drain for a summer shower
4. The simplest ways to organize a summer shower
It happens that the summer cottage is visited very rarely, and then, not for work, but more for recreation. In this case, the shower can be the simplest designs that you can even bring with you.
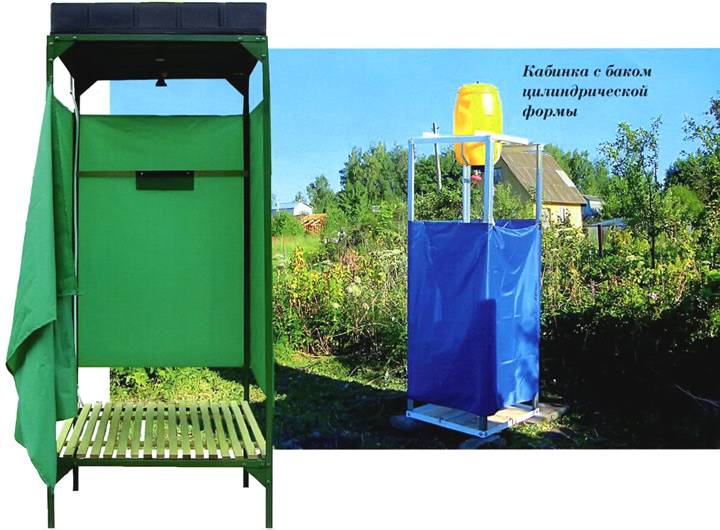
- Portable shower. This design looks like a large heating pad and is made of the same material. After filling the container with water, it is twisted with a special nozzle, at the end of which there is a mini-watering can. At the opposite end there is a loop for which it is convenient to hang the container on a tree or a hook. By placing the container in a well-lit place, the water will heat up very quickly. The volume of such a "shower" is 10-15 liters.This entails restrictions on the duration of the reception of water procedures and the number of people who can use it. But it is a very convenient and inexpensive option for one person.
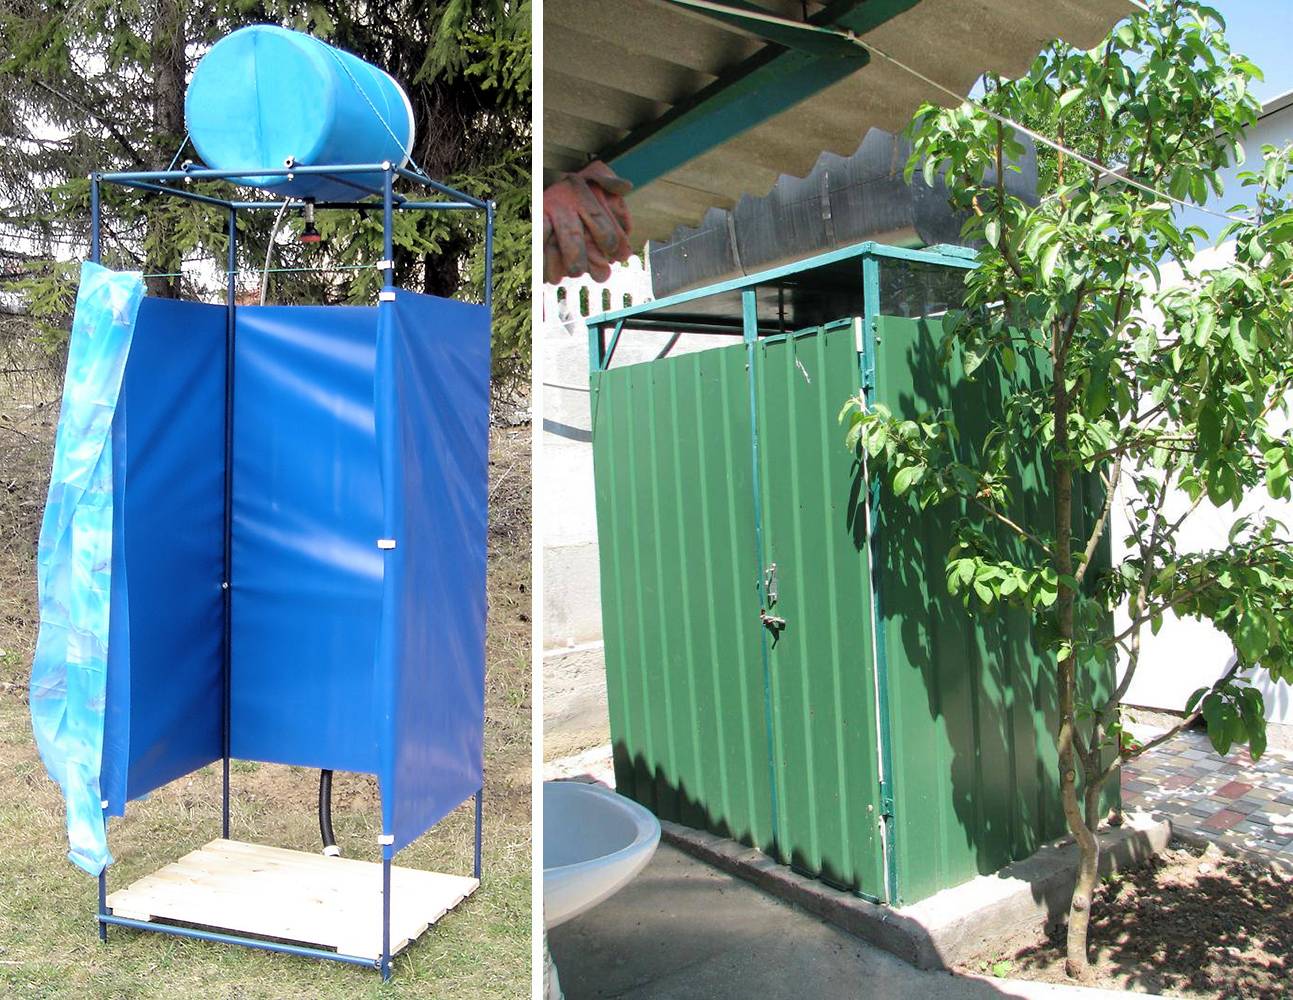
- Shower rack - is an iron pipe on legs, which is equipped with a shower head and a hole for connecting a hose. Such a rack is convenient in that it can be placed in any convenient place and, if necessary, brought into a utility room for storage. Its disadvantage is the lack of a water tank. That is, if there is no warm water and normal pressure in the system on the site, then you will have to take a cold shower.
- Use of the shower system. The shower rack is a metal bar to which the overhead shower and faucet are attached. In order not to bother with the arrangement of a special room for its placement, many attach the shower system directly to the wall of the house or outbuilding. For this, water is drawn out of the wall. The wall of the building is protected from moisture. You can veneer it with tiles, siding or other materials that are available. For convenience, you can separate the space with a curtain, and place a wooden pallet or rubber mat on the floor.
Keep in mind that this is an option for rare use. At the time when you will not be in the country, the system can be removed, and the outlet closed with a special plug.
All of the above types of showers are good because they do not require the arrangement of a foundation and a drain. But the disadvantage is obvious - the possibility of their use depends entirely on weather conditions.
Site selection
The design of the summer shower assumes that the water will be heated from solar heat. Therefore, it is better to allocate a well-lit area for the installation of a shower cabin, where the sun's rays will actively warm up the water tank throughout the daylight hours.
 The best place to build a shower is a sunny place.
When choosing a place, it is worth considering the convenience of water supply, ensuring, if possible, automatic filling of the tank. It would be wise to take care in advance about the flow of water by placing the structure on a natural elevation, or by making a small embankment for this so that after washing it enters the septic tank or sump.
Installation and equipment
When taking on the arrangement of a shower cabin with your own hands, you need to consider many factors. Even non-compliance with at least one of them can render the shower cabin unusable.
On the street
As already mentioned, an outdoor shower can be built from various materials: wood, metal or plastic profiles.
In addition to the basic materials, you will need to prepare the following elements:
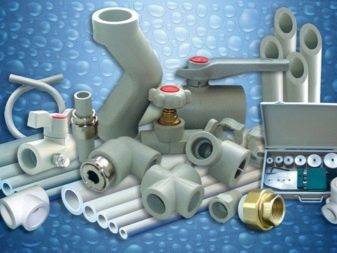
- water pipes and fittings for supplying and draining water;
- water tank;
- taps and watering can;
- pallet.


Pre-determine the location of the future shower, make a sketch of the cabin and calculate the amount of materials needed.
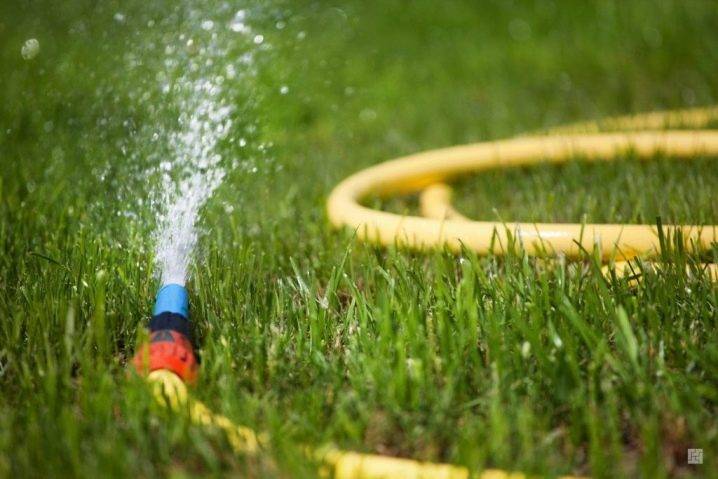
The first stage in arranging a cabin in a summer cottage is the supply of water. A simple garden hose will do, and you can hook it up to any faucet on site, saving you money and the hose won't take up much space.
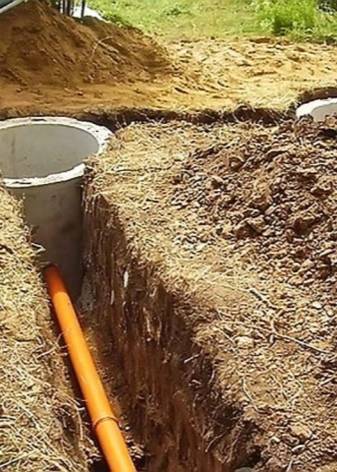
Then proceed to summing up the water pipes.It is necessary to dig holes along the length of the entire future system, the depth of which should be greater than the depth of freezing of the soil, which will allow you to use the shower even in the cold season. When assembling the pipeline, the final element should be a tap. It is advisable to insulate the water supply with any material, for example, mineral wool.
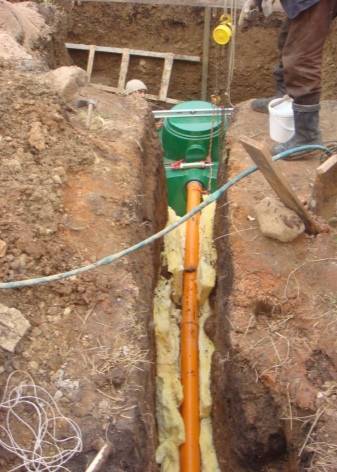
After laying the pipes, you can proceed with the installation of the heating element and only then backfill the soil.
The next step is drainage equipment. There are several ways: drainage into the ground and diversion to a disposal site. The first case is suitable for a site with light, well-permeable water soil. The second is considered more practical and involves the disposal of waste water into a cesspool.
The final stage is the actual assembly of the cabin itself. First you need to assemble the frame by bolting or welding (depending on what material is used). The finished frame must be securely fixed in the prepared place.
Then you need to install the tank. If installation of heating elements is supposed, then they are installed before the tank is erected
It is very important to correctly position the heating elements inside the tank - they should not touch each other and the surface of the tank, and their location should be as close as possible to the bottom of the tank.
The do-it-yourself shower cabin is almost ready. It remains only to install a watering can, hooks for clothes and pockets for bath accessories. If desired, an outdoor shower can be decorated with various elements.
In room
After installing the shower cabin in the room, you should be prepared for increased air humidity after the start of its operation, therefore, first of all, you need to take care of the insulation and protection of the internal walls.You can close them with a film and upholster them with sheets of gypsum fiber on top. The walls are usually tiled, but PVC panels can also be used in the country, the cost of which is much lower than ceramics.
The next important step is the arrangement of the flooring. Waterproofing also plays an important role here. Cement floor screed is a great solution to this problem. It is advisable to make the floor in the shower room multi-layered: first - a subfloor, then - a vapor-proof film. Next, you need to lay ecowool insulation, OSB sheet, GVL sheet, polyethylene film, cement screed, elastic waterproofing and, finally, ceramic tiles. To reduce the weight of the screed, it is good to use a light filler - expanded clay.
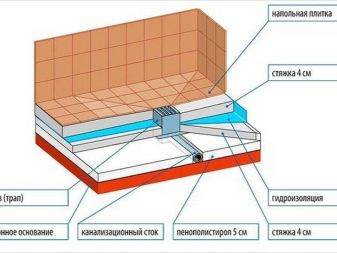

A prerequisite for arranging the floor in the shower room is a slope for draining. Thus, any water that hits the floor will drain into the sewer.


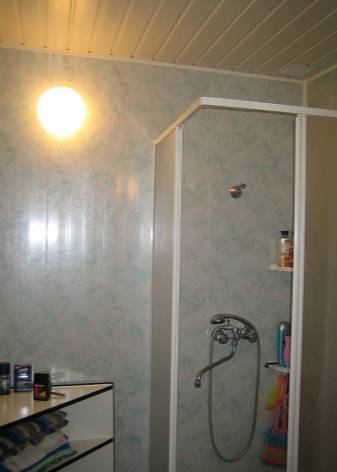
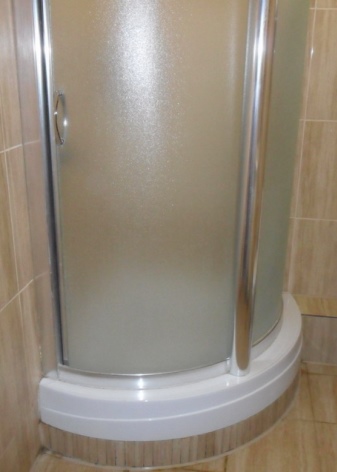
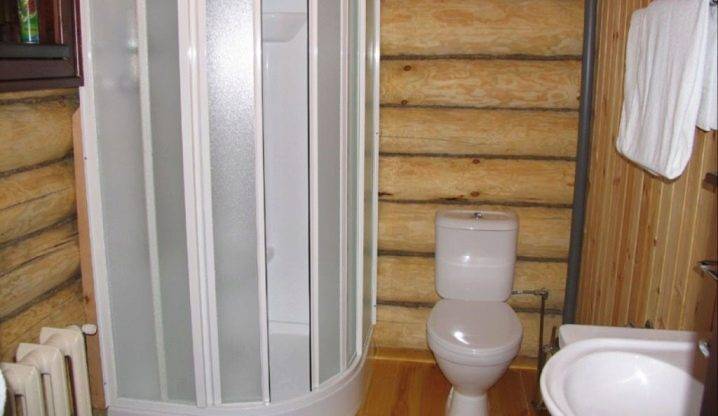
Usually, ready-made shower cabins are installed indoors.
When starting installation, it is important to carefully read the instructions and follow the indicated steps exactly.
1. Where to start?
If you have been thinking about building a summer shower in your country house, then you already have an idea of how it will look like and what you need to purchase. In addition to the design itself, very important parameters are:
- Choice of location;
- Shower size;
- Water tank volume;
- The nature of the building - temporary or capital.
Many try to choose the most secluded corner behind the house or in the shade of trees in order to hide such an intimate structure from prying eyes.This is precisely the main mistake! By building a shower among trees, you will be constantly attacked by insects that love moisture and coolness so much, and deprive yourself of the opportunity to naturally heat the water in the tank. Therefore, the place for the future building should be in an open, well-lit area and in no case be in a pit or in a lowland. Even if you plan to use a heated tank, it is wiser not to use electricity in order to save money on hot days. The building itself should not be located at a small distance from the house. Taking a shower late in the evening, you need to get home as soon as possible so as not to get sick.
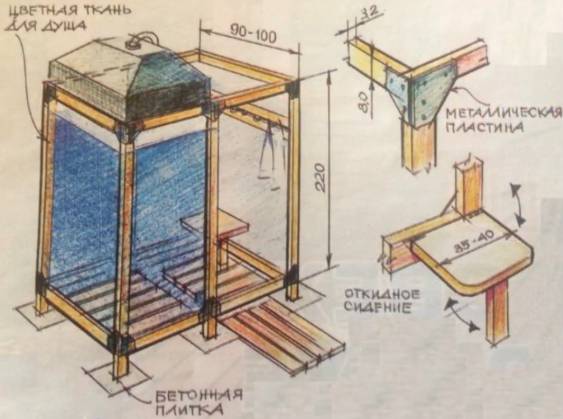
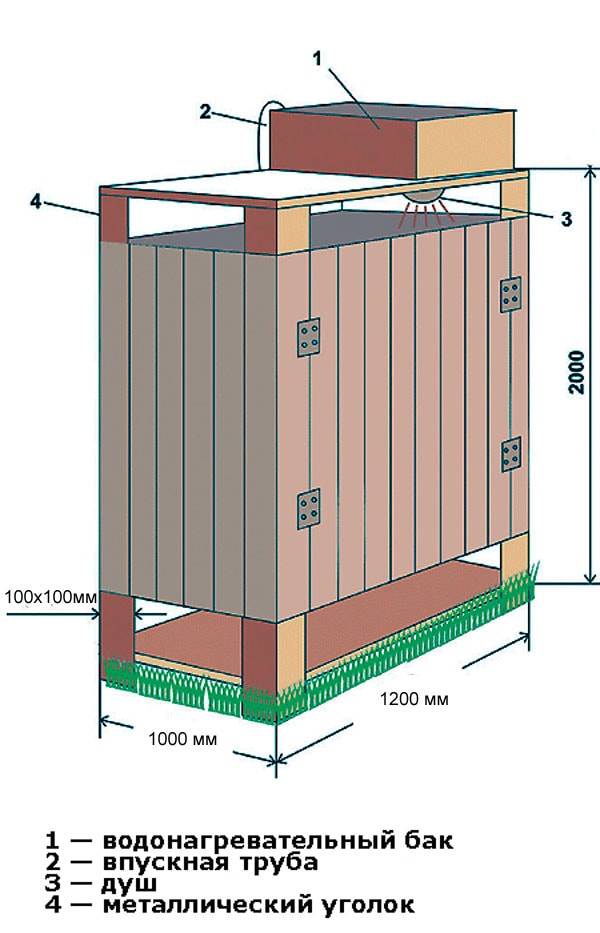
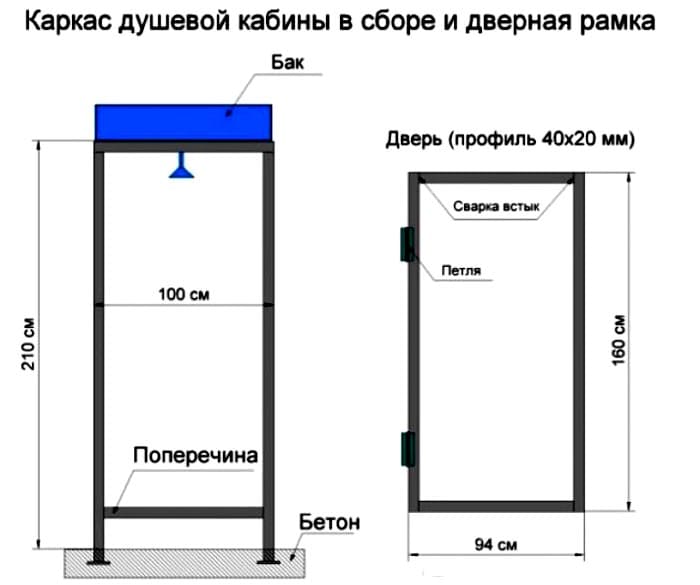
As for the size of the future building and the volume of the water tank. The recommended height of future walls is 200-300 cm. It is necessary to build on the growth of the tallest family member, who should not rest his head on the shower head. The width and length of the shower space is calculated depending on whether the building will have a dry dressing room or be limited to only a wet area. The option with a dressing room is, of course, more convenient, the clothes will be protected from getting wet, and you will have the opportunity to change clothes comfortably. Thus, your shower will consist of two sections, separated by a partition. An area of 220 × 120 cm is quite enough for these two zones, even taking into account the skin.
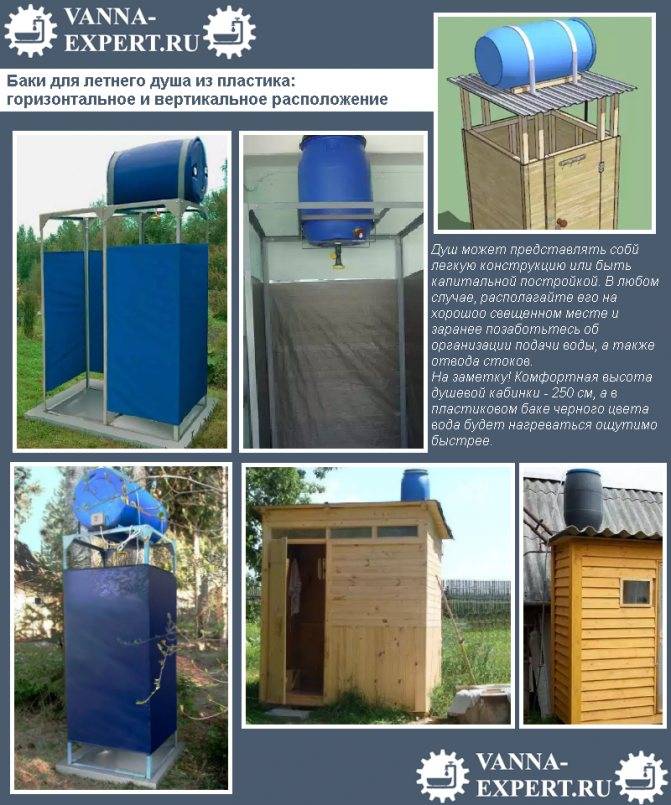
When choosing a water tank, it is necessary to take into account the number of people who will use the shower and the intensity of its use.If you come to the country house only on weekends and use the shower after a hard day's work, then a container that will hold the amount of water at the rate of 40 liters per person is quite enough. This will allow each user to pour water continuously for about 10 minutes. If a much larger number of people take water procedures in a row, you should think about a larger tank. But keep in mind that temporary buildings will not withstand containers with a volume of more than 200 liters. As the tank itself, you can use iron or plastic barrels, or purchase ready-made country models with a built-in watering can. A little tip - if you paint the surface of the tank with black paint, the water in it will heat up much faster due to the ability of black to attract heat.
So, let's highlight the main points:
- Location - in an open, elevated, bright area, at a maximum distance of 2-4 meters from the main building;
- The size of the room - the height is selected taking into account the growth of the tallest member of the family, the minimum comfortable perimeter is 100 × 100 cm;
- The size of the water tank capacity is 40 liters per user, multiplied by the number of people who will receive water treatments in sequence.
The nature of the future construction - temporary or capital, must be selected based on the following parameters:
- Intensity of shower use. If during the planting season you move to the dacha, using it as a full-fledged housing, then you should think about a capital building made of bricks or at least wooden elements. The walls should be well protected from the wind.
- The budget that you plan to allocate for the construction of the structure.
- Materials and tools that you have. For example, in your country house there are bricks from the dismantling of an old farm building. In this case, it will be much more economical to use them than to purchase new materials for the frame. Or you have a lot of wooden bars or old corrugated board, tin sheet or wooden lining. Use the resources you already have. As for tools - if you have old iron pipes that you would like to use as a frame, but do not have a welding machine and a tool for cutting them, then acquiring these tools will result in a round sum. Even if you borrow them from friends for the duration of the construction, having no experience in using them, you can waste your time. Therefore, it is worthwhile to sensibly evaluate your skills, the tools that you have available, and, in order to save money, use the available materials. Under such conditions, construction will not take much effort and money.
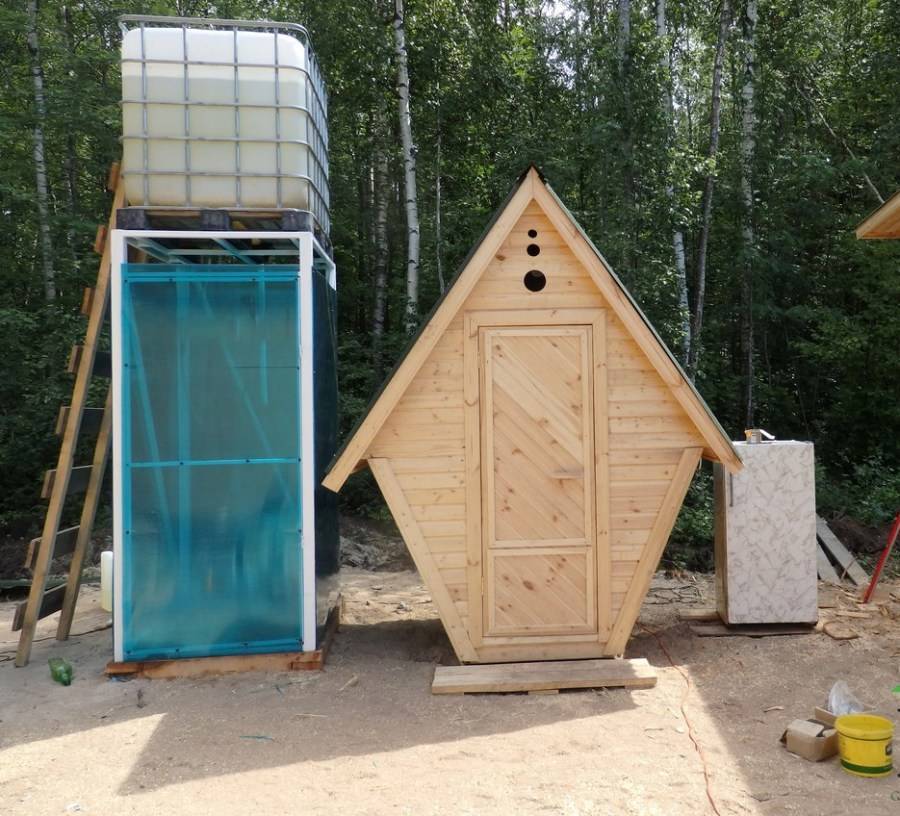
How to make a summer shower with a toilet: the nuances of construction
To save space on the site, as well as time and materials, many people want to build an outdoor shower together with a toilet. This has certain advantages - construction is carried out quickly, it is profitable on the budget, the premises are located compactly and conveniently, but some nuances must be taken into account.
The first is the sewerage system. It is not recommended to combine a septic tank for a toilet with a drain of water from a shower. The tank will quickly fill up, and you will have to pump out effluents much more often. Therefore, there must be a separation: a septic tank for a toilet, a drainage pit for a shower.
The second is smell. To get rid of it, the partitions are made as airtight as possible, and each room has its own ventilation.You can block the shower and toilet with a storage unit for inventory, placing it in the center of the complex.
Third, runoff can pose a hazard to drinking water wells. Therefore, the norms establish a minimum distance between objects of 20 m, and 10-12 m to a residential building.
Pallet manufacturing
Work should begin from the bottom of the cabin - the pallet. If you use a ready-made base, this will reduce the complexity and installation time.
When making a pallet yourself, you must take care in advance to protect the room from moisture. To do this, you need to use roll waterproofing.
It all depends on what material the floor is made of. The surface that has been treated must not allow moisture to pass through. The same applies to the bottom of the walls.
Next is the pouring of concrete. In this case, the surface should be inclined in the direction of the drain by 2-3 cm per meter. Before pouring, drainage pipes are laid and a drain ladder is fixed.
Country shower lighting and ventilation
Lighting will be useful, as you will have to take a shower in the dark. However, when laying and wiring wires, follow the safety rules:
- Work with wires without damaging the insulation
- Make wiring so that it does not interfere with movement both indoors and outdoors
- Carefully isolate the joints
- Provide moisture proof for switches and lamps
For ventilation, make a window or a special hole with a grill or mesh so that debris and insects cannot get inside. Ventilation will help to avoid wrangling and bad smells in the shower.
For good ventilation it is necessary to make an opening window
Metal shower
The steel structure is made from a profile pipe or corner. The width of the shelf is chosen depending on the load. The main load is a tank with water, lining. The more massive the water tank, the finish, the larger the cross section of the corner. They line the structure with materials of their own choice, organize the water supply and drain in the same way as a wooden structure.
Production of a metal frame
For welding, take corners with a thickness of 4-5 mm. The width of the shelf depends on the load. Also construct a frame from a metal profile. The wall thickness of the profiled pipe for racks is from 3 mm, for strapping from 2 mm.
They construct a metal frame without a welding machine. The connection is made on thick mounting angles with bolts. As a result, a collapsible structure is obtained, which is removed for the winter. Scheme and drawings of the soul in the country with their own hands choose in accordance with the possibilities, skills. There are several main elements: racks, strapping with a transverse profile, a roof.
Sheathing the frame with corrugated board

Sheet material is selected according to the size of the frame. For trimming, use scissors for metal or a grinder with a toothed disk. The corrugated board is fixed on galvanized self-tapping screws with sealing washers. Fixation step from 7 cm.
Sheathing frame with polycarbonate
Building a shower with your own hands on cottage made of polycarbonate, use sheet material with a thickness of 10 mm. Fasten with galvanized self-tapping screws with a sealing gasket. Pre-drill holes or fix directly with self-tapping screws with a full thread.


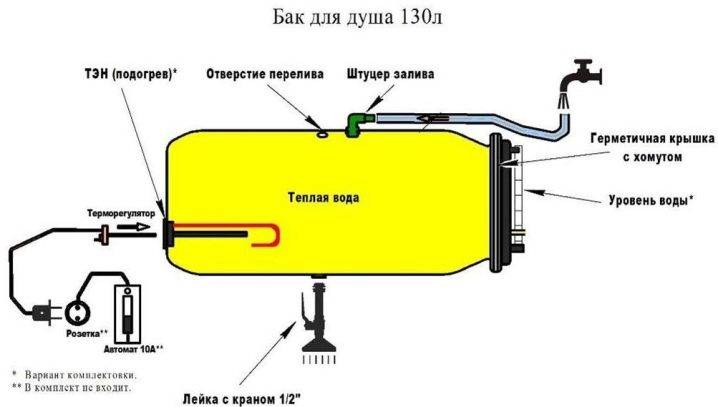
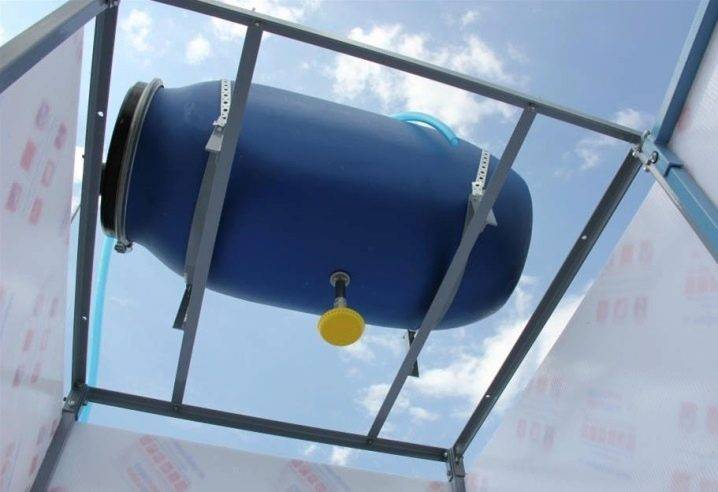
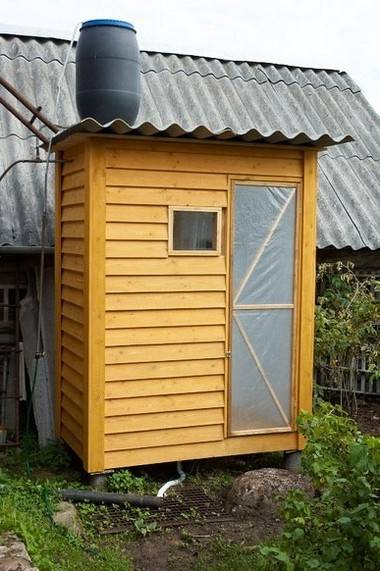
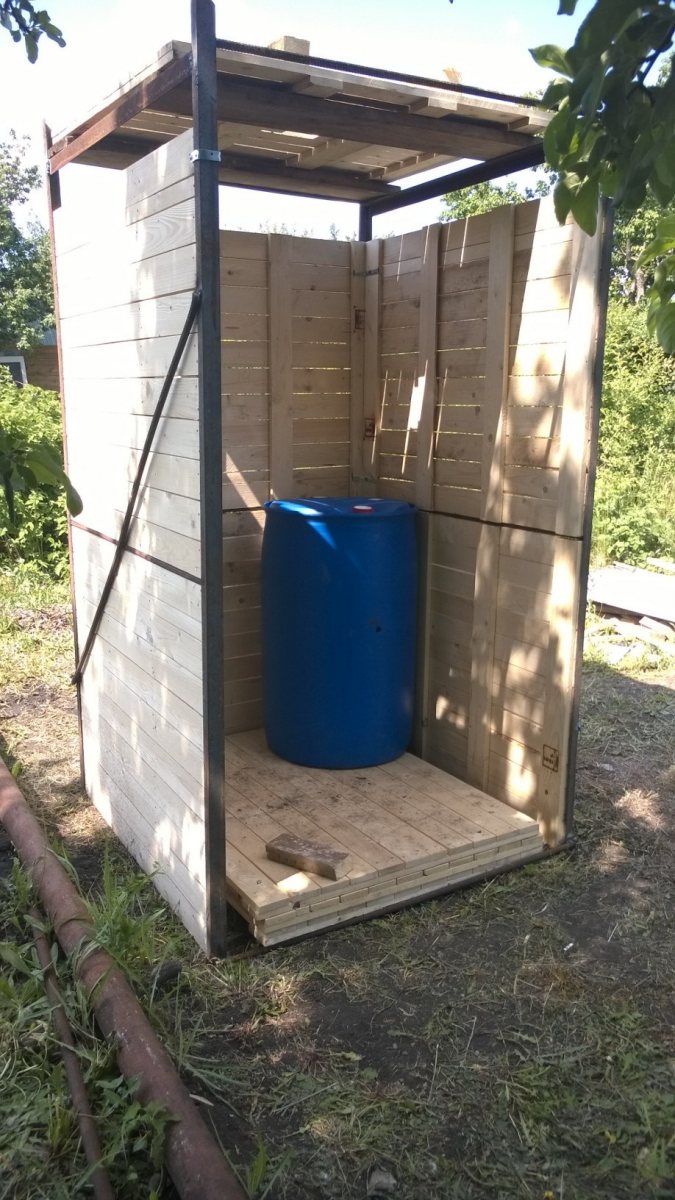
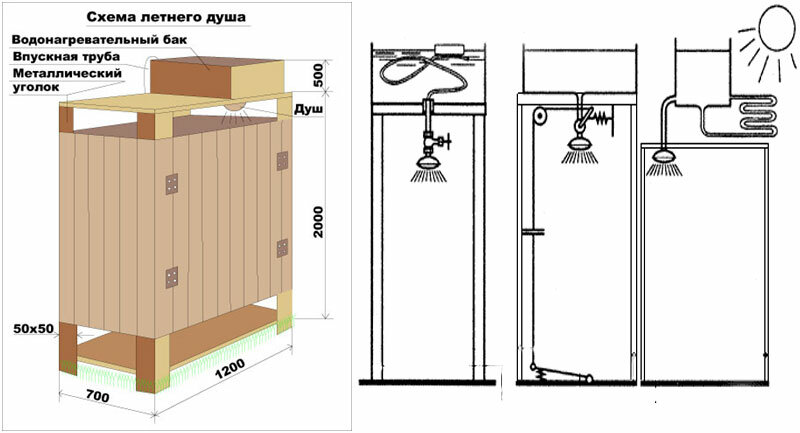
Water tank installation
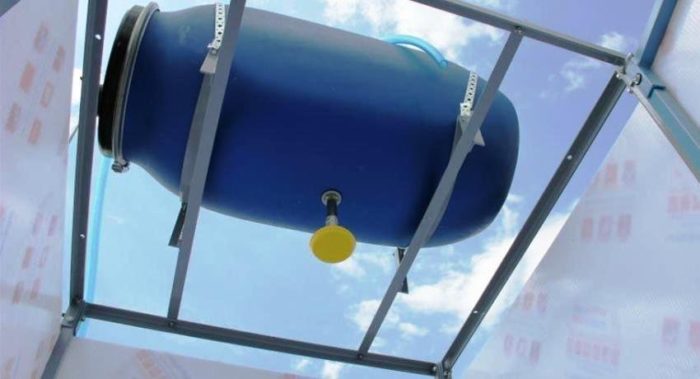
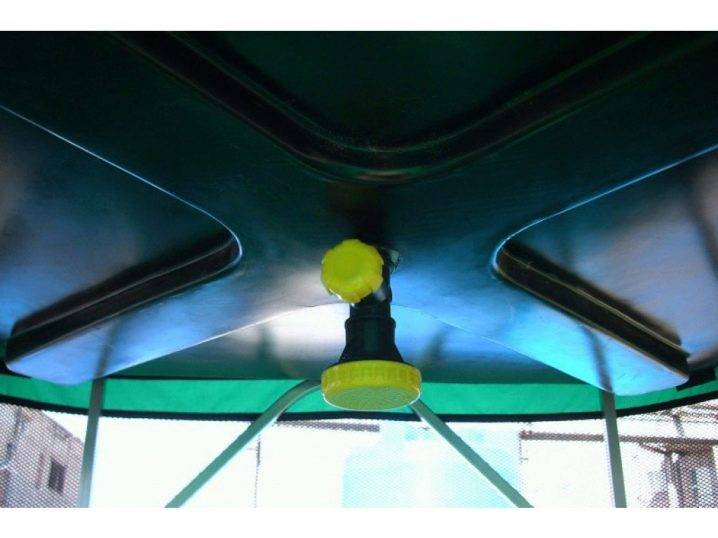
The final stage of construction is the installation of a water tank. The tank is bought ready-made, made from a stainless steel barrel. A hole is cut in a metal container for a drain with a cross section of 15 mm.A piece of pipe with a thread at both ends is attached to it. Cut length from 300 mm. The shower roof is equipped with a hole where the pipe is inserted. A tap, a watering can are screwed onto the free end. The shower tank is firmly fixed on the frame frame, filled with water and closed with a lid.
Garden shower water supply installation
The main step in the construction of a garden shower with your own hands is the installation of water supply. An excellent tank for water supply is a metal barrel or a plastic tank painted black. Standard volume - from 100 to 200 liters. A water level meter or valve should be installed in the tank, which will shut off the flow of water when the tank is full.
The watering can should be installed above the level of the head. This will help to avoid pressure drops during operation.
For a do-it-yourself shower tank in the country, you need to create a greenhouse based on beams covered with PVC film. The tank can be pasted over with foil, which will help speed up the process of heating the liquid from sunlight.
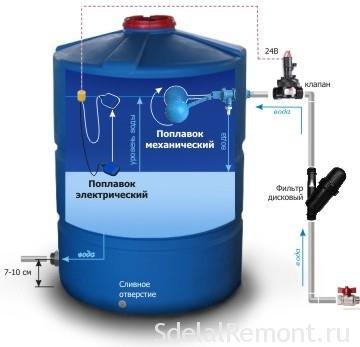 Scheme of a water tank for a garden shower.
The tank must be mounted on top of the shower structure. To supply water, a water pipe must be welded or a pump hose installed. Water heating can be done using a heating element - a thermoelectric heater. This method proves to be the most practical and economical.
Heating elements are divided into two types - dry and wet. Dry ones work without direct contact with water, which eliminates the possibility of scale formation on them. Therefore, such devices can last longer. However, wet heating elements are much cheaper, and therefore more common.When installing electric heating equipment, it is necessary to take into account safety precautions, ensure the isolation of water from electricity, make grounding and install an ouzo of protection.
Shower types
Depending on how the cabin (compartment) is located, there are several options:
- corner - the most common due to its compactness and ease of placement. It can be square, rectangular, polygonal, with a circular segment;
- wall-mounted - a rectangular structure adjacent to the wall on one side;
- with one wall - is placed so that the main walls (partitions) of the bathroom serve as walls on three sides. Often one or two partitions are erected specifically to limit the shower compartment;
- without walls - a niche or area between walls that has a separate drain into the sewer.
Industrial shower cabins have straight or convex (Fig. 5) doors, home-made ones are most often supplied with straight ones, since this greatly simplifies installation and use.
According to the type of base, a do-it-yourself shower in an apartment can be:
- with a more or less high tray (applies to both finished booths and built-in shower enclosures);
- on the podium;
- with a floor at the level of the common floor of the bathroom.
In all three cases, draining into the sewer is provided by a shower drain and sewer pipes laid either under the common floor or under the podium (tray). If the floor level of the shower enclosure and the entire bathroom are the same, it is advisable to add a common ladder to the drain of the shower cubicle (the so-called shower drain) - this will help to avoid flooding the apartment and neighbors in case of accidental clogging or insufficiently fast flow through the main drain.
According to the complexity, all types of plumbing structures of this type are divided according to how many finished elements are used in the installation.
The easiest way to make a shower in the apartment, using ready-made prefabricated kits. The installation of separately purchased tray and doors, as well as a mixer, requires great skills in construction and decoration. Finally, the most complex - and at the same time economical - option: with a home-made pallet or podium (or alteration of the floor), independent water supply and sewerage, finishing, and so on.
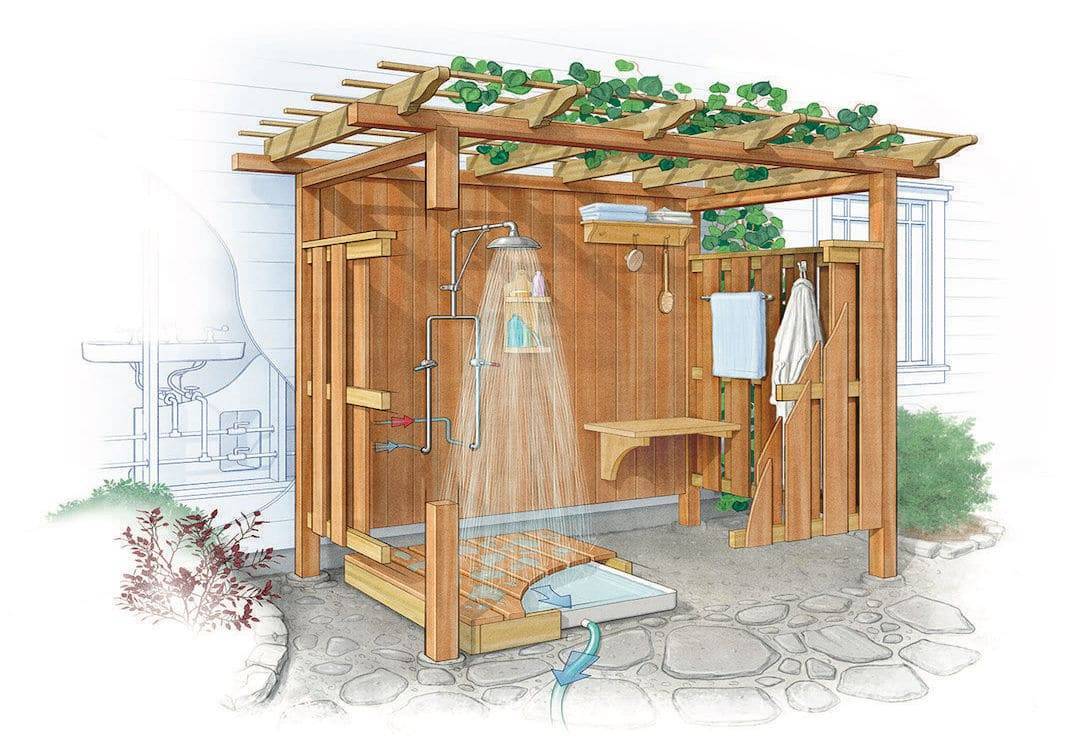
We build a summer shower
Getting down to practical advice, let's try to build a simple, but aesthetically beautiful and comfortable outdoor wooden outdoor shower for summer cottages, with a minimum consumption of materials.
It's nice to cool off with a cool shower on a summer evening.
Do-it-yourself summer shower is not only an oasis in the hot heat, but also a flight of your imagination
Let's cook:
- boards and slats
- shower set (faucet, curved tube, bracket, adapter and nozzle)
Climbing plants can be great walls for a do-it-yourself summer shower
- garden hose
- self-tapping screws
- fasteners
Outdoor shower with tub
Boards for the floor of a summer shower must be treated with special means
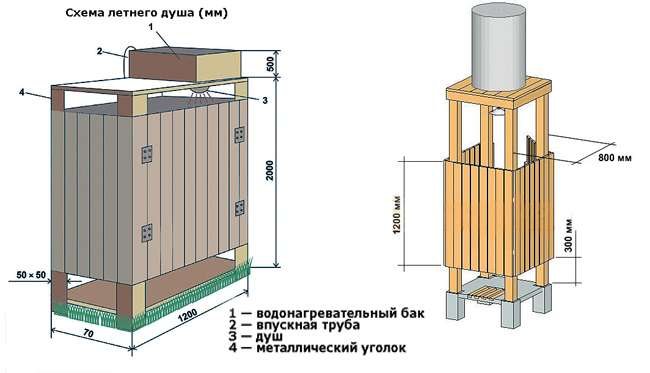
The figure shows the dimensions of each part of the shower.
Rice. one
Rice. 2
The next step is to assemble the pallet. Since the pallet is round, we need a drawing.


Rice. 3
We assemble the structure in three stages:
From four boards we make an inner square.
Rice. four
We draw a circle on them.
Rice. 5
We saw off the parts of the boards that go beyond the circle with a jigsaw.
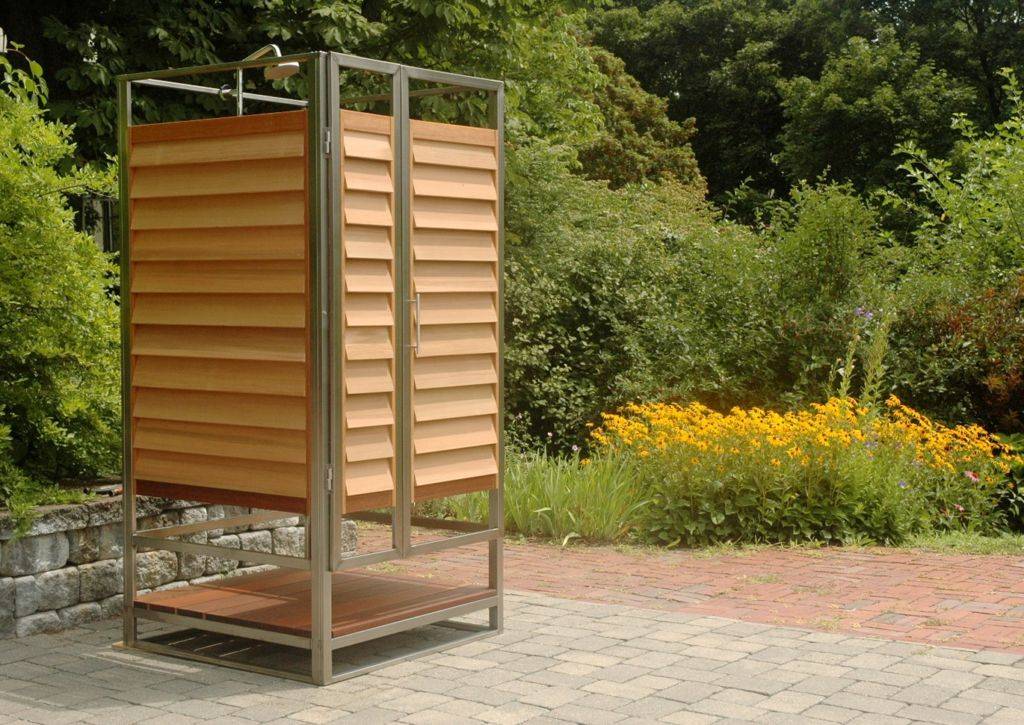
Stylish outdoor shower
Wooden shower cabin - a beautiful and durable option
We impose a second layer of boards diagonally to the first, draw a circle on them and saw off the excess parts.
Rice. 6
We put a mount for the shower support. We attach one part to the first layer of boards, the other to the second. We have a gap where we will insert the shower rack.
Rice. 7
We tighten both layers with self-tapping screws.
Rice. eight
Installing the support.
Rice. 9
We complete the pallet finishing by laying the top layer of slats. We repeat the operation with drawing a circle and sawing off excess parts.
Rice. ten
- We fix the pipe to the rack with a bracket.
- We mount the remaining parts of the shower set on the support. We fasten the atomizer to the top of the tube. In the lower part we fix the mixer and the adapter. Connect a garden hose to the adapter.
Summer shower with beautiful tiles and plant decor
Summer shower with a decorative path to the house
Summer shower with hydromassage
For adherents of solid buildings, we offer to build a capital summer shower. Let's prepare the tools:
- hacksaw
- a hammer
If you do not have the opportunity to build a summer shower for a summer residence with your own hands, then a portable summer shower with a bottom water supply will be the way out of the situation.
- level
- drill
- Bulgarian
Summer shower at the entrance to the house
- concrete mixer (tank for mixing cement mortar)
- shovel
- Master OK
Outdoor shower with decorative stone floor
The design of such a shower room will not only allow you to freshen up on a hot summer day, but also bring aesthetic pleasure.
Construction begins with the preparation of a pit for the foundation. We dig it according to predetermined sizes. Carefully align the walls and bottom of the pit.


We expose the formwork with a margin on the walls of the shower cabin. Mix and pour the solution. We wait until it is completely dry, and proceed to the construction of the shower walls.
An outdoor shower is one of the essential additions to a suburban area.
We mark the masonry, lay out three walls in half a brick, using a level and a plumb line.
When laying the walls, do not forget to leave a ventilation hole at the bottom of the shower and a niche for a small window closer to the ceilings.
Summer shower near the wall of the house with water from the public water supply
We lay floor bars along the upper row of bricks and securely immure them.
We close the floors with a layer of waterproofing material and slate, having previously made a hole in it for the pipe.
Summer shower made of wood in a modern style
An outdoor shower is one of the household facilities necessary for a comfortable pastime in a suburban area.
Let's start finishing work. The ceiling and walls can be plastered and tiled, you can use plastic fastening to a metal frame.
We run a drain pipe along the bottom. We make a frame from a metal profile or wooden bars. We lay out the bottom with wooden slats or plastic tiles.
We insert the door frame into the open wall of the shower, fasten it to the bolts, fill it with mounting foam and hang the door.
Shower panel stone wall decoration - a versatile option
Now you have an accurate idea of how to build a summer shower for a summer residence and what is needed for this. You do not have to follow our exact instructions, you can paint the shower, use other finishing materials. For an open version, you can install a frame with a curtain, and in the capital model you can do without a door, replacing it with a sliding wooden or plastic curtain.
A do-it-yourself summer shower will become an indispensable outbuilding on a personal plot
We offer you to watch interesting ideas for a summer shower in this video:
Materials for warming the shower in the country
Knowing how to build a shower in the country with their own hands, they build objects that are as comfortable as possible for operation. Systems are equipped with heaters, a concrete base is made with a solid frame structure, etc. Another way to improve a lightweight structure is to insulate it.
As insulating materials are used:
- Mineral wool. Sheet mats are laid out in a frame, waterproofed with a film, sheathed from the inside and outside with finishing materials.
- Glass wool. Use strictly according to the instructions, the material crumbles and clogs the airways. However, it does not deteriorate under the influence of frost and heat.
- Sheets of waterproof foam. In a warm shower, modules with a thickness of 50 mm are sufficient. Laid out in a frame, then lined with the selected material.
Insulation of the walls of the summer structure will ensure comfortable washing in bad weather. Experienced owners insulate all planes, including ceilings and floors.
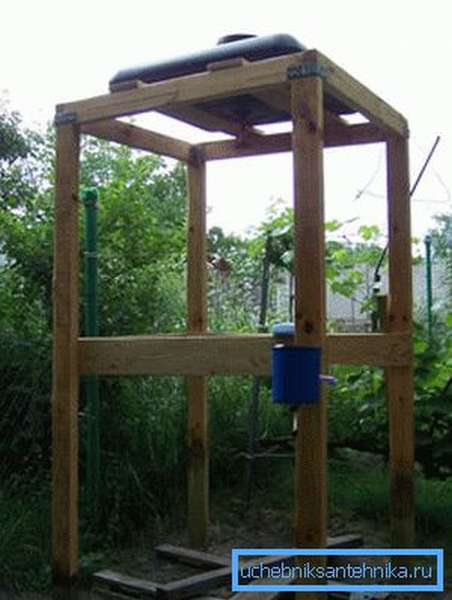
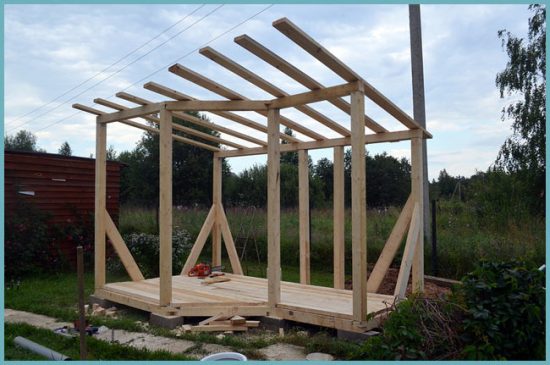
Frame erection
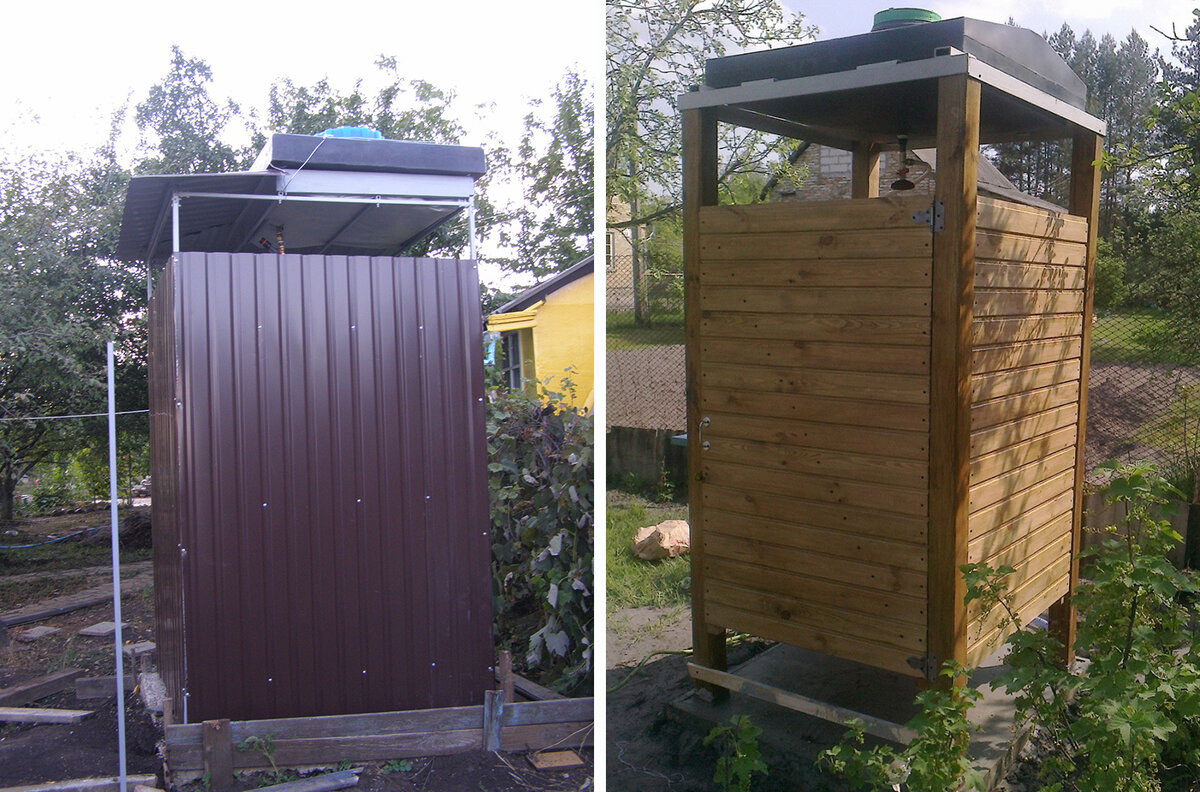
A summer shower made of beams or boards is one of the most popular options for a building that is needed in the household. For the construction of the structure, it is better to use conifers, the main advantage of which is:
- high density;
- moisture resistance;
- High resin content;
- Ability to withstand heavy loads.
 Beam shower frame
For the construction of the frame, bars of 100x100 mm are used. First, the lower frame is assembled, fixing it by means of a bolted connection to the support posts or screw piles. When mounting, it is better to use long bolts with full coincidence of the axes.
Having installed vertically wooden supports, perform the upper trim. To give the structure additional stability, the side frames are fixed with spacers. Planed coniferous wood is excellent as a sheathing. It has a presentable appearance and harmoniously fits into the surrounding landscape.
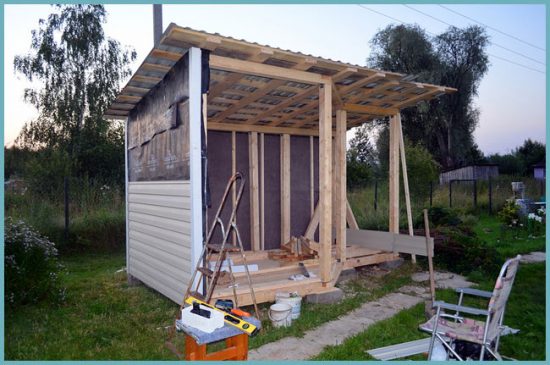 Building the walls of a wooden summer shower
Special seals will help to ensure a snug fit of the door. The door to the booth also needs to be painted or proliferated. For interior decoration of the booth, you can use plastic panels, oilcloth or linoleum. Photos with interesting design options can be peeped on the Internet.
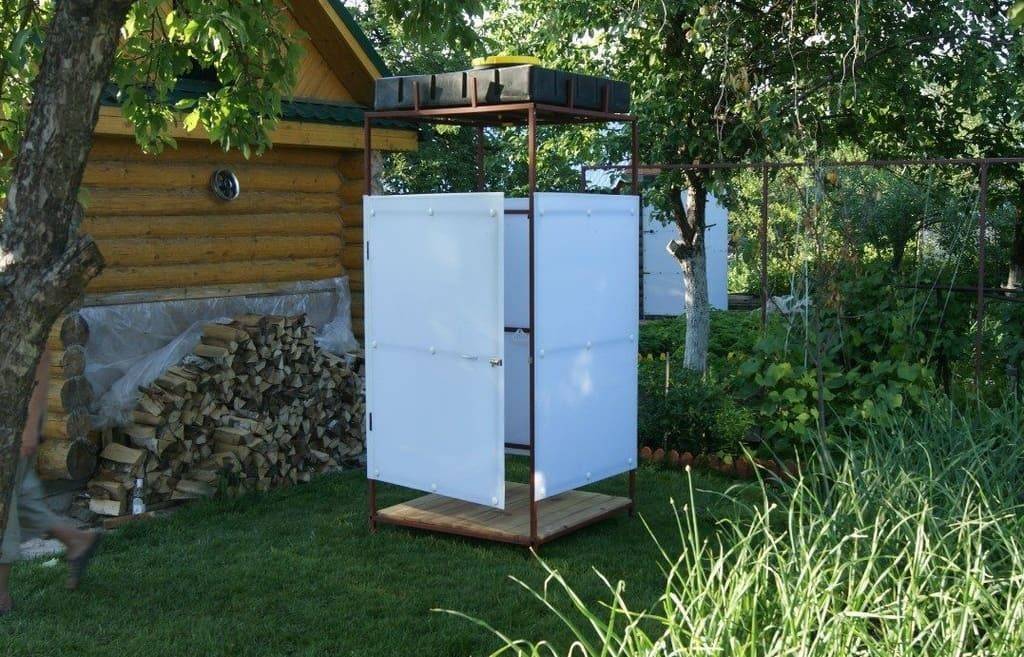
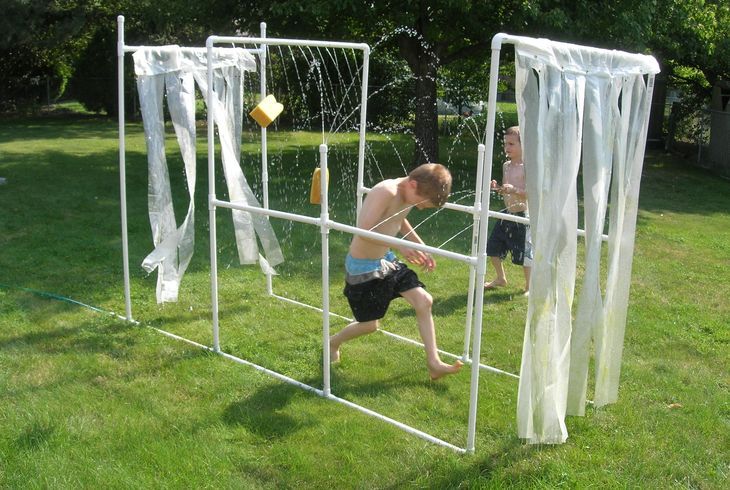
Portable outdoor shower
A very common modern option for a summer shower is a portable design made of plastic pipes. It is convenient to use it in the country not only for water procedures, but also for entertaining children, watering the lawn or as a decorative element of landscape design. The advantage of this method is that there is no need to use drainage or a sewage pit with a foundation, since the structure can be regularly transferred to another place, which eliminates the occurrence of stagnant water.
Before you make a summer shower in the country from PVC pipes, you need to prepare:
- PVC pipes - 10–20 m, depending on the type of construction;
- fasteners (crosses, corners) - 8–20 pieces;
- special precision scissors;
- welding machine for plastic pipes;
- additional parts (faucet, hose, pump, container, etc.).


The manufacturing process is based on the following algorithm:
- cut 6 pieces of pipe 60 cm long;
- using a welding machine, they connect 3 segments to each other with crosses (2 identical supports should be obtained);
- when installing the crosses, it is taken into account that they are located perpendicular to the pipes and parallel to each other;
- cut 8 pieces of pipe 30 cm each, solder a corner on one edge of each;
- cut 8 pipe segments of 20 cm each, insert them into the corners attached to 30 cm segments, close the second end with a plug;
- insert 2 blanks into each cross, so that the bent ends are turned to the middle;
- as a result, you should get 2 side structures-supports with two pairs of outgoing short water guides for each;
- these supports are fastened together with transverse strips 100 cm long, using corners;
- two perpendicular pipes 100 cm long are pre-attached to the lower transverse pipe (to obtain a support in the shape of the letter H) to create stability for the entire structure;
- a tap for water supply is connected to one lower pipe;
- drill holes in the pipes in increments of 10 cm;
- connect the water hose.
The result should be a design similar to Charcot's shower. Its configuration can be changed using simpler forms. The easiest way is to solder PVC pipes in the form of the letter P (like a sports horizontal bar) and make holes in the upper crossbar, from where water will flow.
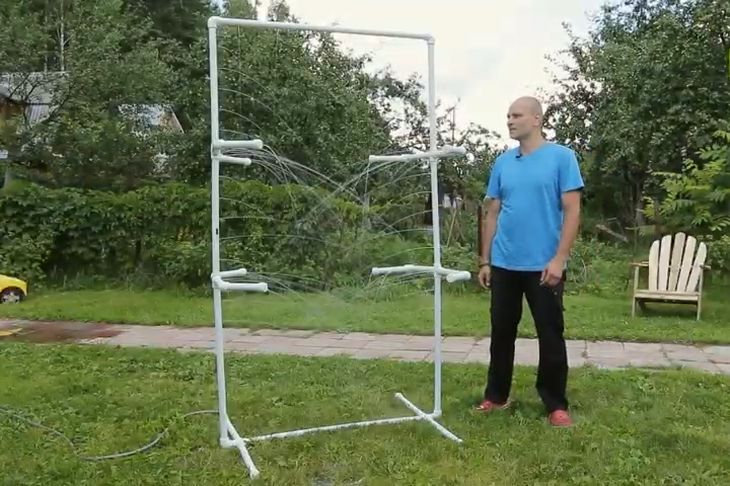
If desired, a shower made of plastic pipes can be built closed. For this, a frame is first created, which is covered with a dense opaque film or other non-woven material. The supply of water in such a design is usually carried out using the so-called toptun pump. A container with water is installed next to it and a connection is made with a hose.The installation of the upper tank is not considered in this case, since the PVC pipe support will not withstand its weight.
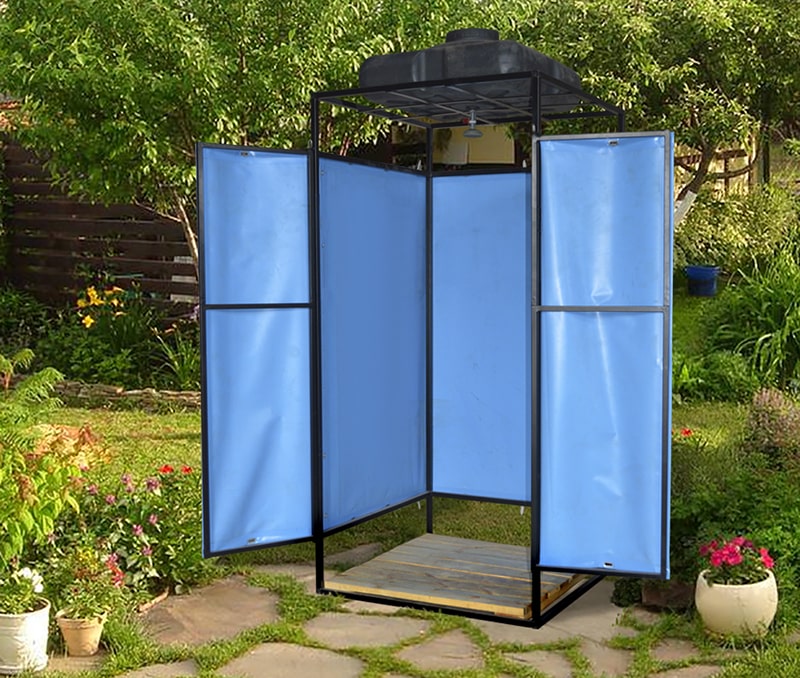
The interior of the summer cabin
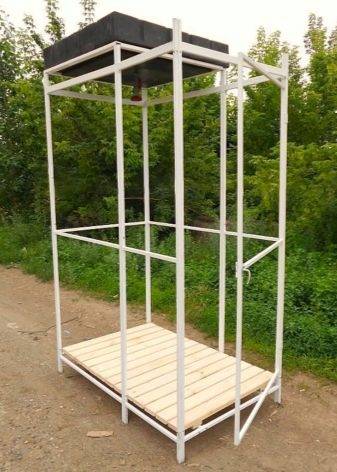
A shower designed for outdoor water procedures is a four-part structure:
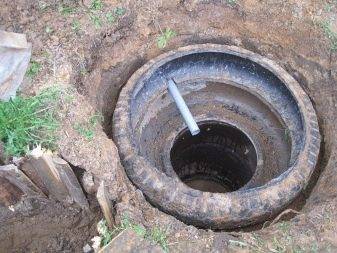
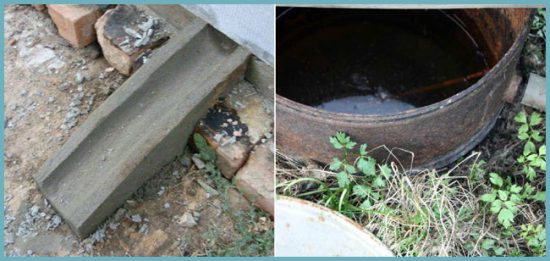
- A drain hole dug deep and wide by half a meter. If you make a recess in the ground with high quality, counting on long-term use, then you need to furnish it with brick sides. The laying should be done in a checkerboard pattern, as this will improve the absorption of flowing water into the soil;
- Floor slab, lying on top of the drain pit and supplemented by a sewer drain;
- Shower cabin, made up of walls no more than 2.2 meters high. The main thing is that the booth is made of strong material, does not loosen and can withstand the weight of a barrel of water;
- Large container filled with water. Its volume must be selected based on how many people want to take a shower in one day. Usually one person spends about 25 liters on water procedures. Two holes should be provided in this barrel - for filling with water from a water pipe or bucket and for installing a tap with a perforated nozzle from a watering can.
All of the listed parts of the summer shower can be improvised materials. For example, nothing prevents you from assembling a booth from metal sheets left over from arranging a fence for the house. Pipes can become supports for it.
In a summer shower made from improvised materials, in comparison with a purchased booth, the following advantages should be noted:
- low cost of materials for construction;
- the ability to make a shower with a unique design and shape, tailored to the local landscape;
- a shower stall made of some materials (polycarbonate or film) is easy to move to another place or clean;
- assembling a homemade shower does not require complex drawings;
- conscientious construction, because you have to use the booth yourself.
True, the home-made design of a summer shower has one significant drawback - a large waste of time and effort for construction.
Arrangement of a drain for a summer shower
The issue of water drainage can be solved in several ways, the main thing is not to make a swamp out of your own garden. Drains can be diverted to a filtration well, from where they will gradually seep into the ground. Or equip the filtration field. The way to organize such cleaning in summer cottages is often the distribution of water through channels, for example, between beds.
Waste water from the shower can be drained in an open or closed way. An open drainage system, also known as an ordinary ditch, can be made if the soil is sufficiently moisture resistant and the water flow is small. Sometimes the walls of the channel need to be further strengthened.
 Drainage options for a country shower
When constructing drains with your own hands, it is important to ensure that the slope of the channel is 0.5-1 centimeter / 1 meter. A closed outlet differs only in that the water leaves through pipes dug underground
Usually, a closed-type drain is equipped if the water goes to an autonomous treatment plant.


