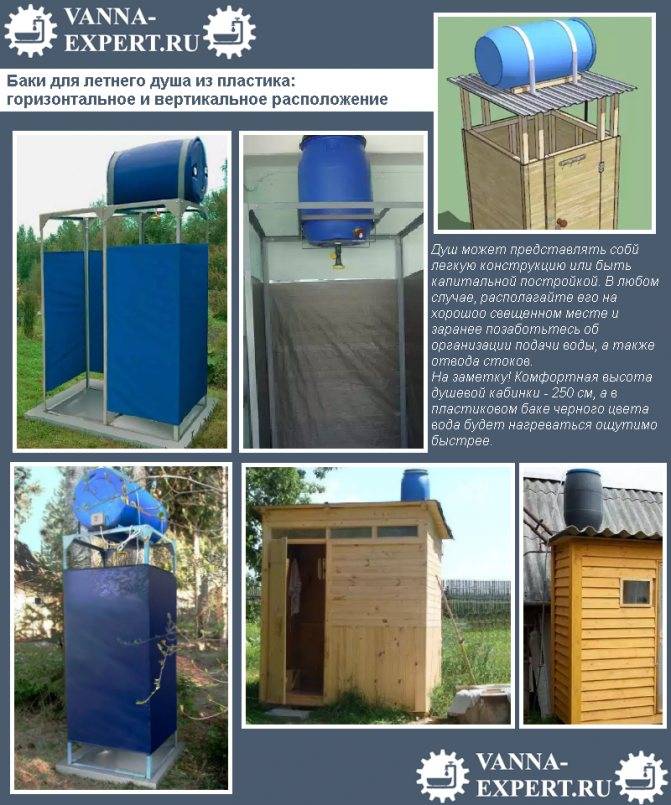
- Summer shower insulation
- The main steps in creating a shower cabin
- Description of species
- Simple
- With dressing room
- with toilet
- Water supply to outdoor shower
- Easier nowhere
- Simple but convenient and not expensive
- Automated heated systems
- Summer shower manufacturing costs
- Water drainage schemes
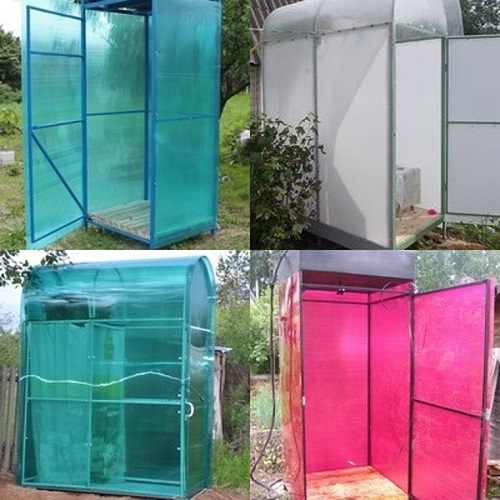
- Varieties of designs
- A simple summer shower for a summer residence made of polycarbonate
- Shower for giving from polycarbonate with a dressing room
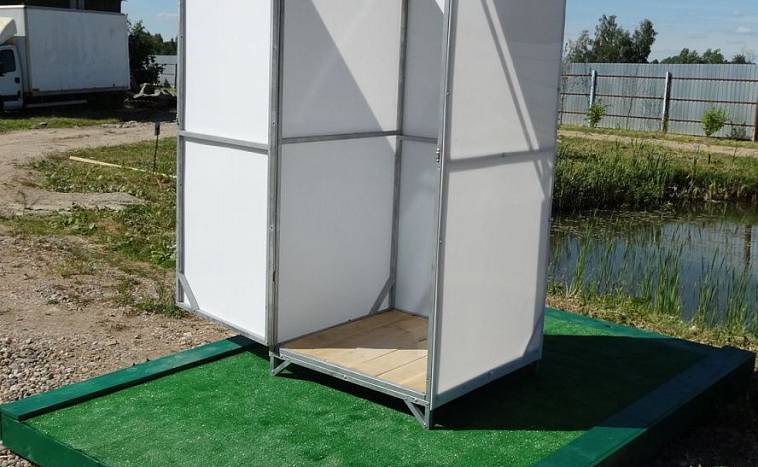
- Shower with toilet for a summer residence made of polycarbonate
- Installation of a tank for a shower, water supply and heating
- Sequence of work
- Features of self-installation of various types
- Choosing a place for a summer shower
- Calculation of dimensions
- Organization of water drainage in the summer shower
- Foundation laying
- Tank filling and water heating
- How to auto-fill a tank
- Organization of heating
- Construction technology of a summer shower made of polycarbonate
- Frame assembly
- Do-it-yourself shower design options for giving with a photo
- With metal frame
- Made of bricks or blocks
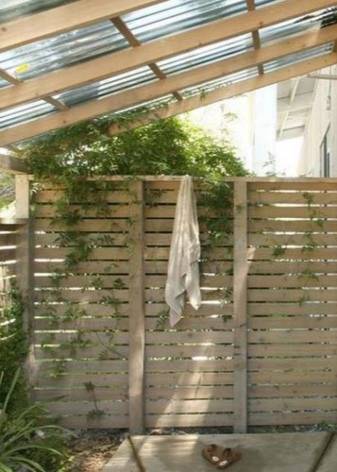
- from wood
- Polycarbonate
- Conclusions and useful video on the topic
Summer shower insulation
Why insulate a simple summer shower if it is used in the warm season? The fact is that carrying out thermal insulation work will significantly extend the life of this structure. The main thing is to competently conduct insulation around the perimeter. For this use:
Mineral wool.This is an environmentally friendly material that is very easy to install. The mats are laid in the frame, after which it is sheathed from the inside. To prevent moisture from entering the material, it is covered with an impervious film.
Shower frame prepared for installation of insulation
Glass wool. If desired, it can be used to warm the shower in the country
Of course, when working with it, you need to be careful, and carefully follow the installation instructions.
Waterproof foam. It is a modern material that is optimally suited for warming an outdoor shower
To do this, it is enough to use plates with a thickness of 5 cm. They fit into the frame, on top of which the interior walls are finished.
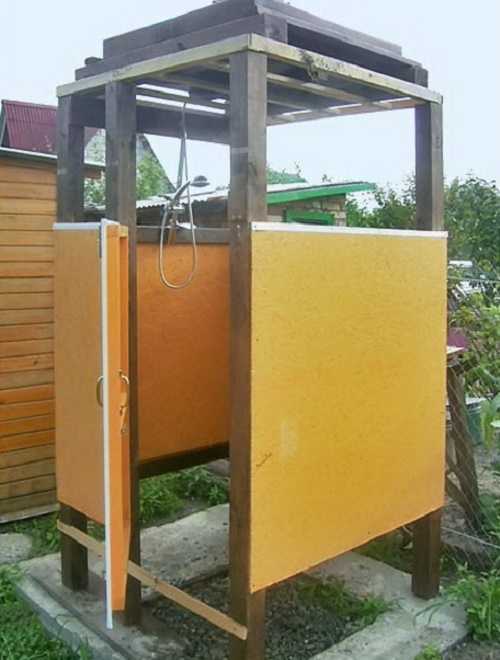
The main steps in creating a shower cabin
First, a hole is dug, which is equal to the size of the shower cabin that will be in the future. Large stones or gravel for drainage are poured into the bottom of such a pit, drainage is necessary, as it will contribute to better absorption of water.

But you can also make a special septic tank, for example, from rubber tires, right under the shower, you don’t need to pump out such a septic tank, since the water will leave through holes in the tires. This option is more versatile if several people will use the shower. Next, cinder blocks are installed in the corners.

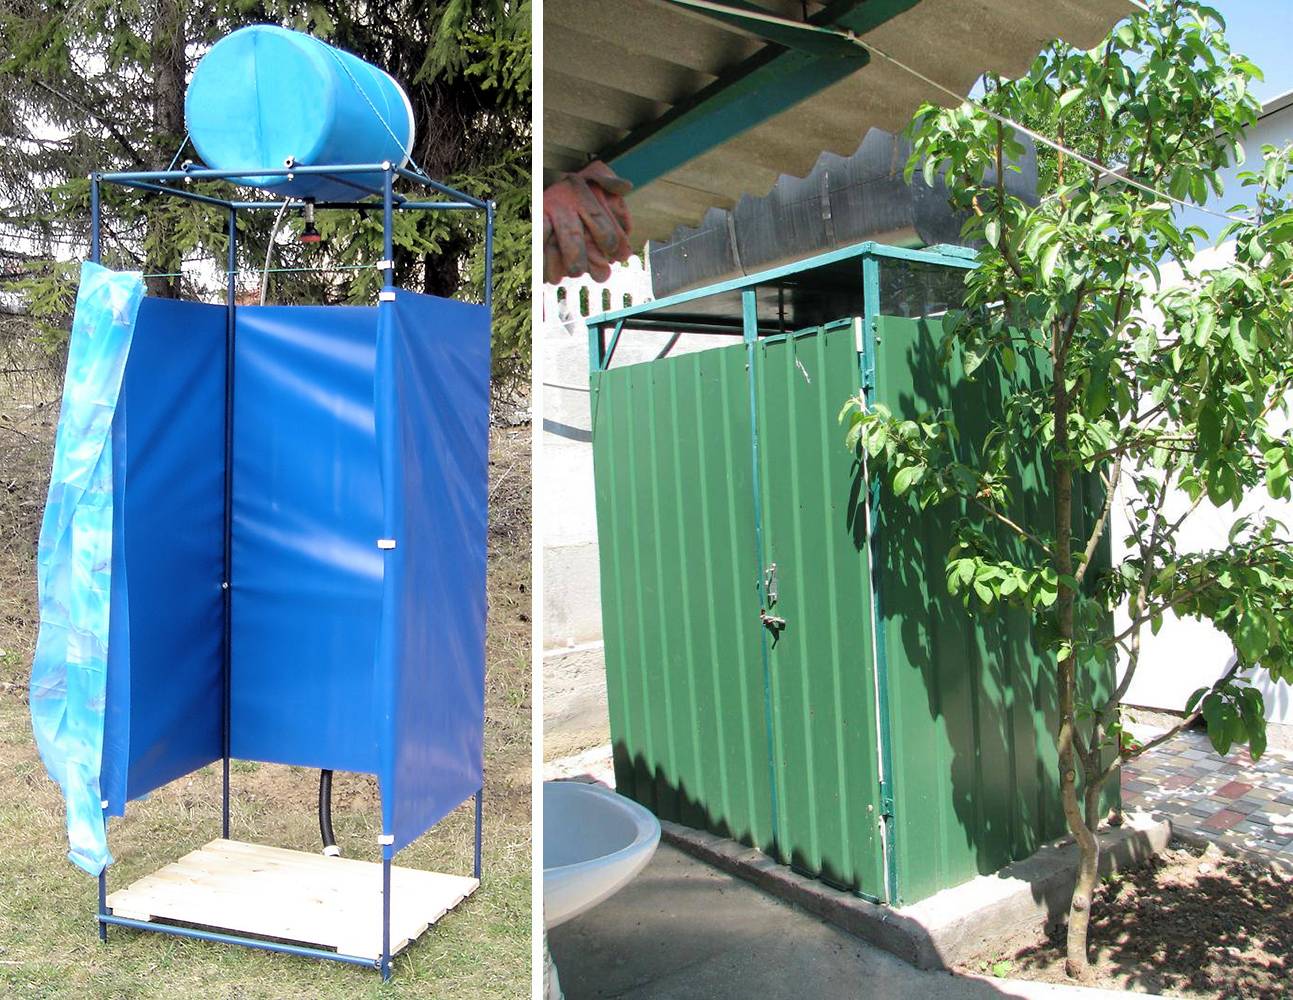
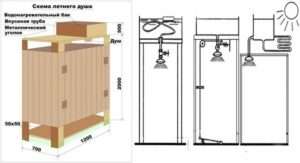
Next, a shower frame is made, which will later be sheathed and thereby create a shower cabin. The frame is made of beams, their height depends on the desired height of the shower, the width of such a beam is usually 15-17 cm.

The beam is installed on the base, using transverse jumpers. All this serves as an amplifier for the roof, on which a 100 liter water tank will be installed.
This frame, which was made, allows you to sheathe the shower cabin not only with wood. For sheathing, you can use, for example, dark polycarbonate, which also attracts heat, as in a greenhouse. Or, for example, a profiled sheet, which is also attached to self-tapping screws in the same way.


We sheathe the frame, the one that was erected. To sheathe the frame of the shower, there are different wooden materials, for example, lining or blockhouse, which will be used in this particular master class.

Before finishing the shower, it is necessary to prime the wood, this will eliminate its decay and the appearance of fungus, and also protect it from pests. Further, the finish can be painted, for example, with acrylic varnish.

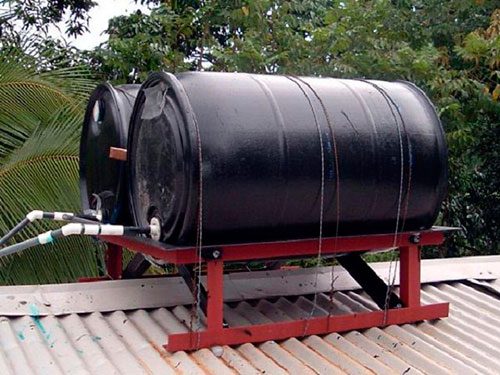
The last and final step is to hang the tank. Basically, a water tank is taken about 100-200 liters, these volumes warm up better and, as a rule, they are enough for several people. Also, the barrel or tank should be painted black, or another, but dark color that will attract heat.

The tank is installed on the roof of the shower, which also enhances the heating of the water, and contributes to its supply. It is necessary to carry out a watering can, a tap or a pipe into the tank, with the help of which water will flow into the shower itself.

Some also install the shower so that they approach it. rainwater drains from rooftops, since it is considered softer, but this is, as they say, an amateur. If the tank will be filled manually, it is also necessary to provide a ladder that will approach the tank.

We hang a curtain, shelves, if necessary, and also hooks. Do not be afraid to create a custom shower stall design, for example, install a door, not curtains. Paint the shower white and much more, whatever your imagination desires.

You can look on the Internet for photos of a summer shower made by yourself, which will help you create your own, but in any case, an exclusive booth. Some create entire summer baths based on summer showers. It all depends on imagination and desire.

A shower in the country is, of course, good, but in certain regions it may not be such a hot summer and therefore it is necessary to heat the summer shower.

The easiest option for heating water is to heat the top words with a boiler. This is the easiest way that does not require significant costs and effort. You just need to connect the boiler to electricity, and place the boiler in the tank.

So all the ways were described on how to make a summer shower with your own hands. The construction of such a shower cabin takes several days, and if you involve relatives or friends, then you can do it in one day. But such a summer shower will delight the entire hot season.

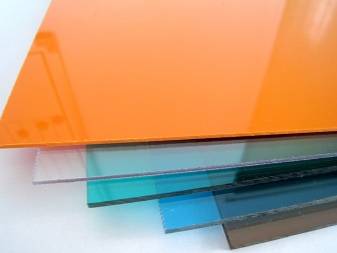
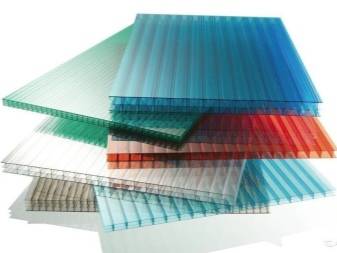
Description of species
Polycarbonate refers to thermoplastic polymers, it is divided into several types:
- monolithic, smooth and durable;
- honeycomb, structured, containing plates between two canvases, resembling honeycombs from the end.
Having decided on the type of building material, you should choose the design of the shower building for yourself. It can be simple (dacha option) or supplemented by a dressing room, toilet, pantry. Sometimes, next to the shower, they arrange a corner for relaxation with a bench, under a common canopy.


But there are options for buildings without a tank. Heated water is supplied through communications from a private house or kitchen, standing separately in the yard. Such a shower also refers to a summer building and has nothing to do with a bath.Let us consider in more detail the different design variations of the outdoor shower.
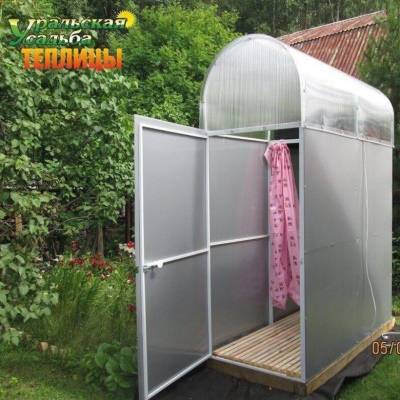
Simple
A building that performs only the function of a shower, without any additions, can contain any shape, be rectangular, square, cylindrical, round.
At minimum parameters, the movements of the hands of the washing person should be taken into account, too close walls can interfere with water procedures.
A simple shower has some accessories:
- a pair of hooks for towels and bathrobes;
- a shelf for soap, shampoo, washcloths;
- lighting if the shower is used in the evening.
With dressing room
Even a spacious shower equipped with a hanger cannot always guarantee dry towels and clothes. Moisture on textiles occurs for various reasons: due to too active bathing, an uncorrected turn of the shower, cramped cabin parameters. The exit is a double room, separated by a light polymer wall or curtain.


The water flow from the shower occurs through the slope of the floor, descending to the drain grate.
with toilet
Often, outdoor showers are arranged under the same roof as a toilet. The entrance, most often, they have a different one. They resort to the construction of such a structure for many reasons:
- in order not to spoil the aesthetic appearance of the territory, household buildings scattered in different parts of the site;
- a double structure takes up less space than two independent objects;
- on a building connected by a common roof and walls, you can save building material;
- it is more convenient to use when all the outbuildings are collected in one place.
A frame made of a shaped metal pipe or a wooden beam is mounted on the foundation, then the walls are sheathed with opaque polycarbonate. The roof is usually installed shed.
Water supply to outdoor shower
All water supply options can be divided into three groups:
- with manual filling and dispensing;
- mechanized;
- automatic, based on electric systems for heating, feeding, dispensing and control.
Easier nowhere
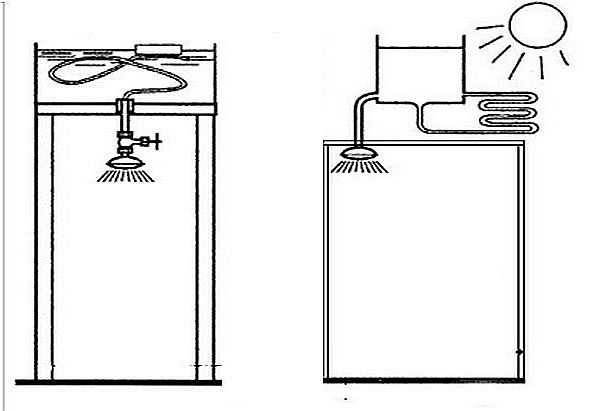
Fully manual options are now used relatively rarely. In fact, the design is a tank open from above, where water is poured from any source (well, river, lake, well, rainwater collectors). The heating of the liquid is carried out by solar heat, the issuance is through the simplest taps or valves, through a hose with or without a shower head.
An important nuance: the water outlet hose is attached to the float at the top of the tank, as shown in the diagram above. This is done in order to take warm, sun-warmed water.
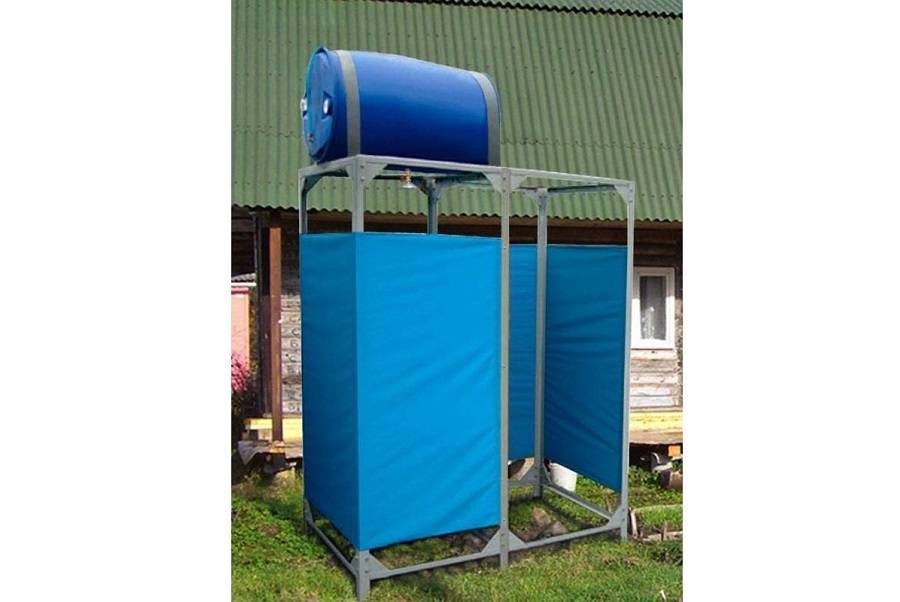
This also includes mobile "marching" options. In fact, this is a container - a bottle, a bucket, a tank - into which a small pump with a hose is immersed.
We will not consider even simpler options, such as a container with a watering can suspended on a tree or other high object.
Simple but convenient and not expensive
Much more often, schemes with partial or complete mechanization of water supply are used. The tank in this case can also be open, but the closed version is more successful. Water is collected using a hose (pipe) connected to a liquid source and an electric pump. Connection to a well, central communications, a reservoir of any type is possible. In the latter case, it is necessary to treat the water at the intake stage, otherwise the entire system may become clogged. Often in such a scheme water heating is provided.
If the fence is made from a well or well, it is advisable to install pumping equipment of increased power and productivity, and directly at the fence site, as well as install check valves.
If there is no place in the well or wellbore to install the pump, you can mount the equipment at or near the point of consumption.
At the same time, for seasonal living, it is better to immediately provide for the possibility of turning off the pump and preserving the entire water supply system.
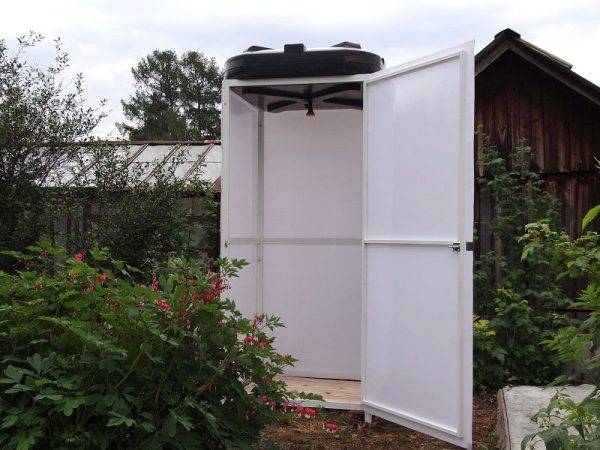
A convenient shower tank mounted directly on the roof of the building (or instead of the roof - if we are talking about relatively flat wide models).
For normal operation of this design, a constant connection to a source of water and electricity is necessary. In this case, electricity is used both for pumping fluid and for heating it.
Considering that the water supply to the tank is automated, it is necessary to prevent its overflow. For this, mechanical or electrical float valves are used, which stop the water supply when it enters in excess of the required level.
On sale there are a number of ready-made solutions that include all the necessary elements and need only to be connected to water and electricity. At the same time, quite often there is also a shower cabin.
Automated heated systems
This is the most complex and costly, but also the most comfortable way to organize a summer shower for a summer residence. True, due to the sufficient complexity of the system, its installation will require either serious knowledge and skills, or the participation of professional installers.


Products with water heating due to solar radiation are very popular. Below is a diagram of such a device.
Given that summer days are not always pleasing with sufficient solar activity (this also depends on the region), it is more convenient to have options with the possibility of heating from a backup heat source - a heating boiler.
A complete diagram of a heated summer shower may look like this.
The control unit is optional, control and adjustment can be done manually. But it’s better not to be stingy and install automation in order to wash calmly, without running around to constantly check the level of heating of the tank and the presence of water in it.
Summer shower manufacturing costs
Speaking about the economic component, it should be noted that the independent arrangement of a summer shower is much cheaper than ready-made structures. Of course, manufacturers offer a wide range of products that differ in size and shape, style and materials used. The cost of finished structures fluctuates around 10-20 thousand rubles, not all summer residents are ready to spend that kind of money to take an illuminating shower.
As for the do-it-yourself design, its cost depends on the materials used. If you plan a stationary shower with a foundation, a high-quality frame and waterproof lining, then you will practically not be able to save money, and the final price of the structure will be the same 10-15 thousand rubles. True, it should be noted that in this case the owner of the cottage will receive not only a beautiful, but also a durable outdoor shower, the construction costs of which will justify themselves more than once.
If a simple shower (portable or mobile) is enough for the homeowner, and improvised materials are used to create it, then the implementation costs can be reduced to zero.When arranging light structures, there are no particular difficulties, but the construction of a stationary summer shower scares many. In fact, there is nothing wrong with this, and the help of specialists is not required, the main thing is to clearly follow the instructions, observing all the norms and requirements.
The time spent on the construction of the structure also depends on the type of summer shower and the materials used to implement it. A bucket shower or a simple mobile shower can be organized in a couple of hours, but a stationary shower made of brick or wood, erected on a pile foundation, will take at least 2 weeks. Approximately 7-10 days are needed to create the base, a couple more days will be needed to assemble the frame and its sheathing.
Water drainage schemes
Despite the fact that the consumption of water per bather is usually small - about 30 ... 50 liters - with two or three users, a simple discharge of liquid into the soil can become a problem. Therefore, it is better to decide in advance how to divert wastewater.
One of the ways is the device of an open ditch or a closed pipe.
But it is more reasonable to carry out a full-fledged output to a septic tank, a treatment center or a centralized sewer system. You can read more about how to flush here. You will also be useful information about the independent device of the septic tank, if you prefer this way of getting rid of drains from the summer shower.
Varieties of designs
The flexibility of polycarbonate allows you to create structures of various shapes and purposes.
The shape of the shower can be:
By appointment, the following types of showers are distinguished:
An outdoor shower for a summer residence is a frame structure of various shapes. A water tank is installed on top of the cabin.It is not difficult to create a design with your own hands:
- Prepare the base.
- They erect a strip foundation or foundation on piles.
- The frame is made of aluminum or steel profile.
- Lined with polycarbonate.
- Install the tank.
- Bring water.
- Arrange the interior space.
Drainage is diverted in various ways:
- equip a septic tank;
- pipes are used
- build collecting pallets;
- create drainage systems.
In some cases, they equip a summer shower in the country with hot water. The easiest way is plumbing. However, not every suburban community has this luxury. Sources of hot water supply can be flowing or storage water heater.
Most often, summer residents install a boiler for the kitchen and shower. In this case, the outdoor shower is adjacent to the outer wall of the kitchen.
Attention!
For a family of three, a storage water heater with a volume of 50 liters is installed. The water in it heats up within an hour.
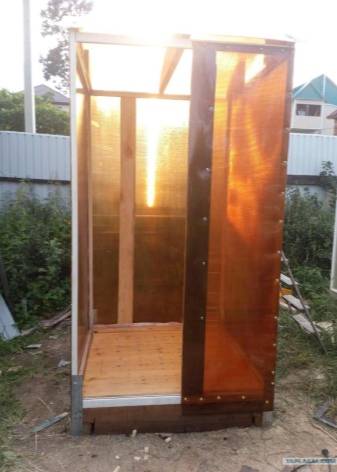
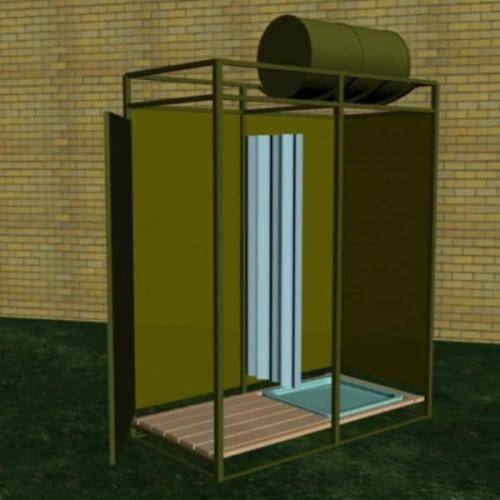
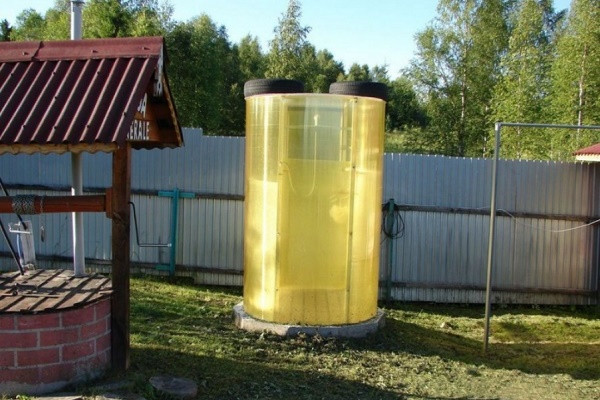
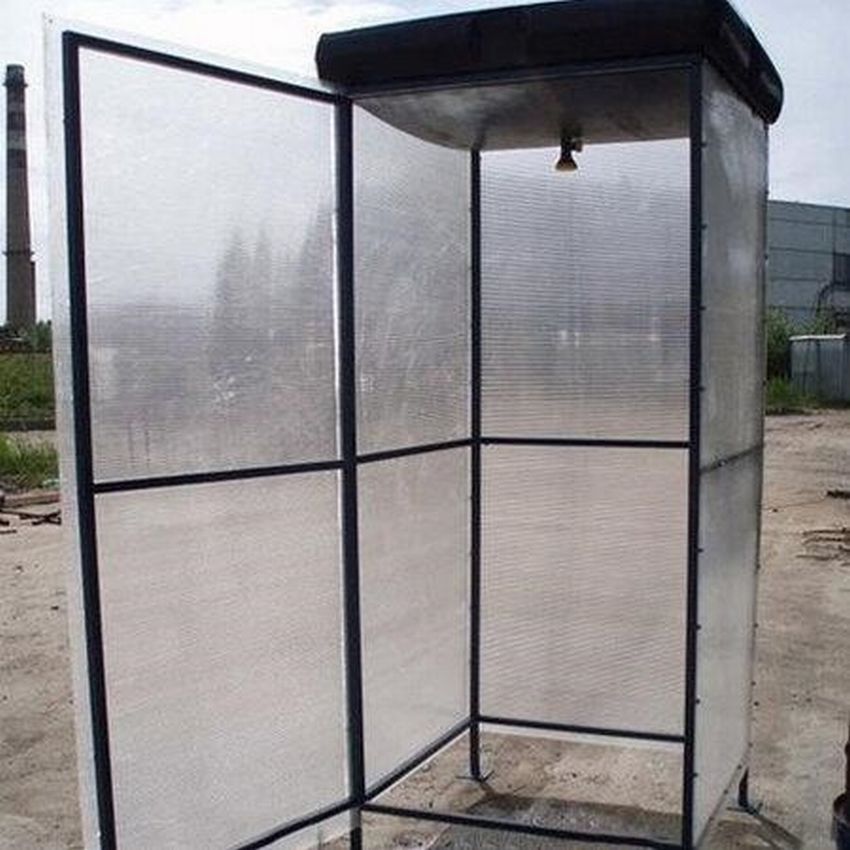
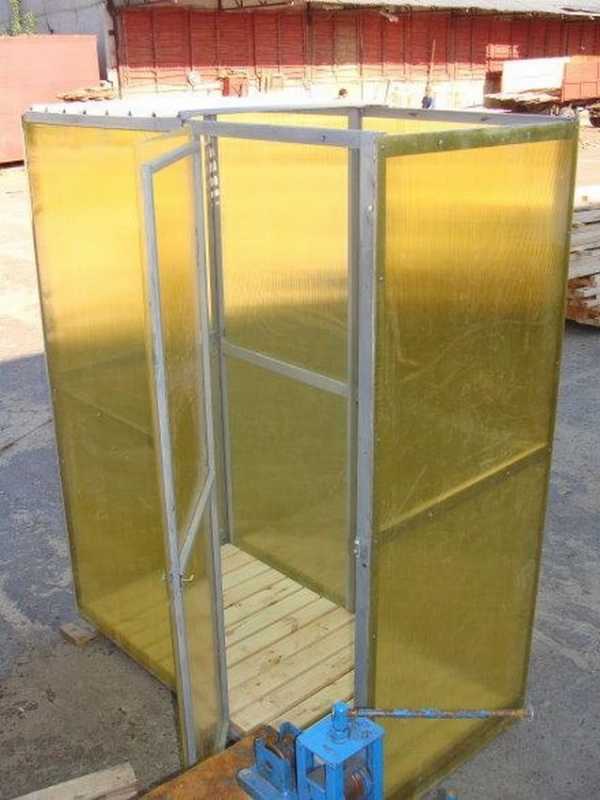
A simple summer shower for a summer residence made of polycarbonate
The base of a simple polycarbonate garden shower design can be round or square.
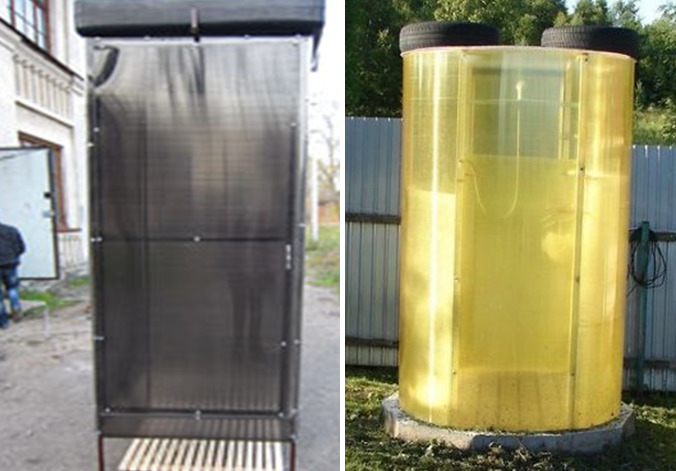
Photo instruction for the construction of a summer shower in a polycarbonate country house with an absorbing well:
- At the selected site, a pit is prepared according to the size of the shower stall, with a depth of 1-1.5 m.
- A third of the pit is covered with fine gravel, the second third with medium-sized gravel and the third with coarse gravel. A formwork of boards or bricks is installed along the perimeter and the foundation is poured, leaving a drain hole in the center.
- Assemble the frame. Produce the second stage of pouring the foundation with a slope to the center.
- After the concrete has dried, the water drain hole is treated with bituminous mastic.
- The frame is sheathed with polycarbonate.
- A pallet made of planks is laid on the shower floor. Connect the water supply hose.
- A water tank is installed on the roof.
- Equip the interior of the cabin. Attach the siphon, shelves and hooks.
Country shower is ready. Before operation, check the water supply and drainage system. If deficiencies are found, they are eliminated.
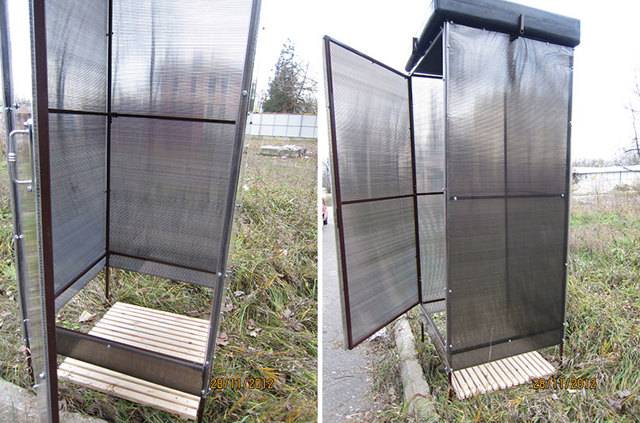
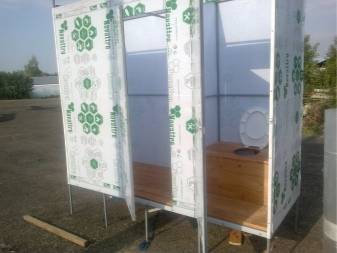
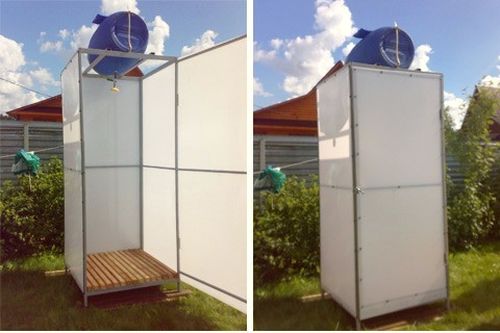
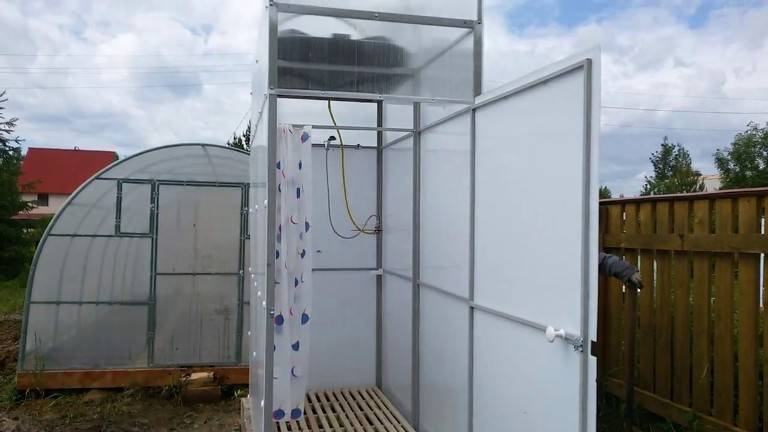
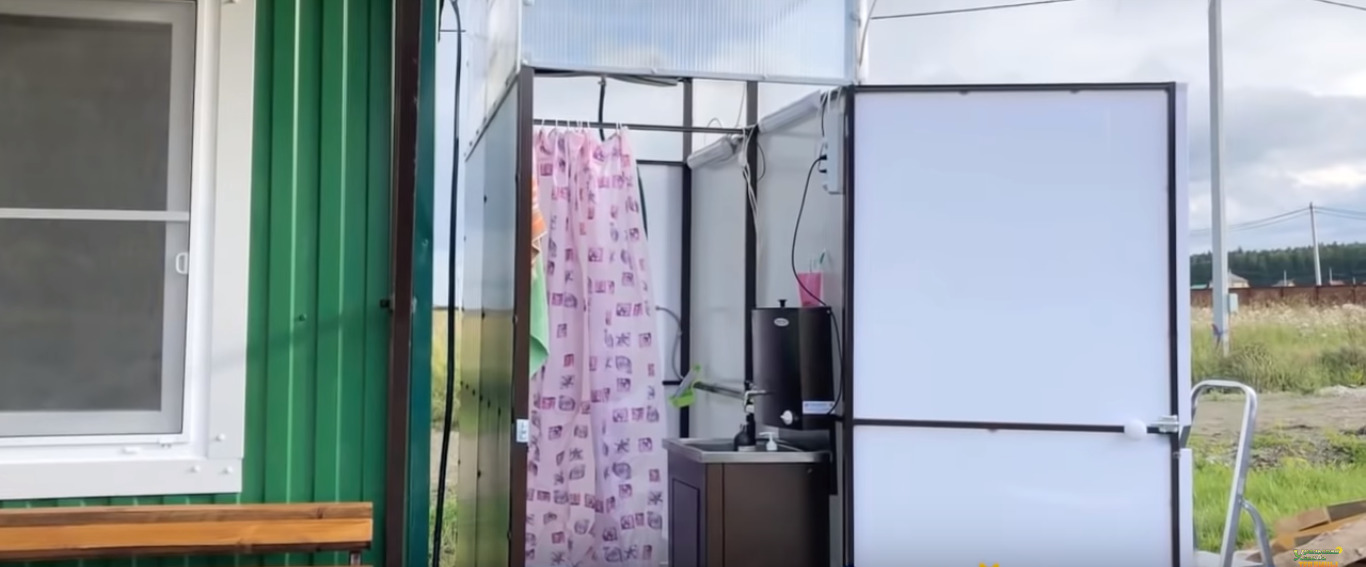
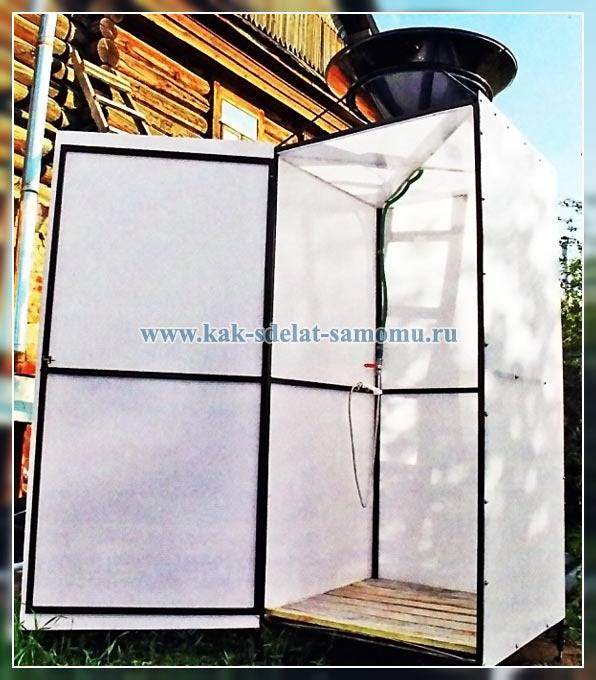
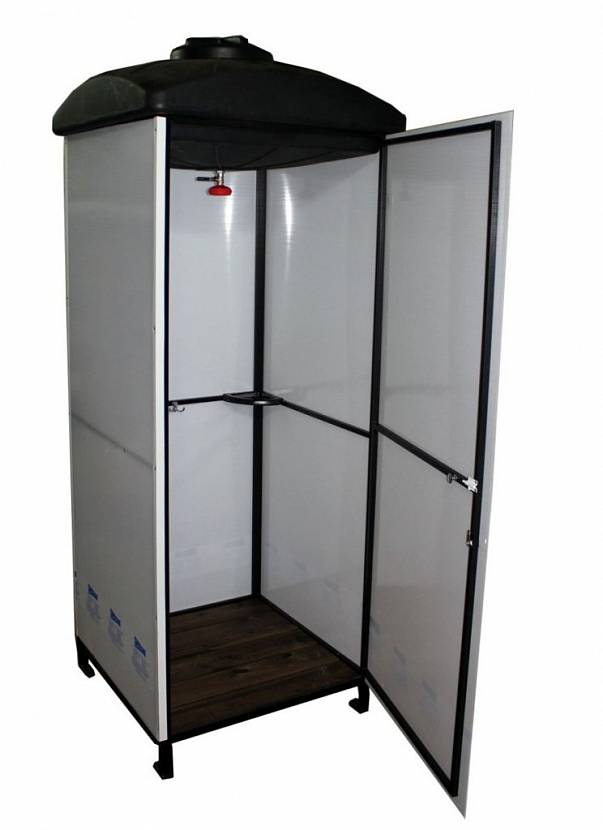
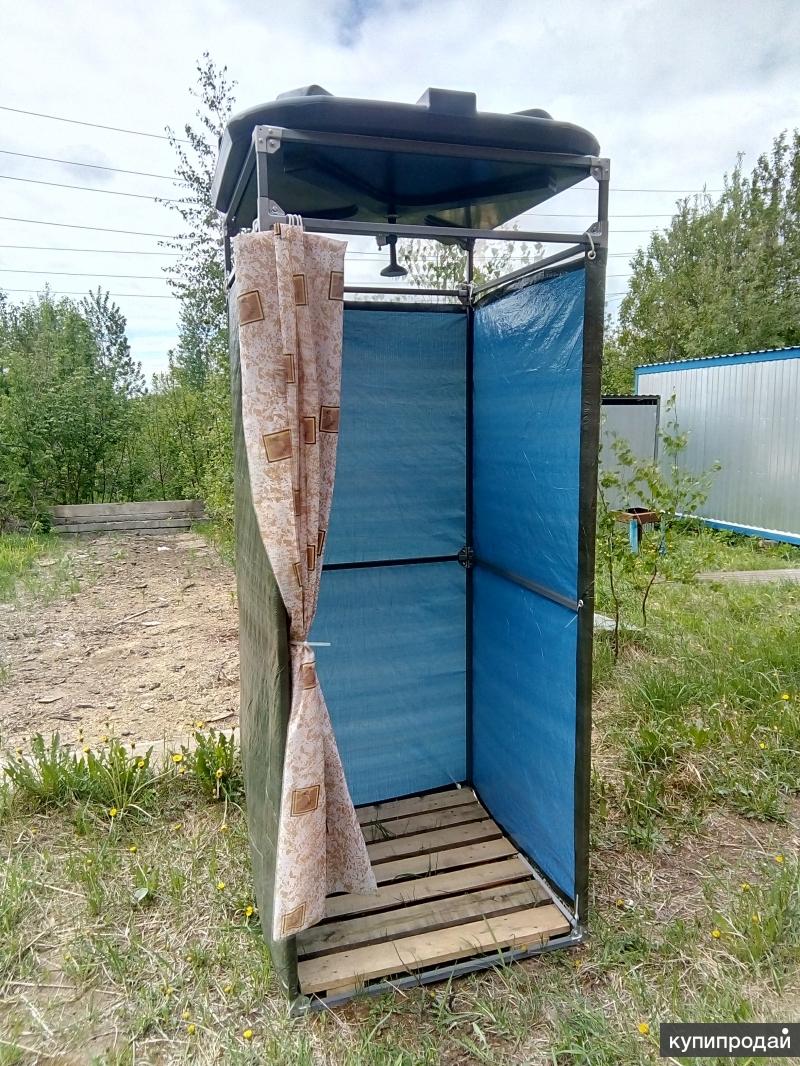
Shower for giving from polycarbonate with a dressing room
When building a shower for a polycarbonate cottage with a dressing room, one should take into account its differences from a simple design. They consist in the fact that the space is divided into two sections with a waterproof curtain for the bathroom or a lightweight door.
For water drainage in the floor, a slope under the drain with a grate is provided. The wooden crate will not allow moisture to accumulate in one place and will contribute to the rapid drying of the cabin.


![[instruction] do-it-yourself shower in the country: dimensions and drawings](https://fix.housecope.com/wp-content/uploads/5/9/e/59eaa6e07050878ffe6b7b2fe15790f5.jpeg)


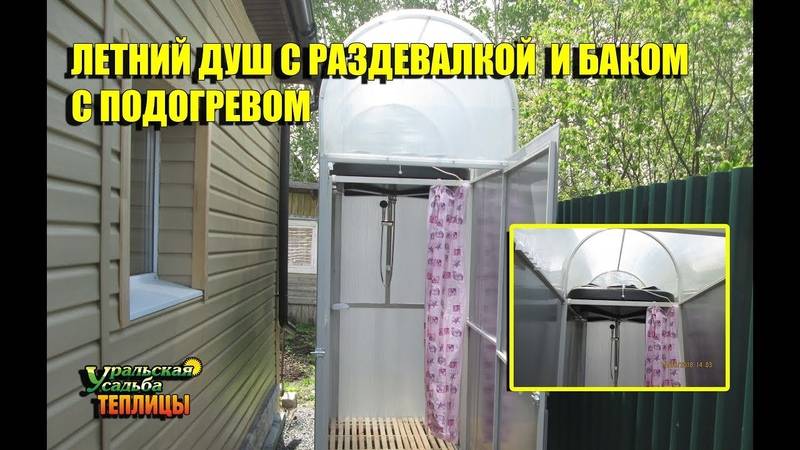
Instructions for installing a shower with a dressing room and a heated tank:
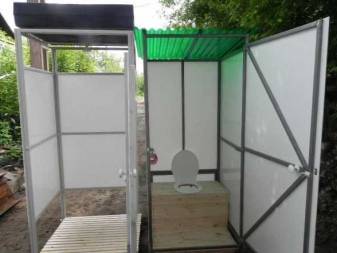
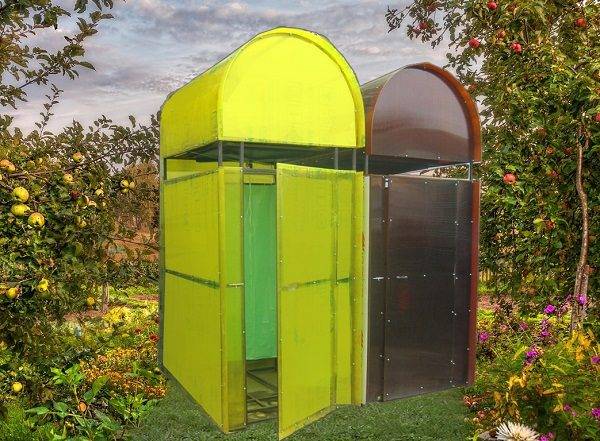
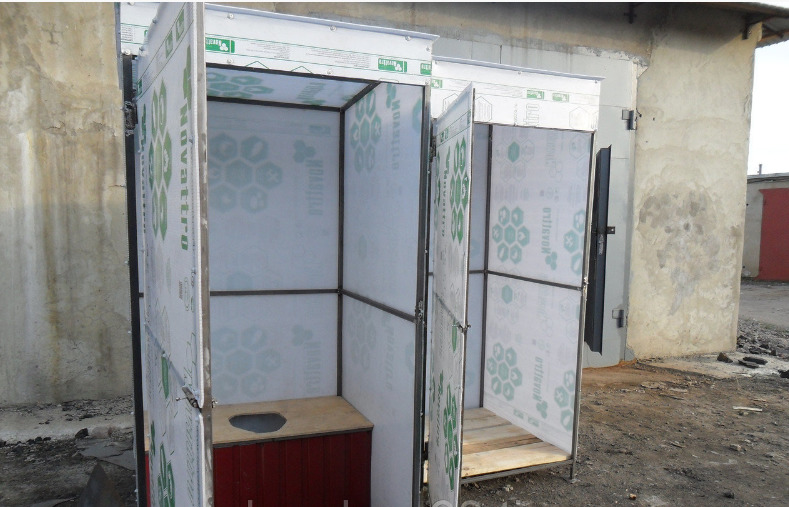
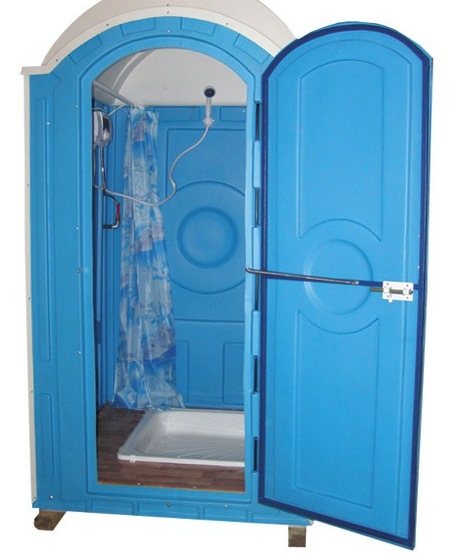
Shower with toilet for a summer residence made of polycarbonate
Summer residents often equip a hozblok at their dacha, which solves several problems. It includes:
- toilet;
- storage space for garden tools.
Sometimes the hozblok includes a kitchen. The summer building is built from inexpensive building materials. A frame structure made of a profile sheathed with polycarbonate is a budget option.
A place in a summer cottage for arranging a hozblok is chosen according to the same parameters as a toilet
It is important that drains do not enter the source of drinking water, so if a well is located on the site, the distance from it to the utility block should not be less than 30 m
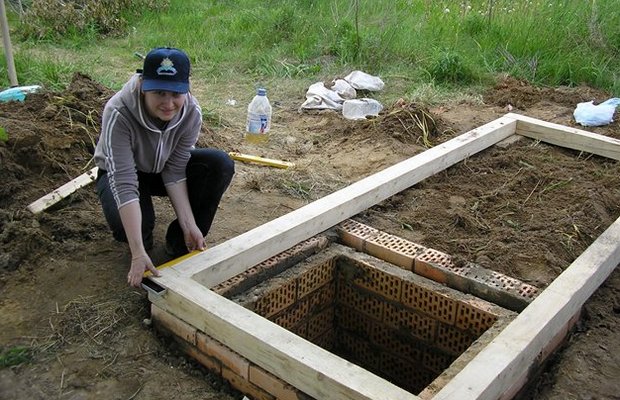
Before arranging the foundation of a shower with a toilet, a cesspool is prepared.
On the equipped foundation, a frame is erected from a metal profile or wooden beam 4*4 cm. Erect the base under the toilet seat.
The next step is to build a gable roof. Equip the base in the shower room. Sheathe the frame and the interior.

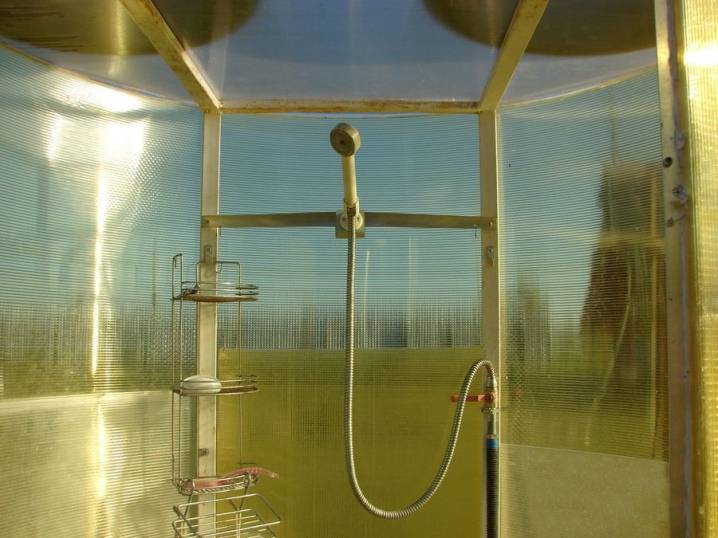
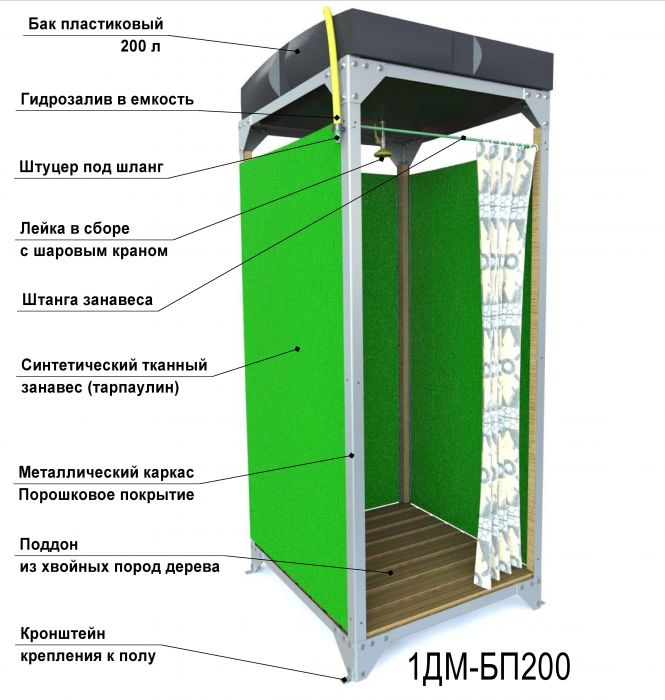
Installation of a tank for a shower, water supply and heating
The choice of tank should be approached very carefully. In this case, it is worth considering some recommendations of professionals:
- Metal containers heat up faster in the sun. Plastic containers are distinguished by their durability, due to resistance to corrosive processes. They also have a small weight, which will reduce the load on the frame.
- The water tank should be painted in a dark color, which will speed up the heating. This is ensured by better heat absorption.
Most often, the shower tank is dark in color.
- The tank must be sealed to prevent dust and dirt from entering the water.
- Before installation, holes are made in the tank for a tap and a water supply.
Today in the store you can find ready-made designs that have a watering can, tube, faucet and fittings in their kit. A sensor for monitoring the water level and its temperature will not be superfluous. The container is installed and fixed on the prepared frame.
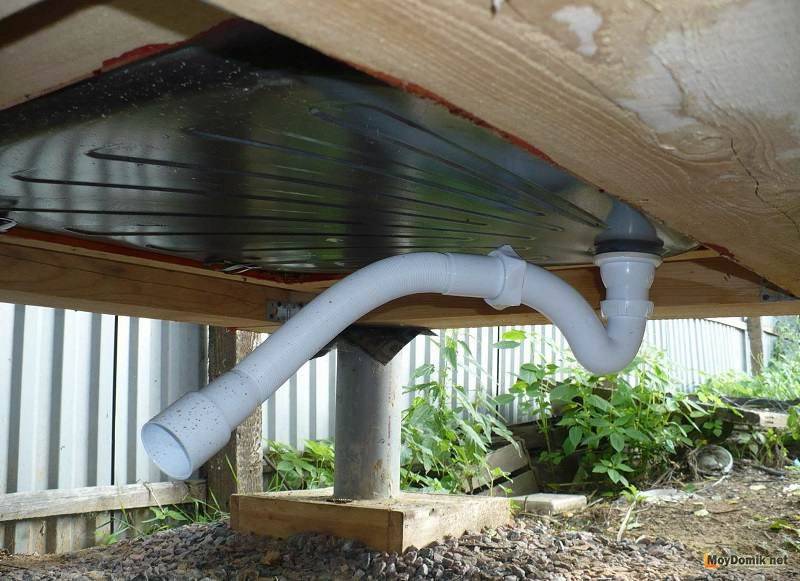
Water pipes are used to supply water to the shower:
A trench is being dug at the pipeline site. Its depth should be greater than the level of soil freezing. This will protect the system from frost.
The pipeline is going
Particular attention is paid to the junction of pipes. They must be tight and secure.
At the end of the line, a water tap is installed, with the help of which water will be supplied to the pipeline.
The pipeline is insulated with mineral wool and laid in a trench. If it is necessary to supply electricity, the electrical cable is buried in the same trench with the pipe. This will make the job easier.
At the final stage, the pipeline is connected to the water source and to the storage tank. In the latter case, polyethylene pipes or a garden hose can be used.
Water tanks can be installed separately - in this case, you can increase the volume of heated water
If necessary, the garden shower can have independent water heating. A common option is to install heating elements. Also, heating is carried out using a boiler or a gas boiler of low power. When installing these heating elements, safety requirements should be taken into account.
Solar panels are also used for heating. This is a glass box with a coil inside. With its help, a greenhouse effect is created, which leads to water heating.
Sequence of work
In general, the sequence of work in the construction of a shower with heated water in the country with their own hands includes the following steps:
- Creation of a sketch and marking on the ground.
Scheme of a shower for a cottage with heating using a plastic tank
- Installation of the foundation (for the filler, you will need to dig a mini-pit, and for the pile, drill holes in the ground).
- Installation of the frame (vertical and horizontal supports) and the upper ceiling for installing the tank.
- Hanging the door on one of the vertical supports.
- Sheathing the frame with the selected material for the walls.
- If necessary, thermal insulation of the structure and installation of a roof over the space for the tank (only for forced heating).
- Installation of the tank and installation of heating equipment, reflectors, protective film (depending on the type of heating chosen).
- Installation of hangers, hooks and shelves.
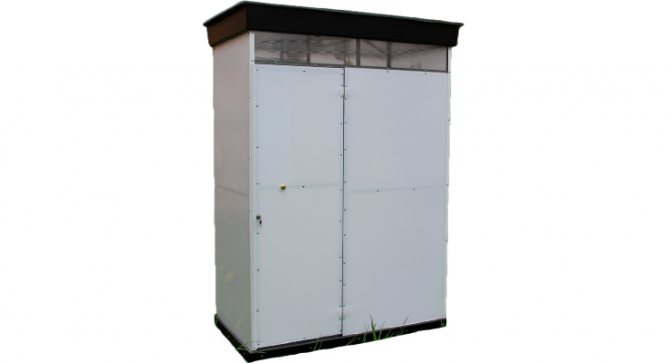
Speaking of ready-made options, we can mention a heated plastic shower for a summer residence, which already includes a water heater. How it looks you can see in the photo.
Ready-made plastic country shower with heating
Features of self-installation of various types
The functions of the device used in summer cottages can be expanded if you use the non-standard capabilities of its structural varieties.
For example, a circular shower, along with hygiene, will also provide a healing effect.
According to the principle of the device, a circular shower type consists of several systemically located pipes equipped with small holes and a faucet.
In the center is a holder with the main watering can. With the help of a tap, the water supply pressure is regulated.
Thus, the circular shower additionally provides a comprehensive hydromassage of the body.
To create an original shower craft, it is necessary to connect several pipes equipped with small holes in series with the central riser, on which the mixer holder is located.
In shape, the circular type of shower resembles the back of a chair with transverse or longitudinal crossbars.
Then you should take care of the flow of water - the ladder will cope with this task. The owner of the cottage has the right to decide whether he needs a pallet in this case, or a ladder will do just fine.


An excellent alternative to a regular shower can be a rain shower. This is a device whose water flows mimic a tropical downpour.
Functionally, a tropical type shower is a hydromassage device.
However, not every apartment has the opportunity to install a rain shower, but if such a design is installed in the garden, the impression of authenticity will be complete.
It is not difficult to build a rain shower in the country on your own. To do this, it is enough to increase the area of \u200b\u200bthe watering can of the mixer and strengthen its holder.
A ladder will help control the discharge of a powerful stream of water, which distinguishes a rain shower. It is also convenient to use a deep pan.
But you need to remember that both the holder, and the ladder, and the watering can must be of high quality.
Choosing a place for a summer shower
First of all, it is necessary to determine the place of installation of the future shower. When choosing it, you need to consider several points:
- The shower must be located in a place where the sun hits for most of the day, otherwise the water will not warm up to the desired temperature;
- It is better to build a shower on a hill, or at least on the edge of a slope, so that the water used during washing leaves evenly, and does not accumulate in one place;
- And, finally, it is desirable to place an outdoor shower in a place protected from wind and drafts.
Having decided on the place of construction, you can begin to create a project for your summer shower.
Calculation of dimensions
The draft design is of great importance in construction. The owner of the summer cottage must decide on the general appearance and dimensions of the summer shower structure and separately with each of its elements:
- booth;
- Door;
- dressing room;
Before building a shower from polycarbonate, calculate the dimensions of the objects
- water tank;
- water supply system to the tank;
- used water drainage system;
- foundation;
- frame;
- threshold at the entrance to the washing department;
- location of bath accessories;
- location of lamps.
Of fundamental importance in determining the dimensions of the summer shower are the dimensions of the washing booth. The recommended height is 2.2–2.5 m, and the width and length are about 1 m each. However, when designing the dimensions of both the booth and the changing room, one should be guided by the size of the shower users and the possibility of their joint stay in any of the departments.
After creating a draft design, it is necessary to calculate the quantity and cost of materials, and then make appropriate adjustments to the project.
To obtain the desired shower from polycarbonate, you should carefully follow the scheme for its construction.
Organization of water drainage in the summer shower
There are several ways to arrange a drain in a summer shower. So, water can be diverted into a filtration well or into a filtration field. In the latter version, channels are arranged between the beds. This will allow you to simultaneously irrigate the site at no extra cost.
Withdrawal is carried out in an open and closed way. In the first option, ditches are made at a slight slope from the collection point. Often this option is used on moisture-resistant soils. The closed method involves laying pipes in the ground.
It is necessary to decide where the used water will drain, given that it will be soapy
Foundation laying
Even if the load is small, it is not recommended to install an outdoor shower without a foundation at all. Hurricane winds, which are not uncommon in many regions of our country, easily overturn everything that is not securely fastened.
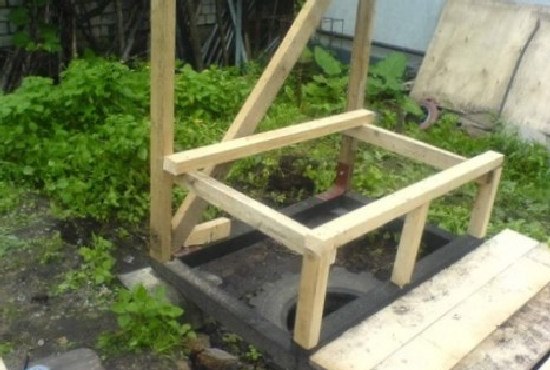
The foundation is made of concrete blocks or poured in the form of piles in the ground. The easiest and fastest way to lay the foundation for a small summer shower:
- drill or dig wells 60-80 cm deep;
- pour crushed stone to the bottom;
- install frame racks;
- fix the supports vertically;
- fill holes with concrete.
Supports made of metal must be pre-treated against corrosion, from wood - from decay.
It is better to lay a strip base under a brick building. Pour a layer of crushed stone or broken brick into a trench 30-40 cm deep, 20 cm wide, install formwork, lay reinforcement, pour concrete. After 3-4 days, walls can be laid.
Tank filling and water heating
Filling the shower tank with water is usually not a problem. Sometimes they carry water in buckets - if you want to wash, you will carry it. Not very convenient, of course, but it happens ... If there is water supply in the country, they fill it with a hose, install a supply pipe with a valve. It is necessary to add water - open the tap, the tank is full - closed.
How to auto-fill a tank
The most advanced do automatic filling. Then the water supply is opened / closed by a float system similar to the one in the tank. Only in the event of a breakdown, it is necessary to provide for the drainage of excess water. And, preferably, when leaving the cottage, shut off the supply tap. And then you can turn your own and neighbor's cottage into a swamp.
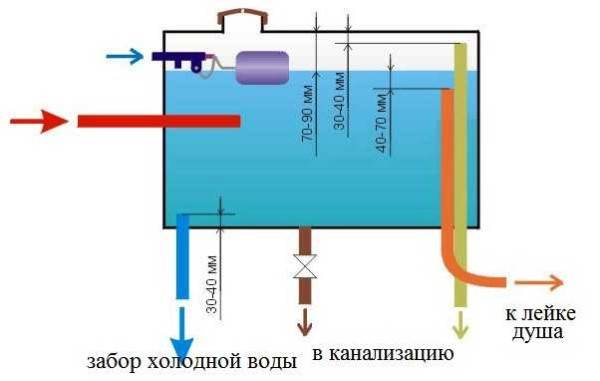
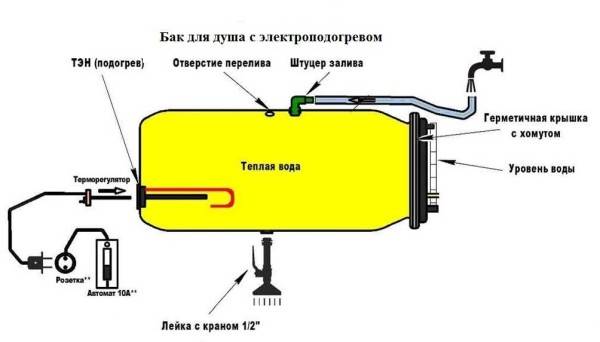
Water tank device with automatic level control
An exemplary scheme for the implementation of auto-filling the tank is shown in the figure above.
Please note: water is taken into the shower close to the surface: this is usually where the warmest water is located. Only this pipe is placed at the opposite end from the cold water inlet, otherwise the water will still be cold. Two pipes go to the sewer: one overflow (mustard color)
With its help, the tank will not overflow in the event of a breakdown of the float mechanism. The second drain into the sewer for a complete drain (brown). Useful for system conservation - draining for the winter, because a crane is installed on it
Two pipes go to the sewer: one overflow (mustard color). With its help, the tank will not overflow in the event of a breakdown of the float mechanism. The second drain into the sewer for a complete drain (brown). It will come in handy during the conservation of the system - draining for the winter, therefore a crane is installed on it.
Organization of heating
The easiest option is to use solar energy. Yes, it heats water through the walls of the tank. But the water column is too large for it to warm up quickly. Therefore, people come up with various installations for solar water heating.
Solar water heating method
As mentioned above, in the tank the warmest water is at the top. And the traditional feed comes from the bottom. That is, we take the coldest water. In order for the warmest water to enter the watering can, a hose is attached to it, and it is attached to a piece of foam that I let float. So the water intake is from above.
To speed up the heating of the water, they make a “coil” (in the photo above, this is the right figure). At the bottom of the water tank and above, two pipes are welded in one of its walls. A black rubber hose is connected to them, which is folded in rings in the sun. If there is no air from the hose, the movement of water will be quite active.
If the sun is not enough for you, but you can bring electricity to the soul, you can use heating elements (wet). We need them with a thermostat so that you can set the desired temperature. They are usually used in storage water heaters, so you can find them.
Scheme of the device for heating water with a heating element in an outdoor shower
When you pull the power line to the shower, do not forget to install an automatic device with an RCD. This is the minimum that will ensure your safety.


![[instruction] do-it-yourself shower in the country: dimensions and drawings](https://fix.housecope.com/wp-content/uploads/e/b/0/eb058d1c2e8389ca6cfa3cb99f1ae8e2.jpeg)
Construction technology of a summer shower made of polycarbonate
After determining the installation location of a garden shower made of polycarbonate and choosing the required dimensions, it is necessary to start building the foundation and sewer system.
- To do this, markings are made on the site for the dimensions of the shower, on which they dig a pit 30 cm deep.
- Profile pipes are driven in at the corners so that they protrude 10-20 cm above the ground surface.
- Sand is poured into it with a layer of 15 cm, it is leveled and rammed.
- A plastic pipe is laid with a branch, which with its end will stick up right in the middle or from any edge of the site.
- Crushed stone is poured with a thickness of 15 cm.
- Install the formwork around the perimeter of the pit from the boards.
- The concrete solution is poured with a slope towards the installed drain. The hole of the installed outlet must be closed, for example, with a rag.
- After two days, the formwork is removed.

Slab foundation for outdoor shower
The sewer pipe can subsequently be connected to the sewer system of the house. As mentioned above, there is the option of forming a drain into the sewer. Then it is not the slab foundation that is poured, but the tape (shallow). And between the foundation elements they dig a hole with a depth of at least 1 m, which is covered with rubble. A wooden grate is laid on top of the foundation, it will serve as the shower floor.
Frame assembly
As mentioned above, the frame can be made from a profile pipe or wooden slats.Since we already use profile pipes in the construction of the foundation, the frame structure itself will be metal. To do this, the same pipes of the same section are attached to the pipes installed along the perimeter of the foundation. Mounting method - electric welding.
Then assemble the lower and upper strapping. In fact, these are horizontally arranged elements connecting the installed racks.
Please note that the width of the polycarbonate sheet is standard - 2.1 m. And it is enough to close the wall of the summer shower
If the structure is being built large, then polycarbonate sheets must be joined on one frame element.
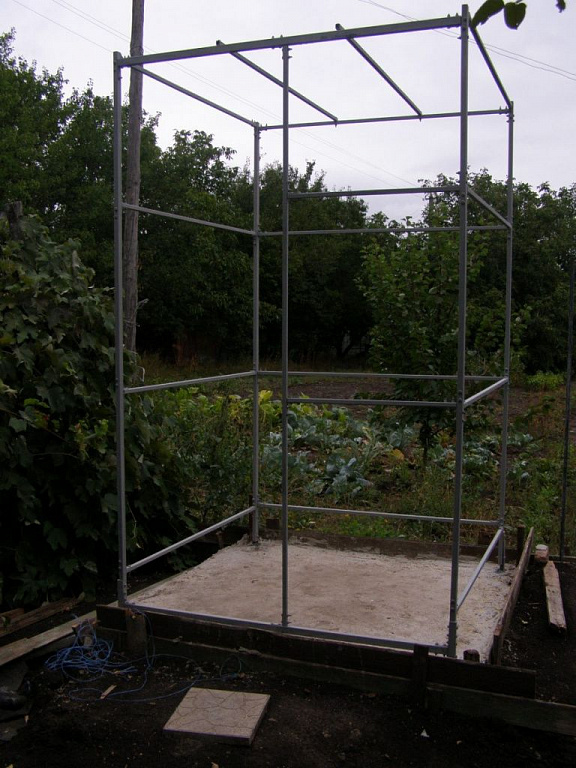
Polycarbonate shower frame
Do not forget that in the shower building it is necessary to take into account the front door. It will have to be formed by an installed vertical pipe, which is mounted between the element of the upper and lower trim. The width of the doorway is at least 0.7 m.
There is one more point that must be taken into account in the process of choosing the design of a summer shower. Will the building be with or without a roof. The first option is expensive, but it makes it possible to keep the building clean from leaves falling from above, dust and other small debris. The design of the roof can be any: single, gable, arched.
Do-it-yourself shower design options for giving with a photo
An outdoor shower can be built from any material intended for outdoor use:
- metal;
- plastic;
- bricks;
- concrete blocks;
- tree.
The design of the simplest shower is a frame on which the water tank located on top rests. The container is equipped with a spout with a mesh nozzle.
The water warms up in the sun, but if its heat is not enough, an electric heating element or a stove is built in for heating, where you can burn firewood or garbage.
The frame is sheathed with finishing materials or simply wrapped with a film. The entrance is closed with a door or curtained with a curtain, inside a grate or a pallet is installed under the feet.
With metal frame
Most often, the cabin is made of steel pipes or corners, and then sheathed with wood, corrugated board or plastic panels. It's fast, simple and economical.

Construction will require several meters of profile, finishing materials, a welding machine and free time. Instead of welding, bolted or riveted connections can be used.
Made of bricks or blocks
A capital summer shower for a summer residence is rare. It is harder and more expensive to build
But the undeniable advantages - durability and the ability to use even in the cool season - attract the attention of summer residents who spend a lot of time outside the city. If you attach a brick shower to a house or a bath and carry out heating, then you can swim there all year round.

from wood
A wooden cabin is inexpensive, environmentally friendly and easy to assemble. In addition, the building fits well into the country landscape, is combined with a barn, a bathhouse and various utility rooms on the site. When choosing a material for a shower, you need to take into account that wood is afraid of water and insects, so it will have to be regularly treated with antiseptics.

A wooden structure can be bought ready-made. Manufacturers immediately impregnate the wood with protective agents. Protection needs to be updated every few years and make sure that the tree does not get wet.
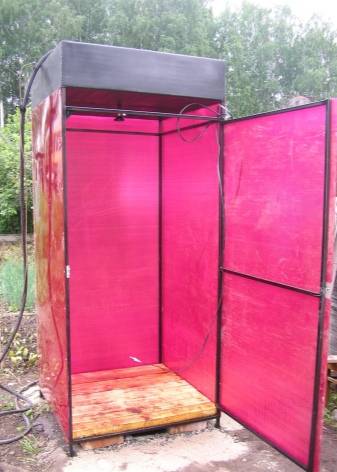
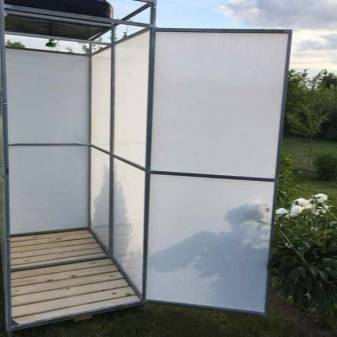
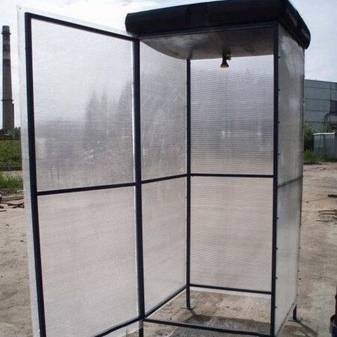
Polycarbonate
A summer shower on a metal or wooden frame can be sheathed with cellular polycarbonate, if you are satisfied with its translucency. The construction technology is simple - the racks are concreted in the ground, jumpers are attached to them, plastic sheets are attached to them, a water tank is installed on top.

Colored polycarbonate is used for the walls of the booth, and transparent polycarbonate can be laid as a dome over the water tank. All edges must be protected from moisture, otherwise fungal spores penetrate into the cells, which causes flowering and staining.
Conclusions and useful video on the topic
Video #1 Option for arranging a shower cabin with a dressing room:
Video #2 Assembly of the purchased structure and polycarbonate sheathing:
A polycarbonate shower is a practical and affordable option for a summer cottage. The construction technology does not cause difficulties, and the cost of the materials used is quite acceptable. Having spent a little time and enlisting the support of an assistant, it will be possible to build a durable structure and improve the conditions of country life.
Tell us about how you built a shower stall with polycarbonate walls in your own summer cottage. Perhaps you have technological nuances in your arsenal that will be useful to site visitors. Please write, publish thematic photographs, ask questions in the block below.


