- Tools and materials for work
- Method No2. How to fix a toilet with glue
- Dismantling the old
- Glue fixation
- Do-it-yourself wall-mounted toilet installation
- Installation order
- Required Tools
- Applying markings for fixing the installation
- Installing the installation
- Fixing the installation
- Installation of a wall-mounted toilet for installation
- Mounting with dowels (bolts)
- Installing a toilet bowl on a tiled floor with cement
- The most common mistakes at work
- Installation on ceramic tiles
- Connecting the toilet to the water supply
Tools and materials for work
In the process of work, depending on the type of floor in the bathroom, tools such as:
- perforator with drills of different diameters (when it is planned to drill concrete or cement);
- hand drill and drills for wood or ceramics;
- a set of screwdrivers, a hammer, pliers, keys;
- tape measure, marker;
- sandpaper of large and small section;
- spatulas (if it is intended to mount the equipment on glue, epoxy or cement);
- scissors, construction knife.
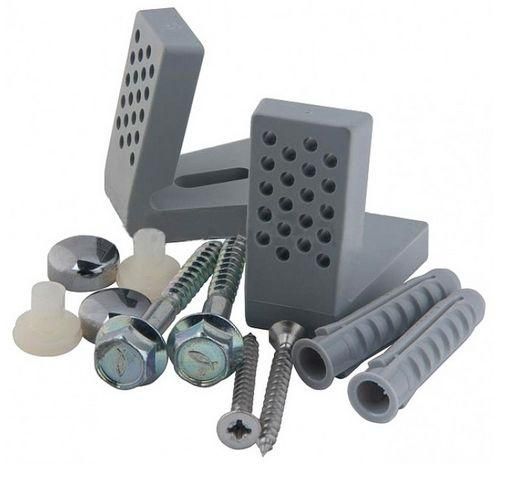
In addition to the items listed above, you will definitely need:
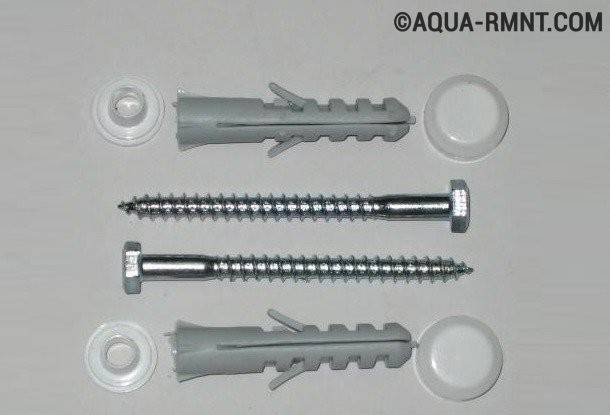
- dowels, screws with gaskets under the head;
- connecting corrugation;
- flexible hose for supplying cold water equipment;
- cement;
- adhesive composition (silicone sealant, epoxy resin, liquid nails);
- a piece of thin rubber for a sealing gasket under the base;
- a board with a thickness of 28-32 millimeters, if it is necessary to raise the plumbing above the floor or fasten it to a wooden floor.
With all this at hand, it will not be difficult to cope with the task.
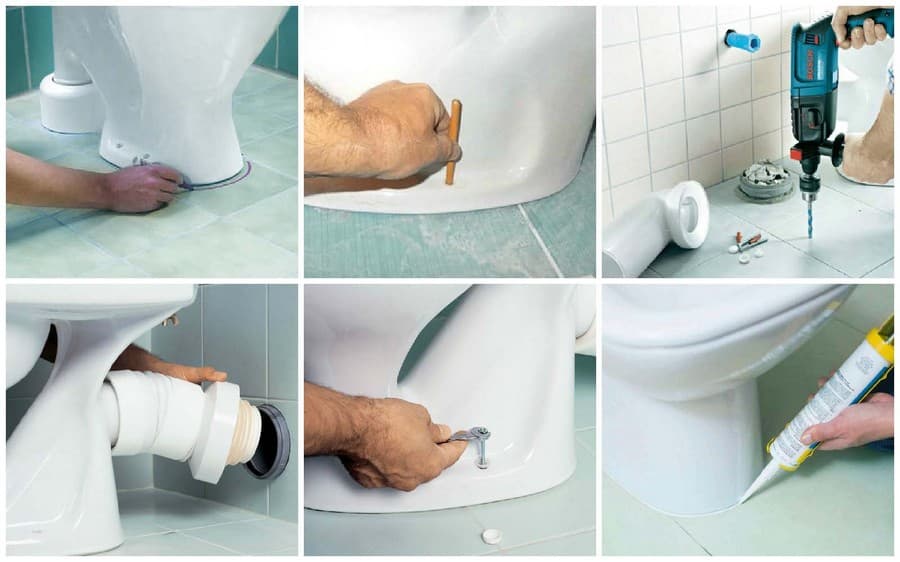
Method No2. How to fix a toilet with glue
This method is almost as popular as the previous one. For fixing, in this case, a special construction glue is used (you can buy it in a specialized store) or a mixture prepared with your own hands from epoxy resin. In addition, toilets are often fixed with a simple silicone sealant.
How to fix a toilet with glue
- Reliability. The device, fixed with glue / sealant, will not wobble for sure.
- No dirt, dust. Therefore, after completion of work, it is not necessary to carry out cleaning.
- Ease of installation. To work, you do not need to have any serious knowledge or experience. You just need to know how to work with a glue gun.
- Safety. By attaching the toilet bowl to the glue, you do not risk damaging its bowl.
Do not forget that this method also requires some patience - it will take 12-24 hours for the glue to dry completely (which means that you cannot use the toilet during this time).
Epoxy is the best toilet glue
To fix the plumbing fixture, prepare everything you need, namely:
- roulette;
- silicone-based sealant or glue;
- square;
- ammonia;
- marker;
- sandpaper;
- spatula (you will need a narrow one);
- a spray bottle filled with soapy water;
- rag.
Toilet installation: a - preparation of the installation site; b - preparation of the base; c - coating the bottom of the toilet bowl with glue; d - installation of a toilet bowl; d - installation of the tank; e - sealing the socket; g - connecting the tank to the water supply network; h - adjusting the water level in the tank; and - a fully installed toilet
After preparing everything you need, follow the step-by-step guide below.
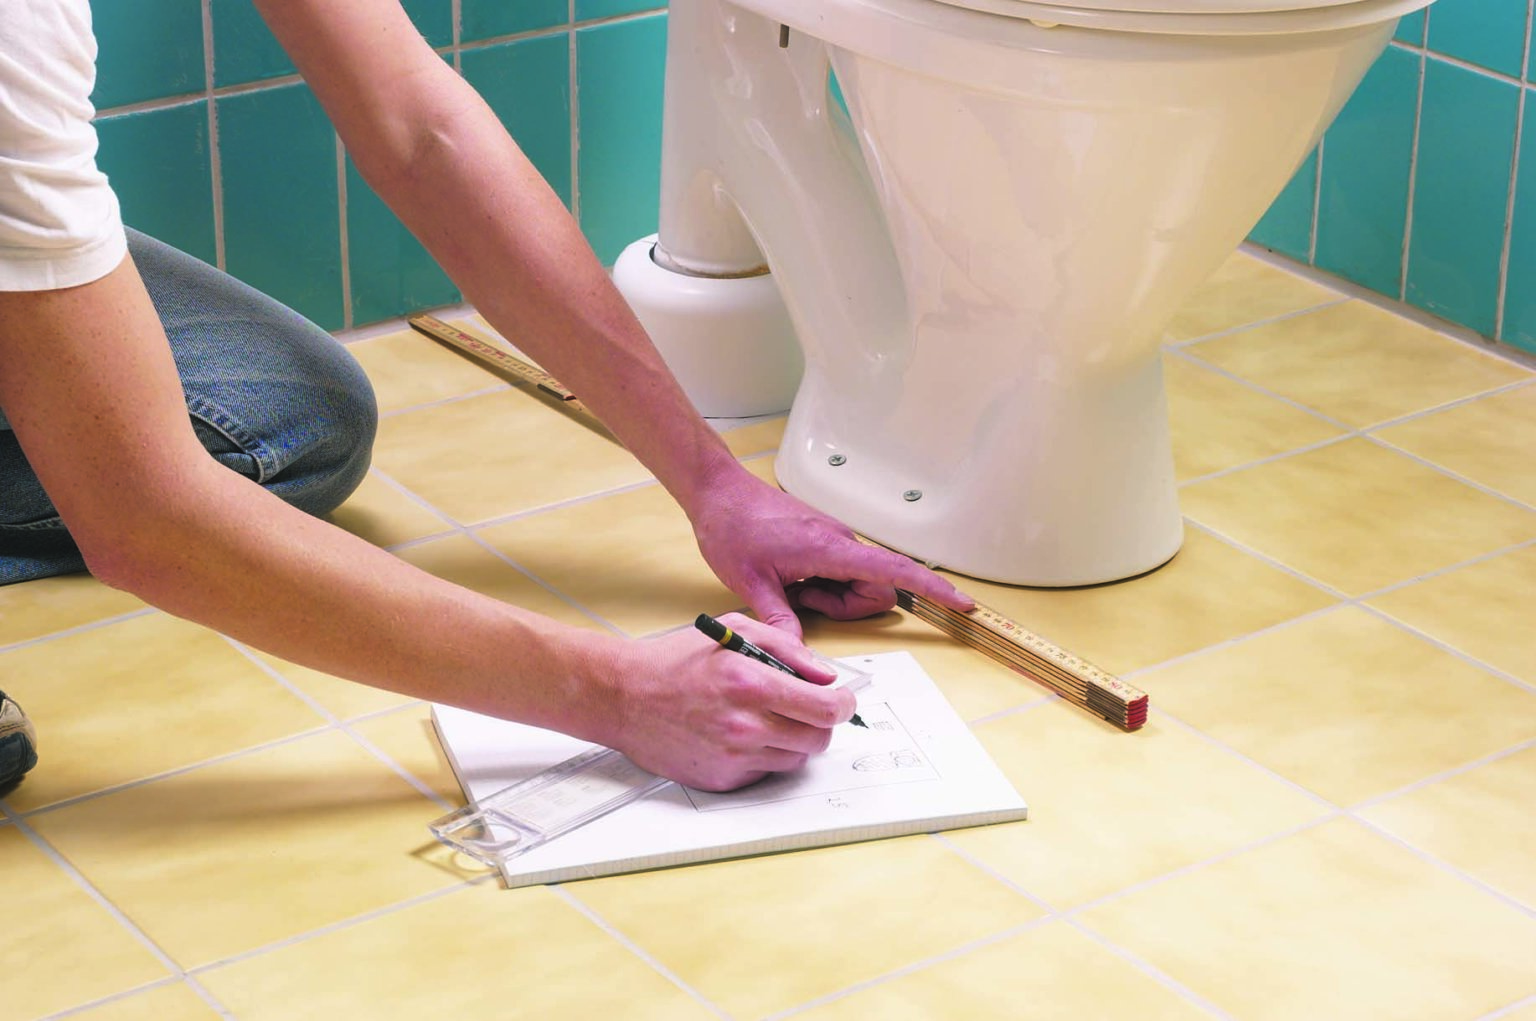
Step 1. The toilet is tried on - placed on a pre-placed cardboard, so as not to damage the flooring. The convenience of the device is checked, how best to connect it to the sewer / water supply.
The toilet is tried on
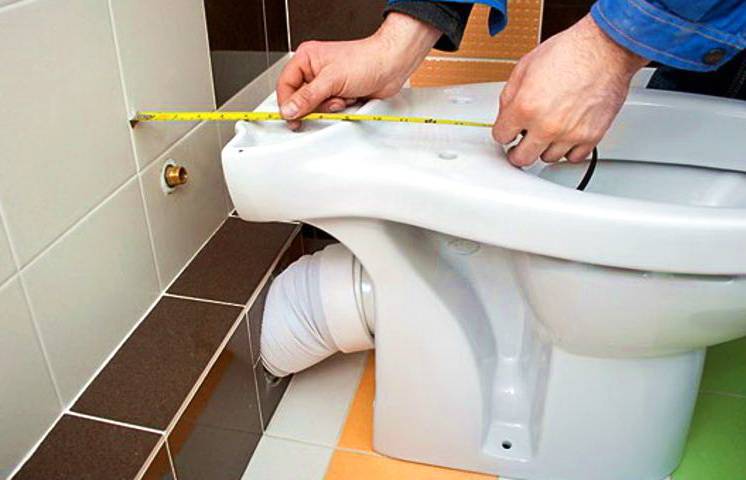
Step 2. The product is centered, for which you can take a tape measure or a corner. The distance to the walls on the right and left is indicated.
Indicated distance on the leftIndicated distance on the rightThe toilet is centered
Step 3. The cardboard is removed from under the toilet. The device is aligned with the walls of the room, which will require, as in the paragraph above, a tape measure or corner.
The product is re-aligned
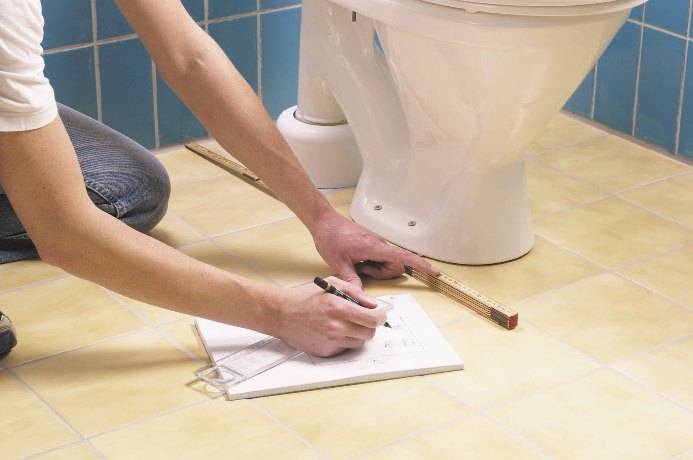
Step 4. The part of the bowl that will be in contact with the floor is outlined with a marker.
Outline the support
Step 5. The edge of the support is cleaned with sandpaper or a knife. It should turn out perfectly smooth - so the adhesion to the glue will be maximum.
The edge of the support is cleaned
Step 6. Where the toilet will be installed, the tile is treated with ammonia for the purpose of degreasing. Then wipe dry with a microfiber cloth.
The tile is degreased
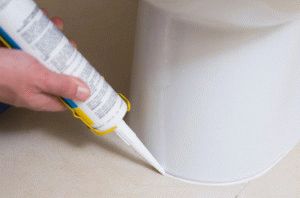
Step 7. Sealant or glue is applied to the edge of the support
It is important to correctly calculate the amount of adhesive composition, because if there is too much of it, then you can stain the tile, and if not enough, then the toilet bowl to the floor will be fragile
Glue is applied to the edge of the support The adhesive composition is applied
Step 8. The toilet bowl, after being treated with glue, is brought into the toilet and carefully placed in the place that was marked at the beginning of the process. This is best done with an assistant so as not to stain the tile with glue and install the product crookedly.


The toilet is installed. It is advisable to do everything with an assistant
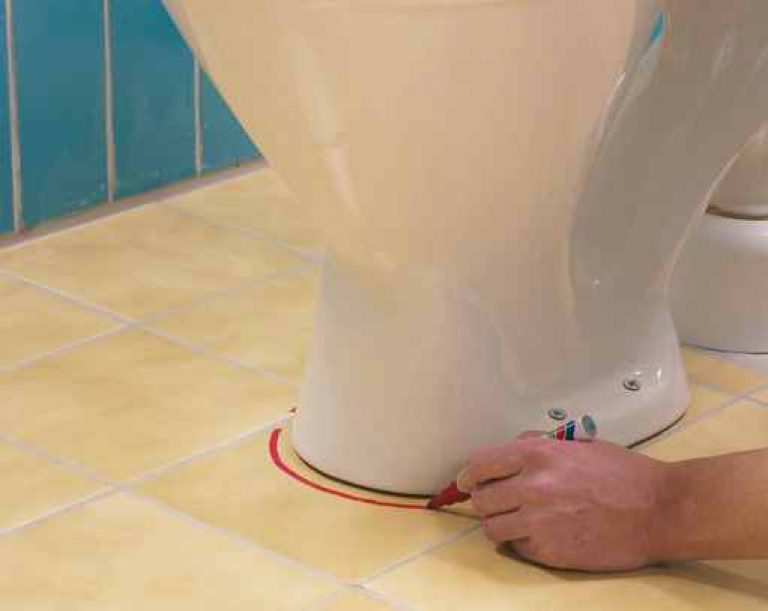
Step 9. The floor around the support is sprayed with soapy water. This prevents any excess sealant that needs to be cut off from sticking to the tile.
The floor around the support is sprayed with soapy water
Step 10. The spatula is wetted in a soapy solution and used to remove adhesive residue.
Residues of glue are removed with a spatula. Remains of glue or sealant must be removed immediately after fixing the toilet bowl to the floor in order to prevent the composition from drying out and staining the tiles
Step 11. After some time - on average, 12-24 hours - the glue or other composition used to fix the toilet will dry. The product must not be used or moved during this time.
Step 12 Now, after the glue has completely dried, work can be continued. It is connected to the sewer network, a tank is installed and connected to the water supply, a seat with a cover is installed, and so on.
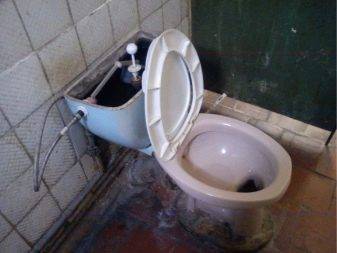
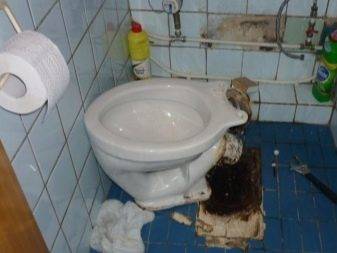
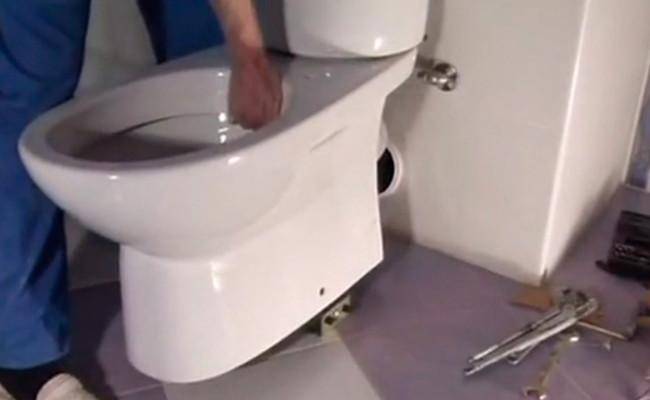
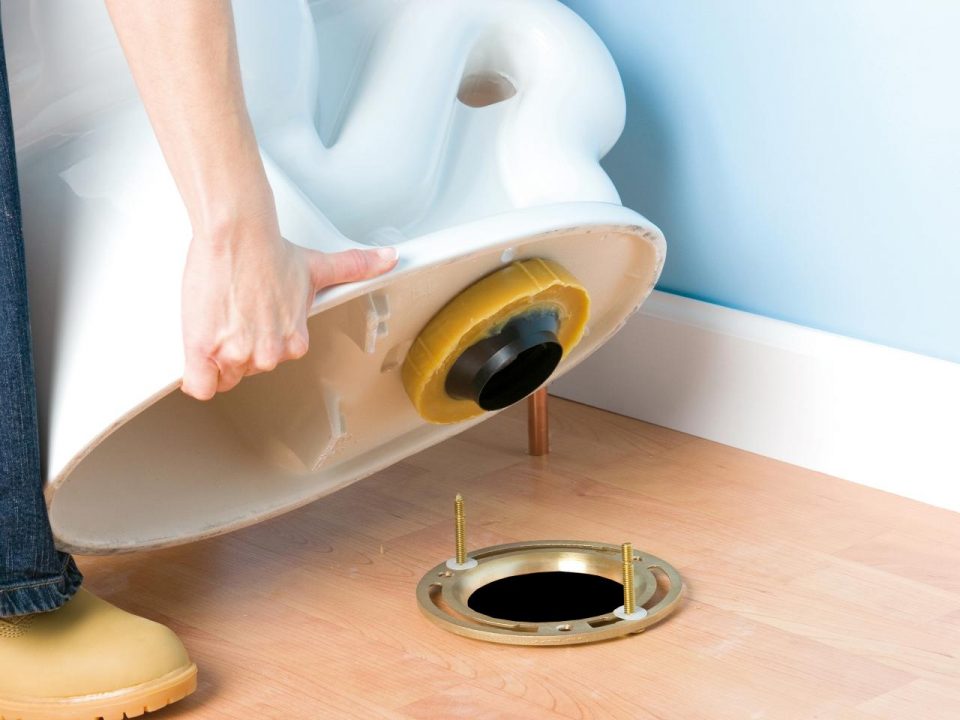
Dismantling the old
When the new toilet has already been selected, the location is known, as well as its main characteristics, it is worth moving on to the next step in the form of dismantling the old toilet. Most often, you have to clean floor-mounted toilets that are attached to the floor. You can easily and quickly deal with such a task yourself.There is no need to go to the master.
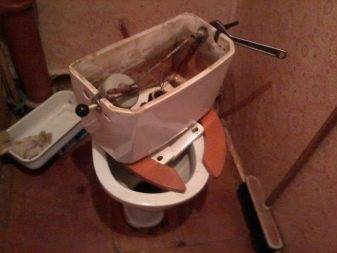
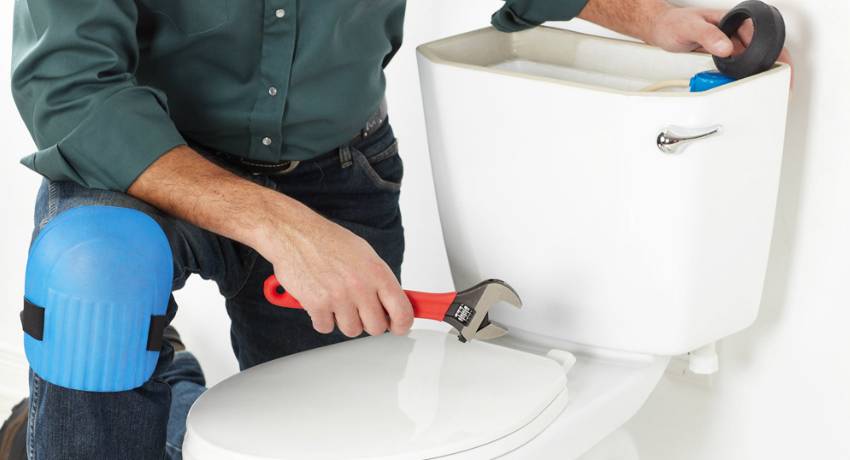
It’s worth starting by turning off the water and draining it from the tank into the toilet bowl. Then you need to unscrew the hose that goes from the drain to the tank. Next, unscrew the fasteners of the tank. If they do not lend themselves, it is worth using special tools. They are applied to fasteners (for about 6 minutes), completely dissolving lime or rust during this time.
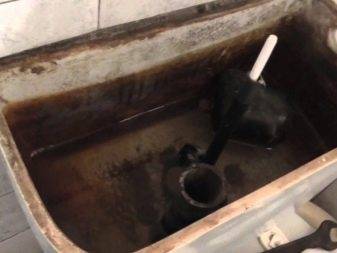
Of course, you can do without such funds. For example, using a wrench or a screwdriver to break the mounting bolts is easier. If the old toilet is planned to be thrown away, then the problem of poor detachment of the tank can be solved with a hammer. After the tank mounts are unscrewed, you should go to the toilet bowl mounts. Often they look like a nut screwed on an anchor. To facilitate the unscrewing process, you can use the methods described above.
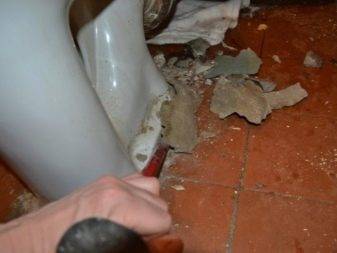
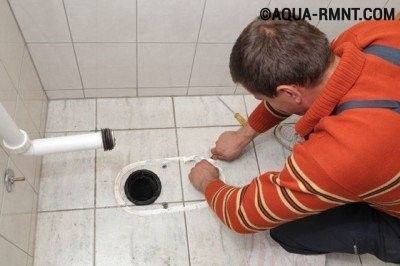
When all fasteners are unscrewed, it is necessary to disconnect the toilet drain from the sewer. In old toilets, as a rule, the place where the drain is attached to the sewer pipe was coated with cement. If so, you will have to remove the cement with a screwdriver and hammer. And you need to start with a coating that runs across the seam.
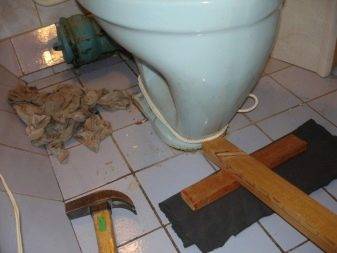
Next, you should swing the drain, but leave it in place. The toilet must be moved in different directions in order to finally drain the water remaining in the knee. It is necessary to disconnect the neck from the sewer pipe. This is not always easy: sometimes the toilet may be glued with cement mortar to the floor. In this case, with the help of a chisel and a hammer, the pedestal is broken off in parts.
Now the toilet should easily unhook, it can be taken to the trash. If desired, you can chop with a sledgehammer to make it easier to take out. Another important point is to plug the sewer hole with a plastic or wooden plug. This will allow you to work without unpleasant odors.
After the old toilet is dismantled, you should evaluate the condition of the pipes. For example, before installing a new design, experts recommend replacing a cast-iron pipe with a new plastic one. Modern pipes can greatly facilitate the installation of the toilet. Perhaps it is better to replace an uneven pipe with a direct analogue in order to make it easier to mount the toilet to the sewer drain.
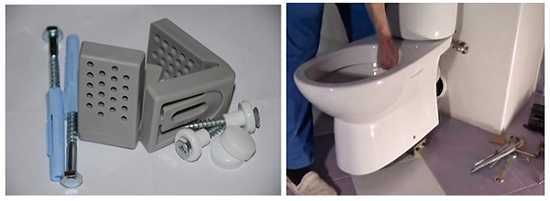
Glue fixation
A reliable toilet mount can also be designed with the help of an adhesive composition purchased ready-made or prepared with your own hands.
This method is considered the simplest, but at the same time fastening without bolts will require a lot of time (it takes 12–15 hours for the epoxy adhesive to fully cure).
Another condition for obtaining reliable fastening is as follows. Before gluing the toilet to the floor, you will need to carefully level the surface of the screed or cover it with thick floor tiles.
When figuring out how to glue the toilet to the floor or tiles, preference is usually given to special epoxy resins, prepared according to the instructions attached to the composition.
The method of attaching a sanitary ware to the adhesive composition is simple, for this you will need to do the following preparatory operations:
First, the working surfaces are cleaned of dust and dirt residues.
To do this, you will need: 100 parts of ED-6 resin, 200 parts of high-grade cement, 20 parts of solvent and 35 parts of hardener.
When preparing the adhesive composition, the sequence of actions is important, which determines the order in which individual components are added to it.
First of all, you should heat the resin to 50 degrees, and add a solvent to the thick solution. It is followed by the addition of a hardener and at the very end of the procedure, cement is placed there. In the process of adding the components, the mixture must be continuously stirred, as a result of which a homogeneous and dense plastic mass should be obtained.


For better fixation of the plumbing fixture on the screed or tile, their surfaces are pre-cleaned and lubricated with a not very thick layer of the prepared adhesive mixture.
Upon completion of installation, excess epoxy composition up to 4 mm thick, squeezed out by the mass of the device, is immediately removed with a damp cloth.
When installing a toilet bowl, you should carefully ensure that its socket is located strictly opposite the sewer drain hole. If this is not observed, you need to forcefully press the base to the floor.
Upon completion of these operations, the device is left for about 12 hours, necessary for the final curing of the adhesive. After the specified time, you can proceed to connecting it to the water supply and sewerage.
Do-it-yourself wall-mounted toilet installation
The installation of a wall-mounted toilet with installation can be done by hand. To do this, you need to have the necessary tools and develop a clear algorithm of actions. Further trouble-free operation of the entire system will depend on the correct and reliable installation.Do-it-yourself installation of the installation requires a detailed study of the instructions for a particular model, it will not be superfluous to watch a video with master classes and photos.
Installation order
It is very important to follow the sequence of installation work and perform all stages with high quality. Mounting order:
- accurately make all the necessary measurements;
- put markings on the wall;
Be sure to check before installation
- install and fix the installation;
- connect water pipes and sewerage;
- install a toilet.
Installation of the installation is carried out strictly before the start of finishing work. There is no need to rush during installation. It is better to check everything carefully than to redo the repairs in the toilet later.
Required Tools
Do-it-yourself installation of a hanging toilet with installation does not require the purchase of a professional expensive tool. It will be enough elementary tools available in the arsenal of each owner:
- pencil;
- level;
- roulette;
- perforator with a set of drills for concrete;
- open-end wrenches of the appropriate size;
- fum tape;
- sealant.
Mounting the installation
Applying markings for fixing the installation
When the installation site is selected, the installation is purchased, the theory is studied (video and photo), you can proceed with the installation. The first step will be marking. It is on it that the installation will be installed.
- Draw the vertical center line of the installation.
- Mark the distance of the installation from the wall, which depends on the type of sewer connection and the location of the sewer outlet. The gap between the installation and the wall must not be less than 13.5 mm.
- Mark the fixing points for the drain tank. The standard mounting height of the cistern for a wall-mounted toilet bowl is 1000 mm.This size may vary depending on the type and size of the installation.
- Depending on the method of fastening, mark the points on the wall or floor for fastening.
Drawing: frame installation
Other installation options:
- bowl installation height - 400-420 mm;
- release button installation height - 950-1000 mm;
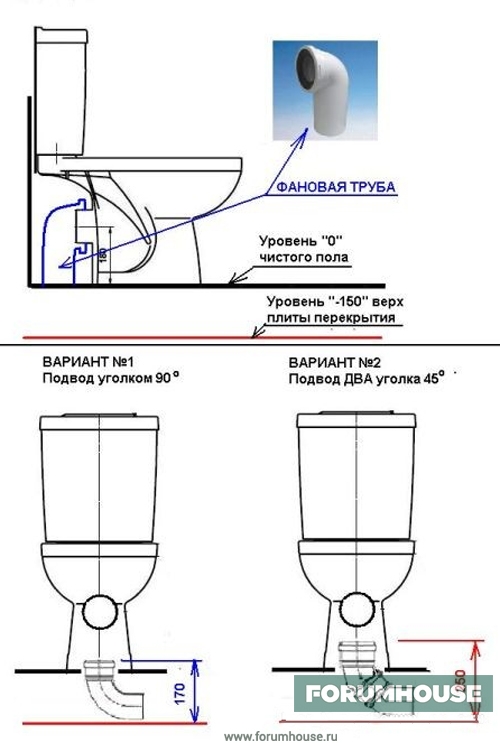
- the protrusion of the sewer pipe above the floor - 200-230 mm;
- play between the tank and the wall (after installing the installation) - 15-20 mm.
Installing the installation
Regardless of the type of installation, fasteners should be given special attention, because the strength of the entire structure will depend on them. According to the pre-applied markings in the wall and floor, holes of the appropriate size are drilled using a perforator. Dowels are inserted into the holes, and then fixing anchors
Installing the installationImportant! If the installation is carried out in a private house with wooden walls and floors, screws are used for fastening. In some cases, additional rigid fasteners from a metal corner are required.
Fixing the installation
- A frame is baited onto the prepared fasteners, first of all to the floor.
- The entire structure is set strictly according to the level in all directions.
- The leveled frame is fixed with plugs.
Installation of a wall-mounted toilet for installation
An installation is a structure on which a wall-hung toilet is installed. Acts as a bowl holder, plumbing inlets and, on some models, holds the cistern. It is purchased as a set with a toilet bowl, and separately.
Manufacturers present installation options with bowl height adjustment, which allows the consumer to individually set the toilet to the desired level.
The installation system is divided into several types:
- standard: width 50 cm, height 112, depth 12 cm
- low: if installation is planned in a place with a limited height, for example under a windowsill, the installation height is up to 82 cm
- double-sided: provides for the installation of the toilet bowl on both sides
- corner: the frame is installed in the corner of the room
- linear: used in case of installation of several plumbing fixtures, such as a toilet bowl, bidet
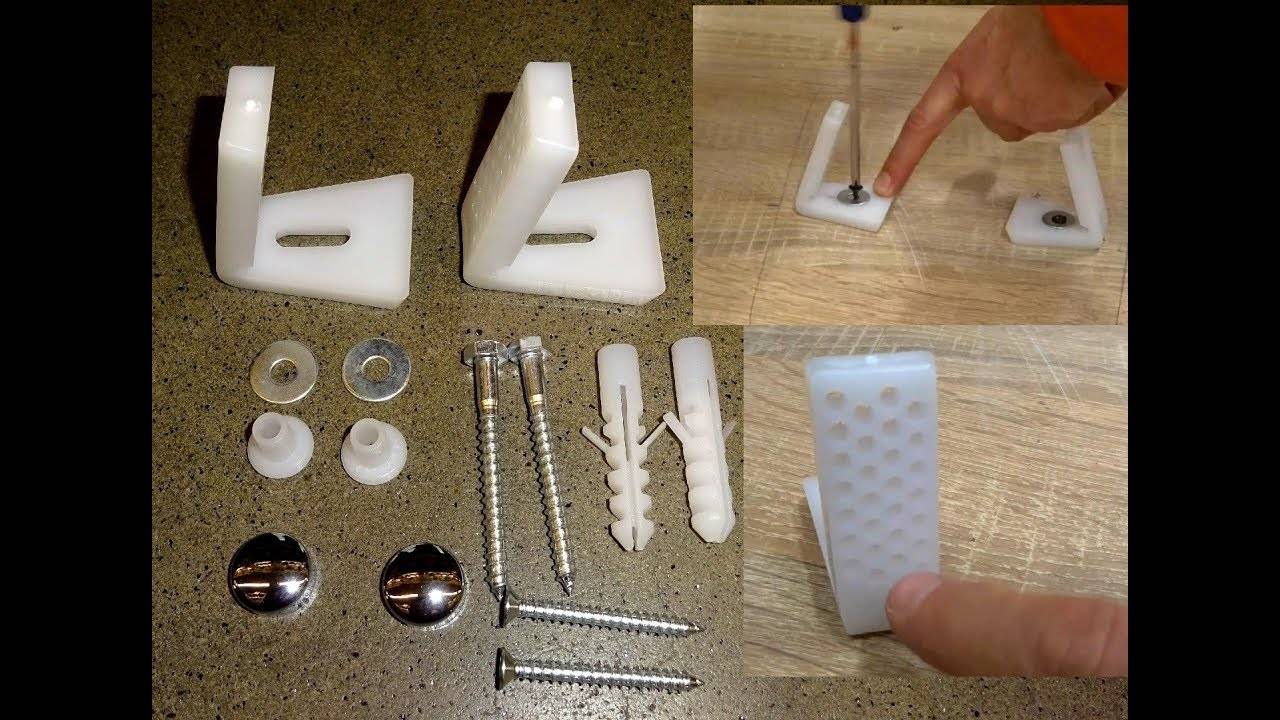
To perform the installation of a wall-hung toilet, you will need a set of tools:
- hammer drill or hammer drill
- drill bit for concrete and brick with pobedit coating
- screwdriver with bits
- building level or laser axis builder
- anchor bolts
After choosing and purchasing the model you like, you should open the package and check the toilet for integrity, the absence of cracks and chips, as well as completeness. The box should contain assembly instructions and a product passport, in which all the elements included in the kit are registered.


If necessary, by shutting off the water supply tap, dismantling work is carried out to remove the old toilet bowl.
Before proceeding to the installation installation, it is necessary to check whether all communications (sewer pipe, water supply hose) are connected for further connection.
Step 1
The first step is to install the frame. The place for mounting the frame is determined, without fail on a load-bearing wall. It is necessary to qualitatively install the frame structure, since the reliability of all equipment during further operation depends on this. Using a laser axis builder or building level, horizontal and vertical lines are determined for a clear installation of the frame.
A marker is applied to the wall through the holes in the frame. Holes are drilled in the place of fastening with a puncher or drill in impact mode. The steel frame is installed and secured with anchor bolts under strict level control.
Step 2
The next step is to work on connecting to the water supply. The tank valve must be closed during all installation work.
Step 3
Then the installation is connected to the sewer. There are several connection options, the most common using a special corrugation for connecting toilets.
Step 4
When the installation is installed, the next step is decorative design - hiding communications by creating a false - a wall of plasterboard or other material, followed by tiling.
Step 5
When the wall is completely ready, the toilet bowl is hung on special studs. After complete connection, the water supply tap opens. A visual inspection is carried out for leaks.
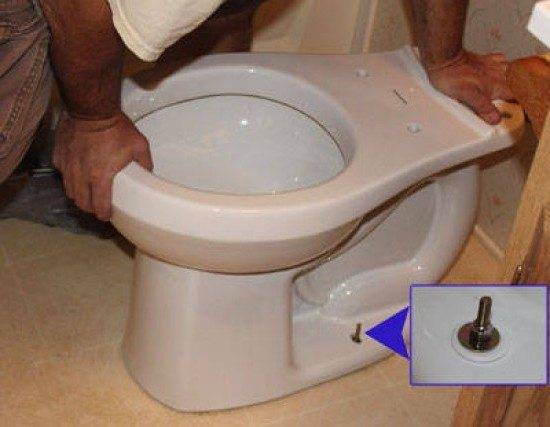
Mounting with dowels (bolts)
This method is the most practical and does not require large expenditures. It also provides a secure fixing for the toilet, provided that the floor screed is pre-prepared for installation.
Fixing the toilet bowl to the floor with bolts is suitable for both conventional structures and light, compact ones, that is, this option can be considered universal.
Bolts for fixing the toilet to the floor allow you to get a tight connection if you use a sealing gasket cut from a piece of linoleum or elastic rubber.
These blanks are placed under it, and then outlined along the contour with a marker. Immediately after this sharp knife (sometimes scissors are used for this), a sealing element is cut out, corresponding in shape to the supporting part of the product.
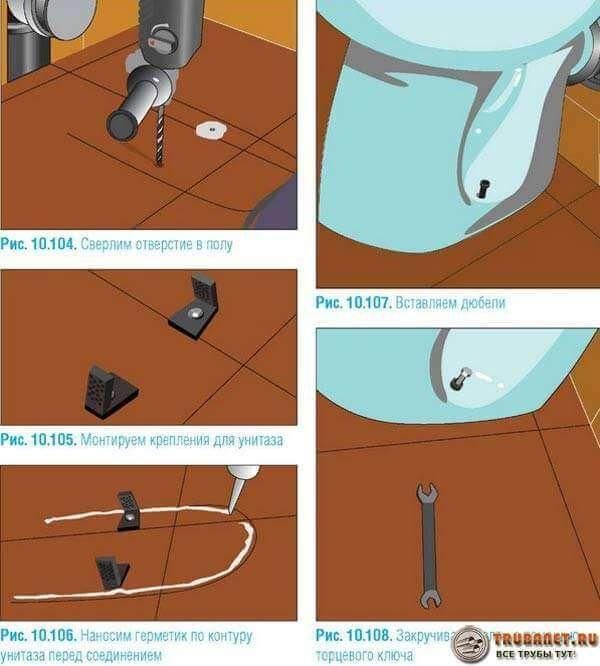
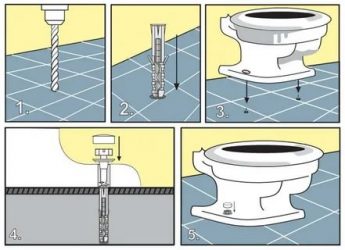
Before fixing the toilet bowl to the floor, markings are made on the surface of the screed specifically for dowels, into which the hardware is then “driven”. The latter are usually included in the kit of the mounted device. In their absence, special bolts for attaching the toilet to the floor are purchased at a hardware store.
The order of further operations looks like this:
First, a purchased toilet bowl is placed on an already prepared place for fitting, and then it is circled along the contour with the same marker.
Then the toilet bowl is removed, and the marked place is coated with a sealed compound, on which the previously prepared gasket is glued
Additional information: in some cases it is possible to do without sealing, but for this the floor surface in the toilet must be well leveled beforehand.
Before attaching the toilet bowl to the prepared surface, you need to prepare holes for metal dowels, for which a drill with a diameter slightly larger than the size of the hardware is used.
Then the same holes are made at pre-marked points of the glued gasket.
Now it will be possible to hammer the dowels into them and carefully install the toilet bowl on the gasket for subsequent fixation.
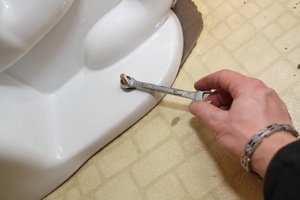
Bolts for fixing the toilet to the floor should be screwed in very carefully, without effort, trying not to damage the ceramics.Violation of this rule when handling tools and hardware can lead to cracks or chips in the attachment points.
Violation of this rule when handling tools and hardware can lead to cracks or chips in the attachment points.
This is unacceptable - the bowl will then become unusable
After fixing, they proceed to the connection to the sewer, paying special attention to connecting the corrugation of the drain channel
To form a tight connection, its ends are abundantly lubricated with silicone, one of them is inserted into the socket of the sewer outlet, and the second is put on the outlet neck. In the course of installation, the joints are carefully crimped with palms, which will allow the hermetic composition to quickly absorb into the corrugation material and form a reliable contact.


At the end of all these operations, the time comes to connect the water outlet, and the plumbing fixture is completely ready for use.
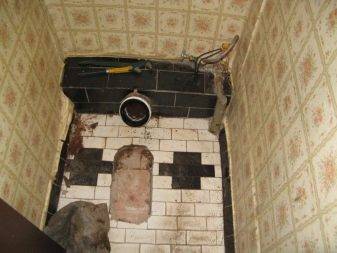
Installing a toilet bowl on a tiled floor with cement
This method is often used before the floor is tiled. However, in cases where the previous toilet was mounted before finishing and on cement, this method may be the only one available.
In this case, it is advisable to choose a model of a new toilet bowl so that the fasteners and the contour of the installation coincide in location. If this is not the case, it is better to cement the recess in the tiled floor to the level of the top plane of the tile, and then mount the toilet as described above.
If, nevertheless, the installation of the toilet bowl on cement is chosen, it is necessary to prepare in advance the places for fastening the product with screws, install plastic or wooden (undesirable, because the wood in the cement screed will quickly pick up moisture) dowels in the holes.
Next, prepare a cement mortar and fill it with a recess in the tiled floor. After that, the toilet is installed on the dowels and the solution.
After installation, the cement mortar is immediately removed along the contour of the toilet bowl, the surface of both the plumbing fixture and the tile is thoroughly cleaned.
The composition of the cement mortar for such a toilet installation can be taken as follows: cement / sand / water = 3/6/1. Liquid glass, a tenth of the volume of cement, can also be added to the solution. In this case, liquid glass is first mixed with water prepared for mixing cement, and only then this mixture is poured into the mixed dry components (cement and sand).
Important nuances:
- before applying the cement mortar, tiles with a glossy surface must be ground or treated with an abrasive (remove the glossy layer) and cleaned with a solvent;
- surfaces to be joined should be moistened with water;
- it is necessary to withstand the cement mortar until complete curing for at least 24 hours, at high humidity or temperatures below 10 degrees Celsius - up to 2 ... 3 days.
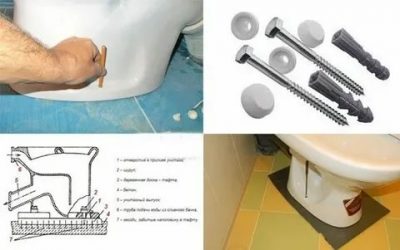
If the hole in the floor is too deep, you can use another interesting, albeit little used now mounting option - on taffeta.
This is the name of a massive wooden board, which is “embedded” in the cement screed with its lower part. The toilet bowl is attached to the upper part in any suitable way - with dowels or glue.
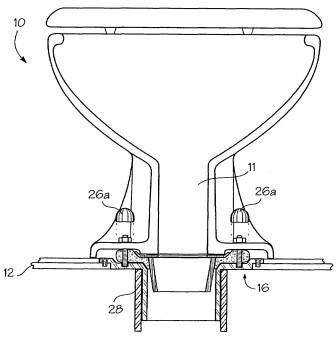
As can be seen from the above diagram, for a better connection of taffeta with a screed, nails are driven into the lower part of the board up to half its thickness (or screws are screwed in). The heads of nails (screws) securely hold the board in the screed.
Mandatory treatment of taffeta with drying oil or varnish in several stages, because otherwise the tree may begin to rot and mold!
The upper part of the taffeta can be located above the plane of the finished floor (as shown in the diagram) or be flush with it or slightly lower.
The most common mistakes at work
When carrying out plumbing work, it is necessary to observe the clarity and sequence of actions. This will ensure that in the future there will be no leaks, unpleasant odors and other negative aspects in the bathroom.
When fastening the compact toilet bowl to the floor, it is very important to carefully level the surface on which the plumbing fixture is placed. To level the surface, it is best to use the building level.
This tool will allow you to make all the necessary measurements with maximum accuracy and without undue effort.

To level the surface, it is best to use the building level. This tool will allow you to make all the necessary measurements with maximum accuracy and without undue effort.
Ignoring this item happens quite often and leads to a violation of the integrity of the system, the appearance of leaks and the subsequent failure of the equipment.
Another crucial moment is the 100% tightness of all butt joints and the rigid installation of fasteners.
It is especially important to pay attention to the area where the corrugation is connected to the toilet outlet.
Through a poorly processed edge, sewer liquid may be released in the future, which will cause sharp, unpleasant odors to appear in the bathroom.

When connecting the toilet bowl to an old cast-iron riser, in order to avoid leaks and the appearance of an unpleasant odor, the pipe inlet is washed very carefully, cleaned to metal and dried. A sealant is applied to an absolutely clean surface, the corrugation is inserted tightly and gently pressed down so that it clearly takes its place
For a guarantee, you can apply sealant not only on the inner surface of the pipe, but also make an additional outer layer, thinner at the top and thicker at the bottom. No liquids or odors can penetrate through such a barrier.


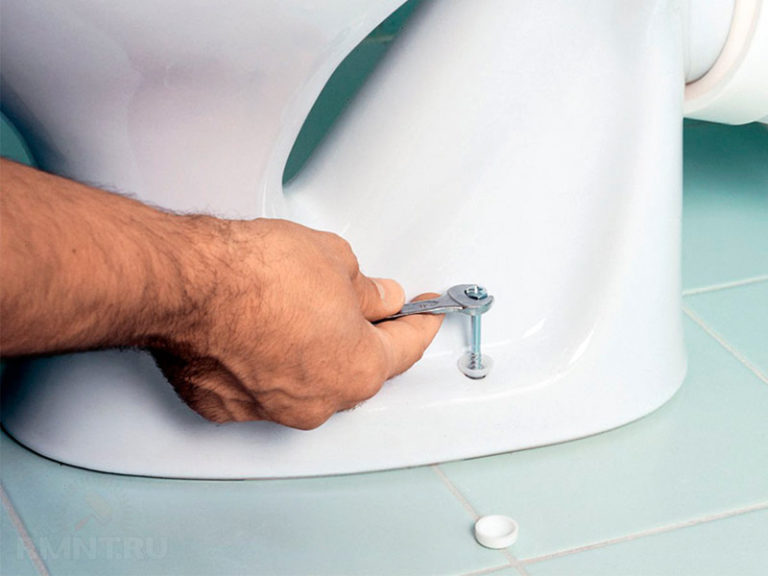


When attaching the toilet to the floor on the dowels, you need to act carefully and without haste. If you overdo it and screw the plumbing too hard, it may crack during operation.
Very weak fasteners are also not an option, as the compact will begin to swing, and water will ooze from under the base. It is desirable here to observe the "golden mean" and create an optimally reliable, stable mount.
Careful attention to the process and taking into account all of the above points will help attach the toilet to the floor accurately and clearly, avoiding the need to redo everything or make adjustments in the future.
Installation on ceramic tiles
In modern apartments, the floor in the bathroom is usually made of tiles. Then the plumbing has a backlash in the case when the tile is not laid in level and has drops. Correcting such a defect is the most difficult. Indeed, in order to get rid of the staggering plumbing fixture, you must first eliminate the unevenness of the floor. It is impossible to do this without dismantling the tiles.
Therefore, to begin with, the problem is eliminated by placing a plastic gasket under the base of the plumbing fixture.Such devices are sold in hardware stores and are quite inexpensive. If this option does not bring the desired result and the shakiness persists, the tiles are dismantled and the coating is laid again.
Important!
Silicone sealant is sometimes used as a gasket. They coat the area of the tiled floor where the device should stand. When the material is completely dry, install it. This method helps to temporarily solve the problem of a staggering device.
Connecting the toilet to the water supply
These plumbing products have a different system for connecting to the water supply:
- closed connection;
- external connection.
Despite the different connection options, all joints must be sealed. With a hidden connection method, a flexible water hose made of different materials or a copper tube can be used. If the copper tube is included with the product, then the flexible piping will have to be purchased separately.
Particular attention must be paid to the water pipe suitable for the tank. It can be with both internal and external threads. If the thread is internal, you will need to put an adapter and apply a sealing winding
After the connection is made, it is necessary to check the operation of the toilet cistern and the possibility of leaks. If everything is working properly, then tighten the mounting bolts to the stop and install the cover
If the thread is internal, you will need to put an adapter and apply a sealing winding. After the connection is made, it is necessary to check the operation of the toilet cistern and the possibility of leaks. If everything is working properly, then tighten the mounting bolts to the stop and install the cover.
Experts recommend using screws when installing various kinds of plumbing. only they are the safest and you can minimize the risks of various kinds of problems, for example, with water in conditions of high humidity. In any case, when you go to a plumbing store, be sure to consult with consultants and sellers: they will help you choose the most suitable option.