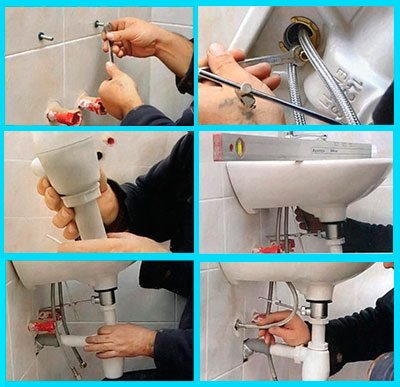
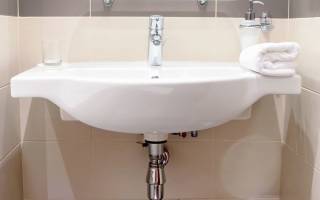
- Step-by-step instructions for installing a console sink
- Preliminary marking of the surface
- Making holes for fasteners
- Mounting the sink bowl
- Connecting the siphon to communications
- Faucet installation process
- Sink Installation Recommendations
- Siphon types
- Washbasins on a semi-pedestal
- Video instructions for installation of sinks
- Stages of installation work
- How to determine the correct size of the sink
- Multiple mounting options
- How to attach a bathroom sink to a wall
- We carry out preparatory work
- Where to put the crane?
- 1. Where and how to install the crane?
- 2. Locking mechanism
- Connection to communications
- Stopcock installation
- How to install water supply hoses
- How to put the mixer
- Connecting the hoses to the faucet
- Collection and installation of the siphon
Step-by-step instructions for installing a console sink
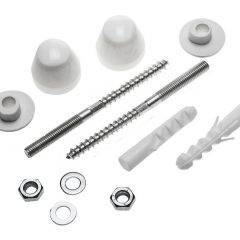
When installing the console fixture, follow the technological sequence. For installation, you will need the following materials and tools:
- drill with drills for concrete;
- laser level;
- tape measure, marker;
- set of wrenches;
- fasteners (dowels, screws);
- sealing tape;
- sealant.
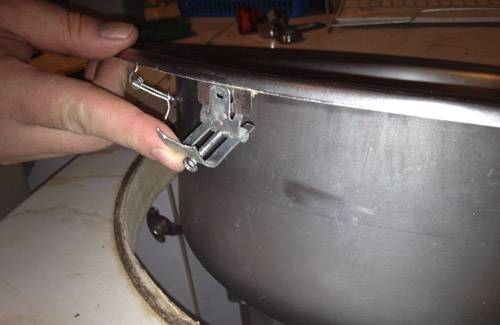
Hanging sink fixtures are welded blanks of various shapes. More reliable fixation is provided by parts that look like frames.Non-standard models are supplied with metal brackets. Before starting work, check whether the wall can withstand the load. If the nail easily enters the material, then increase the size of the fasteners or install the frame.
Preliminary marking of the surface
When marking, consider the following:
- The location and height of the sink. When calculating the parameter, they are guided by the convenience of using the equipment. The standard height is 85 cm, it is suitable for a person with a height of 160-180 cm. A horizontal line is drawn at the desired level, which is the upper limit of the device. At right angles to the floor, 2 lines are drawn, the distance between which should be equal to the width of the washbasin.
- Location of tile joints. In order for the wall-mounted sink to look aesthetically pleasing, it is necessary that the fasteners match the seams. When marking, use the level.
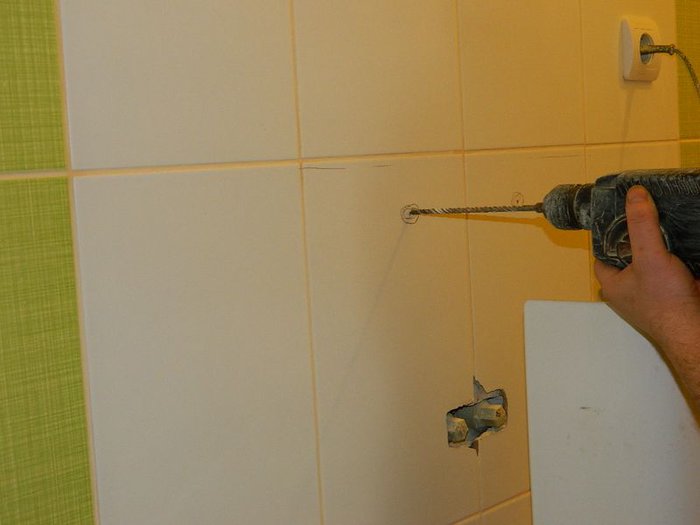
Making holes for fasteners
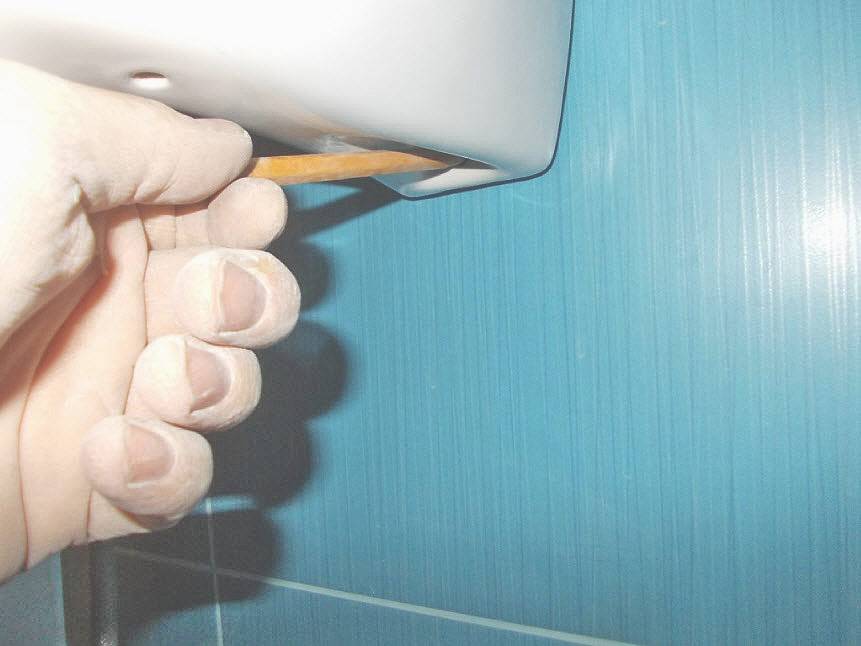
For the introduction of brackets, the bowl is turned over. After installing the fasteners, the level is pushed to the horizontal line. Fixing points are marked on the wall. At the points obtained, holes are drilled with a drill 1-2 mm smaller than the diameter of the dowel leg. They are filled with glue for a secure connection. Next, polymer dowels are driven in, into which self-tapping screws are screwed. To prevent the drill from moving, masking tape is glued to the tile.
Drilling holes for the sink.
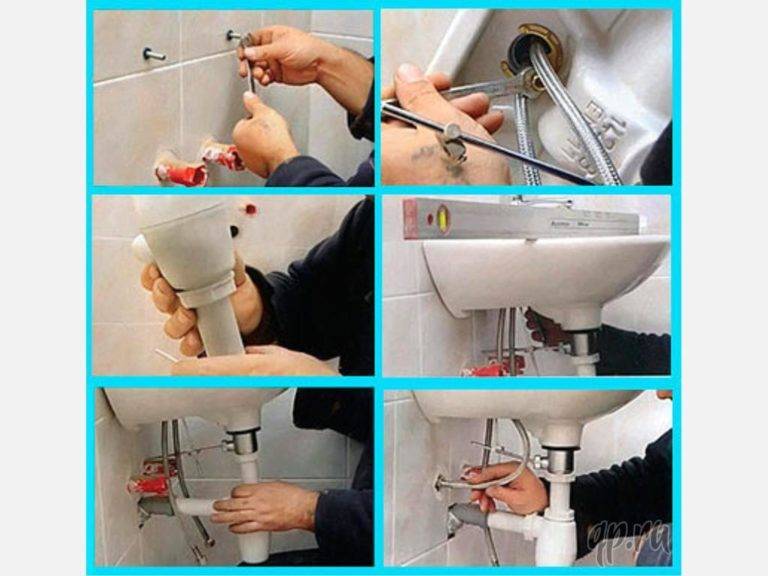
Mounting the sink bowl
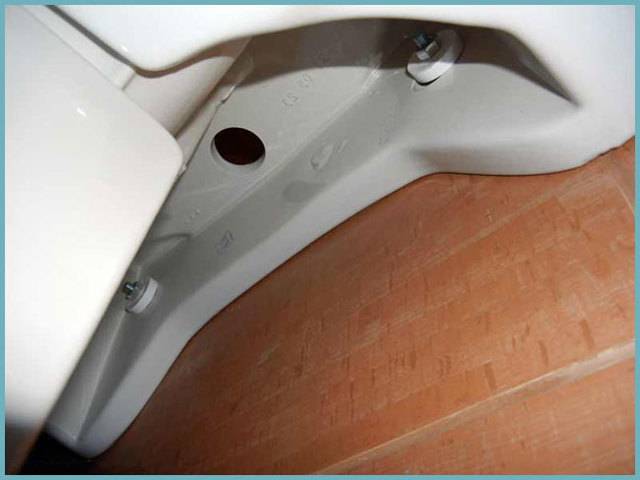
Before fixing the sink in the bathroom to the wall, check the reliability of the brackets. The pins are inserted into the mounting holes of the bowl. Self-tapping screws are supplied with gaskets and nuts, which are tightened until the washbasin takes the desired position. The joint of the device with the wall is coated with sealant.When screwing in fasteners, apply moderate force.
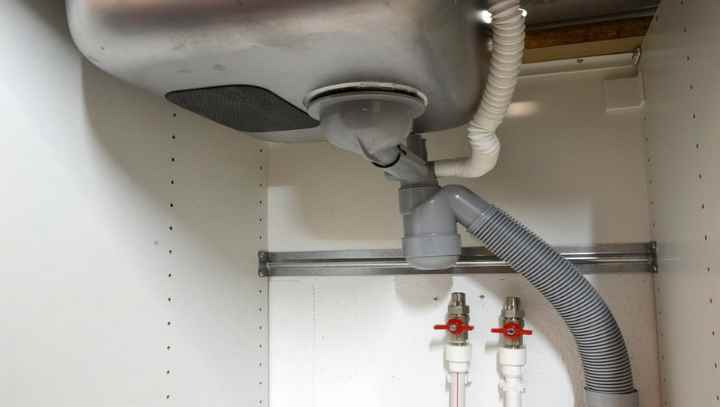
Connecting the siphon to communications
The process of installing a drain device includes the following steps:
- Socket fixation. A rubber seal is installed on the hole, which makes it possible to obtain a tight connection, a grill and a clamping bolt. The gasket must not move when the screw is screwed in.
- Siphon assembly. The socket is connected to a flask and a flexible tube. The latter is inserted into the outlet of the sewer pipe using cuffs or a rubber seal.
Faucet installation process
The crane is mounted before hanging the sink on the wall, because. after fixing the sink, it is difficult to install it. Installation is done like this:
- Flexible water pipes are connected to the mixer body. With the help of these elements, the device is attached to the washbasin and the water supply system. Sealing tape is used to seal joints.
- Flexible hoses are inserted into the sink hole, semicircular gaskets are put on them. The threaded end is connected to the mixer, with the clamping nut to the pipes. If the dimensions of the nozzle and hose do not match, use an adapter cuff.
- Testing the system. To do this, resume the water supply, inspecting the connections. If there is no leak, the installation is correct.
Sink Installation Recommendations
To mount the washbasin to the wall, you need to prepare the tools:
- screwdriver;
- wrenches and wrenches;
- drill with a drill for concrete or wood, according to the type of base;
- a hammer;
- level;
- pencil.
You need to check how solid the wall in the bathroom is. To do this, use a small drill. In a place that will then be closed by plumbing, a test hole is drilled.If the drill enters the wall easily, you will need to use anchor fasteners to secure the brackets. The depth and diameter of the hole depends on the hardness of the wall.
When installing a sink, it is worth considering the requirements of Building Regulations and Rules (SNiP). According to SNiP, the standard height from the floor to the upper edge of the washbasin, which is convenient for a person of average height, is 80–85 cm. Based on this, the height of the brackets should also be selected. If the growth is different from the average, you need to adjust the position of the sink for yourself.
Installing a small washbasin on anchor screws is simple:
- Mark with a marker or pencil on the wall the place for fixing the anchors. Make holes with a drill so that their diameter is slightly smaller than that of the dowels. Fix the dowels in the holes using a small amount of glue and a hammer. Screw in the anchor screws until they stop.
- Sinks of large sizes are fixed on brackets. To install the bracket, mark a horizontal line on the wall and check its evenness with a level. It will act as a border along which the upper edge of the equipment is exposed. After that, the width of the shell is marked and the thickness of the side walls is outlined down. The resulting marks are connected by a horizontal line. Fasteners are mounted along this line.
- Next, you need to attach the bowl to the upper horizontal along the previously drawn line and thus mark the places on the wall with a marker that coincide with the holes for fastening in the sink structure. After that, holes are made in the wall in these places with a victorious drill.It is necessary to drill as deep as possible to the very base of the wall, otherwise the plaster layer will not hold the structure. The hole diameter should be slightly smaller than the cross section of the bushings used. Dowels are driven into the resulting holes.
- Now you need to mount the brackets. On the wall, mark the places where you will need to install the fasteners, holding the washbasin with your hand. Holes are prepared in the marked places of fasteners, dowels are driven in and fasteners are installed. Check the reliability of the fasteners with pliers. They should not budge under load.
- After all the above procedures, if everything is done correctly and the brackets are fixed securely enough, you can install the washbasin itself. The seam is treated with sanitary sealant. Install sink and faucet.
When installing frame fasteners, nuances are taken into account. They are used if the walls in the bathroom are hollow or loose, which makes it impossible to fix conventional brackets. This design consists of two profiles and is attached simultaneously to the floor and walls. Adjustable legs make it easy to set the desired height. First you need to pick up the level and fix the frame. Then the studs for the sink are twisted. After that, the frame is sheathed with plasterboard and lined with a finishing material. Rubber washers are placed on the studs and the bowl is mounted.
Performing the steps in accordance with the instructions for fixing plumbing equipment leads to the creation of a solid structure that will last for many years.
Previous Post Types, purpose and rules for installing accessories for beds
The next entry Features of fastening vertical racks when assembling a frame house
Siphon types
Siphon - a mechanism located directly under the sink, similar to the letter S, connects the washbasin bowl and the sewer.
Siphon types:
- 1. In the form of a bottle. Equipped with a water lock system, it can also be connected to a water drain from a washing machine, the ability to carry out self-cleaning. Often a siphon will be used with an overflow system.
- 2. The tubular model of the siphon is made in the form of a pipe with bends. The bend of the pipe provides a shutter from sewer odors.
- 3. The corrugated siphon is similar to the tubular type, but has a plastic structure, can change shape and reduce size.
- 4. Siphons with overflow system. Any type of siphon can be equipped with an overflow system that protects the sink from overflowing. The siphon has an additional tube that connects to the hole on the side of the sink.
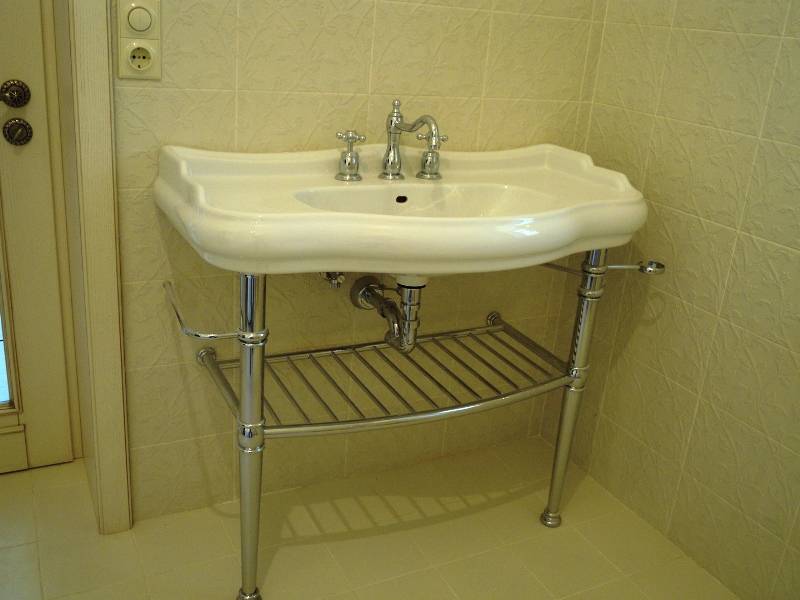
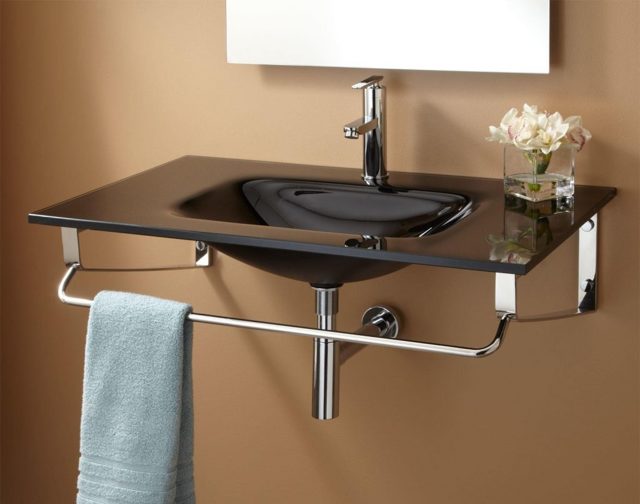
Washbasins on a semi-pedestal
Unlike a full-fledged pedestal, a semi-pedestal does not perform load-bearing functions, but only hides communications that fit the bowl. Such sinks look sleeker and more compact, but require a completely different way of summing up communications, which should come out of the wall at the level of a decorative semi-pedestal.
The advantages of this type of washbasin include saving space, which is important for small bathrooms, as well as the ability to independently determine the installation height.
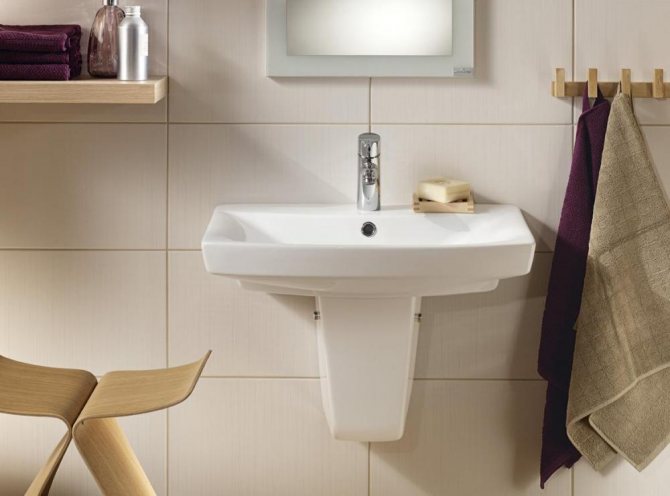
The semi-pedestal performs only decorative functions, hiding the supply lines.
Mounting Features
Since the semi-pedestal does not support the bowl, special powerful brackets are used to attach the sink, which are attached to the wall with dowels and self-tapping screws or anchor bolts.

When the brackets are securely fixed to the wall, a washbasin is hung on them, after which they are connected to the sewerage and water supply. The semi-pedestal can be mounted in one of two ways:
- Hanging with spring suspension. For this, special holes are provided in the lower part of the bowl, into which loops of a metal spring are threaded. Then bolts are put on the ends of the loops, after which the semi-pedestal is hung and fixed with nuts.
- Fastening to the wall with studs. To do this, after mounting the sink and connecting the communications, the semi-pedestal is applied to the wall in the right place, the attachment points are marked through the mounting holes. Then holes for dowels are drilled at the marked points, into which the studs are screwed. The semi-pedestal is put on the pins and pressed with nuts using plastic washers.
Some models are equipped with a towel holder that can be attached both to the bottom of the sink and to the wall using dowels and screws.

Washbasin with half pedestal and towel holder.


Video instructions for installation of sinks
We offer you to watch useful videos on the topic of the article.
The nuances of competent installation of the sink:
Siphon connection wizard tips:
Installation and connection of the sink above the washing machine:
Self-installation of the sink is a fairly simple event. Even a novice plumber can handle it without outside help.
It is important to do everything carefully and in strict accordance with the instructions, then the newly installed plumbing fixture will last a long time without requiring repair and additional maintenance.
Stages of installation work
Shut off water, both cold and hot. Then you need to decide what place in the interior of the room is reserved for the bowl, taking into account the supply of cold and hot water under the mixer. After that, the sink prepared for installation is tried on in place, and its position is finally chosen.
Correctly determine the size of the bowl and the height of its installation. It is necessary to choose such a model so that it does not occupy extra square meters of the room, but, at the same time, has sufficient dimensions to cover the spray sector of the water jet. It can be standard in width 50-65 cm models. The most “ergonomic” installation height is 0.8 m from the floor. And the distance in front of the wash basin is preferably left within 0.8-0.9 m.
Photo guide for mounting the washbasin on the wall - in principle, everything is clear without further ado
At the chosen height, armed with a ruler, a pencil and a level, the central horizontal line is indicated along which the installation work will be carried out. This will be the upper limit of the installation of the plumbing fixture.
It is very important to know the thickness of the sides of the bowl. They must withstand the emphasis of the brackets. The measured thickness is laid down from the previously made horizontal on both sides of the sink and is fixed with a mark
The measured thickness is laid down from the previously made horizontal on both sides of the shell and fixed with a mark.
The resulting marks are connected by a horizontal line indicating the height of the brackets.
Next, we work with the bowl: turn it over and fix the brackets on the sides. It is better to do this work together: one - manipulates the sink, exposing it horizontally; the other - makes the necessary marks.


Having attached the bowl to the horizontal, mark with a marker through the recesses on the reverse side of the place for installing the fasteners. In this case, you need to make sure that all the lines, places for the brackets match. According to these designations, holes with a diameter slightly smaller than the diameter of the fixing screws or dowel screws are drilled with a drill.
Plastic or nylon bushings (plugs can be used) are driven into the drilled places, screws are screwed into them. Support-brackets are attached to them, on which, in turn, the sink bowl is installed. The places of its further fastening to the wall are marked with a marker, drilled, and the bowl is put in its place.
The final step is to connect the siphon, the outlet end of which is inserted into the sewer socket; faucet installation and plumbing connection.
Slightly “baited” the fasteners, finally expose the sink horizontally in level, after which the final reliable fixation of all fasteners is carried out.
How to determine the correct size of the sink
All plumbing fixtures can be divided into several groups that differ in size:
- The most compact miniature sinks designed specifically for small spaces.
- Standard equipment.
- Combined appliances. They can combine two or more shells.
- Non-standard equipment of various sizes and shapes. Performed on individual projects.
When placing plumbing equipment in a room, its three main parameters must be taken into account: depth, width and height. This is the only way to choose the device of optimal dimensions for a particular room.
This is very important, because too large a sink will take up a lot of free space, and a small one will be inconvenient to use. Not only the width is important, but also the depth of the product
The dimensions of the sink must exactly match the area of the bathroom, otherwise it will be very inconvenient to use. This is especially true for cramped bathrooms.
To choose the right width of the sink, you need to remember that 0.5-0.65 m is considered the best option. Such equipment fits well into a medium-sized room and does not “eat up” free space in it. It is convenient for washing and allows you not to splash water on the floor. Such a sink will also look good in a large room, but wider models that solve some special design problems are also appropriate here.
The minimum width of the shells sold in stores is only 0.3 m. They are certainly not convenient enough to use, but there are no other options for small spaces. When choosing a plumbing fixture, you need to evaluate the installation method of the mixer. Most often, it crashes into the middle of the so-called installation platform, where a special hole is provided for these purposes. The dimensions of the installation site are also important.
If it is planned to install a double sink, and this is very appropriate in large families, you need to choose models where the distance between the centers of the two devices exceeds 0.9 m. Otherwise, it will be very inconvenient to use such equipment. The distance to the wall also matters.Practice shows that the best option is 0.48-0.6 m. In this case, you need to focus on the arm length of the person who will use the device.
Water lily sinks are specially designed to be mounted above the washing machine. This saves space in small bathrooms.
Make it simple. You need to stand near the sink and stretch out your hand, its opposite edge should be at the fingertips or in the middle of the palm. It will be convenient to use such equipment.
Pay attention to the depth of the bowl. The larger it is, the less chance of splashing water falling into it.
The best in this regard are models such as "tulip" or "semi-tulip". They are deep enough. Worst of all are flat "water lilies" that are placed above washing machines and some overhead sinks.
And the last important nuance: the installation height of the device. It is selected based on the growth of those living in the house. It is desirable that everyone is comfortable using the equipment. On average, the installation height is 0.8-0.85 m. Console models can be hung at the desired height, while devices with a pedestal must be chosen very carefully. The installation height cannot be changed.
Multiple mounting options
The installation method will depend on the sink you purchased. Below we will look at several popular mounting options. Before starting installation, it is necessary to shut off the water in the pipes. And also complete all the preparatory work that we described above.


First you need to note the installation level of the plumbing device. Initially, mark the selected height on the wall. The optimal height is 80-90 cm.In order for the walls of the bowl to withstand the pressure of the brackets, it is necessary to know their thickness. We measure it and transfer it to an already existing horizontal (height). Then we make marks.
The next step is to designate the markings for attaching the sink to the wall. Turning the bowl over, we mark it on the recesses on the reverse side for installing the frame. In this case, you need to level the washbasin with a level. Since this work is quite difficult for one person to do, it is best to involve someone else in this process. Make sure that all the lines you have drawn match.
According to the markings, it is necessary to make a hole for the bracket and the washbasin. Then we drive bushings into the holes, they should be included with the washbasin. We screw the screws into them. And then you can install the support.
The next step is to install and secure the bowl. We put the bowl on the brackets and make marks to secure it, then drill holes through them and install the sink in its place
It is very important to control the depth of the pin on which the bowl will be installed. The length of the protruding part of the stud should exceed the width of the bowl by 10-15 mm
Before inserting the plumbing fixture into its place, be sure to apply sealant to the edges of the bowl. To better protect the joint between the wall and the top of the bowl, you can attach a special plastic strip. It is attached with silicone sealant. If you have installed correctly, the washbasin will fit snugly against the wall and not wobble.
The washbasin model, which does not have a bracket and is attached directly to the wall, is installed in a similar way. Having marked the place of attachment, drill holes for the studs.Keep in mind that the mount will be bolted, so it should protrude by 1.5-2 cm. Another type of installation is to mount the sink on the wall to which the cabinet will be attached. In this case, it is necessary to make sure that the elements of the cabinet will not interfere with the sewer system and the mixer. The plumbing device is attached to the wall with bolts, and the pedestal is attached to the brackets.
How to attach a bathroom sink to a wall
It is a metal frame. It is attached to the wall, then a sink is inserted into it. The frame allows you to change the size of the mount. Such a console has sector, rectangular or arc parts.
Brackets T and L shaped are small compared to the previous ones. But they also securely fix the sink on the wall surface. In some cases, they are welded from a square tube.
Before starting work, the old equipment is dismantled. For this:. After dismantling the old equipment, the sink is fixed to the wall: The sink is attached to the surface and tried on. It is placed at a height convenient for use. The best option would be a mark of 0.8 m from the floor level. And from the wall to the edge of the sink should be at least 0.9 m.
At a given height, marks are placed. Before connecting communications, the reliability of the fasteners is checked. Connecting the mixer consists of the following steps:. The mixer after installation should take a stable shape.
The axes of the device entry into the couplings must be joined. It should be remembered that the sink is already attached with the faucet, which will greatly facilitate installation. But first, markings are made for attaching the sink with or without brackets.There are several options for attaching the washbasin to the wall. Everyone decides which one is suitable for the ease of doing the work.
The layout of the water supply system in the house will be incomplete without connecting all plumbing fixtures. The main thing is to think over their optimal placement in the room, to provide free access to the wiring nodes, flexible connections for prevention and repair. Each model has its own design nuances, which means it is installed differently.
Small washbasins are attached to the wall with anchor screws. After marking, holes are made. For this you need to do: He will not allow the sink to move sideways or rise above the cabinet; however, forward shifting remains possible in most bollard designs. To prevent it, apply a small amount of sealant to the ends of the walls before installing the sink.
We carry out preparatory work
Before starting the installation of the sink, it is necessary to determine exactly the place where it will be located, and the procedure for connecting the equipment to utilities. Once again, carefully measure the height of the device and its width. When choosing an installation site, we must take into account that the approach to the sink must be free. In addition, it should be easy to use.
If the plumbing fixture is to be installed in place of an obsolete device, the latter will need to be dismantled
This must be done very carefully and carefully so as not to damage the old sewer and water pipes.
After dismantling, we thoroughly clean the place of future installation, prepare the areas for connecting engineering communications. Experts recommend avoiding the use of all kinds of adapters whenever possible. They worsen the sealing of joints and spoil the appearance of the structure.


The sink is fixed to the wall using special fasteners. If they are not sold with the equipment, please purchase them separately.
In some cases, adapters cannot be dispensed with. For example, if you have to equip a connection with very old pipes. Then it is desirable to purchase high-quality parts that are most suitable for the pipeline.
One more moment
It is important to properly complete the sink if it is sold without a siphon and other elements. It should be understood that the siphon does not apply to universal elements.
Different siphons are designed for different models of equipment. For example, one that is suitable for a steel product is not suitable for sanitary ware.
Usually a conscientious manufacturer completes the sink with everything you need. If so, you should make sure that all the details are in place. It is advisable to immediately purchase a suitable mixer.
Where to put the crane?
Before you figure out how to install the faucet on the sink, you should choose the right model, paying attention not only to its aesthetic appeal. Important parameters of valves are:
- place of installation - on the washbasin, on the wall or in the wall;
- locking mechanism design.
1. Where and how to install the crane?
The most common mixers are fixed on the plumbing bowl in the corresponding hole.This arrangement is by far the most optimal in terms of design, ease of installation and maintenance.
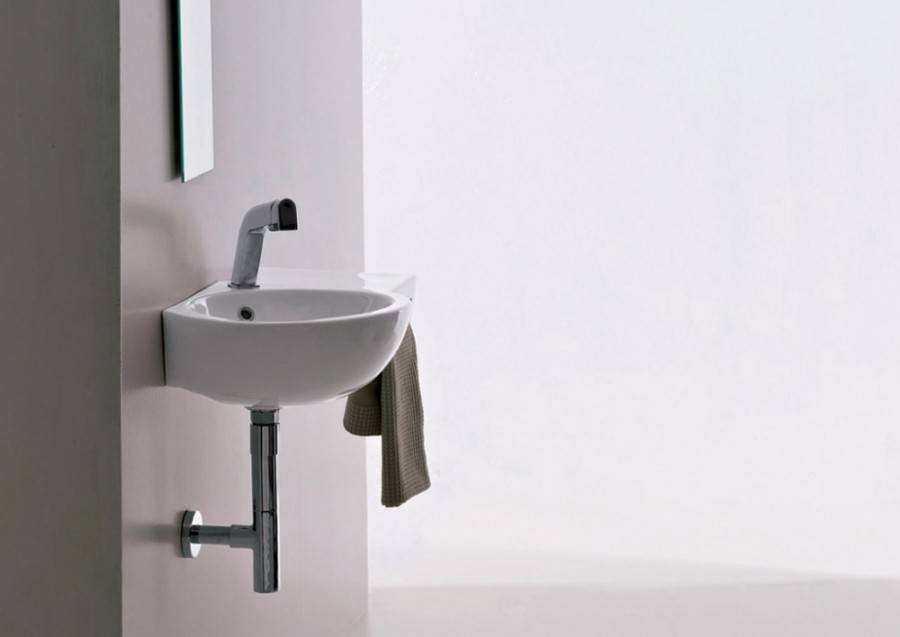
Shutoff valves can be attached to the washstand both before its fixation and after. However, it is often more convenient to install a faucet before the washstand is in its permanent place. Water supply in such models is carried out with flexible hoses in a steel braid, metal-plastic, copper or corrugated bellows connections.
Wall-mounted faucets are often used when they are designed to distribute water alternately to the washbasin and bathtub, or when there is limited space under the bowl, for example, due to the washing machine located there.
In the recent past, wall-mounted basin mixers were used alternately for basin and bath to save space and money. Now it is an expensive accessory.
In-wall faucet kits are elite expensive valves and require extensive preparatory work. Their connection to the water supply is carried out by specially laid out rigid sections of pipelines.
2. Locking mechanism
Regardless of the sink model, the installation of the mixer is selected with a rocking lever (“joystick”) or axle boxes (“twists”) of a valve or plate type. In the vast majority of cases, controlling the water supply with joysticks is more convenient than by rotating the axle boxes.
Connection to communications
After installing the sink itself, it must be connected to the water supply and sewerage.
Check the correct installation and operation of the water outlets. They should not protrude beyond the plane of the finishing wall.If the outlets protrude, the faucet will not fit neatly because the reflectors will not completely cover the cams, causing a gap.
Stopcock installation
The next step is to install stopcocks. Cranes differ from each other in terms of fastening methods and materials. They are made of cast iron, stainless steel, polypropylene, brass, bronze. According to the method of fastening, they are coupling, fitting, flanged and welded.
The welded valve is mounted in the pipeline using a welding machine. It is difficult to attach it with your own hands, so such products are not very popular. For pipes of small diameters, mainly choke fasteners are used. For pipelines of large diameter, flange fasteners are used. Coupling fasteners are universal and are used with pipes of various diameters.
How to install water supply hoses
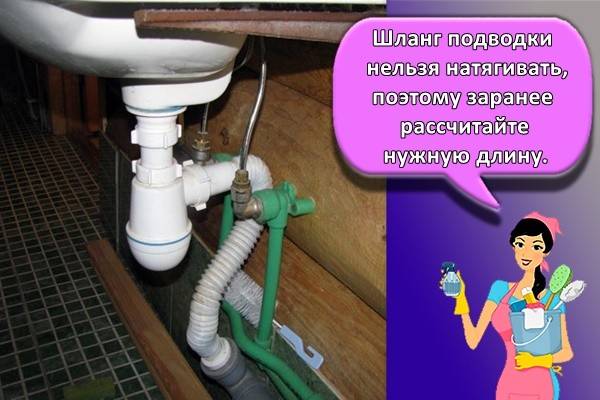
Before installing the supply pipes, make sure that they are not damaged. Also check the integrity of the gasket set. The supply hose cannot be stretched, so calculate the required length in advance. Do not twist the eyeliner, as this will lead to its deformation. You can bend it no more than indicated in the passport to it. It is worth twisting the tips by hand, screwing them a little with an adjustable wrench at the end, in order to avoid damaging the gasket.


How to put the mixer
In expensive models of sinks, as a rule, a mixer is included in the delivery. For cheaper models, it will have to be purchased separately. To install the mixer, screw the flexible hose with a wrench. Place a rubber gasket on the faucet base. Screw in the pins. Thread the hoses into the sink. Put on the mounting piece from below.Put a metal washer on top. Attach a cap nut to each of the studs.
Connecting the hoses to the faucet
After installing the mixer, it should be connected to the water supply. Connect the ends of the inlet hose to the pipes and tighten the nuts.
Collection and installation of the siphon
Assemble the siphon following the instructions for your model. Install the seal and put on the bottom. Place the gasket and stainless outlet in the sink outlet. Tighten the connecting screw with a screwdriver. Connect the siphon to the sewer system.