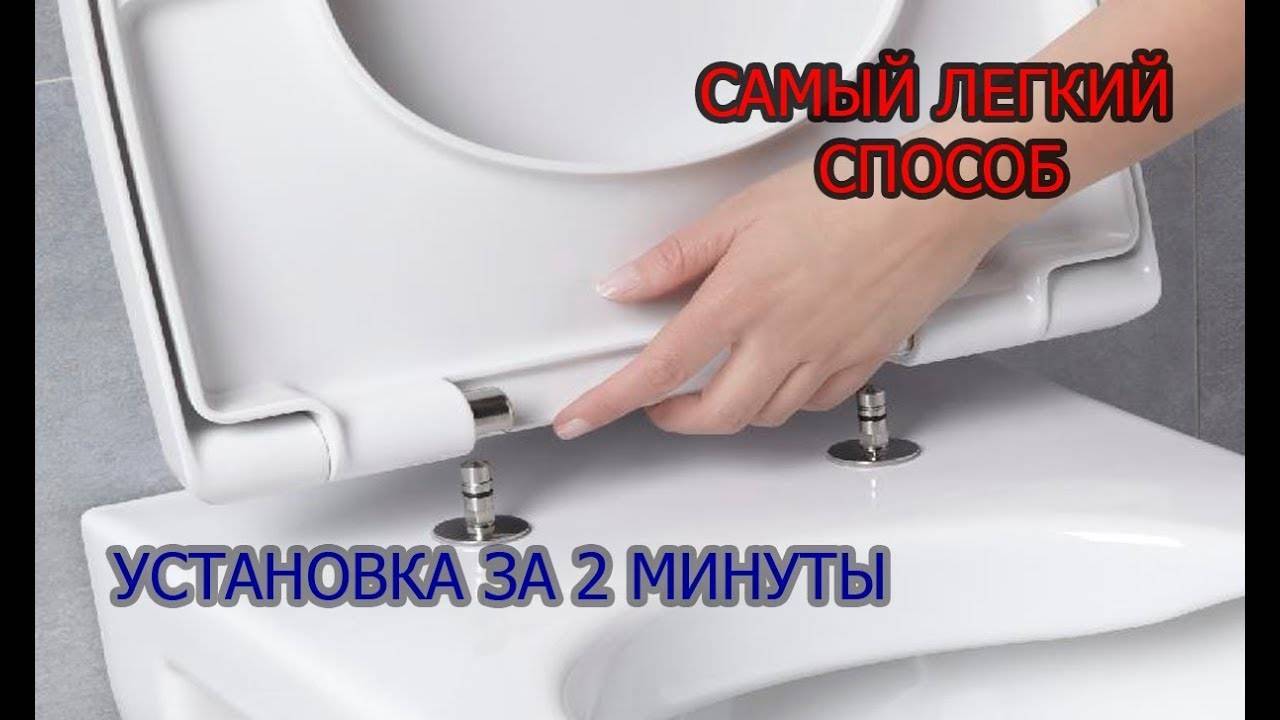
Making a toilet seat
To build a toilet seat for a country toilet with your own hands, you do not need to make super efforts - every person who knows how to handle a standard set of working tools can make such a design. The easiest way to make a rectangular wooden structure - consider the sequence of its construction:
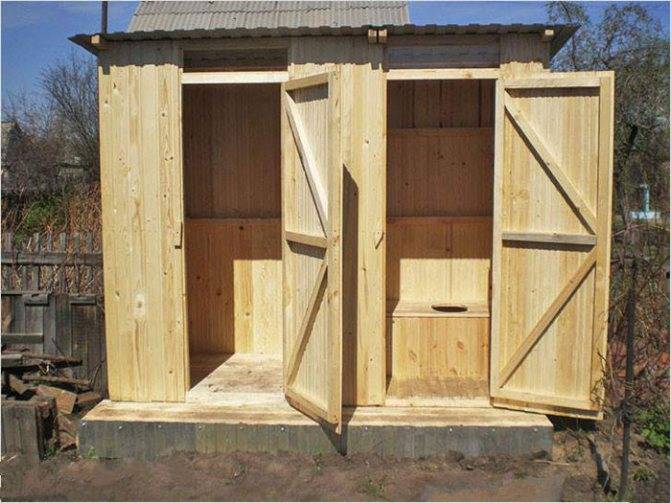
Wooden toilet seat can be made by hand
- Prepare wooden blocks: four long and four short for the base rectangle, and four for the transverse supports.
- Assemble the frame from the base bars, connecting the parts with self-tapping screws. Reinforce the top and front sides of the resulting rectangle with transverse bars. The height of the structure must be at least 40 cm. The width of the frame must completely cover the opening of the toilet.
- Prepare boards or plywood sheets and sheathe the installed frame with them.
- Using an electric jigsaw, cut a hole in the center of the upper skin for a direct toilet seat.
- Construct a toilet seat from the boards: cut four parts according to the dimensions of the previously made hole and connect them with self-tapping screws. From the same boards, cut out the cover for the seat. The latter can either be tied to loops, or fixed to the seat with bolts.
- Install the seat on the frame structure.
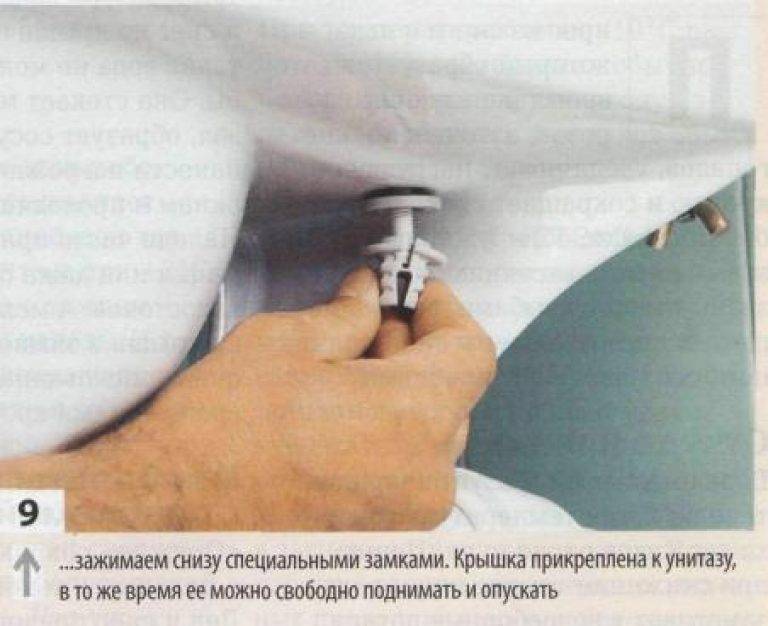
- Attach four shock-absorbing rubber pads to the back of the seat.
- Treat the outer and inner sides of both the toilet seat itself and the entire frame structure with water-repellent and antimicrobial compounds.
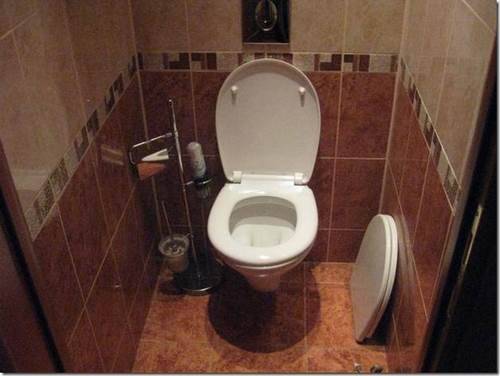
Thus, there are two ways to get a toilet seat - buy a ready-made model for your toilet or do it yourself from improvised materials. Whichever option you choose, always be guided by the operational requirements for the toilet seat - both the store and the self-made design must meet a number of the above indicators so that visiting the country toilet does not cause discomfort.
Microlift device
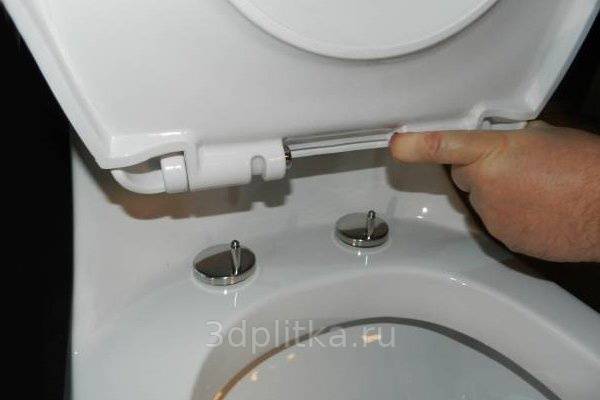
Plumbing manufacturers are improving their models. There is a mechanism for lowering the lid called a microlift. It lies in the fact that the toilet closes on its own.
You need to fix the structure in much the same way as a regular model. The differences are in the hinge mechanism. If the cover has to be replaced, it will be useful to study the operation of the device.
Details that make up the microlift:
- cylinder,
- stock,
- piston,
- spring.
Breakdowns are usually associated with a malfunction of one of the listed parts. It is difficult to make repairs without experience, although sometimes the problem is hidden in the lack of the right amount of lubricant on the surface of the piston cylinders.This is due to improper operation of the mechanism, when a person tries to close the lid by force.
The design should be disassembled, try to evenly distribute the lubricant over the entire area of \u200b\u200bthe cylinder. Some owners decide to purchase a new seat cover. There are those who find a microlift system for a specific model.
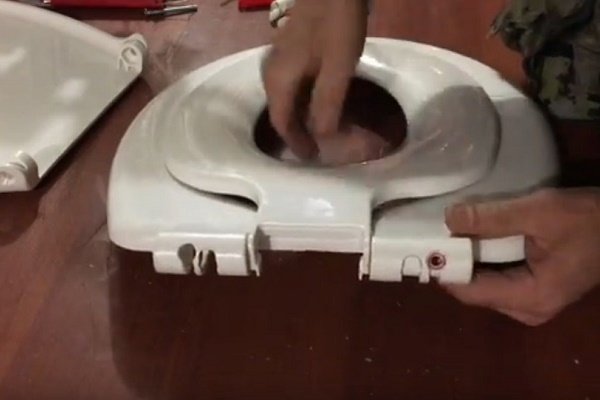
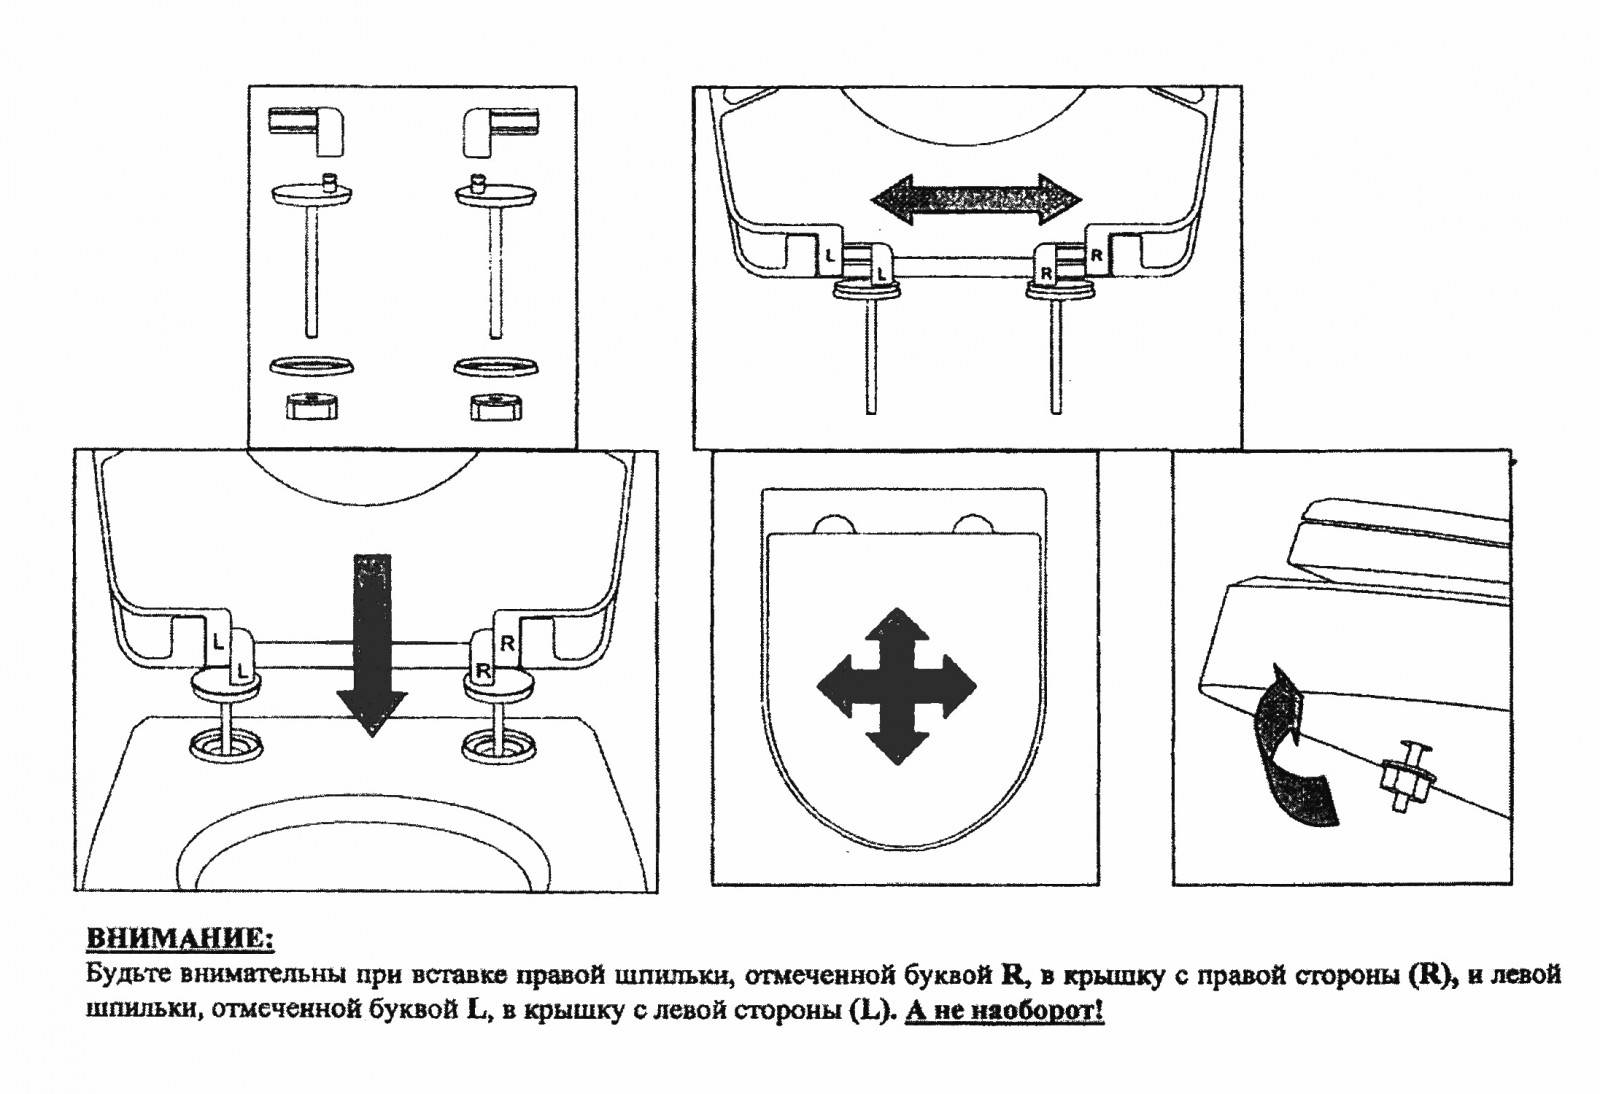
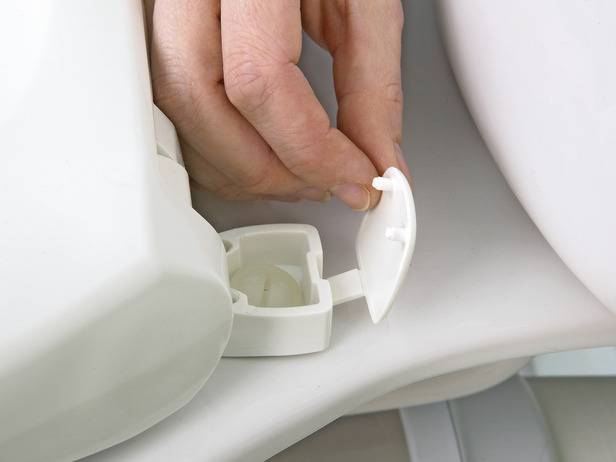
To install a new cover, you need to perform a number of actions:
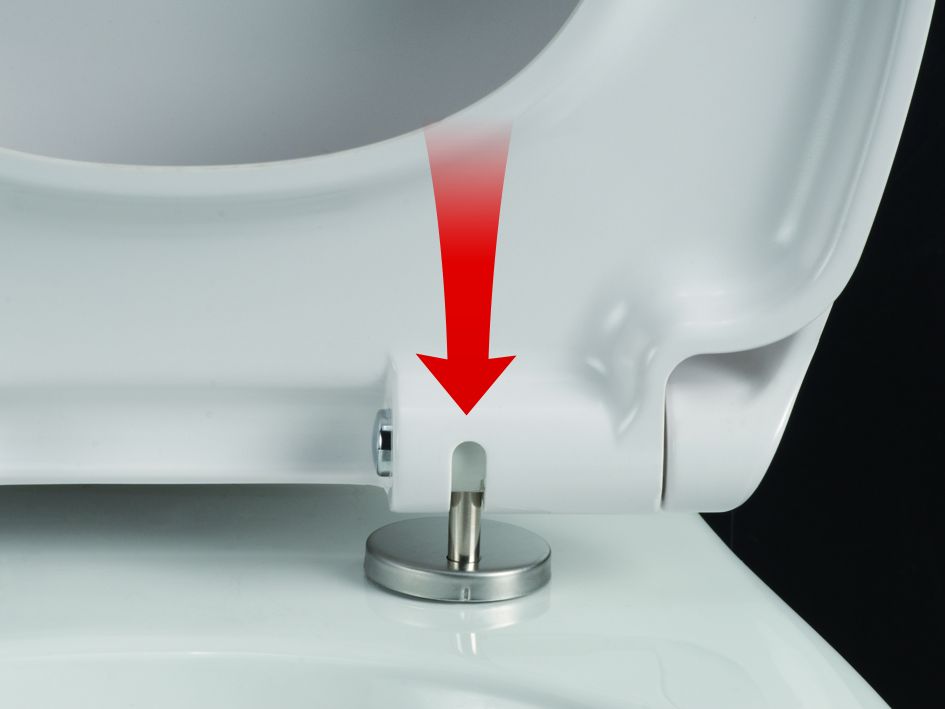
- Place microlifts on the pins of the patches-platforms.
- Place the seat cover on the floor, side up.
- Place microlift bushings into the holes of the ears.
- The left one is marked with the Latin letter L, the right one is marked with R.
- Gaskets must be placed on top of the holes located on the rear edge of the toilet.
- The design, together with the microlift, is installed on the toilet bowl, the studs are inserted into the holes.
- Everything is fastened with nuts that are included in the kit.
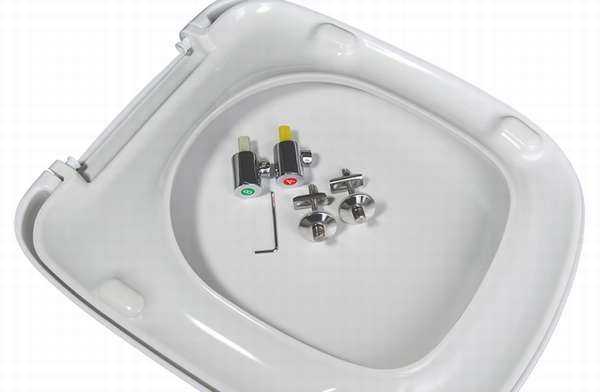
There are models that are much easier to mount, just use a hex key. It is usually included in the package.
There are all kinds of seat covers on the market, which differ in the type of material, the presence of additional functions. Good toilet bowls and related products cannot be cheap. In order not to face the constant replacement of the lid and toilet seat from the toilet, you should choose a design for quality, and not external data.
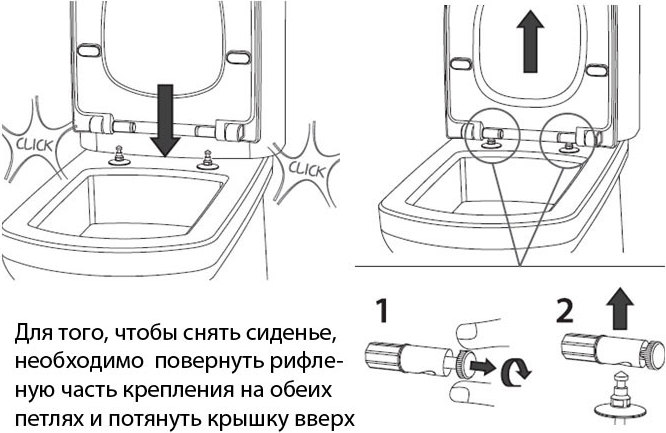
How to remove the seat from the toilet
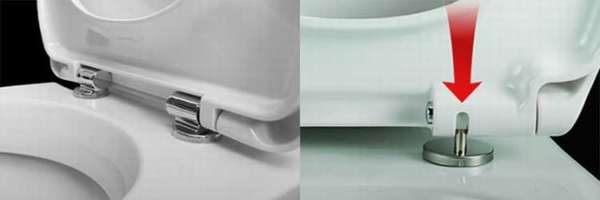
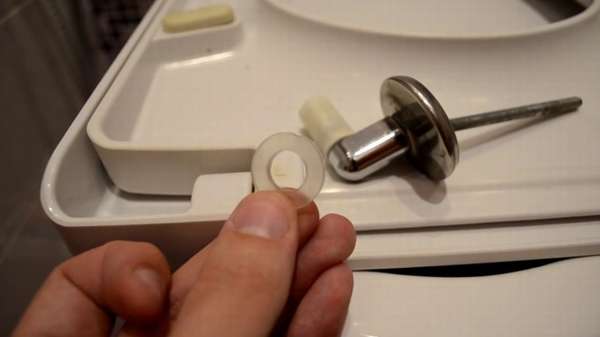
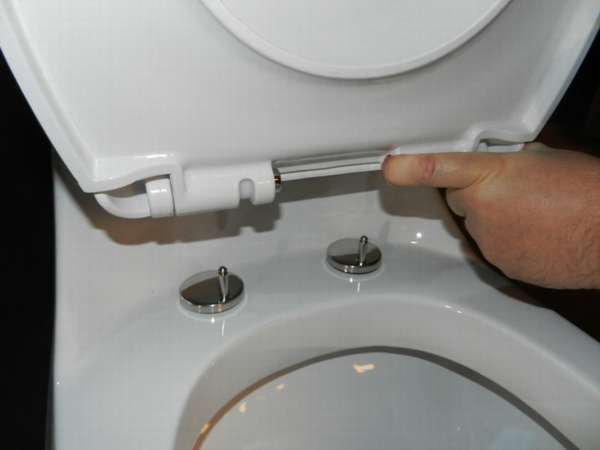
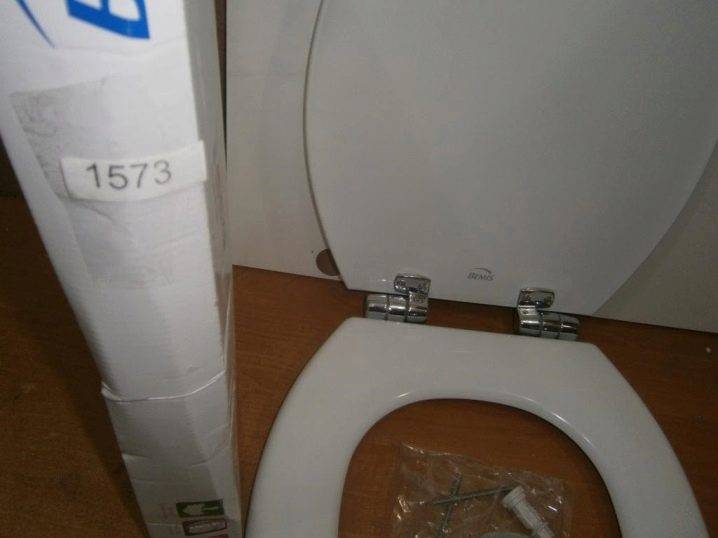
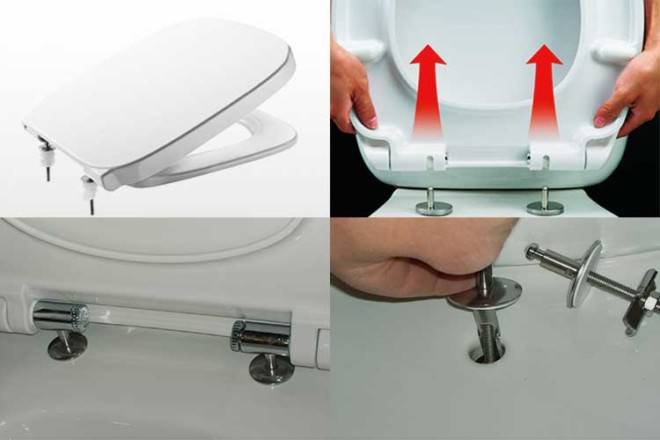
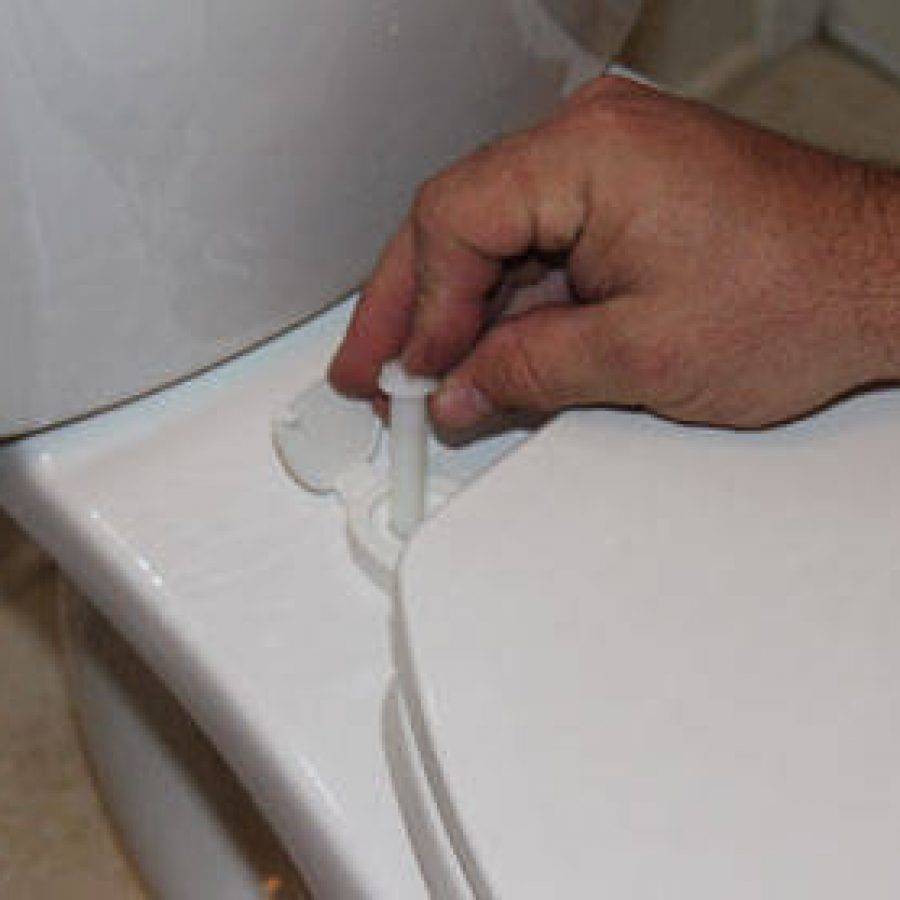
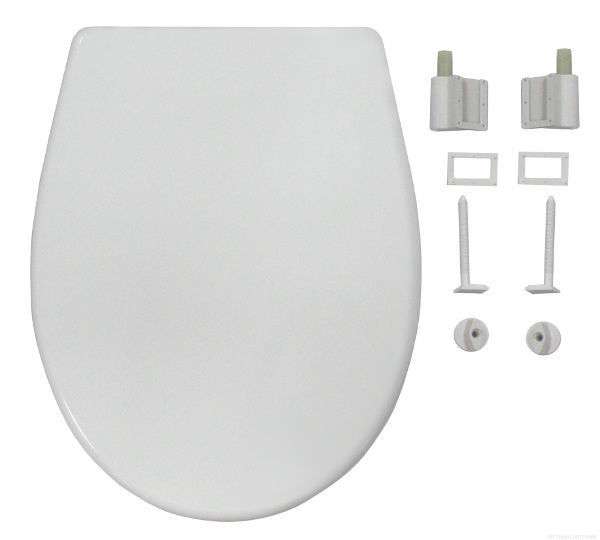
The design of the seats in almost all toilet models is identical. In particular, the seat is fixed with two bolts or a special plastic screw that connects the cover and, in fact, the seat itself.
Changing a seat in an old toilet
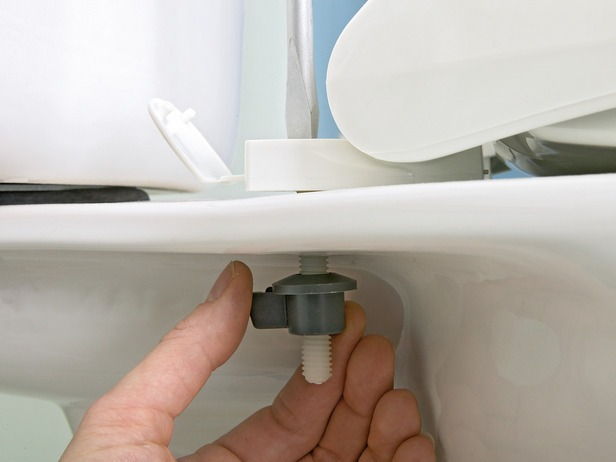
In older toilets, it is sometimes difficult to reach the locking nut, so the household must have a socket wrench.
The seat in an old toilet is usually secured with a bolt located underneath. Such a bolt can be easily removed with a socket wrench, an ordinary wrench or trite pliers
- Plastic or wooden toilet lid.
- Iron hinge.
- Rubber gasket.
- Rubber or plastic washers.
- Seat.
- End key.
- Bolt with nut.
- Loosen the nut counterclockwise.
- Wash tank.
- Toilet.
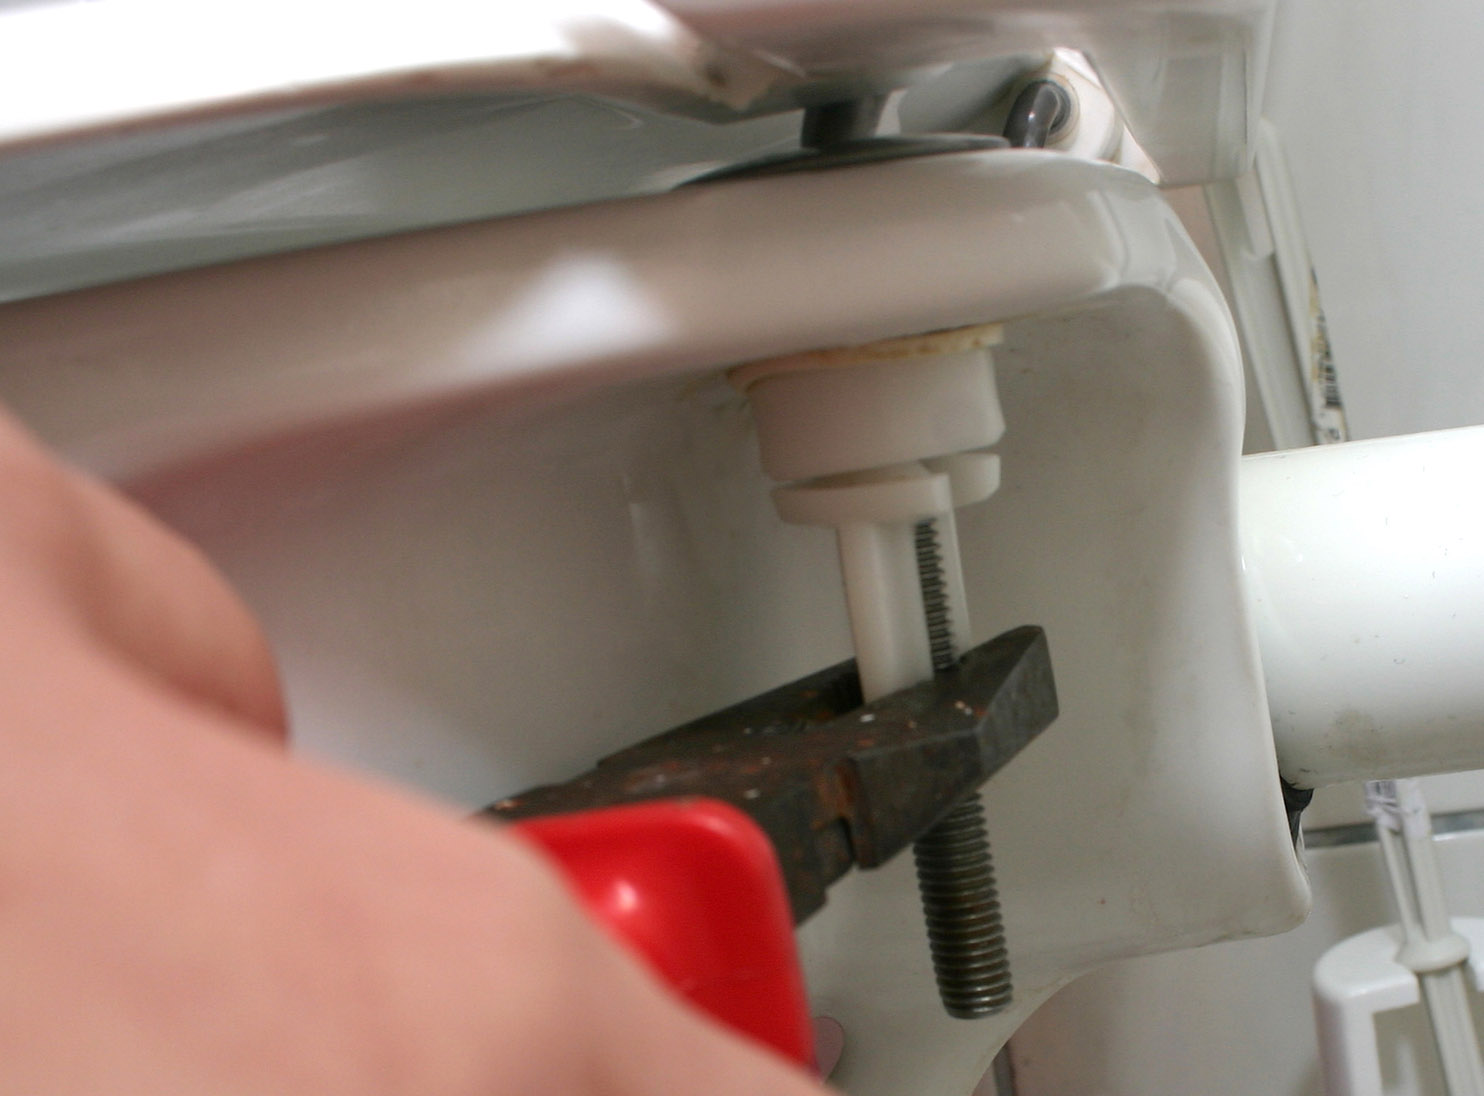
When replacing an old toilet seat, you will usually need a socket wrench. If you can't unscrew it, drill a 3 or 4 mm hole in the base of the nut with a drill bit. loosen the fastener and use the key again.


If there is no socket wrench - it does not matter, it is enough to use pliers. In old toilet bowls, the nut can “stick” and it is not so easy to unscrew it. It is enough to treat it with a special WD40 liquid or just pour it with ordinary oil. Wait about half an hour, after which the nut, as a rule, is unscrewed.
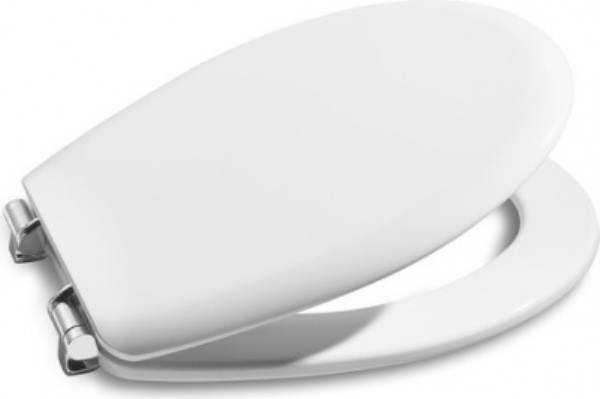
A conventional toilet seat with a secure metal mount. This will last much longer than the cheap plastic version.
Plastic seat mounts are cheap, but less reliable than metal.
Fasteners for the toilet seat attachment mechanism can be purchased separately. Again, metal fasteners, as shown here in the photo, are much more reliable than plastic ones, but are quite inexpensive.
In a critical situation, the bolt has to be cut with a hacksaw. Carefully cut the part of the bolt above the washer. The faience toilet bowl is very easy to damage, so be extremely careful.
What are they?
Let's first define what we can find in stores.
Material
What are the seats made from?
Plastic. Most often it is polyethylene, polyvinyl chloride or polypropylene. The seat, as a rule, is not solid: the upper surface is rounded, and inside there are ribs that provide rigidity. The seat rests on the toilet bowl with plastic protrusions or rubber inserts.
Advantage: cheap. Disadvantages: fragility; rapid scratches.
Duroplast. It is also, strictly speaking, plastic. However, a set of properties sets it apart. It has a hard and scratch-resistant surface that looks more like ceramic. Ultraviolet and weak acids are safe for Duroplast. In addition, antibacterial additives make the use of the seat safer in terms of the spread of germs.
Advantages: beauty and strength. Disadvantage: the cost is much higher.
 Duroplast. Strong, durable and beautiful
Plywood. Good old toilet seat in the spirit of the middle of the last century. At the bottom, rubber pads are glued or screwed with screws. Pros: Cheap and very durable. Breaking such a seat is almost impossible. Cons: Appearance is somewhere between disgusting and horrible.
Ancestors did not turn defecation into a cult
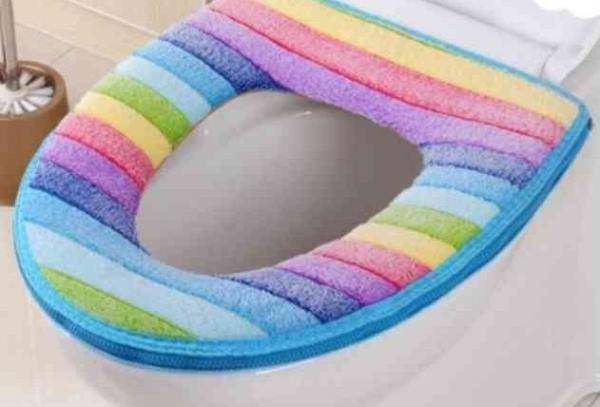
- Plastic seat with foam padding, sheathed in polymer fabric. Like other products, they can be beautiful and gaudy; the second type of such seats is much more common. Pros: The sirloin is soft, and you can comfortably delve into reading the inscriptions on the air freshener. Cons: breaks quickly. If there is a cat in the house, then very quickly. If the cat is used to using the toilet, then immediately.
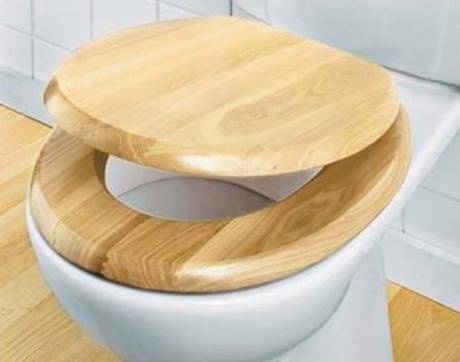
- Wood, chipboard and MDF. Appearance depends on the quality of workmanship. There are frankly rough products, there are also very attractive ones.
The main drawback is a solid weight against the background of plastic competitors. When the seat falls, the chances of cracking the toilet cease to be ghostly.
 Something like this
The form
If you are wondering how to choose the best toilet lid for your white friend, take a look at the variety of shapes.
Most common covers and seat shaped semi-oval. However, in stores you can also find chopped, rectangular products. The edges are slightly rounded to prevent injury or tearing of clothing.


Covers of the original design are somewhat less common. If the manufacturer decides to make the seat with a cover exclusive, his imagination has no limits: there are ducks, and guitars, and frogs, and folk musical instruments ... Frankly, it all looks very tasteless; however, if it is sold, then there is a demand.
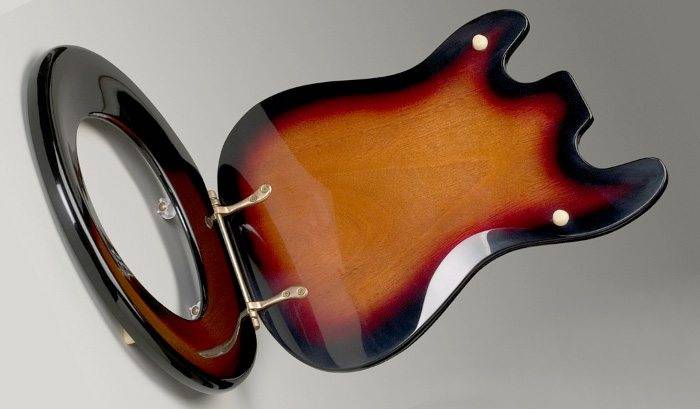 Music lovers also go to the toilet
Child seats stand out
How to choose a toilet lid if you have a small child? Pay attention to those seats that, in addition to the usual seat and cover, also have an intermediate insert with a smaller hole.
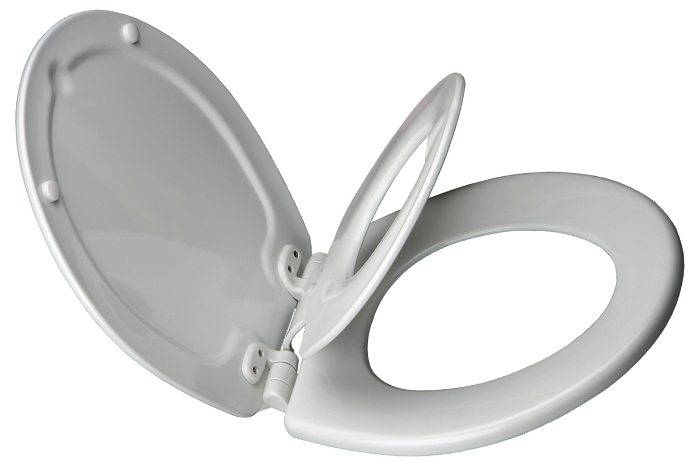 For young conquerors of adult toilets
If you want the little one to wean from the potty, it is advisable not to start by bathing in the toilet. And it is almost inevitable when trying to use an adult size toilet seat.
Buns
Pleasant additions include a variety of devices designed to increase the comfort of using a water closet.Manufacturers' attempts to convince you to have a bowel movement in an atmosphere of progress, surrounded by technical innovations, are very touching, sweet and sometimes reach insanity, although before installing high-tech things, make sure your plumbing is working and, for example, the toilet bowl is not leaking.
What is one analyzer of the composition of intestinal gases, built into the seat! What about radios? And audio systems that imitate the sounds of running water and are intended for those who are embarrassed by the idea of doing their simple task in silence?
However, these devices also find their customers.
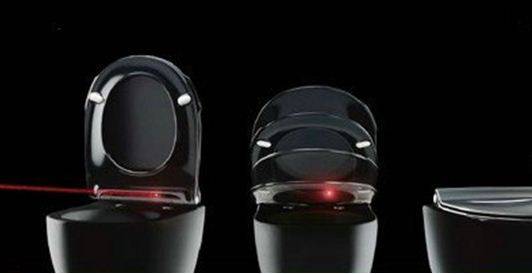 This sorting robot monitors the user and, as soon as he gets up, promptly slams the lid
When deciding how to choose a toilet seat, pay attention to two simple fixtures from this area, and at the same time to plumbing and think about how to choose a compact toilet. Unlike most toilet gadgets, they can actually be handy.
Unlike most toilet gadgets, they can actually be handy.
- The microlift lowers the lid slowly. Surely, after all, this situation is familiar to you: after visiting the secret room at night, you wake up and let go of the lid, and it wakes up all the household with its roar.
- The seat heating system is suitable for sybarites and owners of cold washrooms.
If a breakdown has occurred
It often happens that the fasteners or the seat itself with the cover break, crack, and various chips occur. The reasons for these minor troubles are very different: they threw back the toilet lid too sharply, unsuccessfully stood on it or on the seat with their feet, dropped something heavy ... But you never know the reasons, as they say: “breaking is not building”.There is not always a desire to go to the store for a new cover. Let's try to fix these minor problems on our own:
- To glue the crack, there is an easy way: apply a little acetone to the cracked plastic - it is known to dissolve most types of plastic, then connect both parts along the fracture line and let dry. Dichloroethane has the same effect.
- If there is a breakdown of parts made of polyethylene or polypropylene, then fire will come to the rescue: you need to melt the edges of the cracked part a little, and then connect them and let them cool. Then gently sand the seam - it will become almost invisible.
Models have one common “trouble”: often either the shelf itself or its eyelet breaks. This is due to the fact that the cistern is installed incorrectly, without the use of any props, and all of its weight lies directly on the plastic fasteners. With this method of installation, it is enough to lean back on the tank while sitting on the toilet, or simply push it with your hand - and problems cannot be avoided.


Do not rush to immediately run to the store for new fasteners or a shelf. Repairs can be carried out without leaving home:
Clean the broken surface of debris.
We wipe it dry (you can use a hairdryer) - the surface should not be wet.
Any improvised means must degrease the surface (acetone or gasoline will do). If the chip is completely fresh, this can be omitted.
Next, carefully mix the hardener and epoxy resin in any unnecessary clean container.
Lubricate both sides of the chip with the resulting mixture, press them strongly against each other
Important: the protruding mixture must be removed immediately before it hardens. Then firmly fix the connection.
When the resin hardens, we put everything in place: both the tank with the shelf and the seat with the lid
And do not forget this time about supporting the tank - do not step on the same rake twice.
We hope that this instruction on fastening the toilet lid and eliminating the problems that may arise during its installation and dismantling will help you cope with such a simple task as replacing the toilet seat.
The topic of our article is a toilet lid mount. It would seem, what could be easier - to put the cover with the seat back in place? However, as in any business, there are subtleties.
We will figure out how the seats are attached to the toilet and what problems may arise during their operation and replacement.
Are there any standards in the production of seats and covers? Or are they, like the toilet lid mounts, produced by manufacturers entirely at their own discretion?
Nothing like this. The production of seats is regulated by nothing less than GOST number 15062-83. It also specifically specifies the fasteners used.
What interesting things can be learned from the text of the standard?
Plastic seats can be made with or without covers. Wooden ones are made without lids.
- Plastic seats can be made from acrylic plastics, HDPE, HDPE, polypropylene, plastic polyurethane and… any other plastics that are beautiful, pleasant to the touch and durable. The wording is, frankly, vague.
- Wooden seats are made from birch plywood. Only from her. In the paragraph above we have already seen a refutation of this clause of the standard.
- Seat shock absorbers (rubber inserts that are located between the seat and the toilet) are supposed to be made of medium-hard chemically resistant rubber.
- The toilet seat mount should be made of any plastic that is strong enough to hold the lid in place. For toilets with a separate shelf, however, low-pressure polyethylene is especially recommended.
- The seat must have at least four shock absorbers (see also).
- The mount for the toilet seat must allow it to be freely raised and lowered.
- The assembled and mounted seat must withstand, without cracking or destruction, a load of 120 kg, evenly distributed over the seat, or 80 kg along one edge. If you weigh more, you stand on the edge of the seat solely at your own peril and risk.
The seat and lid package must include the toilet lid fasteners and an assembly drawing.
Well ... Curious, informative, but the range of seats in hardware stores does not always meet this standard.
Why?
Design and material of manufacture
By design, the seats are divided into soft and hard. Soft models are covered with vinyl or polyethylene on top, they are quite inexpensive, have a bright cheerful design, are easy to use, but will not last long, because the upholstery will quickly tear or crack. Solid models are more reliable, they are not so afraid of mechanical impact, sharp objects and aggressive detergents. In addition, a special cover can always be put on the hard cover, which can be easily changed. The assortment includes a variety of covers made of plush, textile, eco-leather, vinyl, with a zipper or ties.
Today, manufacturers usually use two materials to make caps:
- Plastic;
- Duroplast.
Of course, there are also seats made of wood and MDF, but quite rarely and most often these are designer models that are rarely found in ordinary stores.
Plastic seats are cheaper, lighter, but they scratch easily and break quickly.
Duroplast is a more modern material, it is stronger, which means that such a model will last longer.
Another plus is that such seats often have an antibacterial coating, which is very important for maintaining hygiene in the toilet. True, such options are more expensive than ordinary plastic ones.
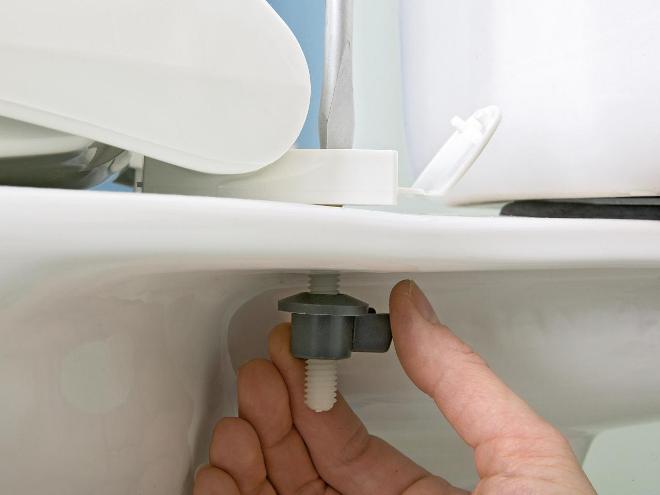
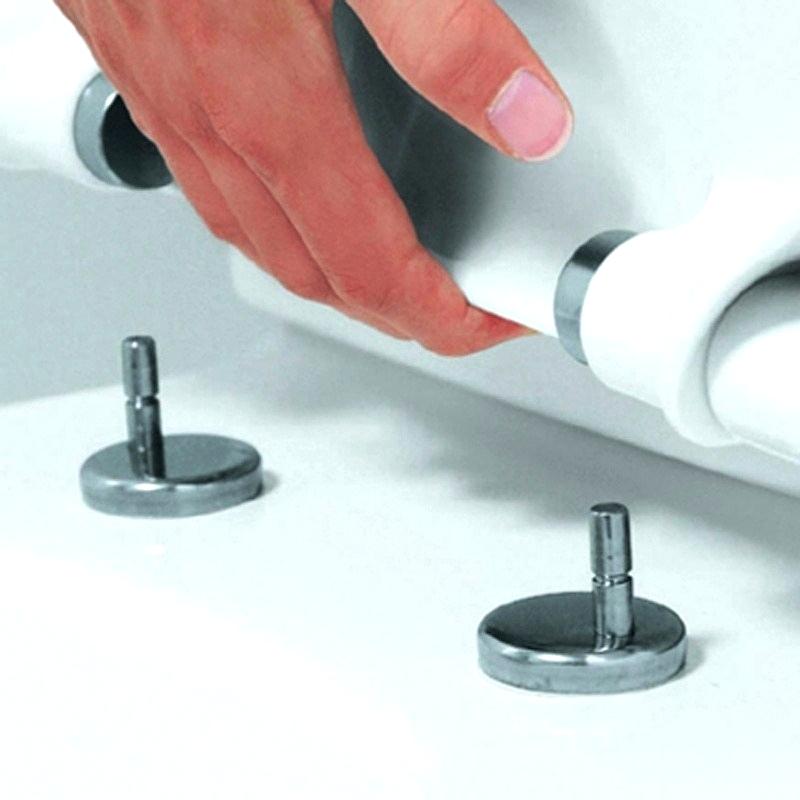
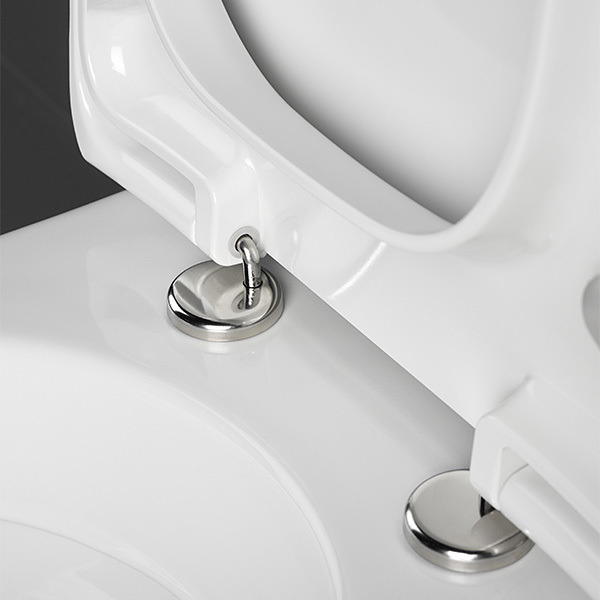
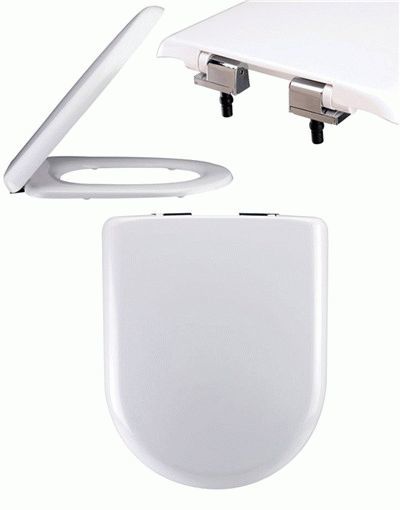
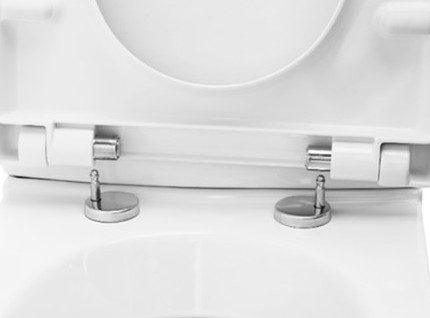
Hinged connection
Attaching conventional structures is easy. You need to do all the steps in reverse order. Before this, you may need to assemble the purchased model. Usually fasteners are based on plastic, metal, metal-plastic hinges.
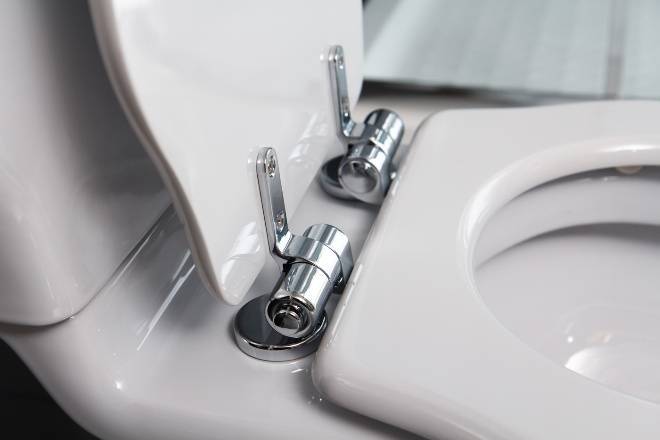


Plastic are more often used in budget series. In addition to the price, they have another advantage - the absence of corrosion. Metal manufacturers use in expensive designs. They last longer.
If you need to replace the toilet lid, the system can be disassembled. To do this, you do not have to remove the common mount, just remove the hinge shafts. The design depends on the manufacturer, it is better to study it according to the instructions. Often a locking pin is used at the end of the shaft. You will need to preload the pin by pulling the shaft out of the hole. There may be latches that have a lock. They must be rotated 90-180° counterclockwise. Shafts can be fixed with screws and screws.
Conclusion
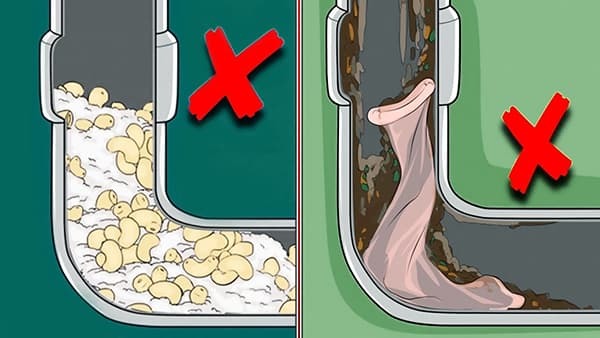
Using a toilet without a seat is not only inconvenient, but also unhygienic.The cost of products is low, and their installation does not cause difficulties, so you should not invite a plumber to do this work ().
The installation principles for any seat remain the same, only the fasteners change. The video in this article will provide an opportunity to find additional information on the above topic.
The toilet seat often fails. In this case, the easiest way out of the situation is to replace it.
When you first need to dismantle the old seat, and only after that start installing a new one. It is worth talking about these procedures more similarly.
Many are faced with the problem of attaching the seat to the toilet. If earlier steel bolts and nuts were used for these purposes, now quite often the seats come with plastic versions of this mounting material.
So, today the following types of toilet seat mounts are used:
- steel bolts and nuts;
- hairpins;
- plastic bolts and nuts.
If we talk about metal fasteners, then installing them is quite simple. To do this, only a wrench of the appropriate size is needed from the tool.
In some cases, you can get by with pliers. The bolt is inserted from above into the corresponding holes. A nut must be attached from below. For this you need a key. The disadvantage of such fasteners is that steel parts are susceptible to corrosion.
Currently, seats that have plastic connecting elements are increasingly appearing on the market. They are installed in the same way as steel.
However, this type of fastener has one undoubted advantage, which is that such connecting elements are not subject to corrosion.
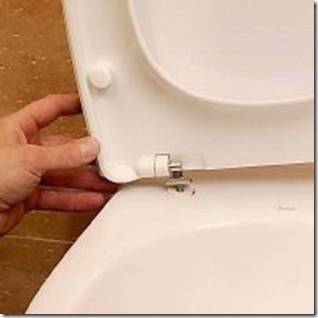
Before you install the toilet seat in its rightful place, you must dismantle the old one. For these purposes it is necessary to use keys of the appropriate size.
Old toilet seats probably have steel fasteners that will need to be unscrewed. Most often, two such mounts are used. it is located on the back of the toilet.
Removing the old seat is easy enough. After it is removed, you can proceed with the installation of a new one. Before that, you first need to clean out the old bolt holes that are located on the toilet. Corrosion may well form in these places.
Only then can you directly install a new seat. This is done quite simply. The same tools are used for this purpose as in the work related to dismantling.


Only in this case everything happens in reverse order. When fastening the bolts, do not overtighten them. This will create an additional load, both on the toilet itself and on the seat.
Always remove the old fixture before installing a new toilet seat. Every person who decides on such an undertaking faces this problem.
Removing an old toilet seat is not always easy. In some cases, you will have to use additional tools and materials.
Of course, if we are talking about new fasteners, that is, not yet rusty, then they can be unscrewed quite easily with the help of keys of the appropriate size.
In the event that we are talking about an old mount, additional efforts may be required.In this case, the connection point must be lubricated with a liquid lubricant.
It can be any oil that is sold in specialized stores. After that, you should wait about 20 minutes, only then take the keys. In this case, there is a high probability that it will be possible to unscrew the bolt without any additional problems.
Sometimes you can use a hacksaw or a grinder to remove the mount. With their help, the bolt head is cut off, and then the mount is painlessly removed.