- How to hide the pipes in the toilet with blinds
- Carrying out work
- Preparatory work
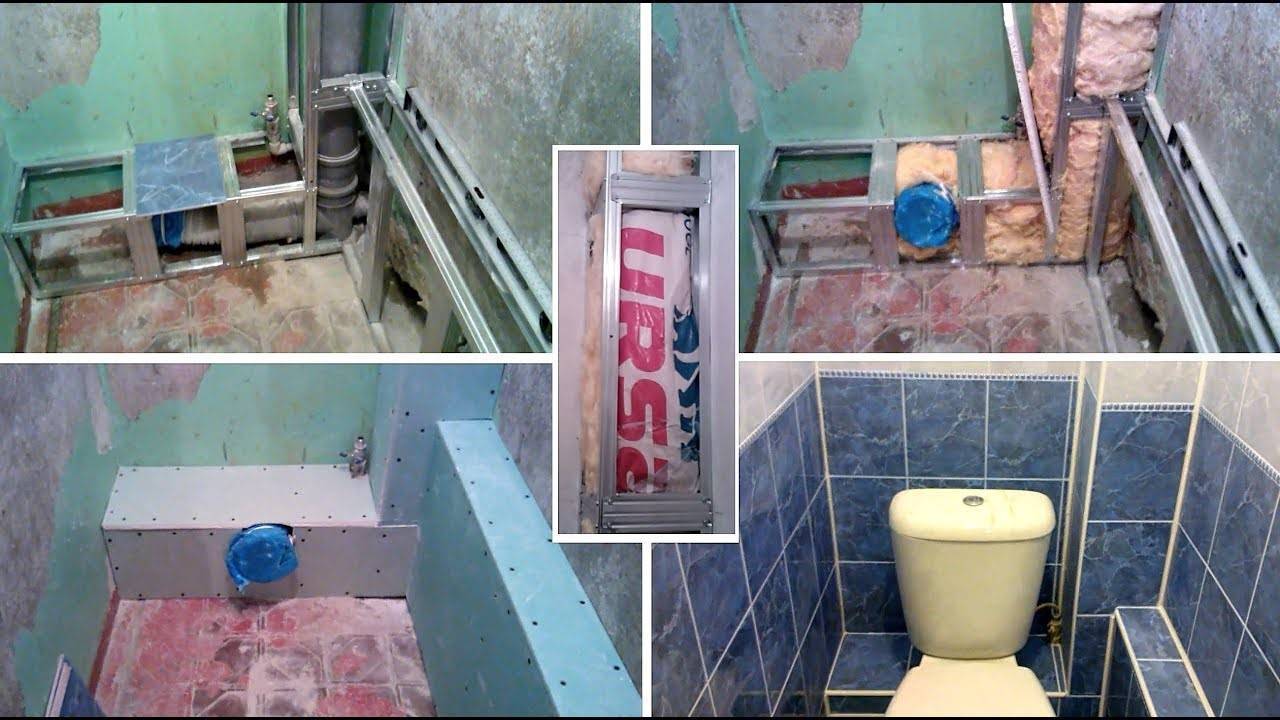
- Building a support from a frame
- Sheathing the frame with sheets of GK
- Box assembly
- Finishing materials for pipes in the toilet: options
- Septum position
- We mask under drywall
- Toilet plumbing diagrams
- The choice of material for finishing the box
- 3. Basic rules of disguise
- Installation-free options
How to hide the pipes in the toilet with blinds
One of the simplest designs. Drywall or plastic is useful for sheathing pipes. This method is quite simple: it is enough to purchase a sheet of drywall, preferably moisture resistant. The cost of one sheet is about 4.5 dollars. In addition to the GKL, you will need a profile. It can be wood or metal. It is better to choose a metal profile. It is of two types:
- guide. They form a contour and fasten at 4 corners, at a distance of at least 10 cm from the pipes.
- Wall. They serve to reinforce the structure.
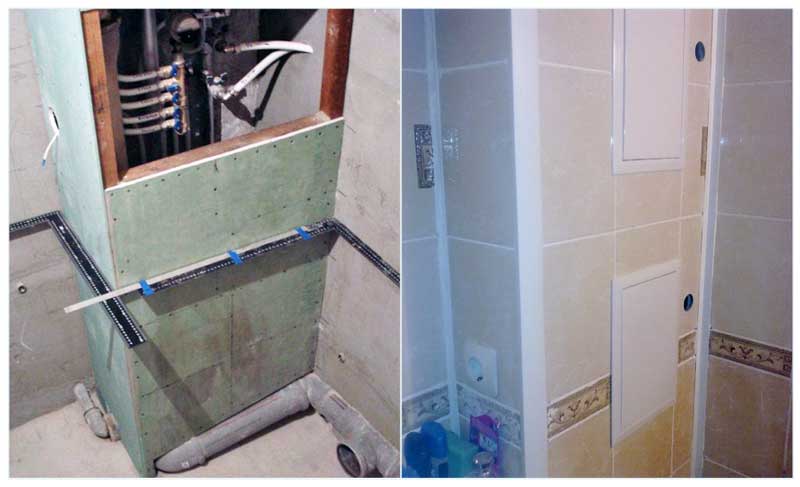
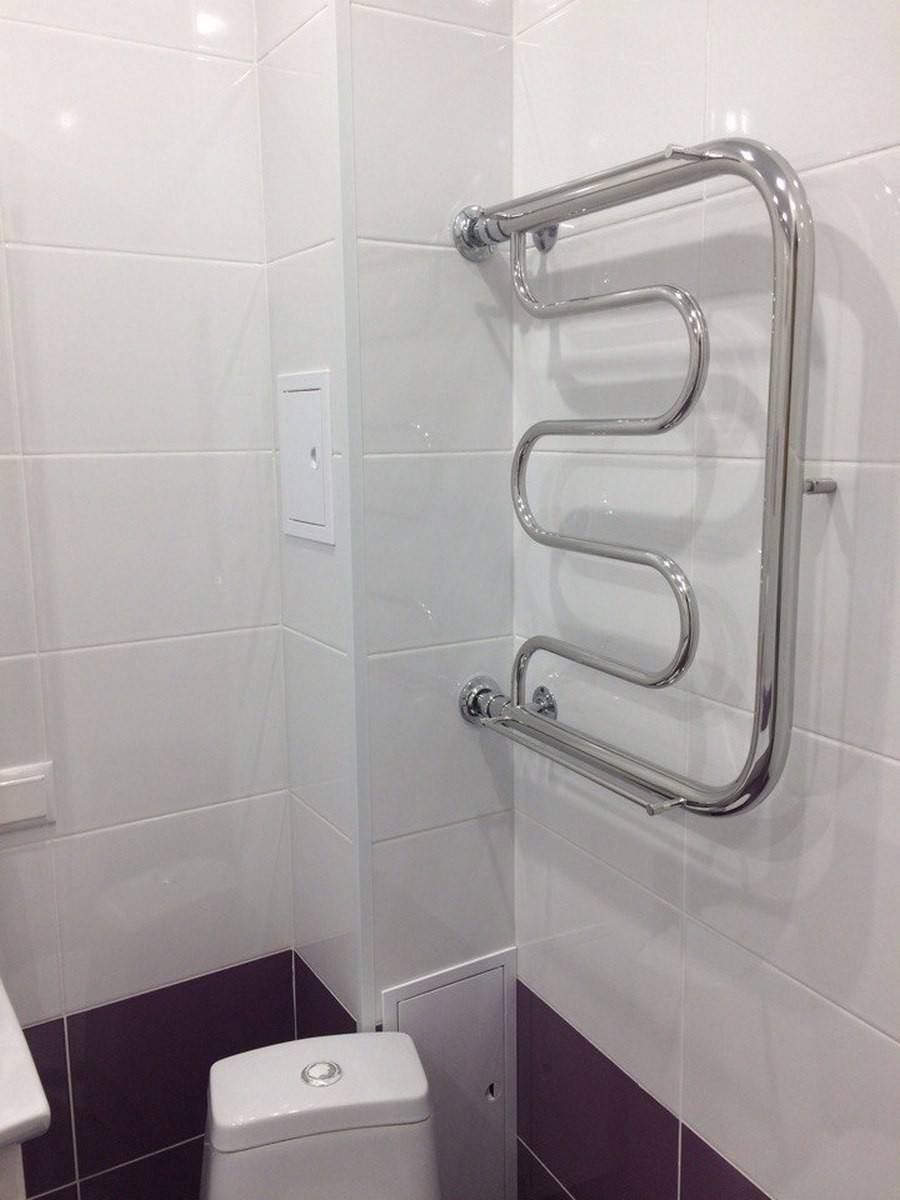
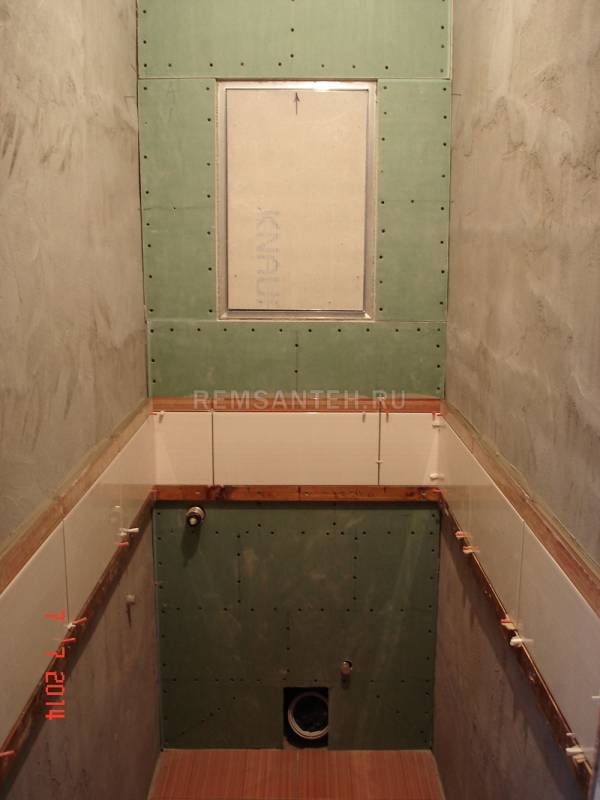
We invite you to familiarize yourself with Stencils for the bathroom: do it yourself, design and decor (41 photos) Plasterboard box with an inspection hatch
If the height of the box is less than a meter, then you can do without them. After installing the frame, the drywall sheet is attached to it with self-tapping screws.
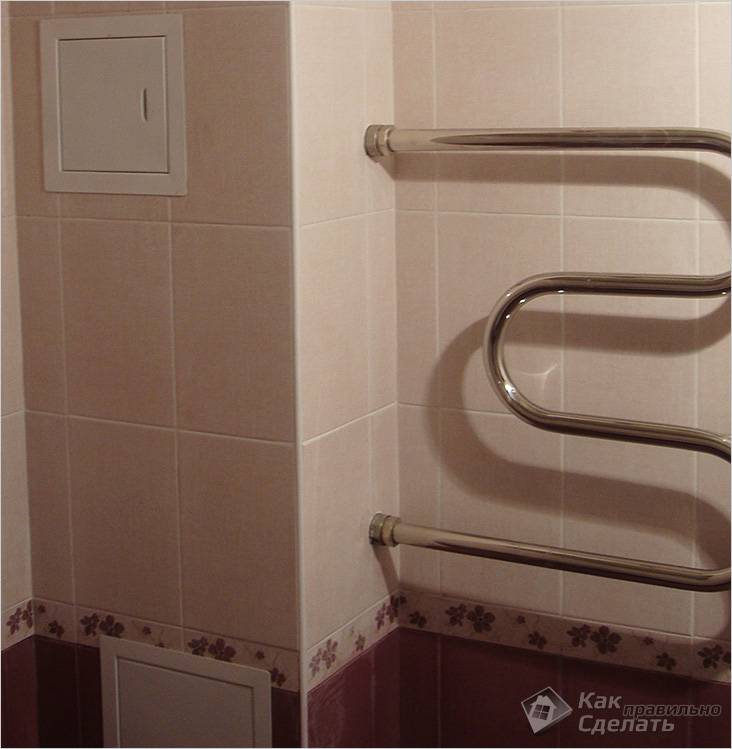
Such a box can be tiled and made invisible.The cost of creating a GKL box will be slightly higher than plastic paneling.
The principle of building a box from plastic panels is the same as from GKL. In short, then close the pipes in the toilet plastic panels is very simple:
- It is necessary to install the frame around the perimeter at a distance of 5-10 cm from the pipes.
- If the height of the box is more than two meters, it is worth reinforcing the structure with a transverse profile or wooden blocks.
- Sheathe with PVC panels. A square meter of such material will cost an average of about $ 5.
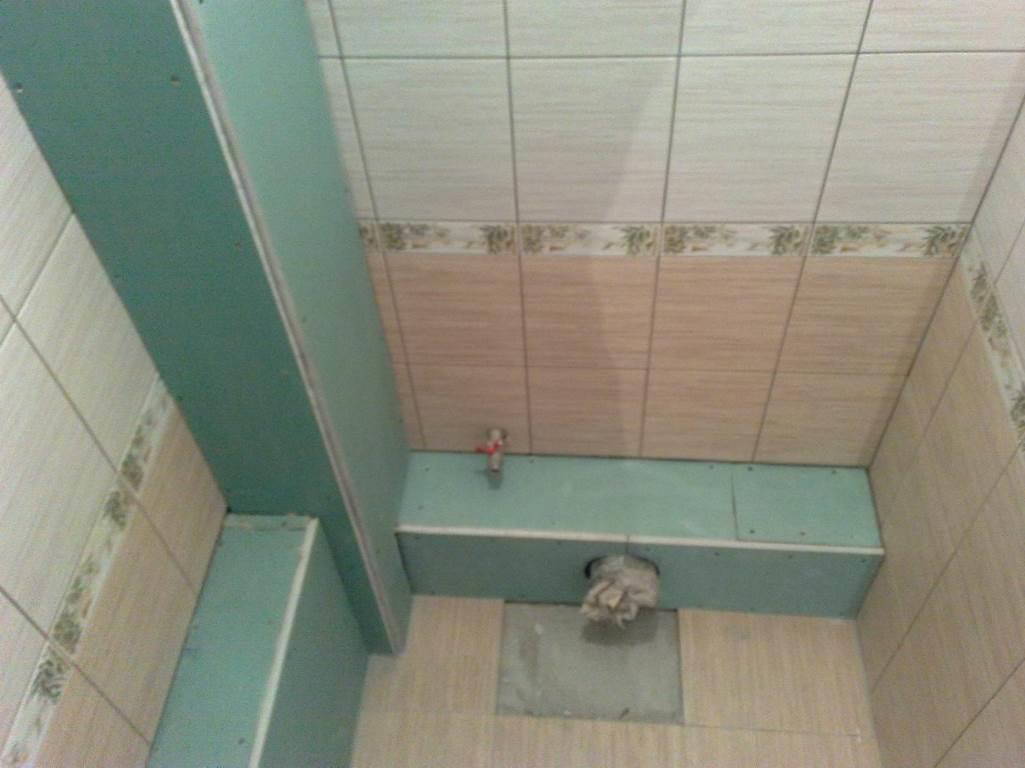
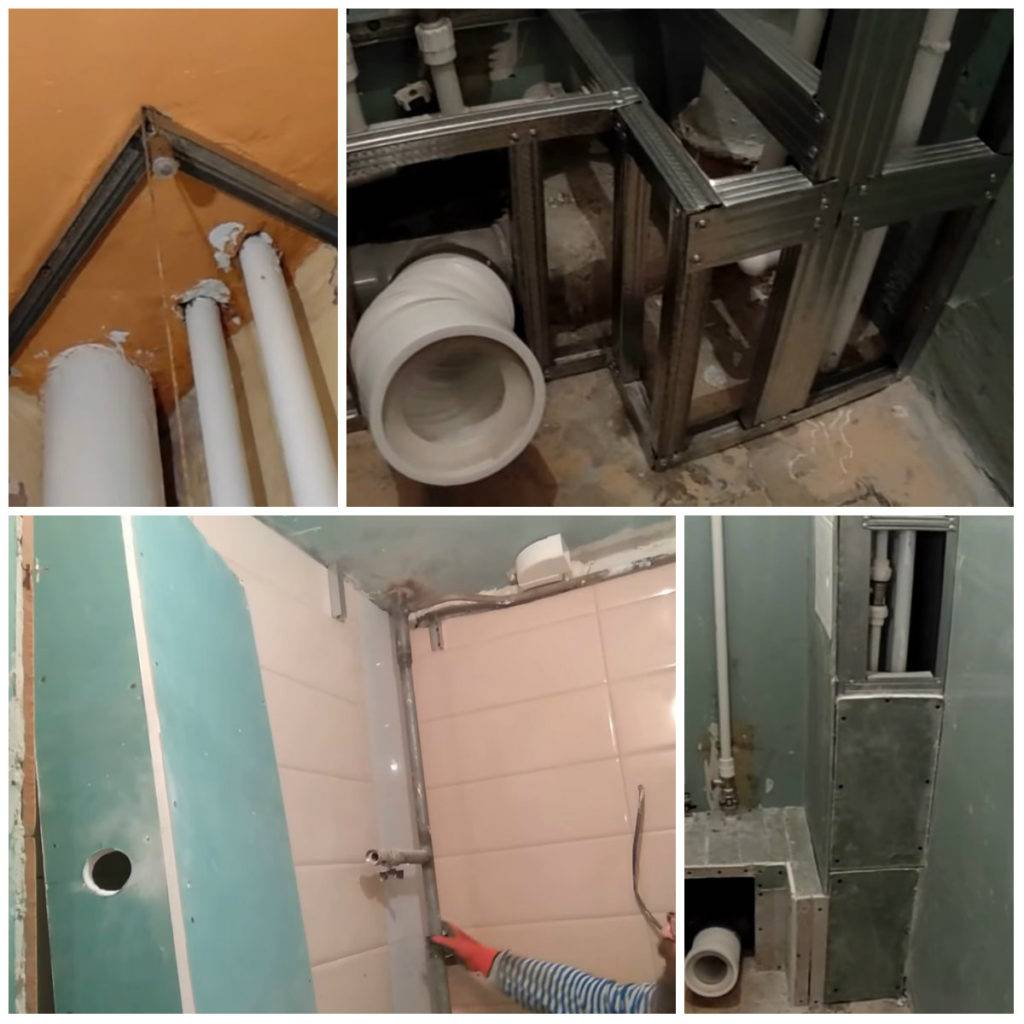
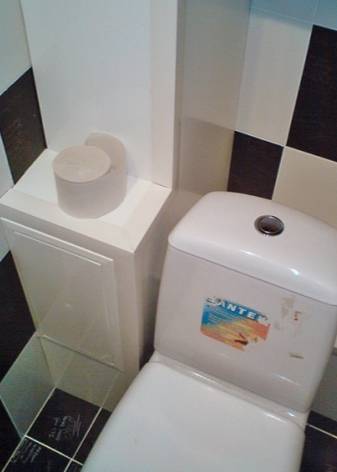
corner box
Frame assembly process
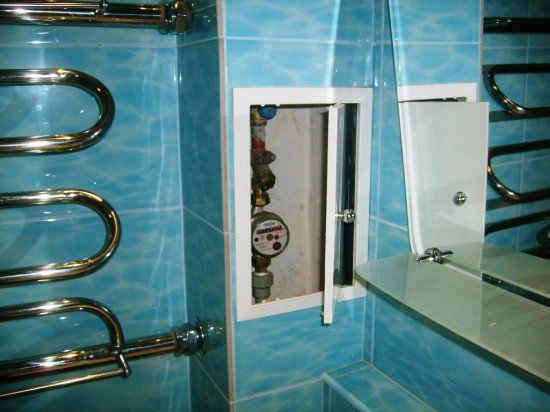
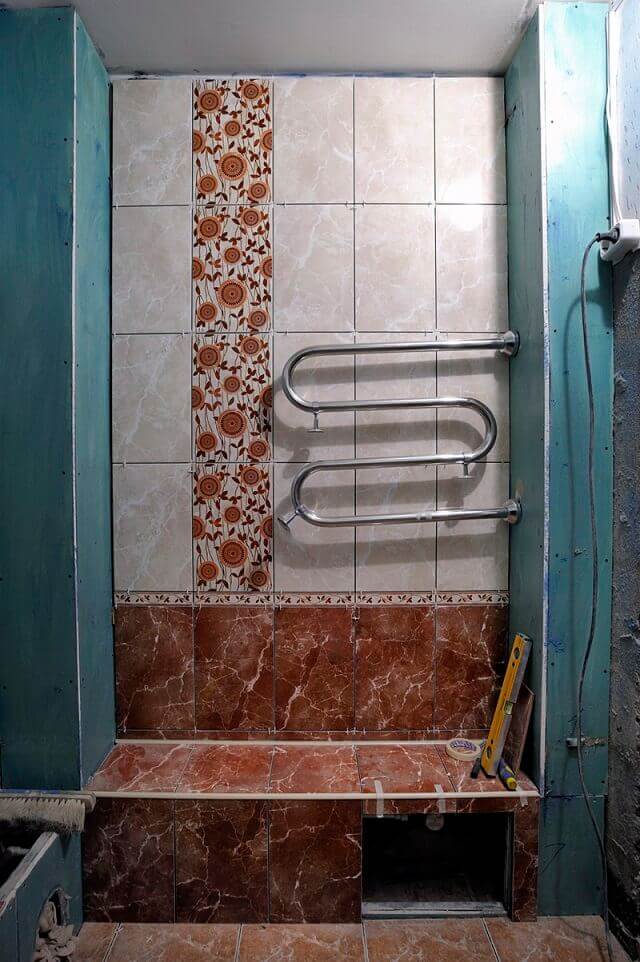
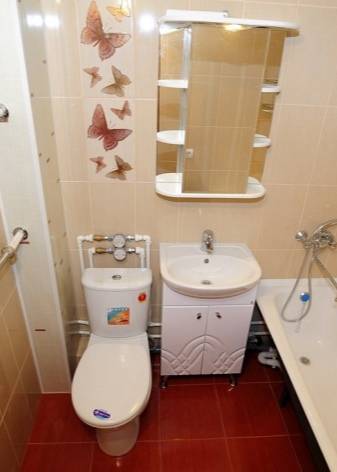
Box with an inspection hatch in a small toilet with a water heater
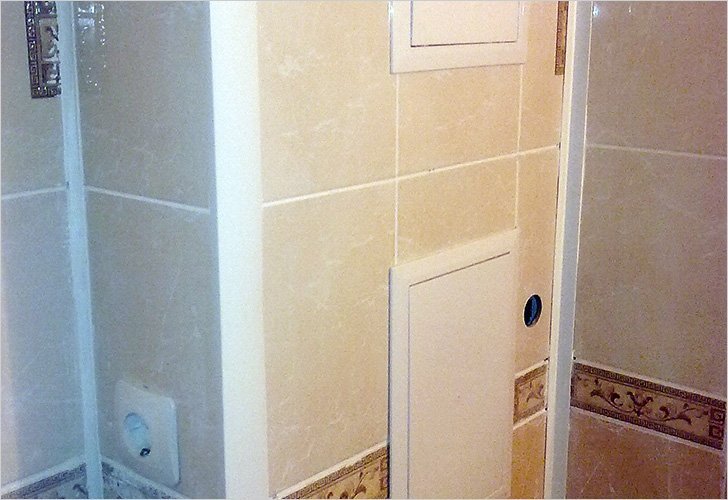
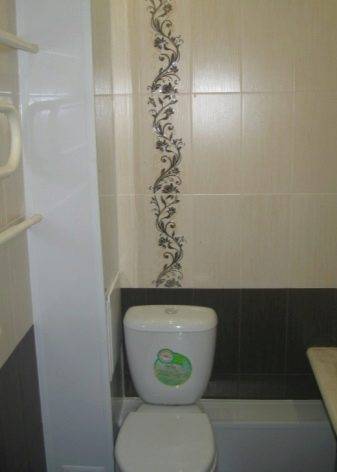
Hidden inspection hatch, decorated with tiles
When choosing a method of masking communications, determine the possibility of installing a particular design in your toilet. To avoid pipe breakage, before installing the camouflage structure, it is worth checking all connections for leaks.
Blinds in the toilet with a boiler and wardrobe
Roller blinds in the toilet
Vertical blinds
We offer you to familiarize yourself with the Types of plumbing work in the apartment
Carrying out work
Preparatory work
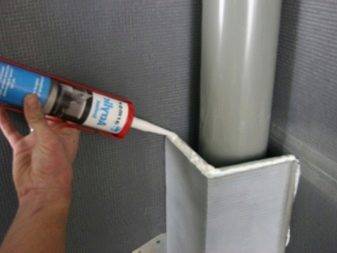
Before you start lining the riser pipes in the bathroom, you should prepare the room properly, in particular the pipes. To begin with, they should clean off the old coating and apply fresh paint. This is required in order to extend the life of the pipes by protecting the paint from the corrosion process. The fact is that after the pipes are closed by means of a box, access to them will be difficult, even if a hatch is made on the front wall of the box. When the paint on the pipes dries, this will mean that the time has come for the next stage - the creation of a frame structure for the box.


Building a support from a frame
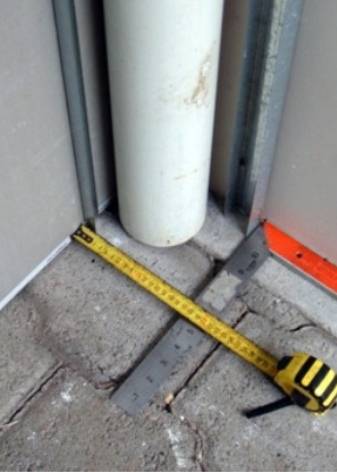
- Marks are made on the walls, ceiling and floor for the future frame, while you will need a pencil, a building level and a plumb line.
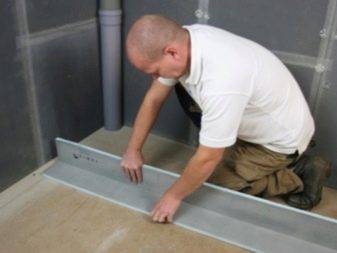
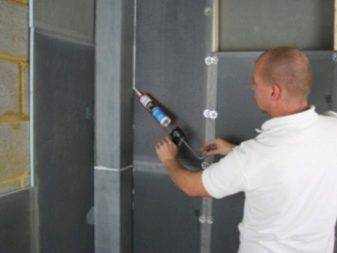
- Further, according to the markup, you can begin to set up the guides, and fix them to the wall surface with dowels.
- The completion of the construction of the frame consists in the installation of rack elements along the guide profile beams. The connection of profiles that are joined to each other is carried out using special fasteners, which are commonly called bugs.
So, let's move on to the most important thing.
Sheathing the frame with sheets of GK
The next step is sewing up the base made of gypsum fiber blank
Here you should pay close attention to such nuances:
- Use only moisture resistant drywall panels.
- Panels should be chosen with a thickness that can give the box more rigidity (i.e. 1.2 cm).
- When joining drywall blanks, either edge alignment should be used (if there is a factory-type edge), or a chamfer laying method at an angle of 45 degrees.
- A gap is made in the skin so that everything is ventilated naturally.
- Check the position of the self-tapping screw heads - they must be sealed, and not exposed and not hanging over the wall.
After the gaps between the racks are measured, support-beams should be made, which are fixed with metal screws
It should be noted that in order to prevent deformation of the frame installation during seismic shifts, a special shock-absorbing tape should be used. It should be applied to the areas of contact of the working surface on the racks.
The use of such a tape also makes it possible to level vibrations, and this will prevent them from entering the profile. Due to this, you will have protection against the destruction of the frame structure.
Sheathing with drywall sheets is performed according to one of two scenarios - either with pieces of material that was prepared according to measurements, or with a single piece of material with the removal of extra centimeters after it is fastened with self-tapping screws. If there is a shortage of a certain part, the sheets of the joints can be laid in place of the transverse rails, and after the edge of the two parts of the sheets, they should be fixed. The resulting voids between the wall and the sheathing should be filled with mounting foam.
In order to get even corners, use sloping corners. A little putty mixture should be applied to its back side, and when pressed, apply to the corner. After that, using a wide spatula, it will be possible to achieve the effect of a leveled wall. When the putty dries, you can go over the surface with sandpaper and primed. After that, you can start finishing work - glue wallpaper, paint or lay tiles.


Box assembly
Anyone can create a box in the bathroom with their own hands. Many users choose plastic panels for assembly, with the help of which an original decorative option is obtained to hide communications.
Also, the plastic box has the following advantages:
- plastic panels are in demand due to their simplicity and affordability.On sale there is a wide selection of products in different colors and designs, due to which the design can be performed in any style;
- plastic panel box is interchangeable. Any part can be easily removed, which is convenient if necessary for partial disassembly;

- for such a box no additional finishing is required. Plastic panels belong to the category of finishing materials, have high decorative properties;
- the design is resistant to deformation and quickly repaired. However, plastic has sufficient flexibility and strength, so it is quite difficult to damage it;
- installation of the support frame and plastic is within the power of even a beginner who has not previously been involved in construction and repair. The box can be made in one day, this will require improvised tools;

- the design has an affordable cost when compared with ceramic tiles and drywall;
- The box is compact and spacious. Products have a small thickness, so they do not require a massive frame. For this reason, the box will occupy a small area.
The only disadvantage of plastic is its low level of fire resistance. Despite the fact that many manufacturers claim the ability of products to self-extinguish, the material is afraid of smoke. Therefore, it is not recommended to smoke in rooms where there is a plastic finish.
To create a decorative plastic box yourself, you need to follow a few steps.
- If steel pipes are installed in the bathroom, they will need to be prepared before the walls are erected. To do this, communications are cleaned of old paint and covered with a new layer of coating.
- Then you can start drawing up the markup. You will need to mark the contour of the side and vertical walls. For this, a plumb line with a level is used.
- According to the markup, guides should be fixed. They are fixed with dowels.
- Then you can proceed with the installation of the rack profile, which is attached to the rails by means of self-tapping screws.
- To strengthen the structure, you should put the crossbars. They will provide lateral stability.
Now you can start the plating process. To do this, you need to bring the panels into the bar, stringing them row by row. Each plate is adjusted to the required dimensions in advance. The panels slide into the slats as much as possible and are fixed with self-tapping screws. During the connection of the panels to each other, a tight grip of the locking mechanism should be ensured. The final step is to install the outer molding. Similar strips are used to finish the joints of the frame part with the ceiling and floor.
Finishing materials for pipes in the toilet: options
Among the finishing materials, several of the most convenient and practical are distinguished, any of them, to one degree or another, meets the requirements and has its advantages. Let's consider each in more detail.
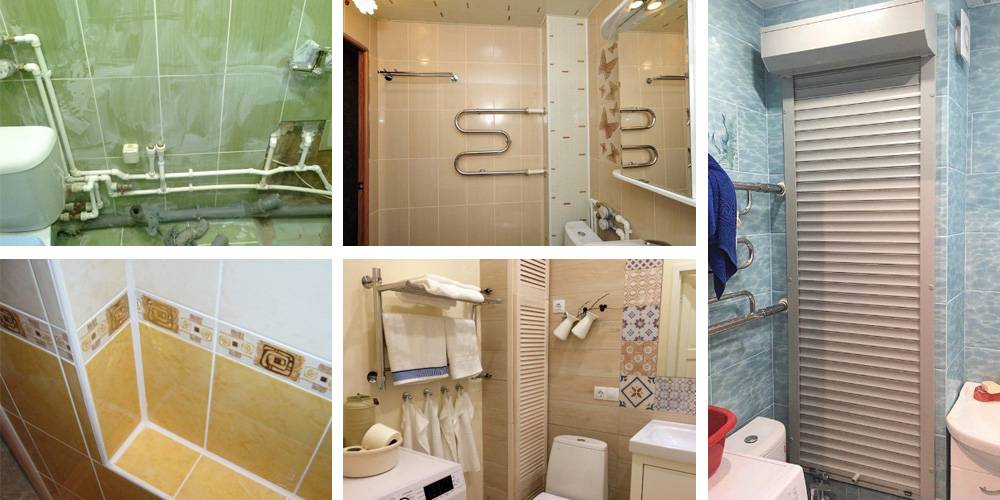


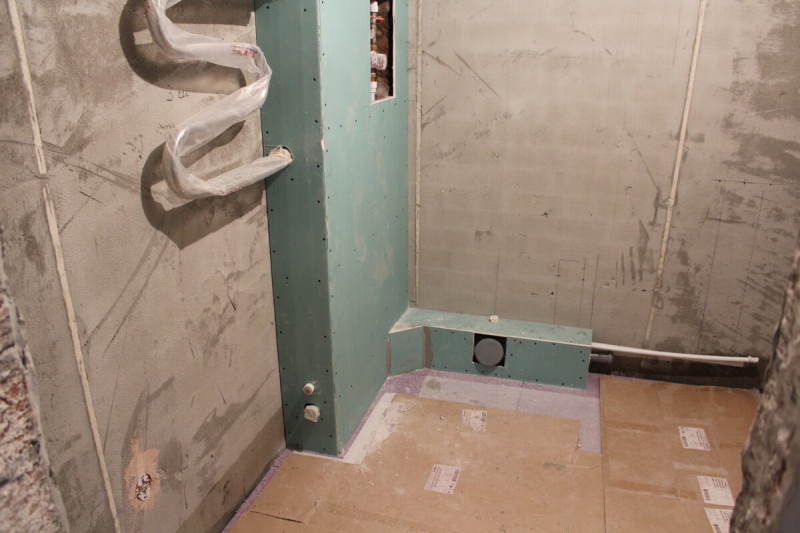
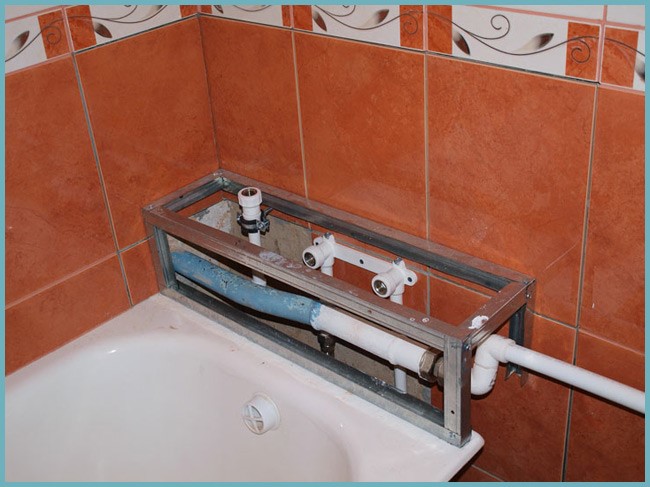
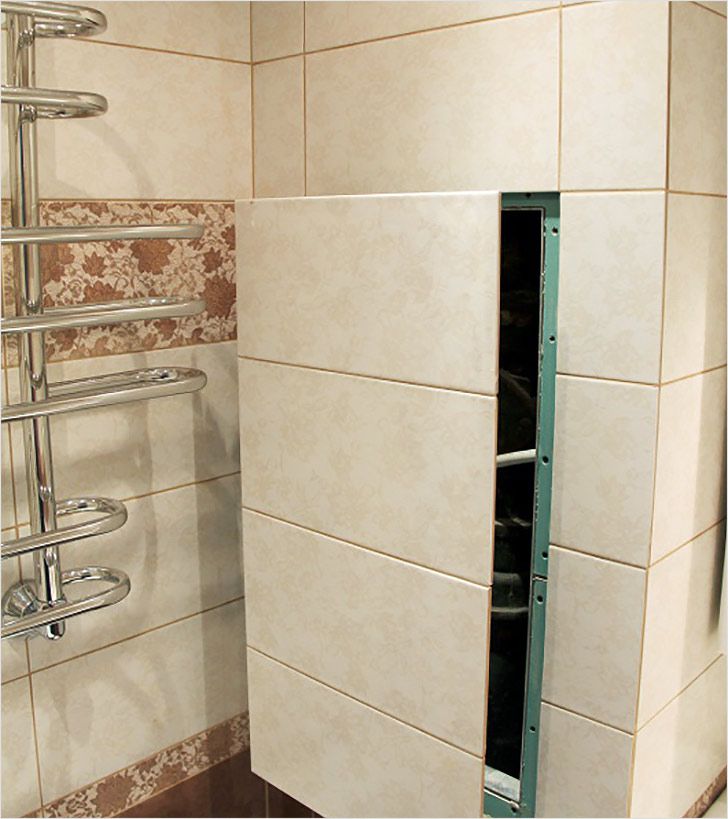

Table. Characteristics of options for finishing materials
| Finish material name | Finish material name | Characteristic / properties |
|---|---|---|
Drywall. The most common option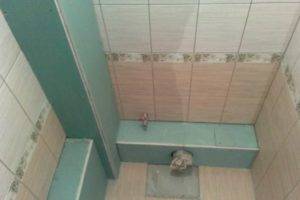 | pros | Ease of installation. For installation or dismantling of drywall trim, conventional tools (not highly specialized) will be required. Also, in the profile of this material, it will be quite simple to make inserts and inserts (hatches). |
| Environmental friendliness. Drywall is an environmentally friendly substance. Flammability - minimal | ||
| Moisture resistance.There are types of material that do not respond to high humidity. | ||
| Availability. The material is inexpensive and will not harm the budget | ||
| Finishing. Someone considers this a minus, but many people like the opportunity to decorate a plasterboard wall in the way that the general style of the bathroom dictates. | ||
| Minuses | If repairs are necessary, the box will have to be dismantled. This is easy to do, but you will need to create another from new drywall | |
Plastic panel (PVC). Very popular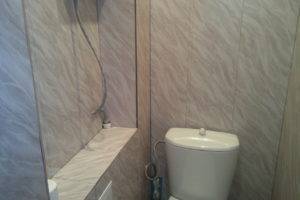 | pros | Cheap. This is the most budget option. |
| Easily installed. To carry out the installation of PVC panels, you will need a metal or wooden frame made of bars | ||
| Lungs. The weight of this material is small, but sufficient to withstand the installation of hatches | ||
| Moisture resistant. Fungus and mold do not form on PVC panels, they are easy to clean | ||
| Beautiful. A variety of shades and patterns allows you to choose the material for any interior | ||
| Flaws | Brittle, easy enough to damage the PVC panel | |
| Aluminum blinds. The option is not too common, suitable for small toilet rooms | pros | small price |
| Functionality. The space behind the blinds can be placed shelves that will be hidden from prying eyes | ||
| Durability. Aluminum blinds can last for many years | ||
| Moisture resistance. They are not afraid of dampness, they are easy to care for | ||
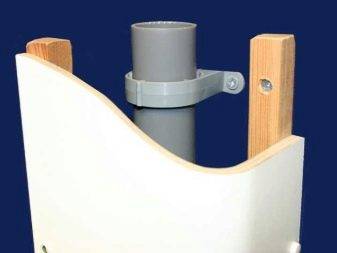
| Ease of installation. To install the blinds, you only need to strengthen them from above, you do not need to touch the side walls for this | ||
| Minuses | Low noise isolation | |
| Cracks between walls | ||
| Additional difficulties (a pipe extending from the toilet will prevent the blinds from being completely lowered, you will have to make a separate plastic box for the bottom) | ||
| May change color over time (turn yellow, darken) | ||
Laminated MDF (sanitary cabinet). Often used in Khrushchev. As a rule, doors are made of this material, which are attached to the side walls with the help of timber and hinges. It turns out the design of the type of utility locker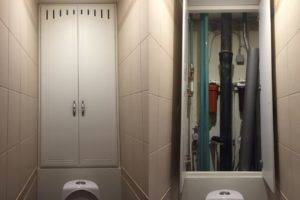 | pros | Space saving. In the niche of the cabinet you can put various household items |
| Convenience. Always have access to communications | ||
| Aesthetics. Doors can be made in the general style or become an advantageous accent in the room. | ||
| Minuses | Cost (if the doors are made to order) | |
| Fragility (MDF does not always endure moisture) | ||
Roller shutters. One of the most modern finishes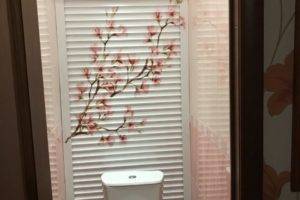 | pros | Style and beauty. Even photo printing is possible on the surface of this finishing material (on request) |
| Professional installation. Installation is carried out by specialists, which will eliminate errors and unnecessary hassle. | ||
| Ease of use. Roller shutters do not interfere with access to communications | ||
| Flaws | High price | |
| Difficulties in placement (ventilation from above and toilet pipes from below will bring additional difficulties) |
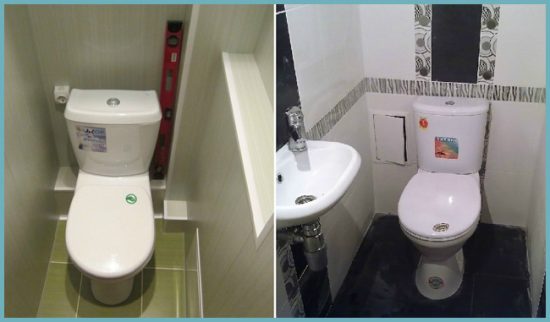
Septum position
This question is quite important. Where to place the false wall - behind the toilet bowl or in front of it? It depends on the model of the toilet. For the “compact” design, in which the cistern is mounted directly on the toilet bowl, there is only one option - the wall is mounted behind the cistern. If a suspended model is used with the location of the tank on a special installation, you can safely arrange a partition immediately behind the back wall of the toilet bowl.The installation in many cases becomes the basis for the installation of such a partition and always has a sufficient distance from the racks to the edge of the toilet so that decorative panels can be mounted.
Below is a diagram of the placement of the wall between the wall-mounted toilet and the installation.
We mask under drywall
This method to date has significantly increased the number of its supporters. Because it is technological and simple.
How to close the water pipes in a drywall bathroom, photos clearly demonstrate. It can be seen that the plasterboard sheathing looks very aesthetically pleasing. In the same way, you can close the sewer pipeline.
As a disadvantage of this method, they highlight the fact that the room loses its size. This way, how to hide sewer pipes in the bathroom with drywall, is great for a newly built house, where the owners themselves determine how to place internal partitions.
Video
Toilet plumbing diagrams
The issue of masking pipes concerns both budget housing and luxury apartments. The difference lies in the methods of terminating communications, which are largely determined by the piping layout.
If in a 15-meter combined bathroom it is possible to sew up all the walls with false panels, then every centimeter is important on a 2 m² patch. Often, after repair, the interior of the toilet often takes on unthinkable forms.
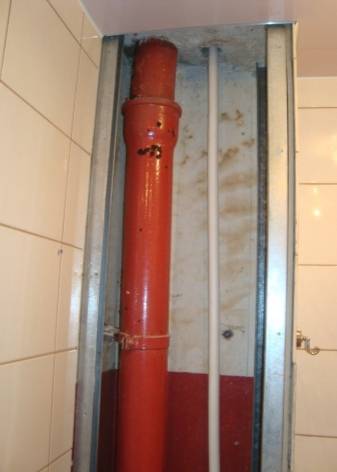
In a typical housing, everything is simple: in the corner of the room there is a common sewer riser, pipes of centralized water supply are installed parallel to it. They are connected to intra-apartment communications from pipes of smaller diameter. Thus, both the vertical riser and the horizontally laid branches need to be masked.


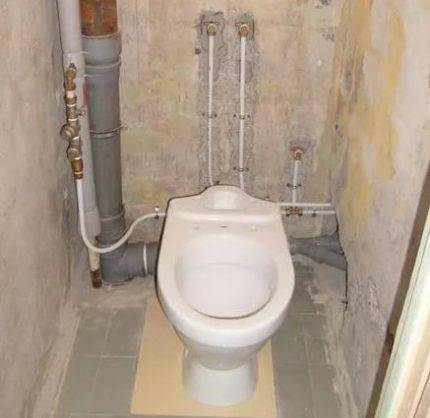
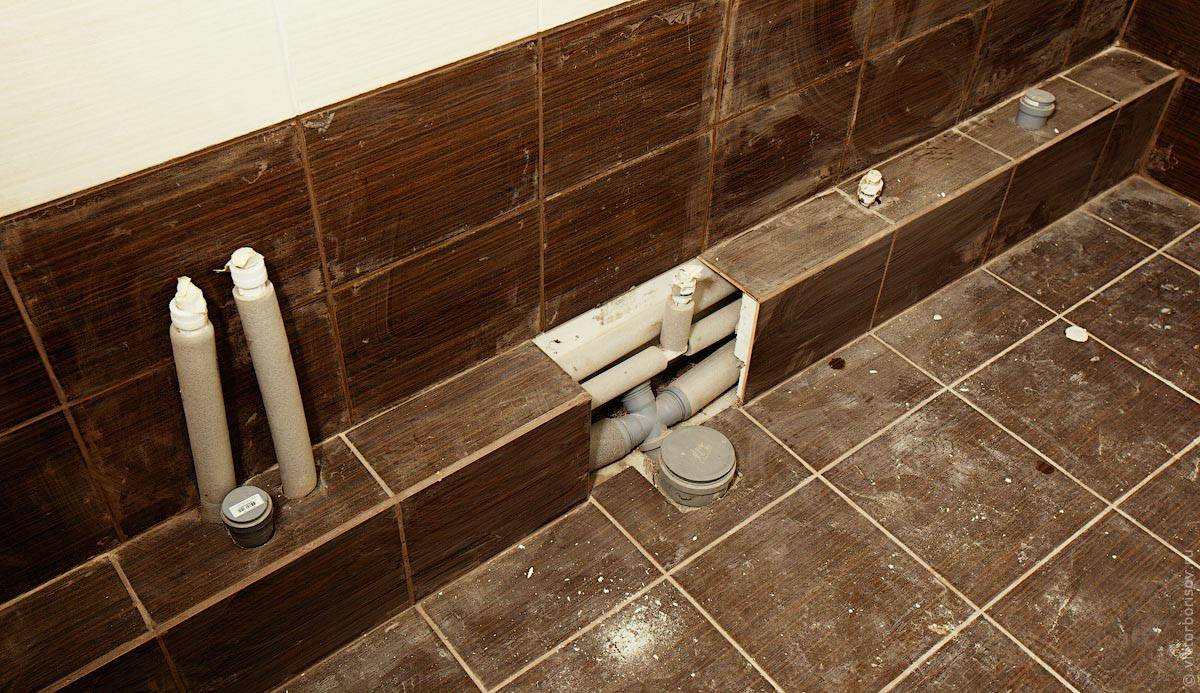
The simplest layout of sewer pipes and plumbing in the toilet. The best option for hiding communications is the construction of two boxes (along the riser and behind the toilet), occupying a minimum of usable space
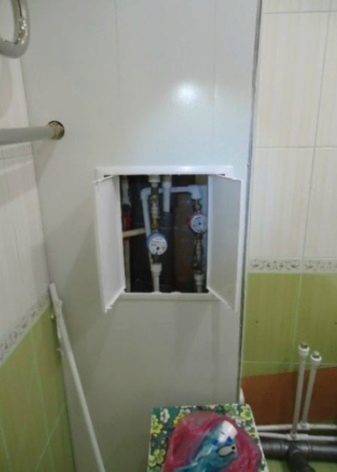
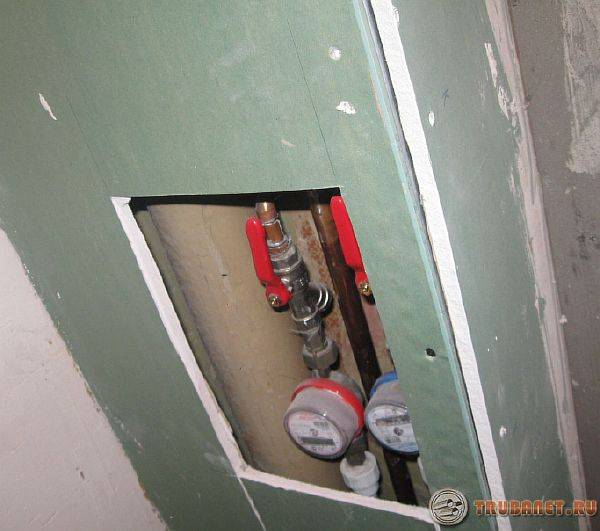
Difficulties arise when, instead of a pair of branches, you have to hide water meters that require regular access, filters, collectors, etc.
Simple boxes are indispensable here, you have to attach partitions to the load-bearing walls or build structures that resemble screens.
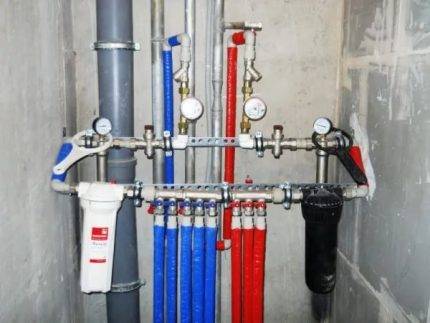
The collector, meters and filters are located above the toilet and occupy almost the entire wall opposite the entrance to the toilet. The best way to close the wiring and appliances is to build a plumbing cabinet with wide doors or use blinds.
In a private house, everything is easier if you take care of masking communications even before the project is implemented. Part of the pipes can be hidden in the walls, and technical hatches can be created for important nodes. Filters and metering devices are installed in a specially designated room - along with a pump and other equipment responsible for the water supply of the house.
In high-rise buildings, no one will allow chasing walls under pipes, and the characteristics of the walls are not suitable for, albeit partial, but destruction. It remains the exterior decor, with the options of which we will get to know better.
The choice of material for finishing the box
Usually, the same material is used for lining the boxes as for the walls. And the most popular, of course, is ceramic tiles. And not only for aesthetic reasons, it is easy to clean, resistant to disinfectants and durable.
 Finishing the box with plastic (left) and tiles (right)
In addition to ceramics, plastic panels are laid.They are cheaper and less reliable, but if pipe repairs are required, such a box is easier to dismantle. Sometimes the construction of a box made of drywall is only painted, but the option is not practical and durable. In addition, dirt accumulates in the pores of the paint, and this contributes to the development of bacteria. Facing stone, brick or mosaic are more often used only fragmentarily, to highlight certain areas. Thus, for example, it is possible to allocate a plumbing hatch for ceramic tiles.
3. Basic rules of disguise
There are several recommendations, following which, you will make your hidden plumbing reliable and safe.
- The minimum number of connections. We have already mentioned that such places are the most problematic and prone to depressurization, so try to make sure that there are as few of them as possible. This can be achieved by resorting to the help of professional plumbers who can draw up a competent wiring plan.
- Using the same materials. If the presence of connecting elements is unavoidable, then they must be made of a material identical to the material of the pipes. Thus, you can not be afraid that the coefficients of their linear expansion or tensile strength will be different.
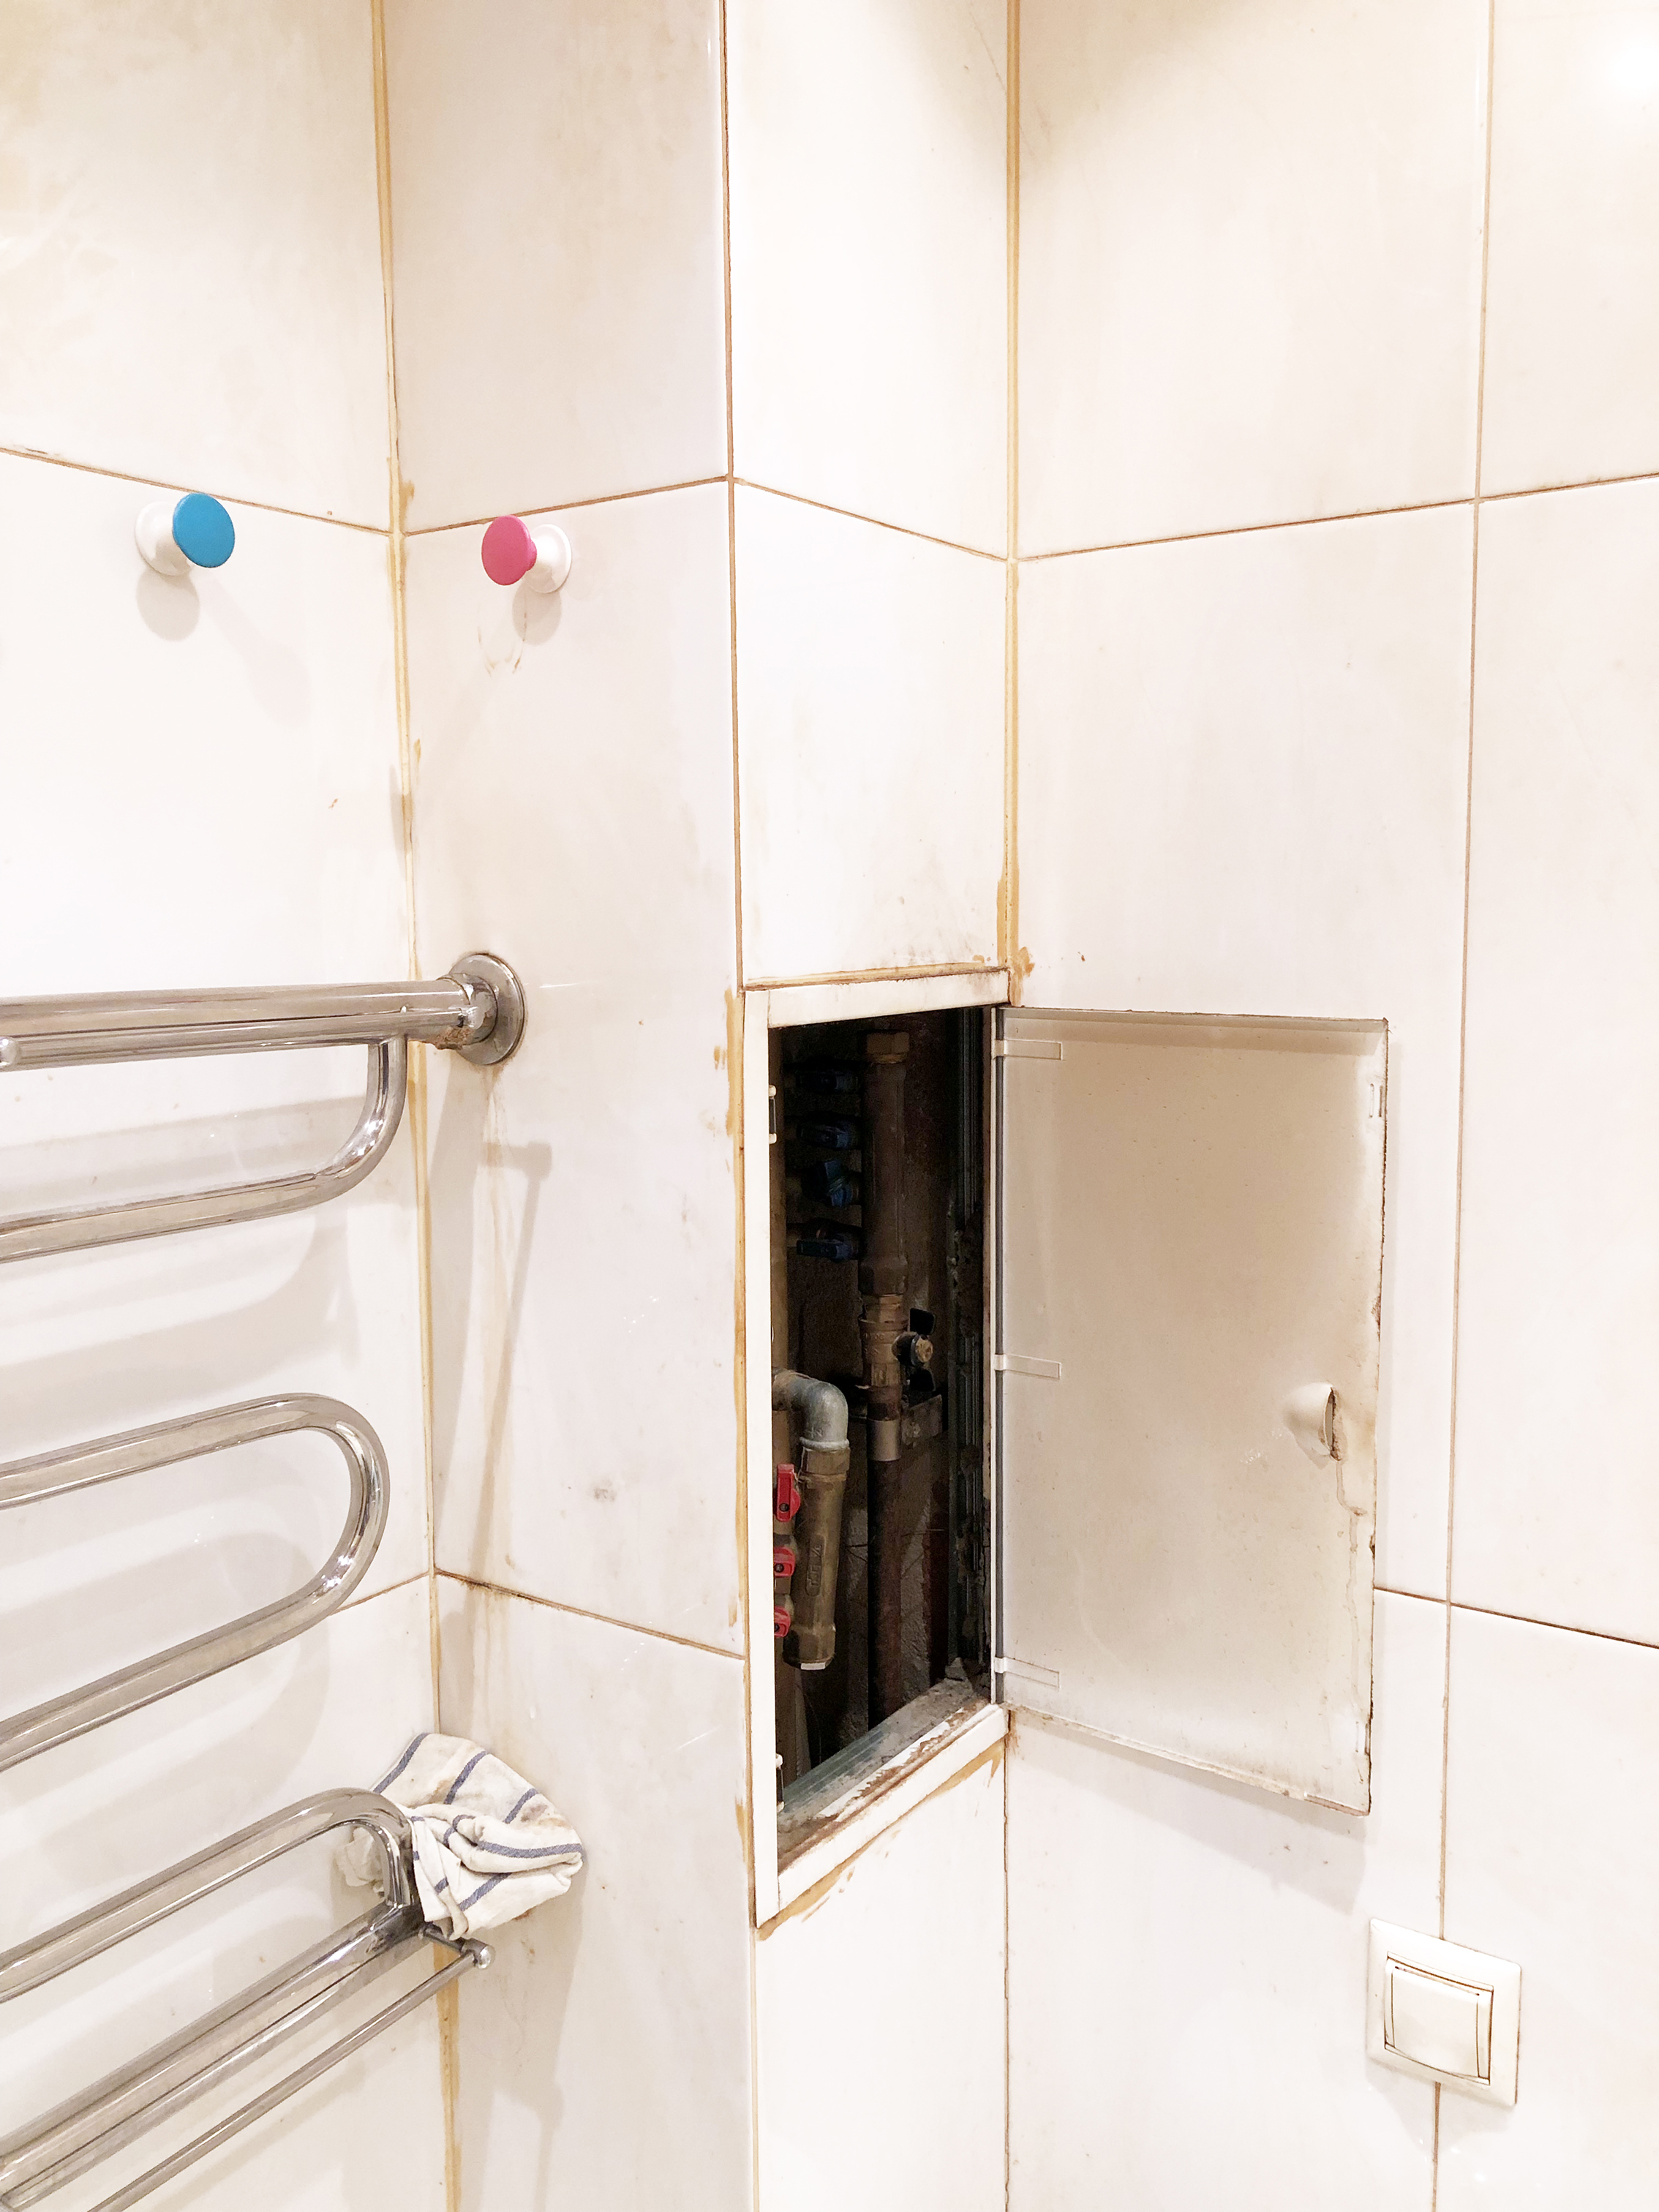
- Mandatory presence of a viewing window. It is obvious that in the presence of water meters, it is necessary to take readings from them, and once every few years and give them for verification. Therefore, it is worth immediately providing for quick access to them. A small hatch with a removable door will do the job perfectly. Also, such an element is required in places where there are many connections or water filters.At any time, you can check their condition and fix the leak in time.
- Do not neglect insulating materials. This rule is especially important for pipes with cold water. After all, condensation often collects on them. To avoid this, use a special insulating casing made of foam rubber or thermoflex. In the case of masking hot pipes in the wall, it will allow them to expand safely.
Installation-free options
It often happens that the appearance of a bathroom with open risers annoys homeowners, but there is no way to start something drastic. In this case, you can use the ideas of masking communications with improvised means:
-
You can hide pipes from prying eyes with the help of roller shutters. They perfectly mask unaesthetically passing pipes, meters and other devices, but at the same time provide access to them at any time in case of a breakdown.
-
- Curtains will help to disguise communications. Perhaps this is not the most aesthetic solution, but for the first time it will help to hide rusty pipes.
- In order not to waste space in the box under the risers, you can arrange a closet. Extra storage space is never a waste in a bathroom.