- What materials to use?
- Is it possible to sew up gas pipes in an apartment with drywall
- Decoration materials
- Drywall
- PVC panels
- box
- Plumbing cabinet
- roller shutters
- Blinds
- improvised materials
- Sheathing methods
- How to block pipes with a false plasterboard wall?
- How to block pipes with plastic panels?
- A little about the plumbing hatch
- The choice of design for the box
- The whole wall is covered
- square box
- Tiered box
- Oblique false wall
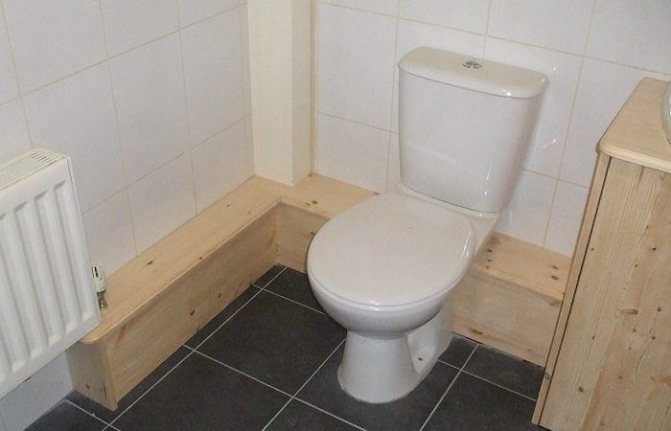
- Toilet pipe box
- An approximate step-by-step plan for creating a box in the toilet
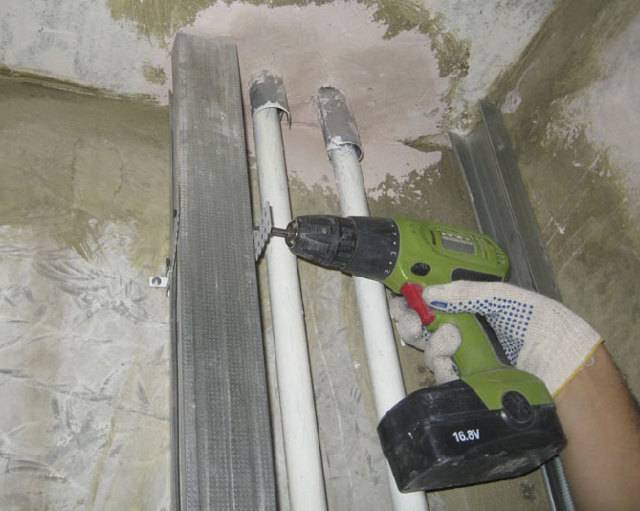
- Profile mounting
What materials to use?
Before masking the sewer pipe and closing the riser, they determine the type of masking. In this case, the masking material must meet certain requirements. For example, it should be:
- environmentally friendly and harmless, non-toxic;
- resistant to moisture and dampness, rusting;
- easy to clean and aesthetically pleasing;
- optimally compact, characterized by low weight.
Among other types of suitable building materials, plastic panels, MDF, drywall and plywood are best suited for this purpose. In this case, all types of material must have a moisture-resistant sheet form.
It is important that for many years the design of the sewer does not require replacement. In addition, you need to think in advance about the convenience of repairing communications in an emergency. The selected material must be durable and aesthetic
It should provide access to meters and ball valves. At the same time, you need to buy it taking into account the finish of the toilet. In addition to various raw materials, there are also creative methods. Moreover, each type of disguise has its own characteristics.
The selected material must be durable and aesthetic. It should provide access to meters and ball valves. At the same time, you need to buy it taking into account the finish of the toilet. In addition to various raw materials, there are also creative methods. Moreover, each type of disguise has its own characteristics.
Best suited for masking plastic and drywall. Both materials successfully fit into the background solution of any interior. They are suitable for any floor, ceiling and wall cladding. The only fundamental difference in working with them is the need to decorate drywall.
The plastic panel may have a different shape. This disguise is suitable for those who want to quickly solve the problem on their own. The panels are distinguished by locking connection technology. It is easy to work with them, to assemble the screen you need either 3-4 standard wall panels, or one large one. Plastic panels are not limited in the choice of texture.
These panels are easy to work with. They are easy to clean, can imitate the surface of any type of material, including stone, plaster, whitewash, brick, clinker, marble. In addition, drywall needs to be painted, while plastic does not.Otherwise, both materials are economical in price, quick to install, and involve the creation of prefabricated structures.
Is it possible to sew up gas pipes in an apartment with drywall
All the options considered earlier do not hide communications, but only mask them. This does not suit everyone, so they resort to the construction of a box. The most common and permitted material is used - drywall, but plywood, plastic, MDF can be used. GKL is mainly preferred because of the low cost and ease of installation. In addition to it, you will need special profiles, self-tapping screws. Of the tools - a screwdriver and scissors for metal.
In addition to simple installation, attract other advantages. The pipes will completely hide under the box, which will become part of the interior. The decor of a similar design is carried out in various techniques: simple staining or finishing with a decoupage film would be appropriate
The disadvantages include a decrease in usable area, which is important for a small kitchen, so the option is used mainly in spacious rooms. For emergency access to communications, the installation of fixed structures is prohibited
Ventilated decorative box for masking gas communications
Manufacturing begins with the installation of the frame, the options for which are quite a lot. Choose according to the intended size and possible installation of additional elements. Pipes do not always close completely, sometimes only some section. The frame is mounted separately or built into furniture. In some cases, they make a false wall, hiding all the unsightly places. In addition to the metal profile, the use of wooden slats is acceptable.


The box is mounted in several stages:
- Calculate the dimensions of the structure.The width should provide unobstructed access for maintenance of equipment;
- Install the frame. The profile or rails are fastened with screws to the wall after checking the level of a strictly vertical and horizontal location;
- Measure the finished structure. Transfer data to a sheet of drywall and cut blanks;
- Fasten to the frame using self-tapping screws and a screwdriver. All irregularities, cracks are puttied or sealed with mounting foam, cutting off the remains after polymerization.
Installation of the box begins with the frame device
If there are taps or connections in the communication area, blind box device violates the rules security: the equipment must be accessible at all times. In this case, it is made removable, which complicates the design. As a more affordable option, choose a decorative panel that can be easily removed. There may also be a counter under it. In addition, this option allows you to make the box an interior decoration if the facade is lattice or patterned. Workshops will take over the production.
You can buy a ready-made plastic box that is easy to install and remove if necessary. It can be given any color that does not violate the integrity of the interior of the room. Like a drywall construction, it has the same significant drawback: it takes up free space.
You can hide the highway in the corridor in compliance with safety rules. Usually the pipes run under the very ceiling, it is forbidden to close them tightly with a box. Even with the installation of inspection hatches, there may be claims from the gas service if the work is carried out without coordination with them.The original solution is narrow shelves under the pipe so that it is not visible from below. You can decorate with decorative elements or just apply a coat of paint.
Decoration materials
You can close plumbing connections in the toilet using various building and finishing materials, as well as special equipment. Read more about each option below.
Drywall
Drywall is considered one of the most affordable and convenient materials that are used in construction and repair. It is used for a variety of needs, including sewing up pipes in the bathroom. The advantages of drywall are:
- health safety;
- convenience in work and operation;
- the possibility of quick dismantling;
- relatively low price;
- the possibility of installing doors and other structural elements;
- availability of various finishes.
PVC panels
PVC panels
Plastic panels (it would be more correct to say from polyvinyl chloride) solve two problems at the same time: they block pipes and make the resulting structure more aesthetic. On sale you can easily find PVC panels that look no less aesthetically pleasing than ceramic tiles. Other advantages of plastic panels include:
- quick and easy installation;
- low cost;
- the ability to make a design that, if necessary, can be disassembled;
- a large selection of colors and textures;
- no need for decorative trim;
- resistance to moisture and temperature changes.
box
Drywall and PVC panels are used to mask pipes in the toilet in the same way - they make a box into which communications are hidden. Drywall sheets or plastic panels are mounted on the frame.The frame for these materials needs a different one, but the principles for installing the box are very similar. It should be possible to access the most important structural elements - for repair and maintenance work.
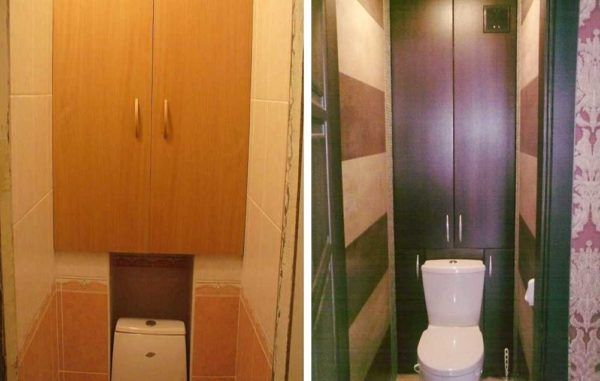
Plumbing cabinet
Another type of structure that allows you to seal pipes in the toilet is a plumbing cabinet. It differs from the box by the obligatory presence of large doors and built-in shelves that can be used to store household items. You can make a sanitary cabinet yourself from ordinary furniture facades, purchase a ready-made one, or order an individual project from a company that manufactures furniture for bathrooms.
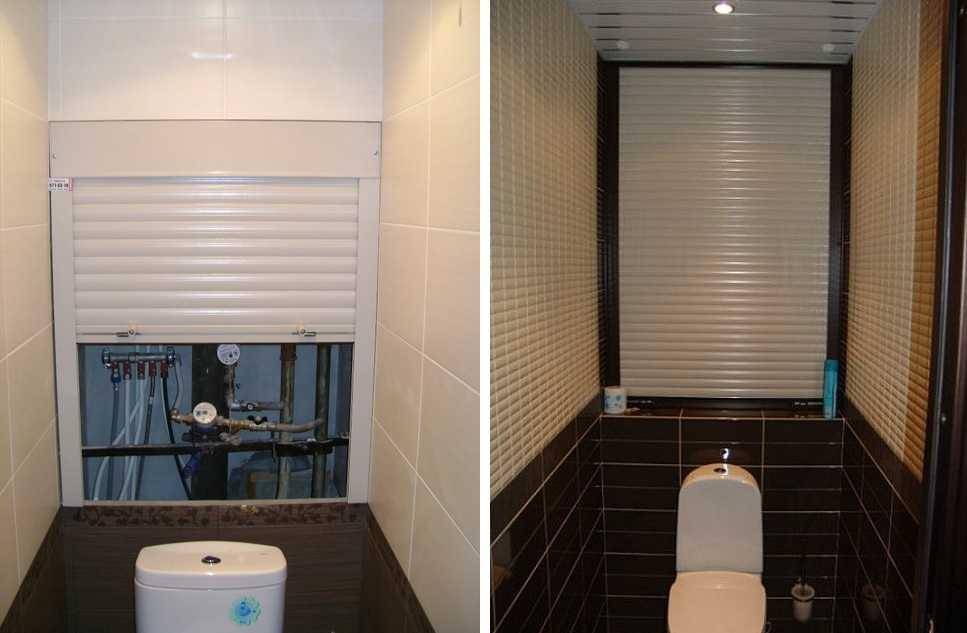
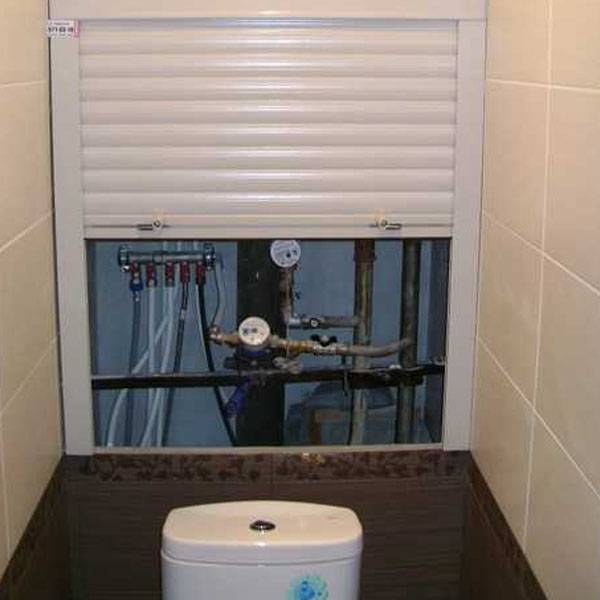
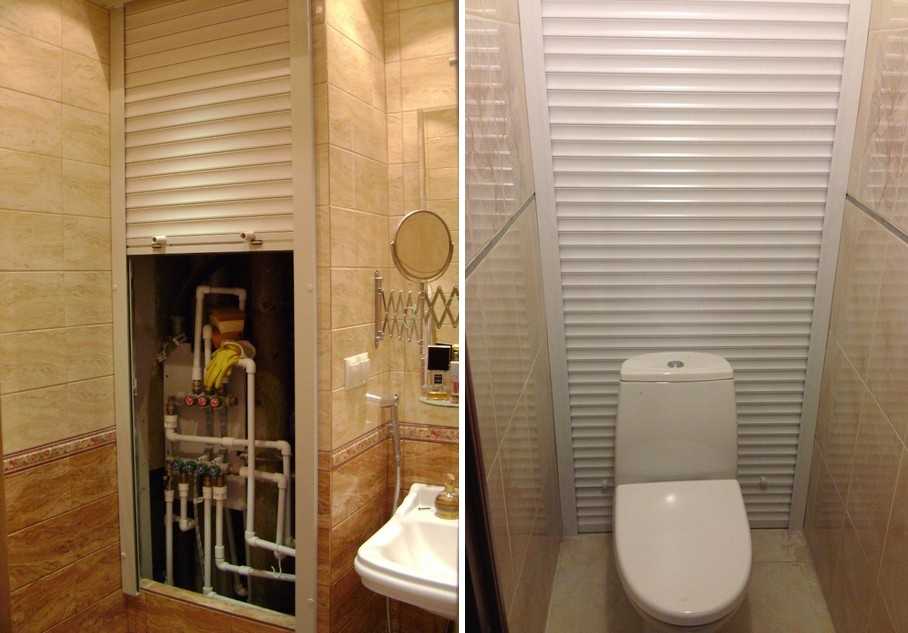
roller shutters
Plumbing shutters have become widespread relatively recently. They are a mobile structure consisting of a base frame and dozens of narrow panels, which, if necessary, are assembled into a roll, providing access to the pipes. Roller shutters for the toilet are made of materials that are not afraid of moisture. You can control this device using buttons or remotely using the remote control.


Blinds
An option for masking pipes in a bathroom, very similar to the previous one, is plumbing blinds. Roller shutters, in essence, are a later, modified type of blinds. The latter are much simpler - the design does not provide for a frame, and only mechanical control is possible. Blinds are made mainly of plastic, so they are moisture resistant, but not very durable.
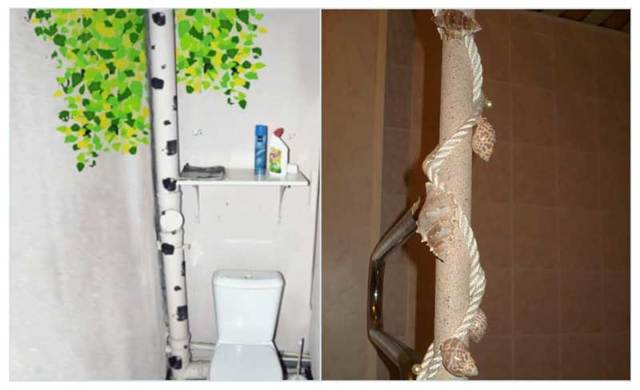
improvised materials
You can also decorate unsightly plumbing and sewer pipes with the help of improvised means. What materials to use - depends only on your imagination.Here are some of the most interesting and easily implemented ideas:
- paint the pipes in a bright color or draw patterns on them;
- disguise pipes as trees, turning the toilet into a forest or jungle;
- wrap the pipes with twine or braid;
- use artificial plants for decoration;
- paste over the pipes with decorative stones;
- Decorate pipes with special stickers and stickers for home decor.
Sheathing methods
So, in order to sew up communications in the toilet, you can use one of the two most suitable materials for this: drywall or plastic panels. We have compiled for you brief instructions for the construction of pipe fences.
How to block pipes with a false plasterboard wall?
First you need to stock up on tools and materials for work. To build a drywall box, we need:
- the required number of drywall sheets;
- metal profiles and guides;
- roulette;
- a hammer;
- building level;
- perforator and screwdriver;
- hacksaw and scissors for metal;
- self-tapping screws;
- dowel-nails.
The first step is to draw the layout of the future box on the floor and on the walls
Profiles and guides will be laid along it, so it is very important to measure everything accurately. When calculating the dimensions of the box, do not forget to take into account the thickness of the finishing materials (in our case, ceramic tiles).
Further, in accordance with the calculations made, we cut the metal profile into several parts of the required length. With the help of dowel-nails, we fasten the sections of the profile according to the markup.
Now we cut out the details from the drywall sheet that will serve as the sides of our box
We fasten the profile to the drywall blanks with self-tapping screws.We insert the resulting structure into the frame assembled in the previous paragraph.
We cut the ceiling profile into several parts equal to the width of the box, and install them as jumpers. We close the front of the box with drywall.
At the final stage, we bring our design “to mind”: we strengthen the joints between drywall sheets, putty, mount protective corners. Lastly, we apply a decorative coating - paint the box or tile it.
With the help of dowel-nails, we fasten the sections of the profile according to the markup.
Now we cut out the details from the drywall sheet that will serve as the sides of our box. We fasten the profile to the drywall blanks with self-tapping screws. We insert the resulting structure into the frame assembled in the previous paragraph.
We cut the ceiling profile into several parts equal to the width of the box, and install them as jumpers. We close the front of the box with drywall.
At the final stage, we bring our design “to mind”: we strengthen the joints between drywall sheets, putty, mount protective corners. Lastly, we apply a decorative coating - paint the box or tile it.
How to block pipes with plastic panels?
The set of tools and materials needed to build a plastic panel box is very similar to the one we used in the previous section. The only difference is in the following points:
- PVC panels;
- metal ud- and cd-profiles;
- silicone-based sealant;
- plastic plinth;
- cutter or sharp knife.
- First, we mount the frame.We do everything in almost the same way as in the case of drywall profiles: we draw the markup, cut the profiles, fasten them to dowels or self-tapping screws. In advance, in the right places, we install crossbars-jumpers that will be located between the panels.
- Now let's move on to paneling the frame. First of all, we mount the starting profile and fix the first panel on it with self-tapping screws. We alternately set the required number of panels, attaching each subsequent one to the previous one. To install the last panel, use the start profile.
- Armed with a knife or cutter, we cut holes in the right places for installing doors. In places where the panels are joined, we fasten a plastic plinth.
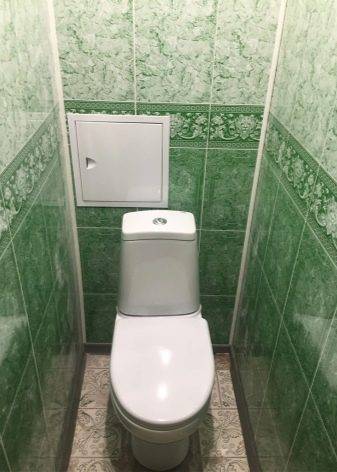
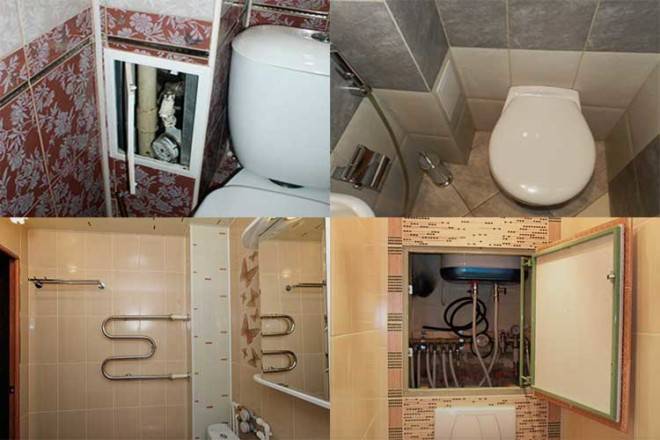
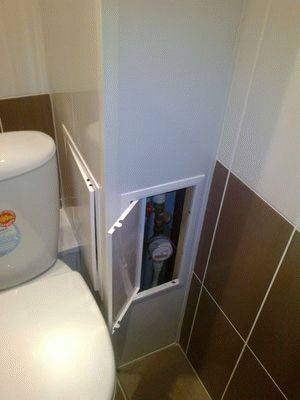
A little about the plumbing hatch
Structures that mask communications must certainly be equipped with hatches, in other words, small doors for access to pipes, meters and valves. If you use options such as roller shutters, blinds, a plumbing cabinet, then there will be no problems with this. However, in structures made of drywall or PVC panels, you will have to think in advance about the presence of a special viewing hole. In the case of plastic, everything is quite simple: it is easy to install a plastic door in the right place. In the range of stores a large selection of models of any size. The variant of the drywall construction is a little more complicated, because it is usually lined with tiles. In such cases, you can choose one of several options:


- Install a simple metal or plastic hatch, the doors of which will swing open outwards. Such an opening will be visible, but will not stand out too much from the overall picture.
simple plastic hatch
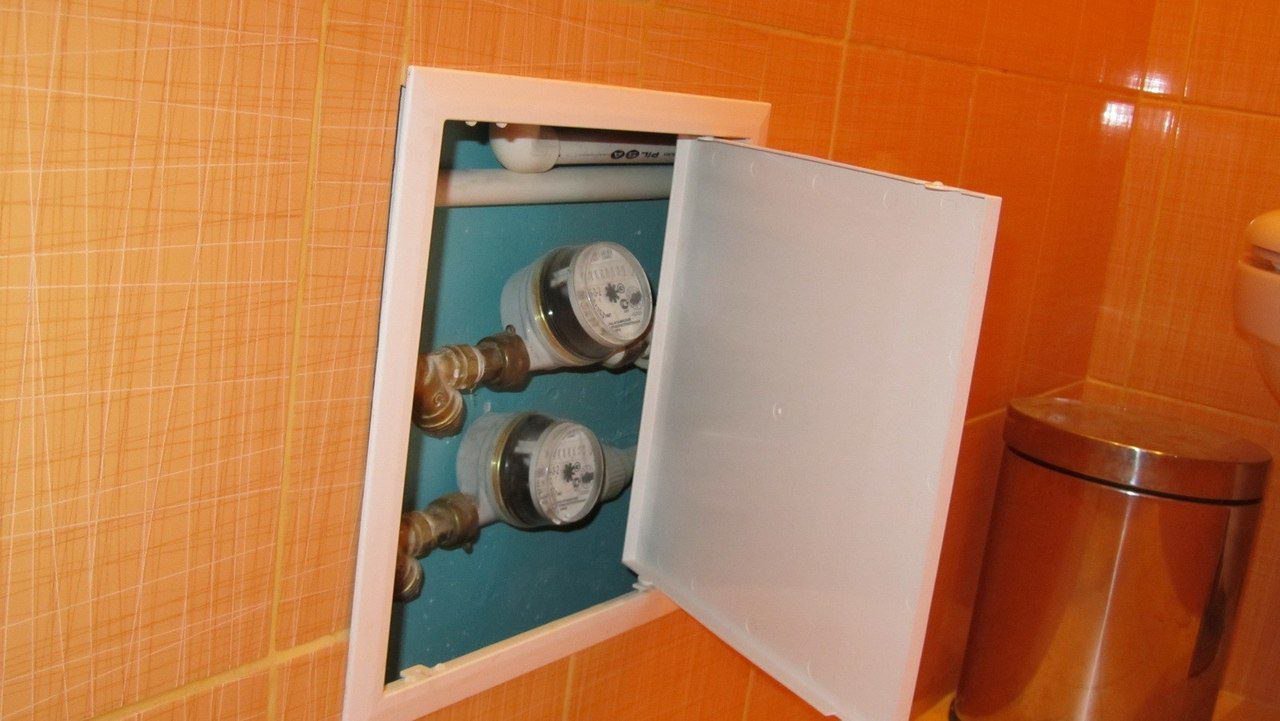
- Purchase a special hatch that can be hidden.The surface of the door of such a hatch will look like part of a false wall. This option is not the cheapest.
Camouflage hatch
The choice of design for the box
Before decorating the toilet niche and at the same time gaining access to taps and meters, they make a frame for installation, taking into account the fact that roller shutters and blinds do not need it. The main material for finishing plumbing units is ceramic tiles (tiles), which, when opening openings are closed, are laid on drywall. To do this, a plasterboard box of several types is pre-mounted, depending on the location of the water and sewer pipes.
Rice. 7 Mounting the square box
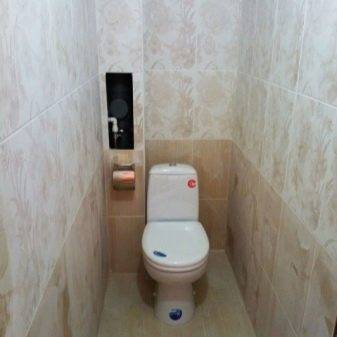
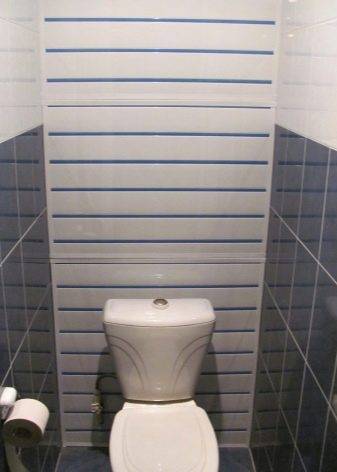
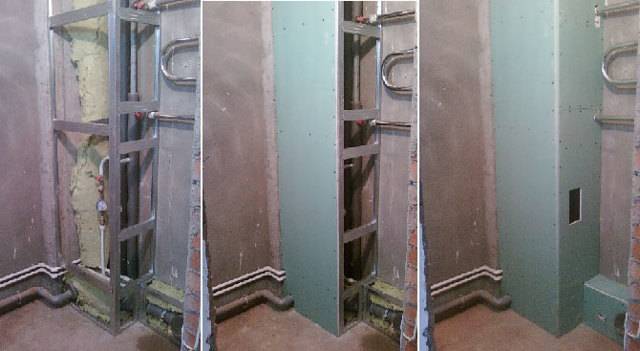
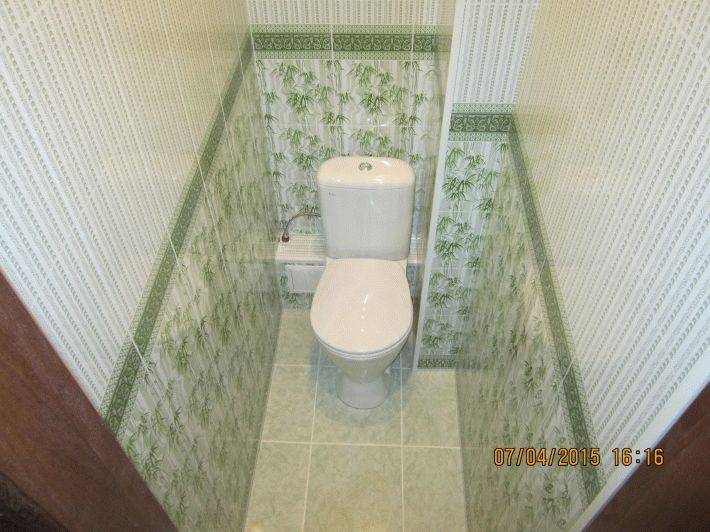
The whole wall is covered
The method, when the entire opening is closed with finishing sheets or hanging fixtures, is most often used for communications located behind the toilet. For the installation of drywall around the perimeter of the opening, with the help of dowels and self-tapping screws, a frame made of a metal profile and a crate are attached, after which drywall is screwed to the structure. Access to pipes with valve cocks and water meters is made through hinged hatches.
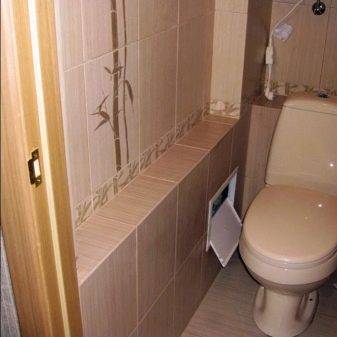
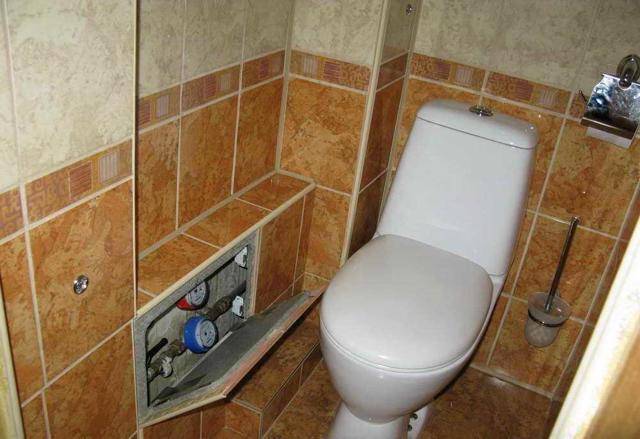
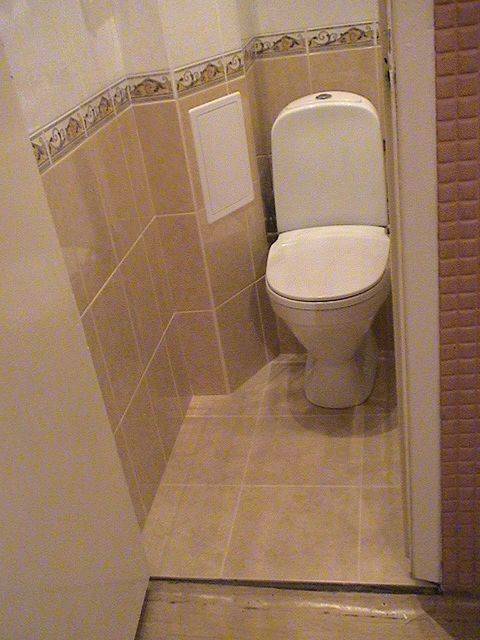
square box
If the pipes run in the corner of the toilet room or do not occupy the entire area of the wall, they are covered with a square plasterboard box. For its device, a metal profile is screwed to the floor, ceiling and walls along the perimeter of the structure, after which vertical guides are inserted into it. To install a door for access to plumbing fittings, a window is made of a metal profile, after which the entire structure is covered with drywall.Similarly, they act in situations where the water supply is located horizontally on the floor - guides are screwed onto the walls and floor, they make a crate and sheathe it with drywall.
Rice. 8 Boxes of various types
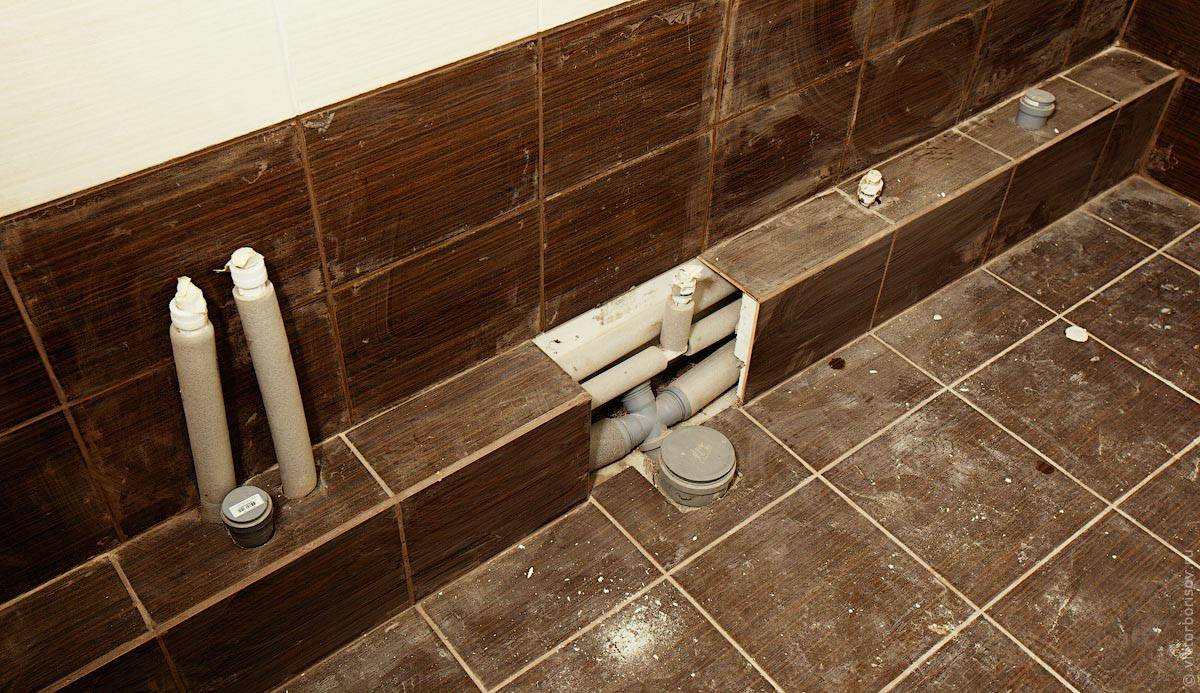
Tiered box
One of the frequently encountered situations in the use of a multi-level box, when there is enough space in the sanitary unit, the length of the horizontal section is small, or the owners decided to save a little on chasing.
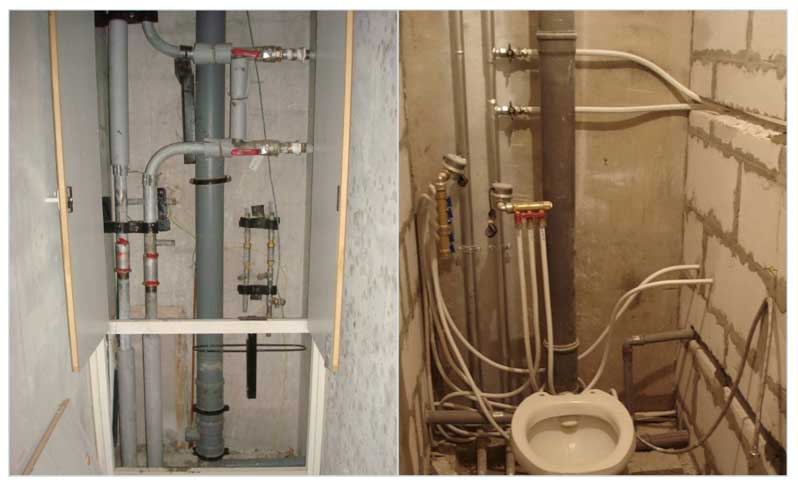
The method is often used if the horizontal plumbing is at the bottom. In this case, the vertical and horizontal pipelines are sheathed by fastening drywall to a metal profile crate.
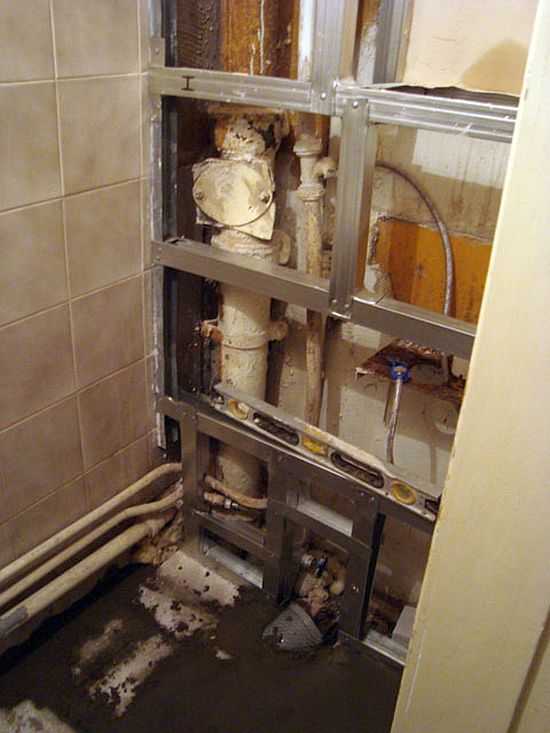
Oblique false wall
With a certain arrangement of pipelines, in order to save space or materials, not a square design is made, but oblique. For the installation of false walls, profiles are fastened to the floor, ceiling and walls, a horizontal frame is made, after which the profile structure is sheathed with drywall.
Rice. 9 Installing the profile battens
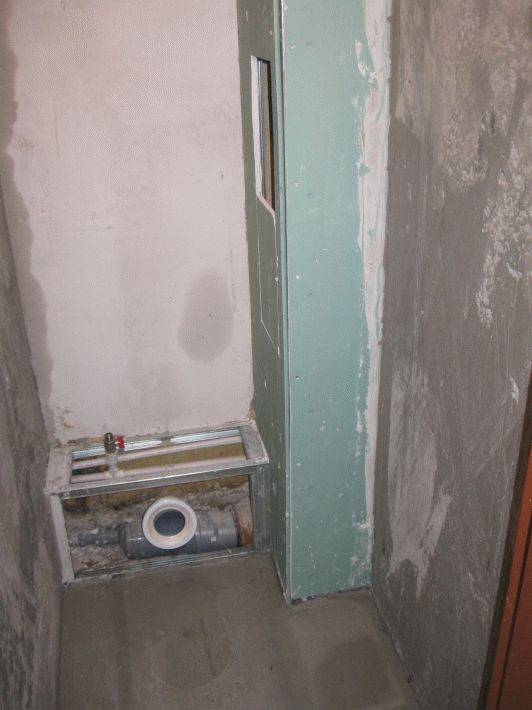
Toilet pipe box
The interior of the bathroom is often spoiled by pipes, without which, of course, it would not be able to perform its functions. There is only one way out in this case - to make them as less noticeable as possible, while maintaining the ability to access if necessary.
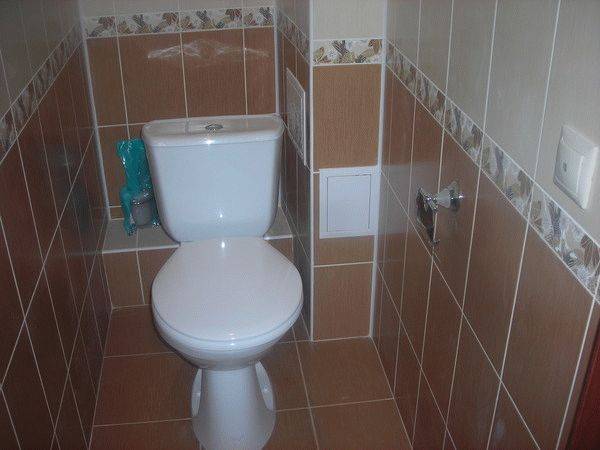
Gypsum board pipe box, tiled.
The best option is to make a special box for pipes in the toilet. The configuration of such a box will depend on the location of the pipes: sometimes you can make a false wall or build a simple square box, but you also have to create complex structures from several elements located at different levels.


Before you make a box for pipes in the toilet, you need to consider that an accident can happen. If you plan to hide the pipes completely and do not want to leave a door to access them, then it is better to check everything first and replace them with new ones so that you do not have to break the structure in case of a leak. But even with high reliability, materials that are easy to dismantle are chosen for such purposes.
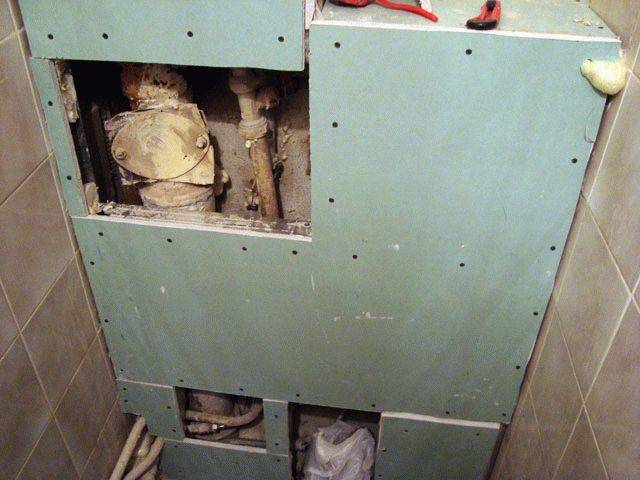
In place of the slots there will be hatches for access to the main pipe assemblies.
Making a box in the toilet with your own hands is not so difficult. First you need to decide on the material. The most popular are drywall and plastic panels. Walls can also be trimmed from PVC panels.
An approximate step-by-step plan for creating a box in the toilet
Regardless of the material you choose, the initial stage will be the creation of a structure from a wooden beam or a metal profile.
- It is necessary to make markings, given that the walls of the box should be located at a distance of 5-10 centimeters from the pipes.
- The profile is attached to the walls with dowel-nails, using a perforator for this purpose.
- After that, levels on the ceiling and floor are laid off from them, attaching them in a similar way.
- The creation of the frame is completed by attaching an angular profile, which is attached with fleas to the upper and lower, and then connected to the wall profiles using additional pieces.
- A drywall box is installed in the toilet using self-tapping screws or plastic panels are screwed on.
In the first case, the drywall must be marked and cut into pieces, which will be sewn into the frame. The process uses 27 mm self-tapping screws, which are screwed every 30 centimeters. Excess parts at the joints can be cut with a paint knife or a hacksaw.
Before you make a drywall box in the toilet, you need to consider that it will cost more than in the case of panels. But its plus is that you can choose any finish option, including paints, wallpapers and tiles.
The final cost of the work is highly dependent on the amount of drywall required, which in turn depends on the location of the pipes and the chosen configuration.
The cost of facing will depend on the material and area: for example, when choosing a tile - from 600 rubles per sq. m.
The drywall option is also more labor intensive than the toilet box made of PVC panels. The sheathing process is quite simple - the panels are fastened with fleas to horizontal profiles with self-tapping screws, as is the case with drywall. The cost of such sheathing from specialists is close to 500 rubles per square meter.
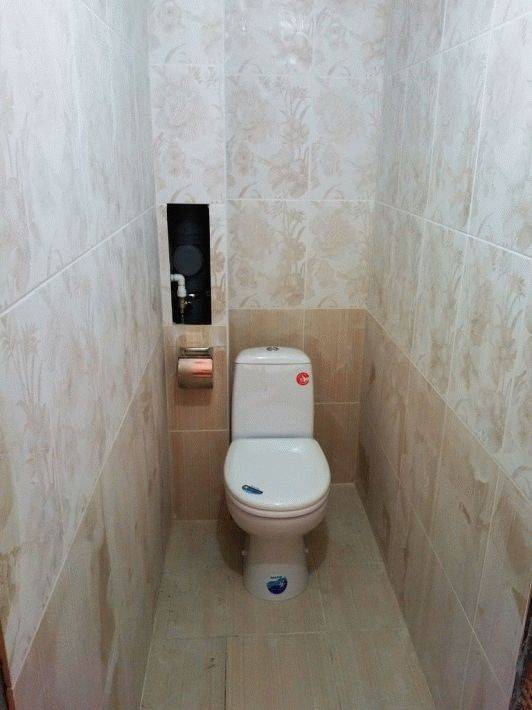
PVC panel box with sanitary hatch
There is another option that is perfect for owners of small and cramped bathrooms - you can hide the pipes using blinds, which are sold in almost any store. The indisputable advantage of the method is that access to pipes and meters remains free. As an option - the installation of roller shutters. The price for special plumbing shutters is approximately 3000 - 3500 rubles.


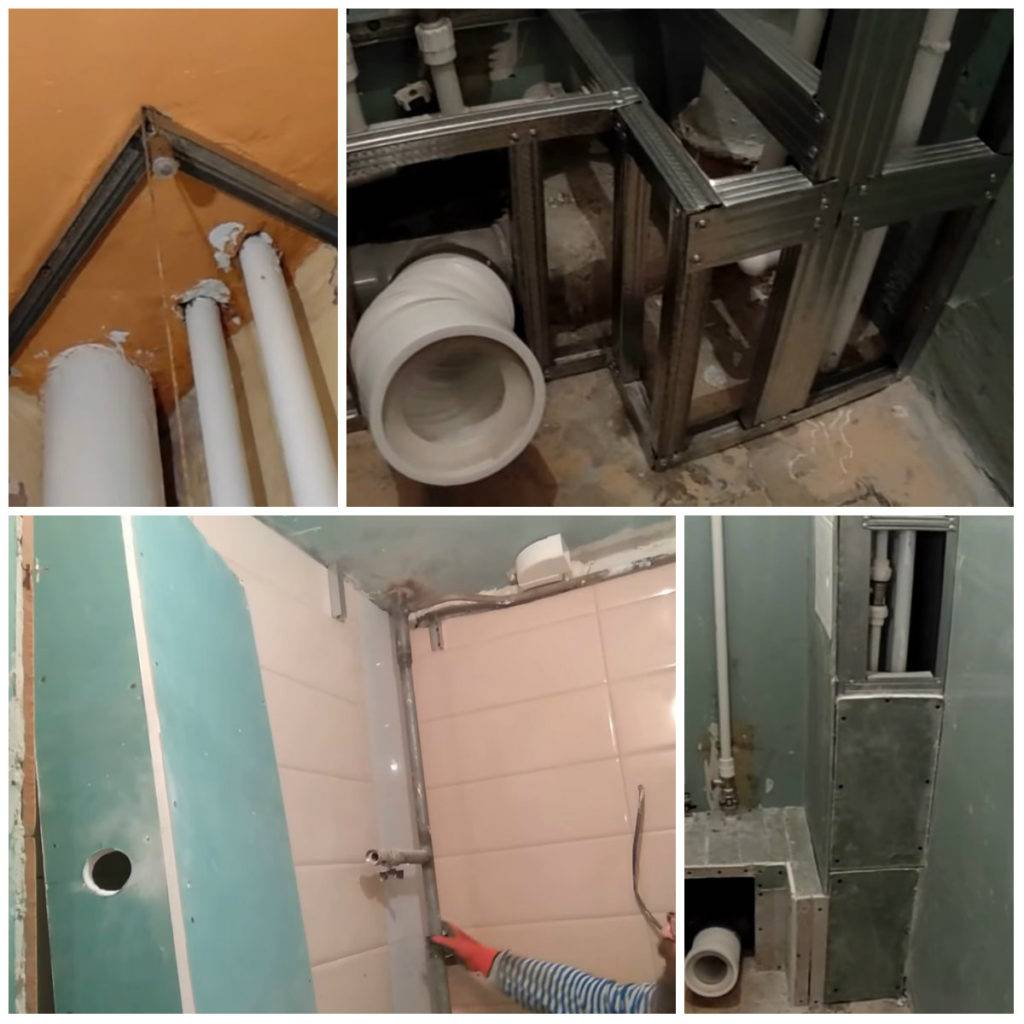
Profile mounting
For proper installation of a metal structure, the following steps must be taken:
the first step is to install the guide profile 26x27 on the floor. To do this, with metal scissors, you need to cut the profile exactly to the size of the line on the floor;
- We fasten the rack profile 27 x 60 to the wall, inserting it at the top and bottom into the guide segments. The pitch of the screws should be 15-20 cm, so the design will be more stable;
- The second profile is screwed in the same way;
Screwed rack profiles to the walls
- Next, we fix the segment exactly along the line with dowel-nails to the floor, try not to displace the segment during drilling, this can affect the quality and evenness of the box as a whole;
- Fix the second segment in the same way, if the edges of the profile interfere, they can be bent with pliers;
To install the profile evenly to the floor, you need to set the level at an angle of 90 degrees. The base of the frame must be fixed exactly according to the drawn markings so that one guide profile is tightly and evenly attached to the other.
- The same actions must be done on the ceiling;
- Now you can install the corner profile, it is fixed at the top and bottom with small self-tapping screws "seeds";
Angle profile installed and fixed with self-tapping screws
Once this design is ready, it needs to be reinforced with crossbars. Jumpers should be at a distance of 30 cm from each other.;
It is necessary to use the building level to install an even metal frame. Fasten the jumpers strictly parallel to the floor, this will help form a reinforced frame and fix the drywall well in the future.
At the same time, it is necessary to design a reinforcement for the future installation of a technical hatch.
Pay attention to the video: how to make a frame from a metal profile


