- Stages of work
- Excavation
- Waterproofing
- Mounting
- Do-it-yourself concrete caisson for a well
- Video - How to make a concrete caisson with your own hands
- Step-by-step instructions for arranging a monolithic concrete caisson
- What is a borehole caisson and why is it needed?
- We independently construct a concrete caisson
- Arrangement of a pit for construction
- Reinforcement mesh installation
- Construction formwork installation + pouring
- Cover formwork construction
- Filling the lid with concrete
Stages of work
The caisson is tied to the location of the well or septic tank. Therefore, the design is carried out under local conditions:
- analysis of the composition of the earth;
- identification of the groundwater horizon;
- clarification of the depth of soil freezing;
- accounting for the dimensions of the equipment located in the internal cavity of the caisson;
- ease of installation and maintenance of water pump units.
The practical device of a caisson for a well made of concrete rings is divided into several stages:
- earthworks:
- choice of location (tied to the location of the well);
- laying trenches for pipelines;
- excavation;
- carrying out measures to protect against shedding;
- filling the remaining free space with earth;
- mounting:
- arrangement of drainage;
- base manufacturing;
- installation of rings;
- waterproofing and thermal insulation measures;
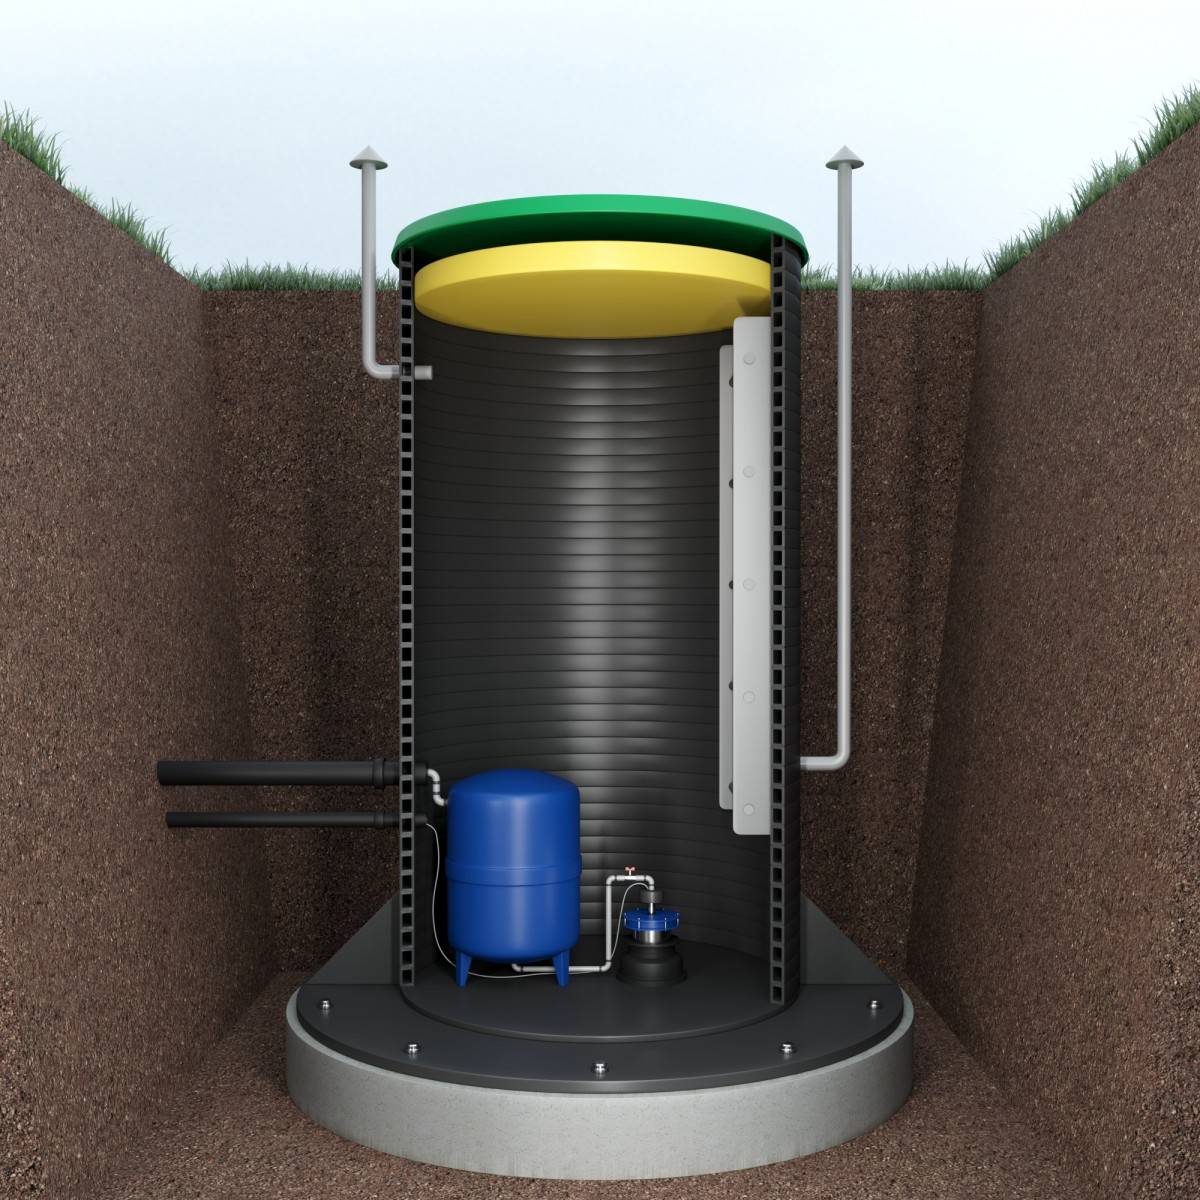
- arrangement of the caisson:
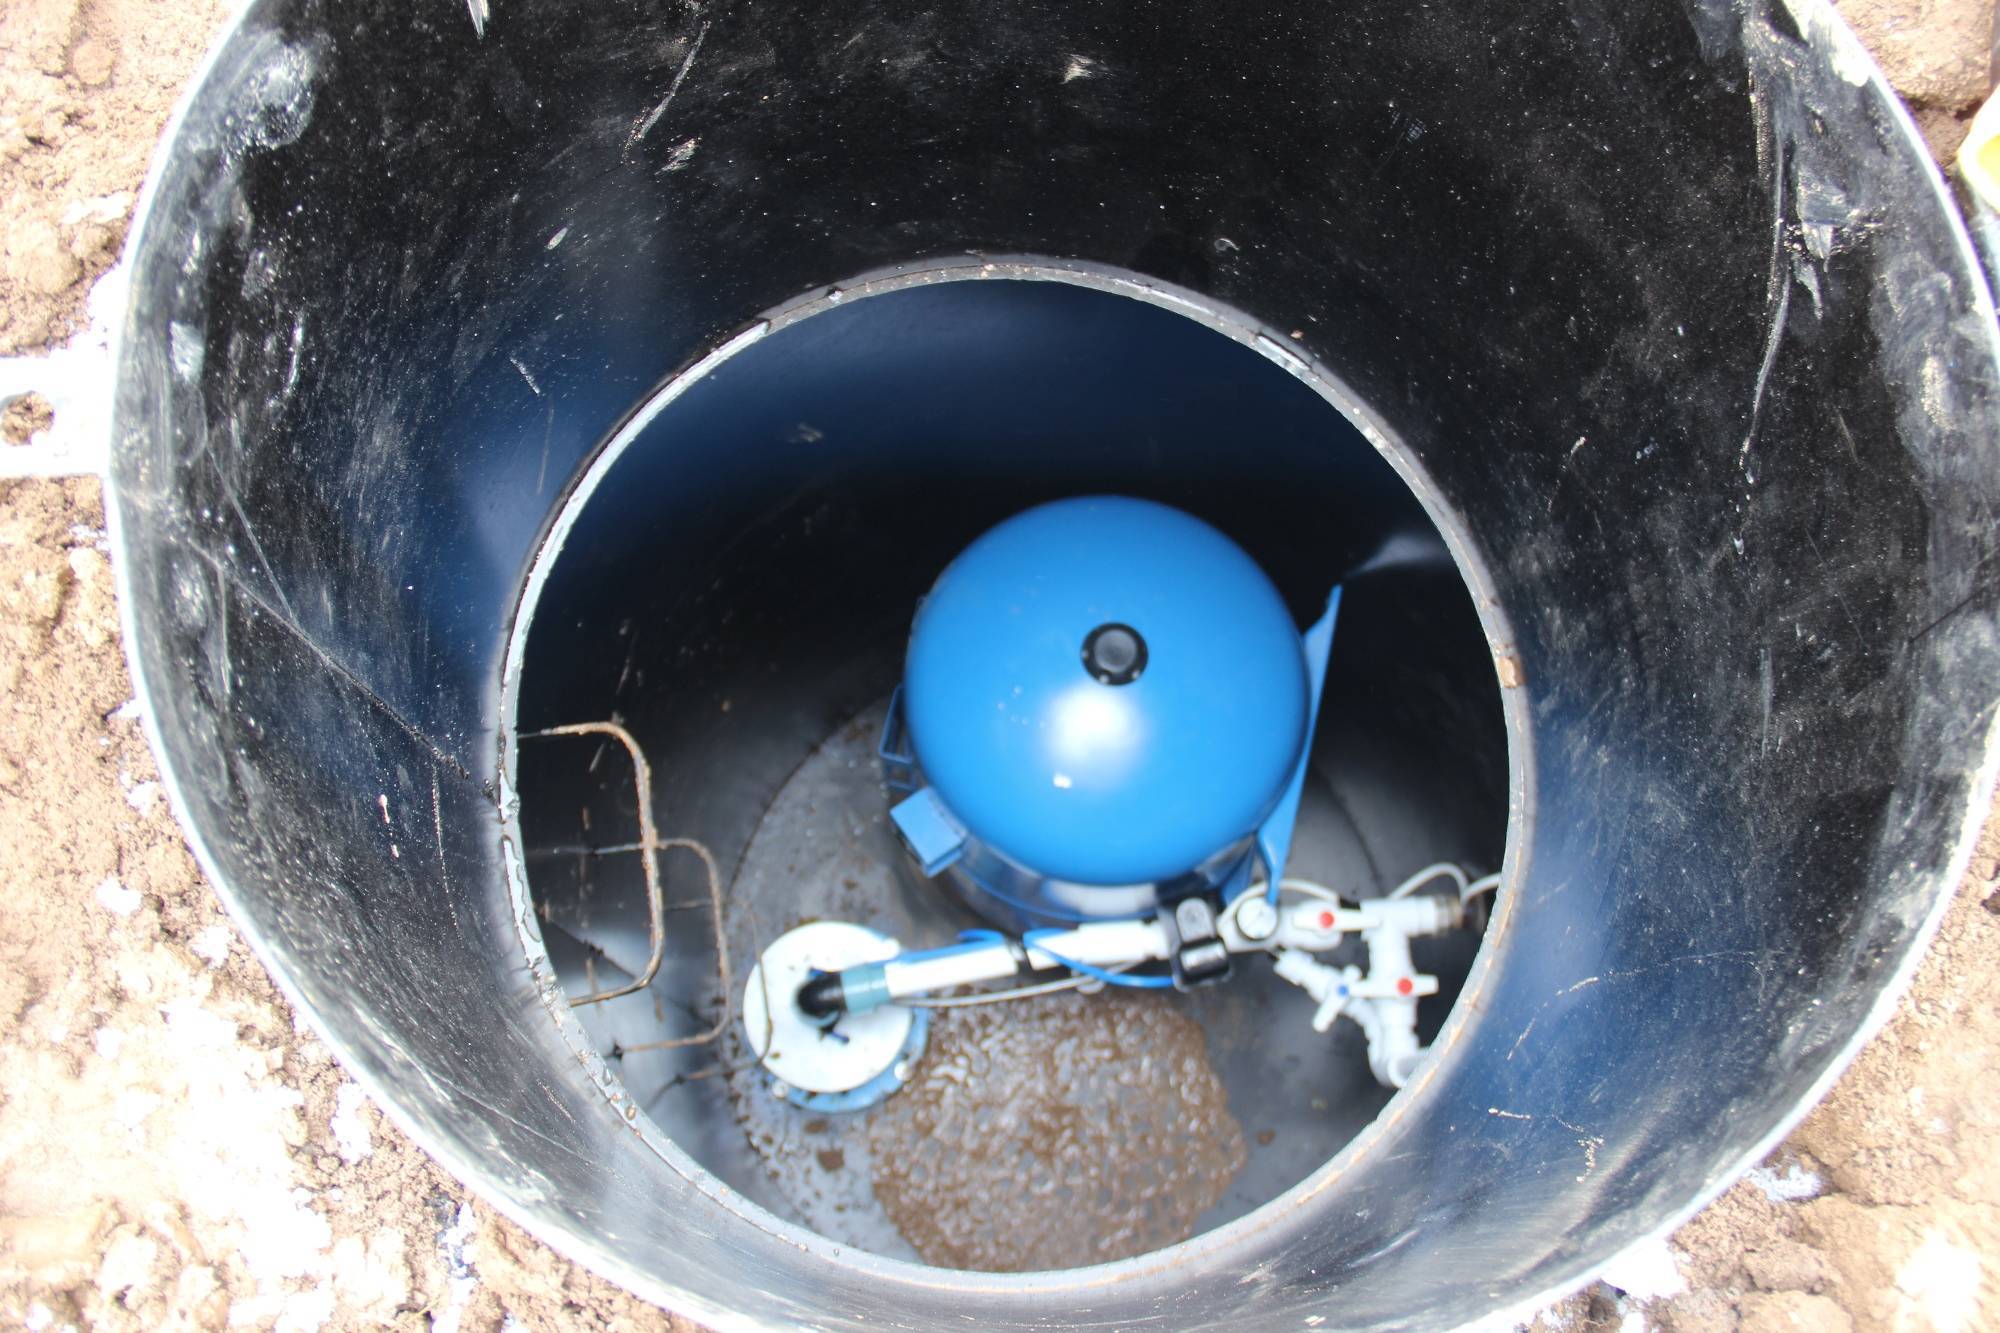
- installation of pumping equipment;
- connection of pipelines;
- commissioning operations.
- cover installation.
Excavation
Digging a pit for a caisson is carried out by mechanical means or manually. This is determined by the size of the pit and the composition of the soil. Clay and loam, rocks are processed with the help of an excavator. Light sandstones, sandy loams lend themselves to manual labor, provided that the depth should not exceed two or three meters.
Work is carried out in the spring and summer. The best option is in the absence of precipitation.
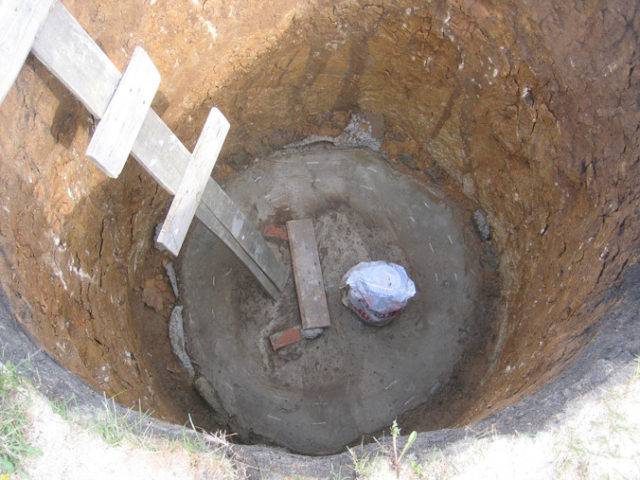
The depth of the pit is determined by the size of the structure and the level of soil freezing. Drainage is performed at the bottom of the pit, - a trench is dug along the contour up to 20 ~ 40 cm deep, a width of a spade bayonet, covered with rubble.
The base is being made - the bottom is made of concrete. Reminds me of a monolithic foundation. It is advisable to provide embedded metal parts for connection with the vertical structure. The slab is installed on a cushion of coarse sand (grass).
Waterproofing
Unlike metal or polymer products, the caisson is prefabricated, consisting of individual parts. In addition, concrete is a hygroscopic substance. Due to such factors, it is required to carry out waterproofing of the caisson from concrete rings:
- The outer wall, the seams are coated with waterproofing material. To improve adhesion, pre-treatment with a deep penetration primer of the AQUA-stop series is recommended. As insulation, it is advisable to use bitumen-based mastics or molten tar.
- The ends, before direct installation in place, are treated with silicone sealant. This substance can simultaneously serve as a connecting element between adjacent parts.But, the mechanical shear strength of the seam will be less than that of a cement-sand mortar.
- The seam, to increase strength and tightness, is recommended to be bandaged with a mesh material (tape "serpyanka").
- The inner cavity of the caisson is impregnated with sealant of the AQUA-stop series, treated with Penetron or a similar waterproofing material.
Mounting
The assembly of the structure is carried out as soon as the pit, pipeline is ready. A lifting mechanism is used. When installing a caisson of concrete rings, it is necessary to monitor the alignment of adjacent parts.
Subsequence:
A cement-sand mortar or silicone sealant is applied to the joints. In the presence of embedded metal parts, additional fixation by welding is carried out.
Waterproofing works are being carried out. Mastic is applied in two or three layers


Particular attention - the junction of the lower part and the bottom. In this place, the pressure of ground and melted snow is the greatest.
The top ring is installed 10~20 cm above ground level
This will prevent the ingress of melt water and precipitation.
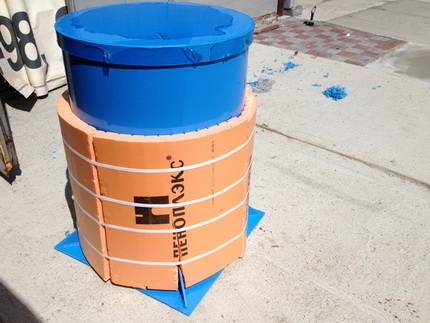
The caisson is insulated, - with the material of the Penoplex series on the outside or with foam plastic inside. It is advisable to wrap the outer layer with a polyethylene film in three or four layers.
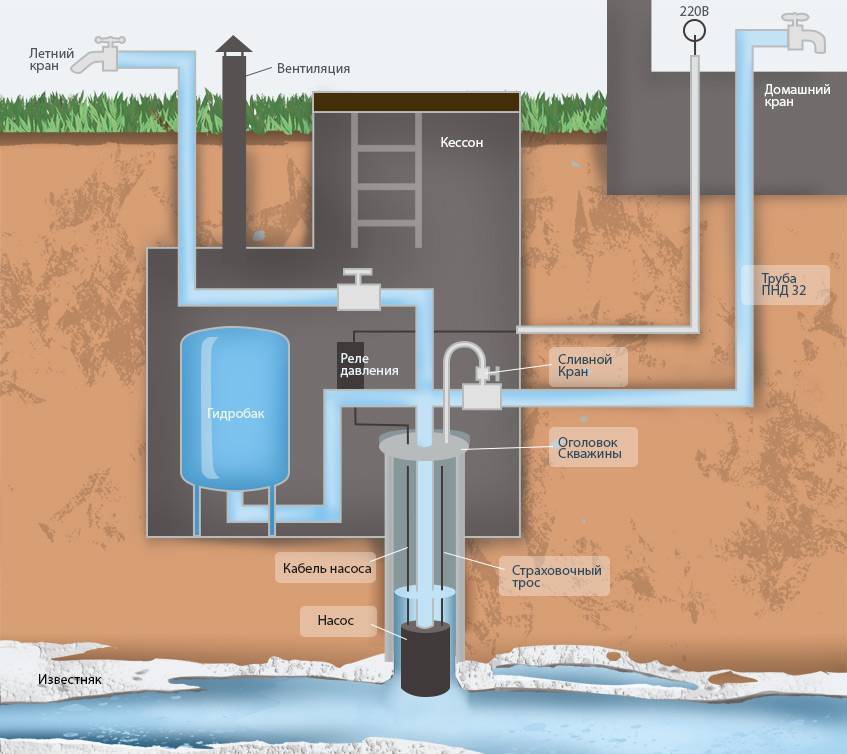
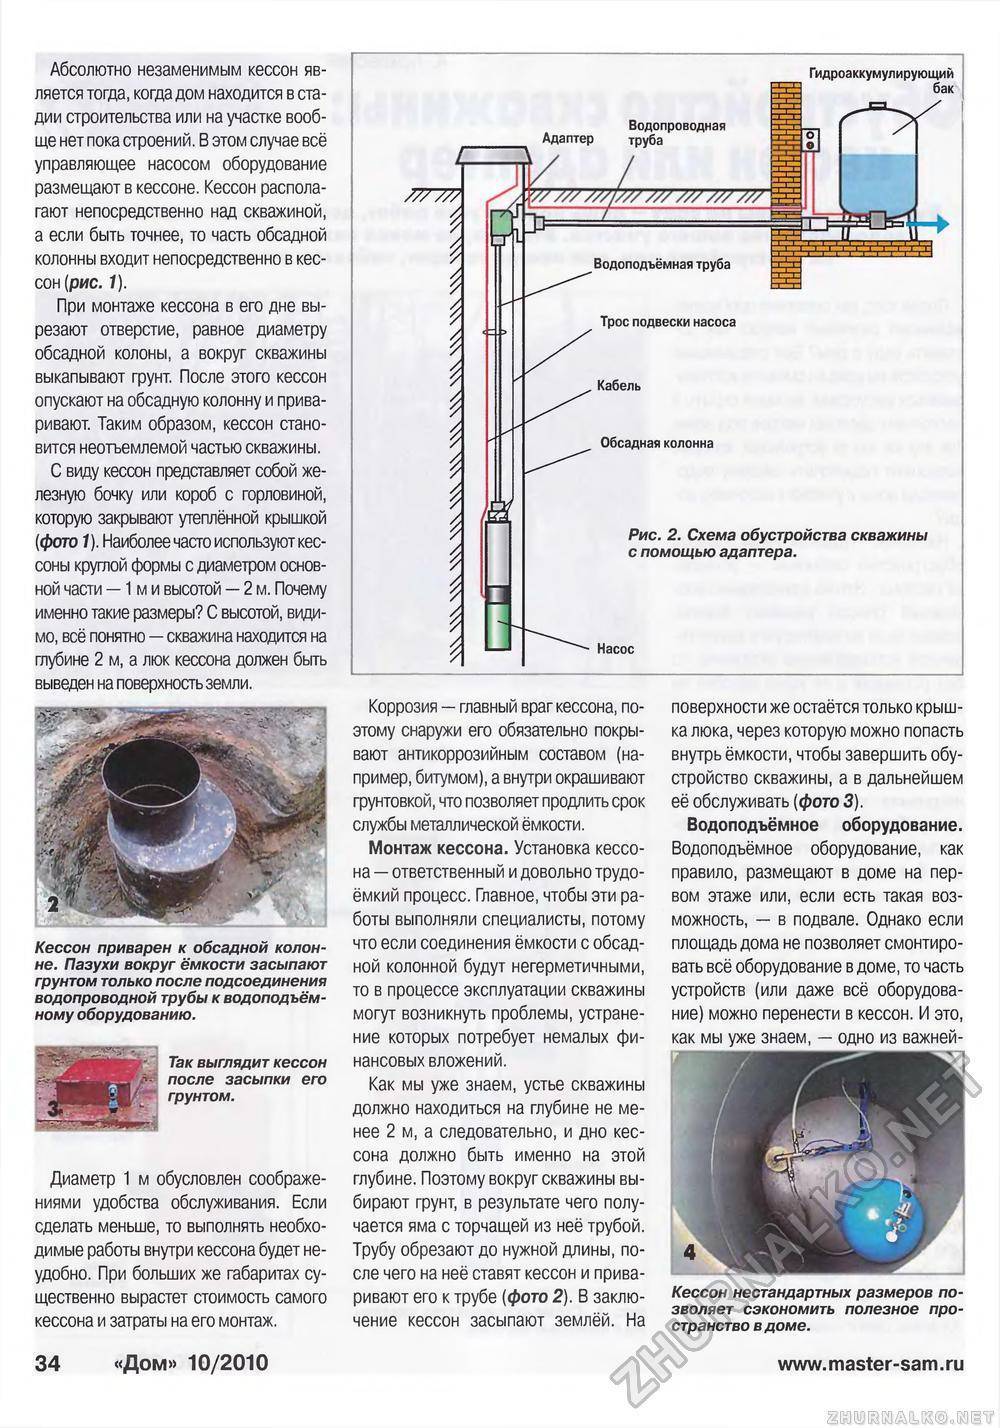
Arrangement of the caisson - the necessary equipment is installed inside, pipelines are connected. Carry out commissioning work.
The top cover is mounted, ventilation is installed. Along the perimeter, at a distance of up to 0.5 ~ 1 meter from the outer wall, thermal insulation (penoplex) is laid in a continuous field, covered with earth.
During operation, especially in the spring-autumn period, it is necessary to periodically check the caisson. In the event of the ingress of external water, take measures to eliminate it.
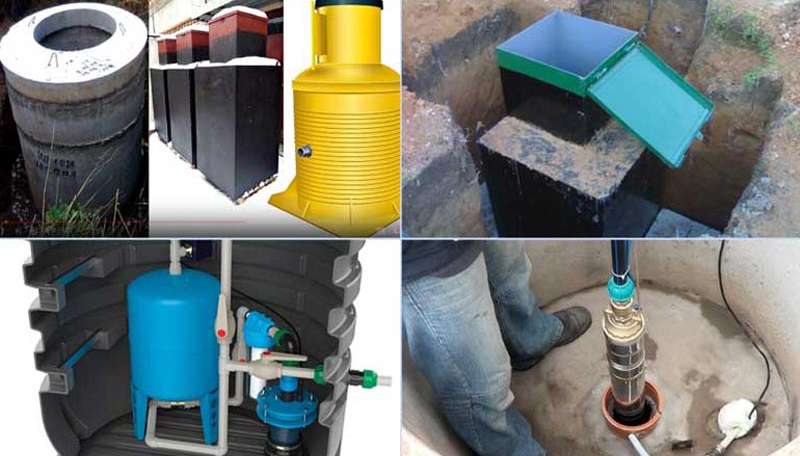
Do-it-yourself concrete caisson for a well
If there is no possibility or desire to hire lifting equipment, then a monolithic concrete box can be made to protect the well and equipment. But you need to take into account that you will have to spend time not only on the arrangement, but also on the drying of concrete walls. Such a tank is usually made of rectangular section to simplify the installation of formwork.
Video - How to make a concrete caisson with your own hands
Making a caisson is best done in the spring. This will help to assess the moisture content of the bottom of the pit and choose the type of base of the caisson:
- with dry soil, a draining layer of crushed stone is sufficient;
- a wet bottom indicates that a concrete monolithic base is needed.
Such a study is carried out at the stage of excavation.
 Production of a brick caisson floor
Step-by-step instructions for arranging a monolithic concrete caisson
| Step 1. A pit is dug around the head. Its depth is determined not only by the freezing point of the soil, but also by the type of base of the caisson. The drainage layer is generally 25-30 cm, and the monolithic concrete bottom with a sand cushion is 20 cm. To determine the width of the pit, you need to add 10 cm for each wall to the selected internal size, plus a gap to the walls of the pit if the formwork is double . Gaps are also important at high GWL to make drainage sinuses around the caisson. | 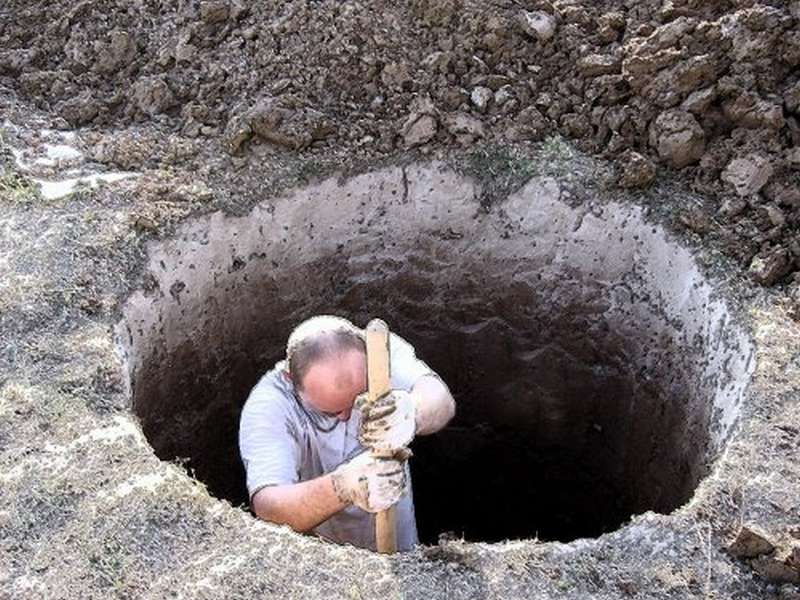 Dig a pit around the head Dig a pit around the head |
| Step 2 Arrange the bottom. For a low GWL, first a 10-cm layer of compacted sand is covered, and then a 15-cm gravel layer.If the bottom of the pit is wet, a concrete base is poured. To do this, a film is laid on the sand cushion, which also goes on the walls of the pit, and a reinforcing grate is placed down on the wooden bars so that it does not touch the walls. Then the concrete solution is poured with a layer of 10 cm, closing the reinforcement. | 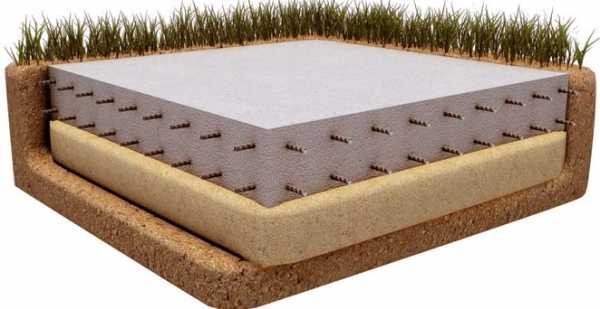 Arrange the bottom Arrange the bottom |
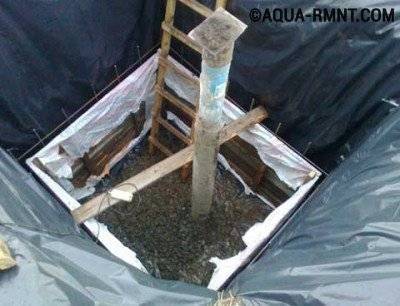
| Step 3. After the bottom has dried, formwork is erected. In non-flowing soils, it can be done with one wall, while the outer part will be made by the side of the pit, covered with a film. In wet and crumbling soils, both formwork walls are boards made of wooden boards, between which a reinforcement mesh is installed. It is imperative at this stage to provide for the exit points of the water supply and the entry of the power cable. | 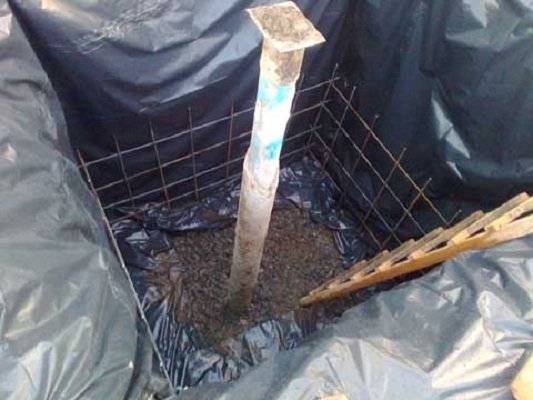 Formwork manufacturing Formwork manufacturing |
| Step 4. The concrete solution is kneaded and fed into the formwork. For uniform distribution of concrete and the convenience of pouring it, a gutter is made from a plastic pipe. Serve concrete in portions, compacting it with a vibrating tool or bayonet. This allows you to remove air and make the concrete dense. | 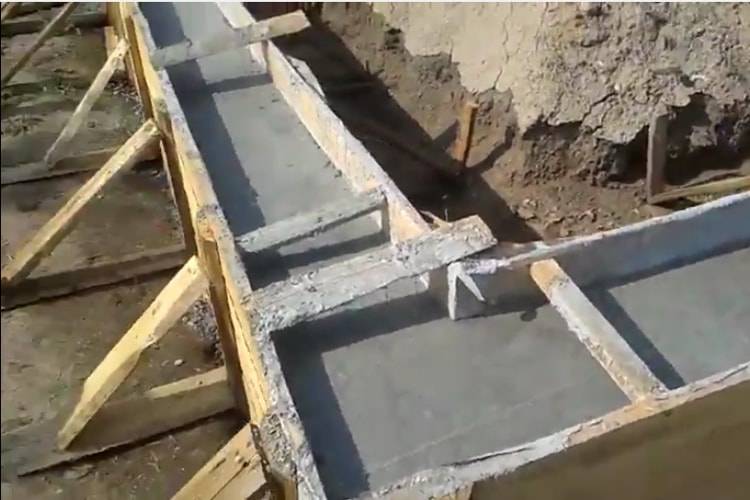 Mixing the concrete solution and pouring it into the formwork Mixing the concrete solution and pouring it into the formwork |
| Step 5 Dry the concrete walls properly. To do this, they are sprayed with water and covered with a damp cloth for up to 5 days. Such a measure will prevent the formation of cracks from the rapid evaporation of moisture. |  Dry concrete walls Dry concrete walls |
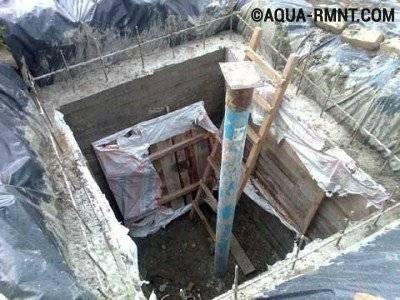
| Step 6. After a week, the formwork is removed and work is stopped for about 4 weeks for the concrete to fully mature. | 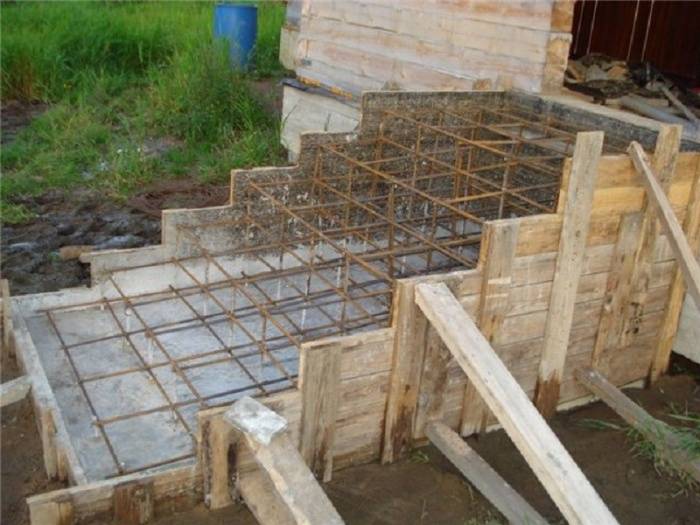 Remove formwork Remove formwork |
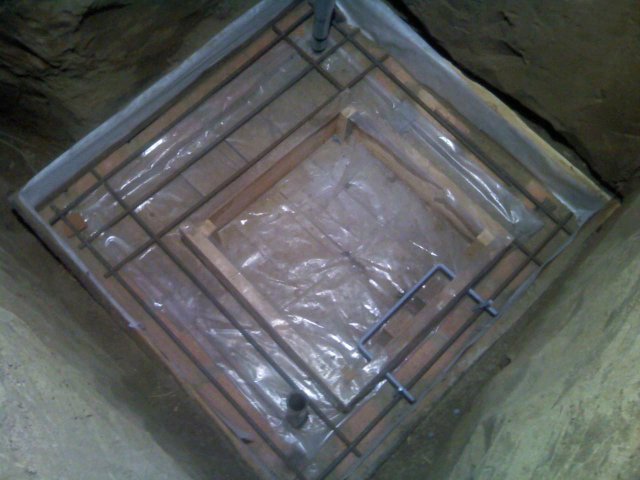
| Step 7 Install a finished concrete slab with a hatch as a floor. It is possible to pour the roof from a concrete solution, having previously built a horizontal formwork. Take into account the place of the hatch and the exit of the ventilation and watering pipes. | 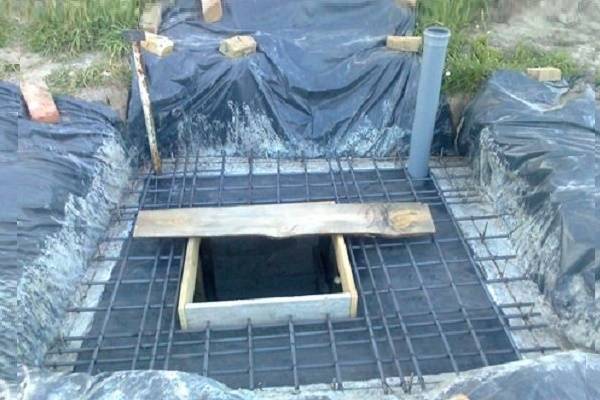 Horizontal slab formwork Horizontal slab formwork |
| Step 8Waterproofing is applied to the walls of the tank from the inside and outside, for example, bituminous mastic. |  Apply bituminous mastic to the walls of the tank Apply bituminous mastic to the walls of the tank |
The reservoir is ready. At the end, equipment and a ladder are installed, all communications are started and connected, replacing the joints of pipes and cables with the walls of the caisson. After that, backfilling is carried out and the area around the tank is ennobled.
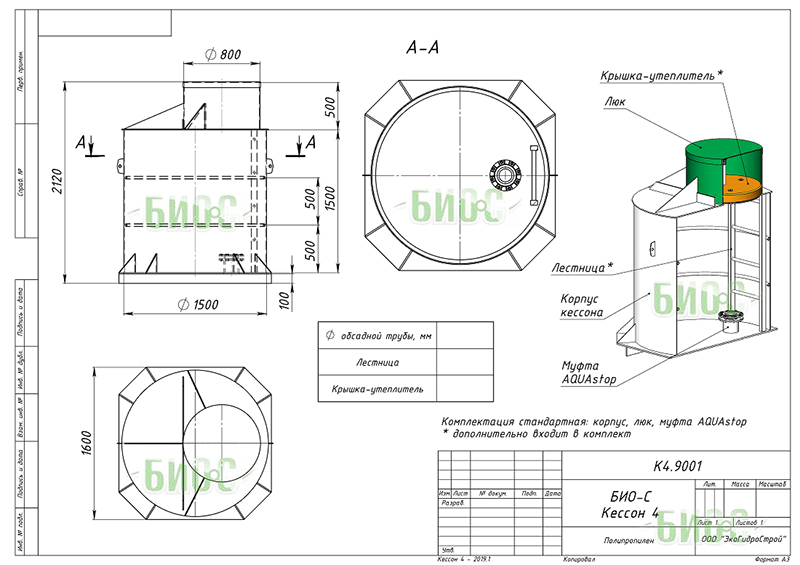
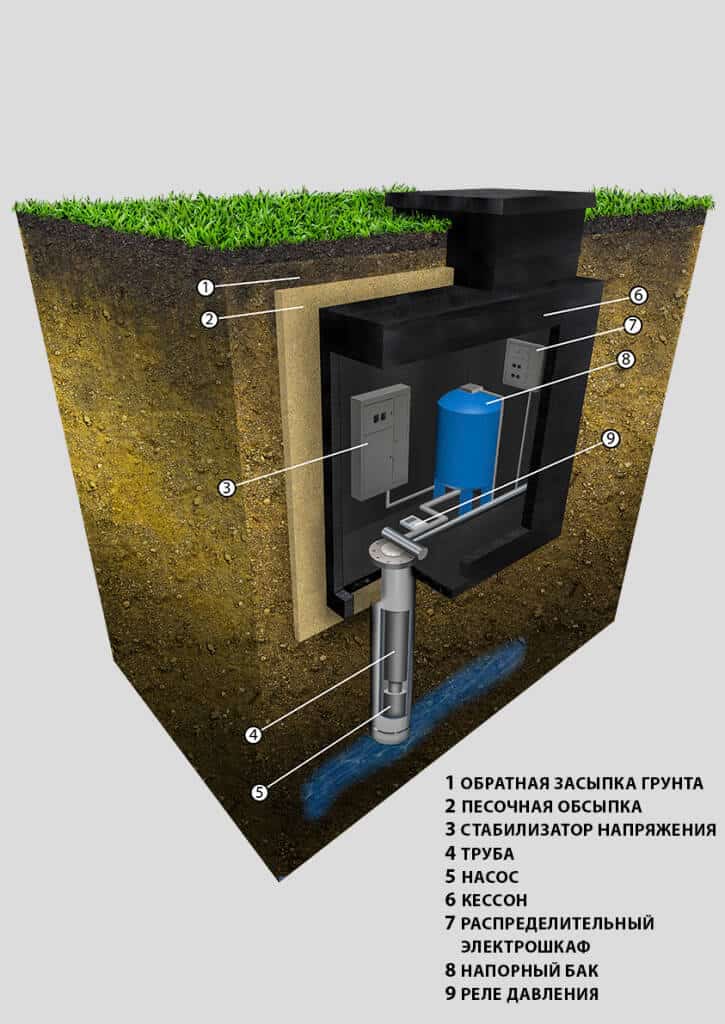
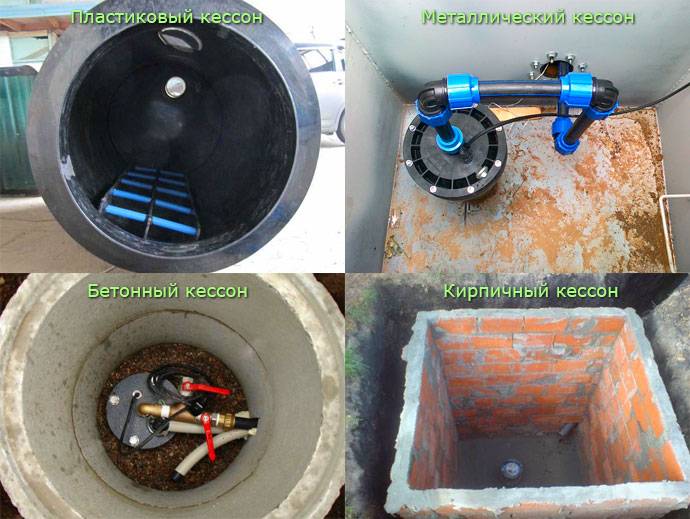
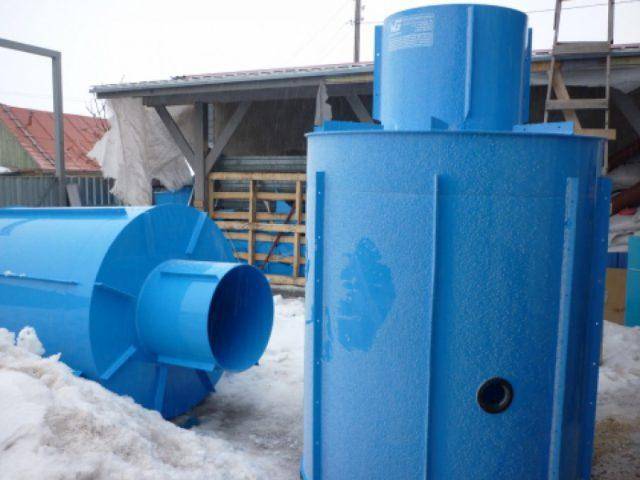
What is a borehole caisson and why is it needed?
A caisson is a container that is reliably protected from water penetration. Initially, they were used exclusively for underwater work, later other areas of application were found for them.


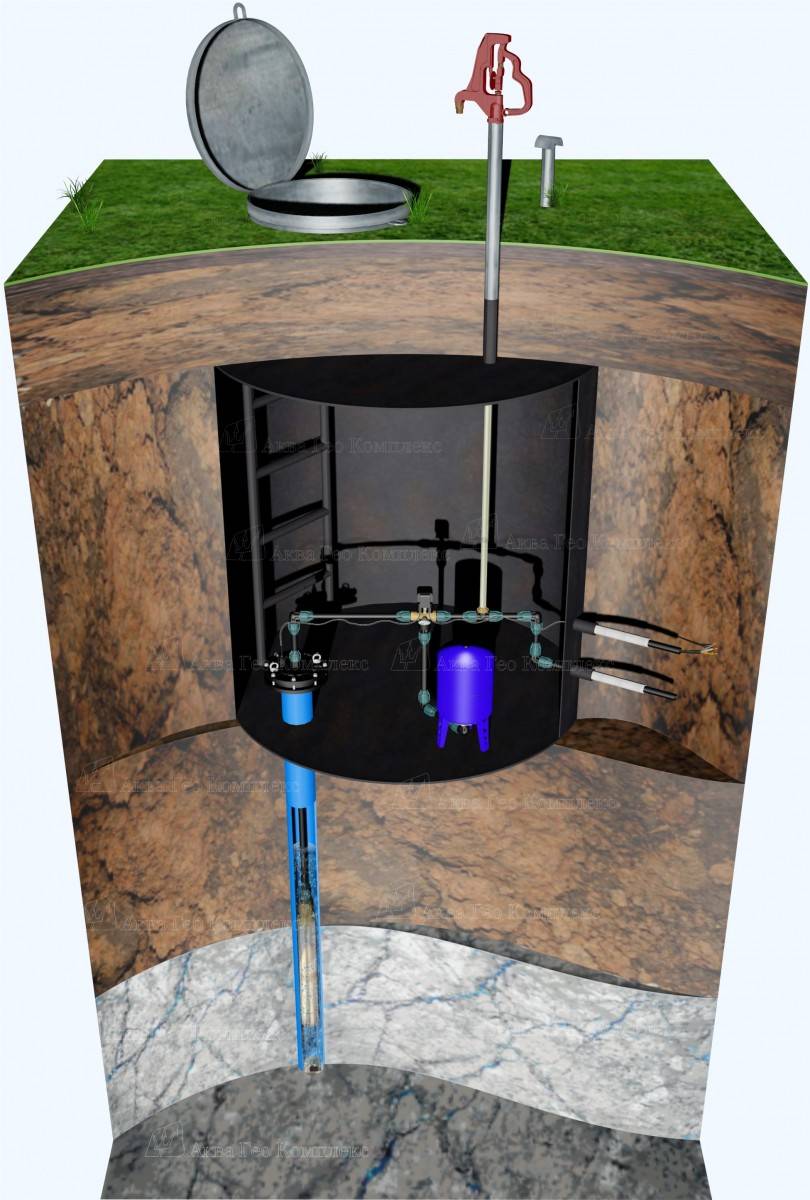


In particular, hermetic chambers began to be installed on the head of the well. The standard caisson has a very simple design. This is a container that closes with a hatch on top.
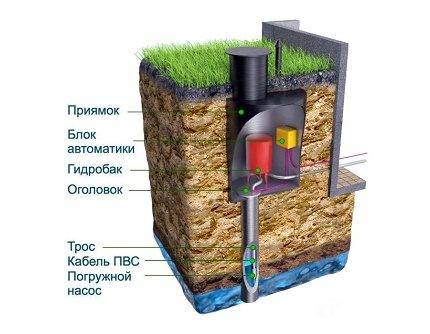
A caisson for a well is a sealed container that protects the head from the effects of low temperatures and the penetration of groundwater.
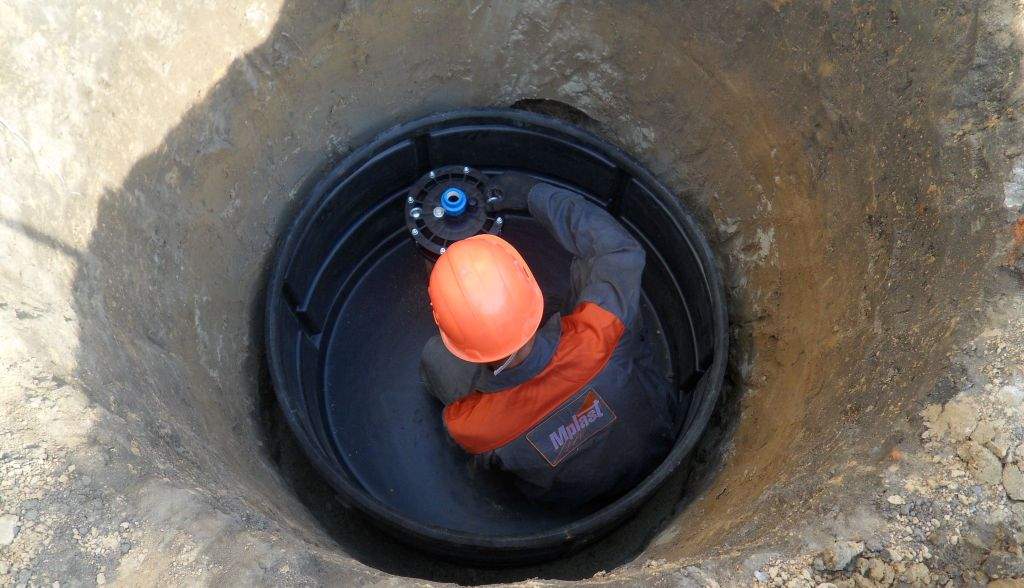
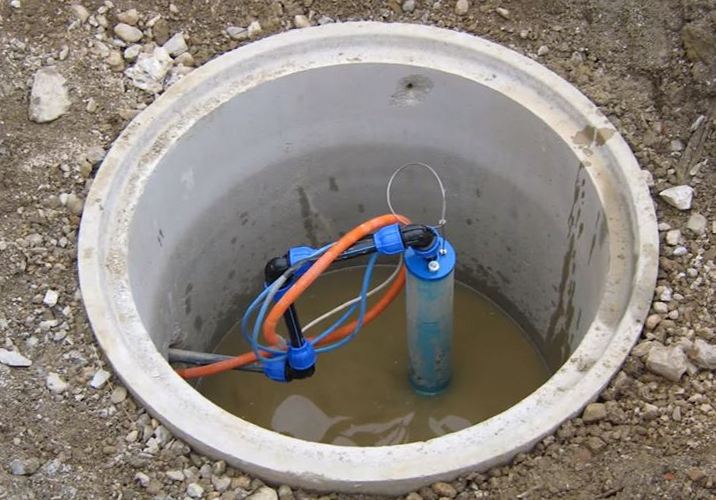
Through it, a person descends into the chamber to carry out maintenance and repair work. In the bottom part of the device there is a casing pipe entry, in the side walls there are entrances for cable and water pipes.
The lid, and in some cases the walls of the caisson, are insulated. Most often, foam or foamed polymer is used for this purpose. The chamber of classical design is made in the form of a cylinder with a height of about 2 m and a diameter of at least 1 m.
These dimensions were not chosen by chance. The height of the container is due to the need to protect the equipment installed inside it from the effects of low temperatures.The tie-in section of the water supply and the head of the well should be placed below the freezing level of the soil.
Most often, this is a depth of the order of 1-2 m. It is this value that determines the depth of the chamber bottom and, accordingly, its height.
The diameter of the container was also not chosen by chance. It should be sufficient to install the necessary equipment and place inside a person who will go down to carry out maintenance or repair of the well.
When choosing a caisson, you need to understand that too small a design will be inconvenient to use, and too large will be unnecessarily expensive. After all, sealed chambers are quite expensive equipment.

The size of the caisson must exactly match the amount of equipment that will be placed in it. In addition, a person who descended to service the instruments should be freely placed in it.
A sealed container buried in the ground performs two main functions:
- Protection of equipment from low temperatures. In winter, the water supplied from the well is exposed to negative temperatures. In such conditions, it can freeze and spoil, or even break the pipeline.
- Ground water protection. The caisson prevents soil water from entering the well head, which prolongs the life of the equipment.
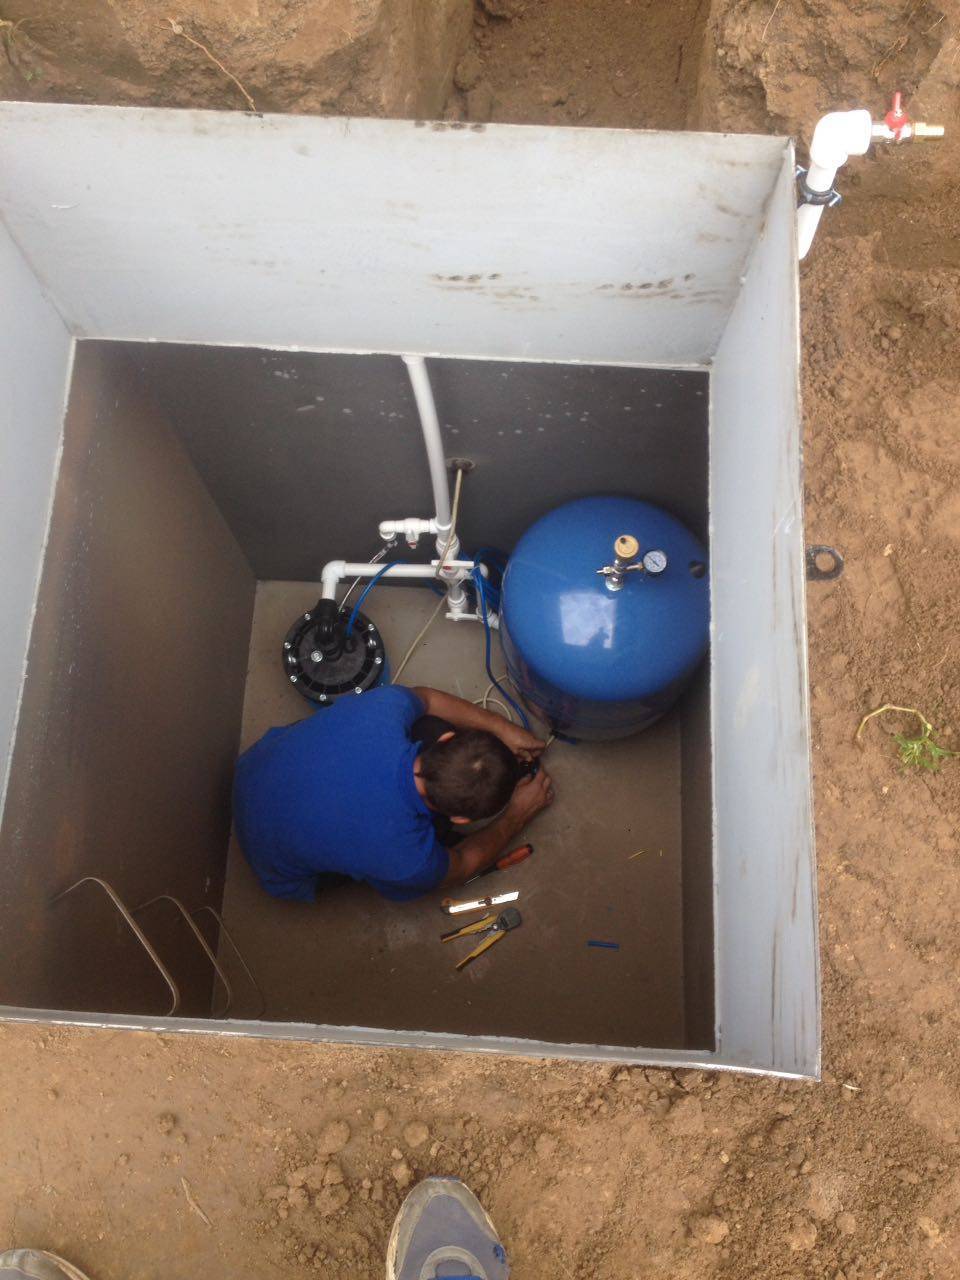
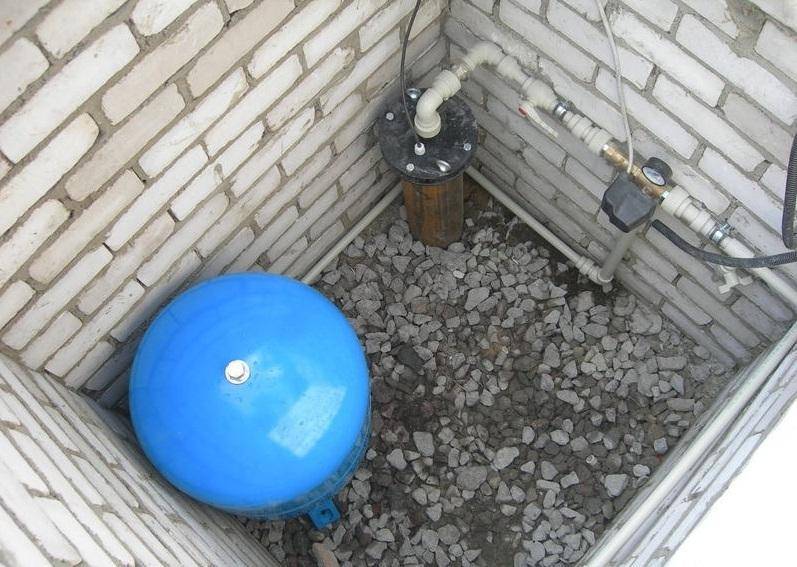
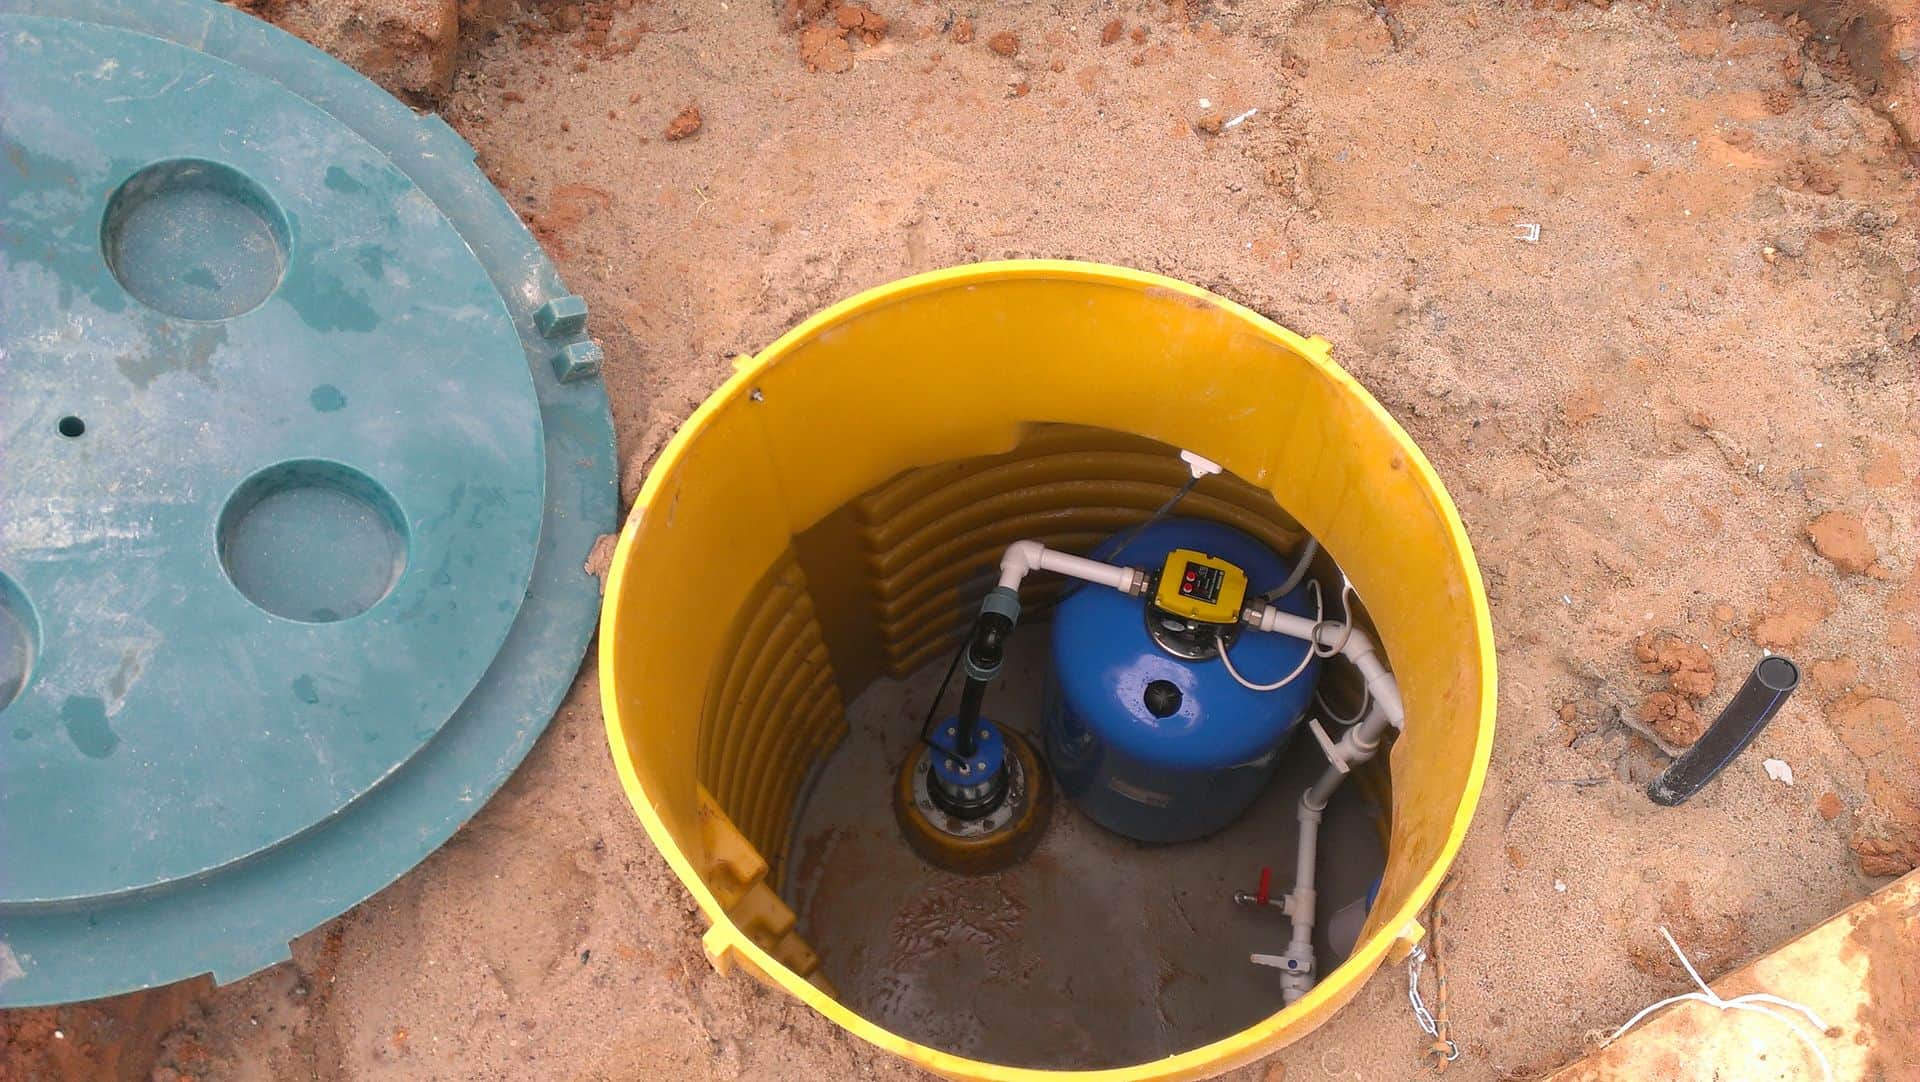
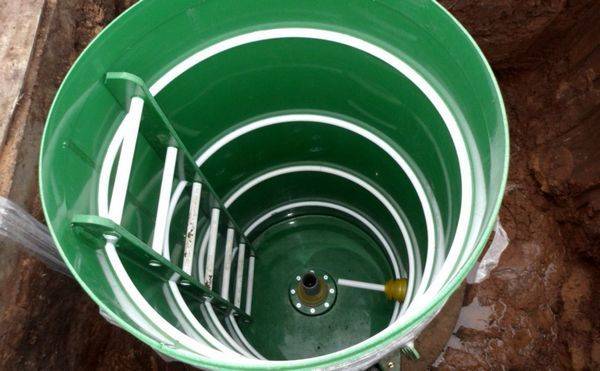
In addition, the caisson is a convenient place to place all the equipment necessary for the operation of the well.
A pumping station, various water purification systems, a borehole adapter, shut-off valves with an electric or pneumatic drive, pipelines and automation that controls an autonomous water supply are usually installed here.
A moisture-proof chamber reliably protects all this equipment from unauthorized access, from damage by rodents and insects.
Chambers made of materials with high heat transfer have to be additionally insulated. For these purposes, only non-hygroscopic types of heaters are suitable.
We independently construct a concrete caisson
Before starting work, you need to decide whether a sealed container is needed or not. The first option is chosen in the case of a high level of groundwater and in this case it is necessary to equip a concrete floor, in the second one you can do without it by sprinkling the bottom with gravel. You also need to find out the dimensions of the future structure. If the equipment for the well will be located indoors, the minimum size of the caisson is 1x1x1 m, if in the tank it is 1.5x1.5 m with a height of about 1.8 m.


The process of building a concrete caisson takes place in several stages. Let's take a closer look.
Arrangement of a pit for construction
A hole of the required size is dug around the casing pipe. Crushed stone is poured to the bottom with a layer of about 15 cm. Before starting work, it is best to cover the walls of the pit with a foundation film that will protect the structure from groundwater.
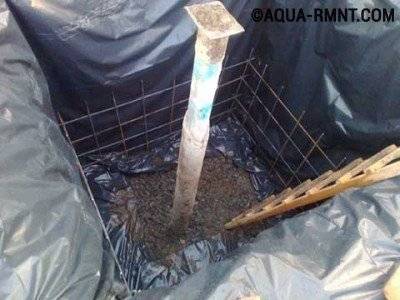
The walls of the pit are best covered with a film: so groundwater does not penetrate inside
Reinforcement mesh installation
Departing from the walls of the pit about 7-8 cm, a mesh of reinforcement is knitted. Its height depends on the size of the future structure. It is best to fill the entire structure as a whole, but this is far from always possible, and then the installation of the caisson for the well is divided into several stages. Accordingly, on the first one, a row of reinforcement of the required height is installed in increments of approximately 30x30 cm.
If a phased pouring of the structure is planned, the formwork is set to a height of about half the structure
Construction formwork installation + pouring
Formwork can be assembled from old bars and boards. Experts advise to cover it with a construction stapler with plastic wrap. This will make it much easier to remove the structure from the cured concrete. After the formwork is installed, concrete is poured. If concreting is carried out in stages, then after the “setting” of the material, it is supposed to repeat the operations of assembling reinforcement, installing formwork and pouring until a structure of the desired height is obtained.
The walls of the structure are poured with concrete until they reach the desired height.
After the structure has completely dried, holes are made in the walls of the caisson with a perforator to bring the necessary water pipes. In the place of passage through the concrete, metal sleeves are put on the parts.


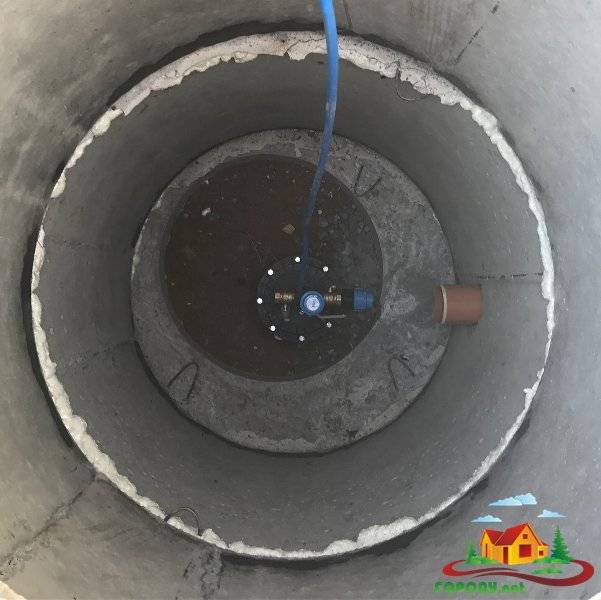


The gap between the sleeve and the pipe is sealed with mounting foam, between the concrete and the sleeve - with mortar.
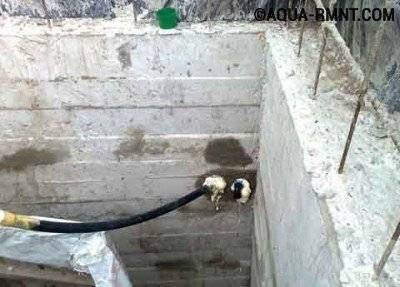
The places where water pipes enter the caisson are sealed
Cover formwork construction
The design is a wooden shield laid on bars. For its construction, durable material is taken. Approximately six bars are placed vertically on the boards, more bars are laid horizontally on top. Everything is screwed on. Formwork boards are attached to the resulting base. The design must provide a hole for the hatch, on which a wooden box of the desired size is installed. The resulting structure must be reinforced from below with bars before pouring.
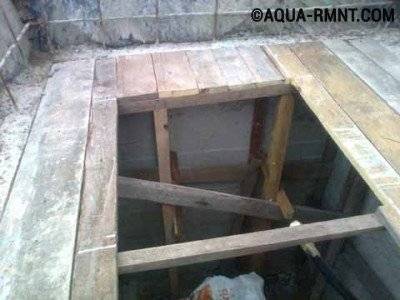
The formwork of the lid is a wooden shield, reinforced from below with bars
Filling the lid with concrete
The building is poured with concrete. The hatch is fixed.
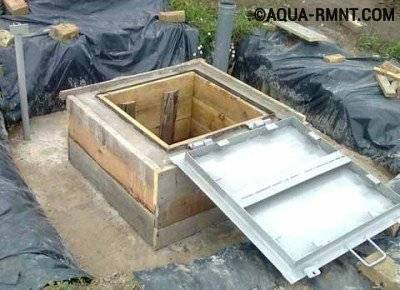
To equip the hatch, a special concrete neck is made
The concrete caisson is ready. If necessary, its walls can be treated with a waterproofing compound, since concrete is very hygroscopic, and insulated. Similarly, you can equip a brick caisson. Only in this case, brickwork is used to build walls.