- Types of switches - designation on building diagrams
- Touch switch - what is it and where is it used
- How to set up centralized lighting control?
- Connecting the switch to the network
- Through switches
- What does a switch look like and how does it work?
- Master switch or knife switch
- How to make a walk-through switch with your own hands a labor lesson
- Connecting Multiple Ethernet Switches Using a Switch Cluster
- Cross switch functions
- Wiring Orientation of switches and sockets
Types of switches - designation on building diagrams
One of the schemes used by electrician builders is the layout scheme. It is carried out according to its own rules and has designations different from the circuit diagrams.
Before installing a switch of a suitable type and type, consumers need to agree on the project, as customers they have every right to do so. In order not to get confused in the diagram below, we provide a photo showing the designation of sockets and switches in the drawings.
 Designation of types of switches on the diagram
A small circle in the drawing is the designation of the switches. A linear segment emanates from it at an angle of approximately 60 ° to the horizontal. An open-mounted switch is indicated by a short dash to the right, set aside from the end of the segment.The number of such dashes shows the number of poles. The number of independent switches in a group is shown by repeating vertical segments shifted by 30°. A four-key switch will be represented by four segments, a triple switch by three, etc.
The semicircle, convex upwards, means the image of rosettes. In the diagram, as many segments are laid off from the circle as the socket has poles. If the socket has a terminal for protective earth, then a horizontal tangent is displayed at the top of the arc.
 Designation of sockets on the diagram
In order for you to understand even better the types, types of switches, as well as the difference in their use, we place pictures that show details that are difficult to imagine in your mind. For example, overhead sockets and switches. Hidden ones differ from them only in a vertical line in the circle segment (sockets) and a T-shaped dash instead of an L-shaped one at the switches. Outdoor sockets and switches intended for outdoor (outdoor) operation are designated similarly to those shown, only the protection class is lower: from IP44 to IP55, which respectively means: “no gaps of 1 mm or more and protection against splashes from any direction” and “ partial protection against dust and short-term protection against jets from any direction.
Touch switch - what is it and where is it used
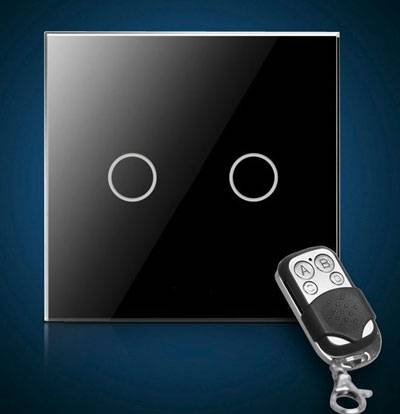
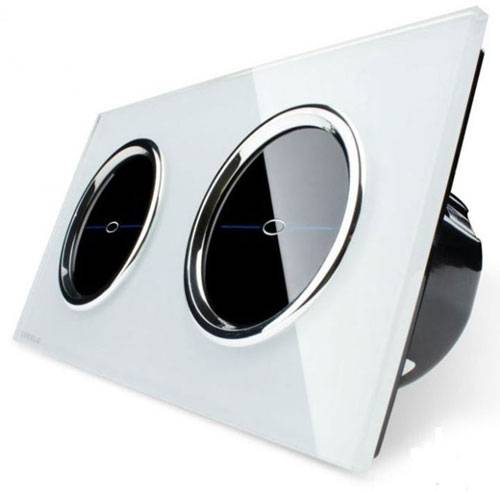
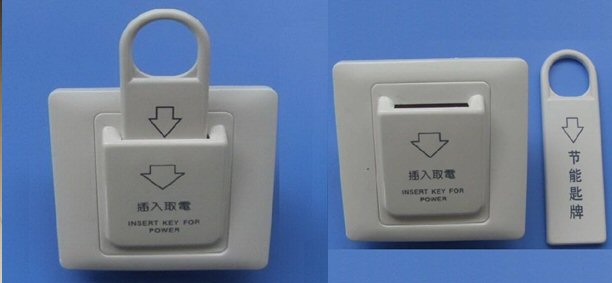
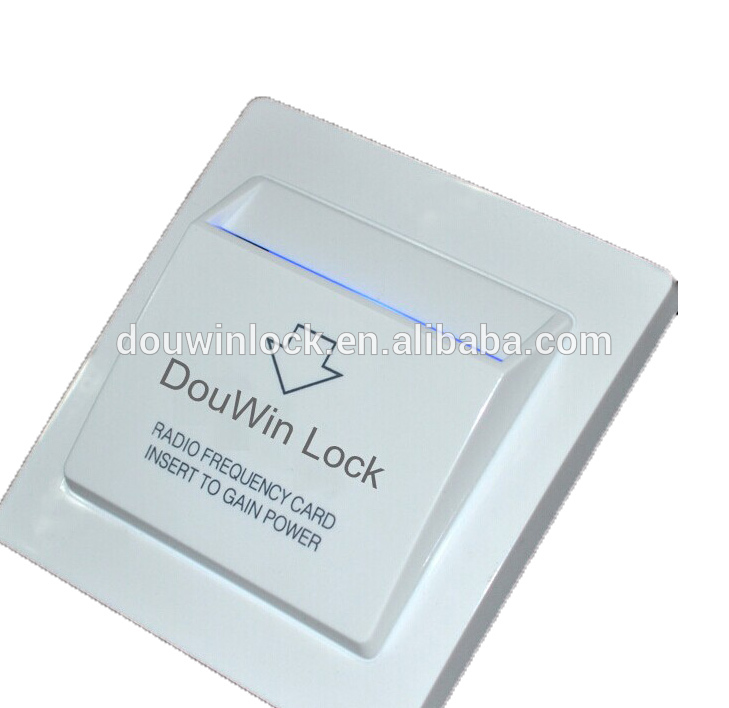
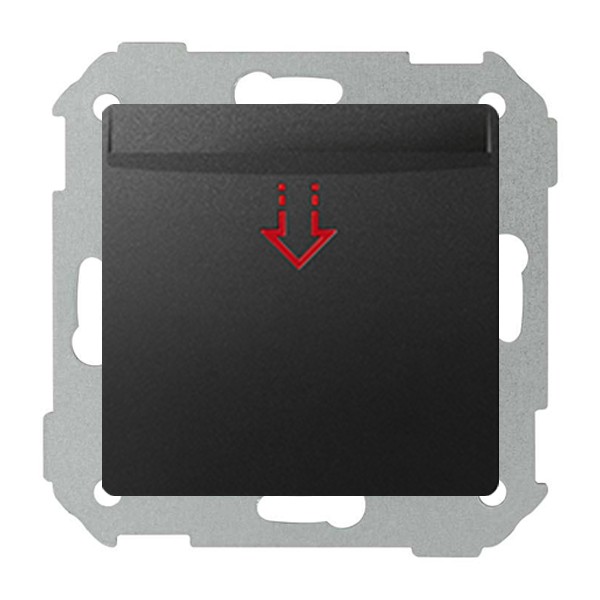
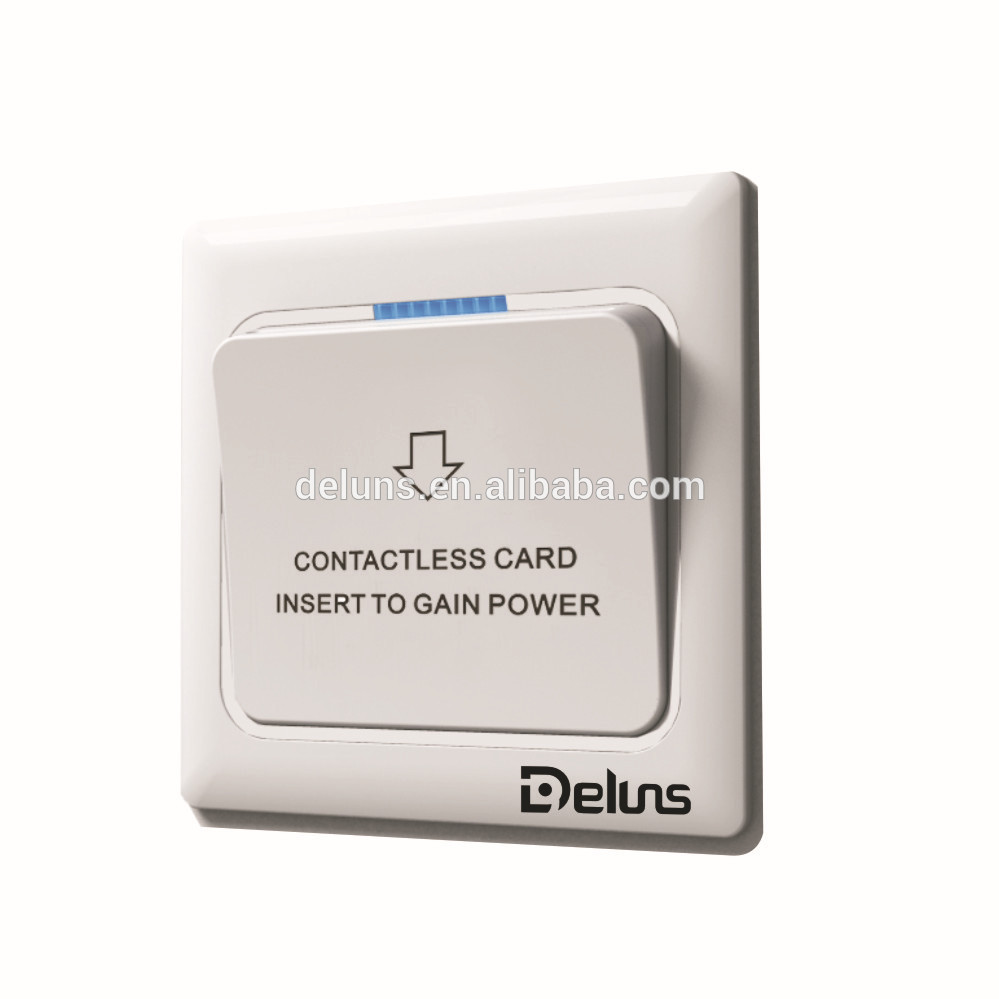
A touch switch is an electronic device that turns on or off the device using a touch signal - light touch, sound, movement, signal from the remote control - in the sensor's sensitivity zone. Mechanical pressing of the key, as on a conventional switch, is not required. This is the main difference between a touch switch and a conventional keyboard switch.
Such switches are used in an apartment or house, most often for the lighting system, as well as for raising blinds, curtains, opening garage doors, turning on or off household appliances, and adjusting heating systems.
Stylish appearance will decorate the interior, and ease of use will give additional comfort. Such a switch is built into the surface of an electrical appliance, for example, in a table lamp. To turn on the device, just touch it. Also, the switch sensor can be controlled by remote control, voice, react to movement, be equipped with a timer, dimmer. The timer will help save on electricity, and the dimmer will create the intensity of lighting that you need. For example, create a cozy subdued light for a romantic dinner or a relaxing evening.
The touch switch is used to save energy in places with high traffic of people. For example, in the entrance. The sensor reacts to movement when the tenant enters the entrance and turns off after a certain time.
Such a switch can be placed in the yard of a private house to illuminate the yard if necessary. This will reduce electricity consumption.
It is possible to equip the office with touch switches, for the convenience of switching off and on the lighting, closing and raising the blinds.
Thus, the touch switch is suitable for:
- apartments;
- private house;
- office
- public places;
- house territories.
How to set up centralized lighting control?
A network of control from several places has a significant drawback - all the switches involved in it do not have a fixed position. Therefore, it is impossible to determine whether the light in the room is on or off if there is no electricity.Installing a conventional switch in front of the first through passage eliminates this problem.
To the already known scheme for connecting toggle and pass-through switches, one more element is added - the usual single-gang. Place it in the same room or take it to the front door. When enabled, it will allow the system to operate normally. In the off state, it will completely de-energize the circuit and, regardless of the position of the switches, the light will not burn.

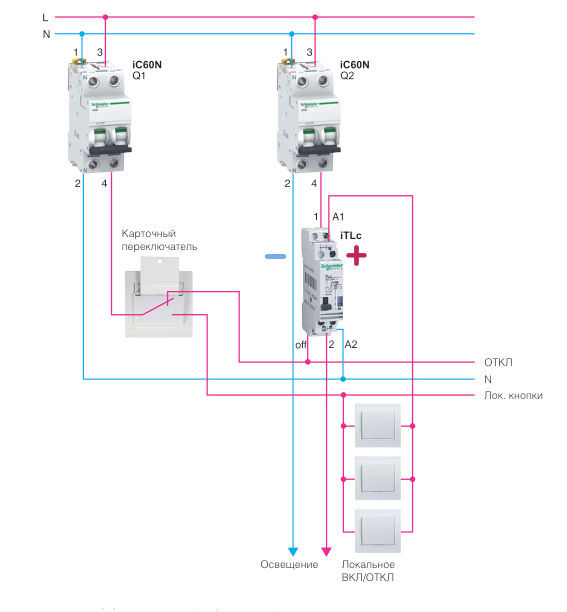


Even better, centralized control can be improved with an impulse relay. It has great functionality and allows you to control a separate group of electrical equipment or lighting throughout the house.
Connecting the switch to the network
We recall that the switch is installed to break the current-carrying wire. The "0-th" wire always comes to the light bulb from the junction box. The wires are connected in a certain order:
- cut up to one centimeter of insulation from the wire;
- on the back of the switch, check the connection diagram;
- insert the stripped wire into the contact hole between the clamping plates and tighten the clamping screw;
- check the reliability of fixing the wire (the wire should not swing);
- make sure that a bare vein is visible from the contact no more than two millimeters;
- insert the second wire and secure it;
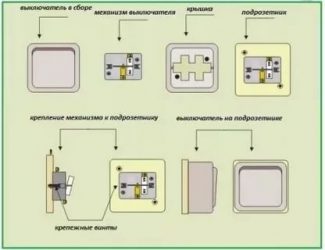
- unscrew the bolts of the spacer mechanism and insert the switch into the cup holder of the wall, align and fix it along its horizon;
- fix the switch in the cup holder of the wall and check its fixation;
- install the protective frame and fix it with screws;
- install the on/off switch in its place.
Work on connecting switches, switching the electrical network does not require great physical strength, but it is imperative to follow the rules of electrical safety and switching elements of electrical circuits.
Through switches
Before you understand what a cross switch is used for, you need to understand how a pass switch works.
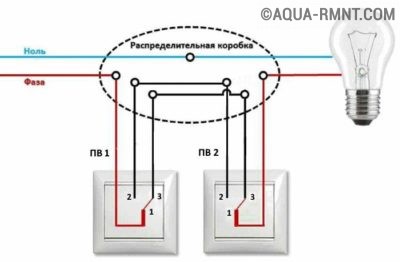
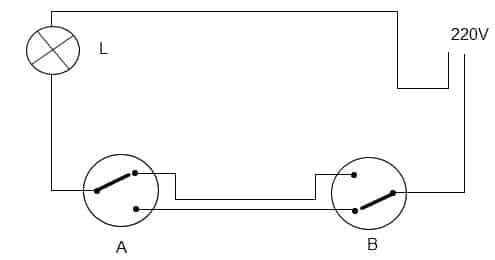
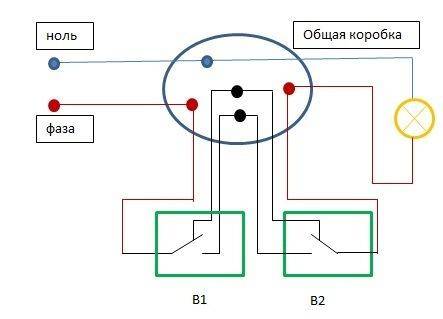
Wiring diagram for walk-through switches for independent lighting control from two points
The neutral wire is connected directly to the lighting fixture, the phase wire is connected through two switches connected to each other by a two-wire wire.
If contacts 1 and 3 are closed on the switches PV1 and PV2, then the circuit is closed and current flows through the light bulb. To open the circuit, you need to press the key of any switch, for example, PV1, while contacts 1 and 2 will be closed in it. By pressing the switch key PV2, the circuit will close. Thus, the lamp can be turned on and off independently from two remote locations.
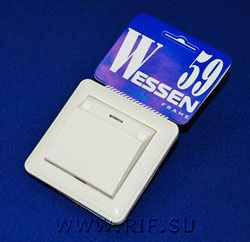
What does a switch look like and how does it work?
If we talk about the front side, then the only difference is a barely noticeable arrow on the up and down key.
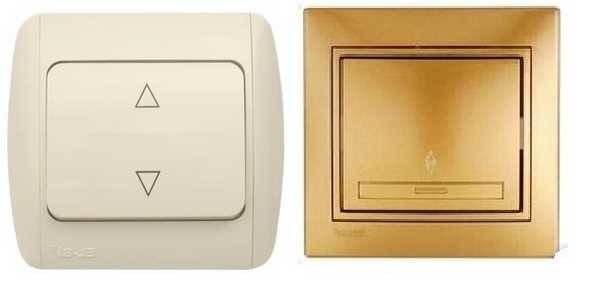
What does a single-gang switch look like? See, there are double arrows
If we talk about the electrical circuit, everything is also simple: in ordinary switches there are only two contacts, in the feed-through (also called changeover) three contacts, two of which are common. There are always two or more such devices in the circuit, and with the help of these common wires they are switched.
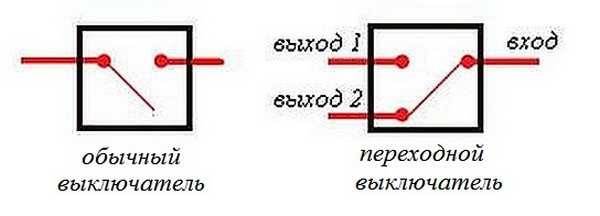
The difference is in the number of contacts
The principle of operation is simple. By changing the position of the key, the input is connected to one of the outputs. That is, these devices have only two working positions:
![How to choose a network switch (switch, switch, English switch) [tambourine]](https://fix.housecope.com/wp-content/uploads/9/5/6/956baac2fbc984e03e4da6236d49f2a3.jpeg)


- input connected to output 1;
- input connected to output 2.
There are no other intermediate provisions. Thanks to this, everything works. Since the contact switches from one position to another, electricians believe that it is more correct to call them "switches". So the pass switch is also this device.
In order not to rely on the presence or absence of arrows on the keys, you need to inspect the contact part. Branded products should have a diagram that allows you to understand what type of equipment you have in your hands. It is definitely on the products of Lezard (Lezard), Legrand (Legrand), Viko (Viko). They are often absent on Chinese copies.
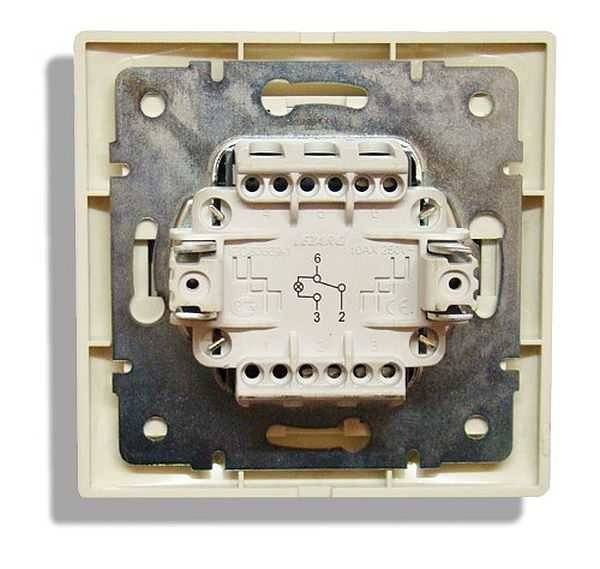
This is what the toggle switch looks like from the rear
If there is no such circuit, look at the terminals (copper contacts in the holes): there should be three of them. But not always on inexpensive specimens, the terminal that costs one is the entrance. Often they are confused. To find where the common contact is located, you need to ring the contacts among themselves at different key positions. This must be done, otherwise nothing will work, and the device itself may burn out.
You will need a tester or multimeter. If you have a multimeter, set it to sound mode - it beeps when there is a contact. If you have a pointer tester, call for a short circuit. Put the probe on one of the contacts, find which of the two it rings with (the device beeps or the arrow shows a short circuit - it deviates to the right until it stops). Without changing the position of the probes, change the position of the key. If the short circuit is missing, one of these two is common. Now it remains to check which. Without switching the key, move one of the probes to another contact. If there is a short circuit, then the contact from which the probe was not moved is the common one (this is the input).
It may become clearer if you watch a video on how to find the input (common contact) for the pass-through switch.
Master switch or knife switch
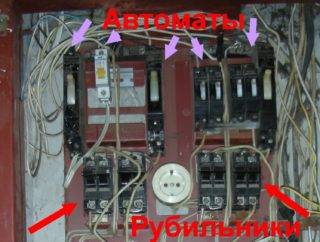 Knife switches in the electrical panel of an apartment building
Using a knife switch is the simplest and most common option that is found everywhere. Advantages of this solution:
- Simplicity. The equipment of the switchboard with a knife switch is carried out by people with minimal knowledge and skills in the field of energy supply.
- Reliability. Simplicity of execution and a minimum of elements in the design make the knife switch a reliable option.
- Compactness. The useful space of the electrical panel is not limited in any way.
- Price. The price of installing a knife switch is lower in comparison with similar options.
Overall, the switch is a durable and reliable solution that does not hamper the equipment of the electrical panel, unlike the installation of a master switch for the entire living space. At the same time, the knife switch is not so convenient to use, because the master switch in the apartment is easier to use in comparison with the knife switch, which is installed on the shield itself. In addition, additional installation of lighting on non-switchable lines along the entire route to the electrical panel will be required.
Since the switch must be located inside the electrical panel itself, in order to ensure a simple shutdown of all appliances, to regulate the power supply, you will have to approach it and perform all operations manually. In addition, you need to make sure that the route from the room inside which the device is installed is illuminated, otherwise you will have to reach the switch in the dark, which creates discomfort.
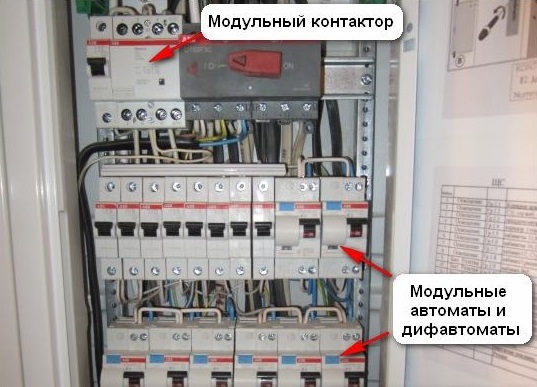
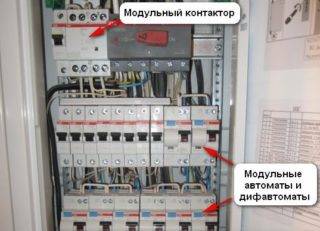 Modular contactor in the electrical panel
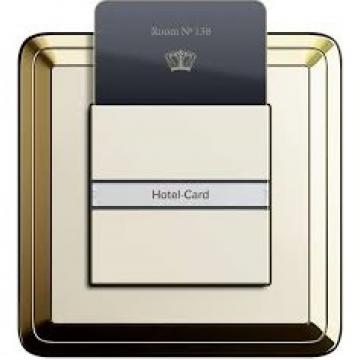
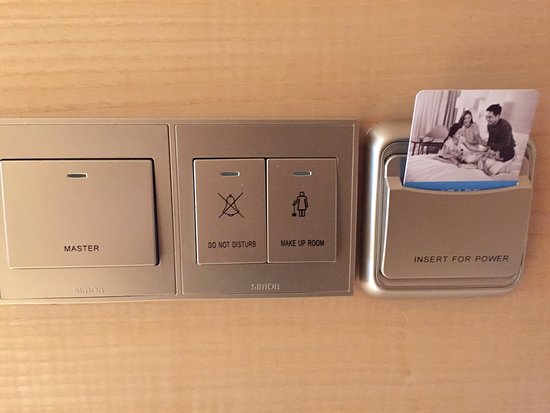
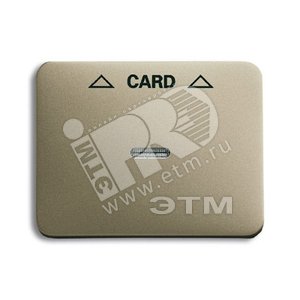
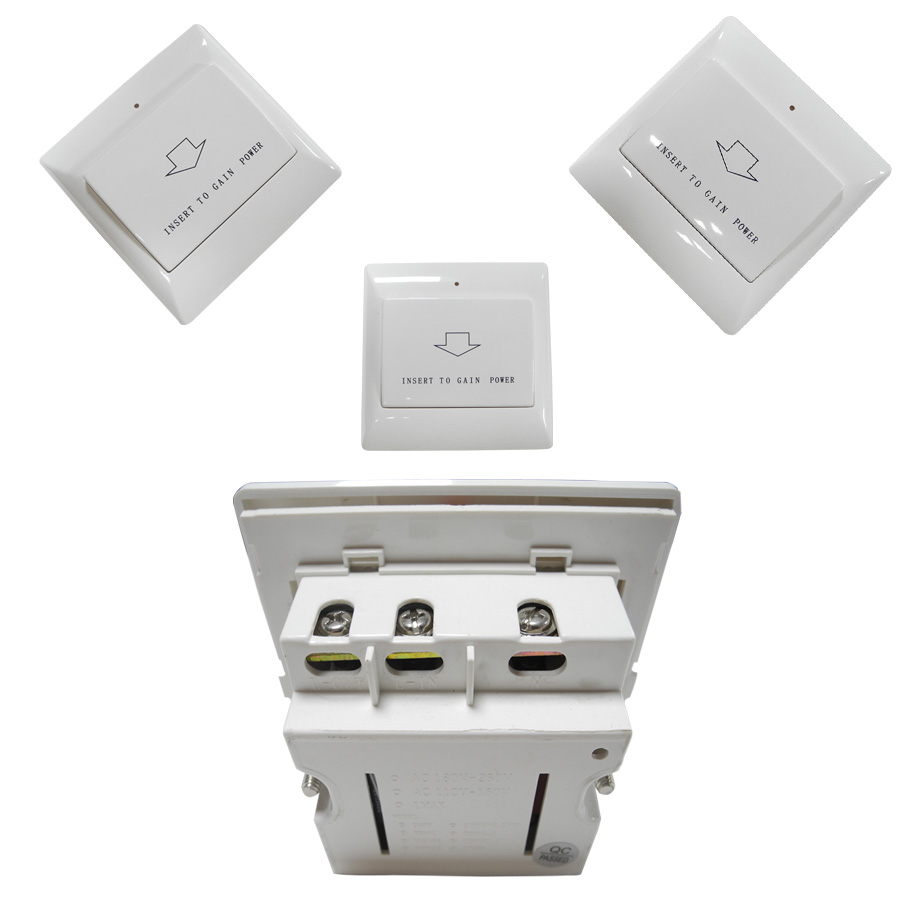
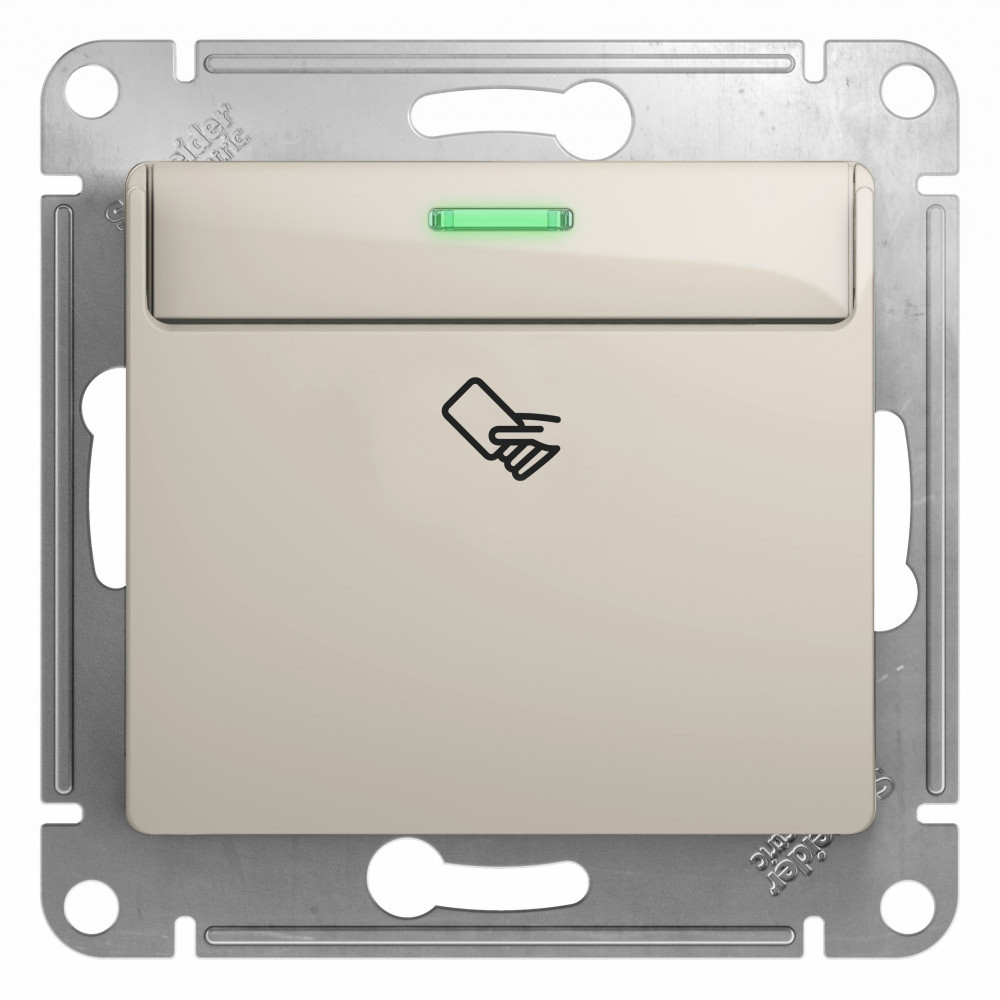
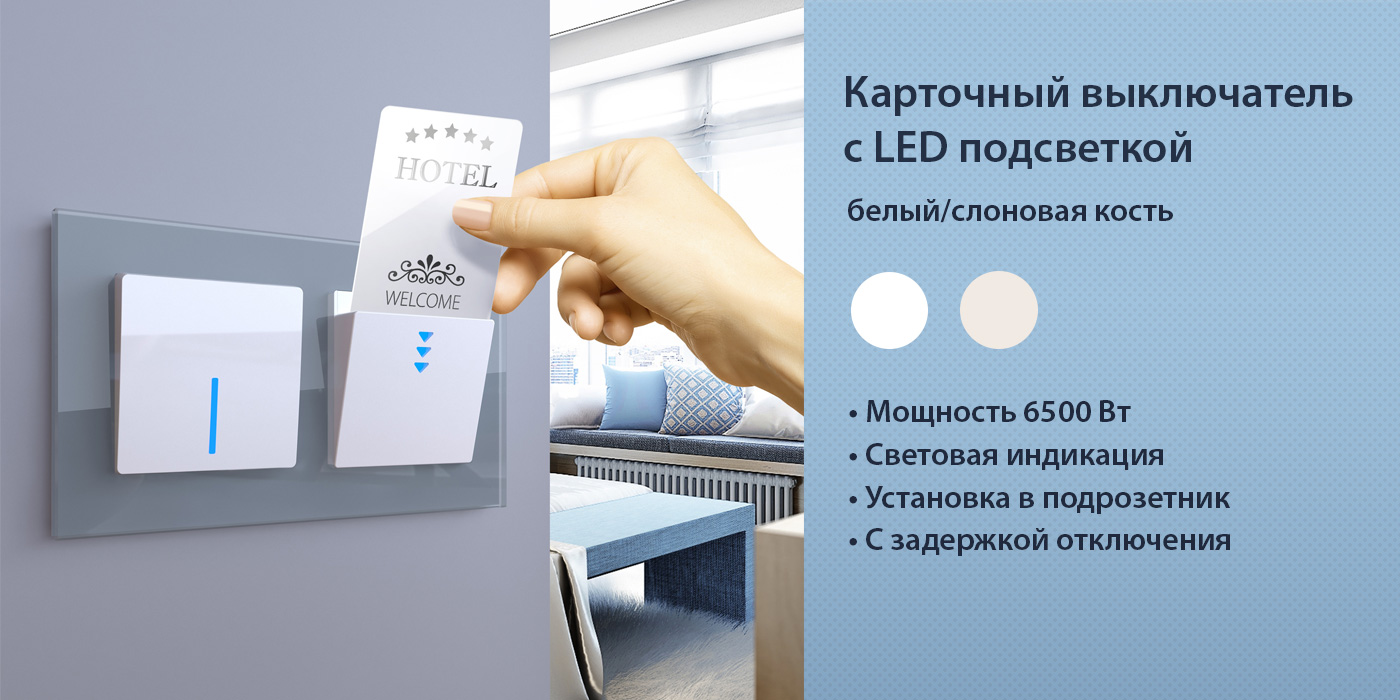
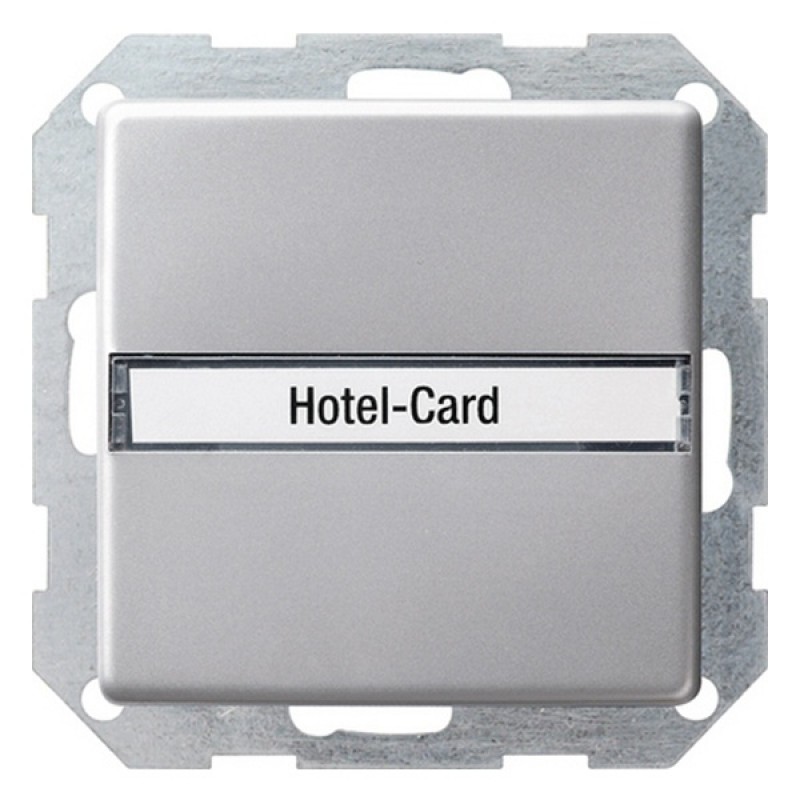
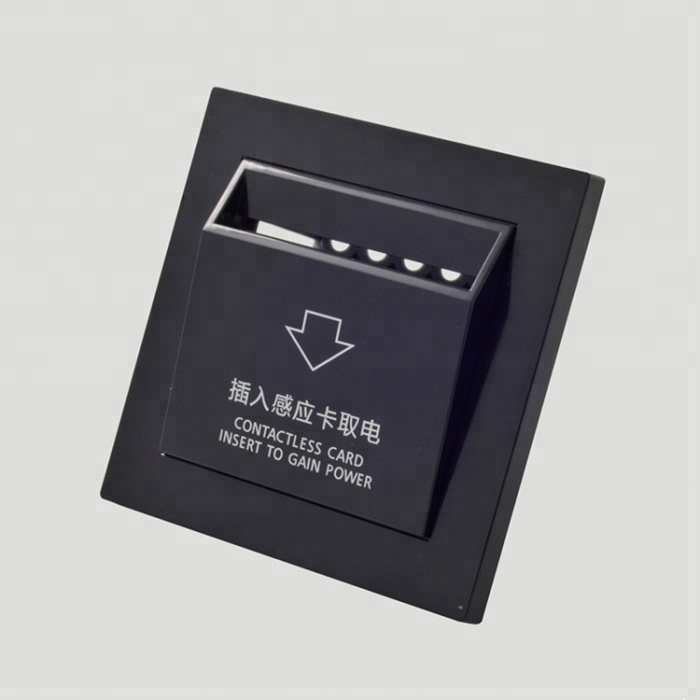
The master switch is a versatile option that provides everything you need. It is not necessary to use the button, which is located in the apartment and immediately turns off the light in the house. Instead, there are options for a holistic access control system, remote shutdown, card access and others. Such a solution is convenient, does not require additional installation of non-switchable lighting to the shield, and there are no difficulties in equipping the machine, which will work at the right time.
At the same time, since the equipment for the normal operation of the contactor requires the involvement of a number of components, as a result, the system becomes unreliable, because if any component fails, the entire system stops working. In addition, a large number of elements leads to an increase in the cost and bulkiness of such a solution, which is why it takes up a lot of space in the shield, but this problem is partially solved by installing a phase selection relay.
The choice between a master switch and a knife switch should be made based on your needs and preferences, as each of them has its own advantages and disadvantages.
How to make a walk-through switch with your own hands a labor lesson
You've probably looked into e-catalogues by now and noticed that a triple pass switch can cost a lot of money. What to do? - The age-old Russian question, reinterpreted by Shakespeare as to be or not to be. We would choose the first one: not everyone can definitely pay that kind of money for walk-through switches.We present to the attention of our readers the first handmade in Runet, where it will be real and the pictures show how to convert an ordinary switch costing around a hundred (this is a really cheap model) into an expensive thing - a pass-through switch. And without special skills and special techniques.
We look at the first picture and see the switch from which the buttons are removed
More precisely, it is also taken out of the socket (if I may say so), but this is not the point now. As you can see from the picture, we have a typical 2-key connection scheme here. Just in case, the screws of the spacers of the socket box and the clamping contacts of suitable wires are shown and signed with colored lines.
All of them must be significantly loosened to dismantle the switch from the wall socket. Do not forget to turn off the power before this, and we also strongly recommend checking with a probe where the phase is, and somehow draw these places directly on the cambric (plastic core insulation). In the future, all this will greatly simplify the process of reinstalling the switch.


Just in case, the screws of the spacers of the socket box and the clamping contacts of suitable wires are shown and signed with colored lines. All of them need to be significantly loosened to dismantle the switch from the wall socket. Do not forget to turn off the power before this, and we also strongly recommend checking with a probe where the phase is, and somehow draw these places directly on the cambric (plastic core insulation). In the future, all this will greatly simplify the process of reinstalling the switch.
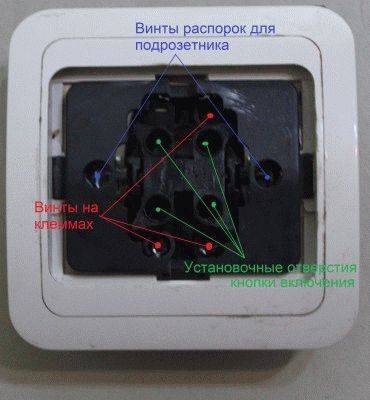
Screws for spacers

Now we look at the next picture, which shows the reverse side of our future victim. In the good sense of the word, of course.Here we see the clamps on the switch housing that need to be unbent in order to remove the electrical part. All this is done with an ordinary screwdriver within a few minutes. Then you need to get spring pushers from the plastic frame. The easiest way to do this is with a thick slotted screwdriver. The thin one just won't fit. You will quickly understand this. There is no need to rush, because this place is the most difficult in the whole process of reworking a conventional switch in the entrance. In the picture, the spring pushers have already been removed, and moving contacts are visible in the place where they were.
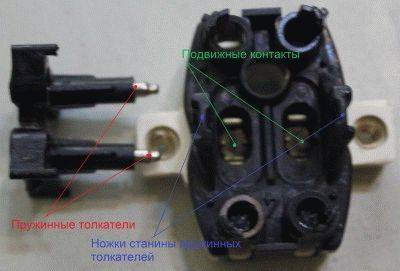
Movable contacts under spring plungers
We skipped the moment of removing the plastic part from the ceramic (in the pictures), because this, in our opinion, is self-explanatory. There are two weak teeth on the ends of the entire removed part of the switch. Just pry them with a slotted screwdriver, and let's start reworking a regular switch in the checkpoint. Now on the ceramic base of the switch we see groups of contacts:
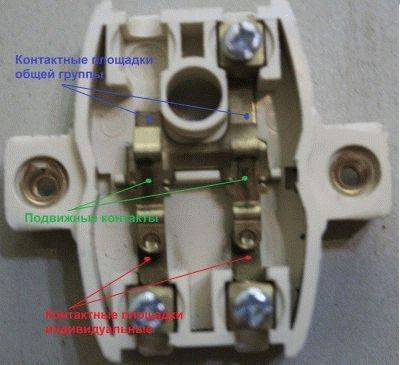
Three groups of contacts
- Contact pads of the general group.
- Individual contacts for each bulb.
- Movable rocker contacts.
Now we have one rocker to turn 180 degrees, and cut off one of the contact pads of the common group (it’s better not to isolate). The resulting position is shown in the last image. Now the final step is how it all works. We take and glue both buttons with a Chinese pistol so that they become one. Now, when one of our contacts is closed, the second will hang in the air.
Everything ingenious is simple. Therefore, in addition to the fact that we have shown how to make a pass-through switch from a conventional one, we add that in principle it is not necessary to remove the spring pushers. You can do without it.And two buttons do not have to be glued if you remove the key from a conventional switch of the same width and the same manufacturer. Usually the pinout of the legs is exactly the same there. All this will allow not only to make a checkpoint DIY switch, but also to produce a really workable and beautiful product.
So, we believe that we have considered the questions asked in excess. Showed how to do it right connect a switch, how not to do this and - most importantly - they told how you can save a lot of money on the whole process. We hope that the recommendations will be to your liking, and now every handy owner will be able to boast of having such an original design in his house. Well, what else would you call a pass switch?
Connecting Multiple Ethernet Switches Using a Switch Cluster
Switch clustering can manage multiple interconnected switches as a single logical unit. The switch cascade and stack are prerequisites for a cluster. A cluster usually has only one administrative switch, called a command switch, that can manage other switches. On the network, these switches require only one IP address for the command switch only, which saves valuable IP address resources.

Figure 5: Command Switch and Multiple Switch Members in a Switch Clustering Block
Cross switch functions
The switching device, designed to turn off and turn on the light and called the cross, has become popular due to the creation of comfortable conditions for the consumption of artificial light.But the main reason for the desire of most people to install a cross switch in a house or apartment is that it is possible to save money spent on electricity.
In such places, cross switches are indispensable.
Most often, the discussed switching device is mounted in common areas in residential buildings of 5–9 floors. The need for this arises due to the arrangement of long corridors in such buildings with a large number of doors and the lack of elevators. In such places, cross switches are installed at the exits from the apartments and at the entrance to the common corridor. For example, the owner of an apartment, leaving it, can immediately turn on the light to the entrance by means of a cross switch, and when he comes there, turn it off.


With such a light supply system, the function of cross switches is performed by all switching devices located between the first and last button for supplying current to the lighting device. More than two switches can be installed that allow you to supply light from different points of the house.
Wiring Orientation of switches and sockets
Who among us has not been irritated from time to time by the incomprehensible orientation of the switches in our apartments and offices. In some cases, the light turns off when pressing the bottom of the key, in other cases - to the top.
The chaos in this matter in the country is complete, which perfectly emphasizes the complete lack of attention to detail. Many attribute this to the peculiarities of the Russian mentality.
It is quite possible that the mentality has nothing to do with it, and the rules for the orientation of the switches were simply not formulated explicitly.
This rule does not apply to switches in the "corridor" or ladder scheme, which, with each press, change the state of the system to the opposite.
Here in China, the switches turn on when you press the bottom of the key. Probably, the Chinese somehow missed the era of knife switches.
There is another theory for the orientation of switches. According to this theory, the orientation depends on the height of the switches on the wall. If the switch is set at the level of the lowered hand, it is more convenient to turn it on by pressing the upper part of the key, if it is at head level - the lower one. kind of scientific approach. You're going crazy with these theories.
In fact, the “ON” position of the key is determined by the manufacturer and there are different things. The main thing is that uniformity is observed throughout the building. Otherwise, the person becomes disoriented.
note
There are switches that have special indicator labels, light bulbs, LEDs, or the inscriptions "ON" or "ON". In any case, the inscriptions should not be installed upside down, and the indicator marks or bulbs should correctly display the “ON” state.
And, of course, we must take into account that we live in Russia, and not in China. We have it right to press the top of the key to turn on.
Recently, it has become fashionable to install switches with a key that switches in a horizontal position, but how to turn them on - left or right - is unknown. Such is the dosed introduction of a light element of uncertainty into dull everyday determinism. But in any case, it is necessary to orient the switches with a horizontal key in the same way throughout the building.
In addition to keyboard switches, there are also toggle switches. In particular, household machines and RCDs have toggle switches (beaks).
The socket orientation rule is much simpler and usually not difficult. Sockets are usually installed so that the plug holes are horizontal.
Sockets with vertical holes are recommended to be installed only in the immediate vicinity of the floor (at a distance of approximately 100mm).
We are waiting for you in the office for a free consultation on engineering networks!
When ordering installation work:
GIFT 1. PROJECTS FOR APARTMENTS FOR FREE
GIFT 2. INSURANCE of the apartment (RosGosStrakh, finishing and engineering networks) for 300,000 rubles.


GIFT 3. Discount on materials up to 40%. Materials can be viewed here
KIT for new buildings: Projects + Installation + Laboratory + All Acts + Finishing
There are all licenses: SRO, Ministry of Emergency Situations, ISO (GOST)
All networks: Electricity, water supply, heating and ventilation!
Check prices? Call: +7 (495) 215-07-10, +7 (495) 215-56-82
Office 3 minutes walk from Oktyabrskaya metro station! Road map
For Designers, Architects, Builders there are partnership conditions, bonuses and discounts!