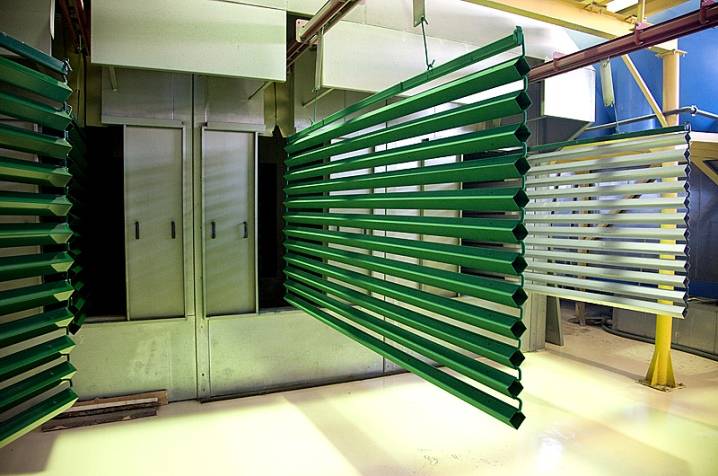
- Matting materials
- Coating options
- Aluminum oxide (electrocorundum)
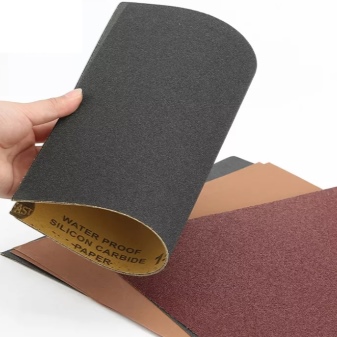
- Silicon carbide (carborundum)
- Pomegranate
- Preparing to paint new parts
- Surface preparation
- Tips
- Preparation for matting
- Preparation of materials and tools
- "No alcohol law". Why putty cannot be sanded with water
- Rookie Mistakes
- Correction of body defects and cleaning it from rust
- Sanding in circular motions
- wet way
- Primer application
- Preparing metal for painting
- Matting materials
- Matting tools
- Matting by hand
- Planer matting
- Matting a car with a grinder
- The main stages of preparing a car for painting
- Inspection and welding work
- How to clean the body
- Puttying and sanding body work
- Surface grinding
- The final stage - primer
- Pre-primer: types of mixture, which one to choose?
- Soil types:
- What criteria to choose paint: types and characteristics
- Recommendations
- Abralon
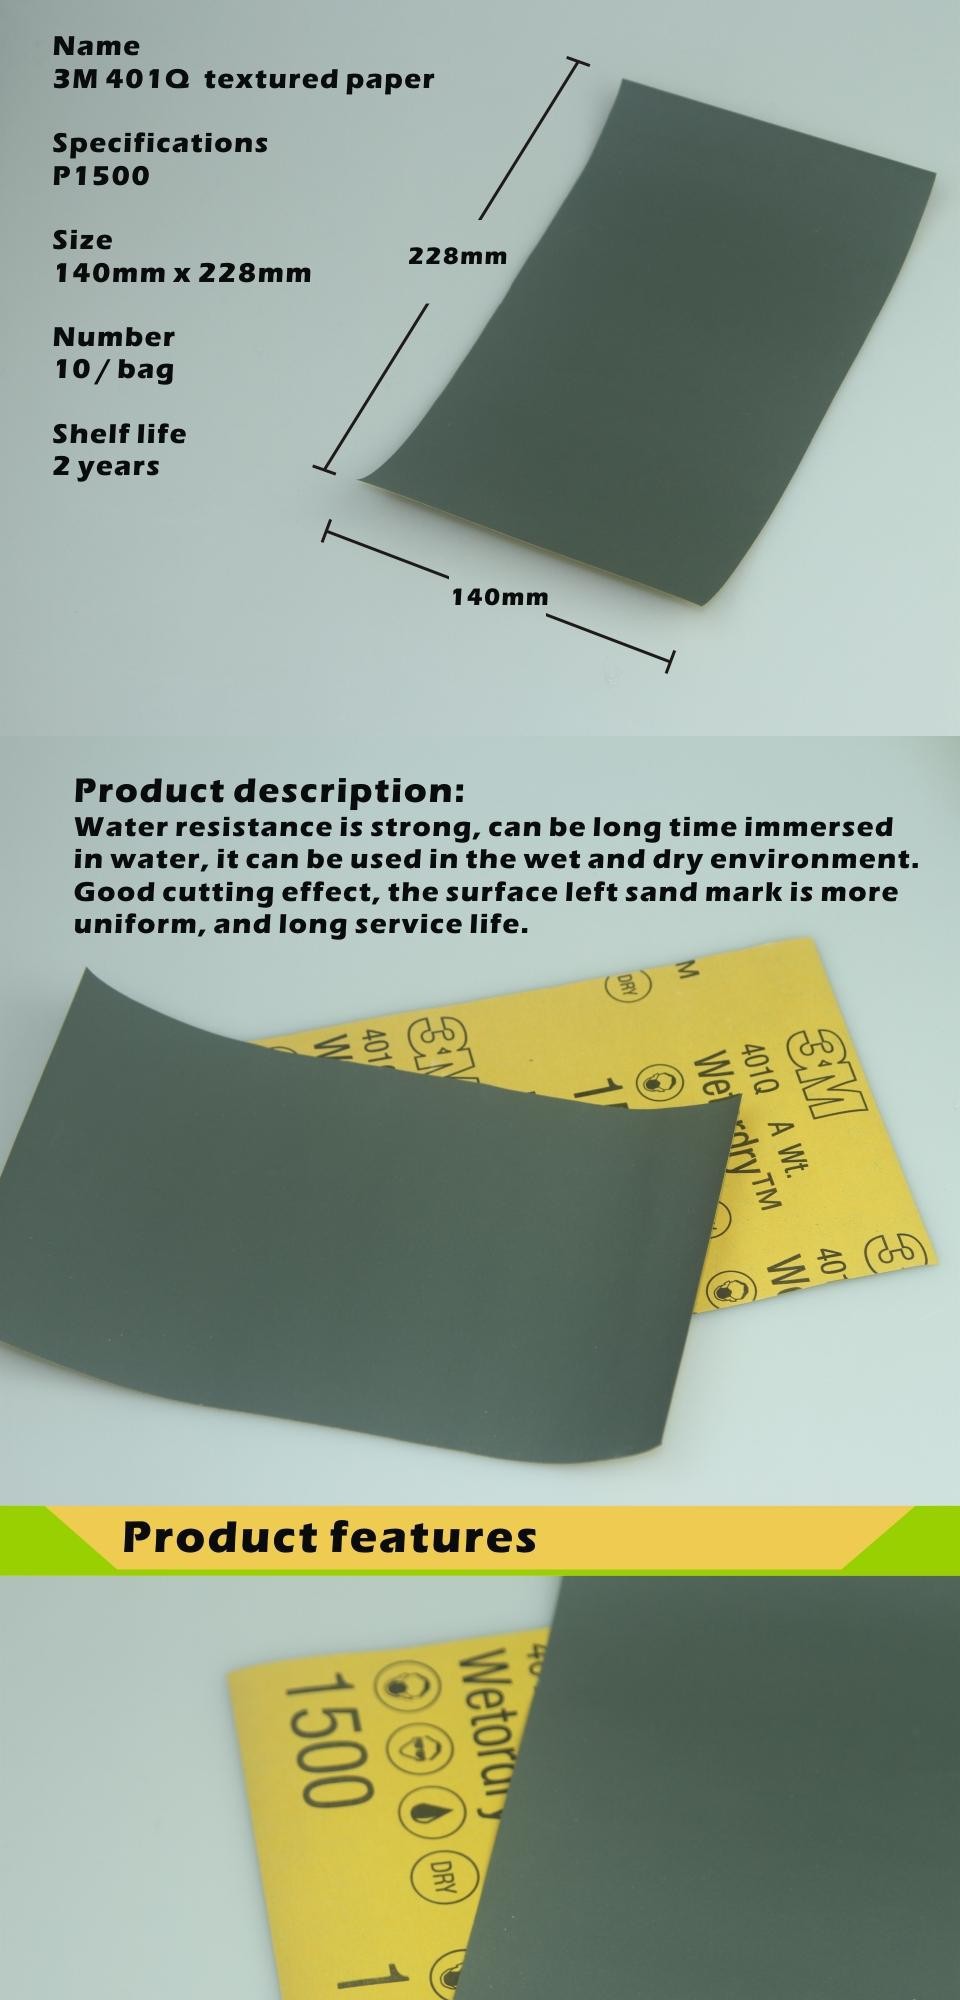
Matting materials
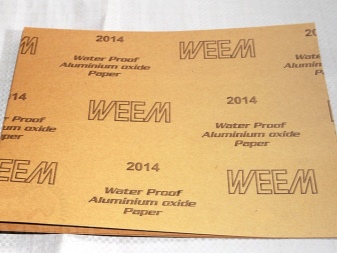
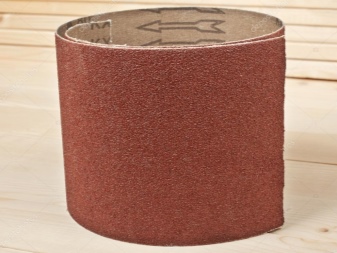
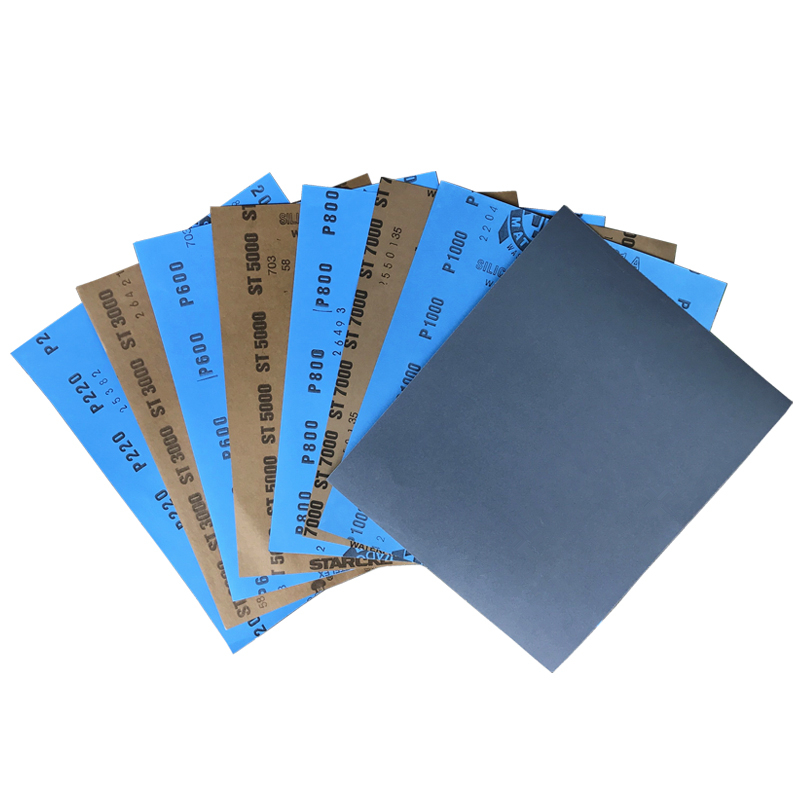
To work on matting a car, you will first need abrasive materials. When removing deep scratches, rust and other significant damage, you will need P120-P180 abrasives, and even P80 for stripping to metal.The standard set is sandpaper with numbers P320 for working on the ground, P800-P1200 for processing before applying paintwork and P2000 for removing minor defects and local repairs.
Choose an abrasive manufacturer based on cost and convenience.
It is important to consider that high-quality ZM products are many times more enduring than domestic brands. It is better suited for long-term work, but it differs in marking and it is important to carefully study the instructions before use.
Matting gels and pastes will help save abrasive and hours of work.
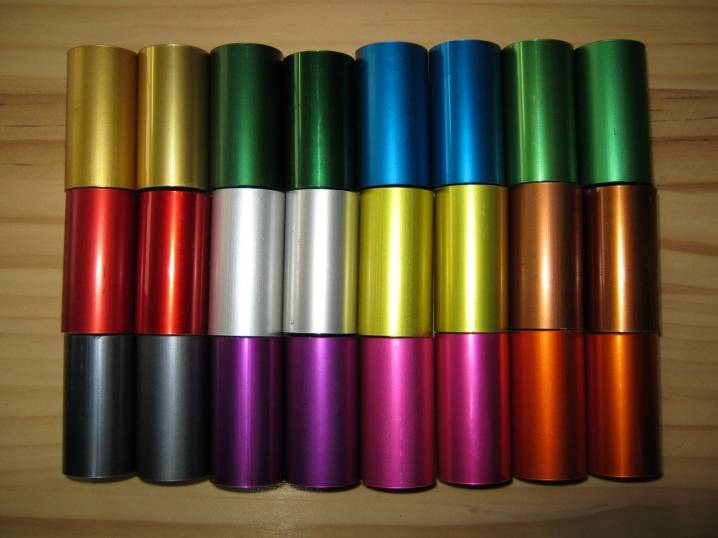
Coating options
The abrasive coating determines the hardness and durability of the skin. Each type of abrasive is optimal for certain jobs and is distinguished by its color.

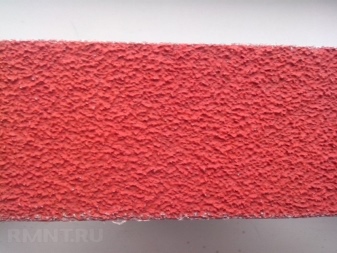
Aluminum oxide (electrocorundum)
This is a universal material, in terms of hardness (9.1-9.5 on the Mohs scale) only slightly inferior to diamond, but much cheaper. The most popular for a tree are its two varieties.
Normal electrocorundum - marking K. Differs in brown color (different shades). It is used to produce most of the sandpaper in the world, in particular - consumables for grinders. Suitable for all types of wood work - from rough primary processing to finishing grinding and polishing, the main thing is to choose the right grit.
Ceramic electrocorundum (ceramic alumina) - designated S. This is electrocorundum that has undergone additional high-temperature processing that improves its abrasive properties. The main purpose is metal work, but it can also be used for rough woodwork, where increased wear resistance and hardness of the skin are required. For example, machine processing of the floor, walls.
Also, when working on wood, emery skins with the following coatings are used.
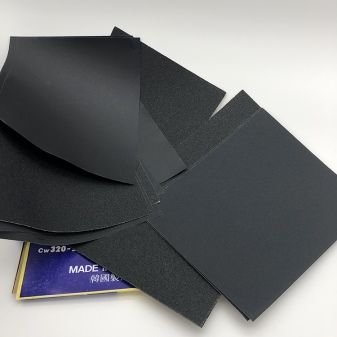
Silicon carbide (carborundum)
Marking C. For wood, its black variety is usually used. It is distinguished by greater hardness (9.5-9.75 according to Mohs), but less strength than electrocorundum. Therefore, it breaks under pressure, forming new cutting edges, which ensures self-sharpening and self-cleaning of grains. Suitable for delicate sanding - for intercoating, leveling the ground, sanding paint, varnish and top coats.
Pomegranate
Rather soft abrasive of natural origin with a hardness of 6.4-7.5 on the Mohs scale. Grinds more evenly and smoothly than all other abrasives, well "seals" the structure of the tree. Therefore, despite the rapid wear, it is in great demand for finishing and manual polishing of wood.
Preparing to paint new parts
New car parts have a special coating designed to protect the part from rust. Depending on how good this coating is, what needs to be done with it depends. A quality coating can be a cataphoretic primer applied in the factory. It provides good corrosion protection and is essentially an epoxy primer. If the body panel has a coating of unknown origin or has traces of rust and any damage under the coating, then such a coating must be removed by grinding and primed again. You can read more about the definition of cataphoretic primer and its preparation for painting here.
New bumpers must be thoroughly washed with soapy water, rinsed with clean water, dried and degreased. For degreasing plastic, some paint manufacturers have special anti-silicone liquids that further reduce the static of plastic parts. Before painting, plastic bumpers must be coated with a special primer that increases paint adhesion to plastic parts. This primer is used if the plastic bumper is not coated with any factory coating. The bumper does not need to be treated with any abrasives, just, as already mentioned, thoroughly degrease and wipe with an antistatic cloth.
Surface preparation
The importance of pre-treatment of the oiled surface has already been mentioned more than once. Only a short-sighted amateur who does not feel sorry for his wasted efforts and funds for materials can omit the preparatory stages
A thrifty owner would prefer to do everything once, but thoroughly and well.
So, here is the sequence in which you need to carry out the processing work:
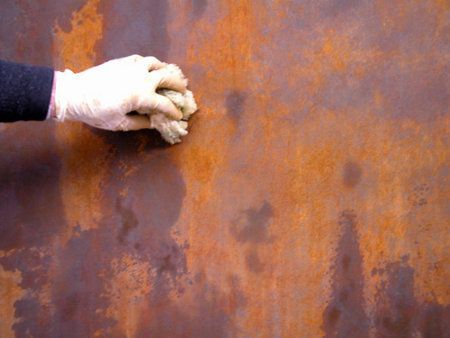
- Clean surfaces from mechanical impurities: traces of old paint or putty, rust, lime, grease stains, soot and dust. Depending on the type of material (wood, concrete, metal), this should be done with a metal spatula or a brush with stiff bristles. Wash with soapy water. Let dry.
- Sand or, if possible, scrape the top layer (the latter - only for wood), using coarse sandpaper, a hand scraper, or even better a sander belt machine. Wash with water. Let dry.
- Repair all chips and cracks with plaster or putty. Sand with fine-grained sandpaper. Wipe with a damp cloth.
- Prime. Let dry. Sand it. Wipe with a damp cloth. Wait for complete drying.
- Apply a disinfectant composition no later than 6 hours after the previous stage. Let dry.
These carefully done stages will greatly facilitate the application of paint and prevent their deformation throughout the entire service life.
Tips
- The temperature in the room should not fall below +10 Celsius. At low temperatures, visually imperceptible condensation will form on the panels, which will cause defects after painting. The machine should stand for several hours in a warm room, where it will be painted.
- To reduce dust, you can place a polyethylene sheet, if possible, around the entire room (see the article “preparing the garage”).
Read about car painting technology here.
Preparation for matting
To improve the reaction between the paint layers, the car body is matted. The depth of scratches must be hundreds of micrometers, therefore, appropriate abrasives must be carefully used to prevent excessive sanding.
Before starting work, it is important to foresee the following points:
- in the process of work, it is necessary to protect the respiratory organs from dust with a mask or respirator;
- the abrasive is selected after studying the instructions for it;
- matting will require several abrasives with different grain sizes;
- you should start with the largest abrasive, and the last penetration is carried out with the finest sandpaper;
- developing powder will help evaluate the quality of matting;
- before starting work, the welds in the processing areas must be degreased.
Preparation of materials and tools
Before you get to work, it is important for a motorist to know what you need to purchase or borrow from your comrades to paint a car. It's too expensive to buy all the tools and appliances to do body work one day
Therefore, it is worth using the “friendly lease”.
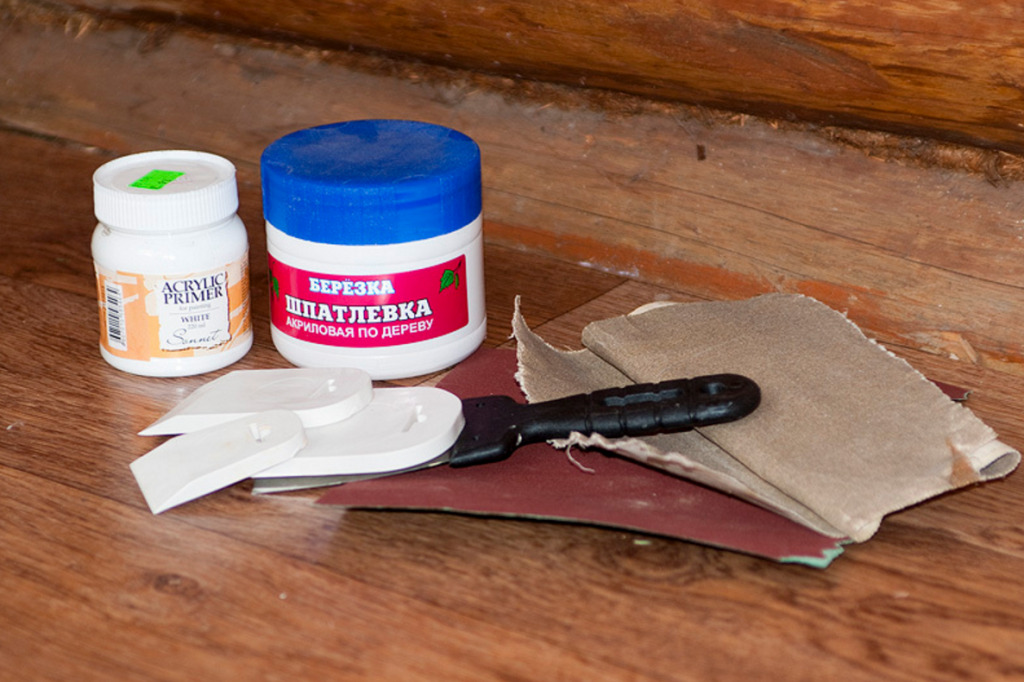
When performing preparatory work, the car owner will need the following tools and materials:
- electric compressor with spray gun;
- grinder with a set of abrasive wheels;
- infrared heater;
- sandpaper;
- spatulas, planers, special bars and a paint knife;
- masking tape;
- protective film;
- putty and primer.
In addition, the motorist needs to take care of safety. Since at certain stages of the preparatory work there is a risk of ignition of combustible substances, the presence of a fire extinguisher next to the car will be mandatory. You should also arm yourself with personal protective equipment such as a respirator, goggles and gloves.


"No alcohol law". Why putty cannot be sanded with water
No wonder putty is considered the weakest element of the repair coating. Have you seen how it was skinned with water, and a month later the “repaired” part swelled with bubbles? This is explained by the fact that polyester putties are incredibly hygroscopic materials. They are like a sponge, they absorb moisture, which then cannot be completely removed even with high-temperature drying.Naturally, during further operation, the saturated moisture tries to evaporate, which causes swelling of the subsequent layers - the surface becomes covered with a rash. Not to mention the fact that penetrating through the porous putty to the metal, water accelerates its corrosion. A few more months will pass, and the increased volume of rust will tear off both putty and paint from the metal ...
No, in no case should you treat putty with water! Dry processing is the only correct way. Well, if grinding with water is still unavoidable, dry the surface after that for a long time and thoroughly.
Due to the same hygroscopicity, try not to leave the polished part in a humid room for a long time. Remember that putty exhibits capillary properties immediately after the first pass through it with sandpaper. If initially the polyester resin enveloped and sealed the filler particles in the putty mass, then after grinding off this sealing layer, the filler begins to absorb moisture from the surrounding air. Of course, there is not as much moisture in the air as in a faucet, but nonetheless. The sooner the part is covered with soil, the better.
It is not worth tightening the putty with grinding, since many of them tend to “stone” over time, and then the process of their processing is complicated. This is especially true of putty with fiberglass.
Under standard temperature conditions, most putties are ready for sanding within 20-30 minutes after application. So put on your gloves and let's go!
By the way, if you are working directly on the car, then first protect all adjacent panels to avoid abrasive damage.And do not be surprised - putty dust penetrates everywhere, not only into the interior of the car, but also into the respiratory system. Therefore, the use of a dust mask is mandatory!
Rookie Mistakes
- Beginners do not consider the dent in its full size. This means the entire area of damage. The damage may not be limited to only the visible part. Therefore, it is necessary to cover the area with a putty with a margin. And sand the entire surface at the same time.
- The putty should be applied to the surface prepared with P80-P100 coarse abrasive, and the edges of the dent should be cleaned with a margin of P120-P180 abrasive. Thus, there should not be large risks around the putty area. Your task is to level the putty, and not to remove large risks around it after that, which can cause additional irregularities.
- Use of sanding paper with too fine abrasive to level the putty. A fine abrasive “strokes” the putty more than evens it out. To shape the putty, it must be sanded with a coarse abrasive P80-P100, and then use sanding paper with a finer grit to remove large scratches.
- Sanding putty down to metal. If, after sanding the repair area, the metal shows through in several places, then most likely the surface will not look even after priming and painting, even if the surface is smooth to the touch. It is necessary to ensure that the edges of the putty look literally transparent, and the repair area is homogeneous.To do this, as it was written above, you need to tighten the entire repair area with a thin layer of putty and grind it also over the entire area.
- Priming deep scratches with a thick layer, in order to fill them. This leads to further shrinkage of the soil and the visibility of scratches after painting. P180-P220 must be scratched before priming. This will prevent subsequent shrinkage of the top layers.
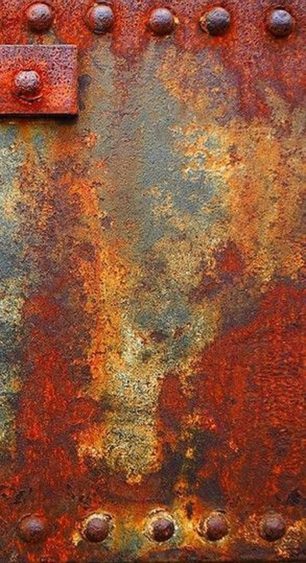
Correction of body defects and cleaning it from rust
The second question is how to paint the car, partially or completely. It depends on how to prepare the car for painting, i.e. what equipment is needed, how much material and, accordingly, money is needed. As a result, the decision was made, and it was taken in favor of a complete painting. Then we start preparing the car for painting.
Preparation for painting a car can be divided into several stages. Our example is one of many options on how to prepare a car for painting, and is by no means a dogma or the ultimate truth. Option.
Troubleshooting. Wash your car thoroughly. An assessment of the condition of the car will give you an objective answer to the question: do you need a partial or full painting. And when inspecting the car, do not try to deceive yourself or reassure yourself.
For example, when you see rusty paint bubbles in the sill or fender area, do not be sorry, press this place with a hard object. This rust crawled out from the inside, which means the process has gone deep. Rather, it comes from the depths - welding may be necessary.
When preparing for painting a car, we carefully examine the risk areas: thresholds, bottom, fenders, pillars, junctions of body parts.
Welding work.Don't hope for a miracle, and the most problematic rotten areas of the body are best cut and patched. To do this, you need a "grinder" and a welding machine.
Car body cleaning. First of all, with the help of a grinder, we clean the welding seams until they are aligned with the plane of the body. Then we proceed to cleaning with an emery skin. For this stage of preparation for painting the car, you will need a special plane and an orbital sander. And, of course, the hands are where the mechanisms do not reach.
The main goal of stripping the body with sandpaper is to ensure that there are no sharp chips and drops left. In places with rust - remove it to the metal of the body. In this procedure, a rust converter will not be superfluous. We process deep cracks, dents, chips with sandpaper p80-p120, large cracks - p60. For more information on how to remove rust from a car body, see this article.
Sanding in circular motions
- As it was written above, it is better to level the putty surface with direct movements in different directions over the entire area, therefore circular movements when grinding by hand are not appropriate.
- When sanding paintwork, one of the arguments against sanding in a circular motion is that the idea of sanding the paintwork is to remove any defects such as pebbles or small scratches. To do this, remove a small amount of paint or varnish.So if you sand in a repetitive straight line motion, you have some control over the sanding marks, the number of passes and the amount of paint removed. If you are sanding in random, overlapping circles, then there will be no control over the sanding marks and it will not be clear how much material has been removed. And control is needed so as not to wipe the varnish or paint to the base or primer. In addition, when sanding in a circular motion, circular, chaotic scratches are left that are more difficult to remove. By making circular motions, the fine abrasive paper will wrinkle, causing deeper scratches.
- The grinder makes circular movements, but the marks are less noticeable and uniform. Sanding in a circular motion by hand gives uneven, chaotic scratches that can be seen under paint or varnish if sanded in this way before painting. The reason why circular scratches are more visible is that such scratches are visible from any angle of view, while longitudinal small scratches may either not be noticeable at all, or only visible from a certain angle.
wet way
If you don’t have the desire or opportunity (or both) to sand dry, in this case you should resort to the old grandfather method: take some water and go through the entire surface with a waterproof sandpaper.First with a block, and then by hand (with uniform pressure, without leaning on the fingers).

Only in this case it is necessary to take a finer abrasive: P800-P1000. You can first knock down the shagreen and cut off the bumps with a coarser abrasive, for example P600, but then you still need to kill the risk with a smaller abrasive, given the grinding step (after P600 it increases to 200 units).
It is forbidden to use an abrasive finer than P1000 when processing the soil "wet"!
When grinding soil, it is important to monitor the integrity of the coating, especially when working on wet - it is clear that water can become a source of corrosion. In addition, such an unpleasant defect as "bubble" and other defects may occur.
Be that as it may, after working with water, the part must be thoroughly washed, removing the remnants of the ground material and dried thoroughly.
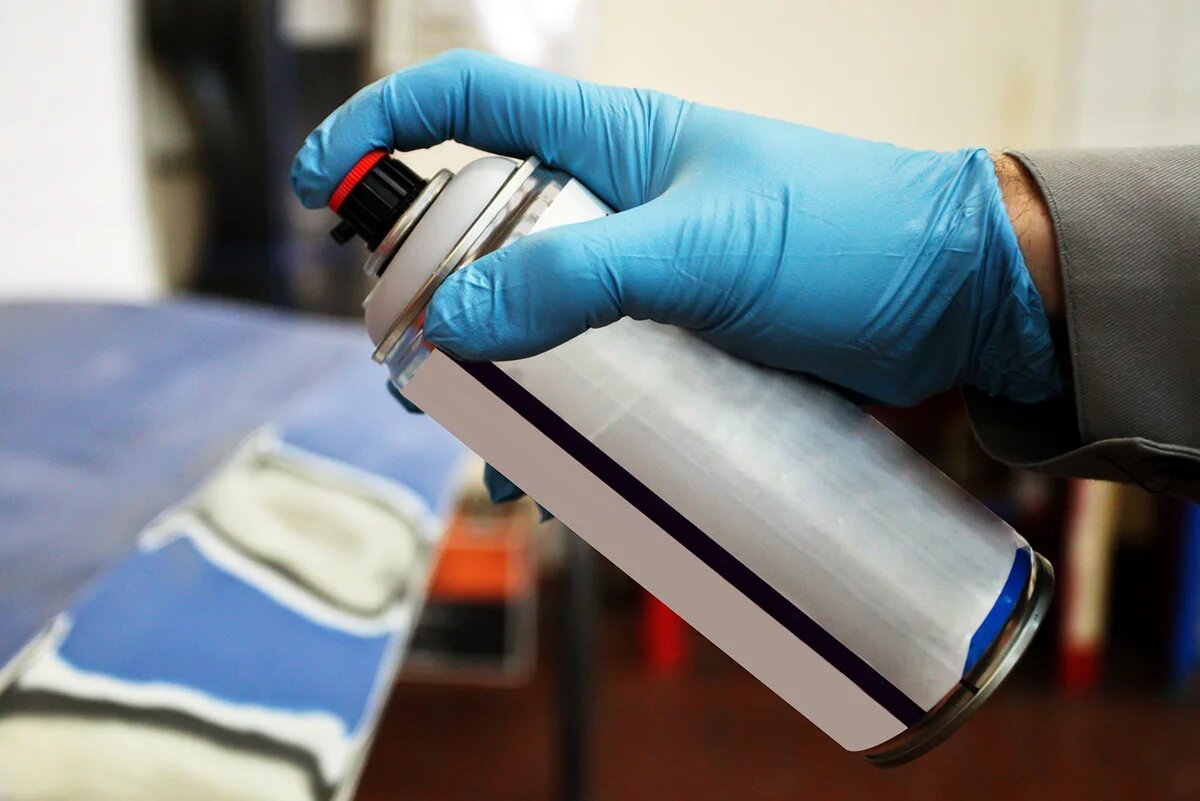
If in the process of grinding sanded places were found, they need to be degreased and primed. For these purposes, it is convenient to use the soil in a spray can. After drying, the primed areas are treated with a soft abrasive sponge (ultra fine).


And the last. The part sanded for painting should stand for no more than 24 hours. If in a day it will not be painted, it must be re-sanded with the final abrasive.
This is necessary for the reason that the risks on the filler (those that are not visible to the naked eye) begin to crack during the drying process, drawing in moisture, dust and dirt from the environment. It is impossible to get them out of there later and they have an extremely negative effect on the quality of the paintwork.
Therefore, if the part has been waiting for painting for more than a day, the old cracked micro-layer must be knocked off. Before doing this, do not forget to degrease the surface.
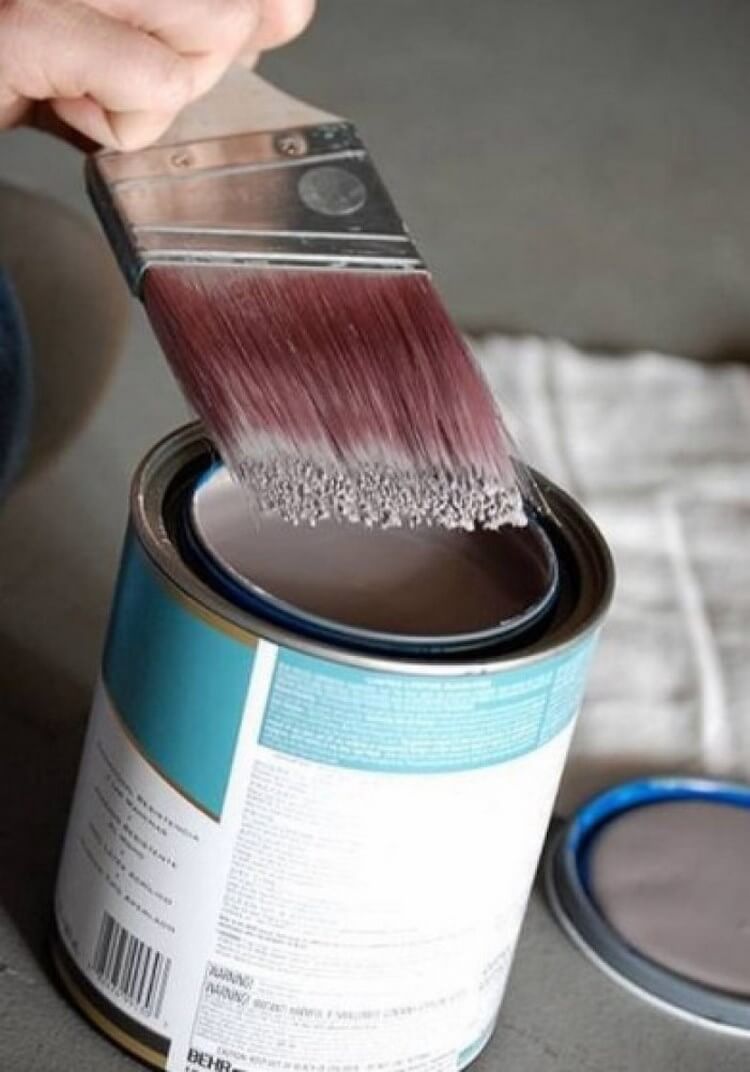
Primer application
The last preparatory stage before the painting operation is priming. Priming is required for:
- ensuring reliable adhesion;
- protection of the steel base from corrosion;
- filling the smallest scratches and pores in leveled areas;
- formation of a suitable surface for applying enamel.
Modern technologies provide for the application of three types of primer.
- The first layer is a phosphate film that protects the metal from rust.
- The second type of primer is a leveling primer, it should smooth out minor defects and create a good substrate for paint.
- The final primer is applied to areas of the body that are most susceptible to corrosion. Such weak points include sills and wheel arches.
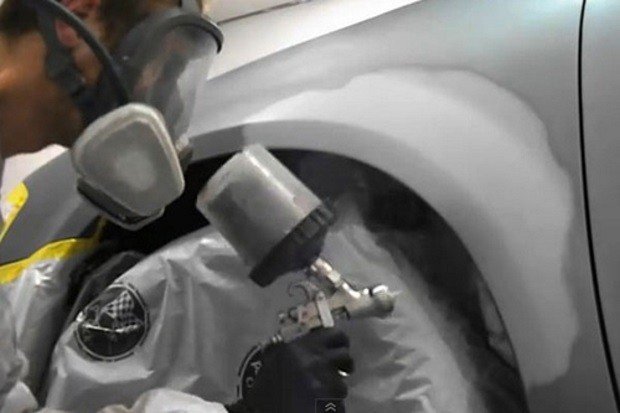
Priming of the body is carried out with an airbrush with a nozzle of 1.3-1.5 mm. The first layer is applied with horizontal movements. In this case, the overlap of each band is 50%. The second layer lies strictly vertically, and the thickness of the coating should be minimal.
After applying each layer, a 10-minute pause is required for the material to dry. When the last layer is completely dry (2-3 hours), you can start grinding and degreasing the coating.
Preparing a car for painting is considered the most time-consuming and painstaking process. After priming, shortcomings of puttying may be revealed, so you will again have to return to the previous stage and eliminate the shortcomings. Only after careful preparation, you can proceed to the most pleasant and responsible process of staining.
Preparing metal for painting
After collecting all the necessary tools and materials, proceed to the preliminary preparation of the metal surface.Thanks to this, you can simplify and speed up the staining process.
High-quality preparation will help to avoid flaws in the work, which are very difficult to correct, and sometimes impossible.
Procedure:
- The base is cleaned of accumulated dirt, dust, as well as the remnants of the previous decorative layer. In this case, use a metal brush or sandpaper. It is best to avoid overlaying a new layer on top of an old one, even if the color is identical.
- Metal degreasing. The process begins with the removal of contaminants using a solvent or white spirit. It is necessary to process the entire area to be painted, not missing particularly difficult places. After that, the plane is washed with a soapy solution, which is easily washed off with plain water. The result should be a clean and dry finish.
- In the presence of visible cracks and depressions, it is necessary to putty. Before that, all defects are covered with anti-corrosion compounds. Putty should not be applied everywhere, but directly on the desired areas. The mixture is applied as evenly as possible and requires grinding to achieve a perfectly smooth surface.
- The corrosive layer is removed with the help of a transducer, which forms a protective film and prevents damage.
- The remaining minor defects are removed by grinding and cleaning.

The metal surface is considered prepared if all the steps are consistently performed and the surface is thoroughly dried.
Matting materials
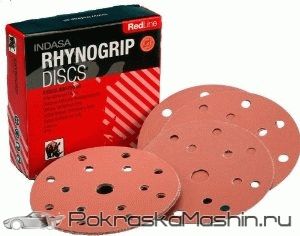 Preparation starts with abrasive numbers from P320 (hard ground or using the wet-on-wet method). In most cases, P800-P1200 numbers are sufficient. However, polishing the surface around the damaged area requires P2000 sandpaper.Matting gels and pastes can help save abrasive and time, and sandpaper bars are used to facilitate work.
Degreasing before matting is usually not required, but sometimes improperly applied alkyd enamel can become an obstacle to the use of fine abrasives. In this case, it is required to degrease the surface with anti-silicone. The clogging of the abrasive with old car paint occurs in different ways, and in this case a lot depends on the manufacturer: you should not switch to a larger “sandpaper”, but it is better to focus on proper degreasing.
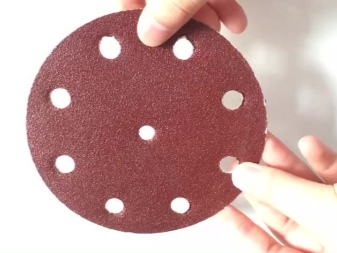
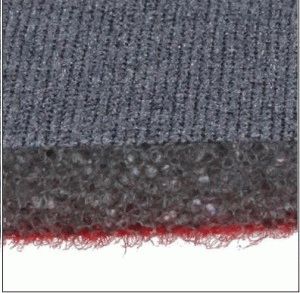
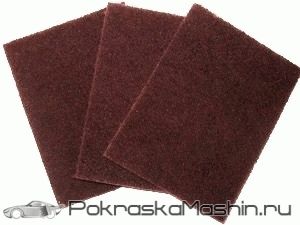 Coarse polishing pastes are used for the same purposes as abrasives from P600, but only polishing pastes are available. The latter are more often designed to eliminate scratches without applying paint. Deservedly popular are abrasives on a non-woven, felt basis - scotch-brites. The material has a high degree of elasticity, which allows it to process the surface without changing the shape of the part and reach hard-to-reach places. Scotch brights are used without a bar and usually have a color corresponding to the aggressiveness of the material: from red to green (copper, gray).
Matting tools
Sanding and polishing tools are useful for convenient matting of the car. The choice depends on the area of the surface to be painted. For a complete repainting of the body, a grinder will become an indispensable assistant. An economical alternative for flat surfaces are sandpaper bars, they are also planers. With their help, it is easier to manually process the surface of the car.
Manual matting is required in difficult and uneven areas. When matting embossed parts, scotch-brights are useful.These are flexible and resilient felt-based abrasives that allow you to process hard-to-reach places without changing shape. They differ in the degree of aggressiveness of the material in color - from red for rough work to green for polishing.
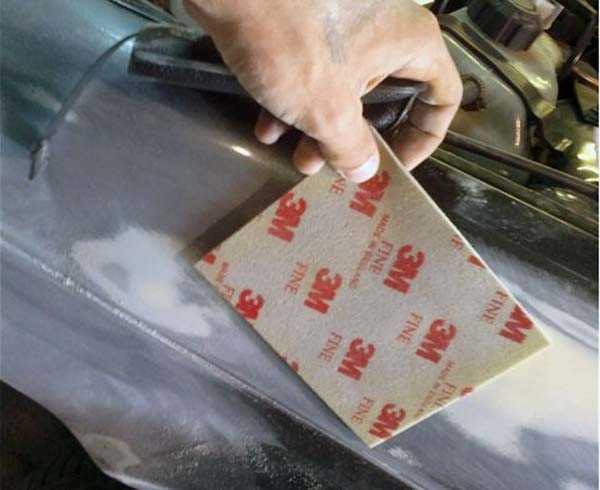
Matting by hand
When manually processing the surface when matting, scotch brite or flexible sandpaper is used. These materials allow high-quality processing of complex relief areas.
At the same time, it is important to remember about the change in the sanding trajectory during bending and take it into account for uniform matting.
In manual work with abrasives, matting and sanding with water greatly simplifies. A wet sponge is used to wet the body. An important condition for high-quality processing is the purity of water, so it should be changed frequently. Adding liquid soap to the water will help to avoid smudges of varnish and shagreen. After matting, the surface is washed with plenty of running water and wiped dry with a lint-free cloth.


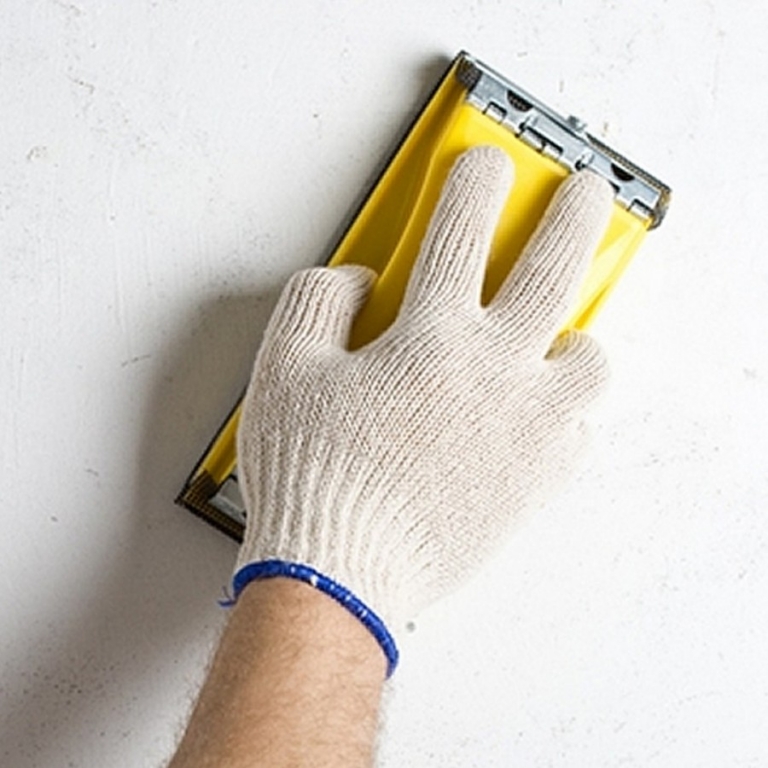
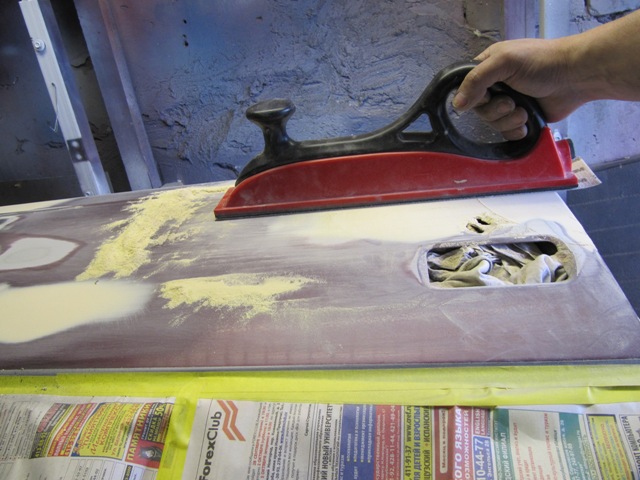


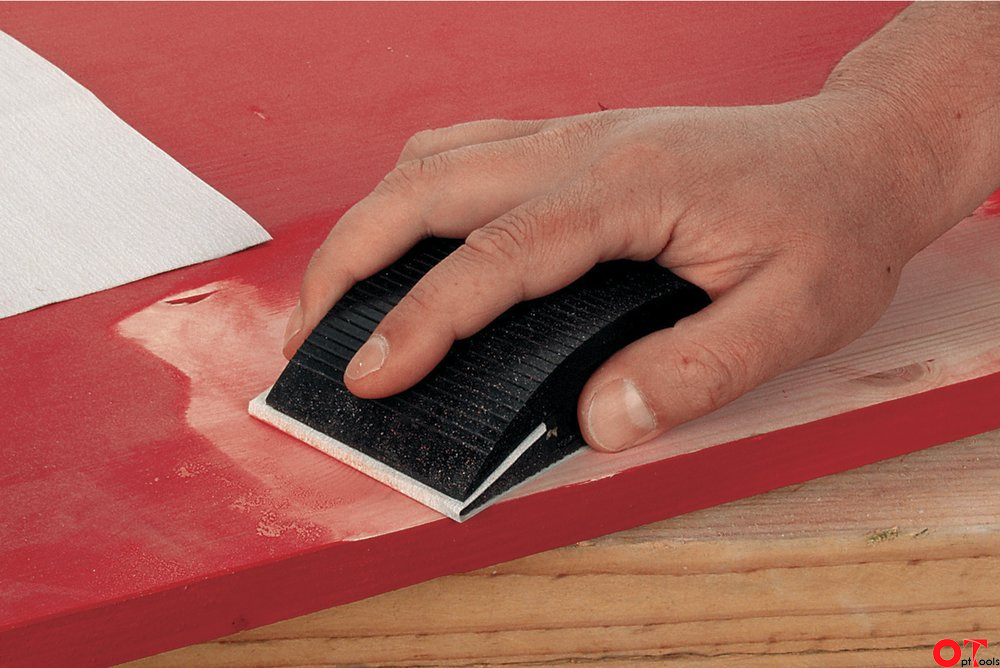
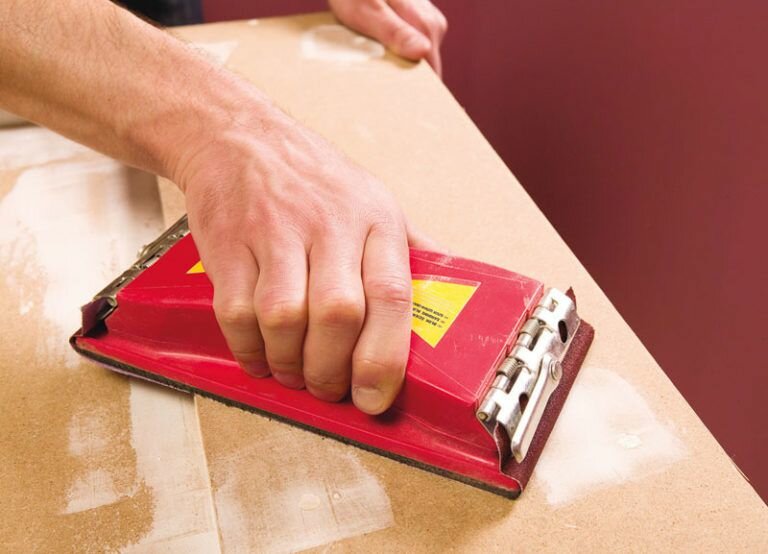
Planer matting
When manually matting flat surfaces, it is more convenient to fix the abrasive on the planer. This is a wooden block that is convenient to hold during the matting process. When working, you should securely fasten the sandpaper and regularly change the direction of the planer for uniform polishing.
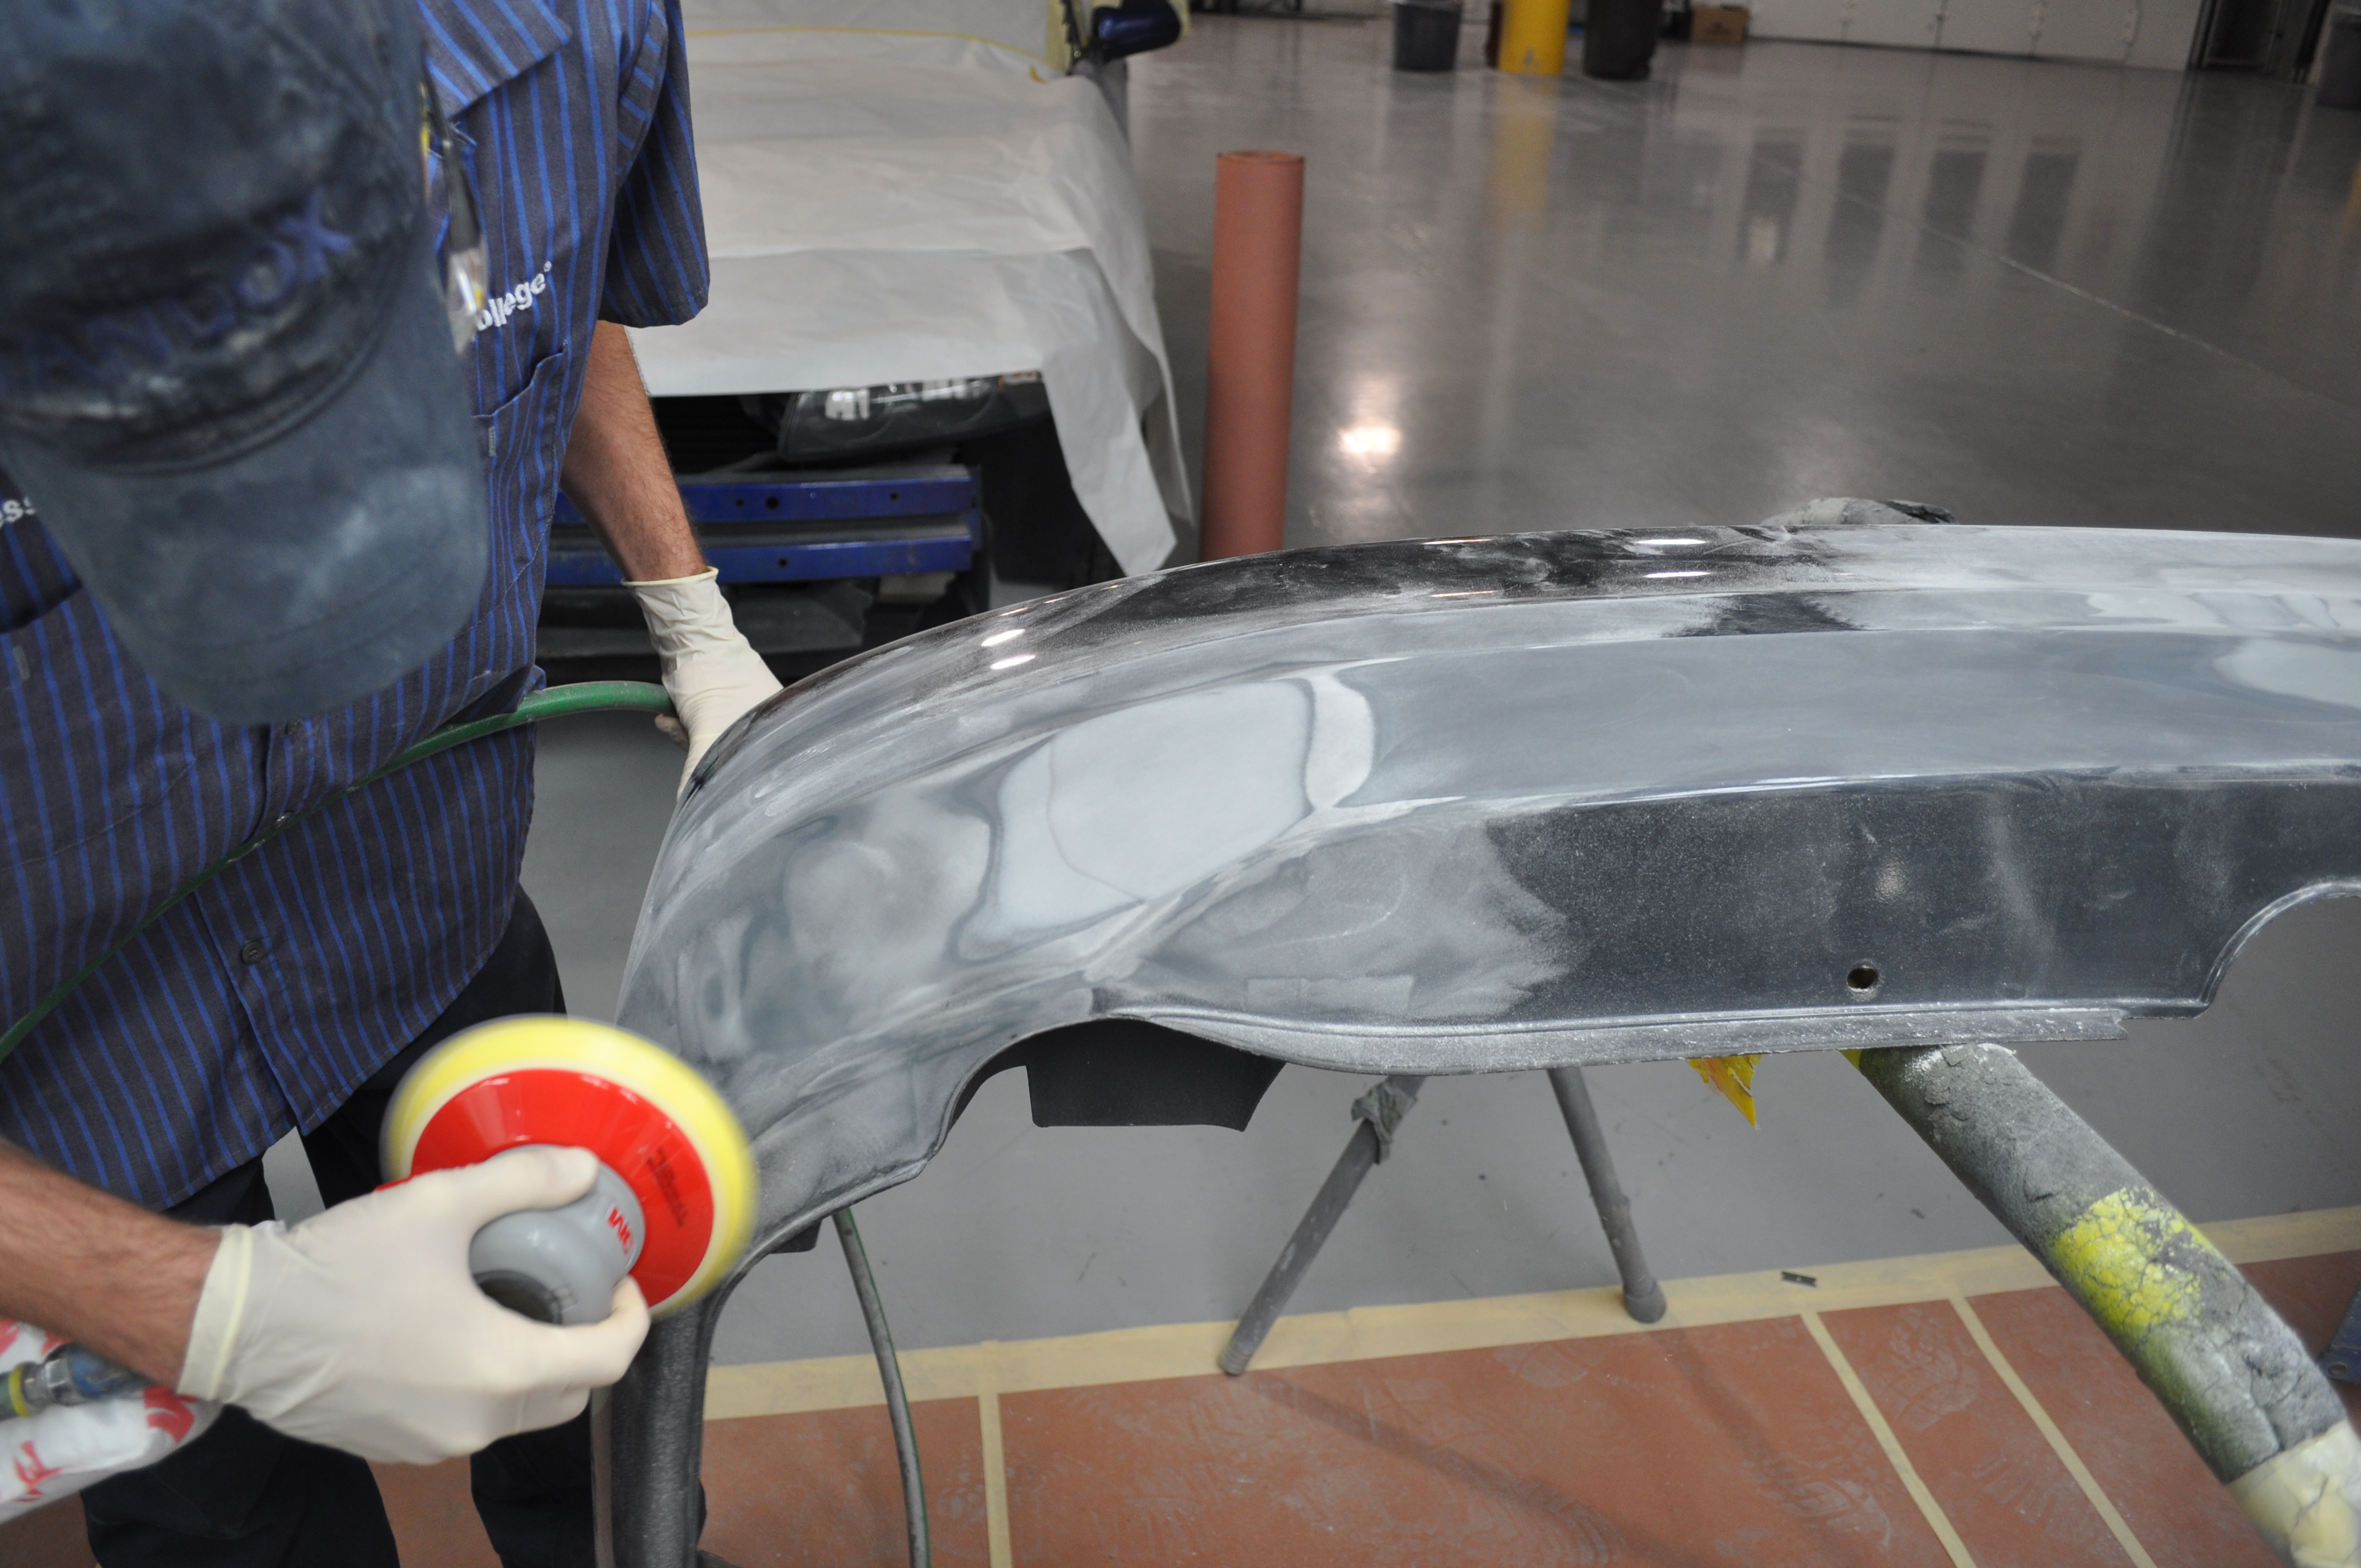
Matting a car with a grinder
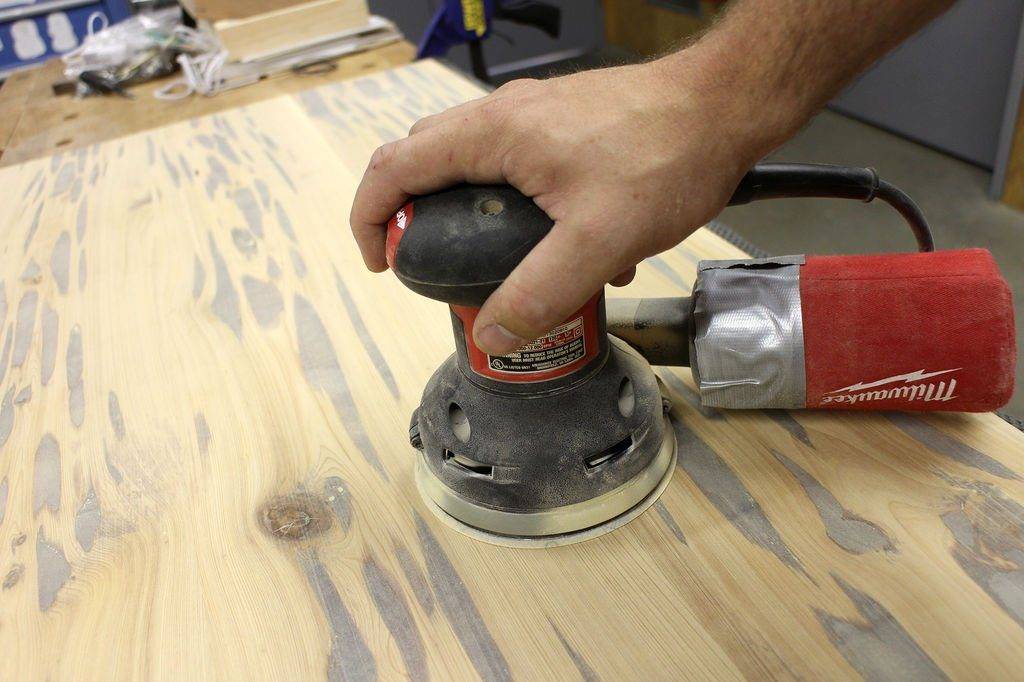
The universal choice of a sander for matting a car body is an eccentric, it is also an orbital machine. The grinder will significantly speed up the work on matting in the following cases:
- complete removal of the old paintwork;
- processing of transitional zones of individual sections of the body before painting;
- leveling of puttied areas;
- removal of the transport primer.
The main stages of preparing a car for painting
Well-organized actions are a system and include the following steps:
- body troubleshooting;
- welding works (if necessary);
- car body cleaning
- putty;
- surface grinding;
- body primer.
Let's briefly consider each stage.
Inspection and welding work
To reveal all defects, even small ones, the body should be washed well. It is impossible to carry out preparatory measures for painting a dirty car! Only by evaluating the condition of the car, you can plan further work, including welding. They are necessary when detecting deep rust or completely rotten parts of the body. To do this, look at:
- bottom;
- racks;
- thresholds;
- wings;
- joints of body parts.
How to clean the body
First, all seams from welding are aligned to the plane of the body using a grinder. The next stage is the processing of the body with an emery cloth. It is not necessary to do this by hand if you have an orbital sander and a special planer. Manual cleaning is done where this equipment does not reach.
Puttying and sanding body work
Before the putty itself, you need to make the body matte so that not a single speck shines. To do this, it is rubbed with R220-260 sandpaper, then a two-component coarse-grained putty is applied to all dents and chips. The choice of putty brand is up to the motorist. Compliance with the instructions is mandatory!
To remove minor defects, a universal putty is suitable, and for microcracks, a single-component acrylic putty applied to a primer.
Surface grinding
Further preparation for painting a car consists of grinding the treated surface of the body with a special machine and P80-120 sandpaper. By the way, developing powder is used to show poorly putty places. At this stage, a fix is still possible. Then the surface is “finished” with sandpaper with P240-320 abrasive, and the body, almost ready for painting, is degreased.
The final stage - primer
The most popular primer for a body before painting is acrylic, which will protect it from corrosion. They begin to prime the car from those places where more putty was applied. The prepared composition is applied under pressure from the compressor in thin layers (required after the previous layer has dried). Do not mix the primer in advance, its shelf life is 1-2 hours.
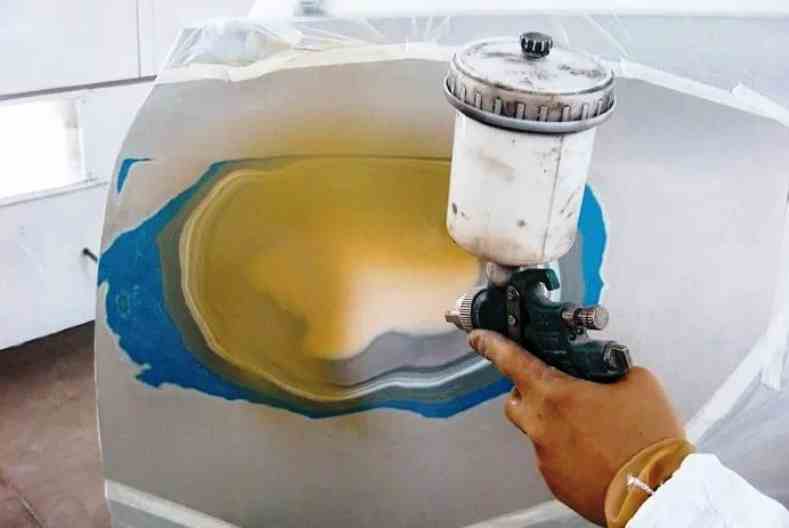
After the primer, a thin layer of paint of a contrasting color, the so-called developer, is sprayed onto the body. Then again you need to grind:
- for acrylic paint, take the skin P400-600;
- for metallics, P600-800 with gray scotch-brite P500-600 is suitable.
Here, in general, is the whole process. In case of detection of missed defects, the steps are repeated, starting with puttying.
Pre-primer: types of mixture, which one to choose?
Before painting, it is recommended to apply a layer of primer to the metal - the solution not only reduces the consumption of paints and varnishes, but improves adhesion to surfaces, slows down oxidative processes and enhances the protective function of the structure.
The primer differs in composition, the choice of solution depends on the degree of damage.
Soil types:
- Passivating - thanks to salts of chromic acid (chromates), the metal becomes less susceptible to moisture. The more chromates in the composition, the slower the formation of rust.
- Insulating - primer with the addition of epoxy or alkyd compounds. Economy option, suitable for black metals, parts are covered with a protective, water-repellent film.
- Phosphating - most often galvanized iron is processed, the primer is more related to passivating compounds (suitable for the restoration of non-ferrous metals).
- Protective - contains phosphoric acid, which forms a water-repellent foam on metal, suitable for processing old, rusty structures.
- Inhibitor - A relatively new water-based formulation that stops rust formation and extends shelf life.
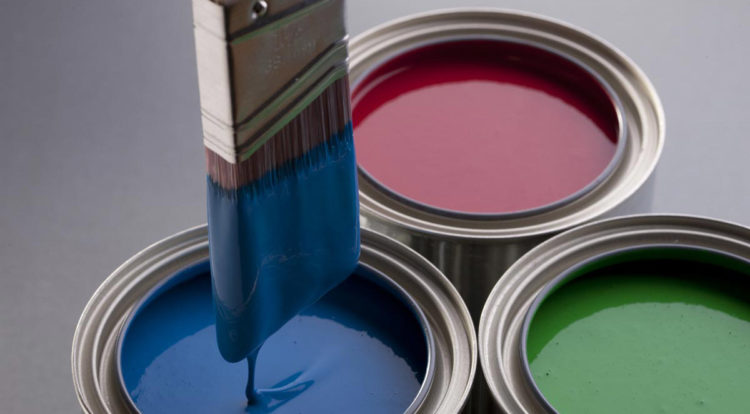
Regardless of the composition and its purpose, the soil mixture is produced in different colors and is never transparent - this way, when staining, it is easier to notice the missing areas and paint over them.
What criteria to choose paint: types and characteristics
Enamel helps protect metal surfaces from the negative effects of ultraviolet radiation and moisture. The main thing is to choose the right paintwork material.
What should you know?
Paint for metal surfaces differs in application temperature.
In order for the layer to lay down evenly, follow the instructions on the can - if the temperature is + 2 ° or + 11 °, then you need to paint the fence only at this temperature.
Also, do not forget about the maximum performance after the paint has dried: if the marked temperature is exceeded, the surface will begin to deteriorate.
It is important to know what solvents materials can be diluted with. Water-based paints do not have a strong odor, and with the addition of a solvent, not only toxicity increases, but also the cost of the composition
There are enamels that can only be applied to a clean, fat-free metal surface, and there are paints for painting metal surfaces on rust - for heavily damaged parts (the composition contains solutions that remove old corrosion).
Rust paint is applied directly to the rough surface.
Some compositions dry out in 4-5 hours, while others in 11-12 hours.
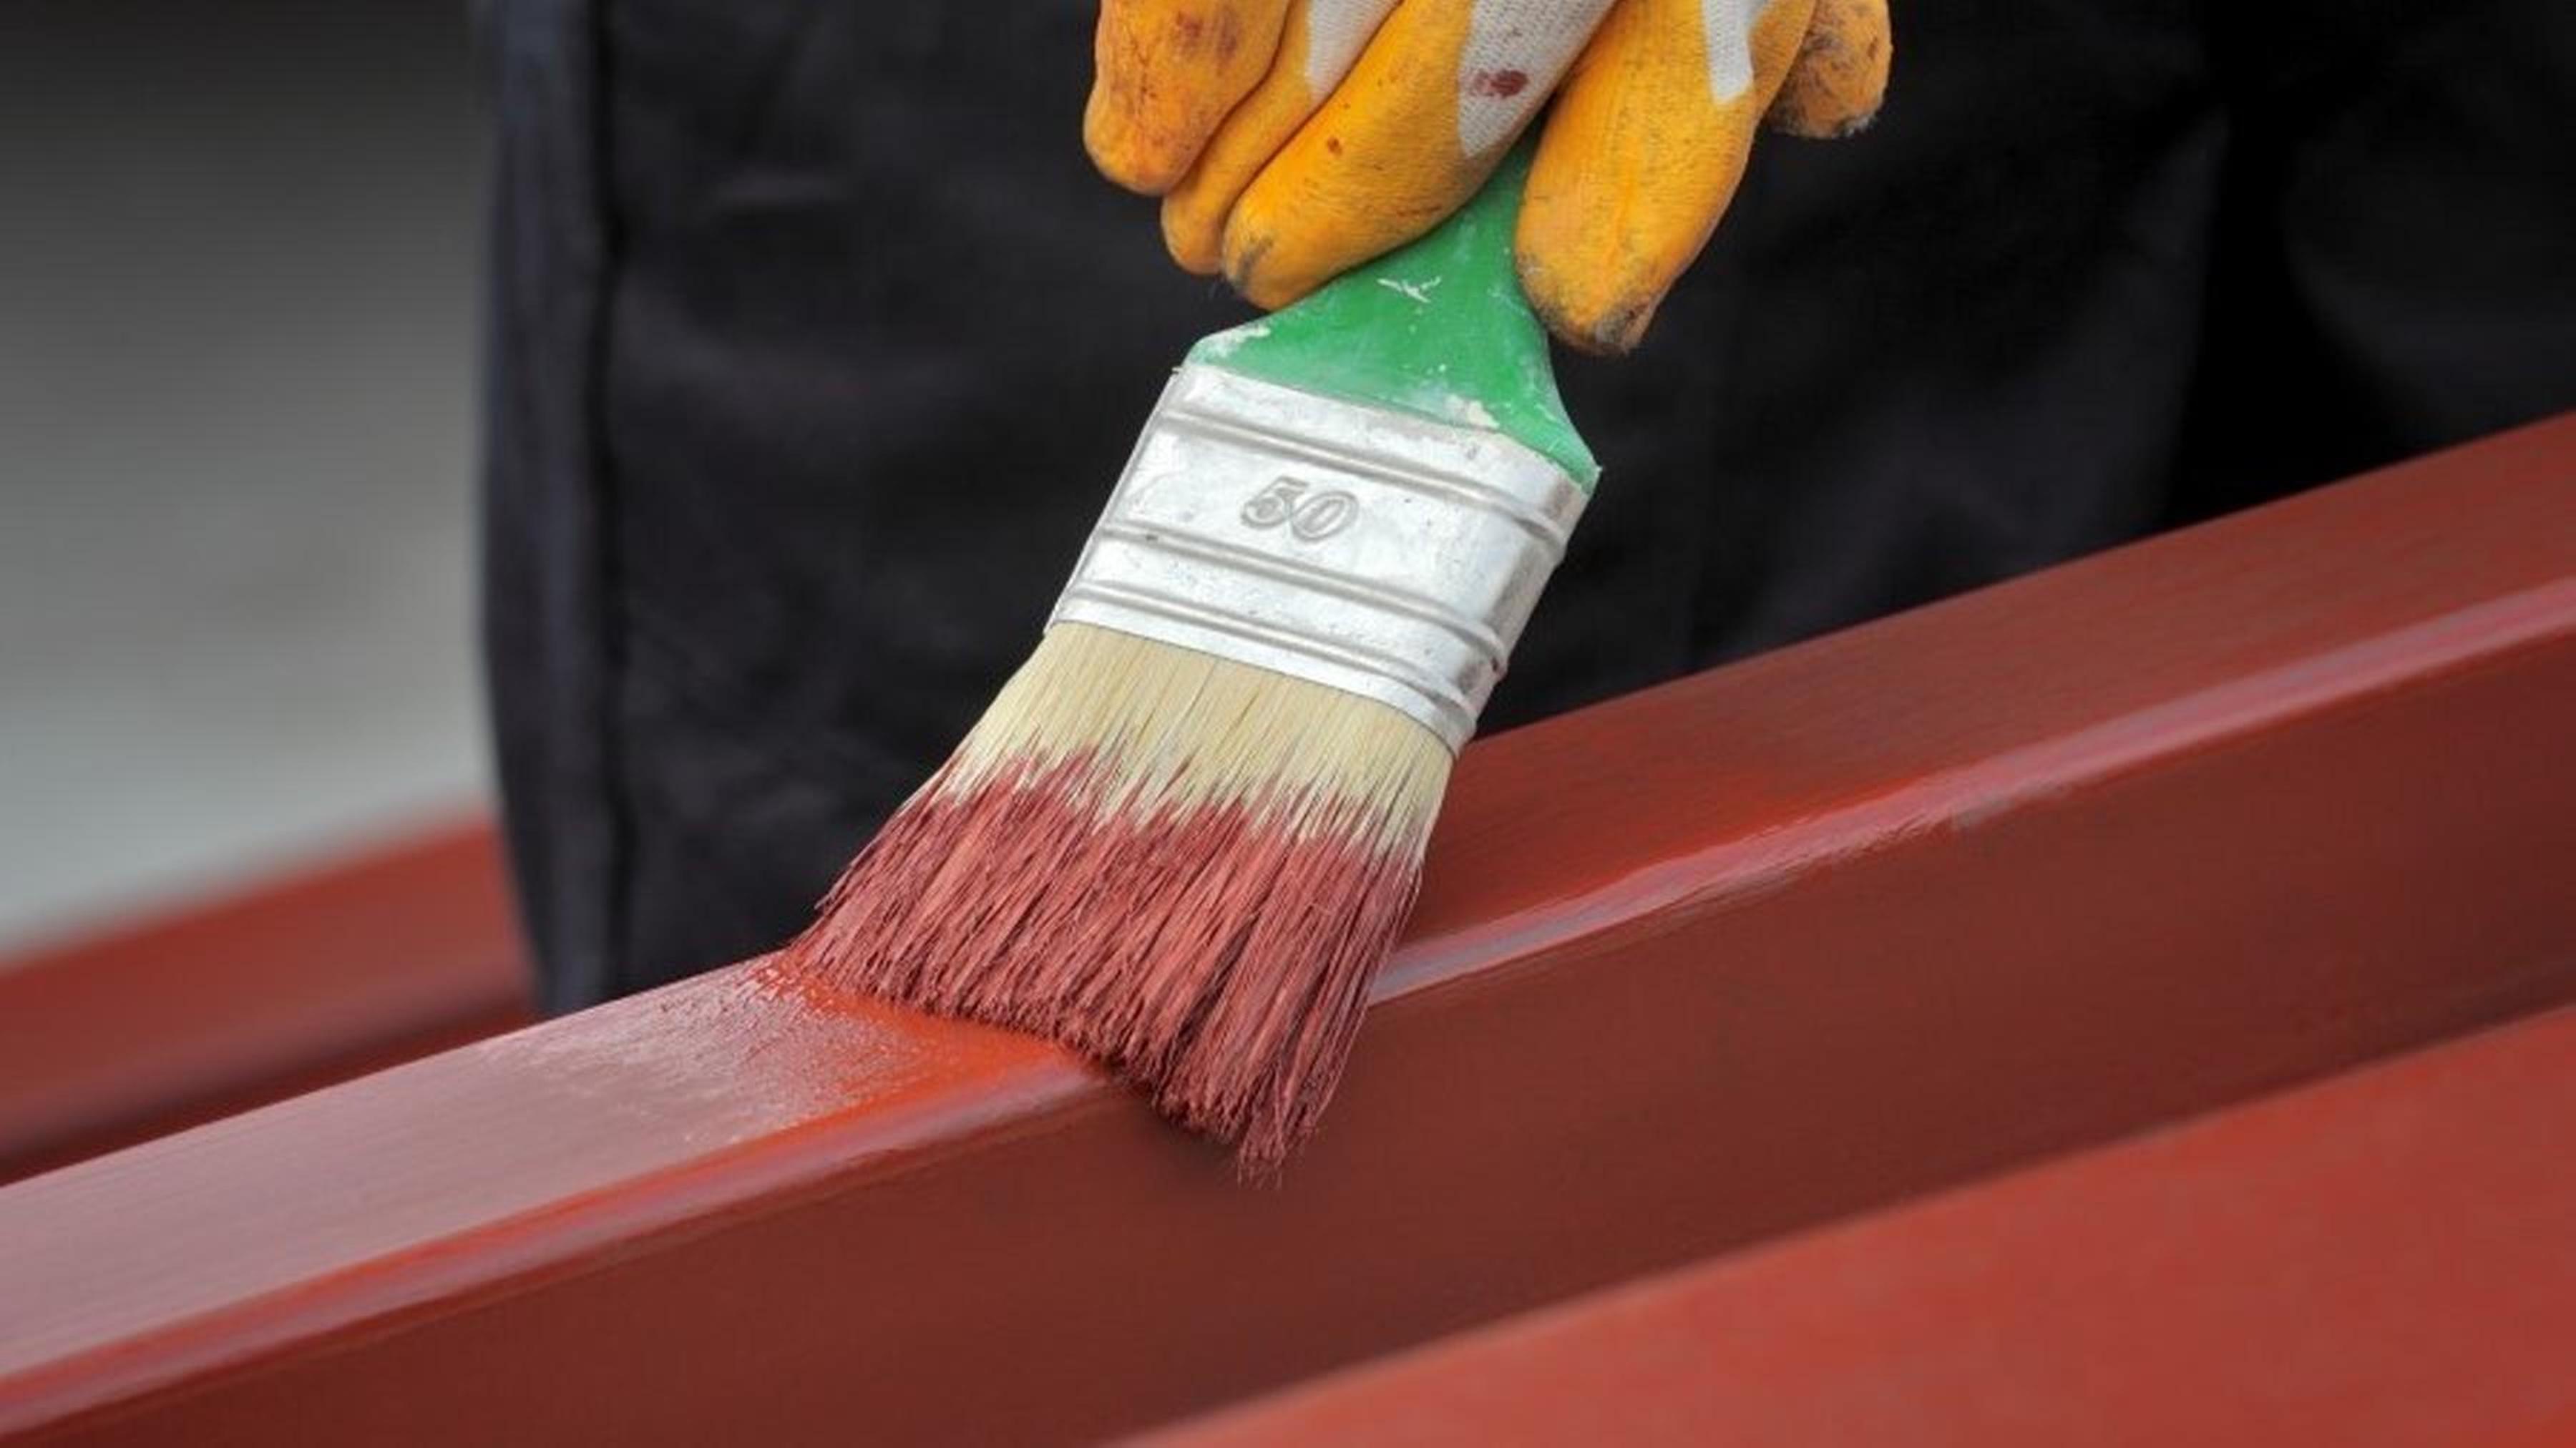
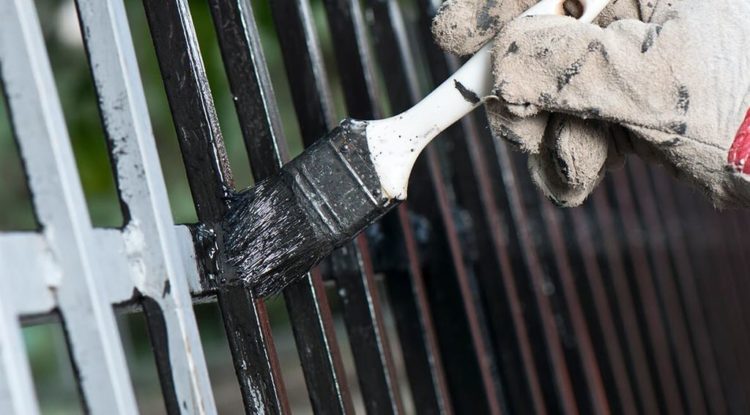
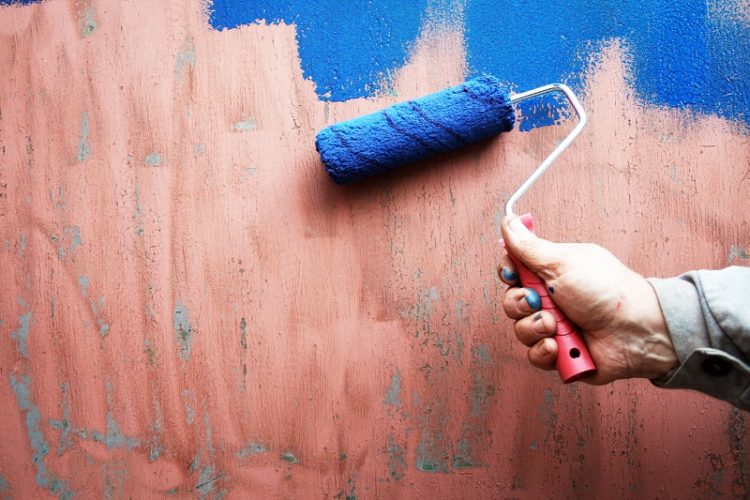
There are also differences in the method of application - for painting large areas it is recommended to use a roller (then the paint needs to be selected according to density), and for small structures (for example, gates) it is more economical to use a brush.
An important factor is the ability of the paintwork material to cover the color of the surface (hiding power).
The final result is affected by the chosen color: matte, semi-matte or shade with the addition of gloss.
Some paints are designed for painting metal parts indoors, while others are suitable only for outdoor facade work. It is better to choose 3 in 1 paints for metal - they are multifunctional.


When painting a heating system or a chimney, it is important to take into account the property of the materials to withstand the stress caused by high temperatures - the higher the heat resistance, the higher the quality of the paint and the longer it will last.

Recommendations
Of course, it is best to buy an already painted profile or trust painting to professionals.
But if you decide to do this work yourself at home, follow the important recommendations.
- The process is best done in a well-ventilated area so that the fumes from the dye do not linger in the air.
- Easily flammable substances, chemical reagents should not be near the workplace.
- The room must be clean and humid.
- Use personal protective equipment. Be sure to wear protective gloves, a mask or overalls, if available. Absolutely all parts of the body must be closed.
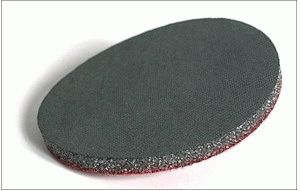
Abralon
Abralon are soft grinding discs made from a patented material. In fact, it is a knitted fabric coated with an abrasive (silicon carbide) glued to foam. They are produced by Mirka. They are very flexible and treat the surface evenly.
Depending on the gradation, they can be used both to prepare the surface for painting and in the polishing process. Due to their softness and elasticity, Abralon wheels follow the contour of the surface well and act evenly. Thus, the entire disk acts on the surface with the same pressure. The risk of grinding the sharp edges of the panel is reduced.
Abralon can be used dry or wet, as well as by hand or machine. Water acts as a lubricant.
The surface treated with Abralon for painting is evenly matte, without visible scratches. Traces of it are well covered with paint and varnish.


