- Niche Building Tips
- We hide beautifully
- Outdoor placement of communications
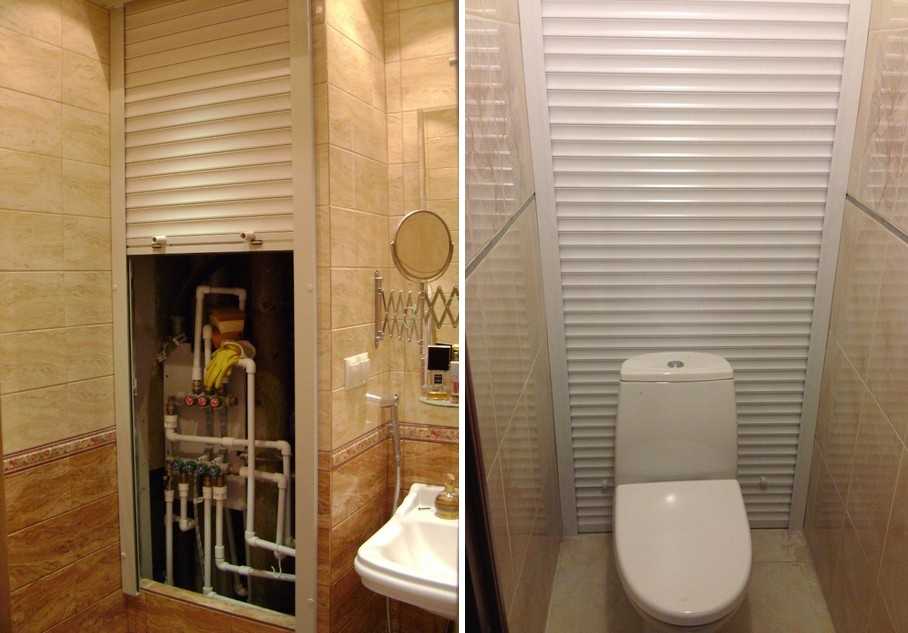
- Blinds
- roller shutters
- Masking horizontally oriented pipes
- Pipe masking - a necessity or a whim?
- How to close a sewer pipe with drywall
- Useful tips from the pros
- 3 best ways to hide pipes
- 1. Remove communications in the walls or floor
- 2. Hide the pipes under the tiles
- 3. Mask the pipes with a drywall box
- Drywall box
- How to make a drywall box
- Peculiarities
- Work order
- What else can you make a box for pipes in the toilet
Niche Building Tips
A niche is a practical solution for both the bathroom and the toilet. Repair often helps to implement it, against the background of which you can break old walls and complete the construction of new ones.
If you do not plan to change the situation in the near future, you can take simple ways of decorating as a basis:
- blind;
- Fabric screen;
- Removable decor on a paper basis.
Hiding pipes with one of the above options is easy. In addition, there will be no need to sacrifice unhindered access to communications and spend exorbitant amounts on the purchase of materials. In addition, such a niche can be removed at any time or replaced with another, more suitable concept.
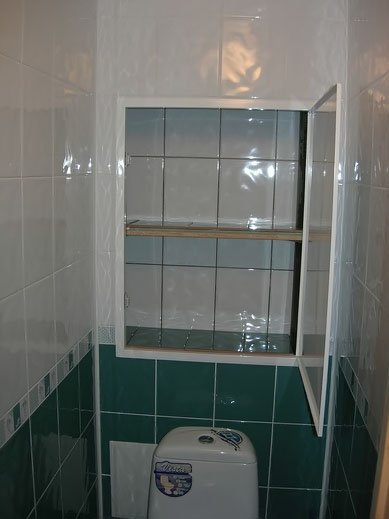
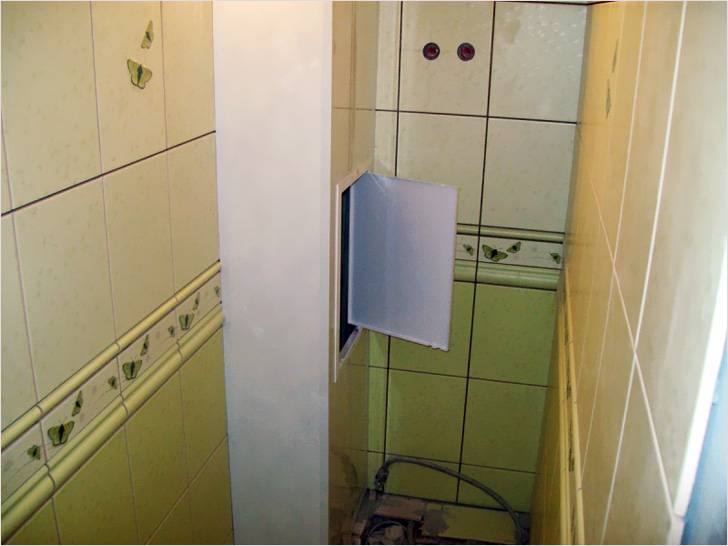
Pipes can be accessed through a specially cut window that can be closed
In their efforts to decorate their home and hide communications, plumbing and counters, people lose their sense of reality and make irreparable mistakes. In the end, not only the sheathing suffers, but also the wall, which the masters in a hurry are destroying.
You can close the back wall of the toilet and block the pipes in the following cases:
- Communications replaced quite recently;
- The wall does not become damp and is not susceptible to fungal attack;
- The general concept of the premises requires decorating all communications;
- There are options for opening/closing the system.
Sewing communications with plastic, wood or drywall is a new plumbing trend that many homeowners have already fallen in love with. Meanwhile, before blindly following fashion, you need to evaluate the entrusted room and the risks that ennoble it. Sheathing pipes behind the toilet is easy. It is much more difficult to do it intelligently. However, even here the homeowner can handle it on his own.
We hide beautifully
It is not always convenient to close pipes with auxiliary materials. In some cases, there is not enough space for complex structures, or the time for repairs in the toilet may be limited. Sometimes it is enough to simply decorate the pipes, when we close the communications with a partition, access to them is difficult, and this can be inconvenient.
Outdoor placement of communications
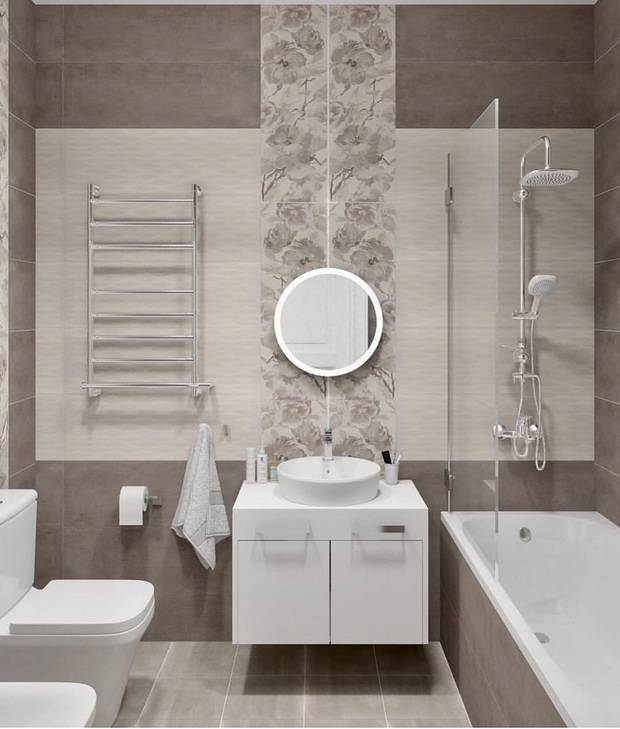
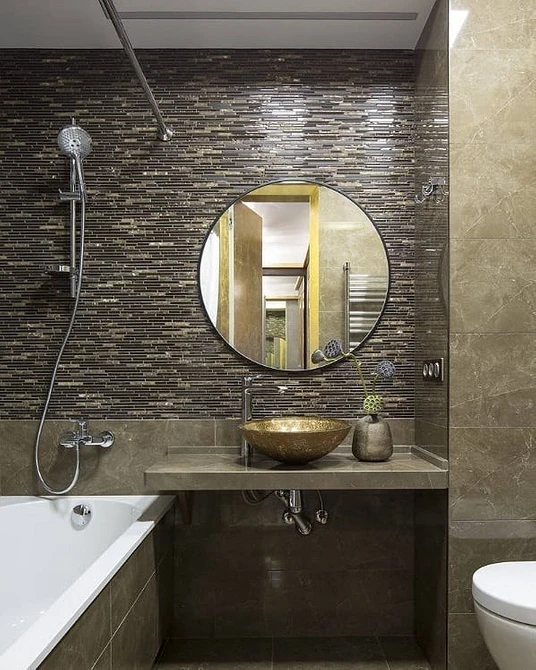
Pipes can be left in plain sight and not decorated, if they look beautiful on their own. For example, metal communications in combination with sanitary ware from the same material are perfectly combined and fit into the interior of a loft, techno or high-tech style restroom. In a toilet with such an environment, they will become a source of pride.But such pipes are expensive, in addition, there is a chance of getting burned.
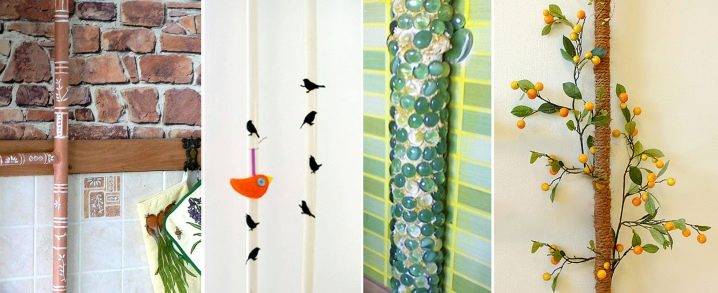
Therefore, you can beautifully beat ordinary communications:
- cover with paint that matches the overall color scheme of the toilet;
- decorate with unusual patterns, while you can use special stencils;
- sheathe with beautiful pebbles, braid, glass;
- disguise with artificial plants or make the pipes themselves in the form of trees: the toilet will resemble an impenetrable jungle or dense forest;
- glue the pipes with various stickers or stickers;
- if you show imagination, you can use a material that is usually recycled, for example, metal caps from carbonated drinks, and in addition to the unusual design of pipes, it would be appropriate to make a small panel of the same material.
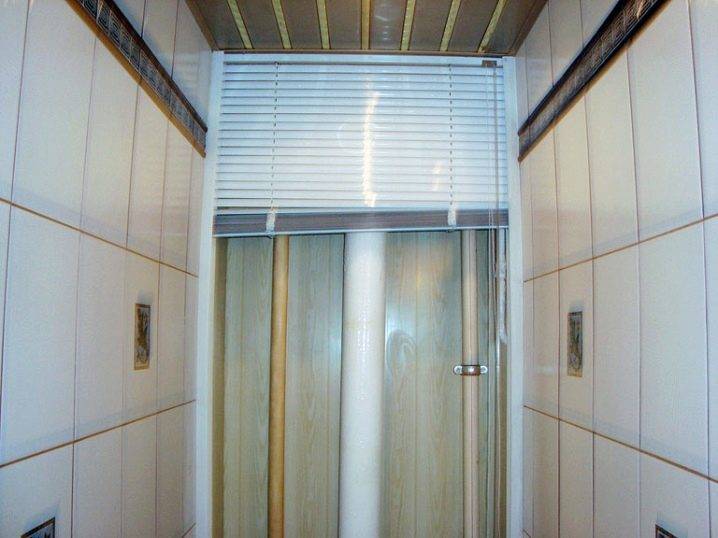
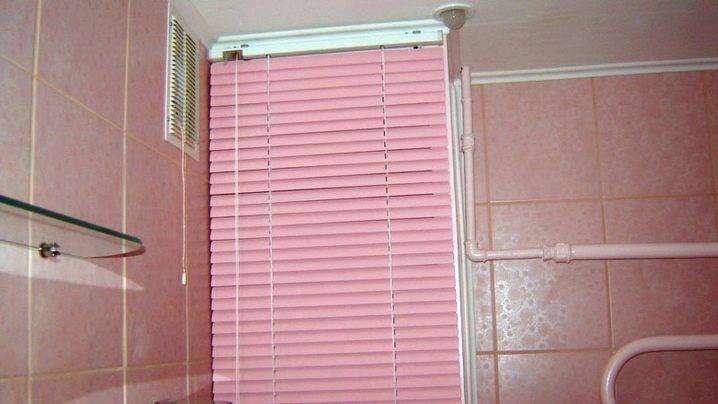
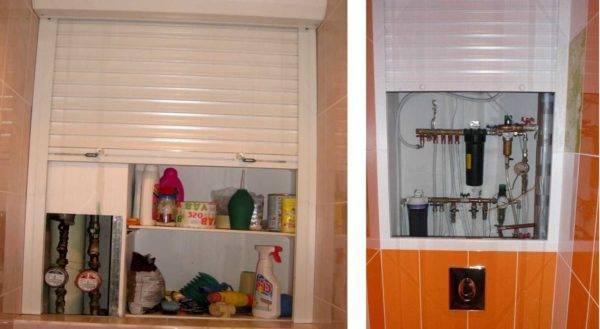
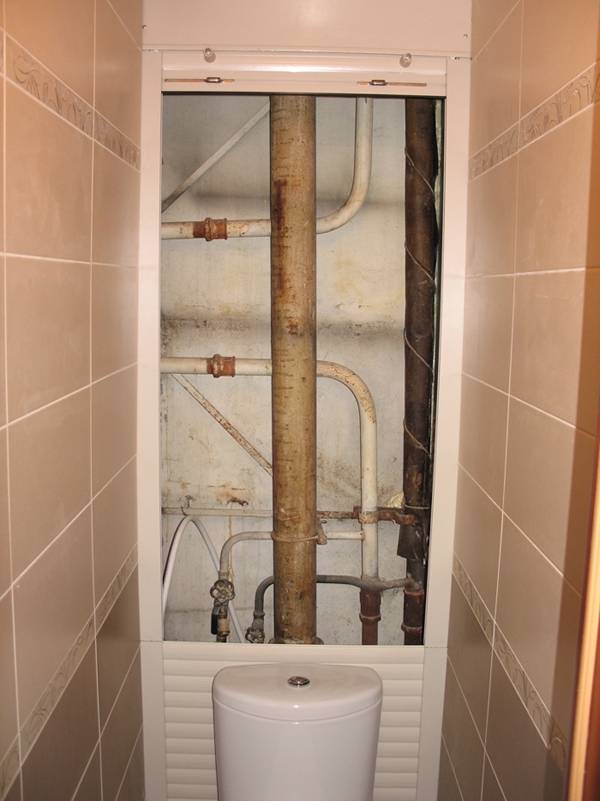
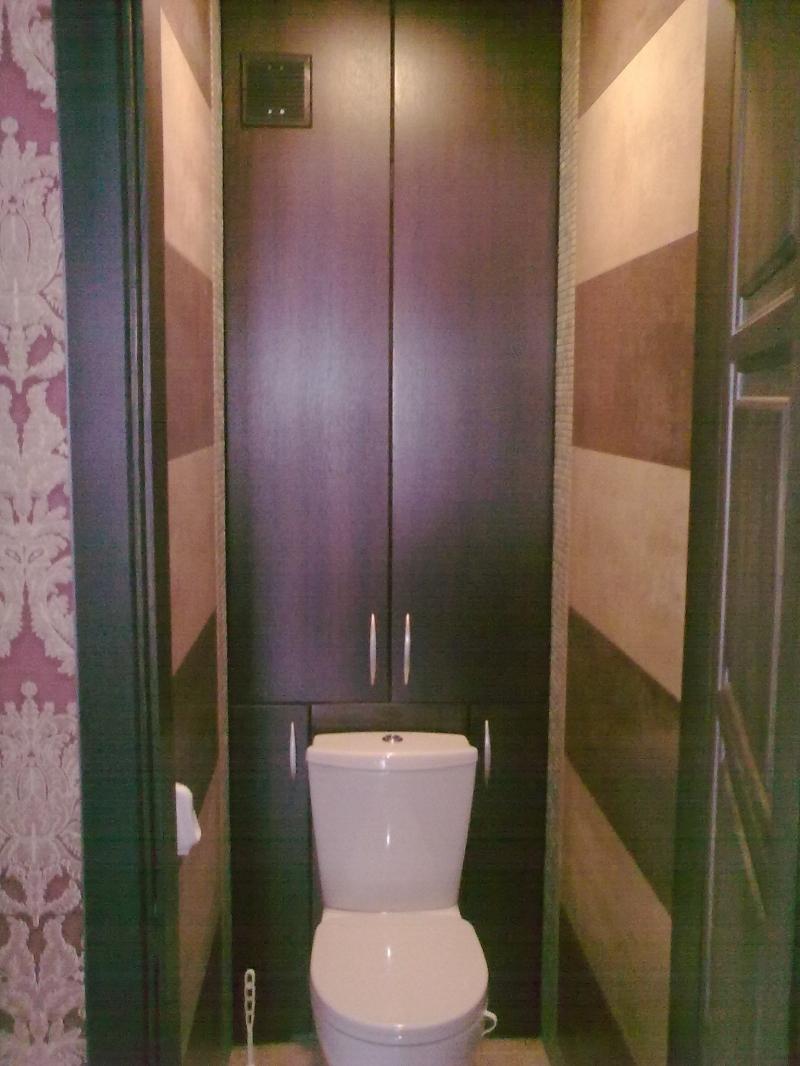
Blinds
Disguise thus resembles a false wall. But not a wall is created, but a curtain. It can be rolled up if necessary.
Blinds Benefits:
- closing pipes in this way saves a lot of time;
- during installation, a lot of garbage is not created;
- long service life of blinds;
- the price is small;
- the niche formed behind the blinds is convenient to use for storage;
- the design is compact both in open and closed form, it will not interfere, however, open shutters provide full access to counters and taps;
- the choice of material is very large: from inexpensive and versatile plastic to expensive and specific wood and metal, but due to high humidity, fabric options are not recommended for use in the toilet;
- the assortment is replete with a variety of colors and patterns, it will not be difficult to choose the right ones;
- in case of damage or loss of appearance, there is no need to replace the entire structure, it will be enough to replace the damaged lamellas;
- they can replace the screen under the bathtub or become a partition covering the washing machine if it is located in a niche.
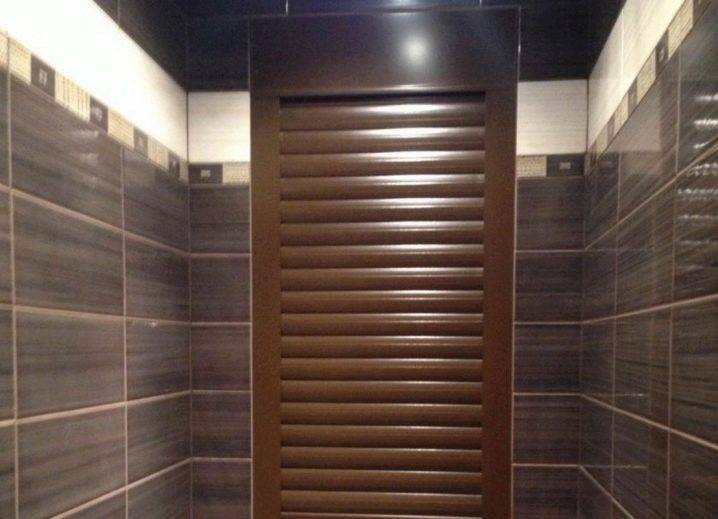
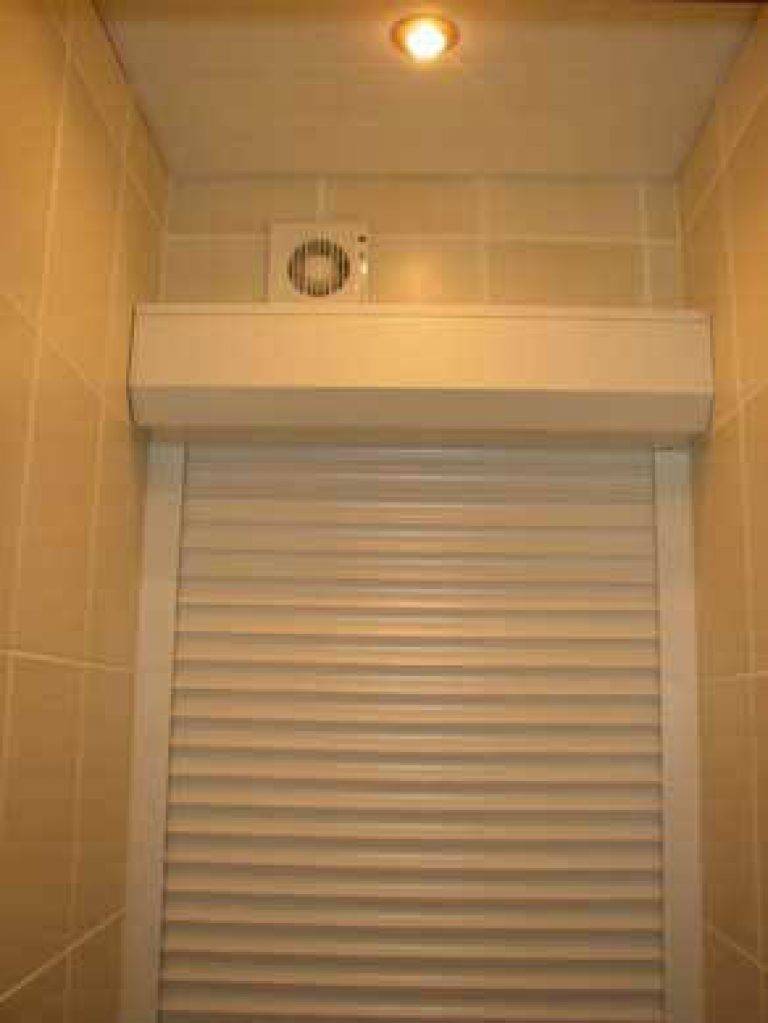
roller shutters
A more reliable and thorough way to hide pipes compared to blinds. They have a similar mechanism: when the structure opens, the planks are assembled into a roll or stack inside the box. They take up more space, but if there is enough space, it is better to give preference to this method of disguise. Particularly interesting are the automatic models controlled by the remote control.


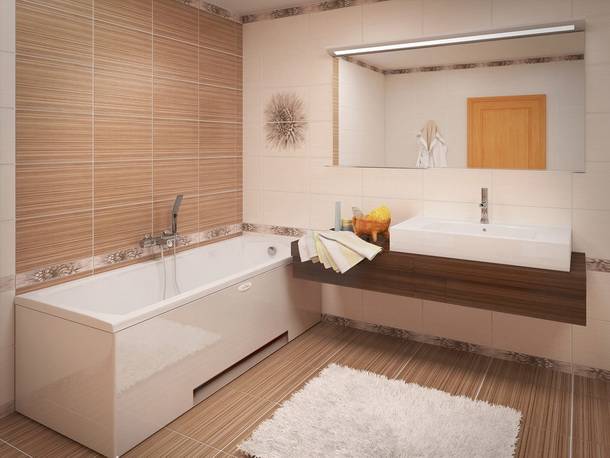
Masking horizontally oriented pipes
Typically, hot and cold water pipes are placed horizontally in the bathroom. You can close them so as to provide unhindered access using chipboard, plastic or plywood.
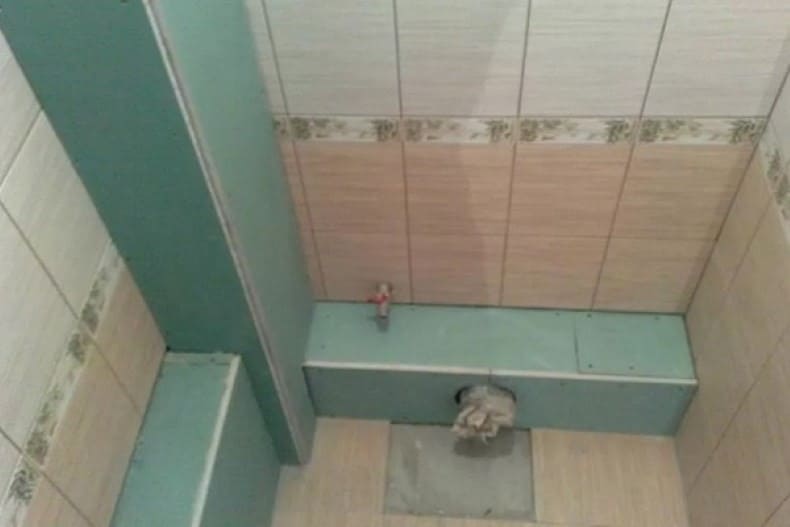
The pipes in the toilet are sewn up in the form of a step, under which the pipes are located. The resulting surface can be used as a shelf, for example, for toilet paper or other items.
Measurements are taken according to which the material is cut. The "step" is fastened with screws. In order for the structure to gain stability, a board is inserted between the pipes and the wall, which, with its upper part, is in contact with the inner surface of the horizontal shield. They are fastened together with a long screw. It is possible to further cover the structure with paint, varnish or pasting with a film, wallpaper.
There are many ways to help hide the pipes in the toilet. The main thing, in pursuit of the beauty and aesthetics of the appearance of the bathroom, is not to overdo it and not disrupt the system.
Pipe masking - a necessity or a whim?
So, for sure, your toilet is no exception, and, like in most rooms of this type, plumbing communications are located. Do they need to be closed? Only the landlord can answer this question, based on the general style of the apartment and his own aesthetic ideas. It can only be stated with certainty that closed pipes are:
- aesthetic;
- convenient (easy to clean);
- functionally.
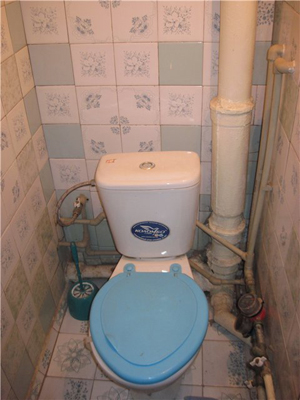
There is an opinion that for a start it will be necessary to replace the old iron pipes with modern plastic ones, and only then mask them. In part, it is: it is more convenient, safer and more practical. However, if the replacement of the plumbing is not planned or postponed, the pipes in the toilet will spoil the overall look.
 Characteristics of materials for water supply pipes
How to close a sewer pipe with drywall
Depending on how exactly the pipes are placed in the toilet, one of the types of creating masking drywall boxes is used:
- on the entire wall;
- on the lower part of the wall and a separate vertical box for risers;
- a horizontal L-shaped or U-shaped box along the perimeter of the rear wall of the toilet and a vertical box for risers.
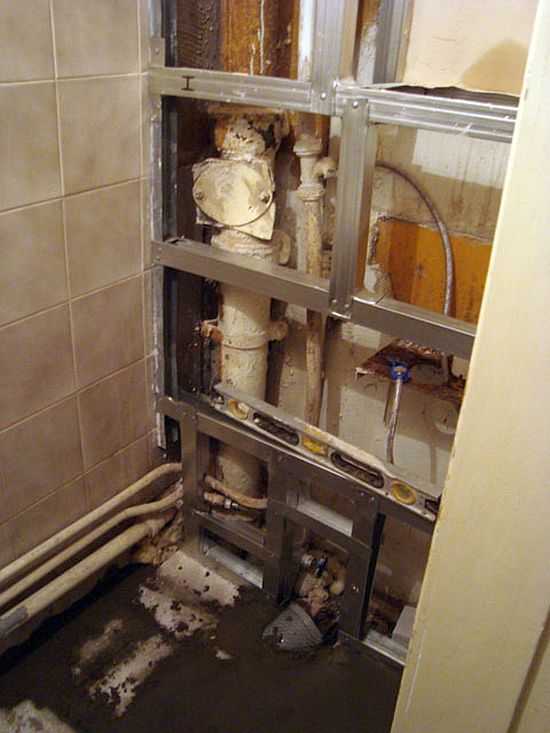
Consider the first option - a single box for the entire back wall. In this case, guides and racks are mounted to the entire required height (to the ceiling or lower, depending on the position of the pipes). Be sure to install spacers - at least two. This is necessary to give the wall the desired rigidity. For access to meters, valves, pipe connection points, maintenance hatches are provided, these places must have a border of racks and guides for fastening the gypsum plasterboard.
When sewing the prepared frame, the places of future hatches are cut out in the GKL panels.It is also possible to assemble the wall from separate fragments, but in this case it is necessary to pay more attention to puttying the joints and maintaining a single plane of the wall.
If several interconnected boxes are provided, the frame for each is mounted separately, but connected by common racks.
Sheathing here is desirable to carry out whole sheets to reduce the number of seams.
Step-by-step instruction:
- the wall(s) are marked with a tape measure and a level. The latter is mandatory, since otherwise it is impossible to maintain the parallelism of the profiles, their vertical / horizontal position;
- protruding parts of the wall and floor are removed, cracks and potholes are repaired;
-
box racks are mounted. They are attached to the floor with dowels, the length of which ensures normal fastening in the material. For uneven walls, it is better to use special mounting brackets that allow you to set the racks perfectly correctly. With flat surfaces, you can mount the U-shaped profile directly to the wall;
-
fasteners are installed. For a vertical box, these are horizontal profiles and vice versa. Jumpers can have different options for fastening to the main racks;
-
sheets of moisture-resistant drywall are attached to a fully assembled frame. As fasteners, special self-tapping screws for drywall are used;
-
an inspection hatch in the box can be made independently, but it is easier to buy a ready-made sample immediately with loops for attaching to the profile;
-
after installing all the GKL panels, the joints between them are glued with a sickle (mesh tape) and carefully puttied until a smooth surface is obtained. The same is done in relation to the self-tapping screw heads recessed into the drywall.
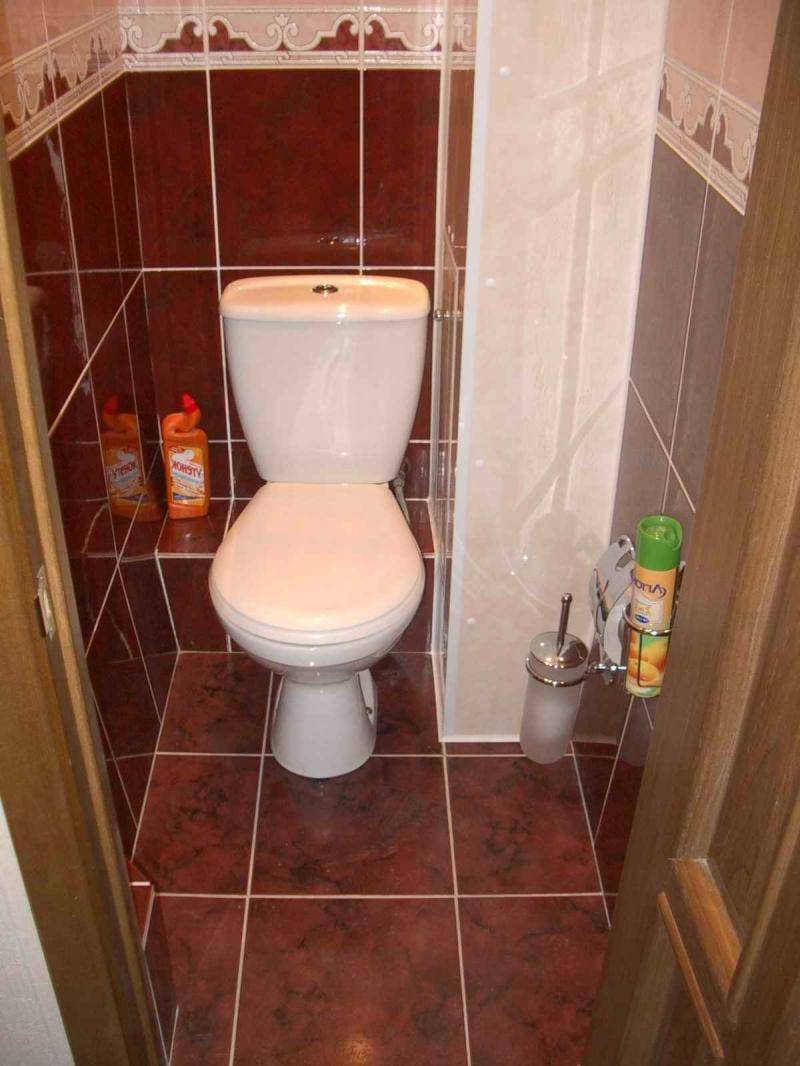
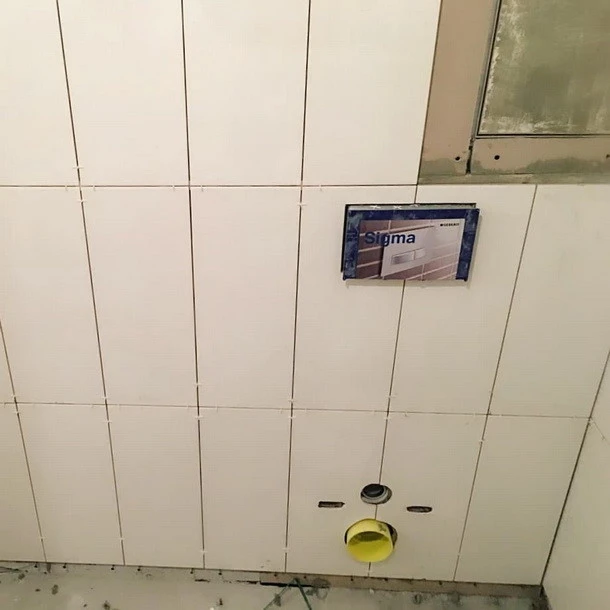
After completion of work, the surface of the box is finished with tiles, painting, plaster or other method.
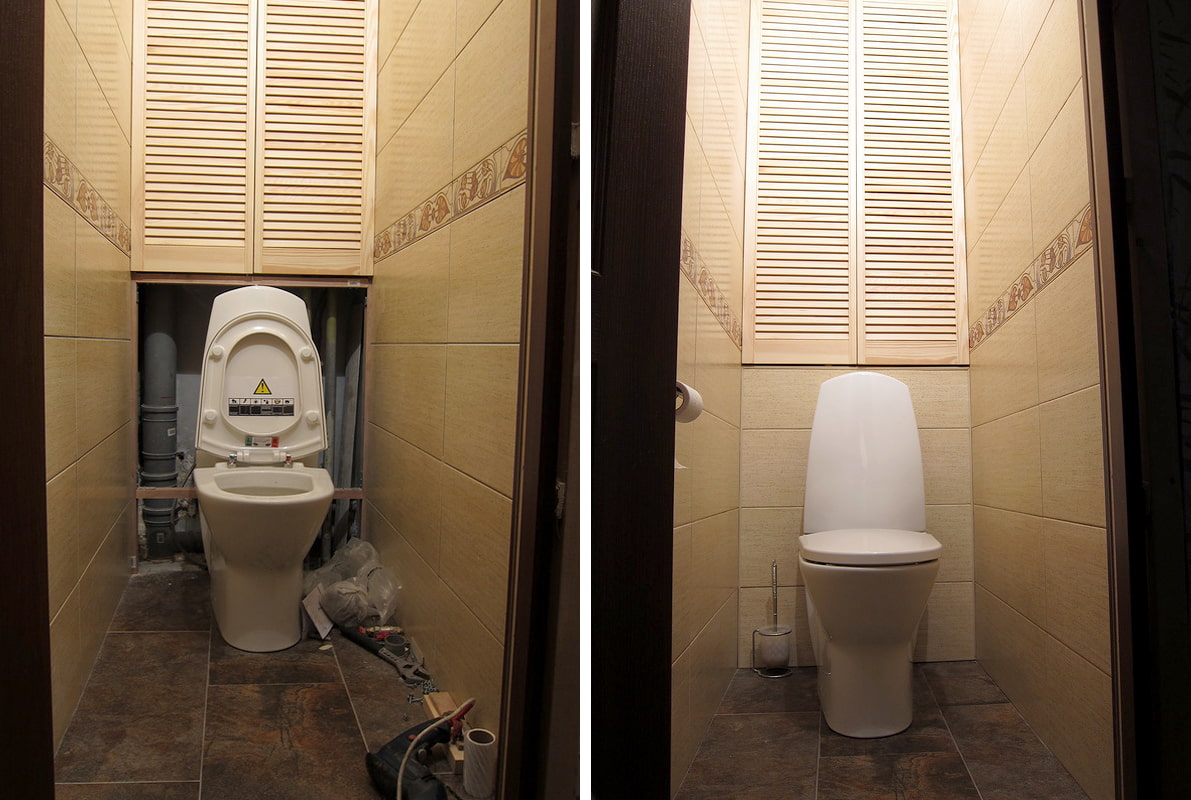
A more detailed solution to the question of how to hide pipes in a toilet with access is discussed in the video.


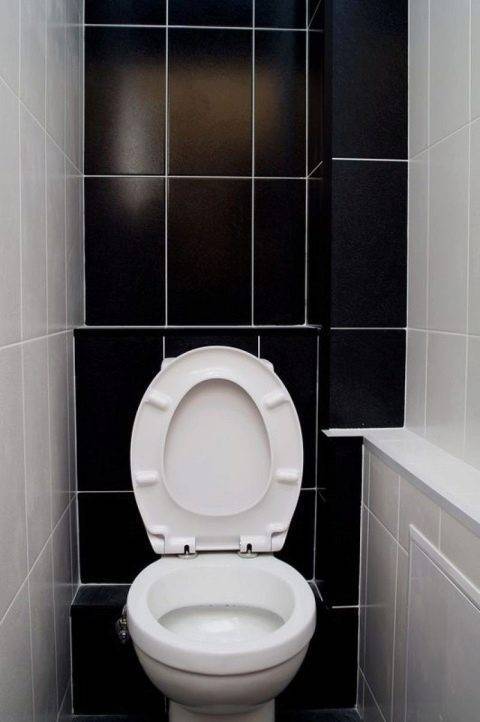
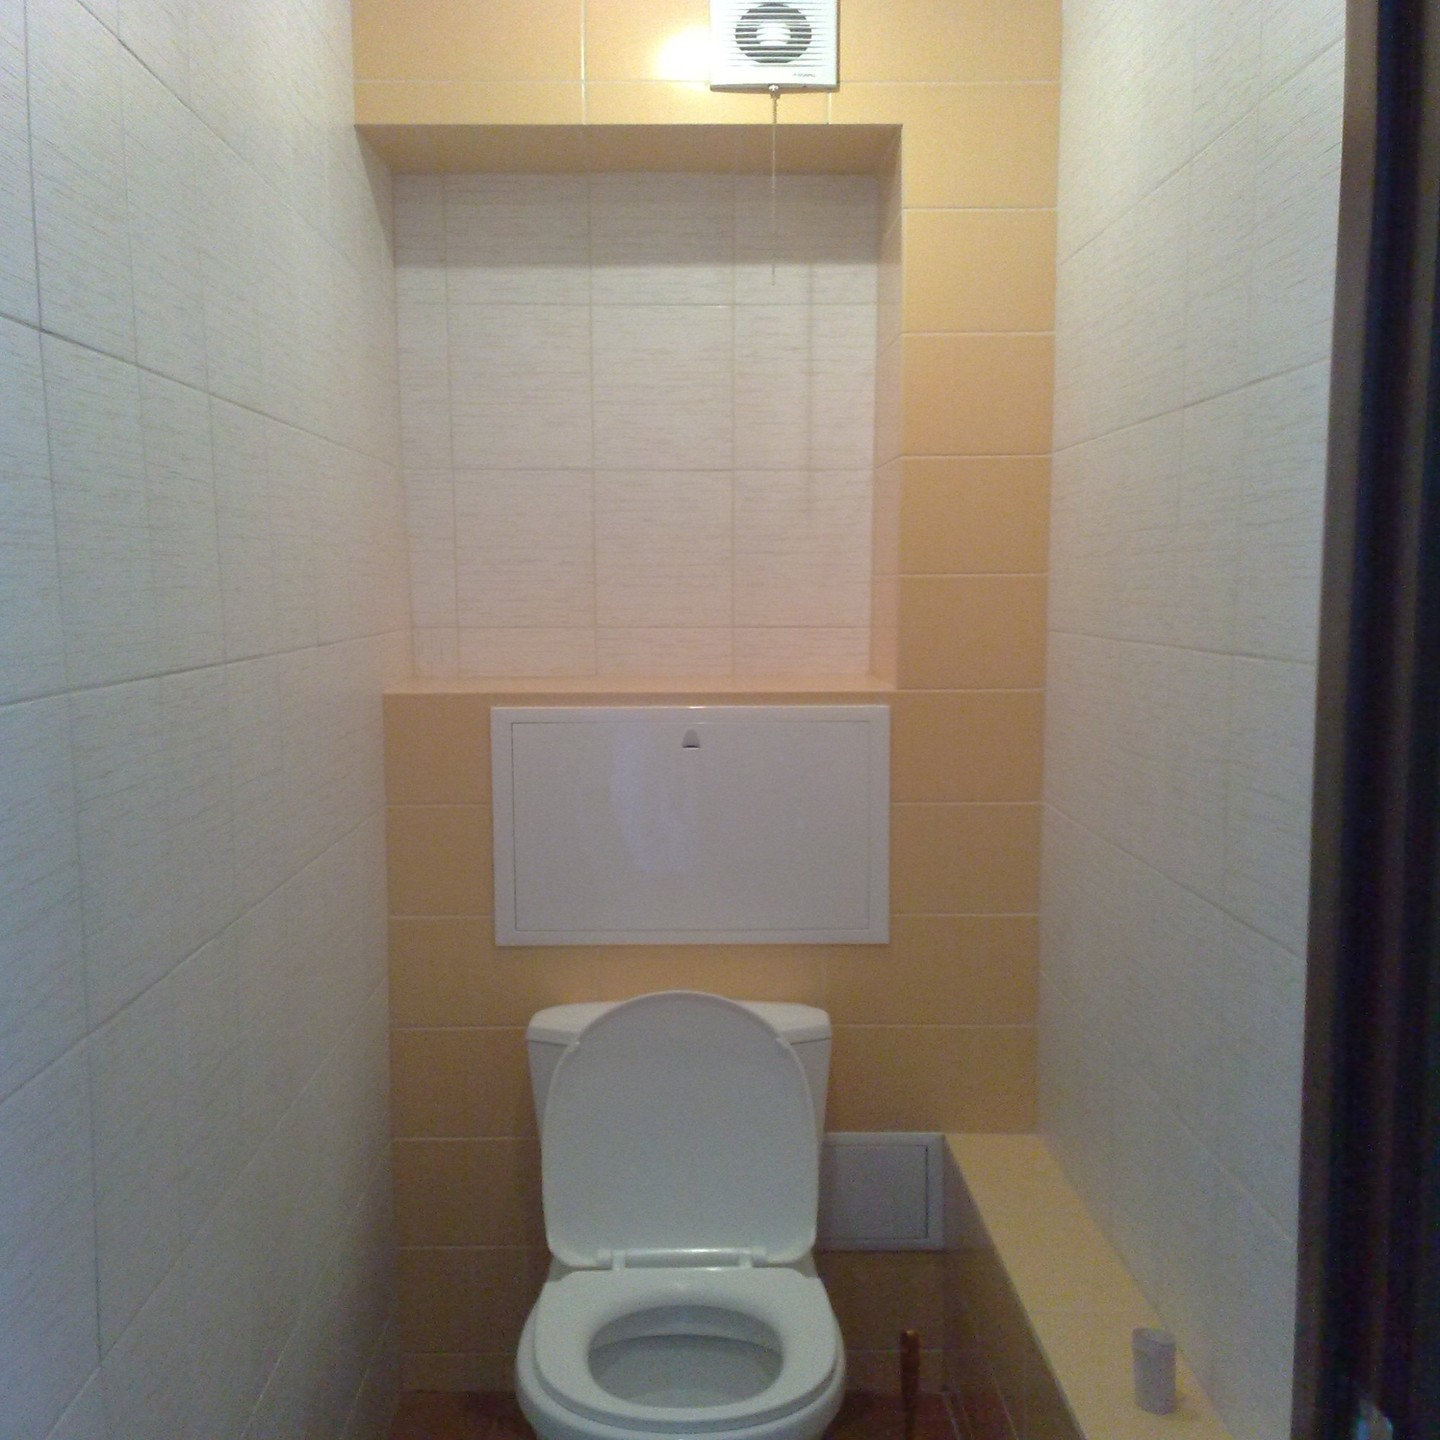
The photo shows the view of the toilet after finishing the walls and plasterboard boxes with ordinary facing ceramic tiles.
Useful tips from the pros
To avoid ridiculous mistakes, you need to familiarize yourself with the practical recommendations of experts.
Knowing the tricks of the masking process, you can beautifully hide the pipes, and such decorations will not affect the functionality of sanitary communications.
- If water pipes will be replaced before masking, it is better to plan the system so that it has a minimum of connections.
- Before decorating pipes, check the operation of the system. It is necessary to supply water to all plumbing fixtures and, making sure that there are no leaks, you can get to work.
- Condensation often forms on pipes. Water accumulates in the most inaccessible places, and you have to constantly wipe it. To avoid this trouble, the pipes in the toilet should be sheathed with heat-insulating material.
- In apartment buildings, the communication system is interconnected. Problems that have arisen with the pipeline in one apartment may affect neighbors. The speed of repairing the breakdown is very important, so access to the pipes must be free.
- Do not forget about access to metering devices. Indications will have to be taken monthly, the procedure should not cause discomfort.
Knowing the types and features of the structures with which it is possible to decorate pipes, it will not be difficult to choose an option that meets the desired requirements. And following practical advice, the chosen method will not prevent communications from functioning correctly.
How to hide a bathroom in the toilet with your own hands, see the next video.
3 best ways to hide pipes
In fact, there are a lot of such methods, so for your bathroom it is quite easy to choose the best option that suits the result and labor costs.
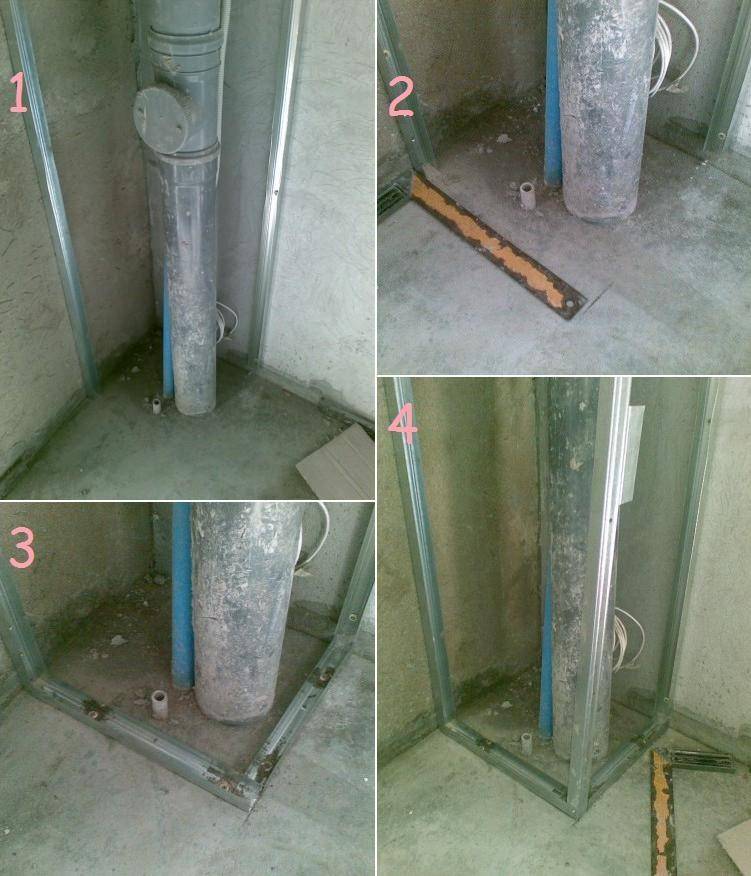
1. Remove communications in the walls or floor
This is the most time-consuming method, but at the same time it gives the best result and does not require the construction of a space-consuming frame. Its main disadvantage is the danger of pipe rupture, which will lead to the need to dismantle the entire structure, including finishing, and costly repairs. Therefore, only plastic pipes for various purposes without detachable connections are masked in this way.
mds_remont

remont_sanuzel
The plumbing can be laid into the wall. To do this, grooves of a suitable size are drilled. Such that the pipe fits freely inside. It is desirable to choose the shortest trajectory with a minimum of turns. If it is planned to lay two pipes in parallel, with hot and cold water, a separate recess is made for each with a distance of at least 0.3 m between them. It is forbidden to lay them in a common one.
Before mounting the structure, it is advisable to equip the strobes with a sleeve made of foam rubber or thermoflex in order to minimize problems from the appearance of condensate and thermal expansion. After laying the pipes, the strobes are sealed with cement mortar. The sewer pipeline can be laid in a screed.If its length is large, be sure to use the corrugation, which is put on the pipes before laying. This will allow them to expand freely when heated.
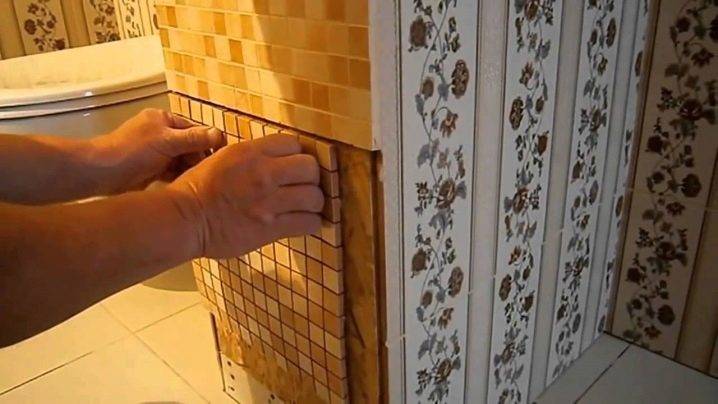
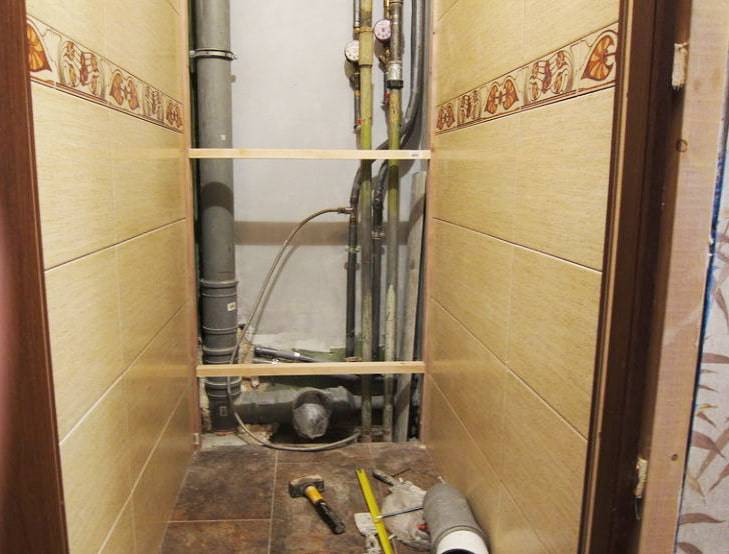
2. Hide the pipes under the tiles
A frame is being built under which pipes are located. The structure is finished with ceramic tiles. In this case, an inspection hatch or several are necessarily performed, depending on the length of the pipeline. The shape of the frame and its location can be any, they are determined by the desire of the owner. Most often, the design is suitable for furniture or plumbing fixtures.


For the construction of the frame, a wooden block or profile impregnated with a protective solution is used. In any case, a structure is assembled that is securely fixed to the wall, floor or ceiling. For sheathing, sheets of plywood or chipboard are used, but always moisture resistant grades. On the sheathed frame, openings are provided for inspection hatches to provide access to the pipes. After that, the base is reinforced with a special mesh.
The tile is laid directly on the grid. Appropriate adhesive is used for installation. Tiles are also glued to the cover of the revision hatch. After the solution has completely dried, the joints are grouted. It is advisable to additionally cover them with antifungal mastic.
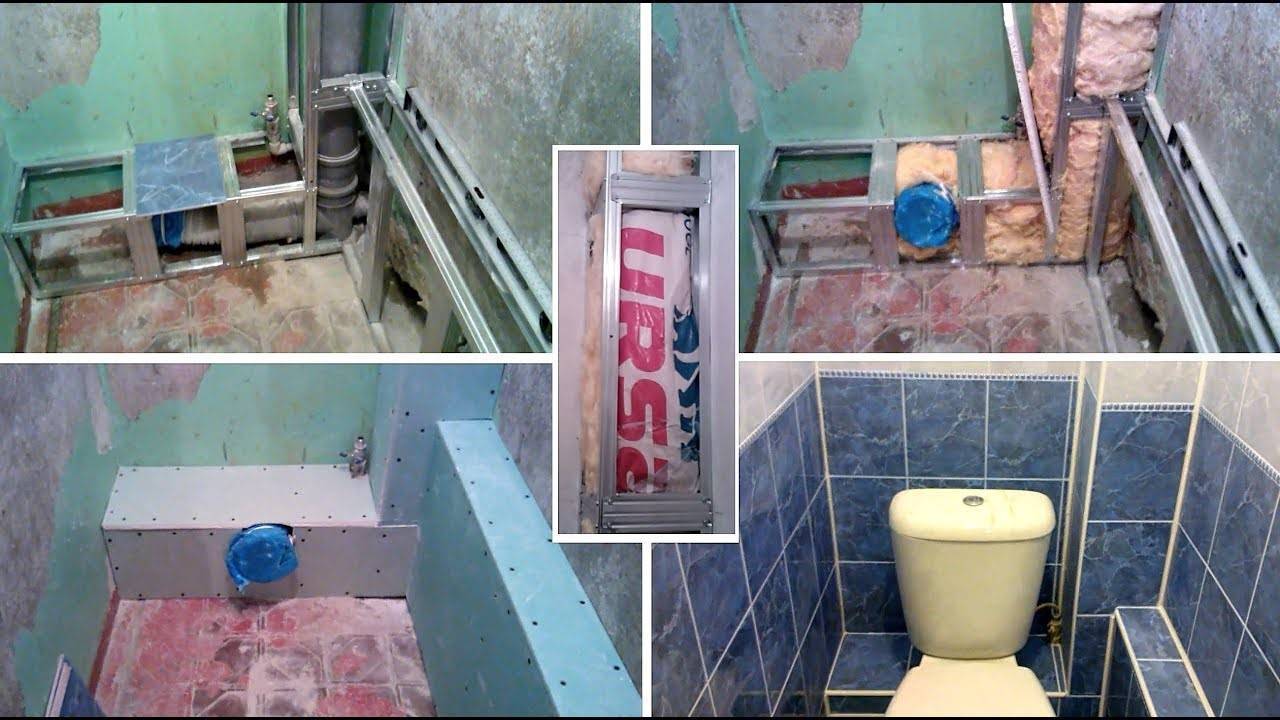
3. Mask the pipes with a drywall box
For work, you can only use moisture-resistant drywall, which differs from the standard sheet in green. Such panels are impregnated with protective compounds and are able to withstand moisture. Drywall is attached to a frame of metal profiles, the size and shape of which depend on the length and configuration of the pipeline. Work begins with the assembly of the frame.
bath_idea
interior_designing
In the process of arranging it is securely fixed to the walls and floor. Then the frame is sheathed with sheets of drywall
It is important to remember that the material has a front side, it must be outside. Self-tapping screws are used to fasten the canvases, their hats are recessed into the base by about a millimeter
On the prepared box, an opening is cut out under the inspection hatch. The door is hinged.
If hot water or heating pipes are laid inside the structure, several small holes must be made on its upper wall. On the bottom, it is also desirable to make a hole in order to immediately notice a leak. To strengthen the corners of the structure, they are covered with special perforated corners. The finished box is rubbed with a grater, then plastered. All seams are carefully sealed. After drying, proceed to the finish.
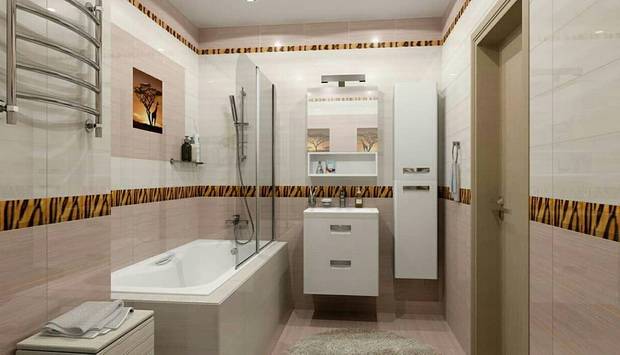
Plastic panels are also used for sheathing the frame, which also gives a good result. Using one of these methods, you can hide pipelines of various shapes, including the most complex wiring. The effort you put in will pay off handsomely. The interior of the bathroom will become much more attractive if engineering communications are not visible.
Drywall box
Plasterboard box assembly
usually done for further laying tiles. The process reminds
installation of a plastic structure. First, the frame is assembled, then it is sheathed
drywall sheets. The last stage is the finishing coating (tile, decorative
plastering, painting, etc.). It is necessary to choose moisture resistant grades of material,
how to close the sewer pipe
in the toilet with ordinary drywall is impossible. It will absorb moisture and
will lose its strength, tiles or plaster will peel off.


We must remember that fast
dismantling the box in this case is impossible, so you must first
put all the pipes in order.
How to make a drywall box
You can close the pipes in the toilet by making a drywall box. This is perhaps the most popular solution. This is because the technology is very plastic, you can hide pipes of any configuration. Another nice bonus is multiple finishing options: lay tiles on glue, level the surface with putty, then paint or paste wallpaper.
The pipe box in the toilet can be vertical or horizontal - this does not change the essence
Peculiarities
If you have chosen to close the pipes in the toilet, there are several points that you need to consider. The first - to all key nodes - counters, filters, etc. you need to have access. It is desirable that access to stopcocks be quick. There are several options:
- make one panel folding or turning (hinged);
- part of the panel can be removable, fastening with a pair of self-tapping screws and / or magnets;
- put a hatch (plastic or invisible hatch for tiling.
You can, of course, make the structure non-separable, but if necessary, you will have to break everything, then restore it, and problems happen even with new pipes.
Special hatch for tiles
The second - the tile, if you finish it, it is better to glue it on a special glue, and not put it on a mixture of cement and sand. A thinner layer of glue is required; its mass is less. Under such conditions, it will be easier to remove / lift the cover.
Work order
First, decide what your box will look like.It is advisable to plan everything so that it not only closes the pipes, but, if possible, also carries a functional load. For example, if the pipes run down along the wall on the right or left, which happens if a hygienic shower is installed in the toilet, the box can be made a little higher, and various necessary little things can be placed on its upper part.
How to close the pipes in the toilet: make a drywall box
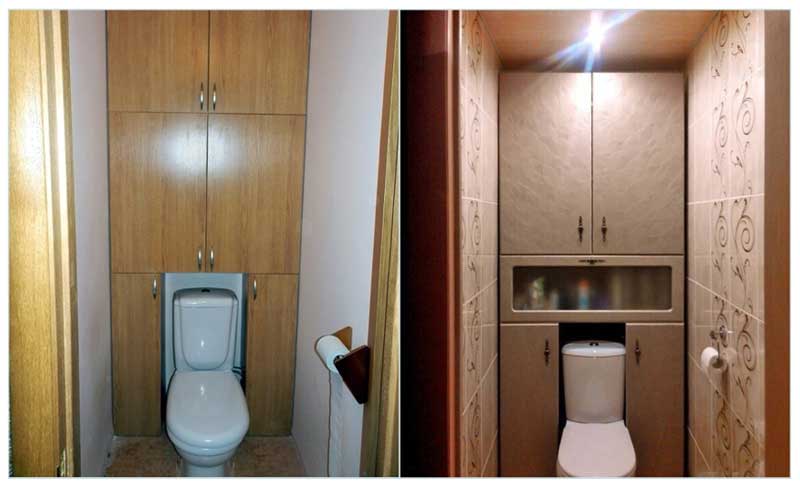
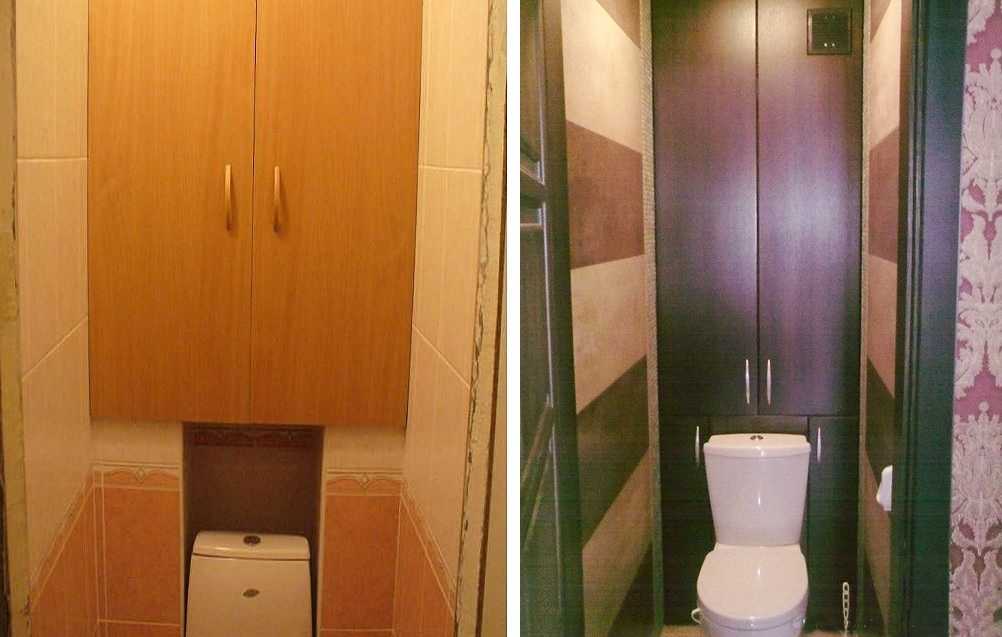
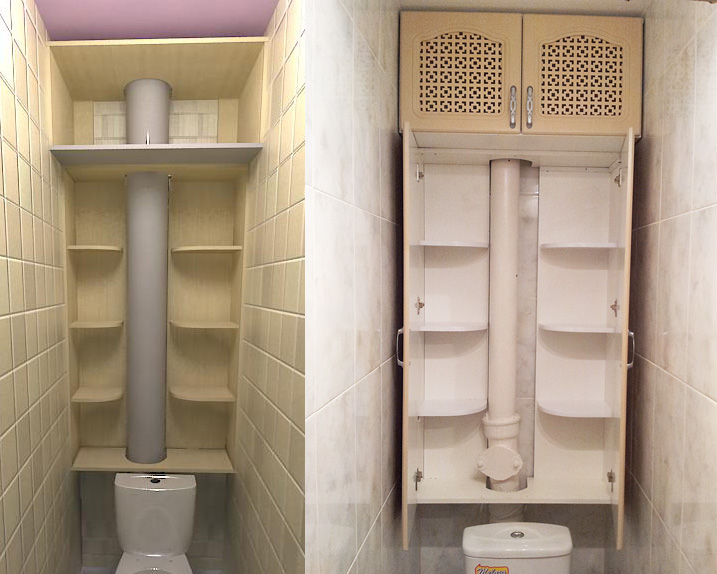
If you close the risers that run in one of the corners behind the toilet (the layout of standard Khrushchev toilets), it makes sense to close not only that corner, but to sew up the entire wall, making a locker out of it. Shelves can be open or closed (with or without doors), but in small apartments this is very convenient.
If the pipes are on the back wall, and the toilet is narrow and long, it makes sense to sew up the back wall completely
Having decided on how your box will look like, markings are applied to the walls and floor. Then take galvanized drywall profiles. Down and on the sides there is a bearing profile - PN (UW) - without curved sidewalls. Since the structures are small, a profile of 50 * 40 mm is sufficient. A rack-mount profile goes to the jumpers - PS (CW) - its width is also 50 mm, and the depth, if desired, can be small.


Jumper connection
Jumpers are cut to size (with scissors for metal) and fastened with self-tapping screws. With a small distance - up to 50 cm - one from each end is enough, with a larger beam, put two. The installation step of the racks is about 60 cm, the jumpers are approximately the same step. In the place where the door is attached (if provided), a reinforced double profile is placed.
The assembled frame is sheathed with drywall, cut to size. They are fixed with small self-tapping screws with a screw at the end (TEX 3.5 * 9.5 mm).Fasteners are installed around the perimeter and in places where jumpers / racks go, the step is 20 cm. When twisting, you need to make sure that the hat is a little buried in the drywall, but does not break through the cardboard.
After sheathing, finishing work comes, and they depend on the chosen finish. For painting and wallpapering, the box is completely puttied; for laying tiles, only the screw heads are covered with putty.
What else can you make a box for pipes in the toilet
Not everyone likes to work with drywall and profiles for them. In this case, the frame can be assembled from dry wooden bars. If desired, they can (and in principle should) be treated with antibacterial compounds - so as not to rot.
Instead of drywall, you can use OSB, moisture-resistant plywood or flat asbestos-cement sheets. All these materials can hardly be called 100% environmentally friendly, but many people are more accustomed to working with them. All of them are moisture resistant, easy to process, so a good option. By the way, tiles fit perfectly on asbestos, better than on all other materials, including drywall.


