- Uneven self-leveling floor: how to avoid problems
- Preparation for leveling the floor along the logs
- floor leveling
- Leveling the concrete base
- Surface grinding
- Filling with self-levelling compound
- Leveling with cement-sand mixture
- Dry leveling
- 8 Step-by-step instructions for applying the mixture using the example of a ceramic tile floor
- How to properly and efficiently pour a wet floor screed without beacons
- Preparatory work and selection
- Material selection
- Training
- Waterproofing and reinforcement
- Marking a horizontal level using a water level (hydraulic level)
- What is the water level (hydraulic level)
- How to work with the hydraulic level
- Definition of the top level of the main floor
- Semi-dry screed
- Concrete coating independently in stages: step by step instructions
- Surface preparation
- Installation of lighthouses
- Mixing the solution
- fill
- Fill Technology Errors
Uneven self-leveling floor: how to avoid problems
In order not to deal with mistakes and irreparable defects later, you need to carefully prepare the rough base before pouring and carefully follow the technology.
Most problems arise when you want to do everything quickly and, above all, save money.
It doesn’t matter what to save on - on a tool, material, as well as hiring professionals. When you have confidence in your abilities and skills - it's just wonderful
When all this is not there, it is better not to take risks, not to spoil the material, not to waste time in vain.
Ultimately, the self-leveling floor will reflect the quality of the work performed. And if everything is done in good faith, then he will please himself for many years, will not create any problems, will not lead to additional unforeseen expenses.
Preparation for leveling the floor along the logs
The logs laid on the subfloor are wooden beams, which are additionally processed by various means that increase their service life and protect them from deformation, decay, etc. The standard cross-sectional size for such a beam is from 50x100 to 100x50 millimeters. If the room does not allow a significant increase in the level of the base, then you can use slats measuring 50x50 millimeters.
You can use one of the following materials for mounting the base on the logs:
- plywood;
- chipboard or cement chipboard (for more details: "Use of DSP board for flooring - options");
- DSP boards are best suited because they have the highest strength index.
DSP boards, as the most effective coating, have other advantages:
- high moisture resistance;
- excellent strength;
- optimal fire resistance;
- protection against microorganisms;
- simple processing and installation process;
- low cost.
To level the lags, you will need a significant supply of materials, tools for their processing, as well as a complete set of tools:
- directly lags;
- antiseptic drug;
- floor covering, which is destined to become a new foundation;
- grinder or fine-toothed hacksaw;
- materials for waterproofing and insulation;
- cord or fishing line to check the level of beacons;
- drawing tool;
- consumables: nail dowels, self-tapping screws;
- electric drill, grinder.
floor leveling
Any floor covering requires certain conditions, that the laying was carried out without complications, and during the operation, various shortcomings did not make themselves known.
For example, the minimum unevenness of the coating can be neglected:
- if ceramic tiles are used, then slight leveling can be done with a laying adhesive;
- to lay a thick linoleum, it is enough to have a solid cover without cracks, chips and large cavities. To do this, you need to know how to level the floor under the linoleum so that there are no flaws.
If you plan to make parquet or laminate flooring, then subfloor quality should be perfect. In this case, the minimum allowable change in the level of the base is 2-3 millimeters. Such deviations can only be determined using the building level and the rule. Upon the revealed defects of the subfloor, it is necessary to level it.
Leveling the concrete base
Starting to solve the problem related to how to level the concrete floor under the laminate, first of all, the degree of curvature of the surface is determined. The choice of alignment method is determined by the state of the base surface and the amount of work performed and the level of financial costs depend on this.
Surface grinding
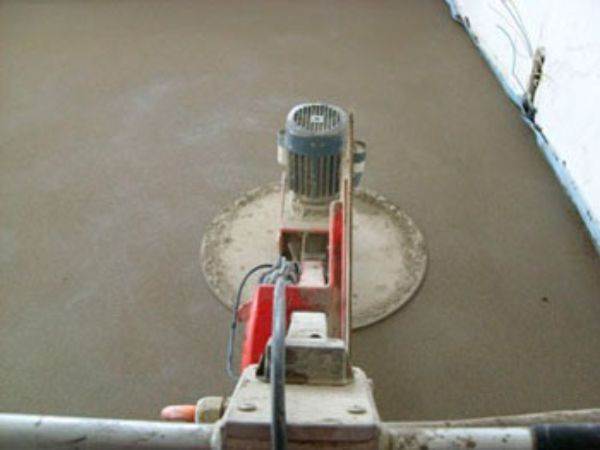
Surface grinding - when the irregularities are small
If the level difference on the surface is insignificant, then this difference can be leveled by grinding. For rooms with a large area, you can invite specialists with specific equipment or rent such equipment.
If the area of \u200b\u200bthe room is small, then you can process the surface with sandpaper.
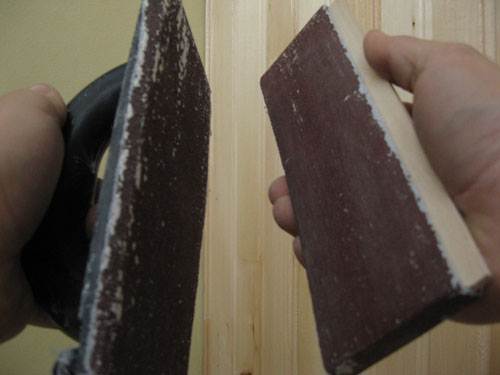
You can grind like that, only for a long time
After grinding, the surface should be coated with a primer, the use of which allows the formation of strong crystalline bonds in the upper part of the base.
Filling with self-levelling compound
This is a rather expensive, but rather quick way of leveling the surface, which is used when the differences are not large - 5 mm. If a multi-stage pouring of a self-leveling screed is not planned, then it is not necessary to set beacons and mark the level. But still, using a laser device or a level gauge, the highest point of the floor is determined, and marks are made on the walls to which the mixture will be filled.


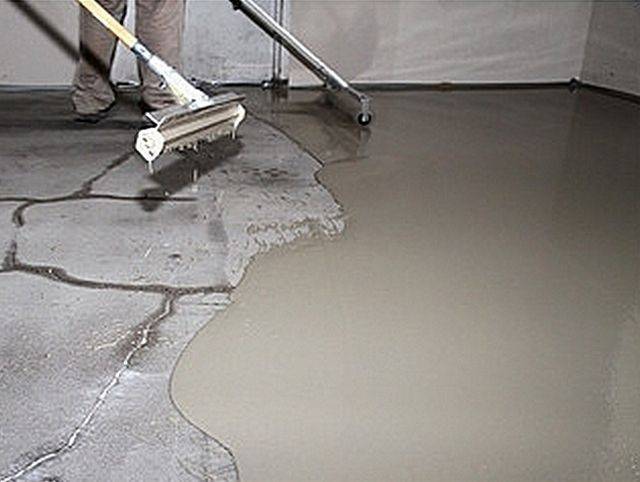


Before the mixture is poured, the base surface must be primed and a waterproofing layer applied to it. There is an instruction on the packaging of the material and a self-leveling mixture prepared according to this instruction is poured into a narrow strip and leveled either with a spatula or a special needle roller.
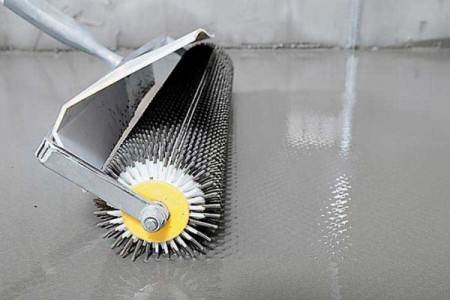
Roller for leveling the mixture
After the screed is applied to the entire surface area, a technological break is necessary for complete curing. This is a period of three or more days. The mixture should harden in the absence of drafts, temperature fluctuations, heating devices and ventilation devices should not be switched on.
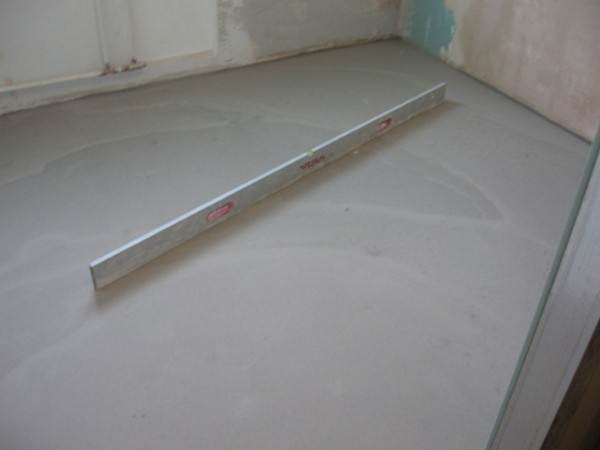
The answer to the question: how to check the evenness of the floor before laying the laminate - as a rule, at least two meters long
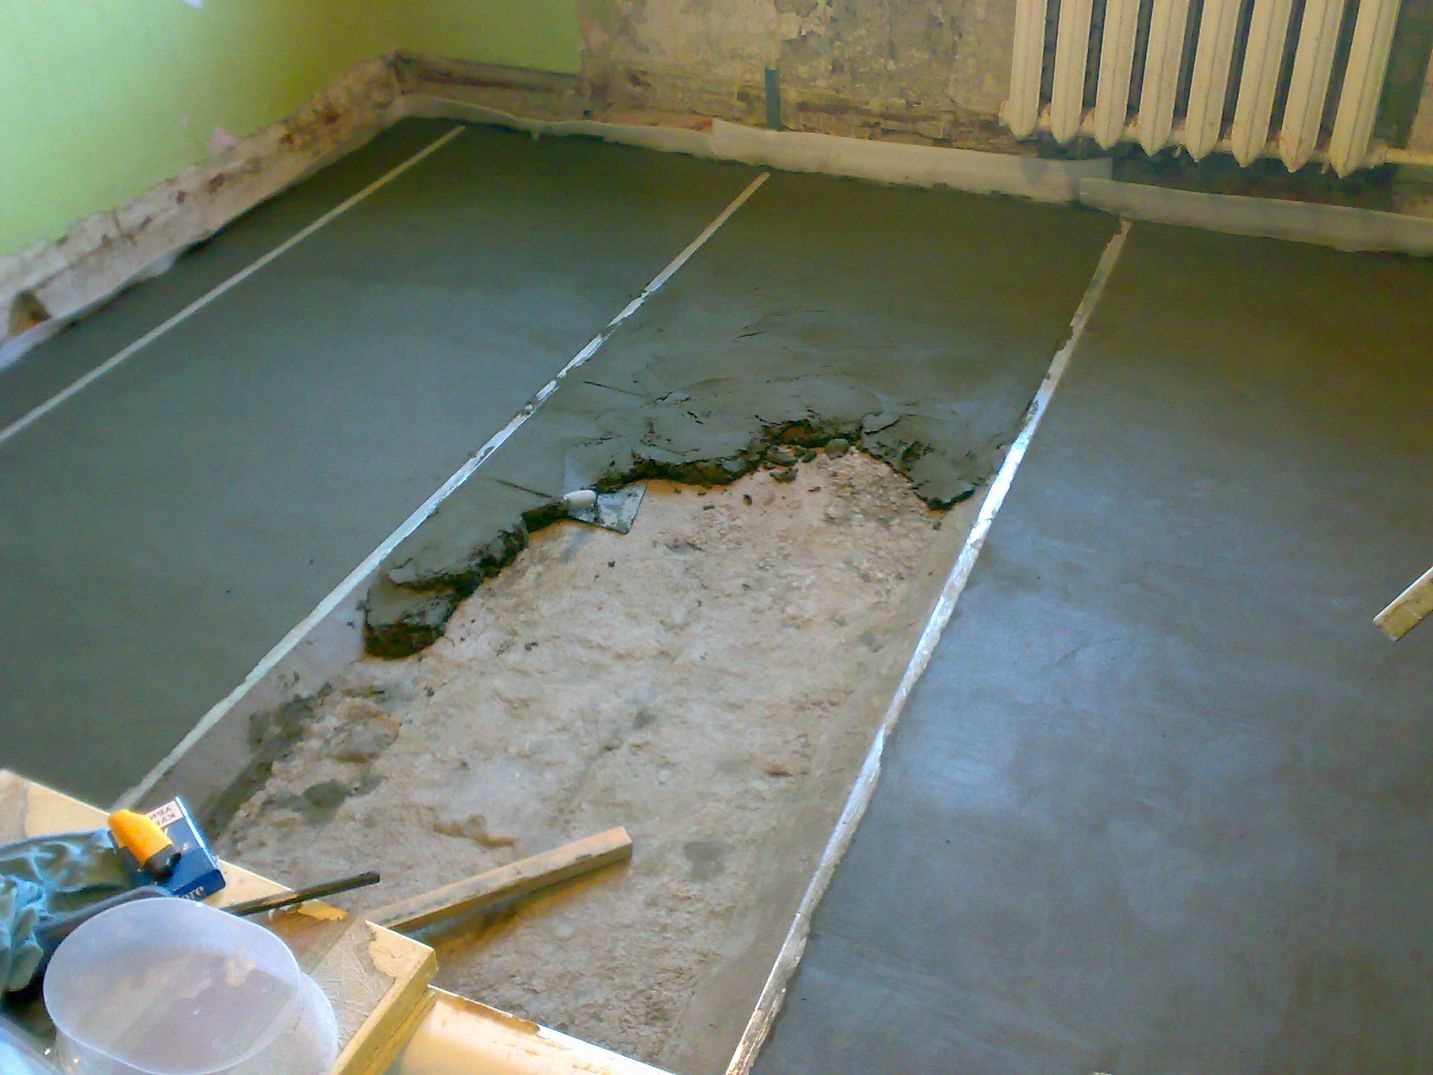
Leveling with cement-sand mixture
If significant differences in height are observed on the subfloor, then when determining how to level the floor under the laminate, the first thing that comes to mind is the use of a cement-sand mixture. For leveling, ready-made compounds or home-made mixtures are used in the ratio of cement and sand, as one to three. By dissolving this mixture in water, you can get a consistency similar to thick sour cream.
The alignment is done as follows:
- Along the perimeter of the room, marks are made on the walls, which are determined using a laser level or a simple level gauge. In the absence of such, this can be done using the usual water level.
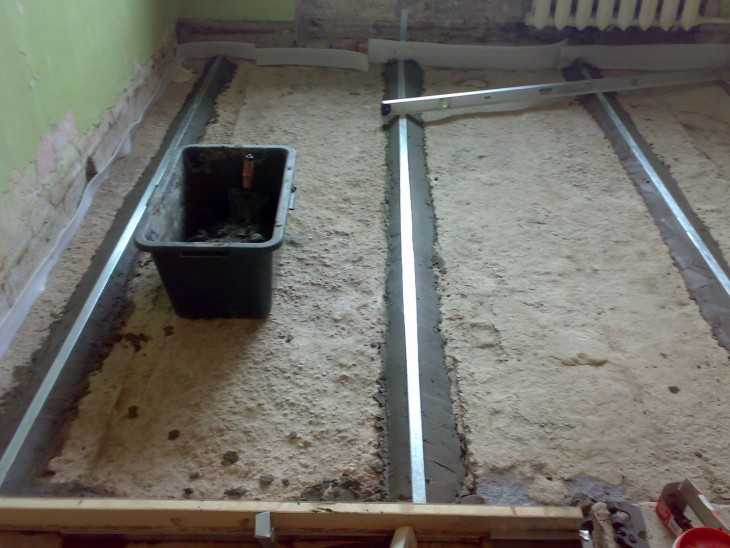
- Lighthouses are installed on the floor.
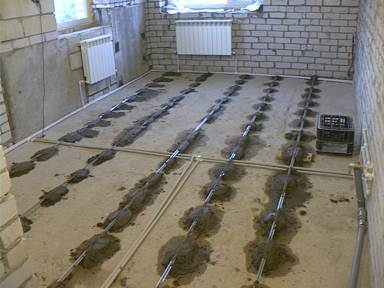
Beacons can be installed like this
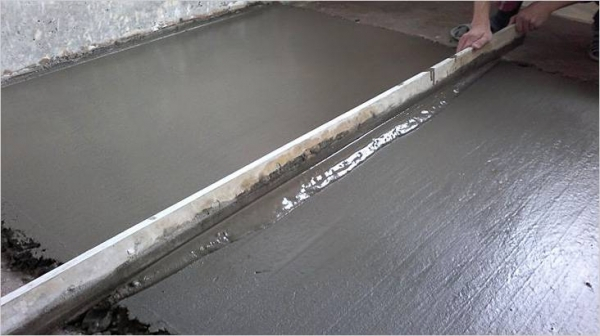
A screed is laid between the beacons and then the solution is leveled as a rule.

The rule should rely on two beacons
- After a short time - 2-3 hours, the surface must be additionally rubbed with a wooden trowel.
- The next day, the beacons are dismantled, and their places are sealed with a similar solution.
Dry leveling
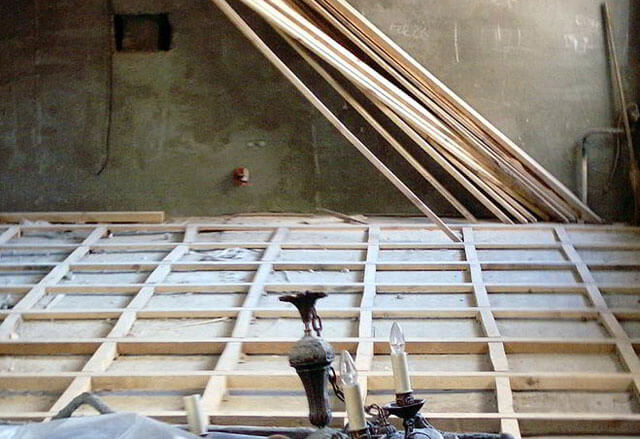
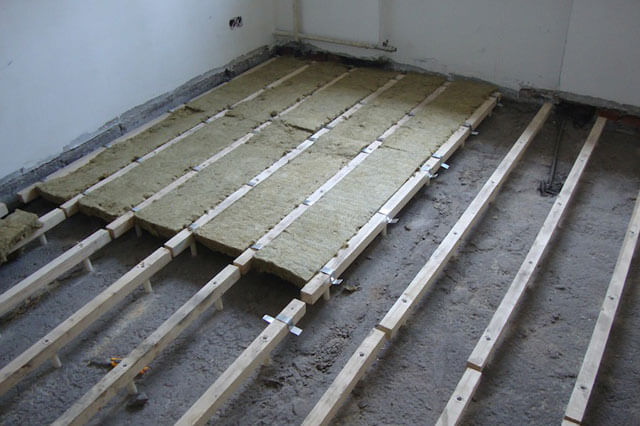
According to this technology, logs are installed, in other words, a structure is armed from a bar, which is closed with gypsum-fiber sheets, plywood, chipboard or other similar material.
Its use is possible if the ceilings are at a height that allows it to be reduced by 10-15 cm.
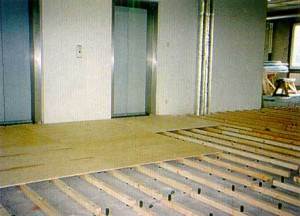
Pretty simple - logs and plywood
- The level of the future floor is noted.
- Waterproofing is placed on the rough surface.
- Sexual logs are mounted, aligned and fixed.
- The selected material spreads from above. There may be several layers.
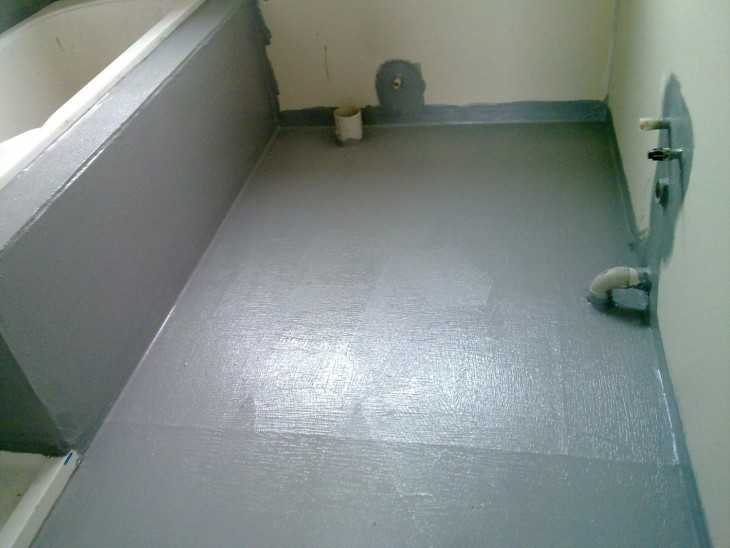
8 Step-by-step instructions for applying the mixture using the example of a ceramic tile floor
For a better understanding of how to work with such material, consider an example.
Condition: on the floor - ceramic tiles. It is very solid and difficult to remove. The difference in floor height between the bathroom and the corridor is up to 10 mm. The layout of the apartment is Khrushchev.
Solution: The bathroom floor surface will be leveled with a self-levelling compound over the old flooring. This is best helped by the finishing composition due to its high adhesion and strength. As a rule, the recommended thickness is from 1 to 15 mm, which suits the conditions.
Understanding the problem, knowing the technology of work and finding the best solutions to the problem are the skills that determine success in leveling the floor.
So, what materials will be needed to complete the work?
- material in dry form (in the example - the finishing composition);
- drill with a nozzle (for stirring the self-leveling mixture);
- roller (needle is better);
- brushes;
- spatula (wide);
- deep penetration primer (it has higher performance than the regular version);
- grinder with a diamond disc;
- large container for the solution (for one batch for the entire area required for pouring).
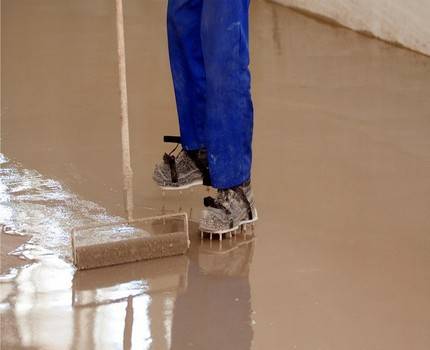
Separately, it is worth noting the need to purchase special shoes that will not spoil the damp flooring. With it, you do not have to smooth the surface again. True, this is only necessary if the floor is poured in a large room (more than 20 sq. M.).


Since the difference between the floor in the bathroom and in the corridor is very significant, careful alignment is required. It is difficult and time consuming to do this on lighthouses, so you need to resort to a self-leveling mixture.
Below, we offer step-by-step instructions for leveling the floor surface with a self-leveling mixture.
Calculate the required amount of material.
When the characteristics of strength and adhesion are unknown, but there is a flat surface of ceramic tiles, you can use a grinder (recall, a diamond disk is placed) to cut lines. You should get a lattice, the pitch of which is from 5 to 10 cm.
Foundation preparation. To do this, with a metal spatula, you need to remove the remnants of building materials. Afterwards, vacuum the floor thoroughly. Do not forget about the overlap of cracks in the walls.
Floor primer
Before that, you need to study the instructions with all your attention, since the material for the primer is not universal. You can use a roller, but in hard-to-reach places it is better to use brushes
With the rapid absorption of the primer, another layer is applied. So you can achieve the preservation of high quality in the future flooring.
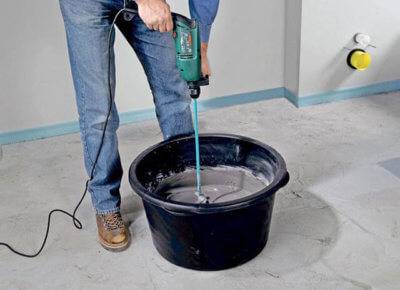
Prepare the solution in such an amount that is enough for the subsequent pouring of the solution into the room. It tends to bubble a lot during cooking, so you need to set the drill to 400-600 rpm. In this case, there will be no bubbles. It is better to stir a little longer than to eliminate problems later. How to cook: first pour water into the container, then add the dry mixture. The material is added not at once, but gradually. The amount of water will directly affect many parameters. If it is more than expected, the solution will be less viscous, which means it will be better to lie down, but it will take longer to dry, and the floor will become less durable. If there is little water, alignment worsens due to the appearance of bumps.
After preparing the solution, you can start pouring the mixture. It would be more correct to do this from the far corner of the bathroom and move towards the corridor.It is necessary not to fill in too quickly so that there are no bubbles. To make the process go faster, you need to smooth the solution evenly poured onto the floor with a spatula. The last stage of work is rolling the solution poured onto the floor with a spiked roller.
There is an interesting life hack from experienced craftsmen. They use perforators to level the mixture as follows: set the point of the chisel on the floor and turn on the equipment. Alignment is improved by vibration. Minus - you can not hold the tool for a long time, otherwise the composition will delaminate, and the floor covering will become worse.
How to properly and efficiently pour a wet floor screed without beacons
A screed in one room should be done at a time. It is convenient to do this together: one fills the floor and distributes the mixture, the other prepares the next portion of the solution.
If the area is large, the room is divided into several sections, between which barriers are installed with drywall. Filling is carried out in a checkerboard pattern, after removing the barrier and carefully sealing the joints.
The floor height difference in the room should be no more than 2 cm. Otherwise, it is necessary to lay the traditional cement-sand mortar on areas with a lower level.
At the beginning of work, the mixture should be prevented from flowing into adjacent rooms using a barrier (for example, from drywall). Observe the purpose of the mixtures: for the finishing layer, you can not use the starter mixture.
Do not deviate from the manufacturer's recommended layer thickness: excess will lead to waste of materials and increased drying time. Insufficient thickness - the risk of fragility of the resulting self-leveling floor.
The manufacturer's recommendations for dry matter to water ratios should be followed.Strictly adhere to the terms of drying of the self-leveling floor, established by the manufacturer of the mixture.
Do not work at temperatures below 15 ° C, as this will make it difficult for the screed to dry and adversely affect the strength of the surface. The finishing screed can only be poured when the starting one is completely dry.
For work, it is better to choose the material of one manufacturer (primer, starting, finishing mixes).
The tool after completion of work must be washed well: the solution quickly hardens. For the same reason, the remains of the mixture must not be drained into the sewer.
Preparatory work and selection
To begin with, it is worth saying that there are several very effective and practical methods for leveling these surfaces. At the same time, they can differ not only in different properties, but also in appearance, especially in the smoothness of the coating. However, even during the development of modern technologies, the cement-concrete screed remains the most relevant (learn also how to make a concrete septic tank in a suburban area).
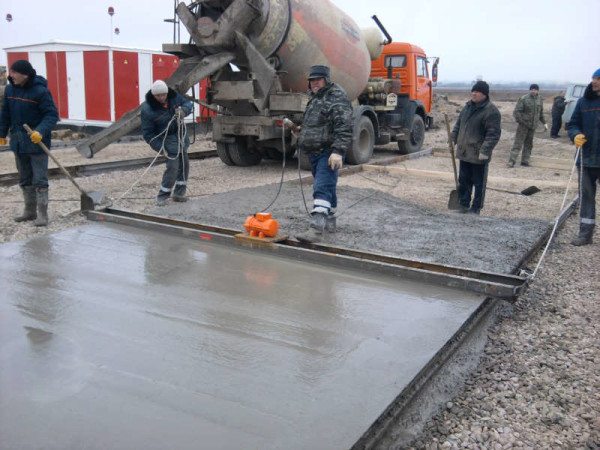
The process of creating such elements on the street is practically no different from that used indoors.
Material selection
First of all, choose the brand of cement. It is believed that the best material for this work is grade 300.
The fact is that its parameters are perfectly considered with this process and at the same time its cost is quite affordable.
Pay special attention to the sand. The fact is that in order to obtain good strength, it is worth using two different fractions of this material, which are cleaned of impurities.
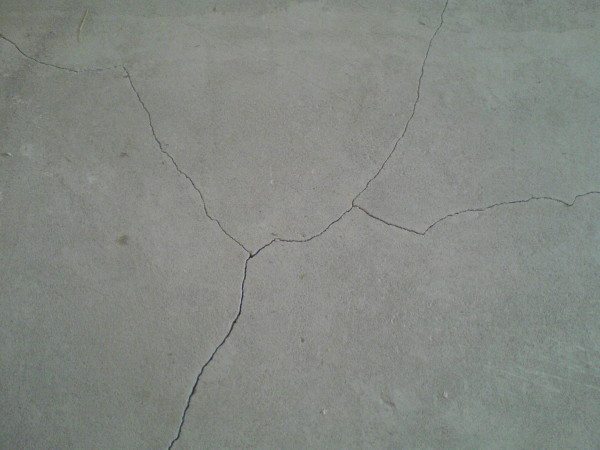
Incorrect selection of components or excess moisture in the solution will necessarily lead to cracks.
- If a concrete screed is being made on the street, then you should think about using additional additives that will give the product resistance to various impact factors.
- You can also add a little plasticizer to the composition. It will increase the ductility of the composition, and also significantly reduce the likelihood of cracks even at high humidity.
The final result depends on the quality of the components used.
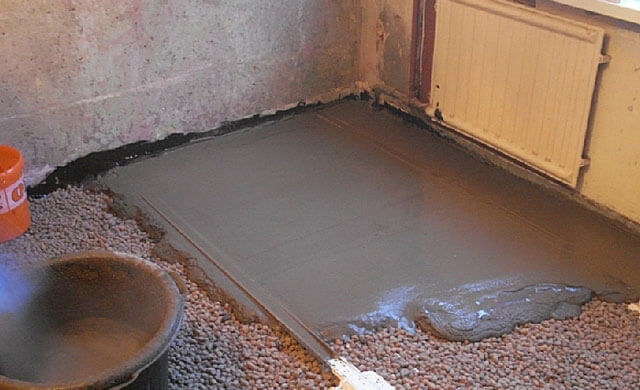
Recently, craftsmen have chosen cellular concrete to create a screed, since they additionally insulate the floor and may have the functions of soundproofing materials.
Sealing cracks in an old screed or floor slab
Training
First of all, all debris is removed from the surface and cracks are cut with places of damage.
- Next, the floor is covered with a layer of primer. At the same time, it is desirable that it contains antibacterial components, especially if a concrete screed is made in the garage, where high humidity or dampness is often present.
- After this, it is necessary to create a thick cement mortar, with which you need to close all the cracks and make a preliminary alignment.
Waterproofing and reinforcement
The need for such processes is often questioned, since the thickness of the concrete screed does not always allow this. However, when working on large areas, reinforcement is considered practically indispensable, since it allows you to maintain the internal integrity of the structure.


There are also rooms for which waterproofing is simply necessary, especially if they are located on the ground floor or are connected, but with water.
To begin with, professional craftsmen prefer to install moisture protection.In this case, most often they use special mastic or rolled materials.
Reinforcement is produced by installing a special metal mesh on stands. In this case, the weight of the concrete screed will increase greatly, but its strength will increase significantly.
Reinforcement using metal mesh on special supports
Marking a horizontal level using a water level (hydraulic level)
What is the water level (hydraulic level)
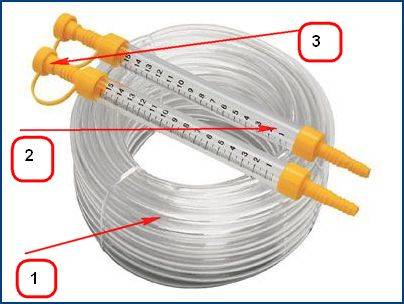
The hydraulic level consists of two glass flasks (2) connected by a long hose (1). A measuring scale is applied to the flasks. Water is poured into the hydraulic level hose, to a level in the middle of the flasks. There should be no air bubbles in the hydraulic level system.
Note: To avoid bubbles in the hydraulic level system, it must be spilled with water. Water must be poured into one flask, water will flow out of the other flask, and bubbles will come out. Water must be filled to complete exit of all bubbles.
How to work with the hydraulic level
Two people are needed to mark the horizontal level using a water level. In one corner of the room, a mark is placed at a height of 90-100 cm from base. One spirit level scale is attached to this mark. The second end of the hydraulic level, the assistant puts to another corner of the room. Moving up and down one flask of the hydro level, you need to ensure that the water is at the same level in both flasks of the water level. After marking this level on the wall, the assistant moves to another corner and so on throughout the apartment.
Note: When moving the spirit level around the apartment, it is necessary to close the openings of the flasks of the hydraulic level with a finger or a lid (3) so that water does not flow out of it.
After the marks have been made in all corners of the apartment (room) with the help of a chopping building cord, a horizon line is drawn throughout the apartment (room).
Definition of the top level of the main floor
From the marked horizontal level, you need to make measurements of the distance from the line to the floor and identify the minimum distance from them. This will be the zero level of the new floor screed.
Further simply. From the top level of the floor, we mark the total thickness of the screed. We make a mark. We measure the distance from the horizon line to the mark made and transfer this size throughout the apartment. We beat off the screed level lines with a building coloring cord. This will be the level line of the finished floor in the apartment or room.
Note: if the screed structure is planned to be multi-layered: with backfill, a layer of sound insulation and heat insulation, all lines of the layers of the floor structure can be marked.
On this. The marking of the floor screed level is completed! Walk on a flat floor.
- Reinforcement of the floor screed: the choice of material for reinforcement
- Concrete screed, purpose and application
- Concrete floors with a hardened top layer: liquid and dry hardening technologies
- Do-it-yourself concrete floor in the garage
- Types of floor screed for apartments and houses
- Damper connection for screed
- Mixing and laying expanded clay concrete screed
- Mixing mortar for screed
- How to level the surfaces of walls and floors
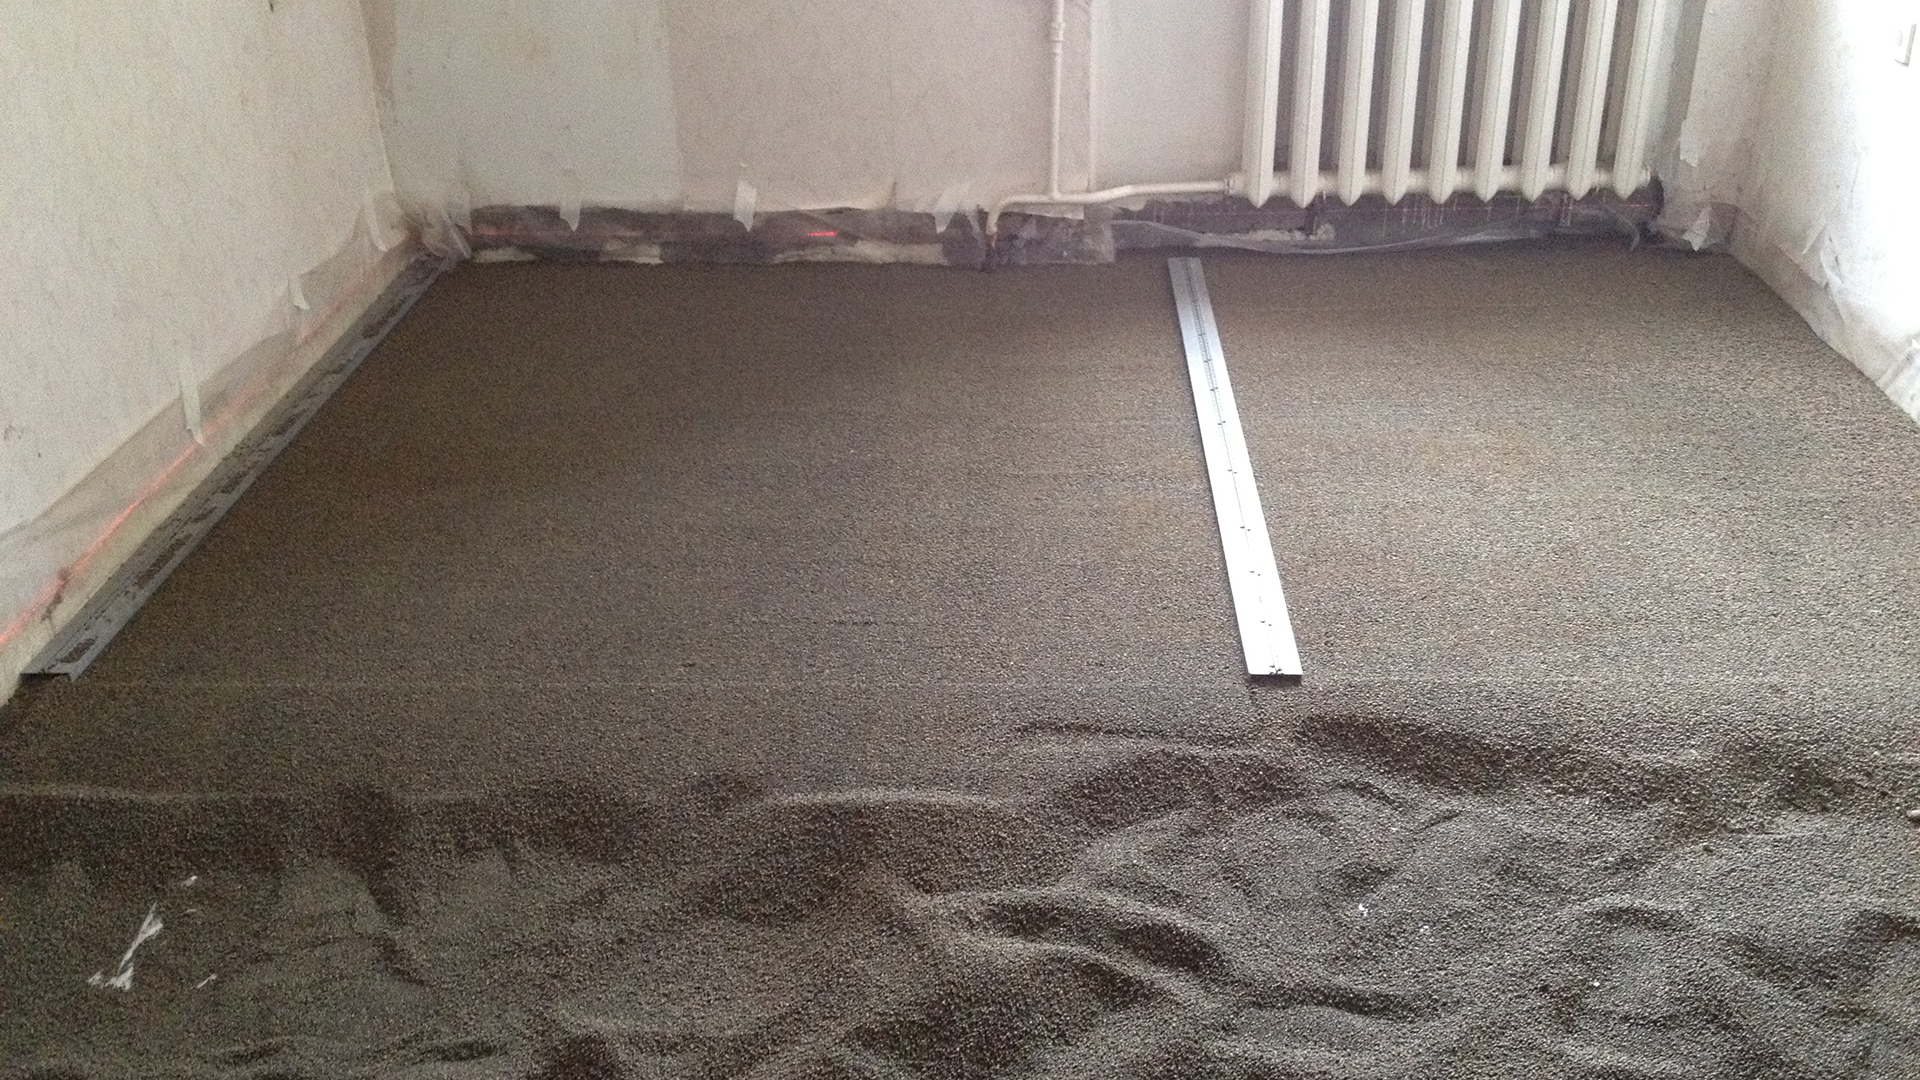
Semi-dry screed
The implementation of a semi-dry screed is carried out by laying a building mixture based on cement with fiberglass:
- Clean the floor from debris, dust and deposits;
- Clean up small irregularities;
- Fill cracks, pits and cracks with cement mixture;
- Carry out waterproofing;
- Lay the edge tape;
- Set up beacons;
- Prepare a solution.To do this, you need cement grade M400, sifted river sand, fiber and plasticizer (in proportion: cement - 1 part, sand - 3-4 parts, fiber - 600-800 grams per 1 cubic meter of solution, plasticizer - 1 liter per 100 kg of cement);
- The solution is laid. It is necessary to lay in small sections, pulling it together with the help of the rule with movements towards yourself - to the left - to the right. The beacons are filled with the mixture completely and cannot be removed;
- After laying the solution, it must be wiped immediately. The time interval for grouting is no earlier than 20 minutes and no later than 6 hours after laying.
Grouting is done with a grinder.
The minimum thickness of a semi-dry screed is at least 3 centimeters, the maximum is no more than 4 centimeters.
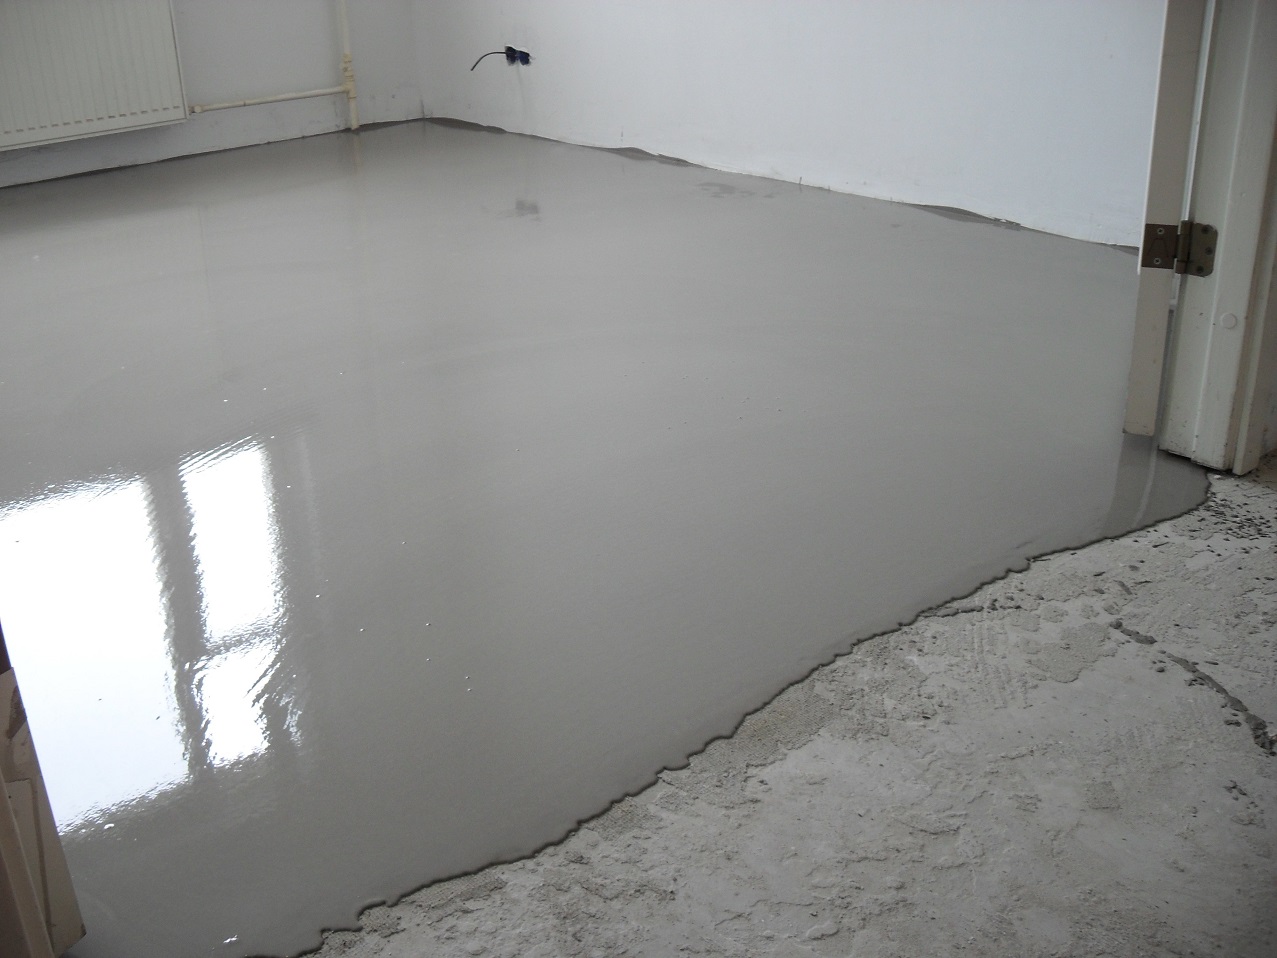
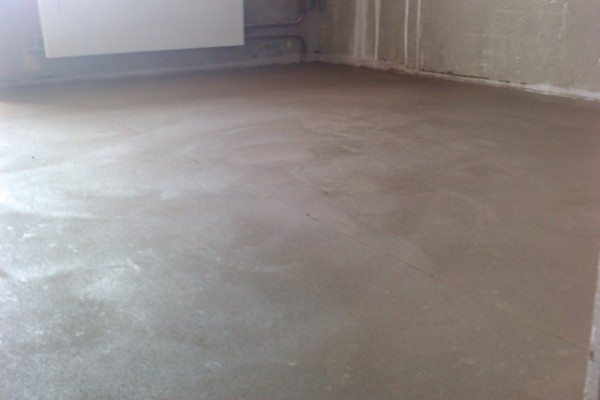
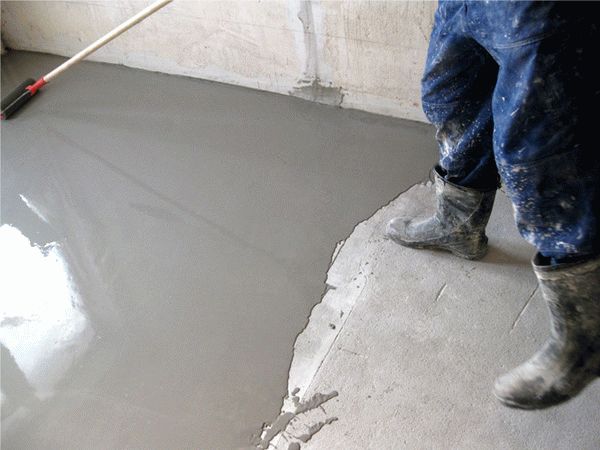
One of the easiest and fastest ways to level a base is to smooth the surface with a self-levelling mortar. It is enough just to dilute the dry mixture with tap water in the required proportions and pour the surface with the resulting solution.
Before pouring, the coating must be cleaned of dirt, dust and other deposits.
Immediately after pouring the mixture on the floor, it must be leveled with a spatula, and then use a spiked roller to remove the remaining air bubbles.
The thickness of the self-leveling floor must be at least three and not more than 35 millimeters.
It is best to do the work with two people because the mixture begins to harden after about 10-15 minutes. To avoid possible cracking of the floor, its surface can be sprinkled with cool water before pouring.


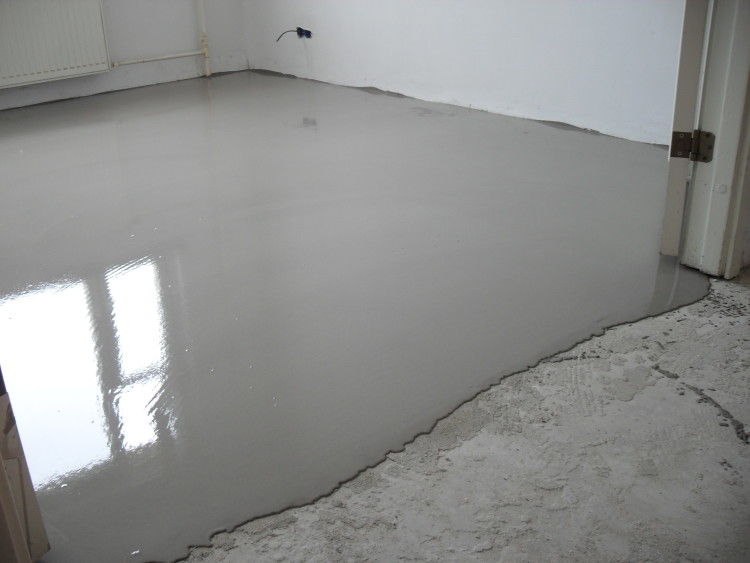
It should be noted that this type leveling is not suitable for the floorwith large irregularities. In the presence of small irregularities, depressions, cracks on a relatively flat concrete surface, you can use the method of filling the entire surface
In the presence of small irregularities, depressions, cracks on a relatively flat concrete surface, the method of filling the entire surface can be used.
Most often, polyester putty is used for concrete floors. It has properties such as moisture resistance, strength, safety in operation and durability. This putty has no shrinkage.
Diluted putty in a ratio of 1:5 is applied to the surface with a thin even layer. After the mixture has hardened, use a spatula to remove all excess. Then smooth the surface with sandpaper.
The choice of type of putty depends on the humidity of the room and the time of its solidification. The time of complete solidification is approximately 1 day.
The grinding method is used on surfaces with irregularities of 3-5 millimeters. This type of leveling is performed using grinders with various attachments. If the concrete coating is old, then the upper and most damaged layer is removed.
When grinding, all types of pollution are eliminated and deformed areas that have chips and cracks are smoothed out.
Concrete coating independently in stages: step by step instructions
Surface preparation
All dirt must be removed from the surface of the base (from the concrete slab),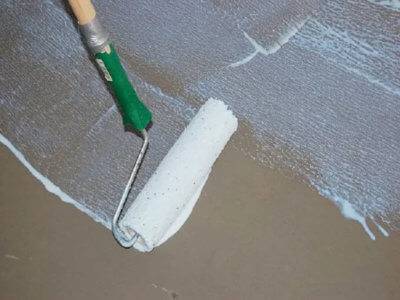
- First primed for the first time, waiting for drying, then begin to apply a second layer of primer.
- After the second layer has dried, a damper tape is applied around the perimeter of the base.
The damper tape will form the desired gap
Installation of lighthouses
The main thing is to make the right measurements, draw up a diagram.
- To work, you need metal profiles. It is necessary to check them in advance for the possible presence of deformations (roughness of parts, difference in length, curvature). All these parameters should not have deviations, otherwise the surface will not be able to level as well as necessary.
- Beacons are installed at a distance slightly less than the rule. Enough 15 cm from the wall. Lines are drawn at specified intervals.
- Fixation is carried out on a cement or gypsum mixture. Gypsum dries faster. Cement mortar sets longer.
- Details are distributed according to the marks from the beacons, all surfaces are leveled according to the desired thickness of the applied layer.
Attention
After completion of work, the evenness of the installation of beacons is checked by level. If the length of the level is not enough for the entire plane, then two rules are used, in the middle of which the necessary tool is placed
Pass across the entire width of the room with measurements.
Mixing the solution
 The procedure for preparing the solution at home:
- Dry ingredients are poured into a tray or basin, mixed thoroughly.
- When the cement and sand are well mixed, water is gradually poured into them in a thin stream.
- Knead without stopping until the consistency takes on a homogeneous structure (there should be no lumps or solid inclusions).
- The mixture should not be too thin. To ensure viscosity, you can pour a little more sand.
- To enhance the properties of the solution, plasticizers are added to it.
fill
Stages:
- The composition begins to be poured from a certain place. To do this, choose a wall remote from the doorway.
- In the intervals between the beacons, a mixture is applied, distributed over the surface by the rule.With a little pressure on the tool, they are carried out with swaying movements along the floor.
- Consistently begin to lay the mixture in all the gaps.
- When the solution has seized, all beacons are removed sequentially. All places that have undergone deformation are covered with the remains of the mixture.
- The coated layer is left to dry until fully cooked.
Advice
Full drying of the solution takes about three days. After this time, you can begin additional work on the formation of the surface, laying tiles, linoleum.
Fill Technology Errors
Even when the surface is perfectly prepared, defects can appear if the manufacturer's instructions are violated, as well as by careless observance of the technology. In particular, these are:
- Insufficient amount of water so that the solution, when dried, gains final rigidity and strength;
- Excessive amount of water, which leads to partial or complete separation of the bulk mixture;
- Too powerful mixer, which excessively saturates the solution with air, which leads to the porosity of the surface;
- The foundation was not primed, which leads to poor adhesion and uneven flow of the finished mixture;
- The development of the solution proceeds at a slow pace, the next portion is added too late, when the first one has already partially hardened and is no longer able to adhere to the new one.
- After pouring, the floor was not worked out with a doctor blade or a rule, which led to bumps and pits;
- The air was not removed from the solution using a spiked roller;
- The heating system was turned on early;
- There were drafts;
- High or low humidity levels;
- Temperature fluctuations.


