- What to look for when choosing a dishwasher
- Types of dishwashers
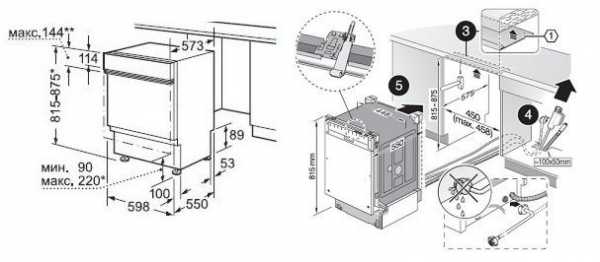
- Choose a size
- Energy efficiency classes and labels
- How to install a dishwasher yourself
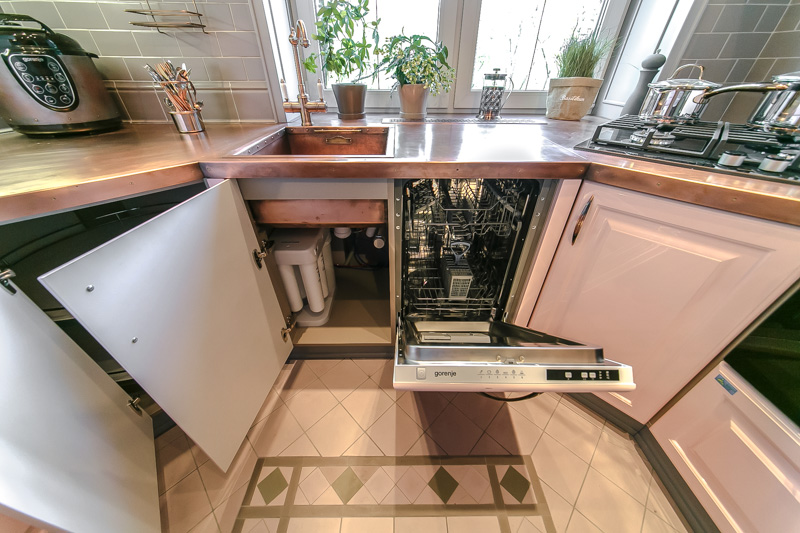
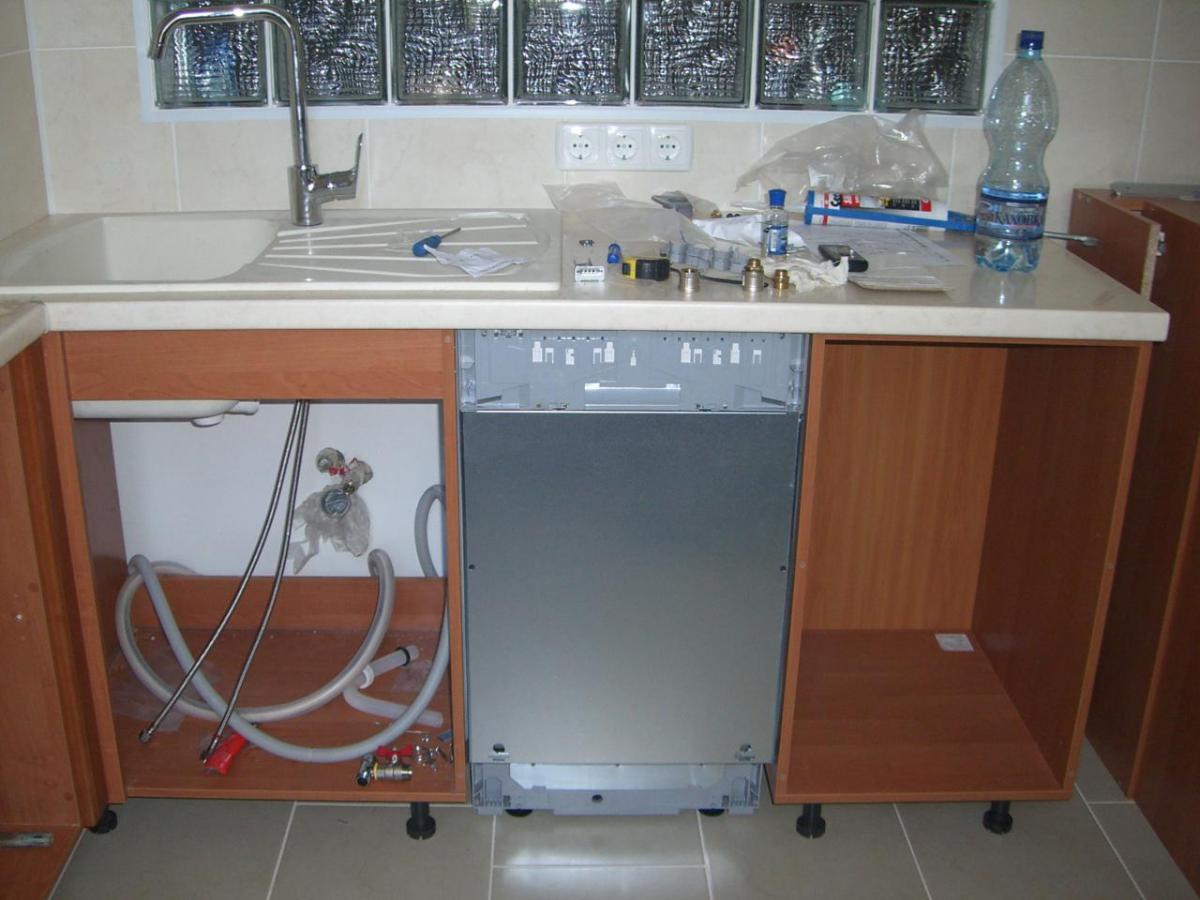
- Installation of built-in dishwasher
- Installing a Tabletop Dishwasher
- Operating recommendations
- Preparation of tools and materials
- How to build a dishwasher in the kitchen
- Connecting an integrated dishwasher
- Installation in a prepared place
- Electrical connection
- Sewer connection
- Water connection
- Installation of the "facade"
- Temporary dishwasher connection
- Connecting communications
- Stage 1: power supply
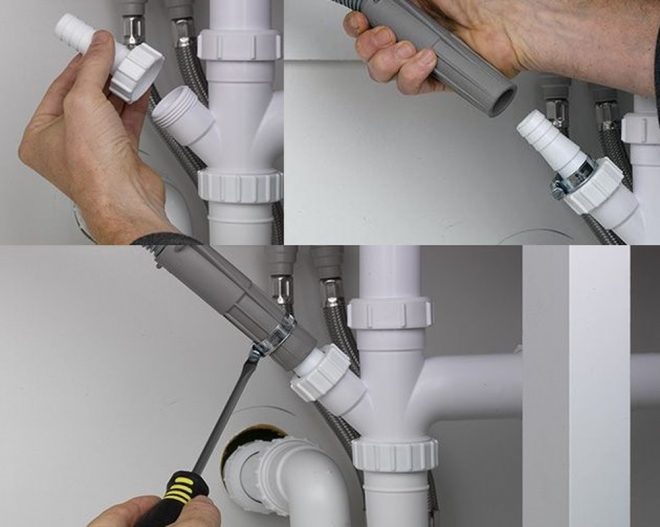
- Stage 2: connection to the water supply
- Stage 3: connection to the sewer
- Independent connection of the dishwasher
- What you need to connect
- Organization of electrical wiring
- Plumbing work
- Drainage work
What to look for when choosing a dishwasher
The advantages of a built-in dishwasher over a stand-alone one are that it saves a lot of kitchen space and harmoniously fits into the finished design. You just have to decide what size machine you need, and correlate the dimensions of the equipment with the place of its intended location.
Types of dishwashers
First of all, all dishwashers can be divided into domestic and industrial. The latter are used in catering places and at enterprises, so we will not touch on them.
Household dishwashers can be divided into the following types:
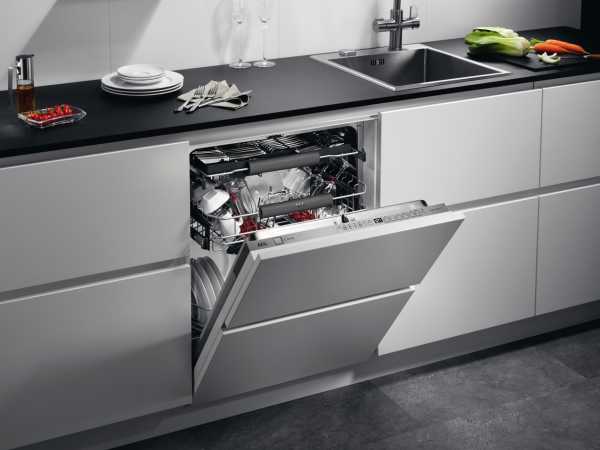
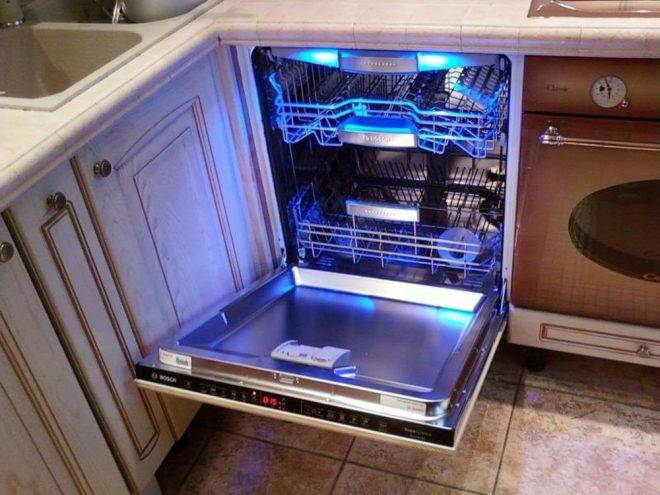
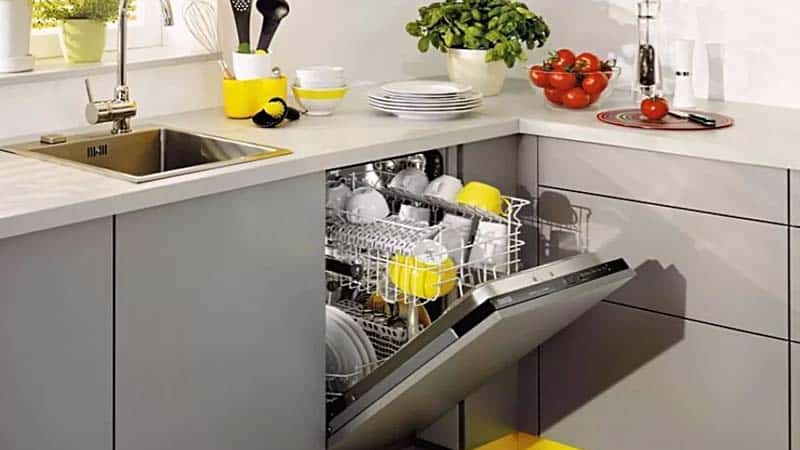
- fully built-in - the system is completely hidden behind the furniture facade. The control unit is located at the end of the front wall. Such models are often equipped with an indicator beam. It creates a light marker on the surface of the floor, which signals that the washing cycle is not over;
- partially built-in - the front wall is completely open or partially hidden behind the furniture front. The control panel in this case is located above the facade and is accessible even when the machine is turned on;
- freestanding - an independent unit in its own case;
The following classification affects the dimensional characteristics of dishwashers. Distinguish machines: - full-size - with a width of 60 cm. An excellent option for a large family. Such an "assistant" will cope with a whole mountain of dishes. In one cycle, it is able to wash from 10 to 17 sets. It is easy to place pots and pans in it. The height of such machines is within 82-87 cm, the depth is 55-60 cm. They are presented in all categories - built-in, partially built-in, separate;
- narrow - their width can be from 45-49 cm. They can hold a maximum of 10 sets of dishes. More suitable for small families of 3-5 people. If the family is large, you will have to run it several times;
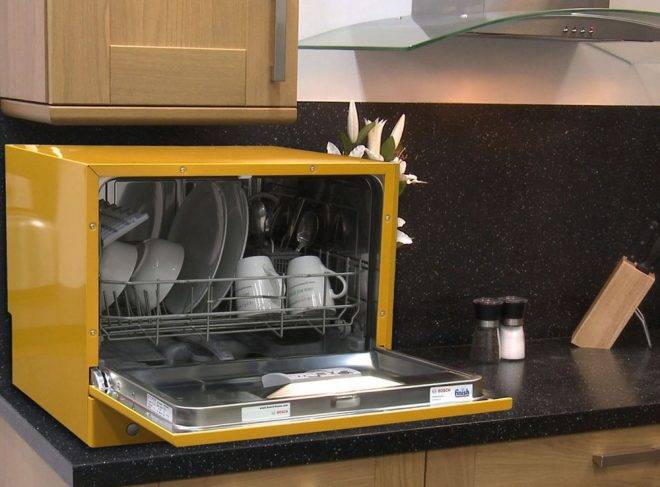
- compact - small devices, similar in size to a microwave oven. They have a width of 35-45 cm, so they are easy to place in any, even the smallest kitchen. For a cycle they are able to wash 4-6 sets of dishes.Available in built-in and freestanding designs.
Choose a size
Built-in dishwashers come in several sizes, and, accordingly, accommodate a different number of dishes.
Table 1. Dimensions of dishwashers
SizeDimensions in centimetersMaximum capacity (in the number of place settings)
| Mini | 50/50/55 | 5 |
| Narrow | 45/55/85 | 8 |
| full size | 60/60/85 | 17 |
How to plan the installation of a built-in of various sizes, drawing
Mini dishwashers are convenient in that they can be built into a small kitchen even under a sink or in a pencil case, as it is similar in size to a microwave oven and its location at eye level is quite convenient. Narrow units should be purchased only on the condition that you do not have a large family. It is advisable to choose full-sized ones if you have many relatives and guests at home. But, you need to understand that the space in the kitchen, respectively, such a machine will take more.
There are various types of machines, the dimensions of the body of which may vary.
Energy efficiency classes and labels
Energy consumption and energy efficiency is also an important point to pay attention to when buying. Manufacturers are required to indicate the energy efficiency class for each product. As a rule, it is indicated on a sticker that is pasted on the device itself or enclosed in a package with documents for equipment.
Classes are marked with Latin letters: A +++, A ++, A +, A, B, C, D (until 2010, marking was denoted by the letters A, B, C, D, E, F, G), where, respectively, class A +++ - the most economical model in terms of electricity and water consumption
As a rule, it is indicated on a sticker, which is pasted on the device itself or enclosed in a package with documents for equipment.Classes are marked with Latin letters: A +++, A ++, A +, A, B, C, D (until 2010, marking was denoted by the letters A, B, C, D, E, F, G), where, respectively, class A +++ is the most economical model in terms of electricity and water consumption.
How are energy efficiency classes labeled for dishwashers of various types
But the price for such models will be much higher than for a product with a subsequent gradation of classes. Also on the sticker should be indicated:
- model and brand of the product;
- water consumption in liters per cycle;
- electricity consumption per cycle (kWh);
- drying class (A - G);
- the number of sets of dishes;
- noise class in decibels.
Explanation of the symbols found on the sticker that the dishwasher body is equipped with
How to install a dishwasher yourself
A careful study of the instructions for the kitchen unit, ingenuity and a little experience will help you quickly and without any problems install the dishwasher. Even a novice owner will be able to cope with the task - regardless of the model, installation is carried out according to the same dishwasher connection scheme.


The first step is a careful inspection of the unpacked unit. If external damage is found, it is recommended to immediately contact the store and replace it, otherwise there is a risk of an early breakdown. If there are no visible chips, scratches, you can proceed with the installation.
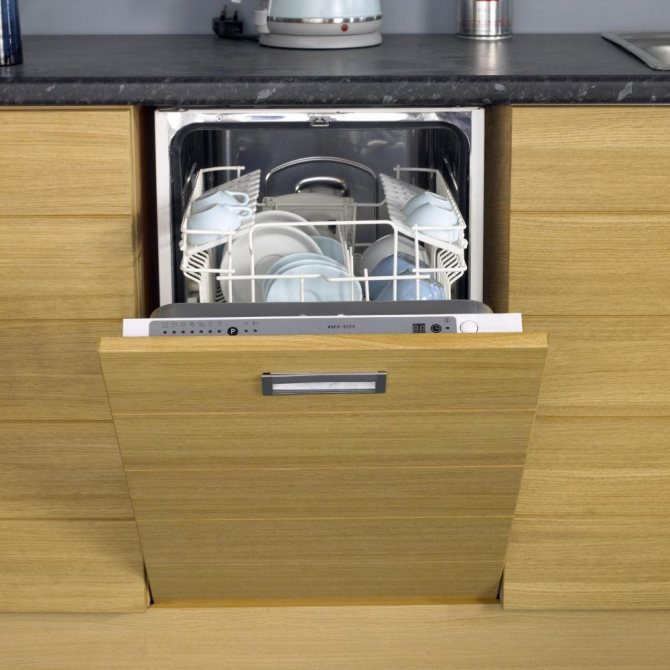
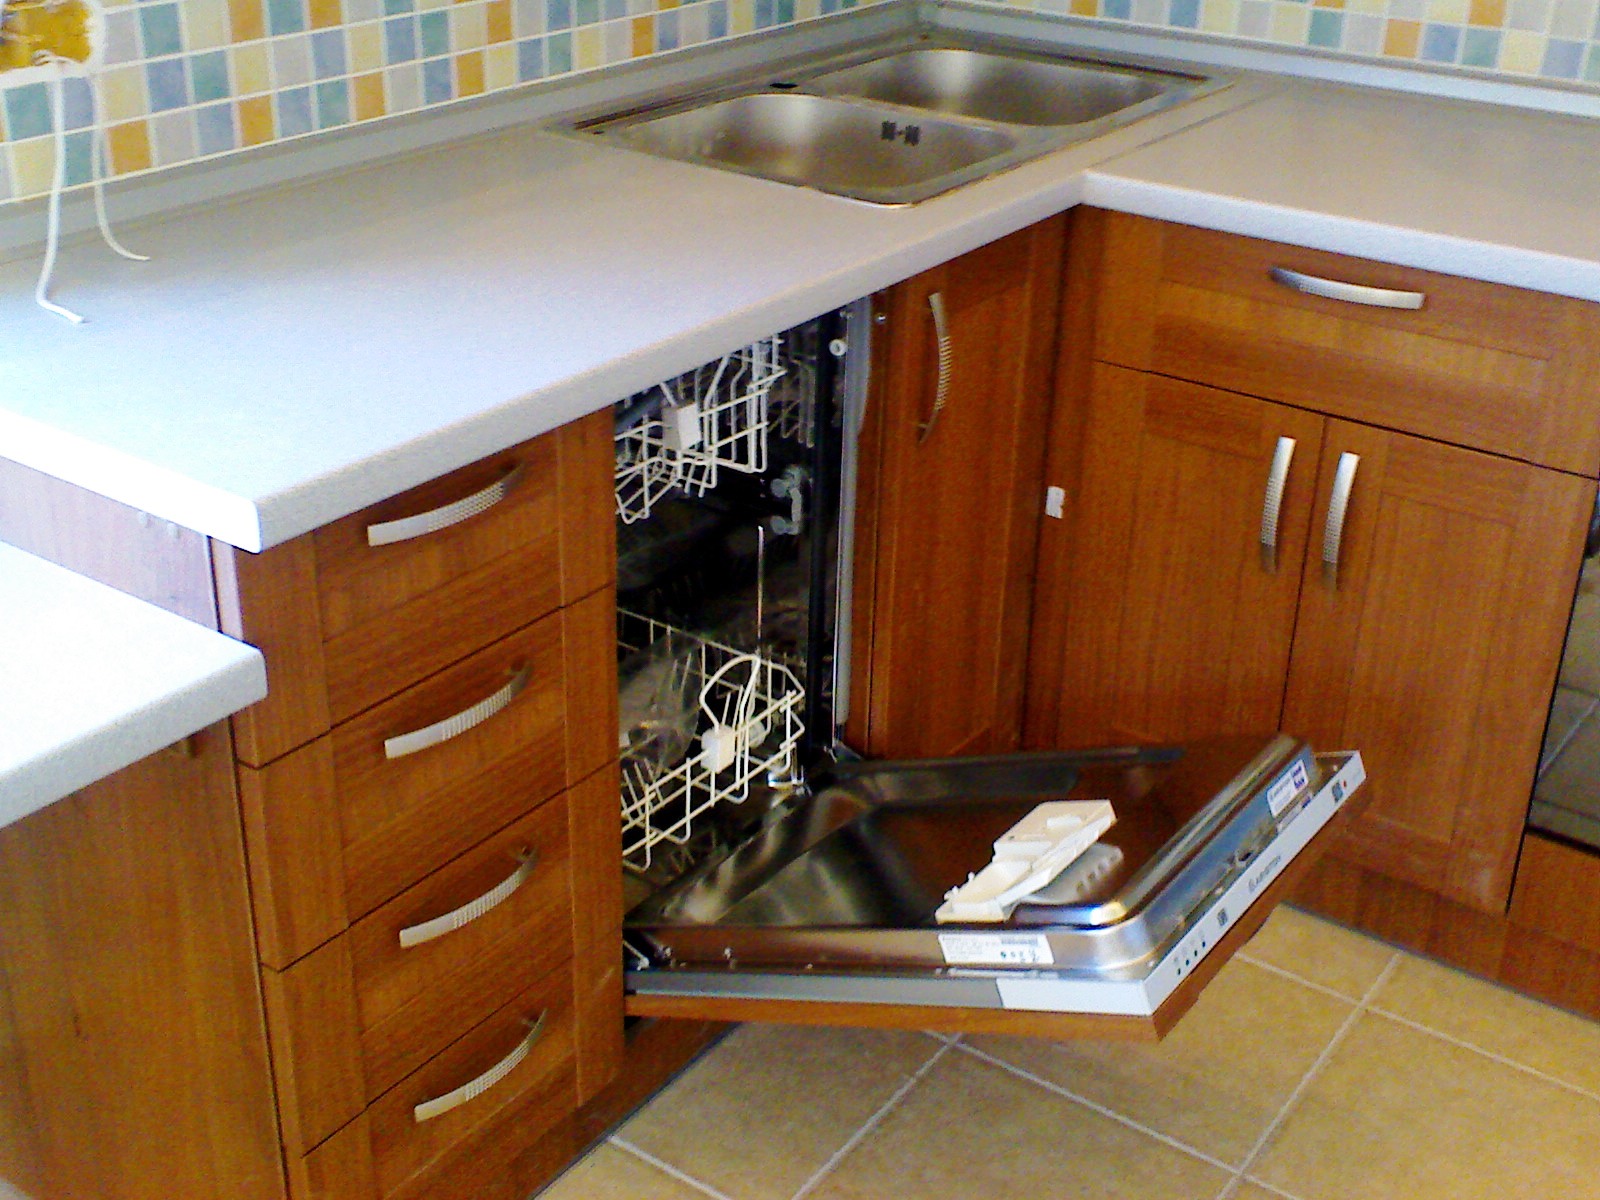
Installation of built-in dishwasher
Having decided on the most suitable place for a fully built-in dishwasher, having previously assembled all the tools and accessories, you can get to work
When installing a dishwasher in furniture, dimensions are of no small importance.It is recommended to carefully measure all surfaces several times - an error of a few millimeters will force you to change the unit or spend a lot of time, be inventive to carry out installation
The installation of the kitchen unit consists of several stages:
- Remove the shelves from the selected cabinet, you can install a small dishwasher under the sink, remove the door (it is advisable to choose a model with adjustable wheels for the built-in dishwasher, it will be easy to twist them to the required height).
- Put a tee on the pipe with cold water (if there is no stopcock, install it immediately, then it will be quite difficult to do this).
- Wrap all joints with fum tape, which will serve as an excellent sealant.
- Install a siphon.
- Run the hose, make sure that it is at a height of at least half a meter from the floor, attach it to the wall, the walls of the nightstand, use special clamps.
- Connect the hose, installed siphon, bend at the required angle. If the length of the hose is insufficient, it is not recommended to grind it - a flood cannot be avoided later.
- Move the built-in compact dishwasher to the bedside table, if possible, immediately install it in the right place.
- Connect intake and drain hoses.
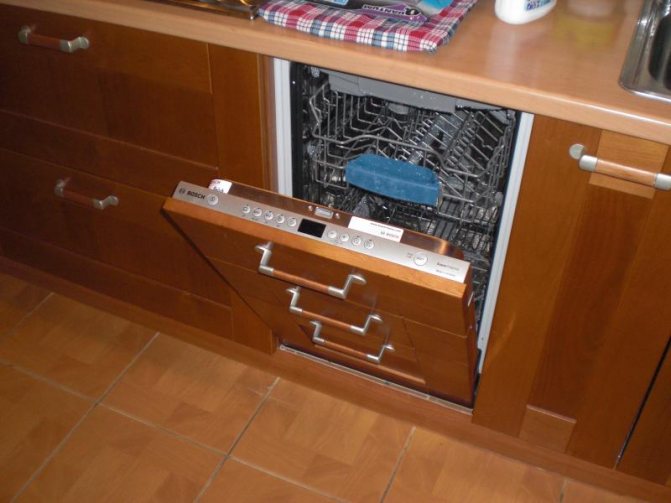
The last step in integrating the dishwasher into the finished kitchen is to check the reliability of all joints, fully push the unit into the nightstand, and wash the dishes for the first time.
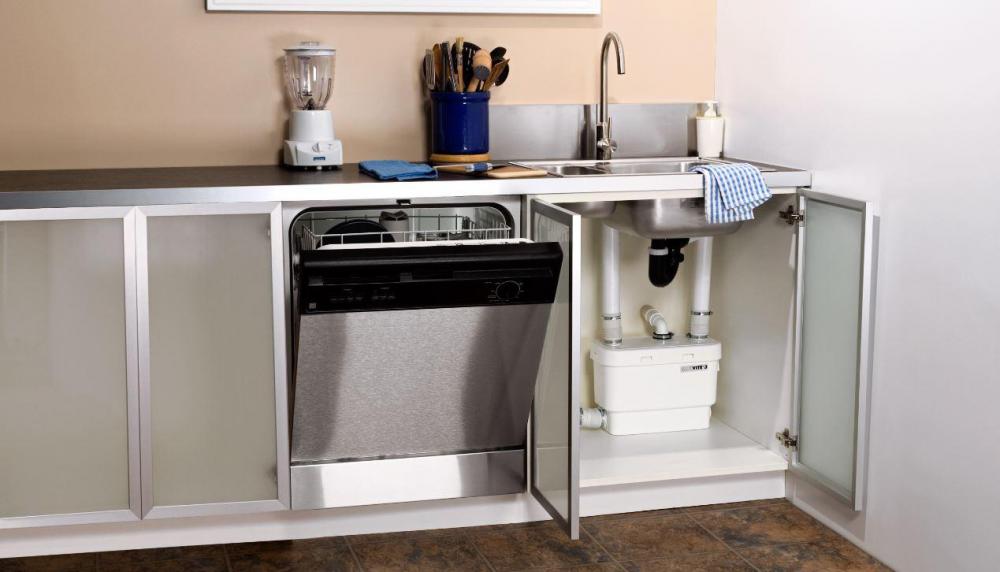
Installing a Tabletop Dishwasher
If there is not enough space for a kitchen assistant, it is recommended to purchase a compact unit that is installed on the table.The dimensions of the dishwasher do not affect the quality of washing dishes; there will also be no problem in installation. The Bosch dishwasher is especially easy to install (it is this brand that is most popular with housewives due to its quality and ease of connection). It will be possible to cope with the work even in the absence of experience, the main thing is to carefully read the technical instructions.
Step-by-step installation of the desktop unit:
- Choose a suitable countertop, the place should be convenient and accessible so that the loading of dishes occurs without difficulty. If possible, it is recommended to install a solid shelf, which will save space, most conveniently position the unit.
- The place should be located in close proximity to the sewer, electrical outlet, water pipe.
- Shut off cold water.
- Install a special tee crane that allows you to leave the outlet on which the crane is installed free.
- Screw the filter to the left free outlet. Do not forget about the sealant - the winding must be carried out against the thread.
- Mount the siphon (connect the hose to the fitting, secure the connection with a clamp), screw the inlet hose to the flow filter.
Carefully check all connections, correct errors if a leak is detected, otherwise the dishwasher will end up with unpleasant consequences, including even a breakdown of the unit.
It is easy to do all the work in just half an hour, but it is better not to rush, because it is not the deadlines that are important, but the quality. After each completed step, it is recommended to carry out a check - this will avoid annoying mistakes.
Operating recommendations
For the correct and careful operation of the dishwasher, it is important to follow certain rules:
Be sure to remove large food residues when loading dishes. Especially greasy dishes, such as frying pans, are recommended to be rinsed with hot tap water before loading. This will facilitate the operation of the machine and save a lot of electricity. Large items - pots, pans are loaded into the lower baskets.
It is recommended to set the gentle washing mode. In fact, it is a self-regulating mode. If you load homogeneous objects, for example, porcelain cups, set the appropriate mode with a lower or, conversely, a high heating temperature. For each machine, such modes are described in detail in the attached instructions.


As for the funds, on the market of consumables, their range is represented by the following classes:
The last class deserves special attention. Hard water is not suitable for the dishwasher. For this, there are salts - they soften the water, which affects the quality of the wash and the efficiency of the machine.
During the installation of the dishwasher, its repair and maintenance, the power supply must be stopped. For this, a separate power supply module with automatic switches is installed. If there is no such node, you will have to de-energize the entire kitchen line or even the entire apartment.
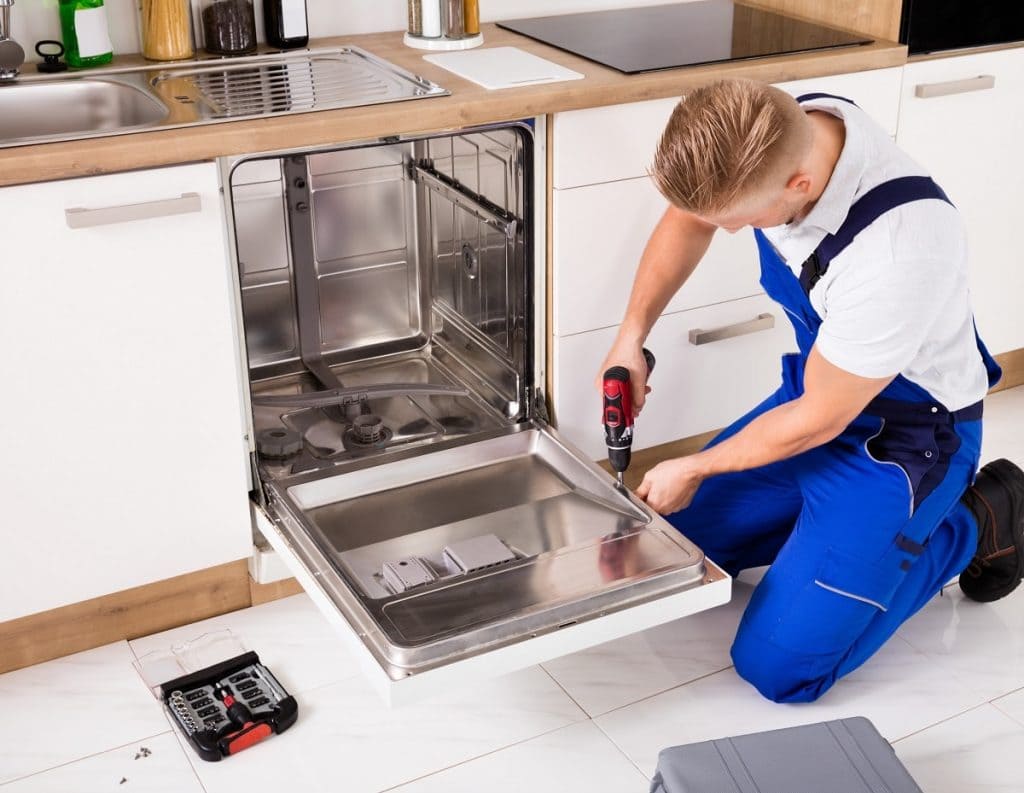
Preparation of tools and materials
So that the work does not disappoint and brings only pleasure, you should properly prepare for it, choose the right tools and materials. For this, the following devices and working tools are suitable:
- Screwdriver. An indispensable electrical device for quickly unscrewing or screwing screws, screws. It can also be used to make holes for future fasteners.
- Drill. Use if a screwdriver is not available.It is also necessary for drilling, helps to make holes in the panel. The diameter of the drill is selected according to the diameter of the screws.
- Roulette. It is needed in order to correctly perform any measurements, to make sure that the actions are correct.
- Screwdrivers. This tool is indispensable without this. The characteristics and purpose of the tool depend on the type of fasteners that need to be fixed.
- Awl. Sometimes it is necessary to pierce neat holes in fragile materials, for this it is advisable to use a sharp, durable object.
- Pencil. We use it when it is necessary to mark places for drilling mounting holes.
- Stencil. This is a very handy device in the form of a large sheet that will help you correctly mark the places for installing fasteners. To do this, you just need to put it on the panel and mark the points with a pencil.
- Double sided tape. It helps to fix the facade and the main surface until they are screwed with screws. Experts recommend that a preliminary “fitting” be carried out, since an error of a few millimeters can lead to disastrous consequences.
If the overlay is made by hand, then you may need sandpaper for grinding the surface, an antiseptic for impregnation and paint for applying to the ends or to the entire surface of the facade.
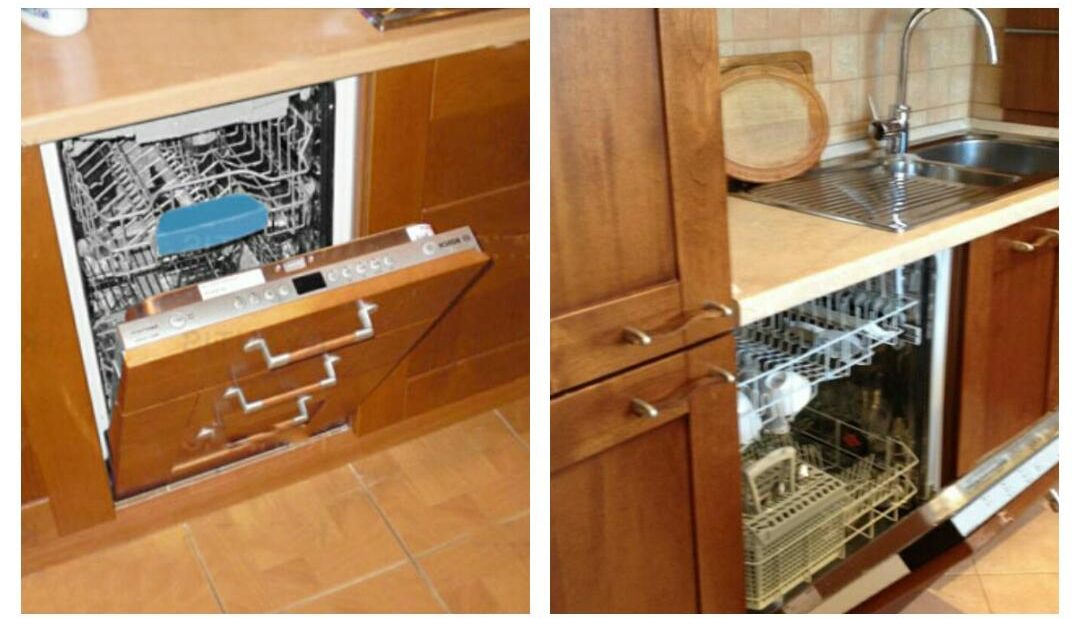
How to build a dishwasher in the kitchen
As with any other type of equipment, instructions have been invented for dishwashers, which must be followed when working. You can build a dishwasher into the kitchen only by consistently performing all the steps that are described in the instructions.
If it is not adhered to, then there is a high probability that fluid will leak.This can lead to sad consequences and conflicts with neighbors.
It is also important to properly connect the power supply. Otherwise, the dishwasher may simply burn out due to a short circuit.
The instruction consists of several sequential actions. So, you can build a dishwasher into the finished kitchen as follows:
Dishwasher wiring diagram.
- The first step of work involves connecting a separate outlet for the dishwasher. The kitchen can have many outlets, but a separate instance of the appropriate power must be installed here. In this case, the socket must be connected to a separate circuit breaker. Its power must match the power of the dishwasher. The outlet must be grounded to eliminate various unpleasant situations that may arise during the operation of the dishwasher.
- To build a dishwasher, it is not enough just to connect it to a power source. All hoses must be connected. They often come with the machine. There are two in total. The first is necessary for draining the water, and the second for supplying it to the dishwasher. Fortunately, in the kitchen you can always find a place where they can be connected. All hoses should be left open. They must be accessible. Otherwise, during an accident, it will be quite difficult to get to them. You can also connect a tee. It will allow you to connect all devices in one place to the water supply and sanitation system. The hose should be placed at a height of more than 40 cm from the floor. All connections in the system must be tight. To accomplish this, it is worth using sealants. In addition, without fail, the hose is connected through a shut-off valve.In the event of an accident, it can simply be shut off by cutting off the water supply to the kitchen. You can also install a special water purification filter so that exceptionally clean water enters the dishwasher.
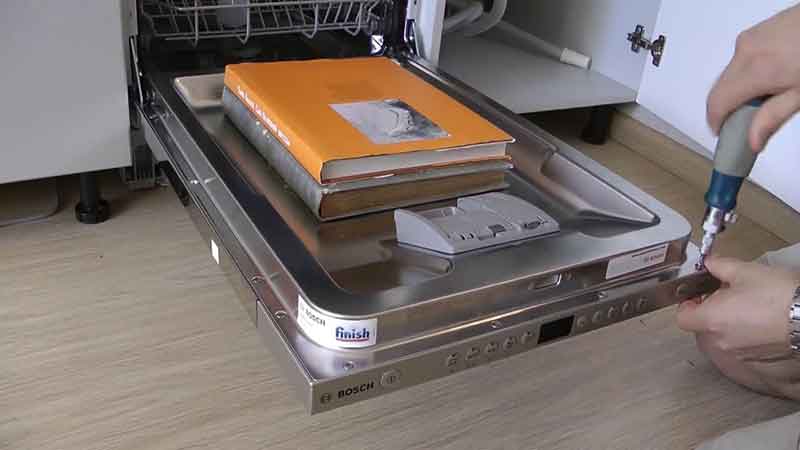
- Now you can build in a dishwasher, as the supply of electricity and water has been established. This must be done directly in the headset. In order for the equipment to be stable, legs are installed on it. Their height is easily adjustable. To do this, you do not even need to use an additional tool. The smoother the dishwasher stands, the less vibrations will occur during the dishwashing process. The floor on which the dishwasher is installed must be level. This is the guarantee of its high-quality long-term work.
Scheme of installation of the facade on the front door.
Embedding a dishwasher in the kitchen in the furniture is quite simple. For this purpose, special holes and fastenings in the form of screws are provided in its design. They are screwed in with a screwdriver. In some cases, you can get by with the most ordinary screwdriver.
Now it's worth installing a decorative panel and making a test run.
During the test run, it is important to ensure that all connections are tight. If water does not ooze from anywhere, then you can load dishes into the dishwasher and enjoy its work.
It is in this way that you can build a dishwasher in the kitchen into furniture.
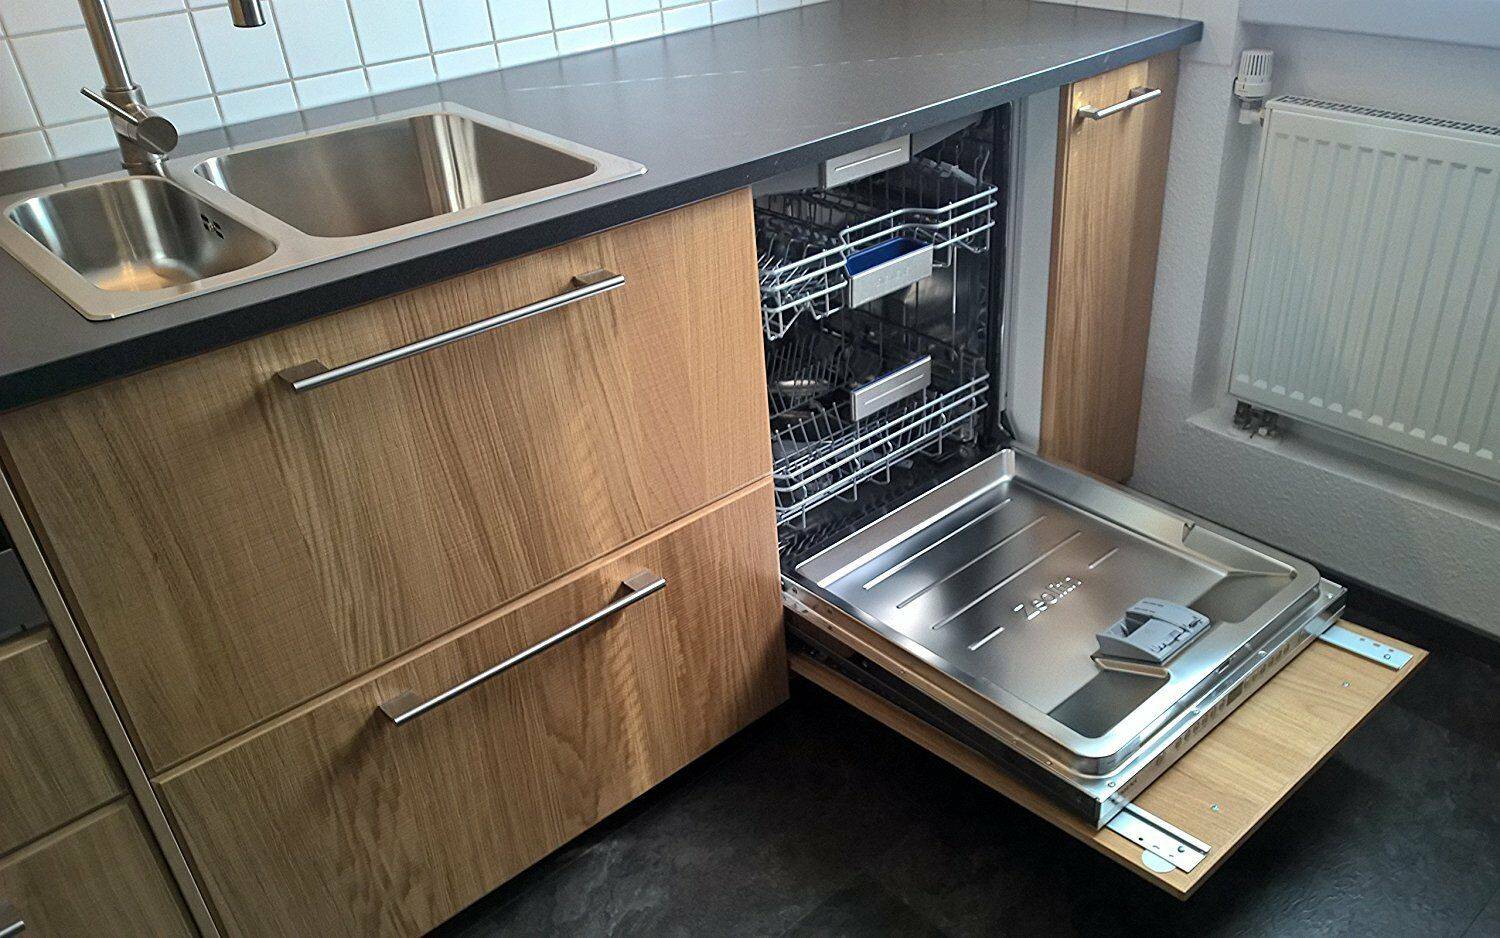
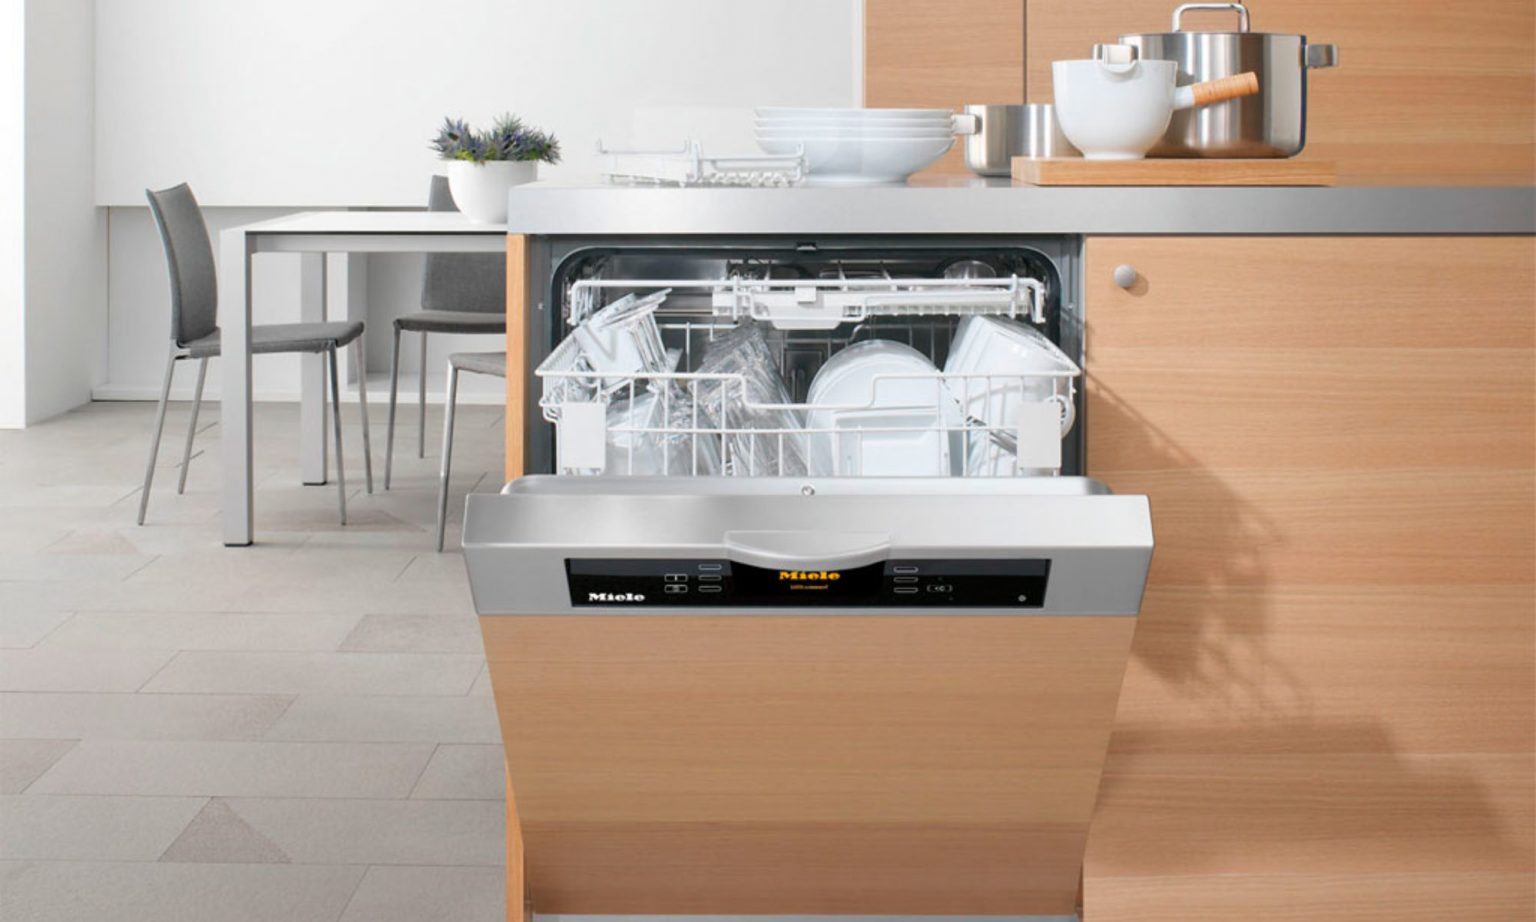
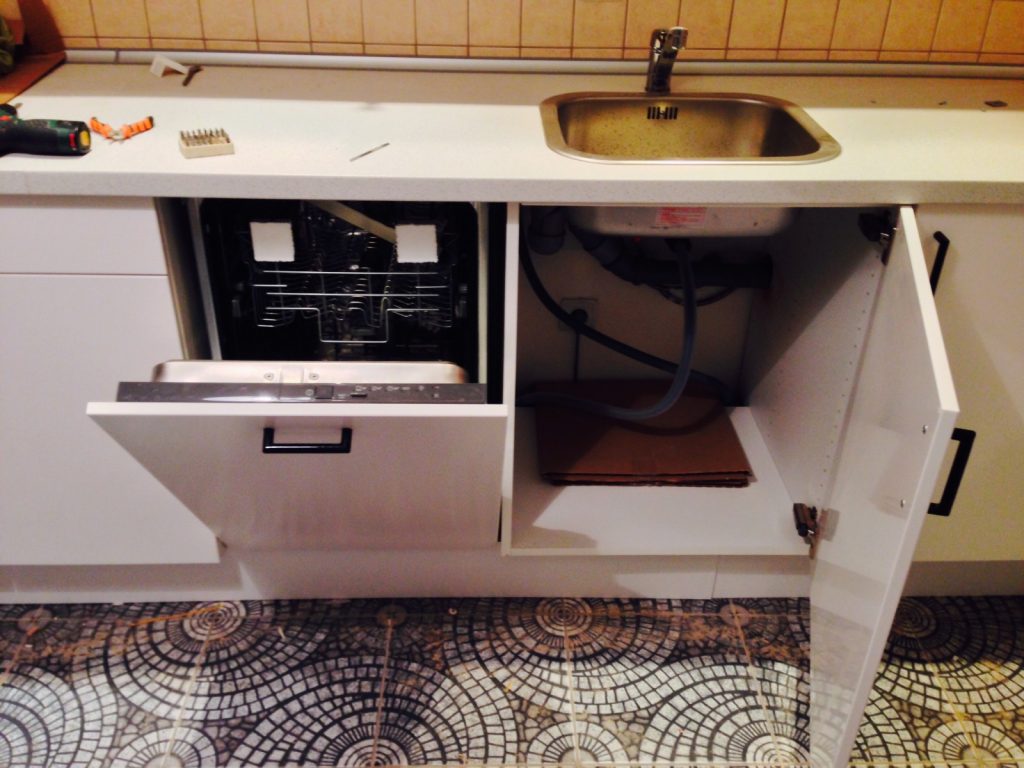
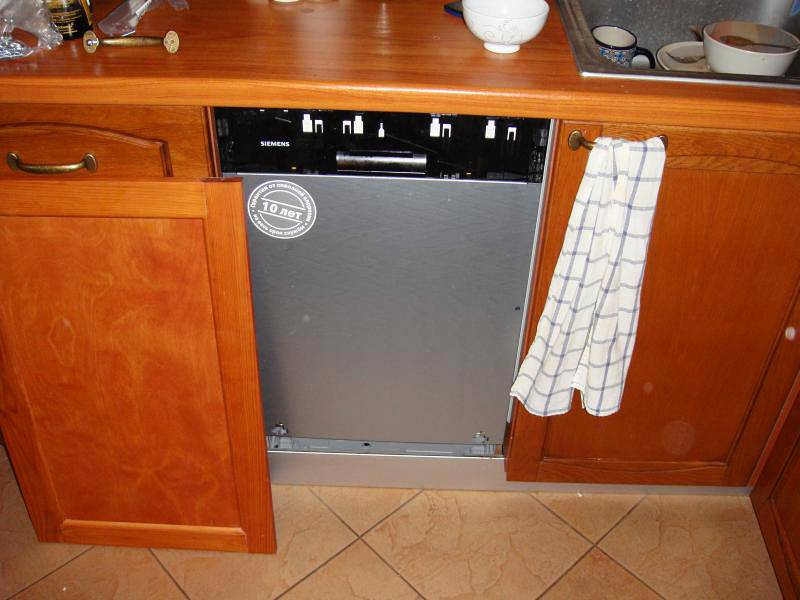
Connection built-in dishwasher
Many jobs can be done by yourself. But there are those that must be performed by specialists with experience and permission to conduct them.This applies to work related to electricity: laying cables and installing outlets.


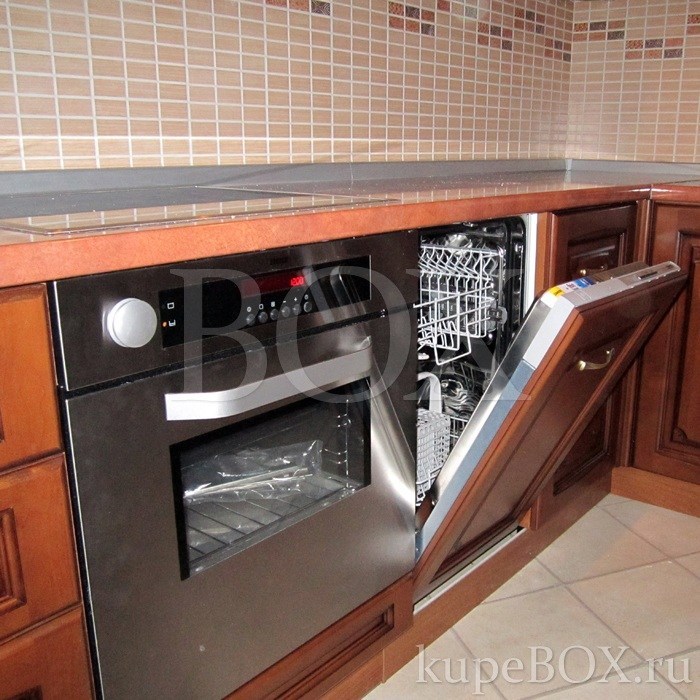
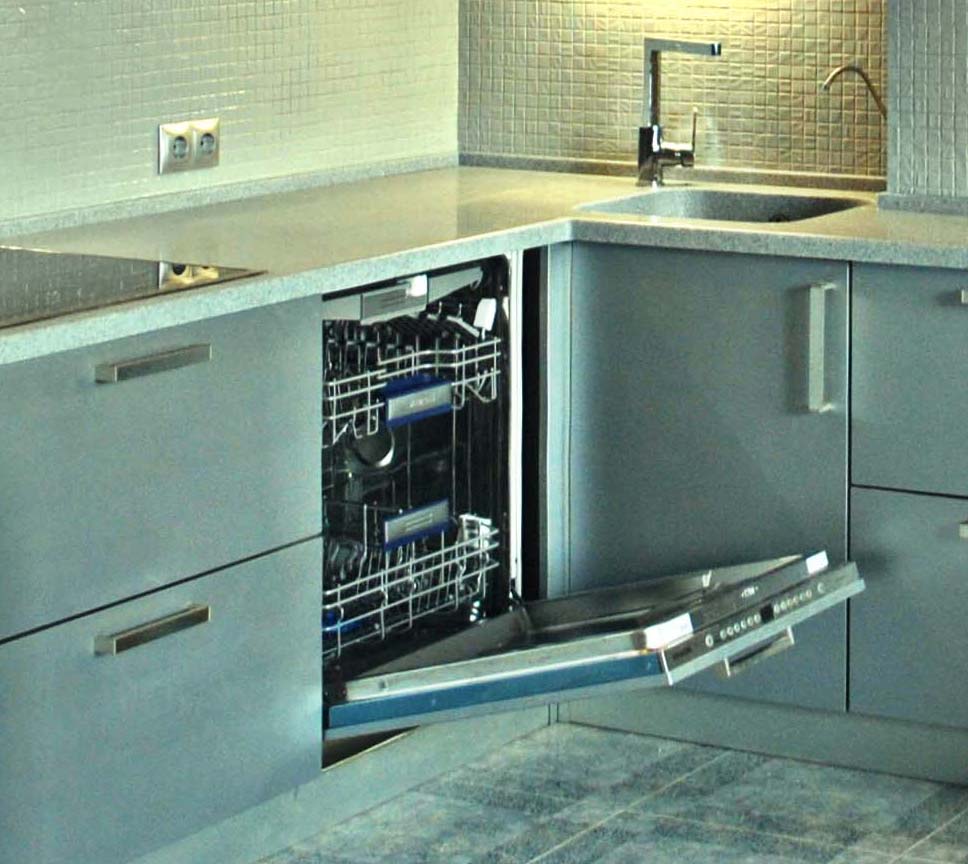
Installation in a prepared place
Before you install the dishwasher in the finished kitchen, you need to make sure that you can easily fit it into the prepared place, and there will be a section for hoses on the side or back. First, the equipment is placed in front of the prepared department. The hoses that are built into it are pulled through the holes to the place of sewerage and water supply, and the power cord to the outlet. Next, install the device in the selected place, before that you should make sure that the length of the hoses and cord is sufficient.
Installation is carried out according to the attached step-by-step instructions for a specific model. You can also read forums and watch videos. Consistently fix the parts included in the kit:
- stick a vapor barrier film;
- sealing tape is fixed along the edges;
- install damper elements.
If the dishwasher body is uneven, correct by adjusting the height of the legs. Some manufacturers of equipment, for example, Electrolux, Bosch and others, attach noise protection to the set, which must be fixed on the bottom. At the end, the door of the apparatus is closed with a facade or a special decorative overlay. Adjust the front parts and strengthen using self-tapping screws.
Electrical connection

You can not stretch the surge protector, so the device is connected to the nearest power point. The cord has a standard length of about 1.5 m, so the outlet should not be located further than this distance. You can not use extension cords, because they will not be able to withstand the load, they will melt. Do not use common sockets that include other appliances.It is best to allocate a separate point for the dishwasher, use grounded sockets with a separate bag. The latter serves to protect against short circuits and network overload. It is impossible to build an electric point at a close distance from the floor, if flooding occurs, a short circuit will occur. The distance from the floor to the place where the machine is located must be more than 25 cm.
Sewer connection
In order for the PMM to drain the used water, it is connected to the sewer system. There are several methods. The first way is to connect to the sink drain system. If it is impossible to fix the hose directly to the sewer pipe, it is mounted in this way. In this case, it is necessary to change the siphon, so the option is considered costly and time-consuming.
The other method is very simple. It consists in mounting the hose from the dishwasher to the cuff of the sewer pipe. For fixation, a special tape is used, which provides excellent sealing. This method is used if there is a free hole under the sink.
Water connection
Most models can be connected to hot water, but experts do not recommend doing this, because it is not of good quality. This will adversely affect both the health of people and the device itself, which will fail faster. Before connecting to the water supply, the water is shut off on the riser. To mount the tee, unscrew the mixer hose. The mixer is installed to one of the inputs of the splitter, to the other - a cleaning filter. Mount a ball valve of a shut-off type. A hose is connected to the faucet, which comes from the dishwasher. The joints are wrapped with a special tape. It prevents the flow of water.
Installation of the "facade"
The front side of the built-in dishwasher must be covered with a panel. As for the facade, it must be made in accordance with the design of the room. In the kit for such household appliances, a special fixing element and a pattern are supplied, which are necessary for installing the panel. It is mostly made to order. The work on the installation of the facade can be easily done independently. They take a paper sheet, mark on it all the necessary places and zones where the clamps are to be installed. This layout is applied to the front door, make the markings of the decorative panel. The necessary places are marked using an ordinary awl.
Then the paper sheet is removed, holes are drilled for self-tapping screws. In the prescribed places, install the front door handle and latches. This manual is suitable for the installation of frontal parts of any size. After the panel is assembled, it is put into place. A decorative element is fixed on the dishwasher door and prepared screws are screwed in.
Temporary dishwasher connection
Now let's figure out how to install a built-in dishwasher separately from a furniture set.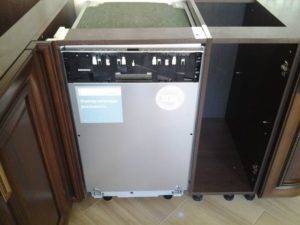
First you need to connect the drain hose to the sewer. To do this, you can connect it to the part of the sink drain, which, in turn, connects to the sewer pipe
However, it is important to create a kink near the "docking" point so that drain waste does not linger in the hose. In extreme cases, the drain hose can simply be left in the sink.
Check that the length of the drain hose is no more than 1.5
In extreme cases, you can leave 2m.
Now you need to deal with the inlet hose.In order to install it, you must first install a special hose tee. Remove the mixer hose from the water supply and put a brass or bronze adapter in its place. Now install a mixer on one branch, a filter on the second, and a dishwasher hose on the third.
Now you know how to operate your dishwasher without building it in until kitchen furniture arrives. Test new techniques and get out of the habit of washing dishes by hand.


Share your opinion - leave a comment
Connecting communications
The dishwasher should be placed next to the opening (do not push it in there), and then connect to the communications. The work is carried out in three stages.
Stage 1: power supply
A separate line should be drawn from the input electrical panel. If the repair has already been completed, then lay the cable along the walls and hide it in a decorative box. If the finishing work is ahead, you need to punch the walls with a perforator, lay the cable in the recesses and cover it with alabaster. Sockets should be installed no further than 1 m from the location of the PMM (see photo). A difavtomat should be placed on the shield and connected to the cable.
 Sockets are installed next to the dishwasher - to the right of it and above the countertop
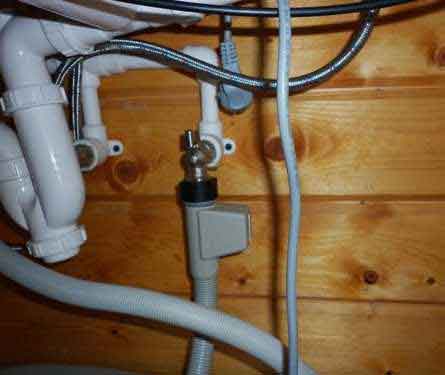
Stage 2: connection to the water supply
Usually, only cold water is connected to the PMM, although there are models that can be connected to both hot and cold. To do this, you need to connect the tee to the junction of the flexible hose going to the sink mixer with the water supply.
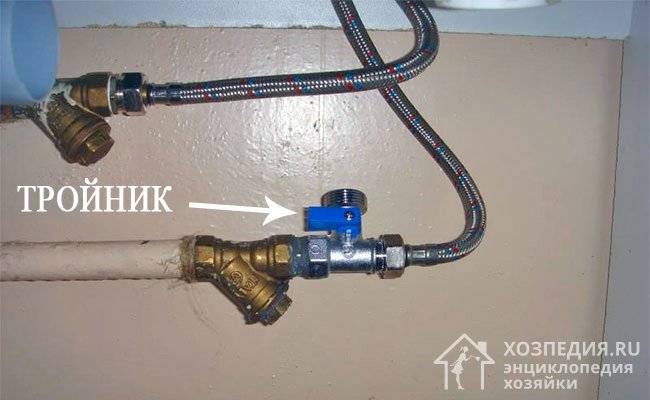 Tee installed to drain water to the dishwasher
For a reliable connection, it is necessary to wrap all threaded connections with FUM tape.
Stage 3: connection to the sewer
To output the waste fluid to the drainage system, it is best to use siphon for washing, which has two additional outlets so that a dishwasher and washing machine can be connected to them.
 Siphon with two outlets
Drainage hoses are attached to fittings shaped like an inverted V. Thus, gases from the sewer do not enter the room. There is also the option of connecting to a tee installed in the sewer pipe (see photo).
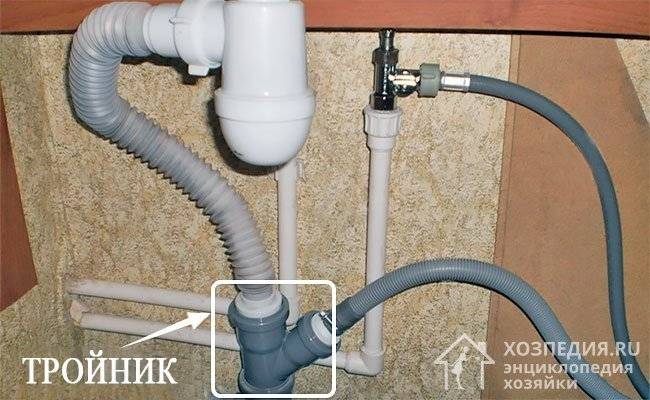 The outlet from the siphon and the drainage hose PMM are connected to the tee
After connecting to all systems, check the tightness of the joints and perform the first switch-on to wash the PMM from factory dirt. Only after that you can push it into the opening, mount it and wash the dishes.
Independent connection of the dishwasher
It is recommended to immediately install the machine on site, and then deal with the connection. But in the case of the built-in model, it is more convenient to first connect the hoses, and then mount the machine in a niche or cabinet. How to install an embedded PMM, read our separate article.
What you need to connect
Accessories:
- euro socket with a moisture-resistant housing and grounding;
- copper three-core cable (for organizing wiring);
- stabilizer;
- brass tee with stopcock;
- clutch;
- corner tap;
- extension cord and additional hose;
- siphon with two outlets (for connecting a dishwasher and washing machine at the same time);
- hose "Aquastop" (if not available);
- fum tape for sealing joints;
- filter;
- clamps, gaskets.
Tools:
- pliers;
- screwdriver;
- wrench;
- level.
Organization of electrical wiring
The dishwasher cord is specially made short.The European type plug can be connected to a special socket, which is located no higher than 45 cm from the floor.
How to organize the electrical connection correctly:
- Drill a channel in the wall, lay a copper wire.
- Arrange a moisture-resistant socket with grounding.
- Connect the outlet through a 16-amp difavtomat. For safety, it is recommended to install a voltage stabilizer. How to choose a dishwasher stabilizer, read in a separate article.
Plumbing work
You know how to install and connect the electrical part of the machine. Any model of PMM Korting, Hansa, Gorenje, Beko, Ikea, Ariston is connected to the water supply in the same way. The easiest solution is to connect through a mixer. But if you install the equipment far from the sink, then the method of tapping into a cold water pipe is suitable.


To connect to a water pipe:
- Using a grinder, cut a piece of pipe.
- Install the release clutch.
- Screw a tap with a shut-off valve onto the coupling.
- Connect the dishwasher hose to the faucet outlet.
Through mixer:
- Disconnect the mixer hose from the pipe outlet.
- Install brass tee.
- Connect a mixer to one outlet.
- To the other - a coarse filter and the end of the inlet hose.
Now take care of the water.
Drainage work
Where to connect the drain? There are also two options to choose from here:
- Directly to the sewer.
- through the siphon.
Why do experts not recommend connecting directly to the sewer? Because it is difficult to remove the blockage. Another thing is the siphon, where you can unscrew the lid and clean it.
To connect to the sewer, it is enough to install an adapter on the outlet, to which you can connect the drain hose of the dishwasher and washing machine.Connections are carefully sealed.
When installing through a siphon:
- Remove the old and install a new siphon.
- Connect the dishwasher drain hose to the outlet.
- Be sure to fasten the connection with a clamp. With strong pressure, the hose can be torn from its place, which will lead to leakage.
As you can see, you can organize the installation of PMM "Hans", "Burning" and other brands yourself. When the work is finished, run the test program without dishes to check the strength of the connections and the operation of the nodes. How to run the dishwasher for the first time, read the article.
The video will help you install the dishwasher yourself:


