- Thermocouple malfunction
- Rules for the care of the oven
- How to quickly and correctly fire up a gas oven
- Operation features
- Similar instruction
- Some nuances of the operation of plates of various trade brands
- How to ignite, ignite, set fire to the oven in the gas stove Hephaestus, ARDO, Bosch, Indesit, Greta: tips
- Methods for determining temperature without a thermometer
- Paper
- Sugar
- Flour
- Gas burner does not ignite or goes out
- How to turn on the gas stove
- Manual ignition of the burner
- Integrated burner ignition
- How to build in an oven: steps
- Preparation of the instrument and auxiliary materials
- Workplace preparation
- Installation
- Connection
- Health check
- Conclusions and useful video on the topic
- Conclusions and useful video on the topic
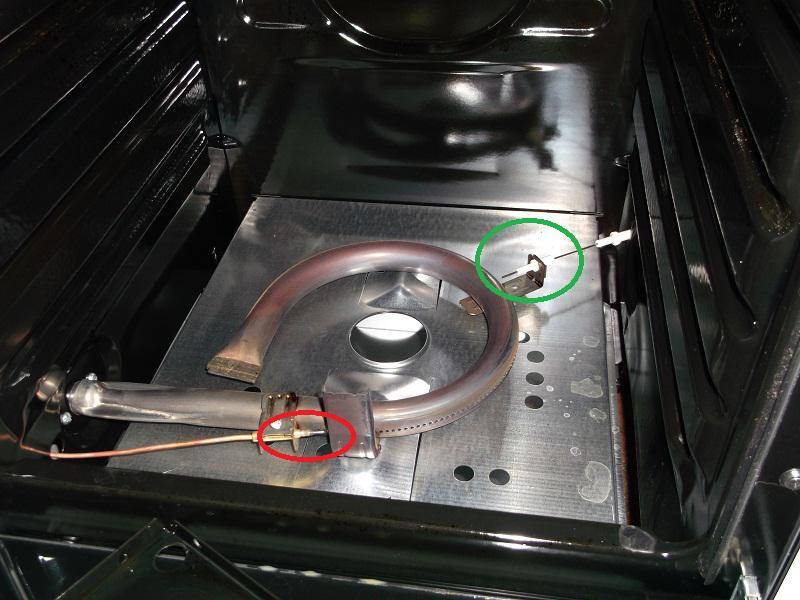
Thermocouple malfunction
The gas control function is a good contribution to the safe operation of the oven. If the burner goes out after releasing the knob, this system is probably broken. The fact is that the device is turned on by pressing and turning the knob. Automatic ignition ignites the burner, where there are special sensors - a thermocouple.
In turn, when the thermocouple is heated, millivolts are generated.This charge is directed along the entire actuator to the solenoid valve, which is magnetized and held open. This happens as long as millivolts are generated. If the burner does not heat the thermocouple, the valve will almost instantly shut off the gas supply, so the extinction of the flame after releasing the knob indicates a breakdown of the gas control.
Gas stoves with oven gas control
What can happen:
- The tip of the device has moved (up or down) causing insufficient heating. You can fix the problem by setting the tip exactly in the flame;
- thermocouple tip is dirty. There may be a complete failure of work or poor heating. This issue is resolved through cleaning;
- breakage of the thermocouple tip - the rod overheats due to high temperatures and a break is obtained;
- safety valve malfunction - the valve cannot open due to voltage problems. It requires the replacement of the gas valve with the entire mechanism. Only the gasman changes this thing.
A new thermocouple can be purchased at a specialty gas supply store. All devices differ in length and connection nut.
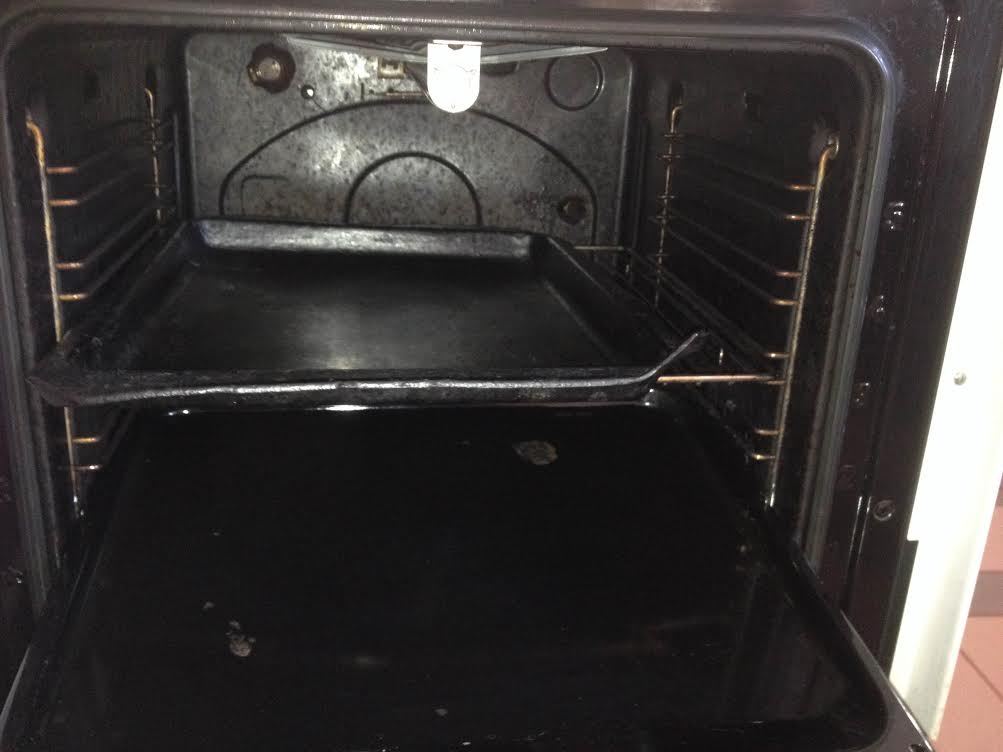
Rules for the care of the oven
The oven will last more than one year if you provide it with proper care:
- The inner surface must be wiped after each cooking. It is better not to let the oven cool down completely - this way the stains will be wiped off faster. Once every 1.5-2 weeks, the cabinet should be steamed with detergents that allow you to remove greasy deposits. After such cleaning, the oven will have to be washed again, but with clean running water to remove the remnants of the product and plaque.
- If you need to remove old stains, you need to slightly warm up the cabinet - just set the temperature to 50 ° C and leave it to warm up for 10-15 minutes. After that, even a strong soot will begin to move away faster.
- For cleaning, it is strongly not recommended to use metal scrapers - they will certainly damage the enamel / ceramic surface. It is better to use sponges or soft rags. Intense contamination must first be filled with a cleaning agent and left for 15-20 minutes.
- Before cleaning, it is better to disassemble the oven as much as possible: remove the grids and baking sheets, any other removable elements. If possible, you need to remove the door as well - it is much more convenient to wash all the components separately.
- It is strictly forbidden to apply cleaning agents on the heating elements and the cooler! When exposed to high temperatures (the next time the oven is used), they can start to release toxic substances that will get into the food and cause severe poisoning.
- After cleaning, the oven door should be left open for several hours. This will allow the surfaces to dry completely and allow excess odors to escape.
- If the unpleasant amber persists, you need to use activated charcoal: dissolve 10-15 tablets in a glass (250 g) of water and put in a barely warm oven overnight. This powerful absorbent absorbs all unpleasant odors.
The operation of the oven can be pleasant if you take care of the appliance in a timely manner and follow the safety precautions. Which cabinet is better - electric or gas, each hostess chooses for herself. With proper care, any oven will work correctly for many years.
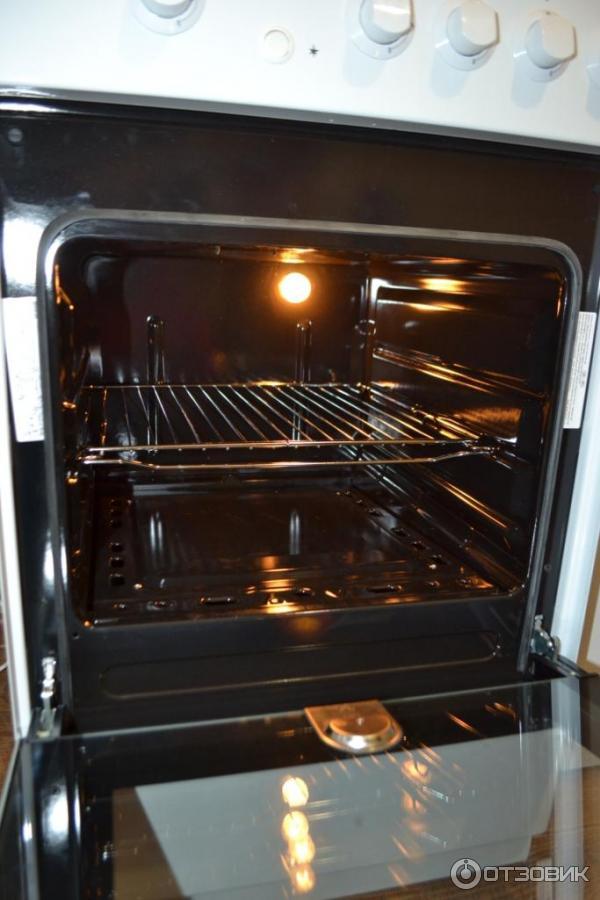
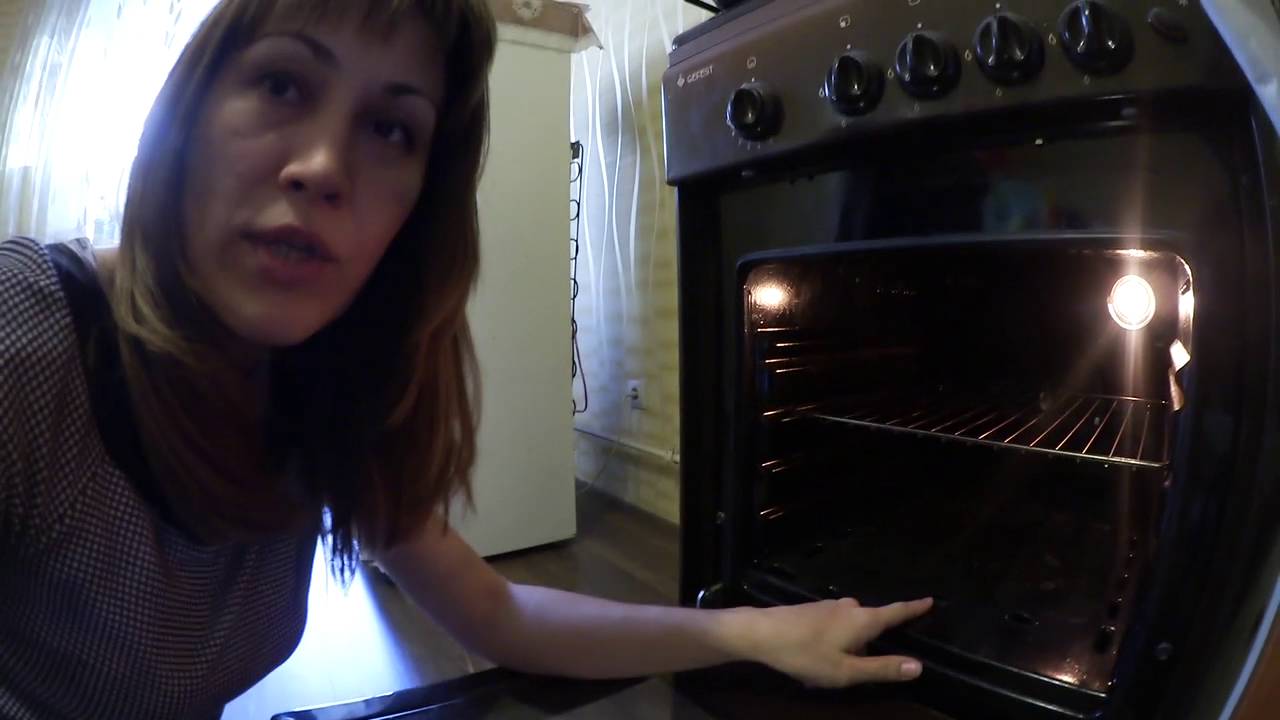
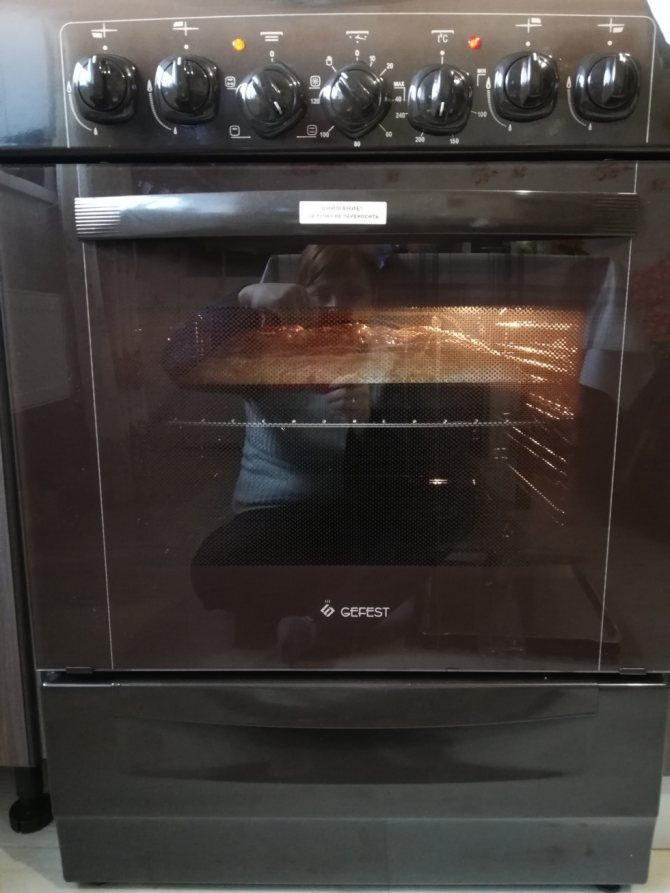
How to quickly and correctly fire up a gas oven
Gas stoves have recently been replaced by electrical appliances, this is most relevant for large settlements. Therefore, some housewives, when faced with a gas-powered appliance for the first time, are at a loss. Almost everyone can light the burners, but turning on the oven is much more difficult for them. Therefore, it is worth figuring out how to properly light the oven in a gas stove.
Operation features
In reality, there is nothing complicated in the operation of gas stoves. The manufacturer prescribes all the main points in the instructions, but if there is no such instruction, for example, when moving to a new apartment, when the stove was inherited from old tenants, you can use the standard recommendations, which are almost the same for each model.
According to the principle of its operation, the oven belongs to potentially dangerous devices, therefore, when operating it, it is very important to take into account all the rules of use and safety precautions. In most modern models, it will not be difficult to ignite the gas, since there is an electric ignition system, and the gas control safety system is located in the oven
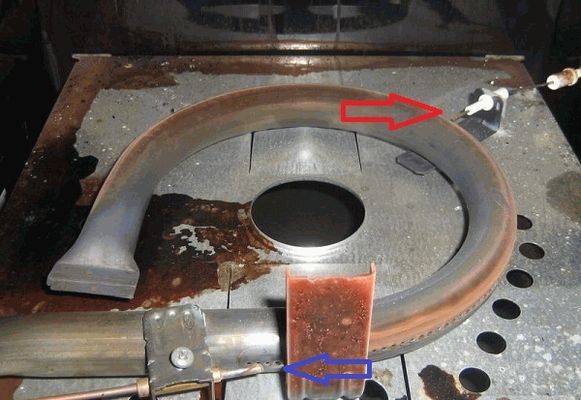
Red arrow - electric ignition, blue arrow - gas control
But some ovens still need to be ignited manually. Let's deal with the question of how to use the oven, in more detail.
Similar instruction
So, in the absence of instructions, you can use the following sequence of actions, which is standard for each model - Hephaestus, Indesit, Darina and others.
- Initially, it is worth checking the correct connection of the device to the gas hose and the electrical network (if there is an electric ignition system).
- Next, it is worth studying the diagrams that are located on the appliance panel: they will help you figure out which switch is responsible for the burners and which for the oven.
- If there is no electric ignition for the oven, then you will need to light it from a match or lighter.
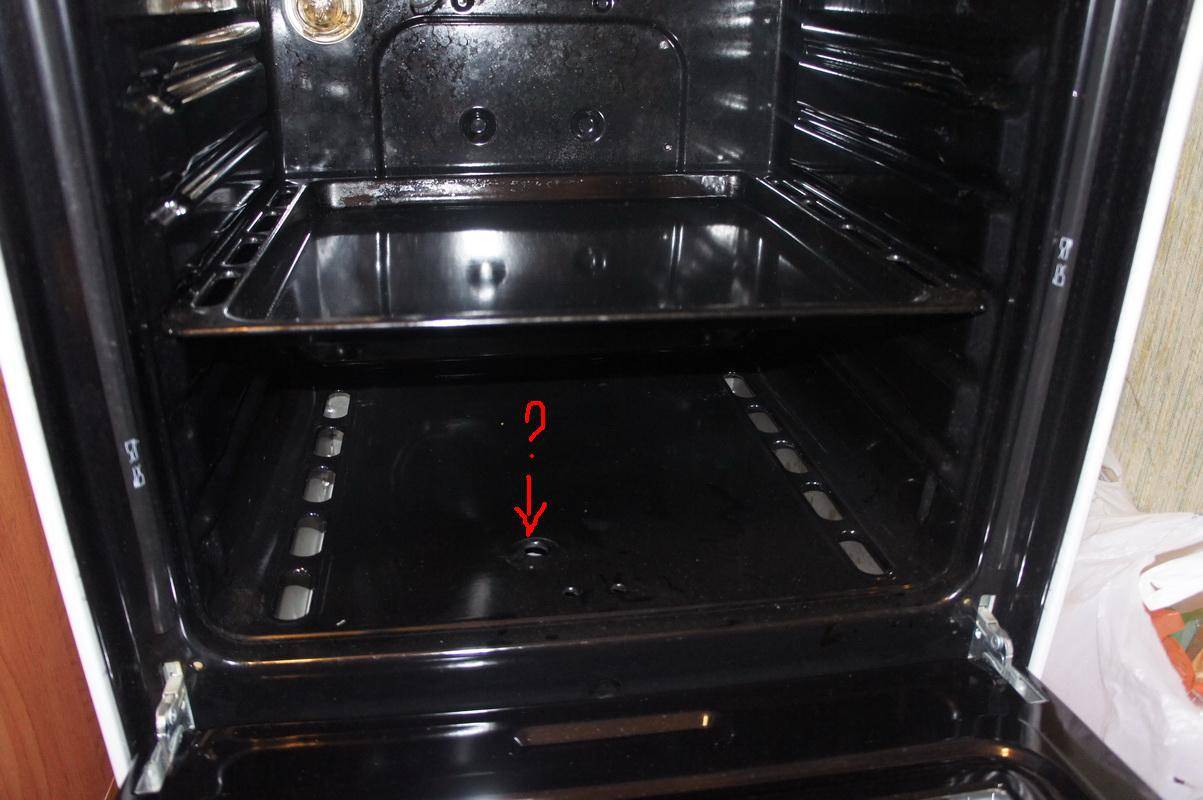
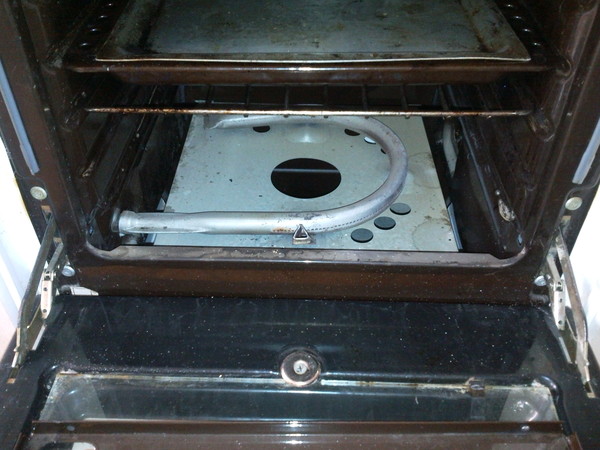
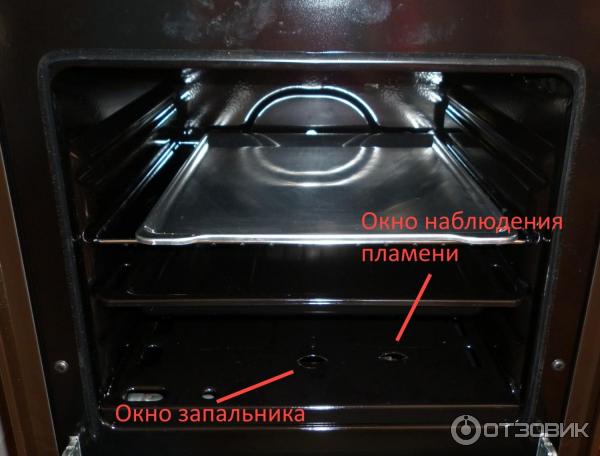
When carefully examining the bottom of the oven, you need to determine the location of the holes through which ignition occurs. They can be located on either side or both at once.
A lit match or lighter is brought to the hole, while the relay on the panel turns simultaneously.
If there is an ignition button, then the process is a little easier. The temperature regime is set and the gas supply starts. At the same time, the electric ignition button is pressed.
If it was not possible to light the oven using the automatic button, then it is worth stopping the gas supply, and then try to repeat the procedure, but without automation, but with a match or a lighter. It is possible that the electric ignition is defective and needs to be repaired.


For your own safety, if the stove is turned on for the first time, you need to wait a while and leave the lid ajar when the burner is on. After a few minutes, place the dish and close the lid.
Some nuances of the operation of plates of various trade brands
If, when following the above recommendations, it was not possible to ignite the gas stove oven, then the matter may be a malfunction of the stove or individual functional elements. Since gas equipment is potentially dangerous, immediate troubleshooting and repair is required.
Owners of devices of such brands as Greta, Darina, Gorenie may encounter difficulty in kindling during operation. When the relay is turned on and pressed, the burner burns, and when you release it, it stops. Such a moment becomes the result of prolonged use when the thermostat fails. Due to a breakdown, it does not determine the temperature in the cabinet, so the fire immediately goes out. Another common problem faced by the consumer is the release of gas control contacts in the oven. Most often, it occurs in the plates of the brands Indesit and Hephaestus.
Elimination of any cause is prohibited to be carried out independently. To do this, you need to call the specialists of the gas service, they will not only determine the cause of the breakdown as accurately as possible, but will also quickly eliminate it.
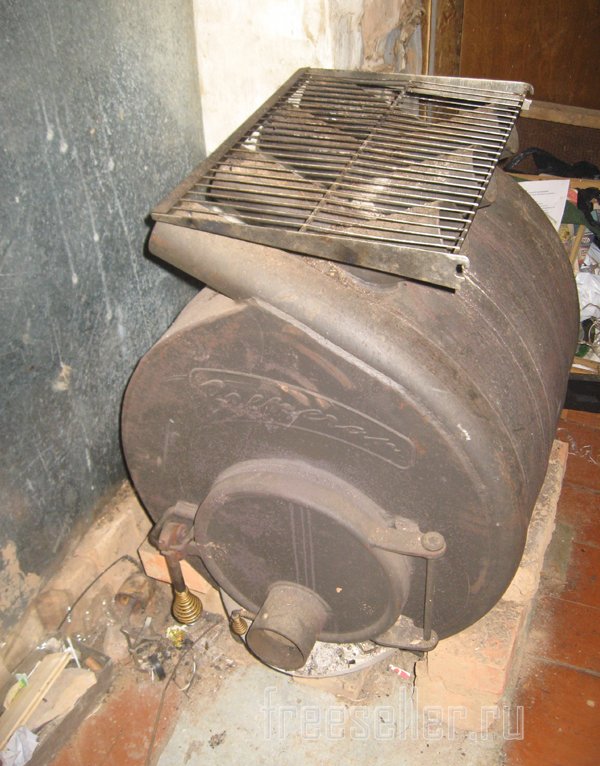
How to ignite, ignite, set fire to the oven in the gas stove Hephaestus, ARDO, Bosch, Indesit, Greta: tips
Many housewives mainly choose safer electric ovens, which are gradually replacing analogues. Therefore, when working with gas ovens, many face problems in their operation.
The predominant quality of gas ovens is considered to achieve the highest temperatures, which affects the effectiveness of cooking various dishes. To be more confident in the next steps when working with gas equipment, you need to read the passport and instructions for use or annotation.
Oven in gas stoves
Do not be afraid to work with similar ovens, modern gas stove manufacturers such as Hephaestus, Indesit, ARDO, Bosch, Greta, etc.use only high quality materials, and all safety developments to ensure complete safety. The main thing is to carefully and carefully handle the equipment in order to avoid unpleasant consequences.
Some stoves have electric ignition, so it’s much easier to work with them, but if there is no such function, then the gas burner is ignited manually in this way:
- Turn the tap to set the desired temperature
- Light a match or a special lighter, bring it to the burner
- When the flame appears, make sure that it is evenly distributed
- Carefully close the door, as the flame can go out when the door is closed, it is worth controlling the gas supply and the presence of the flame throughout the entire cooking process.
Methods for determining temperature without a thermometer
If there are no documents left on the stove and it is not possible to determine the temperature in the gas oven using the numbers on the regulator, since there are no minimum and maximum heating parameters, several simple but effective methods can be used. Their main essence is to determine what is the temperature of the flame inside the gas stove at a certain position of the thermostat.
This is a kind of check with which you can make sure that the mode is selected correctly for cooking certain dishes.
Paper
It can be plain white office paper or a notebook sheet. Newspapers, napkins and baking paper are not suitable for these purposes. The error in the indicators will be 5-10 °C. It is best to conduct the experiment several times to avoid gross errors and inaccuracies.
To determine the temperature, a regular sheet of paper is suitable.
The oven is turned on by setting the regulator in the desired position;
After 10-15 minutes, when the oven heats up and reaches the desired parameters, a sheet of paper is placed inside. It must be placed on a baking sheet or wire rack in the area where food is usually located.
You need to wait until the paper starts to char
At this stage, it is important to control the time. The table shows the ratio of temperature to the period of time that the sheet was inside the cabinet.
| t, °С | Time |
| less than 180 | more than 10 minutes |
| 180-200 | 5 minutes |
| 200 | 1 minute |
| 230-250 | 30 seconds |
| 250-270 | 15 seconds |
| 270-300 | 5 second |
If even after 15 minutes of being inside the oven, the paper did not char, but only slightly changed its color, then inside the oven there is no more than 150 degrees.
Sugar
How to determine the temperature in an already working oven if food is loaded there. For example, there is a charlotte inside and there are suspicions that the cake is browning too quickly. To do this, use lump sugar, which is placed on a sheet or foil and placed inside on a baking sheet or wire rack, in the immediate vicinity of the cake. The melting point of sugar is 180°C. Accordingly, if the pieces began to melt, then the heating level inside the cabinet is higher than this indicator.


Sugar melts at 180 degrees Celsius This method is most convenient for checking the temperature when baking. In order for it not to burn and bake well, it is recommended to heat the oven to 180-200 ° C.
It does not matter if there is no lump sugar, it may well be replaced by granulated sugar. Their melting points are exactly the same. Using both types of sugar, you can quite accurately determine in which temperature range the oven operates.Due to the higher density, lump sugar will melt with a slight delay, while granulated sugar will flow immediately. If the temperature inside the cabinet is very high, more than 200 ° C, both types of sugar will begin to melt instantly.
Flour
How can you know the temperature in the oven without a thermometer, having only flour available? The method is as simple as the previous two. The only difference is that with the help of flour you can determine the maximum heating of the oven:
- first, a baking sheet is covered with baking paper, on which flour is poured in a small layer. The oven is turned on and heated for 10 minutes, after which the baking sheet is placed inside. Next, it remains to detect the time after which the flour will begin to change its color;
- if after 1 minute the flour has not changed color - the temperature is below 200 ° C;
- slight yellowing after 30 seconds - temperature around 200°C;
- turned yellow sharply after 15 seconds and gradual darkening - heating to about 250 ° C;
-
a few seconds after placing the baking sheet in the cabinet, the flour turned black - the oven is working at maximum, the temperature inside is more than 280 ° C.
Despite the simplicity of the method, it has some features. So, for testing, you should use only white flour, by which you can easily track the color change. The amount of flour should also be measured. If there is a lot of it, the darkening will be uneven and it will be difficult to determine at what point the flour warmed up to the maximum temperature.
Gas burner does not ignite or goes out
The cause of a malfunction associated with turning on the oven and igniting the burners may be clogging or wear of parts, failure of the sensor that controls the state of the flame.
Ways to solve the problem problem can be as follows:
- Faulty (displaced tip, clogged or worn) thermocouple. Causes insufficient voltage to be supplied to the solenoid valve. As a result, it shuts off the gas supply to the oven burner. The problem can be corrected by replacing the part.
- Solenoid valve failure. In the event of a malfunction of the gas valve, the control sensor transmits voltage. However, the valve is not kept open - the burner operation is interrupted immediately after the gas cock is released. The valve must be replaced.
- Nozzle clogging. Prolonged use or ingress of products on the nozzle leads to partial or complete blocking of the gas outlet channel. To fix the problem, the burner is removed and cleaned.
- Failure of the TUP crane. The cause of the failure may be damage to the rotary mechanism located inside or one of the links in the gear. The part should be replaced with a new one. If the cause is clogging of the swivel mechanism of the crane, it is cleaned.
- Attenuation of the oven after heating. Poorly adjusted minimum combustion, which the oven switches to after the highest heat, causes too low a flame. The control sensor does not warm up sufficiently and cuts off the gas supply. The master can fix the problem - it is necessary to adjust the operation of the burner.
Gas ovens are not always equipped with a gas control function, sometimes they do not have electric ignition.Therefore, the rules for operation, ignition and the reasons for the attenuation of fire must be considered for each model of a gas stove separately.
How to turn on the gas stove
Before turning on a new gas stove, carefully read the instructions that came with it. If for some reason you don’t have instructions, or you want to turn on a stove of an unfamiliar design, for example, when cooking at a party or in a rented apartment, inspect the front panel of the gas stove - a symbolic image should be applied to it near each handle indicating which she controls the burner.
Find a gas pipe suitable for the stove and open the valve embedded in it. Usually the gas in the pipes is blocked by a ball valve, if you have the same valve, turn its handle so that it is parallel to the gas pipe.
Manual ignition of the burner
In the simplest stoves, gas is ignited manually, using matches or a special lighter. Decide which burner you will turn on, and find out which handle on the stove corresponds to it. Ignite the match, bring it to the edge of the burner, sink the burner handle (i.e. slightly press on it), and at the same time turn it counterclockwise. When the gas that begins to flow into the burner ignites, quickly remove your hand from the burner and extinguish the match. Set the gas knob to the maximum position, make sure that the gas burns around the entire perimeter of the burner with an even blue flame, then turn the knob to adjust its supply to the amount you need.
Similarly, you can turn on a gas stove with a lighter, but there is one small nuance in this matter - there are two types of lighters for gas stoves - piezo or electric lighters.If the piezo lighter, before pressing its button, you just need to remove the fuse and bring it to the burner, then the electric lighter must first be connected to the network.
Integrated burner ignition
If you find a button on the left side of this panel, next to which a spark is schematically drawn, then your stove is equipped with a semi-automatic electric ignition function.
A gas stove equipped with a semi-automatic or fully automatic electric ignition function is much easier to ignite. In the first option, you just need to push the knob from the burner you need, turn it a quarter of a turn counterclockwise and at the same time press the electric ignition button. When the gas ignites, the flame can be adjusted. In the second option, the gas in the burner will light up immediately after turning the knob without any additional action. Note: the most modern gas stoves are equipped with a gas supply control system. In such stoves, the handle must not be released immediately after igniting the gas, otherwise the burner may go out. To prevent this from happening, the handle should be held down for about 10 seconds.
How to turn on the oven in gas stoves is described in detail in the article How to turn on the oven in a gas stove.
How to build in an oven: steps
In order not to rack your brains over how to accurately install the built-in oven with your own hands, follow a pre-developed plan.
Preparation of the instrument and auxiliary materials
In general, to quickly install the oven in a niche suitable for it in the kitchen set, you will most likely need:
- drill with a set of drills and cutters;
- screwdriver or screwdriver;
- insulating tape;
- standard connecting terminals for wires;
- knife;
- a plug with a piece of cable of the required length, if the oven was purchased without them.
If it turns out that an electrical network ending in a suitable outlet is not connected to the installation site, you will have to take care of the method of laying it and masking the laid route.
Make sure you have an outlet for connecting the oven
Workplace preparation
When considering options for how to build in a new oven, you must take care in advance of having a niche, with some margin exceeding the size of the oven. There are several ways to create it:
- provide an appropriate compartment when ordering a kitchen set;
- purchase a separate module produced specifically for built-in ovens;
- select a suitable compartment in existing furniture;
- make changes to the design of an existing cabinet, independently equipping the necessary niche.
The size of the gaps left was discussed earlier.
Important! Deviations of the gaps to a large side are not as critical as to a smaller one.
Installation
Before installation, you must make sure that the cable with the plug from the oven can be connected to the socket intended for it. If there is no corresponding hole in the back or side wall, it must be carefully done by yourself using a drill or jigsaw.


The oven is installed in a niche in accordance with the requirements of the instructions attached to the product. It can stand on adjustable legs or be attached with special screws to the side walls of the compartment allocated for it. In this case, its front panel with a door becomes an integral part of the interior.
During installation, it is important to achieve a horizontal position of the device and secure fixation
Connection
The stage of connecting the oven is usually combined with its installation, since after the final installation, access to the rear wall of the appliance is most often impossible. There are two ways to connect electrical equipment to the electrical network:
- directly;
- through a plug-socket connection.
Electric oven cable marking
In the first case, it is recommended to use standard terminals designed for a suitable power. The second option is more preferable. Typically, ovens are sold with an existing power cable that terminates in a standard plug. Otherwise, you will have to make it yourself by connecting to the appropriate sockets inside the oven body.
During the connection process, it is important to correctly attach the ground wire to the terminals intended for this on the oven body, in the plug, socket and on the input board. To eliminate the possibility of error, it is painted yellow or green in three-core cables.
Carefully! Electrical connections of powerful household appliances using twists are not allowed. Avoid direct contact between aluminum and copper
Professionals use soldering or screw terminals.
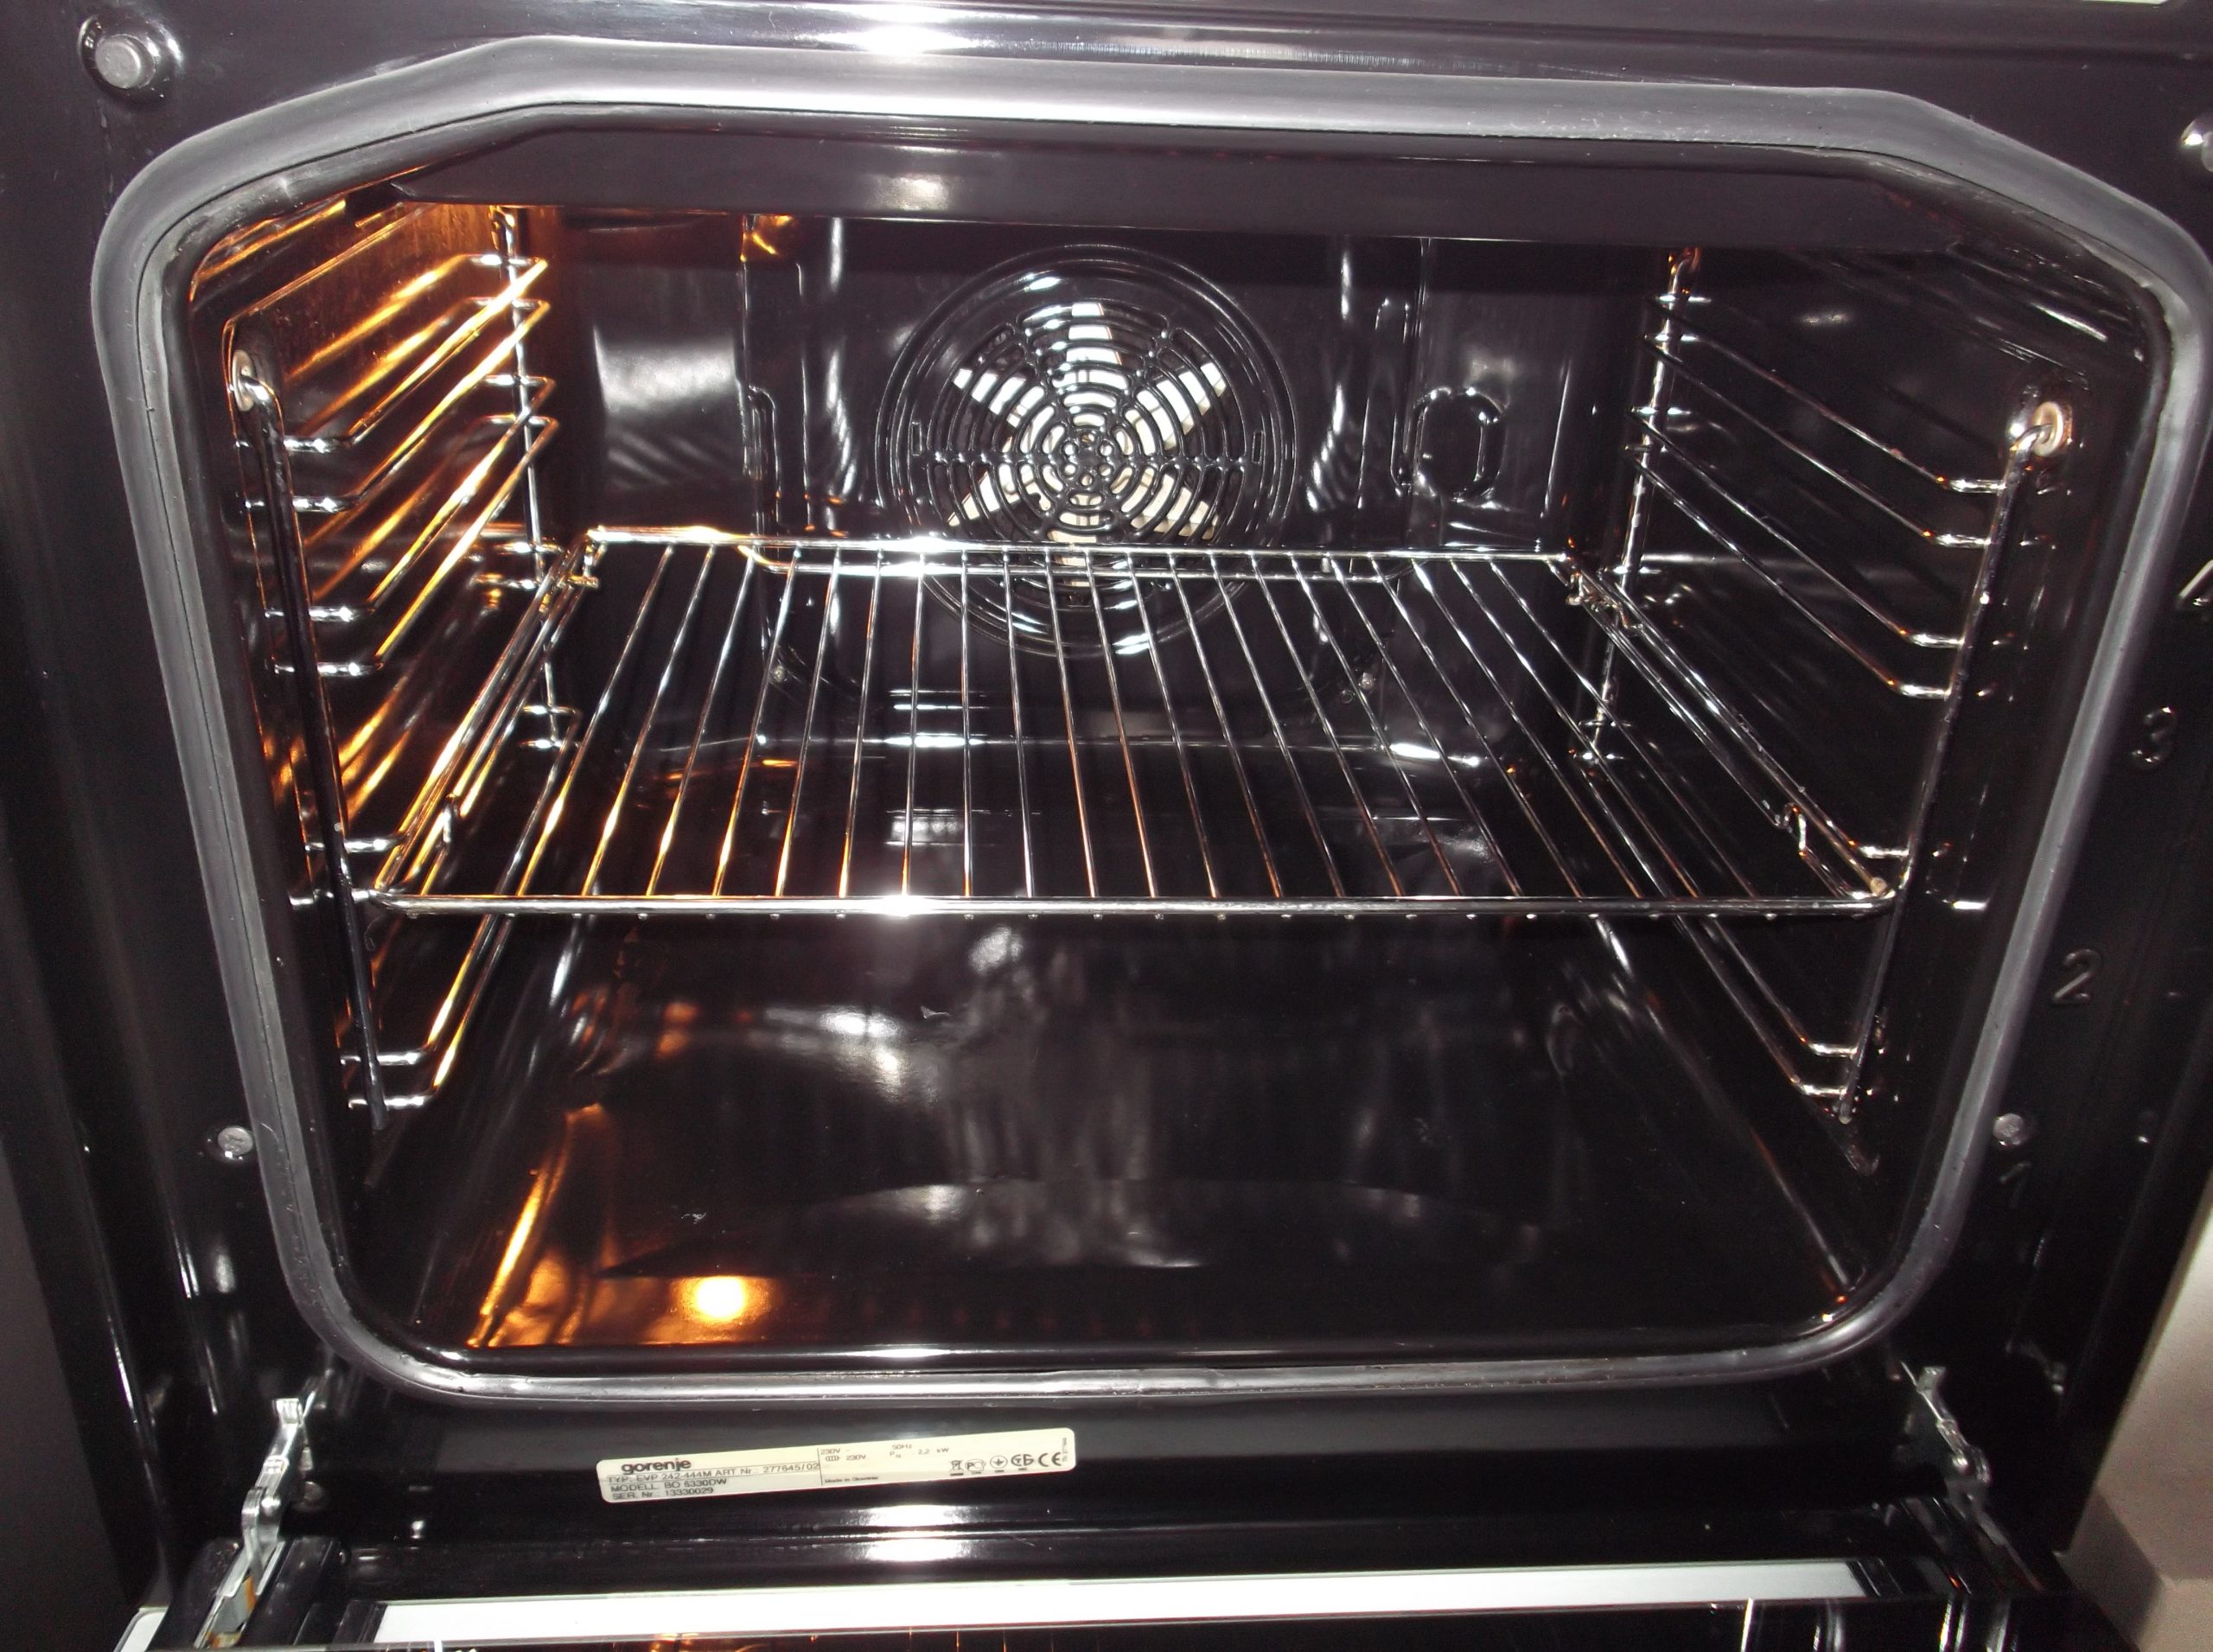
Health check
Any installation must end with a commissioning test. Before using it for the first time, it is recommended to carefully remove the remaining grease from the inner surfaces of the oven chamber using a clean and slightly damp cloth. The trial run takes place for 30 minutes at a temperature of 250°C without placing food in the oven.The appearance of a faint smell of burning and a little smoke is not an indication of a malfunction. Most likely, this burns out the factory oil.
After installation, it is necessary to start the oven
It is advisable to check the equipment in all modes provided for by the instructions. At the same time, the operation of indicators and useful functions is checked. If no deviations are noticed, you can proceed to operation.
Conclusions and useful video on the topic
Why is it important to follow the rules when connecting gas appliances:


Why do you need a dielectric gasket:
How to install the oven:
It seems that installing the oven is not difficult. It is necessary to follow certain steps in sequence and take care of the hermetic connection of all nodes. In practice, inept masters make serious mistakes.
An almost imperceptible gas leak often leads to serious losses, as well as to more terrible consequences - illness and death. Therefore, for the sake of safety, it is better to invite a professional with the necessary knowledge to perform this type of work.
Conclusions and useful video on the topic
What it looks like and where the igniter hole is located in a gas oven is described in the video below. Additionally, the video shows how to remove the protective plate and gain access to the burner.
Information on how to light a flame in an oven without electric ignition with gas control in the following video:
As with any gas equipment, work with the oven must be extremely careful.
Pay attention to any alarming dysfunctions of the device and contact specialists in time to avoid emergency situations.
And it’s quite simple to kindle a flame in a gas oven: you just need to learn how to do it right only once, after which the hostess will not need outside help.
Do you want to supplement the information provided with useful recommendations or comments? Or do you have questions that we have not covered in this material? Ask them to our experts and other site visitors - the feedback form is located below.
A gas stove, like other household appliances, requires handling in accordance with elementary safety rules. If you are about to buy a new stove or have never turned on the one you already have, then this guide is for you. How to turn on the gas stove?
- It is necessary to find a valve on the gas pipe that should be opened. Thus, you will ensure the supply of gas to the gas stove.
- Look at the symbols next to the burners. They will show you the matching of relays and burners. First, select the hotplate you want to turn on. If the stove does not have an electric ignition, then bring a lit match to the divider and turn the desired relay slightly counterclockwise. Once the burner has ignited, adjust the flame to the desired size. Be sure to make sure the fire is blue, otherwise turn off the burner to clean it.
- If the stove has an electric ignition function, then it will turn on a little differently. The semi-automatic system works as follows: you press a button that turns on the current to the burner, as a result of which a spark is supplied to all burners. Now you just have to turn the desired relay. If the stove has an automatic electric ignition function, then first you need to press the relay a little, and then turn it counterclockwise.
- If you need to turn on the oven, then find the bottom hole (one or two) leading to the burner. Then turn the relay counterclockwise and bring the match to the hole. After that, the fire should spread over the entire surface of the oven. If everything went according to plan, then you can safely close the door and wait for the oven to heat up to the required temperature. If your stove is equipped with an electric ignition function, then turn on the oven in the same way as the burners.
- Lighting a gas stove, as you can see, is not very difficult. You just need to follow the above instructions or find the answer you are interested in in the instructions for using the gas stove. If none of the above tips helped you, we recommend calling a specialist who will check the system and explain everything to you.
»alt=»»>
Gas equipment is a convenient and economical attribute of a modern home. But it is also an object of increased danger, which requires increased attention and compliance with operating standards.
Those who have gas water heaters should first of all know how to turn on the gas column and what rules must be observed when using it.