- Faults
- First option
- Second option
- Third option
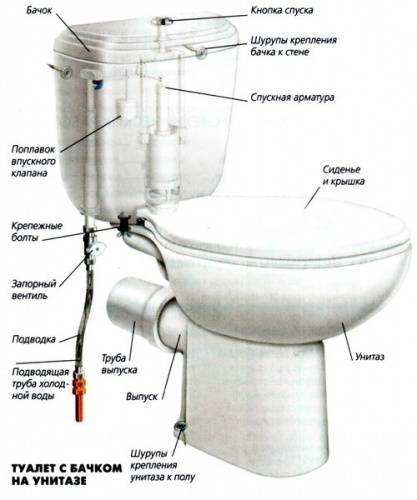
- The toilet cistern is leaking: the reasons why water is on the floor
- External breakdowns
- Crack in the base of the toilet
- Fasteners not tight enough
- The tank is leaking on the sides or from the bottom to the floor
- Broken toilet bowl
- Worn cuff or corrugation
- The main causes of external leaks
- How to replace a leaking gasket?
- We eliminate the leak in the place of the connecting screws
- Installing corrugations on the toilet subtleties and nuances
- How to determine that a leak has appeared?
- Water flows to overflow
- Ways to fix a leak from the toilet bowl
- Solving the Problem Created by Cause #1
- Eliminate Cause #2
- Work and elimination reason No. 3
- Solving Problem #4
- Corrugation for the toilet bowl advantages and disadvantages
Faults
Usually, all possible malfunctions with a toilet bowl have the following symptoms:
- water constantly flows into the bowl;
- liquid continuously flows from the plumbing system into the tank;
- the toilet itself is leaking;
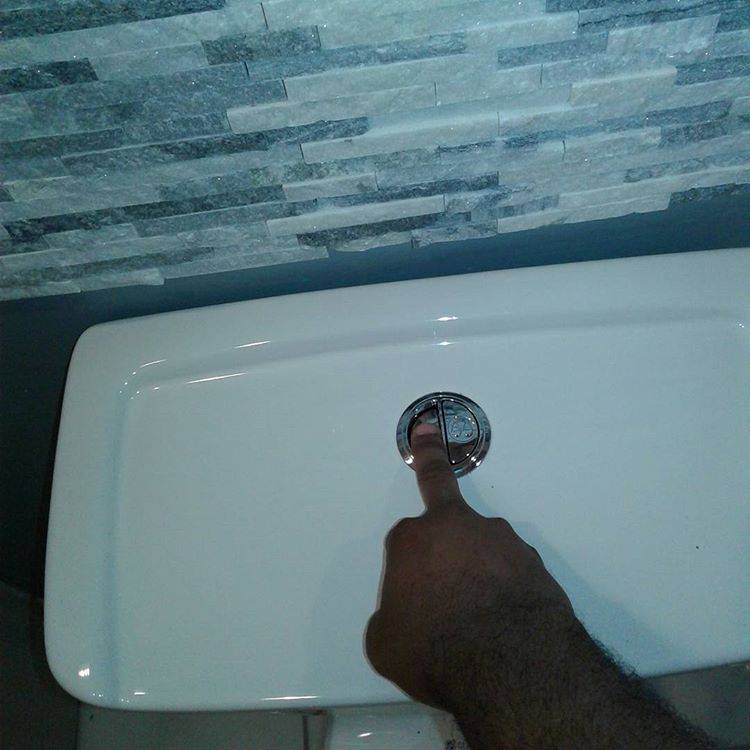
- flush button broken
- repeated pressing of the button is required in order for the drain to occur or the liquid to stop flowing into the tank.
To eliminate the breakdown, it is very important to determine its cause.
First option
Overflowing the tank is the likely reason why water is constantly flowing. All "extra" water goes into the bowl through the overflow.
Let's highlight a few reasons for this problem:
- valve crack (found only in plastic products);
- problems with the pin holding the float lever;
- low gasket pressure;
- its wear.
Understanding the reasons, you can roughly figure out how to act.
How to solve:
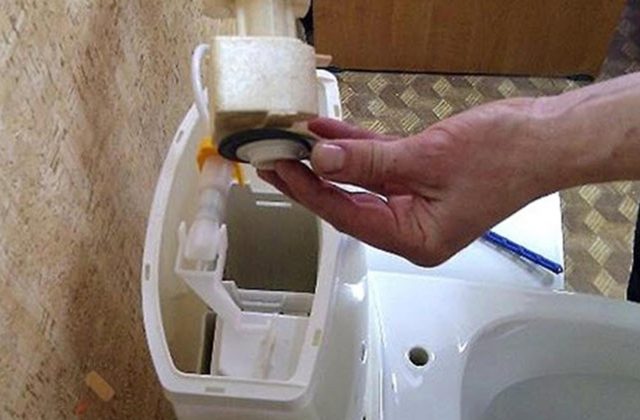
- We remove the cover.
- Raise the float a little. The flow must end. If this happens, it will only be necessary to slightly bend the lever in order to ensure that the water supply is shut off.
- If it doesn't help, you will have to inspect the valve. Instead of a broken stud, you can use a piece of copper wire. If the hole in which it is attached has become large, the entire valve will need to be replaced. To do this, you should take a sample of the old one with you to the store in order to find exactly the same one.
- If the gasket is worn out, then the entire valve will still need to be replaced, since they are not sold separately.
Second option
Consider the option in which water flows, and its level in the tank is less than the overflow. A common cause is a broken bolt that tightens the toilet and shelf. A similar problem existed especially acutely in older models, where there was a pair of steel bolts. Naturally, under the influence of water, they quickly became unusable. In this case, they need to be replaced. Moreover, it is desirable to choose products from corrosion-resistant materials.
You can solve the problem by disassembling and assembling the tank:
- turn off the cold water supply;
- remove the tank cover;
- empty it;
- disconnect the flexible hose;
- we unscrew the bolts that fix the shelf on the toilet: if it doesn’t work, you can use a hacksaw;
- tilt the tank back to get the shelf out of the cuff;
- drain the remaining liquid, lay the tank on a flat surface.
Replacing the bolts with new ones, you should assemble everything
At the same time, it is important to replace the rubber elements so as not to return to repair in the near future.
When tightening the bolts, be careful not to over tighten. The toilet material breaks quite easily.
Third option
What to do if the bolts are intact, there is a lot of space before overflow, and the liquid flows. When there is water in the tank, it does not flow into the bowl as long as the rubber bulb holds it. By pressing the button, the pear rises, the liquid flows out. Over time, the material from which it is made loses its qualities, which means that there is every chance that the pear will begin to let water through.
It is necessary to change the pear. It is fixed on the stem with a thread. You can unscrew it by turning it counterclockwise. You need to go to the store with a sample of the old product in order to pick up an identical one.


A temporary solution could be some kind of weight hung on the stem to press down the rubber, preventing the liquid from constantly flowing out.
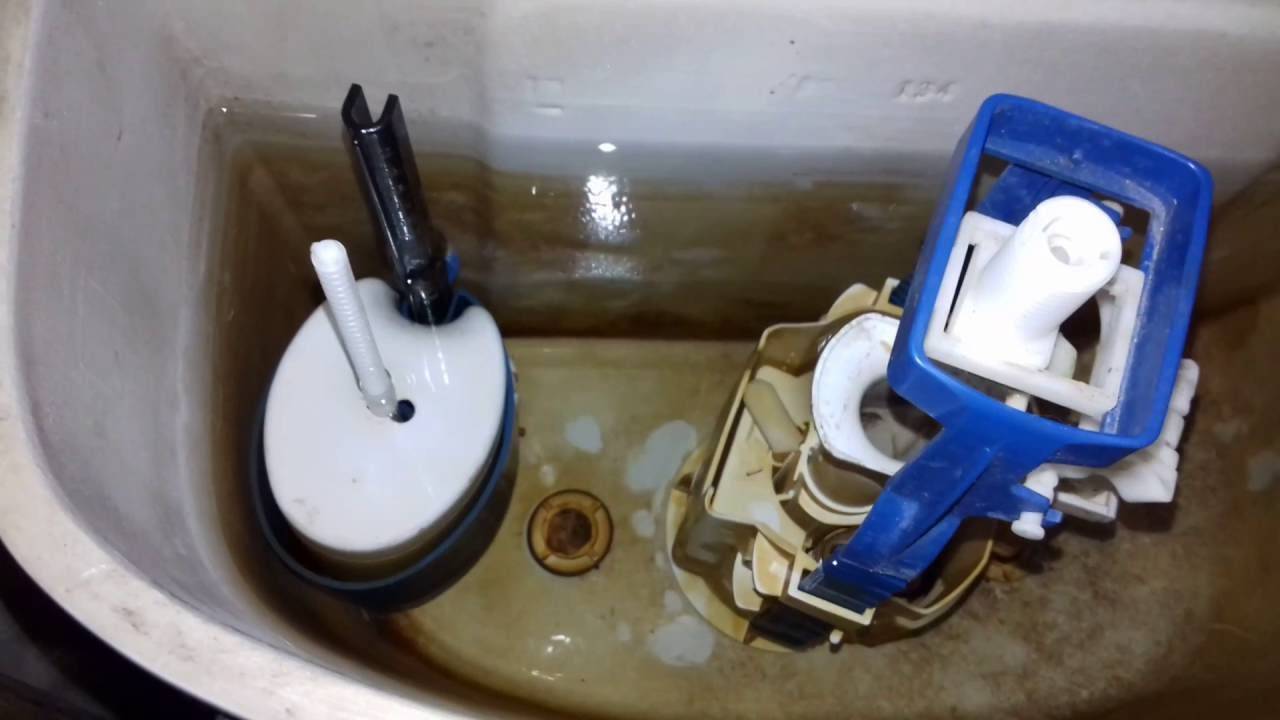
The toilet cistern is leaking: the reasons why water is on the floor
There are two weak points through which liquid can seep out of the toilet bowl and cause a lot of trouble to the owners and neighbors - it can flow through the gasket installed between the tank and the toilet itself or through the screw holes that connect the two parts of the compact. In both cases, the cause is almost always either the design features of the toilet bowl (the tank does not fit tightly on the bowl and over time it loosens, which leads to a leak), or improper installation of the gasket.
The toilet cistern is leaking: troubleshooting options
There are other options - for example, a dry gasket that comes with the toilet bowl. Installing it, the master lays a time bomb. But let's start in order and consider each of the possible places where leaks occur separately.
Gasket between cistern and toilet bowl. In this case, the question of why the toilet bowl is leaking can only be answered by making a certain visual inspection.
Immediately you need to pay attention to the distance between the tank and the toilet - if it is, then, most likely, the point is in the design features of this plumbing fixture. It will not work for a long time to fix a leak with such a toilet - time will still pass, and the leak will reappear
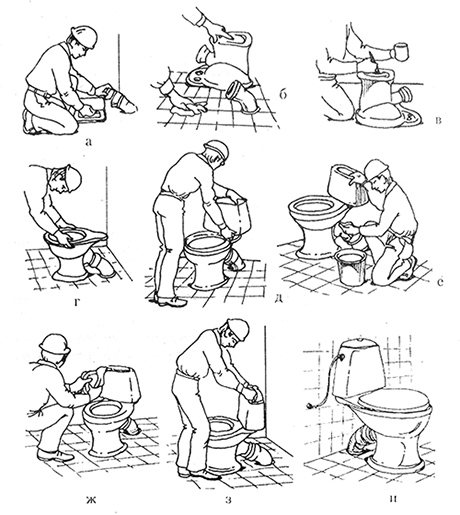
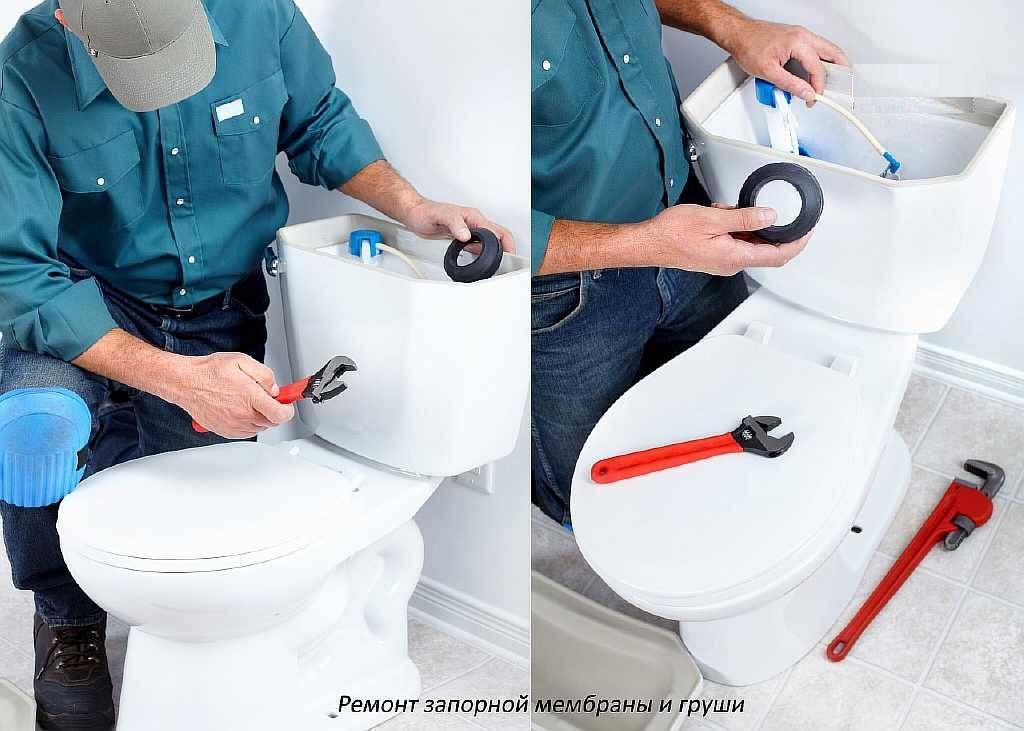
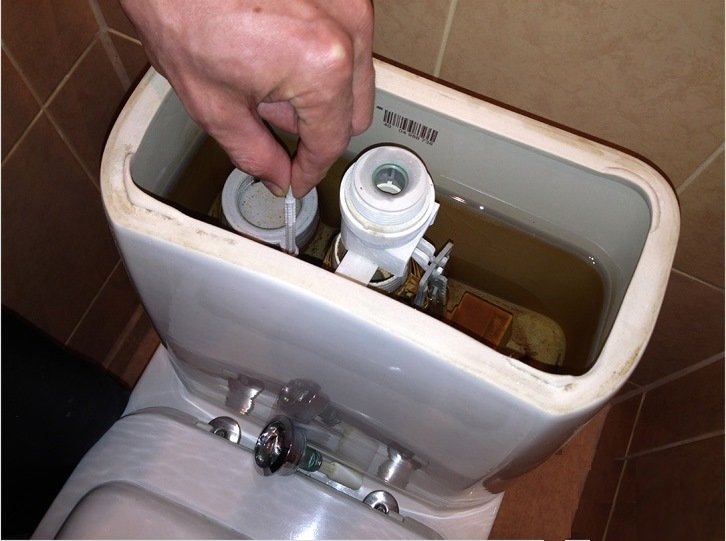
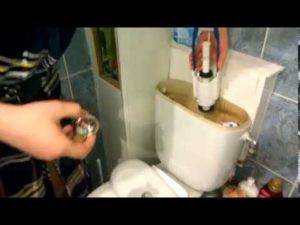
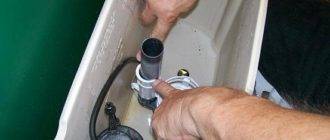
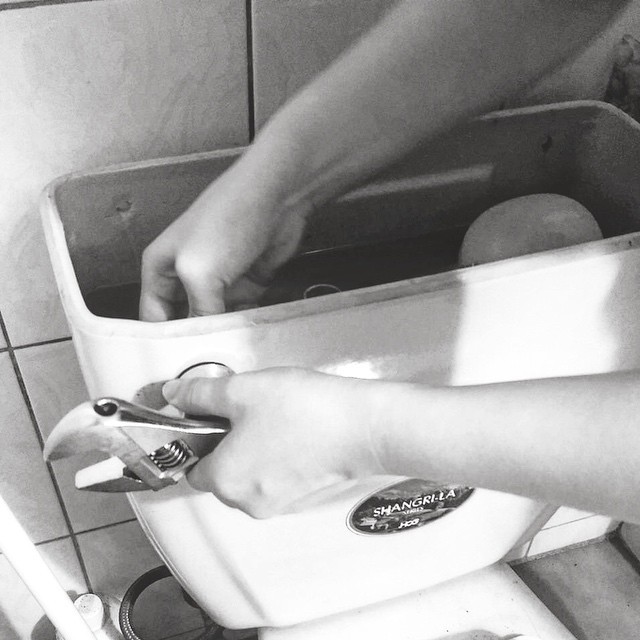
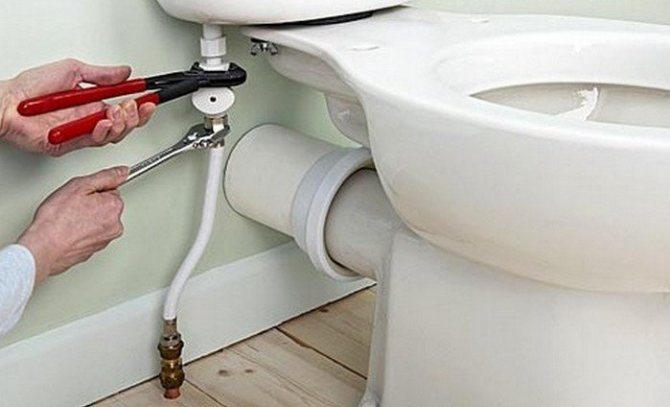
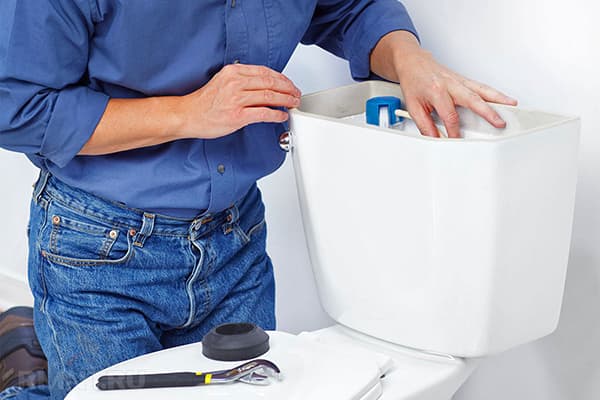
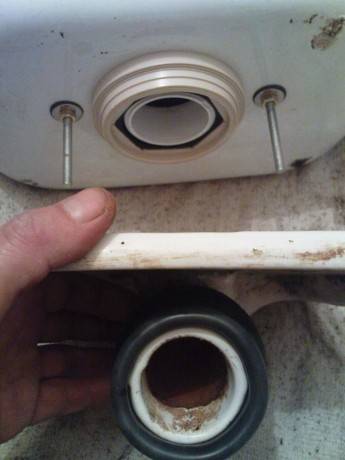
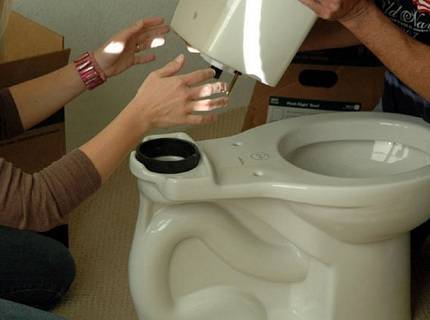
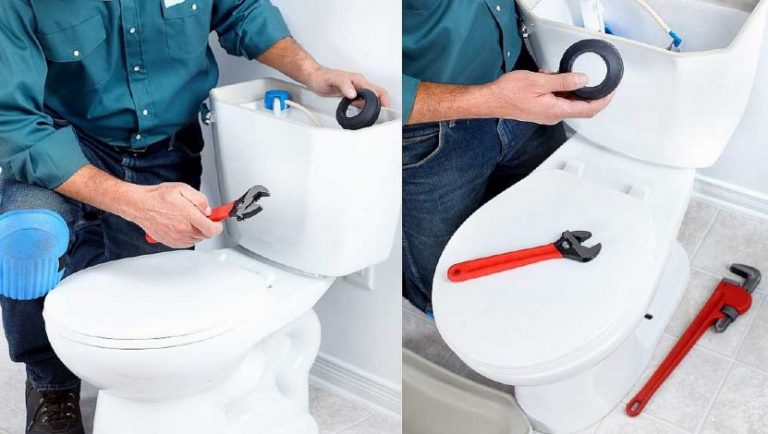
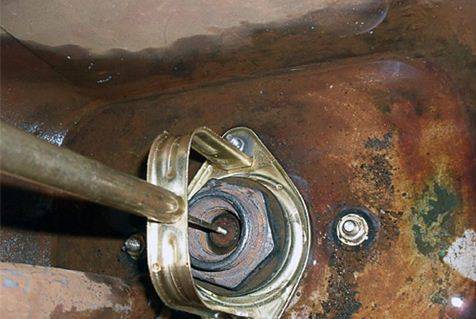
By the way, it can appear with equal success both in a month and after a few years. No, this is not a lottery, but the scrupulousness with which you will treat this problem. In a good way, such a repair of the toilet cistern is performed as follows. First, turn off the water supply, drain the water from the tank, remove it. To do this, you will have to unscrew the two screws that pass through the bottom of the tank and go out from the bottom of the toilet bowl - if they are not rusted, then the tank will be removed easily. After separating the two parts of the toilet bowl, the gasket responsible for the tightness of this joint should remain either on the tank or on the toilet bowl - we remove it and look at its condition - if it is solid and does not squeeze with our hands, then we go to the store for a new one. If it is soft, then the matter is most likely in the wrong installation. In both cases, it is better to replace it.Before going to the store, we wipe dry the junctions of the gasket with the tank and the toilet, thus thoroughly removing all dirt and debris. While you walk, it will dry out, and immediately after returning, it will be possible to continue repairing the toilet bowl. The new gasket is installed quite simply, and so that during the assembly process it does not change its position and the leak does not recur, it can be glued to the tank or toilet bowl with silicone (it is better both there and there). Then we insert the screws into place and tighten them well - just do not overdo it, otherwise the faience may burst. After the tank is installed and the nuts are tightened, it is better to wait a couple of hours for the silicone to dry up, and only then use this plumbing fixture.
Leakage through connecting screws. In most cases, they occur as a result of poor-quality installation of the toilet bowl or due to dry seals. As in the previous case, unscrew the screws, but do not remove the tank. We pay attention to the gaskets, or rather to their shape - if we are talking about flat rubber washers, then we throw them away and go to the store for a new kit for connecting the tank to the toilet. When buying it, make sure that it is equipped with cone gaskets, as they provide a more reliable sealing of the holes. We install a new mounting kit in accordance with the following diagram. Closer to the screw head, we first put on a metal washer - followed by a conical gasket with a narrow part from the screw head. We insert the screw into the hole (from inside the tank) and from below, under the toilet bowl, put on a flat rubber band, then a washer and screw on the nut.You need to tighten the bolts one by one - first tighten one, then the other, then return to the first again and go to the second again. In general, you need to make sure that the cistern falls onto the toilet evenly - skew can lead to a crack on the toilet or cistern.
Toilet cistern repair photo
Here, in principle, are all the places where a leak can occur between the tank and the toilet. As you can see, eliminating it is not so difficult, the main thing is to understand what you are doing.
It is for this reason that when repairing a toilet bowl with a button, pay special attention to disassembly - when disassembling something, we study the design and purpose of the device parts. So it will be easier to understand the principle of operation of the tank and determine its malfunction.
The video clearly shows how to repair the toilet cistern if it is leaking.
External breakdowns
Violation of tightness. If the toilet is installed on a cement mortar, then in the place where it is connected to the sewer pipe, the cement crumbles, cracks appear and the flow begins. Sometimes this arises from the fact that the toilet began to be used shortly after its installation.
It is not recommended to use the toilet for 24 hours after installation. Clean the joint from the old cement. Do this with a screwdriver, chisel or knife. Prepare a new mortar by mixing cement and silicone-based sealant. Do not add sand to cement. Leave for a day until completely dry.
Crack in the base of the toilet
It often happens when a large amount of boiling water is abruptly poured into the toilet. Faience does not withstand a sharp change in temperature and bursts. Two holes are drilled at the ends of the crack.
Cracks and holes are cleaned with emery from bumps and burrs. Apply epoxy to the leak.Do not use the toilet until the epoxy is completely dry. If the epoxy does not help, then you need to replace the toilet with a new one.
Fasteners not tight enough
It is possible that the nuts were loosely tightened when installing the toilet. Or the studs on which the toilet is installed are loose at the base. It is necessary to tighten the fastening nuts. If the studs are loose, then it is necessary to remove the toilet bowl completely and re-fix them.


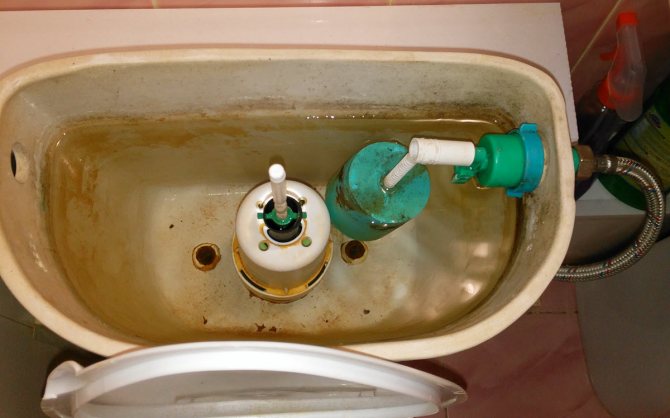
The tank is leaking on the sides or from the bottom to the floor
Quite often, a tank leak is confused with the presence of condensate on its surface. Filling the container with cold water in a room with normal room temperature automatically leads to the appearance of dew drops on the outer walls.
Another thing is when marks characteristic of a constant stream are visible on the sides. Rusty or calcareous marks left by the water flow indicate a defect in the operation of the internal mechanism or cracks in the ceramic bowl itself.
The problems associated with the presence of traces of a leak can be classified as follows:
- the presence of traces of a jet of water from technological holes;
- traces starting below the holes, appearing in places of microcracks;
- the presence of traces on the bottom of the tank.
In the first case, when water simply overflows through the technological holes, the cause of the defect may be a malfunction of the overflow mechanism or the absence of a special hose mounted on the filler pipe.
A blown tube on the valve inlet is not a critical malfunction, just under the pressure of water a large amount of spray is formed in a closed space with an unpredictable trajectory, as a result of which a certain amount of water simply splashes out. Deficiency Correction Method:
- Shut off the water supply.
- Remove cover.
- Put the flown tube on the branch pipe and fix it with a clamp.
In case of mechanical damage to the ceramic or plastic bowl of the tank, a leak may occur on the walls at the fracture points. Visible cracks that threaten the integrity of the structure are useless to seal, the constant process of filling and draining water systematically affects the walls and breaks the seam, no matter how strong it may be. In this case, you just need to replace the tank.
If no visible cracks are visible, but water infiltration still occurs, it is recommended:
- Shut off the water supply.
- Drain the water from the tank.
- Mark water leaks.
- Dry the tank outside and inside.
- Using silicone sealant or silicate glue, treat microcracks inside and outside the walls.
- After finishing the treatment, fill the tank with water.
Filling microcracks with sealing compounds will ensure the sealing of the walls for a rather long time, but this is provided that the walls are not subjected to mechanical action that can turn microcracks into real fractures.
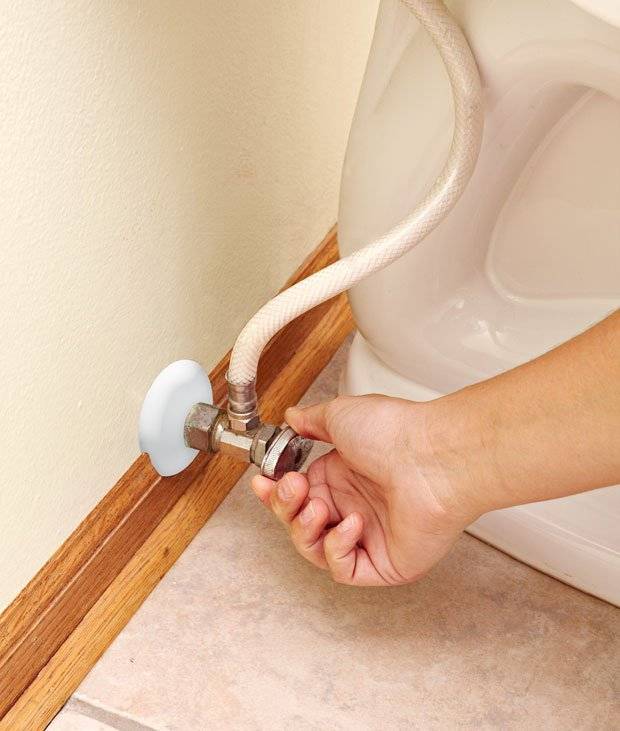
Tanks with bottom hose connections most often leak at the hose connection. You can eliminate the defect by tightening the hose nut on the fitting or removing the hose and reinstalling it using fum-tape or tow.
Broken toilet bowl
Perhaps they stepped on the toilet or put too much weight on it. The toilet needs to be completely replaced.
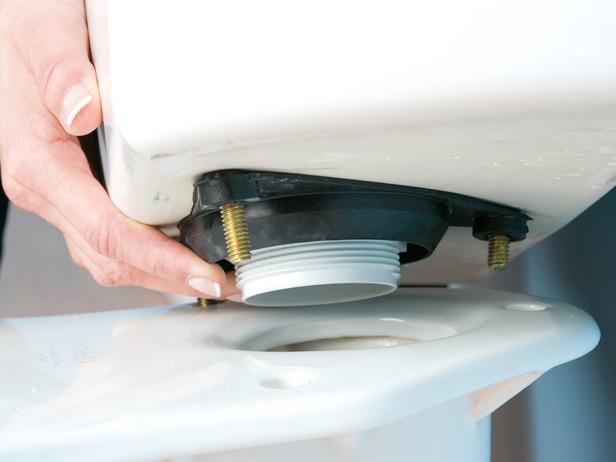
Worn cuff or corrugation
The rubber gasket became less elastic over time and cracked. To fix the problem, you need to remove the toilet from the base. Remove old cuff. Install a new cuff on the sealant.
If it is not possible to buy a new gasket, then the old gasket is bent up around the circumference and sealant is thickly applied to the resulting space. Most problems are solved with sealant, glue, or a new gasket. In the most severe cases, it is necessary to buy a new toilet and call a specialist to install it.
The main causes of external leaks
What to do if the toilet tank is leaking and water is on the floor? First you need to understand the reasons. There are two main nodes, a breakdown in which leads to this kind of trouble. This is the gasket that is installed between the tank and the toilet bowl, and the screws that connect the compact design.
Causes of external leaks can be or loose installation of the drain tank on bowl, or a violation of the technology for installing a sealing gasket.
Also, the tank may leak due to natural wear or the initially poor quality of the gasket. In all cases, the essence of the problem lies in the lack of tightness of the connections.
Sealing gaskets for toilet bowls are in every building store. They are silicone, rubber or polyurethane. Any of the materials perfectly copes with its tasks. The main thing is that the new gasket is not hard. You can check it by squeezing it in your hand. The surface of the product must be smooth and even.
How to replace a leaking gasket?
First of all, turn off the water and empty the tank. After that, it can be removed by unscrewing the two screws connecting the structure. In relatively new toilets, the screws do not have time to rust and are easily unscrewed.
If the screws are seriously “grown”, you will have to be careful when unscrewing. It makes sense to consider the option of a complete replacement of the structure, because
problems can appear simply because the toilet has served its time.
In this case, breakdowns follow one after another, and soon after the repair you will have to face new troubles.
When the parts of the structure are separated, the sealing gasket can be removed and checked for leaks. To do this, it is compressed. If it has hardened and lost elasticity, it's time to buy a new one.


If everything is in order with the gasket itself, then the problem is in the wrong installation, but in this case it is better to put a new one.
Before installing the gasket, the joints are thoroughly cleaned and dried. The new part is placed in the same place as the old one.
To guarantee the tightness of the connection, it can be glued with a special silicone compound. It is applied to parts of the structure and to the gasket itself on both sides.
After installing the gasket, the tank is installed in place, tightly clamping the screws. At the same time, it is necessary to monitor the applied efforts so that the connection is tight, but the faience does not burst.
It remains only to tighten the nuts and wait until the silicone grabs. The toilet can be used after 2-3 hours.
Silicone sealing compounds are designed for bonding rubber, metal, plastic parts. After drying, they form a dense impermeable mass, resistant to all types of influences.
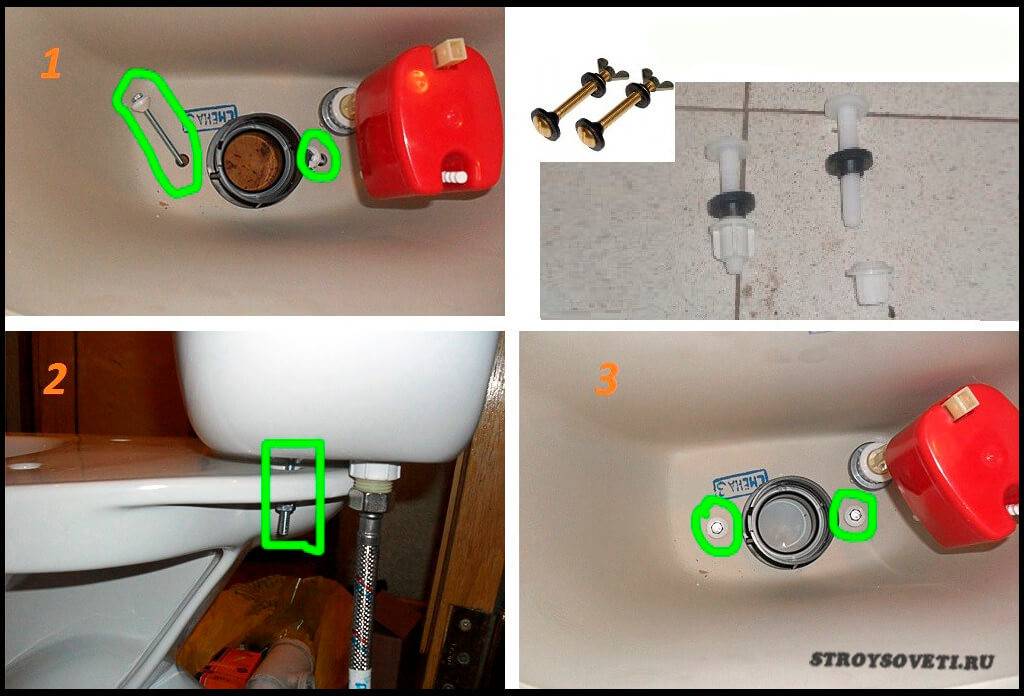
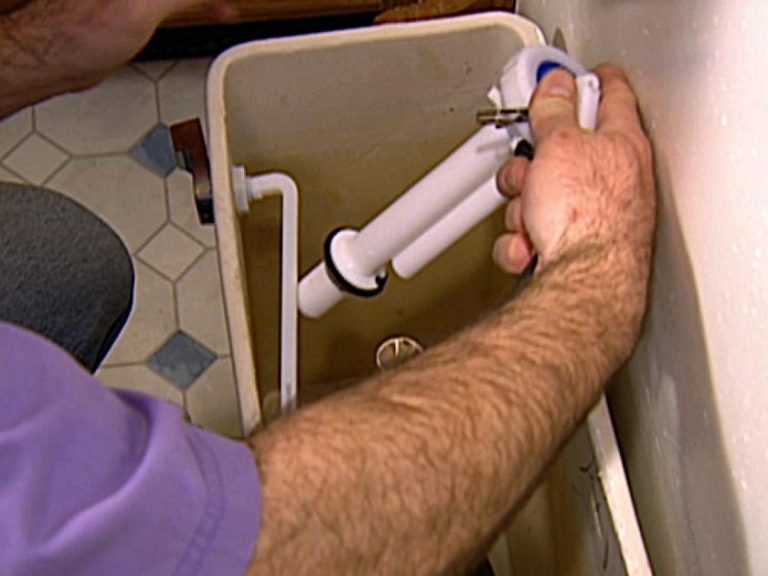
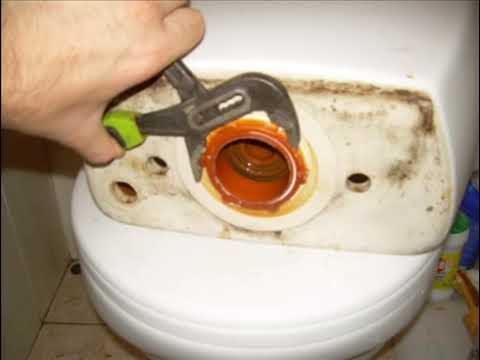
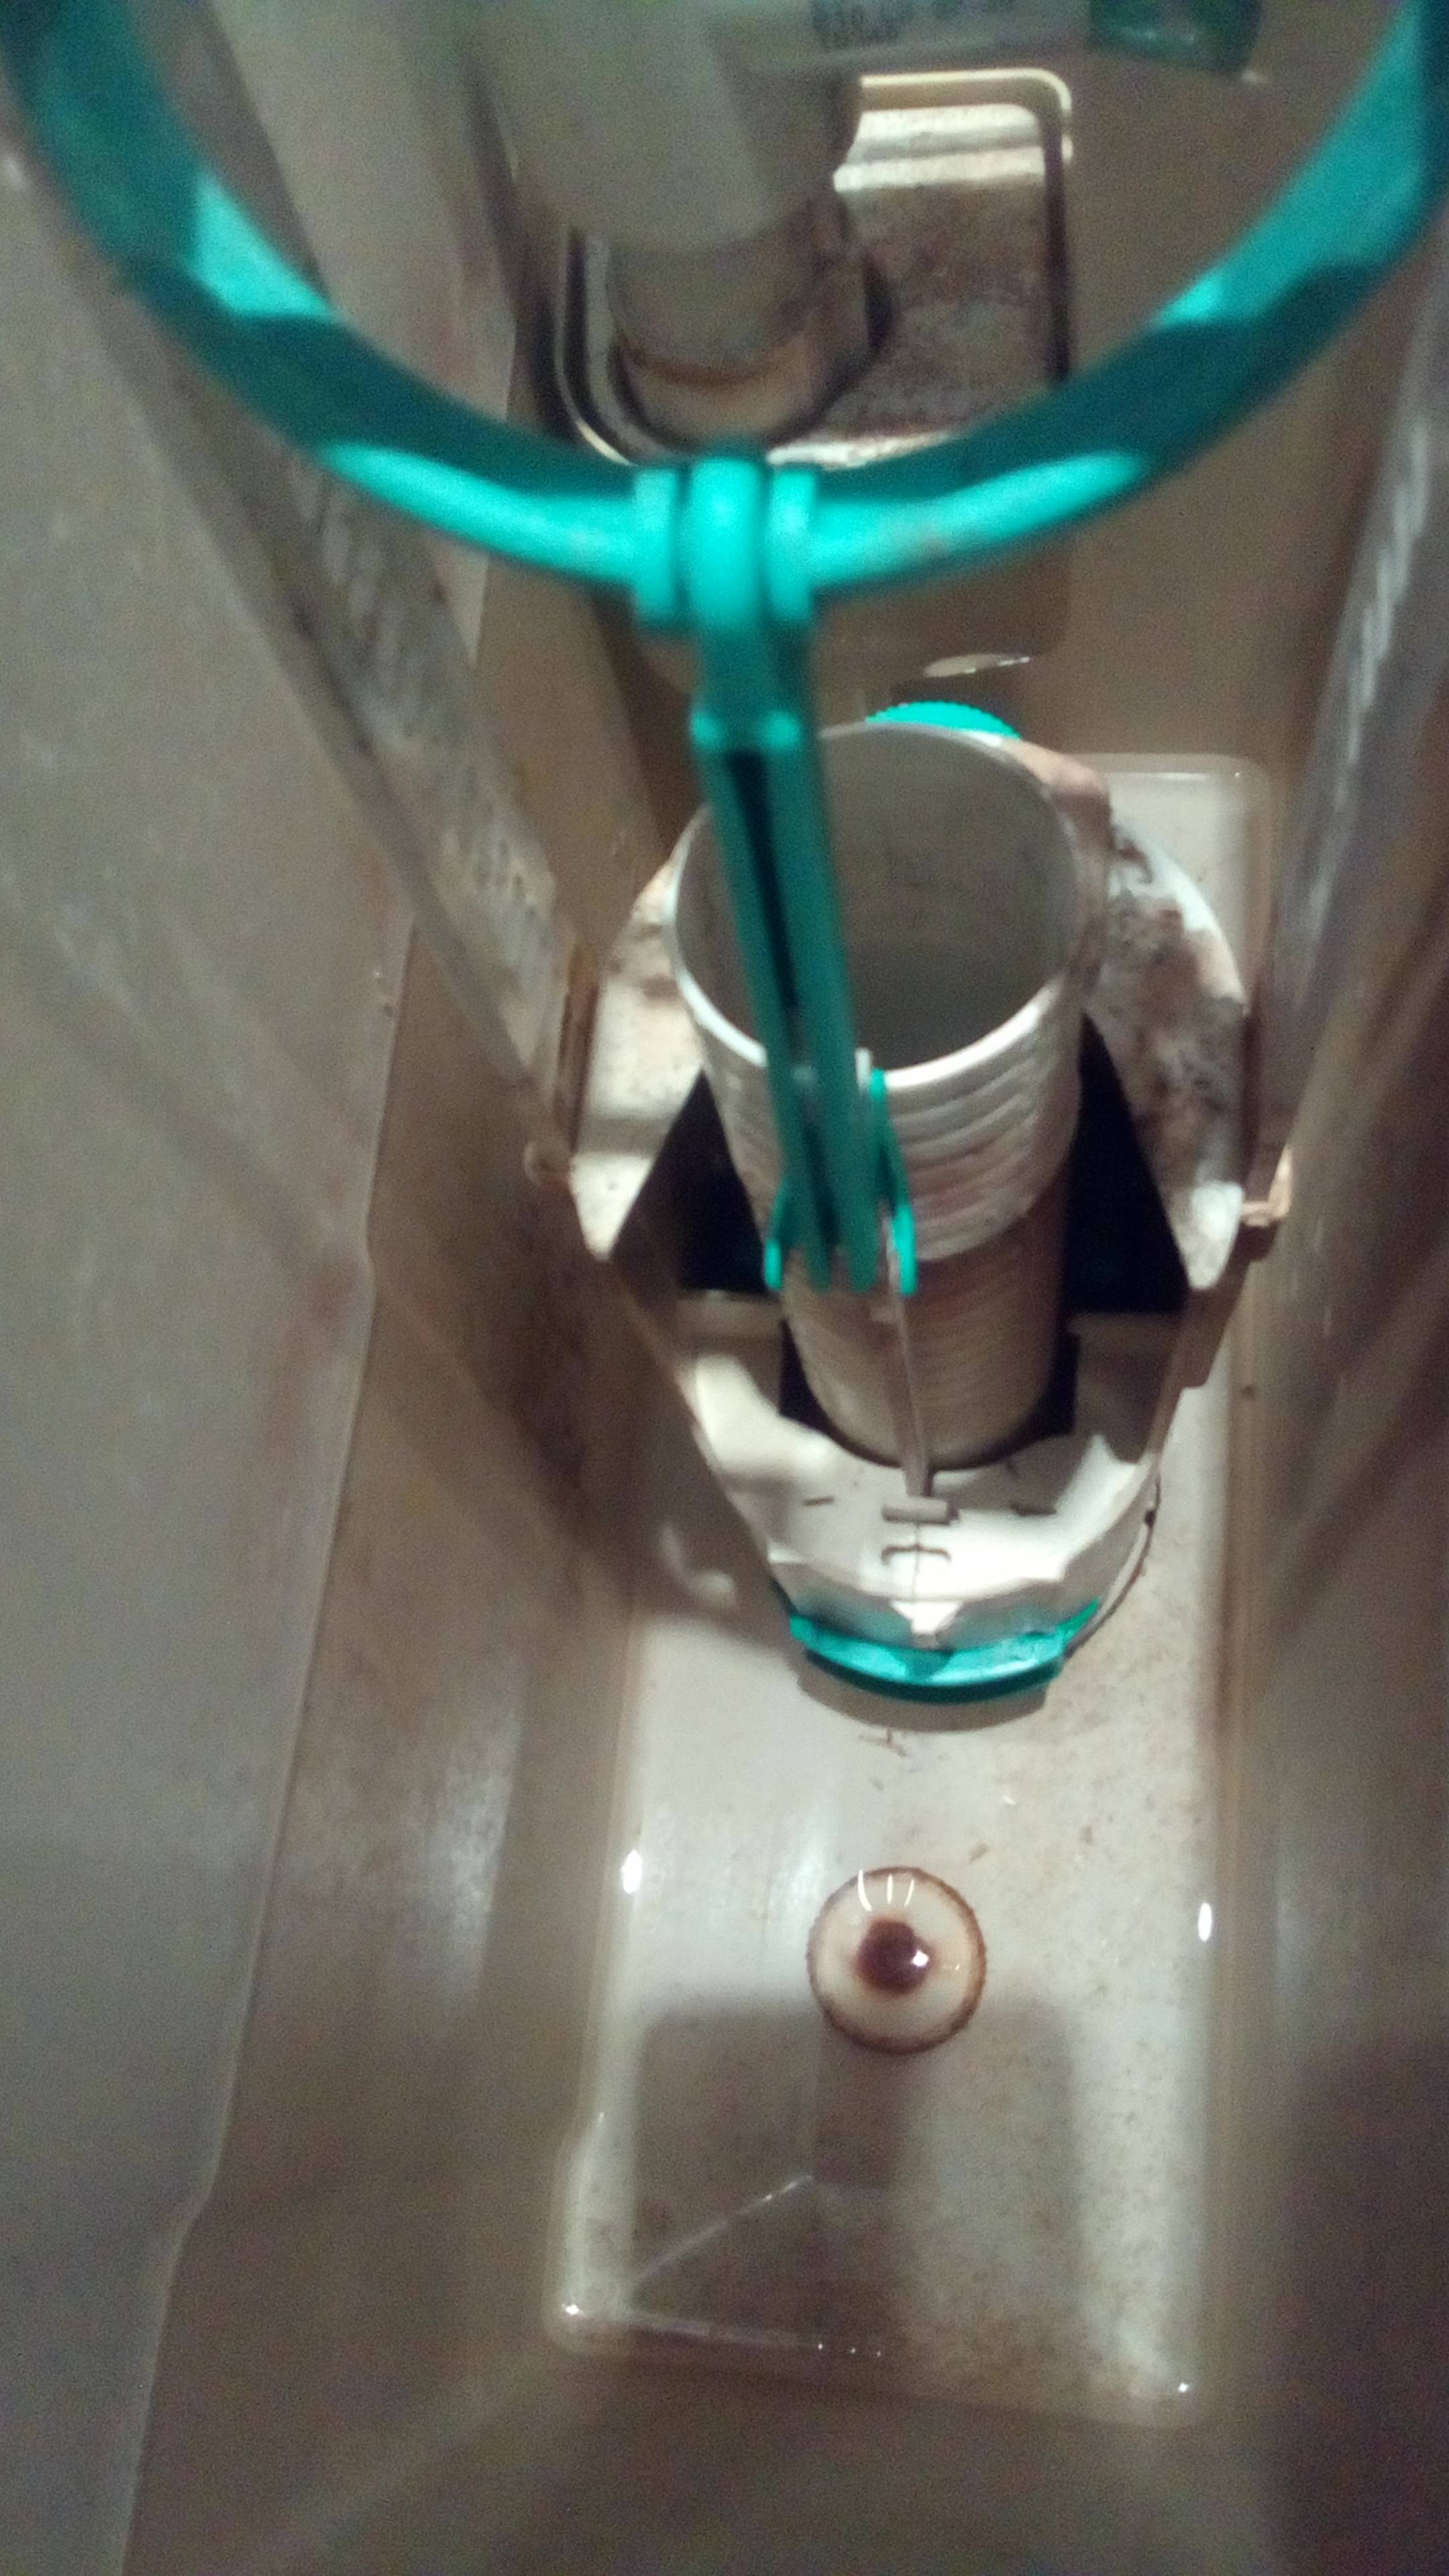
We eliminate the leak in the place of the connecting screws
Leaks in the places where the connecting screws are installed occur in two cases:
- if the toilet was originally mounted unprofessionally;
- if seals are dry.
To eliminate the leak, unscrew the screws, but the reservoir bowl itself does not need to be removed. Most likely, flat rubber seals have become unusable.
They will have to be replaced, preferably with conical gaskets, which provide a tighter fit of the parts.
To install new fasteners, a metal washer is put on the screw, then a gasket (if it is conical, then the wide part to the screw head).
Next, the screw must be inserted into its original place from the inside of the tank, and from the outside, put on a flat rubber band, washer and nut.
When fixing the structure, it is necessary to evenly distribute efforts, alternately tightening either one or the second screw. This will help avoid distortion. If the tank is installed correctly, then all connections will remain tight.
Skews will lead to new leaks or cracks in the plumbing fixture.
Each toilet model has its own design features, so when disassembling, you should be very careful, remember the location of each part, the specifics of fastening and other nuances. This will help to properly assemble the toilet after repair.
Installing corrugations on the toilet subtleties and nuances
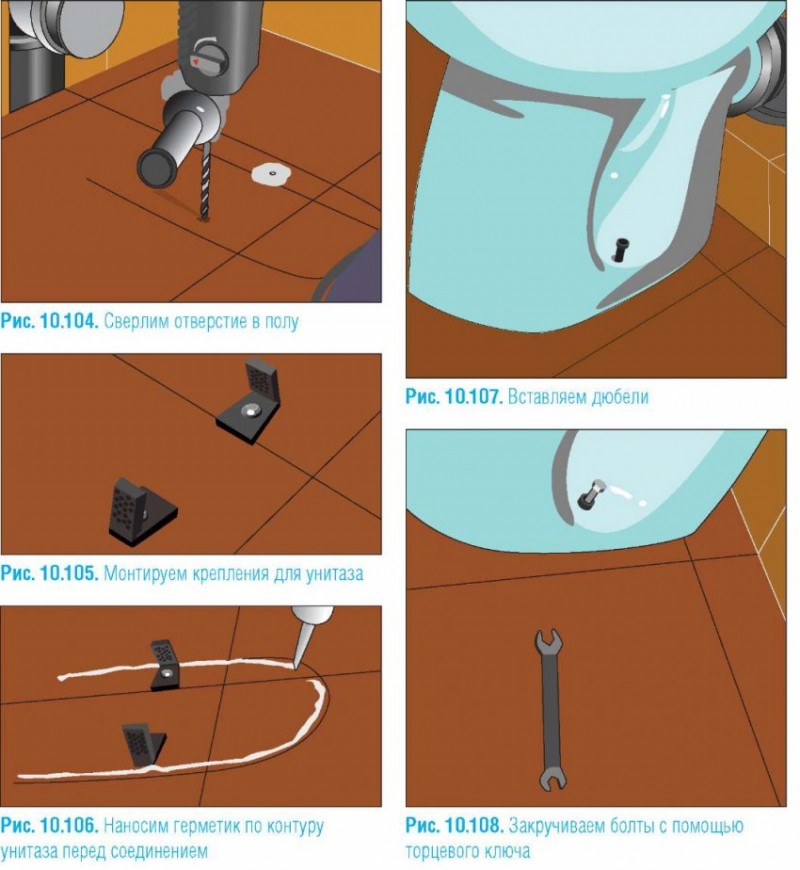
The installation process of the corrugation is very closely related to the installation of the toilet bowl - you cannot put the toilet bowl, and then connect it with the corrugation to the sewer. Everything will have to be combined and done in a strictly defined sequence.
- To begin with, the corrugation must be pulled over the outlet of the toilet bowl. It is put on very easily, but nevertheless inaccurate movements can lead to breakage of the product. If the sealing rubber in the socket is smeared with soap, the corrugation will fit onto the socket easily, with minimal effort - in any case, it must be pulled with a twist.
- Then we move the toilet to the sewer socket and insert the corrugation into it, after which we position the pot in the desired position and mark the places of its attachment.
-
We take out the corrugation from the sewer socket. We drill holes for fasteners in the floor and return everything to its place, inserting the corrugation into the sewer.
- Now, after a test drain, when you make sure that there are no leaks, the toilet bowl can be thoroughly fixed to the floor. In principle, that's all, but there is one subtlety - in order for the rubber to seal the connection between the corrugation and the old cast-iron sewer, the socket of the latter must be very well cleaned of rust and old seal. There are no other nuances here, and you will not need any additional sealing of the seams with silicone. It is not needed here - silicone spoils rubber over time, so you should forget about it altogether.
In conclusion, the topic of why a toilet corrugation is needed and how it is installed, I will say a few words about replacing an old, leaky corrugation with a new one. Such repairs are carried out very simply, without even resorting to removing the toilet bowl. First, compressing the corrugation like a spring, the liner must be disconnected from the toilet. Then, accordingly, pull it out of the socket. The new corrugation is placed in the reverse order - first it is inserted into the socket, then it is compressed and pulled over the toilet. This is all the superiority of the corrugations over the rigid connections for the toilet. Yes, I completely forgot - such a trick is possible only if the corrugation is stretched in the set position, and not compressed to the limit. This point should not be overlooked at the time of the initial installation of the plumbing fixture.
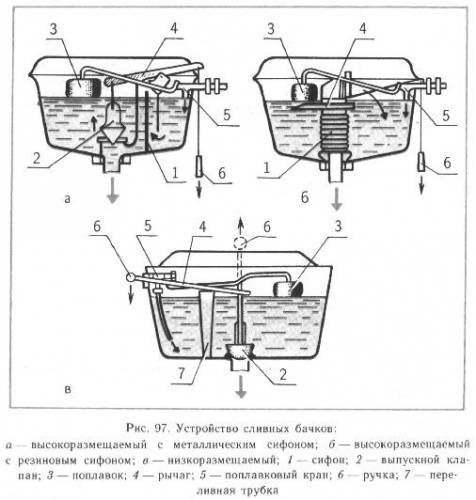
How to determine that a leak has appeared?
During normal operation of the toilet, after pressing the drain valve button, the contents of the tank are drained into the toilet bowl, carrying waste products into the sewer. After the tank is empty, the float of the valve that regulates the water supply drops. Tap cold water begins to fill the tank. After filling, the float rises again, and the valve shuts off the liquid supply.
If the drain fitting or the plumbing device itself is faulty, water begins to flow into the bowl non-stop, and not just after pressing the drain button. In this case, water constantly enters the storage tank (and immediately pours out of it again). In fact, a leak in the toilet is the same hole in the family budget as a leaking faucet. So the sooner a problem can be detected, the better.
To notice a leak, you need to know the signs of its occurrence:
- The sound of incoming water is constantly heard from the tank.
- The surface on which the water flows remains constantly wet.
- Rust streaks quickly appear at the exit point of the water jet.
- The impeller of the counter continues to move when the taps are closed and the plumbing fixtures are not working.
If you find at least one sign of a leak, check the rest as soon as possible. If you see at least 2-3 signs from the list, turn off the water supply to the toilet bowl and take corrective action.

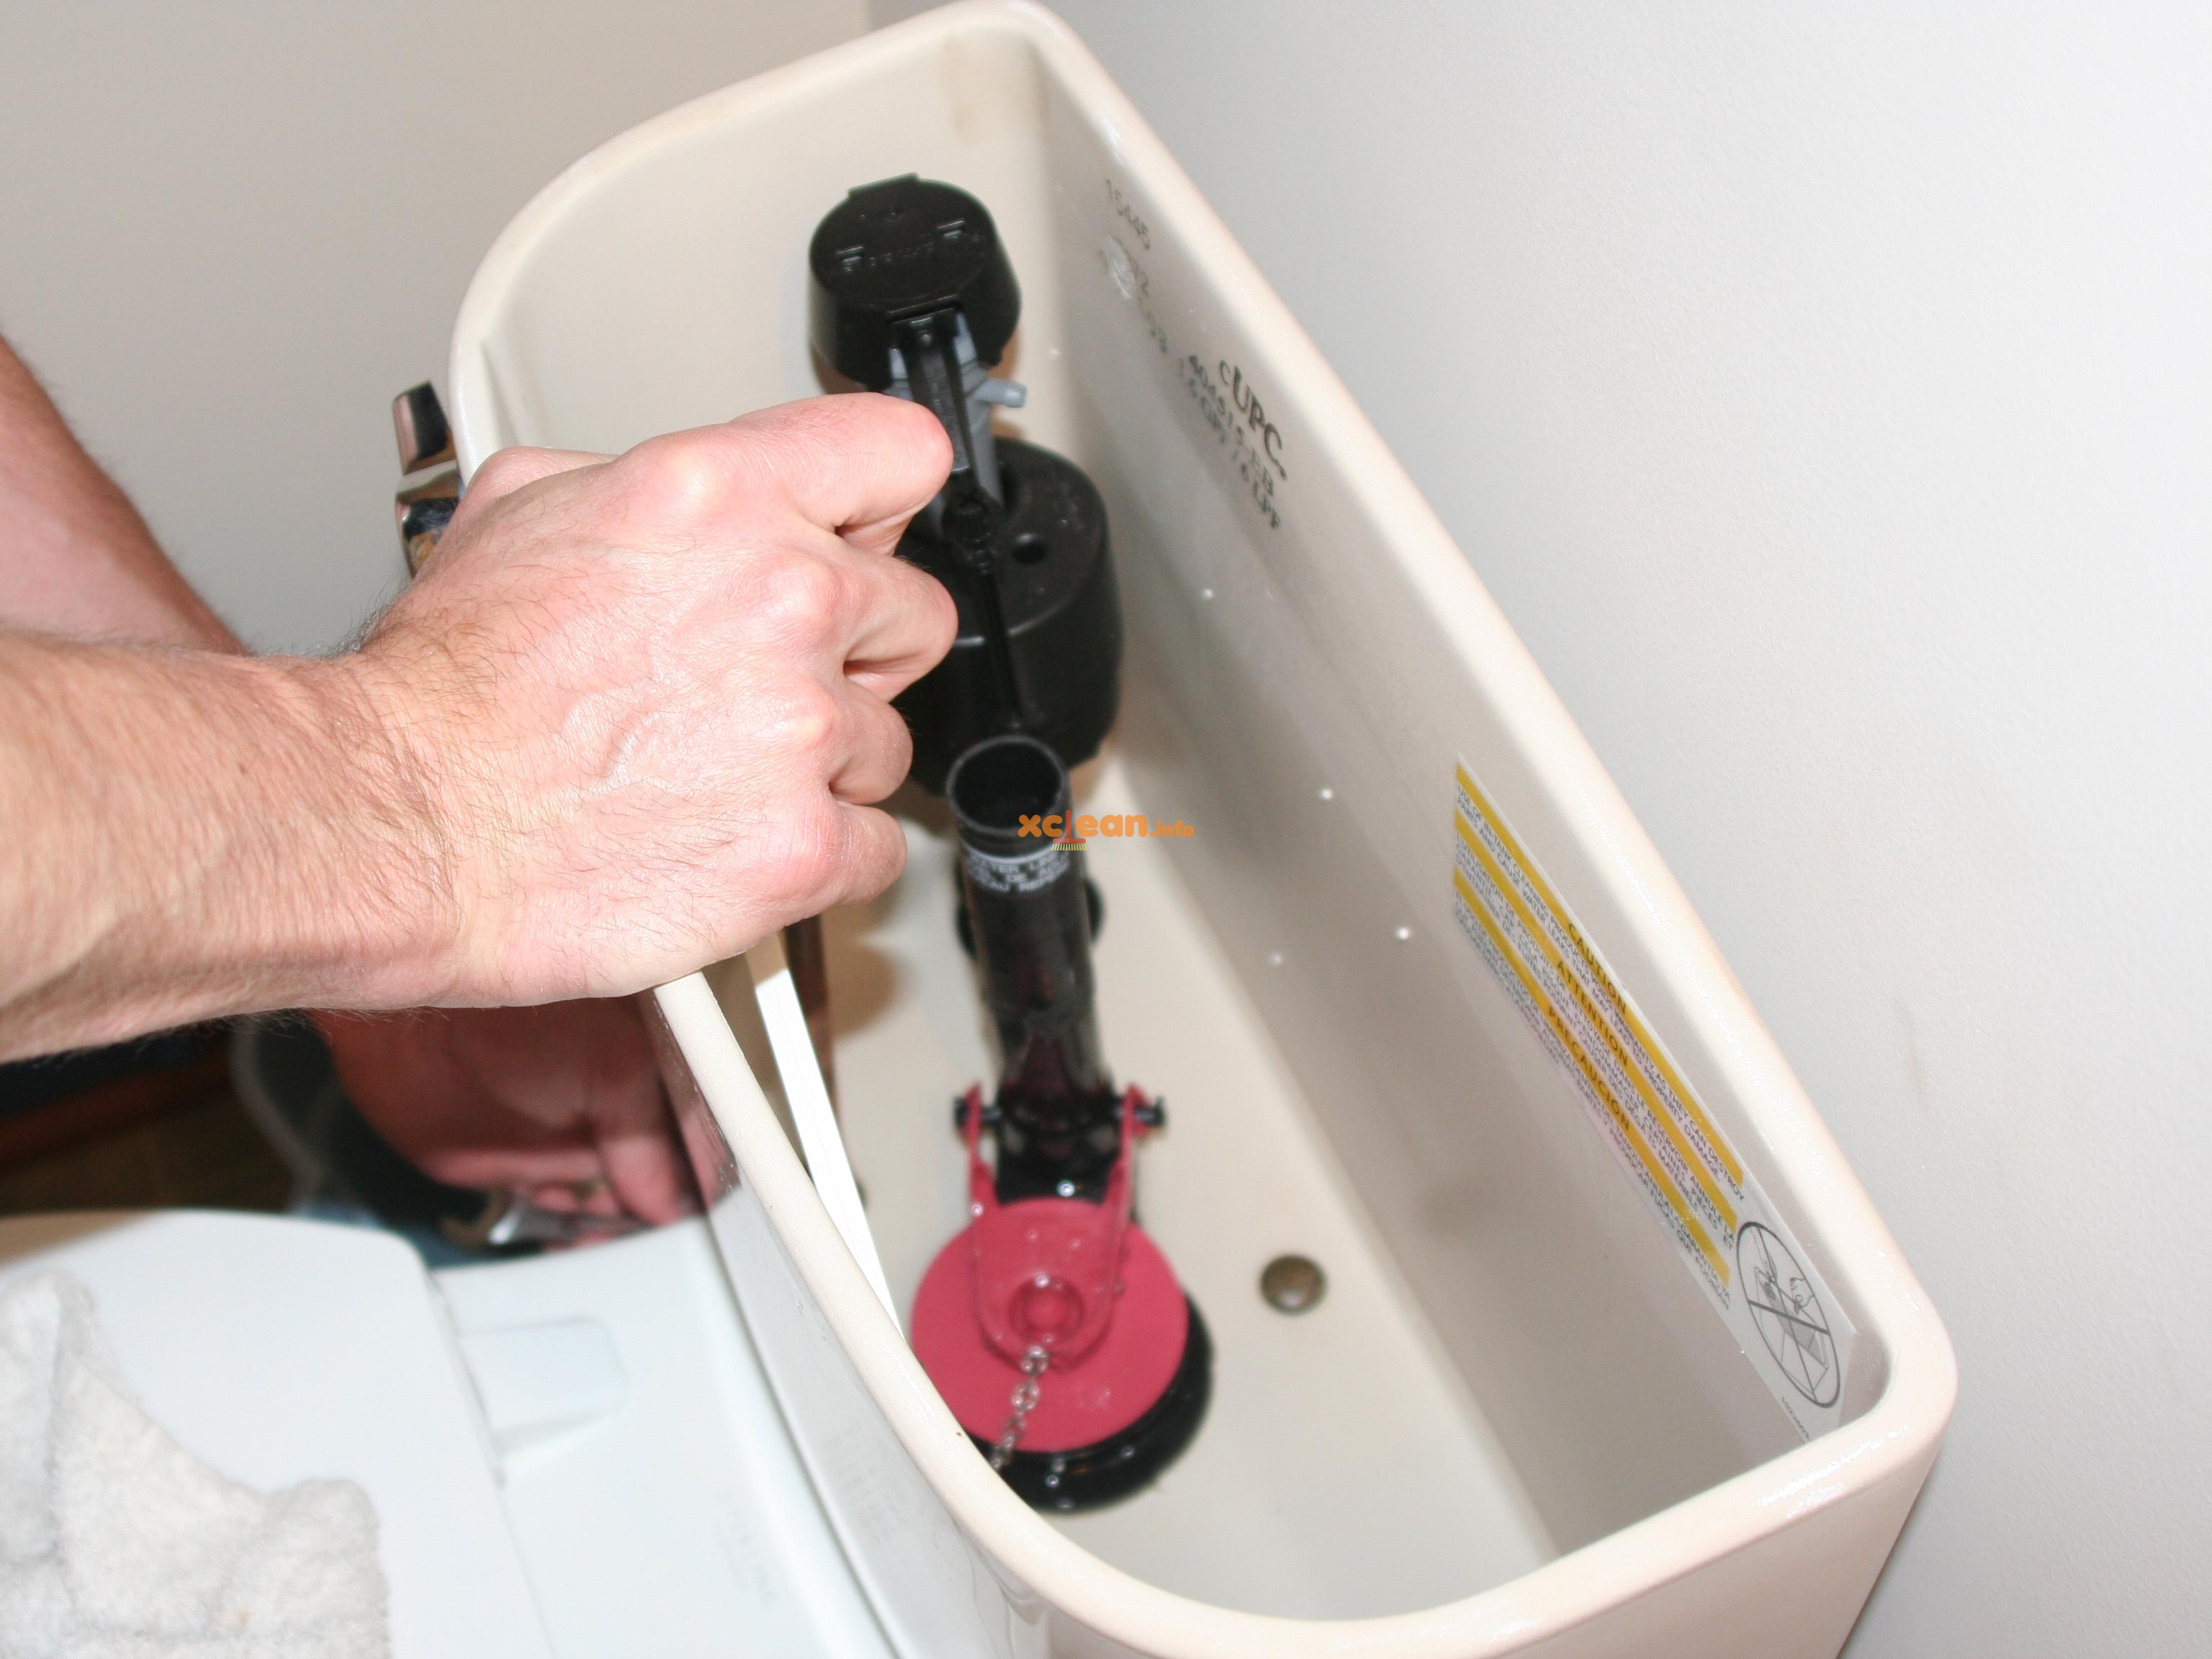


Water flows to overflow
Water constantly flows, reaching or not reaching the overflow level. Most likely, the bolt tightening the shelf and the toilet has rusted or cracked.
You should once again make sure that the leak occurs to the overflow level. Carry out a thorough inspection of the fittings, if necessary, replace several bolts or the entire set of fittings.
Give preference to fittings made of brass. Discard steel as it is less durable.
The solution involves a complete disassembly of the tank. So, you need:
- Shut off the water supply.
- Empty the tank reservoir.
- Shut off the water supply.
- Unscrew the bolts that hold the toilet to the shelf.
- Rusty bolts should be cut off.
- Tilt the tank back, remove the shelf and place it on a flat surface.
In addition to the valve and float, all parts must be disassembled with keys and pliers. Replace bolts with new ones during reassembly. You should also replace or reanimate rubber gaskets with a sealant.
Fix the tank with the shelf with plastic bolts. Roll the cuff towards the toilet and carefully put it on the shelf. If necessary, then tighten the shelf with a thick copper wire or a clamp, as it can also leak, losing elasticity over time.
Ways to fix a leak from the toilet bowl
But if there are reasons why water flows from the tank to the toilet, then there must be ways to prevent this unpleasant and disadvantageous action for the wallet. Now you can get acquainted with the best ways to overcome the trouble when water flows from the tank into the toilet.
Solving the Problem Created by Cause #1
It is quite easy to solve the problem when water leaks, if you only know which root cause is to blame for the flow of water from the tank to the toilet. You need to do a little experiment:
Remove the toilet lid;
Raise the float one centimeter. If the water stops flowing, the goal is reached.The problem is a slightly bent float arm, which now does not shut off the water, and it continues to flow. To fix the leak, it is enough to bend it a little so that the lever closes the water more accurately when approaching the edge of the filling.
If the flow from the tank into the toilet has not stopped, then the valve itself should be inspected. Make sure the retaining pin is in place, intact and secures the float arm exactly in the valve when used. You should also check the hole on which the pin is held: is everything normal and as it should be?
If the stud is really broken, it can be replaced with a piece of thick copper wire. If the hole for it is deformed, then you should go to the store for a new valve.
Are you reading this paragraph because the others didn't fit? Okay, you need to press the gasket against the valve hole. If, when pressed, the water stops flowing, it means that the gasket is weakly pressed, and its adjustment is necessary. If you continue to leak from the toilet, you need a new gasket.
On examination causes and solutions to the problem it was believed that the toilet bowl has a classic design that has been used for 30-40 years. But given the continuous emergence of new designs of toilet bowls and their tanks, we can recommend that you familiarize yourself with the principle of their functioning.
Eliminate Cause #2
First, carefully inspect the fittings. You may only need to replace a few bolts. But just in case, it would be better to purchase a new toilet kit, since it costs quite cheaply. In any case, you should completely disassemble the toilet bowl in order to understand why it is leaking and why it is leaking.So if you find problems that go unnoticed to the naked eye, you will only be glad that you bought a full set of bolts. Replacement process:
Turn off the water supply to the toilet bowl;
Empty the tank;
Disconnect the flexible hose from the toilet bowl;
Loosen the bolts. If they are covered with rust, it is better to cut them down with a hacksaw. Buying bolts is always cheaper than a broken toilet due to the amount of effort involved;
Pushing the toilet tank back, you must pull out the shelf from the cuff that connects it to the toilet;
Drain the remaining water and remove rust from all places where you find it;
Repeat all the steps in reverse order, only with new bolts and it is advisable to change to new rubber gaskets, even if they have not yet deformed enough to let water through
Warning! When you tighten the bolts, try to avoid even the slightest misalignment, and also avoid applying significant force. It is very easy to crush the faience from which the toilet is made, or leave a crack on it.
Work and elimination reason No. 3
Since the pear has already lost its shape, then repairing it does not make sense to fix the problem, from an economic point of view. The way out is to buy a new pear. In the store, you should ask for several pears at once, and choose the softest of them, because over time they all become more rigid (you can see it on the example of your own pear). The pear is attached with a thread, and when viewed from above, to unscrew it, you must turn it clockwise to remove it, and against it to screw in a new one. A temporary solution to the problem with a pear can be a weight suspended from a rod that will press the pear to the saddle.The function of such a load can be performed by any weighty nut. I propose to look at the photo, where a similar solution is played out:


Solving Problem #4
In the case of buying a low-quality float, there is only one solution - to buy a new float, of better quality. If a small hole has formed, then it can be repaired using ordinary polyethylene or plastic heated with a lighter. To be honest, such repairs can only be considered as a temporary measure. After a certain time, you still have to buy a new float.
Corrugation for the toilet bowl advantages and disadvantages
If we compare the corrugation for draining the toilet bowl with the old technology for connecting this plumbing fixture to the sewer, then at least a couple of global advantages can be distinguished here.
- First of all, it is the installation speed. If earlier you had to wait until the sealant hardens, then in the case of a flexible outlet, the toilet bowl can be used immediately after connecting to the sewer.
- Versatility. A flexible corrugated outlet allows you to rotate the toilet bowl relative to the drain hole at almost 90 degrees in any direction. For him, there is only one limitation - the outlet does not allow you to bring the toilet close to the wall with its direct installation. Well, there are other products of this type for this.
- Reliability. It is provided by a well-thought-out system of rubber seals. On such a connection, the joint leaks only in two cases - when the corrugation is installed incorrectly and when the sealing rubber dries out from time to time.
You can see what a corrugation for connecting a toilet bowl is in this video.
This product also has disadvantages, which are not due to the very idea of \u200b\u200bthe product, but to the quality of its manufacture - cheap products of this type can burst even before installation. This happens in the inept hands of the craftsman, but it also happens because of the quality of the plastic. In general, you do not need to buy cheap products, and everything will be fine.