- Determination of power
- Varieties of kitchen hoods
- According to the principle of work
- According to the installation method
- Taped ventilation threatens to shutdown
- Traditional installation
- Recommendations, tips, non-standard installation (gas pipe interferes)
- Installing the hood
- Training
- Installation options for exhaust technology
- Used as filters
- Important rules for installing the hood
- Varieties of hoods according to the principle of installation
- Penalties for unauthorized column installation
- Plasterboard box installation
- Device installation rules
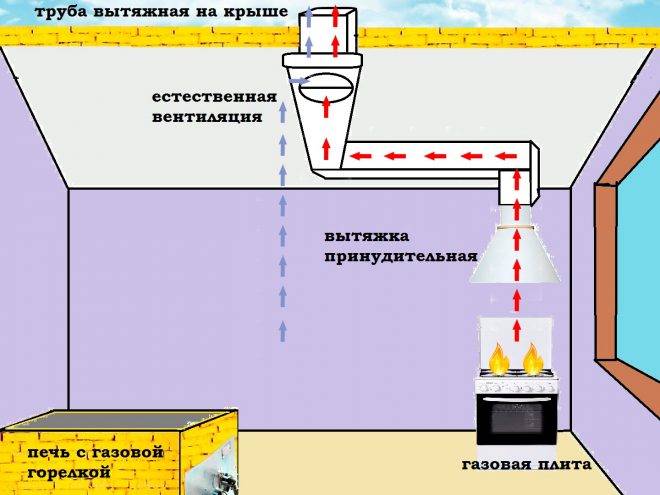
- Scheme of a kitchen hood
- Video - installation of a kitchen hood
- Important rules for installing the hood
- Conclusions and useful video on the topic
Determination of power
In order for the ventilation of the kitchen with a gas stove to fully fulfill its functions, it is important to be able to correctly calculate the power of the future exhaust system. Otherwise, even with the correct installation of the hood, there will be no fresh air in the kitchen. In order not to be mistaken in the chosen power, it is worth considering how many people are in the family, how often they cook and what dishes they prefer.
Those who rarely cook in large quantities, often only for themselves, and in a family of 1-2 people, a power of 200-300 m³ / h will be enough
In order not to be mistaken in the chosen power, it is worth considering how many people are in the family, how often they cook and what dishes they prefer.Those who rarely cook in large quantities, often only for themselves, and in a family of 1-2 people, a power of 200-300 m³ / h will be enough.
For a medium-sized kitchen and a family of 3, in which they periodically like to cook unusual dishes that require a long gas stove work, a system with a capacity of 300-400 m³ / h is required.
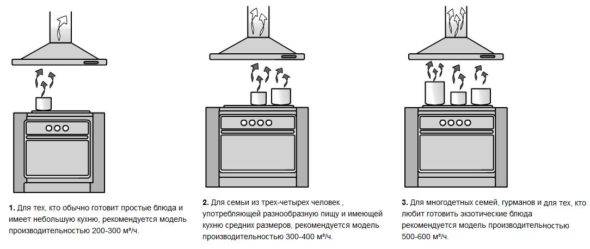
If a large family lives in the apartment, or the exhaust system is planned to be installed in the large kitchen of a private house, equipment with a capacity of up to 600 m³ / h will be required. If you follow these simple instructions, the ventilation system will fully remove stale air from the kitchen, and working with food will bring only pleasure.
Varieties of kitchen hoods
According to the principle of work
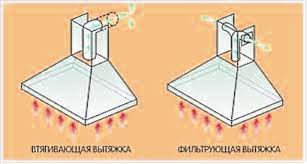
Types of hoods according to the principle of air movement
All hoods can be divided into two main types:
- Circulating or filtering. These are hoods that work on the principle of air recirculation. The volume of gas drawn in is filtered by various (carbon, fat-absorbing) filters and returned to the room.
- Evacuation or retraction. Such devices draw air out of the kitchen in full. They are usually connected by a special duct with a vent that leads to the ventilation duct of the building. It is also possible that a separate hole is made in the outer wall of the apartment and the air duct is led directly to the street.
Circulating hoods are less productive. In addition, they require timely replacement of filters. If the filters are not changed, this can lead not only to a decrease in the efficiency of the device, but also to its breakdown.
Since when the filter is clogged, the load on the fan motor increases many times, which, ultimately, can cause burnout of its winding or other types of malfunctions. The filter replacement mode should be indicated by the instructions for the hood.
The hood with filter is suitable for heating food or infrequent cooking.
Filter hoods are useful in those kitchens where there is no daily cooking, especially fried foods, soups or meat snacks, and food is only warmed up or cooked from semi-finished products.
Therefore, further we will consider hoods that remove air outside the kitchen.
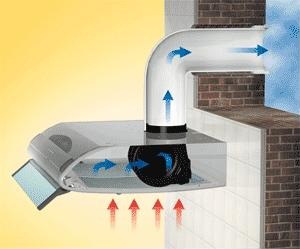
The principle of operation of the evacuation hood.
Evacuation type hoods are more efficient. But here, too, there are a number of difficulties:
- The air ducts for the exhaust hood in the kitchen must correspond to the power of the device, and this applies not only to the part that is installed in the apartment, but also to the entire ventilation duct;
- When a powerful evacuation hood is in operation, appropriate ventilation is required to provide fresh air inflow equivalent to the volume of gas evacuated from the kitchen;
- Ventilation ducts in Soviet buildings do not meet the standards for which modern kitchen hoods are created;
- If a powerful hood will evacuate from your apartment the 600 - 1000 m³ / hour declared by the manufacturer, then with the windows and doors closed, this volume will be compensated by the ventilation of the bathrooms and bathrooms operating in reverse draft mode, filling the apartment with not the most noble smells;
- Punching an additional ventilation hole in the outer wall of the house may require permission from the appropriate authorities responsible for the proper maintenance of the building.
According to the installation method
The hood can be built into the kitchen set.
Place and method of installation kitchen hoods are divided into several types:
- Embedded. These are devices integrated into kitchen furniture so that the hood itself is not visible, but only from below you can see its radiator, and from the side you can see the control panel and sometimes part of the socket (see also the article Built-in hood for the kitchen - a step towards perfection).
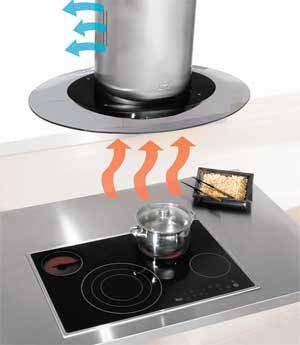
- Desktop. They are a horizontally located elongated bell, which is part of a special technological kitchen equipment. It is mainly used in professional kitchens.
- Ceiling or island (see also the article Island hoods for the kitchen - an aesthetic solution to the problem). Most often, this is one or more air intakes mounted in the ceiling. It can also have a dome shape, and the socket goes into the ceiling, where the air duct is laid. Requires a suspended false ceiling with an air vent system.
- Fireplace or domed (see also the article Dome cooker hood - fashionable and functional). This is a separate device, which is selected taking into account the kitchen interior and furniture. It can also be built into kitchen furniture.
Built-in dome hood.
Taped ventilation threatens to shutdown
Our joint check with the employees of EPU Kazangorgaz began with checking the draft in the ventilation duct. To check the draft in the ventilation duct, gas workers ask for a stool and thin paper or a napkin. If the draft is good, then the paper should stick to the ventilation grate. According to gas workers, one of the most frequent violations is sealed ventilation and closed ventilation duct windows with kitchen hood sleeves.
“Covered ventilation threatens to shut down.Sometimes people say: “It blows me from there, cockroaches run from there, etc.”. They tear off tape and paper in front of us, and then stick it on anyway. We turn off the gas for such subscribers and send them to the management to listen to a second briefing. Only after that, the gas is supplied again,” said the mechanic for the operation and repair of gas equipment at the EPU Kazangorgaz.


If there is a gas leak, then in case of faulty ventilation, it will accumulate in the room, explained the Deputy Chief Engineer of Kazangorgaz EPU. If the ventilation duct is in good condition, then with a slight gas leak it will not accumulate in the room - it will go through the ventilation duct into the atmosphere. If you feel the slightest smell of gas, you must turn off the gas appliances, ventilate the room, call the Kazangorgaz EPU emergency service by phone 04 or from mobile 104.
Then the specialists wash the threaded connections - this is a leak test.
“Connections are washed to check for gas leaks. If there is a leak, the soapy solution is immediately inflated, and we fix it right away, on the spot,” explained Ayaz Aglyamiyev, mechanic for the operation and repair of gas equipment at Kazangorgaz EPU.
Then checked gas stove and oven, all hotplates are switched on. Gas workers watch how the flame behaves: there should be no flame separation, breakthroughs.
“Ideally, the flame is blue without separation, breakthroughs,” Aglyamiyev assured.
Next, we go together with the gas workers to check the column, and for now they remind us of the safety rules. Before turning on the device, we bring a lit match to the viewing window on the front panel. The flame should noticeably deviate towards the gap.Only after that we turn on the device, and after five minutes you need to check again if the combustion products are leaving you.
“The taps must be turned off when you leave the house. It’s not just to leave the igniter of the gas column, it is necessary to turn off the taps in front of the devices, ”recalled Azat Shakirov, a mechanic for the operation and repair of gas equipment at Kazangorgaz EPU.
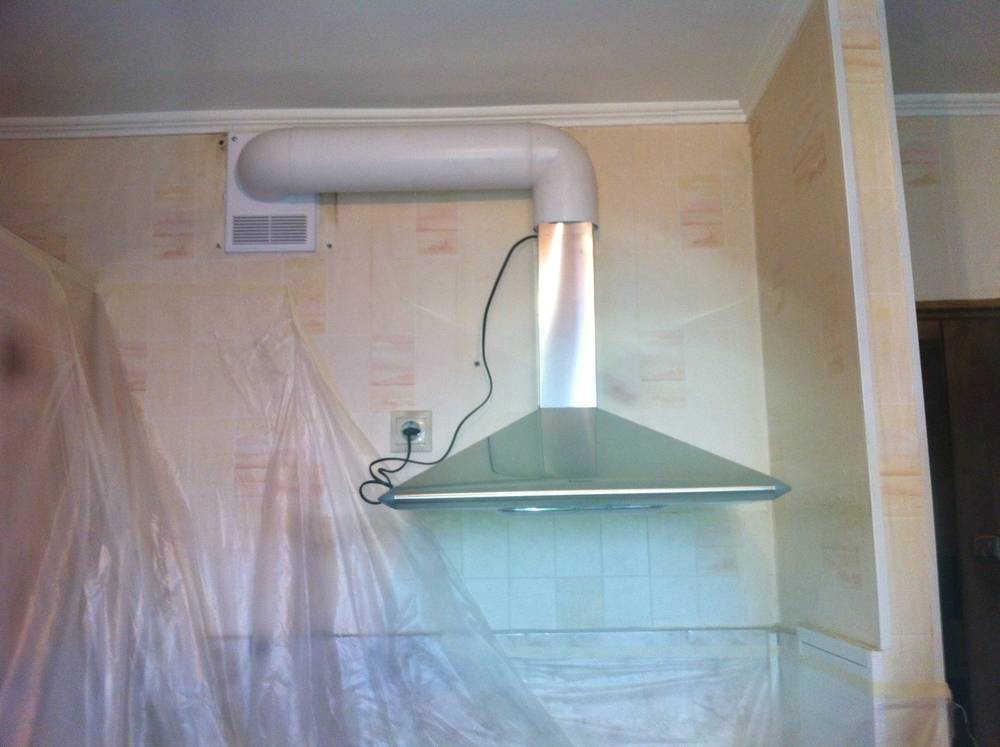
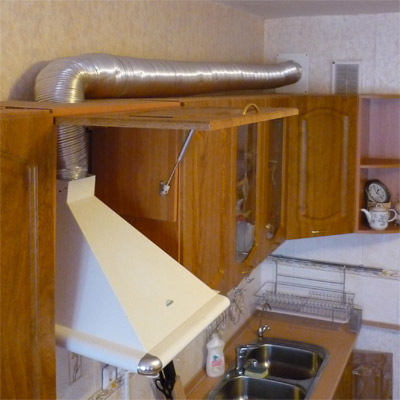
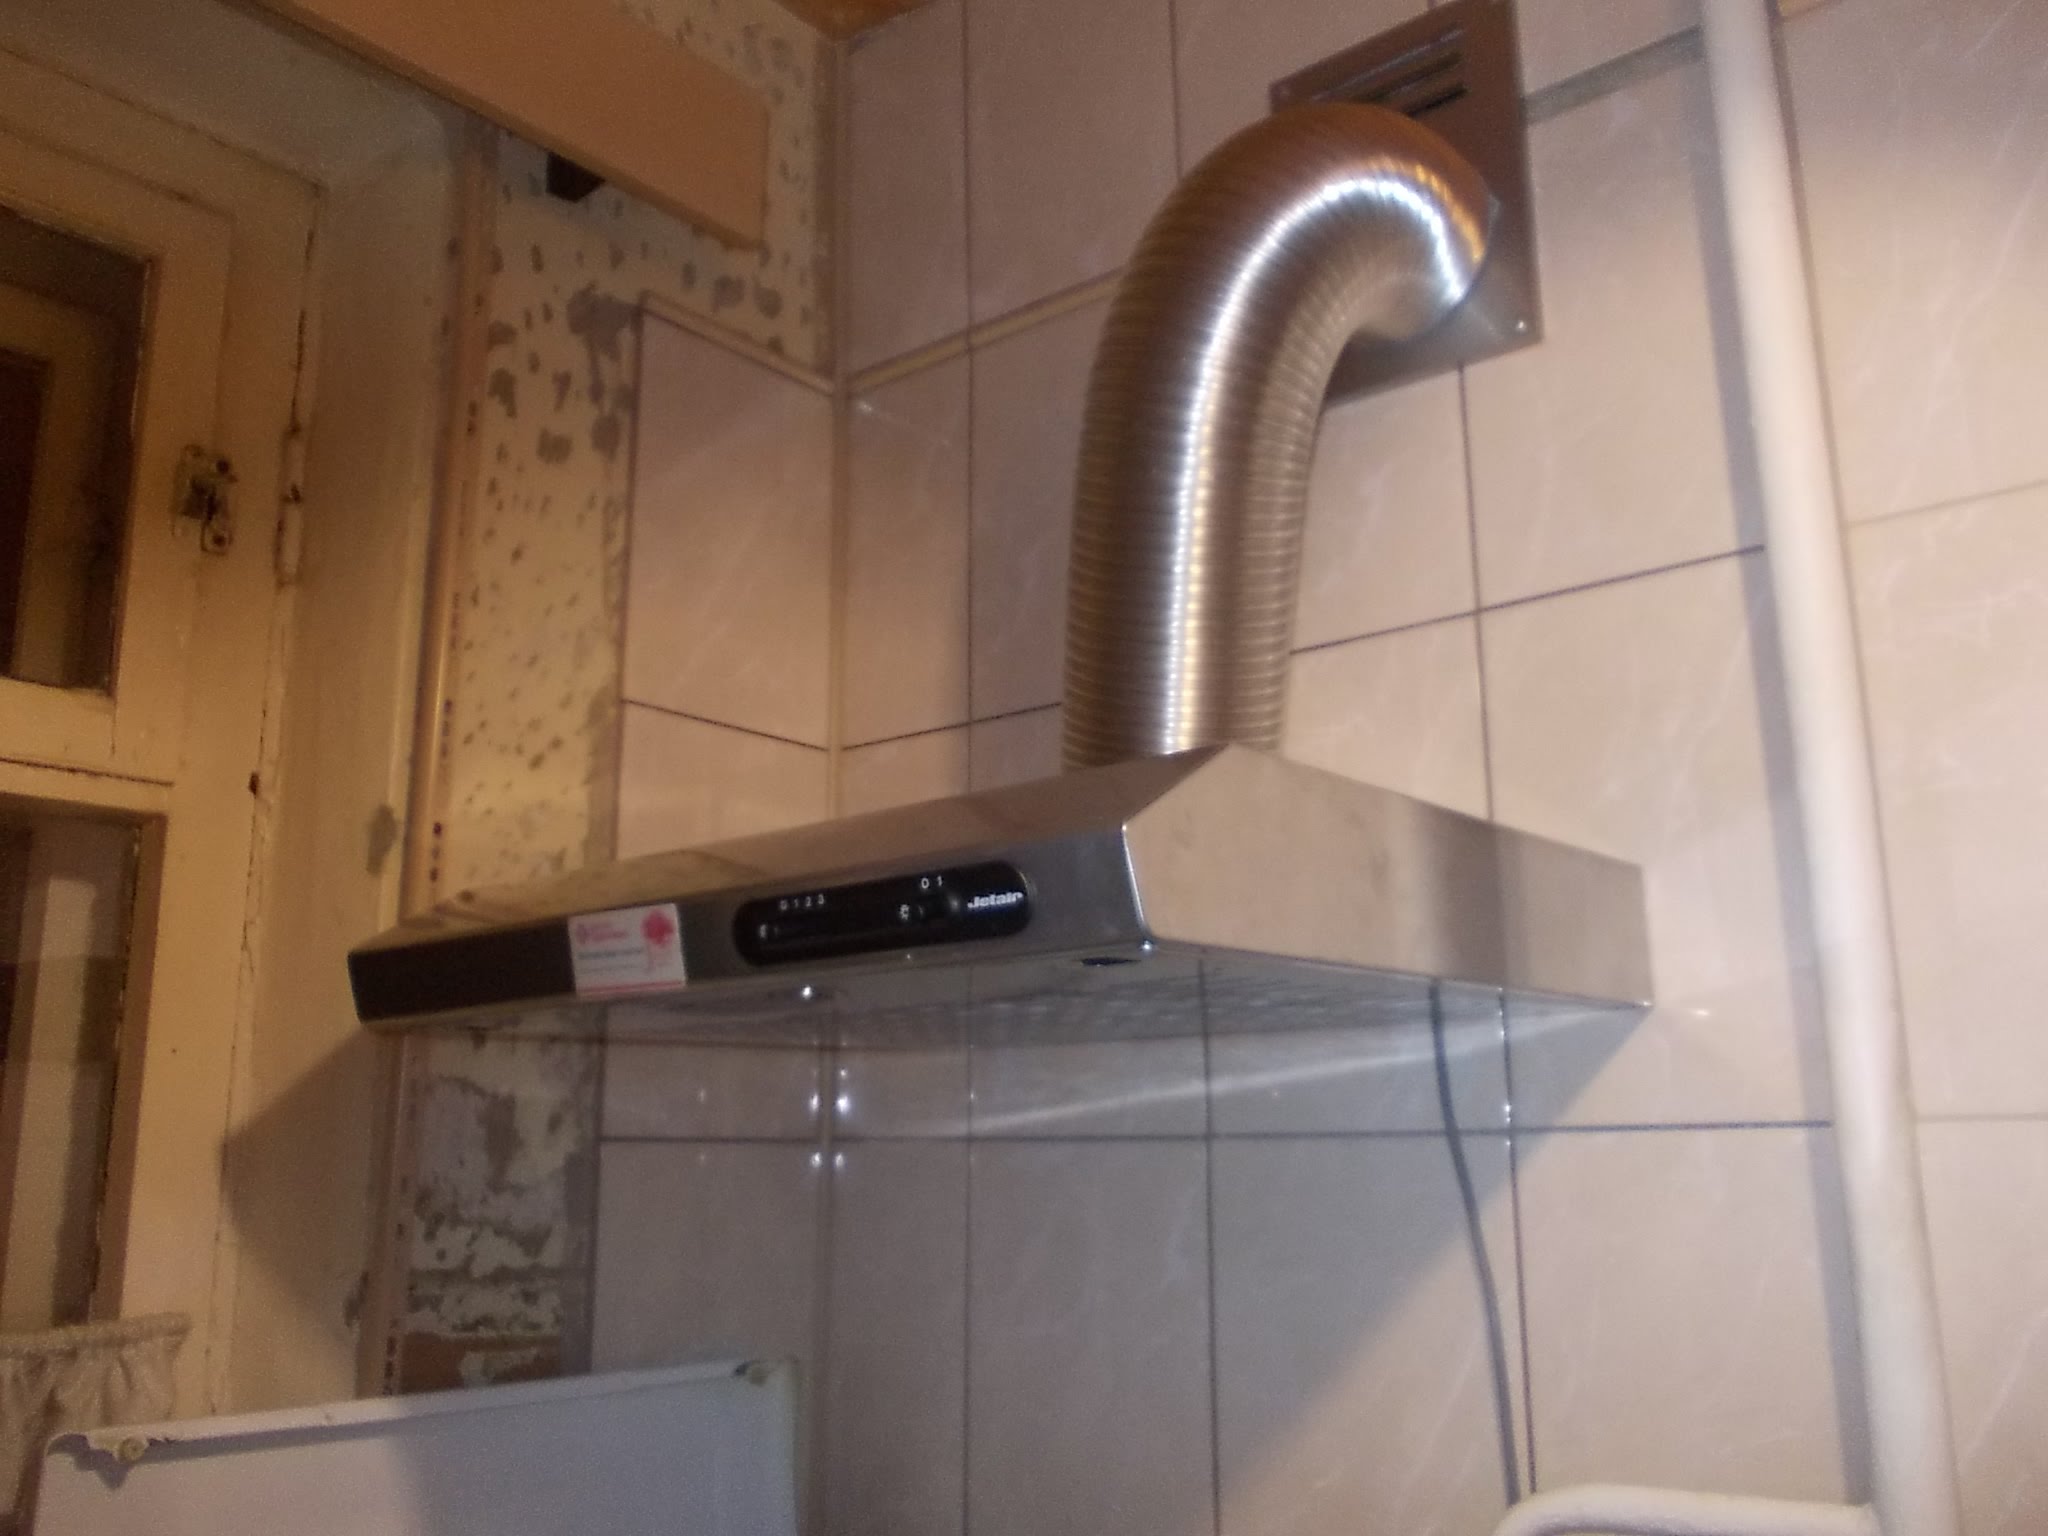
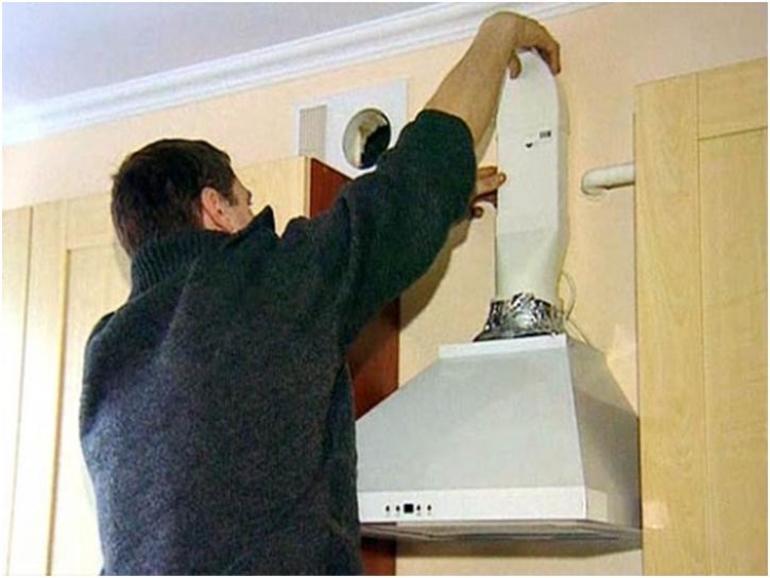
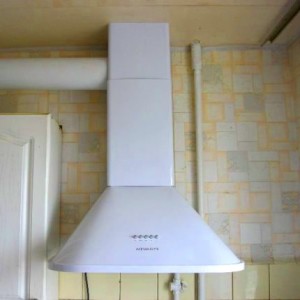
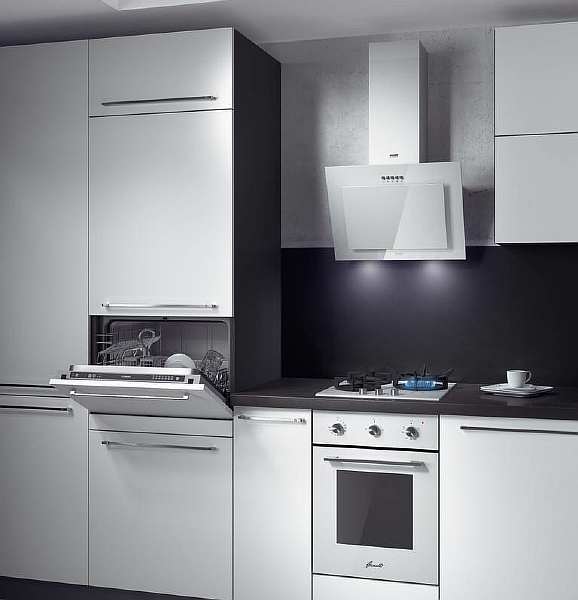
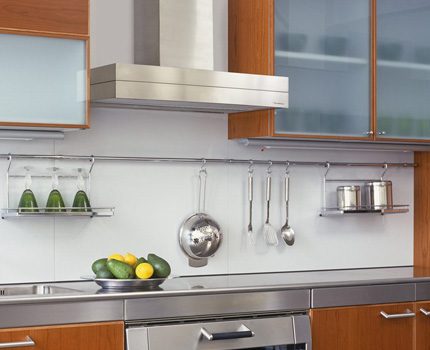
Traditional installation
The vast majority of domestic owners believe that a cabinet above the hob is an impractical option. There is a grain of truth in this opinion, because under the influence of high temperature, steam and soot, almost all accessories lose their original appearance and deteriorate. And in the realities of a small square for a kitchen hood, there may simply not be a place. It will be very inconvenient and difficult to fully use such a cabinet.
Traditional hood placement
For such cases, it is necessary to organize the whole process in the following sequence:
A rectangular frame is formed from metal corners. Its dimensions must be sufficient to accommodate the housing of the exhaust unit on it. The base can be fixed against the wall with self-tapping studs
It is very important to first measure the distance from the gas stove to the hood (the place where it is planned to be installed). A metal frame and the unit itself are installed on the screws (do not forget about the air duct)
The final step is to connect the device to the mains.
Note! Before hanging the hood in the manner described above, grounding should be carried out to the metal frame.When the fans rotate, a small voltage will certainly occur, which must be removed from the device.
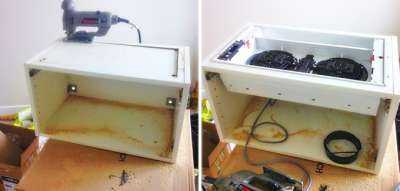
Hood installed in a metal frame
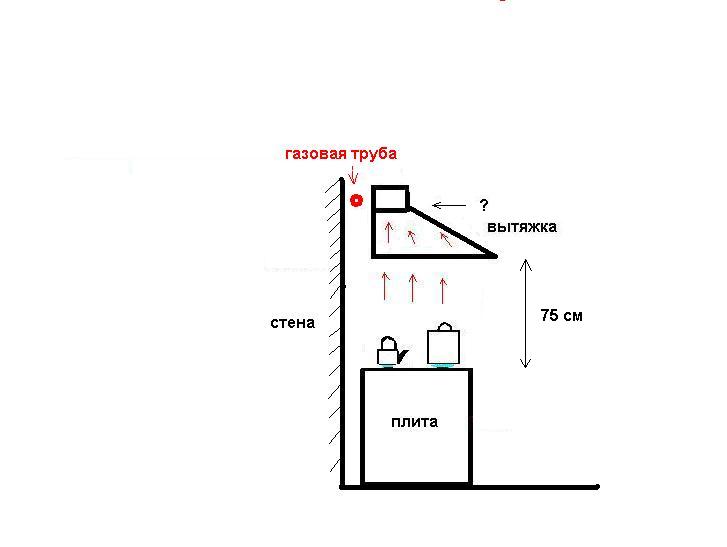
Precisely tell how far the hood should be kitchen with gas stove is possible only if there is reliable input data. In this matter, there is no golden rule or the only correct number for all cases. However, professionals advise focusing on a height of 75 cm. In 90% of cases, it is relevant. We recommend watching the video on standard installation.
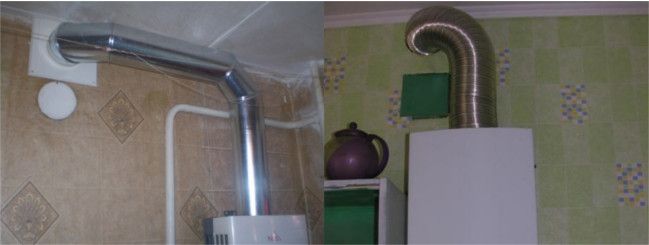
Recommendations, tips, non-standard installation (gas pipe interferes)
There are several recommendations and tips, taking into account which you can competently and professionally perform the installation of the hood without resorting to the help of specialists. All of them are advisory in nature and tested by years of practice. Let's highlight 3 main points.
- It is advisable to place the outlet at the maximum possible distance from the window. Otherwise, there is a possibility of unpleasant odors penetrating back into the apartment, house.
- The hood for gas stoves should not be connected by an air duct to a common house shaft. Gas workers in 99% of cases prohibit such decisions. As an exception to the rules, it is allowed to organize a branch, in such a way that ½ of the pipe is an exhaust system, the remaining ½ are free.
- The distance between the hob and the hood also depends on the power of the unit itself. If we are talking about a low-power solution that provides a performance of 250 - 300 m3 / h, it is better to focus on a height of 70-75 cm. For powerful devices that allow organizing high-quality air exchange of 600 m3 / h, the allowable height can be increased to 80-85 cm.
Advice! The optimal height of the hood above the gas stove is always indicated in the instructions attached to the device. The manufacturer, in addition to the known input data, also takes into account the features of the unit, which allows him to provide more accurate information.
If, when installing the hood, a gas pipe interferes with you, then we recommend the video below, from which you will learn how to beat this moment.
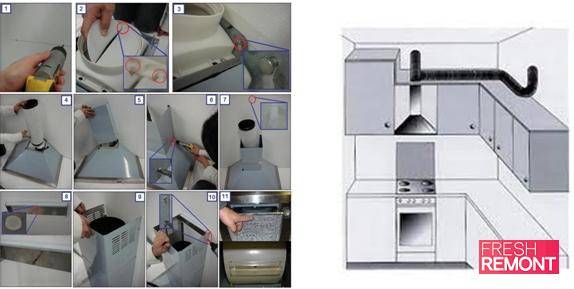
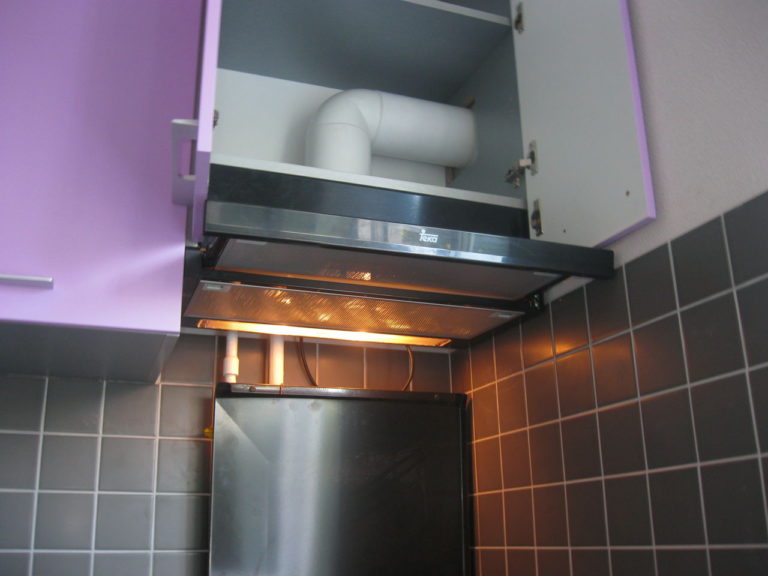
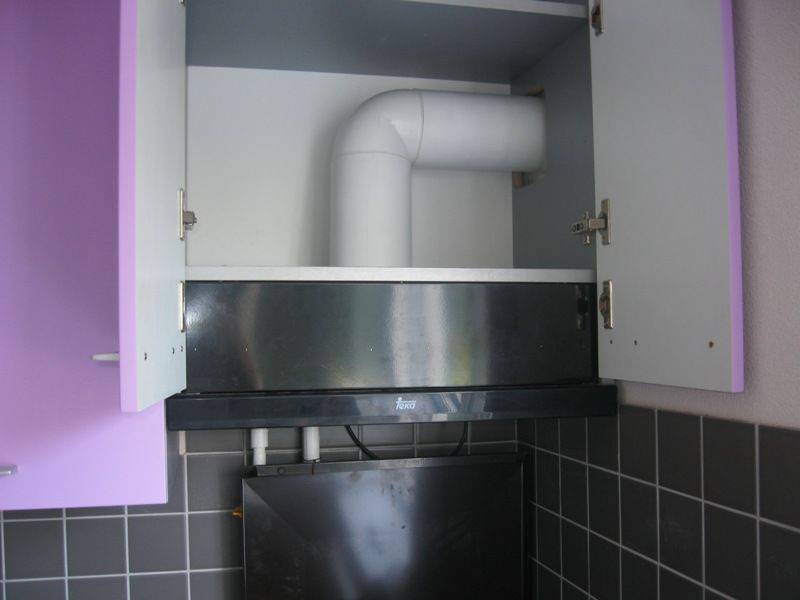
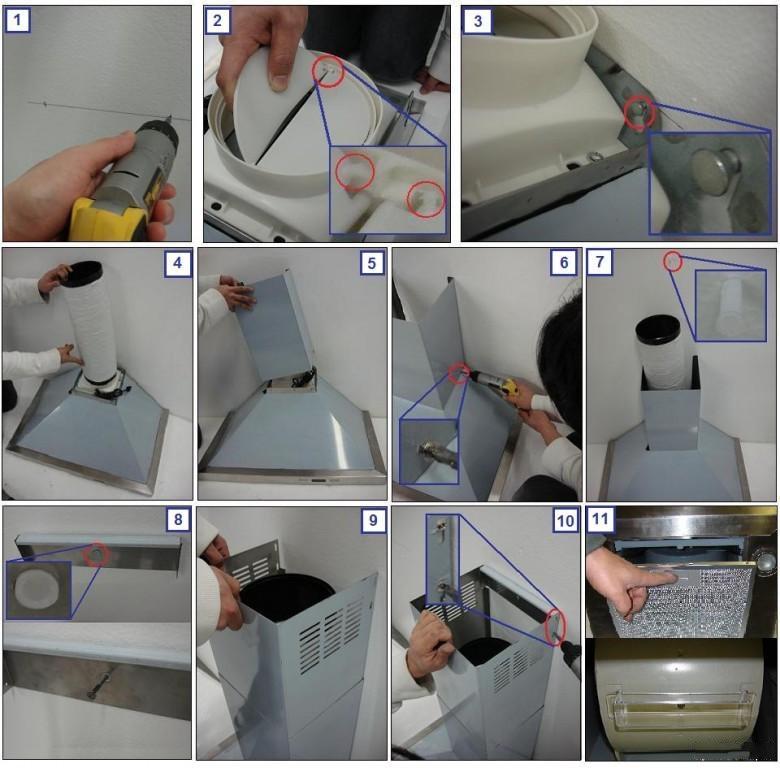
Installing the hood
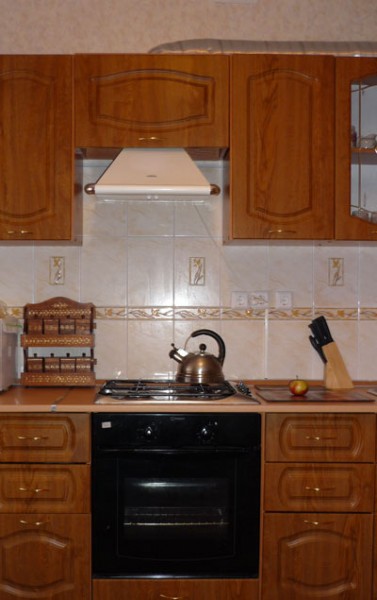
Training
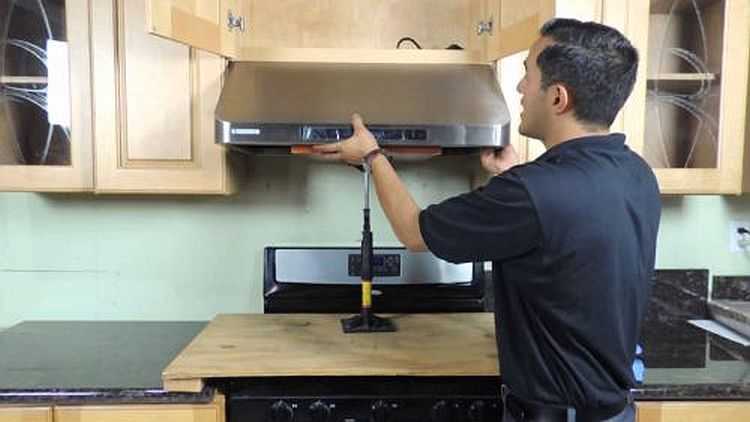
Before proceeding with the installation, choose the right place for the equipment - gas stove + hood. In the photo there is an electric stove - the recommendations are also relevant for gas facilities.
Before you install the hood over the gas stove, you must first prepare the room.
- Mark on the kitchen plan the location of all communications, as well as installed appliances, if the installation is carried out in an already operated room.
- The volatility of the hood assumes the presence of an outlet (but not above the stove!) With 220 V connected. A model with an automatic switch is preferable: it will always turn off in time in the event of a short circuit or fire. If the kitchen is not equipped with a grounded outlet, the rules for installing a hood over a gas stove require that a separate RCD (16 A) be provided in the electrical cabinet. Connect to the network a line of three wires "zero", phase, "ground" in yellow insulation with a green strip drawn along it.
- The value between the exhaust device (lower edge) and the surface of the stove (burner) is measured.
- The completeness of the package is checked for the presence of the necessary fasteners, hooks, dowels, etc.
- The place of fastening of the structure is marked.
- air duct is assembled. It can be square or round.Standard version - size 130x130 mm It is better to choose a plastic construction with smooth internal surfaces. Its diameter should be the same along its entire length, correspond to the cross section of the ventilation hole and, preferably, have a check valve.
- Holes are drilled with a perforator for the hood clamps.
- Screws are screwed in.
- Using the level, the horizontal installation is checked.
- A hood is hung (without a box).
- Connects to an exhaust pipe connected to a duct.
- The hood is connected to an electrical outlet. If the cord is missing or short, an autonomous line is drawn from the shield or is diverted from the socket closest to the hood. It is strictly forbidden to make twists insulated with insulating tape at the places where the missing part of the cord is added.
- A test run of the technical device is carried out in all modes.
- During normal operation, the box is fixed at the final stage.
Installation options for exhaust technology
Comparative illustration: gas stove and electric
According to the installation version, exhaust devices are:
- built-in type - the entire installation is masked in a hanging cabinet;
- fireplace and dome type - the structures are fixed on the wall;
- island model - assembled on the ceiling;
- corner hood - placed in the corner;
- flat model - involves two planes of fixation: behind - to the wall, from above - into the hanging cabinet.
In any of the models, a certain type of filter elements is provided that absorb pungent odors, grease and other secretions.
Used as filters
- Grease traps - are installed only in kitchens with a ventilation shaft.
- Coal filters are elements of modern cleaning systems with a recirculation mode of operation.
Even with the observance of the rules for installing the exhaust system and operation, the efficiency of work will be underestimated if preventive maintenance is not carried out in time: clean surfaces, change filters. Thus, it is not difficult to create the conditions necessary for a safe and comfortable stay in the kitchen. For this, different methods are used. But it is the forced system with local exhaust above the stove that is considered the most optimal and common option.


I have a second floor. The house was built in 1975. I removed the gas water heater 13 years ago and use an electric boiler .. there is a hood with a pipe connected above the gas-electric stove. with normal ventilation .. this was all checked repeatedly .. The ventilation channel for the speakers is closed for me, I don’t use it .. every year they checked it twice. The ventilation channels were clogged, but they were cleaned two years ago ... Now another group came and said that every three months they will need to check the smoke channels (which are under the column) in my case it is generally closed in the built-in kitchen ... and I have to disassemble the facade of the kitchen in general, although they have it in the documents of the house. And that there should not be an exhaust hood in the kitchen at all for everything to be open.
How to check the ventilation in the apartment yourself. Checking the ventilation in the apartment.
Do not know how to connect the hood in the kitchen to the ventilation
Important
How does natural ventilation work in an apartment building. How to organize the right one.
Important rules for installing the hood
When connecting the device yourself, it is important to follow the rules for installing a household hood over a built-in or free-standing gas stove:
- The ventilation device should be located 60 cm from the tile;
- The width of the hood is related to the width of the slab, so it must be set after the purchase and installation of the slab;
- It is better to place the sockets of electrical models at a distance from the tiles - this will eliminate the risk of fires;
- In the case of a direct connection of the hood to the air outlet duct, the pipe must have a minimum of bends;
- The intake hole, equal in width to the hob, works as efficiently as possible;
- The optimal removal of the hood from the heating devices is from 75 to 80 cm;
- If there is no ventilation shaft in the apartment or house, an exhaust device with air recirculation will do;
-
The product must match the interior design of the kitchen in color and style.
Important! The manufacturer's brochure indicates the standard parameters, taking into account the power of the appliance, the style of the kitchen, the height of the user
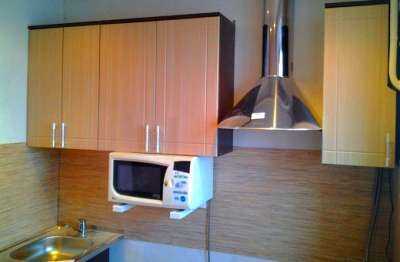
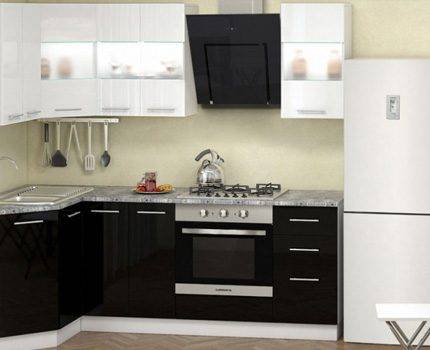
Varieties of hoods according to the principle of installation
How to quickly install an efficient hood over a working gas stove? Experts advise paying attention to the method of installation of equipment:
- dome models. Mounted on the wall, suitable for rooms in a classic and modern style. The devices process large volumes of air and are designed as a dome located above the stove. A pipe with a square section is integrated into the ventilation. Dome models are designed to be built into the flow system;
- island devices. Suitable for a large kitchen with a central stove. The hood is lowered over the hob and connected to the air outlet system by a pipe with a square section;
- Corner fittings.Installed at an angle of 45 degrees, designed for non-standard layout and placement of kitchen mains. The surface of the hood looks like a square with a truncated corner. Corner models are practically not used, therefore they have a limited set of functions;
- Flat hoods. Compact devices with the location of the working panel parallel to the stove. Mounted on the wall, under the cabinet. Designs are used as part of circular ventilation;
- Embedded fixtures. Installed in hanging cabinets, which are slightly shortened. Cutouts for corrugated pipes are also made in furniture. It is difficult to install built-in hoods on your own, it is better to order ready-made cabinets;
- inclined products. Modern exhaust systems with a corner arrangement. Their working area is similar to horizontal devices. Hoods work on the principle of perimeter cleaning, therefore they are produced without moving parts;
- Retractable models. The service area is extended thanks to the sliding modules from below. The unit is built into a wall cabinet with a hidden or circular air duct. The disadvantage of hoods is a small length and less air capture. A retractable hood is best installed in a small kitchen;
- Desktop accessories. Devices are built into the table near the hob. In operating mode, the panel moves up vertically and pumps out polluted air.
Penalties for unauthorized column installation
There is a fine line between legal and illegal when it comes to installing gas appliances. Self-installation of the column is allowed - hanging the device case on the wall and connecting the device to the water supply.The subsequent connection to the gas main is only authorized by the gas service.
The installation of a water heater in an apartment and a private house should begin with the choice of location and the preparation of documents.
The room must comply with the following requirements specified in the Construction Norms and Regulations Gas Supply SNiP 2.04.08-87:
- ceiling height - at least two meters;
- area - from 8 m²;
- the ventilation system is in good condition - a window with a window, a door with a gap in the lower part.
There are several general rules for connecting a geyser:
- water supply pressure is at least 0.1 atm;
- the attachment point must be made of non-combustible materials - asbestos sheet or tile can be used as a coating;
- the optimal parameters when connected to a chimney - a length of 30 cm, an inner diameter of less than 12 cm, a slope angle of 3 degrees;
- the distance from the stove and other objects is at least 10 cm.
The water supply is carried out using a flexible hose. hollow tube must be done made of flexible material, its length is not more than 2.5 meters.
The consumer should prepare the following package of documents:
- an act from the fire service confirming the serviceability of the ventilation system and chimney;
- permission of the gas service to carry out the installation in accordance with the project;
- the project itself
- documents for a gas column, passport;
- application for repair work of the gas system.
During the initial installation of the column, the subscriber must submit a request for redevelopment to the city administration, upon completion of the work, the project should be submitted to the technical inventory bureau.
More about regulations and requirements for installation geyser we talked about in this material.
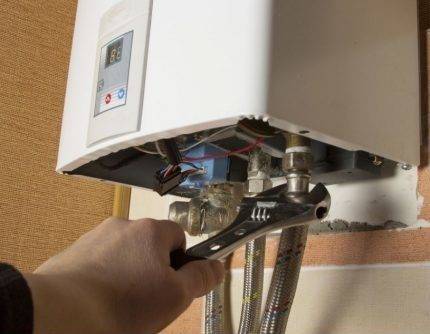
It is forbidden to install a column above the stove if the distance between the devices is less than 10 cm
The column is mounted in the following sequence:
- on the wall it is necessary to prepare the markup;
- then make holes;
- install fasteners;
- hang the body;
- at this stage, you can install water filters;
- embed the tee into the pipe;
- bring a hot and cold pipe to the device;
- then you need to make sure that there is traction;
- connect the end of the pipe to the pipe, the other to the chimney.
Direct gas connection must be carried out by a representative of the gas service. The average cost of installation is from 2.5 thousand rubles.


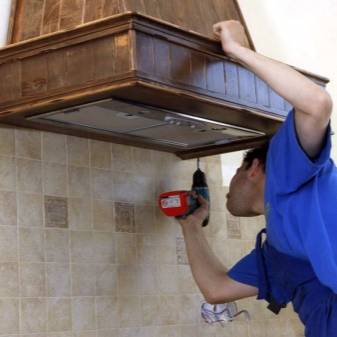
Plasterboard box installation
Assembling a drywall box to mask gas pipes is one of the easiest and most affordable masking methods.
For this job, you need to stock up on the following:
- drywall in canvases;
- tin profile;
- electric screwdriver;
- self-tapping screws;
- stationery knife;
- metal scissors;
- construction foam;
- diamond mesh number 100.
It is worth paying attention to drywall with a moisture-resistant coating, since the atmosphere in the kitchen is quite aggressive
Getting started, first of all, you need to vertically fix 3 profiles, and then measure the distance between them. According to the obtained dimensions, the necessary segments are cut off from the profile in order to mount them horizontally between the racks in the form of spacers. Be sure to check the level of the lines after attaching the screws. Alternatively, you can use a cutter to connect the profiles to each other.
Further, drywall sheets are screwed to the profiles on both sides using a screwdriver and self-tapping screws.An excessively protruding segment of the canvas is cut off, and the uneven end is sanded with a diamond mesh.
Device installation rules
The hood that filters the air and returns it back is easy to install. Above the electric stove, you can install it yourself.
- It is necessary to draw a horizontal line above the hob at the height of the installation of the equipment - the distance between the gas stove and the hood.
- A vertical line is applied to the wall in the center of the slab. The standard provides for the rules for mounting the hood exactly above the hob.
- The template from the package is applied to the lines, and 4 points are marked - the location of the mounting bolts. Depending on the model, the distance between them is set as standard 200×200 or 200×100 mm.
- Holes are made, dowels are hammered in and screws are screwed in.
- A design without a filter grate and a housing is hung on the wall.
- Install the rest of the mechanism.

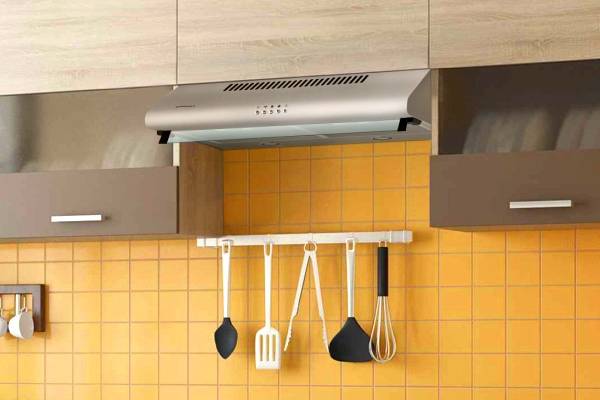
Spacious kitchen with electric stove
In cases where an extractor hood is purchased with air exhausted into a ventilation pipe or chimney, the design with fans is mounted on the wall in the same way as a model with a circulating air purification method. Then it is necessary to make the installation of the air duct, taking into account the minimum distance from the hood to the gas or electric stove. For normal ventilation, in order to prevent the effect of recirculation, that is, the return of air masses from the ventilation ducts back to the chimney, it is advisable to invite specialists.
Basic requirements for the duct:
- the cross section of the pipe is designed to allow air masses to pass through it at maximum equipment productivity;
- the safety factor is taken into the formula for a specific design;
- the optimal distance to the outer wall or ventilation duct should be no more than 5 m;
- a maximum of 3 bends are allowed in the duct;
- pipes of different sections for the exhaust structure are unsuitable;
- all turns are made smooth, with radii.
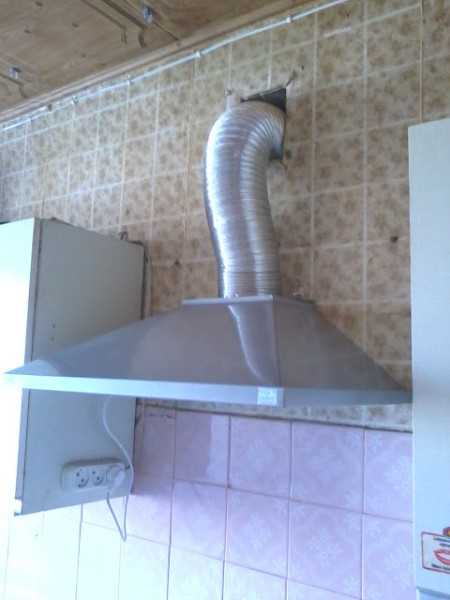
Kitchen with gas stove in a country house
The socket must be grounded and located on the side of the edge of the hood housing at a distance of 25 cm. The safest is to install a switch that can quickly turn off the equipment.
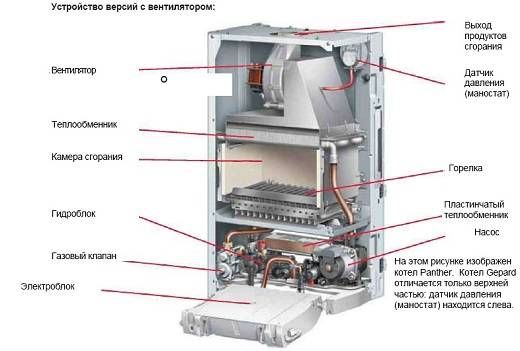
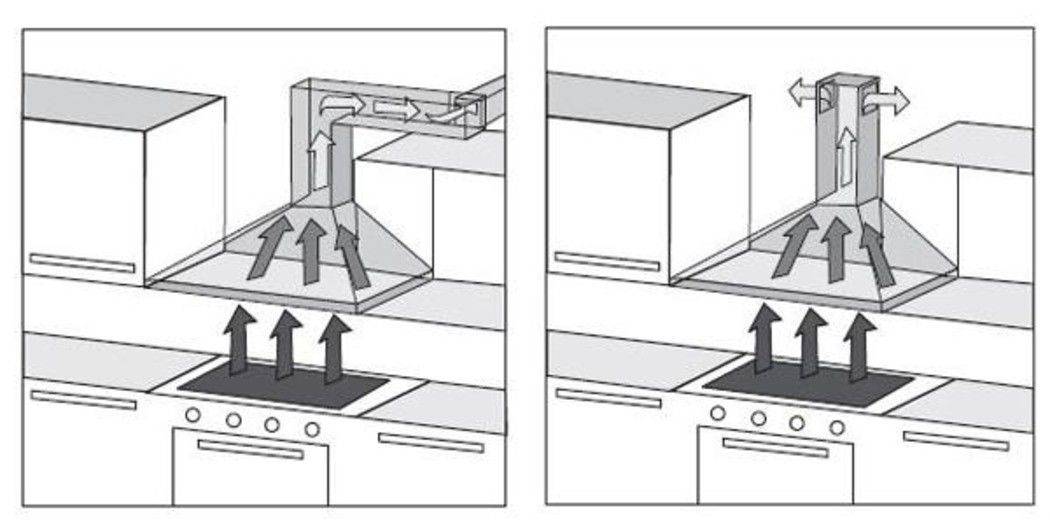
Scheme of a kitchen hood
In order to better understand what you are going to do, you first need to know the circuit of the device and the principle of its operation, otherwise nothing can be done normally. This is also necessary so that you can disassemble and then reassemble the hood yourself in the event of a breakdown or cleaning, which is desirable to do at least every six months to avoid possible fire.
An important role in the hood is played by its engine or engines, as in some more powerful models they are installed in two. This is a kind of "heart" of the whole device, the power of the operating device depends on it. Most often, such engines have a power of 50 to 200 watts, their speed is from 1500 to 2000 per minute. The performance of the device depends on this, but do not forget that the more power, the more electricity the hood will consume, be sure to consider this
In addition, more powerful hoods will have a high noise level, this should also be paid attention to.
An important role in the energy consumption of the hood and its structure is played by the lamps installed in it and aimed at illuminating the stove or hob. Most often, LED or halogen lamps are installed. If you want to save on energy consumption in the future, then you should give preference to LED lamps, since halogen lamps consume virtually the same amount of energy as conventional incandescent lamps.
To connect the device to the network, a regular cord is used, most often its length is one and a half to two meters, if this is not enough for you, then you will have to use an extension cord. If you want to hide the cord and extension cord, then think it over in advance.


An important role in the structure of the hood is played by an anti-grease filter, which is literally “at the inlet” of the device and is visible above the hob. This filter is needed in order to trap unpleasant odors, as well as protect the engine and other parts from dirt and large impurities. This is a kind of metal mesh or dense perforated foil with several layers, ideally it should have an anti-corrosion coating.
Some inexpensive models have so-called disposable filters, they are made of synthetic fabric, they will have to be changed very soon. They are inexpensive, but it is not very convenient, so it is better to give preference to the first option. It is necessary to clean the filters periodically, as they are covered with soot and grease, this can cause unpleasant odors and spoil the operation of the device.
Some more expensive models have charcoal filters, which are usually installed behind the hood motor. Such filters help to further purify the air, they contain microgranules of coal, working on the same principleas filters for water purification. The disadvantage of such filters is that they need to be changed frequently, which is easy to do, but requires some skill. Dirty or old filters interfere with the normal operation of the hood in the kitchen.
Hoods also have several types of controls that differ from each other, you need to choose the type that seems convenient for you, by and large they do not have any functional differences. Here are the main types of controls:
- Button control. It is the presence of conventional recessed buttons that are familiar to every person. Usually the buttons are located on the front panel of the hood, they are easily accessible. Such control is most often found in the cheapest models of the device, but at the same time it is also the most reliable.
Slider control. Also an inexpensive type of control, which is found in many economical models. It works on the principle of a movable lever, it moves through the divisions, changing the power of the device and sometimes the lighting of the hob
Touch control. This control is the most popular, it is in most modern devices. Firstly, it looks very stylish, does not require special care and does not lose its presentation even after long-term operation. The touch panel is most often located on the front panel of the hood, it works at the slightest touch. In more expensive models, you can even set a specific program for the device. For example, with a sharp appearance of a strong odor, the motor starts to work in an enhanced mode, aimed at quickly eliminating an unpleasant odor, when a person approaches, an indicator light is activated that illuminates the surface.
Video - installation of a kitchen hood
Some of the more “smart” models also work without human intervention, they turn on and off automatically when an odor is detected or the stove is turned on / off.
Important rules for installing the hood
Hoods are needed in kitchens with both electric and gas stoves. Moreover, the rules of their installation in the second case are slightly different. After all, when using a gas stove, cooking takes place under the influence of an open flame. This feature must be taken into account before installation.
During the cooking process for no gas stove only the aromas of cooking fill the air - the smell of burning gas is clearly felt in the kitchen. It is he who brings confusion to the question of the correct choice of the optimal distance for the future hood.
Therefore, before purchasing exhaust equipment for arranging a kitchen, you should calculate its power so that you do not have to change the equipment almost immediately after installation.
So, sometimes you can hear the erroneous recommendations of some craftsmen to hang this device lower at a distance of 50-60 cm from the level of the stove. According to them, this will allow better and faster removal of carbon monoxide from the room.
Above the gas stove, be sure to install one of the most suitable models of hoods to get rid of soot, burning and other impurities in the air
Such advisers forget that an open fire can easily spread to the body of the exhaust equipment and then trouble cannot be avoided. The situation can become especially dangerous when the grease filters have already become dirty - they can ignite in a matter of seconds.
To prevent this from happening, you need to remember at what height above the gas stove to hang the hood.The allowable range is within 75-85 cm. Moreover, as experienced craftsmen advise, in some cases an error of 5 cm is possible if the hood does not fit in another way.


For gas stove the distance to the hood must be greater than that provided for the electric one. But by no means less!
In addition to the distance from the stove to the hood, there are other important installation rules, including:
- correct installation of equipment;
- safe connection to the electrical network;
- correct connection to the ventilation system.
In order for the exhaust equipment to work properly for many years, helping to get rid of the symbiosis of various aromas in a timely manner, it must be installed, clearly adhering to the basic installation rules. You can install it yourself or invite a master from a company with a good reputation.
Another important rule that affects the quality of installation and the future microclimate in the room is compliance with the recommendations of the equipment manufacturer. First of all, you have to carefully read the advice on the installation height of the purchased hood model given by the company that manufactured it.
Then you need to study the recommendations of the manufacturer of the gas stove in the appropriate section.
The instructions should pay special attention height advice exhaust device
The mounting height of the hood will largely depend on the type of equipment and its power.
Often you may encounter the fact that the recommendations for one and the second device differ significantly. Hood manufacturers may indicate the installation height of their equipment at 40-50 cm from the stove. In this case, you need to focus only on the distance indicated in the instructions for the stove.
If the accompanying documentation for the gas stove is lost, then the hood above it can be hung at a distance not lower than 75 cm.
Conclusions and useful video on the topic
Video instructions from manufacturers and qualified installers will help even an ordinary inexperienced layman to cope with the installation of exhaust equipment.
Video #1 How to do your own installation of an inclined model:
Video #2 Instructions and useful tips for installing a built-in hood:
Video #3 General recommendations for selection and installation:
As you can see, the installation process is a few simple steps. However, they will be absolutely useless if you choose the wrong model, neglect the accuracy of the markup and do not worry in advance about the device of the locker or the possibility of installing an air duct.
But compliance with the rules, competent calculations and accuracy will allow you to use the hood for a long time and with pleasure.
Want to talk about how you installed a kitchen hood with your own hands? Have useful information worth sharing with site visitors? Please write comments, post thematic photos and ask questions in the block below.