- Installing a toilet on a tile with cement mortar
- Facing the floor surface around the installed toilet
- Ways to fix the toilet bowl and their features
- What is the best way to fasten during the overhaul of the floor
- Fixing a toilet bowl to a tile
- Hanging solutions
- Self-installation of plumbing "step by step"
- We fix on the floor: 3 types of fasteners
- Fixing the toilet to the wall
- External Installation Instructions
- Method #1: screw fixing
- Marking and centering on tiles
- Core and drill tiles
- Sealing and screwing
- Toilet Installation Methods
- Getting ready to install
- The device and principle of operation of the toilet
- Laying tiles around the installed toilet
- How to raise the toilet above floor level
- For cement mortar
- Getting ready to install
- Preparatory work
Installing a toilet on a tile with cement mortar
Installing a toilet on a tile using this method is not the best option. It is suitable for those cases when the toilet is installed in place of the dismantled one or when there are no installation tools at hand.
To fix the toilet on a tiled floor without drilling with cement mortar, you need the following tools:
- cement mortar or cement-based tile adhesive;
- marker or pencil;
- a hammer;
- spatula (narrow and medium);
- chisel.
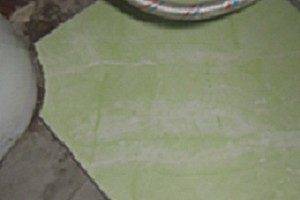
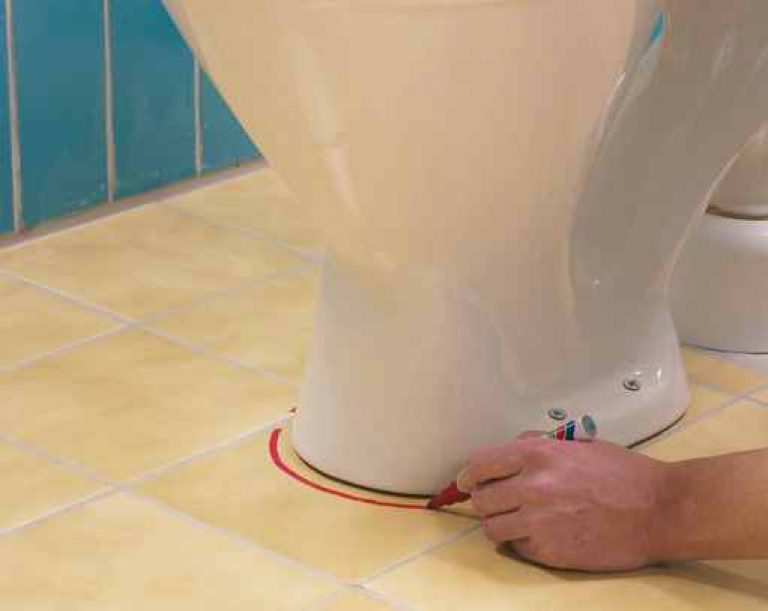
Before starting, it is necessary to approximately check the joint of all installation elements by installing the device in the intended place and connecting all the necessary plumbing elements. Then the base must be circled with a marker or pencil. In place of the marks using a chisel, it is necessary to apply notches.
The next step is to prepare the cement mortar, the cement mortar is diluted 2:1. Large sand impurities are found in the cement mixture, which can affect the setting. It is best to use a pre-mixed tile adhesive, as it is much more durable and dries faster. Calculate the preparation of the solution for 4 kilograms.
Once the mixture has prepared, it must be carefully applied to the place with serifs. Before gluing the toilet to the tile on the resulting composition, you need to moisten the surface a little
The base of the device leg must also be moistened and installed in the place allocated for it. From the front and back sides, under the base, it is necessary to place plastic plates, the thickness of which should be 5 mm and the width 50 mm.
Remove excess solution with a spatula. After drying, it is necessary to remove the linings and concrete the holes from them with the same solution. Do not use plumbing for 5 days.
If in the future you want to dismantle, then this will happen with a splitting of its base. This means that it can no longer be reinstalled.
Facing the floor surface around the installed toilet
Sometimes circumstances develop in such a way that the toilet was installed before the flooring was done. For example, there are no funds to purchase high-quality tiles, or the desired option has not yet been found in the assortment of stores.But it is impossible to live in an apartment normally without a toilet bowl, it was installed, the decoration was left for the future. Another option is cosmetic repairs, with laying new tiles directly on the old one (there are such technologies), but it was decided not to change the toilet bowl.
Those owners who plan to follow this path should immediately be warned - they will face many difficulties. These are difficulties with curvilinear cutting of tiles, and problems with fitting fragments. Moreover, you will have to work in very cramped conditions.
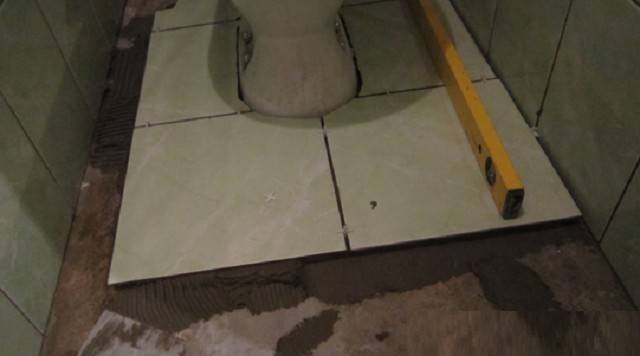
Beautiful tiling around an installed toilet is by no means an easy task!
One more nuance.
But if the decision to go this way has finally formed, then look at the example of making such a lining around the toilet bowl.
| Illustration | Brief description of the operation to be performed |
|---|---|
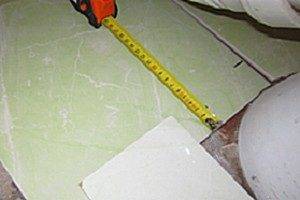
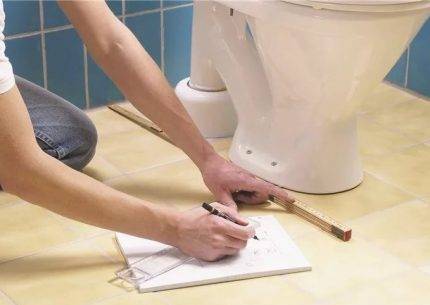
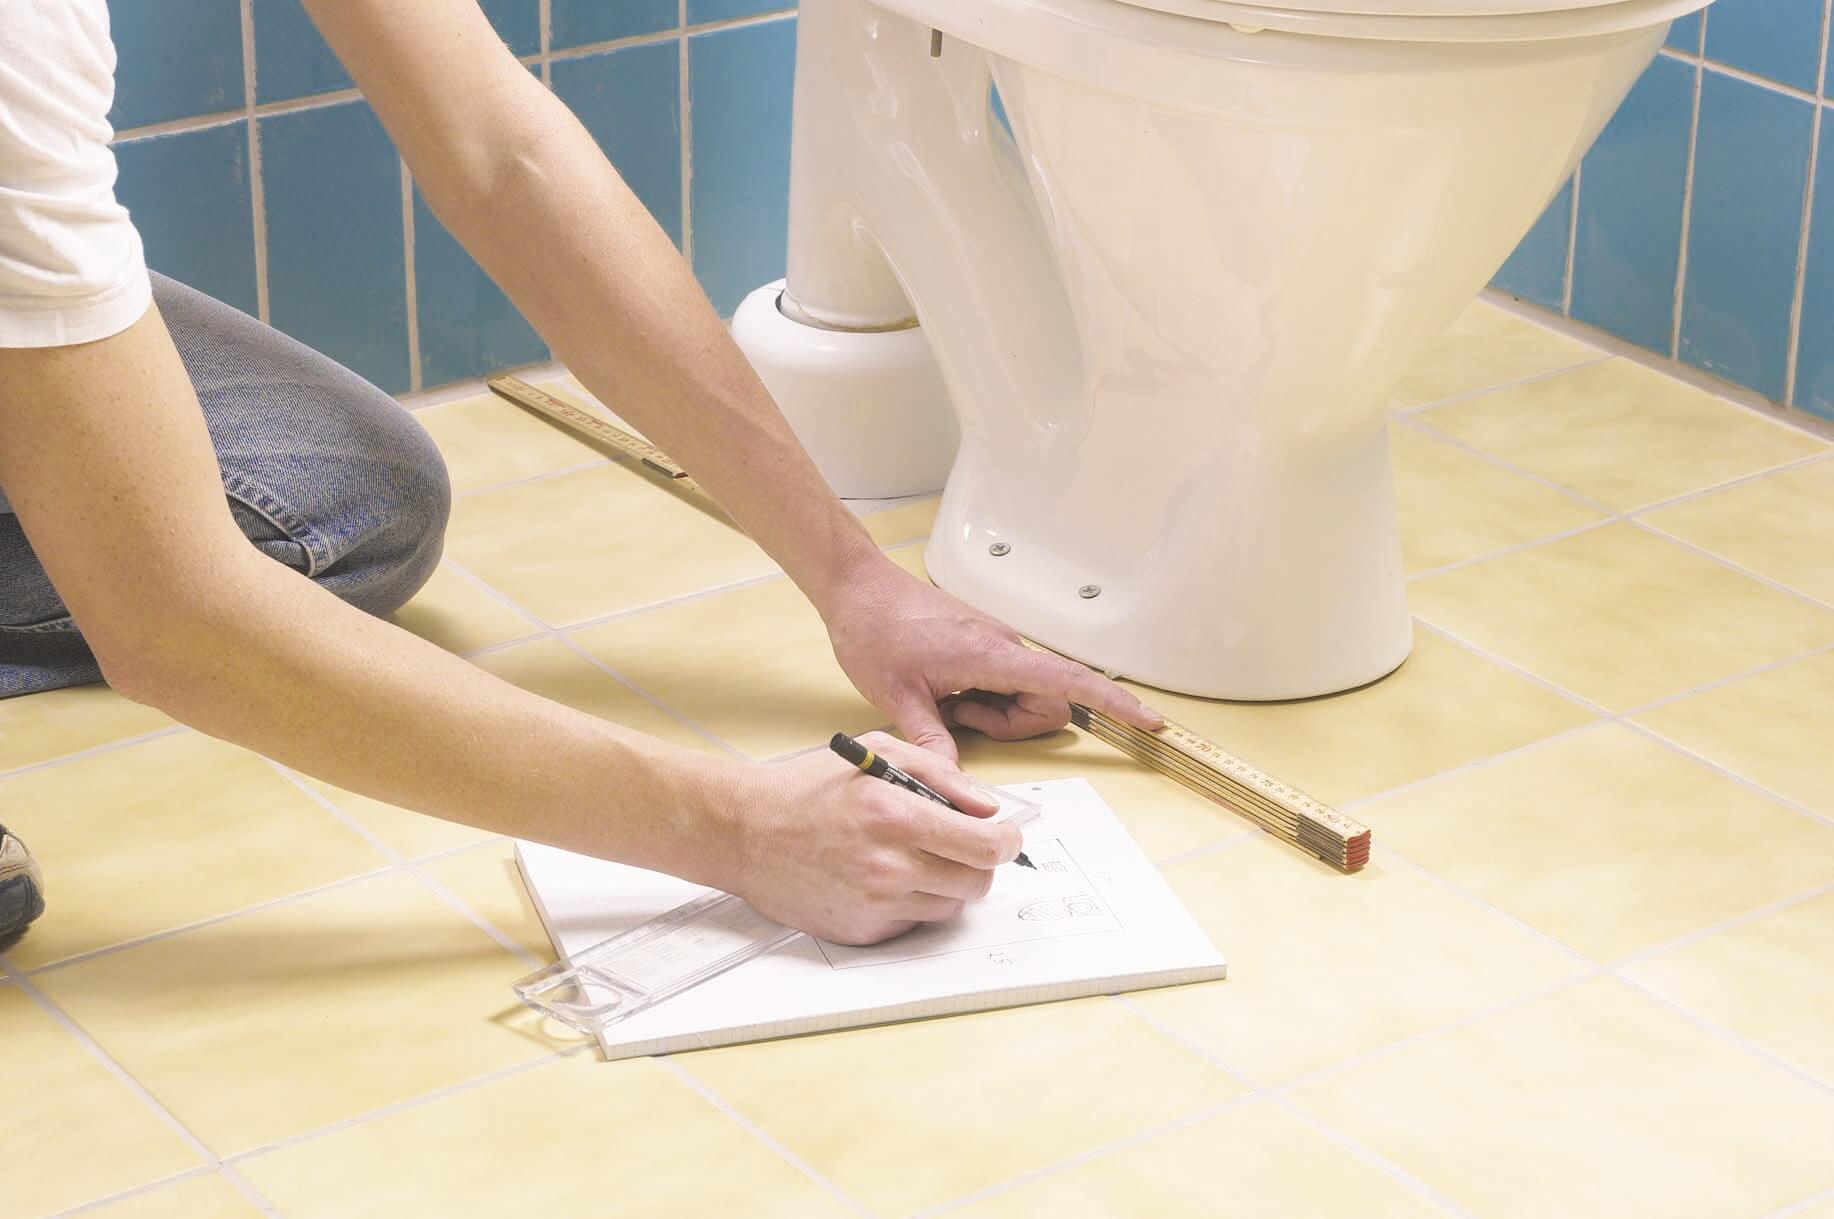
 | One of the obvious solutions is the manufacture of cardboard templates with their adjustment and the subsequent transfer of curvilinear markings to the tile. But some masters practice the removal of patterns literally in place. So, in our example, the fitter started at the back right corner of the toilet base. |
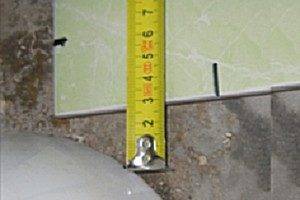
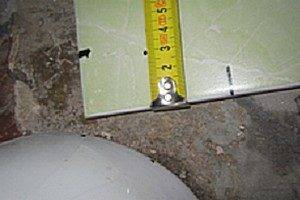 | The dimensions are taken according to the maximum length and width of the cut fragment. Intermediate points are measured and plotted. |
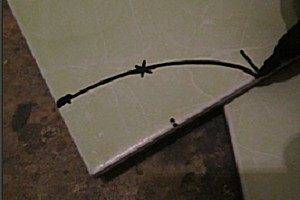 | A curve is drawn along these points for cutting tiles. At the same time, it is taken into account that a seam should remain between the tile and the toilet leg, approximately the same as planned between the rest of the tiles. |
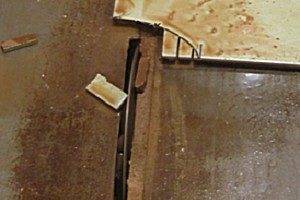 | It is fashionable to make curved cuts with a quality glass cutter, but this requires considerable experience. Another option is to cut narrow strips with a small grinder with a stone disc, followed by breaking them off with pliers. After that, the edges are cleaned with a rounded file or even just coarse-grained sandpaper. |
 | After stripping - you can try on the place. If everything is fine, you can move on to the side surface of the toilet leg. Tiling is not yet carried out - until the fitting of all cut fragments is completed. |
 | The marking of the side fragments is carried out in such a way that from the front side the seam between the tiles would fall exactly in the center of the toilet bowl. Otherwise, it won't be very pretty. |
 | Cutting is performed - both straight and curved sections. The technology on curved lines is the same, with fragmentary cutting of narrow strips and subsequent processing of the edges. |
 | The last cut fragment on the right side of the toilet bowl, with the tile joint approximately on the center line of the appliance. |
 | Having finished with one side, go to the opposite. There are no special features - everything is done in the same sequence. |
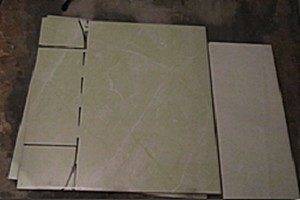
 | After all the fragments are cut and fitted, you can proceed to laying the tiles on the glue. Here it is guided by the usual technological rules for installing tiles, in accordance with the characteristics of the base for laying (on a screed, or on an old ceramic cladding). We will not describe the details here - there are many such instructions on our website. |
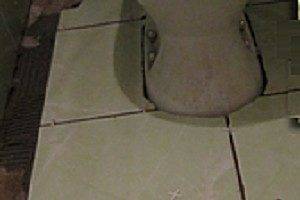 | First of all, lining is made around the toilet bowl, from cut fragments. |
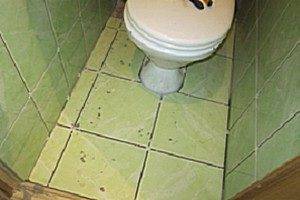 | Well, then - the tile is mounted on the entire remaining uncovered area of \u200b\u200bthe floor, while maintaining the specified rows and thickness of the tile joints. This is how it might turn out in the end. |
As you can see, the task of such a cladding is a very difficult one. And, perhaps, it will still be better at the slightest opportunity to go “on the right path”,
* * * * * * *
In the article, as noted at the very beginning, plumbing moments were missed - in order to pay maximum attention to the various ways of attaching the toilet bowl to the floor. As some kind of compensation for this "gap", we suggest watching a video - a master class for installing a toilet bowl on a tiled floor, as they say, from "a" to "z":
Ways to fix the toilet bowl and their features
There are three main options for attaching the toilet to the floor:
- reinforcement with anchors cast into the screed, or the use of dowels;
- installation of a toilet bowl on a wooden base pre-mounted in the screed using screws;
- fixing with epoxy.
What is the best way to fasten during the overhaul of the floor
If the toilet is being replaced during a major overhaul, then it is better to use the option with anchoring or with a prepared wooden base. In this embodiment, at the stage of forming a screed on the floor, anchors are placed on it strictly in accordance with the placement of the toilet bowl and holes for fastening. As a result, they should protrude about 5-6 cm above the surface. It is better to cut off the excess later than to face a problem when the anchor is not enough to fix the nut on it.


A wooden board (taffeta) is selected according to the size of the base of the toilet bowl. Nails are hammered into it in a checkerboard pattern over the entire surface so that they protrude from the other side. After that, turn the board over and install it in the place of the future location of the toilet. Concrete is poured into the screed along with taffeta along its upper edge. After that you can install toilet in place and secure screws.
Fixing a toilet bowl to a tile
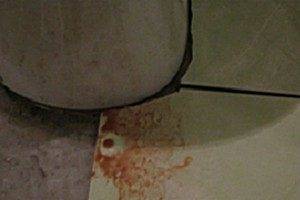
When fixing the toilet bowl under the nuts for anchors and on the dowels, it is imperative to put on rubber gaskets that will protect the toilet bowl from cracking when tightened and prevent the formation of rusty drips on ceramics. It is best to use nickel-plated bolts and anchors so that at the end of their service life they can still be easily unscrewed.
You can do without the use of screws, dowels and anchors. To do this, it is enough to take epoxy resin and properly prepare the surface of the floor and the base of the toilet bowl. This option is best suited if the barrel is installed on the wall, because it is half the weight of the entire structure. First of all, you should walk with an abrasive stone or sandpaper on the floor surface so that later the epoxy resin will normally adhere to the surface. After that, a layer of several millimeters of glue is applied to the floor and the toilet. After setting everything in its place, you should wait for the glue to dry completely.
Hanging solutions
It is getting more and more popular. The wall-hung toilet is installed on the wall without fastenings or contacts with the floor. In order to fix it, it is necessary to build a metal frame that is attached directly to the load-bearing wall, and already to it the toilet bowl itself in the event that it is supposed to hide the tank and pipes behind a plasterboard wall. In some cases, a hinged toilet with an open tank can be attached directly to the wall, but then it will be necessary to transfer the sewer pipe into the thickness of the wall. The fastening itself is carried out using anchors mounted in a wall or frame.
Self-installation of plumbing "step by step"
The toilet bowl for normal operation needs a flat, lined or specially prepared surface of the walls and floor.
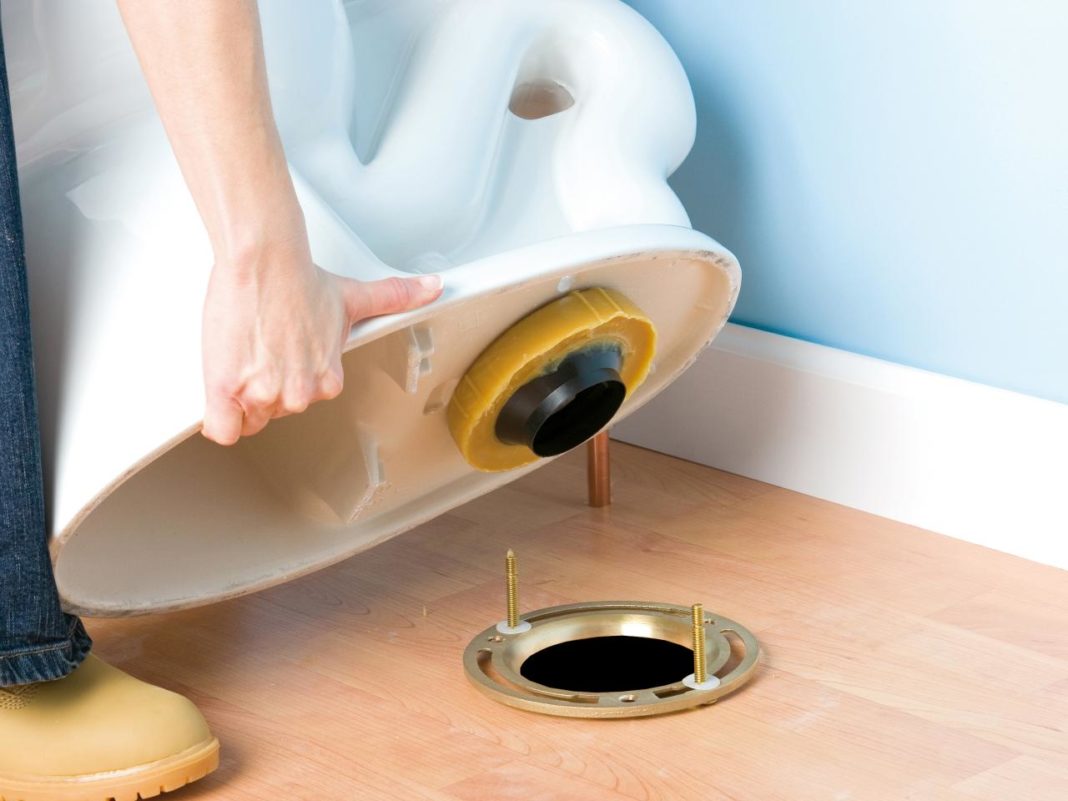
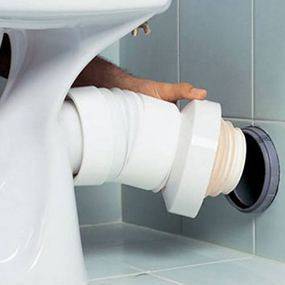
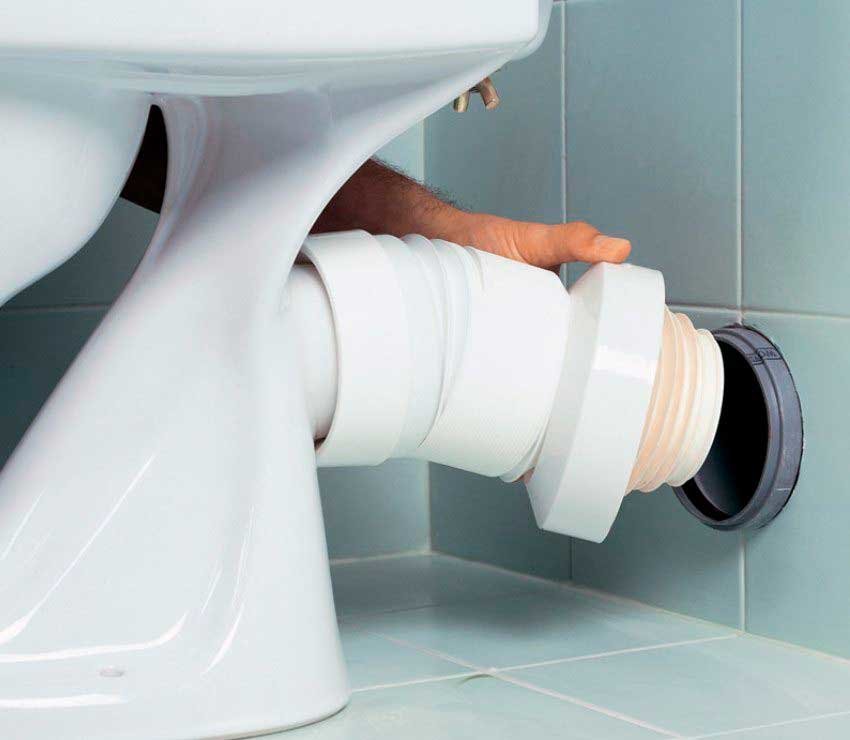
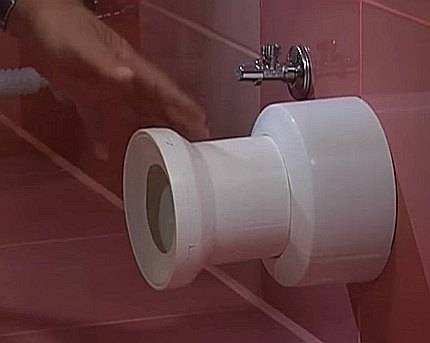
First, we connect the drain of the toilet bowl with the help of a corrugation to the outlet of the sewer pipe-riser. You can also use a hard tube. The best option is if the toilet drain enters the riser without extension corrugations, etc. To seal the drain, we use a ring with a rubber border
It is important to consider that rubber does not tolerate cement and similar coatings on its surface. But the sealant is quite suitable.
To enter water, you need a flexible long enough hose connecting the tap that supplies liquid from the water supply to the tank of your plumbing
Pay attention to both inlet diameters to match the hose with two matching fittings
Obviously, there is no way to screw a 3/4” thread onto a 1/8” pipe.
If the drain is securely connected, you can begin to fix the plumbing.
We fix on the floor: 3 types of fasteners
- The first option for floor installation is anchors embedded in the screed. During the pouring of the floor, long anchors are fixed at the place where the toilet bowl and its fasteners will be located. After the screed dries and the floor is finished, a toilet bowl is attached to the anchor. This is the most difficult method of fastening, since it is difficult to install the anchors so evenly that the toilet stands on them without problems. It often happens that inexperienced builders choose too short anchors, on which it is then impossible to screw nuts. The anchor embedded in the floor must be at least 7 cm above the finish surface in order to screw the toilet to it. Gaskets are required under all nuts so that the surface of the toilet does not crack.
-
The second option for securely fixing the toilet bowl on the surface during the overhaul of the toilet is installation on a wooden base. The main thing is that the board strictly matches the size of the base of the toilet bowl. When pouring the floor, the board is prepared by hammering nails into it. Then it is laid in the solution with nails down. After the screed has dried and the room has been finished, the toilet bowl, previously planted on a layer of epoxy resin, is screwed to the board using ordinary screws. Under them, rubber or polymer gaskets are also needed.
-
Fastening to the floor when anchors and board are not provided. To install plumbing on a finished surface, say, on a tile, it is convenient to use dowels. The toilet is placed in the place where it needs to be installed. Attachment points are marked on the floor. Then they need to be drilled deep enough, but without hitting the waterproofing layer in the screed. Before installing the toilet, you need to increase the reliability of the installation with epoxy / sealant. It would be nice to pour a drop of sealant into the holes drilled for the screws. On an epoxy pillow, the toilet will stand like a glove. Screw caps are also needed.
You can fix the toilet with a wall tank without screws, for one resin. True, with this method of fastening, it is first necessary to clean the surface of the tile so that the glue holds better.
When using "epoxy" it is important to allow freshly installed plumbing to dry properly and gain a foothold on the floor surface
Fixing the toilet to the wall
How to install the installation
Wall hung toilets are being used more and more. Their installation is not much more complicated than usual (by the way, you can read about installing a toilet bowl with your own hands on our website).A wall-mounted toilet, as its name implies, will not have contact with the floor surface. It is suspended using a metal frame, which is attached to the load-bearing wall itself. The cistern and pipes of the toilet in this case are behind a false plasterboard wall. If the mounted plumbing has an open tank, then it will be possible to fix it on the wall itself, but then the sewer pipe should be inside the wall. The same anchors embedded in the wall or in the supporting frame will hold the structure.
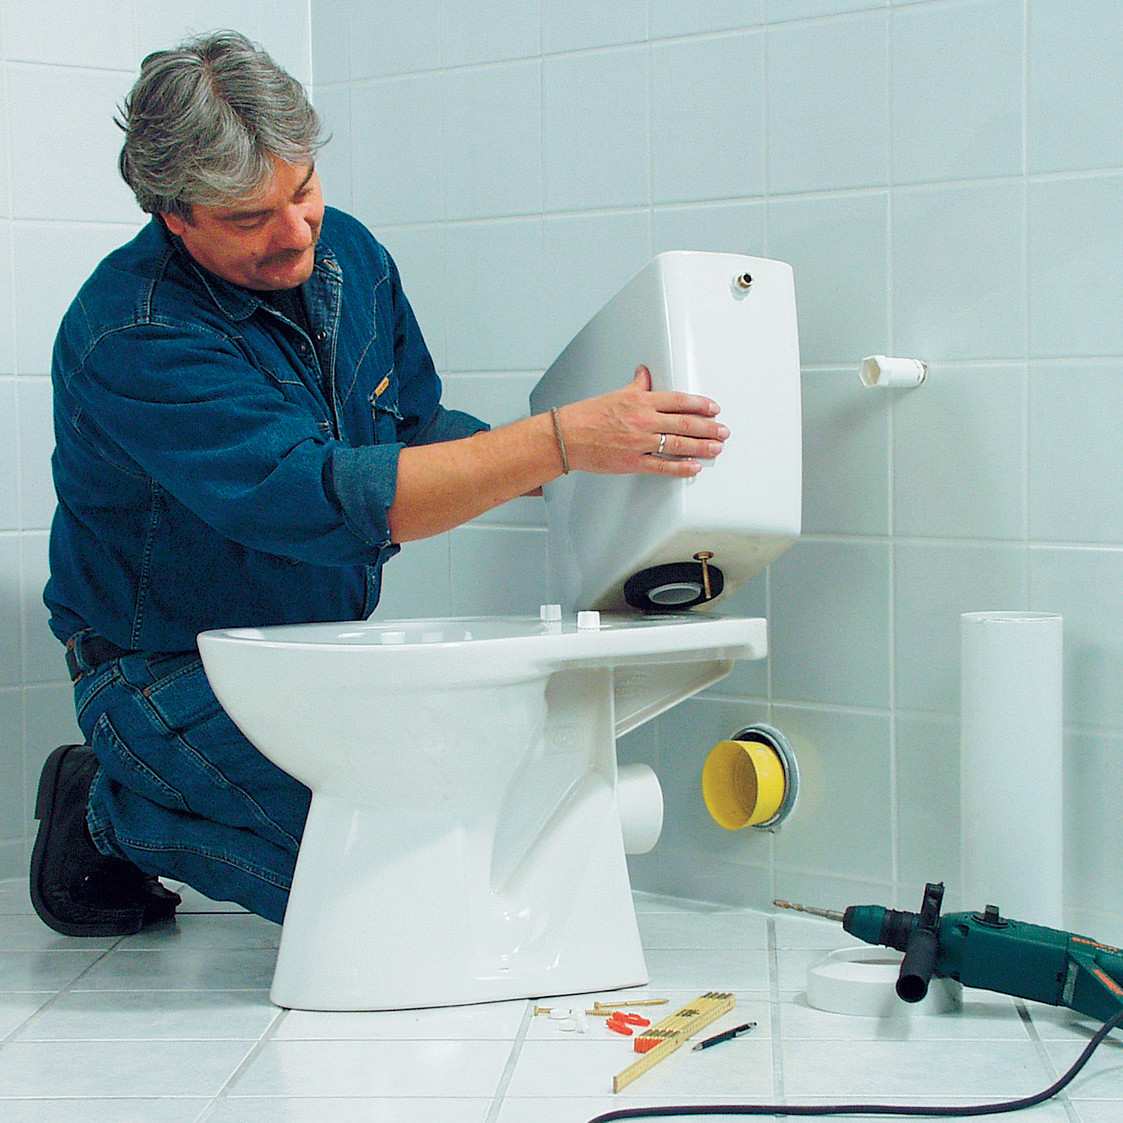
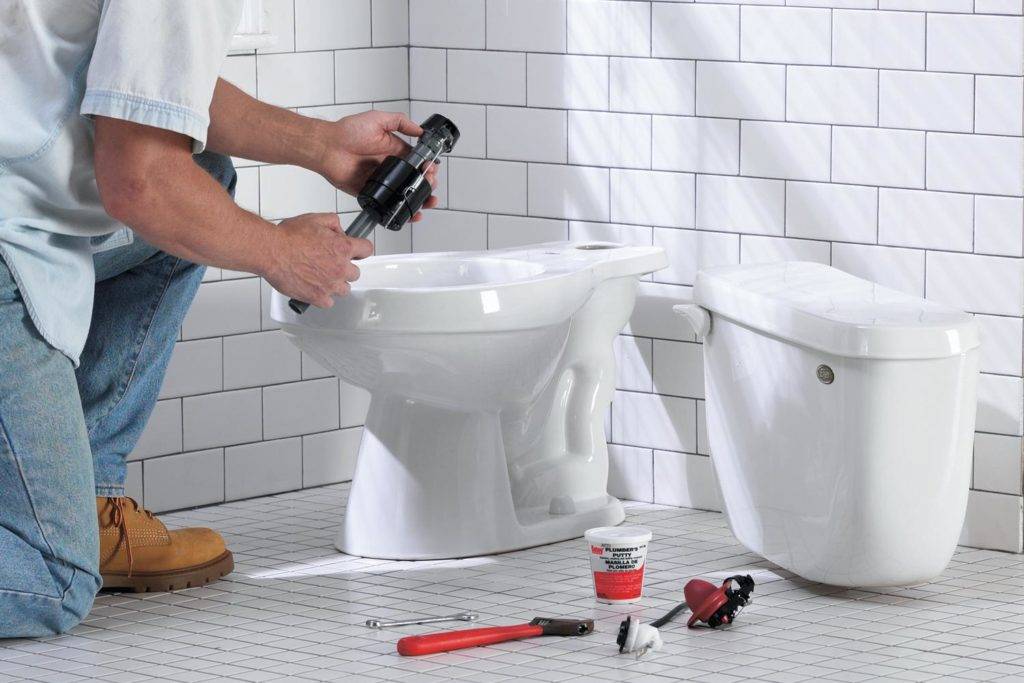
Installing a toilet on a pedestal
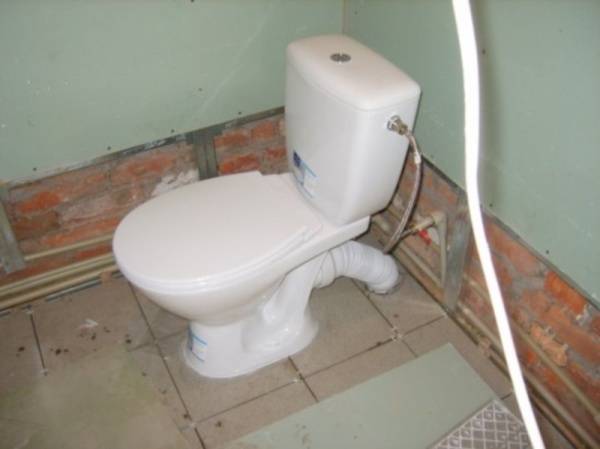
After fixing the toilet bowl on the wall or on the floor, it remains only to assemble the toilet bowl. A tank is placed on the base, already securely fixed, or a pipe is connected to it from a tank hung on the wall.


Installing a toilet on a pedestal
It remains only to check if the toilet is working, and if there are any leaks. We turn on cold water, wait until the tank is filled, adjusting the filling level. We set up the locking mechanism according to the instructions. Rinse and see if it flows from the drain.
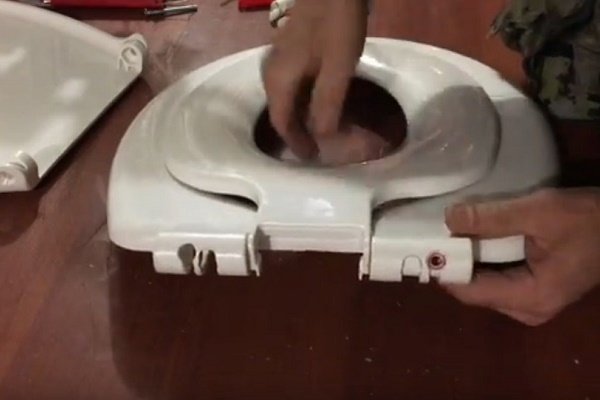
The last step is to screw the toilet seat. But here you, for sure, can already handle it yourself.
External Installation Instructions
With an external mounting method, the toilet is attached to the floor with bolts.
The work is done in this order:
Mark the fixing points and drill the floor to the desired depth

We mark the places of fastening
The holes are filled with silicone and plastic dowels are installed.
Drill holes and fill them with silicone
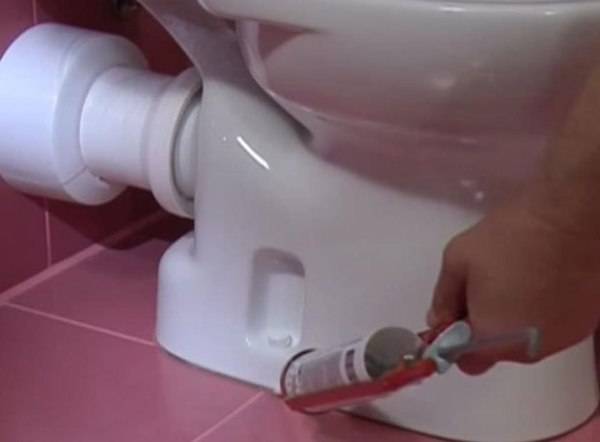
- To prevent moisture from entering under the toilet, a sealant is applied along the previously outlined contour.
- Studs are screwed into the prepared cavities
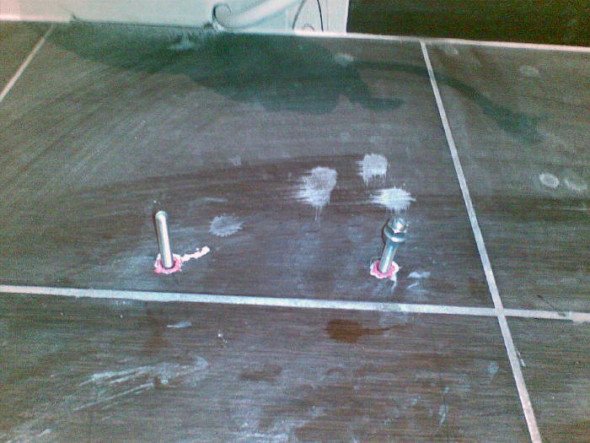
We install the studs on which we will mount the toilet
- The device is installed on the studs, combining the mounting holes with them.
- Tighten nuts or bolts
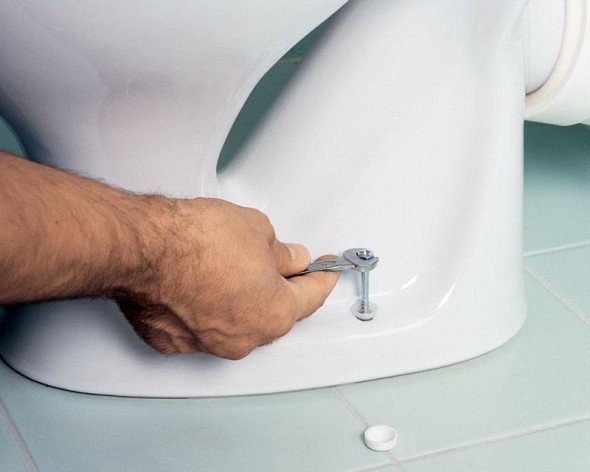
We mount the fixture with studs and nuts or long bolts
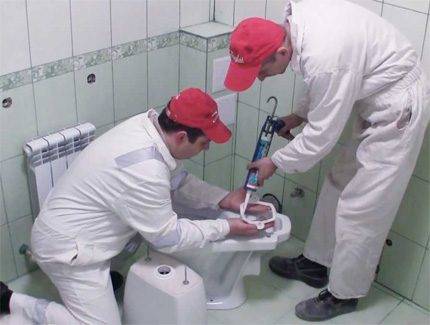
- Excess silicone that has come out at the junction of the toilet bowl is removed with a rubber spatula.
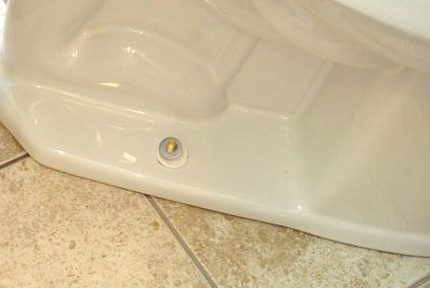
- At the end of the installation, decorative plugs are installed and the device is connected to the water supply and sewerage systems.
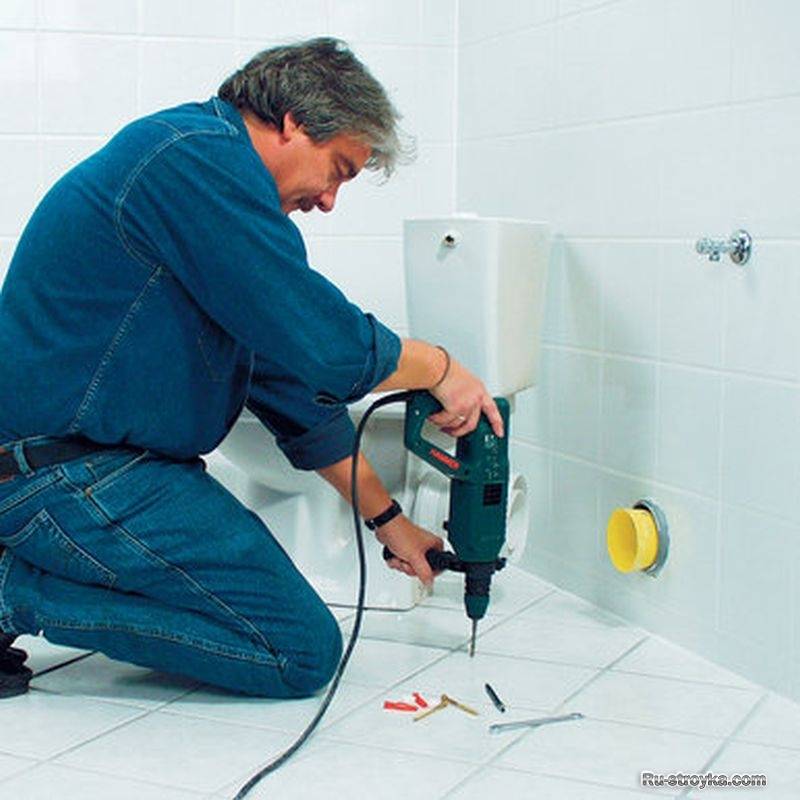
Method #1: screw fixing
The design of each toilet bowl (with the exception of exclusive models) provides for the manufacture of holes for fasteners. These holes are located at the bottom of the device, just above the plane of the sole.
But there is also a considerable proportion of toilets, the design of which is designed for fastening with four screws (2 on each side). Usually these are large-sized models that have significant weight.


Marking and centering on tiles
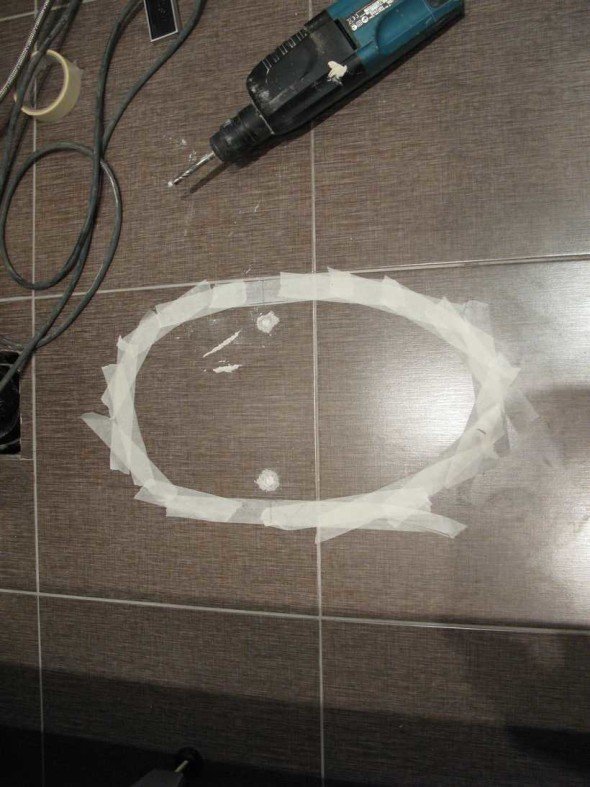
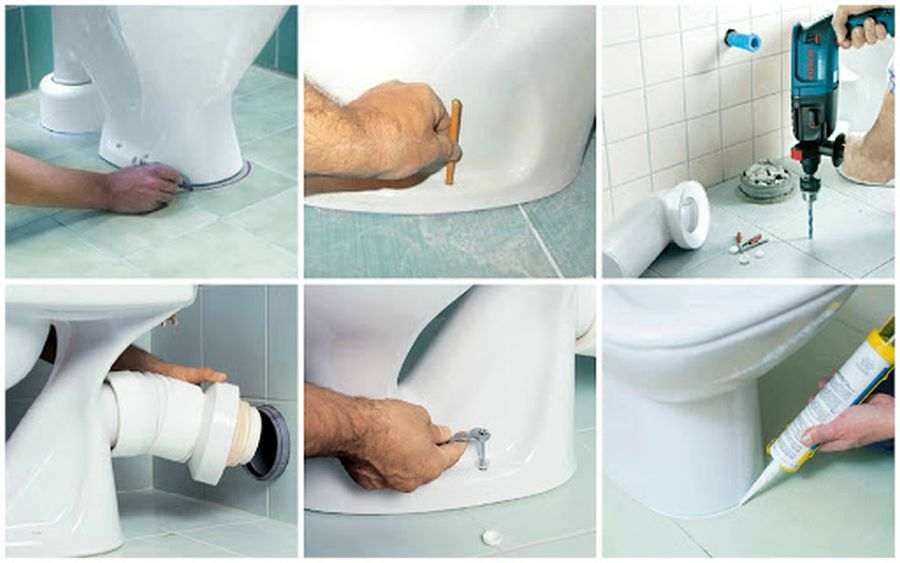
When the task is set, how to install a toilet bowl of any of the marked configurations on a tile, the main part of the solution is to prepare holes for dowels (plugs). But how do you drill holes in ceramic tiles without damaging this fragile material? A special drill for ceramics and little experience with a drill will help here. But first, the master needs to mark the installation site and designate the fastening points.
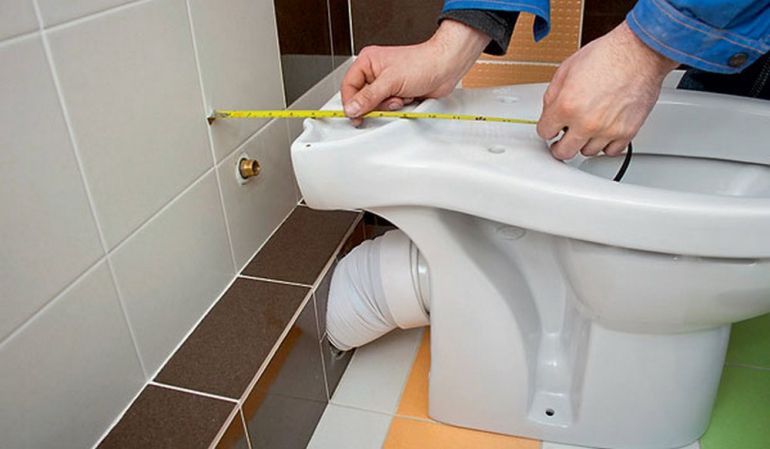
Then, directly on the tile, the border of the sole is drawn with a marker, bypassing along its contour. Next, mark the points of the centers of the mounting holes. After completing the markup, the toilet is removed.
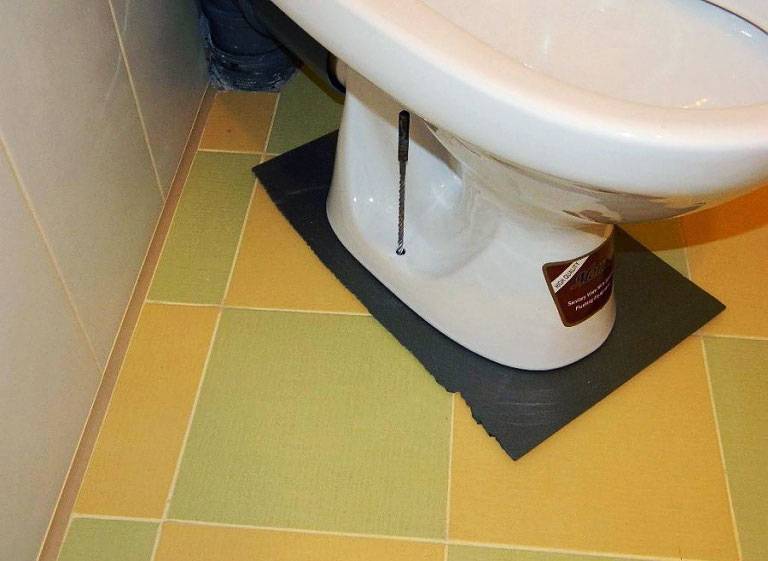
Core and drill tiles
The next step is a small core at points indicating the centers of future holes. The core is made with a well-sharpened center punch.The tip of the center punch is directed to a point and a few very weak blows are applied to the butt plate of the tool with a light hammer. The goal is to chip off the polishing layer of the tile and get small holes with a radius of no more than 2 mm
This work must be done very carefully.

toilet on
Having received small holes on ceramics, they take a drill, fill a special drill under the tile into the cartridge. It is necessary to use a drill with the function of the engine speed controller. Drilling tiles only at low speeds. During the process, it is recommended to periodically water the drilling area with a small amount of water. At the same time, one should not forget about the rules of electrical safety.
Drilling holes in the tile is carried out to the border of the cement screed. Then the tile drill is changed to a concrete drill, and the electric drill to a hammer drill. The diameter of the drill should not exceed the diameter of the drill on the tile. With such tools, holes are drilled in concrete to the depth of entry of the fixing screws and thrust plugs (dowels) are pressed inside.
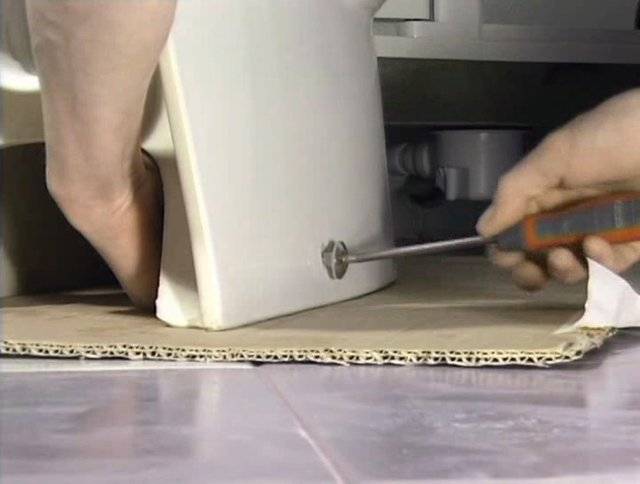
Sealing and screwing
At the final stage of the installation, the following steps are performed:
- The sole of the toilet bowl is treated with a thin layer of sealant.
- The toilet is placed exactly on the previously marked track.
- Mounting screws are equipped with gaskets.
- Insert screws into mounting holes.
- Screw in until it stops with a tightening of 1-2 turns.
The screws must not be overtightened. So you can damage the plumbing faience.
Toilet Installation Methods
There are at least three options for installing a plumbing fixture on the floor:
- using the fasteners included in the standard delivery;
- fixation on the adhesive composition;
- using cement mortar.
In the standard delivery with the toilet there is a fastener in the form of dowel screws.Installation in this way is recommended only on a flat surface.
This method is quite acceptable in terms of its reliability and stability. True, it is not always applicable. Such a mount is most often chosen for small-sized devices with low weight.
Another installation option is fixing with glue. This method gives good strength. But if you need to carry out urgent dismantling - quickly and at minimal cost, this will not work. This mounting option is used if the structure is not planned to be replaced in the near future.
In addition, plumbing can be installed on a cement mortar. This is a kind of alternative to the standard screw and adhesive fixation. This method is not much different from installation on glue, because the cement composition also includes an adhesive component. But in terms of the quality of fixation, the cement solution is less reliable than special glue.
Getting ready to install
The base for the installation of the toilet must be level. There are several options for the development of events, namely:
- if the floor is tiled and does not have level differences, we do not carry out any preliminary measures to level the base;
- if the floor is tiled and not even, install the toilet with chopsticks. To do this, holes are drilled in the floor, chopsticks are hammered into them according to the level, and after that the toilet bowl is attached to the chopsticks with screws;
- if a tile replacement is planned, we dismantle the old cladding and fill in a new screed, if the old one has level differences;
- if the toilet is installed in a new house or apartment without any finishing, we fill in the screed and lay the tiles.
We pay attention to pipes.We clean the sewer from debris and various deposits, install a tap on the water supply (if it was absent before) to shut off the water supply to the tank
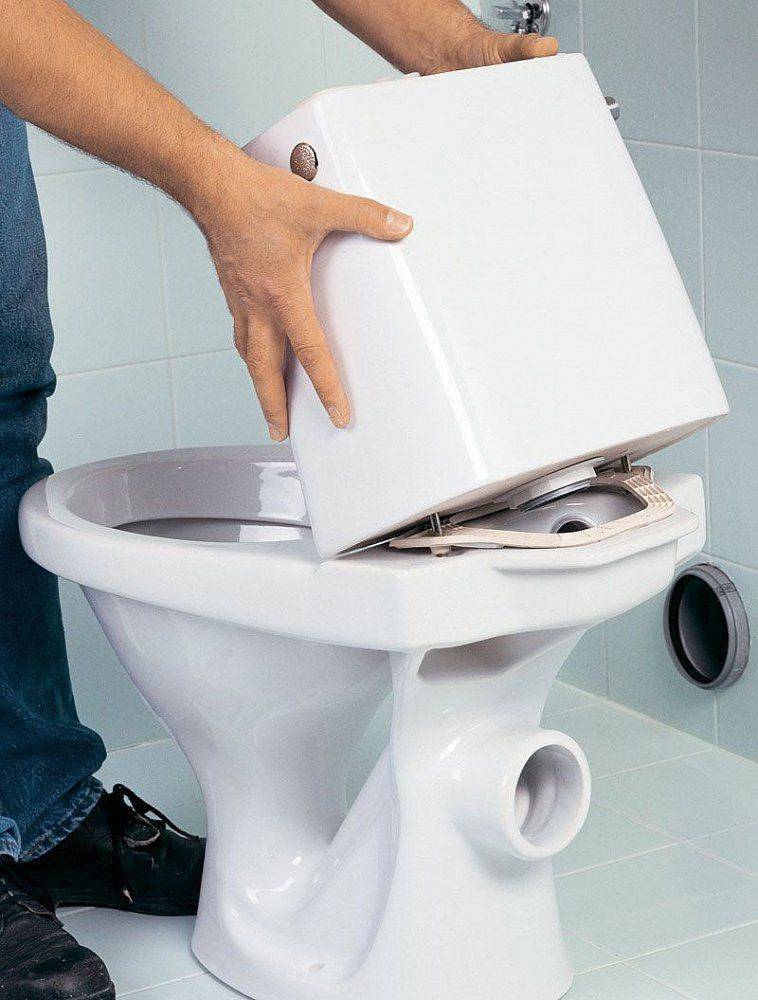
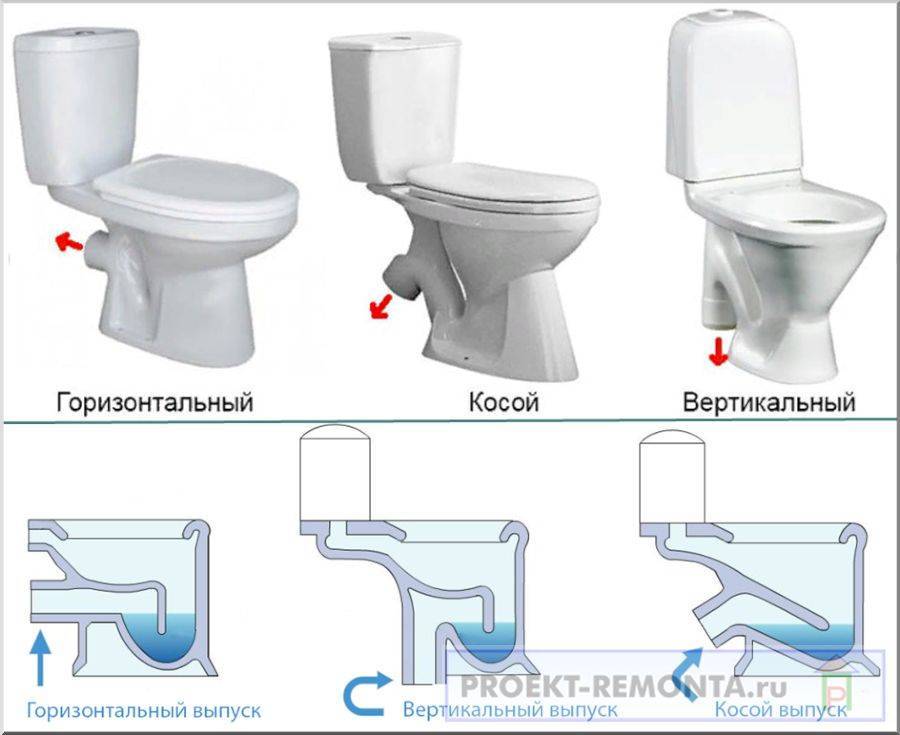
The device and principle of operation of the toilet
The design of the device consists of 3 main parts:
- bowl seat;
- siphon with water seal;
- flush tank.
With a sudden influx of a large amount of liquid, the contents of the bowl are washed away and the siphon is filled with fresh water. A water seal prevents air from entering the sewer into the room.


The tank is automatically filled from the water mains. When the float is raised, the shut-off valve is activated, and the water supply stops. Flushing is controlled by a lever that opens the drain hole. An overflow pipe is installed in the tank to prevent overflow. If any components fail, the water from the filled tank is drained immediately into the bowl, thus preventing possible flooding.
Laying tiles around the installed toilet
Let's assume that the toilet is already installed, and there is no need to remove it. How can you lay tiles in this case? The laying technology itself is no different from performing this operation in any other room, but there are some rules that must be followed when laying tiles around the toilet:
- First of all, the tiles are laid out near the toilet. Tiles should be placed symmetrically with respect to the toilet. With such work, you will have to use a slightly larger amount of material, but the result will look much better.
- To mark the figured cutting of tiles, it is worth using paper templates. Using this method minimizes the chance of sizing errors.In addition, when calculating tiles, you need to remember the need to respect the gaps.
- Laying tiles or tiles in any case will raise the floor, which may adversely affect the usability of the toilet. Suppose, before the repair, he stood very comfortably - then the tile will raise the level of the floor, and it will not be so comfortable to use the toilet. A thick screed or a thick layer of mortar will also have a bad effect on the level of comfort.
In general, experts speak negatively about the idea of laying tiles after installing the toilet. Even if it is installed, it can always be removed and then mounted back, and these operations will take about an hour. Thus, it is better to mount tiles or tiles before the toilet is installed.
How to raise the toilet above floor level
The standard height of the toilet is not convenient for everyone. For comfort, tall people need to raise their buttocks by 5-10 centimeters. How can I do that? If the floor is in the process of being repaired, it is possible to fill the platform of the required height with concrete by knocking down the formwork of the required size from the boards. After the concrete has matured, lay the finishing floor covering, including on this pedestal. Attach the toilet directly to this pedestal.
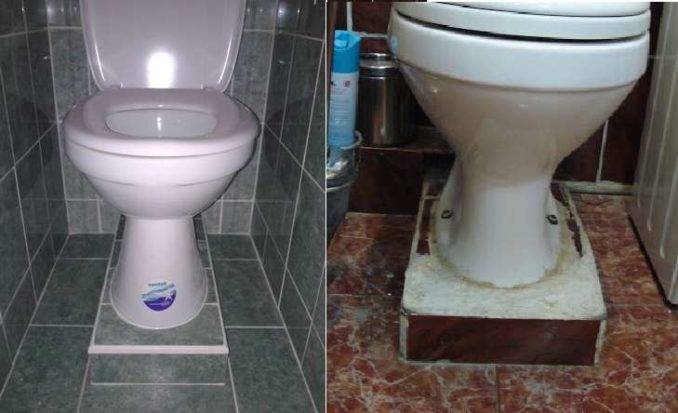
If there is already a tile on the floor, there are several ways out:
- Set on high taffeta.
- Make a pedestal of bricks, foam concrete or aerated concrete blocks, finishing them with the same tiles before installing the toilet.
If there is linoleum on the floor, you can remove it, fill it with concrete or make a pedestal, as described above, then lay the coating again, but taking into account the platform that has appeared. In the case of a wooden floor, the most rational seems to be the use of taffeta.Although a laid out platform can also be made. But it is better to fix a piece of plywood on the boards according to the size of the podium, and then lay the selected material.
For cement mortar
This method is well suited if the new toilet will be installed in place of the dismantled one. But, you can also use it when the house does not have the tools necessary to fix the plumbing accessory to the floor.
The easiest, but far from the best way is to install the toilet on a concrete mortar
In order to install the toilet on the tile in this way, you will need a concrete mortar or cement-based ceramic tile adhesive, a marker, a chisel, a hammer and two spatulas - narrow and medium width. The installation process itself is carried out in the following sequence:
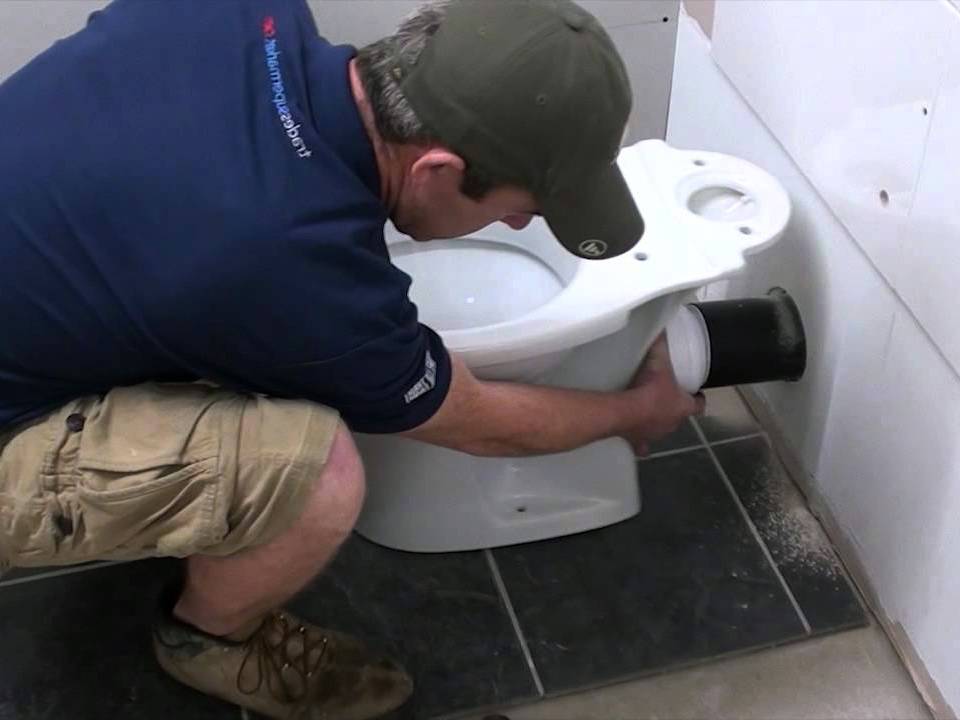
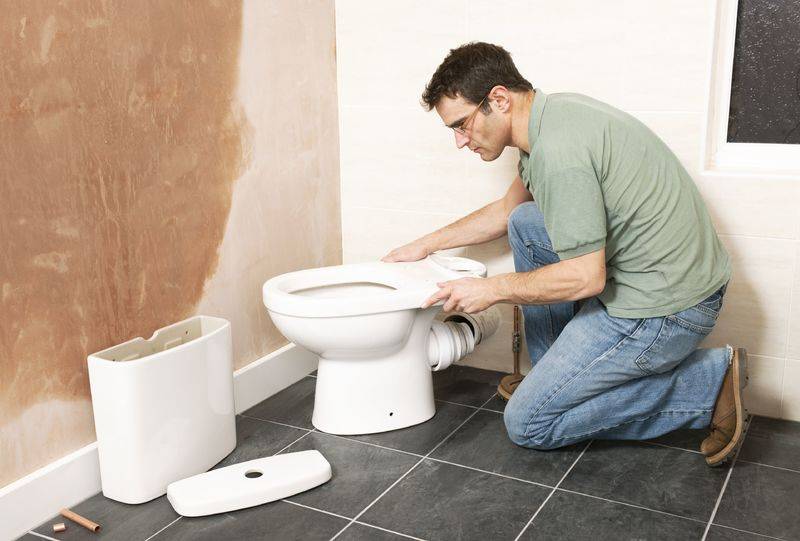
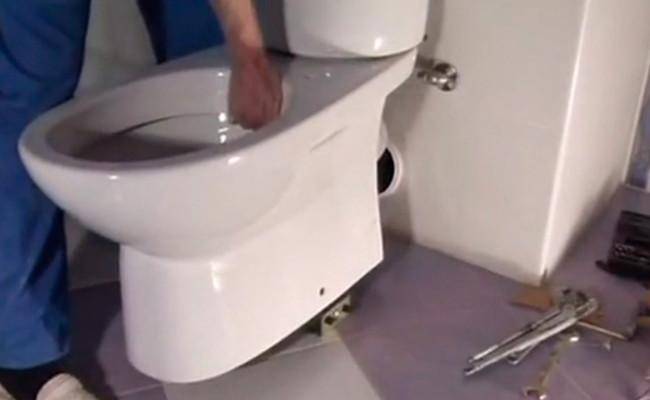
The toilet is installed in the place provided for it and connected to the sewer pipe with a rigid or corrugated adapter. A fitting connection must be made in order to make sure that all elements fit perfectly together.
Next, the base of the toilet leg is outlined with a marker.
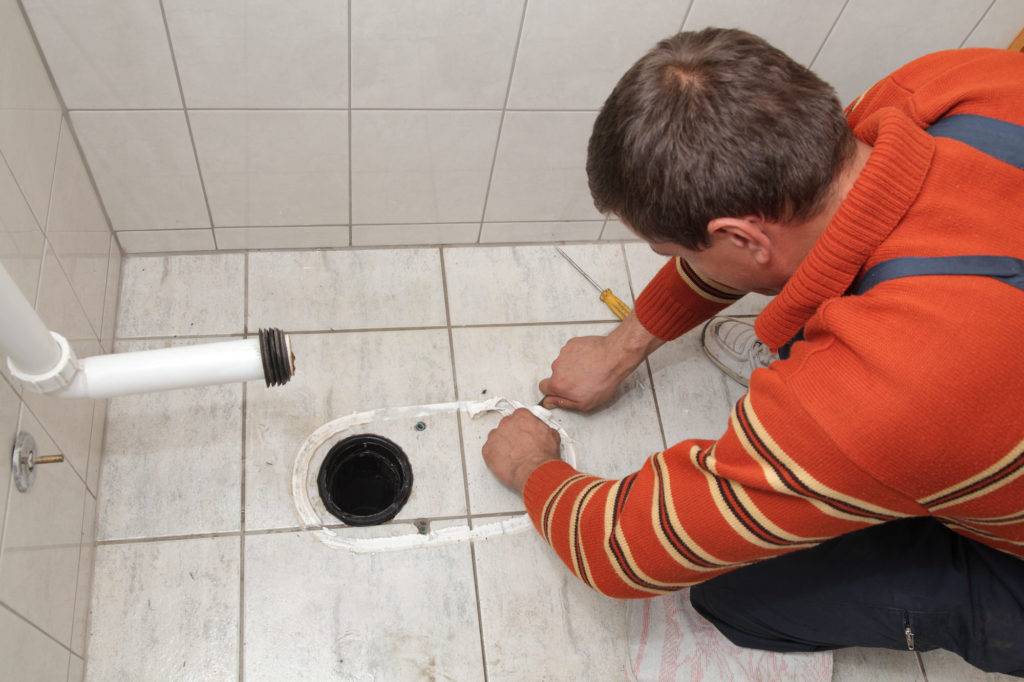
Then, the toilet bowl is removed, and at the place of its installation, in the circled area, notches are made on the tile with a chisel and a hammer. This process must be carried out carefully so that when struck, marks remain only on the front cover of the tile, but cracks do not form. It is recommended to carry out this work in protective glasses so that the chipping crumbs of the coating do not accidentally get into the eyes.
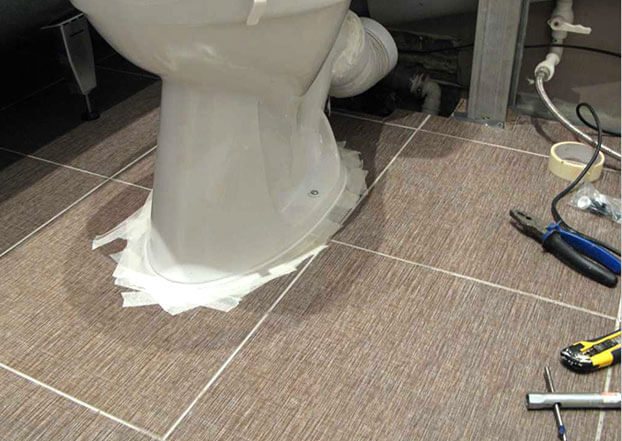
Instead of notches, you can randomly stick waterproof masking tape on the circled area. O is also able to create a rough base on which the solution is well fixed.
It is important to ensure that the glued tape does not extend beyond the edges of the contour.
The next step is to make a concrete mortar from sand and cement in a ratio of 2: 1, or tile adhesive is diluted. The latter solution is preferable, since it sets quickly and has a fine grain size of the powder, which is much more convenient than concrete, in which coarse sand fractions can be found.
The finished solution will require 3÷4 kg.
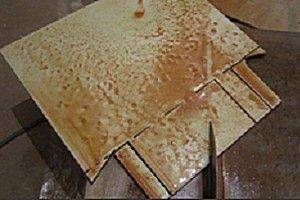
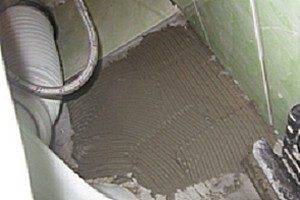
The next step, the finished mixture is laid out on the prepared and moistened area of the tile with notches or masking tape glued to it.
Then, the lower cut of the toilet leg is also wetted along the perimeter, and the device is installed in a place determined for it. Under its base, from the front and rear sides, two plastic linings are laid with a thickness of 5 ÷ 7 mm, a width of 50 ÷ 80 mm. These elements are necessary to create a “pillow” of mortar between the tile and the toilet. When performing this operation, it is very important to level the toilet bowl, as it should stand without distortions, perfectly horizontal.
The solution that protrudes beyond the edges of the toilet leg is immediately collected with a spatula, and the joint seam is carefully leveled. Gaskets can be removed only after the mortar has set well, and the recesses remaining from them must also be filled with mortar and leveled. The drying time of the tile adhesive is indicated on the packaging, and the concrete must stand without use for at least 3-4 days. The toilet can only be used after the solution has completely cured.
The disadvantage of this installation method is that if you have to dismantle the toilet bowl, then it is far from always possible to remove it entirely - it usually ends with splitting the base.
Getting ready to install
The base for the installation of the toilet must be level. There are several options for the development of events, namely:
- if the floor is tiled and does not have level differences, we do not carry out any preliminary measures to level the base;
- if the floor is tiled and not even, install the toilet with chopsticks. To do this, holes are drilled in the floor, chopsticks are hammered into them according to the level, and after that the toilet bowl is attached to the chopsticks with screws;
- if a tile replacement is planned, we dismantle the old cladding and fill in a new screed, if the old one has level differences;
- if the toilet is installed in a new house or apartment without any finishing, we fill in the screed and lay the tiles.
We pay attention to pipes. Sewer from debris and various deposits, install a tap on the water supply (if it was absent before) to shut off the water supply to the tank
Preparatory work
All work should begin with the preparation of the workspace. First you need to clean up the place where the installation will be carried out. We will clean the entire area from dust, sand and earth. If this is not done, then every time it becomes necessary to use the toilet, a crunch will be heard.


We carefully wipe all the tiles. By running your hand over it, you can check if there are any protruding parts.
If the floor has roughness, then you can use sandpaper and wipe the surface, and if there are large protrusions, remove them with a chisel. But this is rarely required.
The toilet has such a structure that it must be placed directly against the wall. Accordingly, it is necessary to think in advance that it is necessary to bring the sewerage.The drain hole of the toilet bowl must be located higher than the sewer pipe. Thus, an unhindered flow of water is ensured and it does not stagnate in the fitting.