
- Features of the choice of mixers
- Advantages and disadvantages
- Benefits of flow filters
- Disadvantages of in-line filters
- Advantages of reverse osmosis systems
- Cons of a reverse osmosis filter system
- List of necessary tools and spare parts
- Design choice
- Connecting communications and checking tightness
- Mounting the device on a wall surface
- How to install a countertop faucet
- Preparatory work and dismantling
- Pull-out spout for kitchen faucet
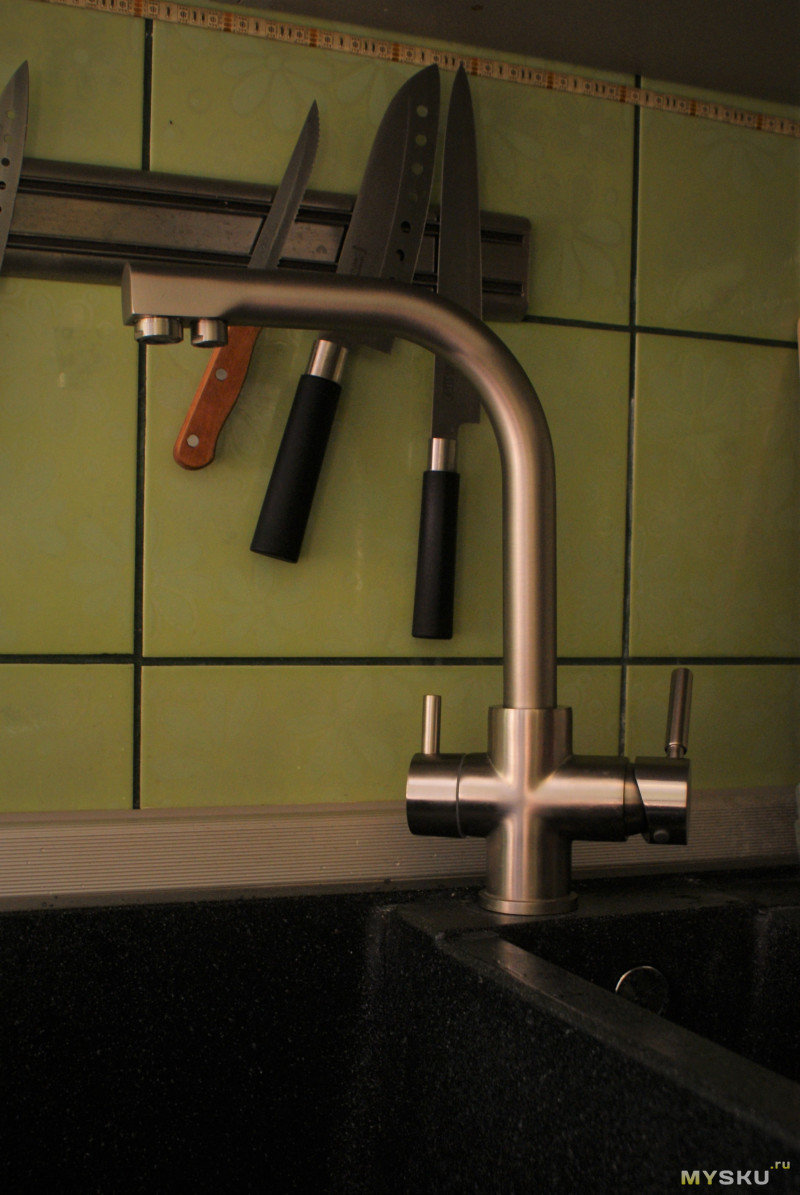
Features of the choice of mixers
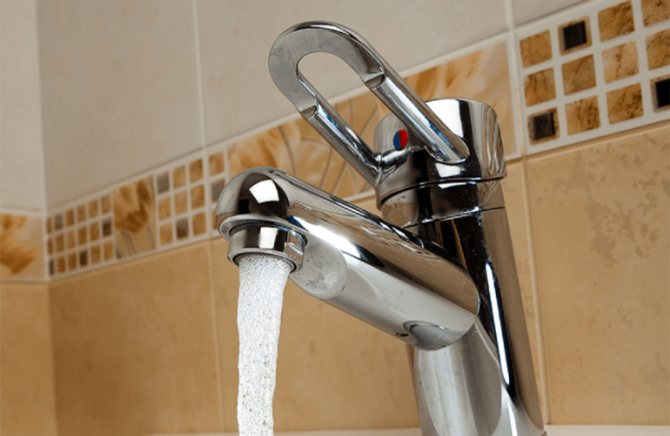
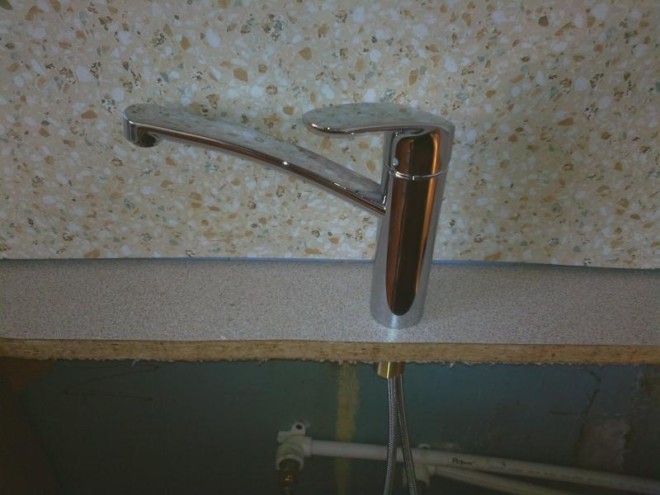
Single handle kitchen faucet There are many options for mounting and positioning the faucet. You can install it in the frame of the sink, on the surface of the table or on the wall. Using any of the methods, the first step is to mark the location of the hot and cold water supply pipes, observing the possibility of access to their connection. This may be necessary during the next repair work, as well as when installing filters.
You should pay attention to some features of choosing a mixer and take into account such details:
- Distance between hole and wall.
- The width of the opening for the mixer.
- Drain hole location.
- Mixer drain. Preferably, its end should coincide with the center of the sink.
- Given the size of the tableware, you should choose the height of the drain.
- Depending on the type of sink, the angle of rotation of the mixer is selected. A single bowl sink requires a rotation angle of no more than 90 degrees. In other cases, the indicator needs to be increased.
Selection of the necessary model of the faucet, taking into account design and functionality, is not a difficult task, since there is a huge variety of types of sanitary ware offered.
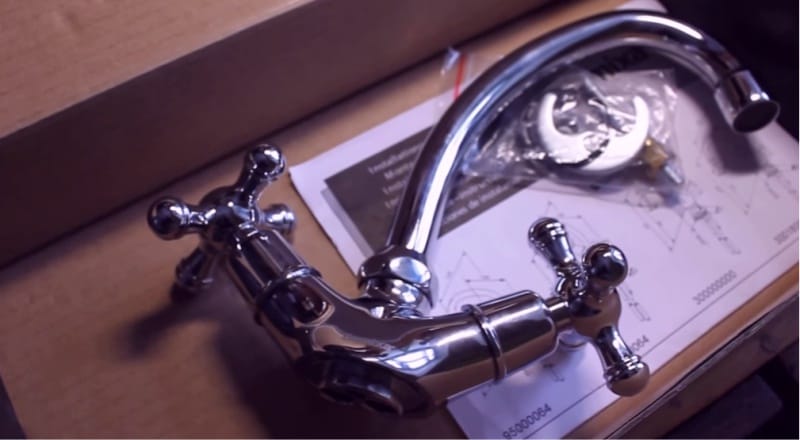
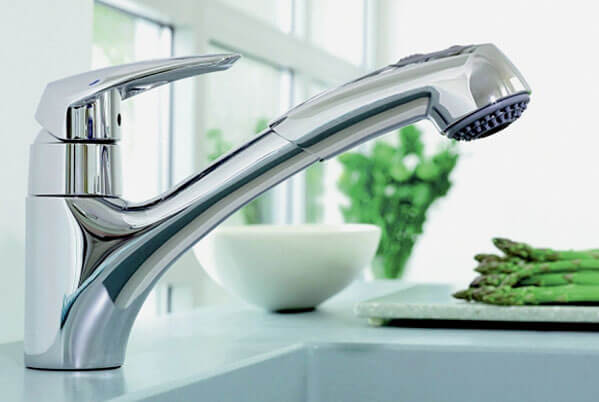
Kitchen faucet with two valves
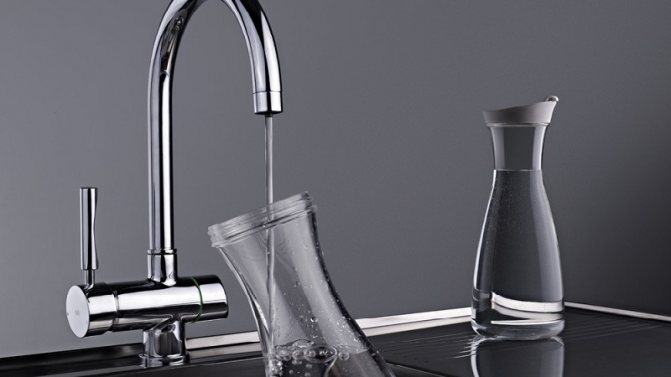
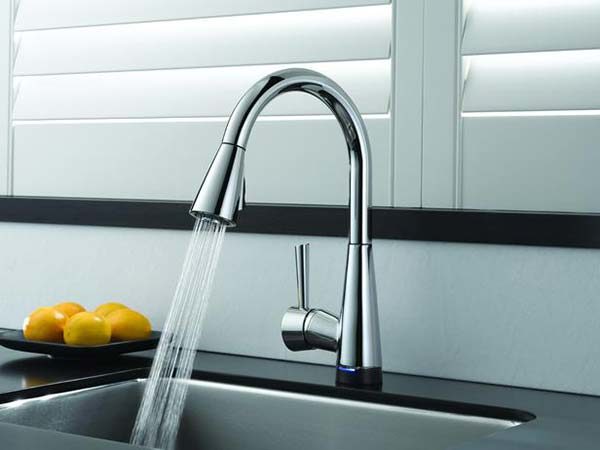
Due to its simplicity and practicality, the model with one stainless steel lever is very popular, in which the pressure and temperature of the water are regulated using a single handle. For a classic interior, designs with two levers are a more suitable option. Faucets equipped with a motion sensor do not require tactile contact for operation, but adjusting the water supply parameters with their help is very problematic.
Also, an important component of choosing a mixer is the choice of material from which the device is made. Models made of inexpensive alloys have an affordable price, but low quality reduces their service life.
Quality and durability are guaranteed by taps made of brass, chrome, nickel or aluminium.
Advantages and disadvantages
A kitchen faucet with a connection to a drinking water filter has several advantages:
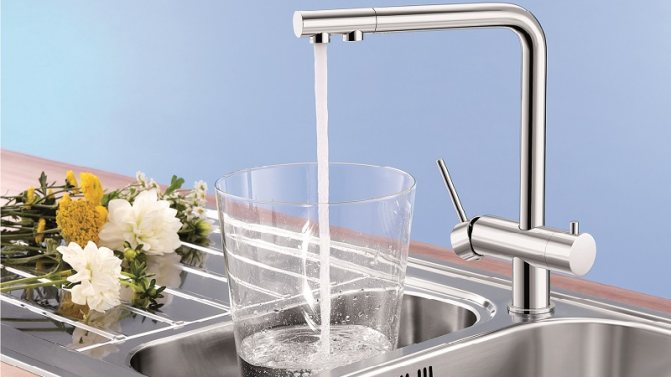
- Saving time. By opening a special tap, the consumer receives clean, filtered water at the outlet without the need to control the direction and switch its supply.
- The filter does not take up much space, all communications are placed in a small kitchen area. An auxiliary water conduit is built into the two-in-one mixer for the kitchen, all filter elements are located under the sink.
- Aesthetic aspect.It is not convenient for every consumer to install an additional faucet separately in the sink, and designs from hanging adapters or cartridges cannot be called comfortable in operation.
The most common household water purification devices are flow type filters that are installed under the sink or on it, another option is to buy a reverse osmosis filter.
Benefits of flow filters
Flow filters of stationary type are mounted under the sink. The device does not take up much space, purified water is supplied through a separate tap, and special cartridges are used to filter the liquid, which are changed once every few months.


Stationary filters clean water from impurities in the form of active chlorine and organochlorine compounds. Does not pass the filter element and toxic metals.
Models of desktop flow filters are placed next to the sink. A special adapter is used to connect to the faucet. Used cartridges have a small resource, replacement is carried out as they become dirty: about 1 time during 2-4 months of active operation.
Like kitchen filters for drinking water faucets installed under the sink, desktop options purify water from mechanical impurities and chlorine, as well as the presence of foreign color and odor.
Disadvantages of in-line filters
Complete purification of water from contaminants is not ensured even by high-quality and highly efficient filters. Passing through the layers of the carbon filter, the liquid is not released from heavy metals, mercury and a number of other substances.
The surface of the filter element gradually accumulates dirt particles, which affects the efficiency of work and serves as a basis for the reproduction of microbes and bacteria. Therefore, it is recommended to change the filter cartridges before they reach their full resource. Replacement is carried out approximately every six months.
Advantages of reverse osmosis systems
Reverse osmosis systems provide almost complete purification of water from contaminants. The device is a kind of flow filters combined with traditional (coal) technology. Such a device provides preliminary filtration of running water.
The main cleaning element in the system is a reverse osmosis membrane, which replaces the carbon cartridge with its porous base. The structure of its holes fully corresponds to the size of water molecules. In the grid of such a filter, a layer of dirt residues does not accumulate, while a stream of water is released to clean its surface, which is drained into the sewer at the outlet. Almost all bottled drinking water is purified in reverse osmosis systems.
Cons of a reverse osmosis filter system
The disadvantages of reverse osmosis systems for drinking water treatment include the high cost of such equipment. This minus is compensated by the quality of filtration, which justifies the choice of this cleaning method.
List of necessary tools and spare parts
Before proceeding with the installation of kitchen plumbing with your own hands, you need to prepare and purchase everything you need. You will need:
- FUM sealing tape - it is better not to take linen tow, as it swells from water, and then it will be difficult to remove the eyeliners;
- Open-end wrench for 10 or 11;
- Tubular wrench - needed to tighten a hard-to-reach nut during installation of the faucet to the sink;

- Mounting kit - it should contain rubber o-rings, that is, half washers (2 pcs.), One horseshoe-shaped metal half washer, stud (1 or 2) and nut. Such a set is attached to the mixer, but if you wish, you can buy a thicker and stronger sealing ring, since manufacturers do not always include high-quality gaskets in the kit;
- Pliers, a small key, a screwdriver - sometimes they are also needed;
- A rag, a basin and a flashlight will also come in handy so that you can see everything;
- And finally, the main thing - 2 plumbing connections - are attached to the kit, but it is better to buy others, since the factory ones are often short and made of silumin;
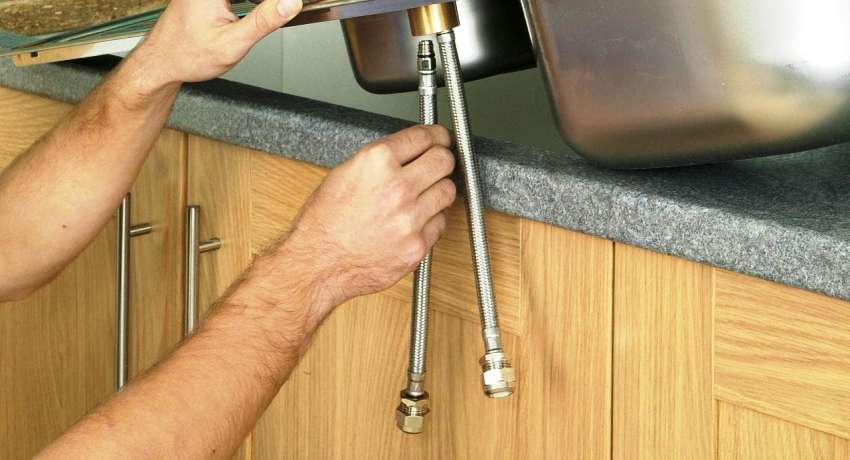
Perhaps it is worth focusing on the eyeliners. Keep in mind that:
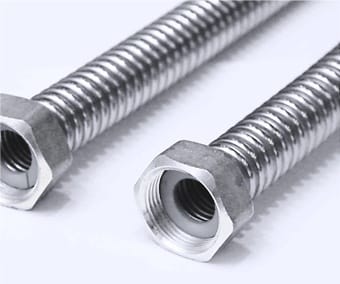
- Eyeliners are needed so long that they do not break, but bend in the form of a semicircle, that is, they should not be too long or, conversely, short in tension. The most suitable length is 86 cm;
- If the factory eyeliner is too short, then it is better not to try to build it up, but to buy a new one;
- In addition, do not buy silumin hoses, especially if you bought a silumin mixer - at least the connections must be reliable;
- Installation of flexible connections is easier than connecting rigid ones, but they are considered less reliable, so it is better to install them together with faucet taps;
- In a set of eyeliners, there must be gaskets;
- Replacing an old faucet in the kitchen most often involves replacing old hoses, because they also wear out.
Design choice
Each mixer model is characterized by the presence of certain design features.Practicality is distinguished by single-lever products. This design allows you to adjust the flow rate and temperature with a single lever. Faucets with two valves are less practical, but fit perfectly into the classic kitchen interior.


Some models are equipped with a special motion sensor, they are classified as non-contact products. When you bring your hands to the mixer, the sensor is triggered and the water supply starts. For the kitchen, this option cannot be called suitable for solving the question of how to install a faucet in the kitchen, since it is very often necessary to draw water into various containers.
The main factor affecting the cost of mixers is the alloy used and the brand of the manufacturer. The most affordable products are made of silumin and other cheap alloys. Such mixers have an attractive appearance, but quickly become unusable. This is due to the fact that the material itself is prone to cracking and quickly turns into crumbs.
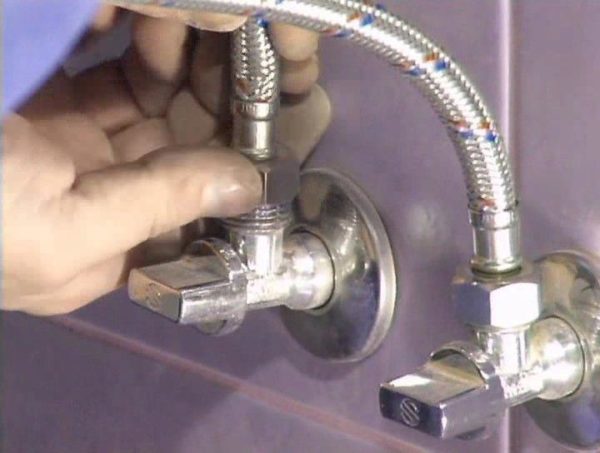
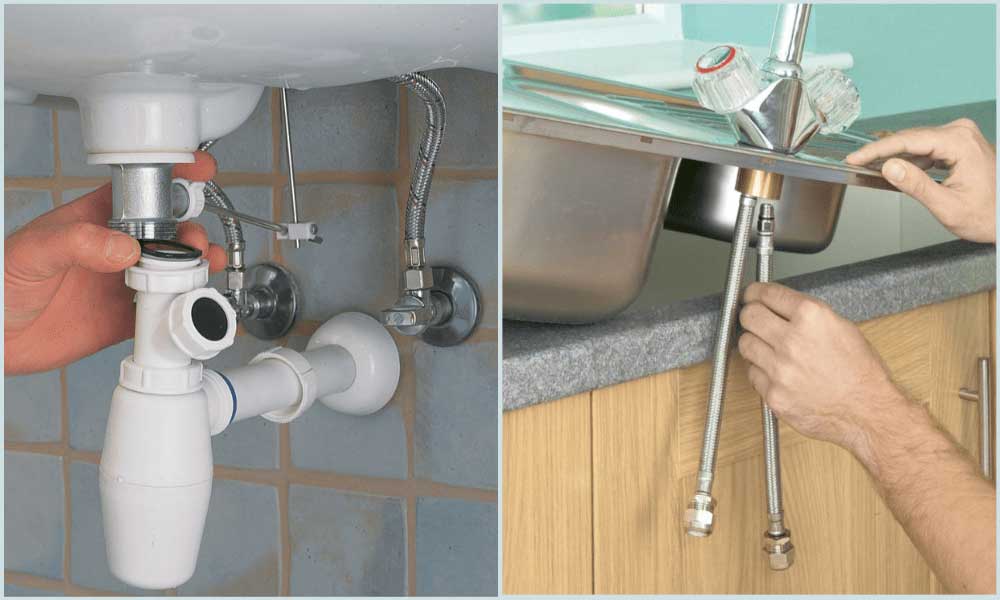
Connecting communications and checking tightness
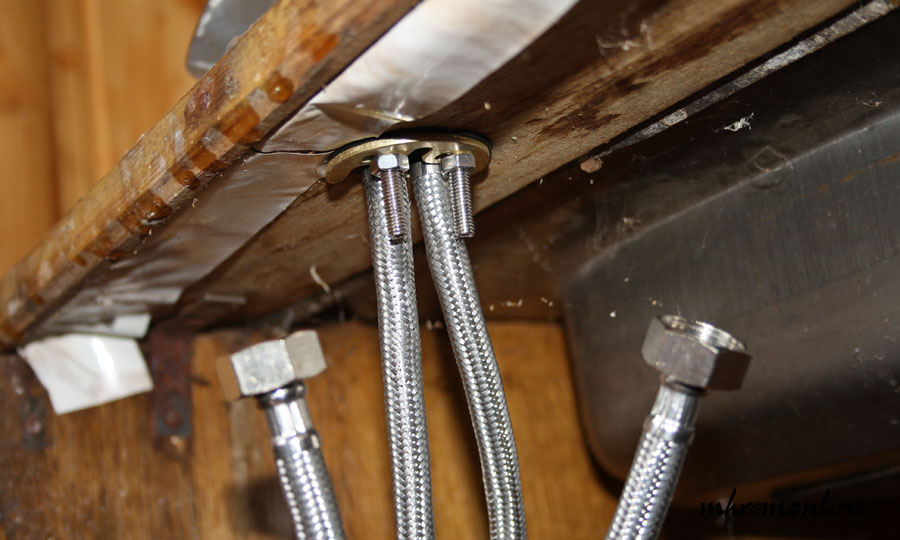
They start connecting by screwing the eccentrics, these elements are designed to connect the mixer to the water pipes. By setting the distance between the axes to about 15 cm, you can achieve a minimum formation of condensate on the pipes. It is this gap that the manufacturer sets when most wall mixers are produced. For tightness, the thread must be wrapped with linen or synthetic tow.
At the next stage, gaskets are installed, which are equipped with almost every mixer.This element can be silicone, paronite, rubber or made of other polymeric material. The gasket is inserted into the body nuts to provide a tighter fit to the eccentrics.

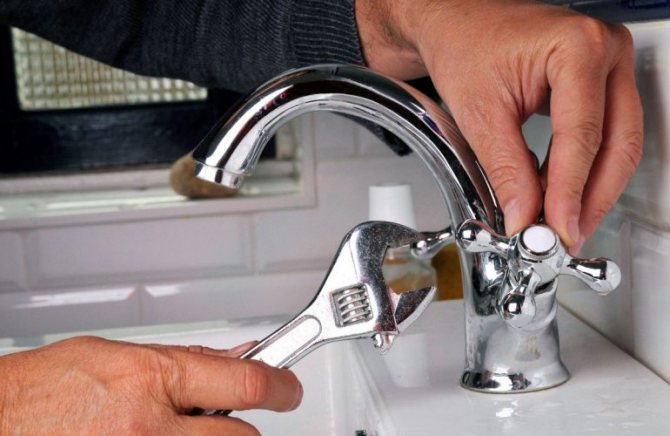
The final event is the tightening of the nuts, first they are tightened by hand, and then tightened with an adjustable wrench. In the process of tightening, it is not recommended to apply great efforts so as not to break the threads on the nuts.
Installing plumbing equipment in the kitchen and connecting the faucet to the sink cannot be called a difficult job, so a simple home master can complete the installation of the product. For high-quality installation work, you must have at hand a set of necessary tools and materials, follow the recommendations of professional craftsmen and follow safety rules.
It should be noted that if the sink had to be dismantled to install a new faucet, then it should be attached to the countertop or a separate cabinet using silicone sealant.
We fix the sink
When connecting hoses, do not overtighten the fasteners.
It will be much more difficult to do this work in the case of metal-plastic pipes. To begin with, it will require you to prepare them, determine the length and bend, and then fix them in the fittings.
In addition, it is necessary to connect the sink to the sewer pipe, reinstall the siphon with the corrugated pipe. Next, you will need to carefully inspect all connections at the first connection to eliminate the possibility of leakage. This happens when the installation sequence is violated.
Be sure to check the operation of the new mixer without putting the tools away
As you can see, even a novice master will be able to cope with the installation of the mixer.
It is only important to follow all the instructions and do not tighten the hose fasteners too much. In any case, upon completion of the installation, it is necessary to check the functionality of the system
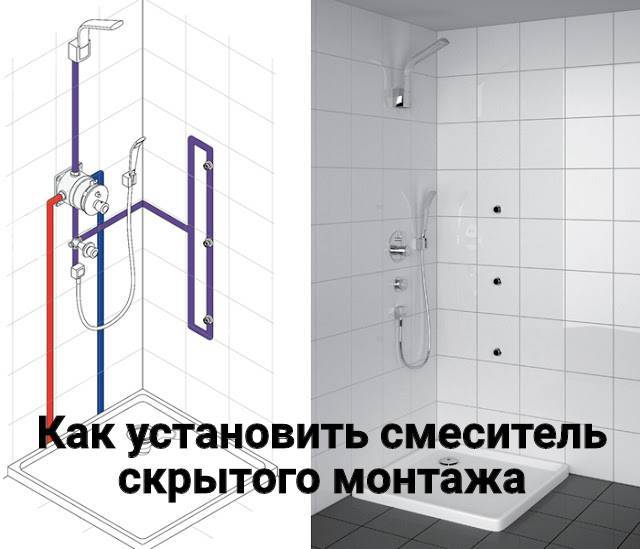
Mounting the device on a wall surface
Mounting the faucet on the wall surface Mounting it on the wall can be considered an actual and popular way to install the mixer. The device does not occupy a large area, and is also able to be located at different heights. A pleasant view is also caused by the absence of pipes and components that are hidden in the walls.


To install such a crane, you can use different types of pipes. Special parts such as couplings, tees and corners will help ensure that their dimensions and mixer match. Special fittings are available for some situations.
The main difficulty in installing the mixer is the correct installation of the plumbing and sewer systems, the installation of adapters and fasteners. They can be of several types - valve, cartridge, with a bending and solid spout. For flexible type, a wide choice of location is possible. A solid is characterized by a limitation in position and angle of rotation. Any wall faucets are distinguished by ease of use, interesting design and build quality.
Installation takes place as follows. Linen thread should be wound on the cutting of the supply pipes and the eccentrics should be screwed. The axial distance between the pipes should be 15 cm. If there is no match, turn the eccentrics and set the required distance in relation to the surface.
The installation of the faucet should, as a result, completely cover the connecting fasteners and defects on the wall surface. In the event of a gap, it will be necessary to shorten the eccentrics to the desired dimensions.
The next step is to fasten the nuts, having previously sealed them with the gaskets supplied with the device. Tighten first by hand and then with a wrench.
When doing this, be careful not to damage the threads. Tightening of connecting places can take place at any time, depending on the need.
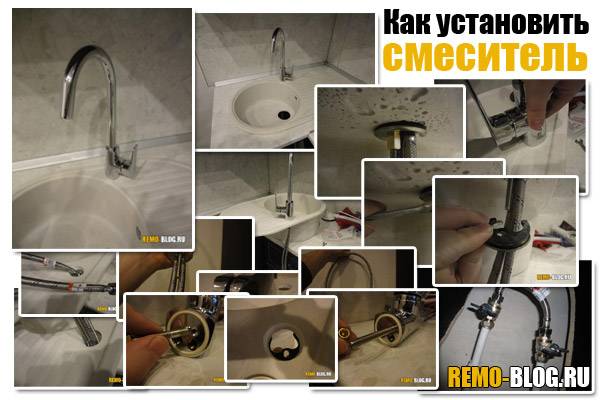
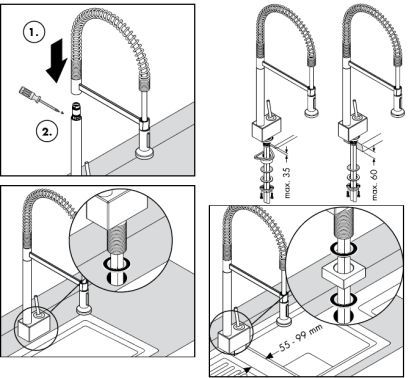
How to install a countertop faucet
For this method, in addition to the devices described above, you will need the following:
- electric jigsaw;
- drill;
- set of drills.
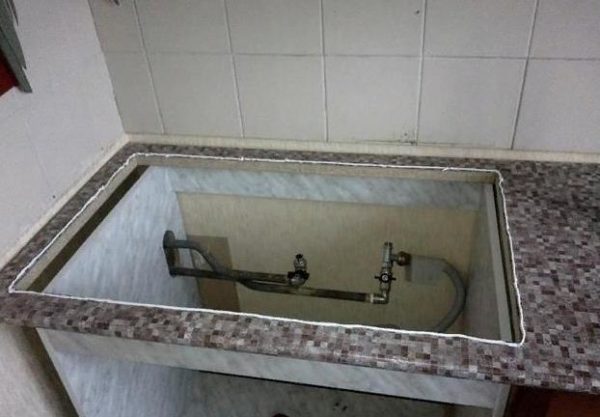
The installation method is practically no different from the previous one. Only in this case it is not necessary to dismantle the sink. Installing the faucet in the countertop is different, the need to make a hole in the countertop itself.
For installation in the countertop, it is necessary to make a hole that is suitable in size. Outwardly, it should look like a similar hole in sinks.
The choice of location for the hole should be based on practical recommendations:
- water should not fall on the countertop while using the mixer;
- it should be convenient to use the valves / lever;
- the spout should be located relative to the sink according to the recommendations presented at the beginning of the article.
First you need to make markings along the contour of the base of the mixer, using a pencil. Using a drill, drill four holes at the corners of the drawn perimeter.Then saw through a hole with a jigsaw through which it will be possible to stretch the eyeliner and insert the threaded pins. The cut must be cleaned of sawdust and clean the edges with sandpaper.
It is important not to make the hole too big. Otherwise, the pressure ring may not be large enough to cover the entire hole.
Further, the sequence of actions remains the same as when installing the mixer on the sink.
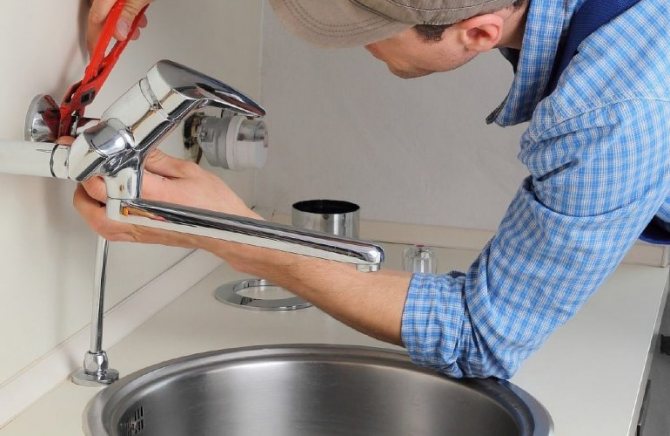
Preparatory work and dismantling
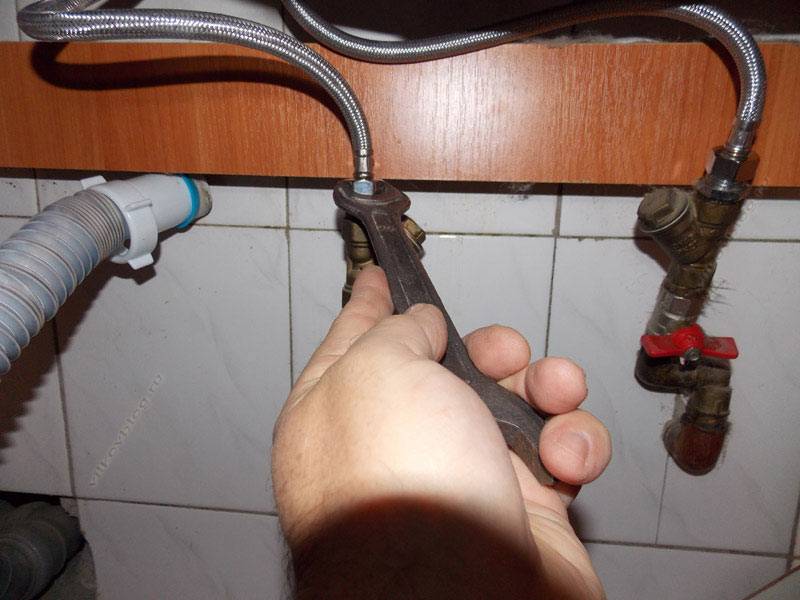
Before undertaking the repair of any plumbing, the mixer is no exception, it is necessary to turn off the supply of cold and hot water. It is not necessary to block the riser in the entrance, it is enough to use the taps that regulate the water supply to the apartment. If there are valves that regulate the water supply only to the kitchen, you can limit yourself to them. Immediately after this, both mixer taps must be opened to balance the pressure.


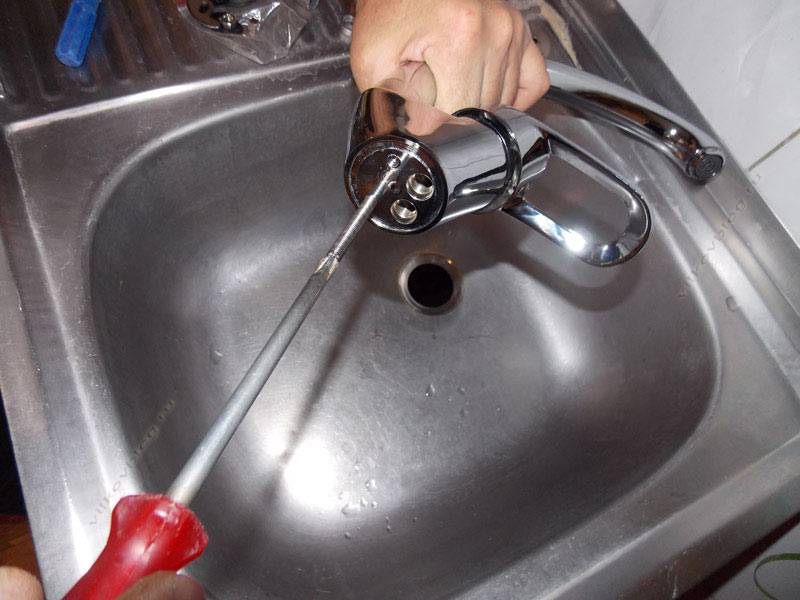


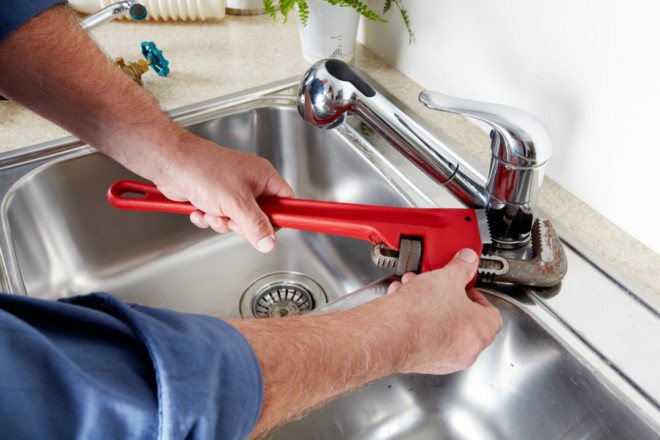
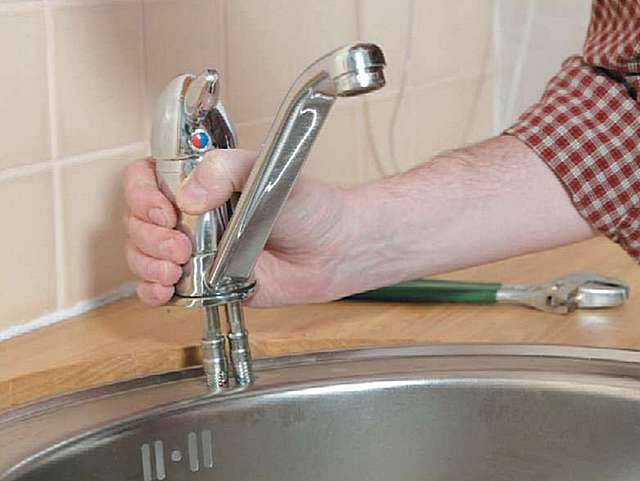
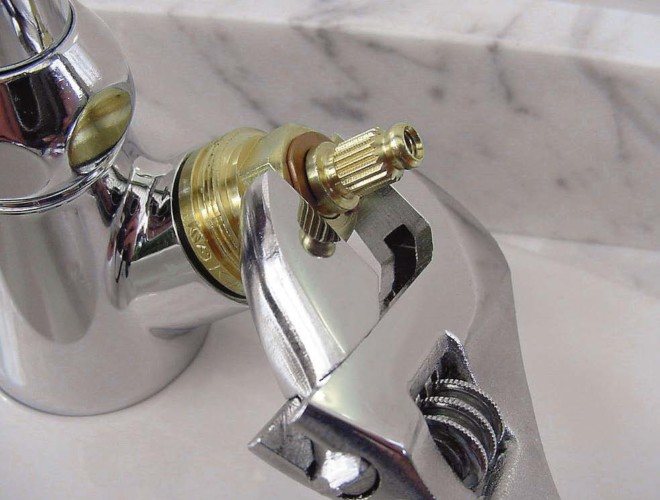
After that, you can unscrew the supply hoses. The water accumulated in them is poured into the basin, allowed to drain completely. The time has come for the most difficult thing - you need to unscrew the nuts holding the old device and dismantle it. At first glance, this is simple, but in practice, everything is far from it. Dismantling the mixer is associated with a number of difficulties:
- narrow space between the wall and the bowl;
- extremely uncomfortable posture for working with a key;
- rust and plaque on the thread.

It is extremely inconvenient to work in a cramped space, you can’t get close to the nuts with a wrench, if the thread is oxidized, it’s easy to “lick off” the edges. This is a problem, but you need to remove the mixer, therefore, you will have to look for a way out. In some cases, this will be the dismantling of the sink. It is removed simply, you just need to disconnect the sewer drain hose and walk around the perimeter with a sharp object, a knife or a screwdriver.
It is enough to take out and turn the sink over, and most of the inconvenience will go away by itself. You can slowly inspect the connection in the light, choose the optimal dismantling strategy.
If everything is very bad, if the connection has “grown together”, you will have to take on the grinder
It is important to work with the utmost care so as not to damage the thin metal
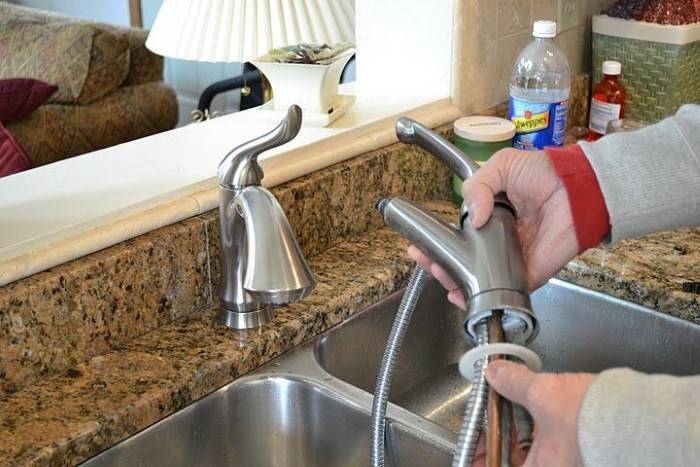
Pull-out spout for kitchen faucet
To increase the working area, some modern faucets are equipped with retractable shower heads. What is this unit? Inside the faucet spout there is a flexible hose with a cap that is fixed to the base of the spout. If you need, for example, to fill a bucket or a large pot with water, so as not to raise the container to the sink, the cap snaps off, extending the spout up to 1 meter.
Looking for large kitchen utensils, it will be interesting to read: How to choose a pan: tips for housewives
The showerhead of this spout switches between aerated and powerful shower jets. To adjust the flow, just press the button on the body. At the end of the work, the hose automatically retracts back into the spout.


To economically provide the kitchen with hot water, read: How to choose the right boiler
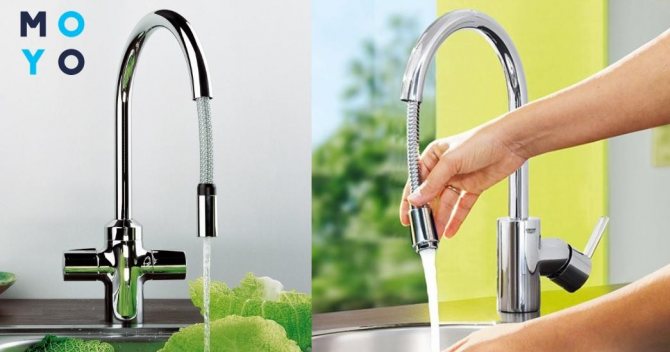
Such a high-tech option will also be convenient if there are several sinks in the kitchen. In this case, you can not buy a separate faucet for each of them, using just one mixer installed in the middle, for example, this one - Franke Novara-Plusc.


