- Plastic window installation technology
- window measurements
- Opening preparation
- Visor installation
- Installation of a plastic window
- The procedure for obtaining permission to glaze a balcony or loggia
- Who to contact
- How to get a glazing permit
- Sash opening method
- Swivel
- Folding
- Tilt and turn
- Sliding
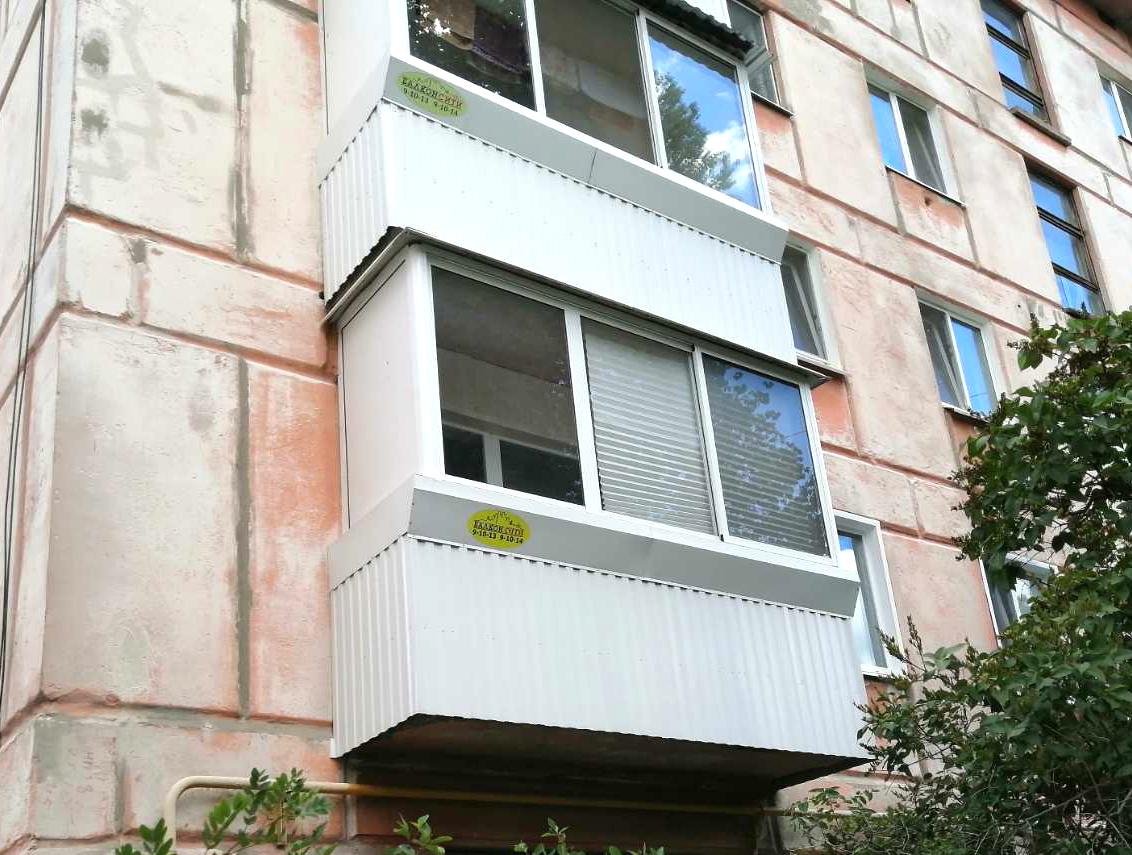
- Installation on a closed balcony
- Which windows are better to choose for a loggia
- Installation
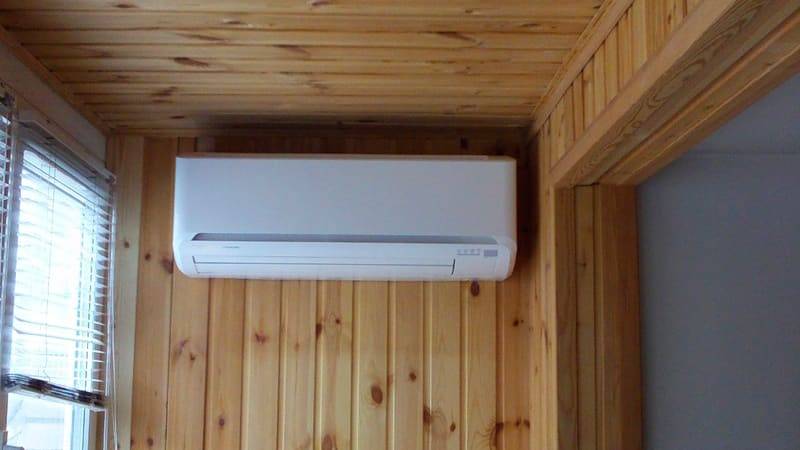
- indoor unit
- outdoor unit
- Installation on a glazed loggia
- Some installation features
- Choice of mounting location
- Consequences of incorrect installation
- Installation details
- Installing an air conditioner on a glazed balcony or loggia, features | Own climate
- Features of placing the outdoor unit on a glazed balcony:
- The advantages of placing an air conditioner on a glazed loggia:
- How to fix frames
- Fixing corners
Plastic window installation technology
Installing plastic windows on a loggia or balcony is not an easy task, but it is quite doable. When deciding to save on installation and perform this process yourself, you should carefully familiarize yourself with the technology of work. How to install plastic windows according to GOST, see this video:
window measurements
Start replacing windows by measuring them.This process must be carried out very responsibly. The order of windows in the company chosen by you is possible only after exact measurement of the future window.
So, the correct process of measuring windows is based on measuring distances in three places. These are the two extreme points of the fence and in its middle. Since the opening is never perfect, several measurement options are needed to determine the dimensions of the future window. The smallest value is taken as the basis.
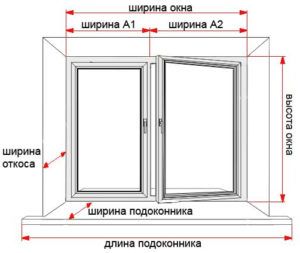 Window measurement scheme
So, the basic rules for taking measurements:
- The width of the window structure is determined by the length of the railing on which the window will be installed. From the value obtained, 60-70 mm should be subtracted on each side. This provides space for mounting the connecting profiles.
- The height of the window is determined by the distance from the railing to the upper ceiling. At the same time, do not forget to reduce the values by 25-30 mm.
Opening preparation
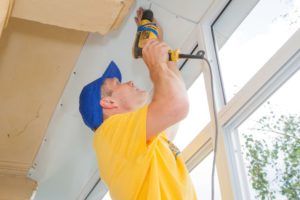
 Before starting the installation of new windows, remove the old sashes and dismantle the window frames
After the measurements are taken and the windows are ordered, we begin preparing the opening for the installation process. To begin with, the old device is dismantled. Work must be carried out very carefully and to prevent breakage of the fence.
- glass is removed from old frames first. Do this with a chisel. First, the vertical glazing beads are removed, then the upper and lower ones, after which the glass is removed;
- further, window sashes are removed from the hinges;
- then, in some places, the frames are sawn and its parts are carefully broken out.
Visor installation
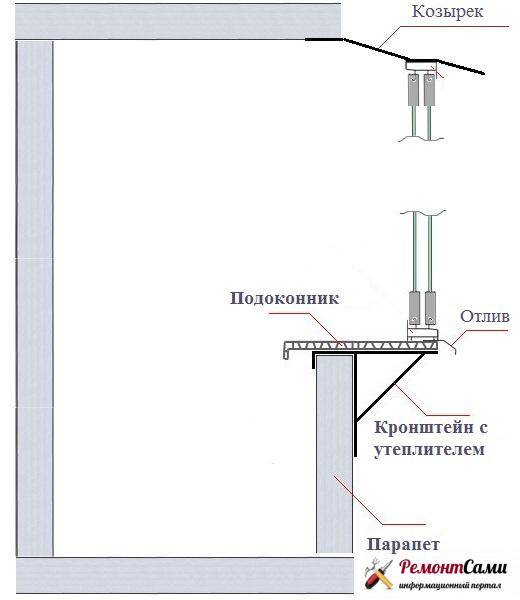
 Before installing the structure, it is necessary to determine the suitability of the old visor. If its further use is possible, then it remains to check its stability and, if necessary, strengthen it.If it became necessary to equip a new visor, then this process can be performed according to the following scheme:
- The rear frame is installed first. It is welded from metal corners. Then we make holes in it for anchor bolts. In the upper part of the frame, holes are made in increments of 40-60 cm, and in the lower part it can be increased.
- Next, the frame is pre-installed in its place, check the level and mark the places where the holes fall. We also mark the line for placing the upper part of the frame.
- At the next stage, at the marked points, we make holes for fasteners in the concrete floor, and along the line we make a strobe. The depth of the strobe must be at least 20 mm.
- Next, the rear frame is attached to the wall, and elements of the slopes and crossbars are attached to it.
- We prepare the roofing material for the visor. In most cases, galvanized stainless steel is used for this. The visor is installed with the edge into the gate, and then it is attached to the frame by welding. Shtroba close up with cement mortar. For more information about mounting the visor, see this video:
Installation of a plastic window
The installation of plastic windows on the loggia begins after the visor is installed, the profiles are connected and the anchor holes are prepared.
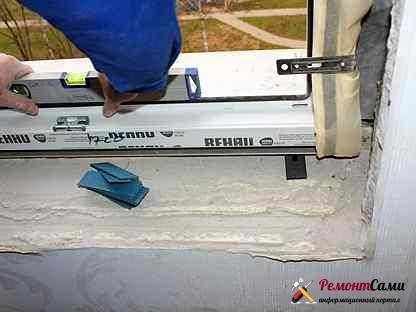
- a window structure is installed in the prepared opening of the loggia, it is pre-fixed with gaskets and the gradual leveling of the profile by levels begins. If in some places the opening is uneven, more temporary pads should be placed;
- after everything is perfectly set, the profile must be securely fixed. Along the entire perimeter, except for the lower part, we attach the profile with dowels, and at the bottom with anchor bolts;
- a drain is installed outside the lower part, and then we proceed to blowing out the joints and seams with mounting foam;
- further, the installation of the window is continued and the sash and double-glazed windows are mounted on the profile. The functioning of the doors and installed fittings is checked. adjustment is being made;
- The final step is the installation of the window sill. It is attached with self-tapping screws, and the space between the profile, the railing and the window sill panel itself is blown with foam.
It is necessary to set the profile as accurately as possible in terms of levels.
 Installing a plastic window on a loggia is quite difficult and requires a lot of labor. There are no trifles here and it is advisable to carefully follow all the above tips from professionals.
You should also find an assistant for yourself, since it will not be easy to complete some steps alone.
The procedure for obtaining permission to glaze a balcony or loggia
The sequence of obtaining is regulated by Article 26 of the LCD, which defines the necessary documentation.
- Agreed project documentation.
- Recorded consent of the general meeting of residents (in case of affecting common house property).
- An extract from the house book and written approval of those living with the tenant (if the housing is provided under a social tenancy agreement).
- Registration certificate.
- Extract from the USRR or certificate of state registration (may be requested additionally).
- Those living in houses classified as monuments of history, culture, architecture will need the conclusion of the relevant organizations.
Who to contact
You should start by ordering a technical passport for an apartment at the BTI. It contains part of the initial information for design work:
- year of construction;
- characteristics of the bearing and enclosing structures of the building, including the degree of physical deterioration;
- plan of the apartment;
- view from the facade.
In addition, the BTI has information about previously executed redevelopment (reconstruction) in the MKD. Having learned which, you can contact the design organization that has already developed standard projects. This will significantly reduce the time and cost of manufacturing design and estimate documentation.
If the upcoming work affects the bearing, enclosing building structures, a technical opinion on their condition will be required. For him, you can contact the organization that designed the house.
If the building belongs to cultural heritage, you need to get a task and a work permit from KGIOP.
To make a project, you need to contact legal entities or individual entrepreneurs who have been issued a permit by the SRO to perform design work (providing your own project, made by hand, is not quoted).
First you need to independently draw up a design assignment, indicating in detail what work should be provided.
The project is coordinated with the management company, which issues a certificate of its compliance with the general house architectural solution. Here is an extract from the house book.
Important information! Contrary to the information available on many sites about the need to coordinate the project with the State Fire and Consumer Supervision, this is not necessary!
The subdivisions of the State Fire Supervision Ministry of Emergency Situations do not supervise redevelopment and projects of this kind are not coordinated. The function is entrusted to local governments and supervision in construction. Structural divisions can be contacted for advice in the field of fire safety.
Legislative legal acts do not regulate the duties of consumer supervision for supervision of the construction and reconstruction of facilities. From January 1, 2007, it is not necessary to apply for approval of redevelopment projects in multi-apartment residential buildings. This function is entrusted to local governments (Article 14 Part 7 of the LCD).
How to get a glazing permit
Interdepartmental commissions have been set up to help local governments that decide on the possibility of glazing. They include representatives of interested departments who have passed certification for the right to issue expert opinions to the project. Therefore, with a package of documents, you need to contact the Administration in any of the following ways:


- Traditional - appearing in person or sending a legal representative.
- Apply through the MFC.
- Register and submit it on the portal of the single reference and information resource "Gosuslugi".
Originals or notarized copies of documents are provided. The approval process takes 45 days. After the decision is made, within 3 days, permission to redevelop and glaze the balcony is issued to the applicant. In case of no-show, it is sent to the postal address or to the MFC.
You can start working. Based on the results, an Acceptance Certificate is drawn up, one of the copies of the approval body is sent to the organization for state registration. On its basis, after measurements, a new registration certificate is made.
If, in a particular case, the question remains open, “Is it possible to glaze a balcony without paperwork, or immediately start preparing permits?”, The advice is to contact the authorities.If your case does not require additional approvals, you can safely proceed to glazing.
Sash opening method
It would be a mistake to think that the balcony frame can only consist of deaf, that is, fixed elements. In order for window panes and frames to be washed or serviced, opening sashes must be installed. They also provide the necessary ventilation. There are several types of opening doors.
Swivel
The mechanism ensures the opening of the frame inside the room. When fully opened, it rotates almost 90°, giving access to the outer part of the double-glazed window and the blind elements adjacent to it. The swivel system is inconvenient for ventilation. When fully opened, it gives too much air flow, it has no other positions. Therefore, comb-type holding devices are produced. Micro ventilation is not provided. If the sash has to be opened frequently, over time it sags under its own weight. It can be adjusted and returned to its previous position, but the number of such adjustments is limited. Hinges and fittings of swing doors break more often. In addition, swivel structures are considered the most dangerous, since people or pets can fall out of them.
ShutterStock
Folding
The lower part of the double-glazed window is firmly fixed. The top one can recline into the room, that is, open at a slight angle. It is very convenient for organizing ventilation and is completely safe. It is impossible to fall out of such a window. The main disadvantage is that you cannot wash the outside of the glass.
Tilt and turn
Combine the functions of both systems, which is very convenient. Mutually level their shortcomings.Tilt-and-turn sashes are equipped with several opening modes, it is possible to organize micro-ventilation. They are easy to clean and maintain. They are considered a good choice for decorating balconies.
Instagram interior_remont_idea
Instagram interior_remont_idea
Sliding
The sash does not swing open and does not recline, but moves along a horizontal guide. It goes behind the adjacent element, which saves space. They are often chosen when looking for the best way to glaze a balcony in Khrushchev. Features of the sliding mechanism do not allow making it airtight. Therefore, for insulated loggias, for example, it is not suitable. Most often, sliding frames are made of aluminum profiles.
ShutterStock
Instagram interior_remont_idea
There are other types of frames. With overpanel, hanging, folding, swivel, etc. They are rarely used to solve non-standard architectural problems.
Installation on a closed balcony
If an external element is installed inside a closed room, for example, in a glazed balcony or loggia, then it simply will not have enough air for normal operation, and the air conditioner will begin to suffocate. This will lead to non-warranty damage and unnecessary repair costs. The exception is when the windows will be open all the time during the operation of the air conditioner.
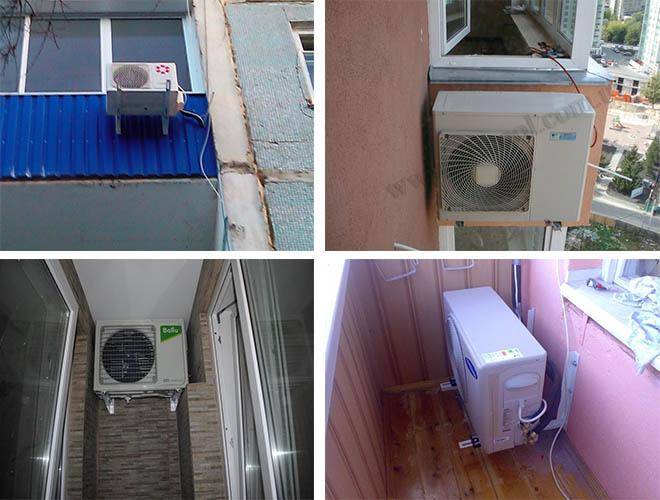
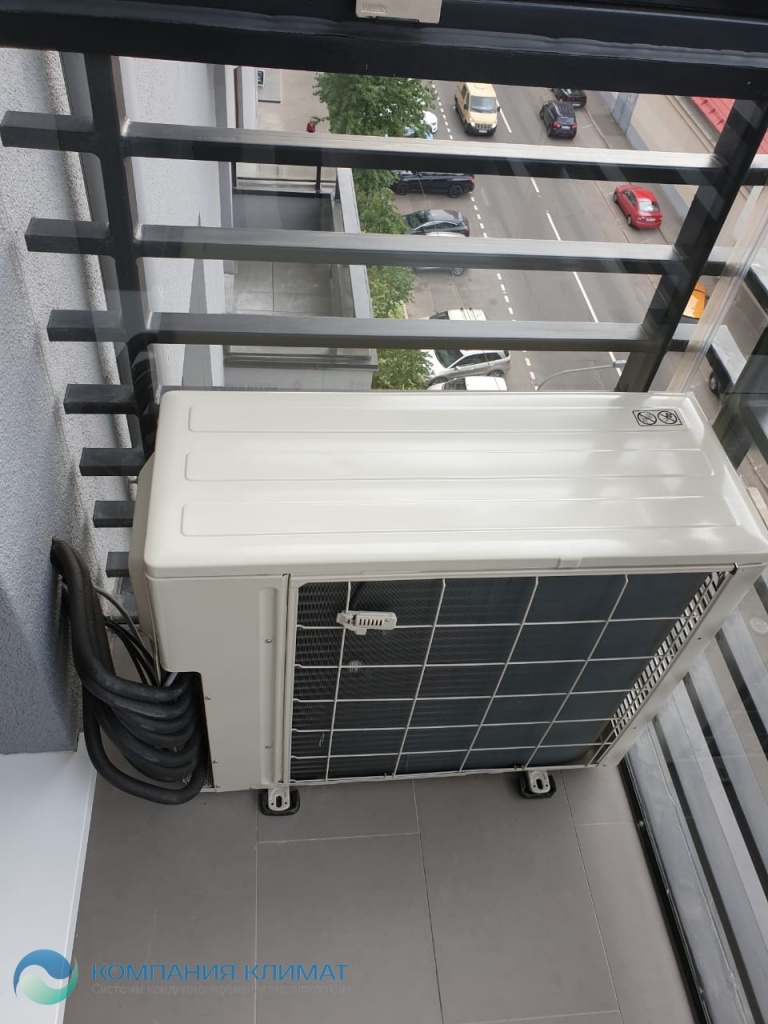
The most common mounting method is to mount the air conditioner on the parapet. Depending on where the balcony goes, the exact attachment point is also selected. If it faces a busy street, then it is advisable to install the device on the side of the parapet. If it is located inside the courtyard, then it can also be attached to the front part.An important nuance is the determination of the sunny side of the building - direct rays should be avoided.
For reference!
The weight of the unit, together with the mount and the visor, will be about one hundred kilograms, so you need to make sure that the parapet is strong enough.
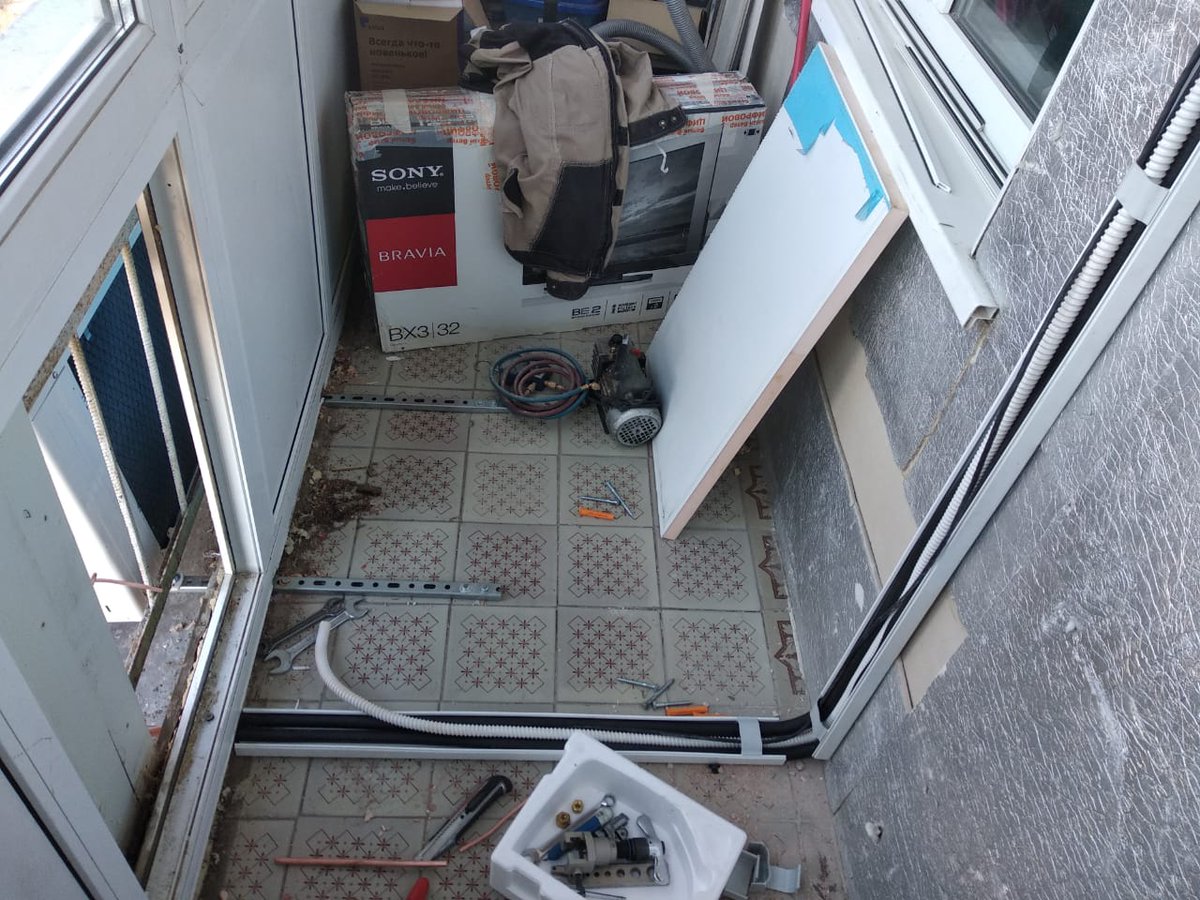
Actually the installation itself is divided into several simple steps:
- Holes are made in the parapet for the outlet of refrigerant pipes.
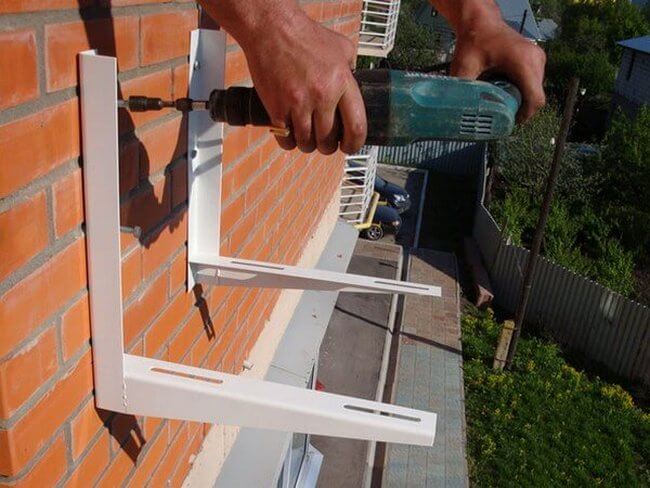
- There are several types of installation of the mounting system - if there is metal on the parapet, then the brackets can be welded to it. In the absence of metal, the fasteners are installed on powerful anchor bolts.
- Then the external unit itself is installed on them. There should be a gap of several centimeters between the elements of the building, the parapet and the body so that it does not overheat.
- The elements are connected by tubes. They should not be bent over their entire length. After installation, they are closed with a decorative plastic box.
- Freon starts up in the system and the air conditioner turns on.

Installing an air conditioner is not the most difficult task, however, it is strongly recommended to contact specialists for this work. They will help to correctly install all the elements of air conditioning and set up their robots, in addition, the responsibility for the performance of the air conditioner for the period of warranty service falls on their shoulders.


Which windows are better to choose for a loggia
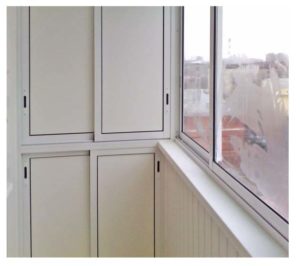
 Heat on the loggia is provided by windows with a high degree of thermal insulation
When starting to install glazing on a loggia, the question arises of how to choose the right plastic windows for this. It all depends on what functional load the loggia or balcony will carry subsequently.
To ensure a warm room, special glass is needed, which has a high degree of thermal insulation. It consists of a special alloy that has heat-resistant properties, which provides reliable protection against the effects of climatic conditions.
Cold glazing is suitable for a balcony used only in summer
In the case when it is not planned to change the direct purpose of the loggia, then the quality of the glass does not really matter.
The main thing is that it has soundproofing properties and protects the room from rain, snow and dust.
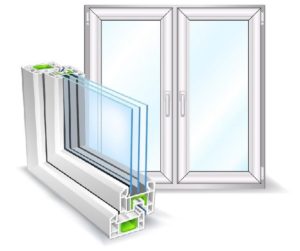
In addition to the quality of glass, we pay attention to the structure of double-glazed windows:
- for an ordinary loggia, you can purchase single-glazed windows;
- for warm - it is necessary to order two-chamber or three-chamber double-glazed windows.
Installation
Having decided on the optimal location, you can proceed with the installation of the indoor and outdoor units, the installation features of which are described step by step below.
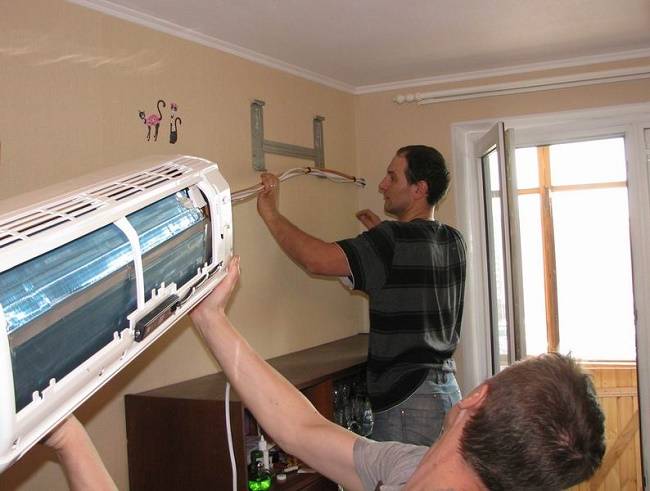
indoor unit
Mount the indoor unit in such a way that the length of the connecting route is as short as possible. There are a number of recommendations that should be taken into account during installation.
- It is not allowed to mount the inside of the split system opposite the bed or chairs - a direct stream of cold air will negatively affect human health.
- It is not recommended to mount the evaporator less than 10 centimeters from the ceiling. This will ensure the necessary air intake and efficient operation of the device.
- It is not allowed to install the equipment above cabinets, mezzanines or other furniture. Firstly, the device will not function correctly, and secondly, when turned on, it will blow dust off the surfaces.
The indoor unit must be placed so that it can be easily accessed for maintenance or repair. There should be a separate outlet nearby, to which other equipment will not be connected. The use of extension cords is not allowed - if necessary, remove the original power cable and connect a new one of a suitable length.
The installation process itself is as follows. A hole is punched in the wall for the output of the connecting line. Next, marking is done, after which a plate is mounted to install the block. A line of the required length is attached to the air conditioner itself, after which it is led out into the hole, and the indoor unit is hung on a fixed plate.
outdoor unit
The outdoor unit should be placed as far as possible in such a way as to shorten the length of the connecting line. Its installation also requires compliance with a number of rules.
- It is not allowed to place the outer part of the split system near windows, especially neighbors, because the noise during operation of the equipment can disturb people.
- The unit must not be exposed to precipitation or direct sunlight. Otherwise, a protective hood must be built over the compressor.
- Do not mount the unit near trees, because branches can get into the unit and damage it.
- There should be no gas pipes nearby.
- During installation, the drainage tube must be taken away so that water does not flow under the walls of the house. Also, do not allow liquid to flow onto the sidewalk onto the heads of people passing by.
- The unit must be placed so that maintenance or repair can be carried out easily.
If the unit is installed directly on the front or side walls of the balcony, their strength must be taken into account. If they are dilapidated, the walls should be further strengthened.
If possible, the highway should be fixed inside the balcony. This will protect it from exposure to high and low temperatures, precipitation and accidental damage. It is allowed to close it with a decorative box.
On a balcony or brick parapet of a loggia or balcony, the compressor is installed on brackets fixed with anchors. If the balcony is metal, corners can be welded to it. In some cases, a metal plate is applied from the inside of the parapet and brackets are installed with a through fastening. It should be borne in mind that the outdoor unit should not be placed close to the walls - gaps are required on the sides and back for natural air circulation.
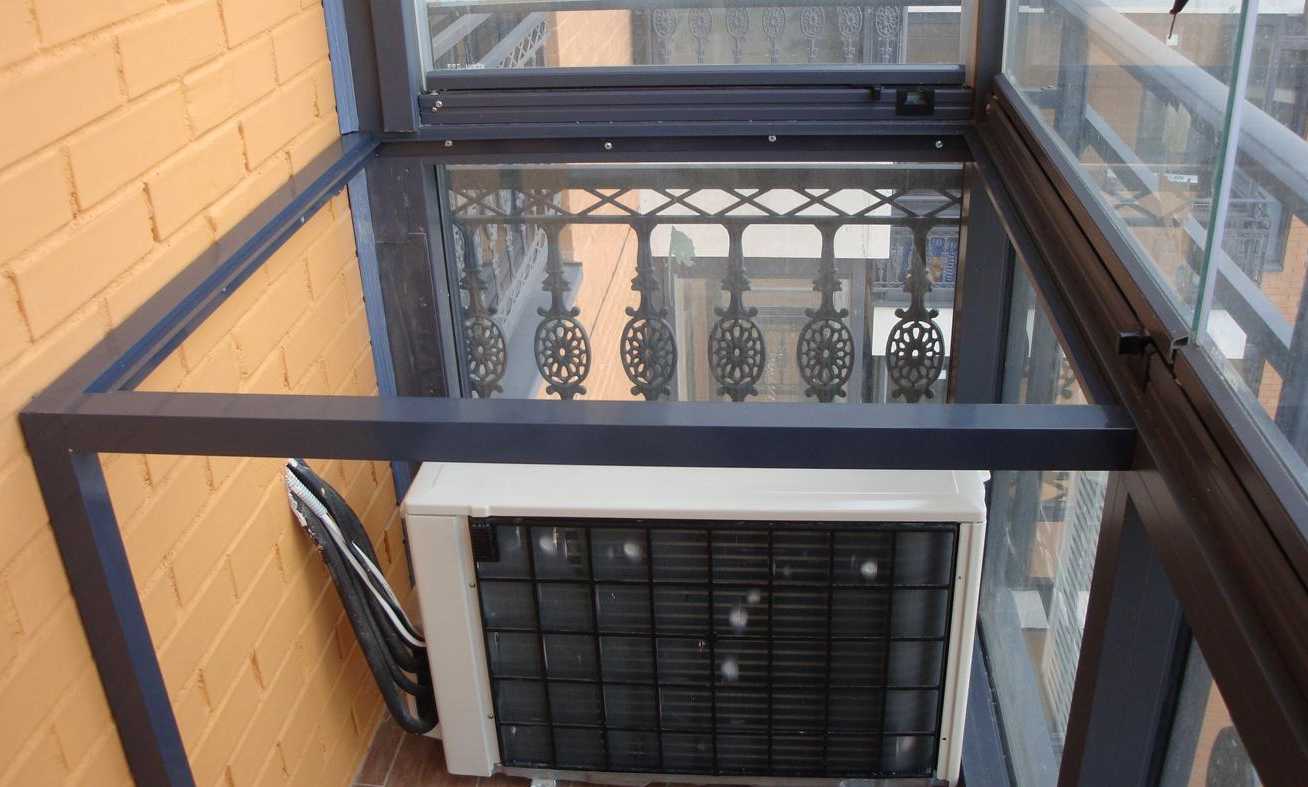
Installation on a glazed loggia
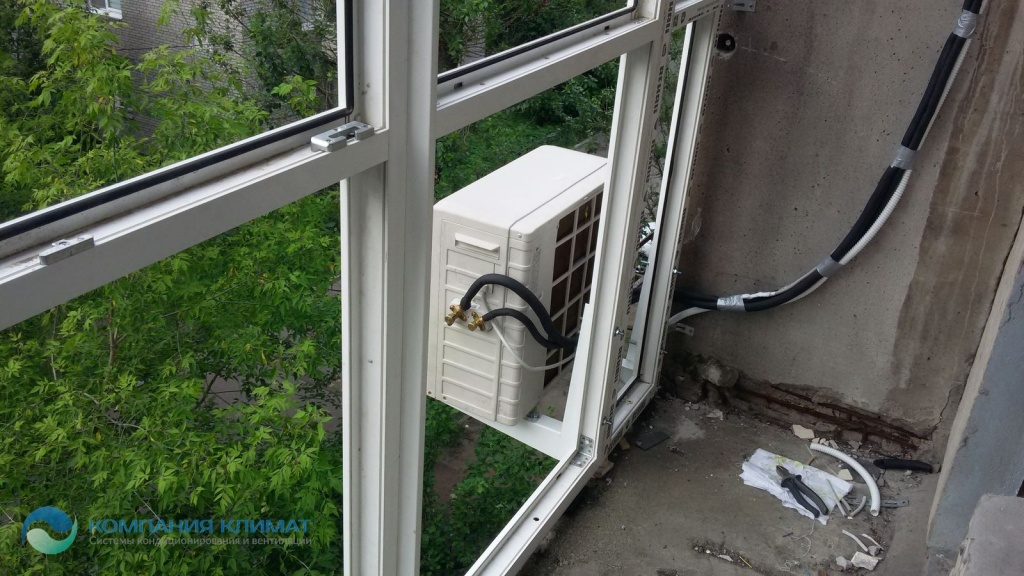
Despite the fact that the installation of an outdoor unit on a glazed loggia is not allowed, sometimes such installation is still performed.
With this type of installation, there is also a list of recommendations.
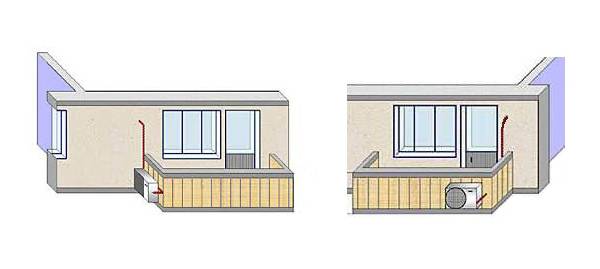
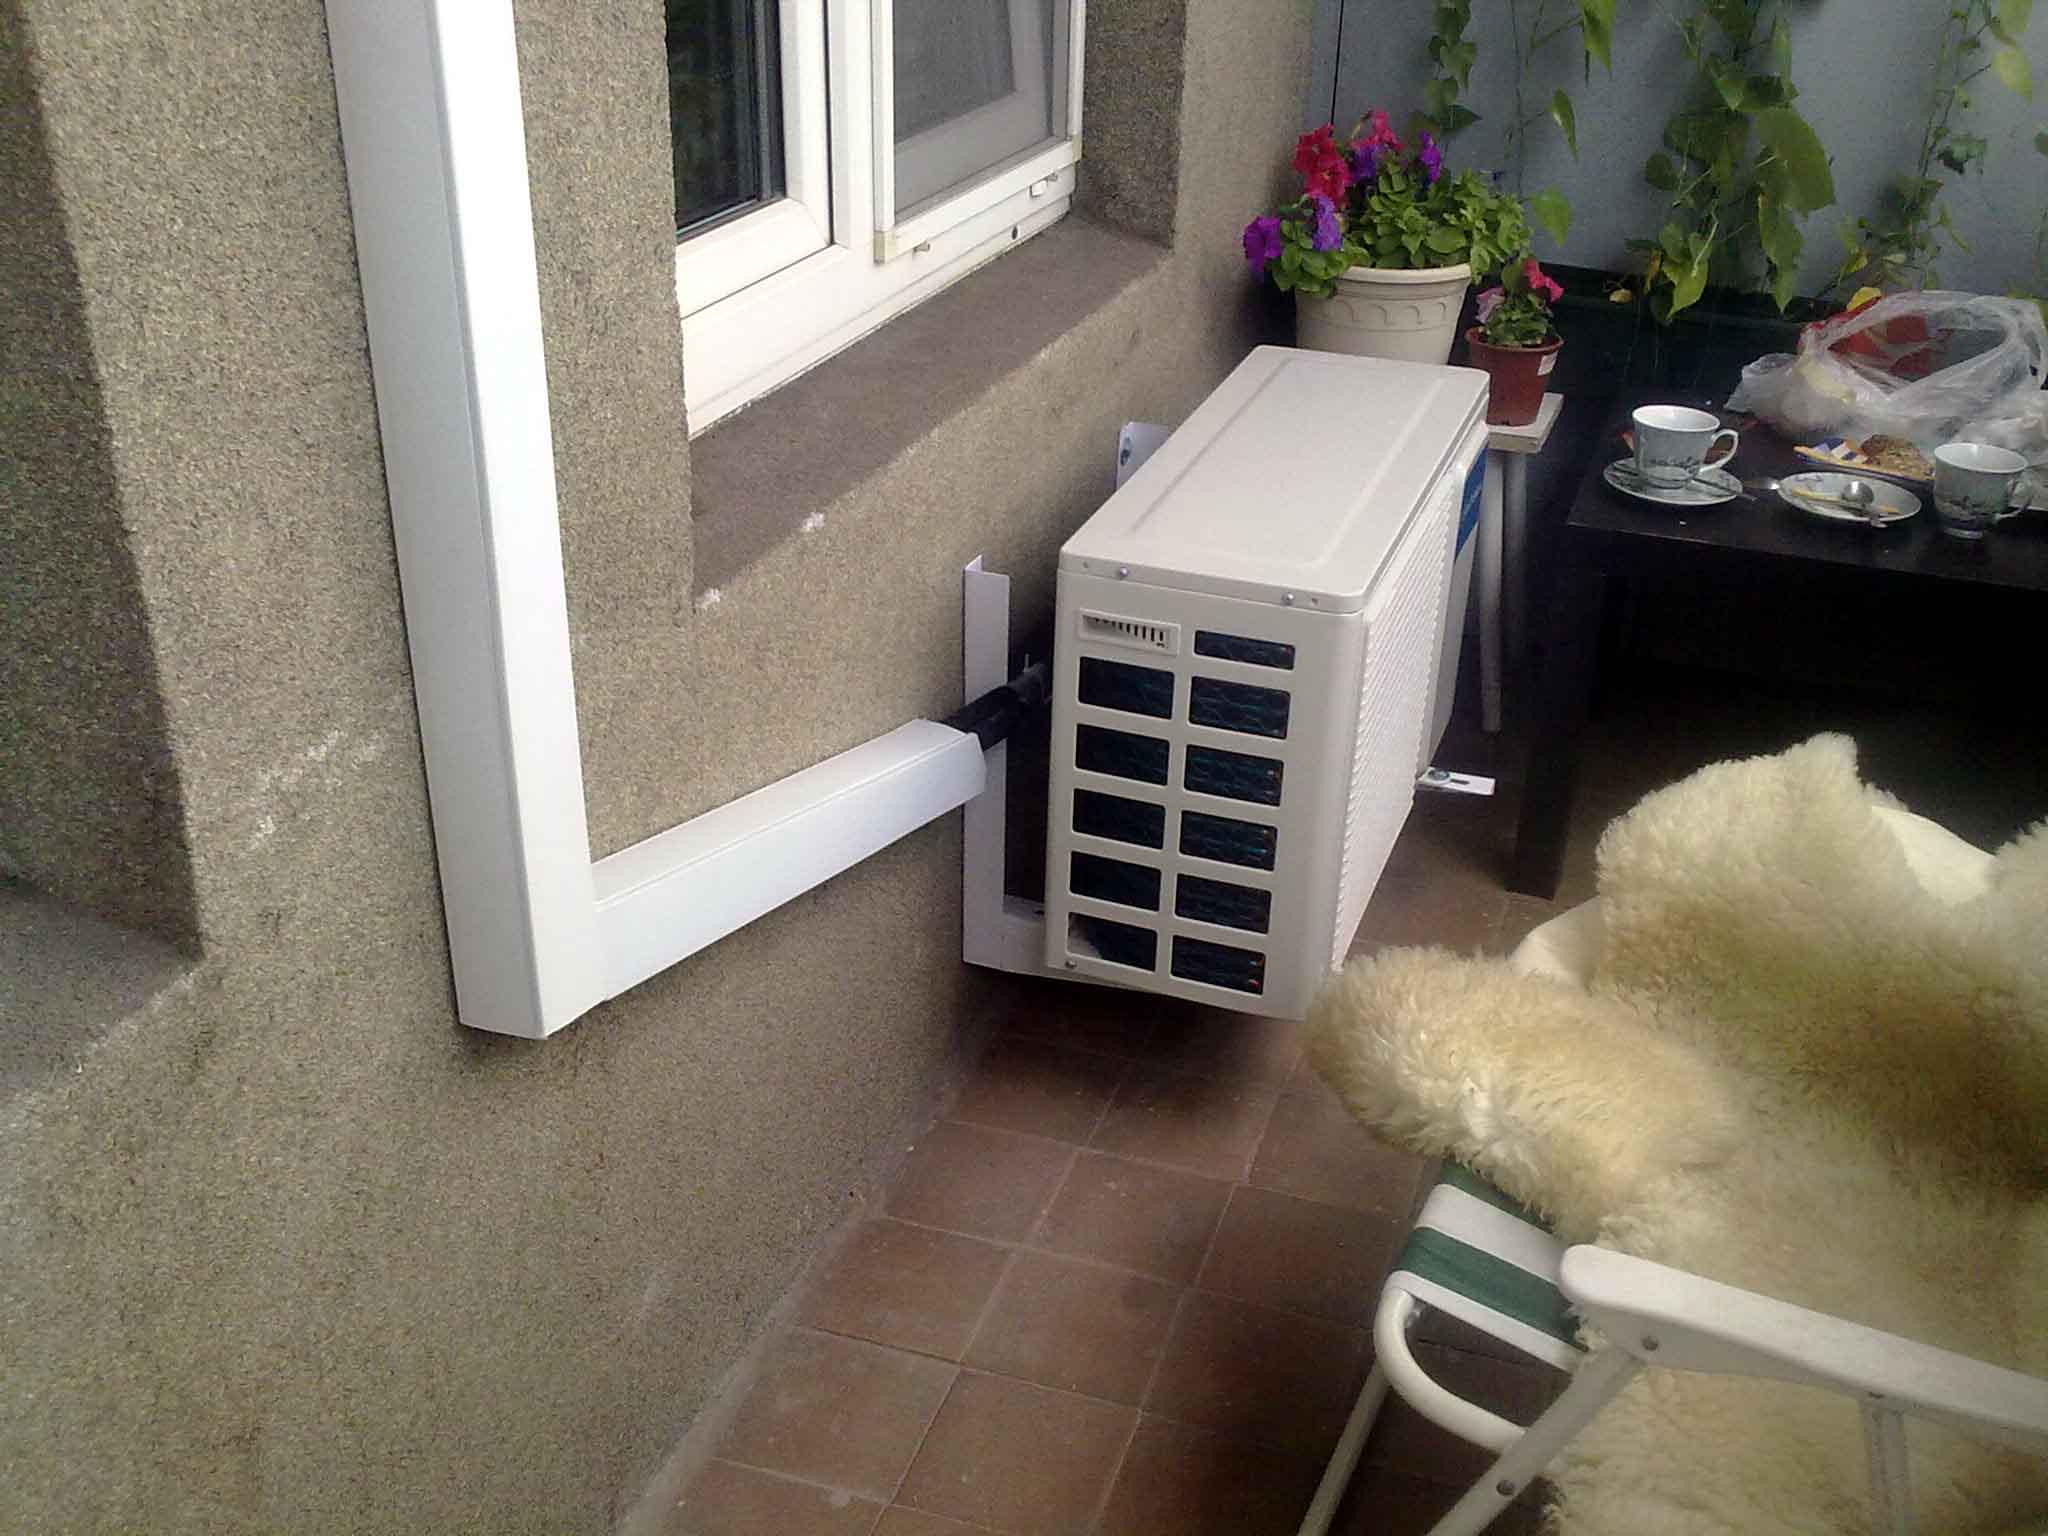
- If the installation of the air conditioner is carried out before the glazing of the balcony, you can order a special box for the outdoor unit, which will allow you to bring the heat out.
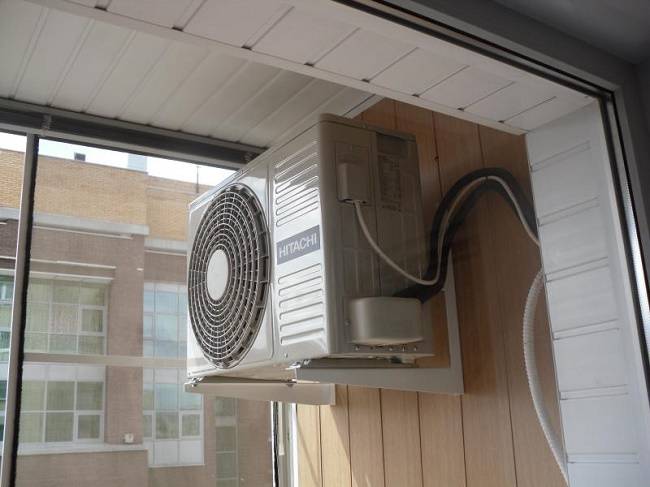
- To remove heat, the unit can be placed directly opposite the opening sash of the window so that hot air comes out.
- The air conditioner can be installed by making a cutout in the side wall for the outdoor unit. The device is inserted into it and securely fixed.
- When installing inside the loggia, you need to put a container into which condensate will be drained. It will be necessary to monitor its filling and regularly pour out the accumulated liquid.
- The best solution would be to connect the drainage to the sewer, but this can be too complicated depending on the layout of the apartment.
After the outdoor unit is fixed, the output line is connected to it, vacuum is performed, refrigerant is started, and then a test run is carried out. If the equipment is working properly, the hole in the wall is foamed to prevent heat loss and drafts.
Some installation features
So, the fact that the outdoor device of the split system in a glazed room should be mounted precisely from its outer side, it was clear. Now we will analyze in more detail the main nuances of its installation.


In the event that your loggia or balcony is not glazed, and you do not plan to glaze them for a long time, then you can install an outdoor unit right inside the balcony.
The installation of an outdoor air conditioner device can be done both on the front side of the balcony, and from its sides. At the same time, all communications necessary for the operation of the air conditioning system are carried out indoors using a plastic box.
Naturally, with an increase in the length of communications (drainage tube, metal pipes with refrigerant and electrical wires) that will be carried out in the loggia, the cost of installation work will increase. But, nevertheless, this method of installing a split system on a glazed loggia is the only correct solution from the technical side.
The material from which the balcony parapets are made does not matter in this case.Most importantly, before starting installation work, make sure that these parapets have sufficient strength and that they can easily withstand the weight of an external split system device.
The outdoor device of the air conditioner, depending on the manufacturer, can have a weight of more than 60 kg, precisely because of this, if you have a fragile old balcony, it should be strengthened before proceeding with the installation work.
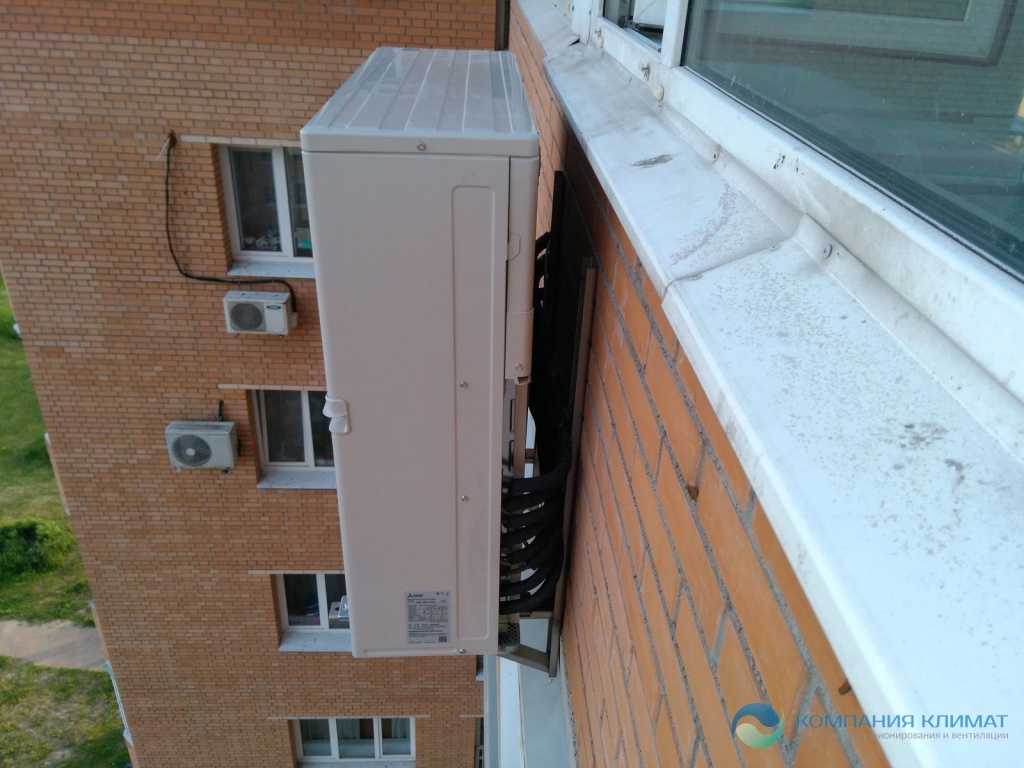
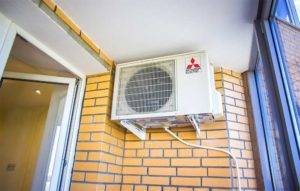
According to experts, it is best to install the air conditioner on the side of the parapet. An outdoor device installed in this way will not spoil the appearance of the facade of the building and will not create inconvenience if you decide to install flower boxes on the outside of the room or simply hang clothes to dry
However, it should be noted that it is very important to install the outdoor unit of the split air conditioner exactly on that side of the balcony, which is least exposed to sunlight.
Choice of mounting location
Before choosing a place for installing an air conditioner, it is necessary to determine the heat loss of the room, the minimum costs to maintain the most comfortable temperature. It is generally accepted to install an air conditioner on a balcony or loggia, since here you can provide free access during installation, as well as in further maintenance by service specialists.
To maintain the smooth operation and long-term operation of the split system, it is necessary to install it technically correctly.
There are two available options to install the air conditioning system on the balcony:
- If the balcony is not glazed, it is allowed to install the outer part of the equipment on it, since a sufficient supply of air from the external environment will favorably affect its functioning.
- It is forbidden to install the outer part of the air conditioning system inside the glazed balcony, because the lack of air will cause the device to fail quickly.
Before installing an air conditioner on a balcony, it is necessary to take into account a number of technical features and manufacturers' requirements. Experts advise not to mount the equipment on an unprotected wall in order to avoid damage from hail, rain, icicles. A more reliable installation site is a balcony. But, again, bad luck, it is impossible to install more than two outdoor air conditioning systems on it.
Therefore, the split system is perfect for mounting on a balcony, it consists of one outdoor device and several indoor ones. Such an installation will allow not to burden the balcony and constantly maintain a comfortable air temperature in the apartment, especially in the summer, when the sun is especially active.
Do-it-yourself installation of a split system on a balcony
When choosing an air conditioner, it is not necessary to buy an expensive system and clutter up the balcony, which always lacks space. It is necessary to turn to experienced specialists who will help you purchase a small, practical and reliable device.
Consequences of incorrect installation
There is a big oversight if you install an external air conditioning system inside the balcony. Indoors, especially in summer, its outer part will quickly overheat and, reaching 40-45 ° C, will turn off.This installation option will lead to a quick failure of the equipment.
Installation of a split system requires correct, step-by-step actions. It is common to install the outdoor part of the air conditioning system outdoors, i.e. on a non-glazed balcony or outside. With good ventilation, it will not overheat and last a long time.
When installing a split system, it is important:
- do not save on the length of the route;
- do not neglect the advice of experienced professionals;
- do not mount the system inside a glazed balcony;
- install away from direct sunlight.
Installation details
In order to install the split system without errors, you must adhere to strict installation rules:
- Mount the outer part of the system on the front side or on the sides of the balcony, as well as on the non-glazed loggia.
- Communications intended for air conditioning should be fixed in a plastic box and inside the balcony.
- Ensure the reliability and strength of the balcony and parapets, as the weight of the air conditioning system reaches more than 60 kg.
If the device is installed on the front side of a balcony or loggia, the length of the drain tube, metal pipes with refrigerant and electrical wiring increases. But the increase in communications does not affect the quality of the device, but significantly affects the cash costs.


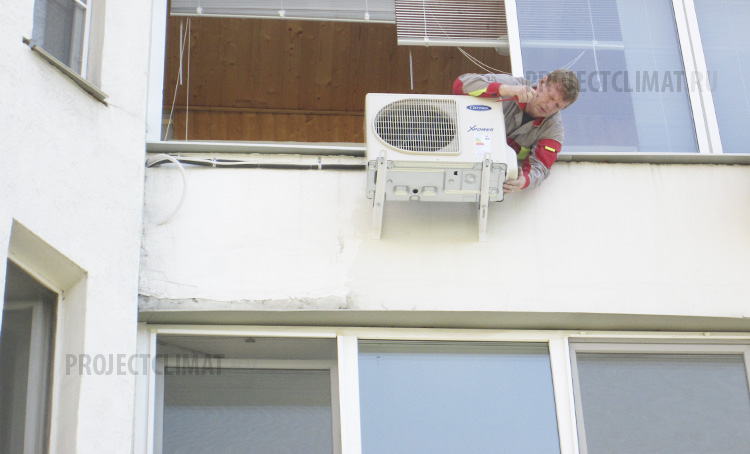


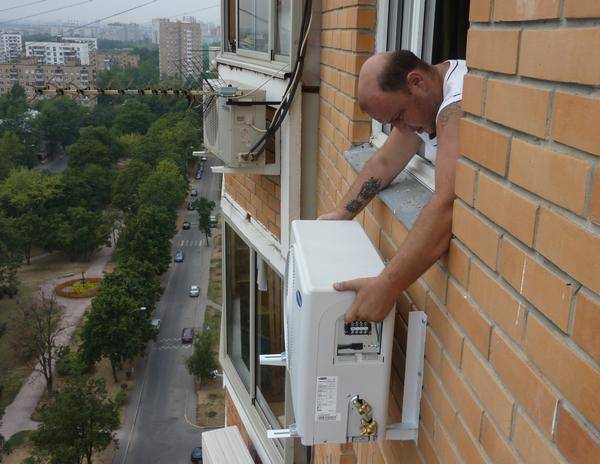
Installing an air conditioner on the facade of the house
Before starting installation work, you need to make sure that the balcony parapets and walls on which the outdoor air conditioning unit will be mounted are strong. Also, it must be taken into account that during the operation of the air conditioner, the outer part vibrates and can be negatively displayed on the balcony, up to collapse.Therefore, it is necessary to rationally think over all construction and installation work. If the balcony parapets and walls are old, their design must be strengthened in a quality manner in order to avoid subsequent troubles.
The side part of the balcony parapet is ideal for installing an outdoor air conditioning system. At the same time, the front part of the loggia or balcony will always have a well-groomed appearance, especially if containers with flowers or climbing ivy are attached to it.
Installing an air conditioner on a glazed balcony or loggia, features | Own climate
We at Svoi Klimat have been installing air conditioners since 2011, and our customers often face the following situation: mounting an outdoor unit on a facade is impossible! This happens for various reasons:
- the room borders only on the front facade, and installation on it is prohibited;
- the cladding of the house is made entirely of glass or other material to which nothing can be attached;
- the managing organization or the owner prohibits the attachment of foreign objects to the building;
- there is no free space on the wall.
Do not despair - there are many solutions: placement in attics and basements, roofs, on common and fire escapes, technical floors, ventilation chambers, parking lots and others, others, others. It all depends on the location of your apartment.
These solutions can only be found by a specialist with extensive experience - a measuring engineer. He checks all options and offers the most optimal in terms of the technical capabilities of the equipment and your wishes.
You can call the measurer by phone +7(812) 748-2-748 Mon - Fri, from 9:00 to 18:00.
One of the most popular solutions is to install an air conditioner on a balcony or loggia.Often, developers provide space for an external air conditioner unit there.
To clarify, let's figure out what we consider a balcony and what a loggia. The balcony is an independent room, protruding several meters from the bearing wall of the building, a fence is installed around the perimeter for security purposes. The loggia, on the contrary, is a continuation of the existing premises, it has a roof and walls.
We are talking about the internal space, because. if installation on the facade is prohibited, then most likely it is also impossible on the outer parts of the balcony. At the same time, the balcony can be either glazed or not. The balcony (loggia) is part of your property and no one has the right to prohibit you from installing anything on this territory.
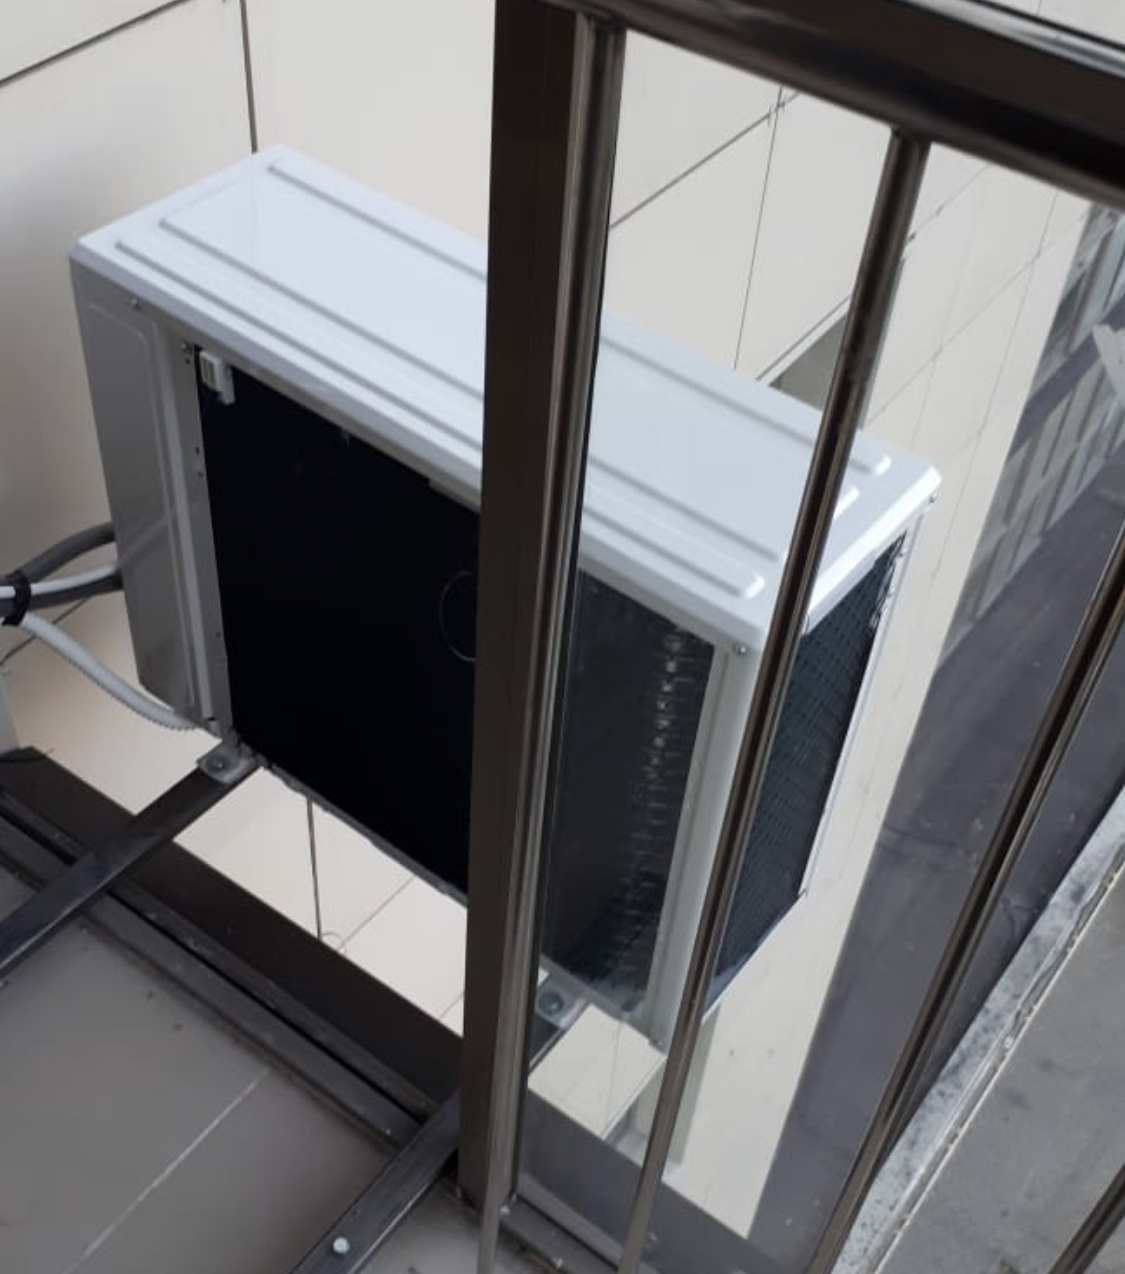
Features of placing the outdoor unit on a glazed balcony:
Features are relevant for glazed rooms. The location of the air conditioner on open balconies practically does not differ from the installation on the facade.
1. The outdoor unit of the split system removes heat from the indoor unit and increases the ambient air temperature. To prevent it from overheating and reducing the efficiency of the window system on the loggia, open the windows for the entire time the air conditioner is running.
Or you can order the installation of a lattice for a balcony or a complete thermal insulation of the air conditioner. 2. The sound from the operating outdoor unit will be reflected from the planes of the balcony and may be slightly higher compared to outdoor placement.
The level and intensity directly depend on the split system, so it is better to choose quiet inverter air conditioners of proven brands (for example, Fujitsu, Daikin, Tosot, Lessar). 3. Keep the door to the loggia closed. This will prevent hot air from entering the refrigerated room.four.
Advice: If you want to cool several rooms, and you have only one loggia and its area is small, instead of several air conditioners, it is better to order one multi split system. It can be connected to up to 8 indoor unitsand the space you save can be put to good use.
The advantages of placing an air conditioner on a glazed loggia:
1. Installation of the outdoor unit does not require work at height - savings up to 8,000 rubles. 2. No need to get access to the roof and coordinate the time of work. 3.
It is not required to coordinate the installation of an air conditioner with the Committee for Urban Planning and Architecture - saving 7,000 rubles and 30 daysthat would need to be agreed upon. four.
Protection of the block from damage by icicles, foreign objects, from theft and vandalism. 5. Easy access for maintenance.
Attention! In addition to selection, delivery and installation, our company is engaged in the maintenance and repair of climate equipment and we often receive applications for poorly working air conditioners mounted on a balcony / loggia by other organizations. Most often, sufficient heat removal from the outdoor unit does not occur due to miscalculations when choosing the installation location. The air conditioner begins to “choke”, which can lead to its breakdown.


To eliminate this, it is necessary to carry out work on the transfer of the outdoor unit, which entails material and cosmetic losses, which could have been avoided by initially contacting a professional climate company.
How to fix frames
There is only one principle: perforated metal strips and anchor screws are used.
The end sides of the bottom and top of the frame are used to fasten the strips of the calculated length.When installing frames, a level is used, and marks are made on the wall.
Balcony mounting drawings
Now, behind the other edge of the perforated strip, the frame is attached either to the ceiling or to the wall. Dowels are used. Often, when attaching a frame to a wall, anchor fasteners are used. Then you have to drill holes in precisely defined places.

Anchor plate fixture
Fixing corners
It is quite difficult to fix the corners when installing balcony frames. To connect and mutually fix these complex knots, you should use the following techniques.
Frames are leveled
First action. An angle profile is selected.
Second action. A metal corner is installed at the corners. Its size is 8-10 cm. Frames are attached to it.
Third action. Frames are fixed to a wooden block. It is masked after installation, using plastic panels on the inside and outside.
Fourth action. When the frames are installed, gaps will need to be eliminated between their profiles and the walls. These slots are "caulked" with mounting foam.


