- energy efficiency
- Location selection
- Do I need a permit to install an air conditioner?
- Choosing a place for the indoor unit
- Where to locate the outdoor unit?
- Determining the distance between blocks
- Which is more profitable: professional installation or do-it-yourself installation of a split system
- vacuuming
- Features of installation in various conditions
- Embedded machine installation
- We place the device over the toilet
- Placement on laminate, wooden floor or tile
- Troubleshooting
- Mechanical failures
- Problems in the electrical part
- Self troubleshooting
- Tips of the masters
- Disassembly of the air conditioner, in which the shaft is pulled out on the right
- Air conditioner installation process
- Mounting options
- Vacuuming - why and how to do it
- The "puff" method
- Vacuum pump
- How to connect the dishwasher to the water supply
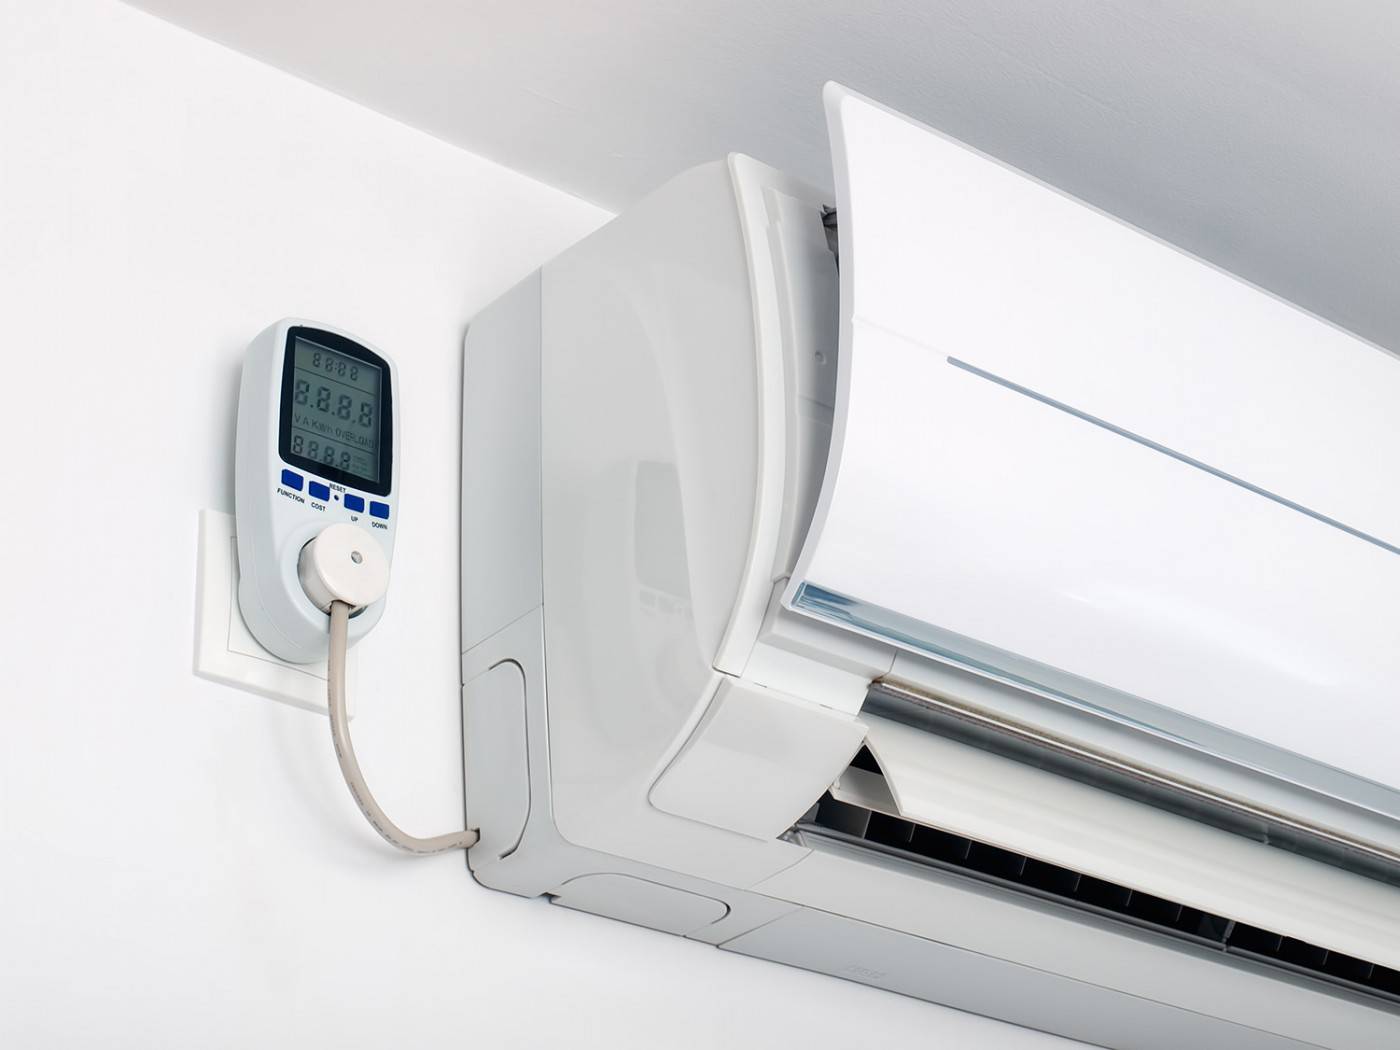
energy efficiency
The energy efficiency of the air conditioner is a parameter that contains two previous parameters. In fact, this is the ratio between them. This indicator is a technical characteristic of all modern electrical appliances and displays energy efficiency (COP).
If we talk about energy efficiency within the air conditioner, then it is expressed in the ratio of the produced power (cooling or heating) to the consumed power of electricity.If we consider an example, then we take a device with a cooling capacity of 2.2 kW, and power consumption of 0.6 kW. The energy efficiency coefficient will be 3.67.
Air conditioner energy efficiency
In modern electrical appliances, it is customary to divide energy efficiency into groups, from A to G, the higher the class, the more economical the device is considered to be in terms of power consumption. In our example, this is 3.67 - which belongs to the class "A" (the most economical devices). Accordingly, class B devices are more energy-consuming than A, class C is more energy-consuming than B, etc.
Location selection
The presence of two or more blocks of climatic equipment provides for the choice of a place for each of them. Before starting installation work, accompanying documentation will be required.
Do I need a permit to install an air conditioner?
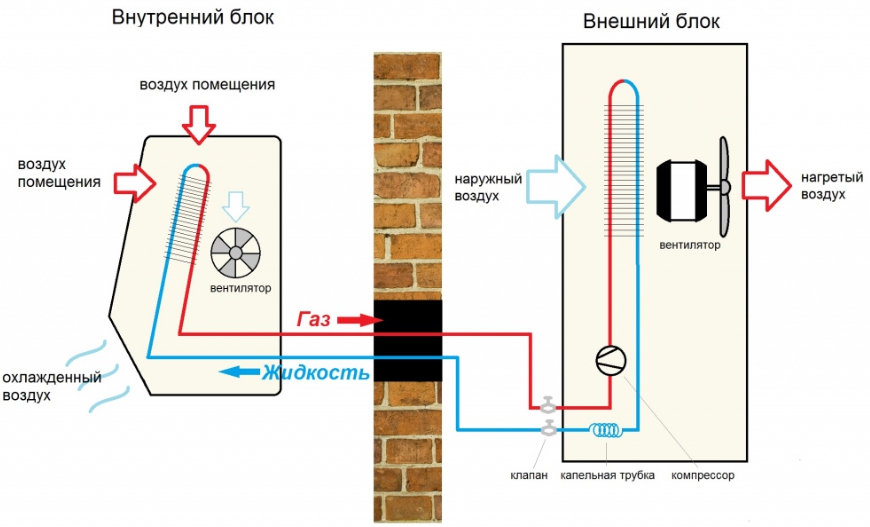
 Structurally, the air conditioner is a system with an indoor and outdoor unit, which is mounted on the facade.
Multi-storey building, on the basis of art. 246 of the Civil Code is common property with the right to dispose of all owners. Installation of equipment without approval is a violation:
- the device makes noise, buzzes, disturbing the peace of neighbors;
- condensate can damage the facade of the building or get onto the balcony from below;
- the overall block blocks the view or view and windows;
- there are risks of cracking walls, short circuit wiring and fire.
Based on paragraph 1 of Art. 25 LCD installation of a split system is considered as a reconstruction or re-equipment of the premises. Clause 3.5.8 of Decree No. 170 informs about the prevention of installing an air conditioner without permission from the management company and neighbors. Consent or refusal can be obtained only after a meeting of the tenants of the house.
Important! Residents of private homes can start installation immediately after purchasing the device. Permission is required if:
Permission is required if:
- installation work is carried out on the front of the high-rise building;
- the user lives in a house of value in terms of history and culture;
- split system is located above the footpaths;
- there are no special fences on the window opening where the unit is located.
Important! The management company does not have the right to rent air conditioners. Art. 330 of the Criminal Code considers such actions as arbitrariness
Dismantling of devices is carried out only by court order.
Choosing a place for the indoor unit
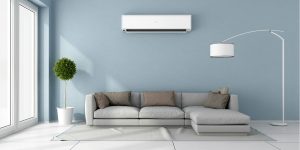
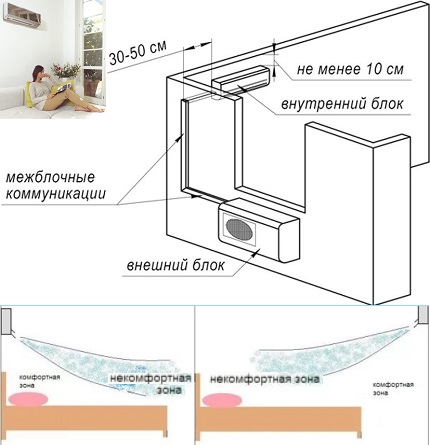
 Installation of the internal module of the air conditioner is carried out by hand so that cold air flows do not cause discomfort. It is allowed to be placed above the head of the sofa, on the side and behind the workplace. Building codes define the order of location of the indoor unit:
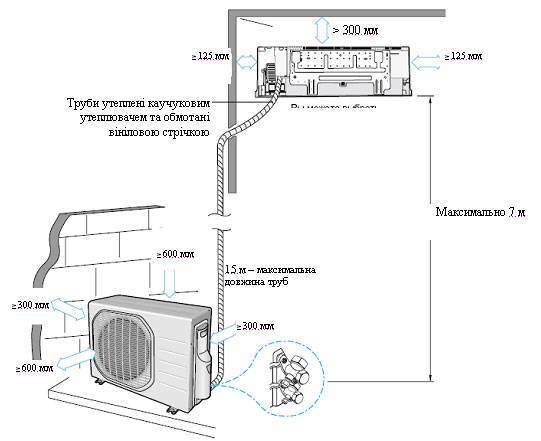
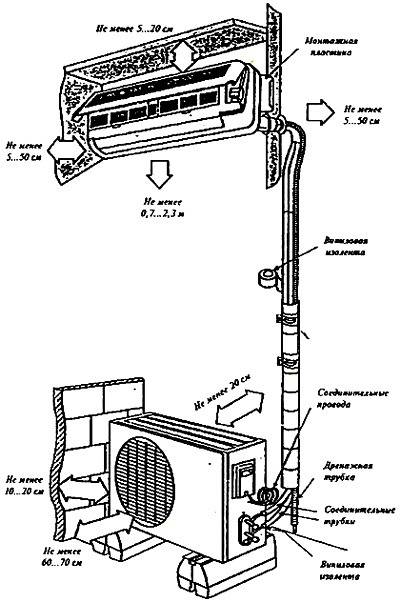
- from the structure to the ceiling - at least 15 cm;
- from the module to the right or left wall - at least 30 cm;
- from the block to the floor - 280 cm, but for apartments on the first floor, the outdoor unit is mounted at the same level or lower than the indoor one;
- from an obstacle to the movement of air flows - not less than 150 cm;
Advice! In a room with a sofa and TV, it is better to place the air conditioner above the sofa.
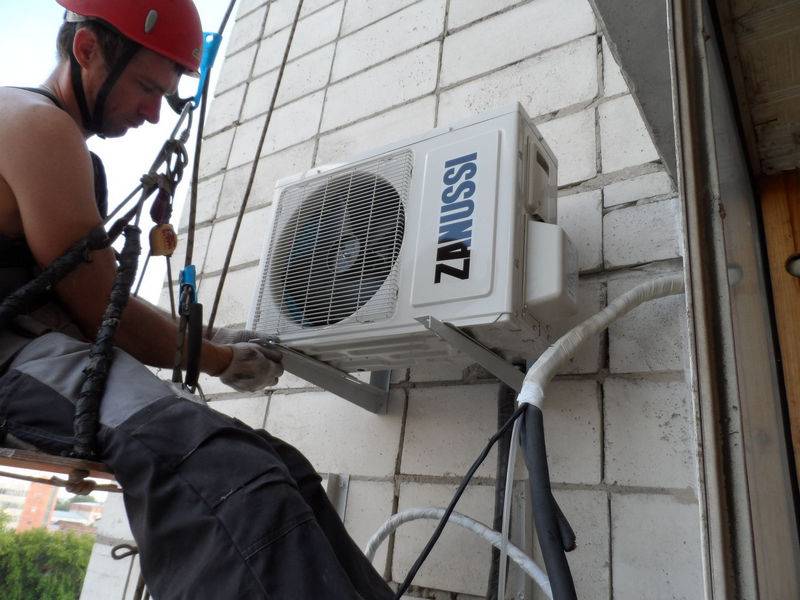
Where to locate the outdoor unit?
The outdoor module is located near the window opening or on an open loggia. If the balcony is glazed, the block is placed on a fence with good bearing capacity or on the facade. Residents of floors 1-2 need to determine a place for the outdoor module as far as possible from passers-by. On the 3rd or more floors, it is allowed to place the device under a window or on the side.
In a private house, the outdoor unit is placed on a wall with a high bearing capacity. On ventilated facades, a special fastening is organized or the block is placed on the plinth.
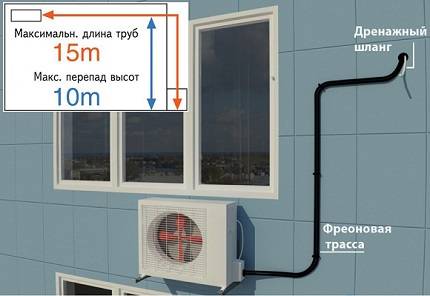
Determining the distance between blocks
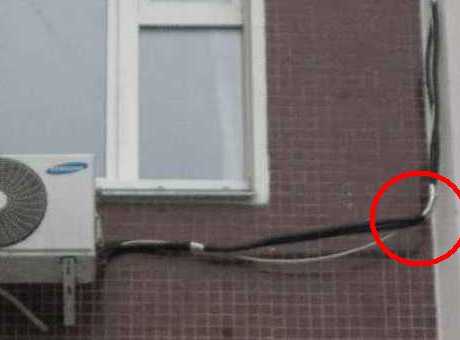
 The maximum length of the inter-module route is 6 m, if it is exceeded, additional freon injection will be required. If the outdoor and indoor module are placed at a distance of 1 m, the route should not exceed 5 m. The surplus of the system is formed into a ring and placed behind the block.
Interesting to know! Manufacturers specify different maximum distance between blocks. For Daikin equipment, it is 1.5-2.5 m, for Panasonic - 3 m.
Which is more profitable: professional installation or do-it-yourself installation of a split system
The price of installing an air conditioner depends on the complexity of the work, on the power and size of the equipment. To make the comparison correct, the cost of professional services for the installation of a small power household appliance, for example, 3.5 kW, can be considered as a basis.
This service includes:
- installation and connection of both units;
- harness laying (up to 5 m);
- formation of through holes in the wall.
Also, the cost of installing an air conditioner includes the cost of consumables. On average, professional installation of low-power split systems costs the client 5500-8000 rubles.
Average prices for renting a tool and purchasing materials for installing an air conditioner in an apartment with your own hands:
- Perforator ("Makita") - 500 rubles per day.
- Two-stage pump - 700 rubles / day.
- Installation kit + communications (5 m) - 2500 rubles.
 Independent installation of a split system saves from 1500 to 4000 rubles.
In some cases, equipment is leased only on security. It is approximately 4000-8000 rubles.The amount of the deposit depends on the value of the equipment rented. If pipe rolling is required, then tool kits designed for this purpose will have to be added to the list. The cost of their rent is 350-500 rubles per day.
The total amount reaches 3700 rubles. To this value you need to add 10%, which will cover unforeseen costs and the purchase of consumables. The result will be about 4000 rubles. This means that self-installation of a split system saves from 1,500 to 4,000 rubles.
It is worth noting that the minimum amount for a professional installation does not always include a complete list of work. You may have to pay extra for some of them. With this in mind, we can conclude that the savings are about 2500-3500 rubles.
On a note! Economic benefits can only be achieved as a result of proper installation of split-DIY systems. Repairs and alterations will only incur additional costs.
 The cost of installing an air conditioner includes the cost of consumables.
vacuuming
After the outdoor and indoor units have taken their places, it turns out that there is still a very important stage of work, it is necessary to vacuum the communications. Without creating a vacuum in the system, your air conditioner will simply refuse to work.
This process is needed, first of all, to remove excess water from the entire system. To do this, you will need special tools. The pump is connected to the split system through a manifold with a pressure gauge and turned on. At a time when the arrow on the pressure gauge will show a vacuum, the device must be turned off. This process does not take much time, a maximum of 15-20 minutes.
Vacuuming the air conditioner
After turning off the pump, do not rush to disconnect it, look at the arrow, if it is motionless and stands in one place, then everything is in order. If it rises, it is necessary to check all connections, which means that the pipes are not tight.
If you are 100% sure that the device is tight, you can start freon. We slowly open the supply tube, then suction occurs, and we look at the gas pressure. Then you can do a test run of the device. Don't panic if it doesn't work instantly. For the first time, this does not happen immediately, since freon needs to disperse through the tubes.
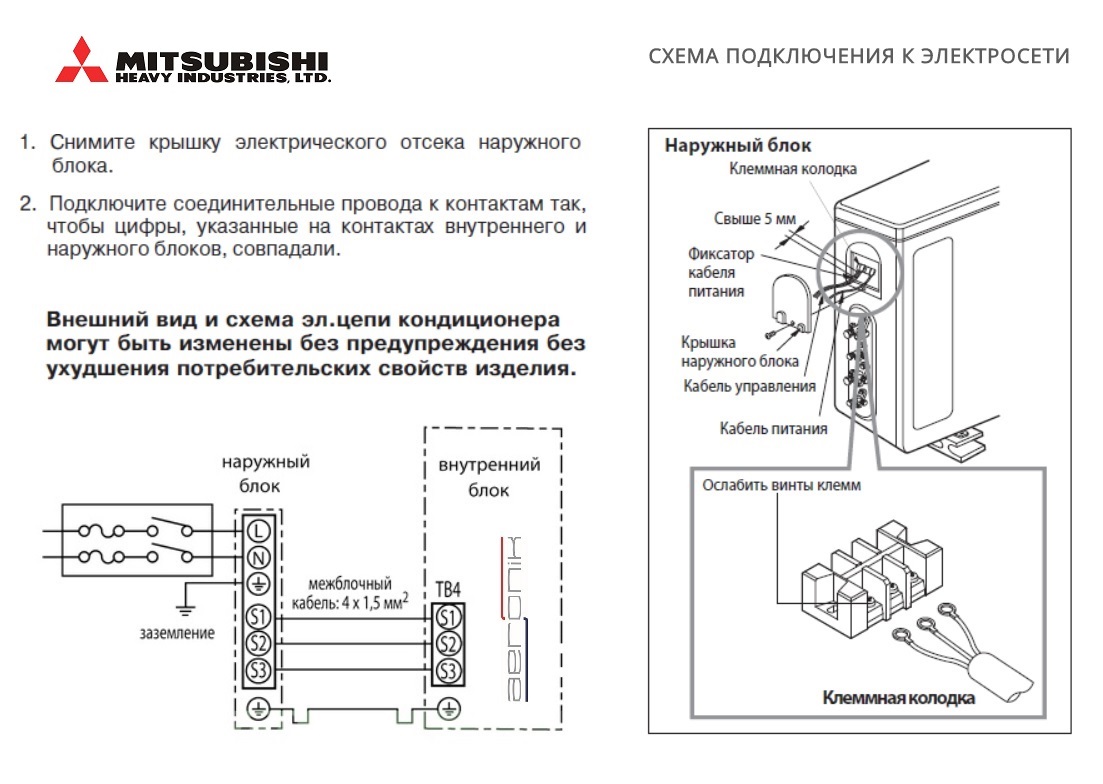
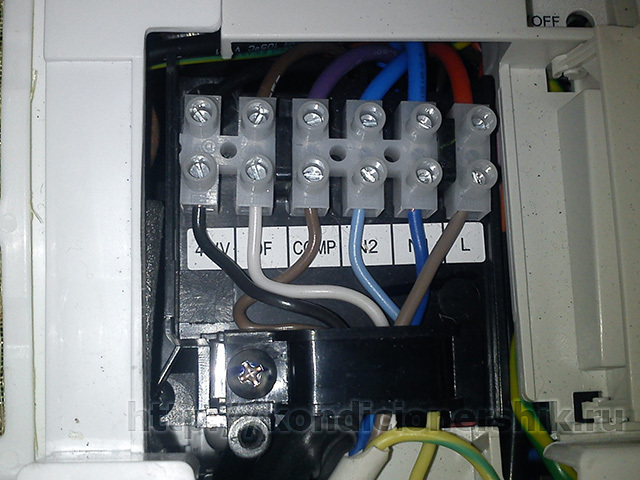
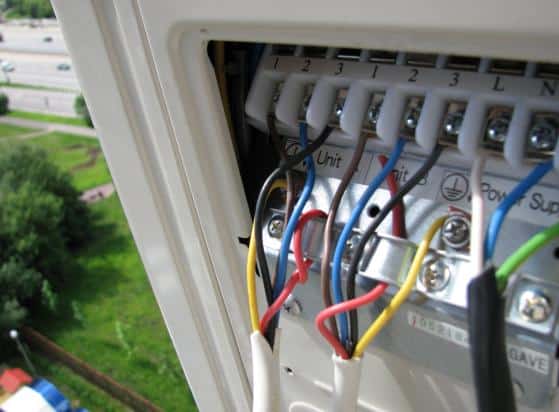
After all the work performed, it is desirable to provide a separate power supply. Any air conditioner must have its own wiring.
Features of installation in various conditions
There are several features of the installation of washers, with which it is better to familiarize yourself.
Embedded machine installation
Mounting built-in washing machine in a special niche is carried out in several stages:
- Installation in a kitchen set. First, the appliances are built into the kitchen set in which it will stand. When performing this step, you need to be very careful and make sure that the device is installed level.
- Plumbing connection. Built-in models are connected only to cold water. In this case, the hose for fluid intake is installed at an angle of 40-45 degrees.
- Connection to the sewer. To connect the outlet to the sewer system, a special pipe is used, which is connected to the outlet pipe.
- Connection to electricity. At this stage, the machine is connected to a separate outlet.

We place the device over the toilet
There are quite unusual options for placing washers. For example, some install them over the toilet.
In this case, the machine is connected to the water supply and sewerage in the same way as always. The main feature is the placement of equipment, as it will be located above the toilet. Before installation, a special niche is constructed in which the machine will be located. It is created from durable wood that can withstand a load of several tens of kilograms. Experts advise strengthening the niche with strong iron corners connected to the shelf and wall.
Placement on laminate, wooden floor or tile
It is not always possible to place the machine on a solid floor surface and you have to put it on tiles or wooden floors. In this case, experts advise to independently make a concrete screed, which will serve as the basis for the technique.
Creating a screed consists of several stages:
- Markup. First, a marker marks the place where the machine will be placed.
- Removal of old coating. After marking inside the marked area, the old coating is removed.
- Formwork construction. The formwork structure is made of wooden boards.
- Strengthening the formwork. To make the surface stronger, the formwork is reinforced with a metal frame.
- Pouring concrete. The created structure is completely filled with concrete mix.

Troubleshooting
Malfunctions of floor and table fans are of 2 types - mechanical and electrical. It is on the first that a simple layman does not pay much attention, and this leads to a breakdown in the electrical part of the device.For example, if the shaft is jammed, and the equipment continues to work, then this will undoubtedly cause the motor to overheat. If the bearing becomes loose, the stator winding will be damaged in the future.
Before diagnosing a fan at home, disconnect the device from the power supply. The unit often does not turn on due to a malfunction of the cord or outlet, therefore, first of all, any other device is connected to the power supply. If it does not turn on, then the culprit is the outlet that needs to be fixed.
To inspect the internal equipment of the fan, disassemble it, proceeding as follows:
- Remove the main rim.
- Unscrew the fasteners on the protective grid and remove its front part.
- Disconnect the propeller with blades. Feature - in fans, the propeller is attached with a nut with a left-hand thread, which is screwed to the motor shaft. Therefore, the fasteners are unscrewed clockwise, and twisted vice versa.
- Remove the protective mesh at the back by unscrewing the nut.
- Loosen 4 screws.
- Remove all mounting material from the motor housing and remove the panel. Do not forget about the bolt, which is located on the handle that regulates the rotation of the body. If this is not done, access to the engine will not open.
- Remove the plug from the back of the instrument.
- Loosen the screw.
- The engine is open.
Since failure is often associated with a lack of lubrication, be sure to put a few drops of technical oil on the bushing.
Turn the shaft first in one direction, then in the other direction for better absorption of the lubricant. After that, assemble the fan in the opposite direction, turn on the device and check for operability.
For more information on how to disassemble the fan and troubleshoot, see this video:
Mechanical failures
To detect malfunctions of the mechanical part of the fan device, pay attention to the following manifestations:
- extraneous sounds (noises, whistles, squeaks, etc.);
- slow speed of rotation of the blades during operation;
- difficulty turning the propeller when the fan is off.
Problems in the electrical part
An electrical malfunction is manifested by the following symptoms:
- the smell of burning;
- inability to start the unit;
- slowing down the speed of the propeller mechanism when the device is turned on;
- operation of automatic safety switches (if provided).
Self troubleshooting
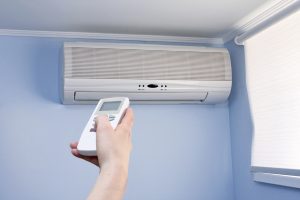
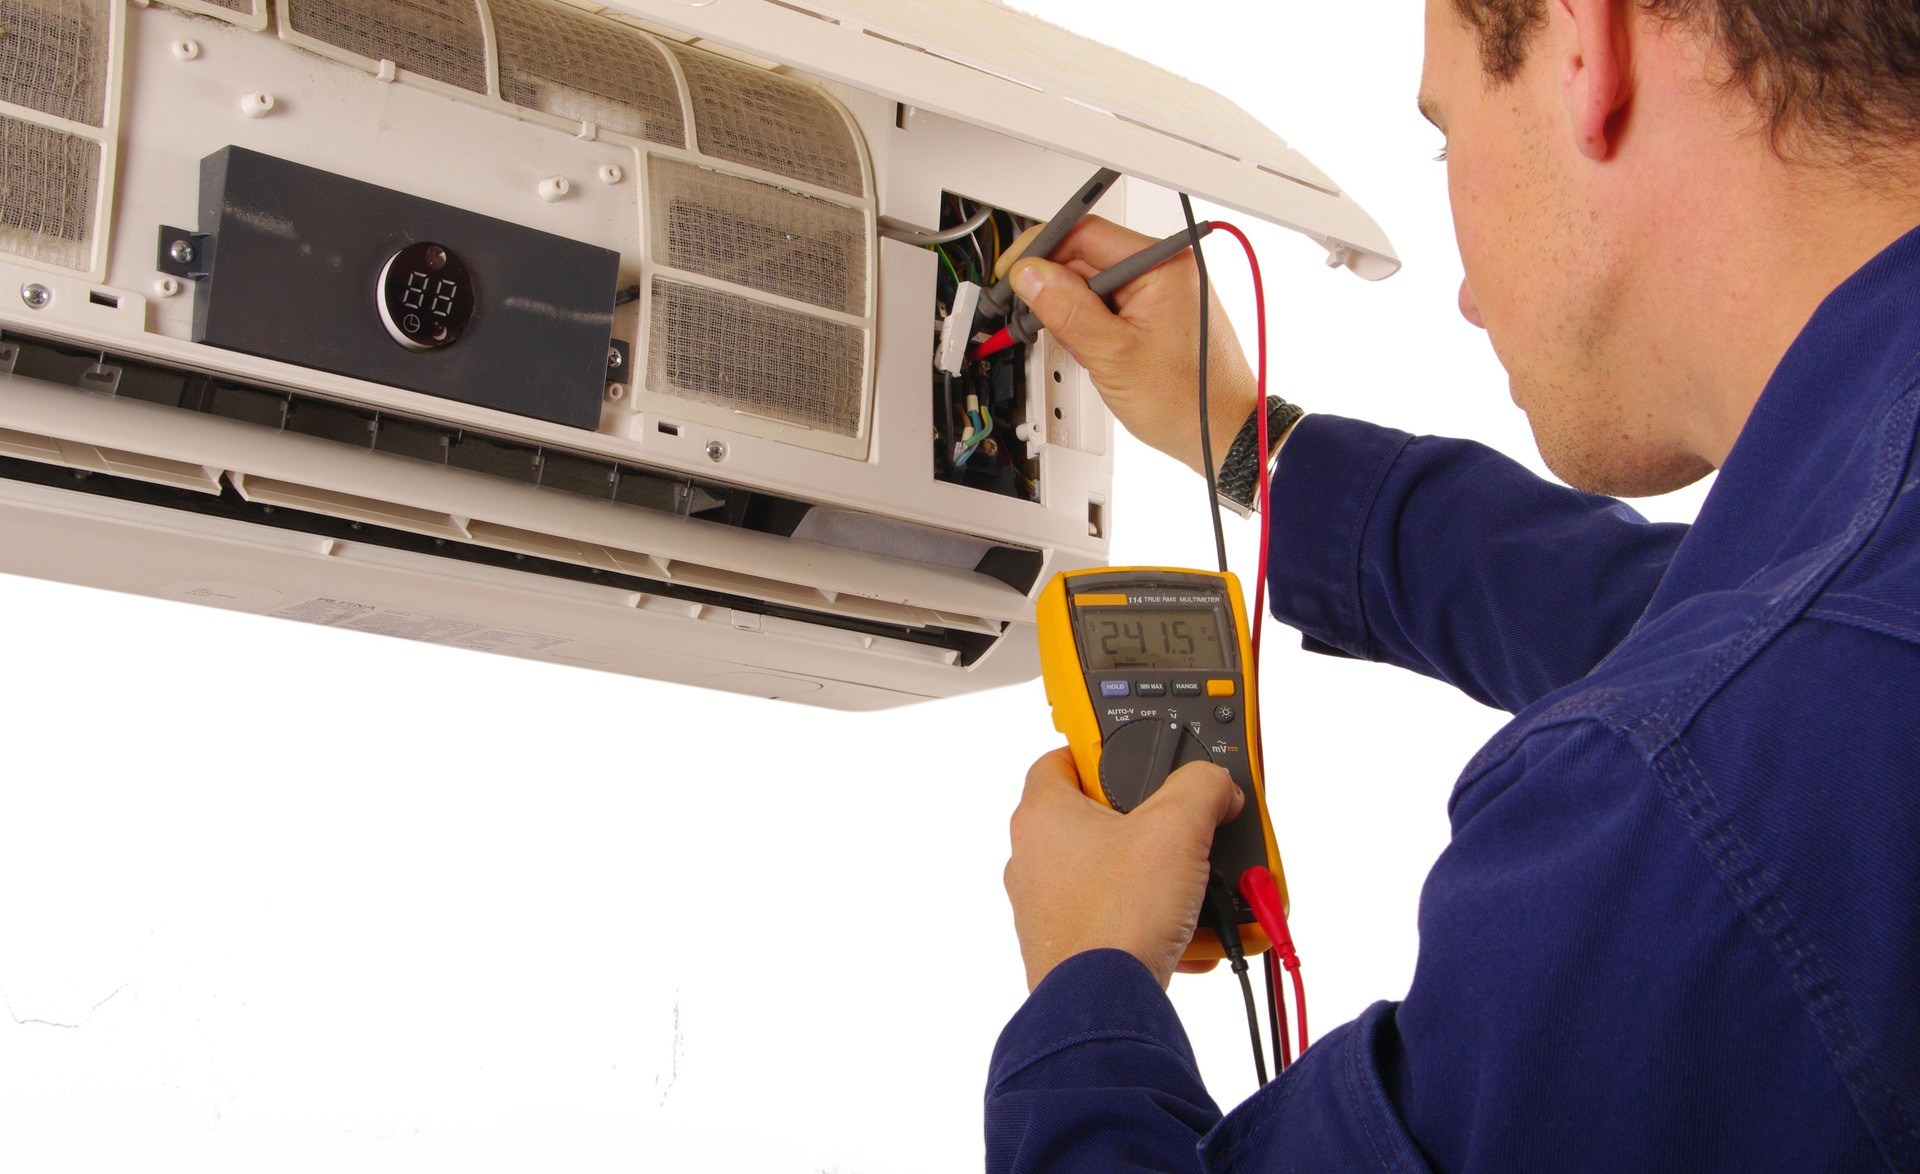
If your air conditioner suddenly stops cooling the air in the room entrusted to it, you can independently determine the cause of the problem:
- Does not work. The reason may be a power failure. It happens due to a damaged plug or cord, a blown fuse, or a power outage.
- Weak cooling. The airflow is obstructed by a dirty filter, an obstruction, or a nearby heat generating device.
- Heats up badly. The outdoor heat exchanger is icy, preventing air circulation.
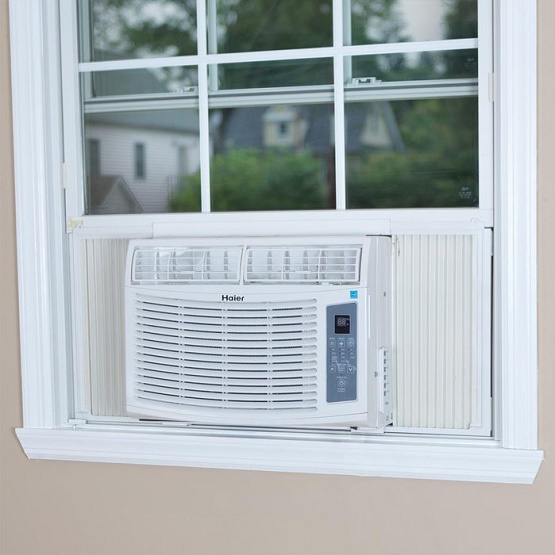
A normally operating window air conditioner will make a barely audible click when the thermostat starts and stops, and after the compressor is turned off, the fan will still work for a short period of time.
Tips of the masters
It is worth listening to the recommendations of the masters regarding the process of safe use of the washing machine:
- After washing, you need to leave the hatch ajar to let out excess moisture, turn off the water supply, disconnect the device from the electrical outlet.
- It is necessary to use only detergents (powders, gels) for washing that are of high quality.
- Use special compositions that prevent scale deposits on the internal components of the device.
- Make sure that the load level of the laundry does not exceed the allowable rate according to the instructions.
If you follow these simple rules, your washing machine will last longer.
Do-it-yourself installation of a washing machine only seems complicated. The owner can handle it himself. The main thing is to take into account the features of the device and the room where it is installed, to have the necessary stock of knowledge and tools.

But regardless of the brand (Ariston or Malyutka), any washing machine can break down. On our website you will find detailed instructions for self-repair and installation of such units as a pump, drum, pump, tank, drain, pressure switch, bearings.
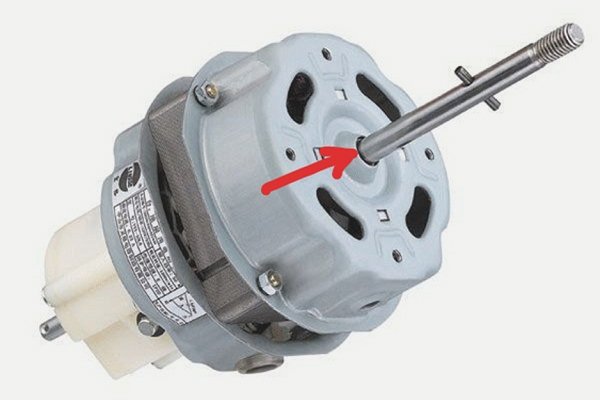
Disassembly of the air conditioner, in which the shaft is pulled out on the right
- the most difficult situation is when you have to remove the control unit and the shaft motor (we warn you that in this case it is highly advisable to contact specialists):
- remove the control unit from the air conditioner housing. To do this, disconnect all the sensors and wires that fit it. Then we release the clips and unscrew the screws that secure it;
- unscrew the motor mount casing (usually 4 self-tapping screws). We unscrew all the screws that will help free the casing and shaft;
- we carefully study how to disconnect the shaft from the motor and remove it from the housing.Most likely, you will have to carefully bend the copper tubes that fit the radiator.
For more information about this case, see the article about cleaning the air conditioner.
To assemble the air conditioner, we perform the considered operations in reverse order.
Thus, we got a rather long, but rather detailed instruction on how to disassemble the air conditioner.
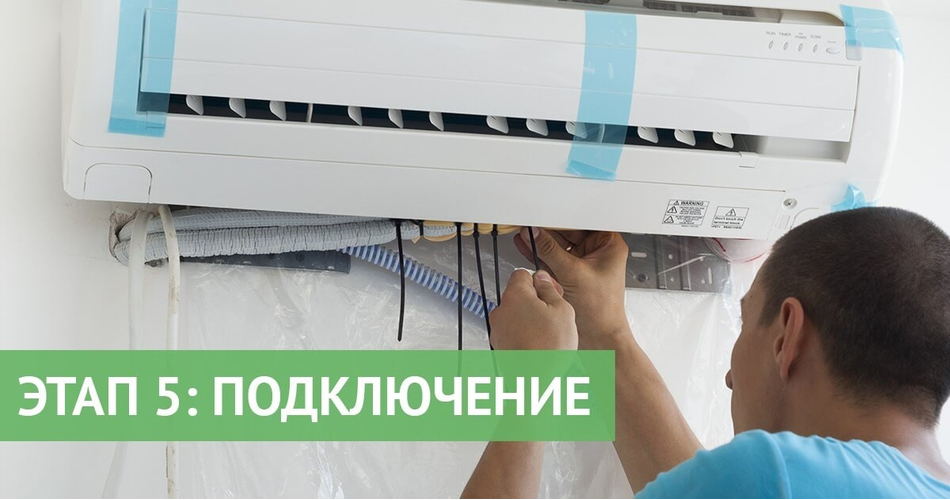
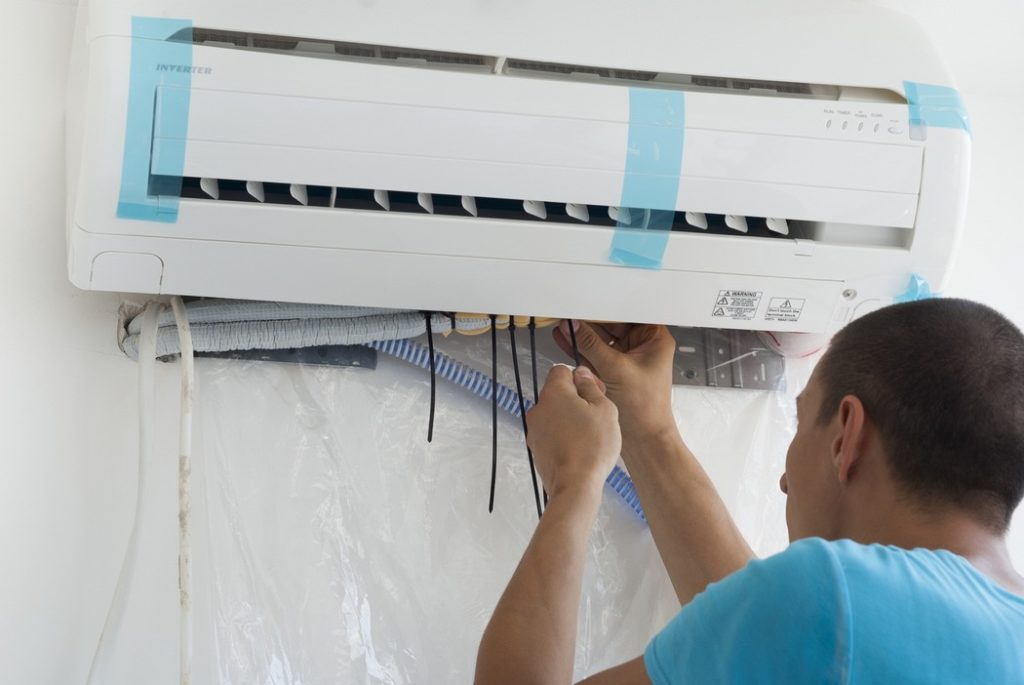
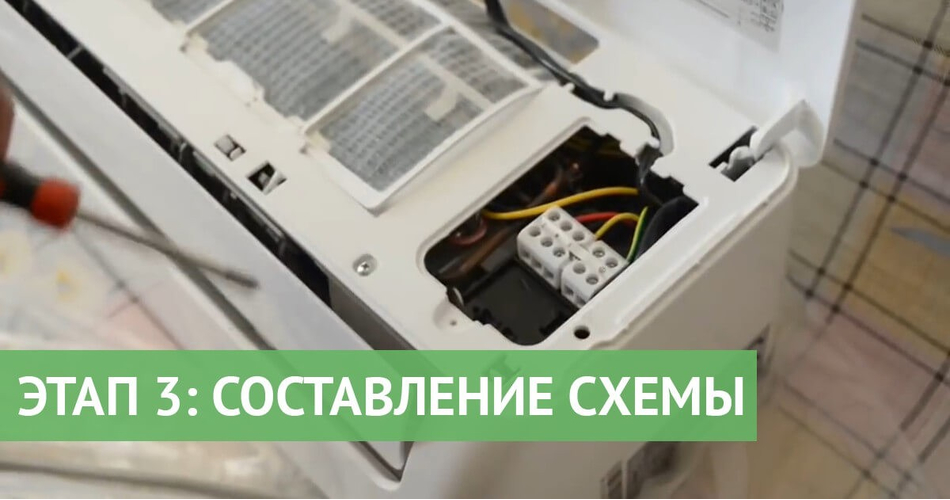
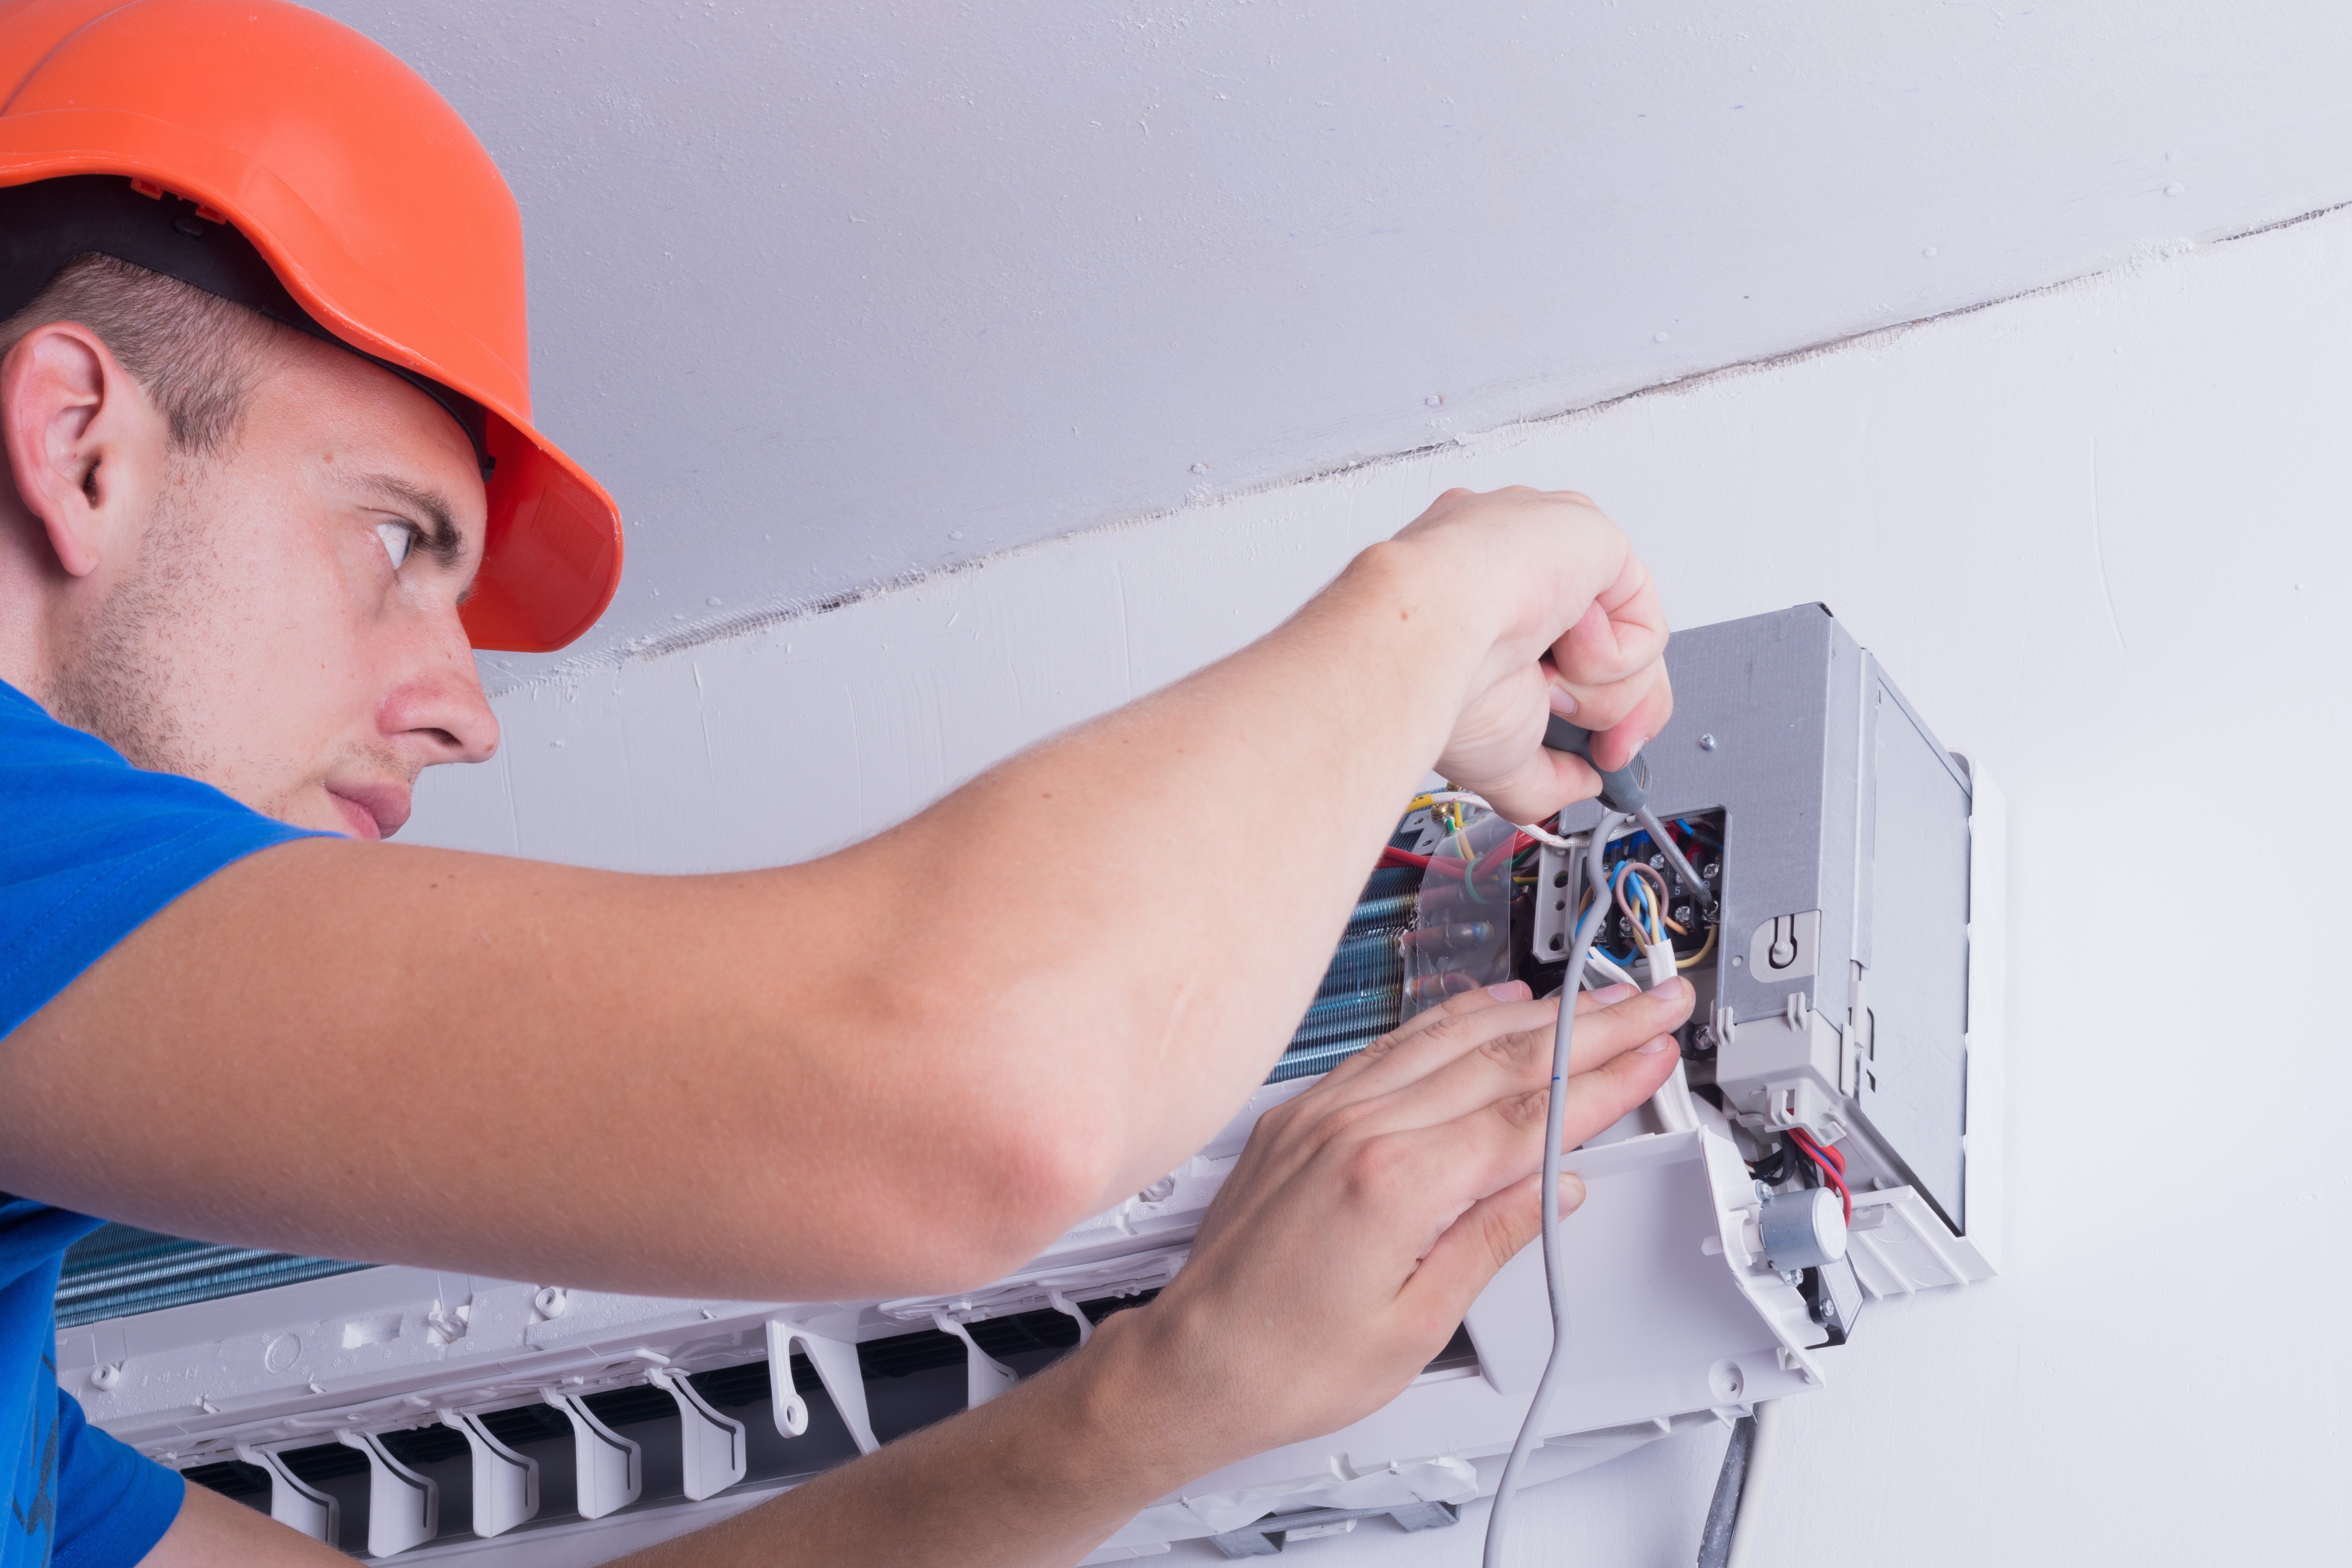
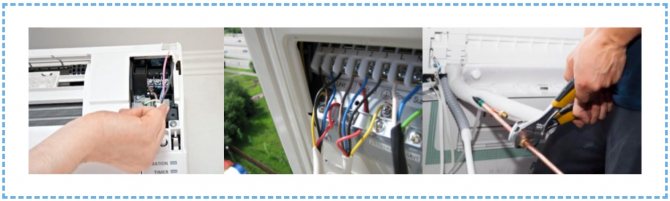
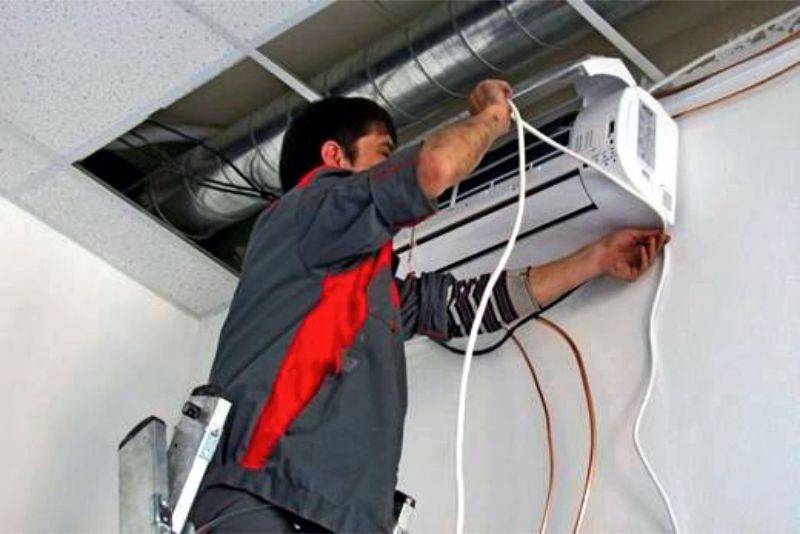
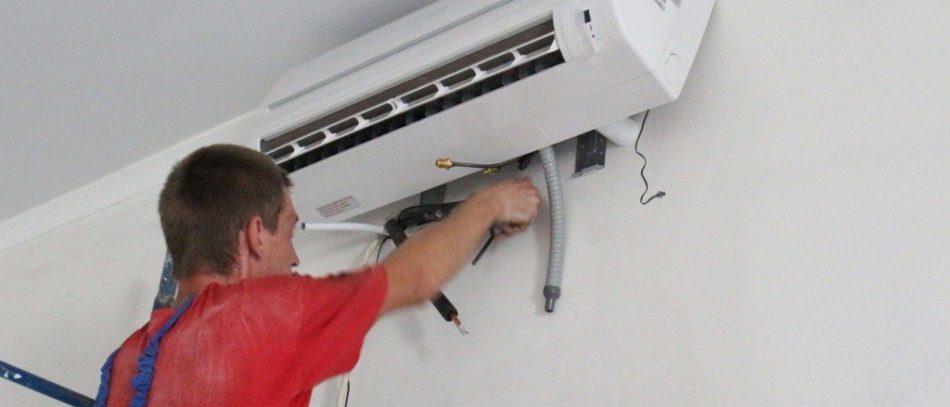
Air conditioner installation process
Installing an air conditioner with your own hands is possible, the main thing is to use a proven scheme, following which you can get the desired result.
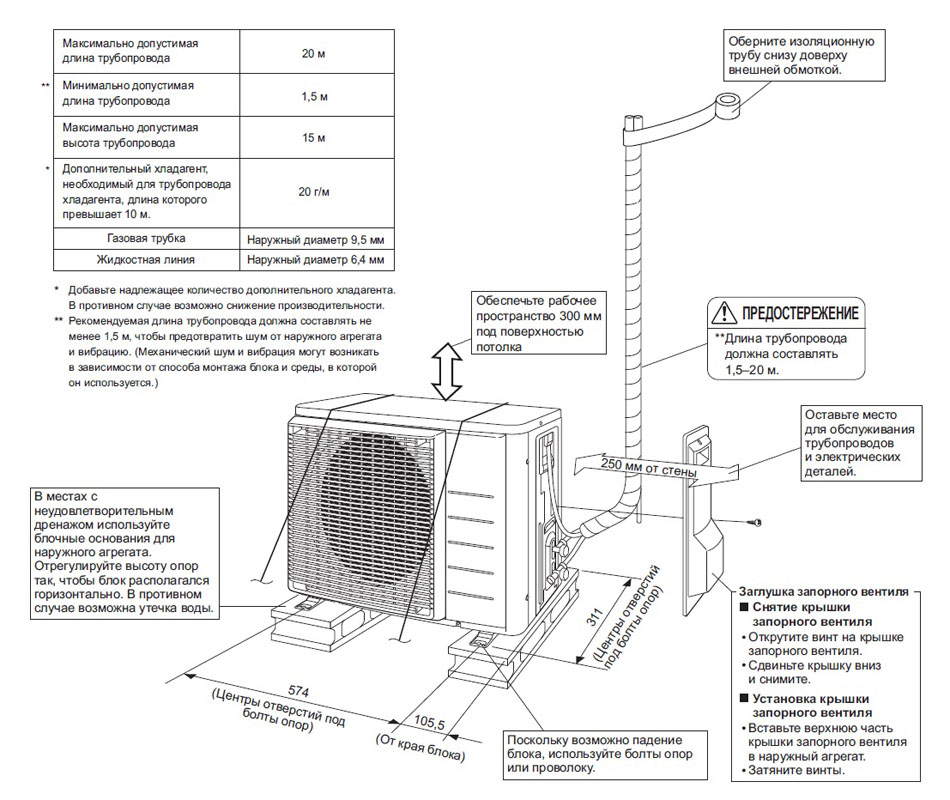
Before proceeding with the installation, it is necessary to determine exactly the place where the air conditioner will hang (distance from the ceiling, furniture, etc.). When the calculations are completed, you need to make a markup on the wall, checking its fidelity with a building level and then attach the mounting plate. You can easily fix such a bar with dowels.
The next step in installing the air conditioning system is drilling a hole in the wall through which communications and drainage will pass. As an actual tool, you can use a 45 mm drill. The place for the hole must be chosen in the corner of the wall at the same level with the bar
Drilling the wall must always be at an angle - this is important for the normal operation of the air conditioner and the free flow of condensate.
When the hole is ready, it's time to start installing the track. To do this, measure the pipes and cut them
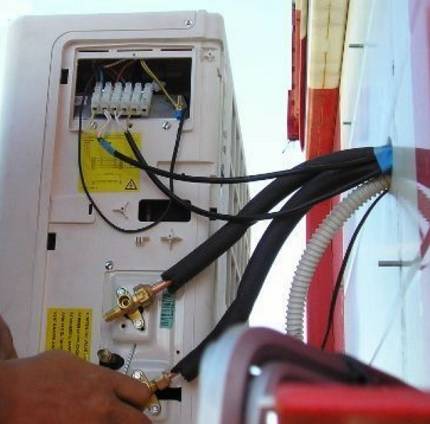
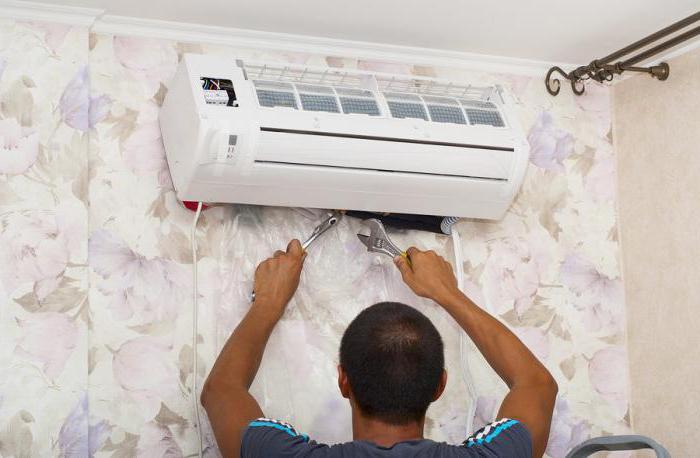
It is impossible to use a hacksaw for metal to work with copper pipes, since chips are formed during the sawing process, which will subsequently ruin the compressor. The best option for working with pipes is a pipe cutter. Finished pipes must be connected to the block inside the apartment.In order for the connection to be of high quality and not to let freon through, it is important to perform copper rolling. The nut that will be used to secure the pipe is important to put on before the rolling process begins, as this will not work later. It is worth making sure that the nut is screwed as tightly as possible.
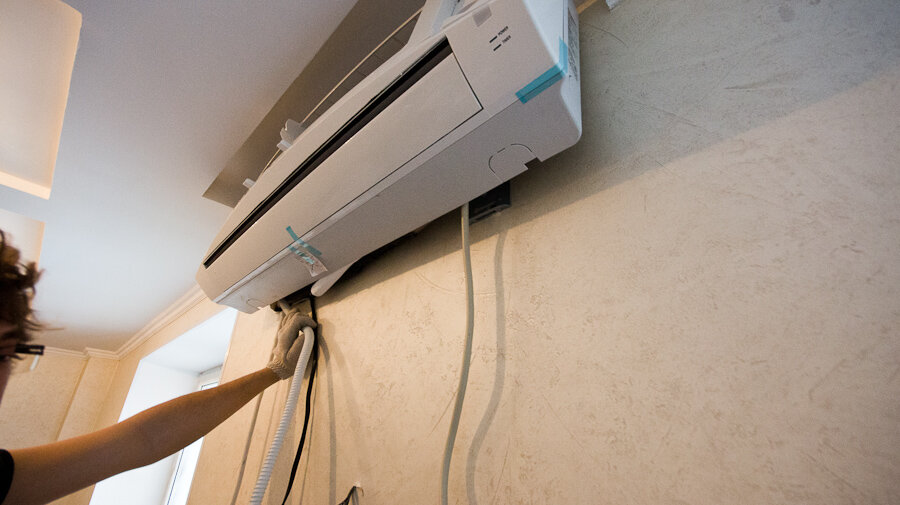
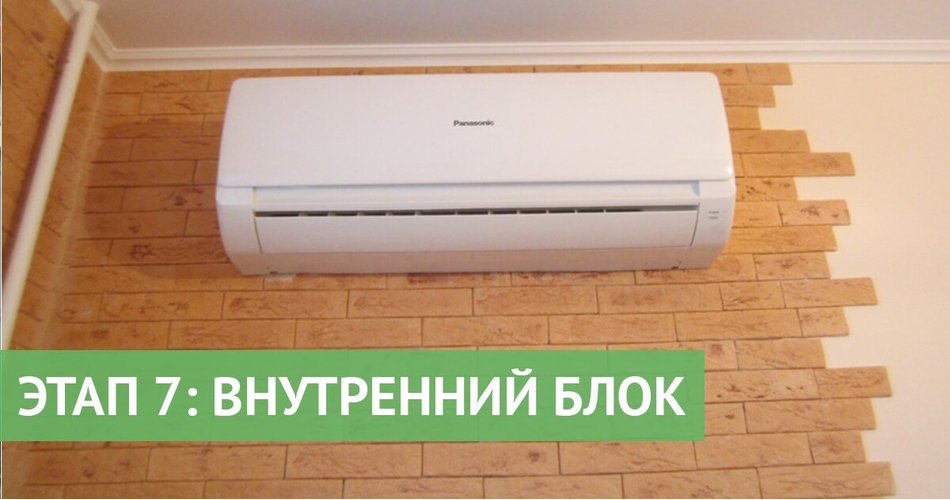
It will be necessary to connect the wires necessary to control the system, as well as drainage, to the inside of the air conditioner. All this is important to qualitatively insulate and wrap with insulating tape. After the free ends of the insulated pipes, drainage and wires must be brought out through the drilled hole. The indoor unit is attached to the mounting plate at this time.
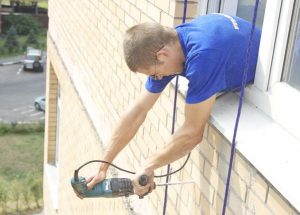
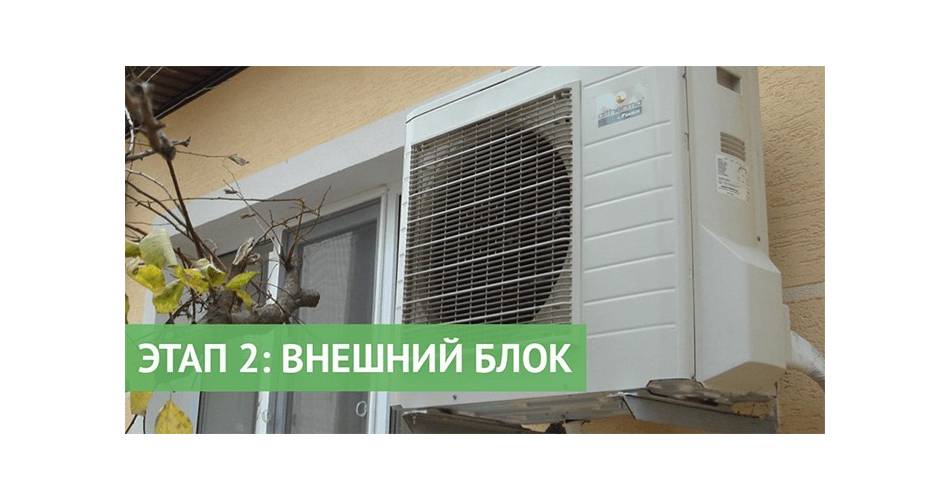
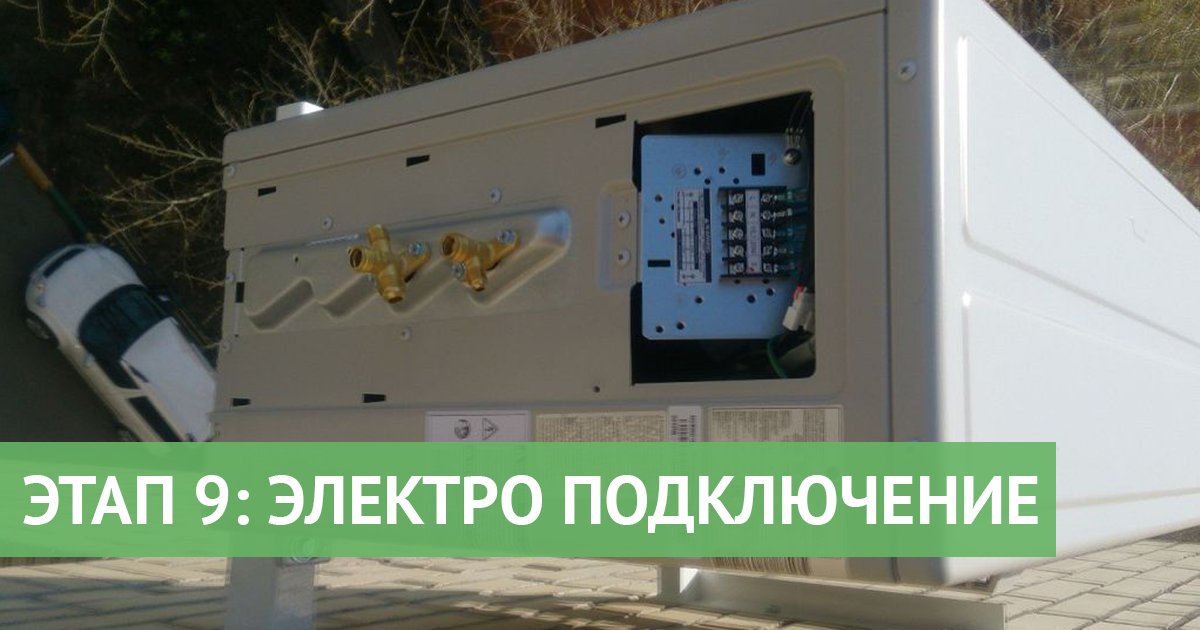
When the work in the room is over, the stage of installing the outdoor unit of the air conditioner begins. It is immediately worth noting that this process involves risk, since you will have to work from the outside of the house. To avoid an unpleasant development of events, it is necessary to securely fasten with ropes that can withstand the desired weight. The rope is fixed on a special belt. In this case, it will not hurt to consult professionals regarding installation work at height. To install the outdoor unit, you will need to measure the distance between its legs and mark it on the facade with marks, according to which you need to install the brackets afterwards.
When fixing the brackets, it is important to understand where it will be best to install the outdoor unit of the air conditioner. From the experience of professionals, the best place is the area below the window. The external device of the air conditioner under the window will be convenient to maintain and repair.It is important that the brackets can withstand the weight of the outer part for a long time, so it is better to use self-tapping screws with a diameter of 12 mm or more for fastening.
After the brackets are fixed, you need to lower the outdoor unit onto them. This should be done carefully and be sure to do it together. It is also important to insure the block with a rope.
When the outer part of the air conditioner is on the brackets, without removing the insurance, you need to fix it with screws and only after making sure that the unit is securely fixed, release it from the rope.
When the external device is installed, attention must be paid to connecting communications. In order not to confuse the holes for pipes and drainage, you can focus on the connections of the unit indoors.
Do not forget that the air conditioner requires a vacuum in the drainage
In order to create this vacuum, a special pump is used. Connect it to the air conditioner by means of hoses and a manifold equipped with a pressure gauge. In this case, you need to open the port. When the connection is established, you need to turn on the pump, which will successfully pump moisture and dust out of the air conditioner. Stop this process only after the pressure gauge shows a vacuum. Do not immediately disconnect the pressure gauge and hoses - it is important to make sure that all connections are tight and air does not enter the system.
When there is no doubt about the tightness of the connections, freon can be supplied to the system. After turning on the air conditioner, you must wait 15-20 minutes, and after measuring the pressure, disconnect the pump.
Mounting options
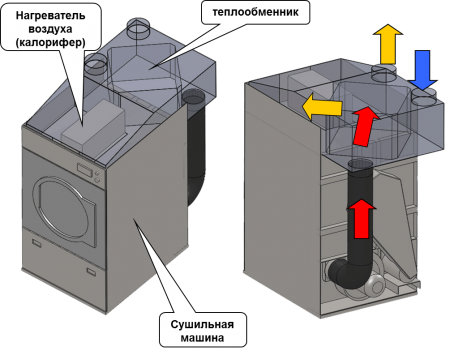
Manufacturers of household appliances for the home have in their lineup several types of machines for drying clothes: exhaust, condensing and with a heat pump.Connecting the dryer of each type has its own characteristics, which is caused by the principle of operation of the machines. For example, exhaust models dry by removing air with moisture into the ventilation system. Condensing products work as follows: heated air enters the laundry chamber, collects moisture and passes through the installed heat exchanger. After that, the moisture settles in a special tray, which must be emptied after each inclusion. As for machines with a heat pump, they, in fact, work by analogy with the previous version. The only difference is that moist air does not pass through the heat exchanger, but through the evaporator.

In private houses and apartments, exhaust dryers are most often installed, which must be connected to ventilation and electricity. If it is not possible to remove the air duct, it is recommended to connect a condensation model, in which water is drained either into a tray or into a sewer. Consider two existing installation options: to ventilation and to sewerage, but first let's talk about how you can install a dryer in a room.
You can see the functionality of these devices in a visual video example:
Vacuuming - why and how to do it
The last stage, which ends with the installation of an air conditioner with your own hands, is the removal of air and moisture, argon residues from the system. During installation, humid air from the room or from the street fills the copper pipes. If it is not removed, it will enter the system. As a result, the compressor will work with a greater load, it will heat up more.
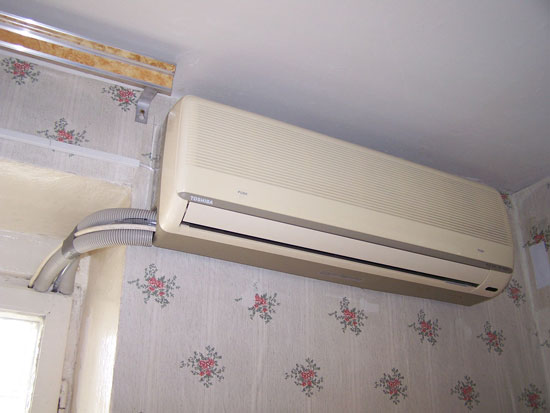
To make the track look neater, it can be wrapped with aluminum tape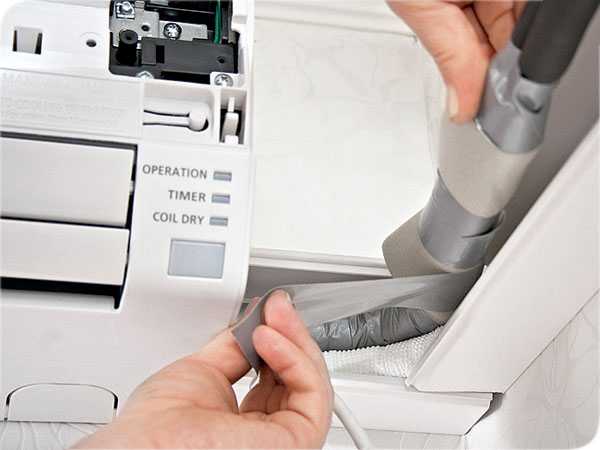
The presence of moisture also adversely affects the performance of the system. The fact is that freon, which is filled with air conditioners, contains a certain amount of oil to lubricate the elements from the inside. This oil is hygroscopic, but saturated with water, it lubricates the insides less effectively, and this leads to their premature wear.
From all this it follows that the system will work without air removal, but not for very long and with possible shutdown due to overheating (if there is such an automation).
There are two ways to remove air from the system: using a vacuum pump or some amount of freon released from the outdoor unit (it is charged at the factory and has some excess freon - just in case).
The "puff" method
On the ports of the external unit, unscrew the valve plugs (in the photo they are indicated by arrows).
Loosen the valve covers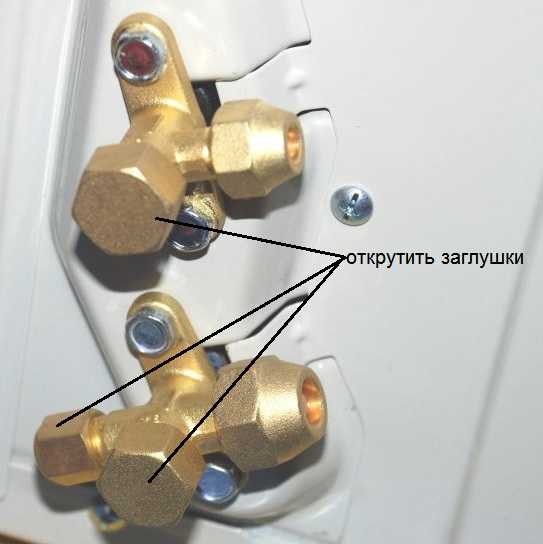
We will carry out operations with the lower port (larger diameter), which sticks out perpendicular to the body. Under the cover there is a socket for a hexagon, we select a key that is suitable in size.

Under the cover is a valve with a hexagon socket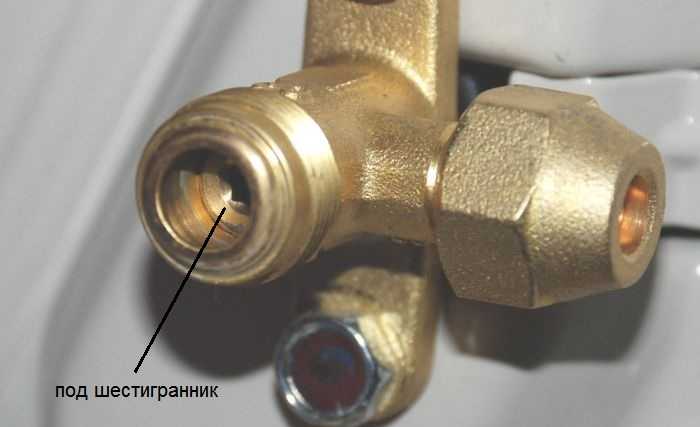
Next, with this key, turn the valve 90 ° for one second, return it to its previous position. We let some freon into the system, it created excess pressure. We press a finger on the spool, which is located on the same port. By this we release a mixture of freon and gases located there. Press for literally seconds. Part of the mixture should remain so as not to start a new portion of air inside.
You can repeat 2-3 times, no more, the second time you can turn the valve located above.With a track of 2-3 meters - you can 3 times, with a length of 4 meters - only two. Freon is not enough for more.
When the air is practically removed, we screw the plug onto the outlet with the spool (filling), open the control valves (under the hexagon) completely, launching the freon into the system. We coat all joints with soapy foam to make sure that they are airtight. You can run.
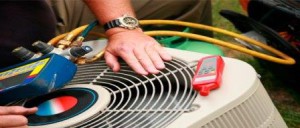
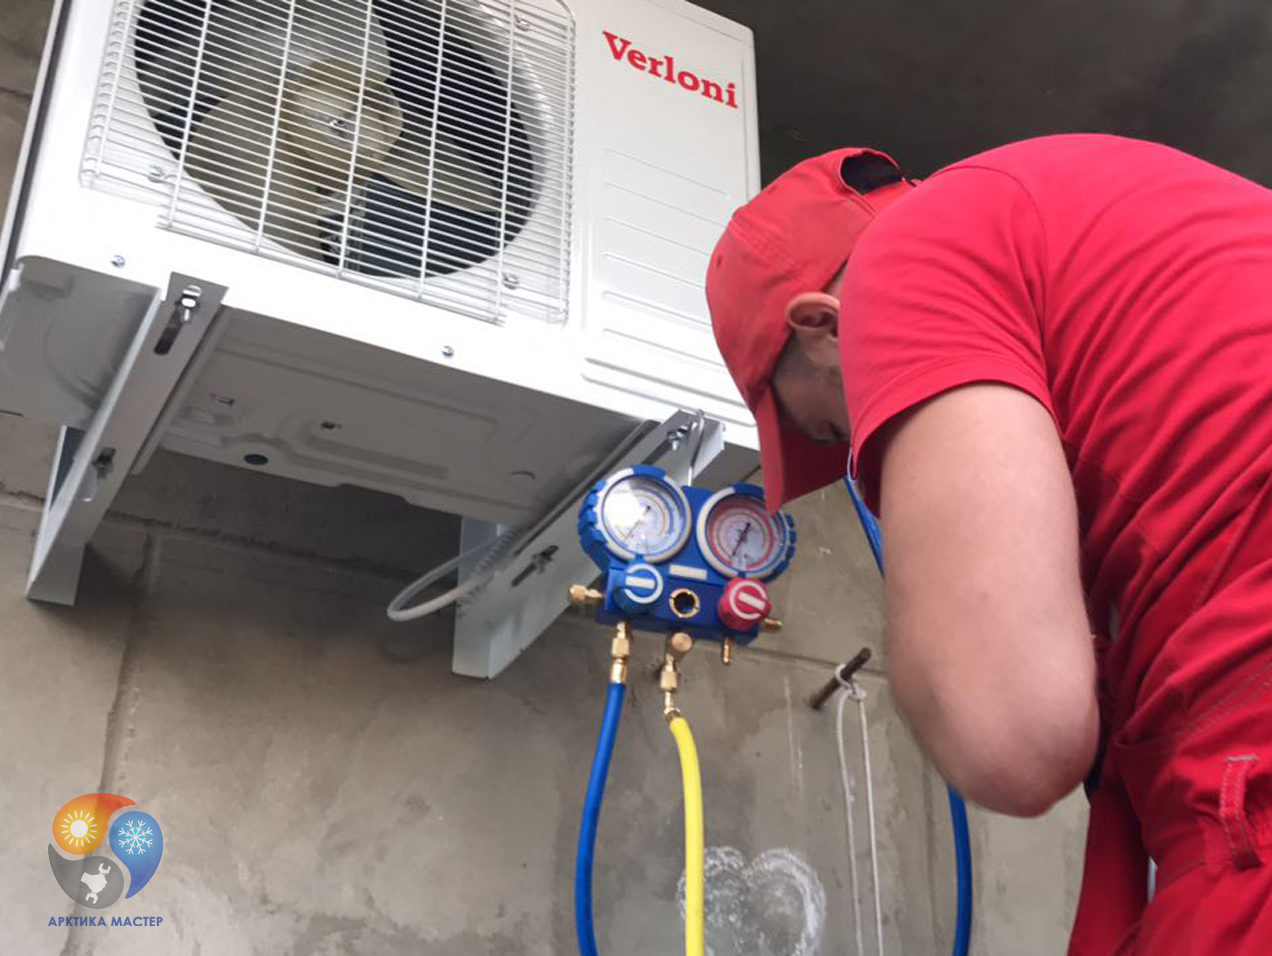
Vacuum pump
This operation requires a vacuum pump, a high pressure tube, a group of two pressure gauges - high and low pressure.
Without opening the valves on the control valves, we connect the hose from the vacuum pump to the inlet with the spool, turn on the equipment. It should work 15-30 minutes. During this time, all air, vapors, nitrogen residues are drawn out.
Then the pump is turned off, the pump valve is closed but not disconnected and left for another 15-20 minutes. All this time it is necessary to observe the readings of manometers. If the system is tight, there is no change in pressure, the pressure gauge needles froze in place. If the arrows change their position - where-that is a leak and it needs to be eliminated. You can find it with soap suds and tighten the connection (usually the problem is at the point where the copper pipes are connected to the outlets of the blocks).
Vacuuming the air conditioner with a pump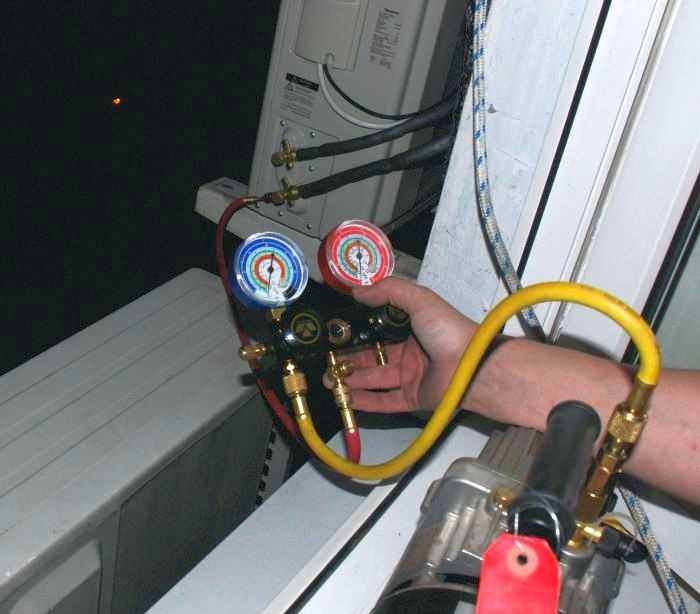
If everything is fine, without disconnecting the pump hose, fully open the valve, which is located below. Some sounds are heard inside the system - freon fills the system. Now, with gloves, quickly twist the hose of the vacuum pump - a certain amount of ice freon can escape from the valve, and you don’t need frostbite. Now we completely unscrew the valve at the top (where a thinner tube is connected).
Why in that order? Because when filling with freon, the system is under pressure, which quickly closes the filling port when the pump is disconnected. That's all, the installation of the air conditioner with your own hands is completed, you can turn it on.
In fairness, it must be said that such an operation - vacuuming - is carried out only in Russia and neighboring countries. In the same Israel, where air conditioners work all year round, nothing like this is done. Why is a matter for thought.
How to connect the dishwasher to the water supply
The first step is to connect the dishwasher to the water supply and sewerage. This is a fairly simple process that you can do yourself.
 You will need to carefully consider and calculate the location of all communications that will be required to connect the machine.
To do this, you need to prepare a few additional details:
- Siphon with fitting
- Special waterproofing tape
- Tee made of metal or metal-plastic
- ball valve
- Hose of the correct length
If possible, it is better to give preference to metal parts. Products made of plastic or other lightweight materials can crack quite quickly, leading to water leakage.
It is important not to confuse waterproofing tape with insulating tape - these are different products. The insulating material is designed to work with electrical wires and shields the electric current, and the waterproofing material does not let water through. When drawing up a project, keep in mind that it would be best to place the unit next to the sink
 When drawing up a project, keep in mind that it would be best to place the unit next to the sink.
Hoses are usually supplied as a kit, but they may well be short.In this case, you need to purchase a new product. It must be completely intact. If you try to lengthen the old one, it will only lead to leaks later. The length of the new product should also not be too large, as this will impede the operation of the pump.

 Install the PMM away from heat sources, as high temperatures may adversely affect the operation of the equipment.
You need to connect the device to the water supply through a cold water pipe for two reasons:
- Cold water is cheaper.
- The quality of cold water is noticeably better, it is less hard. This will extend the life of the filter and the device itself.
- There is no point in hot water, as the device automatically heats it up.
 Before connecting water supply to the machine turn off the water supply valve to the house.
The process of connecting the dishwasher to the water supply and sewerage is quite simple.
It is important to follow all the steps in sequence:
- We need to turn off the water in the apartment. The faucet is usually located next to the riser.
- Separate the hose from the faucet in the kitchen. Such a connection is usually located under the sink.
- Install a tee at the connection point of the mixer, and connect a ball valve to it. The hose of the dishwasher is connected to this faucet.
- A water filter is placed between the hose and the unit.
- Then the product is connected to the filter.
- All connections must be wrapped with waterproofing tape to prevent leaks.
 If rigid pipes are used instead of the inlet hose, coarse water filters should be installed in front of the three-way tap.


