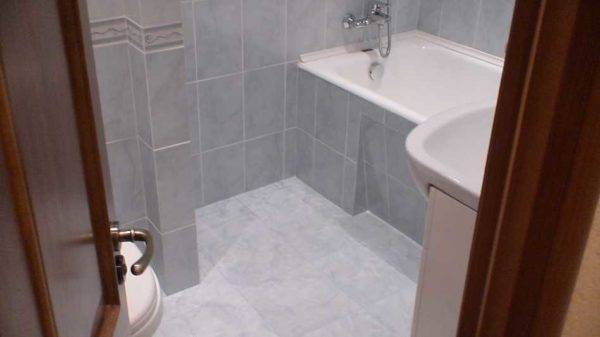
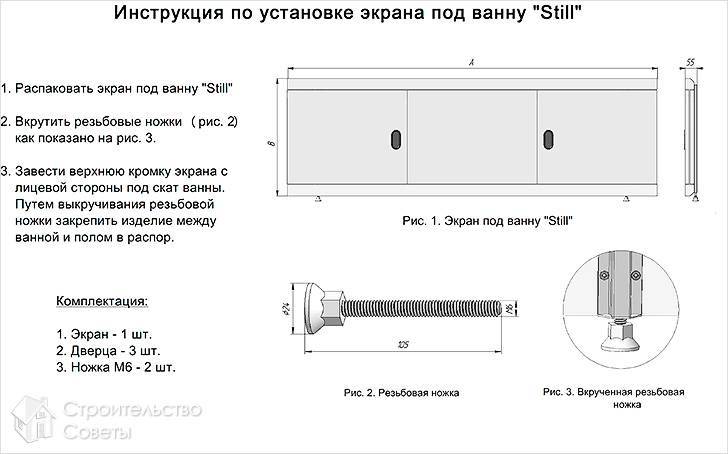
- Some screen selection features
- Metal profile installation and cladding
- Constructions
- Wide rim or not
- Leg notch
- Hatches for revision
- Kinds
- Material
- Plastic
- Metal
- MDF
- Polystyrene
- Drywall
- PVC
- Acrylic
- Glass or mirror
- Design
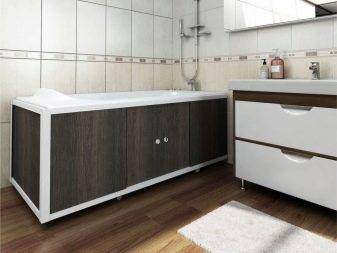
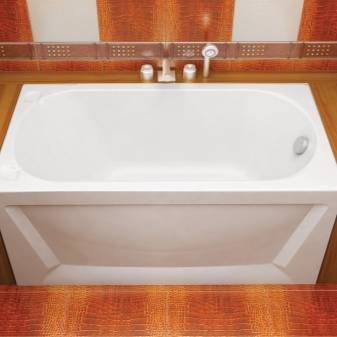
- Deaf stationary
- Removable stationary
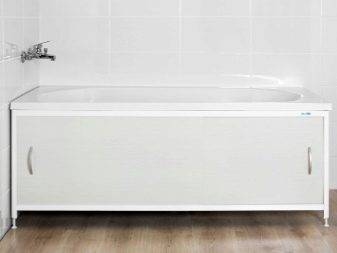
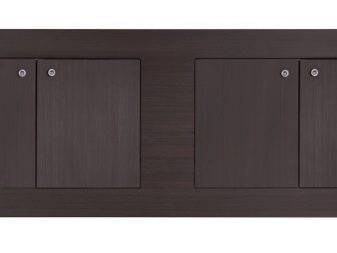
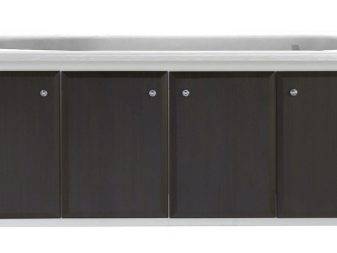
- With hinged doors
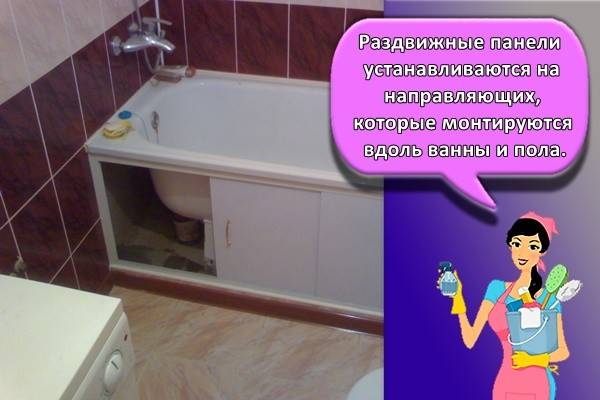
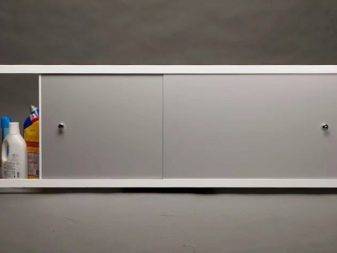
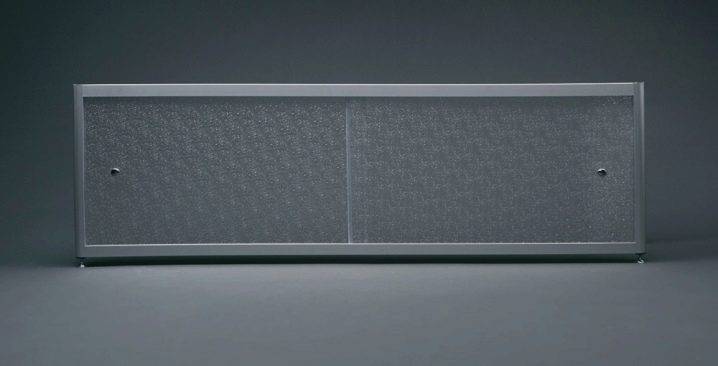
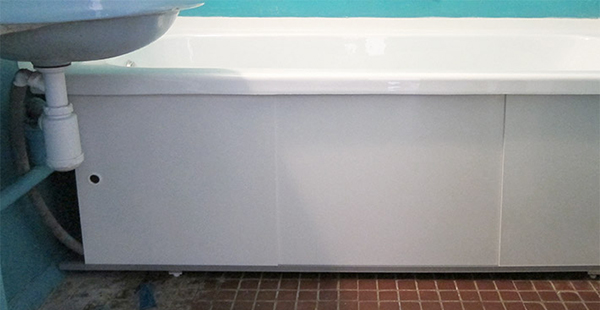
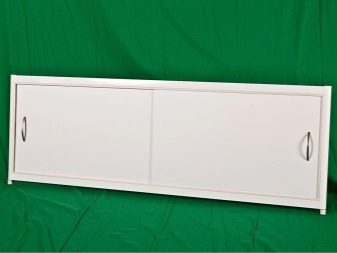
- Model with sliding doors
- From what and how you can make a screen with your own hands
- Installation with legs
- Peculiarities
- Benefits of using
- Aesthetics
- Functionality
- What to look for when choosing a screen?
- How to install a screen for an acrylic bath
- Self-tapping mounting
- On magnets
- For springs
- On clamps
- by surprise
- Manufacturers
- Drywall Screen
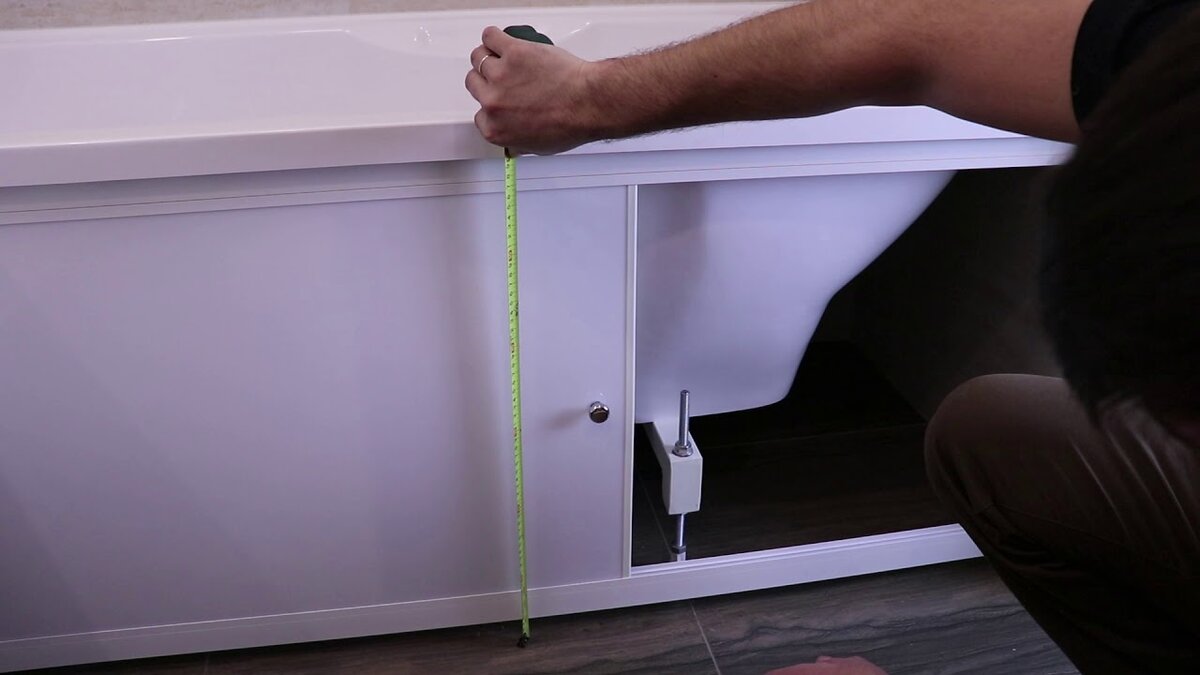
- How to choose the right size?
Some screen selection features
First of all, it is necessary to make measurements of both the room itself and the bathroom bowl. It should be noted that a screen with telescopic legs is better suited for self-assembly. Despite the variety of models, most samples have standard dimensions - 50-60 cm in height and 150-180 cm in length. Less common is a shorter length - about 100-120 cm.
It is worth remembering that the standard height of MDF structures is 56 cm.If this parameter is high, then you need to cut this element with the help of professional equipment, after which it is better to treat the cuts with varnish. With plastic structures, everything is much simpler: their dimensions are very easy to adjust using retractable legs, which are present in almost any model. The only thing is to adjust the extension of the legs in such a way that the installed screen does not restrict access to the bath bowl itself. During the final installation, the location of the communication pipes under the bowl should also be taken into account - they should not interfere with the installed structure.
Separately, you should pay attention to the handles of the fittings. In order to extend their service life, they must be made of galvanized steel or other stainless metal.
If the screen has sliding/hinged doors, then the installation of the entire structure must be carried out in such a way that no additional efforts are required to open/close the doors. At the same time, the hinges (or roller mechanism) will also require close attention - they must move freely.
As a rule, the "native" screen fixture (which comes with the bowl) installs quickly and without problems. If even the telescopic legs are not enough to close the space under the bowl, then instead of regular bolts, you can always use longer ones.
In general, most professional finishers prefer to install do-it-yourself designs rather than using factory options.
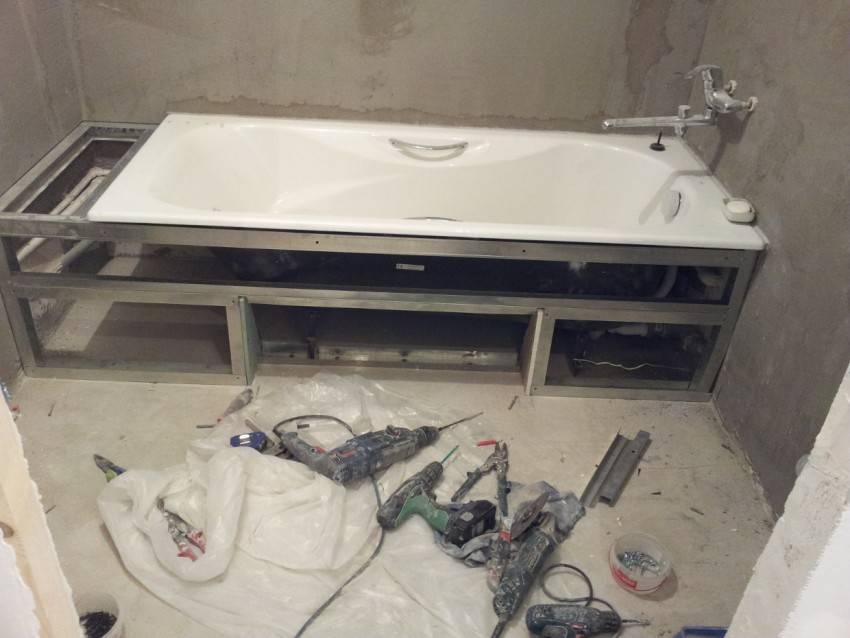
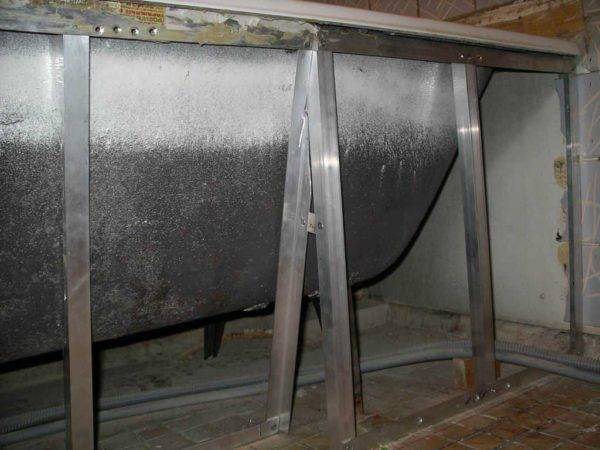
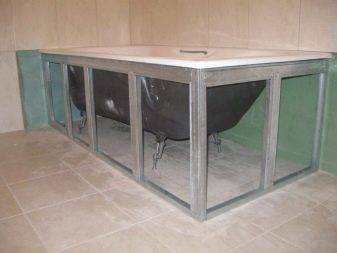
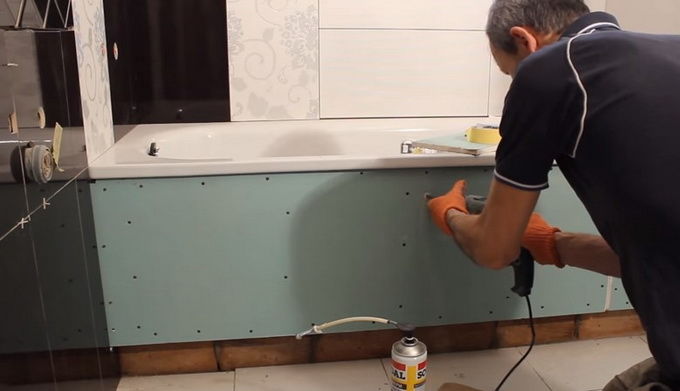
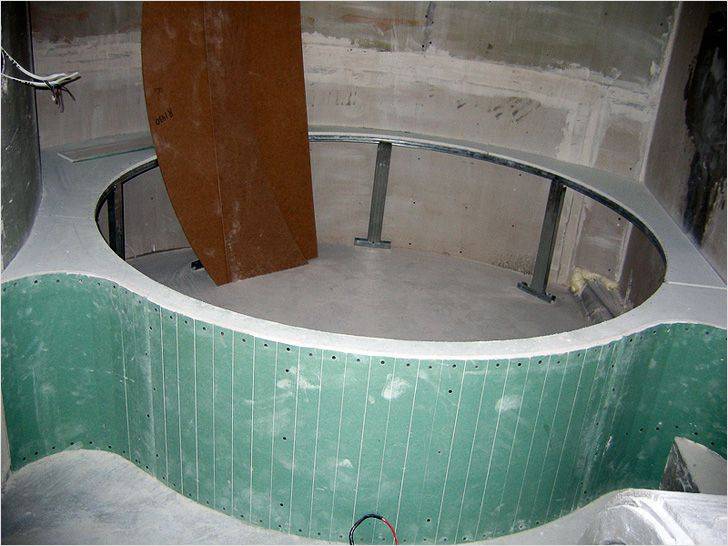
Metal profile installation and cladding
Installing the screen on the bath begins with the arrangement of the frame.We will show works that are suitable for standard placement of a bathtub in a room, when only one side is closed, and a door is installed on the other.
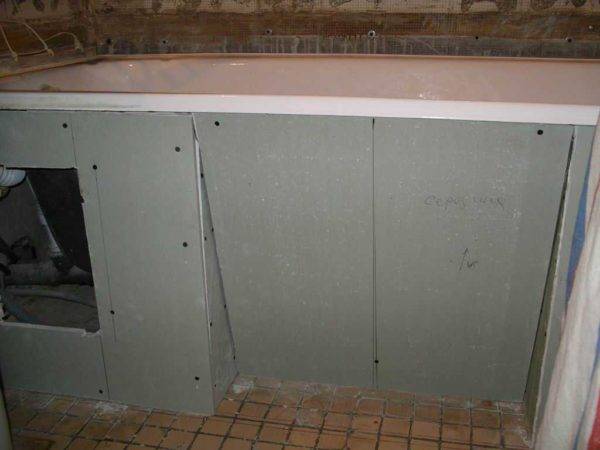
First you need to make markings for vertical racks. Mark the two walls of the bathroom, stepping back from the side of the bath to a depth of a certain distance. To know exactly how far to retreat, you should measure the thickness of the ceramic tile, the thickness of the purchased drywall and estimate the thickness of the tile adhesive layer. Approximately you should get 19-23 mm. Having measured the required number of millimeters, we leave room for the subsequent facing of the partition.
To find out how much space the screen wall will take, add up the thicknesses of the tile, drywall sheet and profile. To this value must be added the thickness of the tile adhesive (at least 3 mm).
Measure the height from the floor to the bottom edge of the tub. According to the resulting size, with a hacksaw for metal, cut two pieces of metal profile for the side racks. Drill two holes in each rack, retreating from the ends by 15 cm.
Place posts against the wall to mark where to drill holes in the concrete. Do not forget about the marks that you made earlier, because it is on them that the racks are installed. On the holes in the profile we make marks in the wall. Having changed the drill to a Pobedit one, we drill holes in the concrete wall with an electric drill.
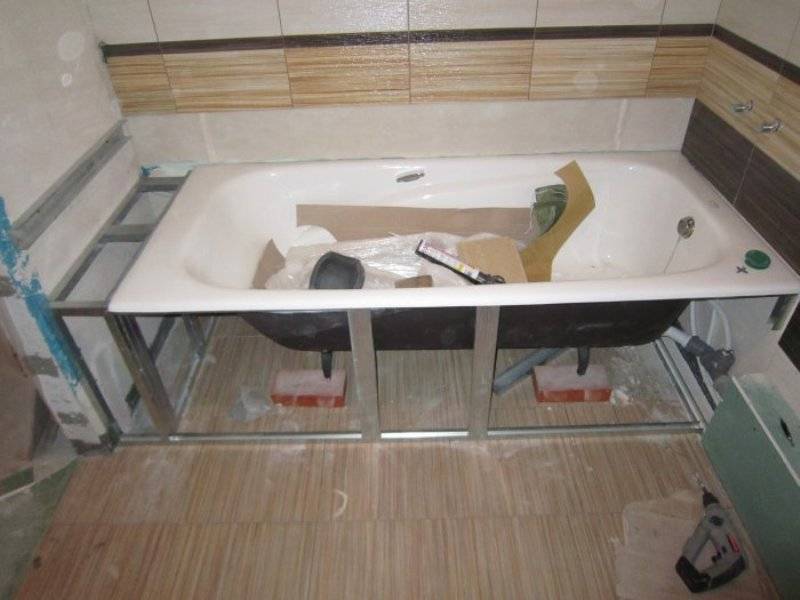
We fix the vertical racks-guides with dowel-nails. Having done this operation, you should forward two horizontal guide profiles. Measure the exact distance between the walls and saw off the metal profile with a hacksaw. Usually this distance corresponds to the length of the tub.
If you are installing a screen under an acrylic bathtub, then put another one in the top guide profile.This will strengthen the edge of the bath, which is most susceptible to mechanical stress. If you have a cast-iron or metal bath, then one guide profile is enough. Connect the horizontal profiles with the uprights with self-tapping screws.
Complete the resulting frame with vertical posts in the middle of the structure. You should end up with about 5 uprights. Before attaching them, you need to cut the corners with metal scissors from above. From below, the racks are inserted into the horizontal guide profile.
Prepare a frame for the door and choose which side it will be on. One edge of the frame for the door is a rack against the wall. Calculate the width and height of the future door and build a frame-opening for it from cut-to-size profiles into the design.
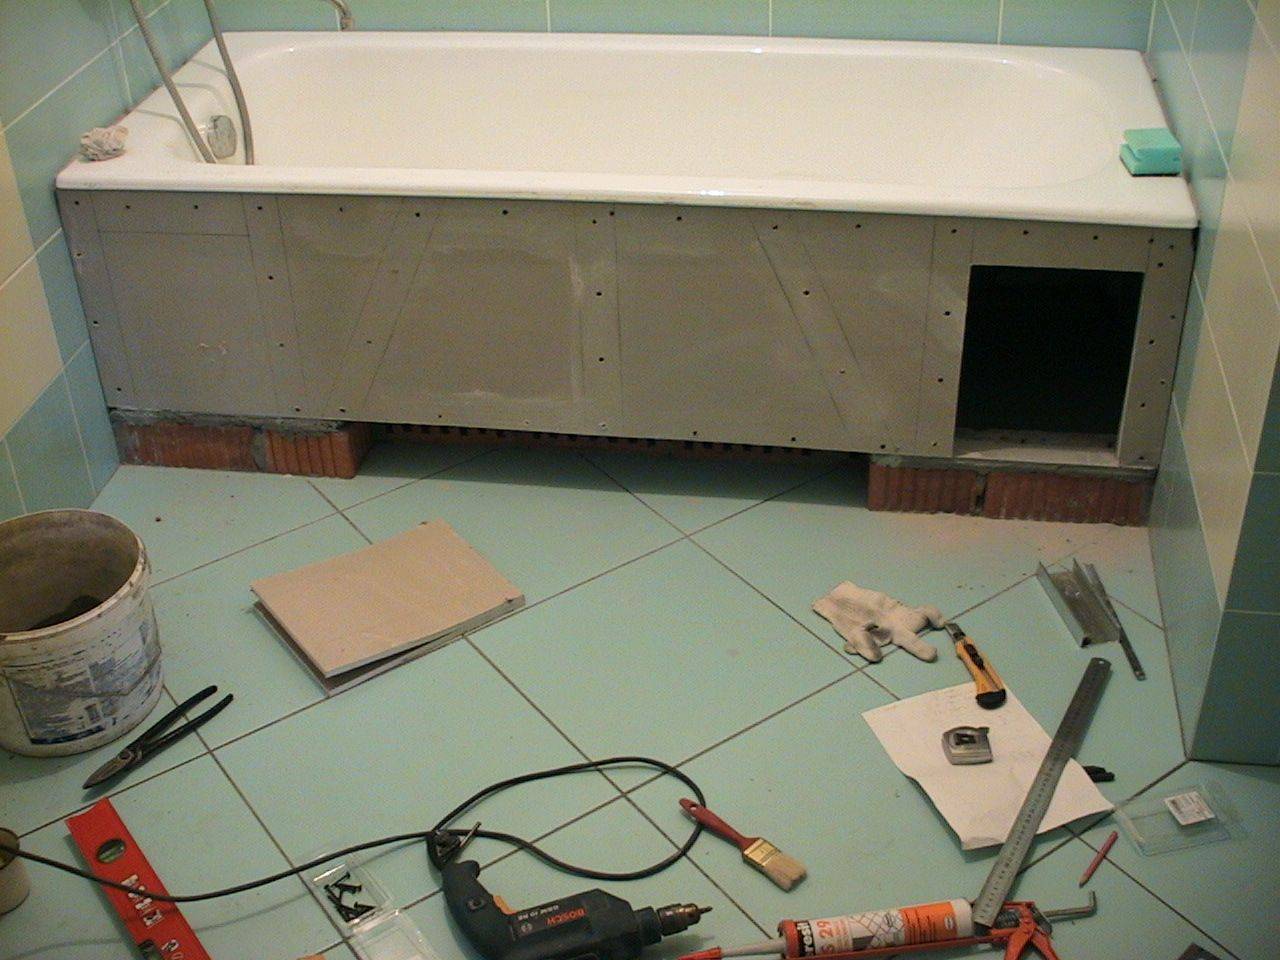
Sheathing the frame with drywall is not a difficult task. The main thing here is to try to make the joints of the sheets converge on the profile. From the opposite edge, cut an opening for a pre-purchased grate. Through this hole, the inside of the screen will be ventilated. After tiling, the grating can be glued onto liquid nails.
Click here for instructions on how to lay ceramic tiles in a bathroom. You can read about the different types of bathroom screens here.
Constructions
We will talk about how you can make a screen under the bath with your own hands so that it is functional, beautiful and comfortable. Everyone has their own idea of comfort and beauty. Therefore, we will consider possible options, and you yourself decide how best to do it.
Wide rim or not
Sometimes a wide side is made around the bathroom. It looks like it's in a box.On the one hand, this is convenient - you can put something on the sides and, from an aesthetic point of view, the bath fits more harmoniously into the interior.
Example of a bathtub screen with a wide rim
But not everyone can afford to allocate a large space. Bathrooms usually do not please with their size and extra 10-15 cm can be critical. In addition, this type of installation may be inconvenient for older people. To enter the bath, you have to take a big step, which is not always possible for them.
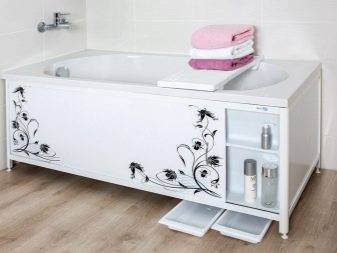
But this option has another positive point: under the bathroom, you can make shelves of large width. They can be open or with sliding / hinged doors.
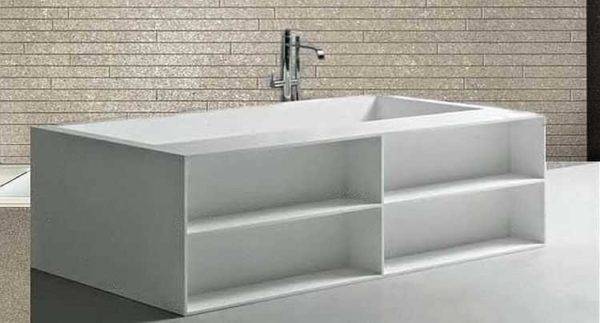
Functional bathroom screen with shelves
Similar shelves are made without a wide side, but their depth is much less. Although, maybe this is not a minus, but a plus - less different things will be collected, it is easier to get something and clean it up.


Leg notch
It is more convenient to wash a bath or wash clothes in it if there is a recess for the legs in the screen. Its depth can be small - 10-12 cm is enough, width - about 35-45 cm. Such dimensions allow you to reach the walls and the opposite side without stress.
We decided on the dimensions, it's up to the small thing - to choose how it will look. The easiest square notch to organize. It can be made of brick, aerated concrete and profile.
Small recess under the legs of a rectangular shape
A non-standard variation looks more interesting - the entire screen is made of two levels, when the upper part hangs over the lower one (pictured below). In this option, you can mount a moisture-resistant LED strip for backlighting. Should be interesting.

In two levels - unusual
The next option is to make part of the screen tilted.In the case of a profile, this is easy to implement - with a brick - it is almost impossible, with aerated concrete - it is possible, but difficult.
Skeleton for an inclined plane
Plasterboard sheathing
What does it look like as a result
There is another option - to raise the upper edge of the screen above the floor by a few centimeters. It will turn out on legs and no problems with legroom. But there are cleaning issues. You can’t lift the cladding high - it’s ugly, but if you leave a small gap, then how to clean it? Problem.
The screen under the bath can be made not to the floor
In general, from all these options, you can choose something most suitable for yourself, although they also make a blank flat screen to the floor.
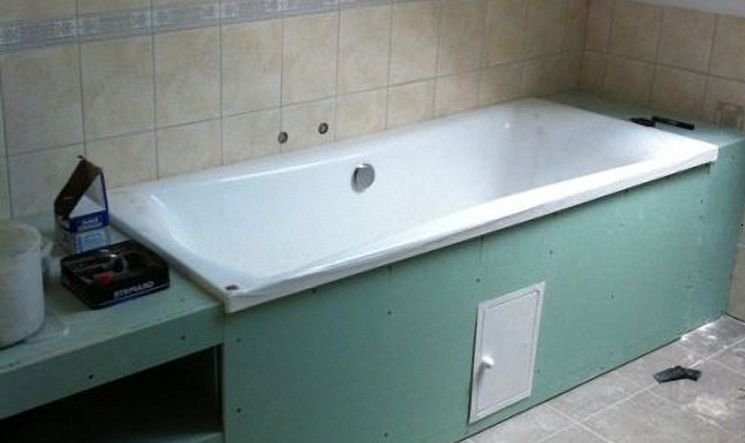
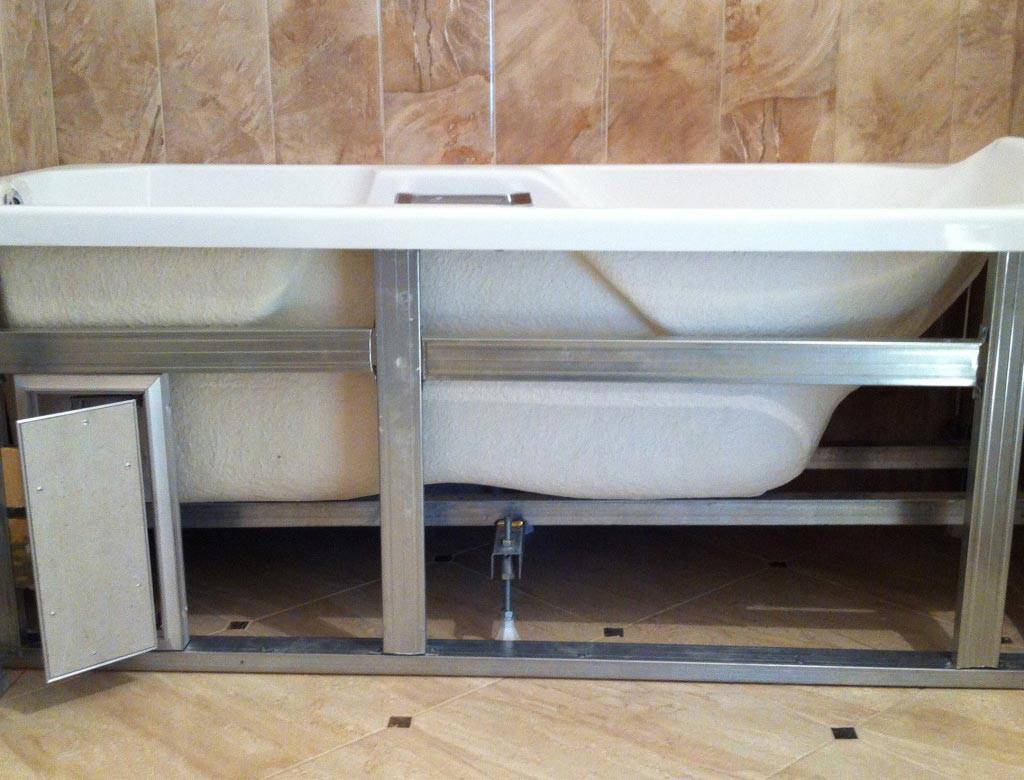
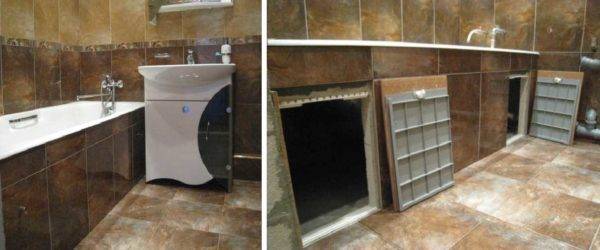
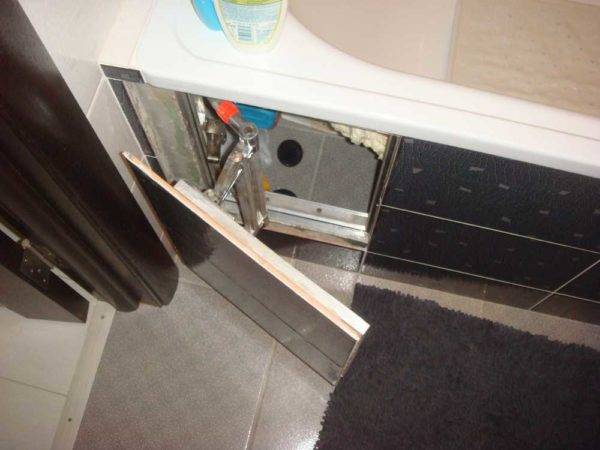
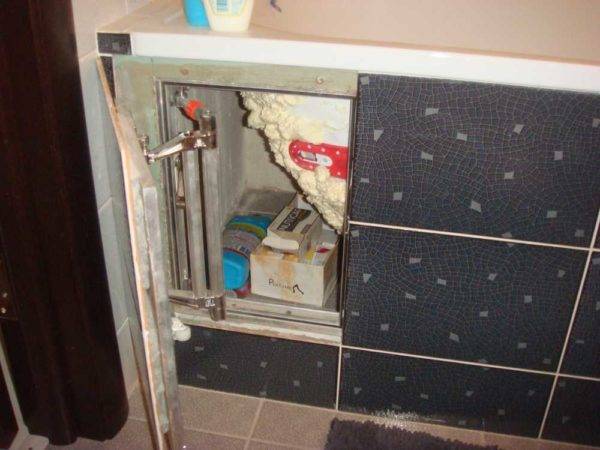
Hatches for revision
The bath screen must necessarily have a removable / opening part through which you can access communications. There are several possibilities to do this. The first is to install a plastic hatch. Not everyone likes it outwardly, but this is the easiest and cheapest option.
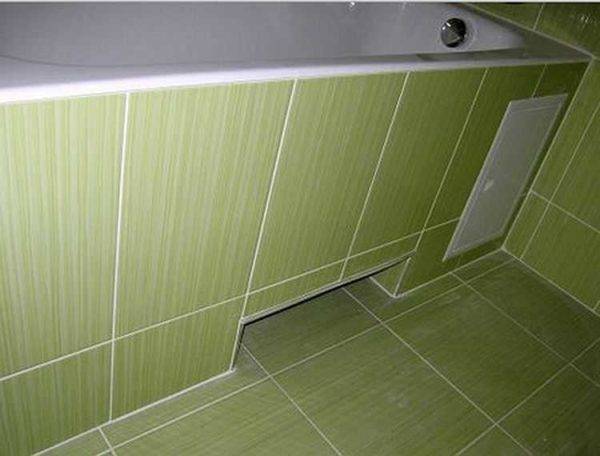
Plastic plumbing hatch
The next possibility is to make a removable panel, which will be attached to the frame with magnets. Not to say that this option is difficult to implement, but it requires more experience - you need to calculate the installation location of the hatch so that whole tiles fit on it.
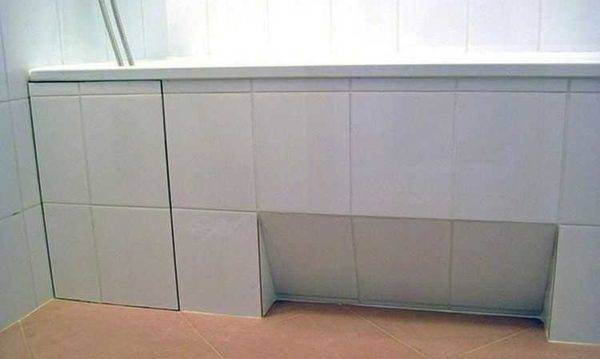
Instead of a hatch - a removable panel
One point: if you rub the seams with a light paste, the hatch will still stand out. There is no grouting in this place, but there are small gaps that are very noticeable against a light background.
On a dark tile with a dark grout, the gaps are almost invisible
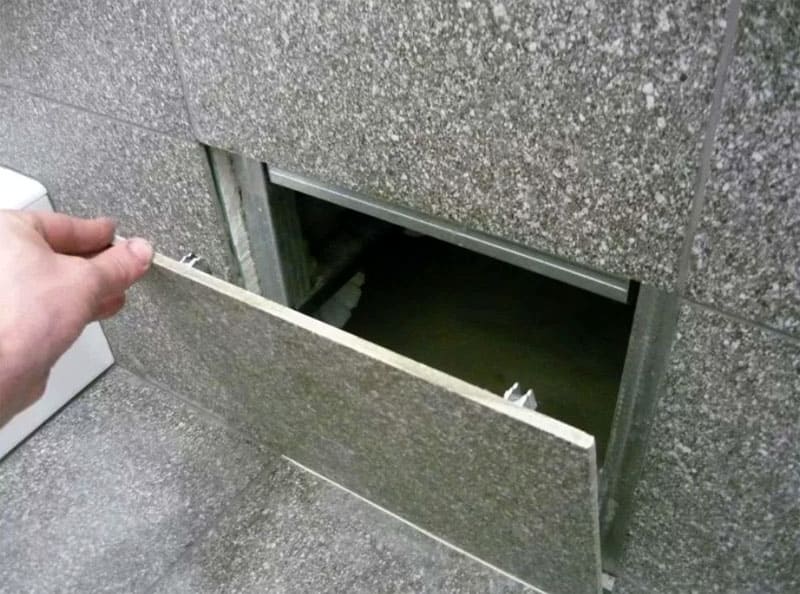
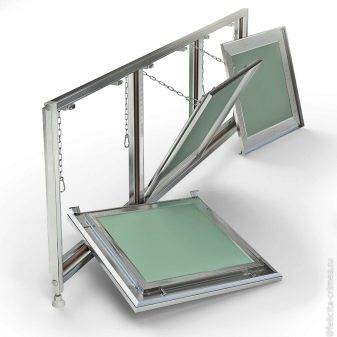
The most technologically advanced, but also the most expensive way is to install special hatches for revision. They are of two types - folding on chains and rotary.
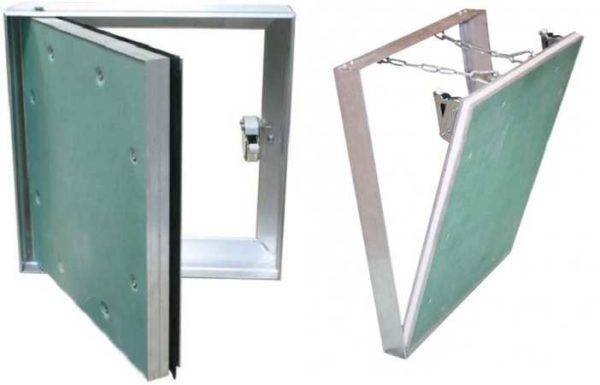
Types of audit hatches for laying tiles
These hatches, unlike plastic ones, are designed for laying tiles on them. With a good installation and correct calculation, it is not easy to see it.


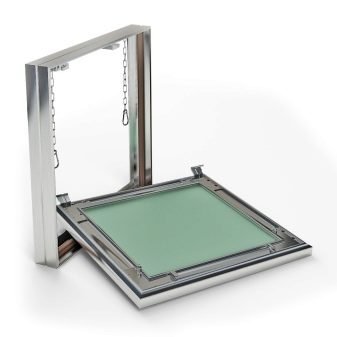
This is what it looks like closed
Opens like this
Work comfortably
Kinds
Screens are classified depending on the material of manufacture and design features.

Material
Bathroom panels are made from different materials. Products made of polystyrene, PVC and plastic are considered popular. Less often in bathrooms, screens made of glass and metal are used.
Plastic
Plastic models are considered the most popular among consumers, which is explained by the following advantages of panels of this type:
- low price;
- simple installation and operation;
- long service life;
- moisture resistance;
- a wide variety of colors and the possibility of applying patterns.
The main disadvantage of plastic models is that with a slight application of force, the material breaks.
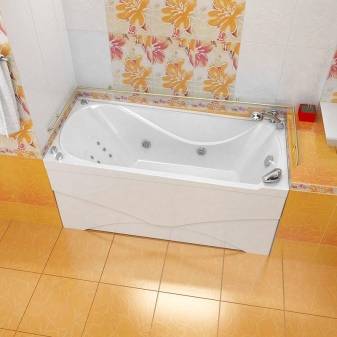
Metal
Metal models are more expensive than plastic ones. Panels made from this material are highly resistant to mechanical damage. As in the case of plastic screens, a variety of patterns are applied to metal screens, which allows the use of such products in various interiors. The main disadvantage of models of this type is that due to scratches and other defects, the panels become rusty.
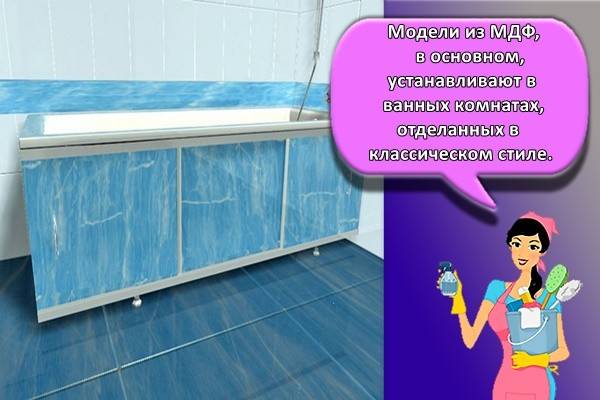
MDF
MDF models are mainly installed in classic-style bathrooms. Screens of this type are susceptible to moisture. Therefore, for the bathroom, it is recommended to purchase MDF panels covered with a protective film.
Polystyrene
Polystyrene is a lot like plastic.Therefore, screens made of both materials have the same advantages and disadvantages.
Drywall
This material is used to make the base for laying ceramic tiles. Separately, gypsum boards are not used to create screens for a bath.
PVC
PVC panels are characterized by the advantages that plastic products have. The main difference between these screens is that polyvinyl chloride tolerates mechanical stress better.
Acrylic
This type of screens is made of plastic, which is then covered with an acrylic layer. Such products often come with bathrooms made from a similar material. Acrylic models have the same properties as plastic ones, with the only exception: decorative patterns are not applied to this type of panel.
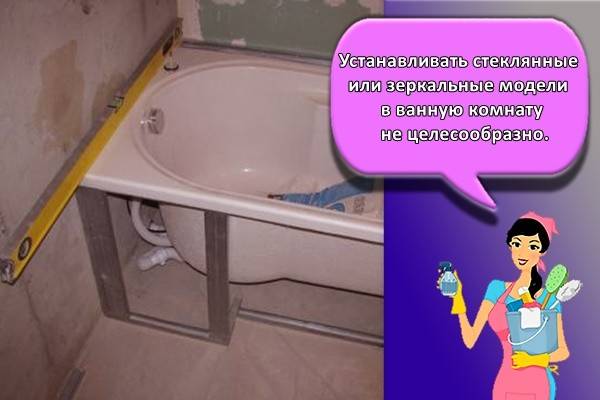
Glass or mirror
It is not advisable to install glass or mirror models in the bathroom. Panels of this type, even with minor loads, break. Installation of mirror models is advisable in cases where there is a need to visually increase the size of the room.
Design
Under the bathrooms, stationary screens or structures with movable doors (hinged or sliding) are installed. Products of the first type are often made from removable panels. The choice in favor of a particular type of construction depends on the purpose of installing the screen.
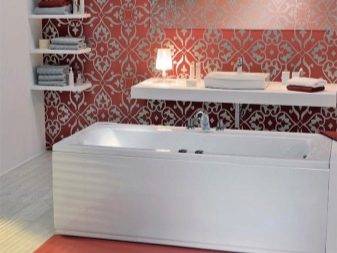
Deaf stationary
Structures of this type are usually built from durable materials such as brick or metal. Such products provide additional support for the bath and endure external influences, including moisture. Among the disadvantages of stationary structures are the following:
- the load on the floor increases;
- reduced space in the bathroom;
- dismantling is impossible without destroying the structure.
Stationary structures are not installed under acrylic bathtubs.
Removable stationary
Structurally, this type of screens does not differ from the previous one. The difference lies in the fact that for the manufacture of these products, plastic panels are mainly used, which can be removed if necessary.
With hinged doors
The use of screens with hinged doors is justified in large rooms. Such designs provide convenient access to the space under the bathroom.
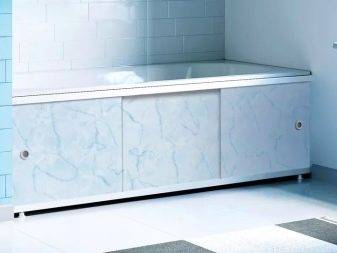
Model with sliding doors
Sliding panels are mounted on rails that are mounted along the bathtub and the floor. Similar designs are used in small rooms. The use of sliding panels is also justified by the fact that the material, if necessary, can be easily removed and replaced with a new one. The main disadvantage of these models is that when pressed, the panels immediately shift.
From what and how you can make a screen with your own hands
You can make a screen with your own hands. The technology is simple:
bath tubing is in progress. The material can be brick, wooden beam, metal profile. At the same time, any of the above materials is suitable for rectangular bowls, for semicircular corner fonts, brick and a special aluminum profile (it can be given any rounding)


In the process of work, it is important not to forget to make a strapping under the hidden hatch through which the bath siphon will be serviced;
- ceramic tiles can be immediately attached to the brick, and GKL sheets cut to size are screwed onto the strapping with self-tapping screws;
- finishing is applied to drywall (mostly ceramic tiles).
In conclusion, choosing the right screen will simplify the task: no need to customize anything, just install. Instructions for all types of fasteners are simple, easy to do on your own.
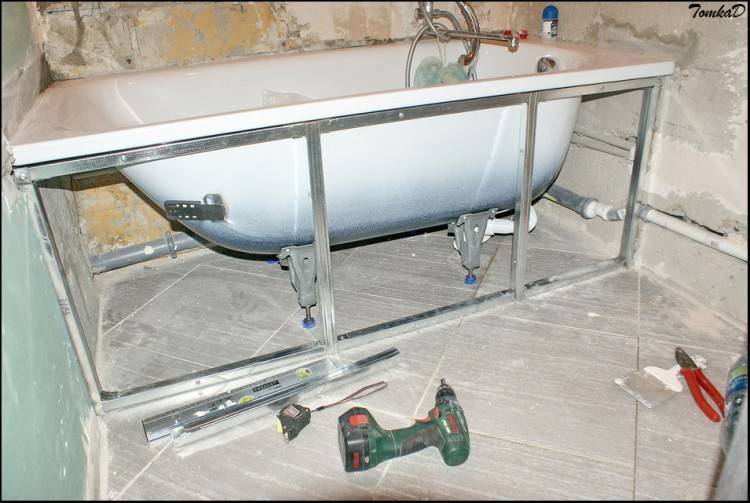
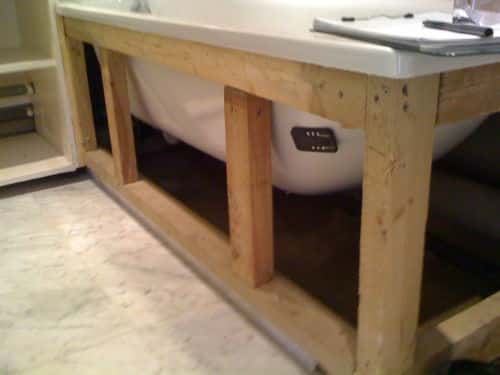
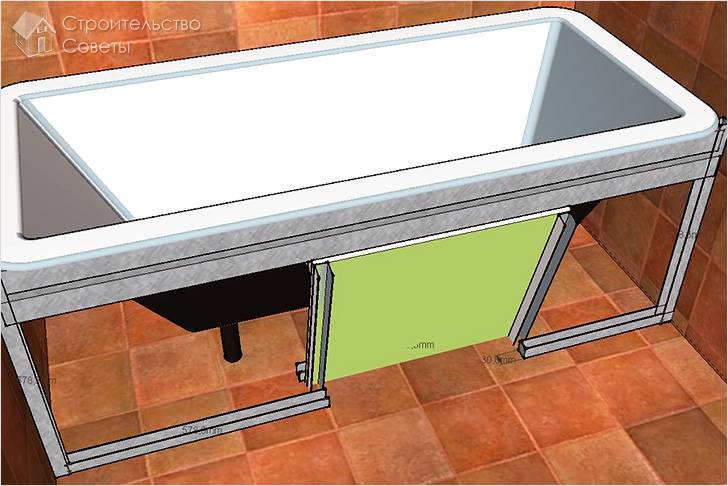
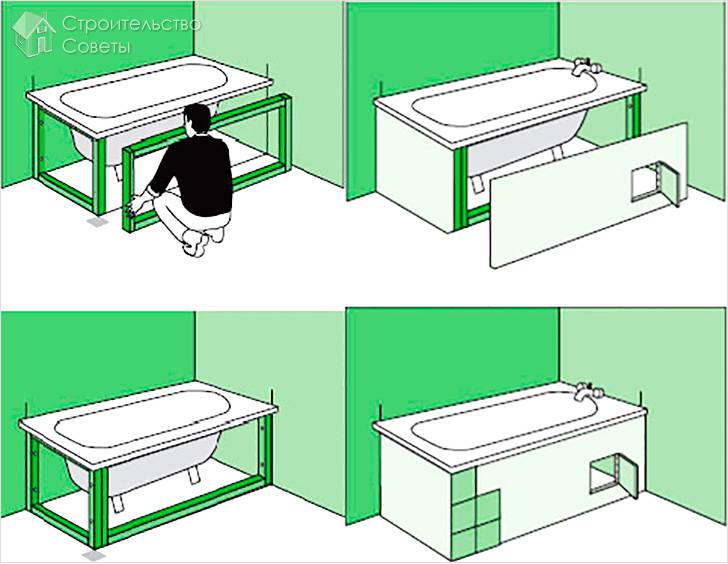
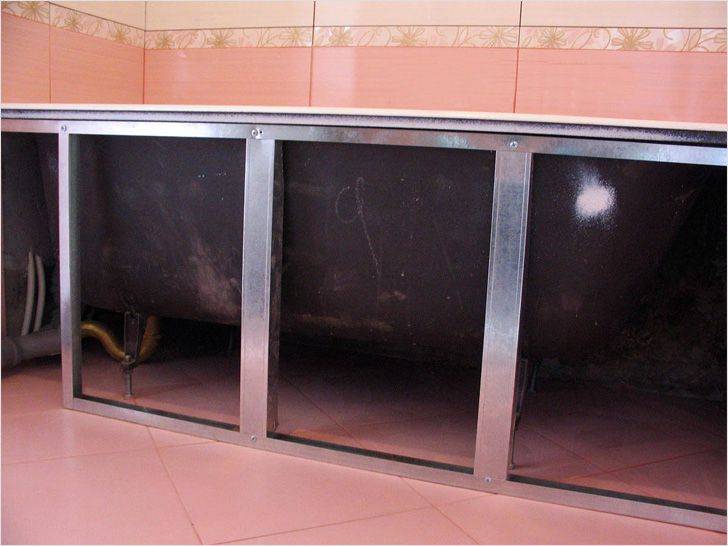
Installation with legs
Plasterboard screen panel assembly diagram under the bathroom.
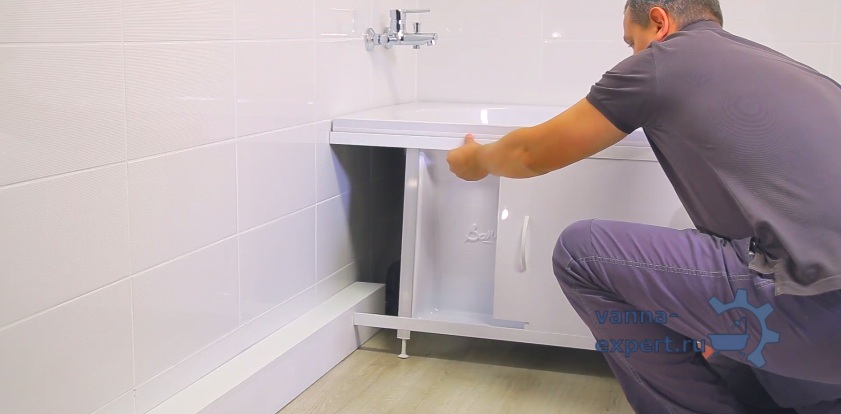
And now as for the actual installation of the screen. We will analyze this briefly for each individual type of screen so that you do not have additional questions. In general, the installation is a simple process, if the instructions are attached to the screen panels in the kit. for assembly and installation.
The installation of a conventional screen on legs begins with the fact that handles are screwed into special holes in the panels, which serve both as holders during installation and as a functional element during operation of the screen. After they are securely fixed at the very bottom of the panels, the legs are screwed into the holes. As a rule, the height of the legs can be adjusted. So, first you need to twist them as much as possible so that they are short, almost at the level of the bottom of the screen. The screen is ready!
Now you will need small wooden blocks that will be attached to the supporting walls for your screen. The bars must match the height of the screen. At the same time, their thickness should be such that they do not interfere with the fixation of the panels themselves. The wooden bars are fastened with a screwdriver to the wall, only first you need to make markings, drill holes there and drive in the dowels. Moreover, the more powerful the bars, the larger the dowels and screws should be.
The scheme of installation of the base under the bath.
If you are using non-solid wooden bars, then it will be necessary to connect them together for reliability.This is easy to do using the thinnest corners or even connector strips. In this case, the connection must be made along the side line so that in the end it remains on the side of the line of attachment of the screen itself.
Further, the installation of the frame panels is carried out directly. For this, the same screwdriver is used. The fixing points on the panels are marked in advance, if they have not been marked by the manufacturer or the manufacturer. Before mounting the screen, it is necessary to put a thin rubber band under the mount. This will make the connection more reliable and also protect the screen panel from possible cracks or other defects during installation under the bath. When the screen is installed, you just have to lower the legs by scrolling them to the desired height.
Peculiarities
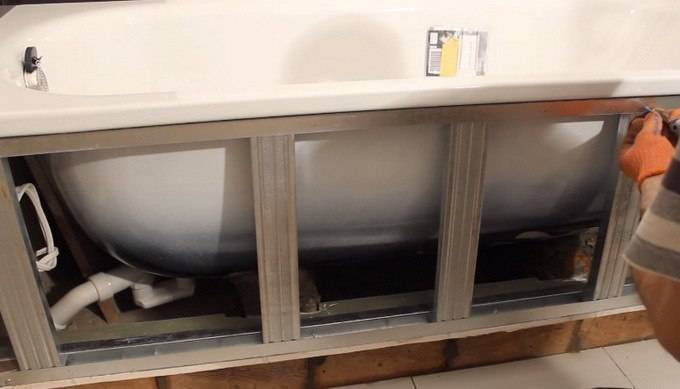
The screen is a structure that covers the sides of the bath, as well as the sections of the walls adjacent to them and the plumbing communications and water pipes located near the floor. In addition to the decorative function, the screen can be used to store household chemicals and household supplies, as well as restrict access to the bath for pets. Screens are made from modern and environmentally friendly materials that can withstand wet bathroom conditions and constant temperature fluctuations. The frame is usually a steel or aluminum profile, which is rust resistant and durable.
The aluminum frame is lighter than its steel counterpart, but it can be subject to deformation from excessive mechanical stress.On such a profile, you can safely mount light plastic doors, as well as elements made of MDF and acrylic. Steel frames are designed to form natural wood screens, as well as for the manufacture of lattice models.
The shape of the models depends on the configuration of the bath and the preferences of the owner of the apartment. Some faceplates have footwells for added comfort around the bathtub, and sloped structures to keep water out of the floor. The cloth of models can have continuous and lattice execution. The first looks more attractive and allows you to close pipes and communications, while the second prevents mold and promotes normal air exchange under the bathroom.
Standard factory screens for steel and cast iron baths have a length of 1.5 to 1.7 meters and a height of up to 60 cm. The legs are often adjustable, which allows you to independently set the model to the desired height and ensures the convenience of placing a person close to the bath. On the modern market there are a large number of screens for corner acrylic bathtubs, as well as for non-standard curvilinear models. This allows you to choose a product of any size and shape, ennoble the appearance of the room.
Benefits of using
Installing panels that close the space under the bath bowl helps to solve several problems:
- create a single space in the bathroom;
- hide household chemicals;
- cover communication pipes;
- reduce the likelihood of water and objects penetrating into hard-to-reach places under the bath bowl.
The solution of these problems is facilitated by a variety of both designs and design of screens.
Aesthetics
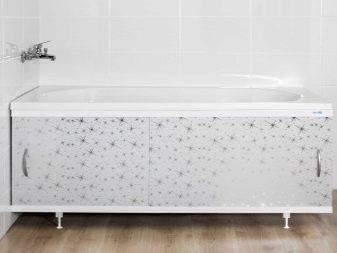
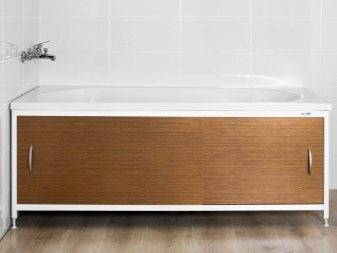
The screen allows not only to hide the legs of the bathtub and pipes for water supply and sewerage, but also to decorate the bathtub. Such products made of plastic look especially attractive. Such panels are often decorated with various patterns that are applied using photo printing technology.
Functionality
Screens perform several functions. The main one is to hide engineering communications. However, not only this task is performed by such structures. Screens prevent the penetration of water under the bath, thereby creating additional protection against leaks. In addition, these products hide household chemicals from pets and children.
What to look for when choosing a screen?
Much depends on the purpose of the screen installation. If you just want to close the unsightly appearance of pipes from prying eyes, stop at simple and affordable PVC products. If you have done a major renovation, bought a new bath and want to give it a more sophisticated look, you can install a screen made of MDF or plexiglass. If you choose a model from MDF, you need to ensure good ventilation of the room to prevent damage to the material from moisture.
The screens in question are equipped with sliding or hinged doors. The former are suitable for rooms of standard sizes, and the latter for spacious bathrooms.
When buying a screen, first of all, you need to be guided by your financial capabilities and the size of the bathroom. The modern market produces a lot of similar goods, you will certainly find a suitable option for yourself.
In addition to the factory ones, there are also home-made designs. They are mostly made of waterproof drywall, fixed to an aluminum profile.The gypsum boards themselves are lined with ceramic tiles. Such a stationary screen is equipped with a door through which you gain access to the space under the bathroom. The design is durable, but requires significant financial and time costs. Therefore, if you do not have special skills and you have a limited budget, opt for factory screens. They are easy to use and great for DIY assembly.
How to install a screen for an acrylic bath
There are several ways to install screen on acrylic bath. The easiest way is to fix a deaf, non-opening panel. The most durable design will be required for swing doors. A purchased or self-made design can be fixed on:
- self-tapping screws;
- magnets;
- springs;
- clamps;
- against a rigid frame.
Sometimes you can see non-removable screens made of moisture-resistant drywall or brick and tiled. Such non-separable designs can be beautiful, but satisfy the owners until the first plumbing breakdown or siphon clogging.


Self-tapping mounting
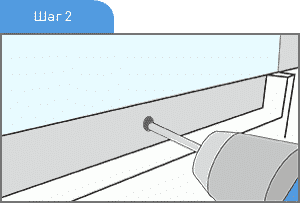
To fix the decorative screen on self-tapping screws, you will need a set of special fasteners. It can be pieces of plastic or aluminum corner. They need to be fixed at the top on the stiffener of the acrylic bath, and at the bottom on the racks of the support frame or horizontal profile, if any.
After installing the fasteners, attach the screen and mark against each of them.

Drill holes in the panel in the marked places and use a cone crown or a large diameter drill to select a hole for the self-tapping screws.
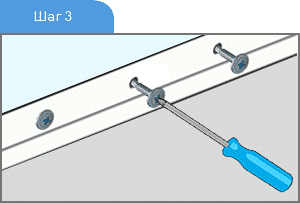
Screw the hardware to the fasteners, and install decorative caps in the cuts of the hats.If you could not find the plugs on sale, then you can cut them yourself and put them on glue.
On magnets
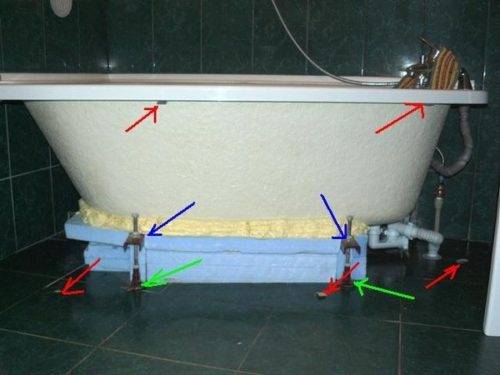
In order for the magnets to firmly hold the decorative panel, a steel frame or vertical stops are required, which are connected to the supporting structure of the bath. The magnets themselves must be glued to the back surface of the panel and then attached to the installed steel profile. To finally fix the screen, 2-3 clamps should be screwed to the bath stiffener.
For springs
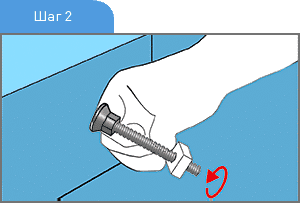
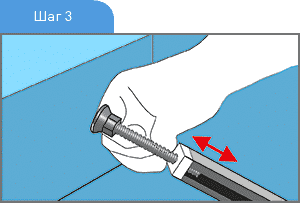
Mounting the screen to the acrylic bath with springs is simple and reliable. Its device is based on the fact that springs are attached to the elements of the supporting frame of the bath, which will raise the screen, pressing it against the stiffening rib. The work is performed in the following sequence:
- put the screen over the side and lift it up to the stop;
- on the racks of the frame, mark the lower level of the panel;
- move the marks 30 mm higher;
- attach the lower part of the spring to the new marks and then the top will show a place on the rack for drilling a hole for the hook;
- on the reverse side of the screen, glue a piece of a corner with a drilled hole for the hook of the lower part of the spring;
- glue wooden blocks to the side wall of the bathtub, which will not allow the panel to move towards the bowl;
- install the springs, press the screen down, slide the top over the side and release.
The dimensions of the bars must be selected experimentally, taking into account the thickness of the panel material.
On clamps
Floor spring clamps are used for bathtubs with a rounded or asymmetric shape. In addition to the clamps, you will need locking latches to complete the job. The procedure for this method of fastening is as follows:
- using a plumb or bubble level, draw a line on the floor corresponding to the edge of the bathtub rim;
- arrange the corner clamps on the floor along the drawn line and mark the places for drilling;
- drill holes in the floor, install the clamps and fix them on the dowels;
- fasten the latches to the bath stiffener opposite the clamps;
- on the back of the panel, mark the location of the clamps and screw the fixing tabs there;
- install the bottom of the screen into the clips, and firmly press the top of the screen against the board until it locks into place.
The main thing in this method is not to make a mistake with the markup in order to ensure that all fastener elements match.
by surprise
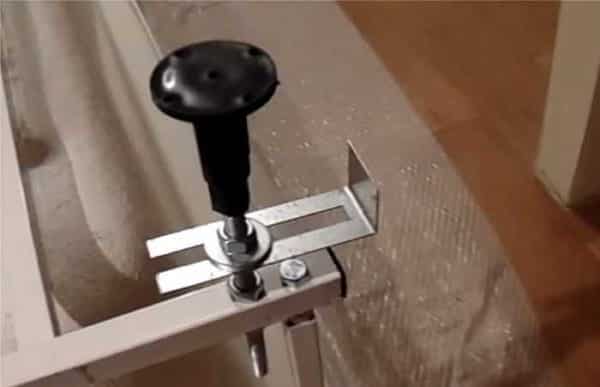
To install the screen on an acrylic bathtub, you will need to make a solid frame, at the ends of which stoppers are installed. spacer screws on support legs.
The decorative panel is attached to this frame with self-tapping screws or glue. You need to fill the bath with water. This is necessary to take into account possible subsidence and more accurately determine the moment of stop.

To install in place, put the finished screen over the side and, turning the screws, lift it until the top edge rests against the edge.
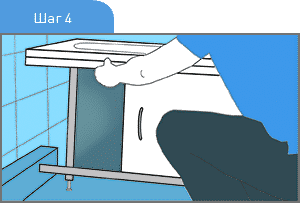
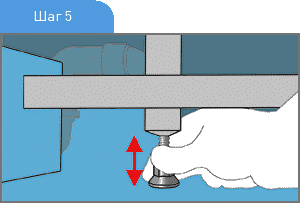
Drain the water and check the security of the installation.
Manufacturers
It is worth considering the most popular bath screen manufacturers that have positive reviews.
The manufacturer "MetaKam" produces reliable screens with PVC frames and panels made of cellular polypropylene. The view of the screen is very stylish, the Metacam Coupe models are stylized as ice in their colors. The design has sliding doors with two wings, the length is 148 mm, and the height can be adjusted from 55 to 60 cm.It is possible to make models to order with color photo printing, while the solvent print is absorbed deep into the structure of the plastic, it does not fade over time, and the screen can be safely washed, including with cleaning products. There are adjustable legs.
The Russian manufacturer Alavann produces practical and very beautiful bath screens made of laminated MDF. The compartment model with three sliding doors has dimensions of 1470x520x50 cm, the height can be increased up to 60 cm. The device is equipped with elegant chrome handles, it can be installed directly on the floor or on adjustable legs with a maximum height of 10 cm. The body, frame and doors are made of high-quality moisture-resistant material, for goods one year warranty is given.
Wannbock front screens, made of high-quality PVC grades, will help to completely close the space under the bathroom with good sealing. Models have a length of 150 to 170 cm, equipped with sliding doors with chrome handles. Their advantage is the originality of design and a large number of fashionable drawings and patterns on the panels. Products can be installed on the floor or on removable legs, they are durable and easy to install.


Bathroom furniture manufacturer Vod-ok offers chic screen models that can even fit into an elite design. There are options for textures "Oak", "Wenge", "White", made of high quality MDF. Doors can have 2 or 3 leaves, be hinged or sliding. Models are equipped with elegant built-in chrome handles, there are adjustable metal legs. There are options of different lengths and widths, it is possible to choose the right one for any bathroom interior.The product is guaranteed for 2 years.
Emmy bath screens are highly durable and have a unique design that will fit into any bathroom décor. The cabinets are made of an aluminum frame, while the walls and sliding doors are made of colored laminated MDF. Materials are not subject to rotting, the development of fungus and mold, are not afraid of moisture and steam. Models from the manufacturer Emmy "Malibu" have 3 sliding doors with beautiful metal handles. Protective screens Emmy "Blanca" have two wide doors, there are different sizes, all products are guaranteed for 3 years.

Europlex produces protective screens for bathtubs from moisture-resistant MDF. Frame and guides for sliding doors made of durable aluminum, there are adjustable metal legs and chrome-plated door handles. It is possible to choose any design and color you like: white, beige, wenge. The laminated surface of the case is glossy and very easy to clean. The height can be adjusted from 50 to 60 cm, various models are presented in length.
Hammer products are original projects of stealth hatches. When closed, the screen looks like a whole wall, without any extra details. The lid opens very easily, providing access to the space under the bath. Products are equipped with removable adjustable legs made of chrome steel, there are various sizes. Screens "Hammer" have many options for colors, textures and designs, suitable for any apartment.
Triton panels are made of white acrylic and will match the acrylic bathtubs of the same name. It is possible to choose the desired length from 120 to 170 cm.Triton screens have a blind design, that is, they completely seal the space under the bathroom, moisture and dirt will not penetrate there. All products are made in their original form with volumetric embossing, glossy white surface is easy to clean and protected from mechanical damage.
Protective panels for Santek baths are produced in different shapes and sizes, it is possible to install corner options for this manufacturer. The screens have a blank structure, are completely sealed and have a bright white surface that is easy to clean. For the manufacture of high-quality acrylic, the products are very easy to install. There are goods with a length of 120 to 170 cm in stock, a quality guarantee is provided for all products.
Drywall Screen
Drywall is a malleable material that can be used to form a screen of any shape that the owner chooses. Instructions to get started about how to install a screen under the bath, or rather, instructions for installing a drywall frame. For this purpose, you can use both wooden planks 4.0x4.0 cm and a metal profile. Wood material must be primed and impregnated with an antiseptic, which will protect the frame from the appearance of mold, fungus and decay.
When equipping the frame, you need to remember that the surface of the drywall will eventually be lined, which will add additional thickness. For this reason, on opposite walls, the assembly line is applied taking into account the thickness of the recess for subsequent cladding. If the drywall will be sheathed with ceramic tiles, you need to add up all the components, which in total will give a thickness of about 2 cm. The line should be applied solid both on the walls and on the floor.It should indicate the line of the future screen. For such work, a plumb line is used, which is guided by the edge of the bath.

- To begin with, the UD profile is taken and fixed along the intended line.
- The part of the profile that joins the floor surface must be additionally attached with a sealant to avoid water ingress at the junction.
- Then the CD profile is fixed vertically with fixation to the main structure.
- The distance between the parts of the profile should be 0.6 m, in addition, racks are additionally mounted in the places of future technological openings for the installation of drawers or utility drawers.
- A depression is formed in the central part. For this purpose, the profile on the floor is mounted in the form of a U-shape. You need to drown the recess in the direction of the bath by about 12 cm. In this case, the racks are mounted obliquely.
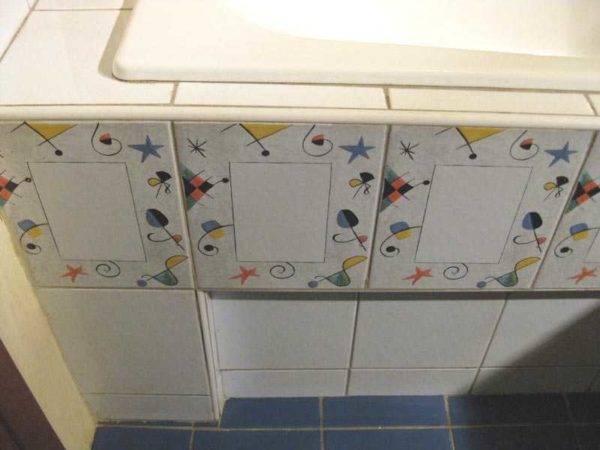
You can give an example of how to install a screen under a bathtub made of plasterboard material, for example, with a tile finish.
- Sheathing is carried out with moisture-resistant drywall.
- The material is cut, remembering that the height of the screen should be 2 cm less than the height from the floor to the edge of the bath.
- Fixation is carried out with self-tapping screws with a step of 0.15 m in the central part of the profile.
- The material is fastened from the edges of the bathtub edge and the floor surface at a distance of 10 mm. This indentation will avoid stressing the potentially swollen drywall. Despite moisture resistance, direct contact with water adversely affects the skin material.
After completion of work with drywall, the material is primed and tiled with the same tiles. You can also use decorative plaster, wet wallpaper and a variety of film coatings.
How to choose the right size?
Any panel for the bath is selected for a specific size. It is very important to check if it fits your plumbing model. The length of acrylic panels varies from 120 to up to 180 cm for standard fonts
And the height is 55-60 cm, but it can change if there are legs.
Most often, acrylic panels come with plumbing and have the same tone as the bathroom, which allows you to look organically to the overall design. They are made of plastic coated with an acrylic layer.
The advantages of the panels purchased with the font include the fact that they fit as tightly as possible to the sides of the bath, saving you from unaesthetic gaps. Experts do not recommend purchasing such screens separately, as they do not always fit exactly in size.
If the screen is purchased separately from the bathroom, then in order not to make a mistake with the choice of size, you should carefully measure the plumbing from all sides.


